
Idler arm rebuild how to
 May 1, 2008 | 02:21 PM
#1
Thread Starter
Contributing Member
Joined: Feb 2007
Posts: 9,055
Likes: 10
From: maple ridge, British Columbia, Canada
Idler arm rebuild how to
Worn idler arms, very common thing. Most people will buy a new idler arm for 100 dollars plus! Here is how you rebuild it, to like new condition for under 10 bucks.
Symptoms:
shakey wheel on the hwy, sloppy steering.
To check:
Get a friend to get in your truck, and turn the wheel side to side. If your idler arm moves up or down its time to rebuild.
Supplies/tools:
-12mm socket
-19mm socket
-17mm socket
-14mm socket (if installing a brace)
-Long rachet for leverage
-17mm open end wrench
-14mm open end wrench (if installing a brace)
-Hammer
-Flathead screwdriver
-Grease
-Idler arm bushings
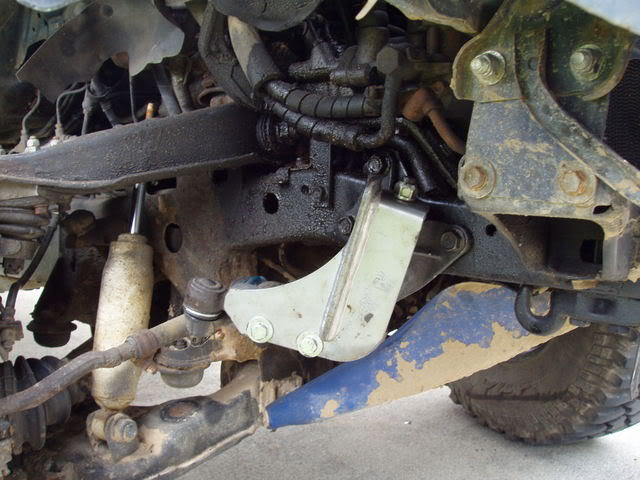
Removal No pictures due to greasy hands.
I found removal easier if your wheels were turned to full lock to the right.
-Remove 4 12mm skid plate bolts and remove and set aside skid plate
-Remove the idler arm cotter pin
-Remove castle nut
-Remove 3 17mm bolts holding the idler arm to the frame *keep track of the bolts, they are different lengths*
-Smack the relay rod with a hammer and idler arm should pop out"
*note*
Some have had problems removing the idler arm and have had to rebuild it while it is still installed.
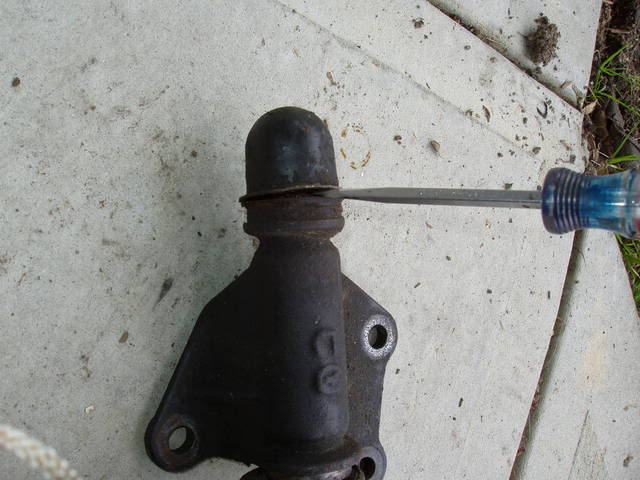
Dissasembly
Using your flathead screwdriver pry off the idler arm cap. I had to tab the screwdriver with a hammer to break the seal.
Next remove the 19mm nut at the top of the idler arm. This holds the whole assembly together. It will probibly be very tight, I used a breaker bar for this job.
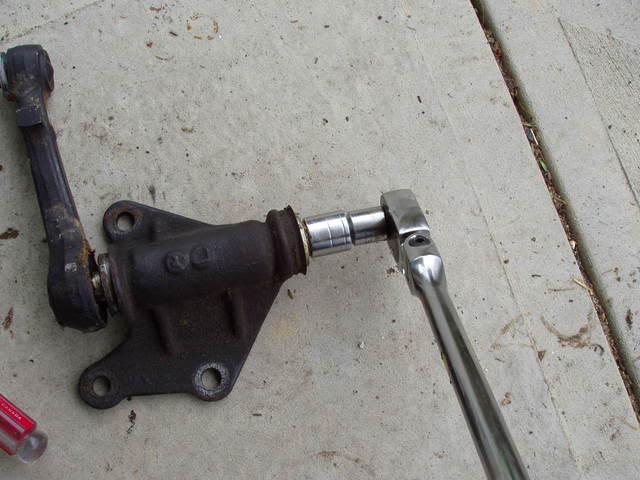
Remove the nut and remove the washer. Mine was pretty stuck so I had to pry it out with my flathead screwdriver.
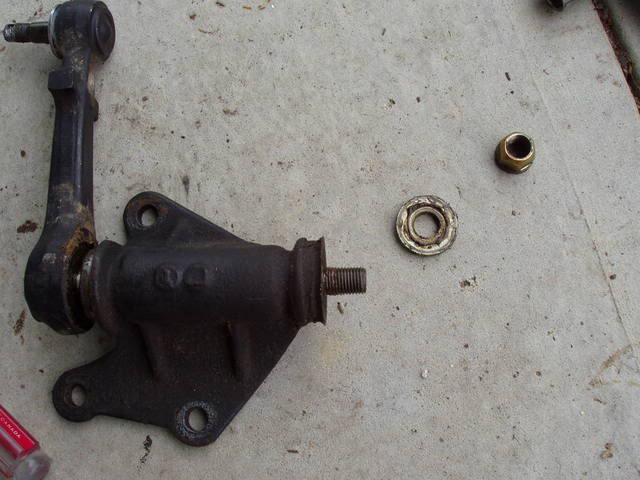
Next, slide the arm out of the housing. If your idler arm has not been serviced in a long period of time, don't expect this to be easy. Mine was rusted in place and took a good whack or two with a hammer to get out.
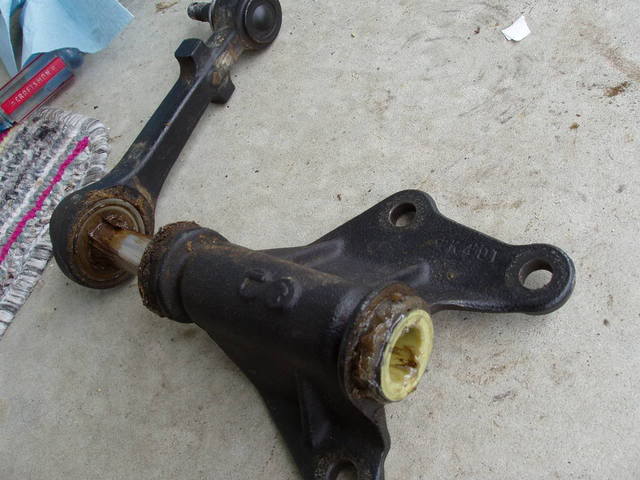
Here is the arm out and the old worn bushings removed from the housing.
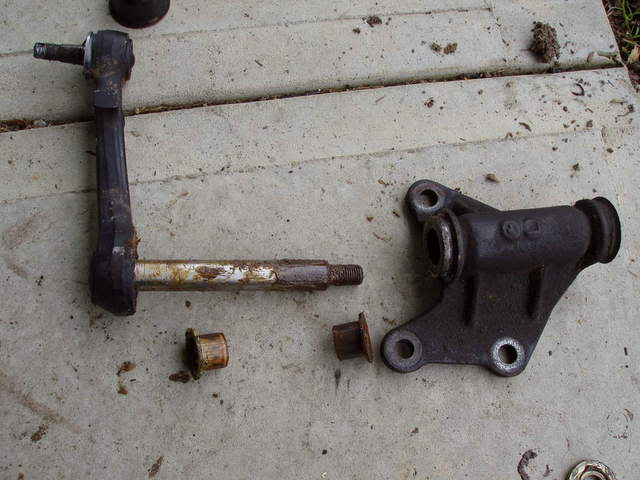
Your idler arm is now dissasembled.
Reassembly
Take your new idler arm bushings (pt# 90386-18002 for 86-91 trucks and 4runners) out of the packaging.
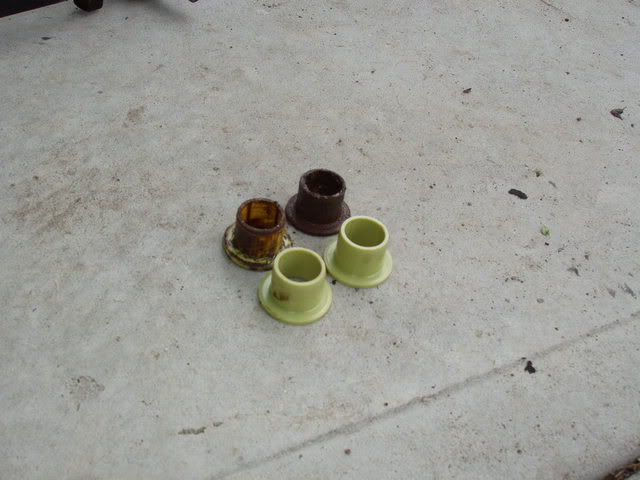
Here are the old vs. new bushings
Now, do not lube your bushings yet. Install them into the housing dry. They are a tight fit so carefully use a hammer to tap them into place.
Lube the surface of the bushings now.
Generously lube the shaft of the arm assembly and slide it back into the housing.
Slide on the big washer followed by that 19mm nut. Sinch the bolt down tight. Torque the big nut to 58 ft–lb.
Last but not least, tap the idler arm cap back into place. Feel free to use a little adhesive here to make sure it will not fall off.
If you are installing a brace or have one installed already. The big flat washer and the idler arm cap are not reused.
Re-install
-Slide the arm into the relay rod
-Install 17mm castle nut loosly
-Install 3 17mm bolts holding the idler arm housing to the frame *torque to 105ft-lb*
-Tighten 17mm castle nut on relay rod to 43ft-lb
-Install new cotter pin
*Optional stuff*
You can also drill, tap and add a zerk fitting on the housing so you can grease it regularly.
Brass bushings are also available for around 45 dollars. But you will probibly need to machine them to fit:
http://www.custommachiningusa.com/Specialty_Items.html
DONE
You should now have much better steering feel and smoother operation.
All for under 10 dollars and an hour of your time.
I would rate this job a 3 out of 10. If you can do your brakes, you can defantly rebuild your idler arm.
Symptoms:
shakey wheel on the hwy, sloppy steering.
To check:
Get a friend to get in your truck, and turn the wheel side to side. If your idler arm moves up or down its time to rebuild.
Supplies/tools:
-12mm socket
-19mm socket
-17mm socket
-14mm socket (if installing a brace)
-Long rachet for leverage
-17mm open end wrench
-14mm open end wrench (if installing a brace)
-Hammer
-Flathead screwdriver
-Grease
-Idler arm bushings
Removal No pictures due to greasy hands.
I found removal easier if your wheels were turned to full lock to the right.
-Remove 4 12mm skid plate bolts and remove and set aside skid plate
-Remove the idler arm cotter pin
-Remove castle nut
-Remove 3 17mm bolts holding the idler arm to the frame *keep track of the bolts, they are different lengths*
-Smack the relay rod with a hammer and idler arm should pop out"
*note*
Some have had problems removing the idler arm and have had to rebuild it while it is still installed.
Dissasembly
Using your flathead screwdriver pry off the idler arm cap. I had to tab the screwdriver with a hammer to break the seal.
Next remove the 19mm nut at the top of the idler arm. This holds the whole assembly together. It will probibly be very tight, I used a breaker bar for this job.
Remove the nut and remove the washer. Mine was pretty stuck so I had to pry it out with my flathead screwdriver.
Next, slide the arm out of the housing. If your idler arm has not been serviced in a long period of time, don't expect this to be easy. Mine was rusted in place and took a good whack or two with a hammer to get out.
Here is the arm out and the old worn bushings removed from the housing.
Your idler arm is now dissasembled.
Reassembly
Take your new idler arm bushings (pt# 90386-18002 for 86-91 trucks and 4runners) out of the packaging.
Here are the old vs. new bushings
Now, do not lube your bushings yet. Install them into the housing dry. They are a tight fit so carefully use a hammer to tap them into place.
Lube the surface of the bushings now.
Generously lube the shaft of the arm assembly and slide it back into the housing.
Slide on the big washer followed by that 19mm nut. Sinch the bolt down tight. Torque the big nut to 58 ft–lb.
Last but not least, tap the idler arm cap back into place. Feel free to use a little adhesive here to make sure it will not fall off.
If you are installing a brace or have one installed already. The big flat washer and the idler arm cap are not reused.
Re-install
-Slide the arm into the relay rod
-Install 17mm castle nut loosly
-Install 3 17mm bolts holding the idler arm housing to the frame *torque to 105ft-lb*
-Tighten 17mm castle nut on relay rod to 43ft-lb
-Install new cotter pin
*Optional stuff*
You can also drill, tap and add a zerk fitting on the housing so you can grease it regularly.
Brass bushings are also available for around 45 dollars. But you will probibly need to machine them to fit:
http://www.custommachiningusa.com/Specialty_Items.html
DONE
You should now have much better steering feel and smoother operation.
All for under 10 dollars and an hour of your time.
I would rate this job a 3 out of 10. If you can do your brakes, you can defantly rebuild your idler arm.
Last edited by Jay351; May 24, 2008 at 11:16 AM.

Thread
Thread Starter
Forum
Replies
Last Post
_Nicco_
86-95 Trucks & 4Runners
35
Sep 21, 2015 03:06 PM


