
Project: 85 5VZ-FE 4Runner
 Aug 14, 2007 | 10:31 AM
#1
Thread Starter
Registered User
Joined: Jun 2006
Posts: 141
Likes: 0
Project: 85 5VZ-FE 4Runner
We have been pretty busy here at ORS. Now it has come time to postig what has kept us so busy. One of our latest projects is a 85 4Runner that we are swapping a 5VZ-FE into for one of our customers here. the V-6 will be bolting to a 2000 taco auto trani with dual t-cases from an 85. stay tuned for a step by step build up on this!
Aug 14, 2007 | 11:02 AM
#2
Contributing Member
Joined: Dec 2003
Posts: 3,659
Likes: 0
From: Between a rock and a hard place, AZ
*Subscribes* 
Aug 14, 2007 | 11:24 AM
#3
Registered User
Joined: Feb 2007
Posts: 441
Likes: 0
From: Pleasant Grove, Utah
*Subscribes*
Aug 14, 2007 | 01:28 PM
#4
Contributing Member
Joined: Jan 2006
Posts: 899
Likes: 0
From: Summit County, Colorado
Sounds like a hell of a combination, Mike!
Looking forward to seeing it!
Looking forward to seeing it!
Aug 20, 2007 | 08:53 AM
#5
Thread Starter
Registered User
Joined: Jun 2006
Posts: 141
Likes: 0
some pics of our progress so far. The front clip had a bad cancer problem so we opted to replace it with one in better condition. Also knowing that we will be putting a heavy duty bumper on the truck we prepared by bracing the front with a thick plate of steel.
Aug 20, 2007 | 09:17 AM
#6
Thread Starter
Registered User
Joined: Jun 2006
Posts: 141
Likes: 0
Stage one consisted of removing the front clip and cleaning up the firewall, and prepping our new one to bedline. Since we are relocating the battery we removed the now usless stock tray and put in our own, much nicer looking one. After buffing down the clip and welding on our batery tray, we coated the whoe thing in bedliner to prevent rust and prolong life.
Aug 20, 2007 | 10:44 AM
#7
Thread Starter
Registered User
Joined: Jun 2006
Posts: 141
Likes: 0
We just finished mounting the battery tray on the front clip over the weekend. After that we sprayed the whole thing down with some bed liner for durrbility and longetivity... not to mention it gives the engine bay a clean look as well. Stay tuned: more coming soon!
Trending Topics
Aug 27, 2007 | 10:27 AM
#8
Thread Starter
Registered User
Joined: Jun 2006
Posts: 141
Likes: 0
We have more updates on the 4Runner! Over the past weekend we stripped the firewall bare of its bedliner paint job, and any one that has done the same knows, it was a job and a half. with that done we placed our new F-clip on and re-spot welded it using the same welds for cleanliness. After that we re lined it. Now the only hurdle between the crossover stearing is to apply seam sealant to the seam and to spray it with bedliner.
Aug 27, 2007 | 11:32 AM
#9
Contributing Member
Joined: Nov 2002
Posts: 10,666
Likes: 5
From: Oklahoma State
Looking great Mike!  Subscribed
Subscribed
Aug 29, 2007 | 06:42 PM
#10
Registered User
Joined: Feb 2006
Posts: 1,753
Likes: 0
From: Hot a$$ PHX
Subscribed, and depending on the final product I might have to send you guys my 87 4Runner for you to work your magic
Sep 13, 2007 | 08:03 AM
#11
Thread Starter
Registered User
Joined: Jun 2006
Posts: 141
Likes: 0
It is time for another update on our 3.4 swap into the 1985 4Runner! Since you have last heard we have finished painting, sealing and routing/attaching the wiring to and through the clip. we are really happy with how the project is coming along, although being shorthanded and busy these past few weeks and not being able to dedicate more time to it. Here are more pictures for you all, hope you enjoy them!
 Sep 13, 2007 | 09:52 AM
#13
Thread Starter
Registered User
Joined: Jun 2006
Posts: 141
Likes: 0
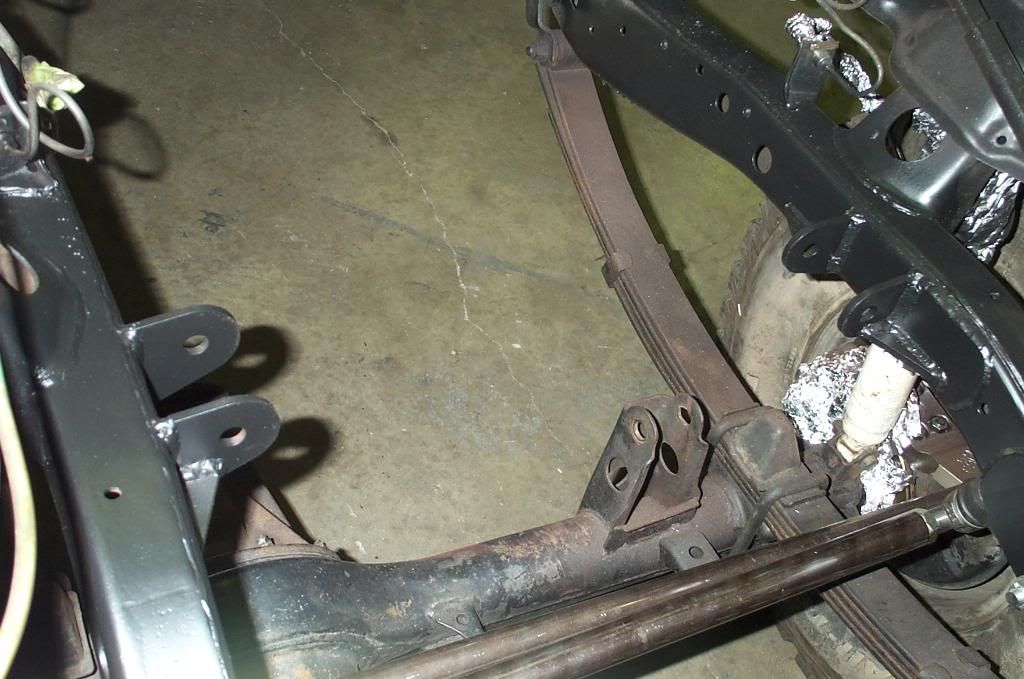
After finishing the front clip it was on to Marlin Crawler's crossover steering kit our customer wanted to convert to. This would have been much harder than it was if the engine had already had been in, so we did it before we are putting the engine in. We first cut off his old power steering box mount, then ground and buffed it down. First we had to remove the old steering system. With that removed, we preloaded the bearings then bolted up the Marlin knuckles (which were not only prettier, but twice as thick too). Then we installed and adjusted the tie rod, followed by the draglink. After that we welded on the stout frame plates and bolt holes so it could accept an ifs steering box. After everything was checked the box was removed and everything was painted black to match the rest of the engine bay. The list of prep work before the engine gets dropped in is getting smaller and smaller. Till next time, let these pics hold you all over.
Oct 17, 2007 | 02:14 PM
#14
Thread Starter
Registered User
Joined: Jun 2006
Posts: 141
Likes: 0
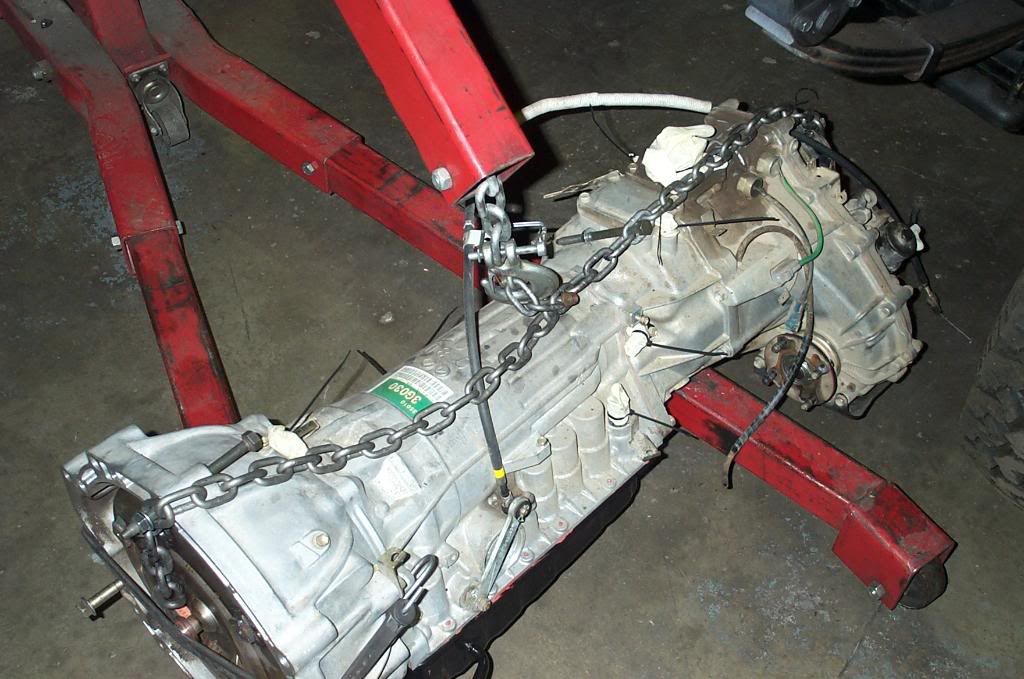
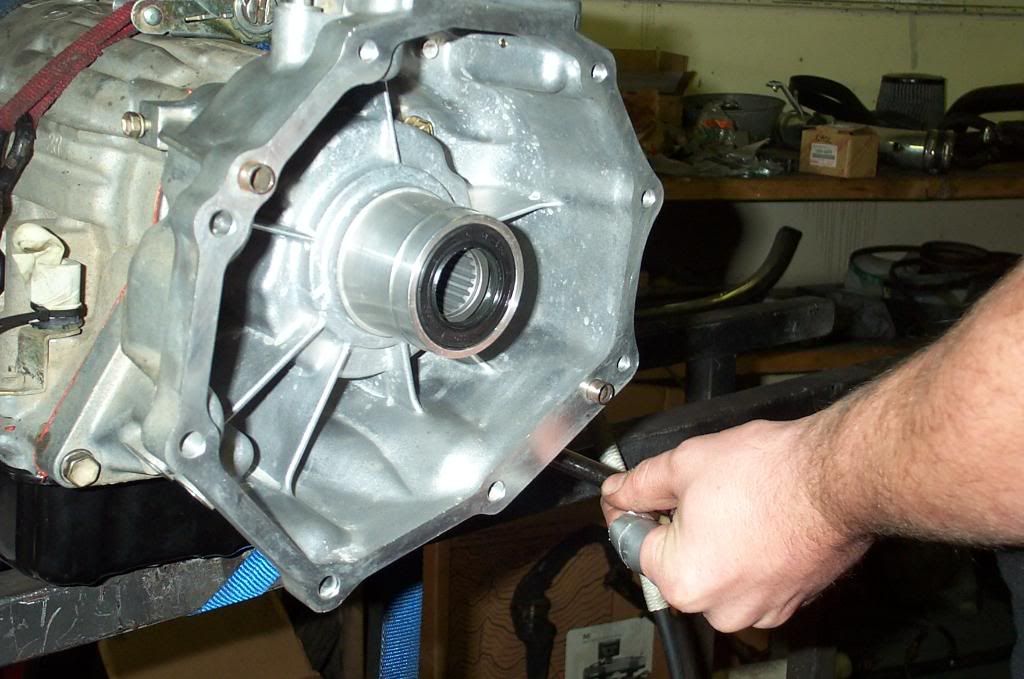
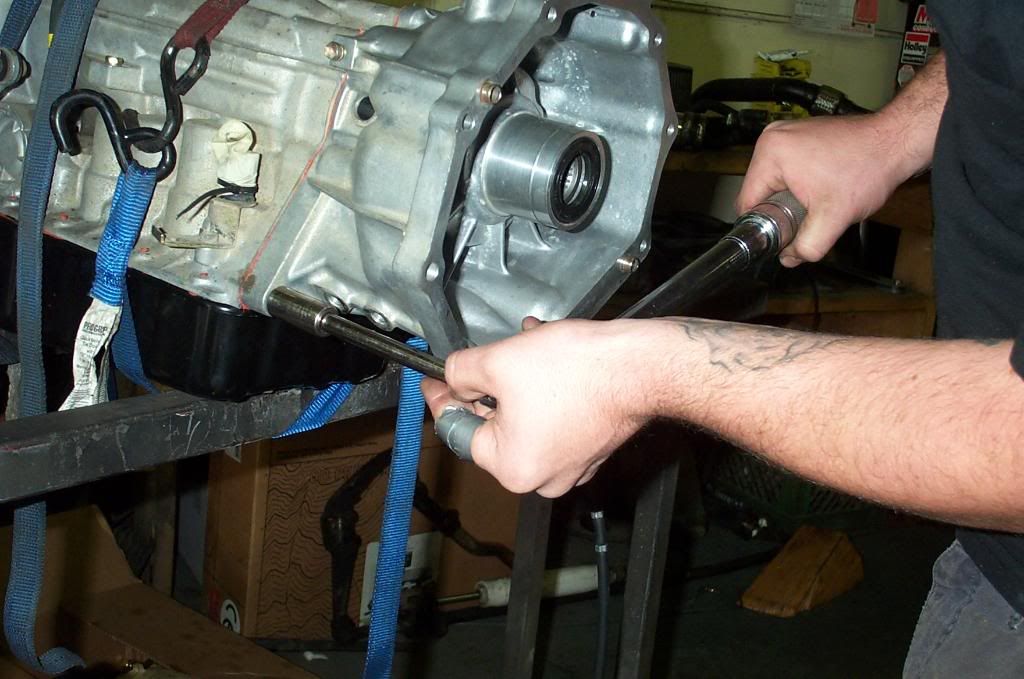
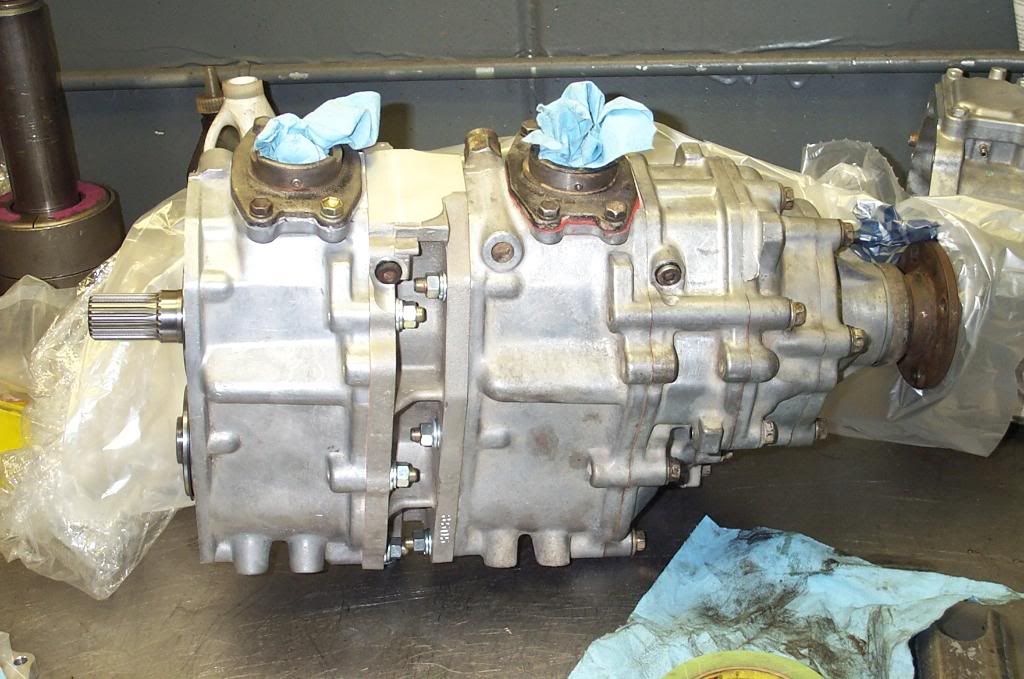
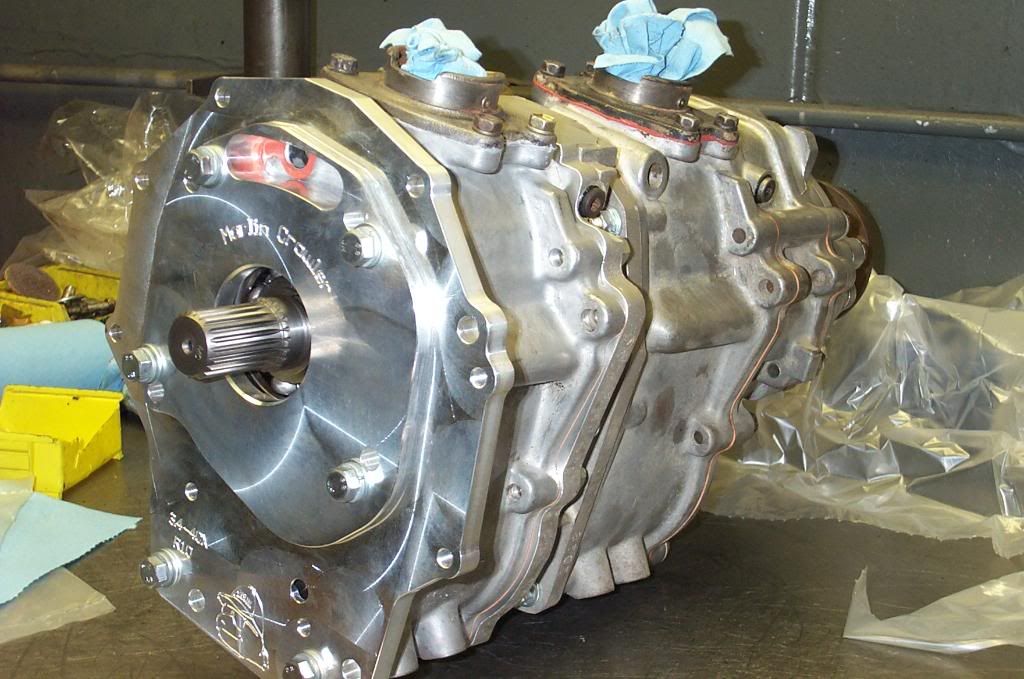
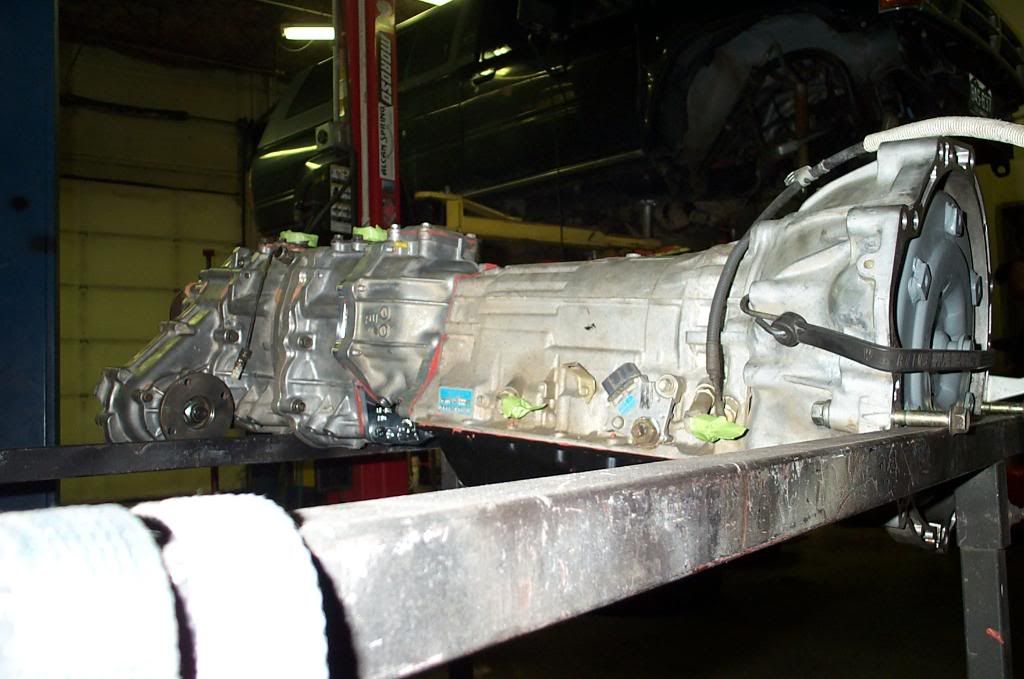
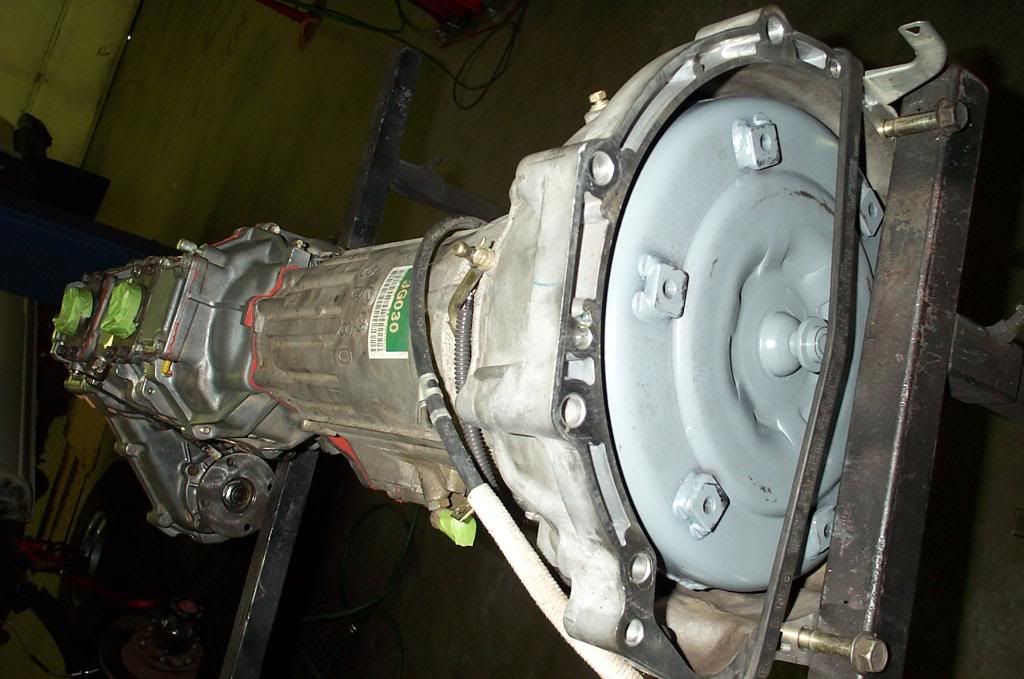
Sorry for the long wait between updates. Our supliers were back-ordered on some parts that were vital to progress on this project. We have just got the dual t-cases assembled and mounted to the A340 auto transmission. We used a Marlin R-10 transmission adapter which allows us to clock both cases 10 degrees for some additional front output and drive shaft ground clearance. This will all be mounted with a R-10 x-member from Front Range.
We fully rebuilt, cleaned, and resealed both transfer cases. Here is what you are looking at:
-A340 (01 Tacoma)
-Marlin trans adapter with R10 (rotated 10 degrees) option
-gear driven reduction box w/ 2.28 gears and Marlin 23 spline inputs shaft
-MC07 standard rotation adapter
-gear driven transfer case w/ Marlin 23 spline input and 2.28 gears
There are lower gearing options but we think this will work very well behind the auto and an engine w/ power.
Last edited by ORS; Oct 17, 2007 at 02:23 PM.
Oct 17, 2007 | 03:43 PM
#15
Registered User
Joined: Apr 2007
Posts: 1,056
Likes: 6
From: Sacramento, CA (Carmichael)
My god That transmission must weigh a ton. Well maybe half a ton.
Oct 18, 2007 | 08:34 AM
#16
Thread Starter
Registered User
Joined: Jun 2006
Posts: 141
Likes: 0
Yes, the transmission had some girth to it. It took 3 of us to steady and position it under the truck. Stay tuned for the engine and FROR X-member install pics!!!
Oct 18, 2007 | 08:53 AM
#17
Registered User
Joined: Jan 2007
Posts: 1,987
Likes: 0
From: Chico Republic, NOR*CAL
nice work. that's gonna be one sweet ride!
Oct 23, 2007 | 03:24 PM
#18
Thread Starter
Registered User
Joined: Jun 2006
Posts: 141
Likes: 0
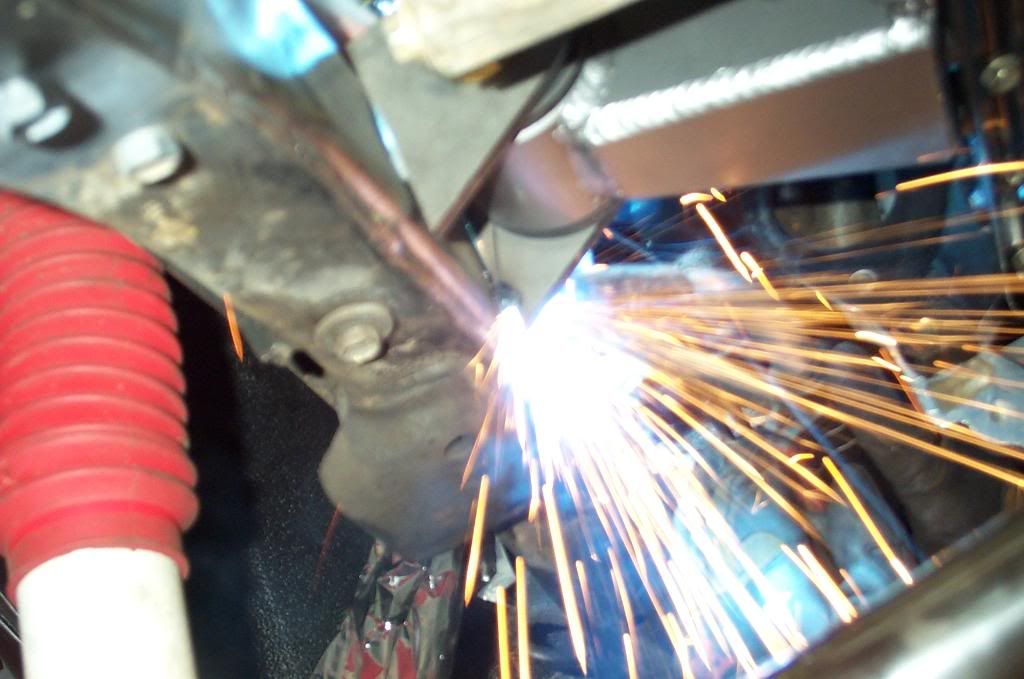
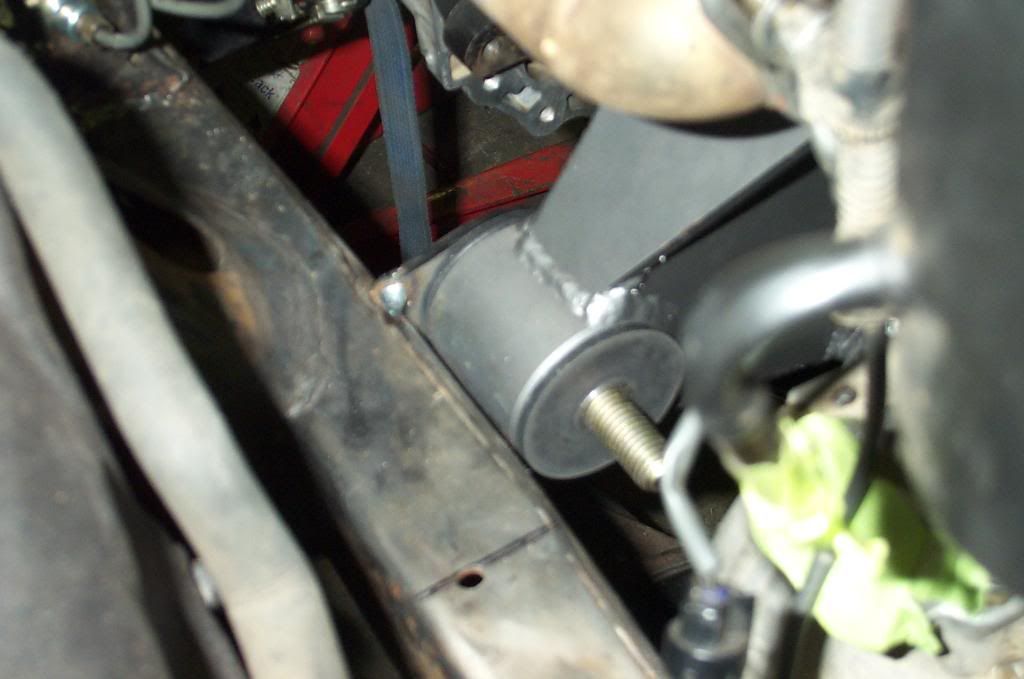
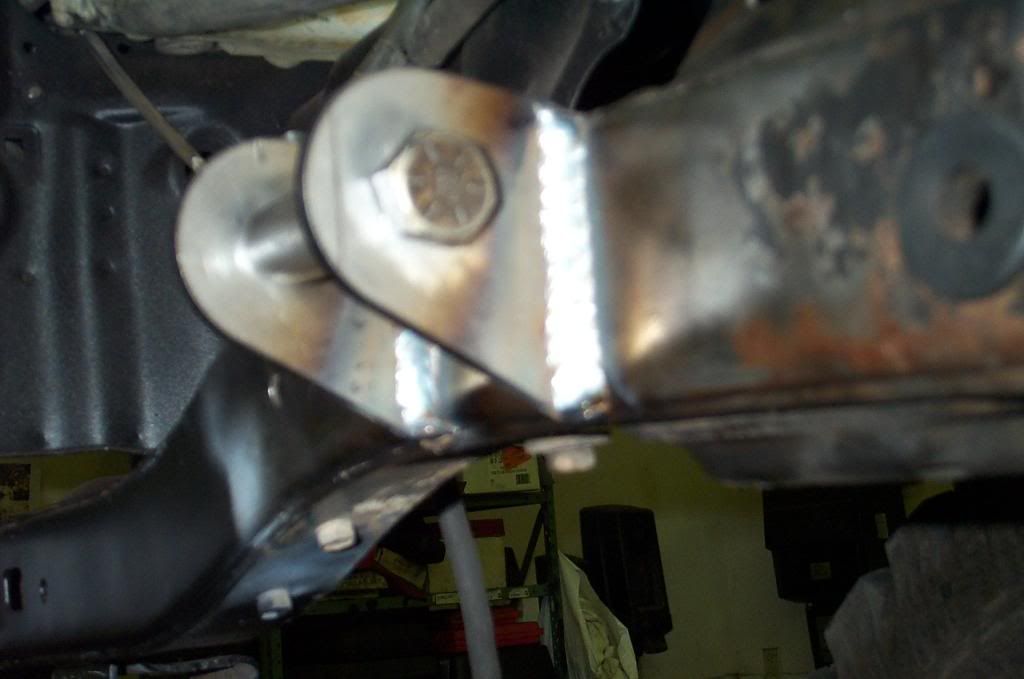
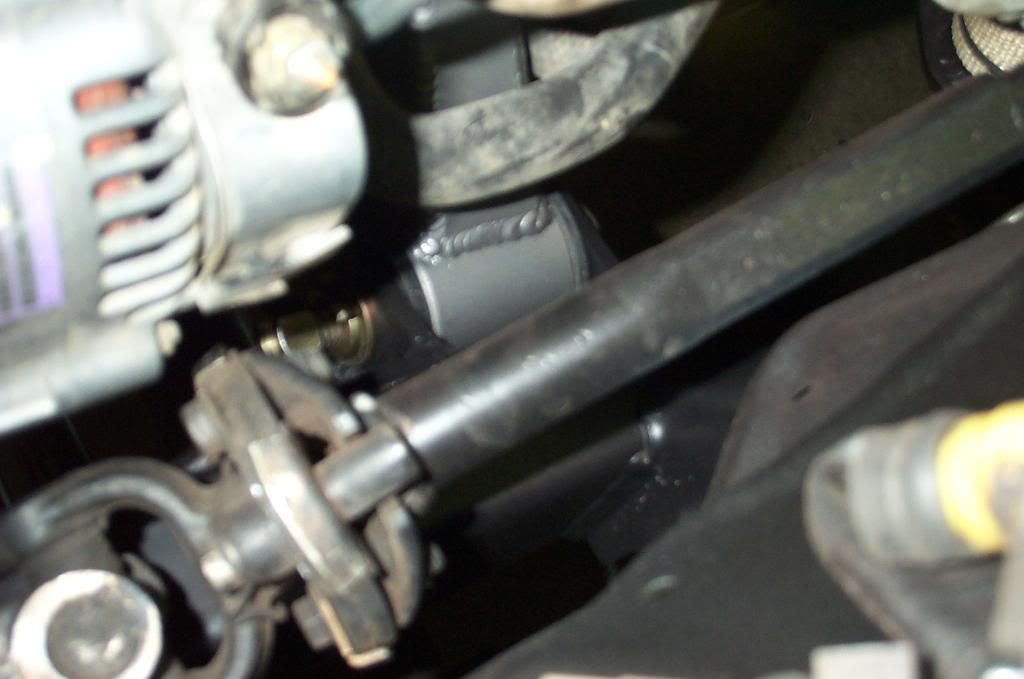
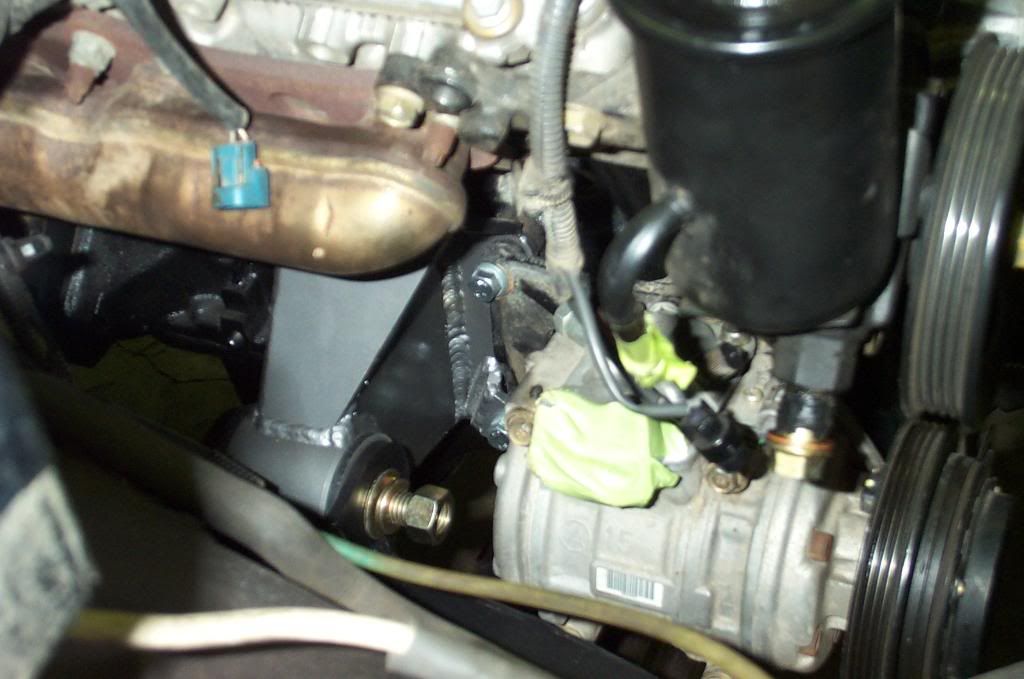
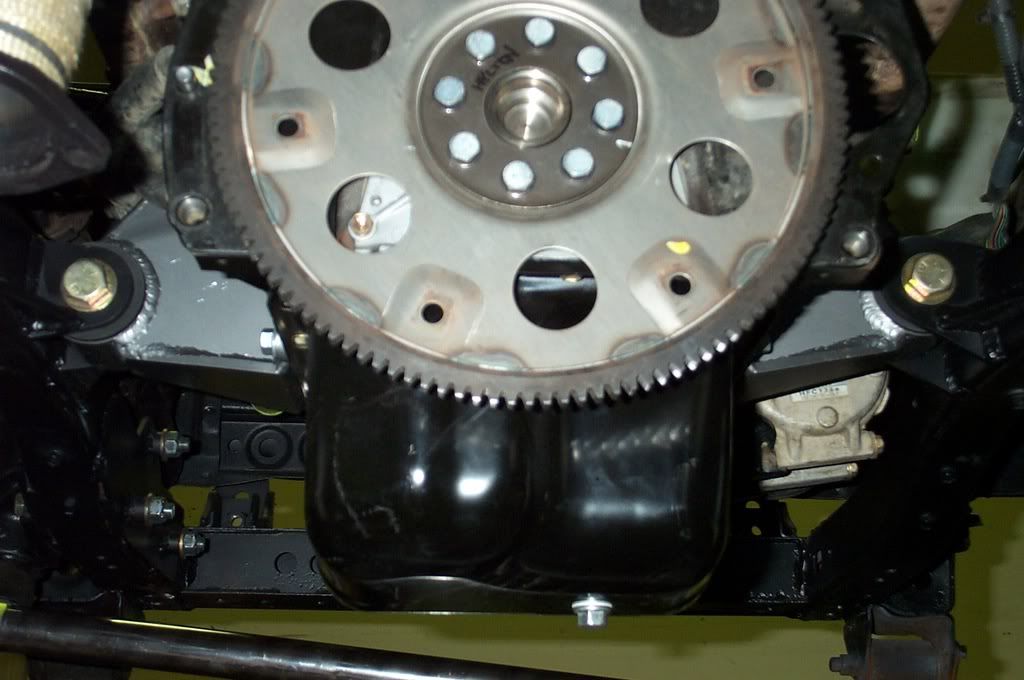
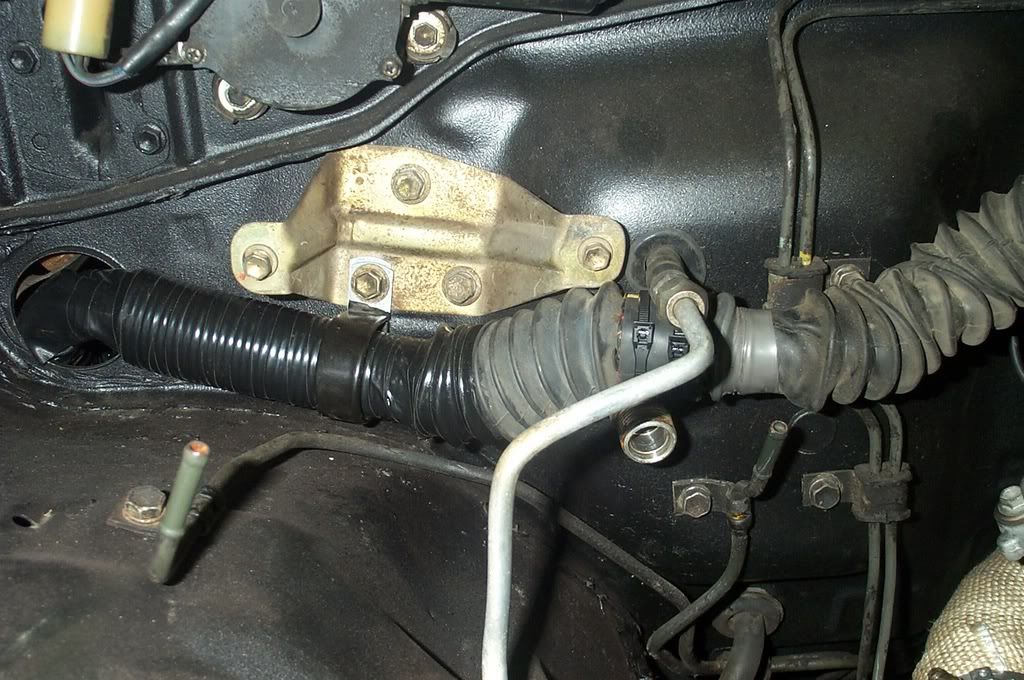
The engine is mounted in the engine bay! Since our customer was wanting both a dual case setup and an engine conversion into an older truck at the same time we had to mock up brackets with the engine and transmission in as they will sit (and yes, bolted together). We set him up with some of our ultra stout performance motor mounts as well. With the mounts we made some custom frame tabs to ensure the best fit possible. This was not a simple or easy process. Careful measuring and examining went into checking many clearances: Exhaust to firewall; trasmission tunnel to transmission and bellhousing; fan to radiator; oil pan to steering, axle, and suspension, not to mention getting the engine straight after appeasing all of the previous gods. After tacking the tabs we unbolted and removed the engine and transmission. The motor mounts' frame tabs were then gussetted and the welds were finished. After that came a thorough frame cleaning and painting, including the motor mount tabs (read more on the transmission/t-case/crossmember install coming soon). We also heat shielded the E-brake and speedometer cables where they run close to the exhaust (the old 4 cyl bodies were the worst), thus protecting them against melting/ becoming brittle.
Now here is the most important part: pictures!
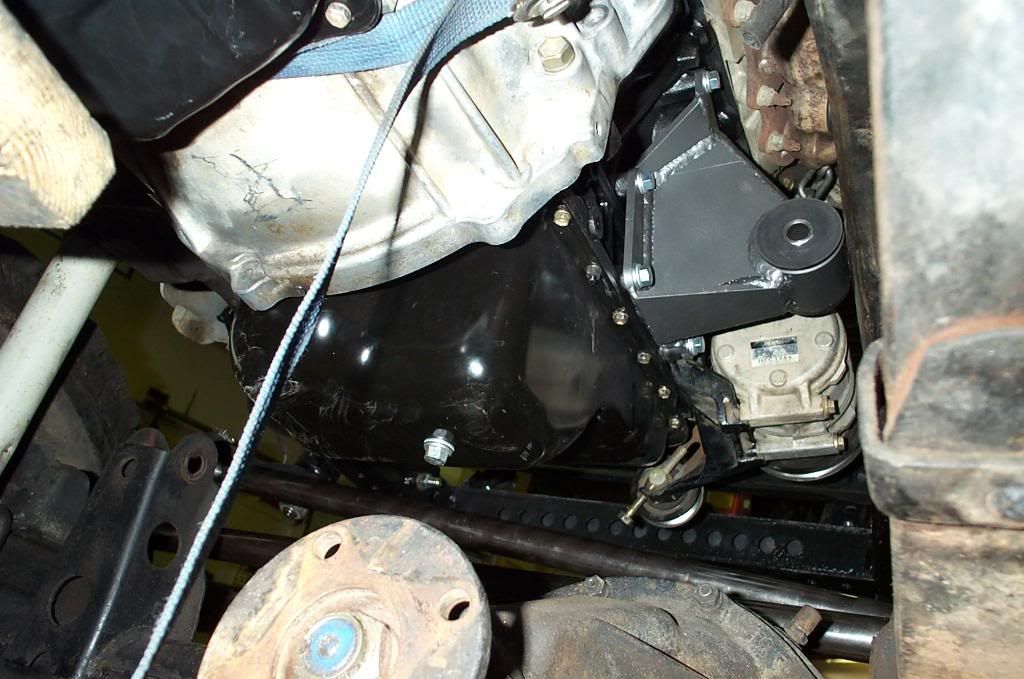
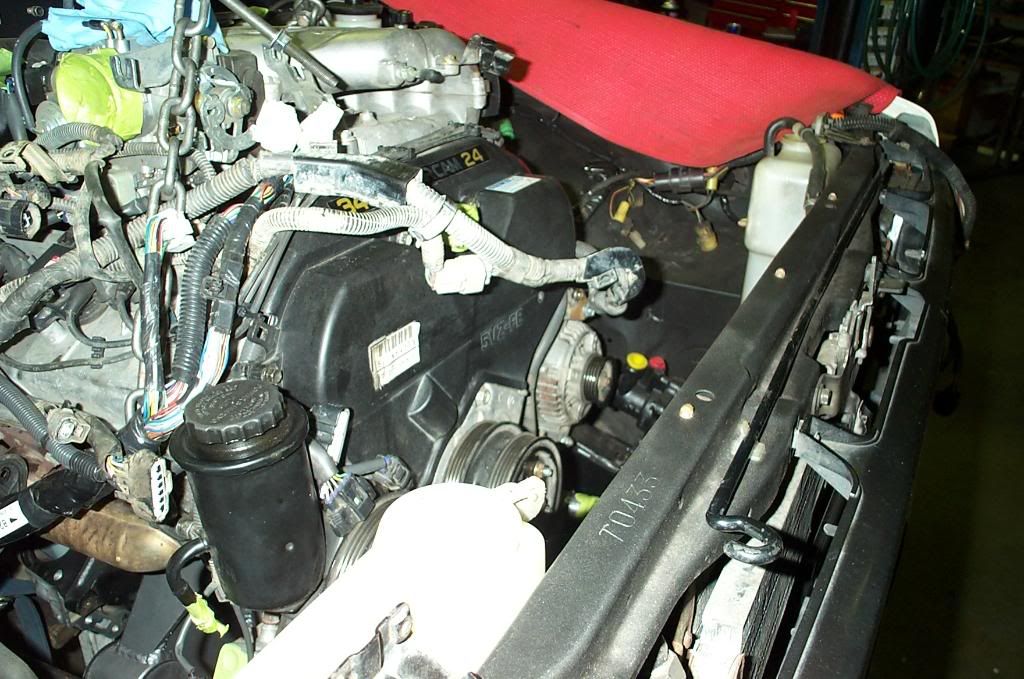

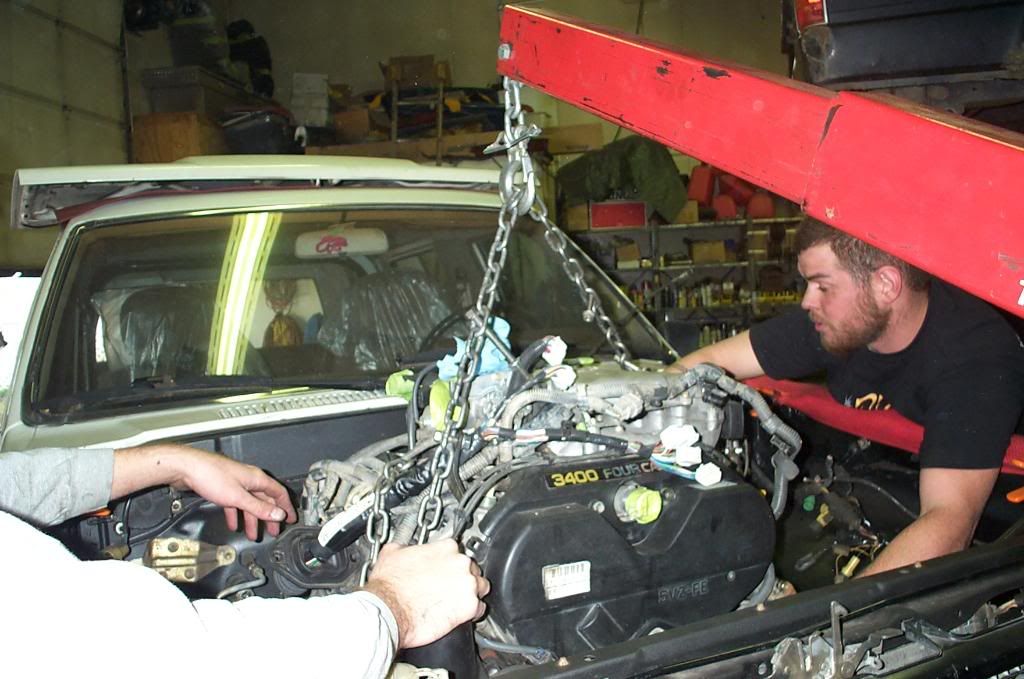
coming out

going back in
done!
Now here is the most important part: pictures!
coming out
going back in
done!
Oct 23, 2007 | 03:28 PM
#19

Registered User
Joined: Feb 2007
Posts: 177
Likes: 0
Awesome! What does something like this cost?
Nov 17, 2007 | 11:32 AM
#20
Thread Starter
Registered User
Joined: Jun 2006
Posts: 141
Likes: 0
OK, Here are some more updates. This truck is nearing completion.
WIRING
After mounting the engine, we moved on to wiring. A portion of the 3.4L engine harness is routed down the driver side of the engine to power the oxygen sensors and transmission. This portion of the harness runs close to the exhaust in some places. We really took our time to be sure the harness was properly routed and fastened to prevent any movement from our desired routing.
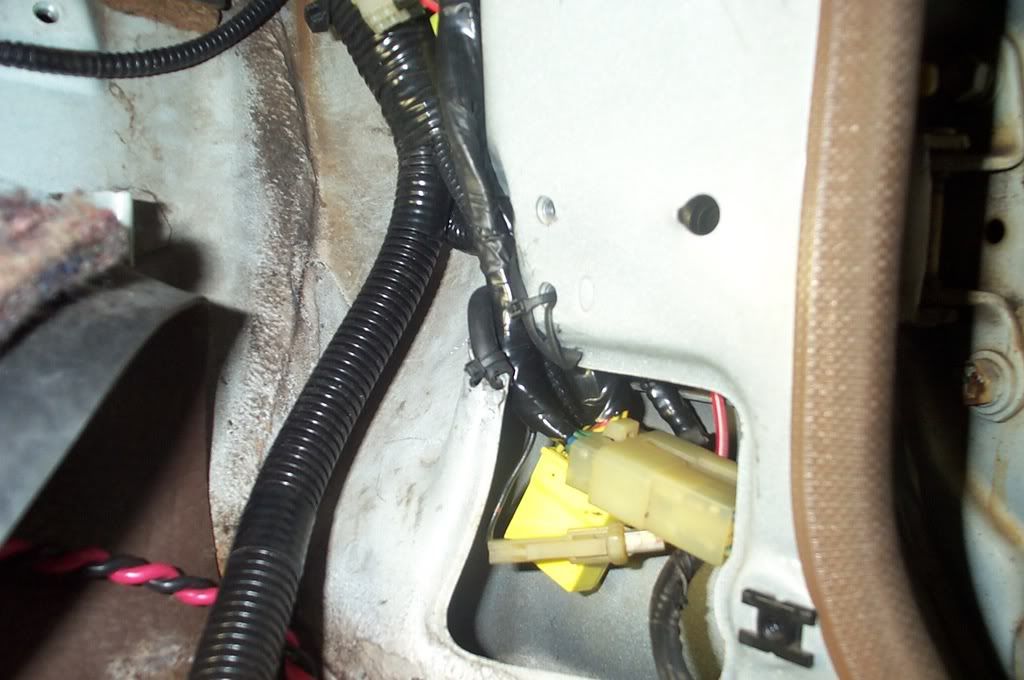
Next we routed the engine harness inside the cab. Before doing so, we remove the oversized Tacoma firewall grommet, fully loom, and tape this portion of the harness. Clearance is very tight under the dash and we want to make sure the wires are fully protected from ?squishing?. We route the engine harness behind the EVAP canister. We find this to be clean, secure and provide the most length possible.
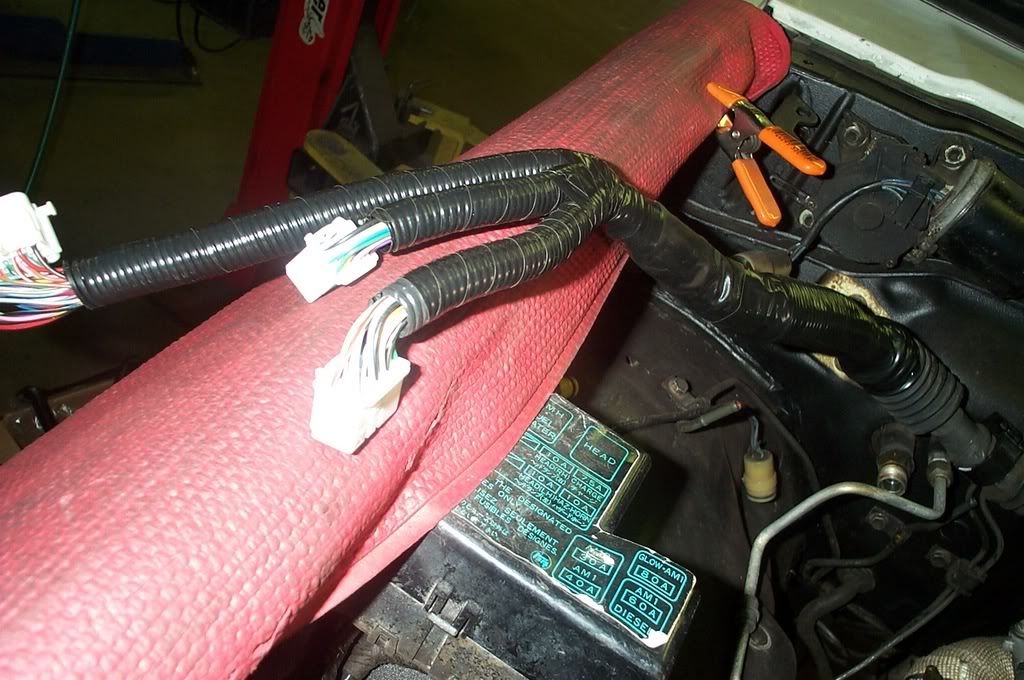
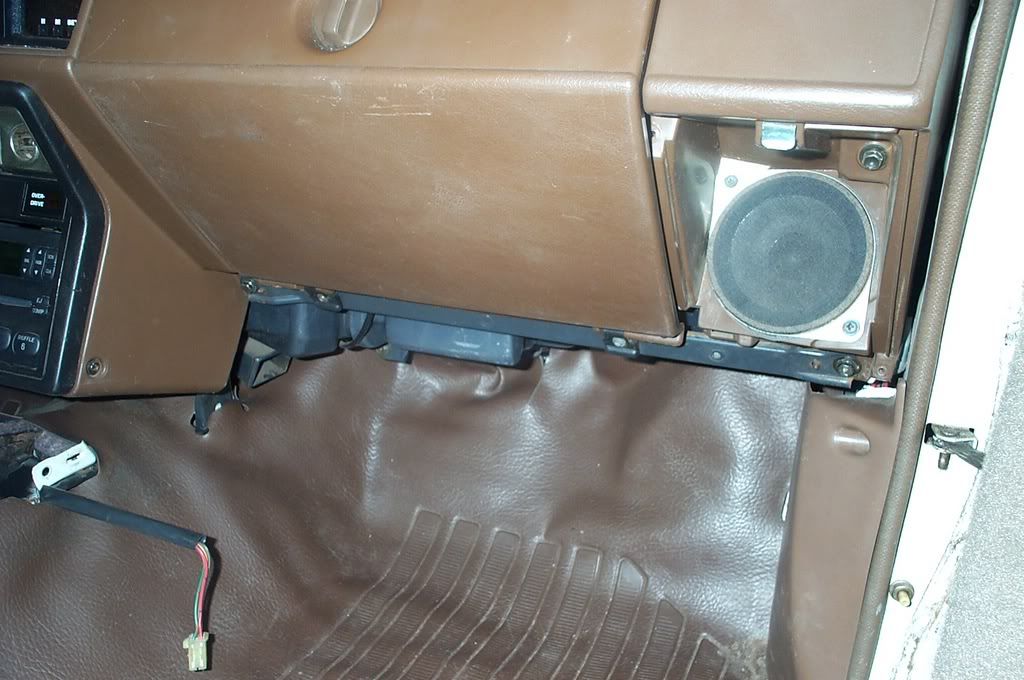
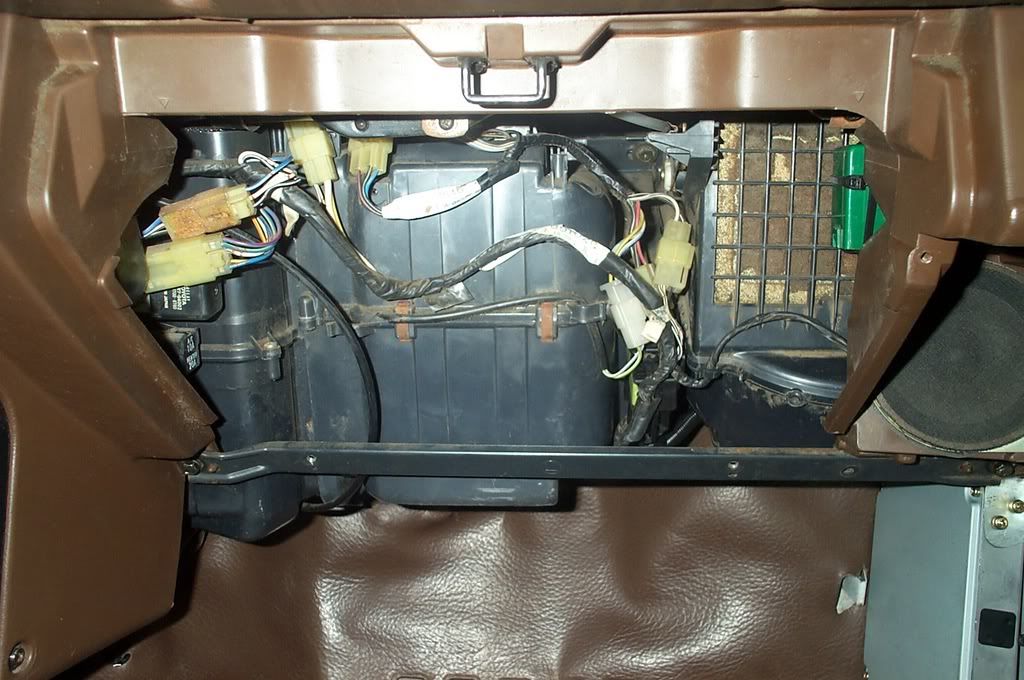
At this time we start the ORS harness install. We connect everything in the P/S kick- panel area and send all the leads on their way to their final destinations. The biggest challenge is cleanly stuffing this and the engine harness up and out of the way to the ECU can be neatly mounted. We carefully stuffed the harness upwards, next to the ?dash? components. We did something a little extra on this one ? we cut a notch in the body to allow part of the ?85 dash harness to tuck neatly and safely behind the ECU. That?s vacuum hose on the edges to protect the wires. :mr-t: At this point we routed the relays from the ORS harness near the evaporator and cleaned everything up.
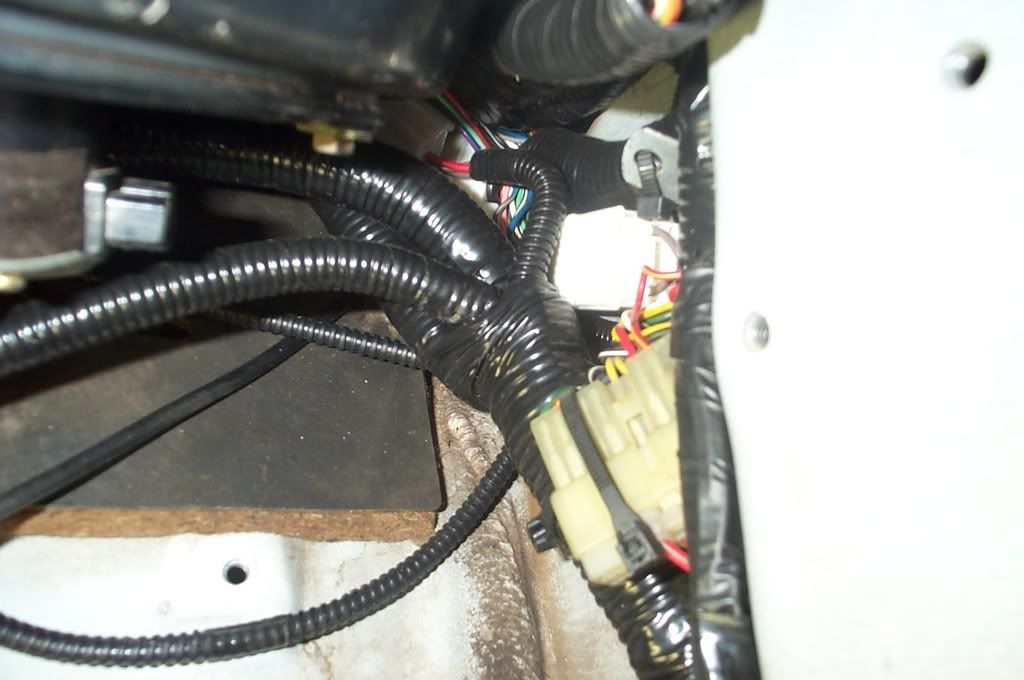
Nest we fumbled around with the stock and ?01 ECU brackets and got the ECU to neatly bolt up. We?re glad we took our time here, it sure does look stock to us!

WIRING
After mounting the engine, we moved on to wiring. A portion of the 3.4L engine harness is routed down the driver side of the engine to power the oxygen sensors and transmission. This portion of the harness runs close to the exhaust in some places. We really took our time to be sure the harness was properly routed and fastened to prevent any movement from our desired routing.
Next we routed the engine harness inside the cab. Before doing so, we remove the oversized Tacoma firewall grommet, fully loom, and tape this portion of the harness. Clearance is very tight under the dash and we want to make sure the wires are fully protected from ?squishing?. We route the engine harness behind the EVAP canister. We find this to be clean, secure and provide the most length possible.
At this time we start the ORS harness install. We connect everything in the P/S kick- panel area and send all the leads on their way to their final destinations. The biggest challenge is cleanly stuffing this and the engine harness up and out of the way to the ECU can be neatly mounted. We carefully stuffed the harness upwards, next to the ?dash? components. We did something a little extra on this one ? we cut a notch in the body to allow part of the ?85 dash harness to tuck neatly and safely behind the ECU. That?s vacuum hose on the edges to protect the wires. :mr-t: At this point we routed the relays from the ORS harness near the evaporator and cleaned everything up.
Nest we fumbled around with the stock and ?01 ECU brackets and got the ECU to neatly bolt up. We?re glad we took our time here, it sure does look stock to us!


