
ZUK coil mod finished, BJ's installed, pictures.
 05-23-2009, 12:15 PM
#1
Registered User
Thread Starter
ZUK coil mod finished, BJ's installed, pictures.
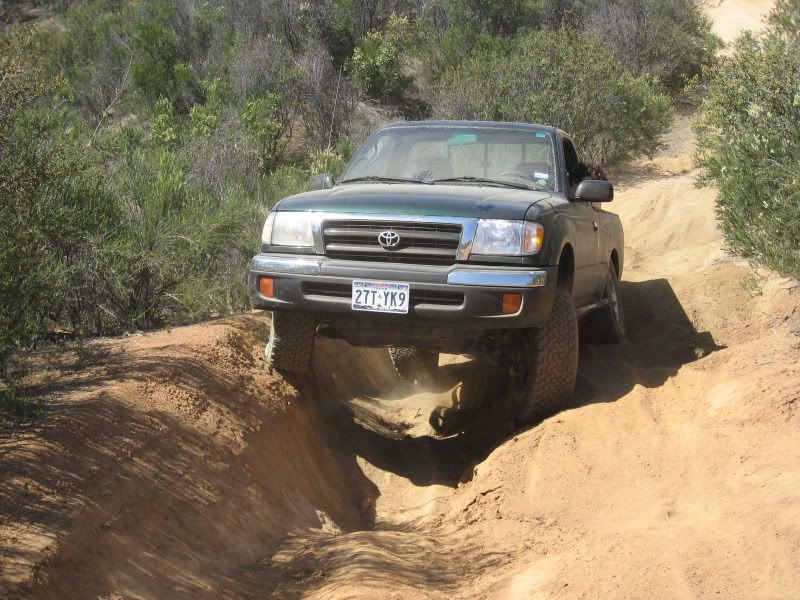
I took a couple of hours today to do the lift install on the rig.
I did take measurements before the lift but the pictures didn't come out. I had 10.5" from the top of the rim to the bottom of the fender before the springs went in and 14" after they were done. So we got 3.5" of lift out of the 14" 125lb coils.
First get a good floor jack and drop the tires.

Take your trusty torch and cut off the upper bump stops, you can see the pass side still attached.

Have your buddy cutting and fabing the mounts while you clean up the frame.

Get the springs mooshed into place. I used the lower bump stop as the lower mount since I'll be fabing up a lower mount when I do the U-blot flip kit from WabFab.

Once both sides are in have a certified welder type neighbor do the critical work.

Go outside and flex it. I did the measurements for the shocks and I have 18" at full compression and 22" at full droop. Not much but better than before.


Pic of the spring pack and I'm happy to say it no longer rests on the overload.

Before

After (with BJ spacers installed)

All said and done it took about 2 hours to do the rear coils and about 1.5 hours for the BJ spacers.
Thanks for playing along.
I did take measurements before the lift but the pictures didn't come out. I had 10.5" from the top of the rim to the bottom of the fender before the springs went in and 14" after they were done. So we got 3.5" of lift out of the 14" 125lb coils.
First get a good floor jack and drop the tires.
Take your trusty torch and cut off the upper bump stops, you can see the pass side still attached.
Have your buddy cutting and fabing the mounts while you clean up the frame.
Get the springs mooshed into place. I used the lower bump stop as the lower mount since I'll be fabing up a lower mount when I do the U-blot flip kit from WabFab.
Once both sides are in have a certified welder type neighbor do the critical work.
Go outside and flex it. I did the measurements for the shocks and I have 18" at full compression and 22" at full droop. Not much but better than before.
Pic of the spring pack and I'm happy to say it no longer rests on the overload.
Before
After (with BJ spacers installed)
All said and done it took about 2 hours to do the rear coils and about 1.5 hours for the BJ spacers.
Thanks for playing along.


Trending Topics
 05-23-2009, 05:05 PM
#11
Registered User
Dude, For S's and giggles try taking out the overloads and see if it flexs better.
Im running no overloads in my tacos for the moments and while it does kinda sag, I get mad flex..
Taco Plug..
/Thread jack.
The truck has a great stance after the front and rear lift..
Good job man !!

Im running no overloads in my tacos for the moments and while it does kinda sag, I get mad flex..
Taco Plug..
/Thread jack.
The truck has a great stance after the front and rear lift..
Good job man !!
05-23-2009, 05:41 PM
#13
Registered User
Thread Starter
Nice looking Taco by the way.
05-23-2009, 07:38 PM
#15
Registered User
Looks good! Do you have another shot of the rear passenger tire when it was up on the fork lift? I saw the one snapped from the rear, but was wondering if you had one taken from the side. I'd be curious to see how it compresses.
I bet all that extra room makes you want 33s now!
I bet all that extra room makes you want 33s now!
05-23-2009, 07:57 PM
#16
Registered User
Thread Starter
Looks good! Do you have another shot of the rear passenger tire when it was up on the fork lift? I saw the one snapped from the rear, but was wondering if you had one taken from the side. I'd be curious to see how it compresses.
I bet all that extra room makes you want 33s now!
I bet all that extra room makes you want 33s now!
 Man I love those retreads.

Thread
Thread Starter
Forum
Replies
Last Post
icentropy
86-95 Trucks & 4Runners
10
07-11-2015 07:21 AM


