
LOCKER Questions

 03-08-2008, 10:11 AM
#23
Registered User
Thread Starter
Join Date: Jan 2008
Location: MULDROW OKLAHOMA
Posts: 102
Likes: 0
Received 0 Likes
on
0 Posts
so I am going to get mine done by a shop in town, should I change the diff oil after a hundred iles or so? and how can i check to make sure its working properly while still in the shops parkinglot?
03-08-2008, 04:44 PM
#24
Registered User
Join Date: Feb 2006
Location: Barrie, Ontario CANADA
Posts: 1,730
Likes: 0
Received 0 Likes
on
0 Posts
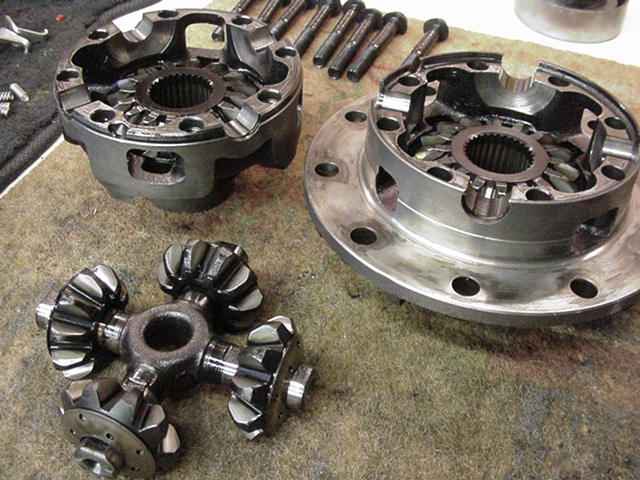
Does anyone have a pic of a 4 pinion VS a 2 Pinion Diff? I don't understand how a 2 pinion works without the other 2 gears.
Sorry for the hijack........
Sorry for the hijack........
03-08-2008, 05:35 PM
#25
Registered User
Join Date: Apr 2005
Location: San Antonio TX
Posts: 358
Likes: 0
Received 0 Likes
on
0 Posts
Personally this isn't a hard job, it just takes attention to detail so everything goes back together properly. It's fine to have a shop do if you don't have time.
This is also an excellent time to install a soild pinion spacer. The locker puts increased pressure on the original crush sleeve and will cause the pinion bearings to lose their pre-load. This is bad for the bearings and will introduce the chances for blowing a ring and pinion.
When the carrier bearing adjusters are re-installed, ask to have both sides equally tightened by about four notches. This will increase the carrier bearing pre-load and make the ring and pinion setup stronger and less likely to deflect. Stress to the shop that the adjusters should and better not be tightened with a chisle and hammer. --If the shop isn't sure what you want or what equally tightening the adjusters will do then that would be a good sign they shouldn't be working on it.--
Last edited by Bear80; 03-08-2008 at 06:03 PM.
03-08-2008, 05:55 PM
#26
Registered User
Join Date: Apr 2005
Location: San Antonio TX
Posts: 358
Likes: 0
Received 0 Likes
on
0 Posts
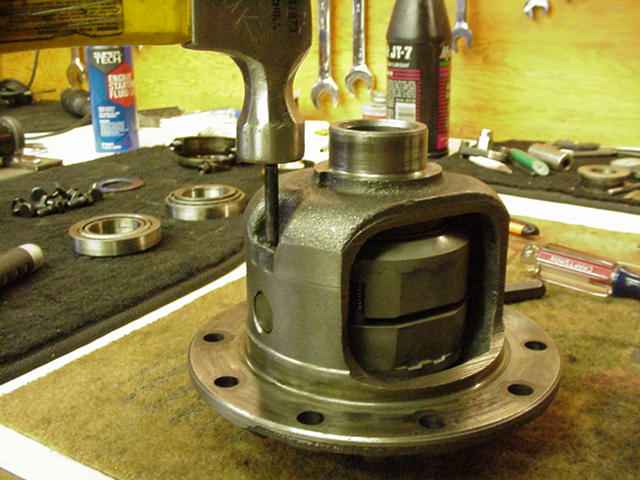
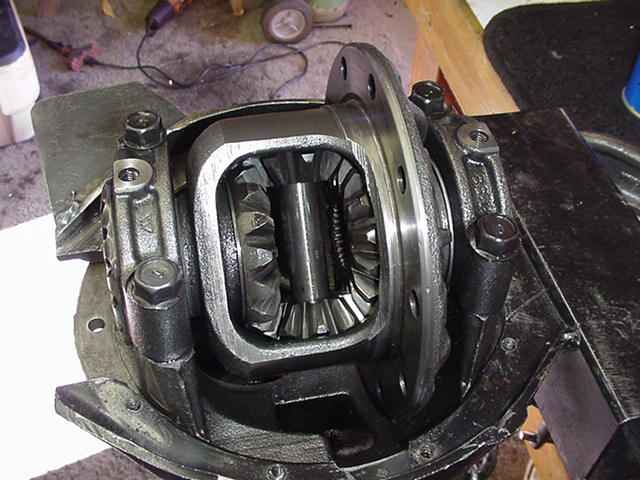
4 pinion carrier and ez locker:
*The ring gear does not need to come off for a locker install*
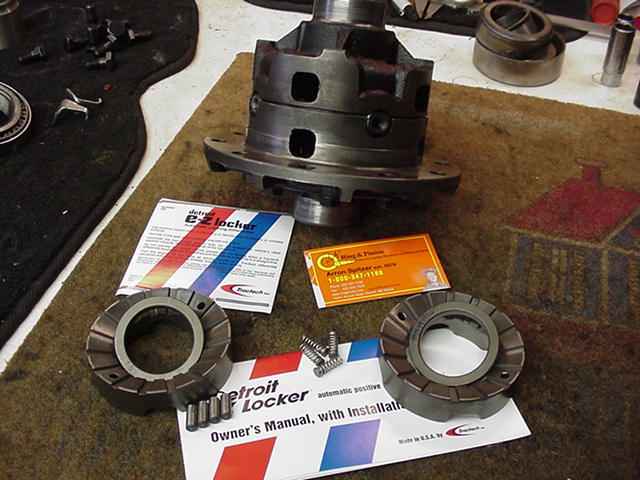
Carrier open:
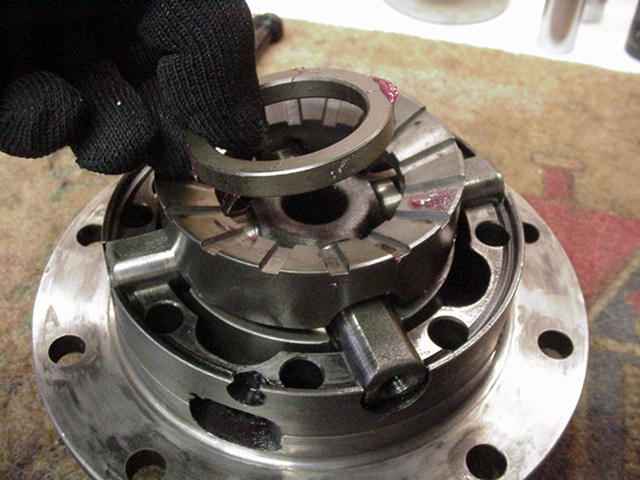
Locker in:
Then the case goes back together and that's it for the locker install.
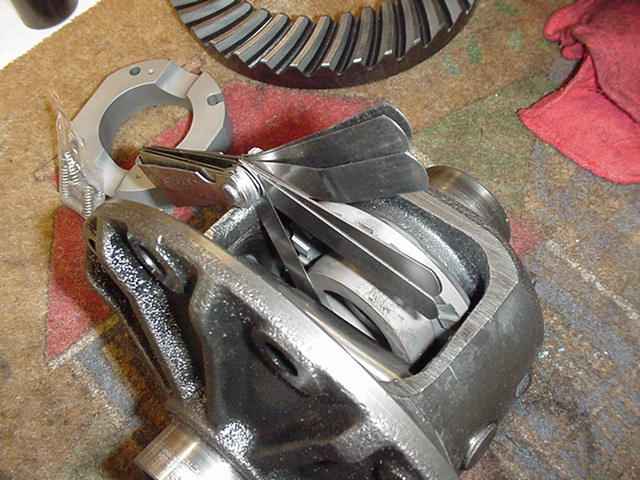
A 2 pinion locker setup:
*The ring gear MUST come off for this locker install*

The two clearance checks that CANNOT be done with a 4 pinion:
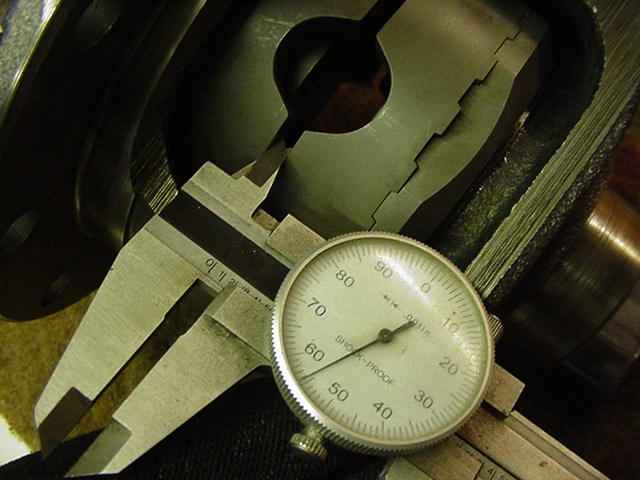
Carrier with the locker in:
Here is the link about adjusting the carrier bearings
Also he has a link for installing a 2 pinion Aussie locker. That link gives a good idea about the install, even for a 4 pinion. The 4 pinion being easier since the ring gear does not have to come off and the carrier mearly bolts together.
Last edited by Bear80; 03-08-2008 at 06:17 PM.
 03-08-2008, 08:26 PM
#30
Registered User
Thread Starter
Join Date: Jan 2008
Location: MULDROW OKLAHOMA
Posts: 102
Likes: 0
Received 0 Likes
on
0 Posts
ok so I hve been thinking about doing this in my garage now that I see that it seems to be easier than I thought. does it come with an IPB cause sme of the parts I dont know what they are?
03-09-2008, 08:13 PM
#34
Registered User
Join Date: Apr 2005
Location: San Antonio TX
Posts: 358
Likes: 0
Received 0 Likes
on
0 Posts
Yes the instructions do have pictures. Let us know if you choose to do this on your own. Don't forget that this is a perfect time for a soild collar also. This also isn't hard but does require the lb/in torque wrench and a simple bar to hold the flange while you torque the pinion nut. I used a long pice of angle iron. If you'd like I'll take a picture to give you a better idea.
03-10-2008, 10:03 AM
#35
Registered User
Thread Starter
Join Date: Jan 2008
Location: MULDROW OKLAHOMA
Posts: 102
Likes: 0
Received 0 Likes
on
0 Posts
yes I am going to do this myself, where can I get that solid collar and anthting else that should be beefed up while i am in there, I also have to replace the rear pinion seal cause it leaks oil from there. which is why I thought of getting a locker anyway just cause I was going to be working in that area.
03-10-2008, 12:01 PM
#36
Registered User
Join Date: Apr 2005
Location: San Antonio TX
Posts: 358
Likes: 0
Received 0 Likes
on
0 Posts
Well doing the locker doesn't require messing with the pinion seal. However, since you'd be replacing the seal, you need to address the pinion spacer with either a new crush or the solid version. I would recommend picking it up from Marlin Crawler, MC-14692, Solid Pinion Spacer, V6 & High Pinion, $29
03-10-2008, 12:54 PM
#37
Registered User
Join Date: May 2007
Location: Tabernacle, NJ
Posts: 538
Likes: 0
Received 0 Likes
on
0 Posts
I posted a bunch of pictures from my lockright install over here if anyone wants to check them out https://www.yotatech.com/forums/f116...58/index6.html
 03-10-2008, 11:03 PM
#39
Registered User
Thread Starter
Join Date: Jan 2008
Location: MULDROW OKLAHOMA
Posts: 102
Likes: 0
Received 0 Likes
on
0 Posts
alright seems like I have everything I need to start this job now, I will post pictures as i go along, now I just sit back and wait on the parts to show up


