
Gear up for fuel mileage ?
 04-08-2008, 06:59 AM
#81
Registered User
Thread Starter
Join Date: Feb 2008
Posts: 241
Likes: 0
Received 0 Likes
on
0 Posts
Anyway,
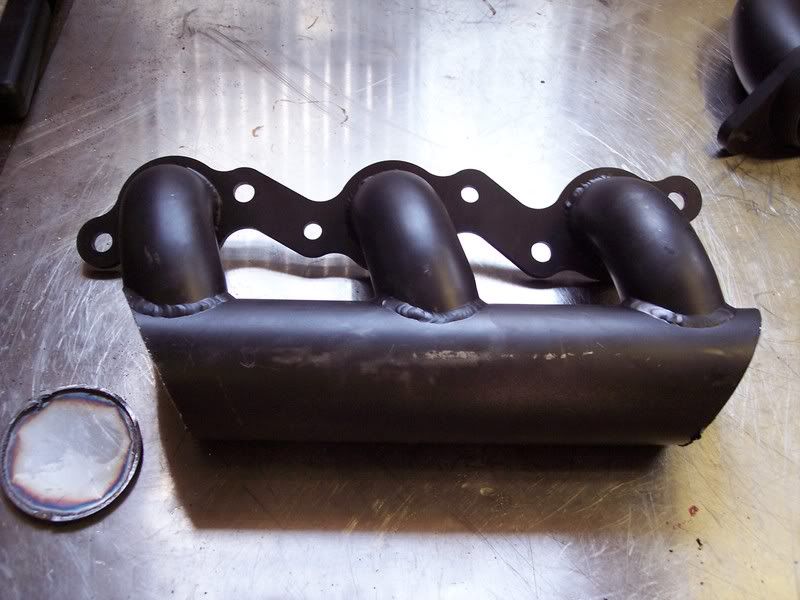
The exaust, has been figured out.
ZZperformance.com makes these, for FWD S/C 3800's, $119 a copy. They claim to hold the 1/4 mile record for FWD 3800's, @ 9.09, 150 miles per hour. (turboed of course)
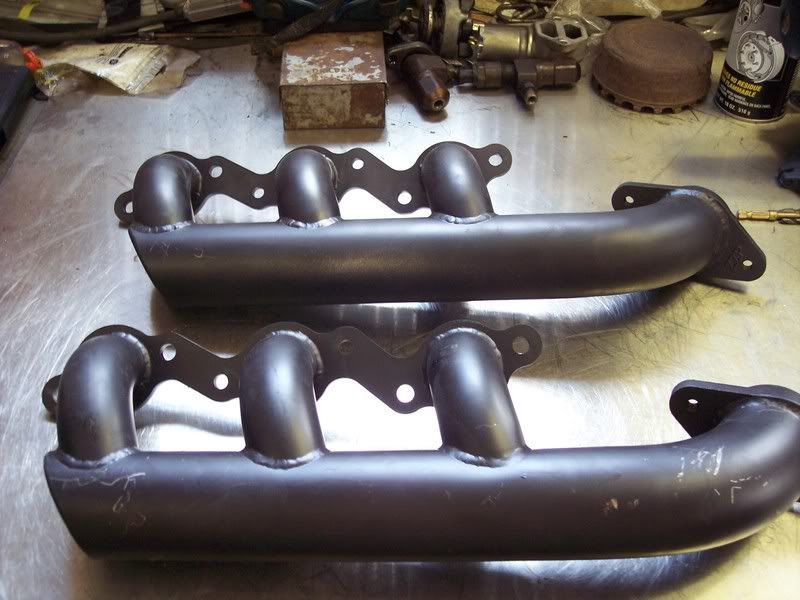
Unfortunatly, both manifolds are, left side (front), because the Right side (rear) man. is cast iron on all series II 3800's. They just port the rear manifolds.......... so that means I have to do this....
More soon,
Thanks, Kiwi
The exaust, has been figured out.
ZZperformance.com makes these, for FWD S/C 3800's, $119 a copy. They claim to hold the 1/4 mile record for FWD 3800's, @ 9.09, 150 miles per hour. (turboed of course)
Unfortunatly, both manifolds are, left side (front), because the Right side (rear) man. is cast iron on all series II 3800's. They just port the rear manifolds.......... so that means I have to do this....
More soon,
Thanks, Kiwi
 04-08-2008, 07:10 AM
#82
Registered User
Thread Starter
Join Date: Feb 2008
Posts: 241
Likes: 0
Received 0 Likes
on
0 Posts
"New Right" side, temped.
Left side,
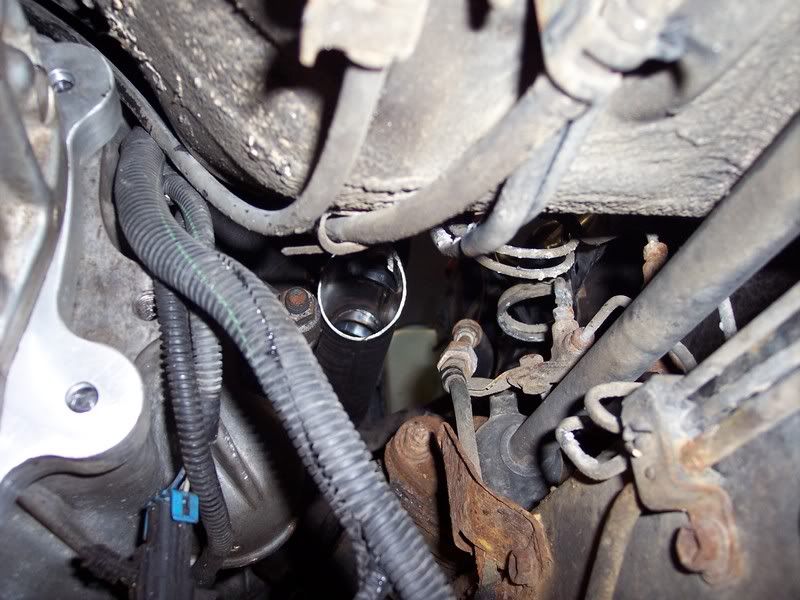
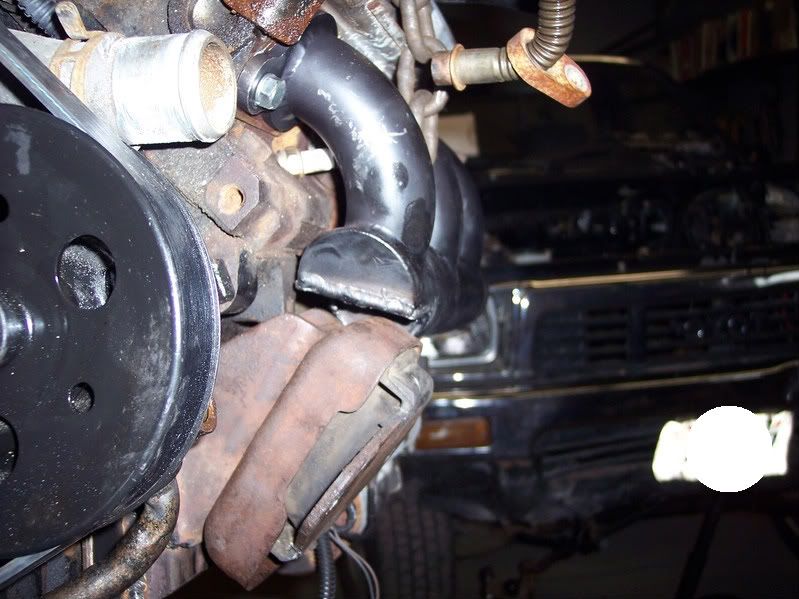
Crossover/down pipe (in the works), clearance, looks good. Drivers side.
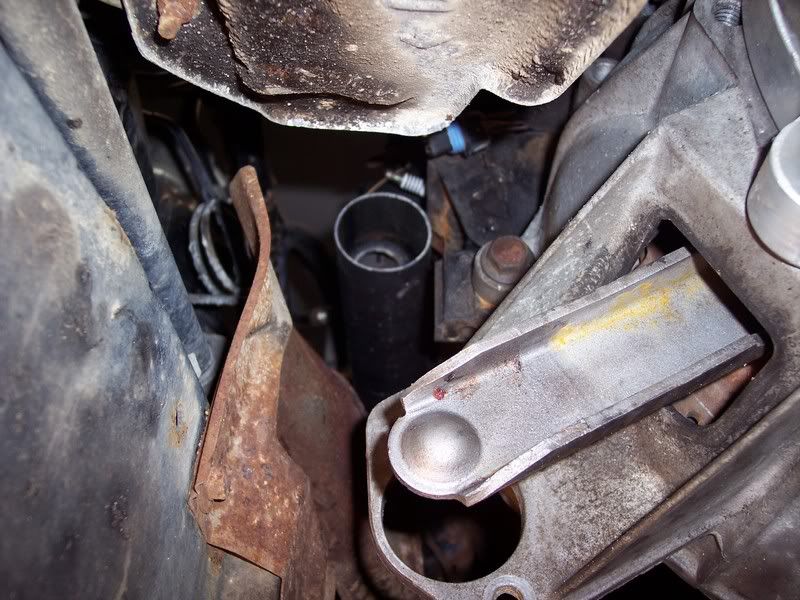
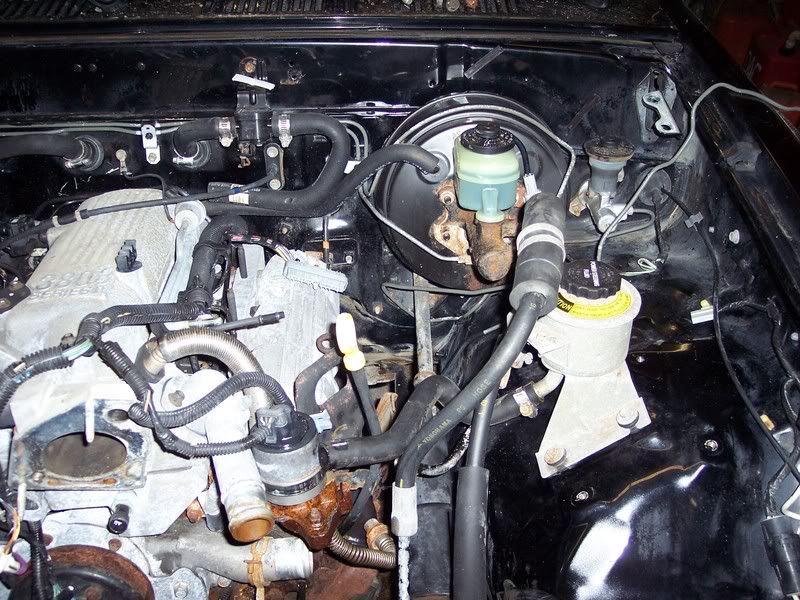
Pass side..... Yes I'm moving the fuel/brake lines
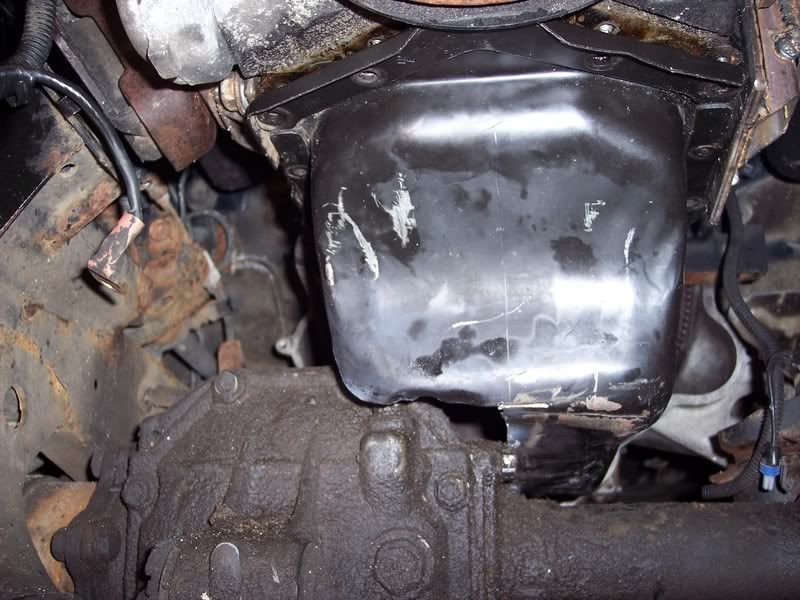
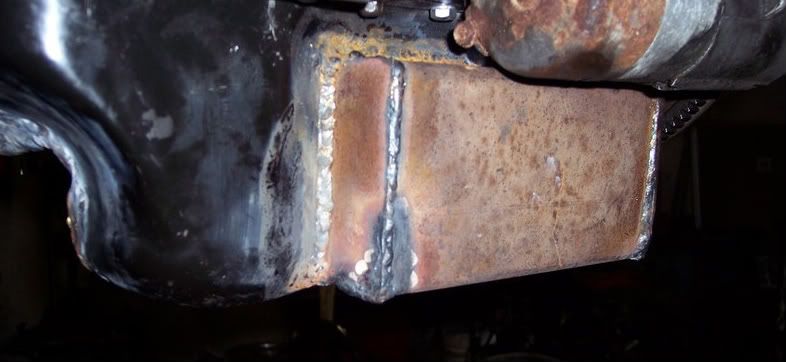
My first look, at the rottin %$^&* oilpan, cut for clearance.
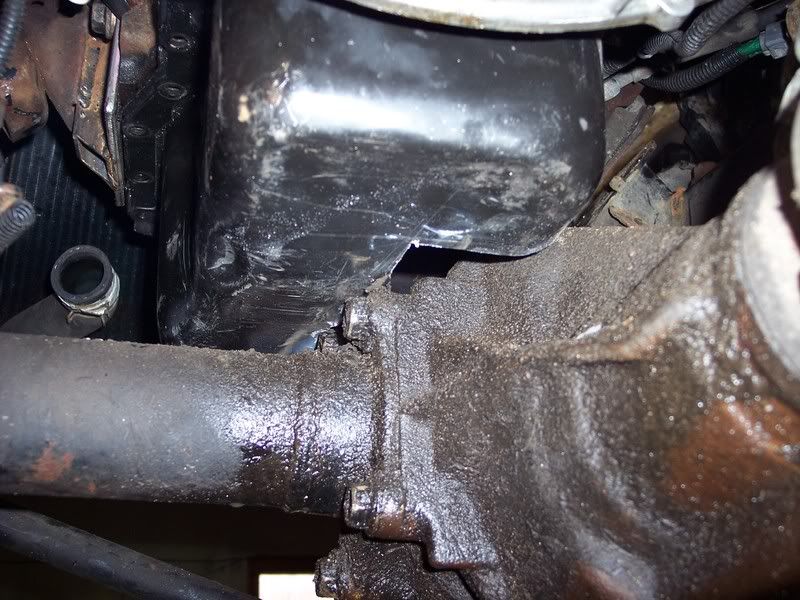
Rear look. The final oilpan looks like Frankenstein, I might post it later. I had to add a side pan for capacity. I cant seem to find enough black engine paint,to make it look better. Is Bondo allowed?
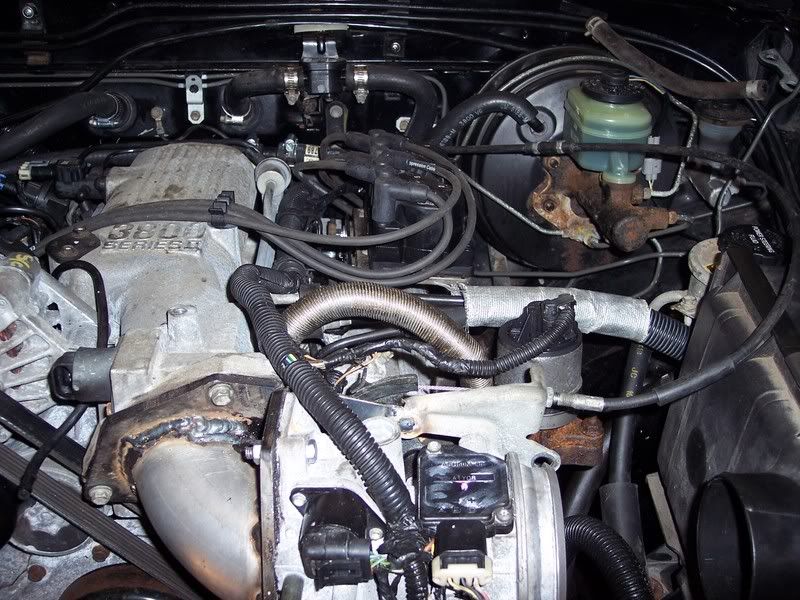
I pressure washed the engine compartment, just for pic's, pretty ain't it. I got the GM ecu mounted. I'm going for that, factory/junkyard look.
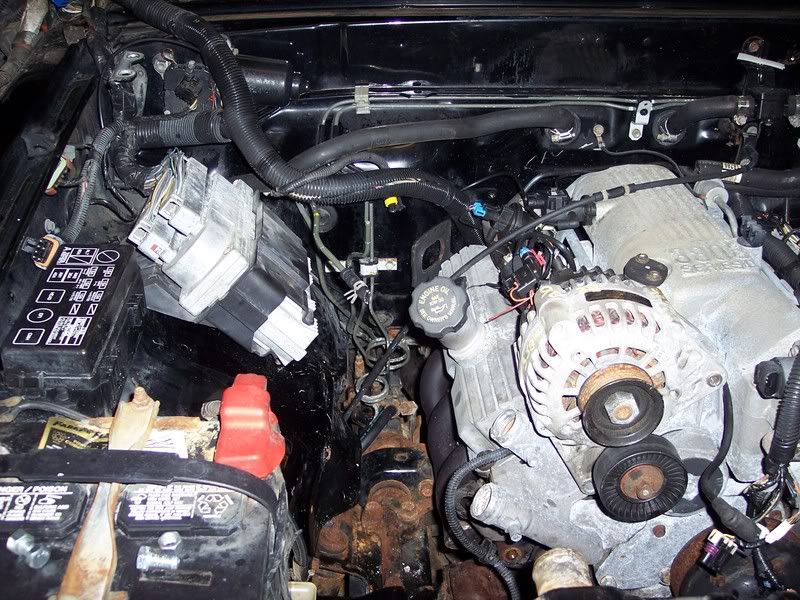
Camera makes it look tilted. It's actually square.
Constructive disscussion, welcome.
Thanks, Kiwi
Left side,
Crossover/down pipe (in the works), clearance, looks good. Drivers side.
Pass side..... Yes I'm moving the fuel/brake lines
My first look, at the rottin %$^&* oilpan, cut for clearance.
Rear look. The final oilpan looks like Frankenstein, I might post it later. I had to add a side pan for capacity. I cant seem to find enough black engine paint,to make it look better. Is Bondo allowed?
I pressure washed the engine compartment, just for pic's, pretty ain't it. I got the GM ecu mounted. I'm going for that, factory/junkyard look.
Camera makes it look tilted. It's actually square.
Constructive disscussion, welcome.
Thanks, Kiwi
Last edited by Kiwipushrod; 04-08-2008 at 07:31 AM.
04-08-2008, 07:52 AM
#83
Registered User
I don't have anything useful to add, but you are really making this look easy. Good job Kiwi 
04-08-2008, 02:27 PM
#84
Registered User
Thread Starter
Join Date: Feb 2008
Posts: 241
Likes: 0
Received 0 Likes
on
0 Posts
A few more details
Hey Cory, Guys,
Cheers/Props are always "useful". Thanks
Heres a few more details/pic's
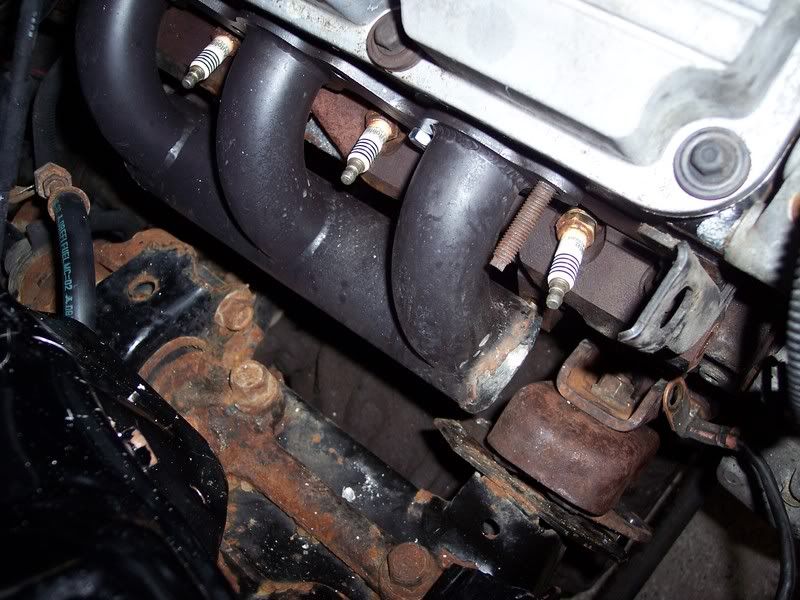
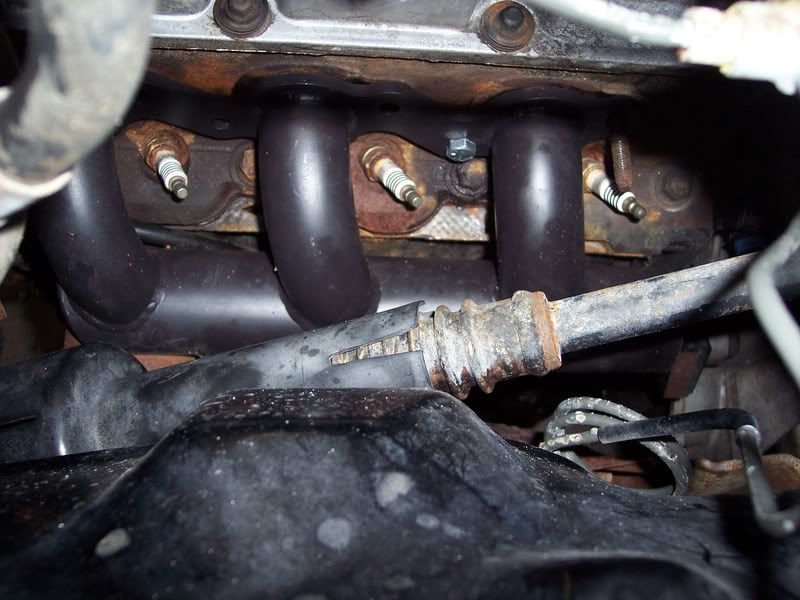
This is what happens when You make Your motor mounts, before You fit the exaust. The headers, primary tube is 1 5/8"ths, connector tube is 2 1/4", I cut 2" of it in half to clear mount. More exaust turbulence on cyl. #1, but necessary with this mount. This is a prime example of, every time You change one thing, it effects three more things.
I also have to pull EGR, from the #1 primary tube, but the GM ecu/ecm, is programmed to close EGR at enrichment/acceleration, and to only open EGR at cruise.
I wont make this mistake next time, I will, cut the Toy's mount perch, and change the angle. cut, bend, weld. Then change the custom bracket accordingly.
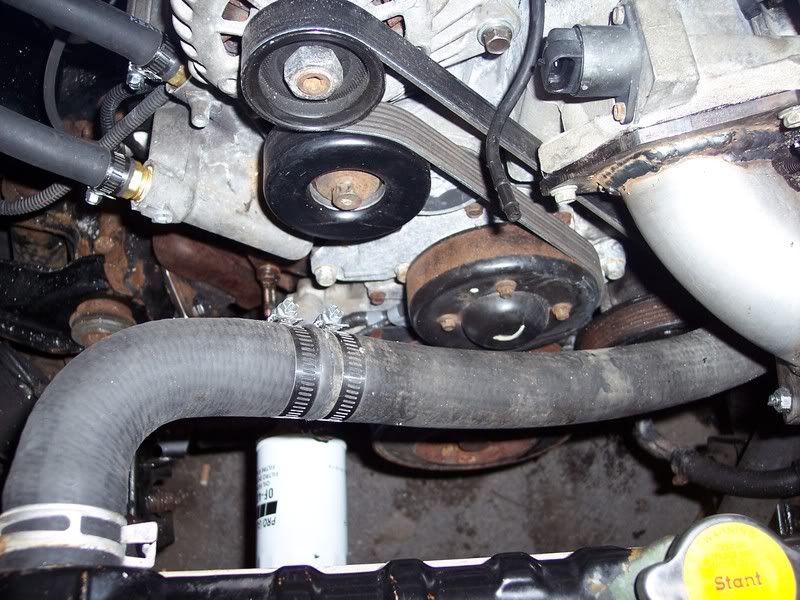
I finally, got the belt figured out, all GM belt systems are designed to run AC. Even if You dont order it, You will get an idler pulley in place of the AC compressor. That would pull belt down between W/P and tensioner, I needed simplicity, so I came up with this. A 1569mm x 20mm belt, with a 1/4" larger dia. tensioner pulley, for more belt deflection.
It works in the shop,......We'll see.

More problems/solutions, soon, every pic is about, 5 hrs. of B.S.
Getting close to fire up.
Thanks, Kiwi
Last edited by Kiwipushrod; 04-08-2008 at 06:52 PM.
04-10-2008, 06:36 PM
#85
Registered User
Thread Starter
Join Date: Feb 2008
Posts: 241
Likes: 0
Received 0 Likes
on
0 Posts
Hey Guys,
Heres some pic's of progress today.
Hey! I got Fuel lines! High pressure line goes (Intact) below, to frame, and clips to GM fuel filter. Metal line, then adapted to Toy line. I will be mounting evap. canister below also.
Htr. Hoses figured out, keeping Toy's htr. control valve setup/location.
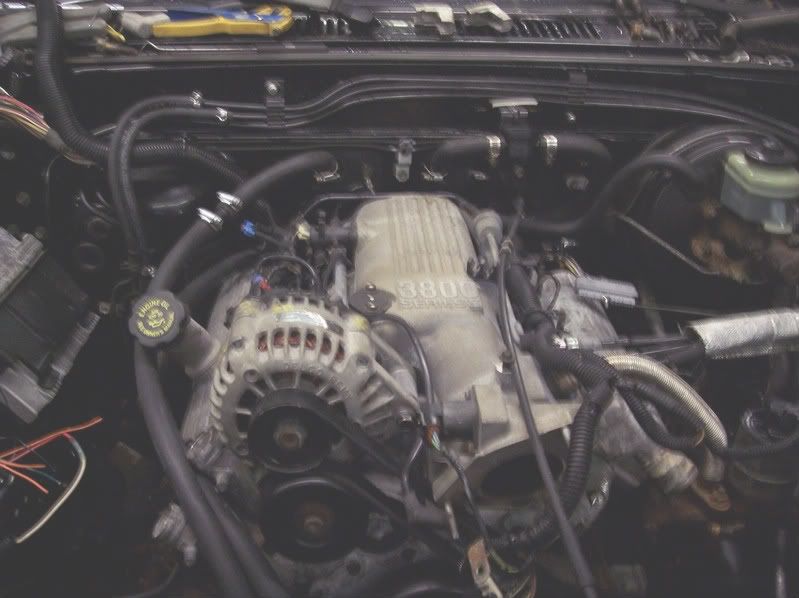
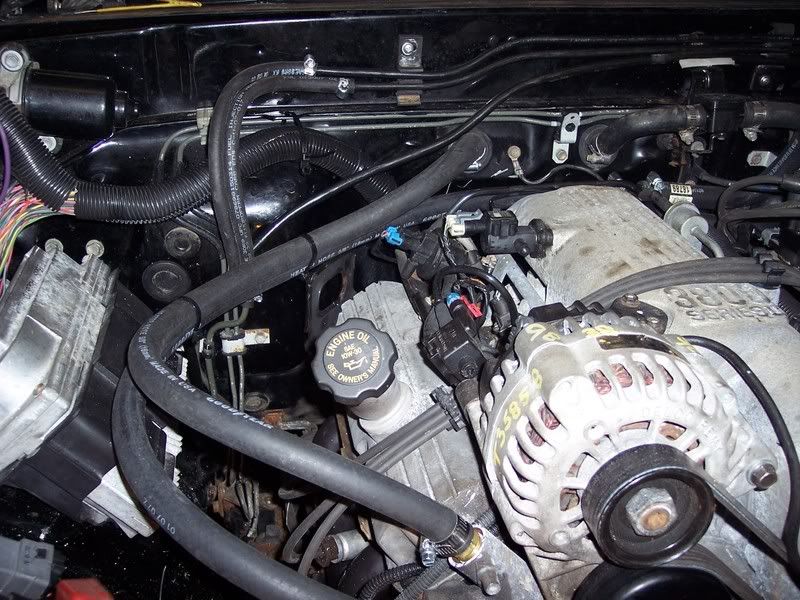
93' Pontiac, simple air cleaner, fits and flows well. The airbox's intake snorkel, fits in stock Toy's hole, drawing cold air from behind headlight. I also had to move EGR valve, outboard about 1.5", to acommadate, new thermostat housing (from FWD), that was needed for rad. hose to clear, steel intake/throttle/Maf, setup.
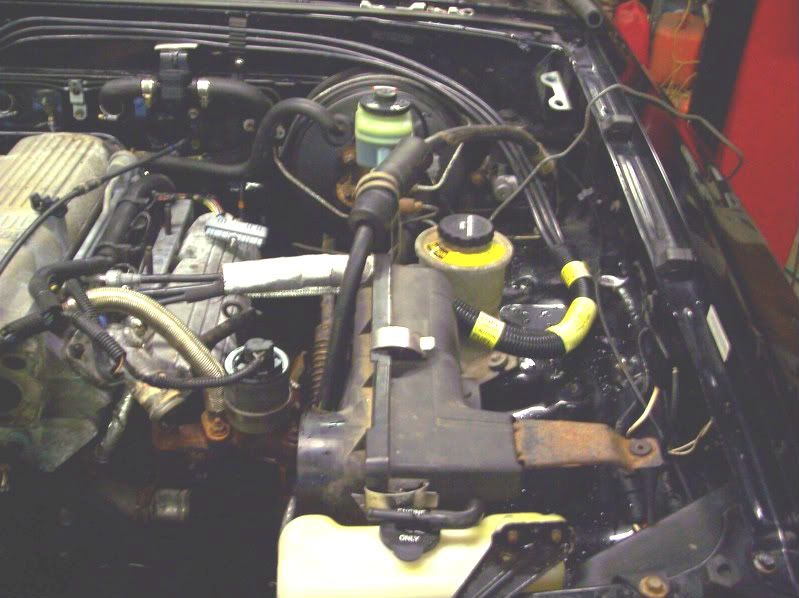
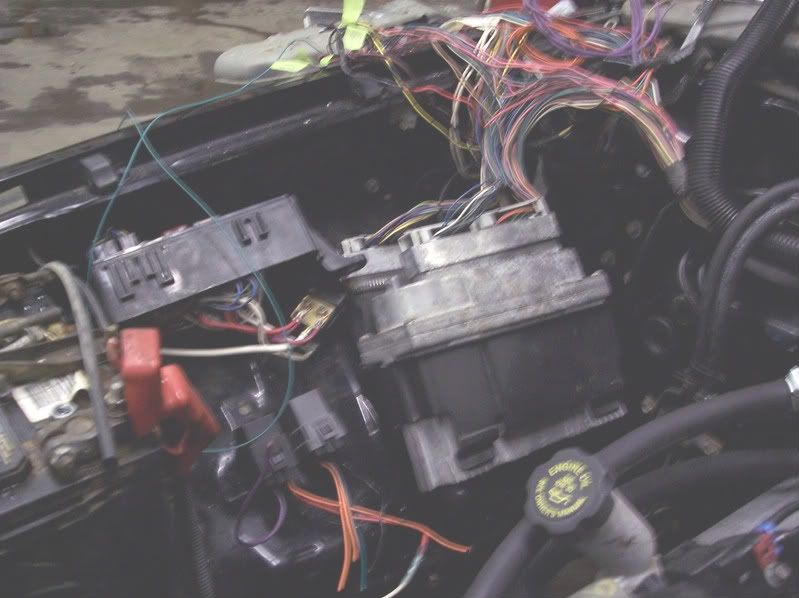
I started on My wiring today. It Look's scary, but really isn't, it's only about a 20 wire swap, with 2 relays.
I'm keeping the dash, Toyota simple, with only a check engine, oil, and alt light. With Toy stock, temp and fuel gauge. I may try to adjust Speedometer spring, to match GPS speed, after I settle on tire size.
There is a last minute, clutch/TB neck, length problem, it's .450" shorter then I'm comfortable with. I'll explain more this weekend, after it's solved.
I appreciate feedback. I'm also, always interested in everybody's mpg estimates.
Thanks, Kiwi
Heres some pic's of progress today.
Hey! I got Fuel lines! High pressure line goes (Intact) below, to frame, and clips to GM fuel filter. Metal line, then adapted to Toy line. I will be mounting evap. canister below also.
Htr. Hoses figured out, keeping Toy's htr. control valve setup/location.
93' Pontiac, simple air cleaner, fits and flows well. The airbox's intake snorkel, fits in stock Toy's hole, drawing cold air from behind headlight. I also had to move EGR valve, outboard about 1.5", to acommadate, new thermostat housing (from FWD), that was needed for rad. hose to clear, steel intake/throttle/Maf, setup.
I started on My wiring today. It Look's scary, but really isn't, it's only about a 20 wire swap, with 2 relays.
I'm keeping the dash, Toyota simple, with only a check engine, oil, and alt light. With Toy stock, temp and fuel gauge. I may try to adjust Speedometer spring, to match GPS speed, after I settle on tire size.
There is a last minute, clutch/TB neck, length problem, it's .450" shorter then I'm comfortable with. I'll explain more this weekend, after it's solved.
I appreciate feedback. I'm also, always interested in everybody's mpg estimates.
Thanks, Kiwi
 04-12-2008, 08:57 PM
#87
Registered User
Thread Starter
Join Date: Feb 2008
Posts: 241
Likes: 0
Received 0 Likes
on
0 Posts
Hey Guys,
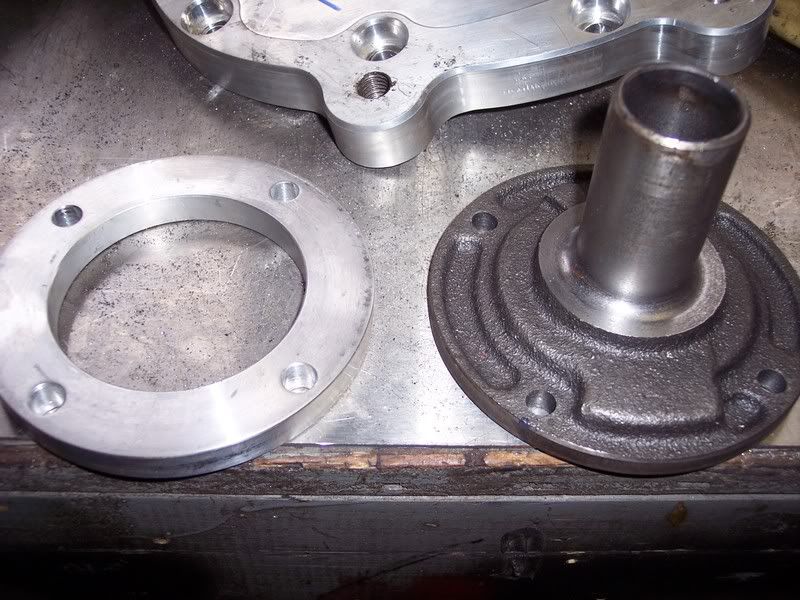
A last minute problem, final assm. check, revealed that the, Throwout bearing neck, was to about a 1/2" short, and to make matters worse, it is cast iron (cant weld).
I searched for a longer neck that I could use, with no luck.
So I came up with this.
A custom .450" alum. spacer disc, to fit between neck and adapter. This puts the T/B neck slightly past, pressure plate fingers, where it belongs.
That also brings the problem of a bad T/B fork angle, (has to reach to far)
So I came up with this. I cut the hardend T/B fork fulcrums (pivot) ball off.
I also came up with a grade 8 allen head bolt same thread, but longer.

Filed to press (hammer) fit.
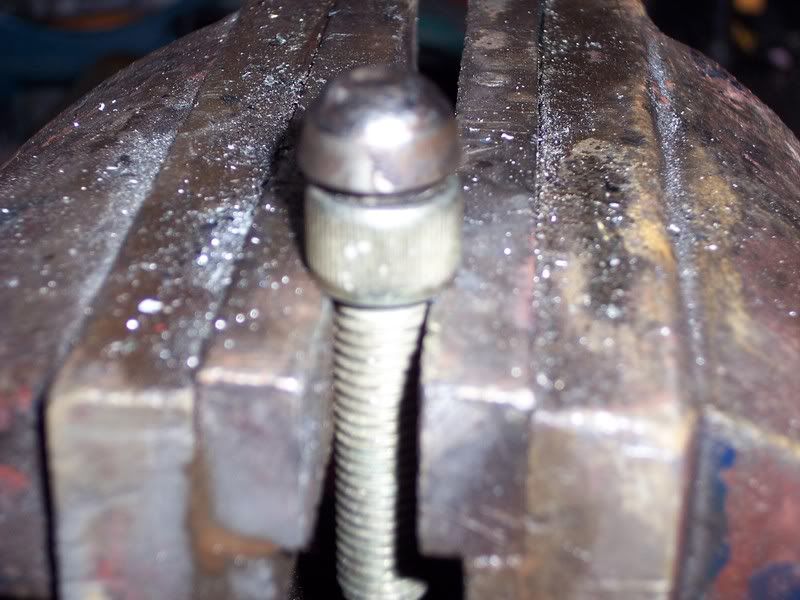
Weld and grind. Now with a jam nut, I have an adjustable clutch fork pivot.

Well, here is the best angle, for a pic, that I could find for the (frankenstein)oil pan.
The problem is 2 thin sheets of stamped steel, are pressed together to make one pan, this makes for the hardest welding I've ever done. I had to gas weld some of it, to seal. I've been told the pan is made this way, to keep engines quieter.
I did'nt like the GM quickconnect htr. hose fittings, so I drilled and tapped, them to 1/2" npt.
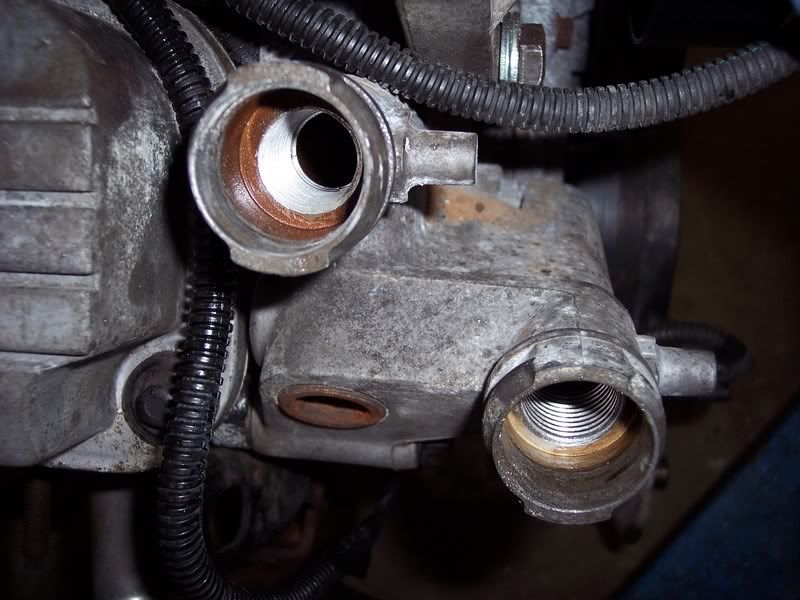
Then installed 5/8" brass barbs. Much cleaner, and reliable.

Got some work done on the long awaited, Remote mounted Maf/Throttle assm.
The 1/4" plate cut to size, on Maf/Throttle assm.
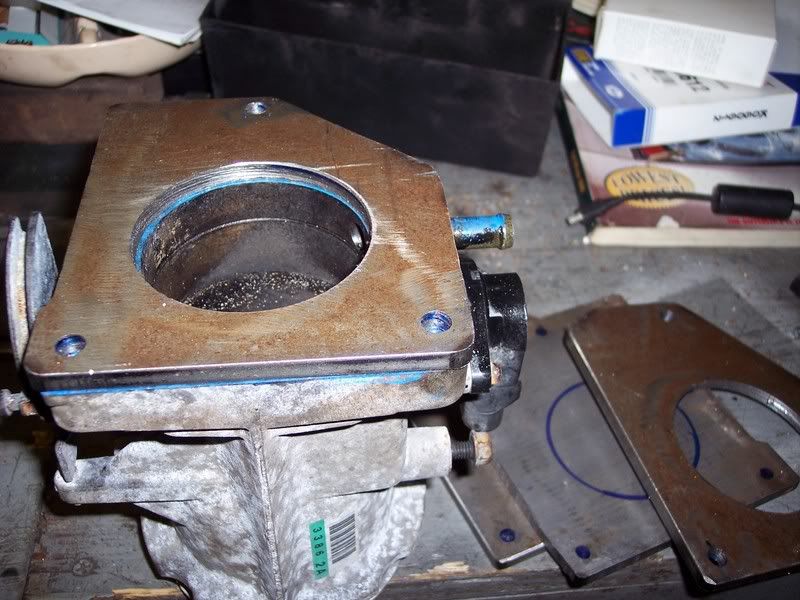
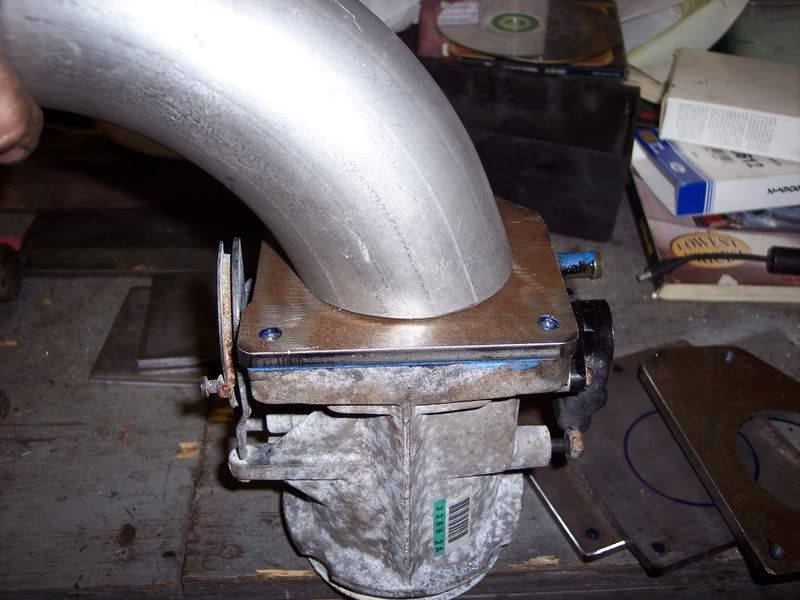
3" mandrel bent steel tube, will be welded to 1/4" plate, another plate on other side will be bolted to the intake plenum, it will all be gasket match, ported.
What do You think Krod?
The oil pan has set Me back a day, I'm hopeing to fire this up tomorrow, as usual, we'll see.
I've also discovered, that there may be some Toyota purist's, that think this is not a worthy swap, Hmmm......
As Always, question's, comment's welcome.
Thanks, Kiwi
A last minute problem, final assm. check, revealed that the, Throwout bearing neck, was to about a 1/2" short, and to make matters worse, it is cast iron (cant weld).
I searched for a longer neck that I could use, with no luck.
So I came up with this.
A custom .450" alum. spacer disc, to fit between neck and adapter. This puts the T/B neck slightly past, pressure plate fingers, where it belongs.
That also brings the problem of a bad T/B fork angle, (has to reach to far)
So I came up with this. I cut the hardend T/B fork fulcrums (pivot) ball off.
I also came up with a grade 8 allen head bolt same thread, but longer.
Filed to press (hammer) fit.
Weld and grind. Now with a jam nut, I have an adjustable clutch fork pivot.
Well, here is the best angle, for a pic, that I could find for the (frankenstein)oil pan.
The problem is 2 thin sheets of stamped steel, are pressed together to make one pan, this makes for the hardest welding I've ever done. I had to gas weld some of it, to seal. I've been told the pan is made this way, to keep engines quieter.
I did'nt like the GM quickconnect htr. hose fittings, so I drilled and tapped, them to 1/2" npt.
Then installed 5/8" brass barbs. Much cleaner, and reliable.
Got some work done on the long awaited, Remote mounted Maf/Throttle assm.
The 1/4" plate cut to size, on Maf/Throttle assm.
3" mandrel bent steel tube, will be welded to 1/4" plate, another plate on other side will be bolted to the intake plenum, it will all be gasket match, ported.
What do You think Krod?
The oil pan has set Me back a day, I'm hopeing to fire this up tomorrow,
as usual, we'll see.I've also discovered, that there may be some Toyota purist's, that think this is not a worthy swap, Hmmm......
As Always, question's, comment's welcome.
Thanks, Kiwi
04-17-2008, 09:04 PM
#88
Registered User
Thread Starter
Join Date: Feb 2008
Posts: 241
Likes: 0
Received 0 Likes
on
0 Posts
Hey Guys,
Heres a video. It runs strong, exaust just down pipes.
Thanks, Kiwi
Edit:
Heres are some pic's/progress from a few days ago
My adjustable, T/B fork, pivot. I hope I wont see this pic, for a long time.
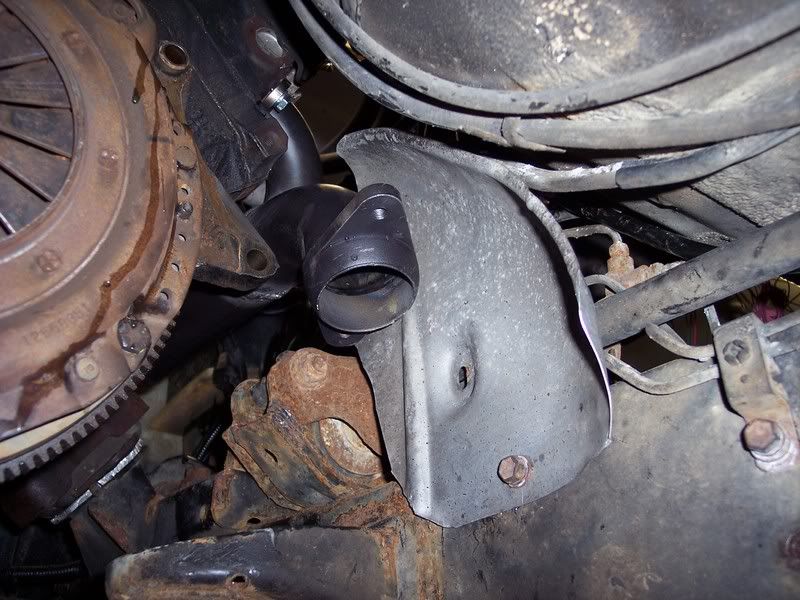
The Camaro, keeps giving. A heat shield for My brake lines. Exaust dump ready for crossover.
Maybe starting to look a little factory?
TB/Maf assm. installed. Used Toy's throttle cable. P/S hooked up and ready.
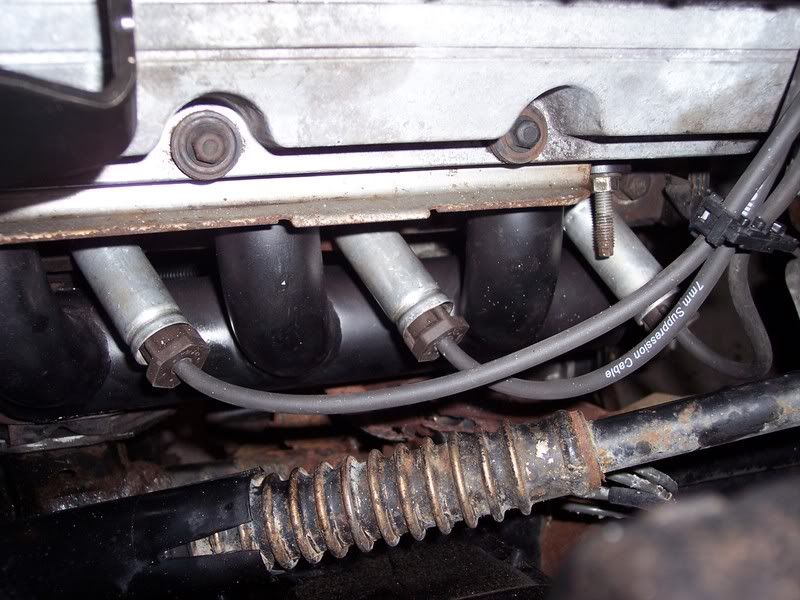
Dr. side exaust look. Plug wire boot shields, from a Ford, I'm sorry JD.
Lots of room. All cooling hooked up.
Thanks, Kiwi
Heres a video. It runs strong, exaust just down pipes.
Thanks, Kiwi
Edit:
Heres are some pic's/progress from a few days ago
My adjustable, T/B fork, pivot. I hope I wont see this pic, for a long time.
The Camaro, keeps giving. A heat shield for My brake lines. Exaust dump ready for crossover.
Maybe starting to look a little factory?
TB/Maf assm. installed. Used Toy's throttle cable. P/S hooked up and ready.
Dr. side exaust look. Plug wire boot shields, from a Ford, I'm sorry JD.
Lots of room. All cooling hooked up.
Thanks, Kiwi
Last edited by Kiwipushrod; 04-18-2008 at 10:37 AM.
04-18-2008, 04:04 AM
#89
Registered User

Join Date: May 2002
Location: Australia
Posts: 152
Likes: 0
Received 0 Likes
on
0 Posts
Mate, big congrats.
I like to see guys doing their own conversions and resolve issues rather than drop it all off at a shop, drive it home and then take all the net kudos.
Well done and post some test drive vids
JD
I like to see guys doing their own conversions and resolve issues rather than drop it all off at a shop, drive it home and then take all the net kudos.
Well done and post some test drive vids
JD
04-20-2008, 07:26 PM
#90
Registered User
Thread Starter
Join Date: Feb 2008
Posts: 241
Likes: 0
Received 0 Likes
on
0 Posts
Hey JD, Guys,
JD, Thank You very much.
I learned a few important things, in the last 3 days,
#1, The 3800 II, in a second gen, 5sp, 4x4, Toy pu, is an absolute blast to drive!! And I have driven a little bit of everything.
#2, My clutch pressure plate (used GM 9.5"), is not strong enough for this motor.
#3, This engine has enough power to push this truck, 65 miles per hour (avg conditions), @ somewhere below 2000 rpm.
#4, I think 32" tires, and 4.10's will not realize, the fuel economy, possible with this setup, But will still be exellent.
I'm still running stock wheels/tires, and turning about 2600 rpm's, @ 65 miles per hour, the throttle blade is hardly open (tc and rust), this is for comparision #'s.
I now have computer data stream in cab, with a snap-on scanner, exact rpm's included, very nice!
I'm also using a gps for miles per hour.
I still have a punch list to complete truck, when it's finished, I'll get down to MPG's.

Thanks, Kiwi
JD, Thank You very much.
I learned a few important things, in the last 3 days,
#1, The 3800 II, in a second gen, 5sp, 4x4, Toy pu, is an absolute blast to drive!! And I have driven a little bit of everything.
#2, My clutch pressure plate (used GM 9.5"), is not strong enough for this motor.
#3, This engine has enough power to push this truck, 65 miles per hour (avg conditions), @ somewhere below 2000 rpm.
#4, I think 32" tires, and 4.10's will not realize, the fuel economy, possible with this setup, But will still be exellent.
I'm still running stock wheels/tires, and turning about 2600 rpm's, @ 65 miles per hour, the throttle blade is hardly open (tc and rust), this is for comparision #'s.
I now have computer data stream in cab, with a snap-on scanner, exact rpm's included, very nice!
I'm also using a gps for miles per hour.
I still have a punch list to complete truck, when it's finished, I'll get down to MPG's.
Thanks, Kiwi
Last edited by Kiwipushrod; 04-20-2008 at 08:03 PM.
04-21-2008, 04:46 PM
#91
Registered User
Thread Starter
Join Date: Feb 2008
Posts: 241
Likes: 0
Received 0 Likes
on
0 Posts
Hey Guys,
I got all 4 Chevy 16" steelies on, with the best used "free" tires, I could find. 2 Mich. and 2 Wranglers. The 4 for a $100, Wranglers, have not appeared yet. All 265/75/16's, I'm not buying new till I figure this out.
I think it's starting to look kinda Tough! What do You think?
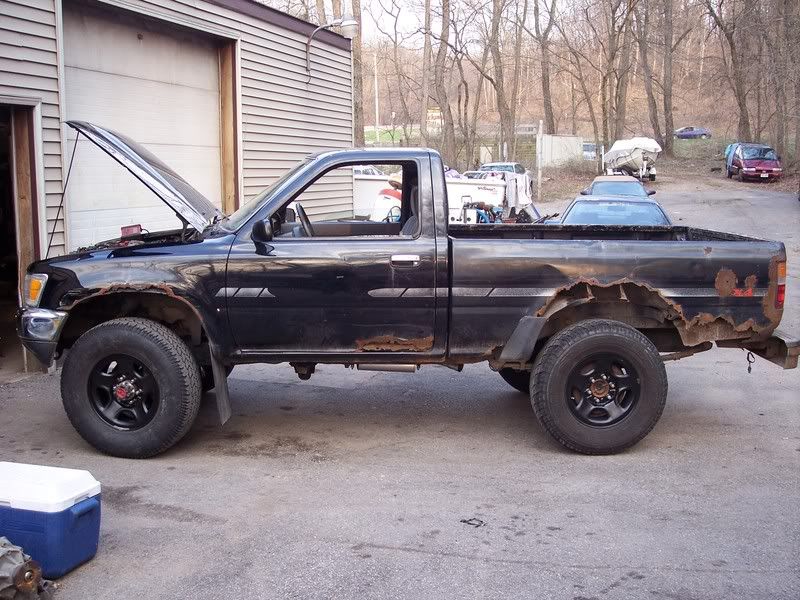
I'm still working on My punch list, Cat. Converter, stronger pressure plate, V6 3 core radiator (not a problem yet), better air cleaner assm., ect.
I drove it today for about 15 miles (with "new" 16' tires), and one time, in 3rd gear @3200 RPM's, with My foot to the floor, I actually started to giggle (Kiwi never Giggles). It's that strong!
65 mph, rpm's about 2430, still too High.
Money out, so far, is about $1300, today I sold the old 22re for $450, so that brings it down to $850, and lots of time, some fun, and some not.
Questions, Suggestions, Welcome.
Thanks, Kiwi
I got all 4 Chevy 16" steelies on, with the best used "free" tires, I could find. 2 Mich. and 2 Wranglers. The 4 for a $100, Wranglers, have not appeared yet. All 265/75/16's, I'm not buying new till I figure this out.
I think it's starting to look kinda Tough! What do You think?
I'm still working on My punch list, Cat. Converter, stronger pressure plate, V6 3 core radiator (not a problem yet), better air cleaner assm., ect.
I drove it today for about 15 miles (with "new" 16' tires), and one time, in 3rd gear @3200 RPM's, with My foot to the floor, I actually started to giggle (Kiwi never Giggles). It's that strong!
65 mph, rpm's about 2430, still too High.
Money out, so far, is about $1300, today I sold the old 22re for $450, so that brings it down to $850, and lots of time, some fun, and some not.
Questions, Suggestions, Welcome.
Thanks, Kiwi
Last edited by Kiwipushrod; 04-21-2008 at 05:08 PM.
04-21-2008, 06:51 PM
#92
Registered User

Wow, that thing would not pass safety here... no way in hell.
Cool swap tho... i still think you should have gone with a supra gearset to get the .7:1 overdrive gear instead of the .85:1....
You can also pick up 3.90 diff gears, if you look really hard, you might be able to fine 3.58 or 3.73 gears from a 2wd 1 ton pickup.... Try calling randy's ring and pinion?
04-22-2008, 07:33 AM
#93
Registered User
Thread Starter
Join Date: Feb 2008
Posts: 241
Likes: 0
Received 0 Likes
on
0 Posts
Hey Greg_Canada, Guys,
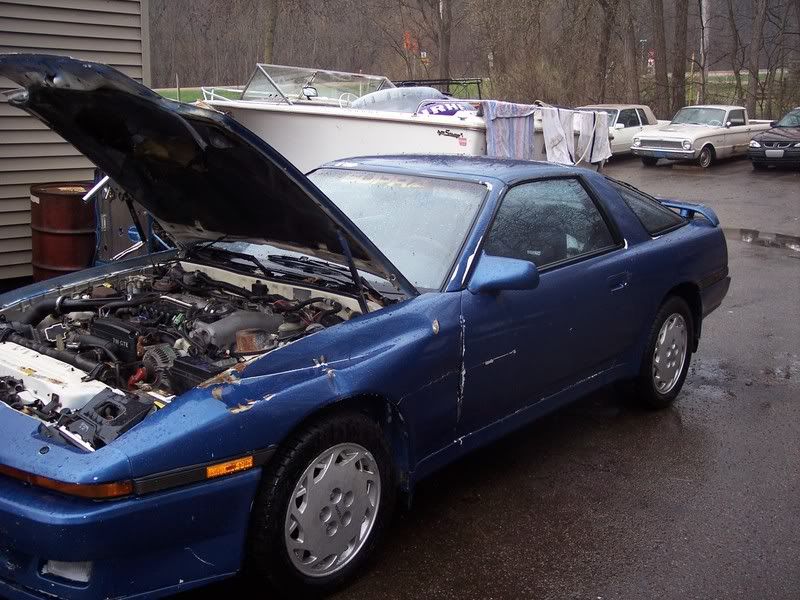
Is this the trans/car, Your talking about?
If this trans is a .7 5th gear,....Guess what?,...with true 32" tires, I'm @1958 RPM's, @ 65mph.
I also would get a better gear spread, the R150's 1st gear, is pretty useless right now
I need some Feedback here Guys! Will this work?
Ding, Ding! Round 2.
Thanks, Kiwi
Last edited by Kiwipushrod; 04-22-2008 at 08:07 AM.
04-22-2008, 09:58 AM
#94
Registered User
Thread Starter
Join Date: Feb 2008
Posts: 241
Likes: 0
Received 0 Likes
on
0 Posts
Hey Guys,
I'm not using the 7M motor.
I need to clarify My Questions.
Does the R154 Toyota transmission, have the same, large Aisin front case, bolt pattern? I'm not concerned, with the bell house, as I have one.
Is the R154's rear case and shaft, adaptable to the R150F's, tranfer case?
How long is the R154's input shaft?
The AX15 input shaft swap can not be done, 1st gears are different ratios.
Thanks, Kiwi
Last edited by Kiwipushrod; 04-22-2008 at 10:13 AM.
04-23-2008, 09:19 AM
#95
Registered User
Thread Starter
Join Date: Feb 2008
Posts: 241
Likes: 0
Received 0 Likes
on
0 Posts
Hey Guys,
VERY, prelimanary mpg figures; 3 cold starts, about 35% city, the rest @55-60 miles per hour. Over 3 days.
88 miles, on 3.72 gals, = 23.65 mpg. same pump, same fill method.
This is with out any ECM mods, or EGR, believe it or not, EGR is good for MPG's. I've also got a few tricks Myself. We'll see.
I'ts VERY early, in the mpg game. But it is a good sign.
I'm working on the R154 to R154F conversion, I'm 90% sure it will work, when I know more, I'll post more.
Some FEEDBACK would be a good thing.
Thanks, Kiwi
Last edited by Kiwipushrod; 04-24-2008 at 04:58 PM.
04-24-2008, 04:21 AM
#96
Registered User
Join Date: May 2002
Location: Australia
Posts: 152
Likes: 0
Received 0 Likes
on
0 Posts
Kiwi
Let me help you out here
Nope, fitting R154 overdrive gears into a R150/151 will basically give you 2 x 1:1 top gears and you cannot swap input shafts or any other gears etc.
Yep all R series are exactly the same.
It is 30mm longer than the basic Toy truck R150/151.
The R150/151's have a 17% overdrive whereas the R154 has a 25% overdrive.
But the R150/151 overdrive can be altered by fitting a set of R452 (Dyna truck) overdrive gears and this will give a 30% overdrive.
Fit a set of R150/151 overdrive gears to an R154 and you get a 37% overdrive just like mine
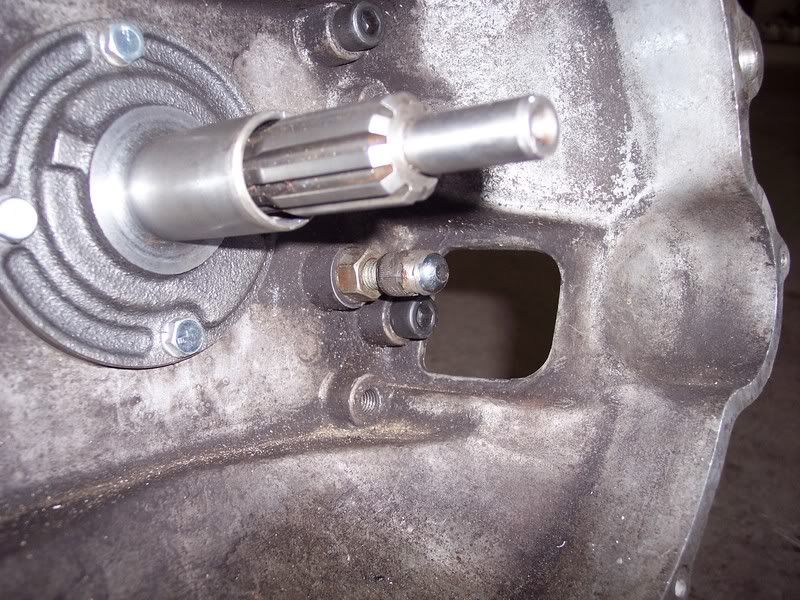
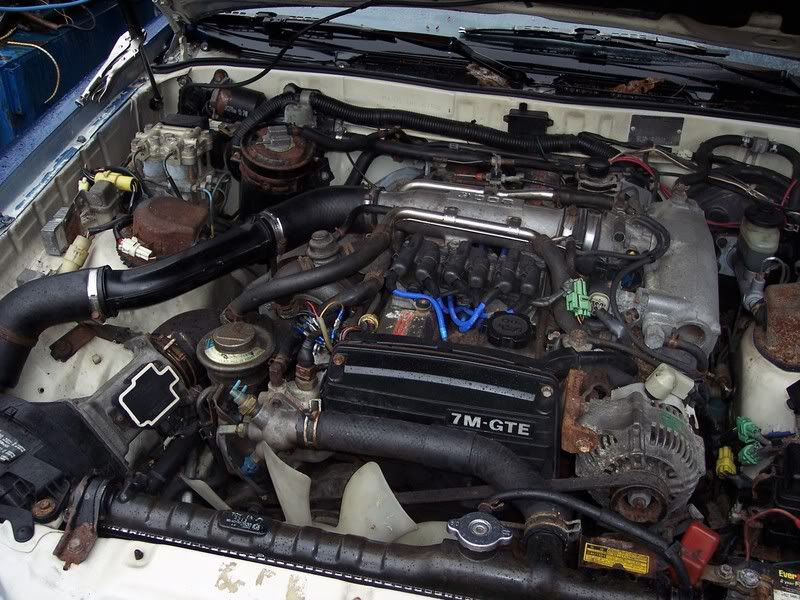
Yep just replace the R154 long output shaft with the short R150/R151 output shaft. See pic 2
What trans do you think I have been using
http://members.iinet.net.au/~ozrunner/5Speed.html
JD
Let me help you out here
Nope, fitting R154 overdrive gears into a R150/151 will basically give you 2 x 1:1 top gears
and you cannot swap input shafts or any other gears etc.
Does the R154 Toyota transmission, have the same, large Aisin front case, bolt pattern?
How long is the R154's input shaft?
The R150/151's have a 17% overdrive whereas the R154 has a 25% overdrive.
But
the R150/151 overdrive can be altered by fitting a set of R452 (Dyna truck) overdrive gears and this will give a 30% overdrive.Fit a set of R150/151 overdrive gears to an R154 and you get a 37% overdrive just like mine
Is the R154's rear case and shaft, adaptable to the R150F's, tranfer case?
What trans do you think I have been using
http://members.iinet.net.au/~ozrunner/5Speed.html
JD
Last edited by JD; 04-24-2008 at 04:28 AM.
04-24-2008, 03:55 PM
#98
Registered User

Join Date: Sep 2004
Posts: 34
Likes: 0
Received 0 Likes
on
0 Posts
Kiwi;
V6 4Runners mid 90's had a 3.90 available rear gearset. I have touched a set my self.
Scan the boneyards for V6 4runners...

I have been following your build.
Impressive.
I will tip a Speights or a DB draft your way.
Cheers
V6 4Runners mid 90's had a 3.90 available rear gearset. I have touched a set my self.
Scan the boneyards for V6 4runners...
I have been following your build.
Impressive.
I will tip a Speights or a DB draft your way.
Cheers
04-24-2008, 04:55 PM
#99
Registered User
Thread Starter
Join Date: Feb 2008
Posts: 241
Likes: 0
Received 0 Likes
on
0 Posts
Hey Guys,
Thanks Elvis.
JD's info, is the final piece, to the MPG Puzzle.
The implications, of the possible, 17, 25, 30, and 37% overdrive combinations, are astounding to Me, and exactly, what I needed.
All with off the shelf parts.
I also, no longer need the $300 Novak adapter, if I use the R154's, longer input shaft and gearset,... Instead, I can make 3/16" mild steel sandwich plates, in house.
Now, it's time to get serious.
Till next time, Kiwi
Last edited by Kiwipushrod; 04-24-2008 at 04:56 PM.
04-24-2008, 06:41 PM
#100
Registered User
Btw, this thread is sweet, i'm just giving it a BUMP.
hey JD, i thought r150's were .85:1, or 15% overdrive? Or is my math incorrect? Where do you get these lower gears? What is Dyna truck?
Greg
hey JD, i thought r150's were .85:1, or 15% overdrive? Or is my math incorrect? Where do you get these lower gears? What is Dyna truck?
Greg


