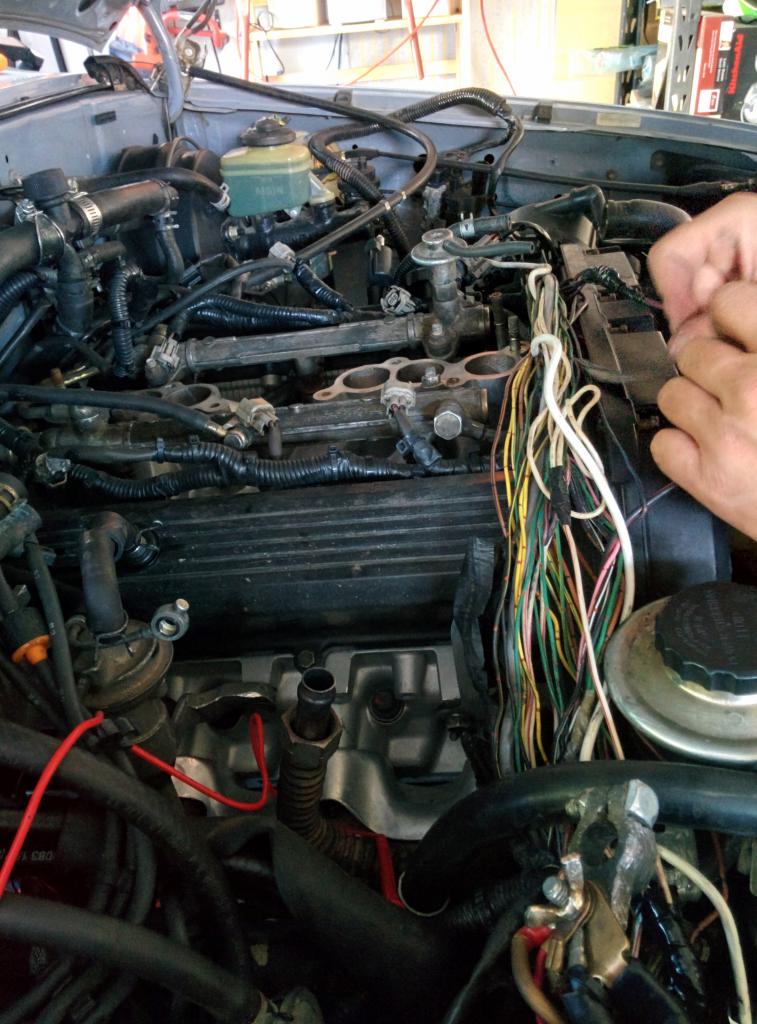
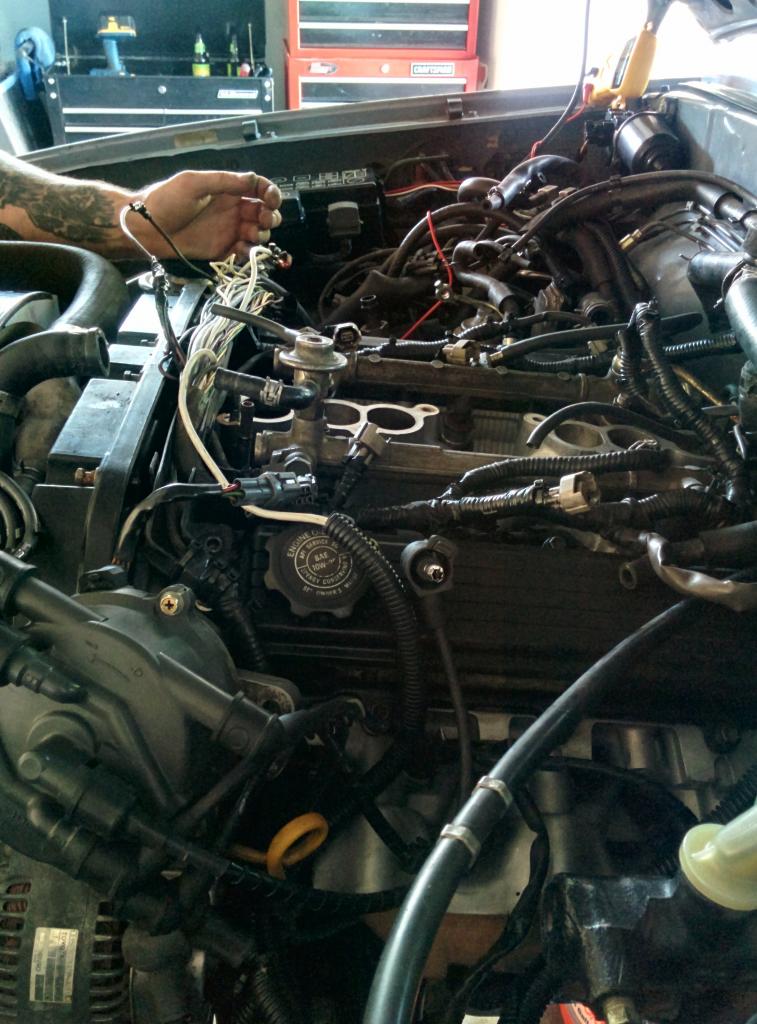
90 4runner 3vze Hesitation Issues - 2 years of troubleshooting: The Ultimate Gremlin
#21
Registered User
Join Date: Jul 2013
Location: john o groats
Posts: 195
Likes: 0
Received 0 Likes
on
0 Posts
check my posting just fitted flsmethrower injectors
Hi
believe im nearly sorted on bad idle. flushed my system three times in two years water always came out clean. over last two weeks coolant has changed to brown sludge. drained system flushed and refilled. Now getting air locks and more brown sludge BUT engine is much smoother and more powerful. when remains of hurricane gonzlas has passed will do another full flush. brown sludge is remains of mixed antifreeze and is very difficult to loosen up. heater has always worked very well and no overheating. can only guess sludge was clogged on sensors.
believe im nearly sorted on bad idle. flushed my system three times in two years water always came out clean. over last two weeks coolant has changed to brown sludge. drained system flushed and refilled. Now getting air locks and more brown sludge BUT engine is much smoother and more powerful. when remains of hurricane gonzlas has passed will do another full flush. brown sludge is remains of mixed antifreeze and is very difficult to loosen up. heater has always worked very well and no overheating. can only guess sludge was clogged on sensors.
#22
Hi
believe im nearly sorted on bad idle. flushed my system three times in two years water always came out clean. over last two weeks coolant has changed to brown sludge. drained system flushed and refilled. Now getting air locks and more brown sludge BUT engine is much smoother and more powerful. when remains of hurricane gonzlas has passed will do another full flush. brown sludge is remains of mixed antifreeze and is very difficult to loosen up. heater has always worked very well and no overheating. can only guess sludge was clogged on sensors.
believe im nearly sorted on bad idle. flushed my system three times in two years water always came out clean. over last two weeks coolant has changed to brown sludge. drained system flushed and refilled. Now getting air locks and more brown sludge BUT engine is much smoother and more powerful. when remains of hurricane gonzlas has passed will do another full flush. brown sludge is remains of mixed antifreeze and is very difficult to loosen up. heater has always worked very well and no overheating. can only guess sludge was clogged on sensors.
#23
Registered User
Join Date: Oct 2014
Location: Olympia WA State
Posts: 5
Likes: 0
Received 0 Likes
on
0 Posts
Detail on warm up. It runs perfect on start up, no hesitation at all. Runs perfect for about 30 seconds. Once the fan clutch turns off, it starts to hesitate if you hit the gas hard. If you don't hit the gas hard, its OK. However, stuck on a hill or when you need to accelerate quickly, it sucks! Hesitation goes away after about 10 to 15 minutes of moderate driving, once its warmed up. I can tell its warmed up because the heater blows hot air, despite what the temp gauge says. After warmup, runs perfect. Temp gauge fluctuates to medium and cold, depending on speed, mostly goes cold when driving faster.[/QUOTE]
I had a car that I took the thermo out of and ran it same symptomís put 140 F thermo in still ran very bad turns out too cold for sensors to work need 190 F Toy dealer book Valve starts to open at 82 C 180 F. Fully open at 95 C 203 F. Maybe try changing thermo or see if in correct way. Also I had hesitation on my toy 1991 changed fuel filter, gas cap Coil cap rotor wirers and knock sensor donít know what did it. I think you are on correct path looking at sensor block. Start injector time switch Disconnect the connector use ohms meterÖSTA-STJ (between terminals) Resistance 30-50 ohms below 10 C 50 F 70-90 ohms above 25 C 77 F Test STA-Ground (base of sensor) 30-90 ohms Water Temp Sensor Disconnect the connector between terminals chart reads 68 F to 104F about .5 to 1 K ohms the other one is for temp gauge.
I had a car that I took the thermo out of and ran it same symptomís put 140 F thermo in still ran very bad turns out too cold for sensors to work need 190 F Toy dealer book Valve starts to open at 82 C 180 F. Fully open at 95 C 203 F. Maybe try changing thermo or see if in correct way. Also I had hesitation on my toy 1991 changed fuel filter, gas cap Coil cap rotor wirers and knock sensor donít know what did it. I think you are on correct path looking at sensor block. Start injector time switch Disconnect the connector use ohms meterÖSTA-STJ (between terminals) Resistance 30-50 ohms below 10 C 50 F 70-90 ohms above 25 C 77 F Test STA-Ground (base of sensor) 30-90 ohms Water Temp Sensor Disconnect the connector between terminals chart reads 68 F to 104F about .5 to 1 K ohms the other one is for temp gauge.
#25
Registered User
Thread Starter
Join Date: Jan 2013
Location: Reno, NV
Posts: 205
Likes: 0
Received 0 Likes
on
0 Posts
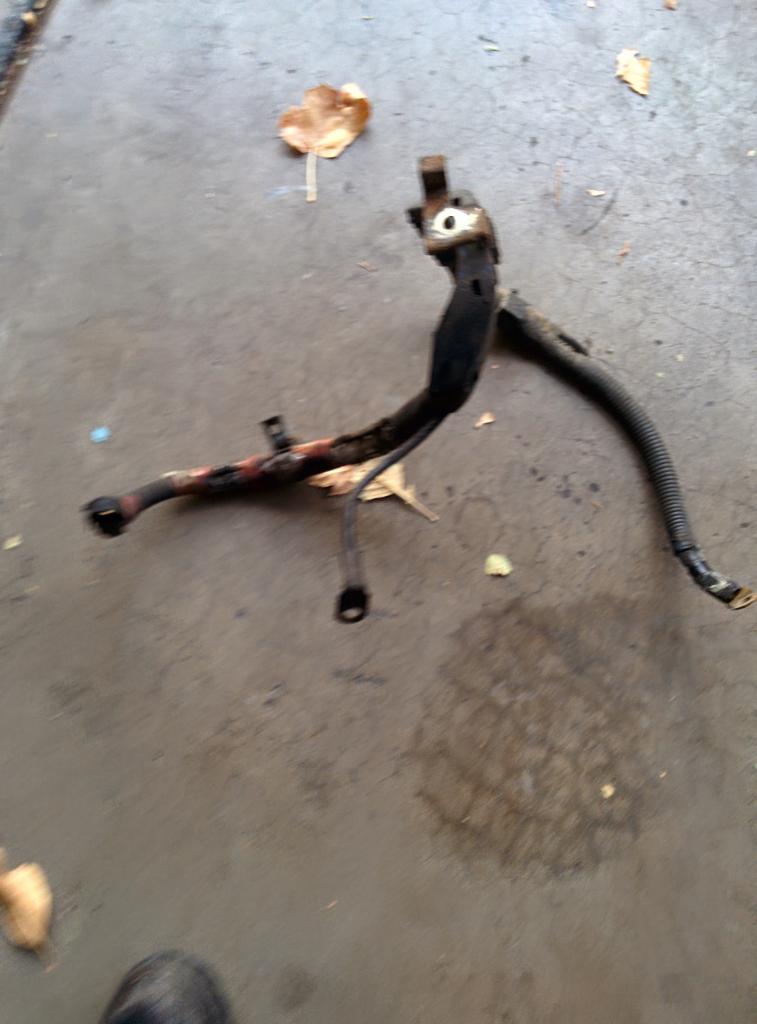
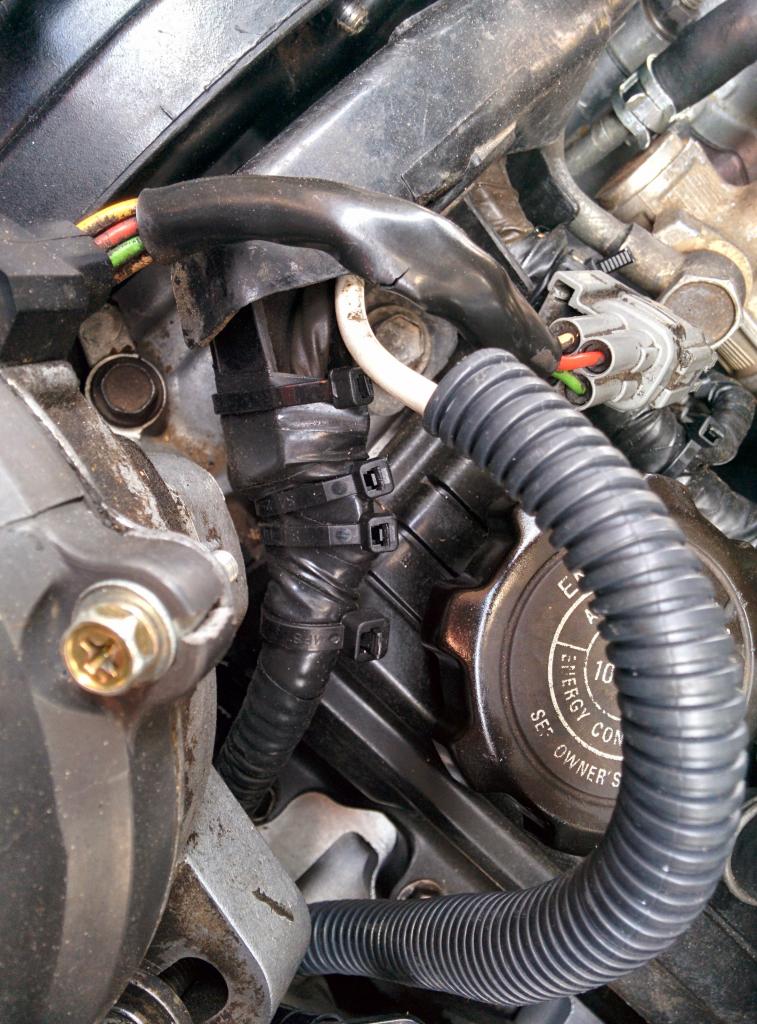
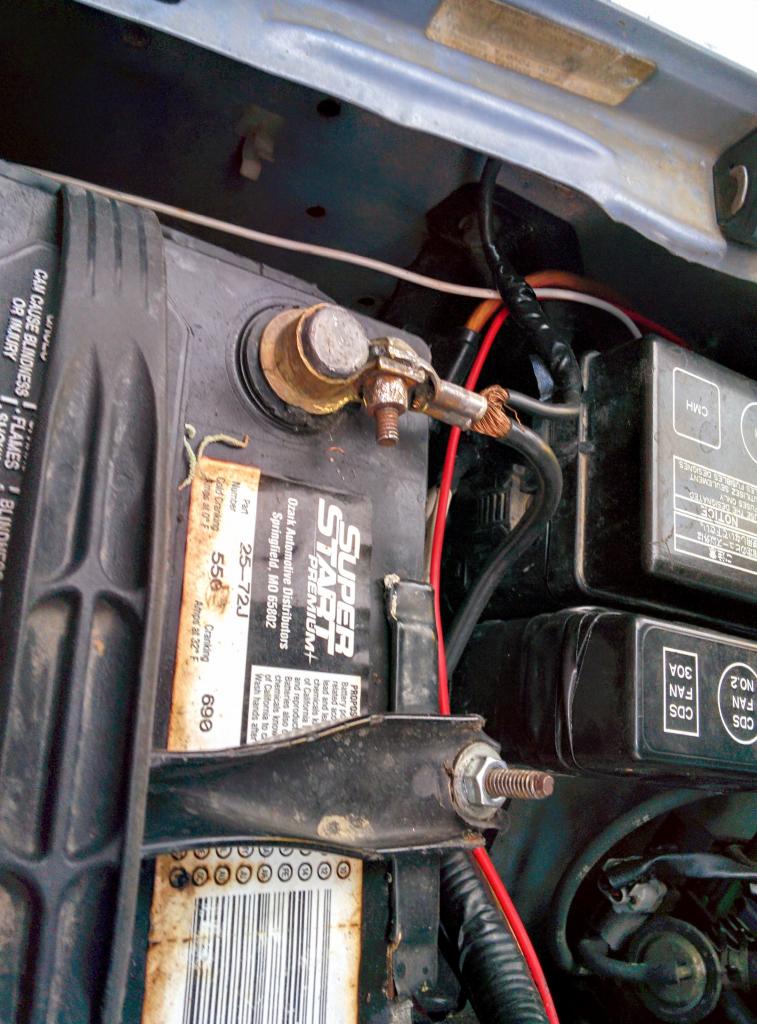
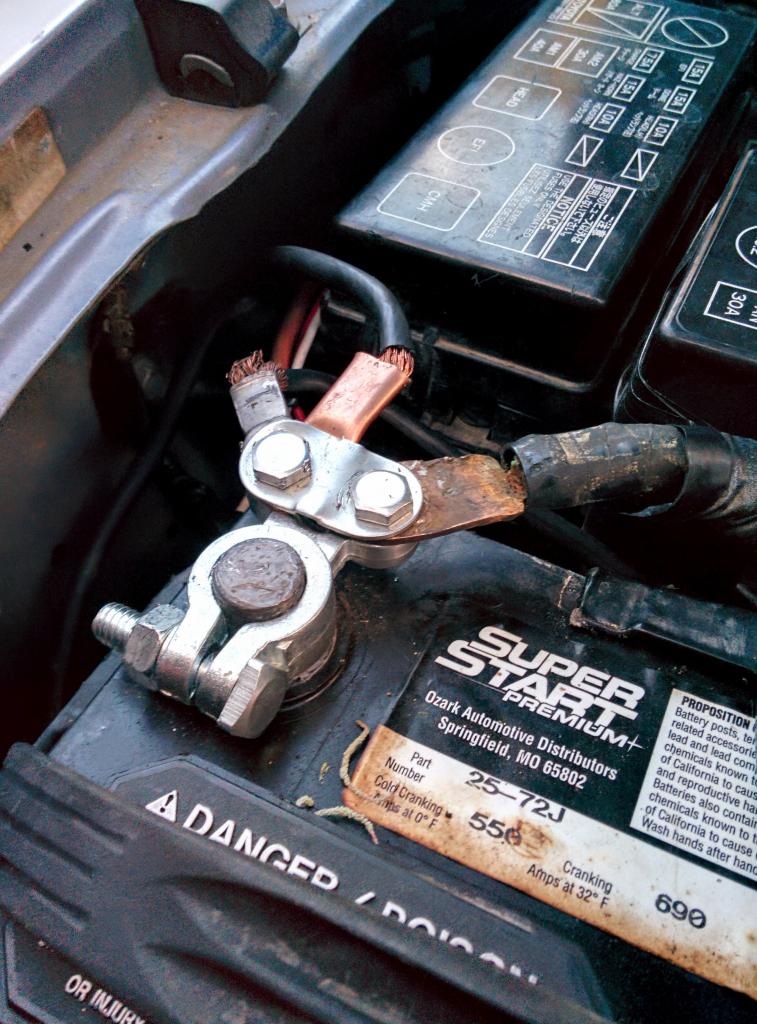
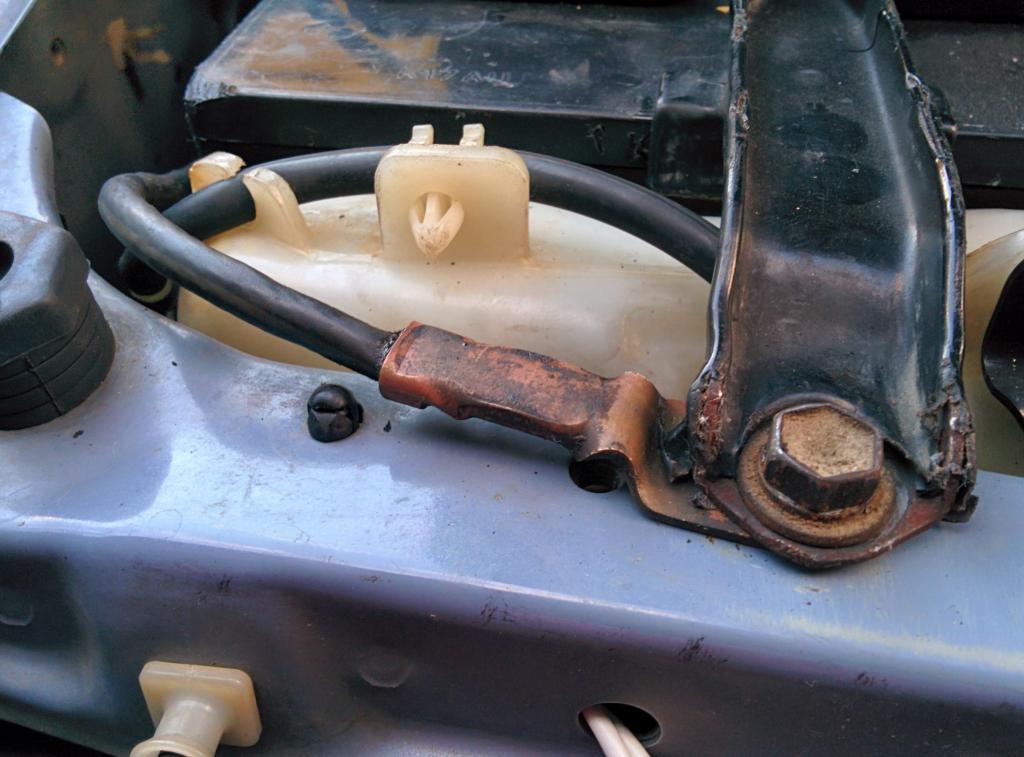
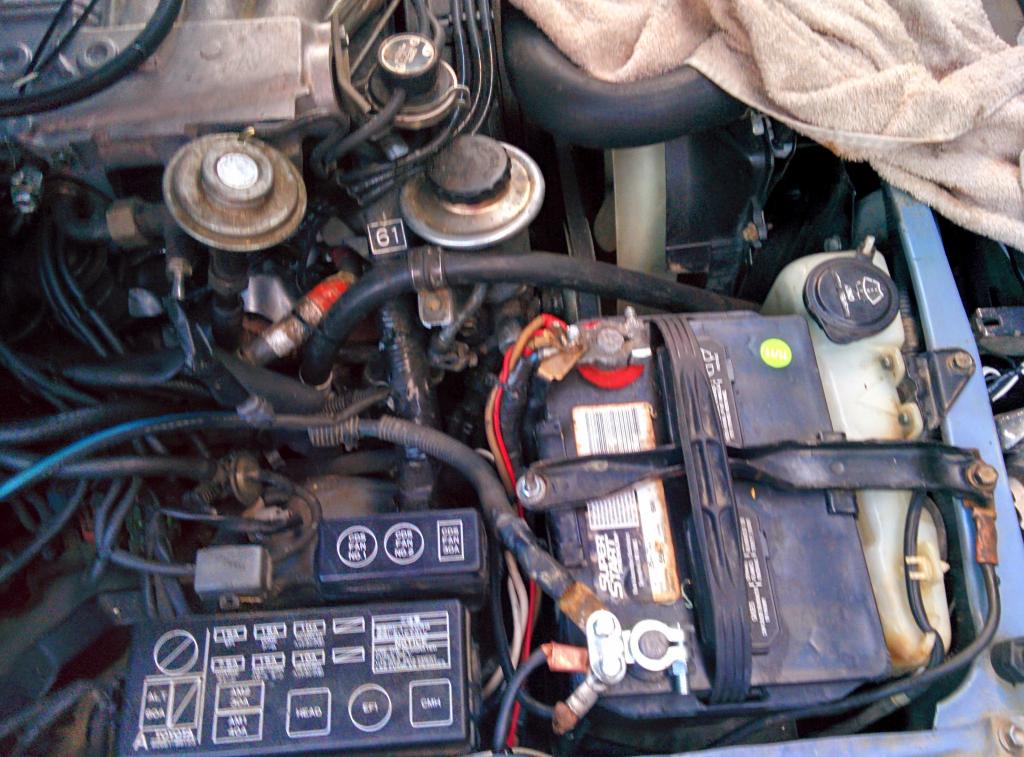
Sorry I couldn't respond quicker. I tried taking pictures of how I did mine, but basically I just did the "Big 3 Upgrade" which amazingly helped with shifting, bucking, misfires, bogged down power. Completely changed the power.
Attachment 100125
I also repaired the old wire that connects to my alternator, which at times, if I use my windows the headlight fades, but that's just due to my alternator dieing, but the big 3 is helping it by giving it more of a break and more flow of power to the alternator without much resistance. Also just go through all the grounds you see in the car and just take them off, sand the base where there connected, and the terminal of the ground it's self, and just reconnect. I'll get more pictures of how my connections are, since there very well hidden. Also make a ground from your tranny to the chasis of the truck. I'm about to do that, but I know it will help, also with vaccum's Which play a big roll in the 3.slow, to check the metal tubes and see if there not clogged up. If they are just run 2ft of vaccum lines to where ever they connect to.
Last edited by mave605; 11-01-2014 at 06:52 PM.
#27
Registered User
Thread Starter
Join Date: Jan 2013
Location: Reno, NV
Posts: 205
Likes: 0
Received 0 Likes
on
0 Posts
i really don't intend to be a dick, but maybe its time a professional stepped in. it looks like you have spent thousands of dollars and still the same issue. you need to find a really good diagnostic technician and have them look at it. it may cost $300-$500 for them to figure it out, but it may save you a lot more money and headaches in the long run. btw, you will not find a good diagnostic tech at a dealer. ask around for a good shop.
I totally agree with you, but at this point, I'm in way too deep! My brother is a master mechanic at the Toyota dealer, one of the best there. We have tried so many random things to get this issue to go away. There is nothing else that they could test or try that we haven't already. He says he has never seen a problem this persistent since working at Toyota, and he has been there for 15 years!
Also of note and I think I included this before, but we ran a switch that turns off the signal from the coolant temp sensor to the ecm. This makes the hesitation disappear when cold completely, but terrible gas mileage and I have to flip the switch back off when warmed up. That's why I believe that something is up with the temp sensor block. Sensor are new and I also tried using used sensors that I knew were functioning correctly.
Last edited by mave605; 11-01-2014 at 06:11 PM.
#28
Registered User
Thread Starter
Join Date: Jan 2013
Location: Reno, NV
Posts: 205
Likes: 0
Received 0 Likes
on
0 Posts
I think you were on to something with no coolant reaching the sensors. New sensors and different gauges don't give you correct temp readings... maybe there is a clog in your coolant passages to the sensor block? Maybe your water pump is on the weak side and doesn't give enough flow to efficiently circulate the system? Just thinking out loud.
For the temp sensor block, how can the coolant not reach them. The sensor block is a pretty simple design. We flow tested the coolant system and its fine, but we didn't test the sensor block because there really isn't a way to. But maybe swapping it out is next. I'm really tired of taking off the upper intake on this thing

#29
Registered User
Thread Starter
Join Date: Jan 2013
Location: Reno, NV
Posts: 205
Likes: 0
Received 0 Likes
on
0 Posts
Hi
believe im nearly sorted on bad idle. flushed my system three times in two years water always came out clean. over last two weeks coolant has changed to brown sludge. drained system flushed and refilled. Now getting air locks and more brown sludge BUT engine is much smoother and more powerful. when remains of hurricane gonzlas has passed will do another full flush. brown sludge is remains of mixed antifreeze and is very difficult to loosen up. heater has always worked very well and no overheating. can only guess sludge was clogged on sensors.
believe im nearly sorted on bad idle. flushed my system three times in two years water always came out clean. over last two weeks coolant has changed to brown sludge. drained system flushed and refilled. Now getting air locks and more brown sludge BUT engine is much smoother and more powerful. when remains of hurricane gonzlas has passed will do another full flush. brown sludge is remains of mixed antifreeze and is very difficult to loosen up. heater has always worked very well and no overheating. can only guess sludge was clogged on sensors.
#30
Registered User
Thread Starter
Join Date: Jan 2013
Location: Reno, NV
Posts: 205
Likes: 0
Received 0 Likes
on
0 Posts
"I had a car that I took the thermo out of and ran it same symptom’s put 140 F thermo in still ran very bad turns out too cold for sensors to work need 190 F Toy dealer book Valve starts to open at 82 C 180 F. Fully open at 95 C 203 F. Maybe try changing thermo or see if in correct way. Also I had hesitation on my toy 1991 changed fuel filter, gas cap Coil cap rotor wirers and knock sensor don’t know what did it. I think you are on correct path looking at sensor block. Start injector time switch Disconnect the connector use ohms meter…STA-STJ (between terminals) Resistance 30-50 ohms below 10 C 50 F 70-90 ohms above 25 C 77 F Test STA-Ground (base of sensor) 30-90 ohms Water Temp Sensor Disconnect the connector between terminals chart reads 68 F to 104F about .5 to 1 K ohms the other one is for temp gauge."
__________________________________________________ __________________________________________________ ____________-
Gone4x4en, thank you for the tech info! I did replace the thermo with a used one that I knew worked, then also a toyota thermo during the rebuild. It was installed properly.
We checked the readings from the cold start injector and temp sensor at the ecm. They read properly and resistance changes properly as it warms up. However, you do bring up a good point because when the coolant temp sensor is disconnected after startup, the hesitation disappears instantly.
We tested the sensors at the ecm and can see the resistance change while it warms up. Something of note is that when the coolant temp sensor is disconnected and hesitation disappears, the injector duration changes drastically! Not sure if it is adding more fuel or restricting it. We added a switch that I can use to stop the signal from the coolant temp sensor to the ecm and it eliminates the hesitation, but if left after warm up, the gas mileage is terrible. Also, with the temp sensor signal stopped while warming up, a very light smoke comes out of the exhaust when revving the engine up.
Last edited by mave605; 11-01-2014 at 06:49 PM.
#31
Registered User
Thread Starter
Join Date: Jan 2013
Location: Reno, NV
Posts: 205
Likes: 0
Received 0 Likes
on
0 Posts
https://www.yotatech.com/forums/f199...sitate-283374/
Here is my build thread too. It covers the rebuild process and some of these issues.
Here is my build thread too. It covers the rebuild process and some of these issues.
#32
Thanks for the tips! I did the big 3 today (though I already had the extra power to alternator). I used the positive cable from my donor truck for the job. I added an extra ground from the battery terminal to the battery tie down and a ground from the engine hook bolt to the battery terminal. Here are the pics...


https://www.dropbox.com/sh/gse6tl30x...cmsPi7U-a?dl=0
Its not going to do much help using cables/factory cables from a donnor car that's going to make any of a difference. I told you to get thick cabled from an audio store, anywhere that sells cables lets say for amplifiers. Now the point of the Big 3 is to completely over haul the factory grounds to compensate the small gauge wire. Which i can tell you didnt do very well. In this set of pictures ive taken, is what should be done, I switched my ground with just a regular thick ground wire from an auto store. Ive noticed you kept your factory ground which isnt going to do any good. It needs to be thick. 2 or 4 gauge wire is the best to use. you can use a zero gauge but it isnt really necessary. On these pictures you can tell on the pic with the alternator that i just changed the tip to a better one, and that blue cable is whats going to connect to the positive end of the battery, but from where it leaves the alternator, it connects to a fuse, then from that fuse to the battery. Even if the fuse blows out, the original alternator cable will be there.
Now after that youll see the new ground that's next to my battery, not the red little cable but the black one, hard to see, i screwed it in where the thread goes into the body also. You can tell the difference from the other holes that they are all different. I shaved down the paint and bam, thicker gauge ground.
Now, The white cable you see thats screwed into the frame, which i took some random pieces of metal that the screw was holding down, and i put this i beleive to be a 4 or 2 gauge wire and shaved down the paint, screwed it in, then from their i connected it to the negative terminal. This will be my battery to chasis ground.
Now the Blue cable. is the last of the upgrade. Hence the Big three. Its from the motor to the chasis. Nothing more. Find a bolt that's screwed in the side of the motor or an empty place a screw would fit. Inspect it and see if its blocked at the end. shave the base clean and screw it in, ill try to get a pic where mine is, but it really dosnt make a difference where mine is located because its on the engine block. After you do that, screw it into the chasis opposite side of the white one, hence where it is in the picture, shave down the base and done. Now your setup was no where near the correct way. Sorry but you need to put back all of the grounds you took out. Because youll get different problems by messing that the existing grounds, when the point of this is to change the battery to frame(thicker gauge as the black one ive used. Battery to Chasis. And Power from the alternator to the positive end of the battery with the fuse the kit comes with, all of this will be in the amp kit. Bigger the gauge, better the flow of connection and less stress for your car. If you have a sound system, this will help alot.
Now please, Please! Put that nasty settup out of your truck and follow as i instructed because. Well not to be rude, but you went cheap
 And since that setup you did wouldnt show any improve ments. I would suggest taking that cable from the donnor car out and Do it right.
 Also please, remove whatever pathetic ground that is, thats connected to the battery harness i presume. That is just horrible, look how old it is!!!, and thats not even relatively a good spot to bit a ground, that piece of the frame is thin, and in the factory, the car is put together, and that dosnt conenct to the other sides of the frame even great. Take if off please. Thanks

Last edited by pewdiepie; 11-01-2014 at 08:16 PM. Reason: concerned for the future life of this guys car
#33
Registered User
Thread Starter
Join Date: Jan 2013
Location: Reno, NV
Posts: 205
Likes: 0
Received 0 Likes
on
0 Posts
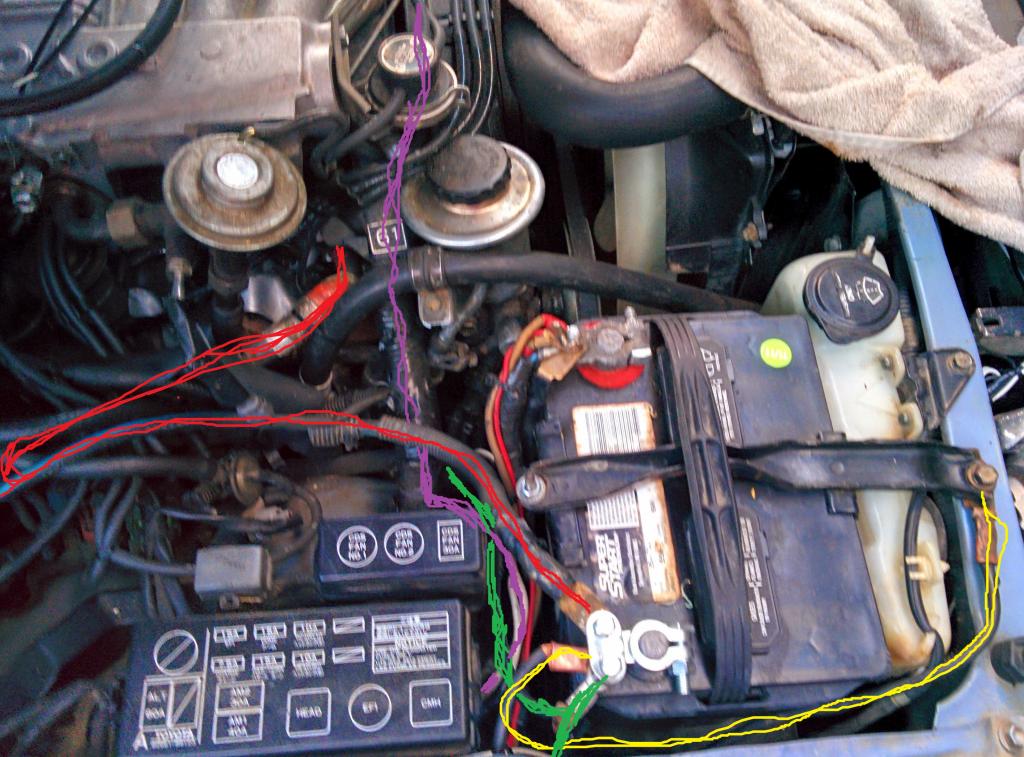
This clarification is great because the some of the big 3 upgrades that I have seen on Yotatech are explained differently. The purple line is a new cable from the 80 amp fuse to the alternator which I did about a month ago. The green cable is the stock wiring harness with one ground going to the body right next to the battery. The green one is a thick guage wire I took from the donor that goes from the negative battery terminal to a big bolt to the body next to the headlight.
I did the red one incorrectly from your instructions, goes from the negative terminal to the block. I will remove that one from the block and route it to the chassis where you explained. Then I need to add one more ground from the block to the chassis like you did.
The donor harness from the previous photo doesn't look like that after install. Its super thick gauge wire from the stock positive battery harness. I took the plastic off and separated the two wires that were in there and used them to make the 2 new grounds that I ran yesterday in addition to the stock ground which I left in tact.
#35

I know what you mean by other people's post on here, but why use some ranky wire? And why the 80 amp fuse? Look at how messy your cables look. I'm sorry but, I'm just pointing out, that the big three needs newer cables. Not old ones from a donor car, because the one you used is shorter. You need length son. Also why is your alternator positive cable going towards your battery? There is no need for that to be unplugged.
Also with the last two things.. the red cable from the negative to the block, well I don't think I said that. it's two grounds from the battery I upgraded, the factory from the frame to the battery, into a bigger and thicker wire. Then another from the negative terminal to the chasis indicated in the pictures with the white cable bolted in the front. And the Blue cable i mentioned, is just from the block to the chasis, not the battery. but you don't have the kit but going unbelievably cheap, and using some really short cable. so your not going to notice any difference from the upgrade. Look on YouTube, also the connection on the battery holder. Just no
#36
Registered User
Thread Starter
Join Date: Jan 2013
Location: Reno, NV
Posts: 205
Likes: 0
Received 0 Likes
on
0 Posts
I had it hooked up just like you said. Didn't make a difference with the hesitation. I appreciate the detailed instructions.
I observed warm up closely on my drives to work in the cold. I found that the 4runners heater gets warm 2 minutes after start up. At 5 miles, in light traffic (no freeway) it is fully warmed up. As the 4runner warms up, the RPM's slowly go from around 2500 rpm's to 800 rpm's. As the rpm's drop during warm up, the hesitation gets less and less noticeable. Once the rpm's get 800 at precisely full warm up, the hesitation is completely gone. All the while, the temp gauge barely moves and kind of fluctuates up and down.
I am convinced that the coolant temp sensor and instrument temp sensors are mixed up somehow, possibly with the cold start injector as well. I took it do the Toyota dealer to see if they can diagnose. They are going to lower the front lift via torsion adjust and align while its there to save money. I will update if the gremlin can be found.
#37
No coolant leaking out when you remove ECT?
That is it right there, you're not getting proper temp readings until the ECT gets heat soaked by the housing. The engine has no idea
So weird if you ask me. It's totally dry in there, too? Something wrong with the water pump and needs a good burp?
That is it right there, you're not getting proper temp readings until the ECT gets heat soaked by the housing. The engine has no idea
So weird if you ask me. It's totally dry in there, too? Something wrong with the water pump and needs a good burp?
#38
I had this exact problem - stumble on warm up cycle. Truck ran great after it was warm. Turned out to be the oxygen sensor. A muffler shop replaced my old one when they broke it changing the exhaust pipes. The replacement O2 sensor they used was shorter than original and did not reach down into the exhaust stream fully. I replaced the O2 sensor with a Nippondenso unit. It was about 1/2" longer than the one installed by the muffler shop. Problem gone.
#39
Registered User
I didn't read about it yet in this thread so I'd suggest checking the intake elbow (that curved bellows) attached to the throttle body. They crack on the bottom in the crevasses where you can't see causing driveability nightmares such as yours. Dorman offers a Chinese replacement that, IMO, works well ('cause I have one on my truck). Thirty-five bucks from Rock Auto.
Last edited by truckmike26; 01-05-2015 at 04:14 PM.
#40
Registered User
Thread Starter
Join Date: Jan 2013
Location: Reno, NV
Posts: 205
Likes: 0
Received 0 Likes
on
0 Posts
I had this exact problem - stumble on warm up cycle. Truck ran great after it was warm. Turned out to be the oxygen sensor. A muffler shop replaced my old one when they broke it changing the exhaust pipes. The replacement O2 sensor they used was shorter than original and did not reach down into the exhaust stream fully. I replaced the O2 sensor with a Nippondenso unit. It was about 1/2" longer than the one installed by the muffler shop. Problem gone.


