Toyota 4Runner 1984-1995: How to Reset Check Engine Lights
Does it just seem that no matter what you do the check engine light just won't shut off? This article will show you the right way to make it turn off.
This article applies to the Toyota 4Runner (1984-1995).
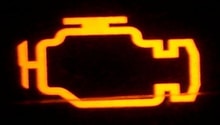
If there's one thing that's guaranteed with owning an automobile, it's that at some point your check engine light will come on. While this serves as a warning that something is wrong, often times it will be triggered for only minor issues. We'll show you the best way for eliminating a check engine light problem.

Material Needed
- A metal paper clip
Step 1 – Find out what caused the check engine light
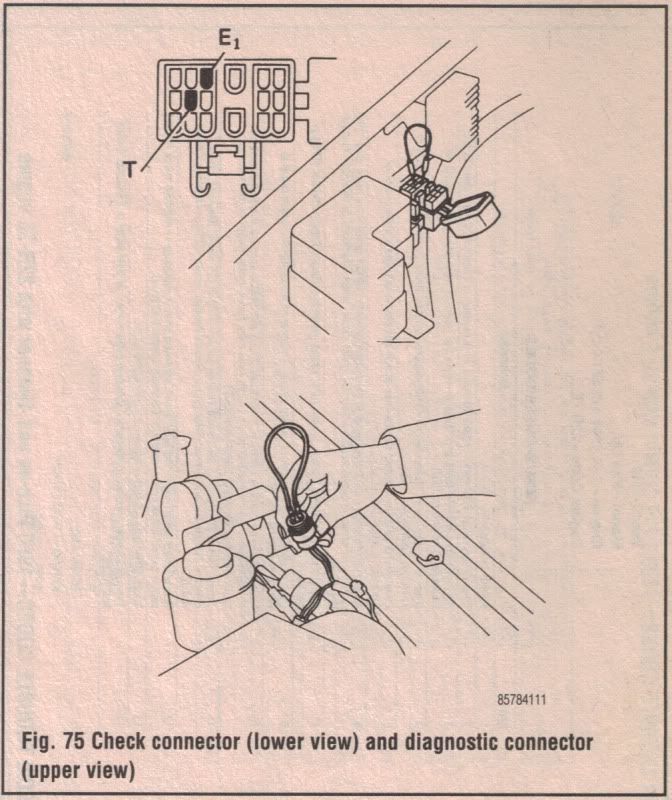
You should start by figuring out what triggered the check engine light in the first place. If you already know what it is and have already fixed it, then you can skip this step; but for those who don't know, there is a simple way to figure out what triggered the light and that is by finding the error code. Open the hood of your 4Runner and find the small grey box next to your fuse box. Use the box's cover to identify the T or TE1 pin and the E1 pin. Toyota has a tool called a diagnostic check connector that you can plug into these two pins. Alternately, you can use something as simple as a metal paper clip to jump the gap between the two pins.
Once those two pins are connected, you can turn the key in the ignition without starting the engine and the check engine light will flash. Count out the number of flashes until there is a pause, then count out the next series of flashes. The number of flashes will correspond to a two digit error code, which you should be able to look up online. Once you've identified what triggered the check engine light in the first place, you'll be able to take the necessary steps to fix it. Sometimes, it could be something as simple as a dirty sensor that needs cleaning, but other times it could mean replacing a part of your 4Runner.
Step 2 – Clear the check engine light
If you've managed to fix what was causing the error, you shouldn't need to do anything. The check engine light should turn off by itself after driving for a while. It takes some time for the computer to realize that the problem has been fixed. But if you want a more immediate solution, then there are a couple things you can do.
You could start by disconnecting the 15 amp EFI fuse in your fuse box. Leaving it disconnected for about a minute should be long enough to clear the computer. The other option is to disconnect the positive and negative terminals on your battery and leave that disconnected for a few minutes. This will allow the electricity to drain from the 4Runner's computer, forcing it to lose its memory. Either of these will at least make the computer to reset, but if the check engine light comes back on, then it means that the 4Runner's computer still detects a problem.

Related Discussions
- How Do I Reset the Check Engine Light on a 97 4Runner w/ 3.4 L? - YotaTech.com
- Check Engine Light Reset? - YotaTech.com
- Check Engine Light - YotaTech.com
- Check Ingine Light Codes for OBD1 - YotaTech.com