Toyota 4Runner 1984-1995: How to Change Oil
With the right tools and know-how, changing your 4Runner’s oil and oil filter can be accomplished simply as well as easily. If you think you’re ready to go at it, read on.
This article applies to the Toyota 4Runner (1984-1995).
The first (1984-1989) and second (1990-1995) Generation of the Toyota 4Runner were available with either a 2.4L I4, or (starting in 1987) a 3.0L V6. And although synthetic oils (0W-30) were approved by Toyota for use in some later Generation 2 4Runner models, most of the Generation 1 and 2 4Runners use a common multi-grade oil, SAE 10W-30 or 10W-40.
While typically more expensive, synthetic oils certainly have had a revolutionary impact on automotive lubrication over the last three decades. However, petroleum-based product development hasn’t been standing still. Since 2001, the American Petroleum Institute (owners of the API service symbol on most name-brand oil containers) has ushered in four significant gasoline engine oil upgrades, which it calls “service categories:”
- SJ (for use in pre-2001 vehicles),
- SL (pre-2004), SM (pre-2010), and—in October of 2010—
- SN, the current category.
Each upgrade was designed to accommodate engine developments such as higher internal running temperatures, increased use of turbocharging, and ethanol-containing fuels. As their assigned years indicate, these service categories are backward compatible, but not forward compatible. This is probably because some early synthetic motor oils were known to wear down the seals in an engine and cause leaks; many drivers have been reticent to use synthetics, let alone mix synthetic and mineral (petroleum-based) oils together. But today’s man-made synthetic oils can handle extreme hot and cold temperatures better than conventional oils. And petroleum-based oils break down faster during high-heat operations like towing or hauling heavy loads, partly because they contain impurities that can't be removed by the refining process. This explains why so many re-sellers of oil are now “blending” their conventional oil with synthetic oil. Plus, many oil companies (such as the makers of Sunoco motor oil) claim that as long as you maintain the same SAE grade and API service category (such as 10W-30 and SN), mixing conventional oil with synthetic oil isn’t a problem.
If you don’t know which grade of oil is currently in your older 4Runner, a good choice would be the 10W-30 multi-grade with the current service category SN. Users running in warmer climates, such as across the South, could benefit from the higher-viscosity 10W-40; but note that many users and service centers aren’t using any of the thicker or “heavier” grades of oil anymore. But no matter which oil you choose, most long-time users DO strongly recommend that when you fill your vehicle with oil, all the oil you use should not only be of the same grade and service category, but also the same brand.
Regardless, be sure to check your trucks’s handbook before buying the appropriate type and amount of oil for the oil change:
- Five quarts (actually, 4 1/2 quarts is required) for the 2.4L I4, and
- Five quarts for the 2.0L V6.
It is typically recommended that you change your vehicle's petroleum-based oil at least every 5,000 miles, or 3,000 miles for hard driving conditions. With synthetic oils, this mileage interval can be much higher—10,000 miles for some vehicles. However, most users believe that even with synthetic oils, 5,000 miles between oil changes makes sense for older, hard working 4x4 vehicles.
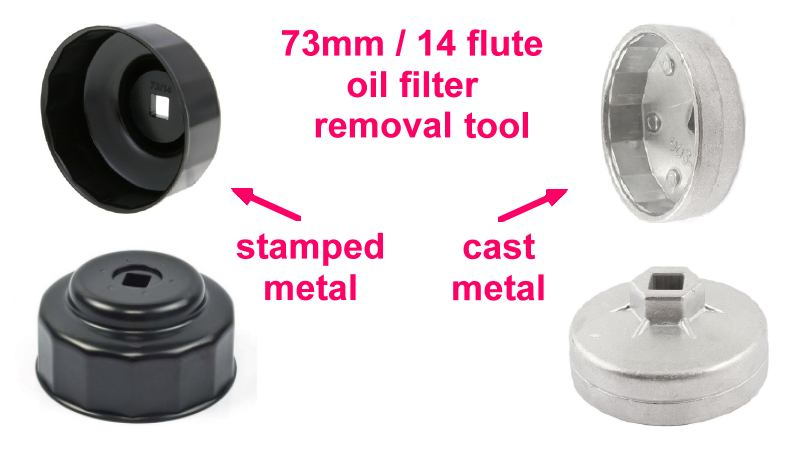
The OEM oil filter for these vehicles was a 90915-YZZD1. To remove this filter (and reinstall its replacement), Toyota recommended using a 14-flute 73mm cap wrench. Because access to the oil filter is very tight, it does make sense to use a reasonably-priced cap wrench, which installs on the end of a standard 3/8” ratchet wrench or extension.

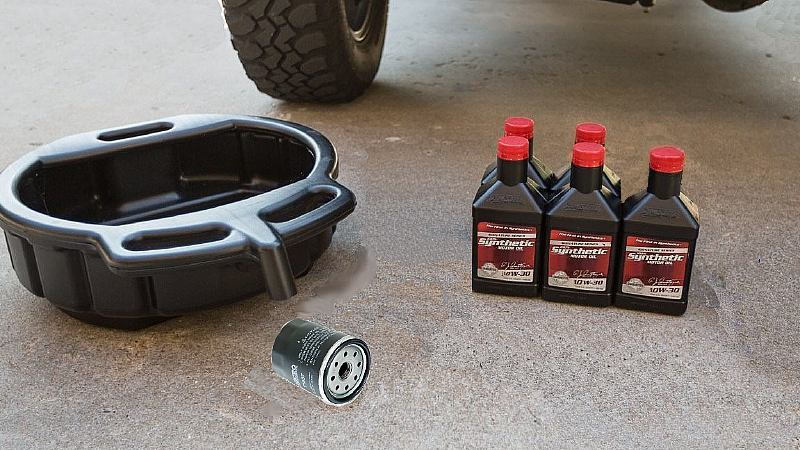
Materials Needed
- 3/4" socket with stem extension and 14mm socket
- Cap-style oil filter wrench (73mm/14 flute)
- Oil filter
- 5 quarts of 10W-30 or 10W-40 conventional or synthetic motor oil
- Trolley jack and two jack stands, or two car ramps (optional)
- Shop rags or old towels to wipe up any spills
- Oil pan that will hold 5 quarts of oil
- Large, clean funnel
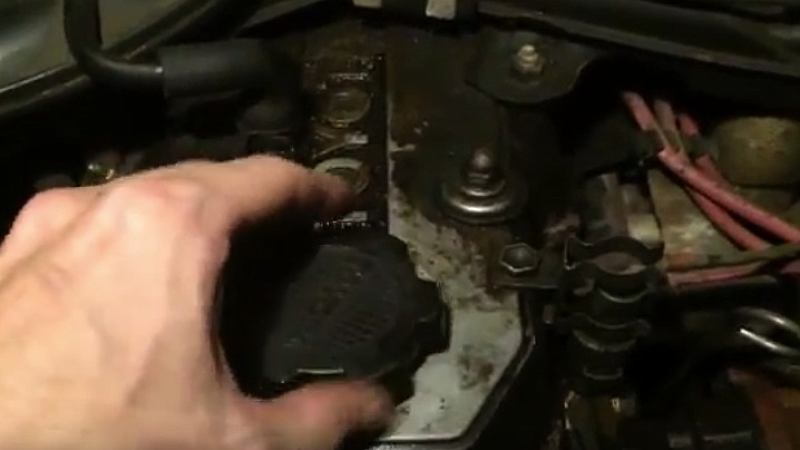
Step 1 – Warm up engine and remove oil filler cap
Turn on the engine and (briefly) warm up the car for a couple of minutes. You want the oil to be warm, not hot, to help it suspend any contaminants and drain more quickly. You also don’t want the oil to be hot when you remove the filter, as this operation can get messy. Also, take care when you go underneath the vehicle, as other drivetrain-related components—such as the exhaust manifold—can remain very hot for a long time.
Then, open the hood and secure it in place with the hood prop rod. Loosen or remove the oil filler cap located on an engine valve cover to help the oil drain. [Note that the cap may also list the type of oil that should be used.]
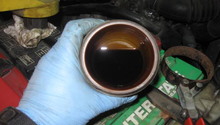
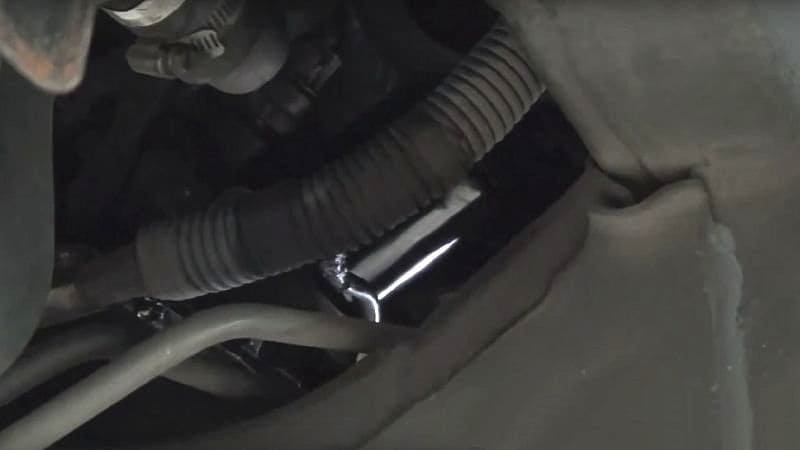
Step 2 – Drain the engine oil
The drain plug is located on the driver’s side of the vehicle, at the lowest point of the oil pan.
Loosen this plug with a 14mm box wrench, then position the catch pan under the drain. With your hand, quickly remove the plug to minimize any oil spillage.
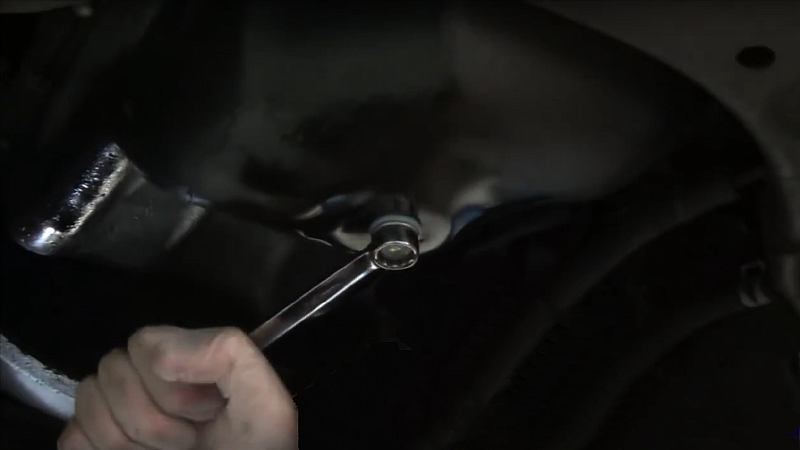
Let the oil pan drain for several minutes to make sure it’s all out. Be sure to also remove and save the crush washer or gasket seal for this plug.
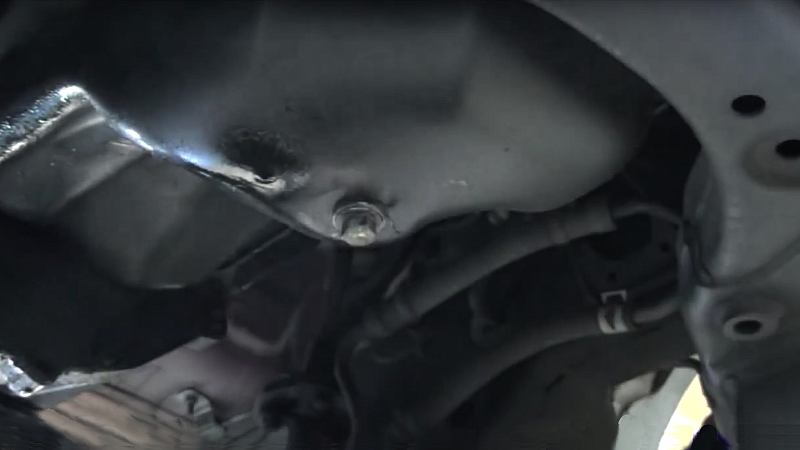
Step 3 – Remove the front skid plate
Supporting the front skid plate with one hand, use a 12mm socket wrench to remove the four bolts that attach it to the undercarriage. Set it aside.

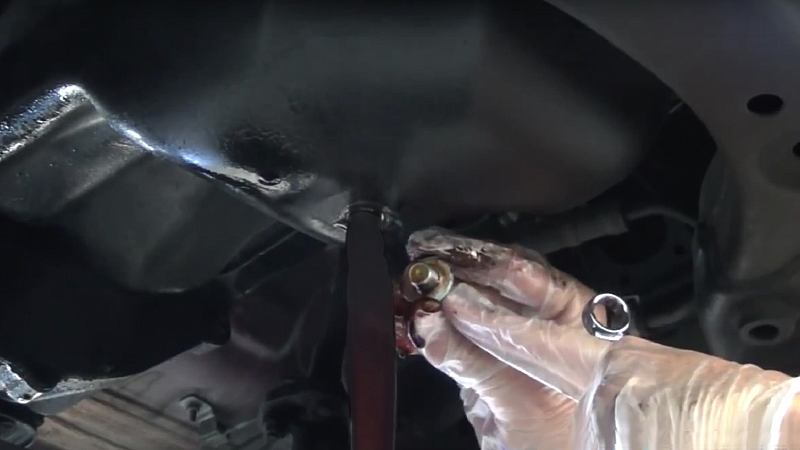
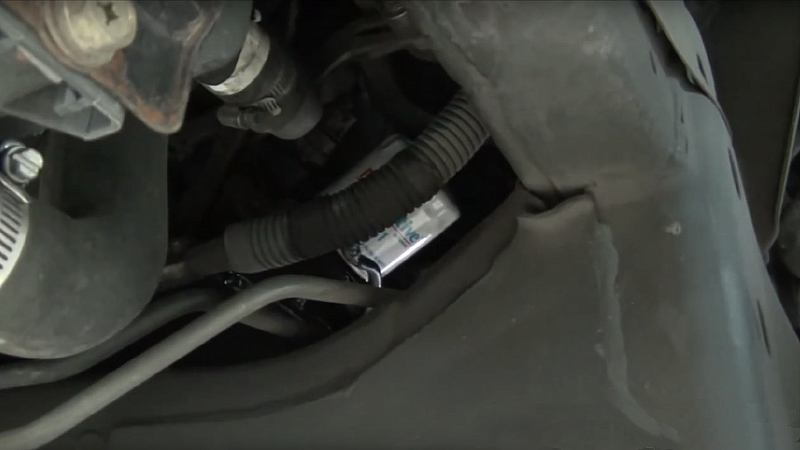
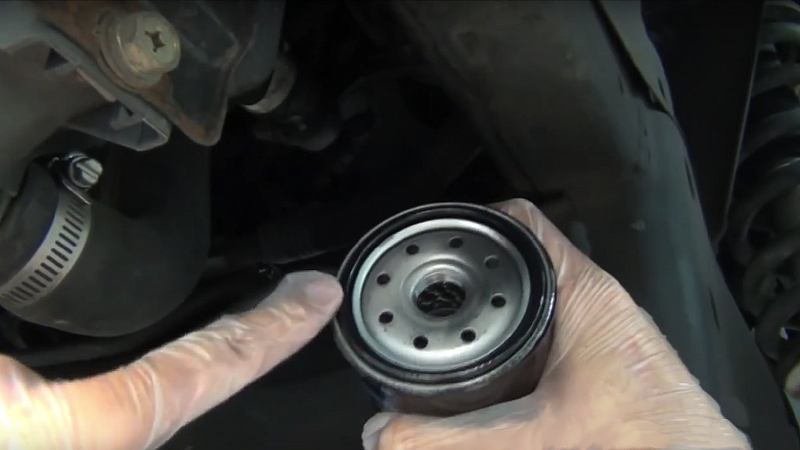
Step 4 – Remove the oil filter
The oil filter is also on the driver’s side of the engine block, and above the oil pan. The oil filter is not easy to access and the work space is constrained.
Put another catch pan under the filter before you remove it. Note: If you have only one drain pan, wait until the oil being drained from the oil pan reduces to just a small stream, and clean then replace the oil pan drain plug, making sure that the crush washer or gasket is back in place. Re-tighten the drain plug to approximately the same torque you found it at (it should be no tighter than 18 lb/ft or 25 Nm for the 2.4L I4, and 33 lb/ft or 44.5 Nm for the 3.0L V6 engine).
Remove the oil filter. Using a cap-style oil filter wrench with a 3/8” socket wrench and extension makes this easier, and reduces the chance of distorting the filter housing. Note that this tool is available in a stamped metal version, or a cast metal version.
Put the removed oil filter open-end down into the drain pan.
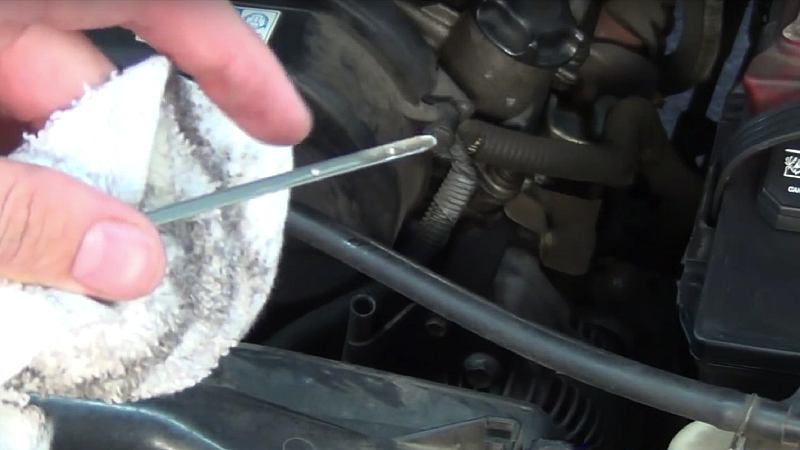
Step 5 – Install the new oil filter
With a clean rag, wipe down the the oil filter attachment location. With a finger dipped in clean oil, wet the rubber gasket seal on the new filter to help it create a seal that won’t leak.
Carefully engage the threads of filter, and screw it down snug. Give it another 1/8 of a turn. Again, using a cap-style oil filter wrench with a 3/8” socket wrench and extension will make this task easier, but care should be taken not to over-tighten the filter. Doing so can make it very difficult to remove for the next oil change.
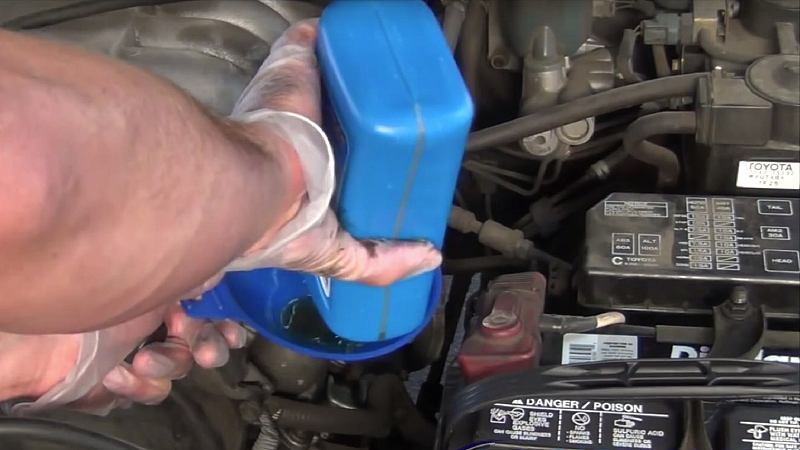
Step 6 – Replace the oil
If it isn’t already, open the hood and secure it in place with the hood prop rod. If you didn’t already, remove the oil filler cap located on the valve cover.
Place a funnel into the oil filler hole.
- For the 2.4L I4 (22R or 22R-E): 4 1/2 quarts
- For the 3.0L V6 (3VZ-E): 5 quarts
Note that many 4Runner owners will put a little less oil into their vehicles (like 4.8 quarts instead of five in the V6) to keep the oil a bit under the full mark on the dipstick, allowing for oil expansion when the engine heats up to maximum temperature.
Put about four quarts into the 2.4L engine or 4 1/2 quarts into the 3.0L engine, replace the oil filler cap, and start the vehicle. Let it run about a minute, then shut it off and check the level indicator on the dipstick. Repeat doing this until the oil reaches the proper fill mark. Note that if you raised the front end of the vehicle to change the oil, hold off bringing the oil level up to the top mark on the dipstick until the 4Runner is back on level ground.
With the oil up to the desired fill marking, let the vehicle run for a few minutes to check for any leaks below coming from the drain plug or oil filter seal. Take great care not to overfill the engine with oil, as too much oil can be just as detrimental to the health of an engine as too little oil.
Step 7 – Replace the front skid plate
If there are no leaks detected, shut the vehicle off and replace the front skid plate with the four 12mm bolts used to take it off.
You’re done.
Featured Videos: Oil Change on Toyota 4Runner Pickup
-
Oil Change and Filter on 1995
-
Oil Change on '85 Pickup
Related Discussions
- Synthetic Oil and Change Interval - YotaTech.com
- Maintenance and Oil Change Schedule - YotaTech.com
- Oil Change Tips and Hints - YotaTech.com
- 22R Oil Change - YotaTech.com
- Oil Capacity of 2nd Gen - YotaTech.com