
NoDak '87 22rte 4Runner build.
 Jun 27, 2014 | 05:56 PM
#1
Thread Starter
Registered User
Joined: May 2011
Posts: 94
Likes: 0
From: North Dakota
NoDak '86 22rte 4Runner build.
Hey guys and gals.
*** add me on Instagram for up to date pics. @nodaktrucks
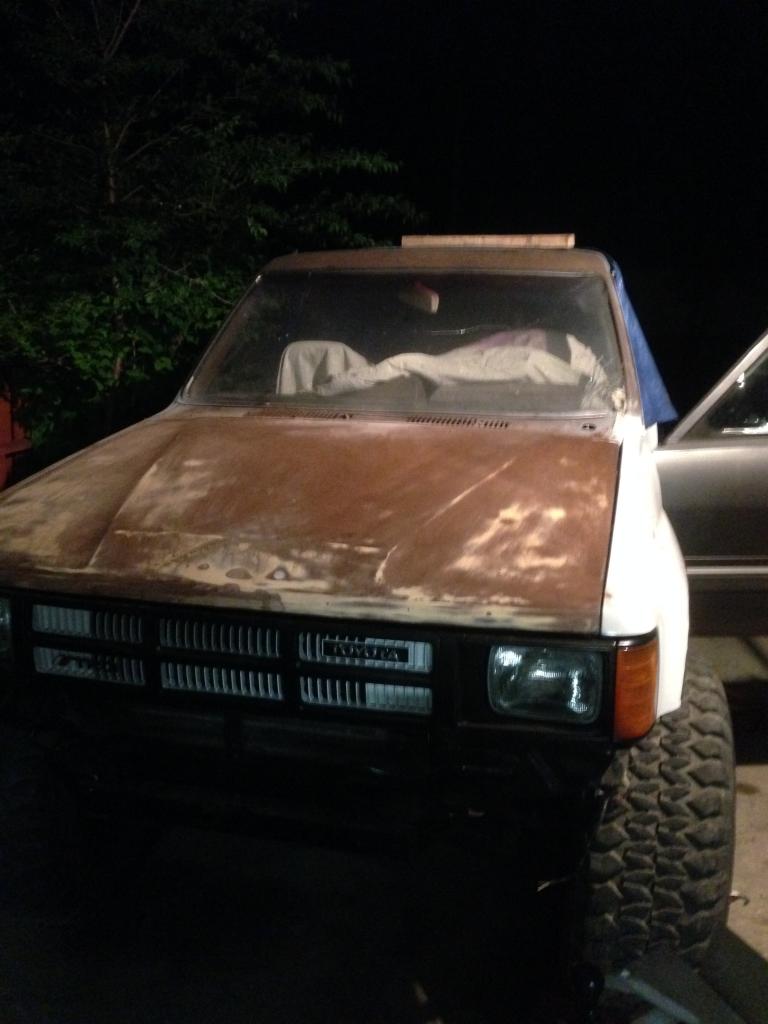
This is my 1986 Toyota 4Runner SR5 22rte with auto trans.
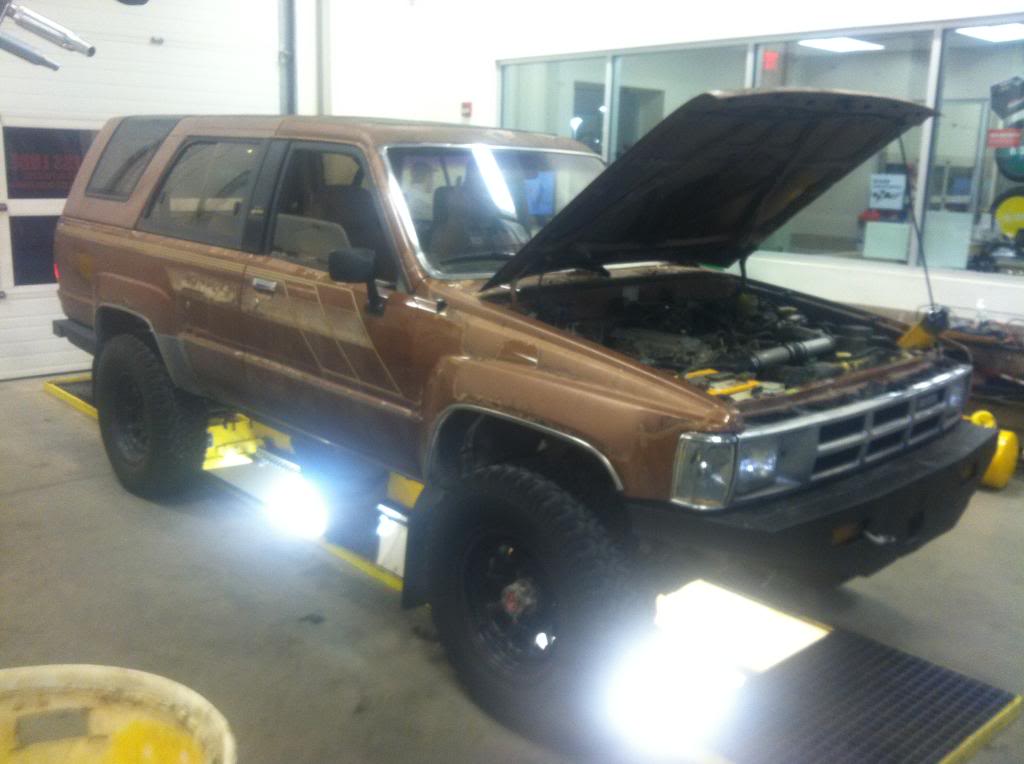
Looks worse than it is. Bought it to save her from the crusher. $250 well spent. 😜
Here's some background info on me and the TurdRunner...
Me- 25, from Fargo, North Dakota. Tech in training at MSCTC in Moorhead, MN. and currently working for a salvage yard. (Surprisingly fun/interesting job)
Let's get this out of the way... Yes, I've seen the movie "Fargo" and no, I don't love it. 😡
Back to Toyotas...
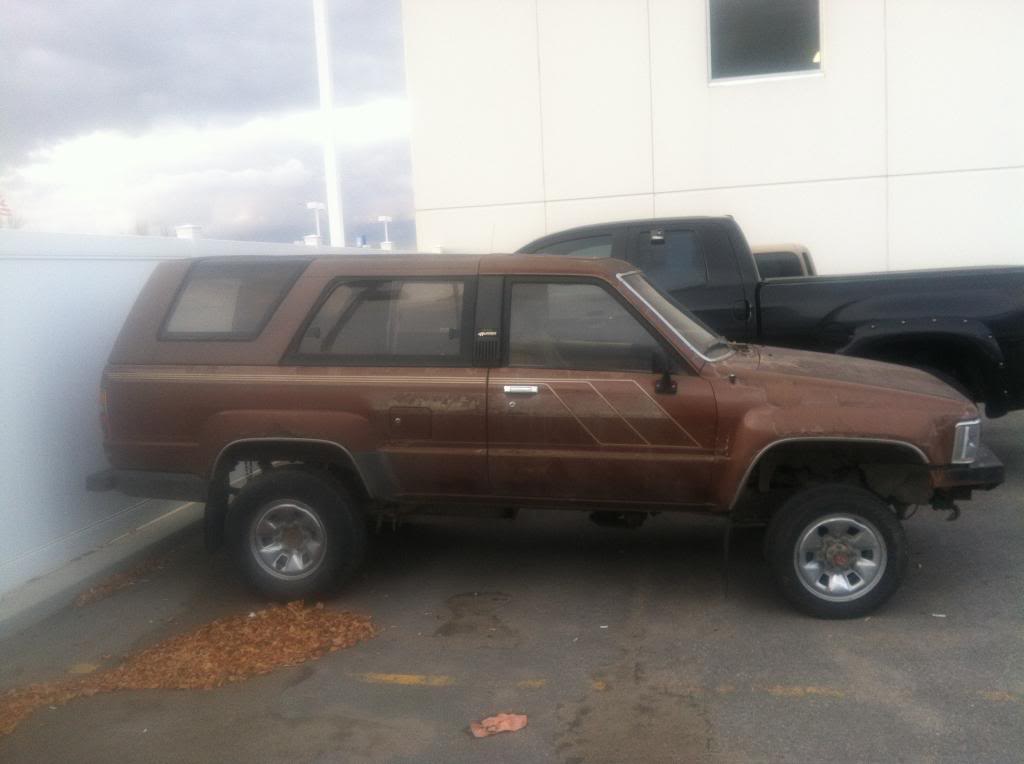
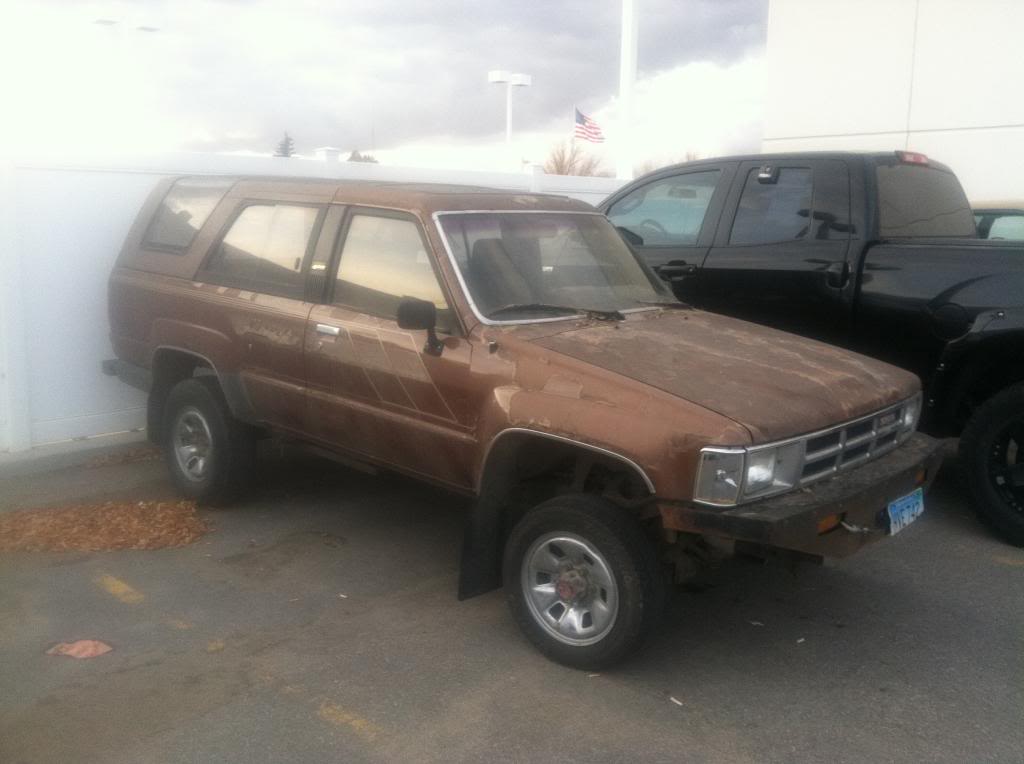
My rig (day I bought it) - 1986 4Runner 188,xxx miles. Didn't idle and hadn't ran in 5-10 years. All the paint was flaking off and faded badly. Covered in year old mud, dust and Minnesota rust. Kinda felt I wasted $250, to be honest. Until I washed it up. Was "clean" with barley any rust. Really looked good. Was happen. Decided this would be my next project.
Original plans (2 years ago) - full rebuild of the 22rte. Bored and hone with TRD cam. Garrett turbo with LC engineering turbo manifold. All rolling on propane with SAS and lockers.
Plans have changed a ton over the last few years but up intell a few months ago I really hadn't started the rebuild. I've only put 150ish miles on the truck sense I brought it.
So here we go...
Bought it, $250. Needed tires and a hardcore paint job.
*** add me on Instagram for up to date pics. @nodaktrucks
This is my 1986 Toyota 4Runner SR5 22rte with auto trans.
Looks worse than it is. Bought it to save her from the crusher. $250 well spent. 😜
Here's some background info on me and the TurdRunner...
Me- 25, from Fargo, North Dakota. Tech in training at MSCTC in Moorhead, MN. and currently working for a salvage yard. (Surprisingly fun/interesting job)
Let's get this out of the way... Yes, I've seen the movie "Fargo" and no, I don't love it. 😡
Back to Toyotas...
My rig (day I bought it) - 1986 4Runner 188,xxx miles. Didn't idle and hadn't ran in 5-10 years. All the paint was flaking off and faded badly. Covered in year old mud, dust and Minnesota rust. Kinda felt I wasted $250, to be honest. Until I washed it up. Was "clean" with barley any rust. Really looked good. Was happen. Decided this would be my next project.
Original plans (2 years ago) - full rebuild of the 22rte. Bored and hone with TRD cam. Garrett turbo with LC engineering turbo manifold. All rolling on propane with SAS and lockers.
Plans have changed a ton over the last few years but up intell a few months ago I really hadn't started the rebuild. I've only put 150ish miles on the truck sense I brought it.
So here we go...
Bought it, $250. Needed tires and a hardcore paint job.
Last edited by Balzonya; Jul 14, 2014 at 07:01 AM. Reason: Pics
Jun 28, 2014 | 03:12 PM
#3
Thread Starter
Registered User
Joined: May 2011
Posts: 94
Likes: 0
From: North Dakota
So I bought it. Busted up A pillar and glass with all the flaking clear coat and the poop brown color really discouraged me.
Thought I'd fix the idle, clean it up and sell it. Well after fixing the idle, which was just a dime size hole in the intake that need to be plugged. Cheapest fix EVER! Haha.
She ran great! Was floored by how well it ran. This was a game changer.
So cleaned here up and temporarily put a set of 32" wheels on it. Ran some oil cleaner through her cause it was puffing out white smoke. Figured years of sitting didn't help. The Justice Brothers Oil System Cleaner is the only product I can back up with real, first hand experience. Stuff worked great along with the 5w30 mobile synthetic oil change.
Pad slapped it cause the pedal had a bunch of play plus low fluid. This didn't help. So breaking been a bit sketchy. Replaced the master cylinder but looking back I don't think I bench bleed it good enough cause the issue got worse! Haven't addressed this yet but I'm sure I'll need to soon.
After all this I parked her in a lot and basically forgot for 2 years.
Bought a house and started a full remodel. Along with side projects and work plus school equals no time left for the TurdRunner. So she there she sat. Killing the grass in my back yard.
Fall of 2013 I put her in the garage and started the body work. I'd decided that a good paint job, sprayed by a pro, was the best rout for max profit.
Didn't get much done before winter hit. No heat in my garage makes working impossible so again, she sat.
Around April I started up the build again. Slowly. Been gaining speed ever sense.
Now, This is my first body experience so was all new to me.
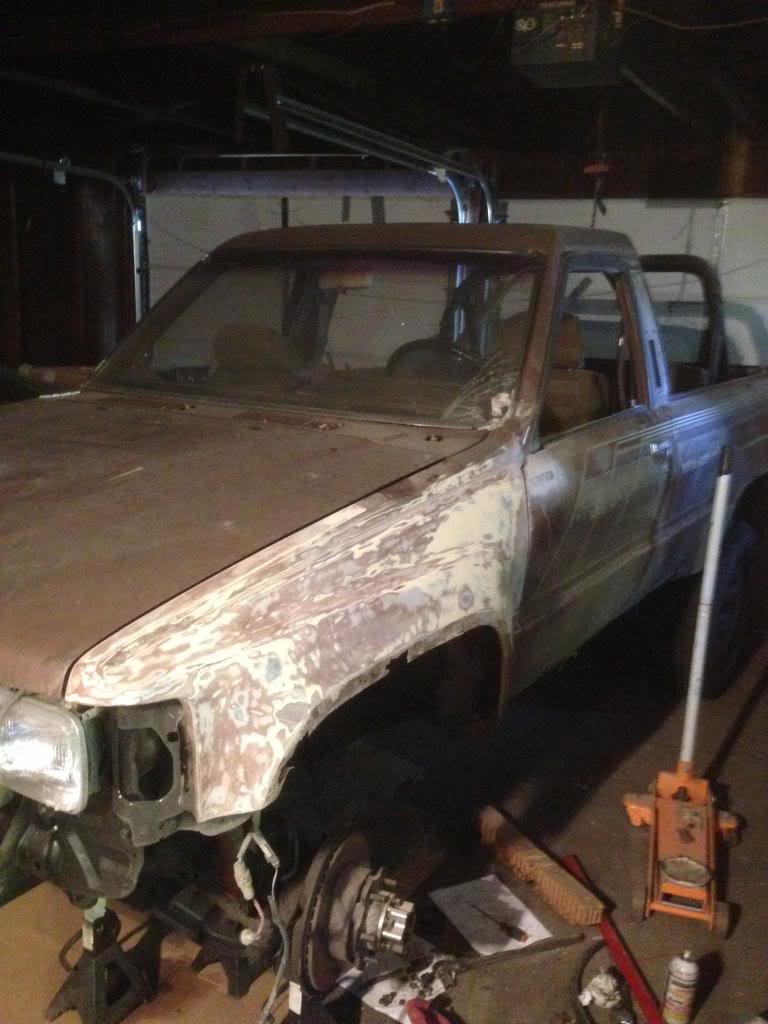
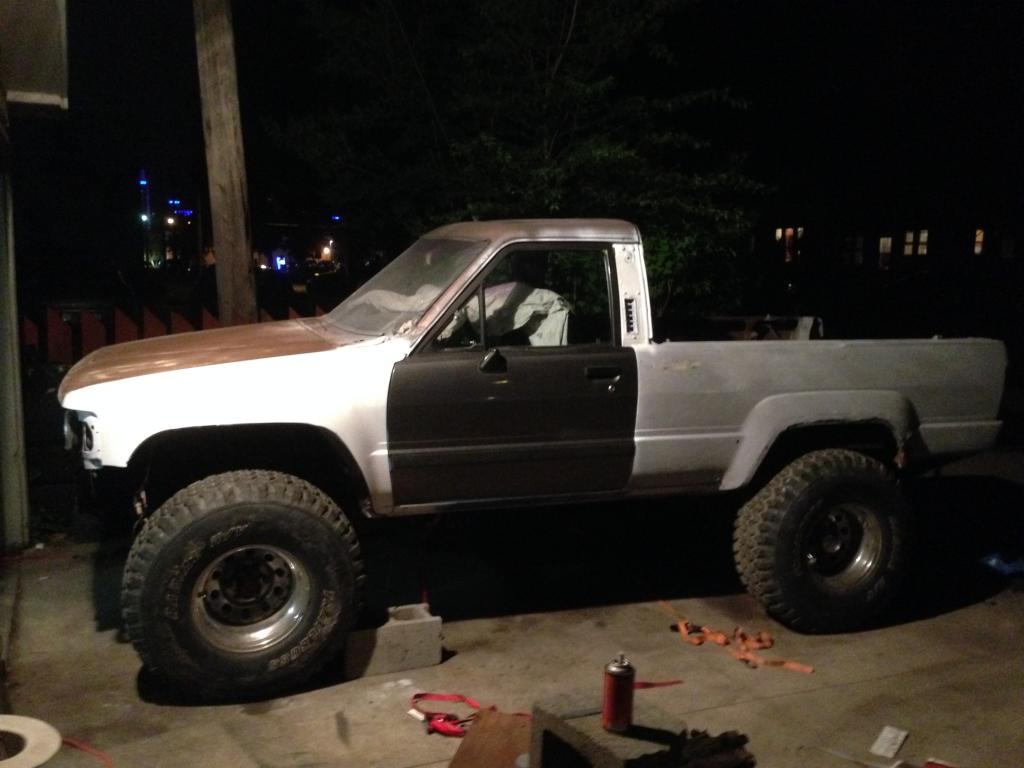
First thing was to toss a set of 35s on and see what need to be cut so I could turn.
Talked with a body shop friend and he said cut an 1� from the fender wells and apply a small door trim to clean up the edge. This worked great. highly recommend doing this.
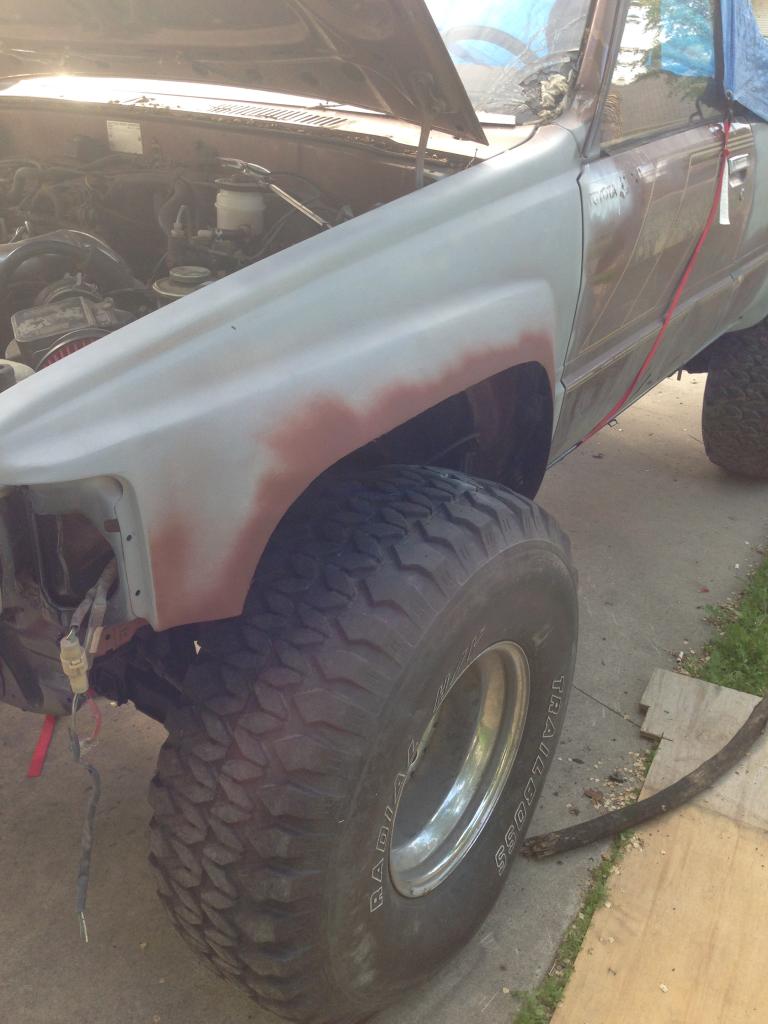
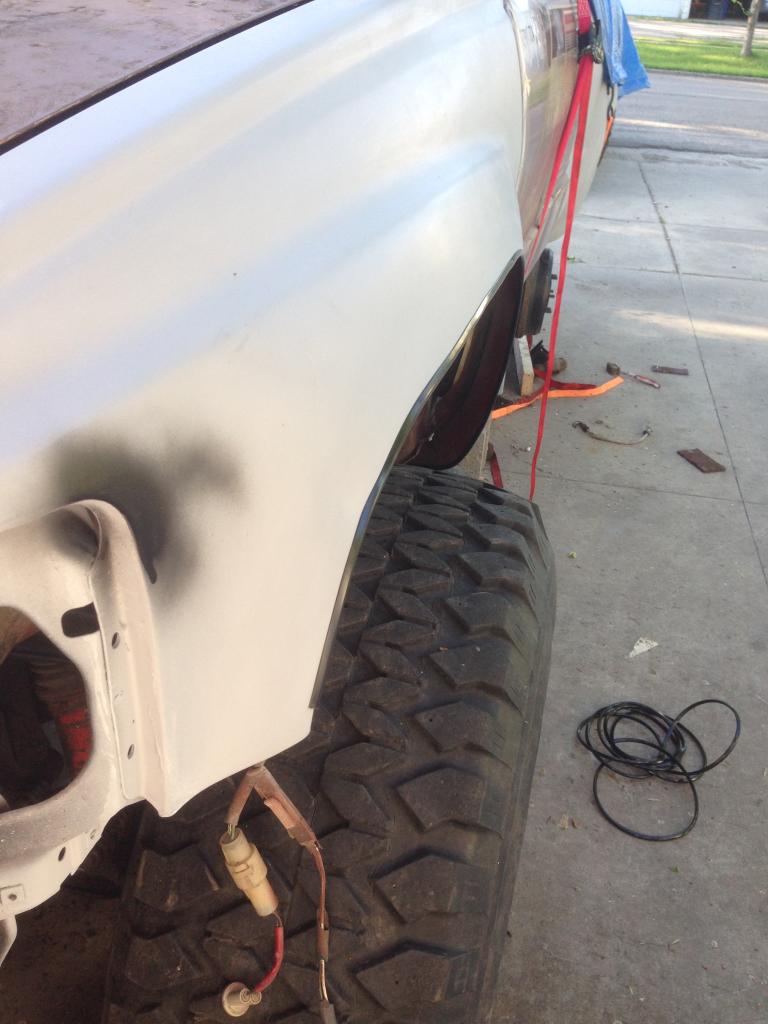

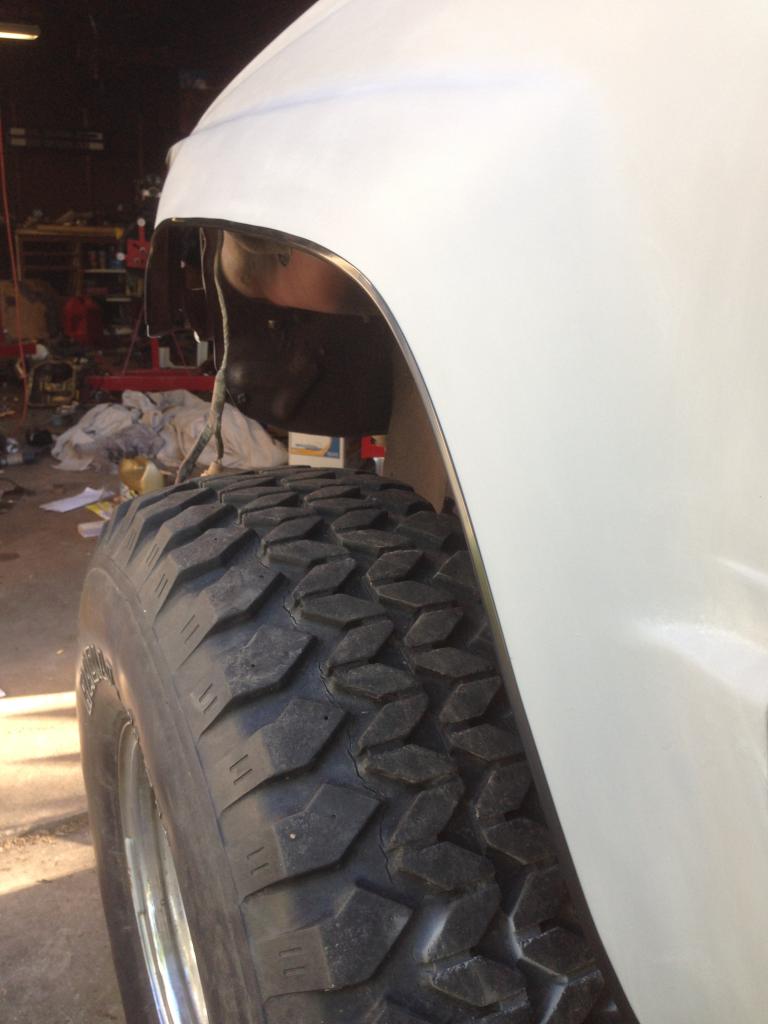
After working on the fenders and some sanding/priming I started on the next project.
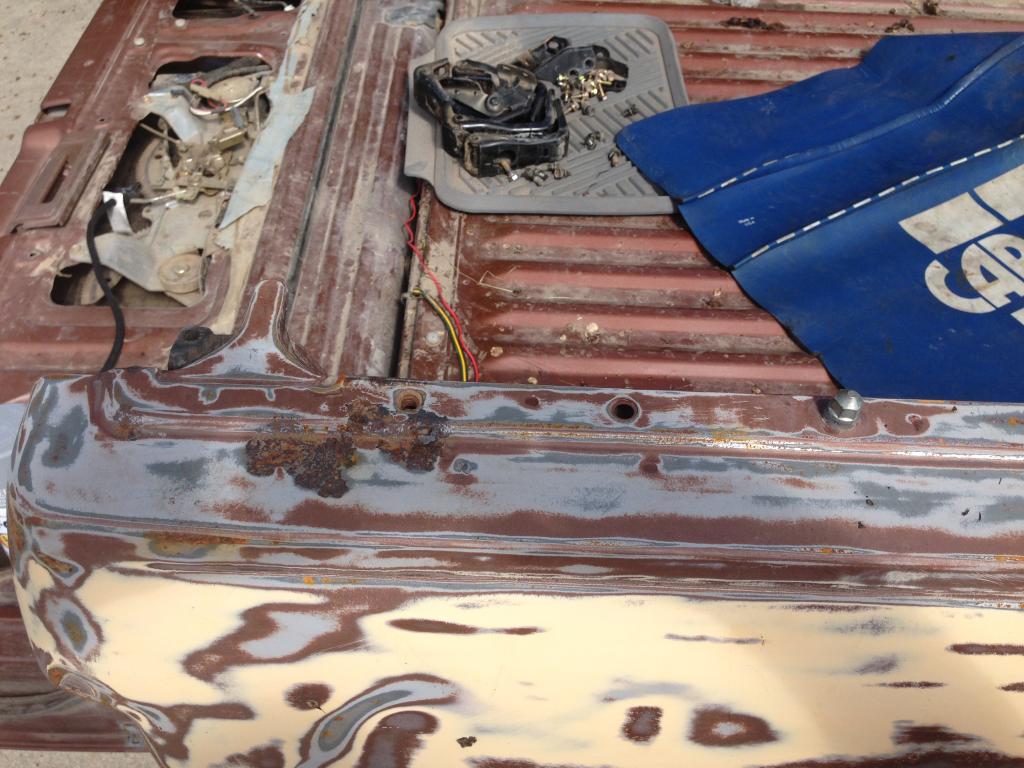
Pulled the bench out and roll bar. Tossed that crappy carpet in the dumpster and sanded all metal for priming. After the primer I used 3 or 4 cans of bed liner to coat the whole bed and underside of the bench. Feel this looks much cleaner than the carpet. Also, more useful and easier to clean.
No pic of that 😵
Thought I'd fix the idle, clean it up and sell it. Well after fixing the idle, which was just a dime size hole in the intake that need to be plugged. Cheapest fix EVER! Haha.
She ran great! Was floored by how well it ran. This was a game changer.
So cleaned here up and temporarily put a set of 32" wheels on it. Ran some oil cleaner through her cause it was puffing out white smoke. Figured years of sitting didn't help. The Justice Brothers Oil System Cleaner is the only product I can back up with real, first hand experience. Stuff worked great along with the 5w30 mobile synthetic oil change.
Pad slapped it cause the pedal had a bunch of play plus low fluid. This didn't help. So breaking been a bit sketchy. Replaced the master cylinder but looking back I don't think I bench bleed it good enough cause the issue got worse! Haven't addressed this yet but I'm sure I'll need to soon.
After all this I parked her in a lot and basically forgot for 2 years.
Bought a house and started a full remodel. Along with side projects and work plus school equals no time left for the TurdRunner. So she there she sat. Killing the grass in my back yard.
Fall of 2013 I put her in the garage and started the body work. I'd decided that a good paint job, sprayed by a pro, was the best rout for max profit.
Didn't get much done before winter hit. No heat in my garage makes working impossible so again, she sat.
Around April I started up the build again. Slowly. Been gaining speed ever sense.
Now, This is my first body experience so was all new to me.
First thing was to toss a set of 35s on and see what need to be cut so I could turn.
Talked with a body shop friend and he said cut an 1� from the fender wells and apply a small door trim to clean up the edge. This worked great. highly recommend doing this.
After working on the fenders and some sanding/priming I started on the next project.
Pulled the bench out and roll bar. Tossed that crappy carpet in the dumpster and sanded all metal for priming. After the primer I used 3 or 4 cans of bed liner to coat the whole bed and underside of the bench. Feel this looks much cleaner than the carpet. Also, more useful and easier to clean.
No pic of that 😵
Last edited by Balzonya; Jun 28, 2014 at 10:32 PM.
Jun 28, 2014 | 05:20 PM
#4
Thread Starter
Registered User
Joined: May 2011
Posts: 94
Likes: 0
From: North Dakota
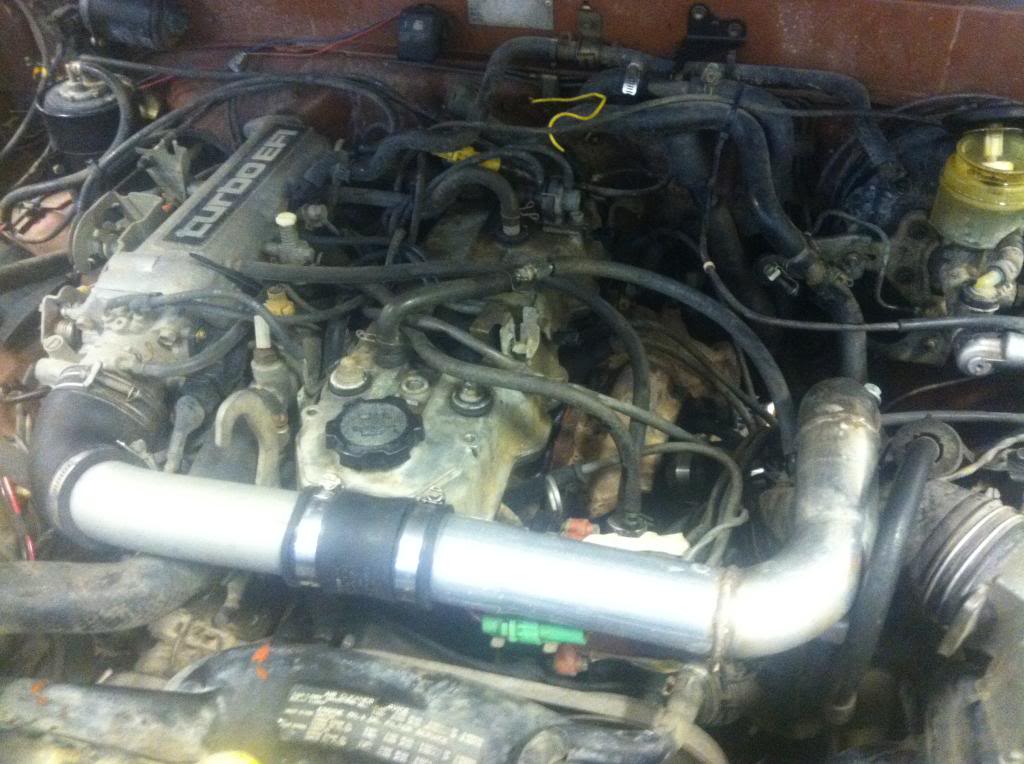
Took a break from the body to do a simple valve adjustment...
Got slightly carried away...
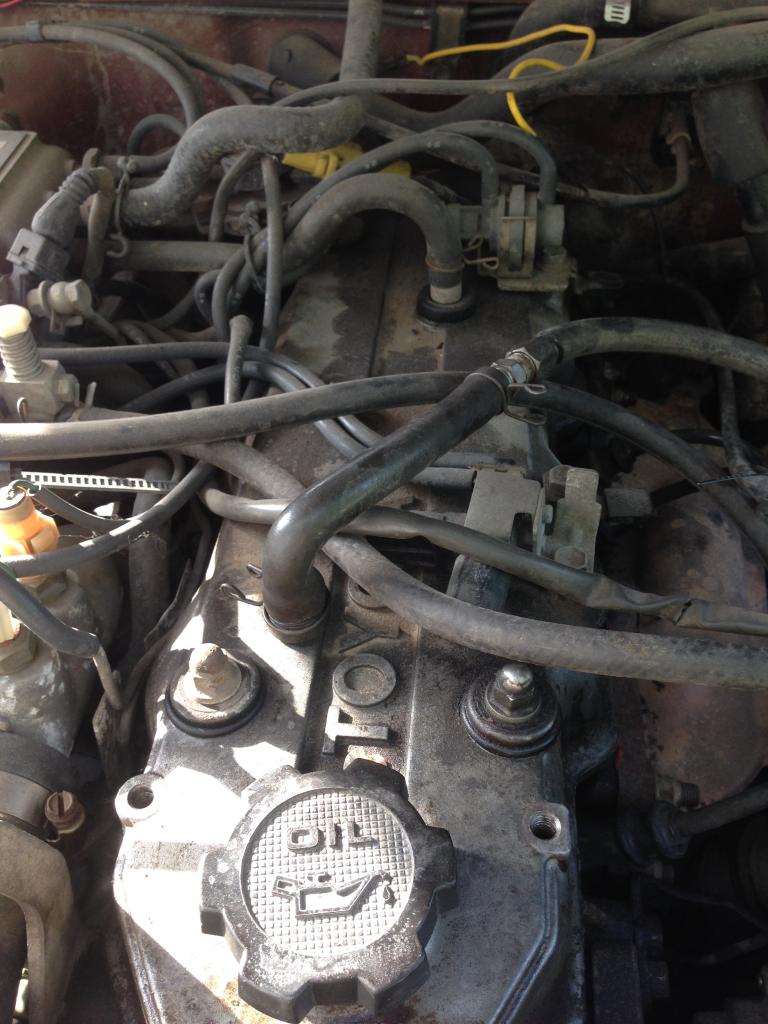
Before...
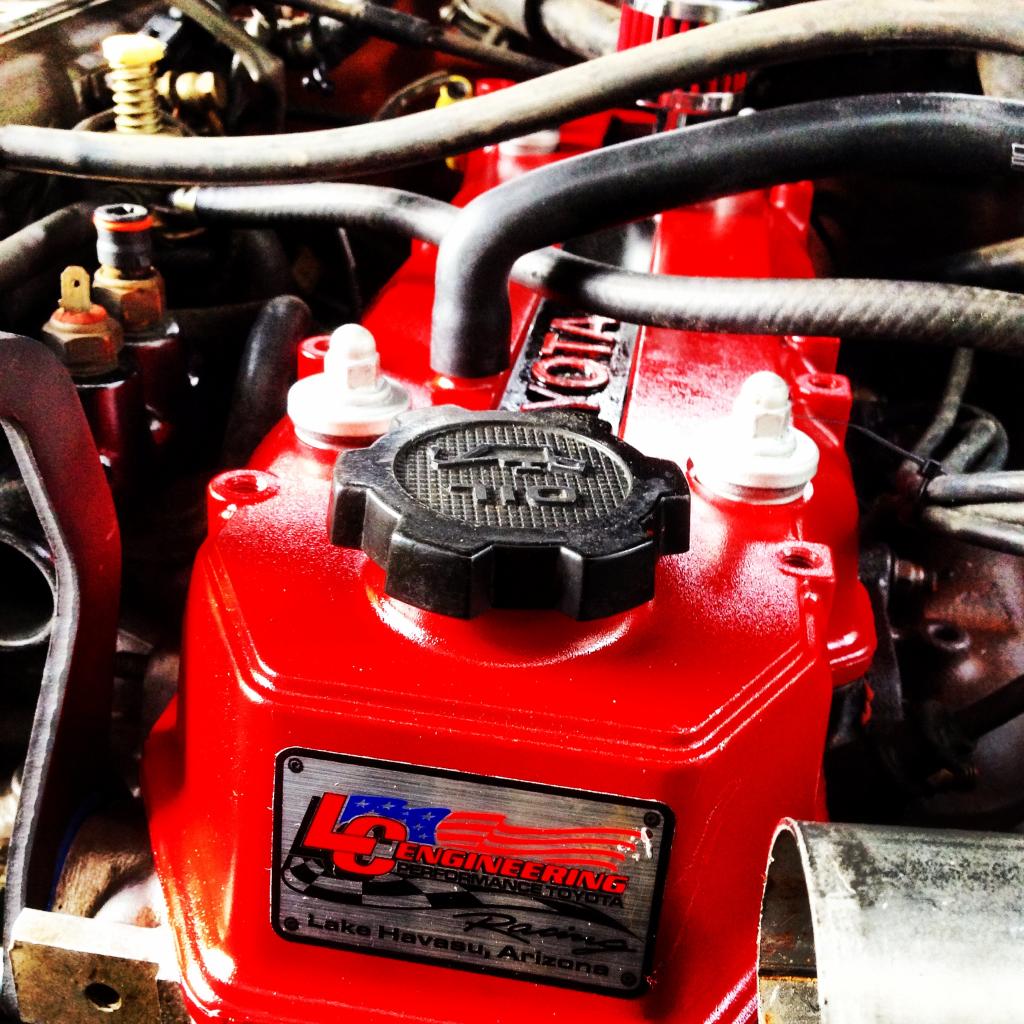
After...
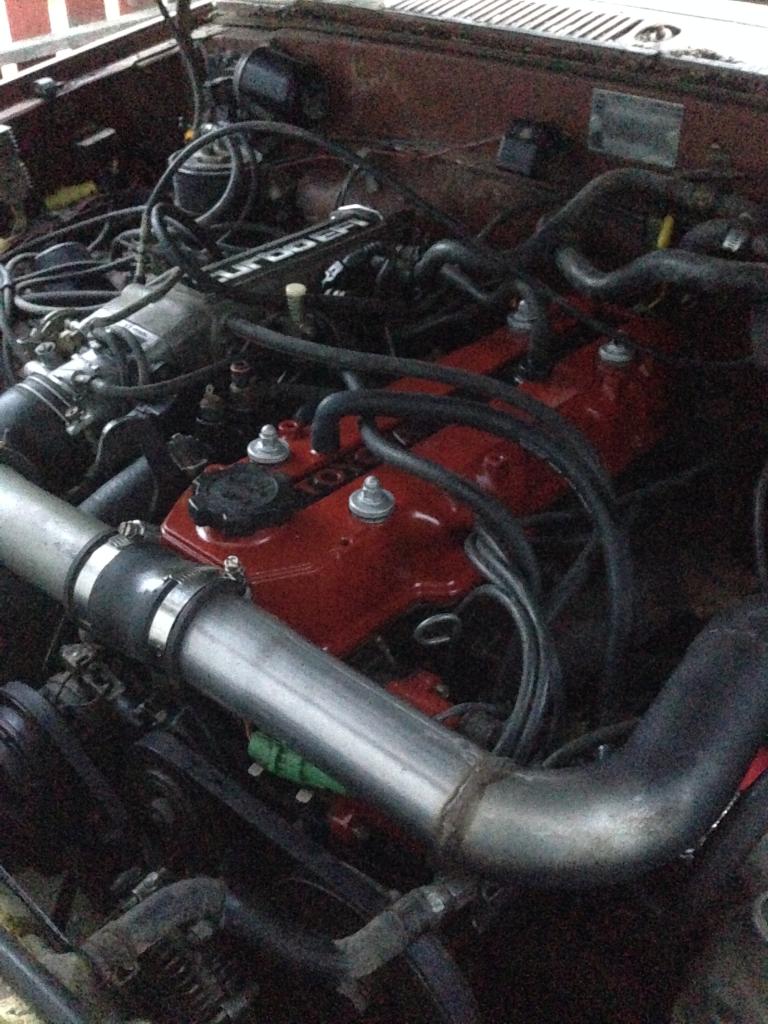
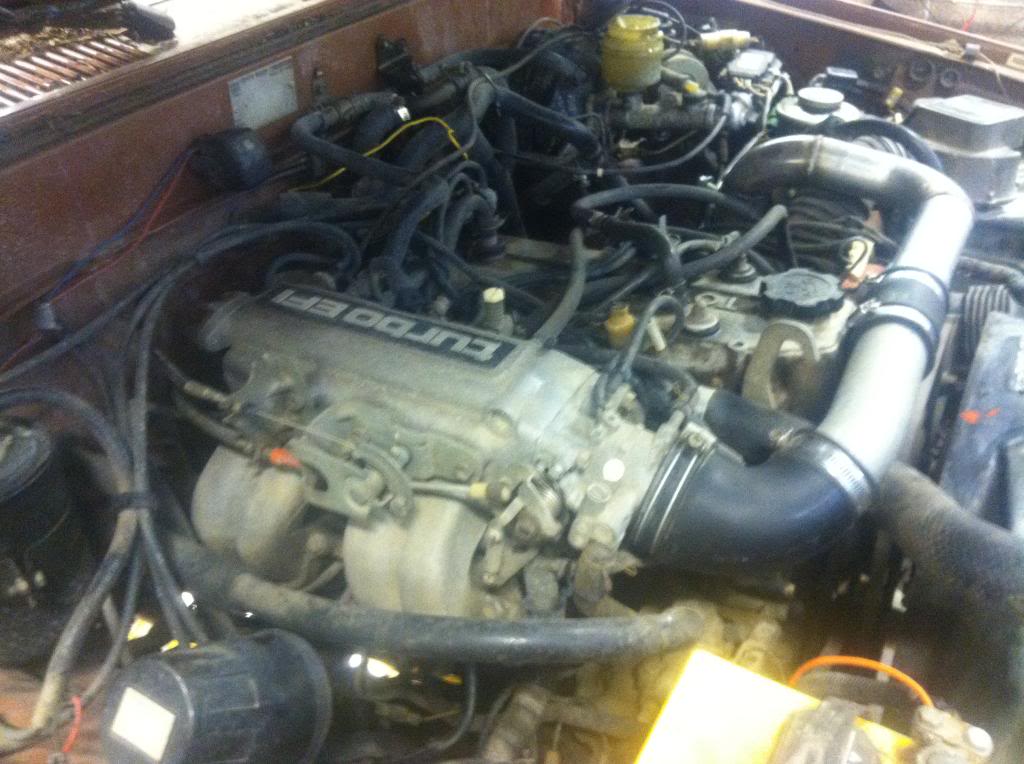
Tore the top end down. Cleaned and properly adjusted everything. No internal upgrades yet. Don't fix what's not broken.
Got the EGR block off from LC engineering and valve cover decal. Painted the valve cover too.
Before...
 ˟
˟
After...
Removed some of the "unneeded" emission lines cause I'm from North Dakota. Where they don't know what "emission testing" is. Haha
This is basically up-to-date and how she sits.
Swapped out the auto full windows/door for the manual window with the smoker window and am working on more body work and jamming the doors for paint.
Got slightly carried away...
Before...
After...
Tore the top end down. Cleaned and properly adjusted everything. No internal upgrades yet. Don't fix what's not broken.
Got the EGR block off from LC engineering and valve cover decal. Painted the valve cover too.
Before...
˟After...
Removed some of the "unneeded" emission lines cause I'm from North Dakota. Where they don't know what "emission testing" is. Haha
This is basically up-to-date and how she sits.
Swapped out the auto full windows/door for the manual window with the smoker window and am working on more body work and jamming the doors for paint.
Last edited by Balzonya; Jun 28, 2014 at 05:47 PM.

 Jun 29, 2014 | 06:56 PM
#7
Registered User
Joined: Jun 2010
Posts: 1,448
Likes: 100
From: Virginia
Awesome work. Keep posting pictures. I'm ashamed to admit I'd like to paint the 22RE's valve cover but I'm unsure on reinstalling it. Does it require RTV instead of a gasket? Is there any particular torque when putting it back?
edit: found the answer 48 inch-lbs and use a gasket kit.
https://www.yotatech.com/forums/f116...l-pain-207188/
edit: found the answer 48 inch-lbs and use a gasket kit.
https://www.yotatech.com/forums/f116...l-pain-207188/
Last edited by Nervo19; Jun 29, 2014 at 07:27 PM.
Trending Topics
Jun 30, 2014 | 09:30 AM
#8
Thread Starter
Registered User
Joined: May 2011
Posts: 94
Likes: 0
From: North Dakota
Awesome work. Keep posting pictures. I'm ashamed to admit I'd like to paint the 22RE's valve cover but I'm unsure on reinstalling it. Does it require RTV instead of a gasket? Is there any particular torque when putting it back?
edit: found the answer 48 inch-lbs and use a gasket kit.
https://www.yotatech.com/forums/f116...l-pain-207188/
edit: found the answer 48 inch-lbs and use a gasket kit.
https://www.yotatech.com/forums/f116...l-pain-207188/
No it's so simple. 4 bolts. I bought the gasket cause you need the half circle plugs for the front and back. The plugs I used some gasket maker to help seal it cause they aways end up leaking there. No torque specs. Just crush the bolt gaskets (get them with the valve gasket) down about half away. You'll see when you do it. It's easy.
EDIT: didn't see your edit until I posted. But I didn't torque them. The "directions" that came with just said to crush half way down but not to over tighten cause you'll get excessive valve noise.
Last edited by Balzonya; Jun 30, 2014 at 09:41 AM.
Jul 3, 2014 | 05:27 AM
#10
Thread Starter
Registered User
Joined: May 2011
Posts: 94
Likes: 0
From: North Dakota
Hey guys. No real updates. Still playing with different intake options.
Just recently got a job at a salvage yard pulling parts so always looking/planning for the next step.
Did a bit of research on it but I'll do more but...
Any ideas on AFM deletion? Not so much removing the system but that stupied grey eye sore. Read up a little on mega squirt but not willing to drop $900 on a 25+ year old truck for 10 hp.
What I was really wondering about is the afm off a chevy 4.3. I it's much smaller. Is there anyway this could work on at 22rte? Sorry if this is dumb but don't know really the difference between these two styles. Like could I retrofit this style MAF to replace the huge afm box on mine?
 Jul 3, 2014 | 09:27 PM
#13
Thread Starter
Registered User
Joined: May 2011
Posts: 94
Likes: 0
From: North Dakota
Thanks for the input guys.
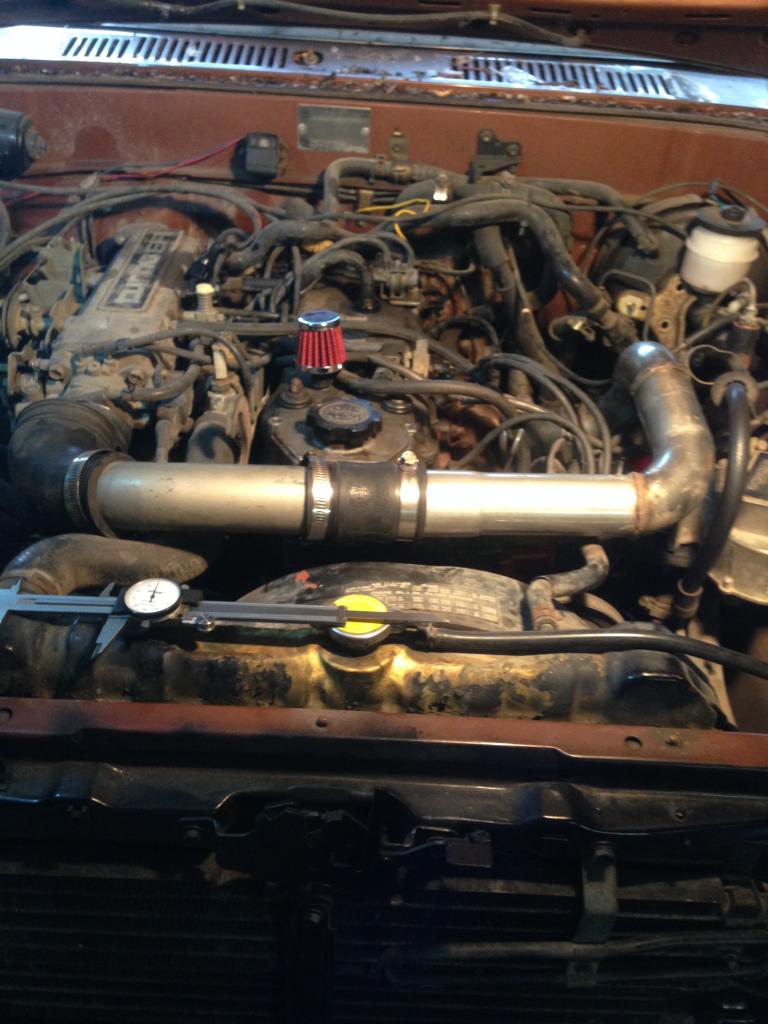
Yeah I found an AFM out of a '92 Camry V6 that I'm gonna swap in. It's 3" where stock 22re's are 2.75 (not 100% but the Camrys bigger for sure).
I've read about the supra afm swap but then found this Camry one which matches the rest of my 3" intake. Guess the overall length and bulk is just gonna have to be fine.
Plus it was free. Hahaha 😜😝
So yeah, got the Camry afm and redid my intake (preturbo) and working on fabing up my post turbo 3". Removing some clutter from under the hood. Wires and other crap the PO installed.
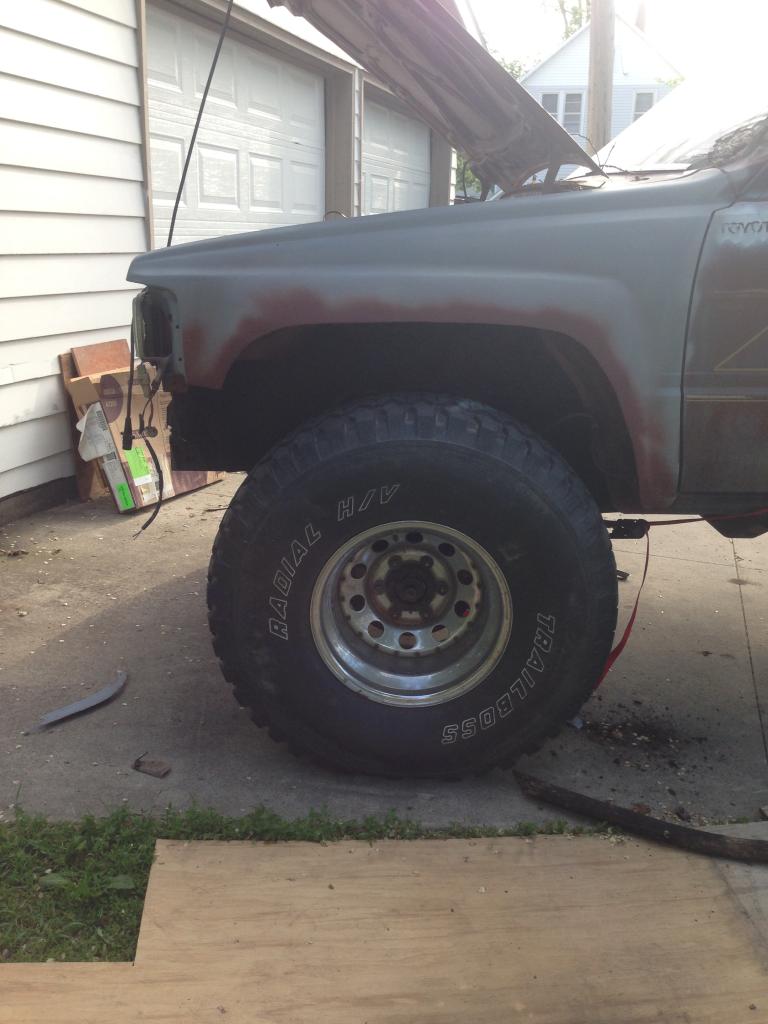
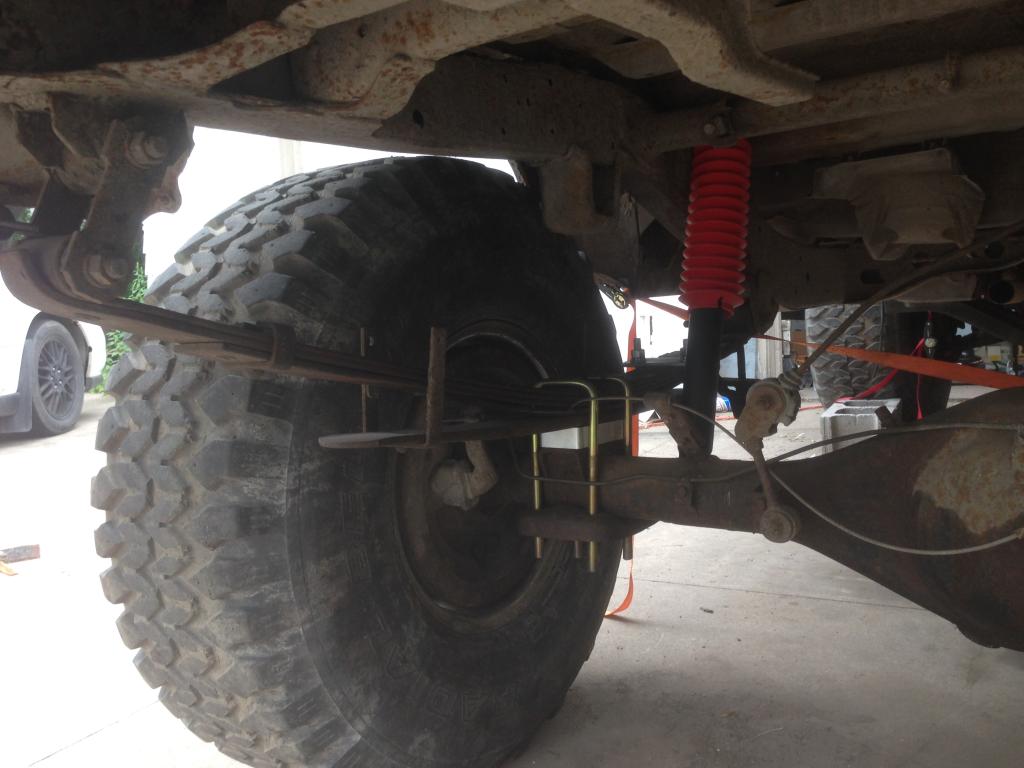
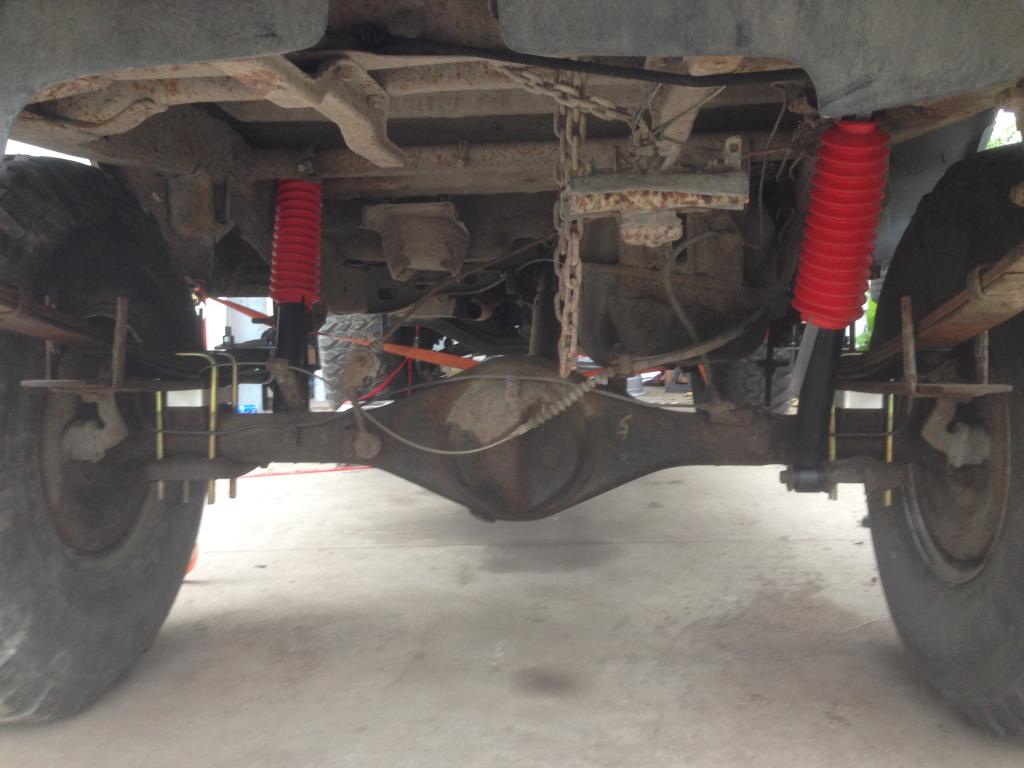
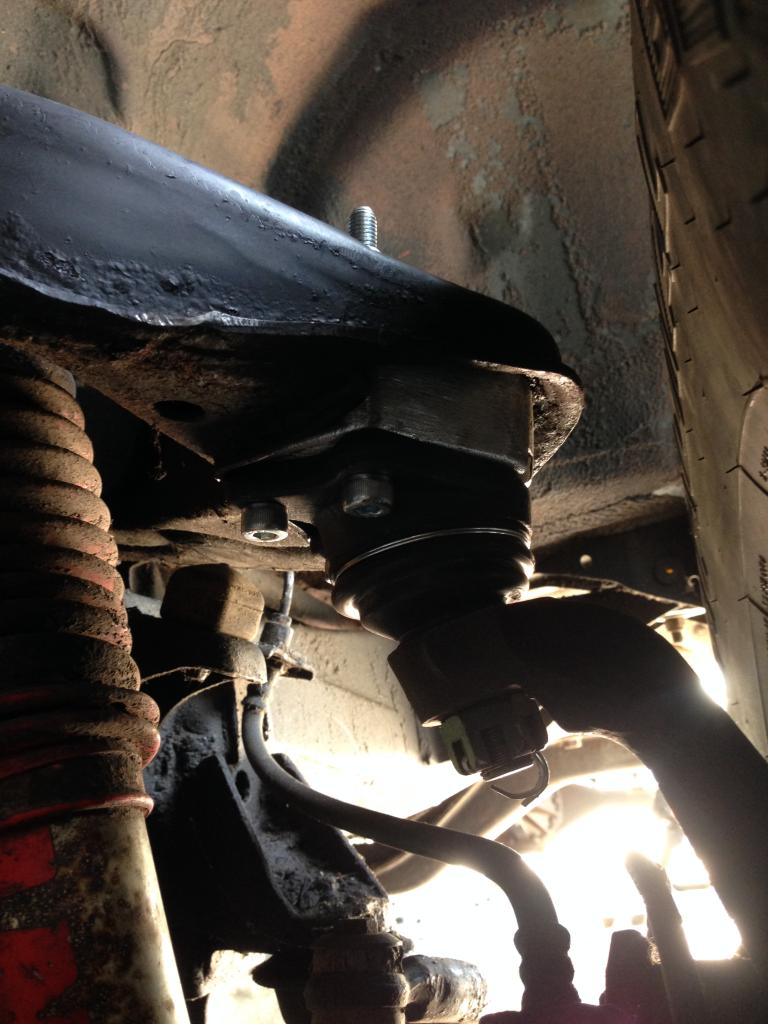
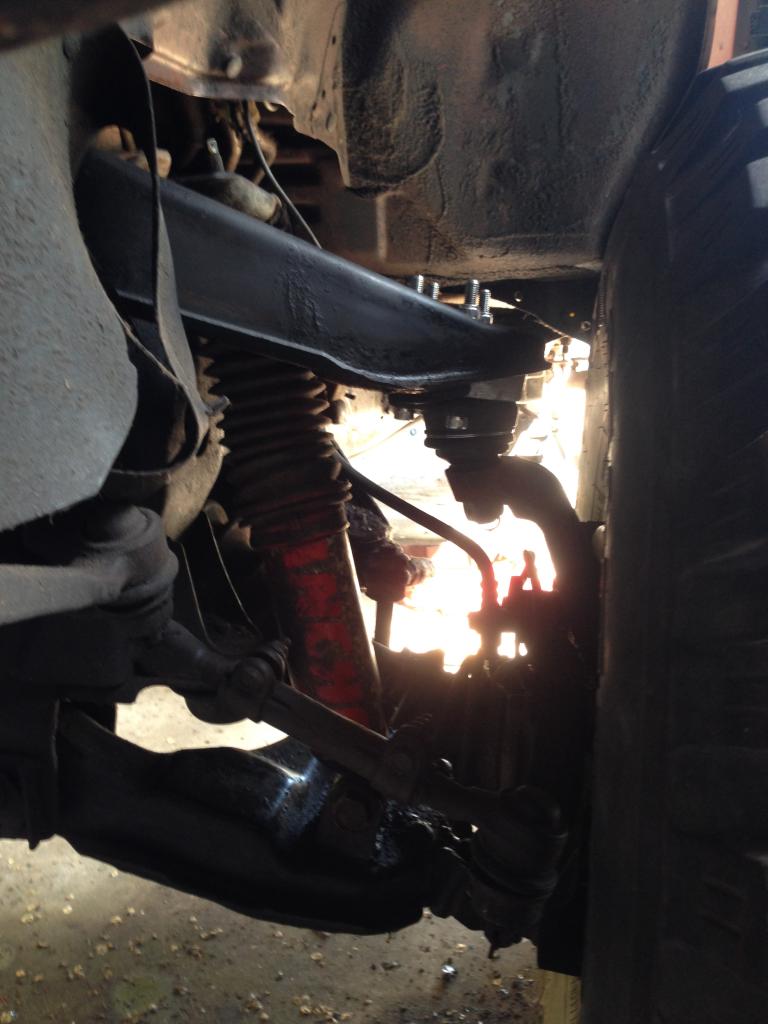
I also forgot to mention I put a 2" lift in around the time I installed the tires.
2.5" BJ spacers and an inch block with 2" add-a-leaf. New shocks. Gonna cut the tire carrier out and clean up the rear soon.
Yeah I found an AFM out of a '92 Camry V6 that I'm gonna swap in. It's 3" where stock 22re's are 2.75 (not 100% but the Camrys bigger for sure).
I've read about the supra afm swap but then found this Camry one which matches the rest of my 3" intake. Guess the overall length and bulk is just gonna have to be fine.
Plus it was free. Hahaha 😜😝
So yeah, got the Camry afm and redid my intake (preturbo) and working on fabing up my post turbo 3". Removing some clutter from under the hood. Wires and other crap the PO installed.
I also forgot to mention I put a 2" lift in around the time I installed the tires.
2.5" BJ spacers and an inch block with 2" add-a-leaf. New shocks. Gonna cut the tire carrier out and clean up the rear soon.
Jul 12, 2014 | 12:25 PM
#15
Thread Starter
Registered User
Joined: May 2011
Posts: 94
Likes: 0
From: North Dakota
Well was having some misfiring issues, determined it was the used ignition parts that I swapped in. Gonna just buy new cap and wires and see if that helps.
But for now, I'm working on interior. Swapping in the grey interior over the ugly brown.
Also, gonna intercool the intake cause, well, might as well and Looks bad ass. Ha ha.
So just ordered the front mount today and will put that in next week.
Would be nice to have the intercooler on for future use. This turbo and set up wouldn't really need the intercooler but I'd like to upgrade later and run much more boost than I am now.
Jul 14, 2014 | 07:11 AM
#16
Thread Starter
Registered User
Joined: May 2011
Posts: 94
Likes: 0
From: North Dakota
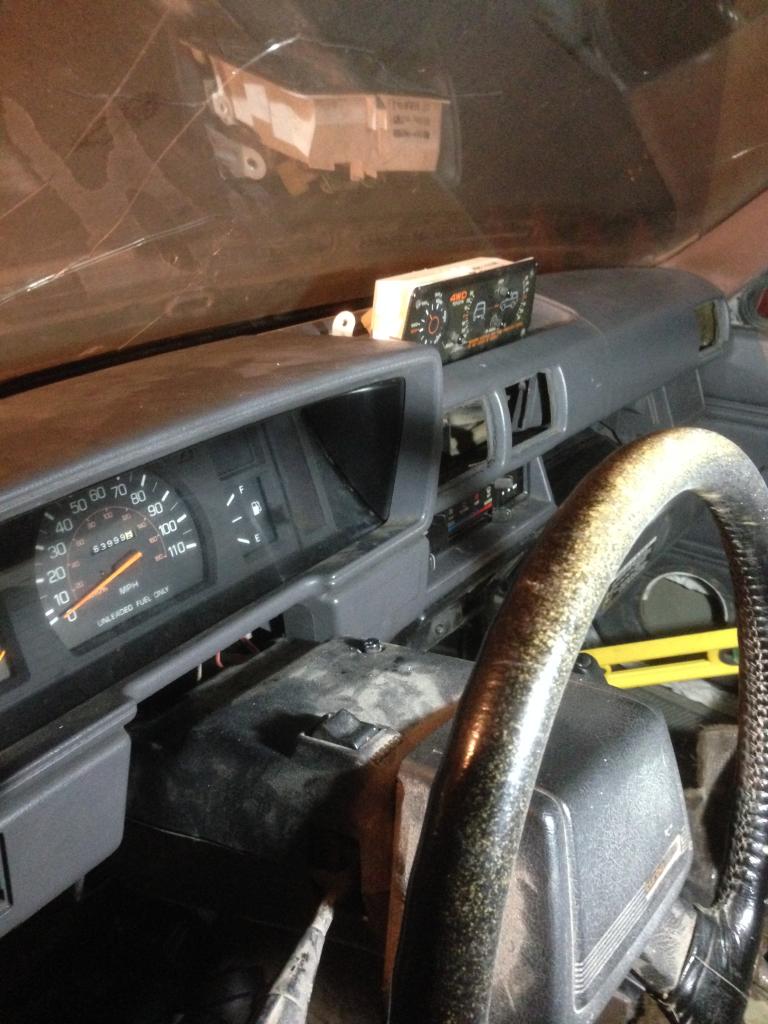
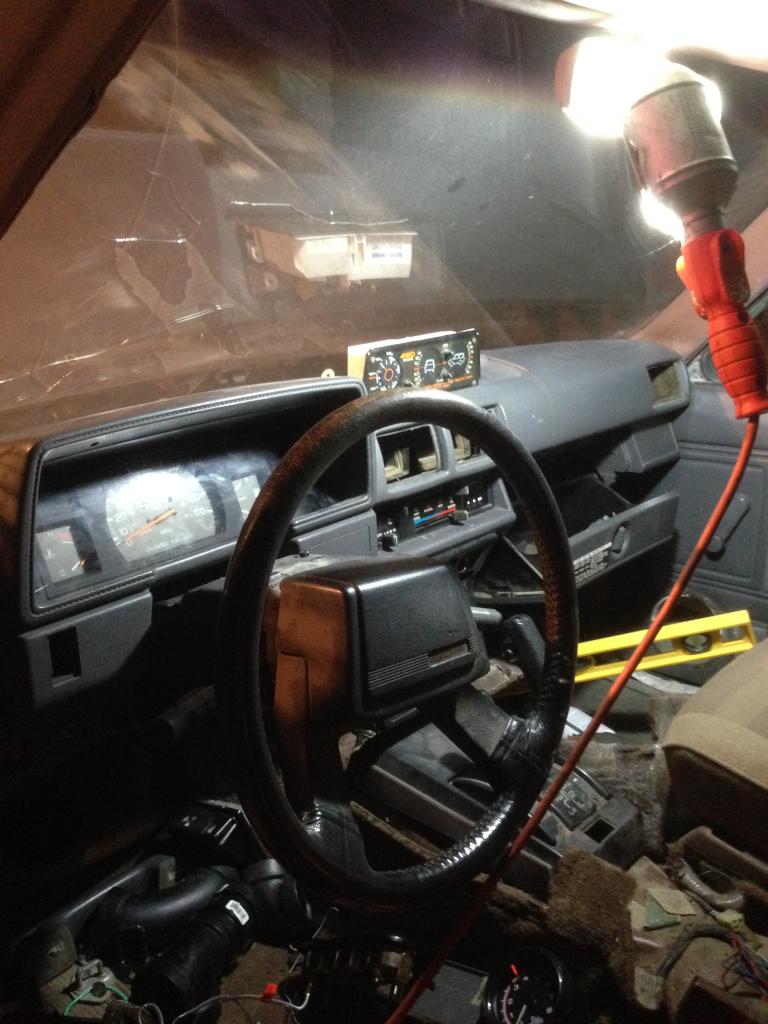
Well got 85% of the grey interior swapped in. Looks much better in my opinion.
I'm not a fan of the electronic cluster, so decided if use the one from my parts truck. Just has MPH, temp and fuel but comparing the two I see they only share one connector besides the speedo input. I don't have any good wiring diagrams as of now but I'll find some cause I want to use these aftermarket gauges I bought.
Tach
Engine temp
Battery volt
Oil pressure
And a boost gauge
Any help with wire identification would be helpful. Or a cluster wiring diagram.
Here's some pics of the "new" interior.
Jul 15, 2014 | 11:37 AM
#17
Thread Starter
Registered User
Joined: May 2011
Posts: 94
Likes: 0
From: North Dakota
Anyone ever try using an electric fan and ditching the stock one?
Picked up a few different styles that I'm gonna try run.
Also picked up some oil cooler lines. Is it ok to install it directly before the turbo? Like front mount and feed line right to the turbo. My turbo is just oil cooled and I think this would help keep it a little cooler.
Picked up a few different styles that I'm gonna try run.
Also picked up some oil cooler lines. Is it ok to install it directly before the turbo? Like front mount and feed line right to the turbo. My turbo is just oil cooled and I think this would help keep it a little cooler.
Jul 16, 2014 | 06:54 PM
#18
Thread Starter
Registered User
Joined: May 2011
Posts: 94
Likes: 0
From: North Dakota
Well still waiting on the intercooler. Ugh someone's getting a bad review.
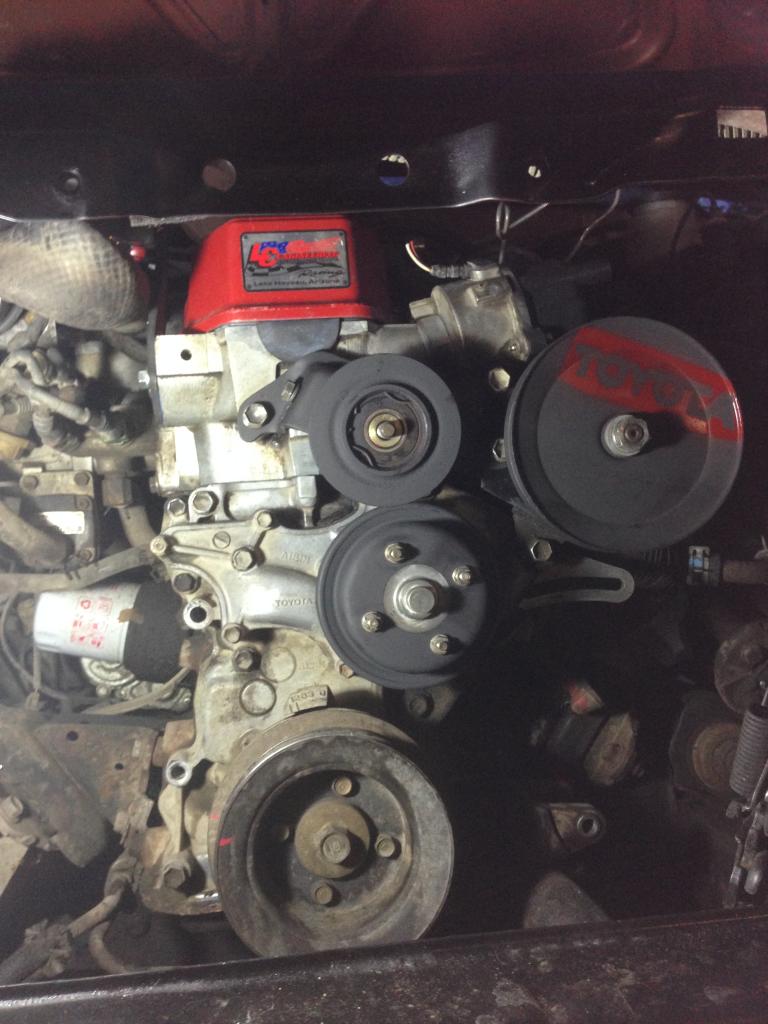
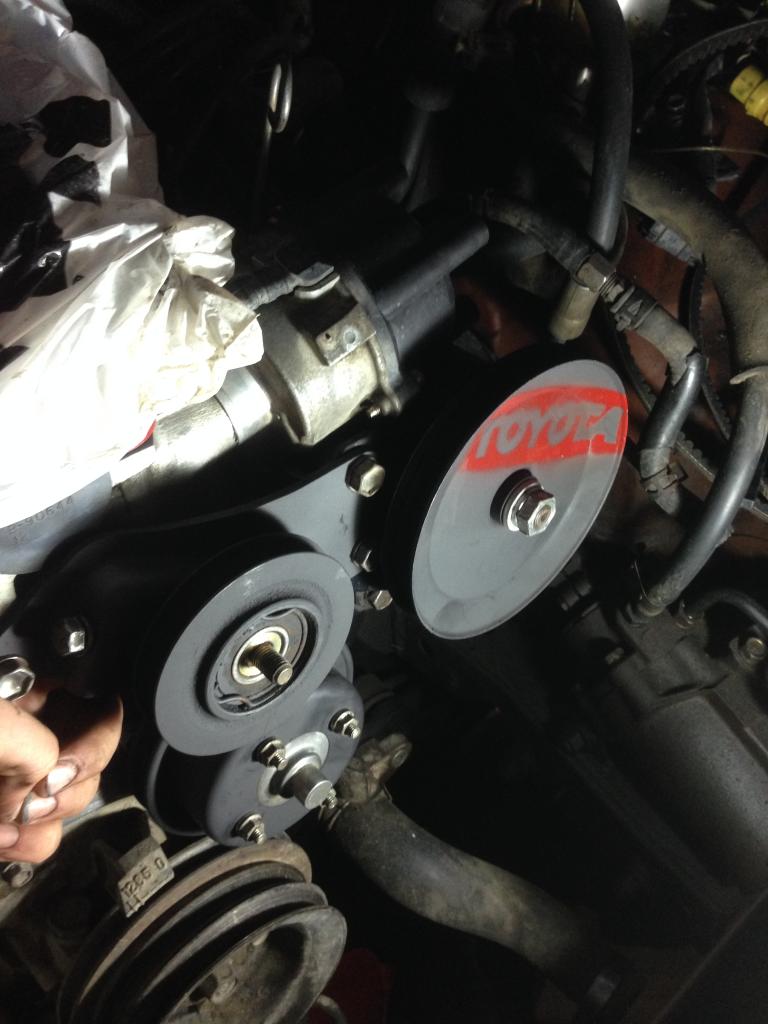
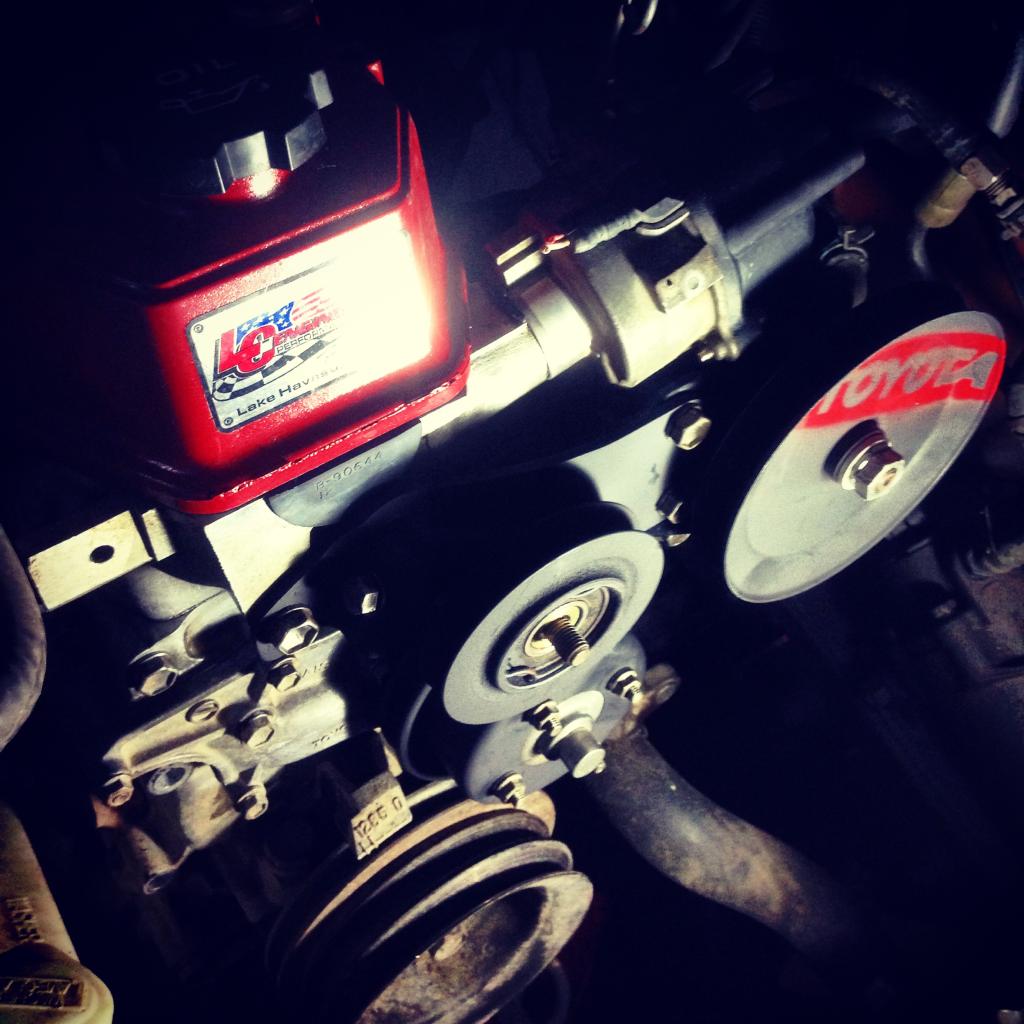
But stripped down the front of the motor and cleaned/repainted the pullies flat black. Added a bit of personality too 😜
Had to clean that block though. It was covered in 20 year old grime.
Pulled the alternator, AC compressor and deleted the fan/clutch. Gonna start the GM alternator swap tomorrow. Then install the radiator with the electric fan.
Jul 16, 2014 | 07:16 PM
#19
Thread Starter
Registered User
Joined: May 2011
Posts: 94
Likes: 0
From: North Dakota

Also, bought a new cap and wires cause I was having some slight misfiring issues. Shouldn't of reused parts from a truck that didn't run in the first place. Well lesson learned.
Anyone know a good coil to run? Is MSD the best?
Not looking for for the $900 system. Just a good upgrade.
Or
Something from a junkyard? Like a "better" one off a chevy/ford/Mazda/etc ?
I don't know just thinking out loud. Cause I work at a junkyard and get free parts ✌️😝
 Jul 16, 2014 | 09:12 PM
#20
Thread Starter
Registered User
Joined: May 2011
Posts: 94
Likes: 0
From: North Dakota
Well my "dumbed down" cluster only has MPH, Fuel and coolant temp (which is what I want) My other aftermarket gauge cluster has oil pressure, batt voltage, and a temp gauge with an actual temp reading vs the stock guessing gauge. So I removed the stock temp and "replaced" it with this boost gauge. Not done yet but got the whole cut and test fixed.
Got some cool ideas for the main cluster. Check back later for an update.
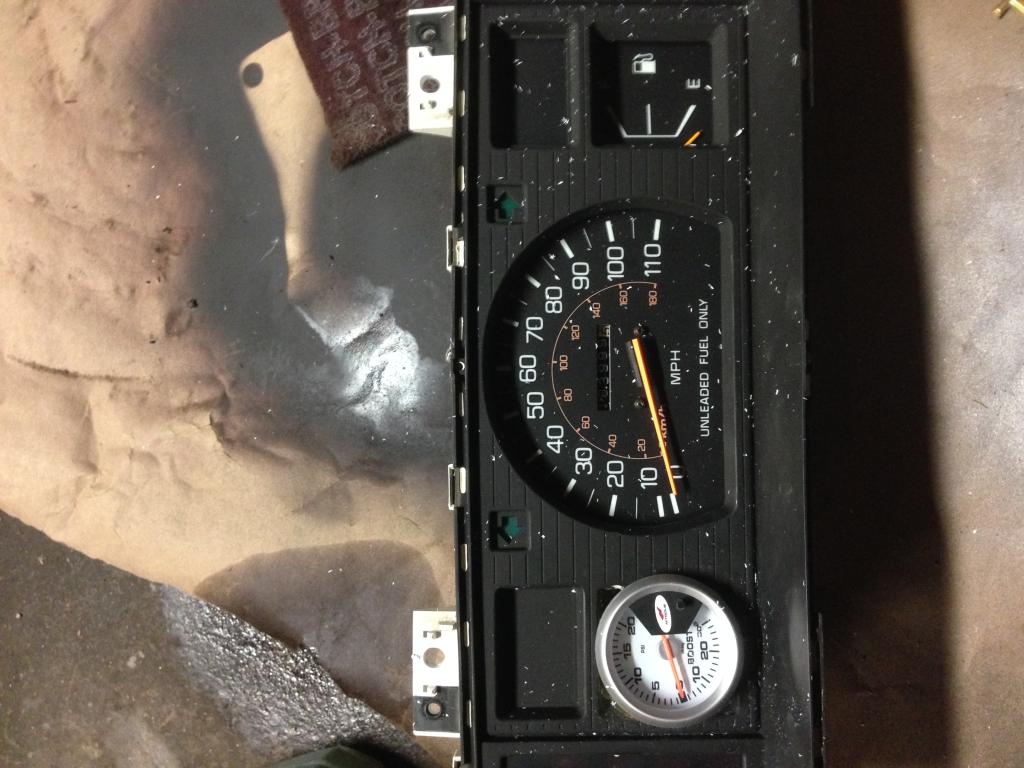
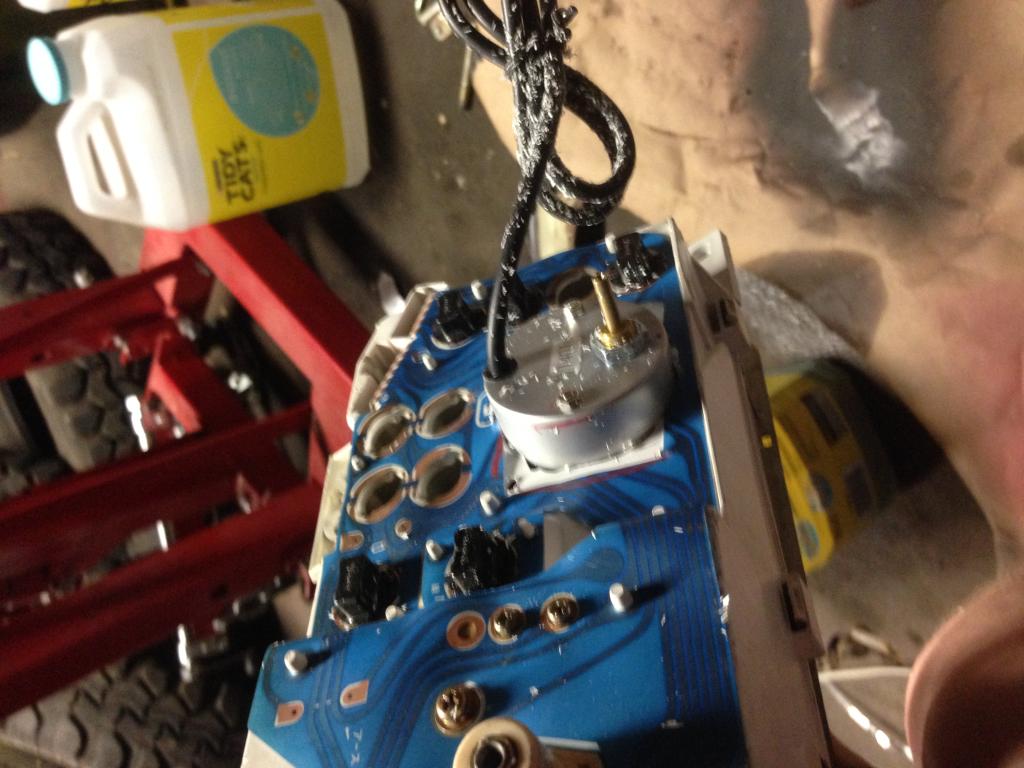
Got some cool ideas for the main cluster. Check back later for an update.


