
2ND Gen TJM17 on a 3rd Gen 4Runner
 Jul 6, 2009 | 06:27 PM
#1
Thread Starter
Registered User
Joined: Oct 2006
Posts: 148
Likes: 0
From: Christiansburg, VA
2ND Gen TJM17 on a 3rd Gen 4Runner
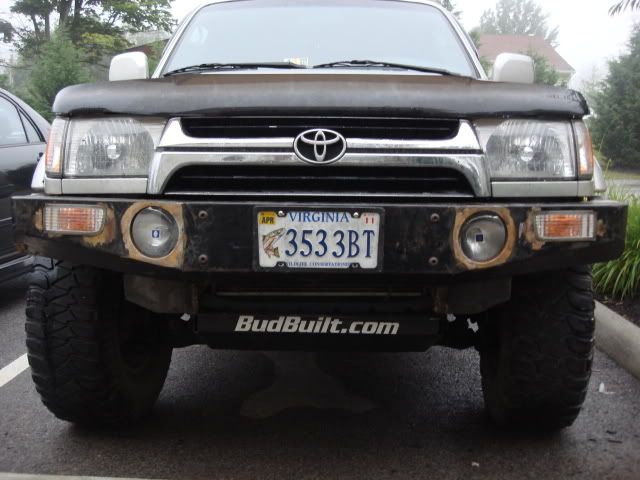
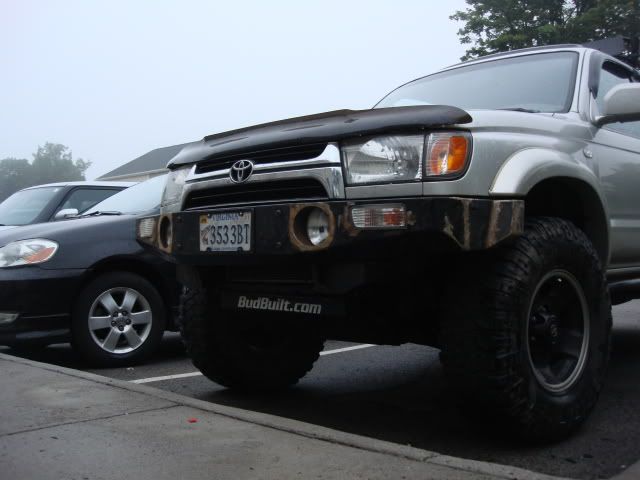
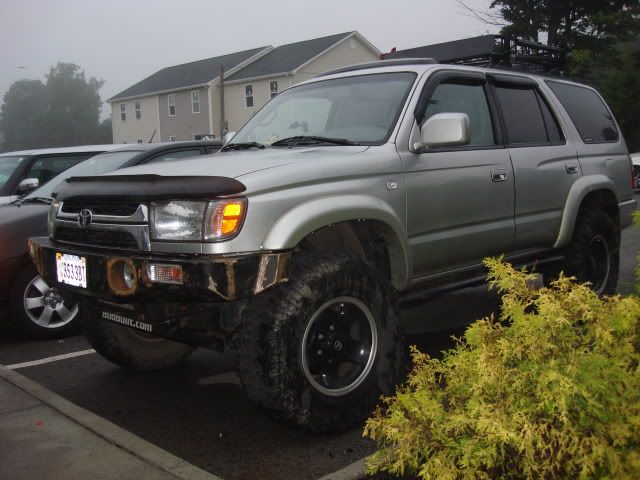
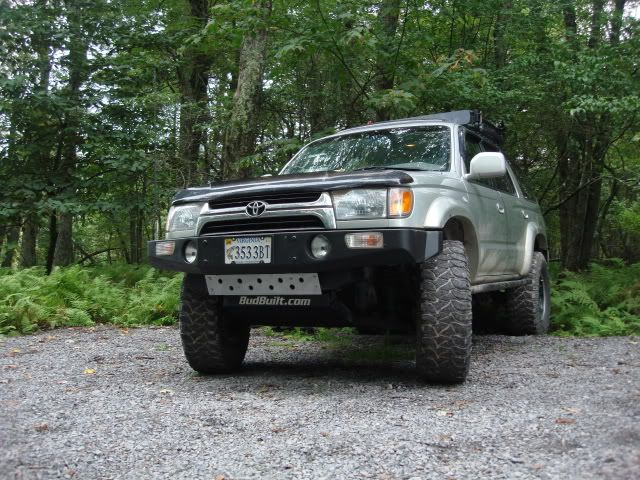
I picked up a 2nd gen TJM17 on the cheap. It was a bit beat up and the mounts were bent, but I figured it would save me a bit of fabrication work if it would fit. It was approx. 66.5� long, which was a couple inches shy of extending to the edge of the flares on my 2001 sr5 with the fat flares. I spent a day figuring how I would rebuild the mounts and address the length issue. Also, I wanted driving lights inset and I wanted to change the blinker lights. Here is some pics from when I was mocking it up and developing ideas for mounting.
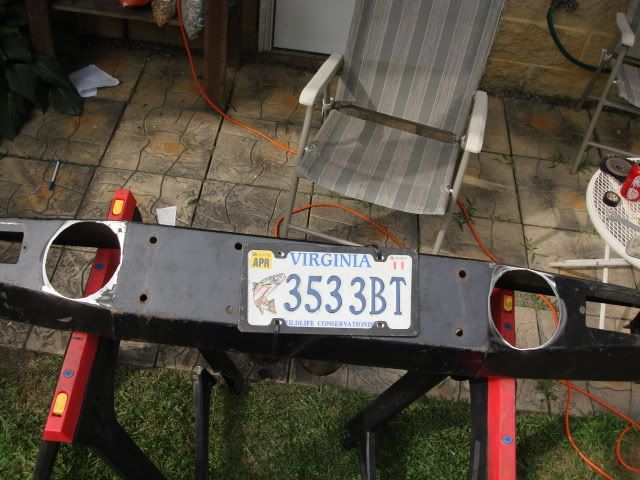
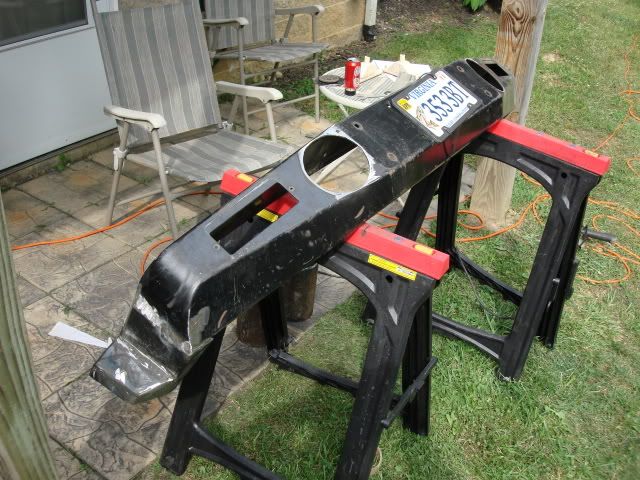
Old stock frame:
The Side wings are off in this pic:
I borrowed a friends welder, used an angle grinder to do all the cutting, and a hand drill for all the holes. Let me say that this was the first project I have ever done the welding on and really only had what information I have gleaned off this website. With a few ideas I set to work.
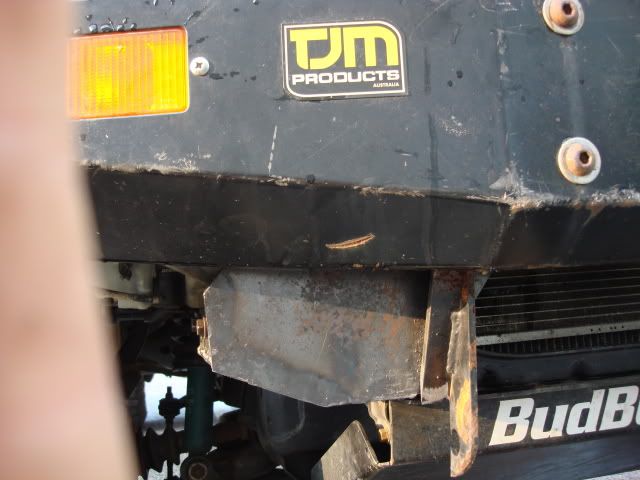
The end cap mod:
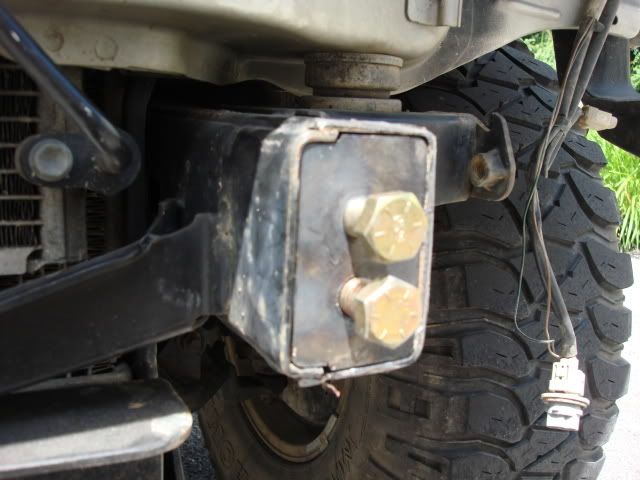
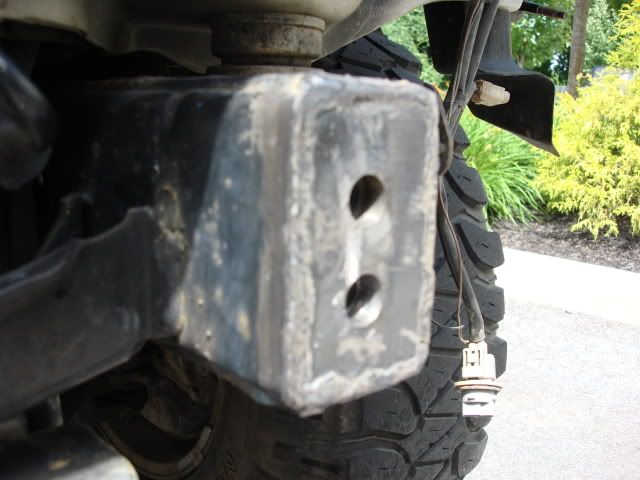
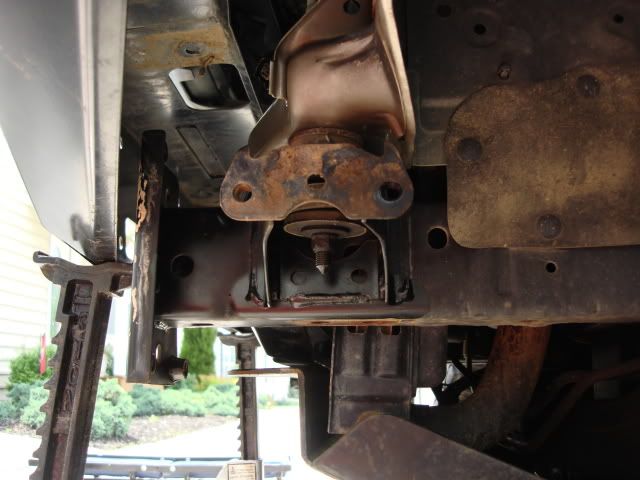
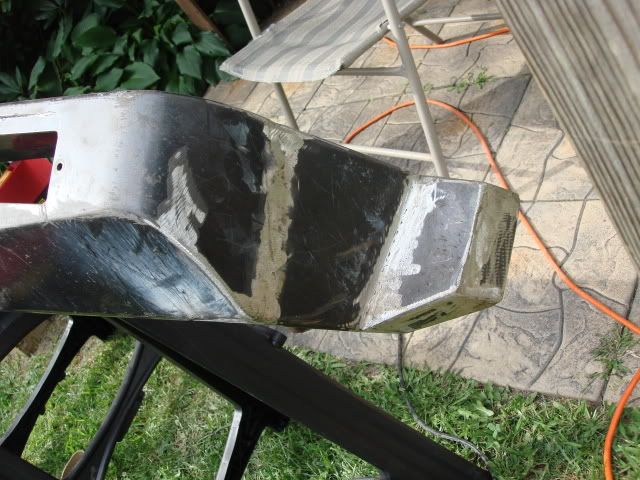
The start of the mounts:
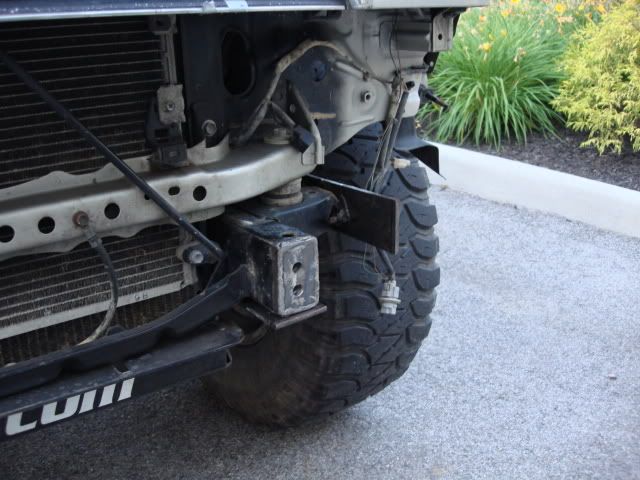
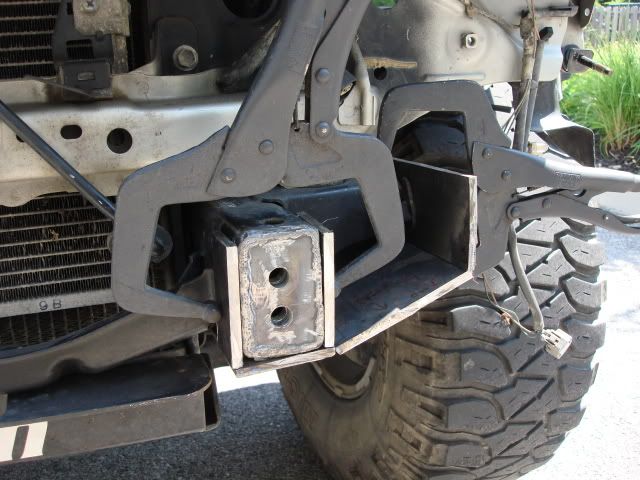
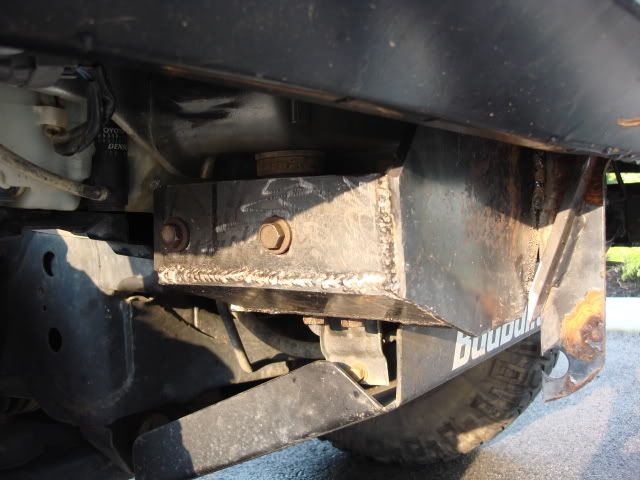
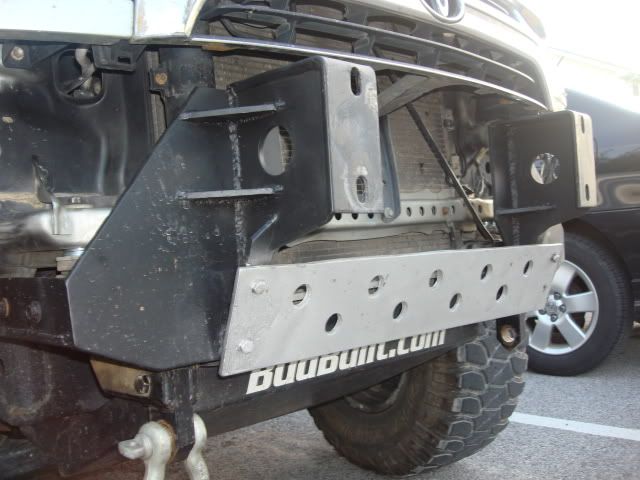
I utilized the 4 stock bolt locations and the eventually the 2 additional end cap bolt locations per side. A flat plate was welded to all the pieces shown in the pic. above. You can see the bottom of it in the pic below. Then I cut the TJM mount to weld to that front plate with reinforced gussets on either side.
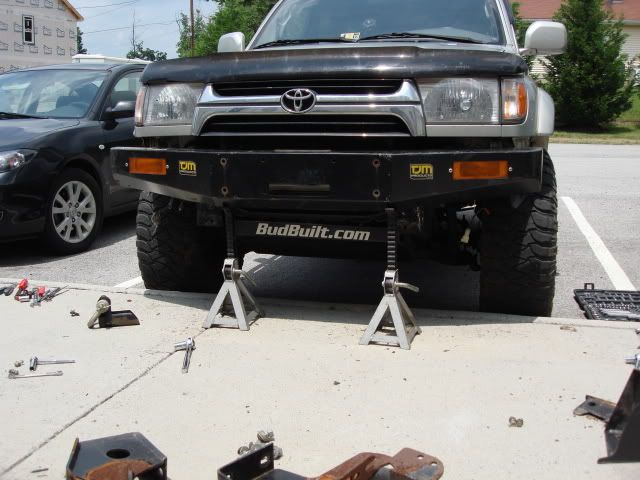
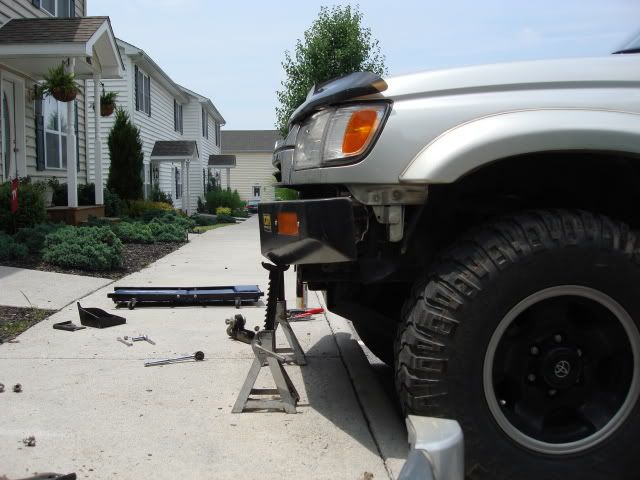
The bumper is on.
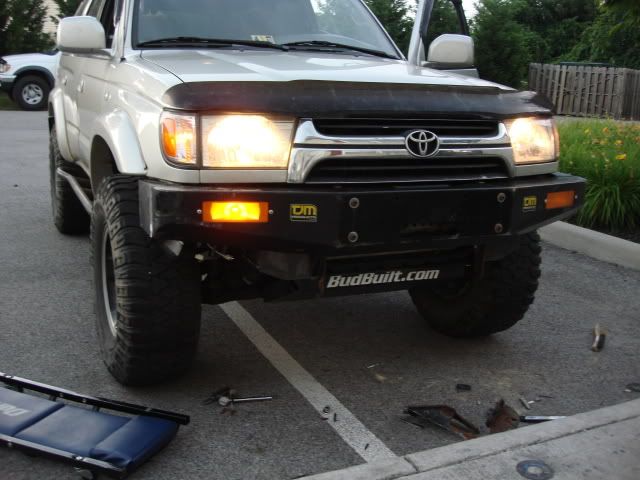
Too short and I figured I would make it 1 piece rather than the stock 3 piece that is bolted together.
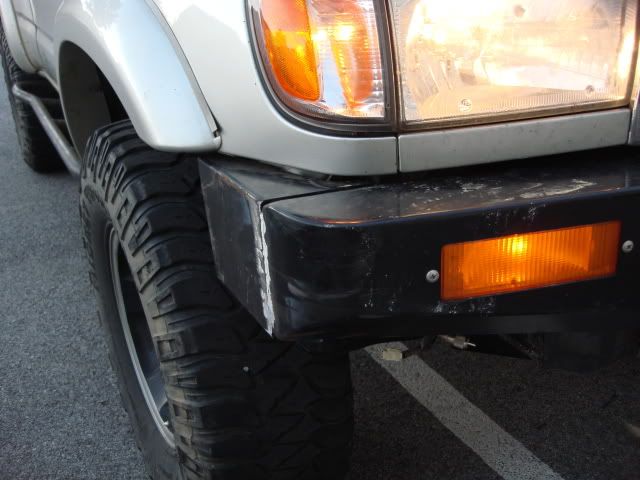
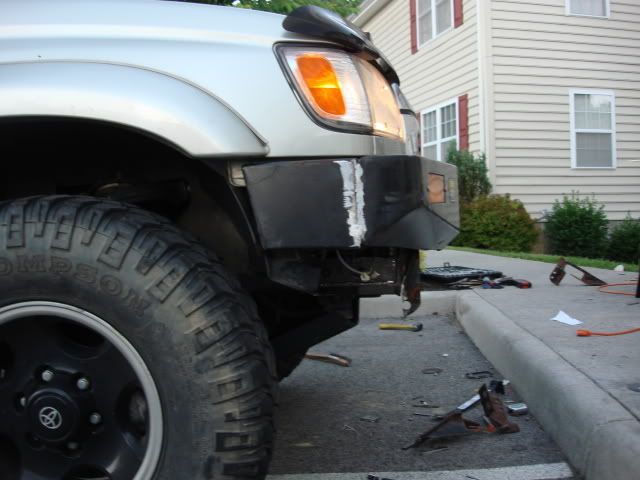
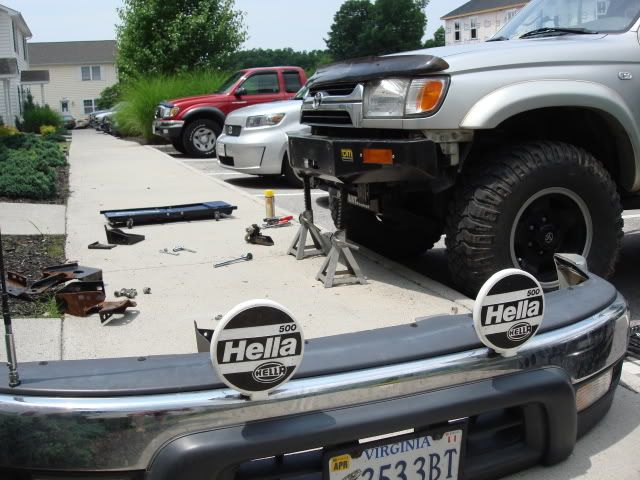
I then set to work on incorporating the driving lights inset into the bumper, extending the flares, and changing the blinker lights to the stock ones for a little different look.
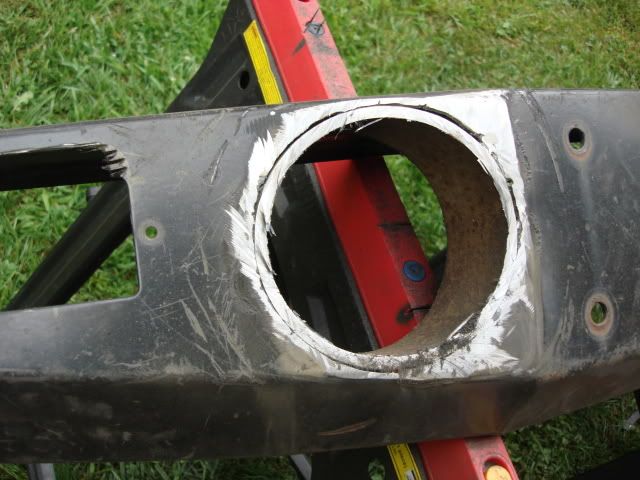
I used 5� pipe for the light insets, and my hella 500s do not fit them but I mounted them in there anyway since I will not be buying new lights for a bit.
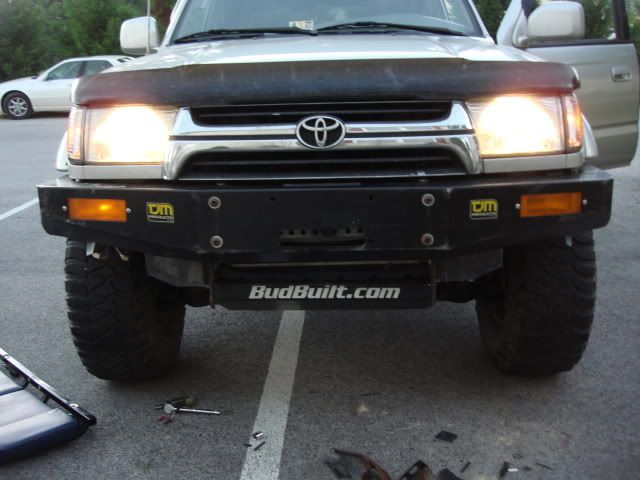
Rain on the last day of the build sucked, but I was able to get it to a decent stopping point. I have a wedding coming up and not a single free weekend until sept, so this project is headed to the back burner. I am going to do a quick rattle can job on it to help dress it up until I can get back to it, but here it is.
Future plans:
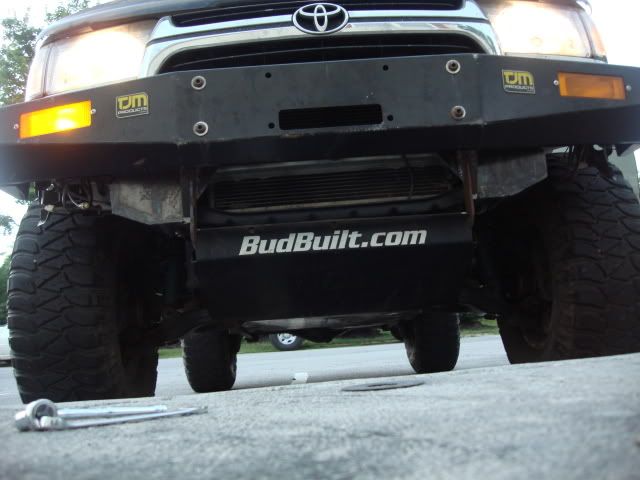
I plan on putting some shackle points on the front plate of the mount near the frame. Straighten the truck sheet metal under the passenger side light so it does not look crooked (a highlift under the sheet metal and self tapping screws were not effective) or perhaps remount the bumper lower so there is more gap. I need to mount a plate with air vents to help protect the lower radiator and will probably tie it into the budbuilt skids. There is already very convenient diagonal braces on the lower portion of the tjm mounts that I retained for this purpose. Then I will likely get it lineX�d.
Final thoughts:
I put a ton of hard work into this so far, approx. 40 hours. It would have been helpful to have the proper tools and another person to help, but was able to accomplish this alone with next to no experience. I have about $250 invested in the tjm, 1/4" plate, 12" of 1/4" x 5" diameter pipe, and consumables (grinding disks, welding wire, {don't ask about drill bits}, etc). In my opinion, the approximately $500 (give or take, also add shipping) price tag the tjm had when it was sold in the US was a steal, but I am very glad that I will have a unique bumper that I built.
I hope this inspires someone to take on a project they have been thinking about, but are not sure they can accomplish. I know I am happy that I did.

Old stock frame:
The Side wings are off in this pic:
I borrowed a friends welder, used an angle grinder to do all the cutting, and a hand drill for all the holes. Let me say that this was the first project I have ever done the welding on and really only had what information I have gleaned off this website. With a few ideas I set to work.
The end cap mod:
The start of the mounts:
I utilized the 4 stock bolt locations and the eventually the 2 additional end cap bolt locations per side. A flat plate was welded to all the pieces shown in the pic. above. You can see the bottom of it in the pic below. Then I cut the TJM mount to weld to that front plate with reinforced gussets on either side.
The bumper is on.
Too short and I figured I would make it 1 piece rather than the stock 3 piece that is bolted together.
I then set to work on incorporating the driving lights inset into the bumper, extending the flares, and changing the blinker lights to the stock ones for a little different look.
I used 5� pipe for the light insets, and my hella 500s do not fit them but I mounted them in there anyway since I will not be buying new lights for a bit.
Rain on the last day of the build sucked, but I was able to get it to a decent stopping point. I have a wedding coming up and not a single free weekend until sept, so this project is headed to the back burner. I am going to do a quick rattle can job on it to help dress it up until I can get back to it, but here it is.
Future plans:
I plan on putting some shackle points on the front plate of the mount near the frame. Straighten the truck sheet metal under the passenger side light so it does not look crooked (a highlift under the sheet metal and self tapping screws were not effective) or perhaps remount the bumper lower so there is more gap. I need to mount a plate with air vents to help protect the lower radiator and will probably tie it into the budbuilt skids. There is already very convenient diagonal braces on the lower portion of the tjm mounts that I retained for this purpose. Then I will likely get it lineX�d.
Final thoughts:
I put a ton of hard work into this so far, approx. 40 hours. It would have been helpful to have the proper tools and another person to help, but was able to accomplish this alone with next to no experience. I have about $250 invested in the tjm, 1/4" plate, 12" of 1/4" x 5" diameter pipe, and consumables (grinding disks, welding wire, {don't ask about drill bits}, etc). In my opinion, the approximately $500 (give or take, also add shipping) price tag the tjm had when it was sold in the US was a steal, but I am very glad that I will have a unique bumper that I built.
I hope this inspires someone to take on a project they have been thinking about, but are not sure they can accomplish. I know I am happy that I did.

Trending Topics
 Sep 25, 2009 | 07:14 PM
#9
Registered User
Joined: Jul 2003
Posts: 405
Likes: 0
From: Clarkston, WA
The pipe idea for the lights was probably from shrockworks but still cool!
Great job man cant wait to see the final product. I would like to build my self some bumpers....I have the skill and the anal characteristics to make some nice bumpers I just don't have access to a welder or shop at the moment
Great job man cant wait to see the final product. I would like to build my self some bumpers....I have the skill and the anal characteristics to make some nice bumpers I just don't have access to a welder or shop at the moment
 Jan 19, 2010 | 04:44 PM
#12
Thread Starter
Registered User
Joined: Oct 2006
Posts: 148
Likes: 0
From: Christiansburg, VA
The pipe idea for the lights was probably from shrockworks but still cool!
Great job man cant wait to see the final product. I would like to build my self some bumpers....I have the skill and the anal characteristics to make some nice bumpers I just don't have access to a welder or shop at the moment
Great job man cant wait to see the final product. I would like to build my self some bumpers....I have the skill and the anal characteristics to make some nice bumpers I just don't have access to a welder or shop at the moment
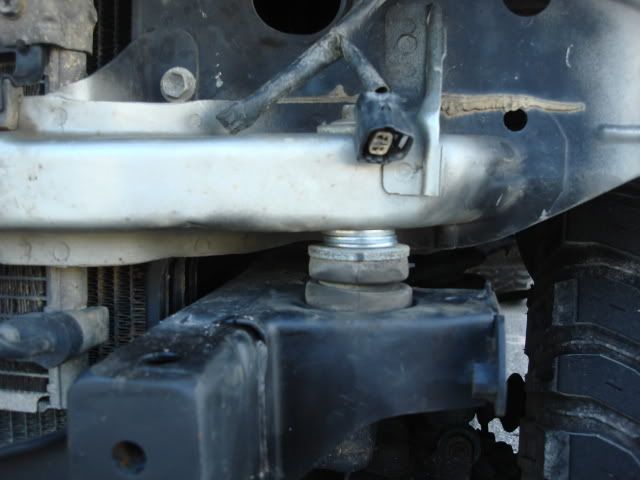
I am still not done: side supports need installed and shackle hangers need to be relocated to front of mounts.
Some additional pics of the mounts and paint.

And my dirty little secret as to how I increased the gap between the body and bumper.

Thread
Thread Starter
Forum
Replies
Last Post
RedRunner_87
95.5-2004 Tacomas & 96-2002 4Runners (Build-Up Section)
84
Jun 1, 2021 01:51 PM
FS[PacSouthWest]: 2- 8"3rd members:4.88 ratchet lockers,new setup kit, rear axle rebuild kit,diff armor
jerusry
Axles - Suspensions - Tires - Wheels
1
Oct 19, 2015 05:28 PM
Steezy96yota
86-95 Trucks & 4Runners (Build-Up Section)
1
Jul 6, 2015 10:00 AM


