
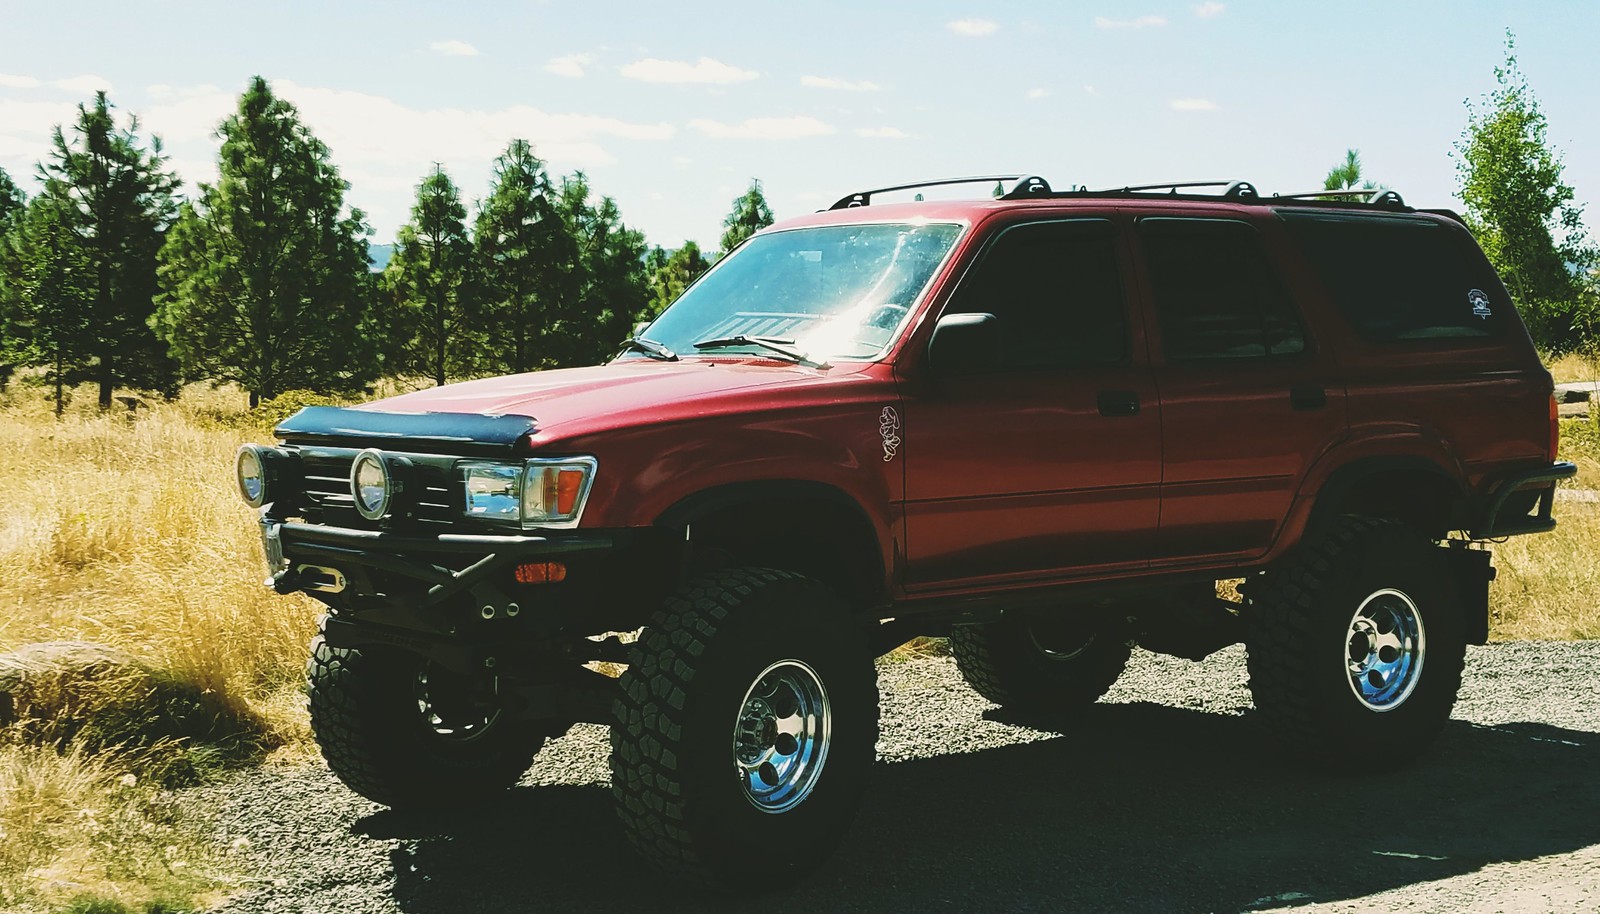
DIY Aluminum Roof Rack Build
 May 8, 2018 | 05:41 PM
#1
DIY Aluminum Roof Rack Build
I had a couple of PM's asking about materials I used for the roof rack I built for my 94 so figured I would post some info in a separate thread
**Dunno why flickr makes it looks like the pics are double posted, sorry ***
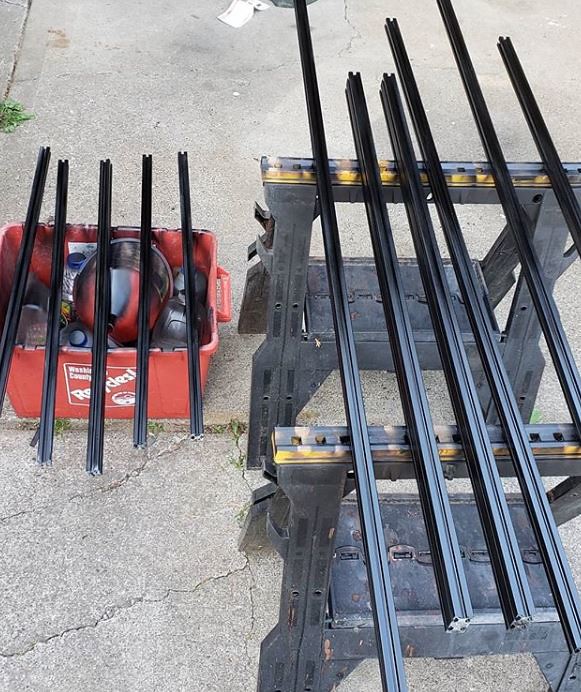
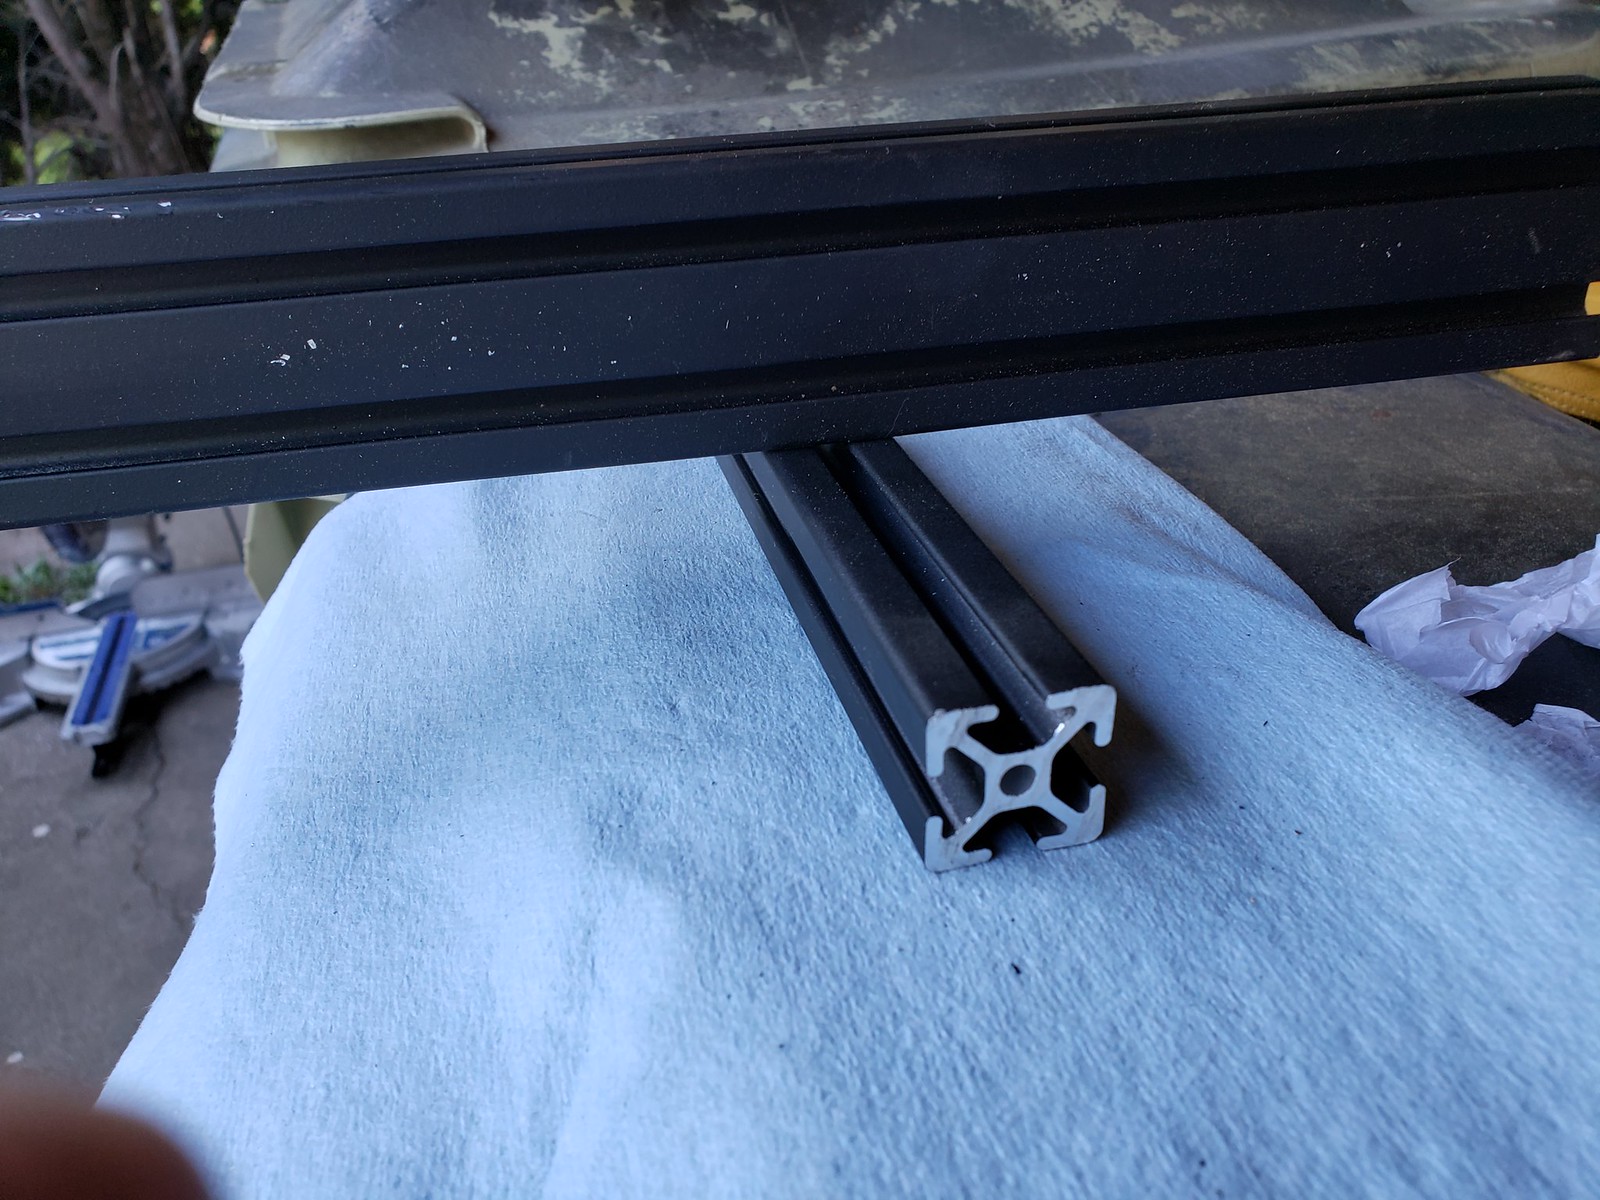
Aluminum used was a combination of 8020 series 10 1" wide, 1"x1" and 1"x2"
Some was purchased from Tnutz.com
https://www.tnutz.com/product-category/extrusions/
I purchased a couple of 145" length pieces from Fastenal.com
If you have a fastenal store near you, you can have it shipped to the store dirt cheap
https://www.fastenal.com/products/details/0961258?term=8020&r=~%7Ccategoryl1:%22600930%20Raw %20Materials%22%7C~%20~%7Ccategoryl2:%22602694%20E xtruded%20T-Slot%20Bars%209and%20Accessories%22%7C~%20~%7Ccate goryl3:%22602693%20Extruded%20T-Slot%20Bars%22%7C~
Some of the material I scored cheap on craigslist.
Brackets and inserts were purchased from tnutz.com
the double inserts are nice $0.30
https://www.tnutz.com/product/double-economy-t-nut-2/
single inserts $ 0.12
https://www.tnutz.com/product/econom...-6mm-10-serie/
corner brackets:
https://www.tnutz.com/product/2-hole...orner-bracket/
https://www.tnutz.com/product-catego...erie-brackets/
For the 1/4-20 bolts I used stainless allen panheads from my local Ace hardware.
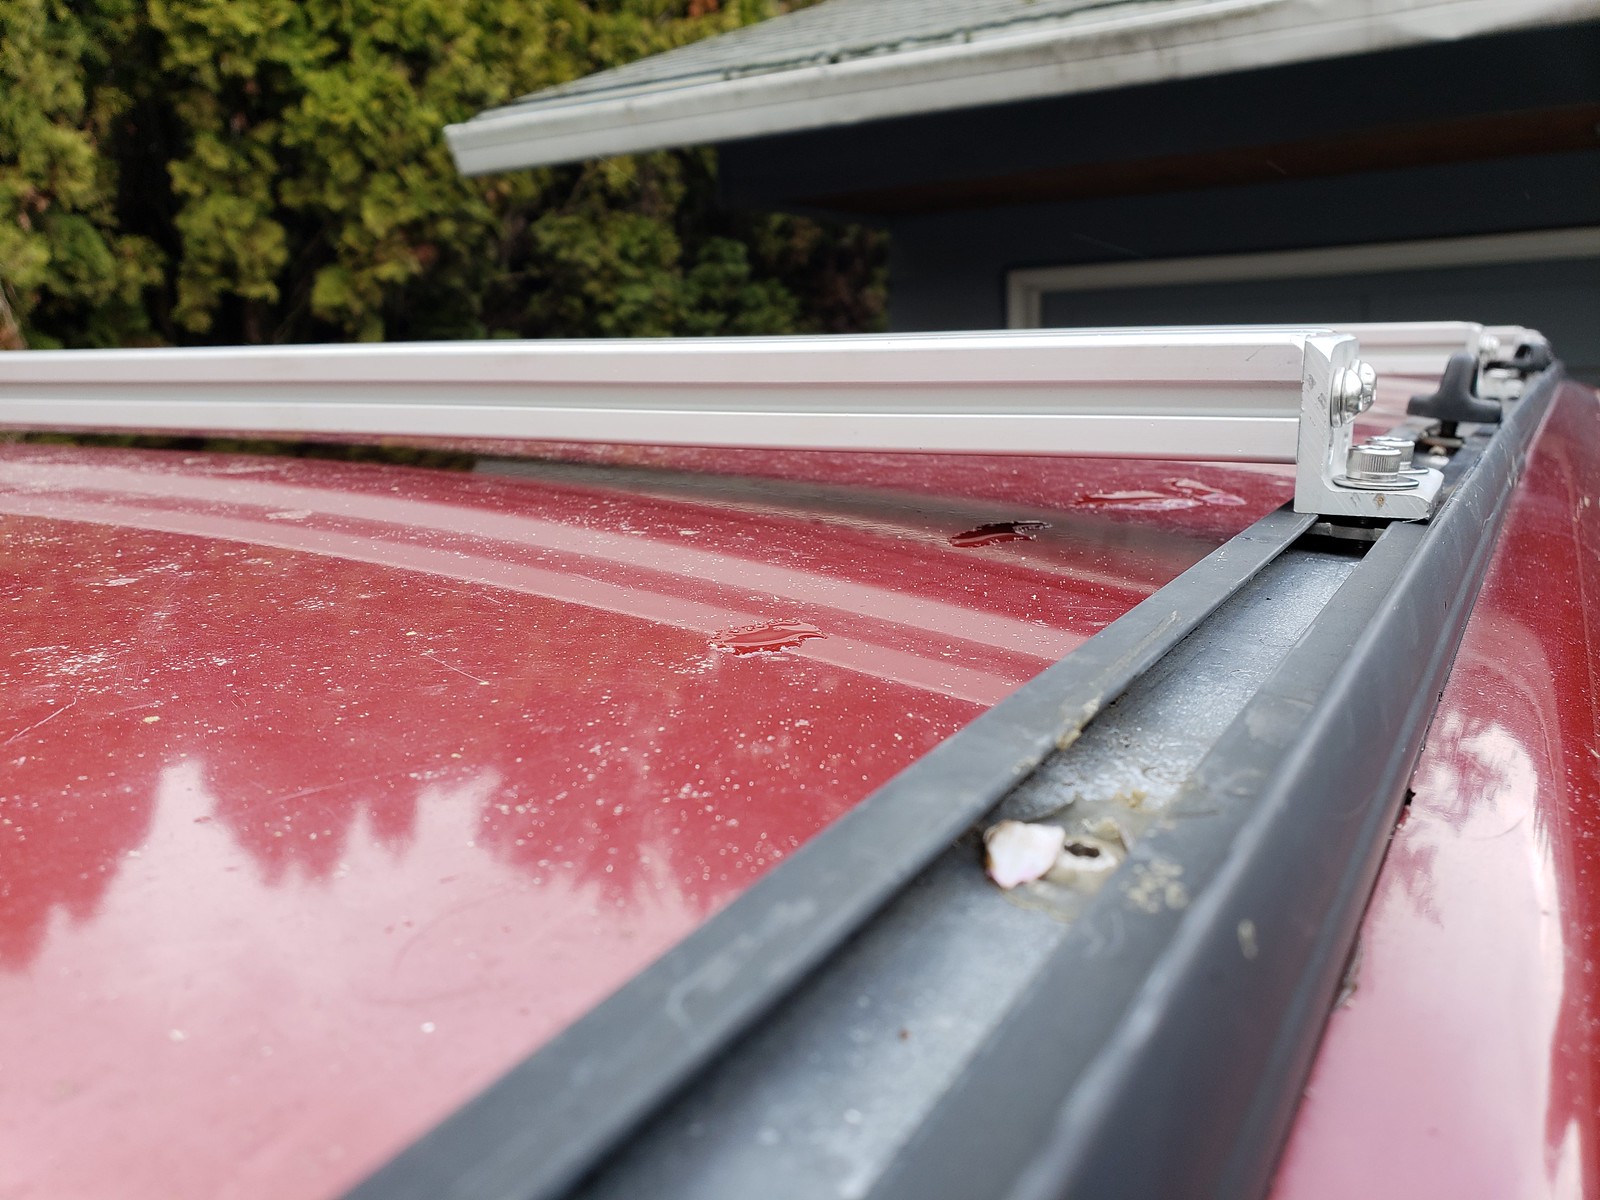
I had previously extended my factory mounts about 26" to add a 3rd factory crossmember
by https://www.flickr.com/photos/42814812@N06/, on Flickr
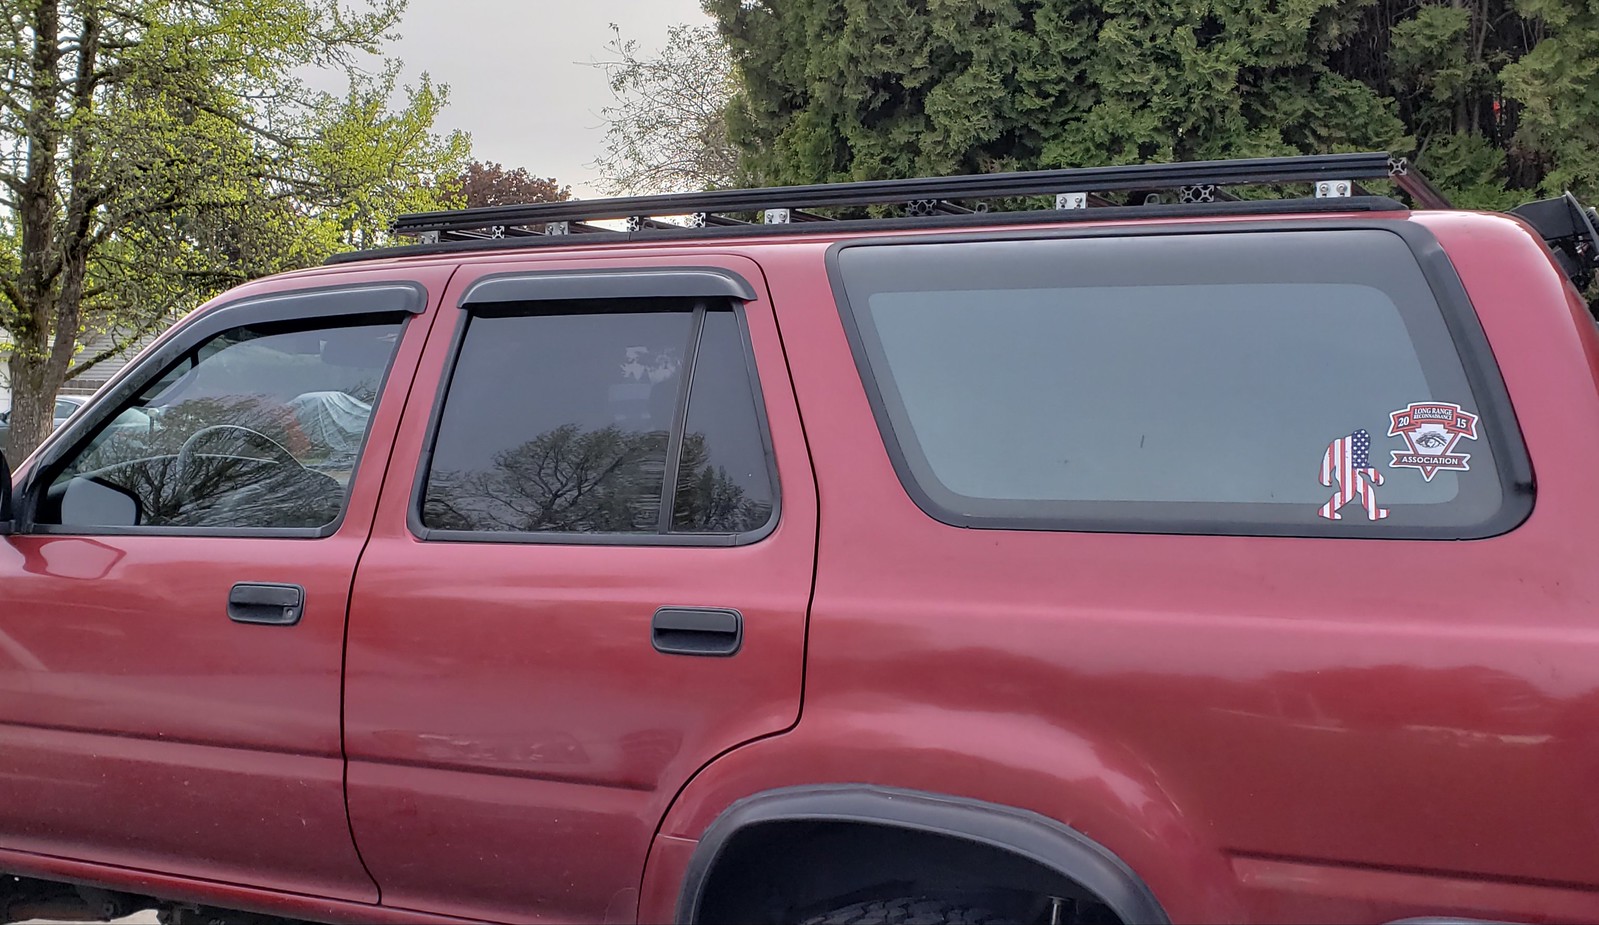
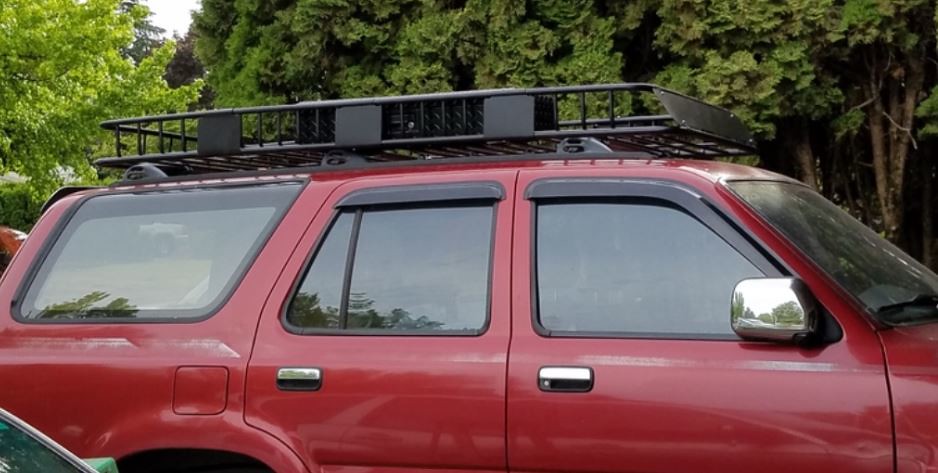
Heightwise it ended up being about 3" high
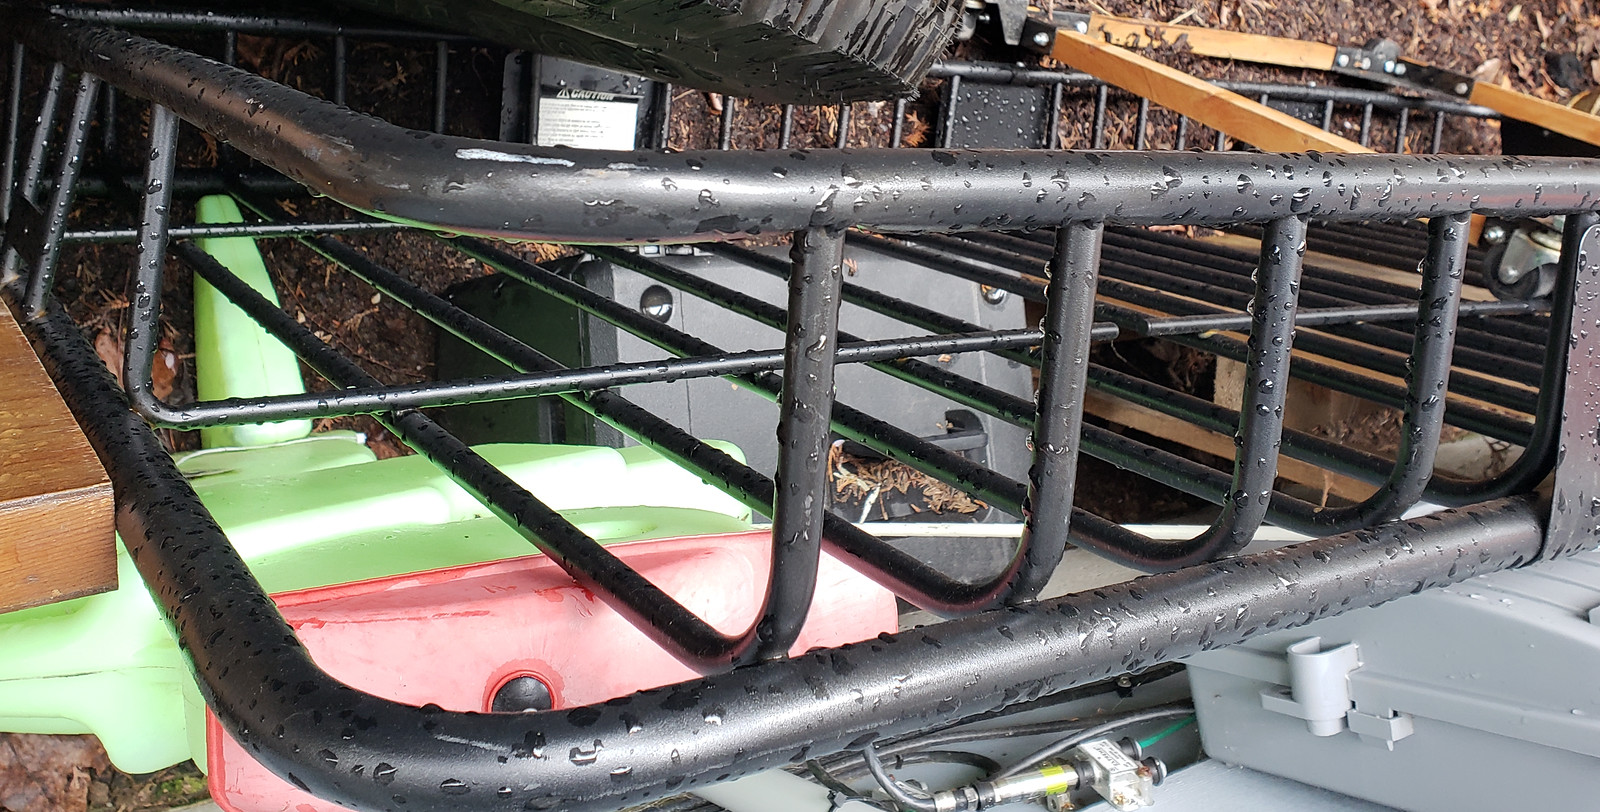
I used some S-track tie down rails for tie down points I had left over from my 81 Trekker project. You can find it on ebay, amazon or discount ramps
my rack ended up 72" by 35". You can go wider but I wanted mine to be the same width as the factory inner rail mounts.
You can cut this stuff with a hack saw, angle grinder with cut off wheel or a miter saw with a multiple use blade, make sure it is rated for aluminum or plastic. If you use a power tool make sure to wear proper PPE (safety disclaimer:violin
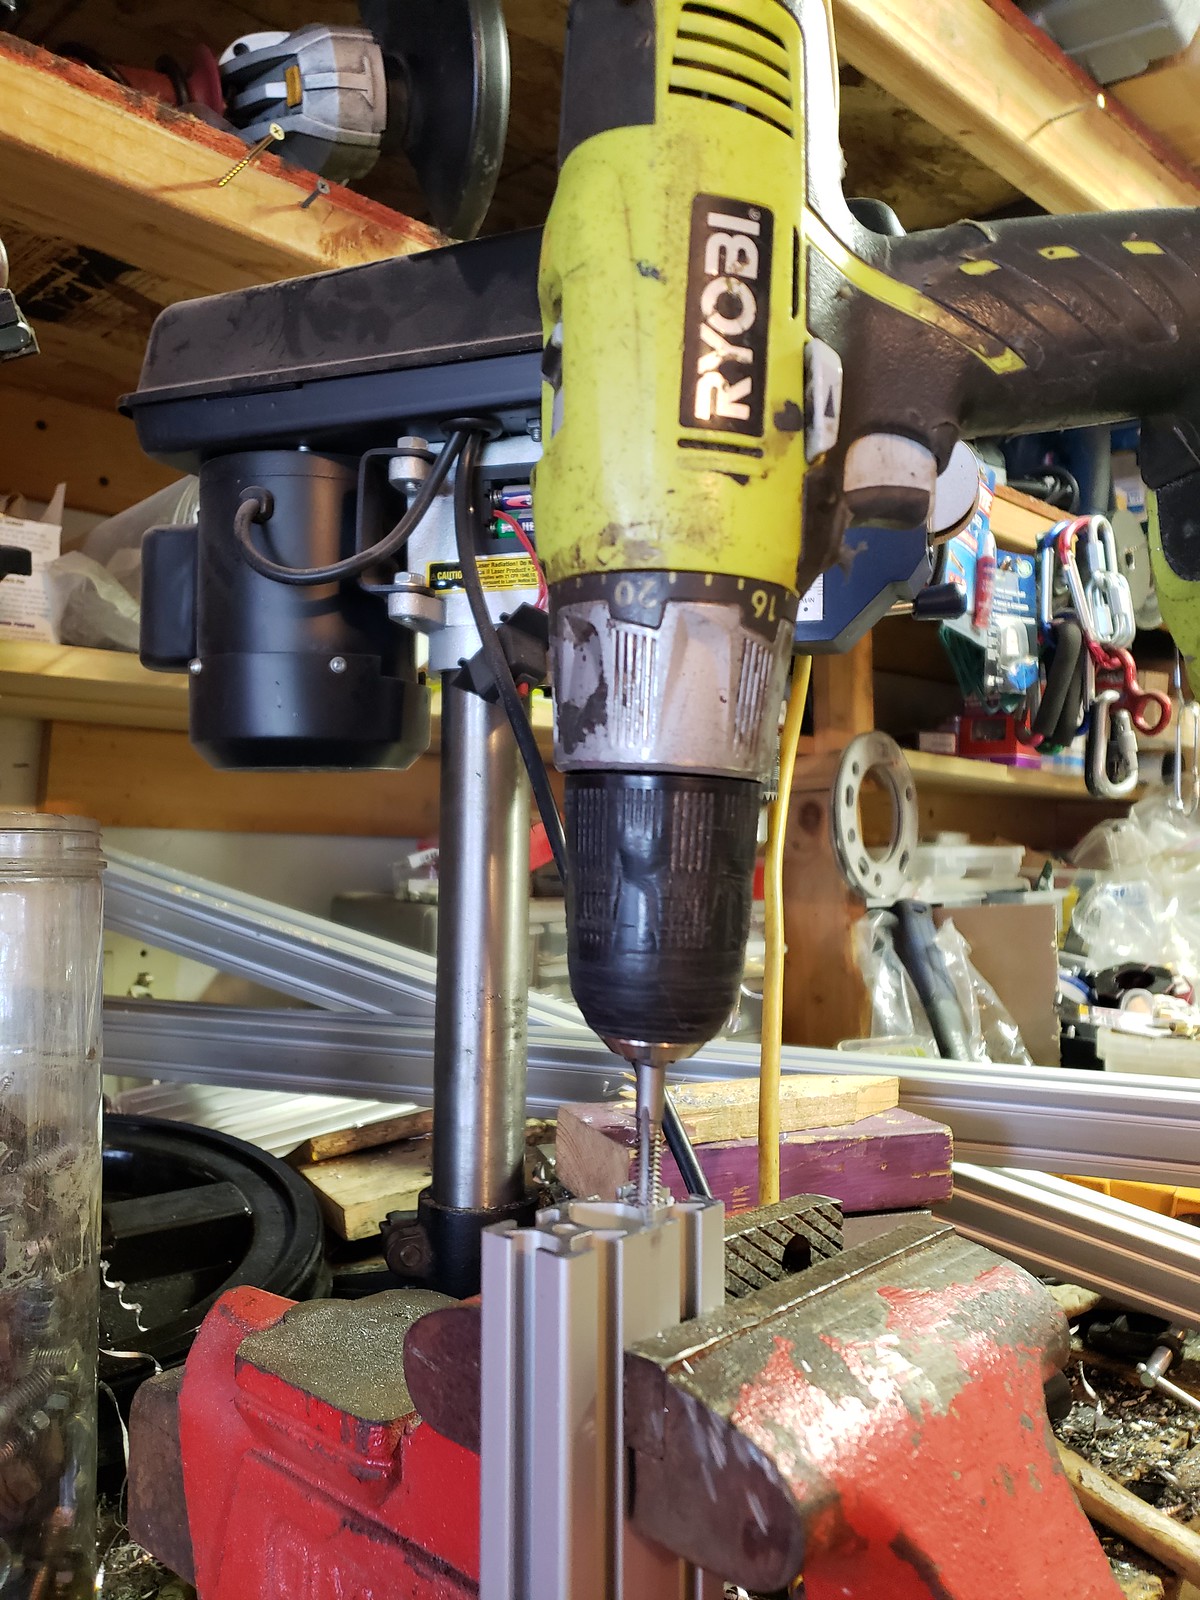
my first step was to make 5 cross bars out of 1"x2" 8020
I threaded the two 1/4" holes on each end with a 1/4-20 tap. using my drill was an experiment, it worked just go really slow.
by https://www.flickr.com/photos/42814812@N06/, on Flickr
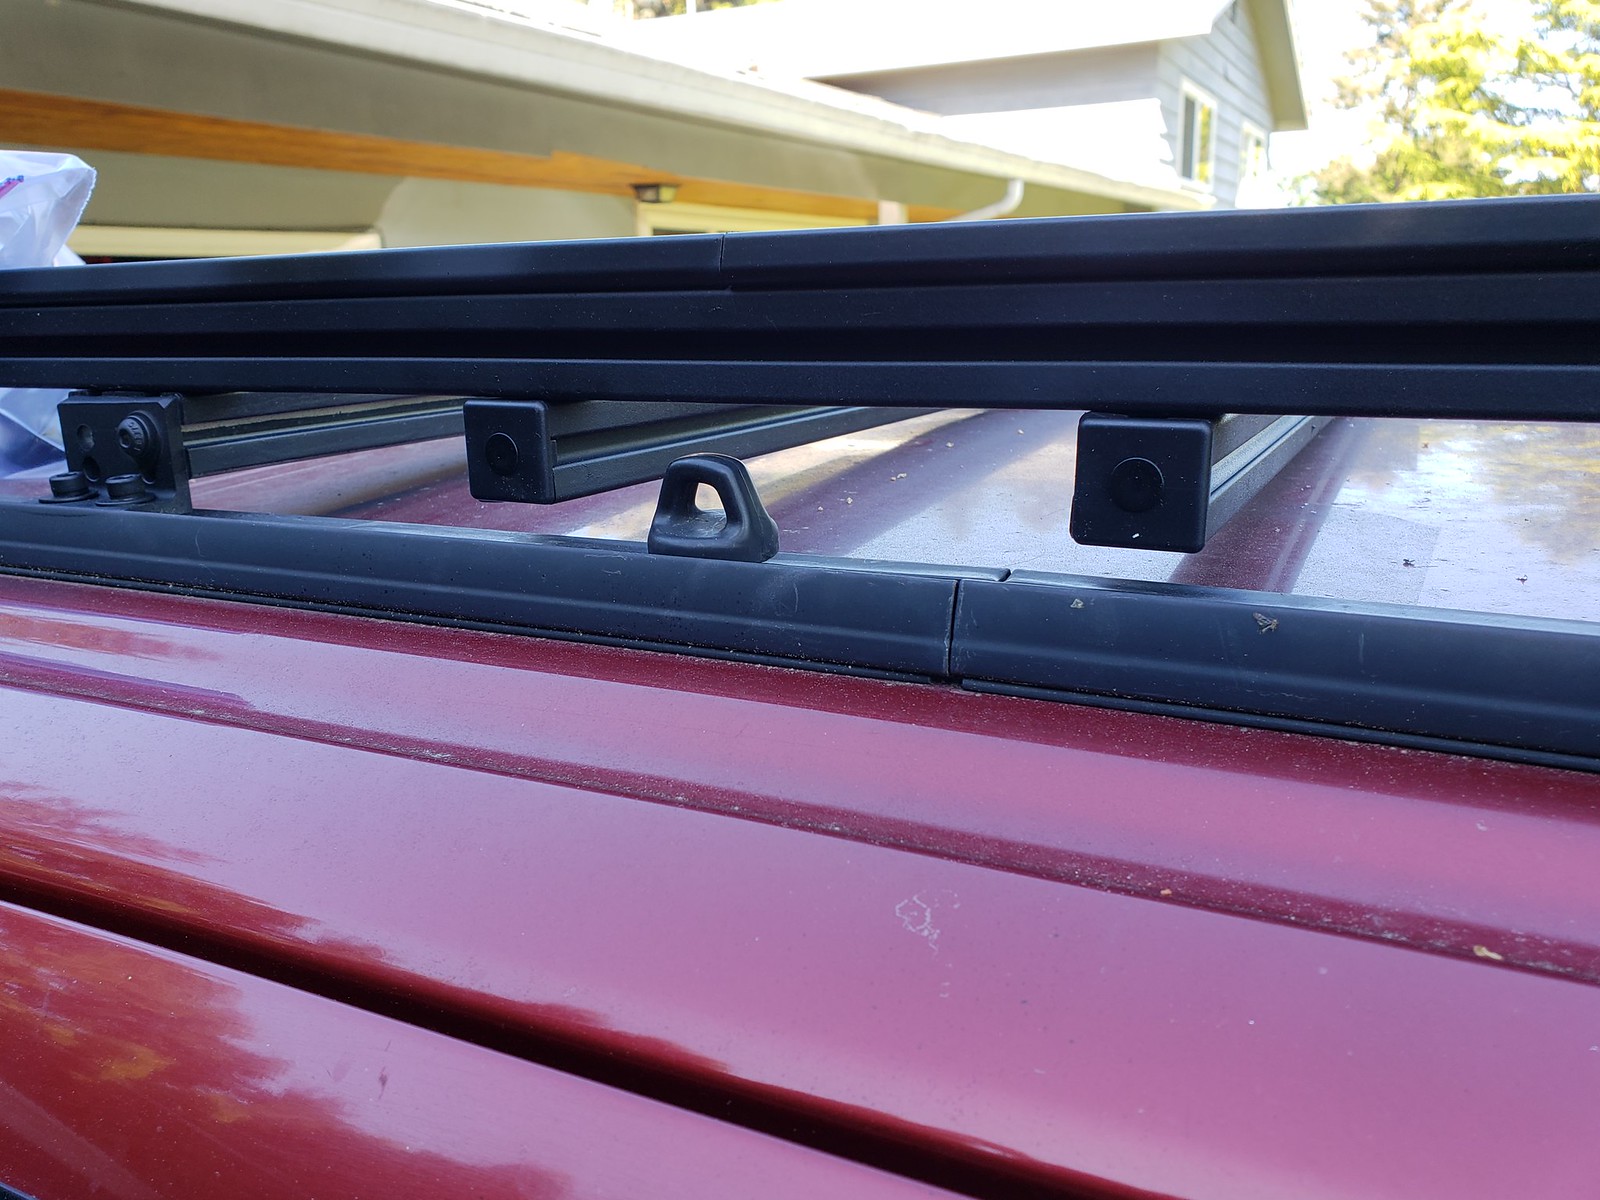
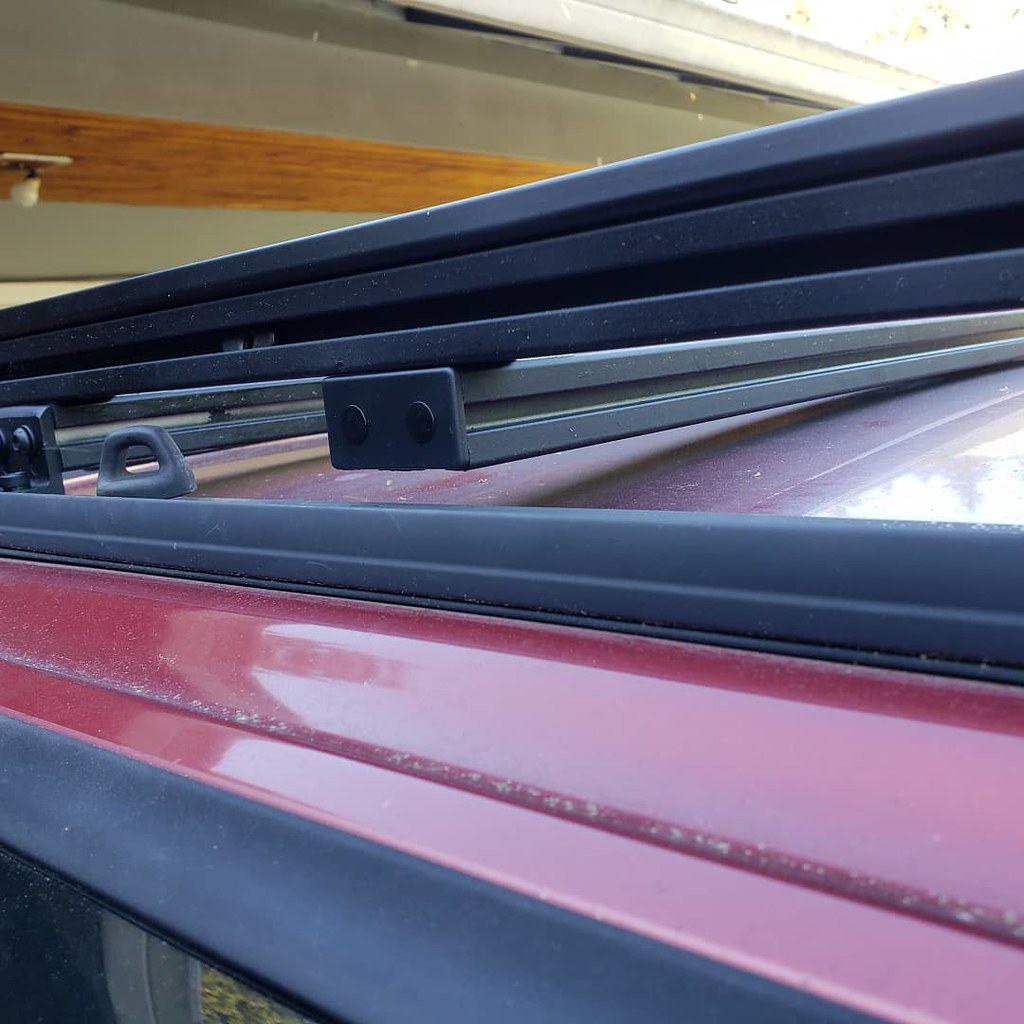
Mounted them using 2 of these on each bar
https://www.tnutz.com/product/cbs-01...orner-bracket/
to the factory rail inserts
by https://www.flickr.com/photos/42814812@N06/, on Flickr
by https://www.flickr.com/photos/42814812@N06/, on Flickr
next step was to add the bars lengthwise.
I painted them using some flat spray paint, way cheaper than ordering black anodized strut, which is a bit more per foot but available here
https://www.tnutz.com/product/ex-101...lack-anodized/
by https://www.flickr.com/photos/42814812@N06/, on Flickr
8020 is great since it goes together like an erector set
I did had some additional cross bars that are mounted to the 2 main side rails, mainly because I had some additional material available
by https://www.flickr.com/photos/42814812@N06/, on Flickr
by https://www.flickr.com/photos/42814812@N06/, on Flickr
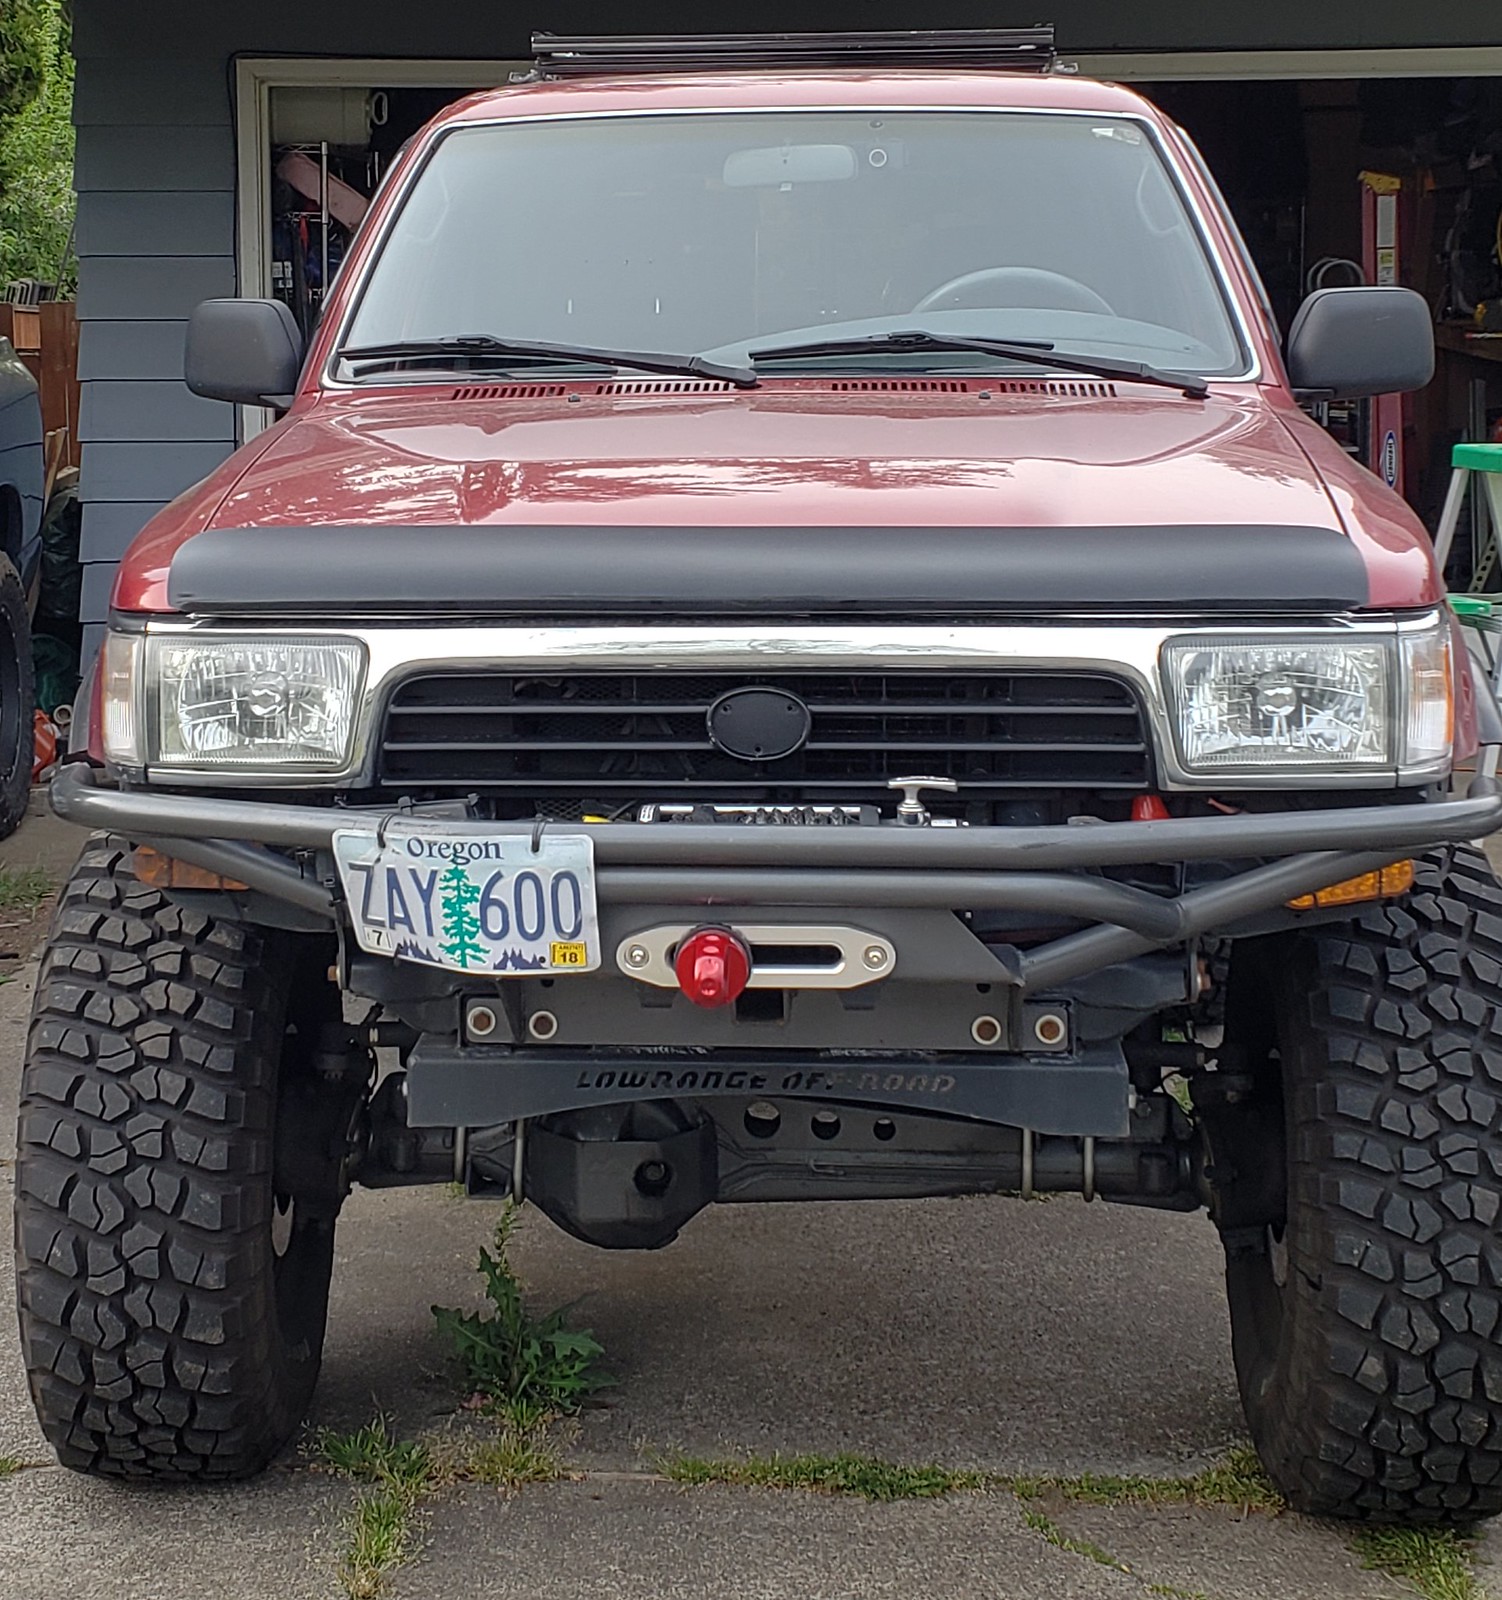
front view:
by https://www.flickr.com/photos/42814812@N06/, on Flickr
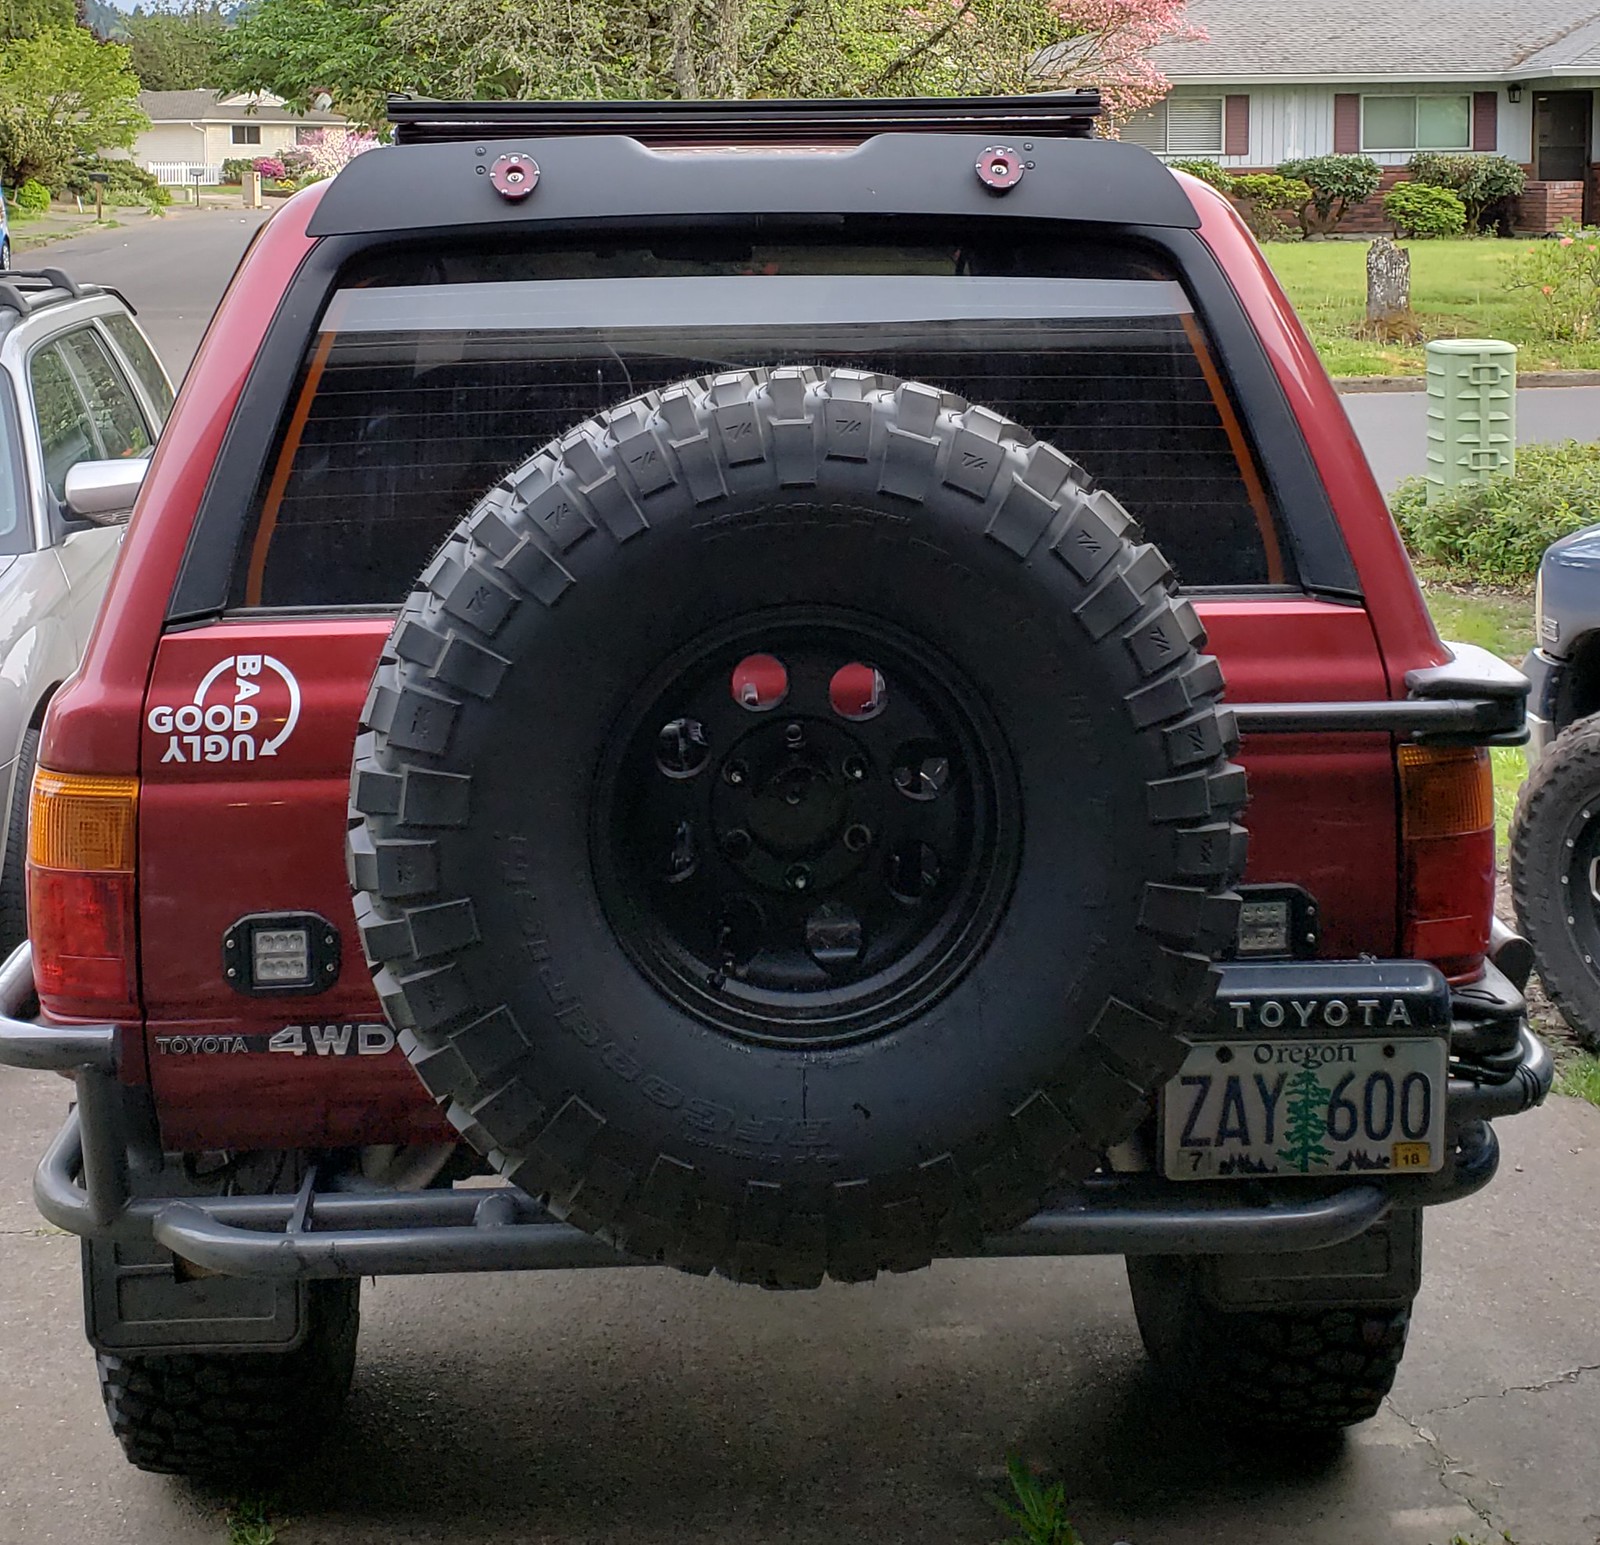
rear view:
by https://www.flickr.com/photos/42814812@N06/, on Flickr
by https://www.flickr.com/photos/42814812@N06/, on Flickr
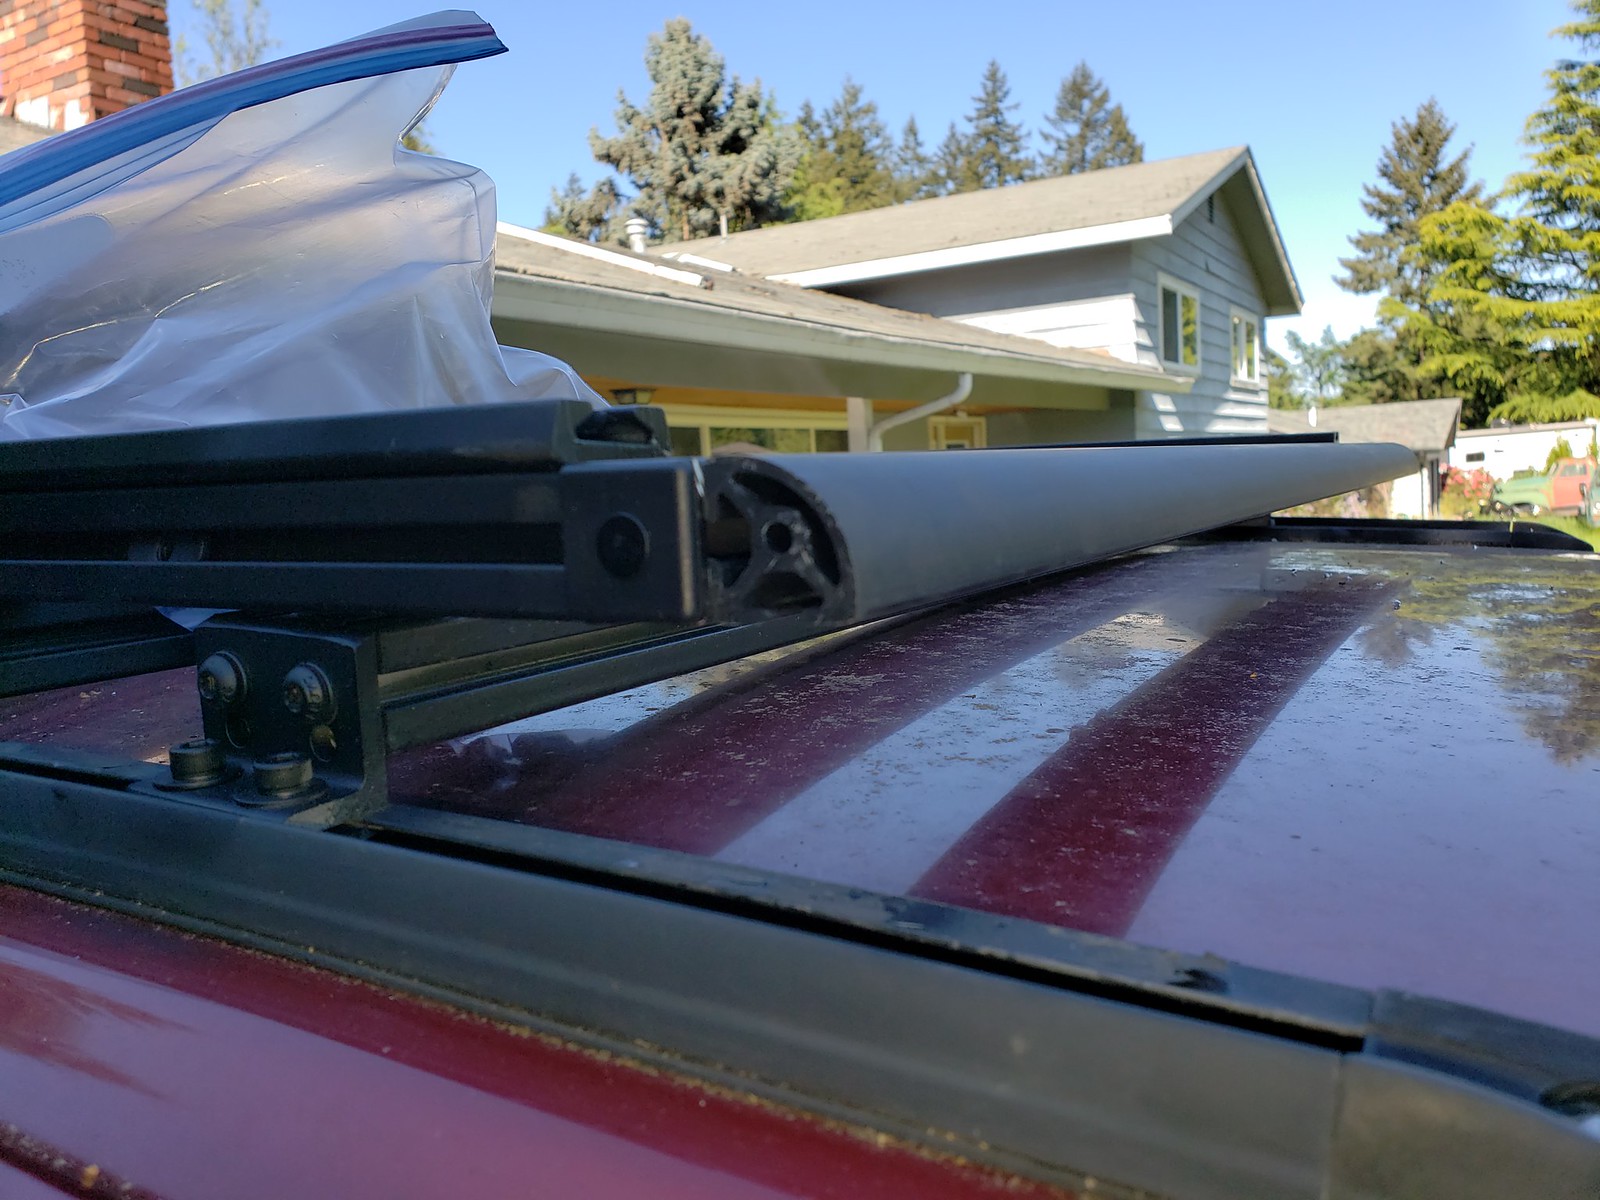
I do have a slight whistle from the rack. My plan is to get some 1/4 round 8020 like this https://www.tnutz.com/product/ex-101...num-extrusion/
to mount on the leader edge of the rack
by https://www.flickr.com/photos/42814812@N06/, on Flickr
I think I am into this rack for about $200
I was orginally going to cut this rack down heightwise to about 2.5" high because I can't stand how high some racks come out. This thing was probably 9" high when mounted on factory cross bars
by https://www.flickr.com/photos/42814812@N06/, on Flickr
by https://www.flickr.com/photos/42814812@N06/, on Flickr
this was a fun project for a few reason
it was budget friendly
I made it myself in a couple of afternoons
it goes together just like an erector set.
It isn't as nice as some of the high $$ racks available but I am happy with it, it serves my goal of being cheap and sturdy as heck
**Dunno why flickr makes it looks like the pics are double posted, sorry ***
Aluminum used was a combination of 8020 series 10 1" wide, 1"x1" and 1"x2"
Some was purchased from Tnutz.com
https://www.tnutz.com/product-category/extrusions/
I purchased a couple of 145" length pieces from Fastenal.com
If you have a fastenal store near you, you can have it shipped to the store dirt cheap
https://www.fastenal.com/products/details/0961258?term=8020&r=~%7Ccategoryl1:%22600930%20Raw %20Materials%22%7C~%20~%7Ccategoryl2:%22602694%20E xtruded%20T-Slot%20Bars%209and%20Accessories%22%7C~%20~%7Ccate goryl3:%22602693%20Extruded%20T-Slot%20Bars%22%7C~
Some of the material I scored cheap on craigslist.
Brackets and inserts were purchased from tnutz.com
the double inserts are nice $0.30
https://www.tnutz.com/product/double-economy-t-nut-2/
single inserts $ 0.12
https://www.tnutz.com/product/econom...-6mm-10-serie/
corner brackets:
https://www.tnutz.com/product/2-hole...orner-bracket/
https://www.tnutz.com/product-catego...erie-brackets/
For the 1/4-20 bolts I used stainless allen panheads from my local Ace hardware.
I had previously extended my factory mounts about 26" to add a 3rd factory crossmember
Heightwise it ended up being about 3" high
I used some S-track tie down rails for tie down points I had left over from my 81 Trekker project. You can find it on ebay, amazon or discount ramps
my rack ended up 72" by 35". You can go wider but I wanted mine to be the same width as the factory inner rail mounts.
You can cut this stuff with a hack saw, angle grinder with cut off wheel or a miter saw with a multiple use blade, make sure it is rated for aluminum or plastic. If you use a power tool make sure to wear proper PPE (safety disclaimer:violin
my first step was to make 5 cross bars out of 1"x2" 8020
I threaded the two 1/4" holes on each end with a 1/4-20 tap. using my drill was an experiment, it worked just go really slow.
Mounted them using 2 of these on each bar
https://www.tnutz.com/product/cbs-01...orner-bracket/
to the factory rail inserts
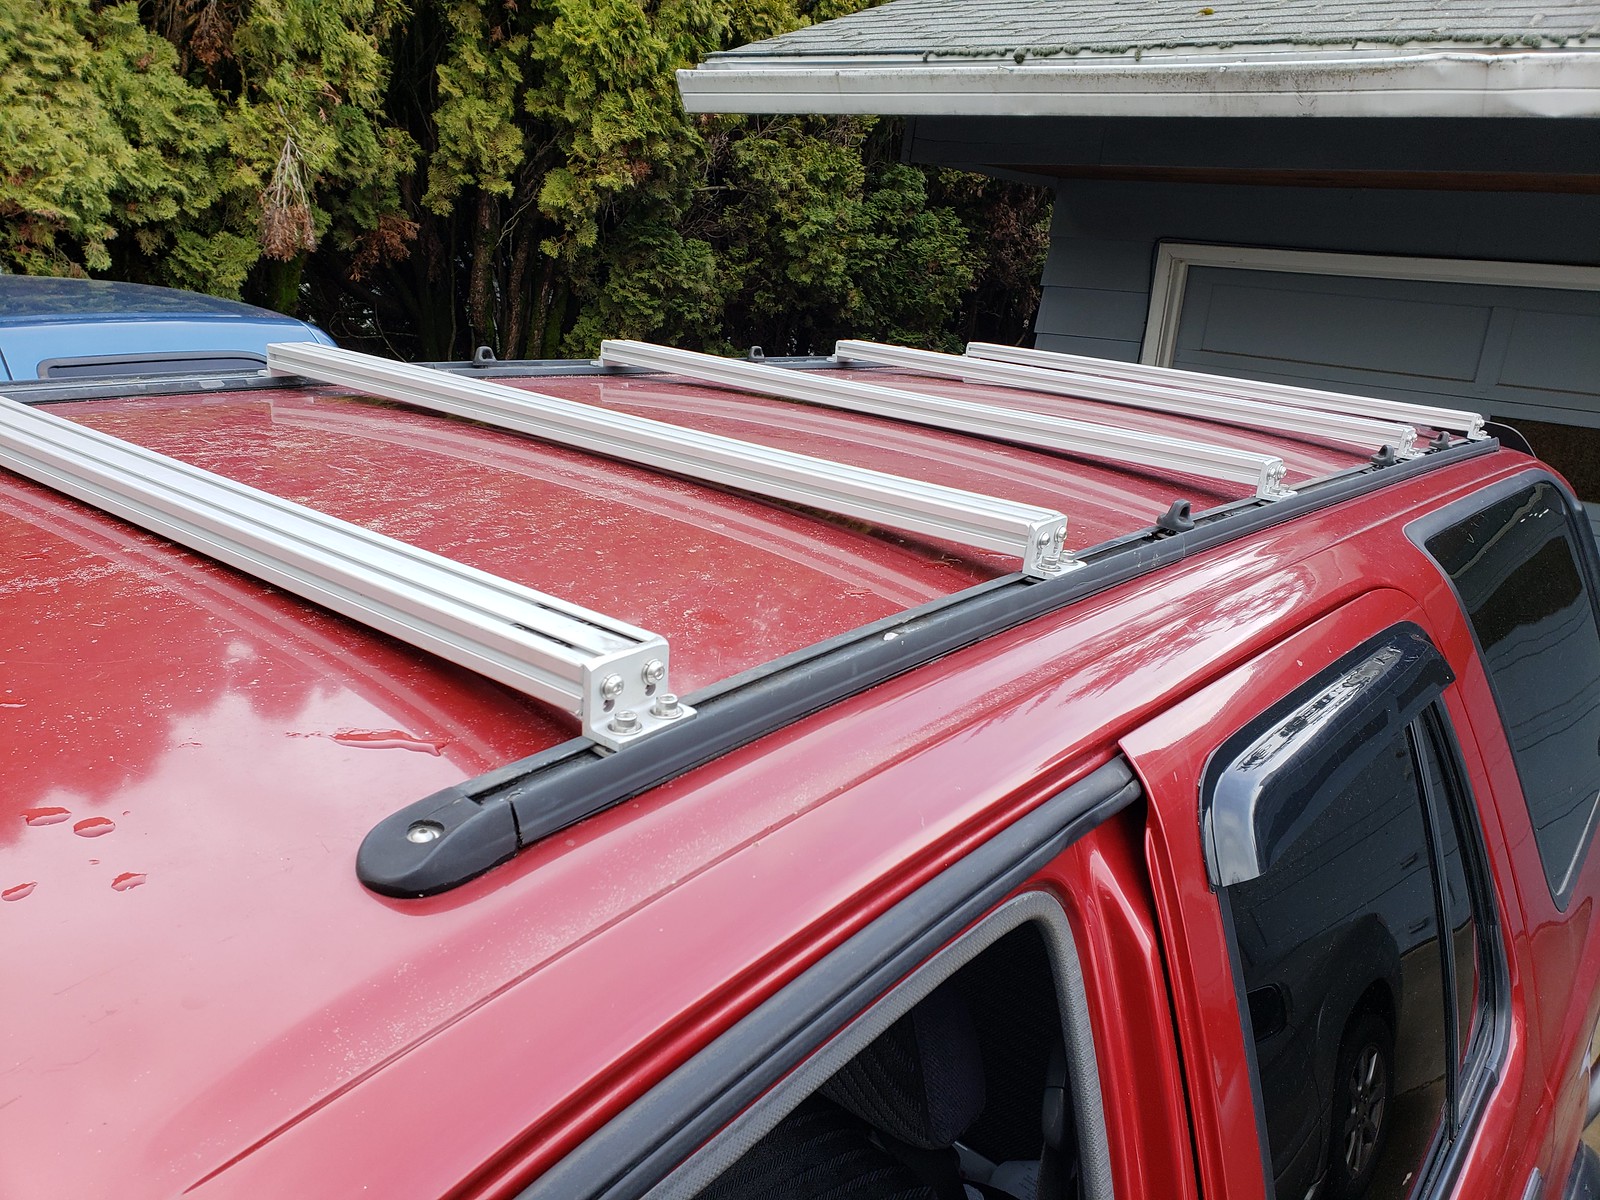
next step was to add the bars lengthwise.
I painted them using some flat spray paint, way cheaper than ordering black anodized strut, which is a bit more per foot but available here
https://www.tnutz.com/product/ex-101...lack-anodized/
8020 is great since it goes together like an erector set
I did had some additional cross bars that are mounted to the 2 main side rails, mainly because I had some additional material available

front view:
rear view:
I do have a slight whistle from the rack. My plan is to get some 1/4 round 8020 like this https://www.tnutz.com/product/ex-101...num-extrusion/
to mount on the leader edge of the rack
I think I am into this rack for about $200
I was orginally going to cut this rack down heightwise to about 2.5" high because I can't stand how high some racks come out. This thing was probably 9" high when mounted on factory cross bars
this was a fun project for a few reason
it was budget friendly
I made it myself in a couple of afternoons
it goes together just like an erector set.
It isn't as nice as some of the high $$ racks available but I am happy with it, it serves my goal of being cheap and sturdy as heck
Last edited by dropzone; May 13, 2018 at 10:07 AM.


 May 13, 2018 | 10:05 AM
#4
to answer a few more questions i had about how this stuff goes together figured I would post them here:
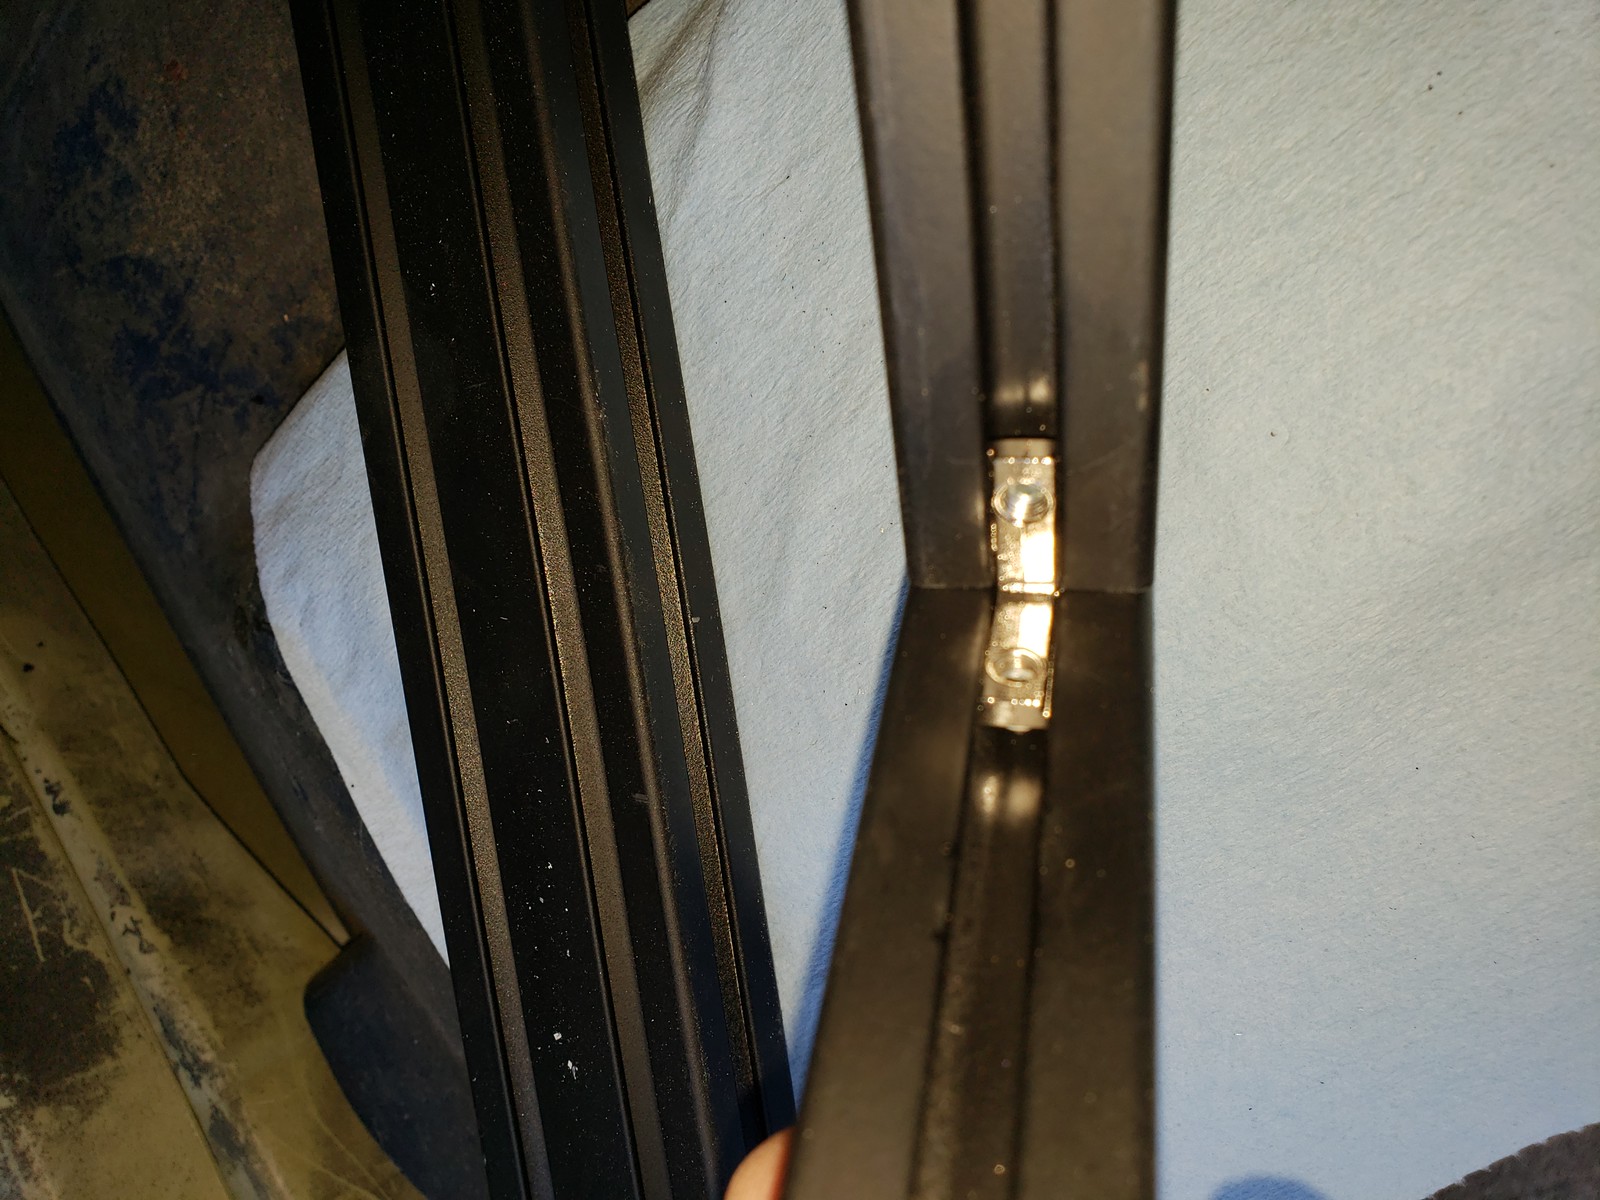
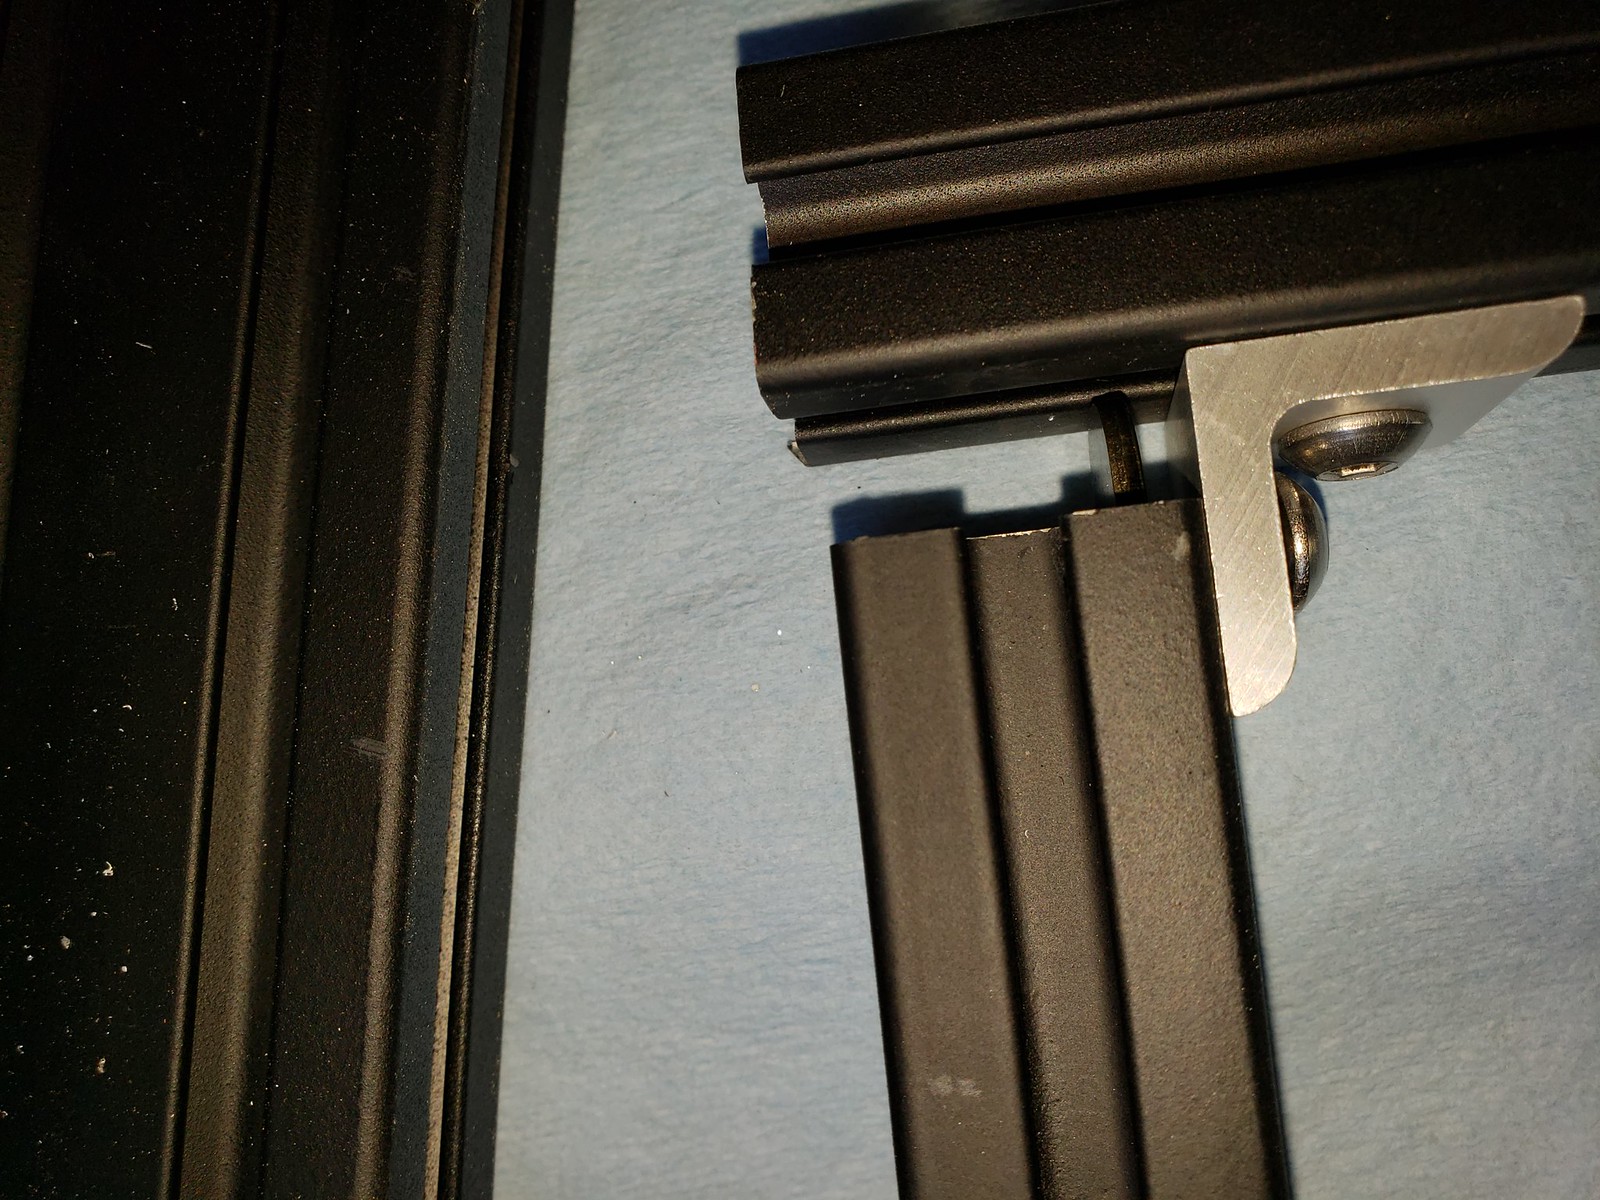
types of connectors:
[url=https://flic.kr/p/261X9id]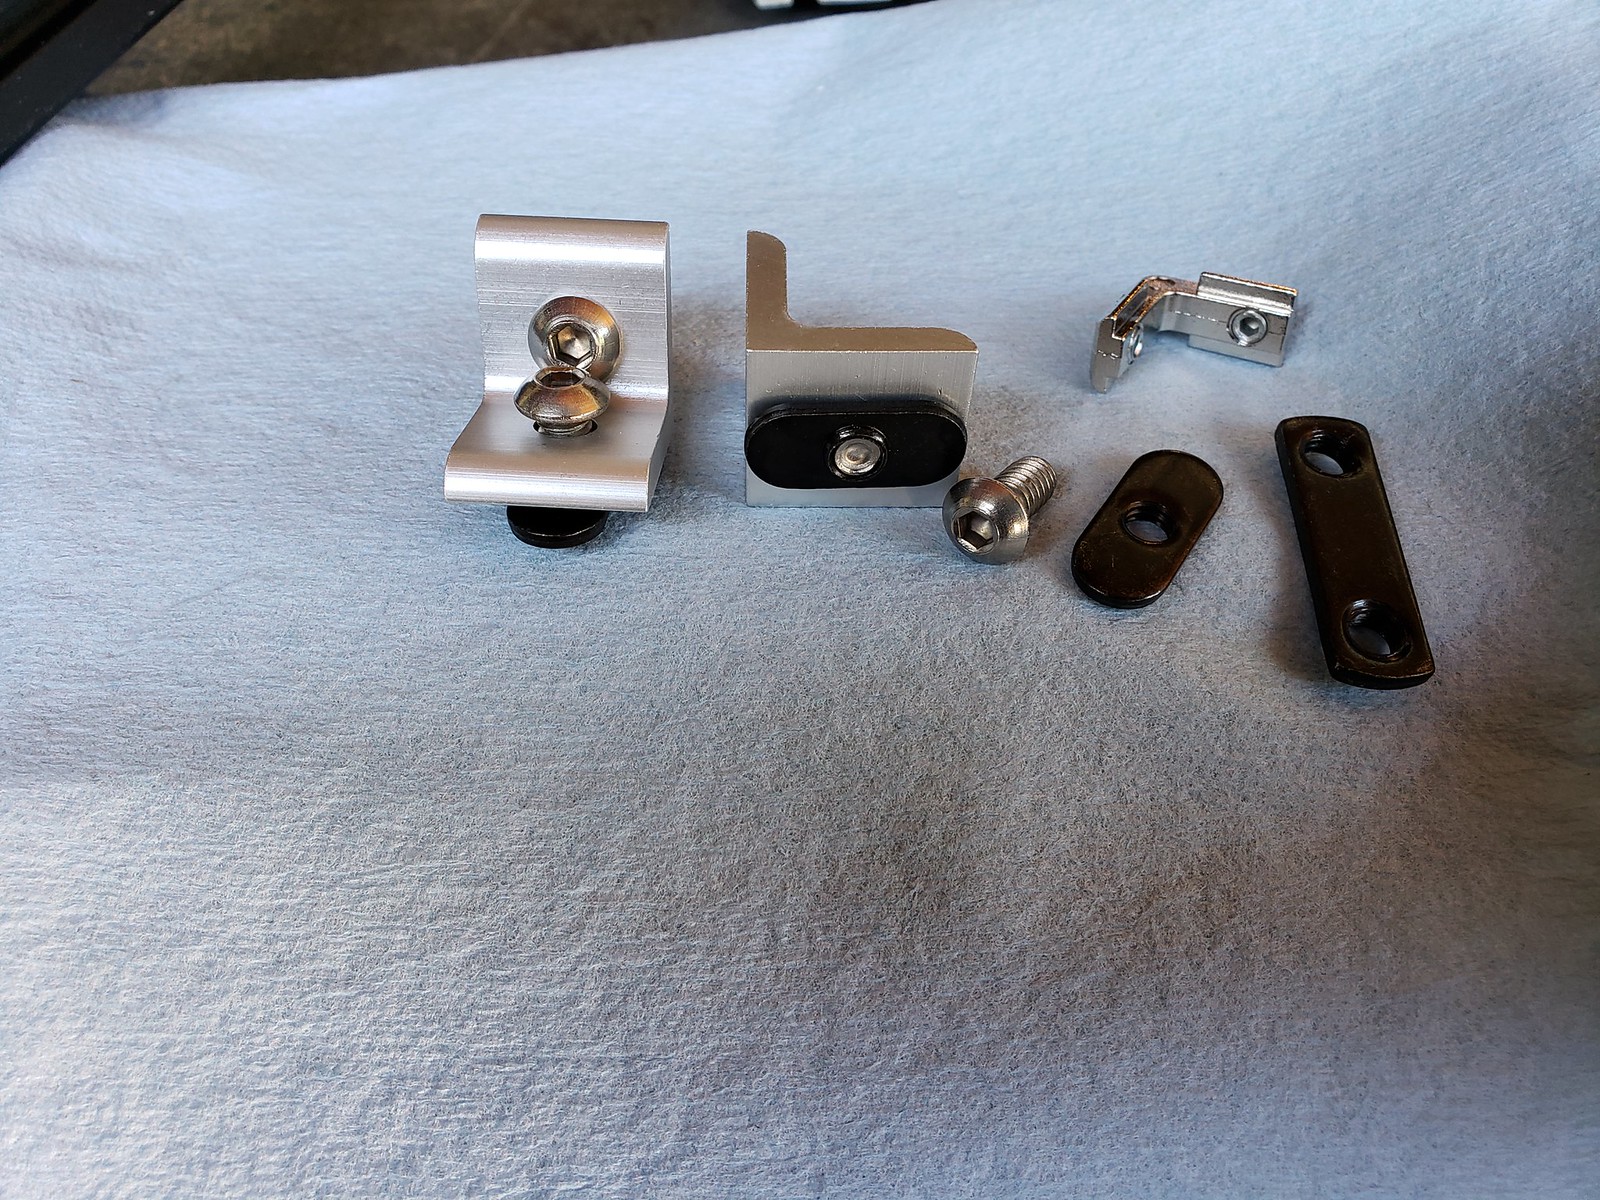
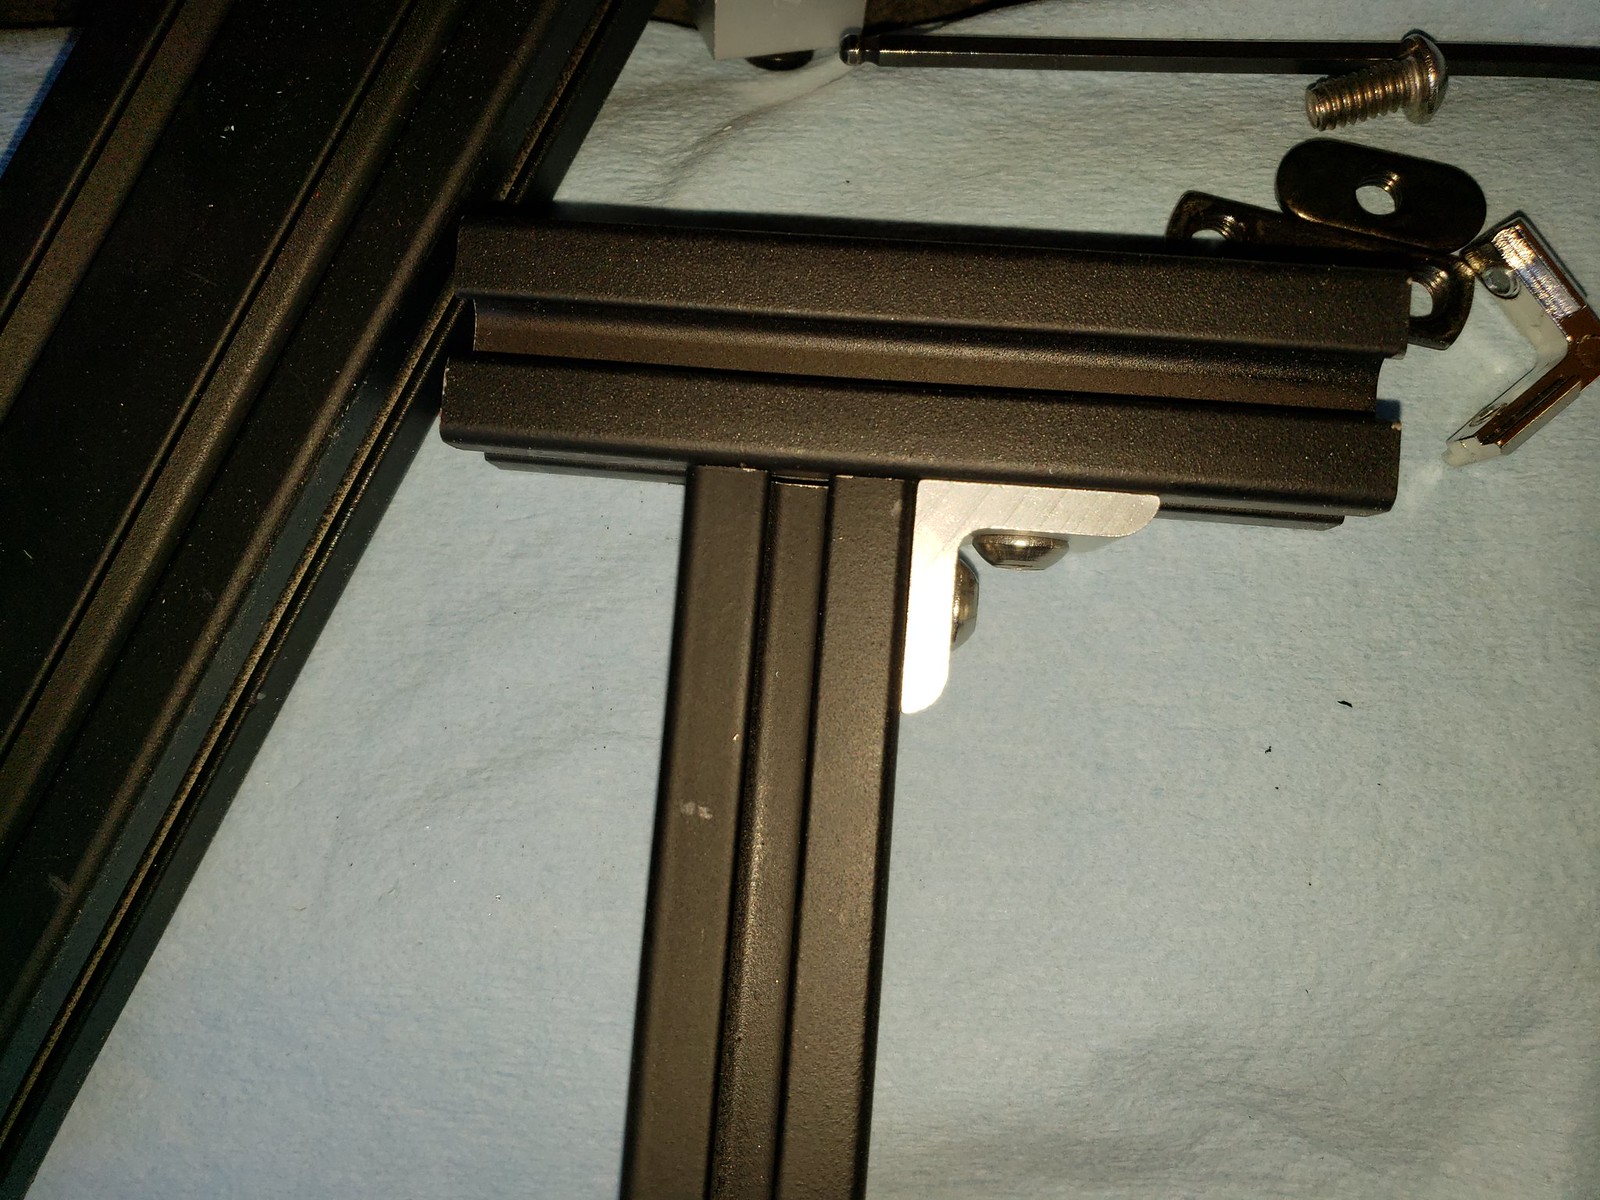
different size L brackets, you use an insert with a 1/4-20 bolt, you can pre assemble and insert thos in the the two pieces to form your 90*
by https://www.flickr.com/photos/42814812@N06/, on Flickr
by https://www.flickr.com/photos/42814812@N06/, on Flickr
by https://www.flickr.com/photos/42814812@N06/, on Flickr
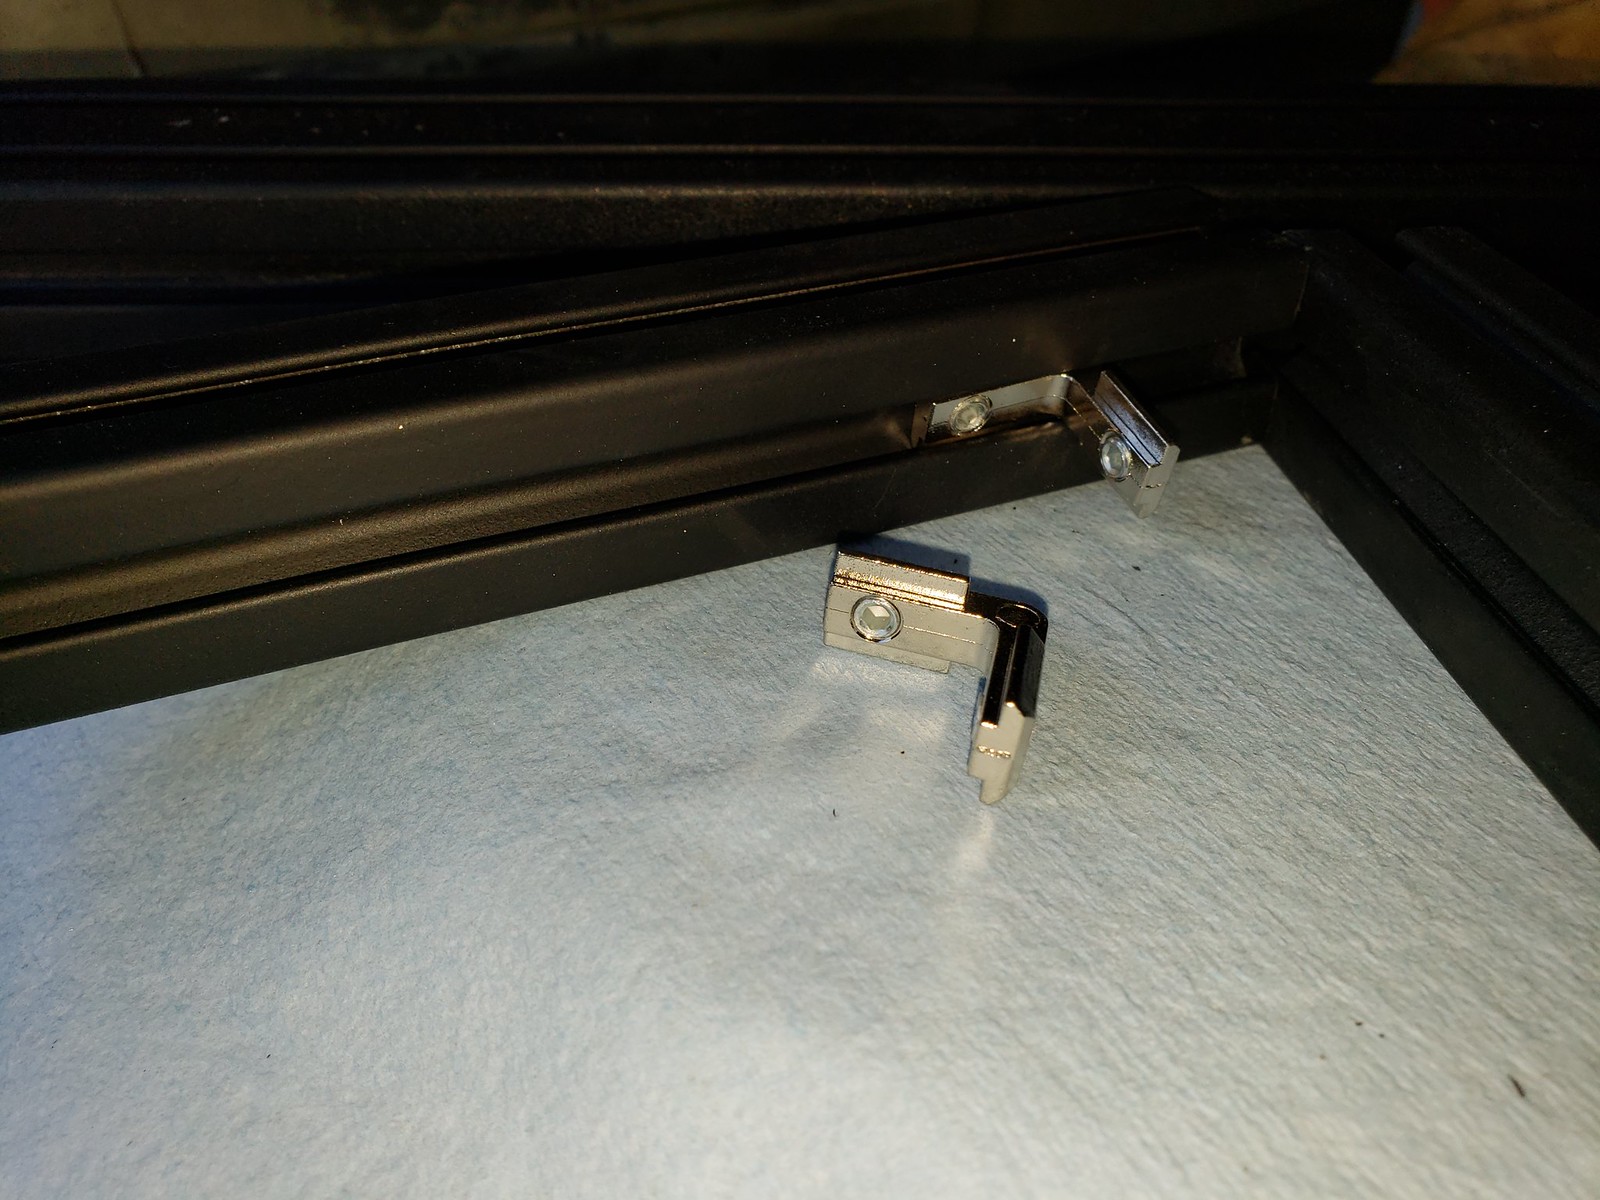
there is a small insertable L bracket that can be used to create a hidden 90. It works but not as strong as the external L bracket in my opinion
by https://www.flickr.com/photos/42814812@N06/, on Flickr
by https://www.flickr.com/photos/42814812@N06/, on Flickr
Painting vs. getting Anodized
I painted the 'natural' color strut I had.
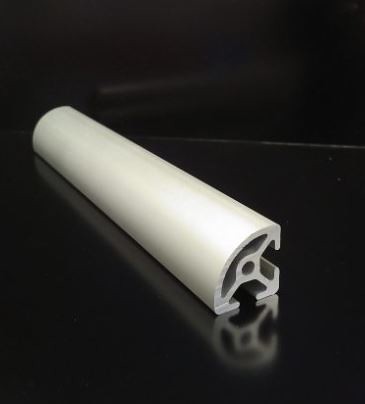
For the 1/4 round piece I went ahead and ordered a 36" piece of anodized,.
anodized on left, painted on right
The anodized is probably more durable as far as retaining color but it is a bit more per foot so it would up your cost
by https://www.flickr.com/photos/42814812@N06/, on Flickr
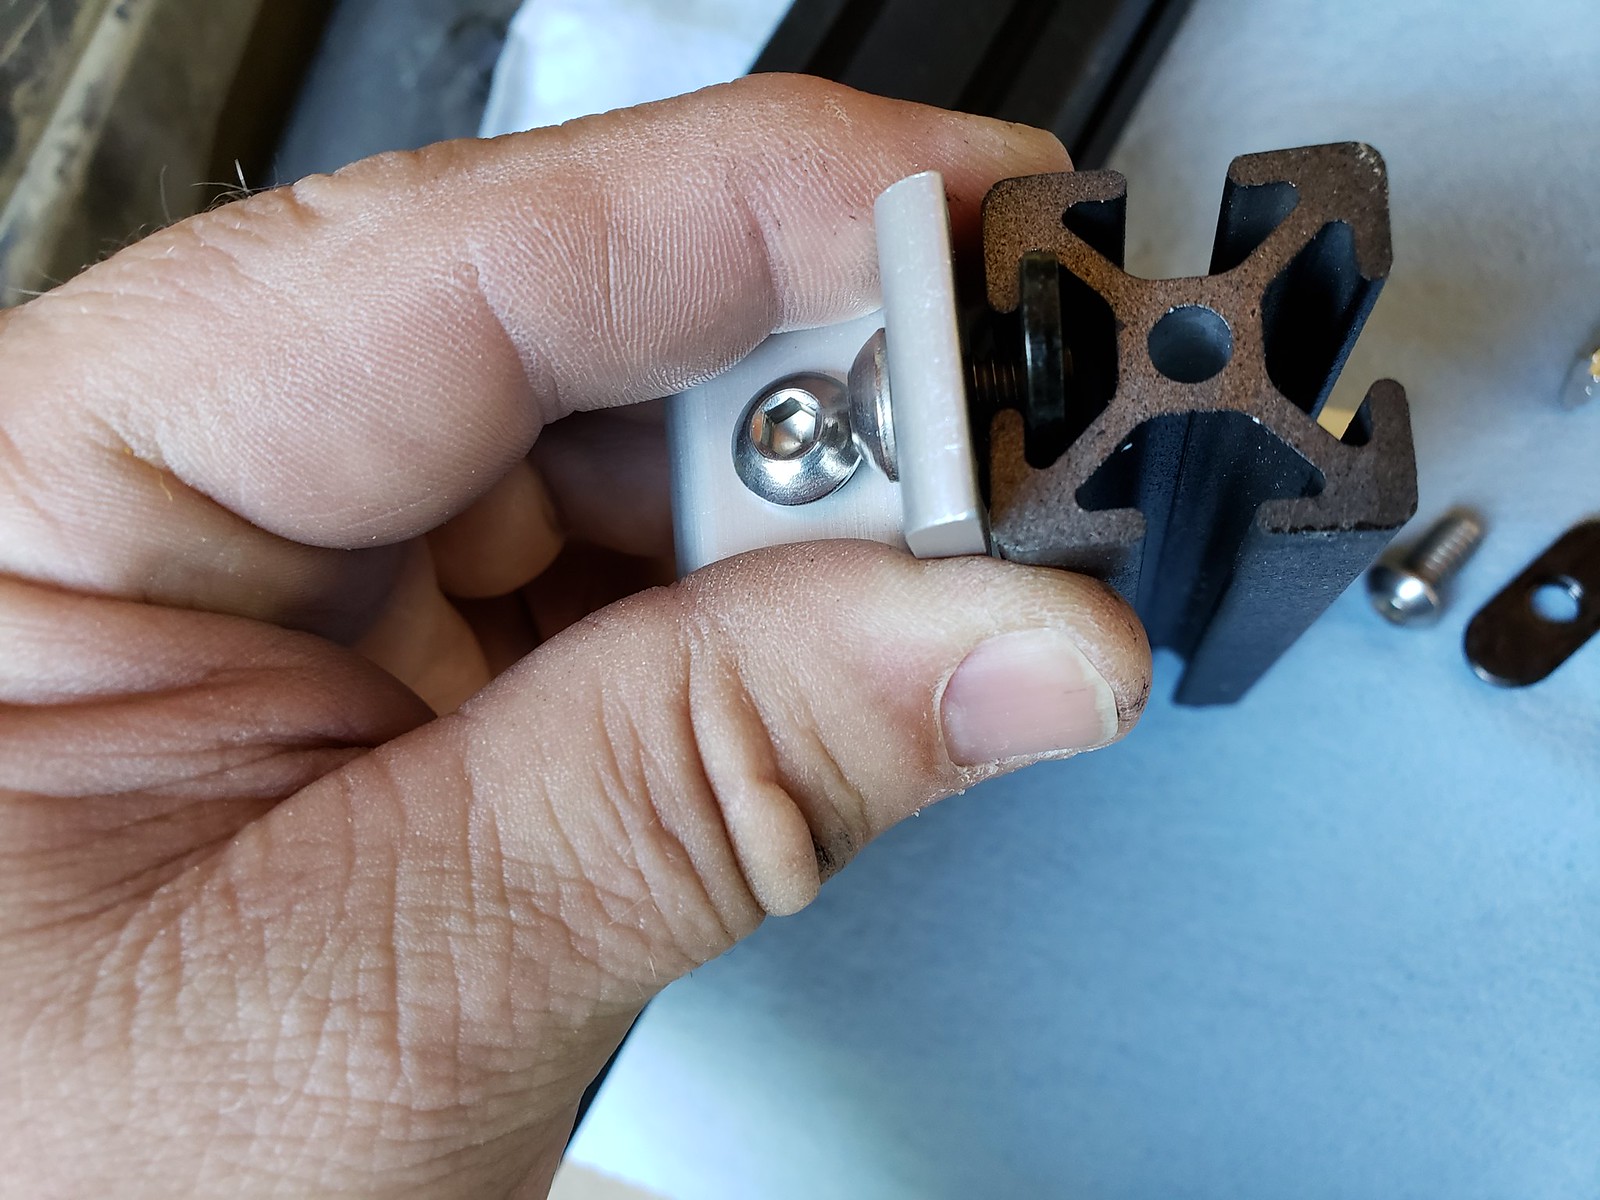
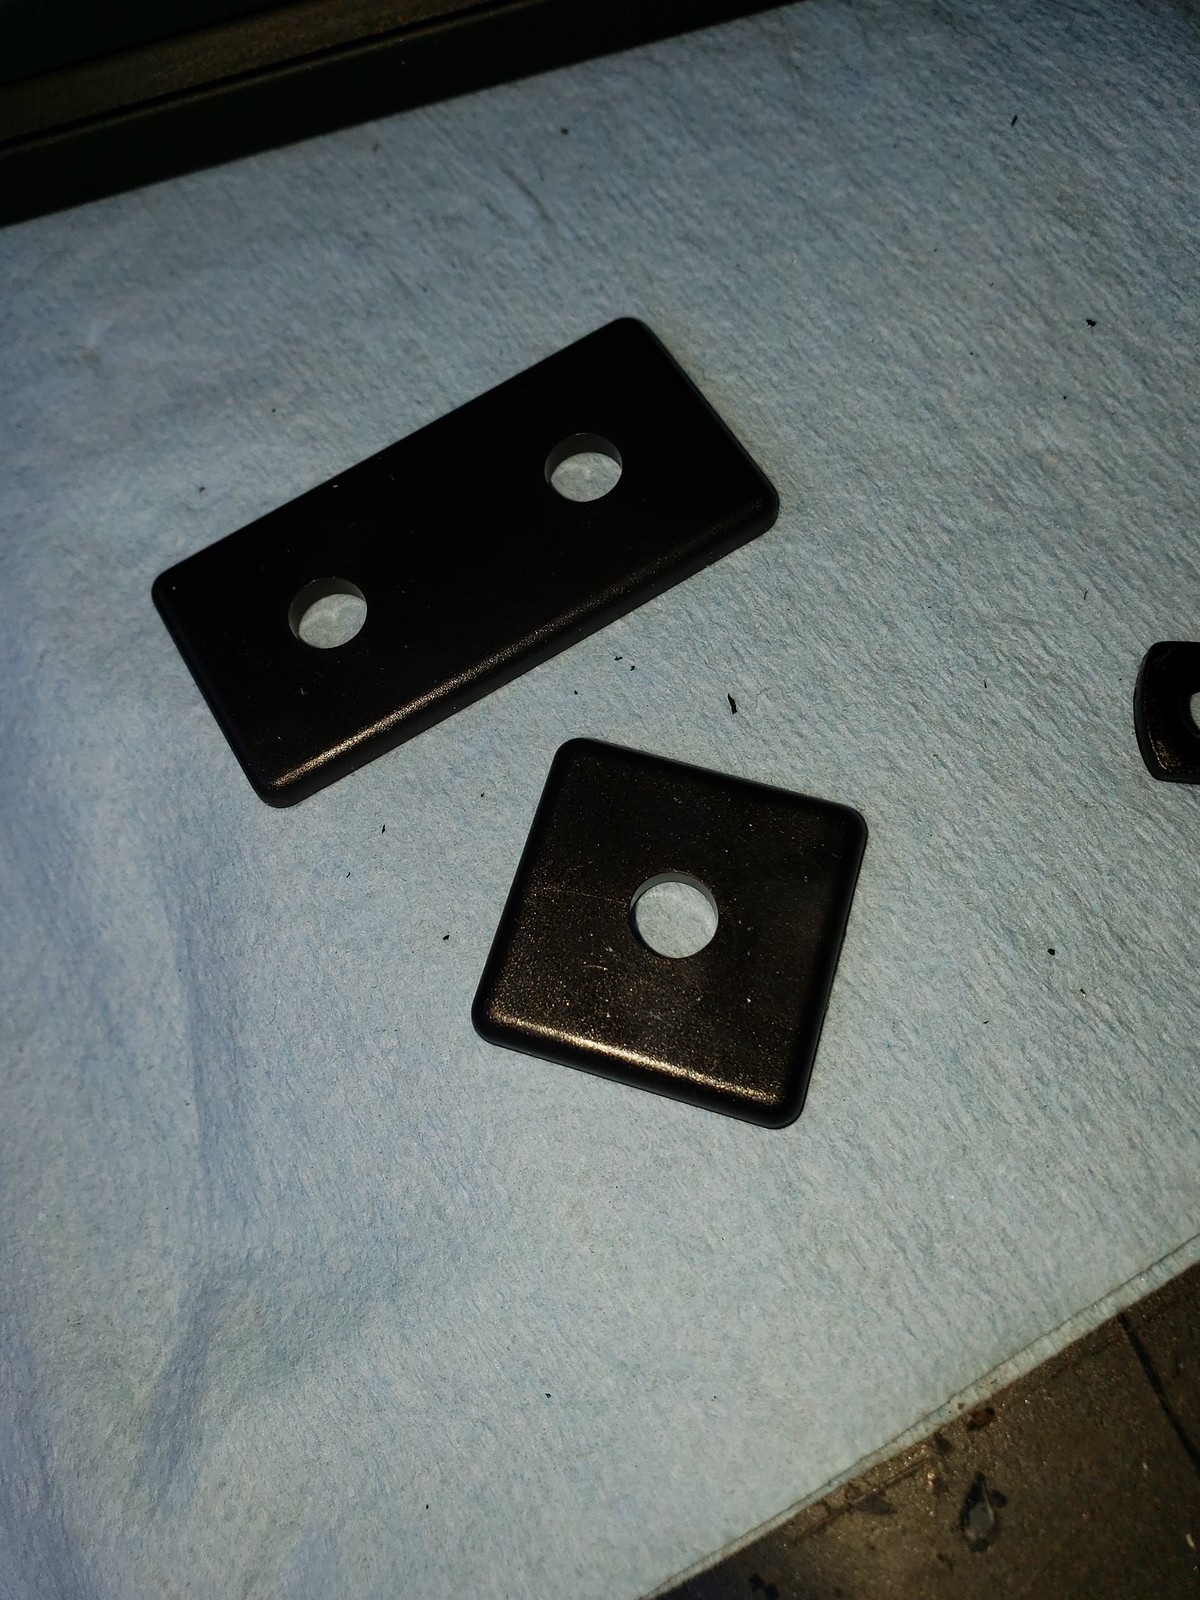
is there a way to finish off the ends:
yep you can make stuff or but some premade end caps
by https://www.flickr.com/photos/42814812@N06/, on Flickr
1"
by https://www.flickr.com/photos/42814812@N06/, on Flickr
1"x2"
by https://www.flickr.com/photos/42814812@N06/, on Flickr
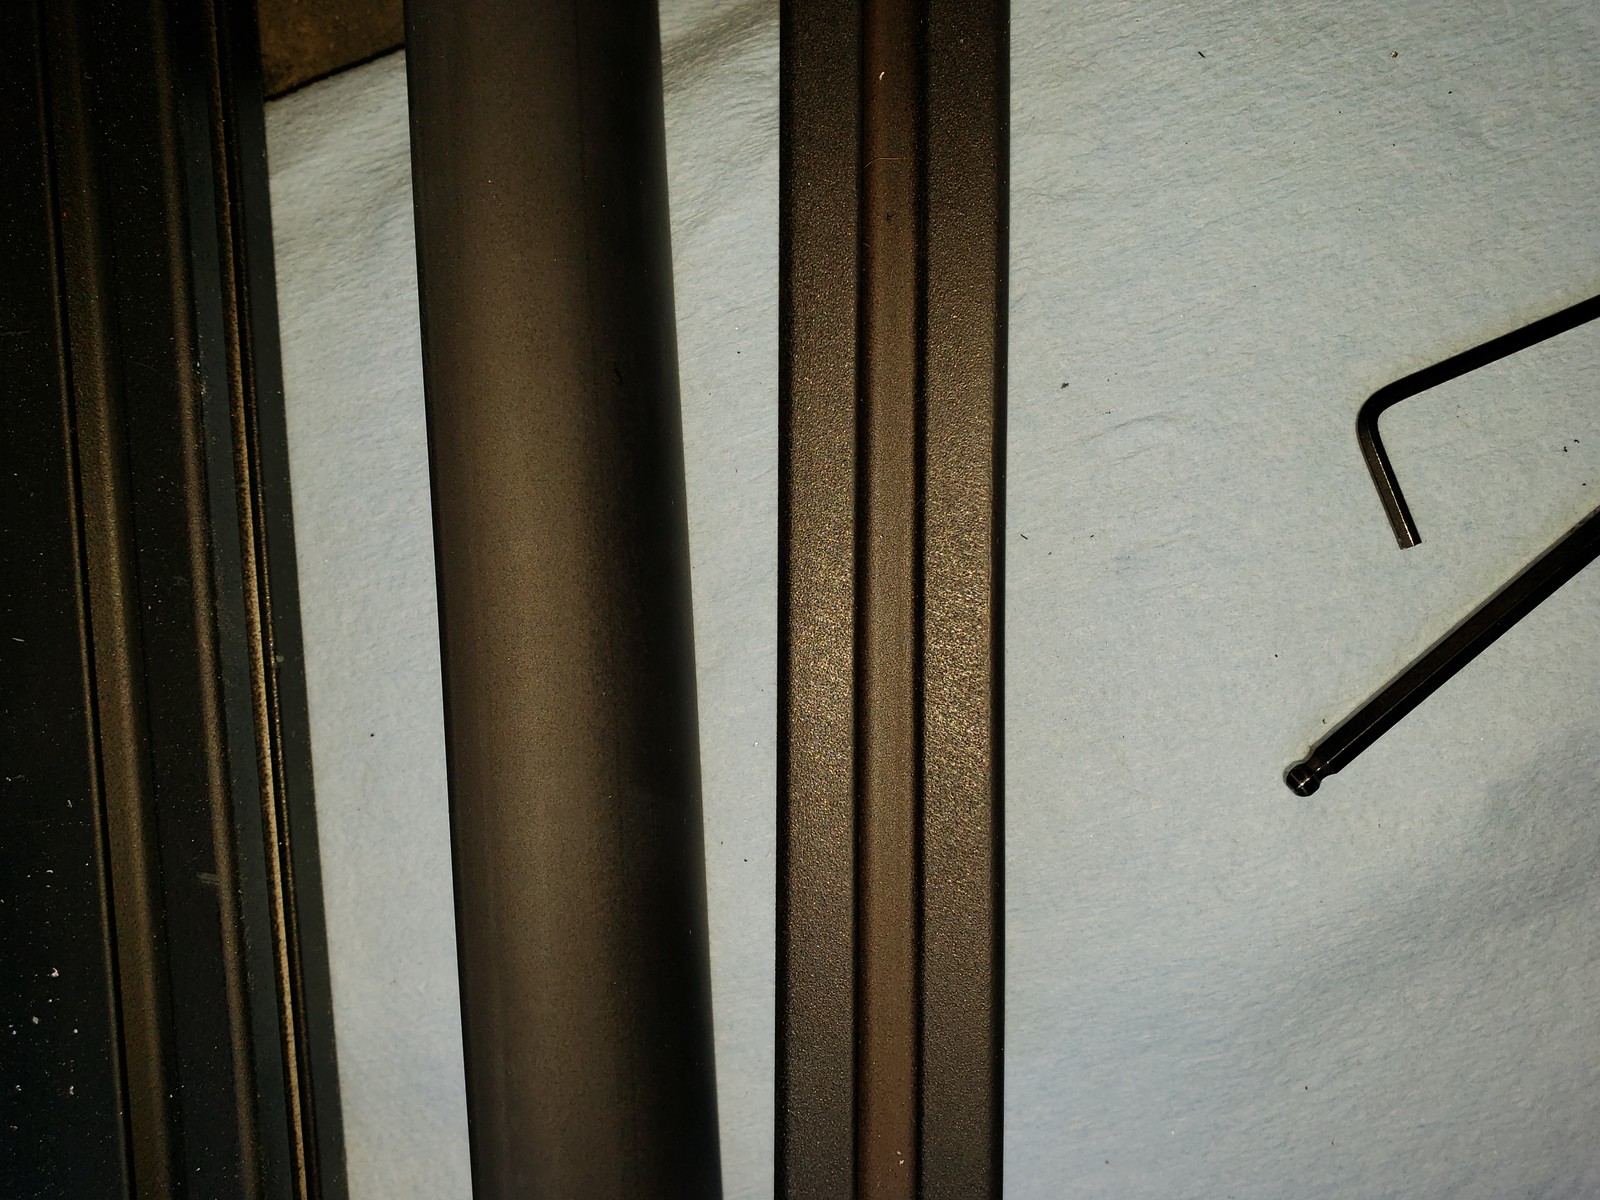
how does the 1" square compare to the 1"x2" in height
by https://www.flickr.com/photos/42814812@N06/, on Flickr
reducing wind noise:
I had a piece of 1/4 round to the front, it cut it down a ton
by https://www.flickr.com/photos/42814812@N06/, on Flickr
types of connectors:
[url=https://flic.kr/p/261X9id]
different size L brackets, you use an insert with a 1/4-20 bolt, you can pre assemble and insert thos in the the two pieces to form your 90*
there is a small insertable L bracket that can be used to create a hidden 90. It works but not as strong as the external L bracket in my opinion
Painting vs. getting Anodized
I painted the 'natural' color strut I had.
For the 1/4 round piece I went ahead and ordered a 36" piece of anodized,.
anodized on left, painted on right
The anodized is probably more durable as far as retaining color but it is a bit more per foot so it would up your cost
is there a way to finish off the ends:
yep you can make stuff or but some premade end caps
1"
1"x2"
how does the 1" square compare to the 1"x2" in height
reducing wind noise:
I had a piece of 1/4 round to the front, it cut it down a ton

Thread
Thread Starter
Forum
Replies
Last Post
modot66
86-95 Trucks & 4Runners
3
Jun 24, 2014 01:00 PM
olharleyman
86-95 Trucks & 4Runners
19
Jun 16, 2014 07:36 PM
Breezey
95.5-2004 Tacomas & 96-2002 4Runners
6
May 30, 2004 08:43 AM
wimpywade94
Offroad Tech
6
Aug 24, 2003 06:22 AM


