Rear Bumper Fab Underway

 06-30-2008, 07:52 AM
#22
Contributing Member
Thread Starter
Join Date: Jun 2006
Location: Bountiful, UT
Posts: 156
Likes: 0
Received 0 Likes
on
0 Posts
06-30-2008, 07:54 AM
#23
Contributing Member
Thread Starter
Join Date: Jun 2006
Location: Bountiful, UT
Posts: 156
Likes: 0
Received 0 Likes
on
0 Posts
06-30-2008, 08:01 AM
#24
Contributing Member
Thread Starter
Join Date: Jun 2006
Location: Bountiful, UT
Posts: 156
Likes: 0
Received 0 Likes
on
0 Posts
Not sure if the body and frame flex on a second gen like they do on a third, but if you have any part of the bumper rubbing or quite close to the body now, you may want to re-think that clearance. I would want, at a minimum, an inch clearance away from the bumper and any body part. Otherwise, if you hit the bumper hard, you stand a good chance of getting some body damage. Just a thought.
Before reading your post I really hadn't thought too much about clearance, so I appreciate your feedback.
06-30-2008, 11:21 PM
#25
Registered User
Join Date: Oct 2006
Posts: 81
Likes: 0
Received 0 Likes
on
0 Posts
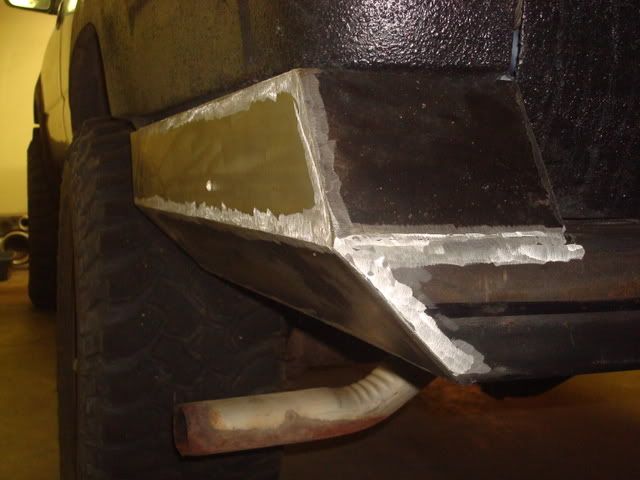
Without seeing the insides of those wing sections or how you tied them into the frame, it's tough to say how well they'll hold up. Definitely fully box them at the bottom and tie them into the frame at the front if you haven't already.
It's a nice looking design. Look forward to seeing the finished product.
It's a nice looking design. Look forward to seeing the finished product.
07-01-2008, 04:21 AM
#26
Registered User
07-15-2008, 08:38 PM
#27
Contributing Member
Thread Starter
Join Date: Jun 2006
Location: Bountiful, UT
Posts: 156
Likes: 0
Received 0 Likes
on
0 Posts
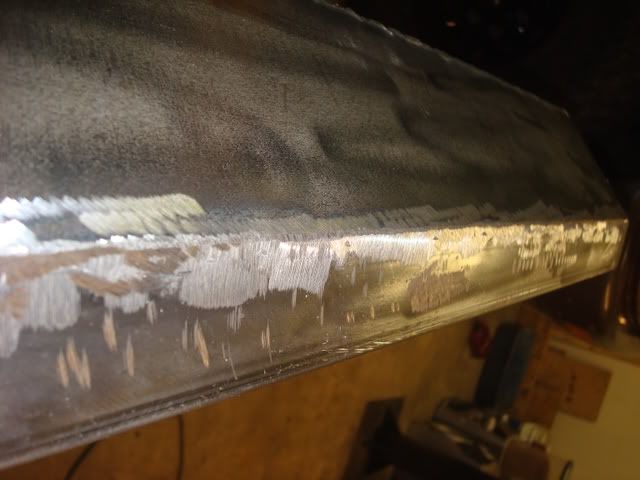
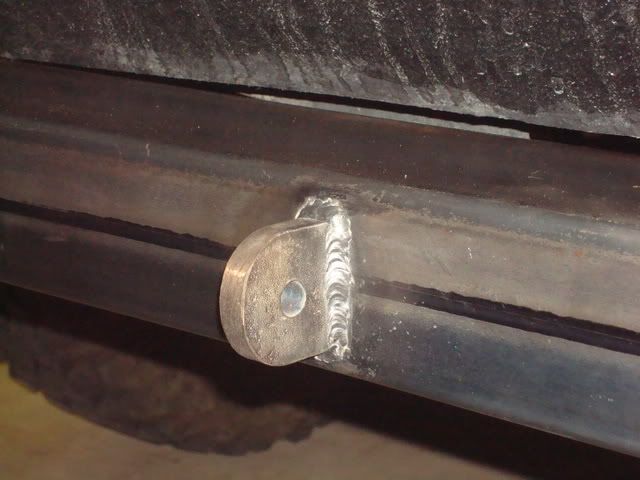
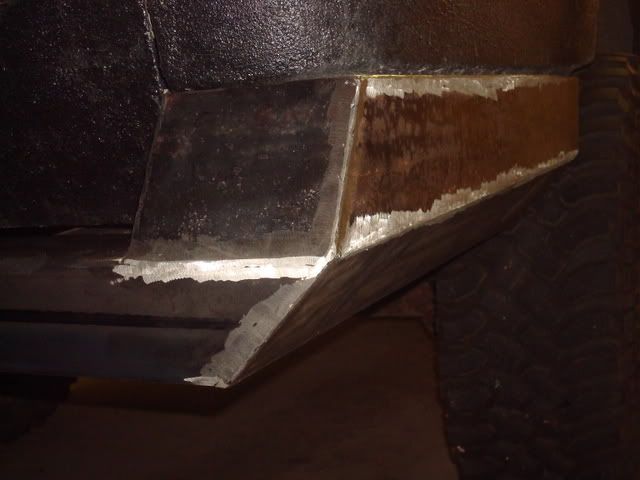
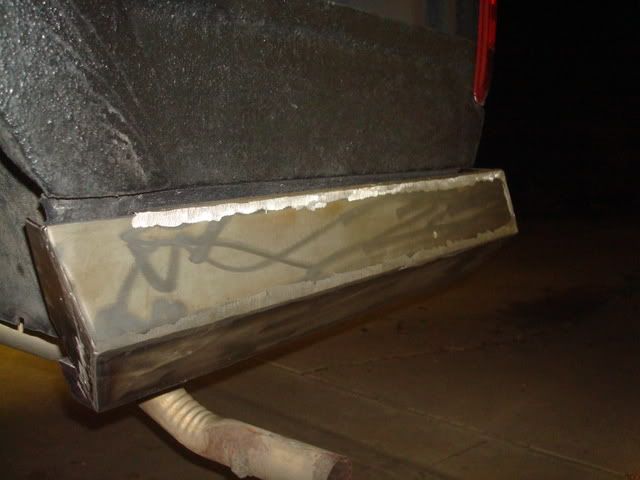
So I've got all the welds done. Some are prettier than others. After my grinder stand and some auto body work, this was my third welding project. I think all the welds laid on pretty good. The fillet welds look much better than the butt welds. Those long butt welds were tough to make look nice. But, I've decided to grind all the butt welds off so that it looks nice for the powder coating. Do you guys think this is a standard thing to do on bumper fab? Grinding off the butt welds? I understand that it will compromise the strength of the weld, but I want to finished product to look good.
Well, here are a few pics of the welds:
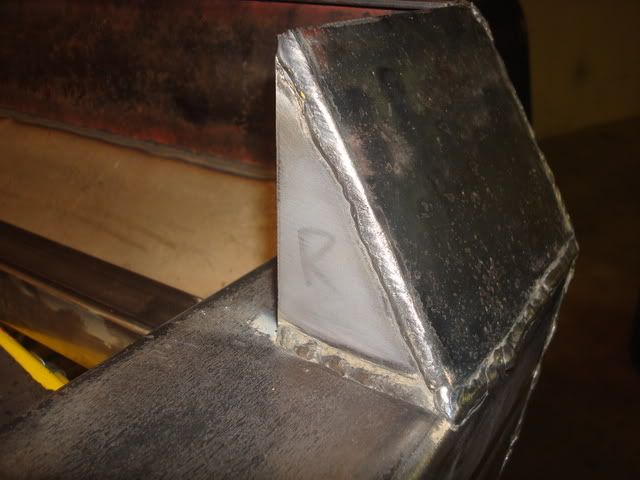
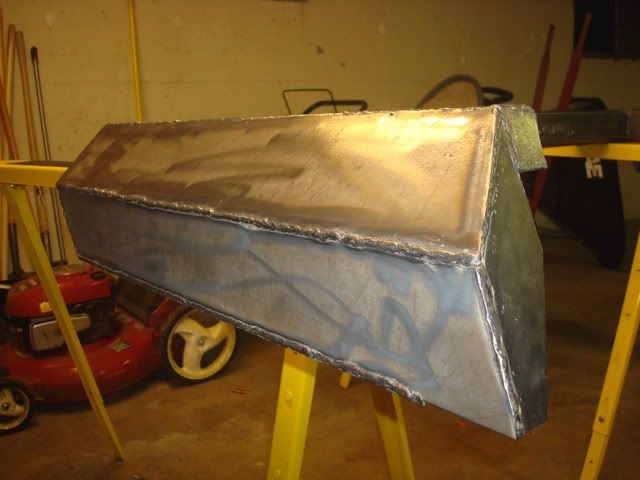
After some grinding:
Well, here are a few pics of the welds:
After some grinding:
08-06-2008, 03:15 PM
#30
Contributing Member
Thread Starter
Join Date: Jun 2006
Location: Bountiful, UT
Posts: 156
Likes: 0
Received 0 Likes
on
0 Posts
I slapped on the bedline to the bottom of the runner myself. Just taped it off and threw it on there. Used Herculiner. I think it cost about $40 or so. Pick it up at Autozone or wherever. Hard part is taping off the arches that go around the wheel wells. I put the UV protectant on about a month after I did the bedliner. I didn't apply the UV protectant liberally enough so there are spots where you can tell it isn't as shiny as the rest because it didn't get enough UV protectant. I will probably touch it up one of these days.
 one day when i take em and get one built i'll give you credit for the killer design.
08-11-2008, 09:07 PM
one day when i take em and get one built i'll give you credit for the killer design.
08-11-2008, 09:07 PM
#32
Contributing Member
Thread Starter
Join Date: Jun 2006
Location: Bountiful, UT
Posts: 156
Likes: 0
Received 0 Likes
on
0 Posts
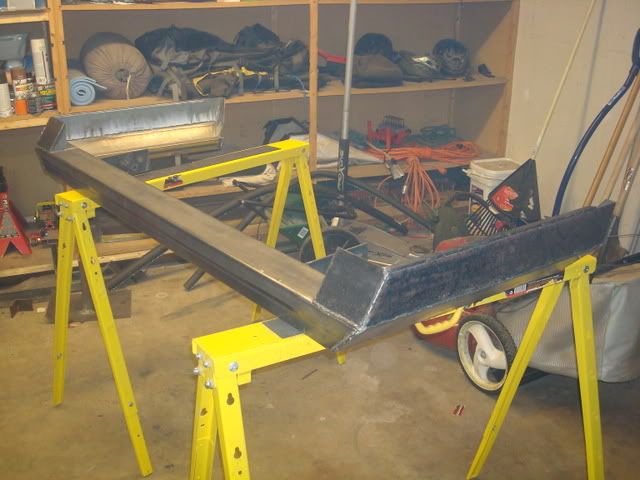
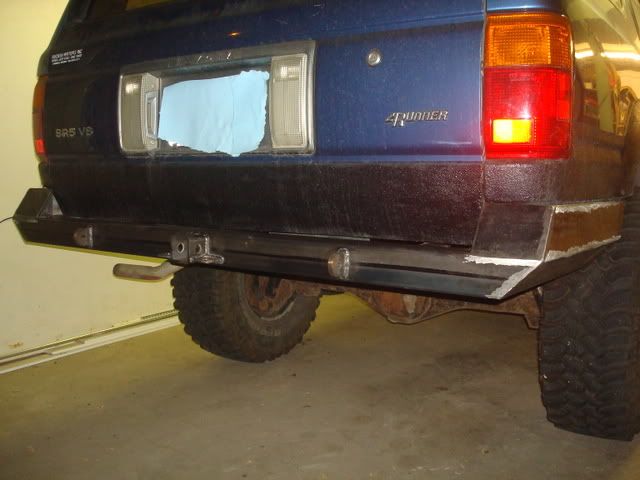
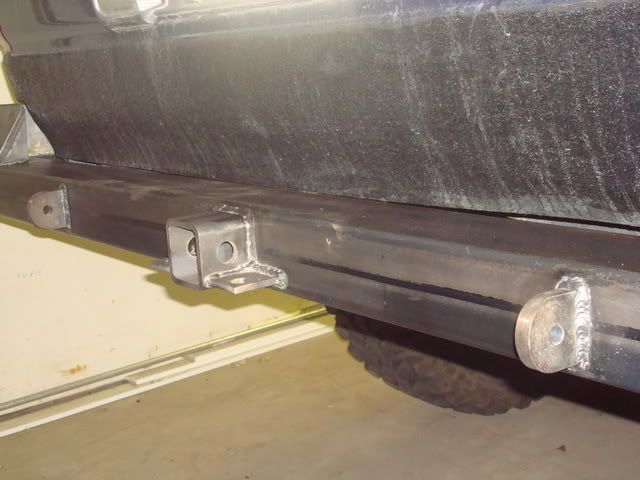
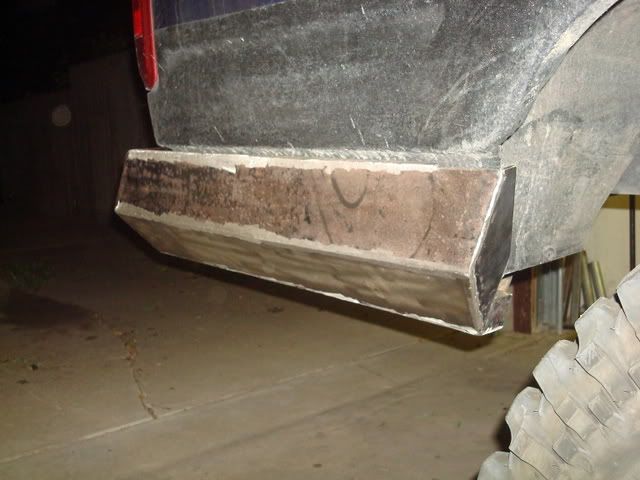
OK, ready to be powder coated
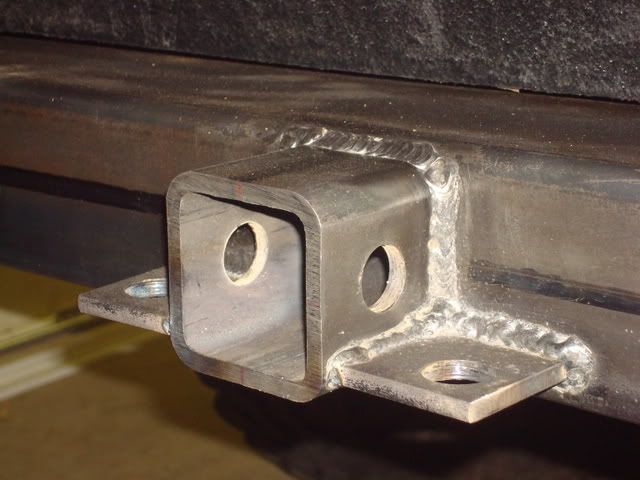
So I've got all the welding done and grinding done and its ready to be powder coated black. Well, I lied, Im going to drill out the clevis lugs to 5/8" or 11/16" dia. If I buy a 5/8" clevis is the pin undersized so it will fit in a 5/8" hole, or is the pin exactly 5/8" dia? I know the working load on a 5/8" stainless clevis is only about 5600 lbs, but that is with a 5 - 1 safety ratio. Do you guys think this is going to be undersized? Well, if it is, too bad, because I'm not tearing off the existing lugs so that I can weld on bigger ones that I can drill a 3/4" or 1" hole in.
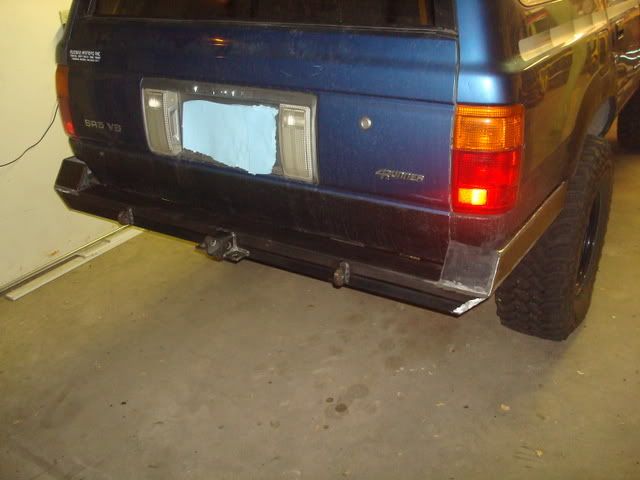
ANYWAYS, after I welded up the whole thing I put it back on the truck and my worst fear had slightly come true. Warpage. The sides had warped down a little bit. The driver's side warped down about 3/8" and the passenger side warped down about 1/4". So I guess really that isn't too bad, but even the smallest blemishes drive the fabricator crazy. I don't know how I could have prevented that warpage though. I tacked it together about every one to two inches before I laid the main welds down. Oh, and the other mistake that is driving me nuts is the two pieces of steel on the right and left of the female hitch piece with the holes in for the trailer chains: one is about an 1/8 inch lower than the other. I don't know how I welded those up without it being perfect. I guess thats what happens when you get to the very end of a project. You just want to be done and see it on the truck.
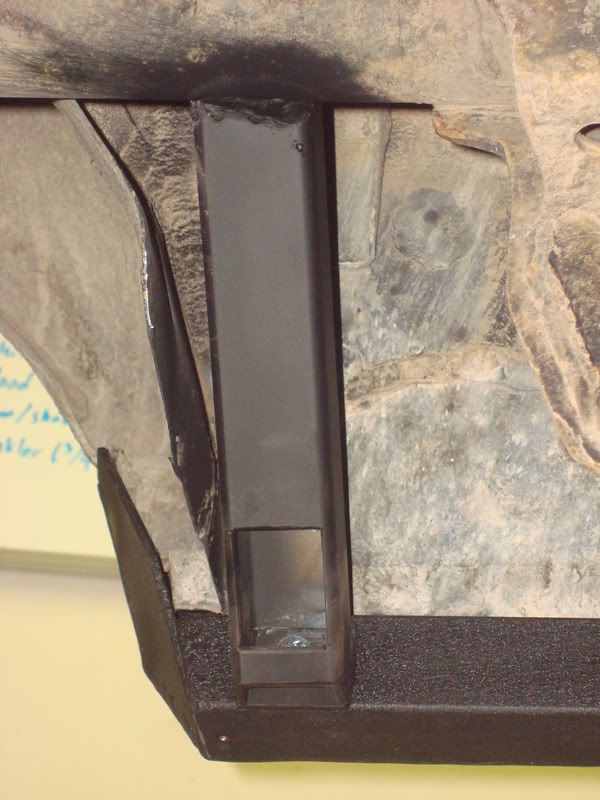
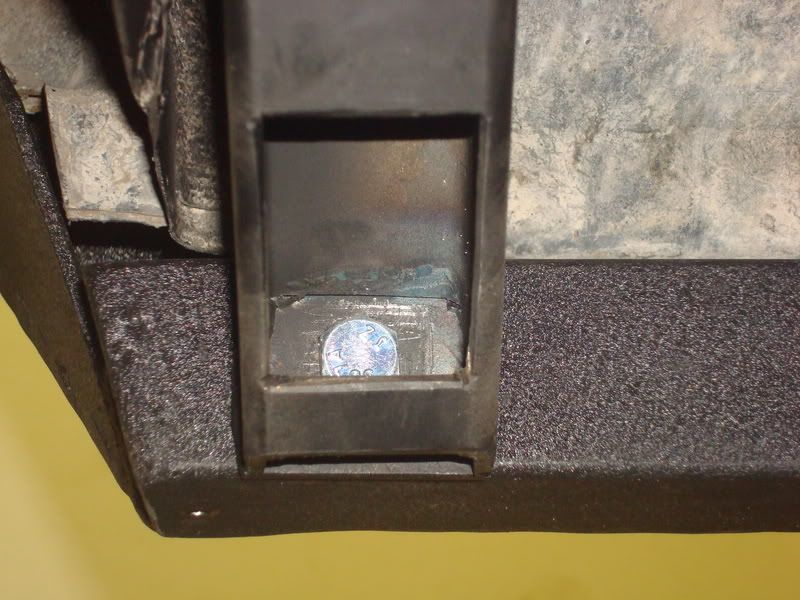
Oh, and the other last thing I need to do is make my side supports. Im going to use some square tubing to tie in the sides of the bumper to the truck's frame at a 45 degree vertical angle. This will be a bolt on piece and I'll wait to do it until after it comes back from the powder coater, just in case it decides to move at all on me again after being in a hot oven.
OK, here are some pics. For the amateur welder that I am, Im pretty pleased with how it turned out. I'll post more pics after its powder coated:
Oh ya, and ignore the dirty truck.
ANYWAYS, after I welded up the whole thing I put it back on the truck and my worst fear had slightly come true. Warpage. The sides had warped down a little bit. The driver's side warped down about 3/8" and the passenger side warped down about 1/4". So I guess really that isn't too bad, but even the smallest blemishes drive the fabricator crazy. I don't know how I could have prevented that warpage though. I tacked it together about every one to two inches before I laid the main welds down. Oh, and the other mistake that is driving me nuts is the two pieces of steel on the right and left of the female hitch piece with the holes in for the trailer chains: one is about an 1/8 inch lower than the other. I don't know how I welded those up without it being perfect. I guess thats what happens when you get to the very end of a project. You just want to be done and see it on the truck.
Oh, and the other last thing I need to do is make my side supports. Im going to use some square tubing to tie in the sides of the bumper to the truck's frame at a 45 degree vertical angle. This will be a bolt on piece and I'll wait to do it until after it comes back from the powder coater, just in case it decides to move at all on me again after being in a hot oven.
OK, here are some pics. For the amateur welder that I am, Im pretty pleased with how it turned out. I'll post more pics after its powder coated:
Oh ya, and ignore the dirty truck.
Last edited by WillRadford; 08-11-2008 at 09:19 PM.
10-04-2008, 03:13 PM
#33
Contributing Member
Thread Starter
Join Date: Jun 2006
Location: Bountiful, UT
Posts: 156
Likes: 0
Received 0 Likes
on
0 Posts
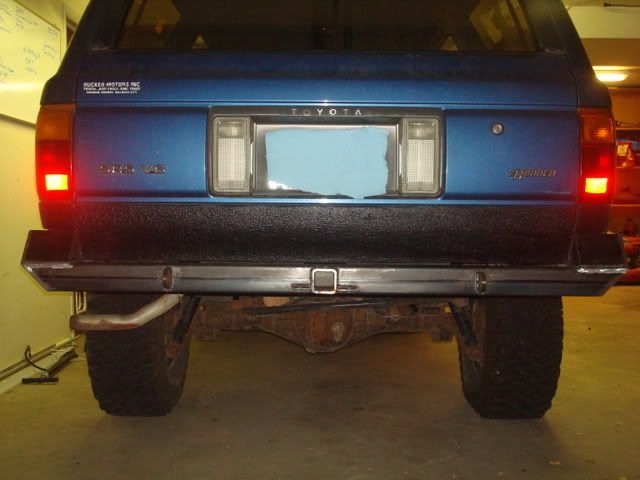
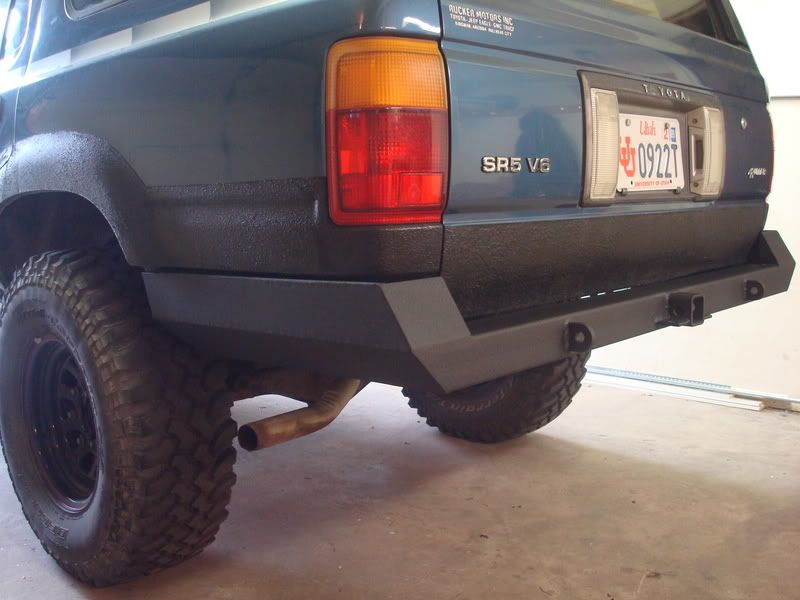
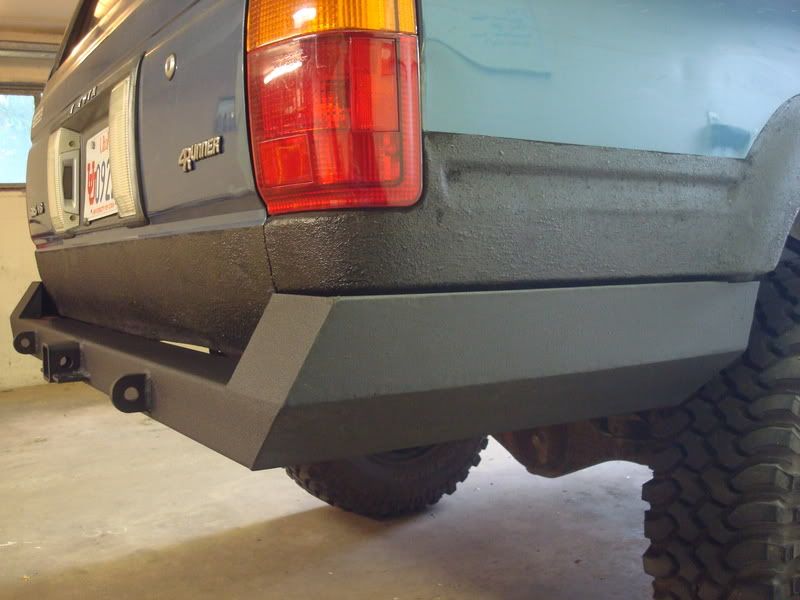
Done finally
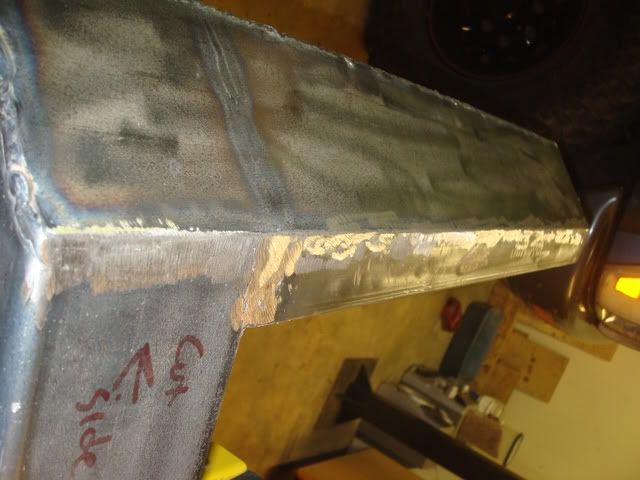
OK, so Im finally done with this thing. I got it powder coated black, as you can see, and I put on some diagonal supports for the sides. I welded the supports to the frame and bolted them to the bumper. Im happy with it. I think it turned out looking really good. I guess now I just need to get it out on the trail and see if it'll hold up. I need to do something about my exhaust pipe still. It sticks down too far now.

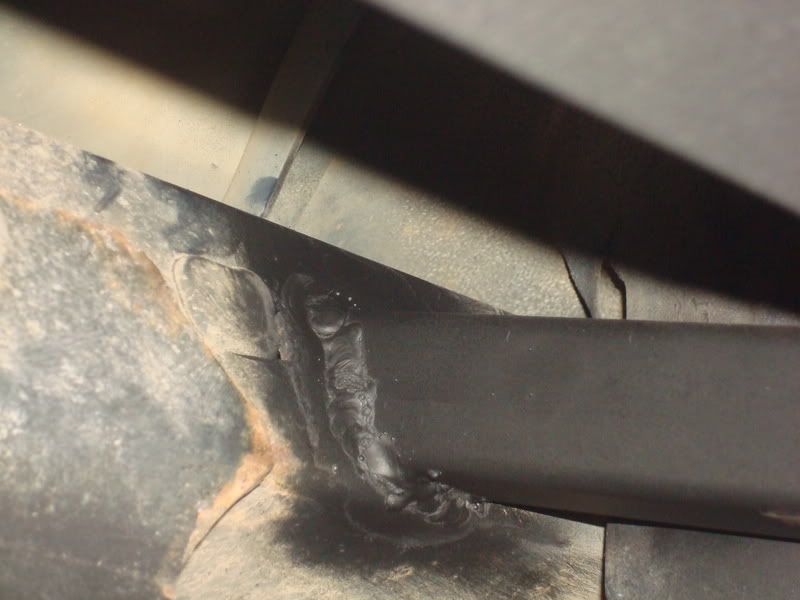
Welding the support to the frame was a pain because of the angle I was at. You can see from how pretty the weld is...
Welding the support to the frame was a pain because of the angle I was at. You can see from how pretty the weld is...
Last edited by WillRadford; 10-04-2008 at 03:15 PM.

 11-16-2008, 01:58 AM
#36
I like it alot. I'm hoping to do somehting like thus, but with a tire carrier. What gauge DOM tubing did you use for the main part?
Last edited by Matt16; 11-16-2008 at 02:00 AM.
 the exhaust pipe and put a turn down on it...
12-05-2008, 06:33 AM
the exhaust pipe and put a turn down on it...
12-05-2008, 06:33 AM
#40
Contributing Member
Thread Starter
Join Date: Jun 2006
Location: Bountiful, UT
Posts: 156
Likes: 0
Received 0 Likes
on
0 Posts


