savageoffroad 99 4Runner Build-Up Thread
 09-09-2009, 02:53 PM
#1
Registered User
Thread Starter
Join Date: Jul 2009
Location: Oakhurst, CA
Posts: 11
Likes: 0
Received 0 Likes
on
0 Posts
1999 Toyota 4Runner SR5
150K Miles
3.4L v6
4WD, Auto Transmission
Sorry, no initial photos. But you've all seen them before... there's a jillion silver Gen 3 4Runner's out there!
This truck is the guinea pig for developing a line of off-road products for '96-'02 4Runners. You can see these items for sale at www.savageoffroad.biz. Thanks in advance for the constructive feedback! This project would never have left the ground without the input guys like you.
And without further adieu, the build.
1st task was getting rid of the stock running boards and attaching some sliders. I elected to design some with a kick-out first. Honestly, I don't like the looks of it, but it's effective. Many will like the kick-out for rear wheel protection.
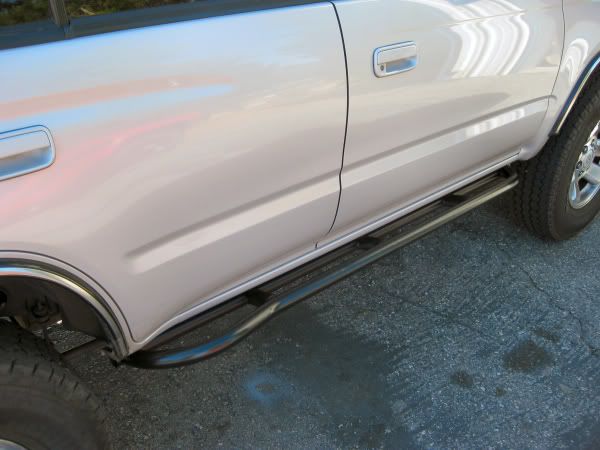
Here's a stock photo of the sliders on the ground. They're gonna change a little. I moved the legs a little and added another ladder rung. They come welded like you see in the photo below so all you have to do is clamp to the frame and weld on. Very fast and easy.
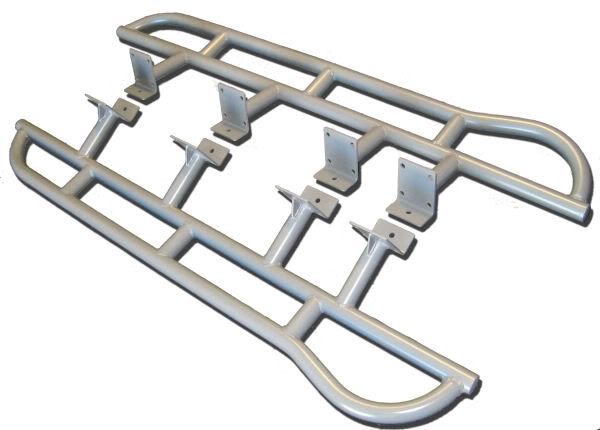
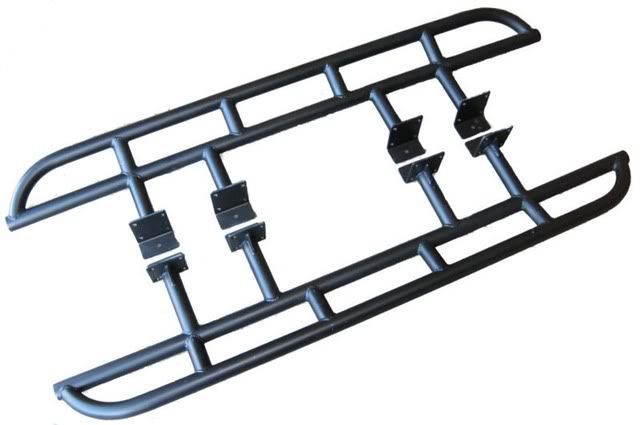
Here's a pic of the standard slider's that I'm planning to run. I like the looks of these much better. The legs are spaced correctly for fitting around cross members and body mounts. The front two legs are close together to provide extra protection for when you drive off a rock. That area near the front door tends to take a beating.
I really wanted to design a set that would bolt on but couldn't come up with an acceptable way to do it. Too much drilling, fancy fasteners, etc. I didn't want to offer ANOTHER diy kit. Most of the work installing the diy kits is cutting and fitting the legs. This design provides consistent fit (jig welded), the strength of L brackets and gussets, and the ease of clamping on and welding to frame.
Now that sliders are out of the way, on to bumpers...
150K Miles
3.4L v6
4WD, Auto Transmission
Sorry, no initial photos. But you've all seen them before... there's a jillion silver Gen 3 4Runner's out there!
This truck is the guinea pig for developing a line of off-road products for '96-'02 4Runners. You can see these items for sale at www.savageoffroad.biz. Thanks in advance for the constructive feedback! This project would never have left the ground without the input guys like you.
And without further adieu, the build.
1st task was getting rid of the stock running boards and attaching some sliders. I elected to design some with a kick-out first. Honestly, I don't like the looks of it, but it's effective. Many will like the kick-out for rear wheel protection.
Here's a stock photo of the sliders on the ground. They're gonna change a little. I moved the legs a little and added another ladder rung. They come welded like you see in the photo below so all you have to do is clamp to the frame and weld on. Very fast and easy.
Here's a pic of the standard slider's that I'm planning to run. I like the looks of these much better. The legs are spaced correctly for fitting around cross members and body mounts. The front two legs are close together to provide extra protection for when you drive off a rock. That area near the front door tends to take a beating.
I really wanted to design a set that would bolt on but couldn't come up with an acceptable way to do it. Too much drilling, fancy fasteners, etc. I didn't want to offer ANOTHER diy kit. Most of the work installing the diy kits is cutting and fitting the legs. This design provides consistent fit (jig welded), the strength of L brackets and gussets, and the ease of clamping on and welding to frame.
Now that sliders are out of the way, on to bumpers...

 09-10-2009, 12:08 PM
#3
Registered User
Thread Starter
Join Date: Jul 2009
Location: Oakhurst, CA
Posts: 11
Likes: 0
Received 0 Likes
on
0 Posts
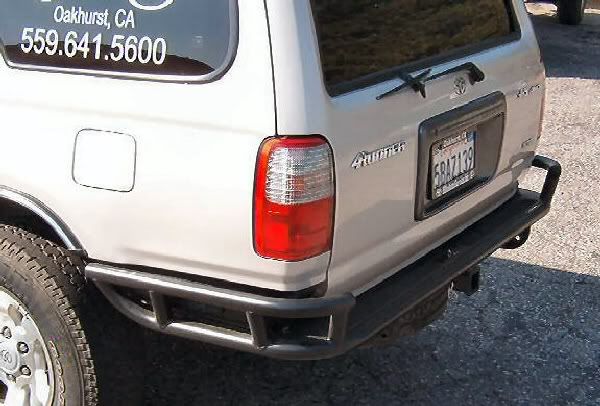
Gen 3 4Runner Rear Tube Bumper
Here's the build photos for the rear tube bumper.
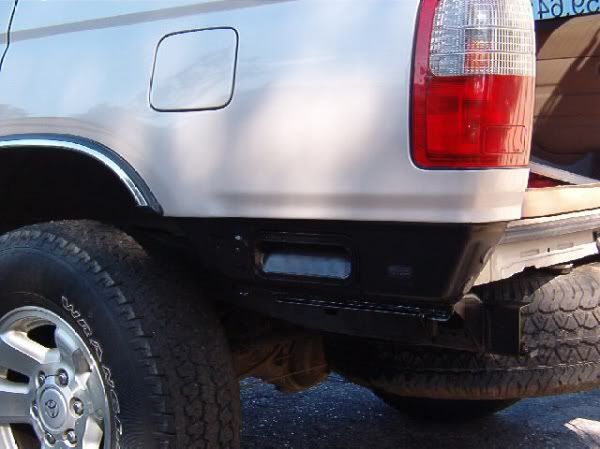
Before mods:
After removing rear bumper, hitch, etc, I masked prepped the rear quarter panels to for painting. There is a lot of ugly behind the gen 3 rear bumpers, but I found that if you paint it satin black, all the ugly disappears.

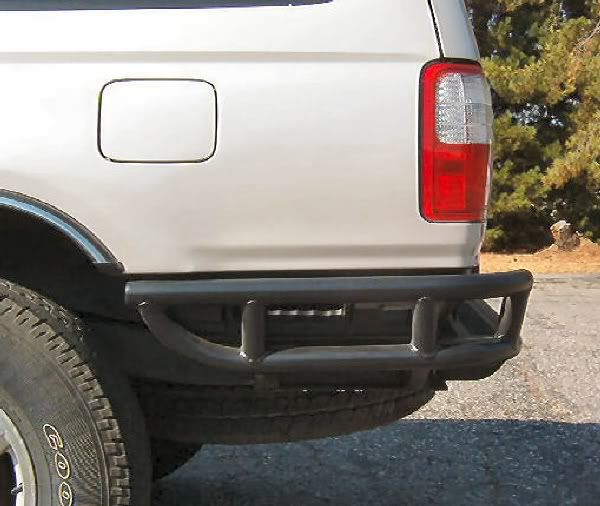
Here's after masking. Even that huge vent on the right side mostly disappears.
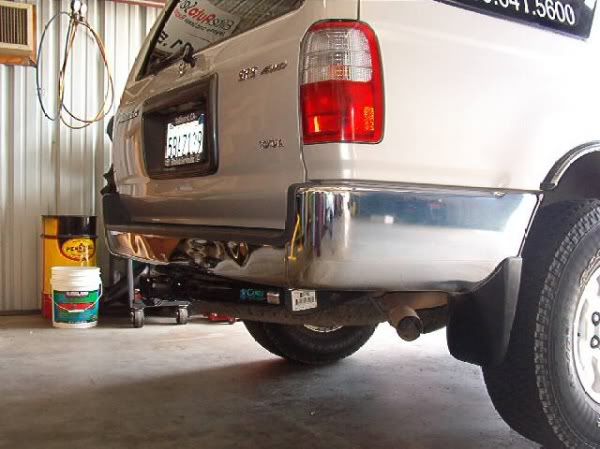
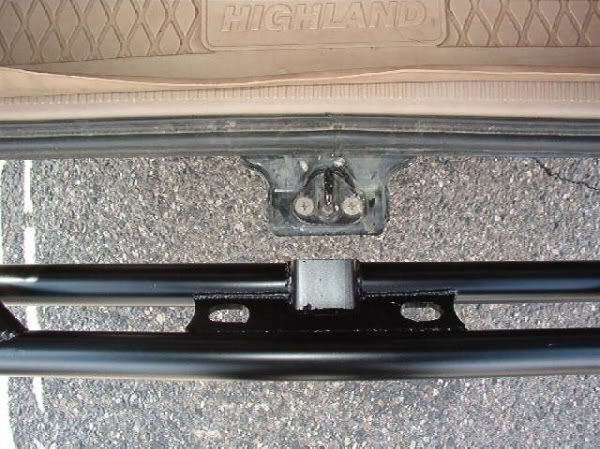
Here's a pic of the rear bumper without the optional rear deck. This is a good shot to show the basic structure of the thing. As you can see, it is STOUT. And it bolts directly to the frame using 4 bolts per side, just like a trailer hitch would. It uses existing frame holes too (older gen 3s might have to drill 1 hole on each side that's optional.) Some optional clearancing of pinch weld is desirable. The body rattled against the bumper on bumpy roads until I sanded notches in the pinch welds for the lateral support braces.
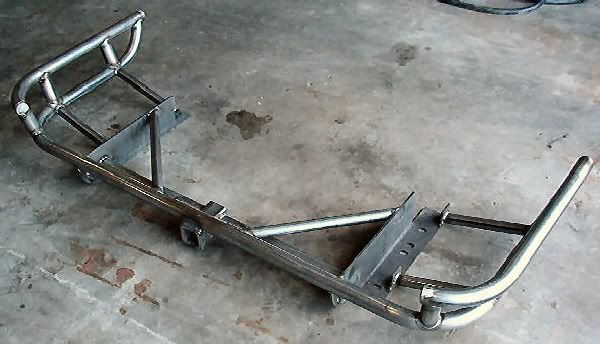
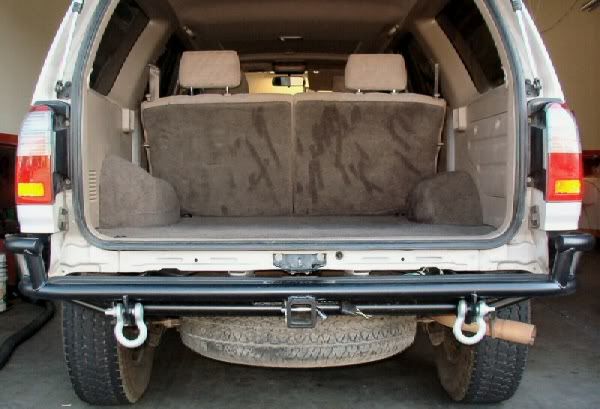
I don't like using this bumper without the optional rear deck because of the gap between the body and bumper. If you have pets or kids, a leg could get stuck in this gap. This space is necessary to fit the factory spare tire and the receiver.
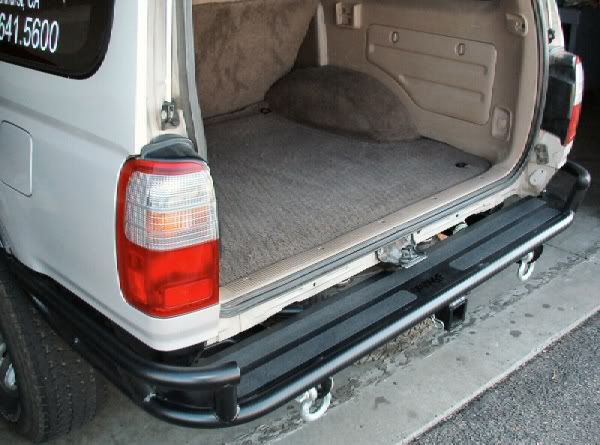
Here's a great shot of the optional rear deck installed. As you can see, it covers the spare tire and the receiver, fitting snugly to the body. The grip tape adds a nice look to it as well as traction for standing or sitting. The Savage logo is laser cut into the center.
Here's some finished photos. For more pics, check out the photos and installation section at the web site.
Before mods:
After removing rear bumper, hitch, etc, I masked prepped the rear quarter panels to for painting. There is a lot of ugly behind the gen 3 rear bumpers, but I found that if you paint it satin black, all the ugly disappears.
Here's after masking. Even that huge vent on the right side mostly disappears.
Here's a pic of the rear bumper without the optional rear deck. This is a good shot to show the basic structure of the thing. As you can see, it is STOUT. And it bolts directly to the frame using 4 bolts per side, just like a trailer hitch would. It uses existing frame holes too (older gen 3s might have to drill 1 hole on each side that's optional.) Some optional clearancing of pinch weld is desirable. The body rattled against the bumper on bumpy roads until I sanded notches in the pinch welds for the lateral support braces.
I don't like using this bumper without the optional rear deck because of the gap between the body and bumper. If you have pets or kids, a leg could get stuck in this gap. This space is necessary to fit the factory spare tire and the receiver.
Here's a great shot of the optional rear deck installed. As you can see, it covers the spare tire and the receiver, fitting snugly to the body. The grip tape adds a nice look to it as well as traction for standing or sitting. The Savage logo is laser cut into the center.
Here's some finished photos. For more pics, check out the photos and installation section at the web site.
09-15-2009, 10:54 AM
#5
Registered User
Thread Starter
Join Date: Jul 2009
Location: Oakhurst, CA
Posts: 11
Likes: 0
Received 0 Likes
on
0 Posts
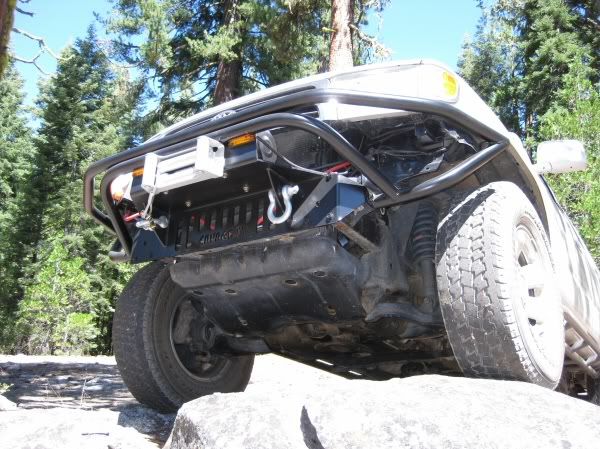
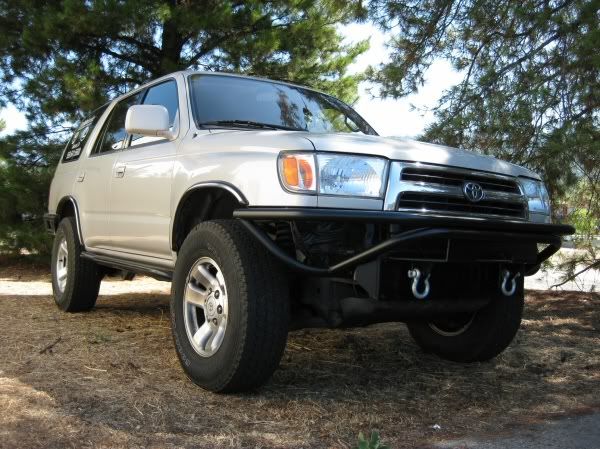
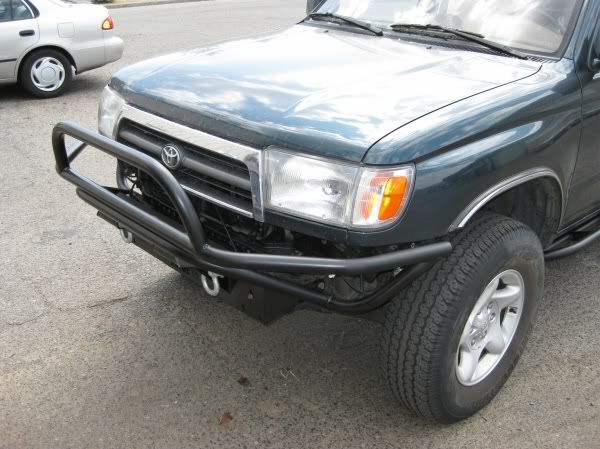
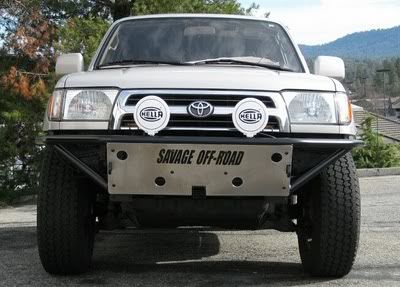
Here's a front tube bumper option for Gen 3 Toyota 4Runner owners. It has a winch plate and optional bull bar / stinger. Read full specs here.
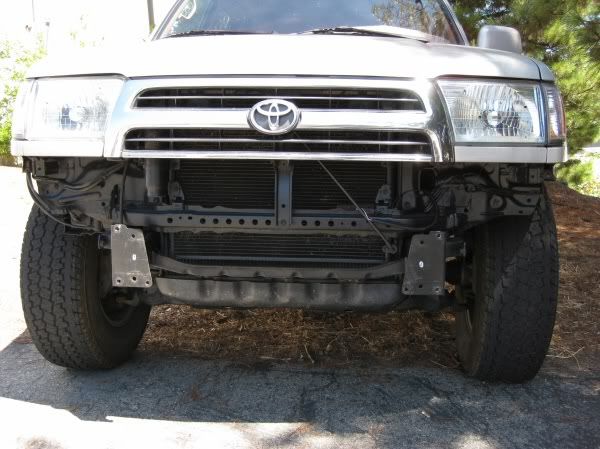
Here's stock bumper removed and the "ugly" painted satin black. The plastic fender liner had to be trimmed for looks, but otherwise completely bolt-on.
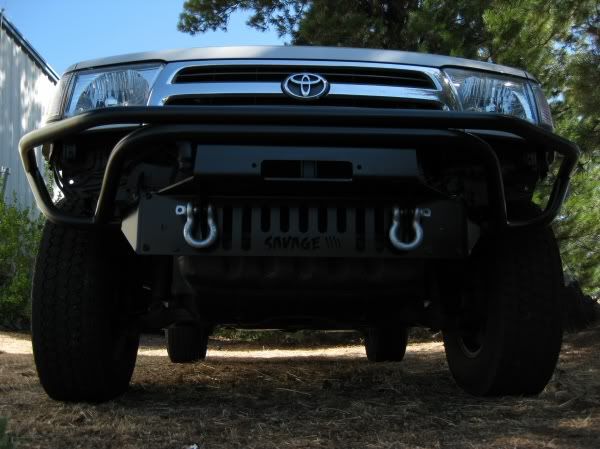
New bumper installed.
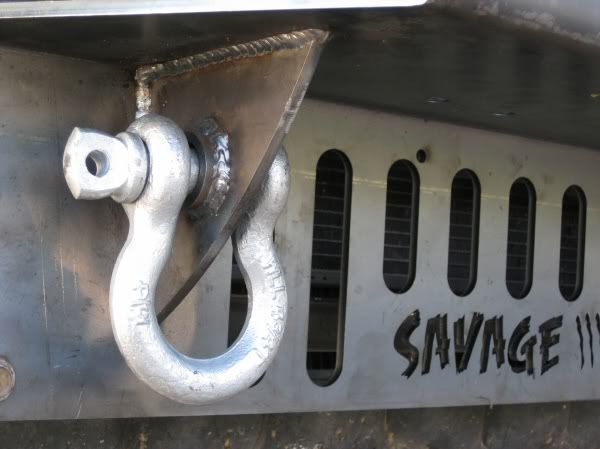
Very strong d-ring mounts.
More views.
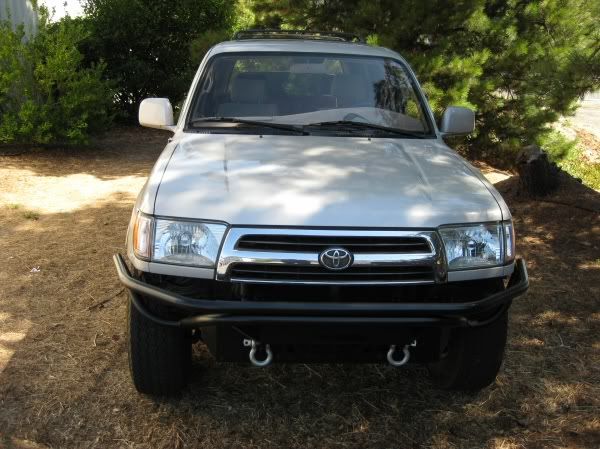
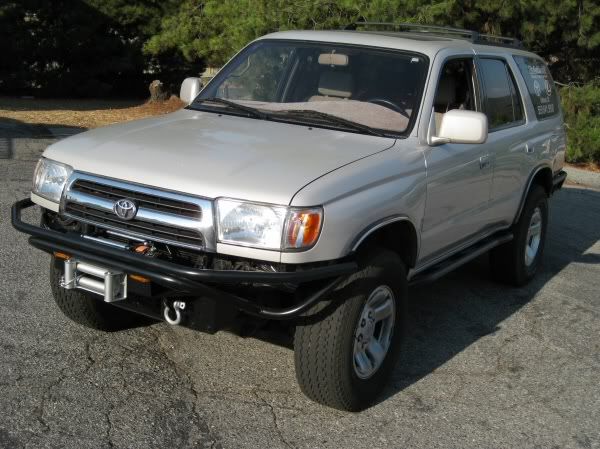
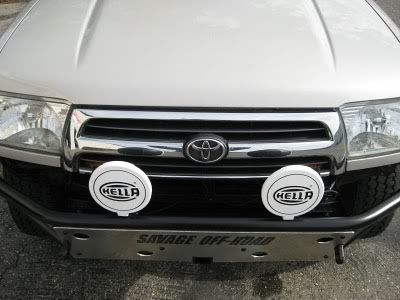
Here's a pic with the optional stinger.
Here's some pics showing the optional LED light kit and a winch installed. I used a Mile Marker PEC8. This bumper is designed to use a Hawse fairlead but I used the roller fairlead that came with the Mile Marker. I had to slot the holes 1/8" but it fits well.
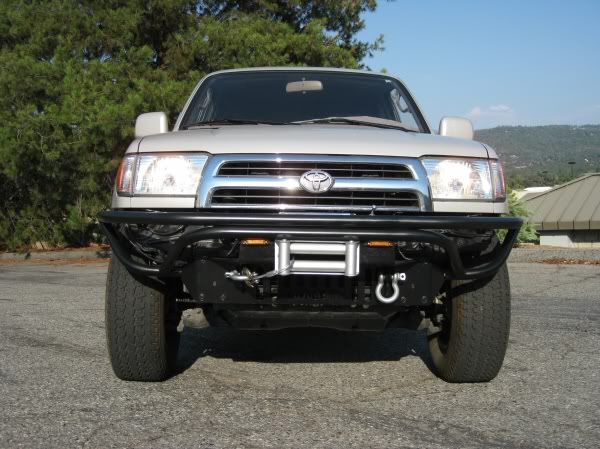
For more info, visit www.savageoffroad.biz.
Here's stock bumper removed and the "ugly" painted satin black. The plastic fender liner had to be trimmed for looks, but otherwise completely bolt-on.
New bumper installed.
Very strong d-ring mounts.
More views.
Here's a pic with the optional stinger.
Here's some pics showing the optional LED light kit and a winch installed. I used a Mile Marker PEC8. This bumper is designed to use a Hawse fairlead but I used the roller fairlead that came with the Mile Marker. I had to slot the holes 1/8" but it fits well.
For more info, visit www.savageoffroad.biz.
01-13-2010, 11:42 AM
#6
Registered User
Thread Starter
Join Date: Jul 2009
Location: Oakhurst, CA
Posts: 11
Likes: 0
Received 0 Likes
on
0 Posts
I got a lot of negative feedback on the last bumper. Do be fair, I didn't like it either. Here's some pictures of the new design. You can get your own at www.savageoffroad.biz.
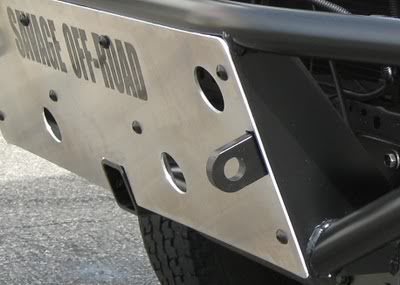
This bumper is designed to be highly customizable. The customer gets to choose which features they want. This one includes light tabs, d-ring mounts, and a receiver set up. I picked the aluminum skid plate because it looked the best with my silver 4Runner. Other options you can get include a light hoop / stinger, DOM tubing, powder coating, winch mount setup, etc.
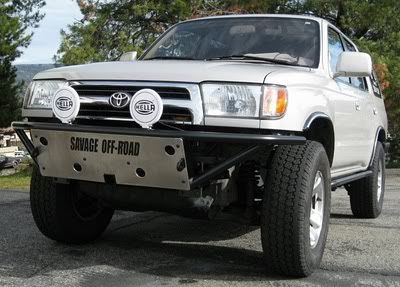
Any feedback?
This bumper is designed to be highly customizable. The customer gets to choose which features they want. This one includes light tabs, d-ring mounts, and a receiver set up. I picked the aluminum skid plate because it looked the best with my silver 4Runner. Other options you can get include a light hoop / stinger, DOM tubing, powder coating, winch mount setup, etc.
Any feedback?
Trending Topics


Thread
Thread Starter
Forum
Replies
Last Post
RedRunner_87
95.5-2004 Tacomas & 96-2002 4Runners (Build-Up Section)
84
06-01-2021 01:51 PM
jon.r
General Vehicle Related Topics (Non Year Related)
8
07-11-2015 03:34 PM
crashburnoveride
86-95 Trucks & 4Runners
1
07-10-2015 06:39 AM


