ChildrenOfBodom's 1999 4Runner Build-Up Thread
 10-16-2011, 11:36 AM
#81
Registered User
Thread Starter
oh lol i see it now. than why'd you get one when you need a drop. i know i got a hitch before my lift and than i lifted and had to get a new one. if your not looking to spend to much money on one. go to Lowes and get one the steel adjustable one. it was like $40 and being adjustable is better than a fixed one. trailer weight and cargo weight will change the height
When I take that offroad, I figure clearance is key, so if I make the trailer tall enough to use the current hitch (or maybe a little drop), that would be best IMO...

Except mine will probably be Imperial Jade or Camo... and it would be a FANTASTIC place for a spare, as shown. That would solve my spare location troubles.
lol... I'm getting ahead of myself again...
Last edited by ChildrenOfBodom; 10-16-2011 at 11:38 AM.
 11-12-2011, 06:11 PM
#83
Registered User
Thread Starter
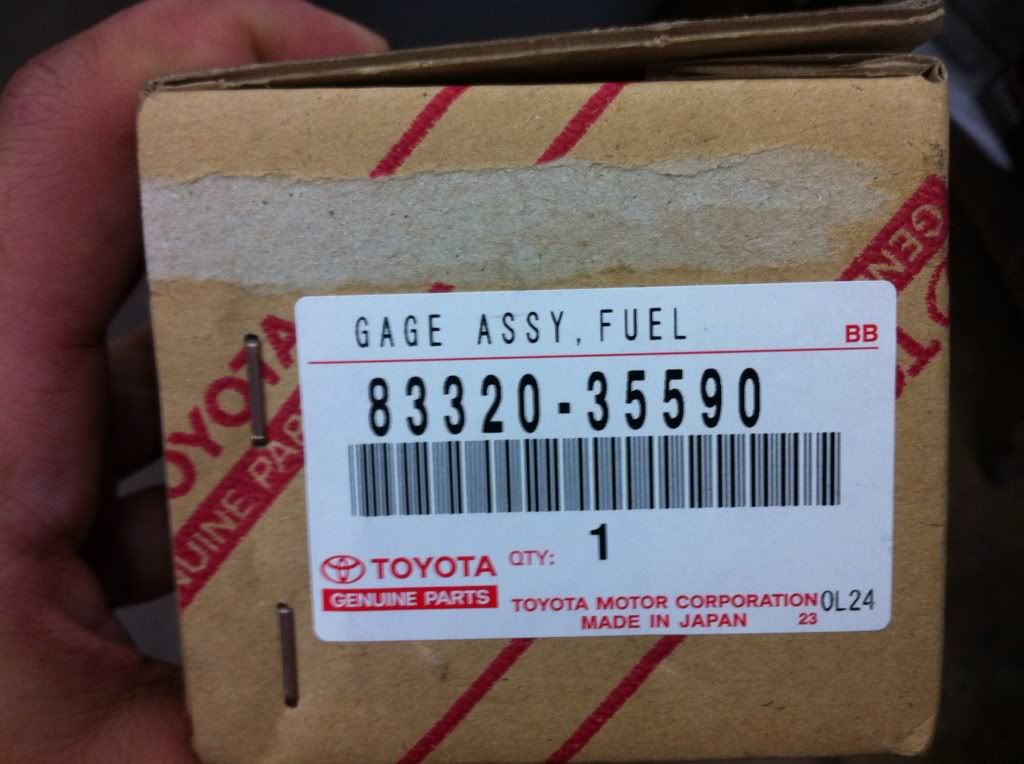
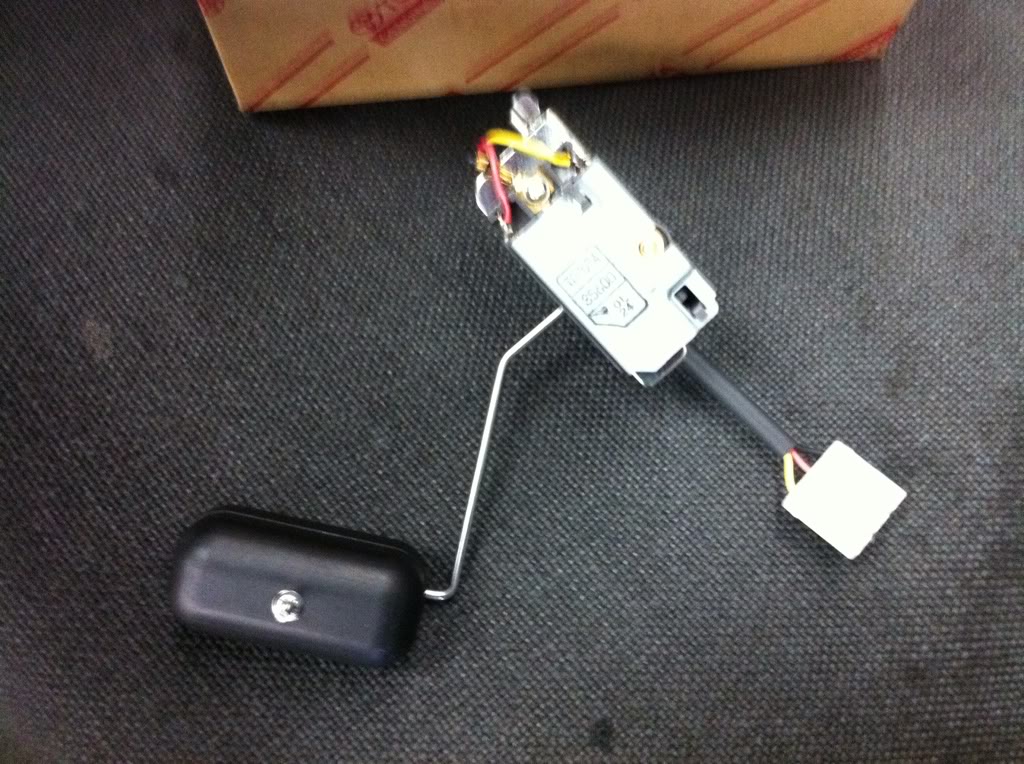
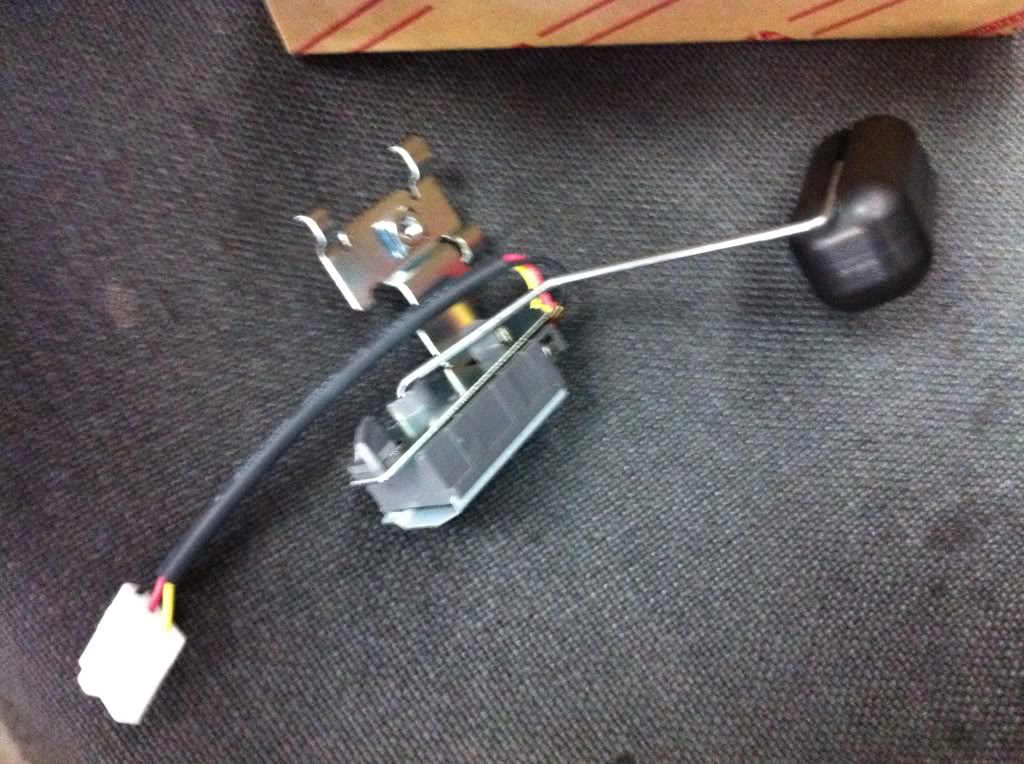
My gas gauge died. 1999 and 2000 years have a TSB for bad fuel sender units and a revised motherboard for the back of the gauge cluster.
New sender:
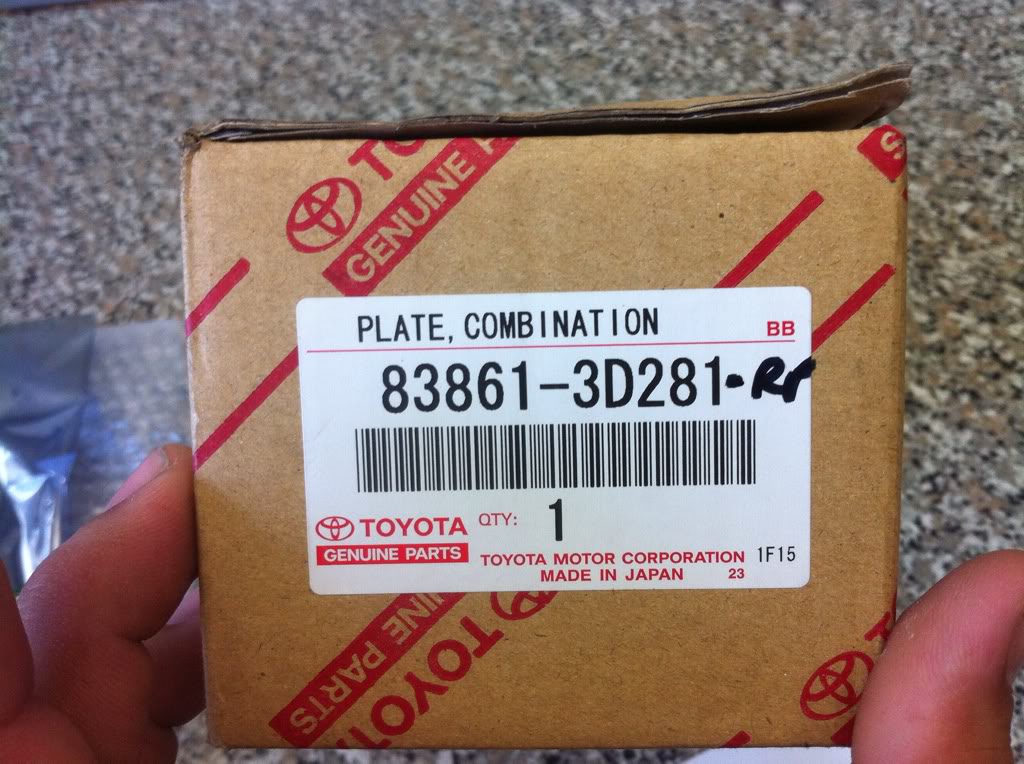
Gauge Motherboard (special order from Toyota, $50 with 0 miles on the ODO or $130 for your mileage)
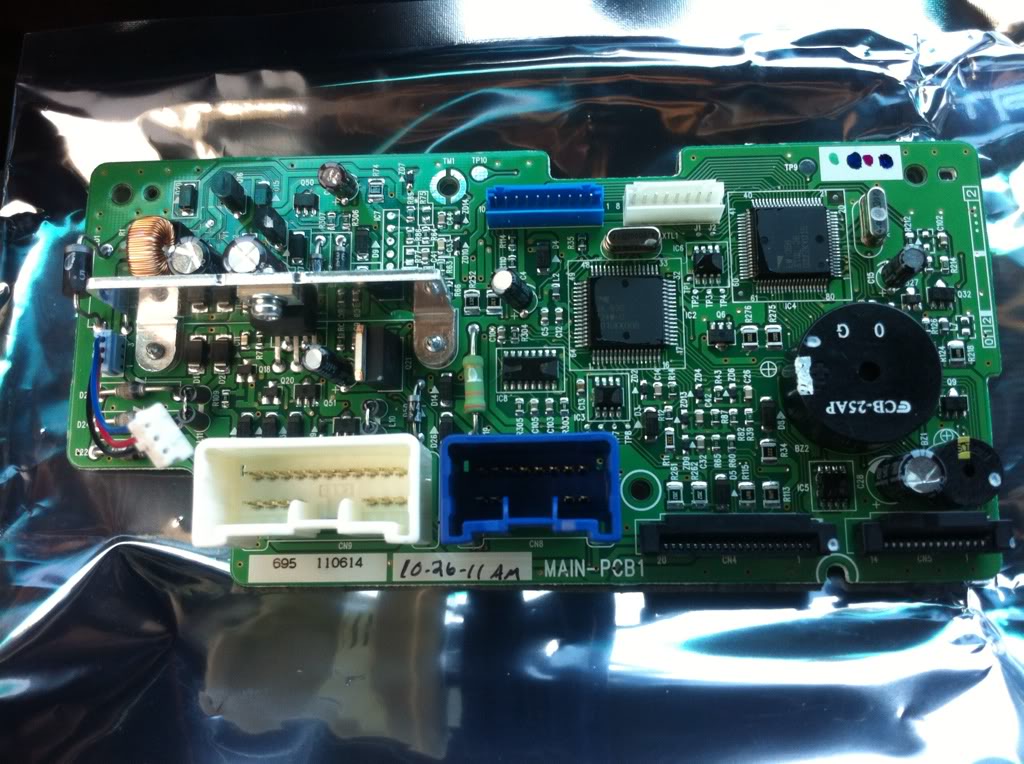
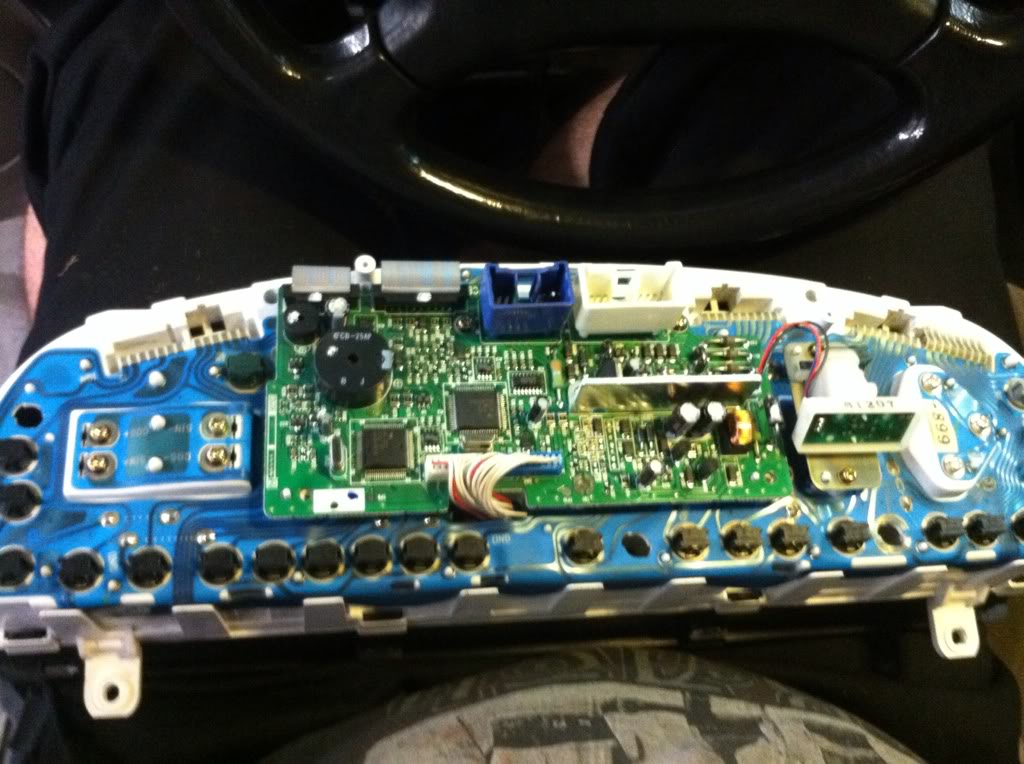
Old motherboard on back of cluster:
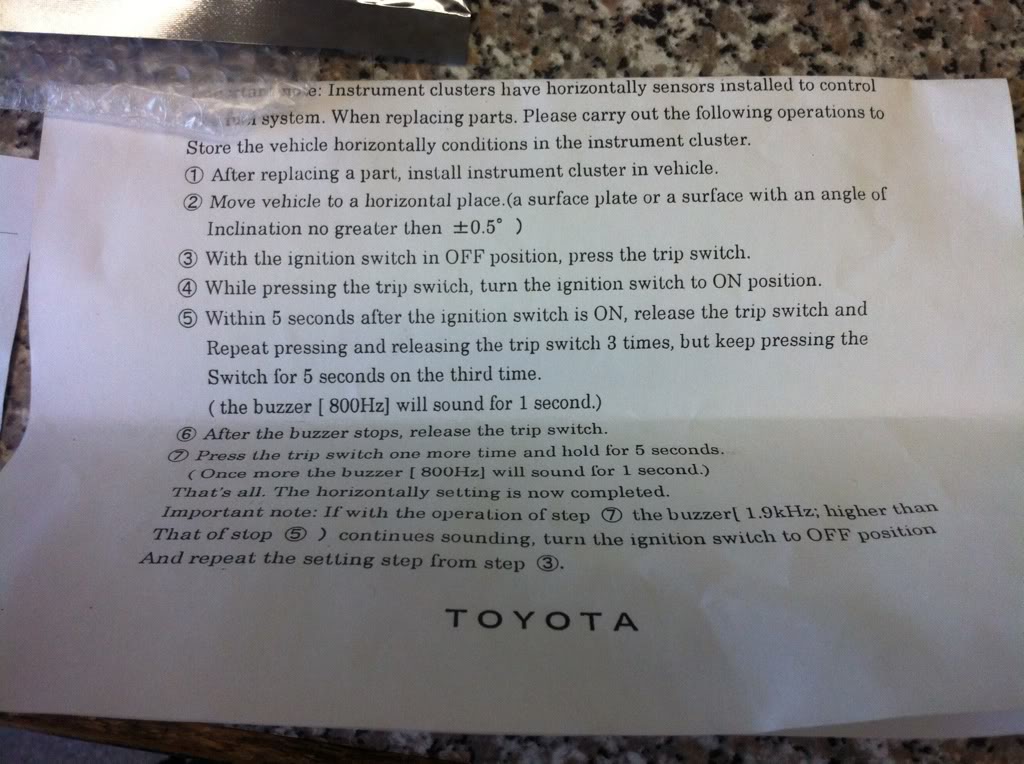
Instructions for reprogramming:
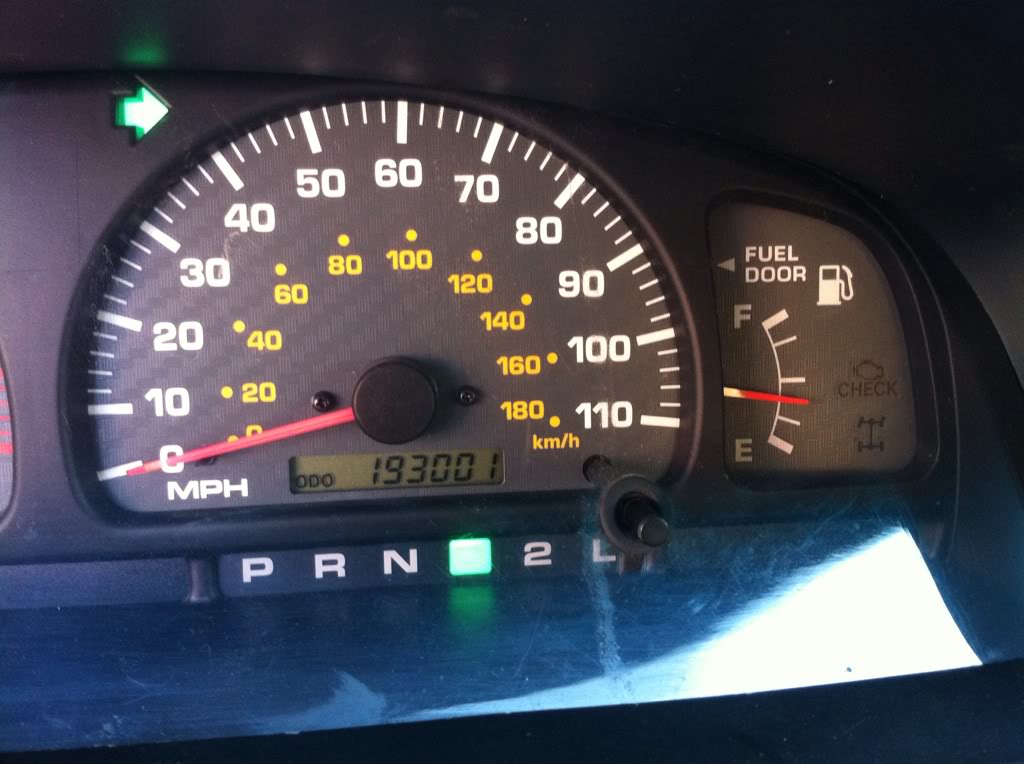
New mileage (I asked for 193,001)
------------------------------------------------------------------------------------------------------------------
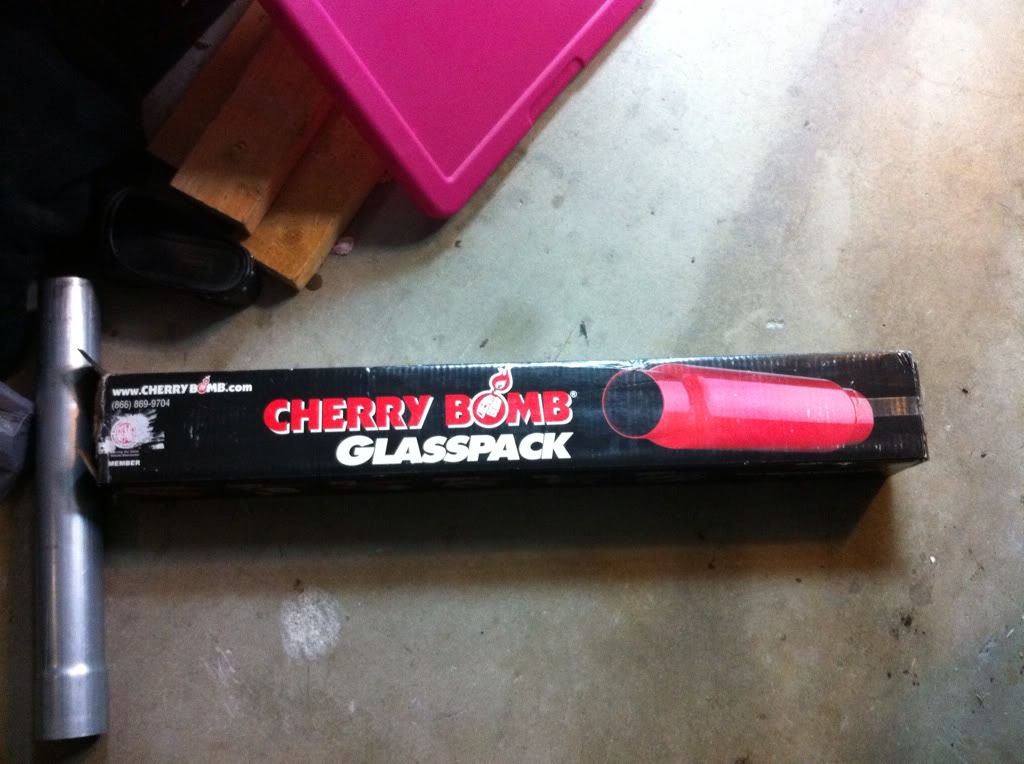
Cut off the MagnaBlow and put one of these on for a 12th of the price. Sounds much better. I'll do my best to make a good video of it when I have time.
New toys!:
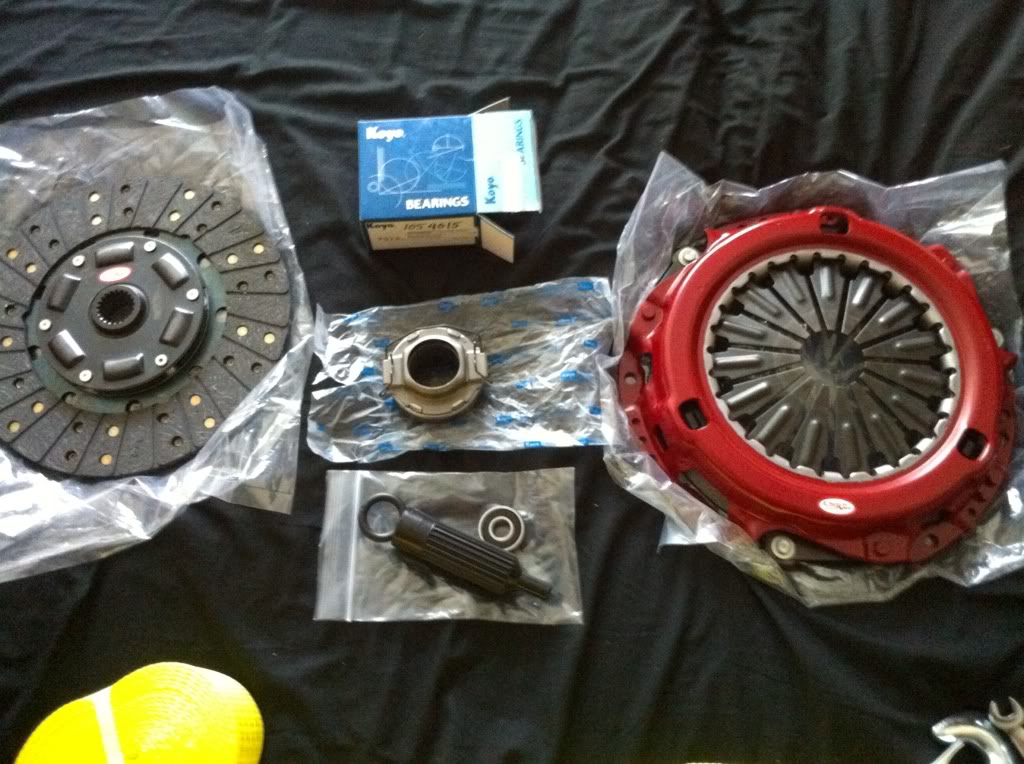
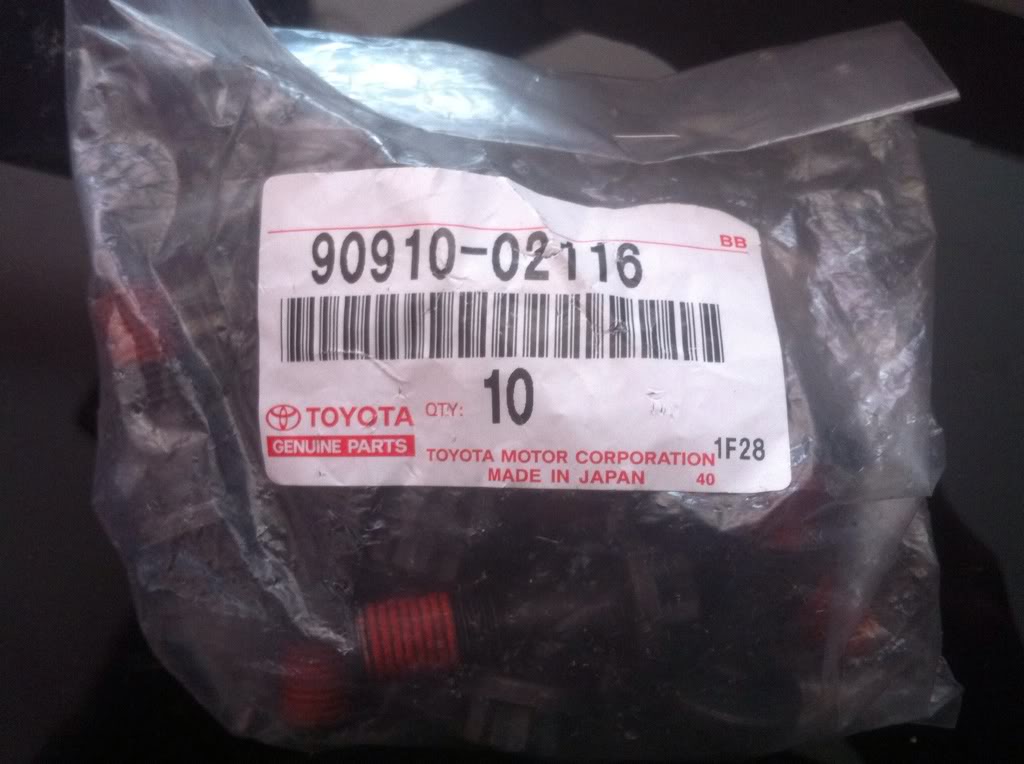
Flywheel bolts (I have a flywheel, not pictured)
Front diff drop (as well as a 4.56 front diff, not pictured):
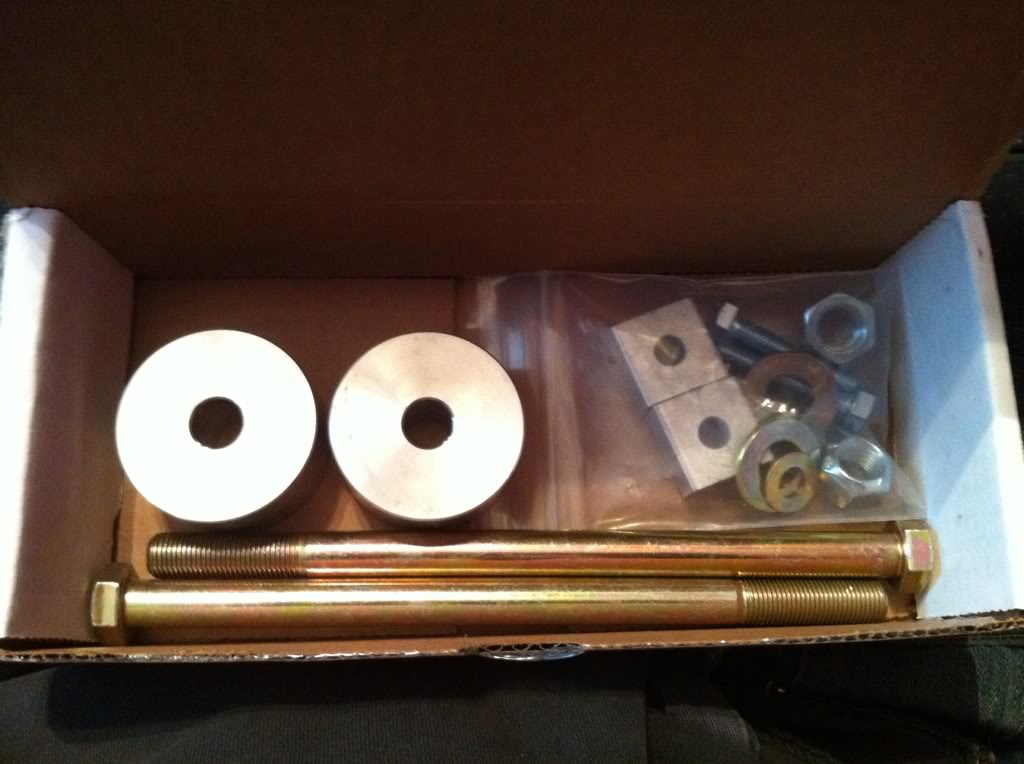
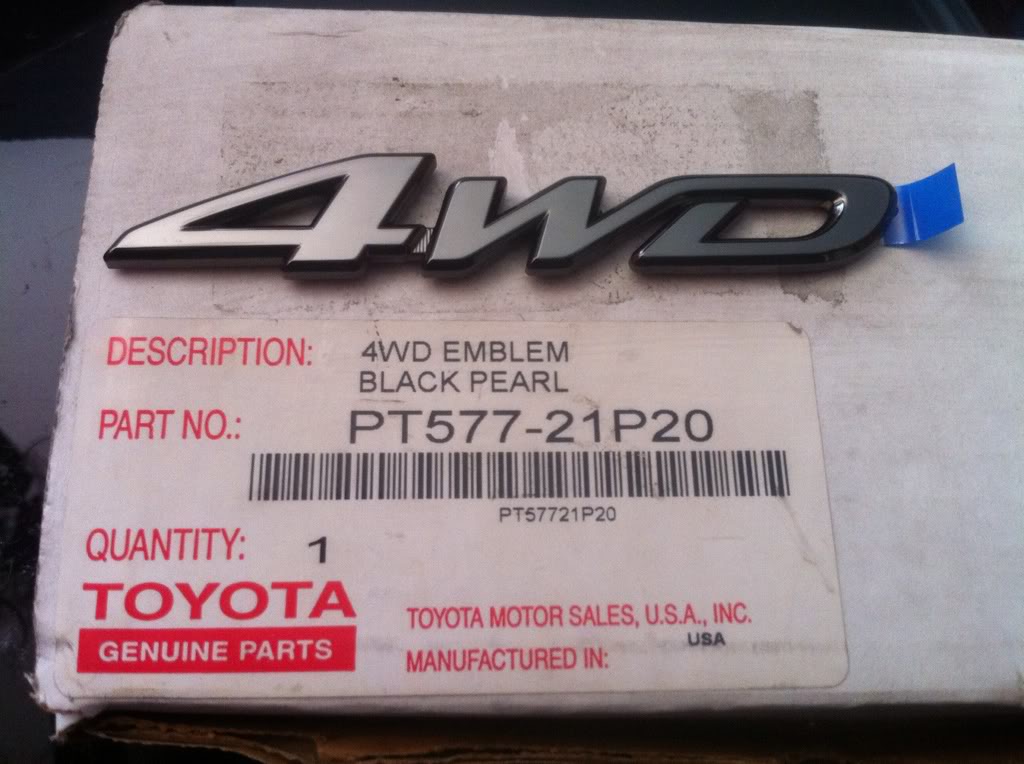
And the icing on the cake
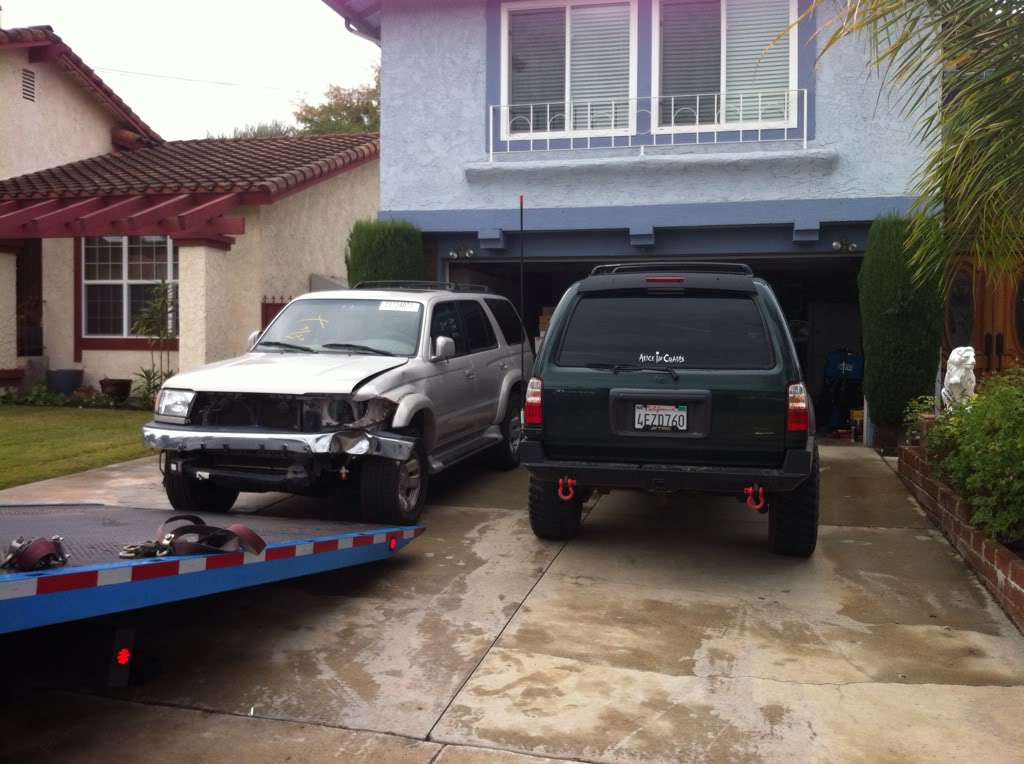
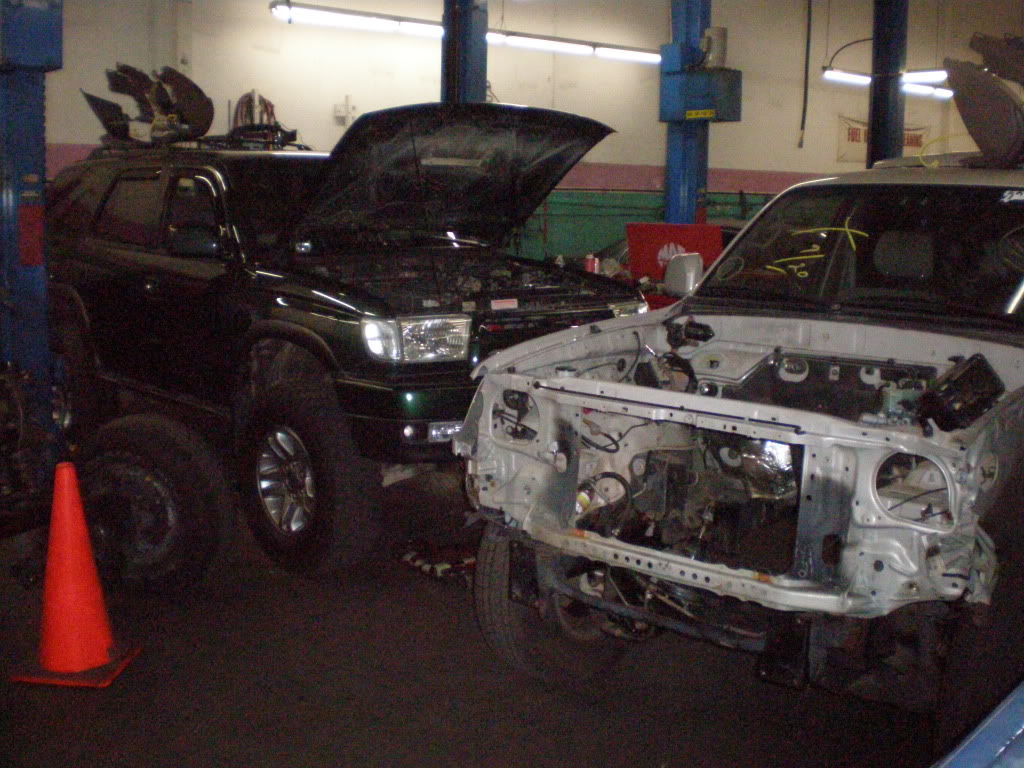
Gee, lots of 4Runners in the family now...
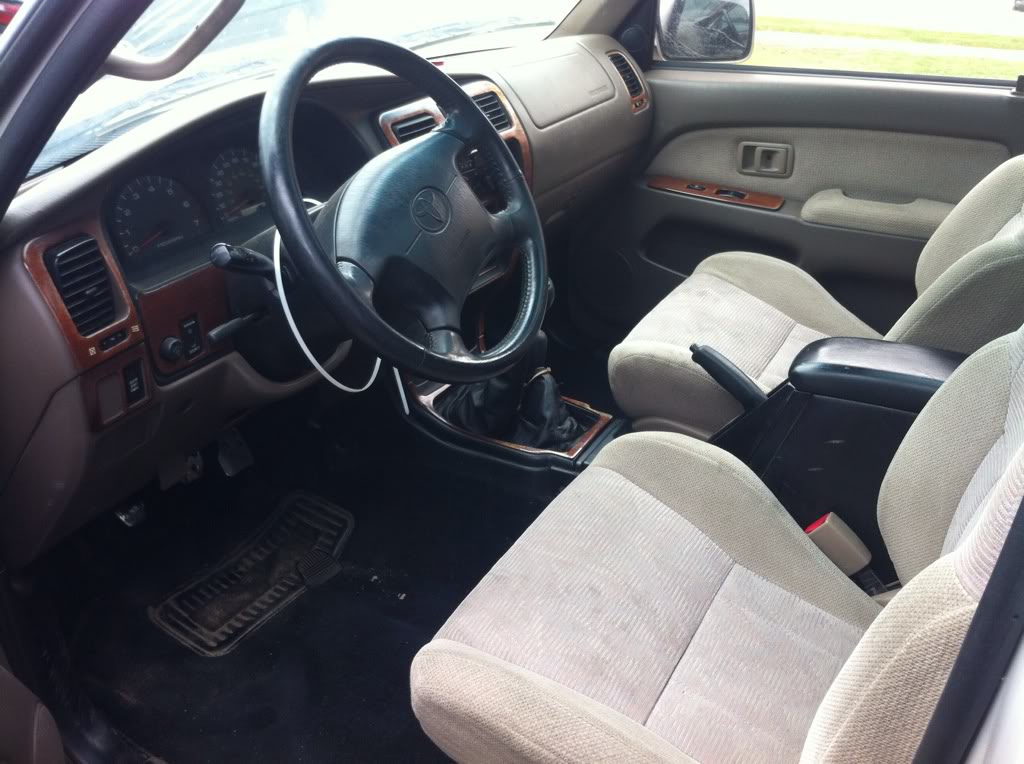
Newest being this 2000 SR5 4x4 5 speed DONOR TRUCK with horrific tail lights!
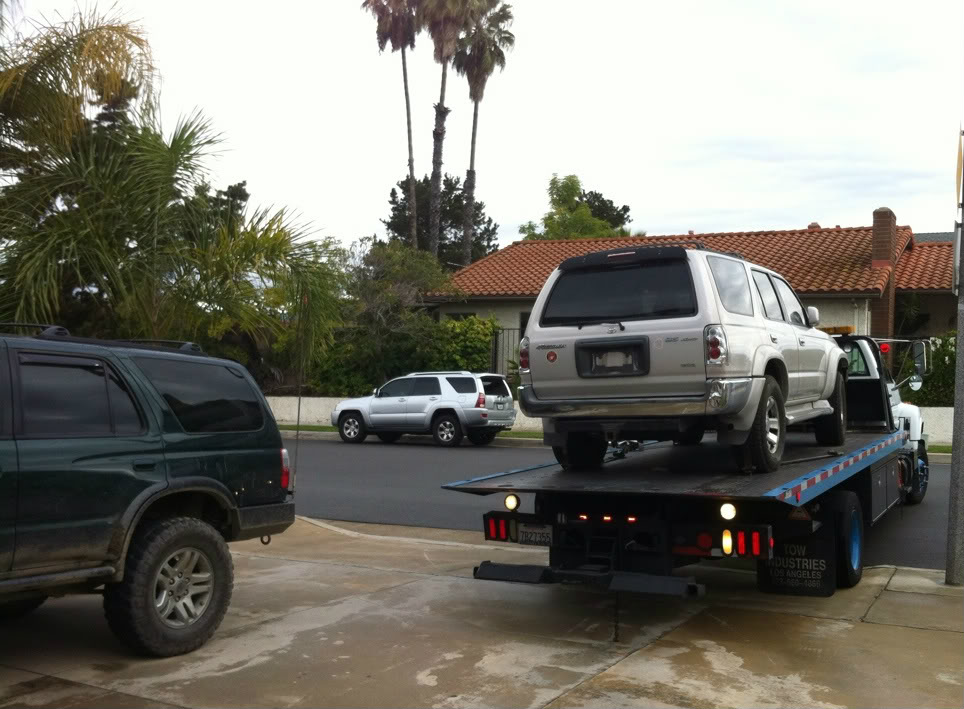
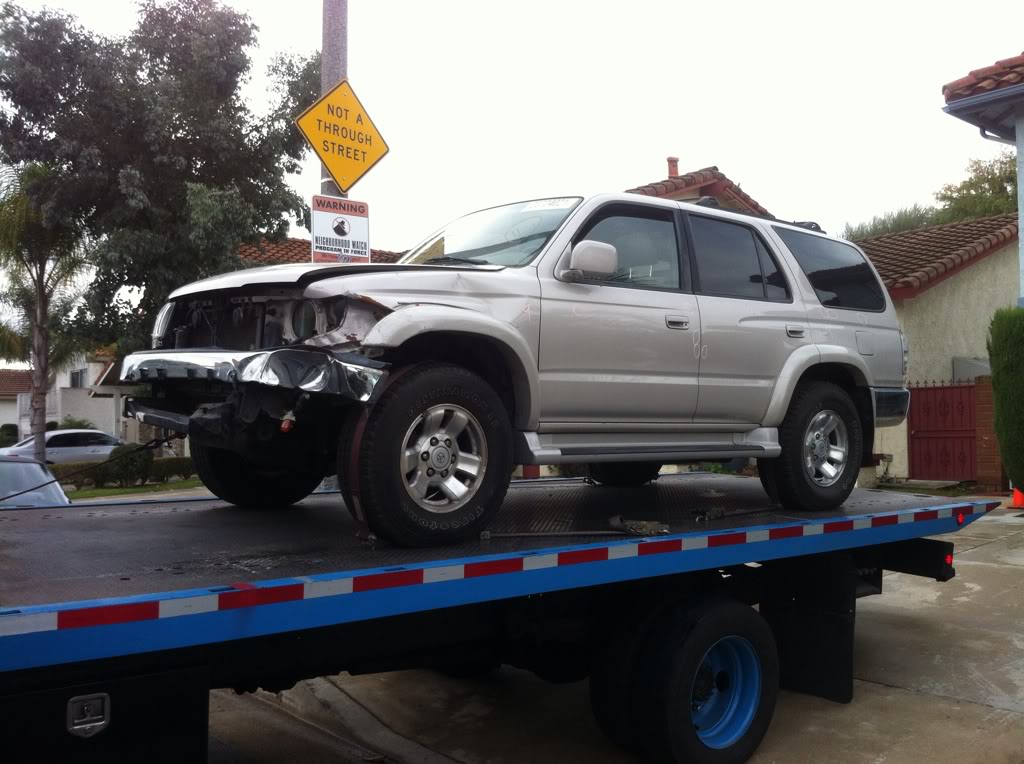
Previous owner tried to make the interior black lol...
Hehe... looks like I've got all of my 4x4 swap parts...
New sender:
Gauge Motherboard (special order from Toyota, $50 with 0 miles on the ODO or $130 for your mileage)
Old motherboard on back of cluster:
Instructions for reprogramming:
New mileage (I asked for 193,001)
------------------------------------------------------------------------------------------------------------------
Cut off the MagnaBlow and put one of these on for a 12th of the price. Sounds much better. I'll do my best to make a good video of it when I have time.
New toys!:
Flywheel bolts (I have a flywheel, not pictured)
Front diff drop (as well as a 4.56 front diff, not pictured):
And the icing on the cake
Gee, lots of 4Runners in the family now...
Newest being this 2000 SR5 4x4 5 speed DONOR TRUCK with horrific tail lights!
Previous owner tried to make the interior black lol...
Hehe... looks like I've got all of my 4x4 swap parts...
11-15-2011, 10:25 PM
#84
Registered User
Thread Starter
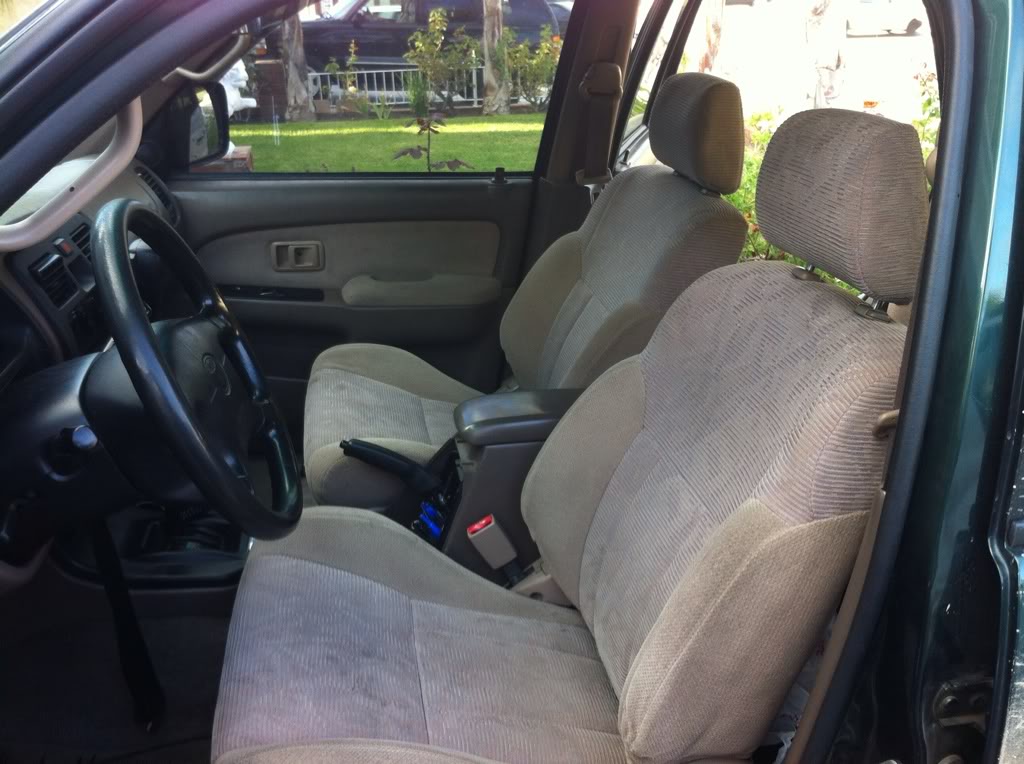
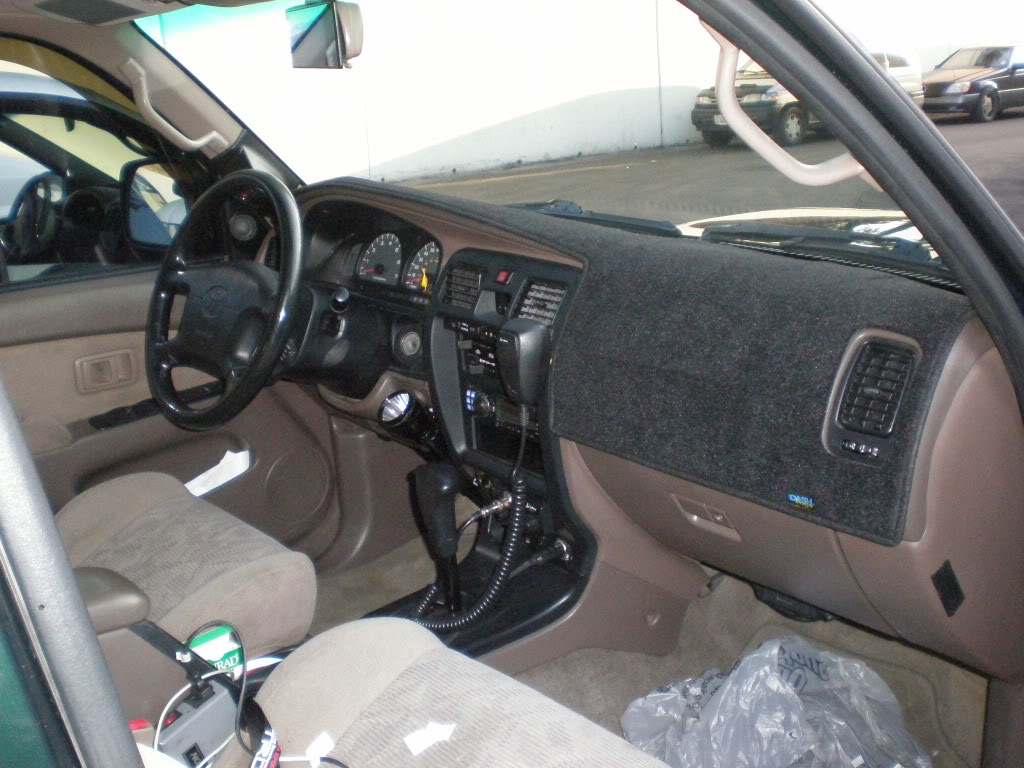
Swapped seats out. My 4Runner now has a matching set of SR5 seats. My old setup was 1997 SR5 front seats and 1999 base model rear seats.
I also switched over some LED's into my gauges (no pics until finished with whole dash, sorry!), swapped door seals for the better ones on the donor.
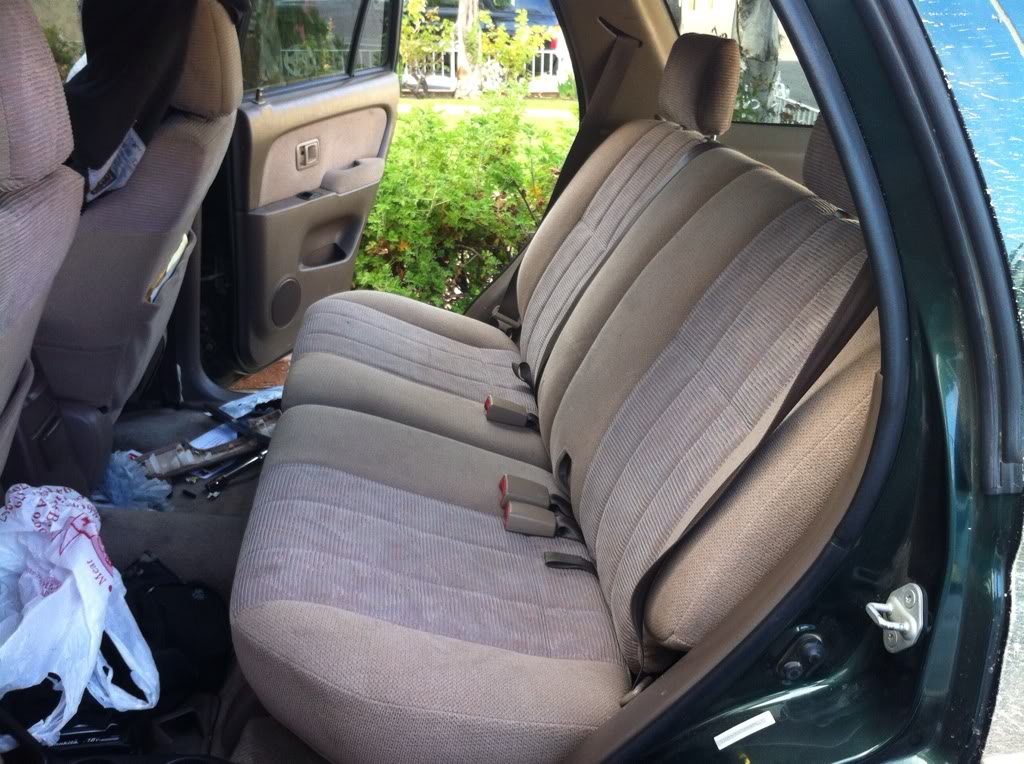
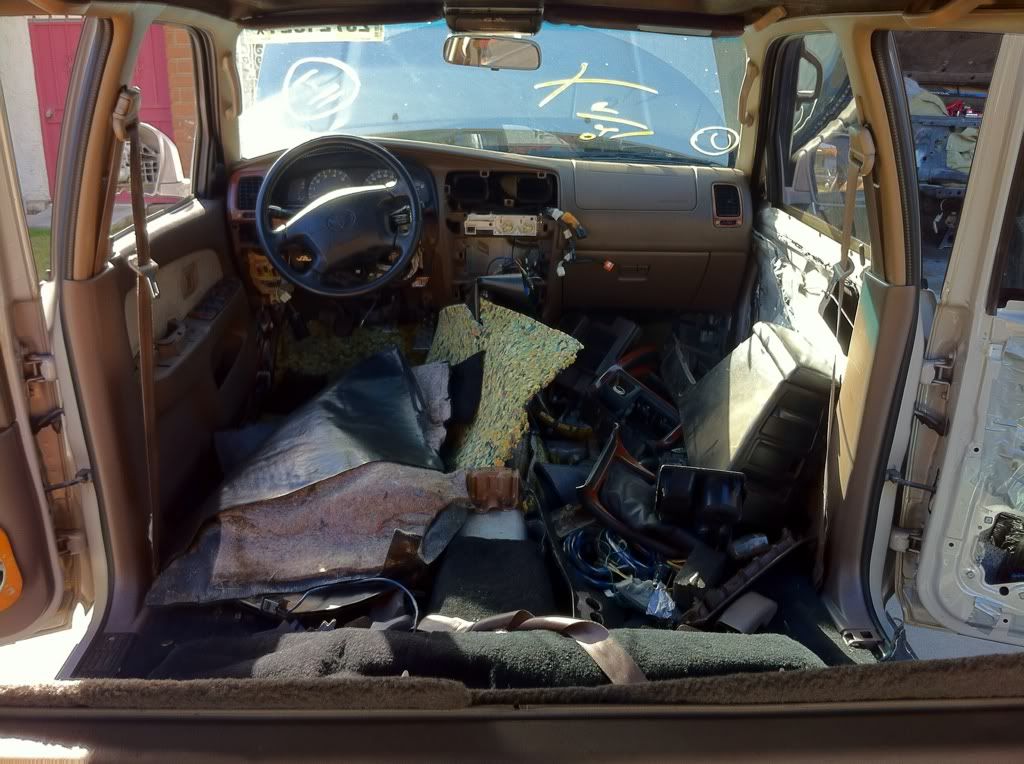
As far as the donor goes, I removed the front bumper, took out the seats/carpet/panels/console/audio. The idiot who used to own this thing lined the floor with ROOFING SHINGLES as sound deadening. There was a lot of sweet audio stuff, a set of front Blaupaunkt components, small infinity rears, RCA's, 5 tons of thick gauge wire, and some cool thick ground wires. I'm probably just going to use the rear speakers to better compare to the Diamond M5 components in the front of my 4Runner. I only wish he left the amps... I'm going to leave the rest of the disassembly until after the conversion is completed.
(this is about halfway through the interior, sorry, i'll take a better pic later)
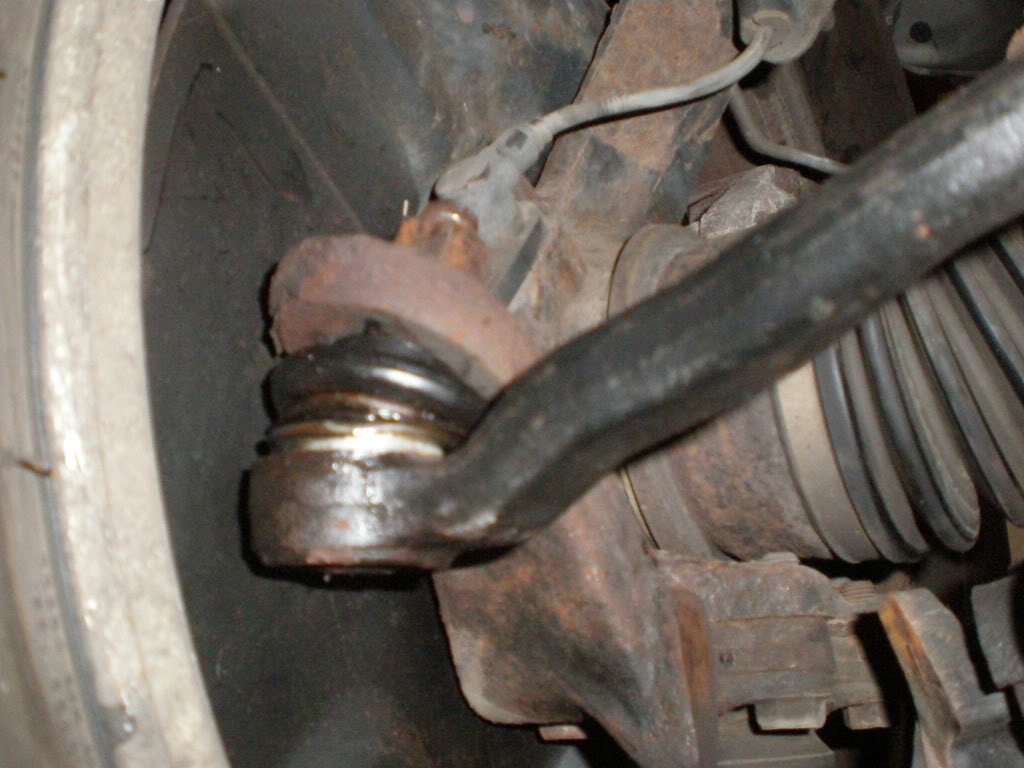
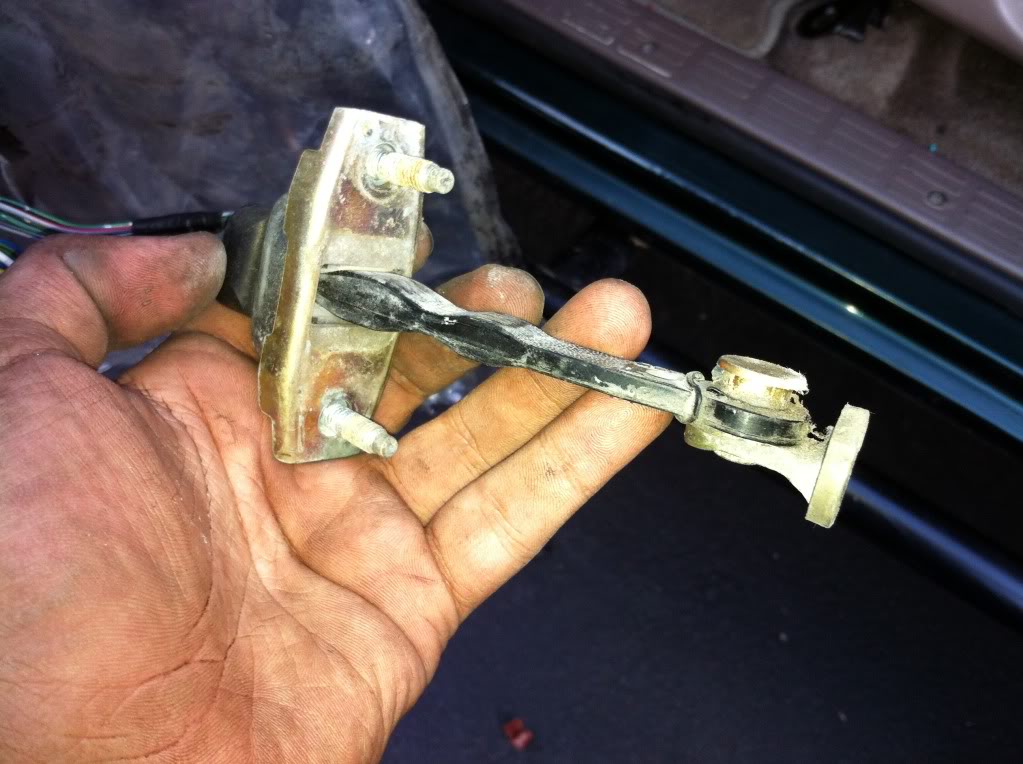
My donor vehicle ran and drove, with the exception of a bent tie rod end that had popped apart. I removed it and my buddy John, who has his own shop, bent it back and reinstalled the ball joint portion with a press. I put it back on and drove the stick 4Runner down to his shop from my house. The clutch was slipping with light acceleration, original at 170k.
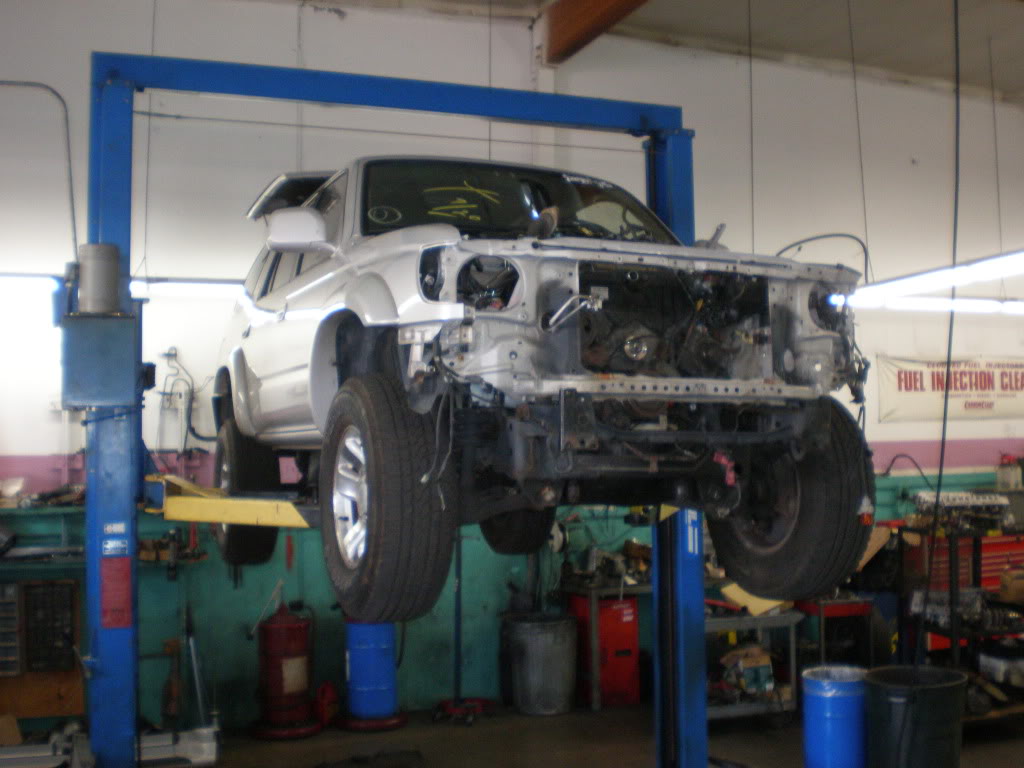
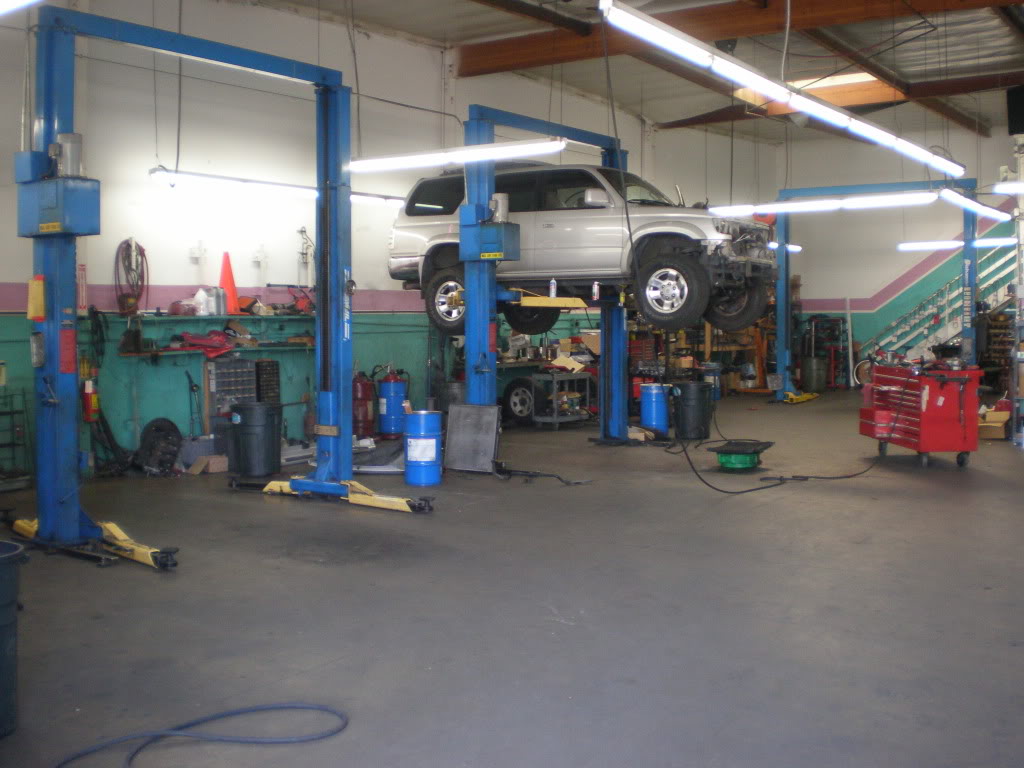
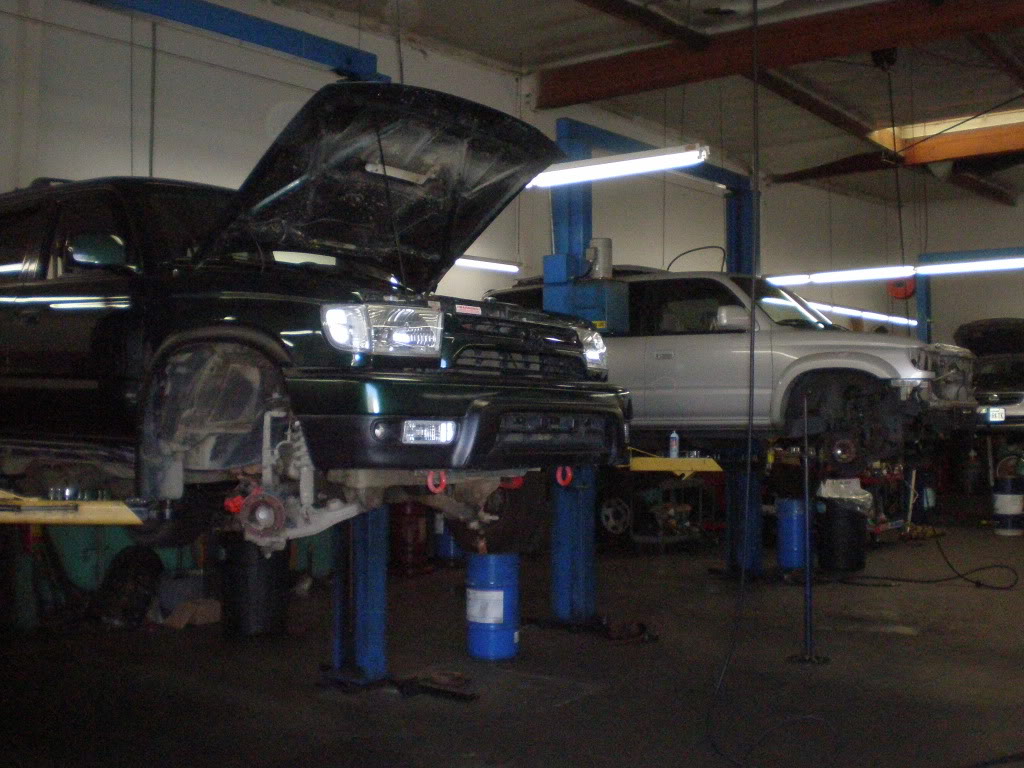
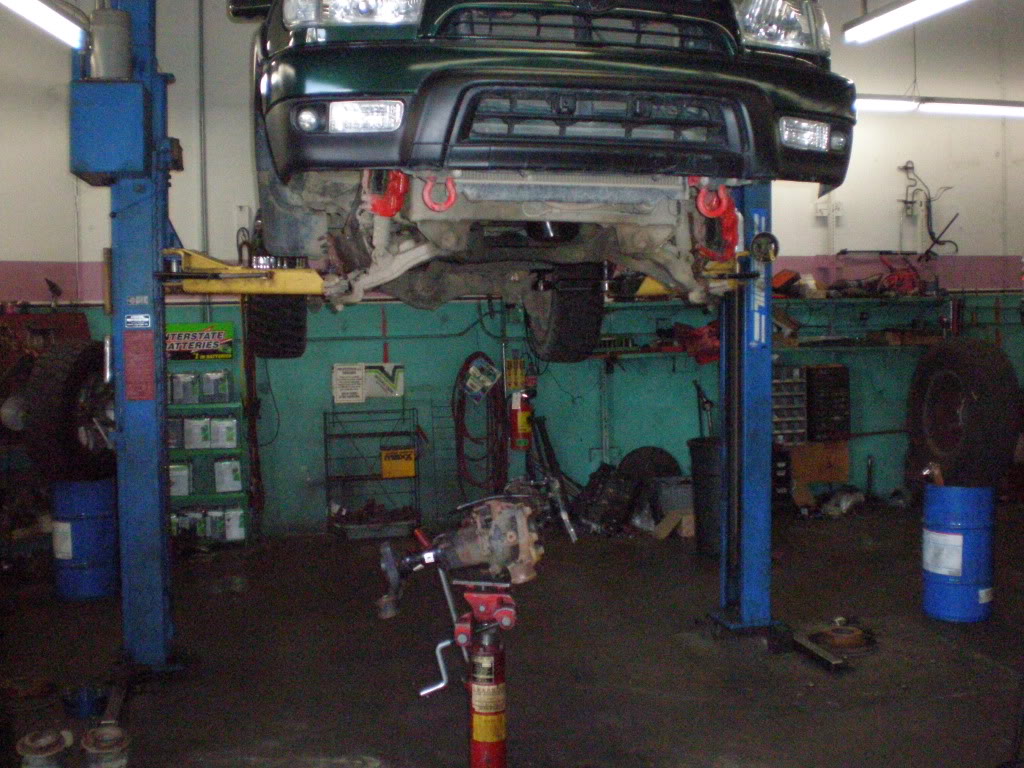
He is letting me use one of his lifts for the swap. We put the donor runner up and cut off a few exhaust bolts that were rusted frozen just to get it out of the way for tomorrow.
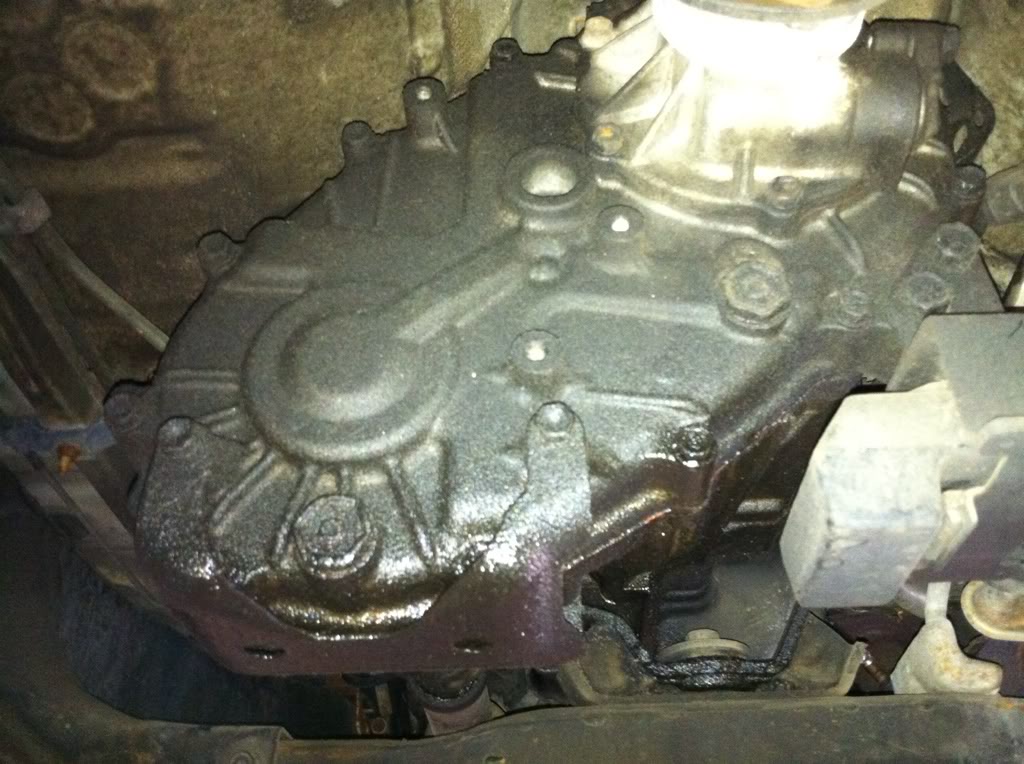
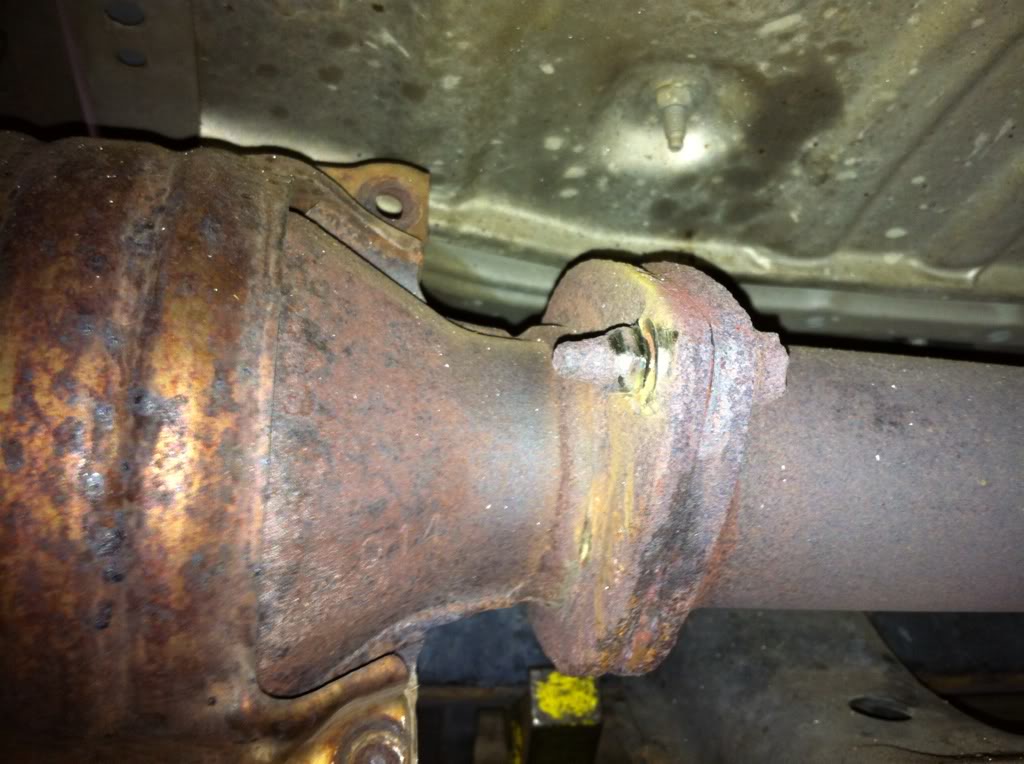
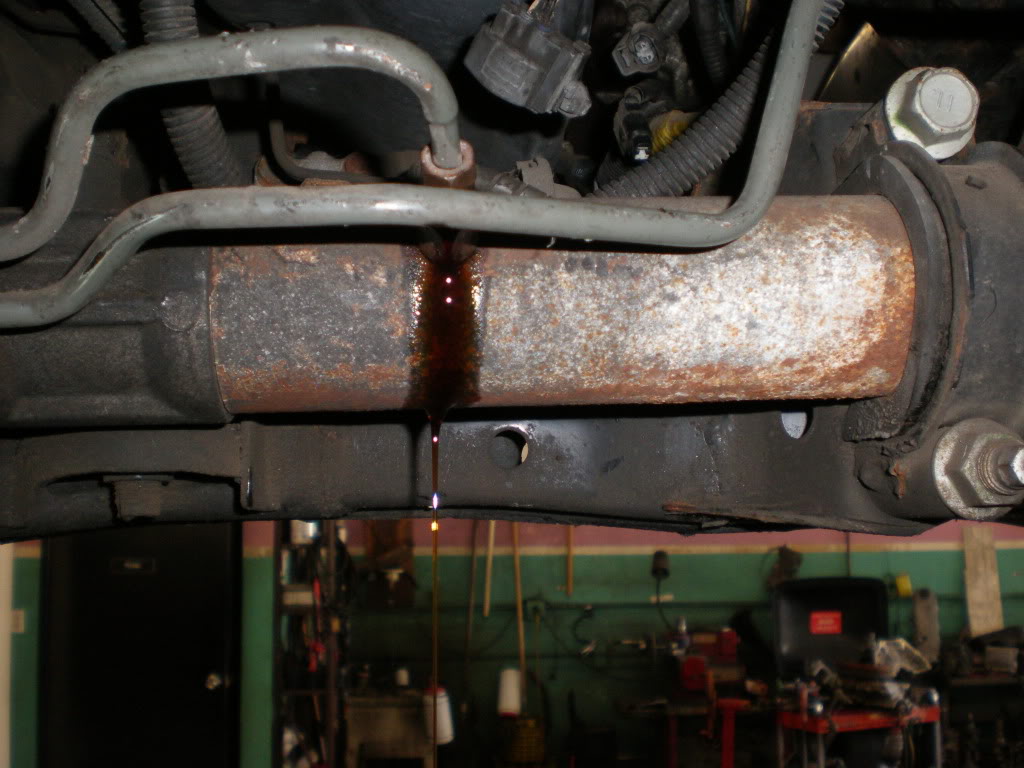
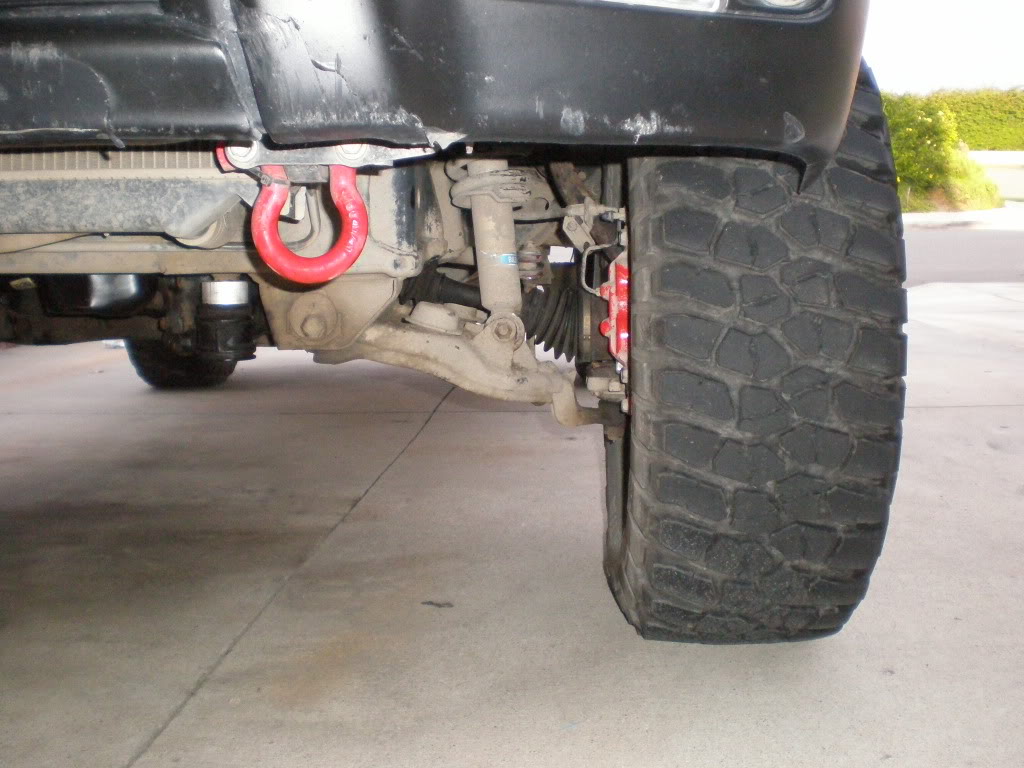
Everything looks alright underneath. There's some leaking from the shifter seal which looked pretty bad, even wet the transfer case. The rear axle seals are blown, theres a broken (original) rear shock, and there's a bit of rust on the exhaust, but it's otherwise alright. The parts I need will be fine to use. The leak will be simple to fix when the transmission is out.
8AM tomorrow morning, we're starting on taking out the motor and transmission. I will update with lots of pics as we progress.
I also switched over some LED's into my gauges (no pics until finished with whole dash, sorry!), swapped door seals for the better ones on the donor.
As far as the donor goes, I removed the front bumper, took out the seats/carpet/panels/console/audio. The idiot who used to own this thing lined the floor with ROOFING SHINGLES as sound deadening. There was a lot of sweet audio stuff, a set of front Blaupaunkt components, small infinity rears, RCA's, 5 tons of thick gauge wire, and some cool thick ground wires. I'm probably just going to use the rear speakers to better compare to the Diamond M5 components in the front of my 4Runner. I only wish he left the amps... I'm going to leave the rest of the disassembly until after the conversion is completed.
(this is about halfway through the interior, sorry, i'll take a better pic later)
My donor vehicle ran and drove, with the exception of a bent tie rod end that had popped apart. I removed it and my buddy John, who has his own shop, bent it back and reinstalled the ball joint portion with a press. I put it back on and drove the stick 4Runner down to his shop from my house. The clutch was slipping with light acceleration, original at 170k.
He is letting me use one of his lifts for the swap. We put the donor runner up and cut off a few exhaust bolts that were rusted frozen just to get it out of the way for tomorrow.
Everything looks alright underneath. There's some leaking from the shifter seal which looked pretty bad, even wet the transfer case. The rear axle seals are blown, theres a broken (original) rear shock, and there's a bit of rust on the exhaust, but it's otherwise alright. The parts I need will be fine to use. The leak will be simple to fix when the transmission is out.
8AM tomorrow morning, we're starting on taking out the motor and transmission. I will update with lots of pics as we progress.
11-17-2011, 05:57 PM
#85
Registered User
Thread Starter
11/16/11
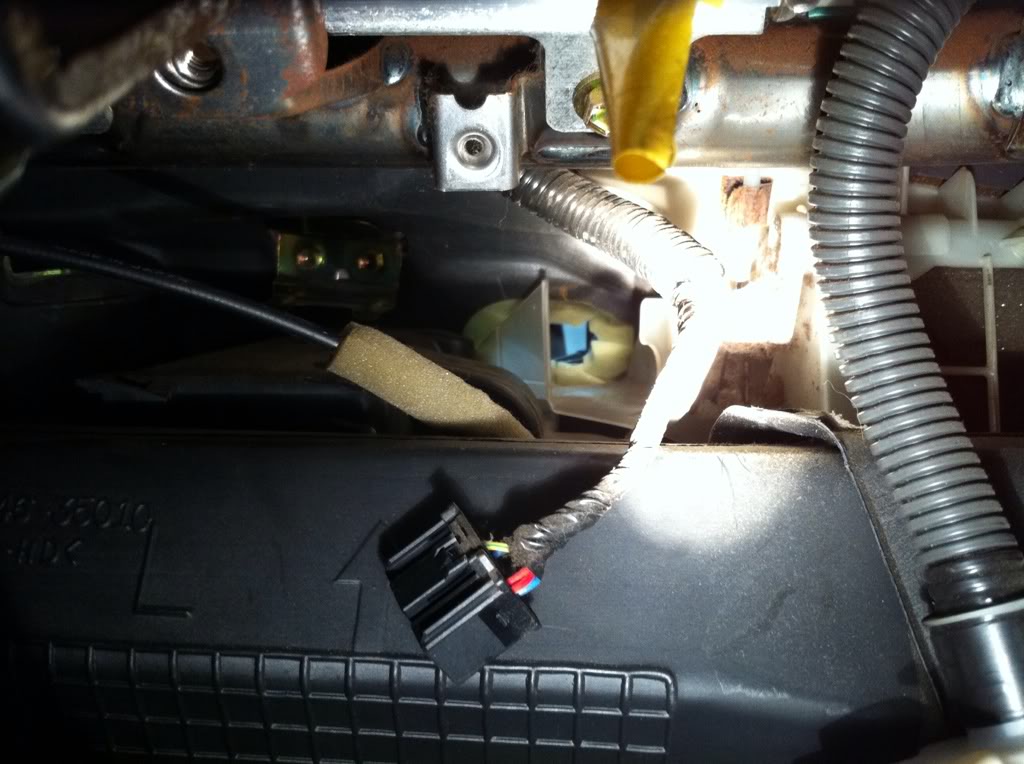
Here's a pic of the tie rod from yesterday.
Todays updates. I'm lazy tonight, so I'll probably go through and revise later.
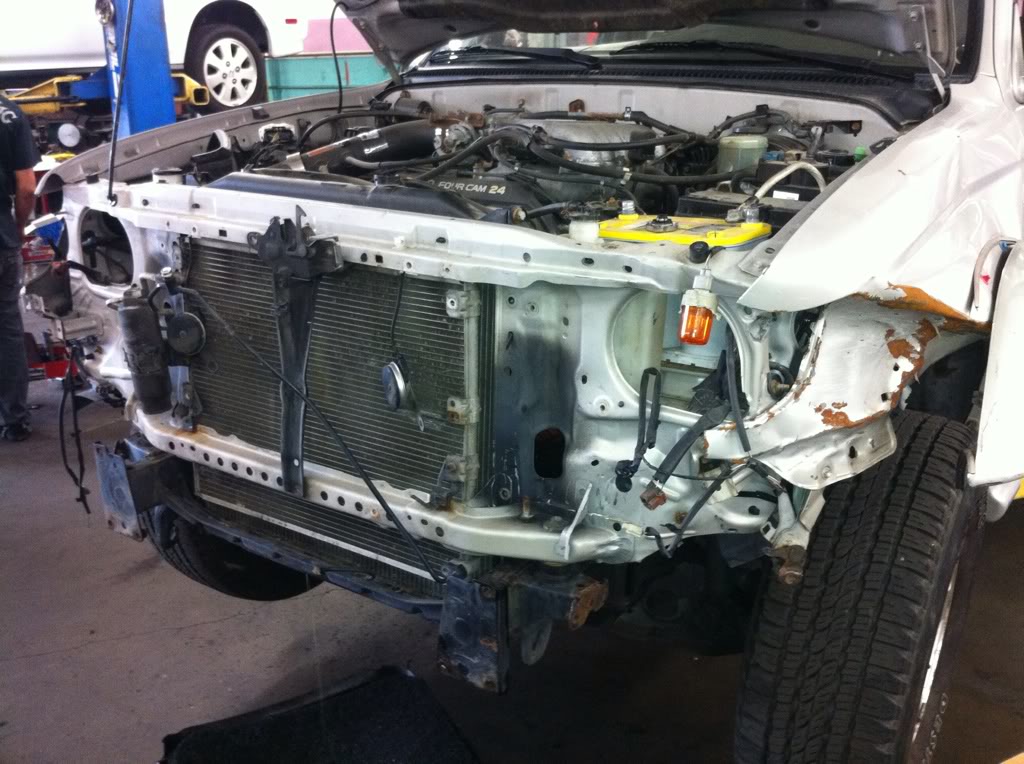
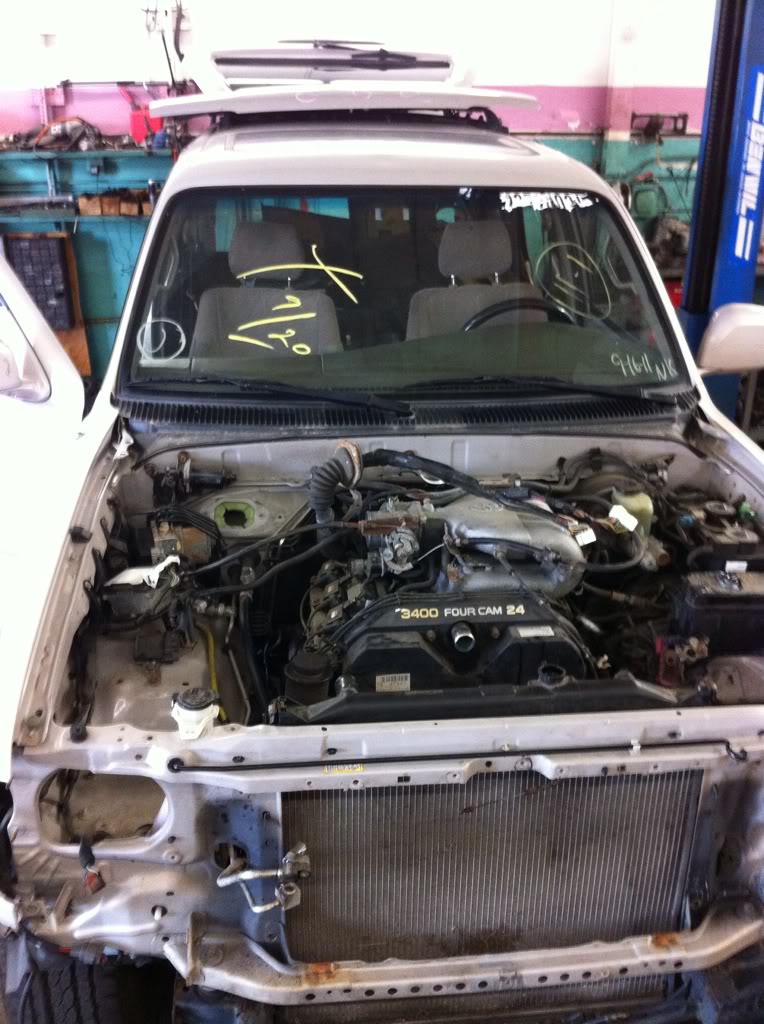
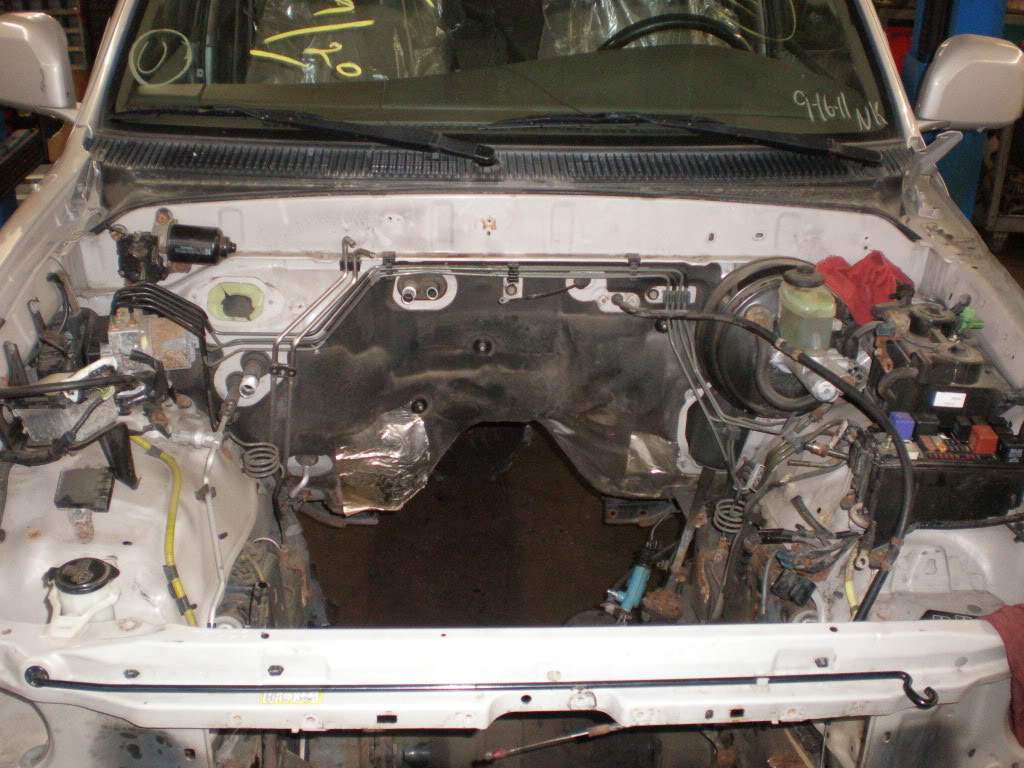
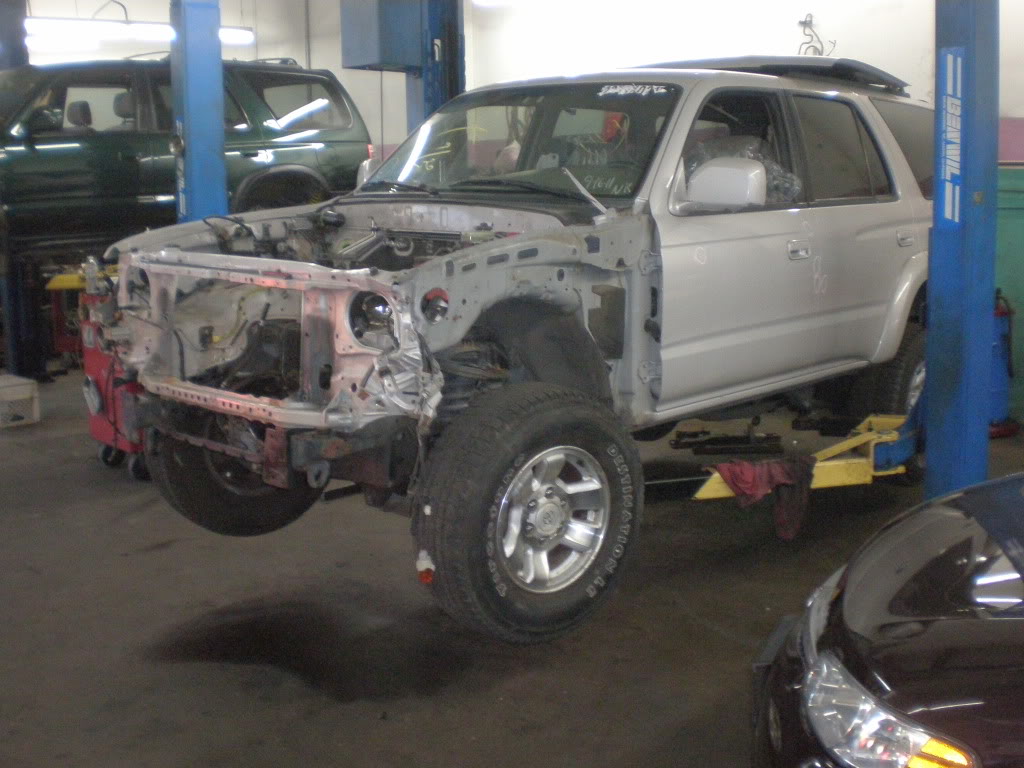
Started taking off most of the stuff on the core support to make it easier to pull the motor.
Pulled the ECU to get engine wire harness out.
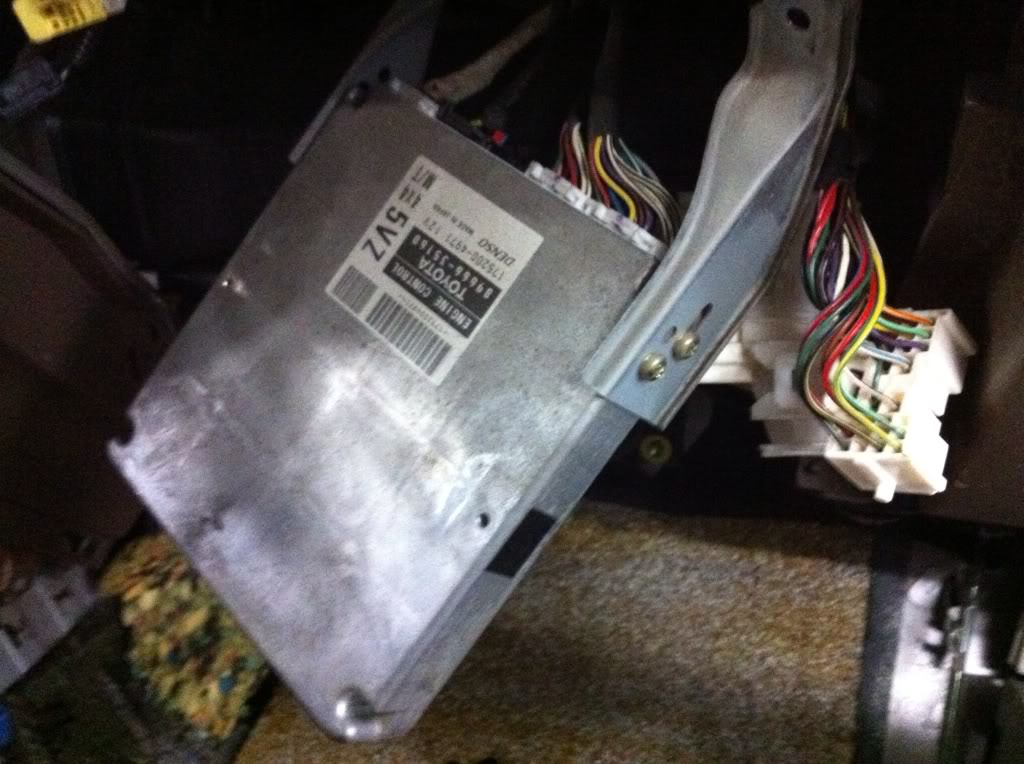
The wires go straight out into the engine bay
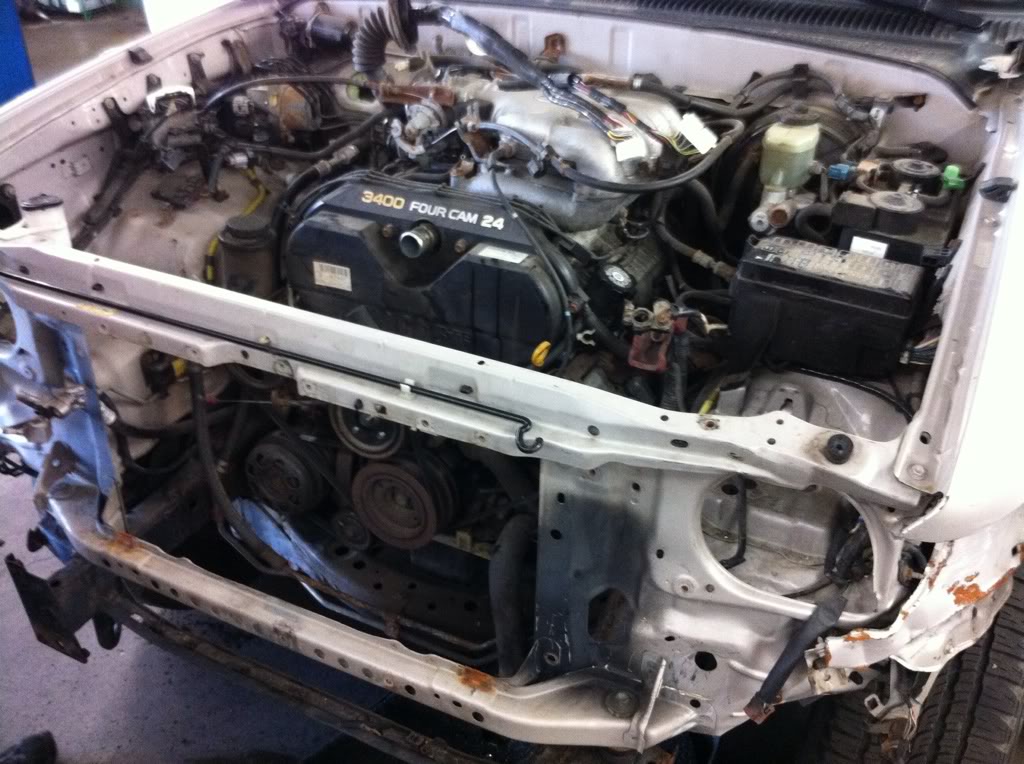
Still removing stuff on the front. A lot of the bolts and studs broke because of rust
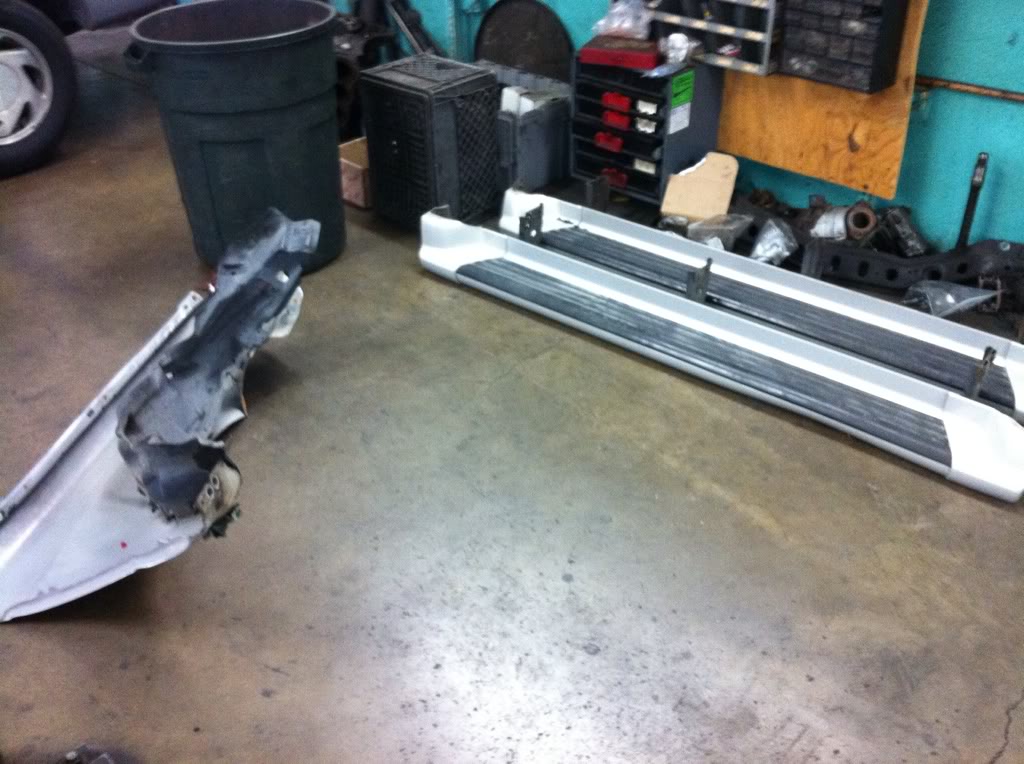
I wanted to remove the damaged fender, which meant removing the running board to get access to some bolts. I just removed both for the hell of it.
Anyway, the good stuff:
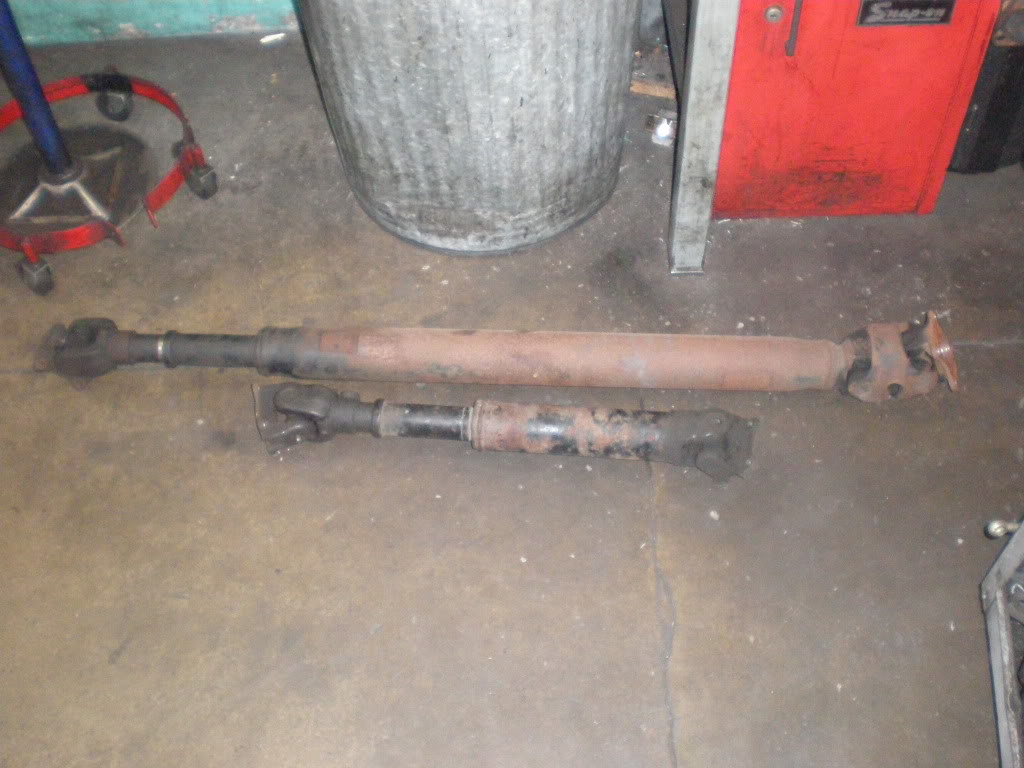
Removed exhaust, driveshafts, crossmembers, front sway bar, etc:

Slave cylinder removed:
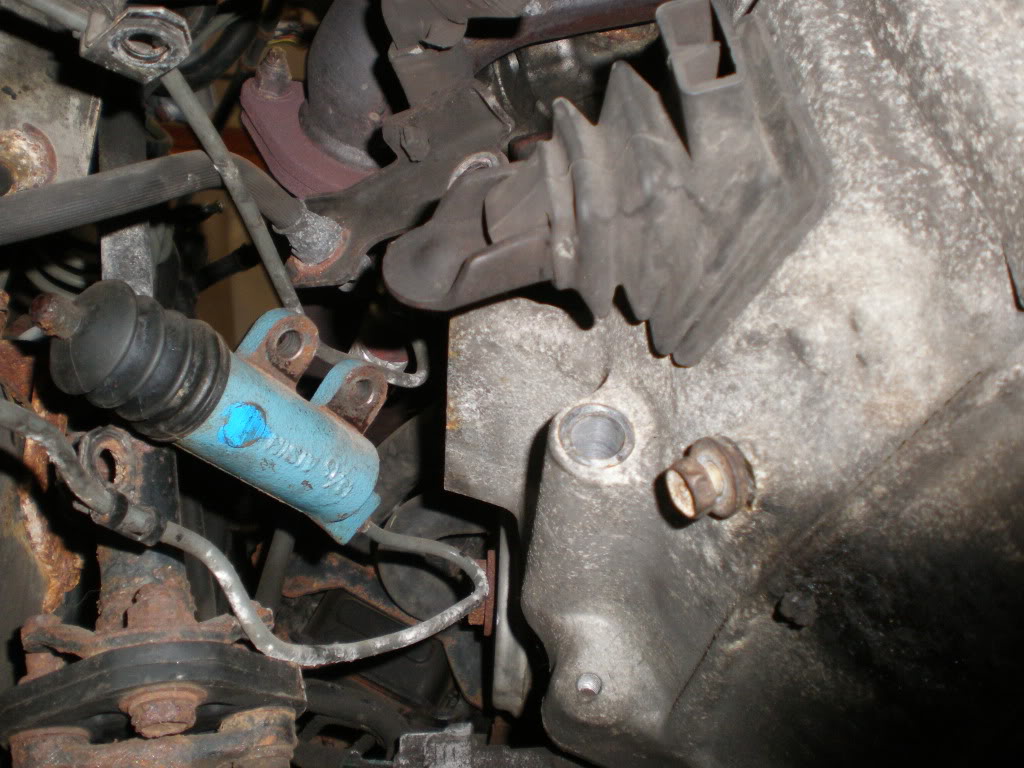
Awesome
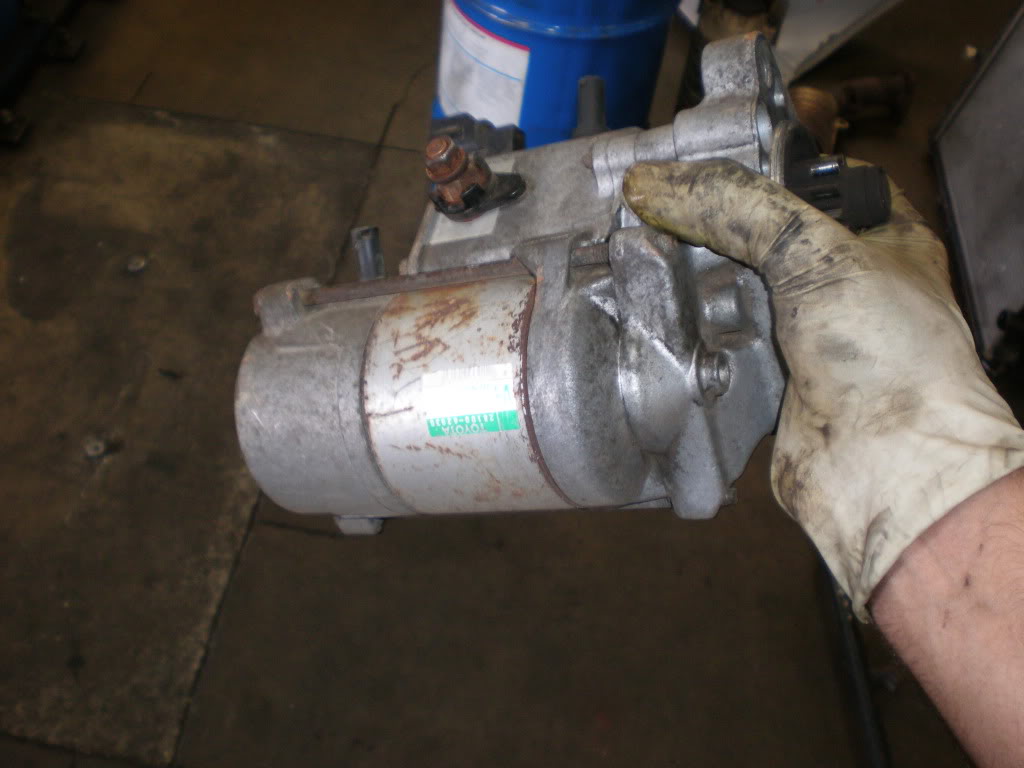
Removed all of the transmission bolts and starter:
Took out both shifters, lined up the transmission jack and pulled the sucker out.
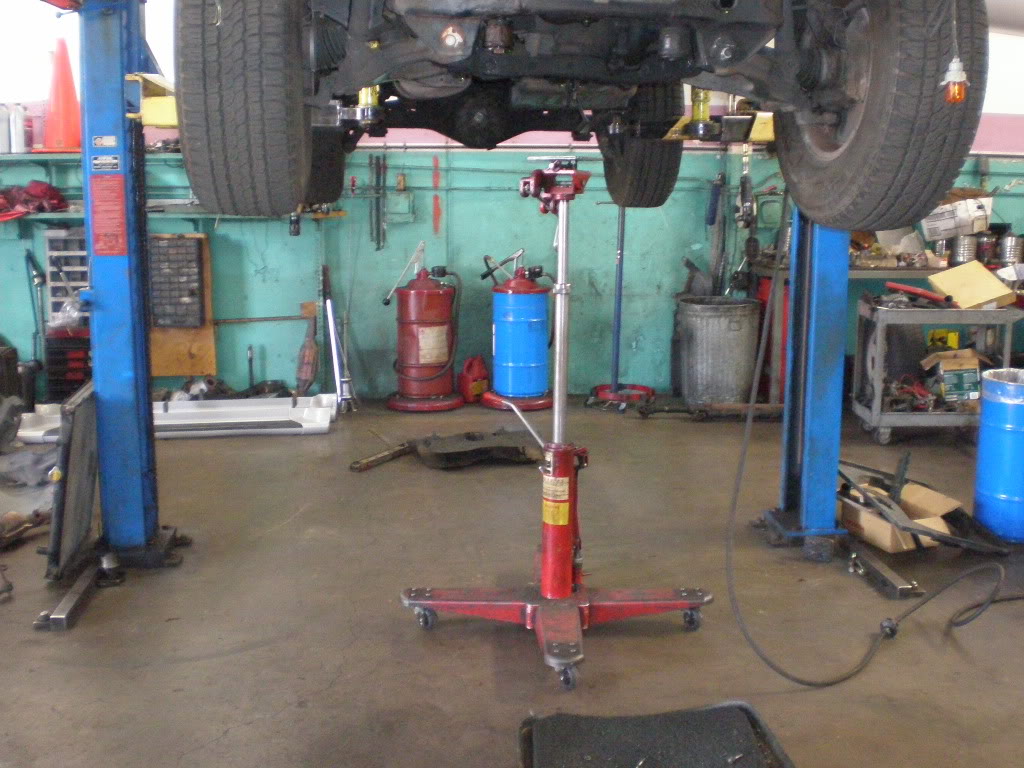
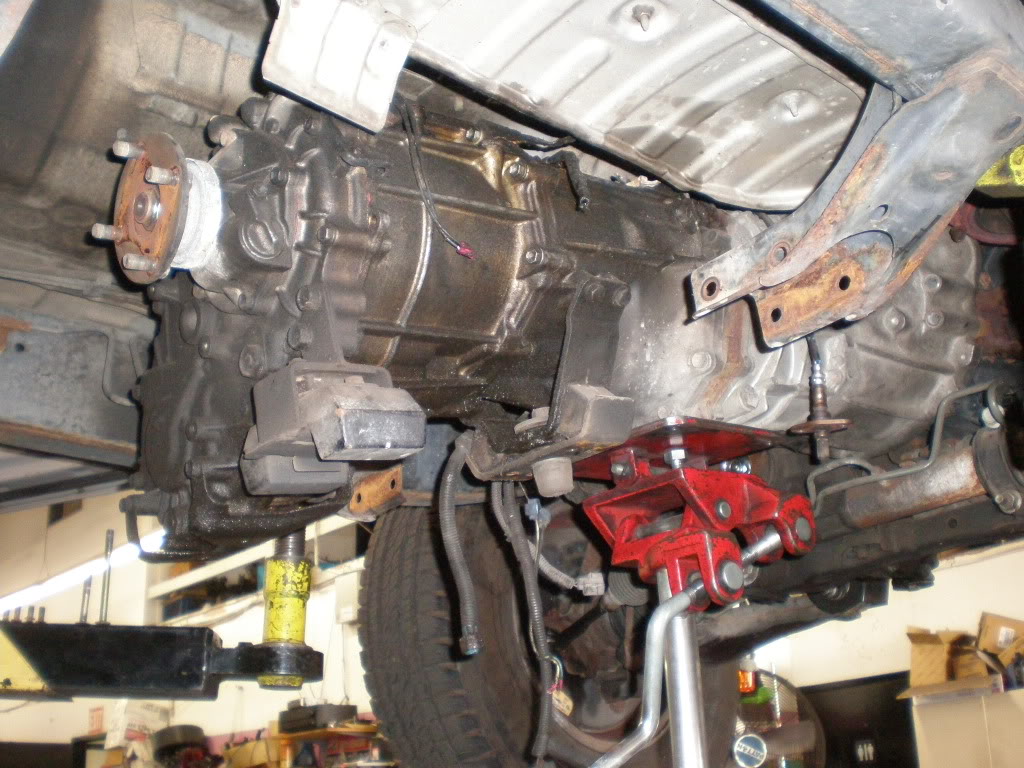
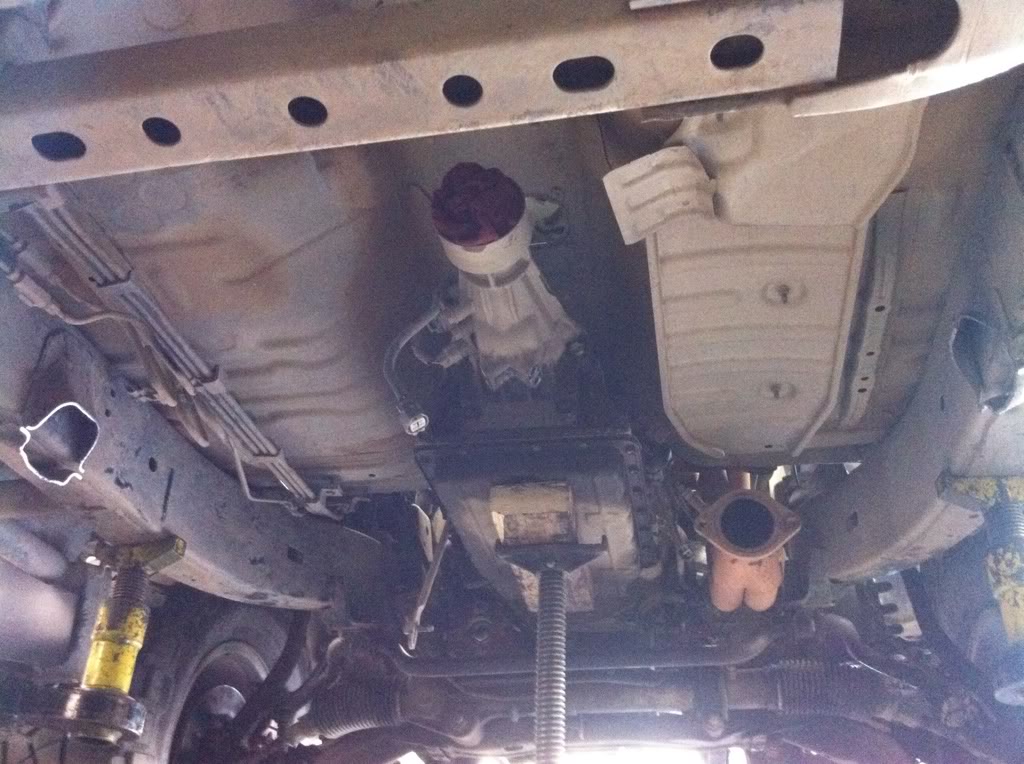
It looks good other than some leaking from the shifter seal. We're gonna fix the leaks while they're easily accessible off the vehicle.

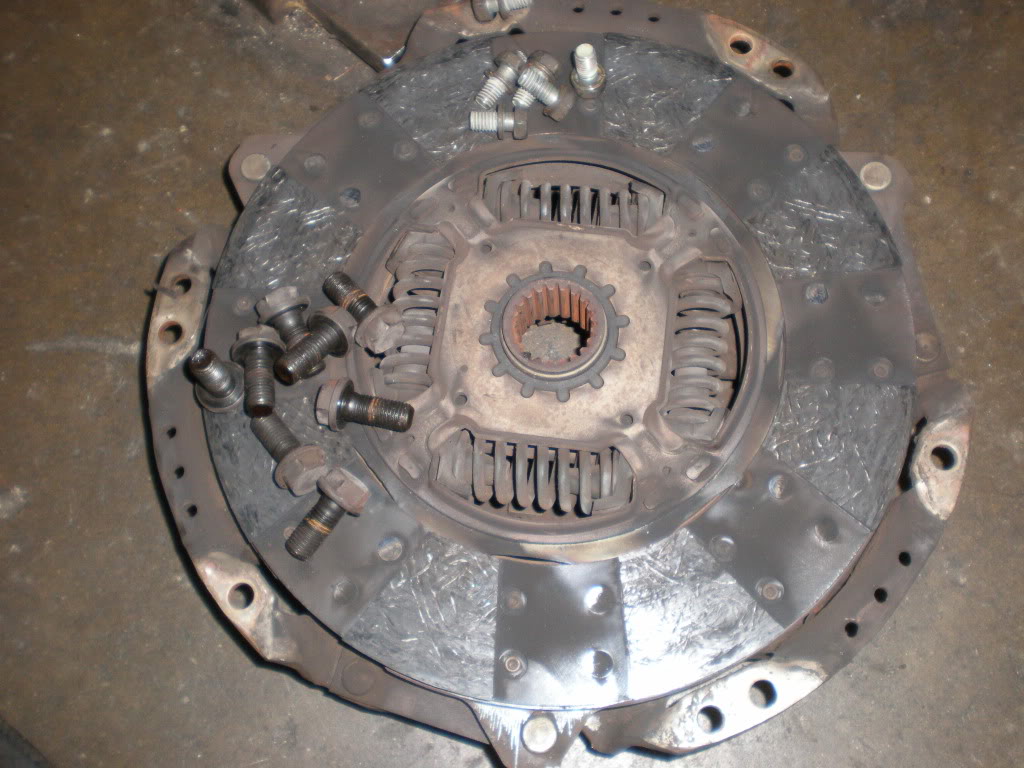
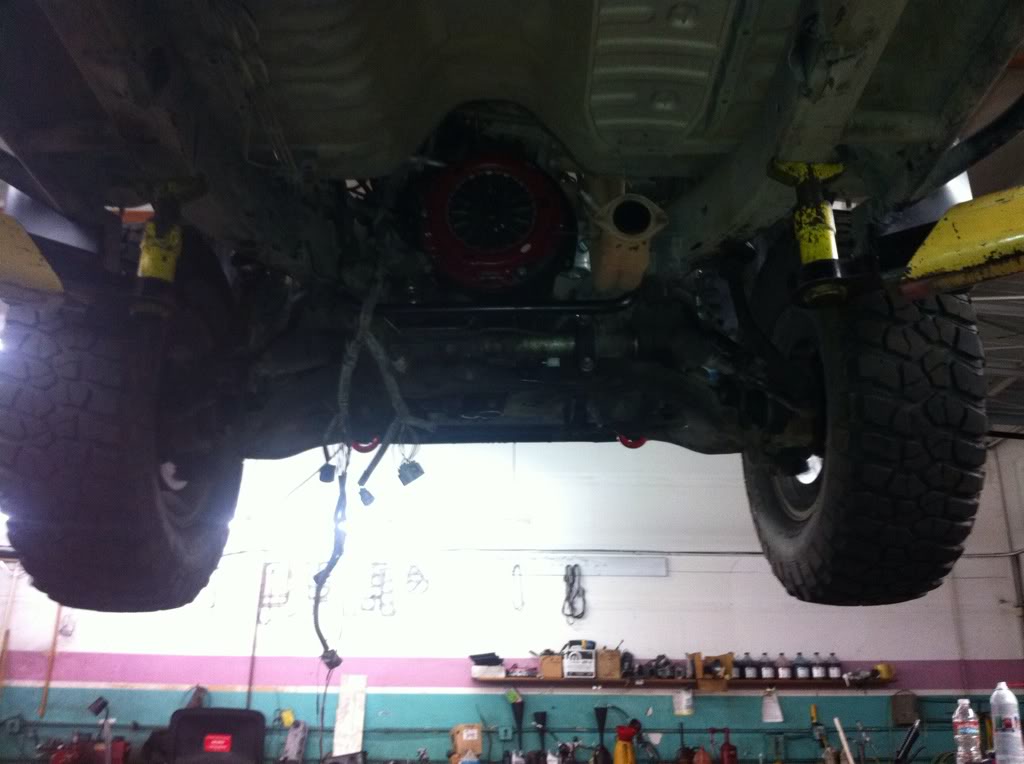
Here's the completely fried clutch disk. The rivets in the disk were worn down.
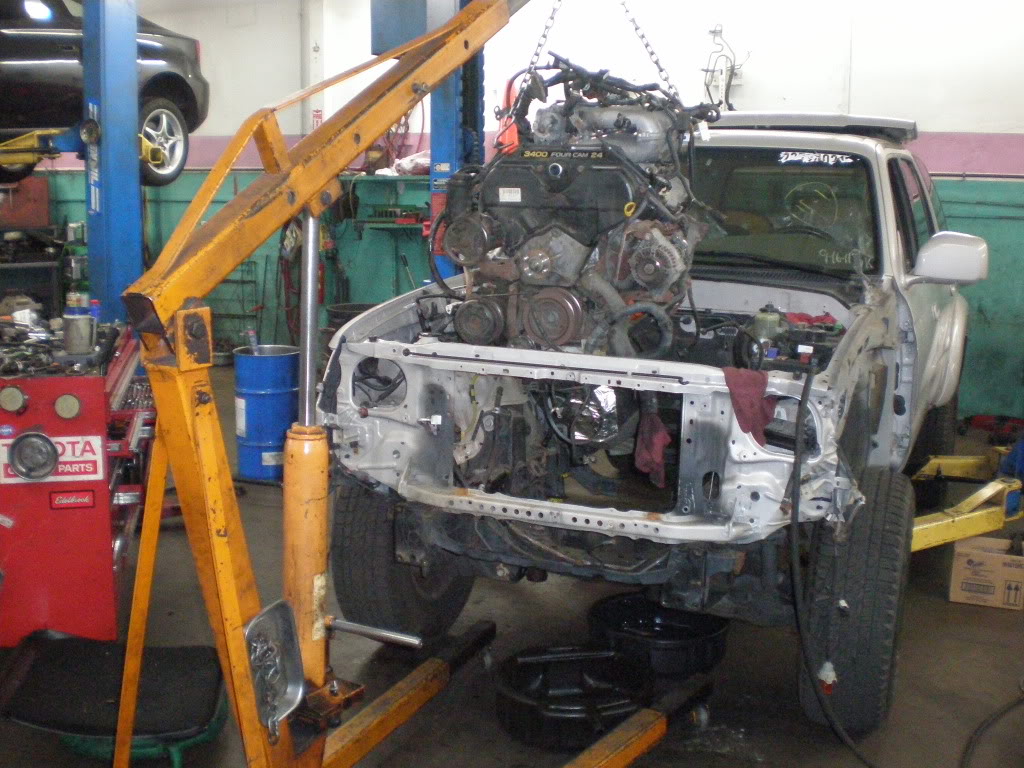
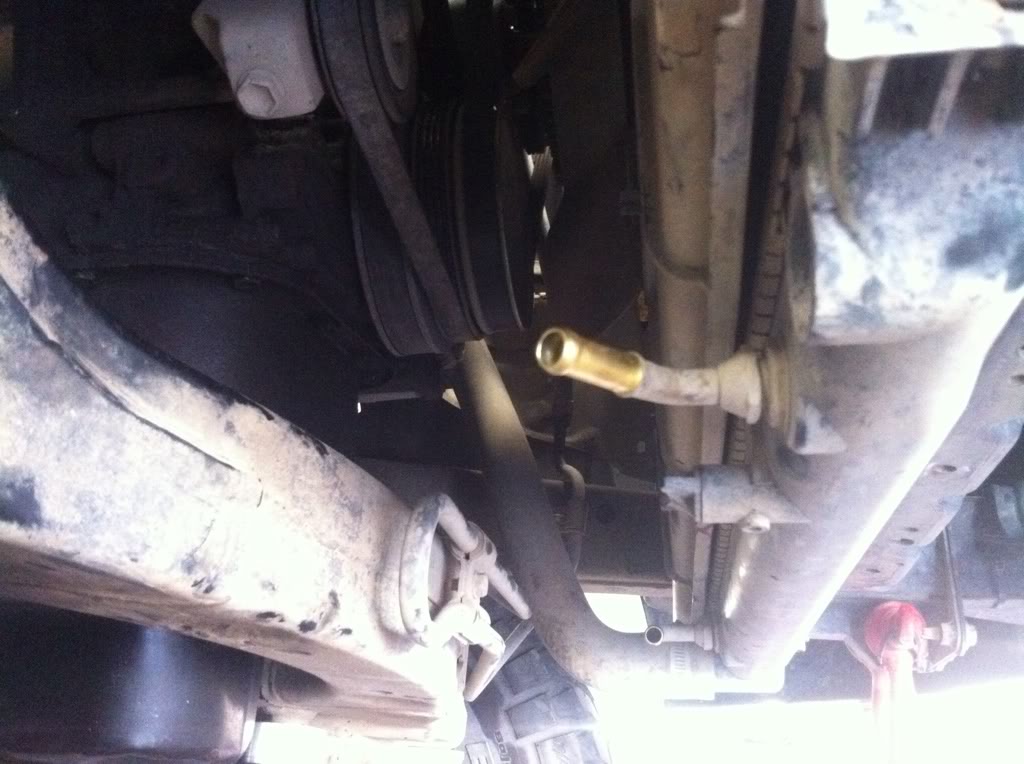
Drained the power steering fluid so we didn't have to remove the power steering pump from the motor:
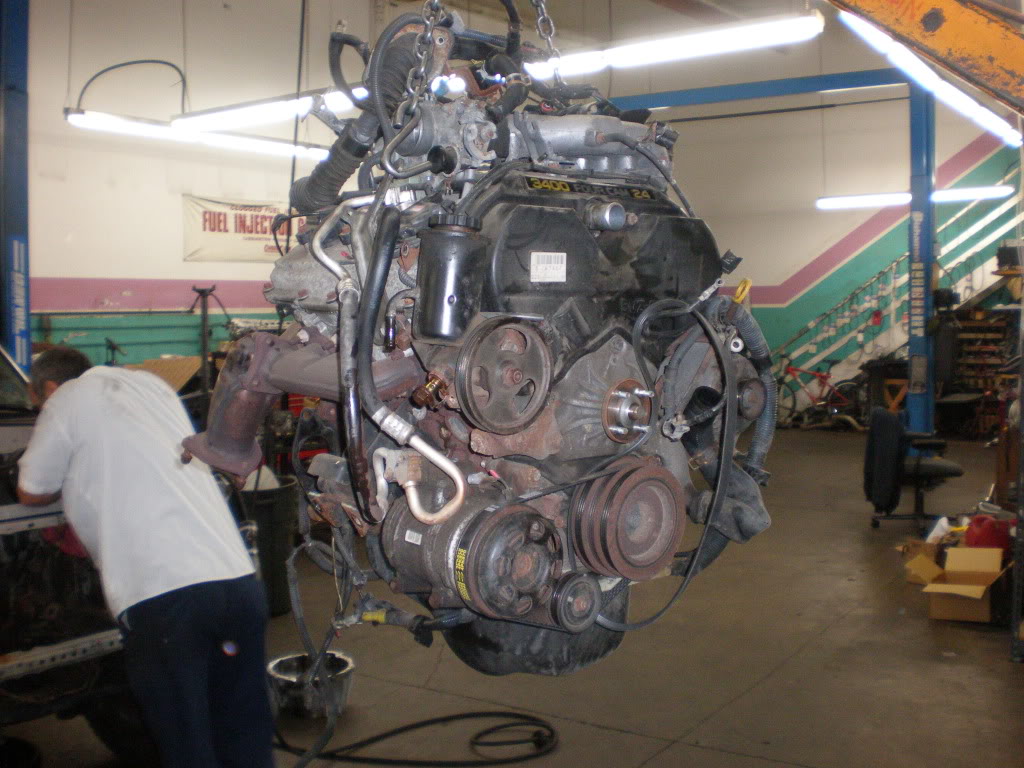
The engine soon followed:

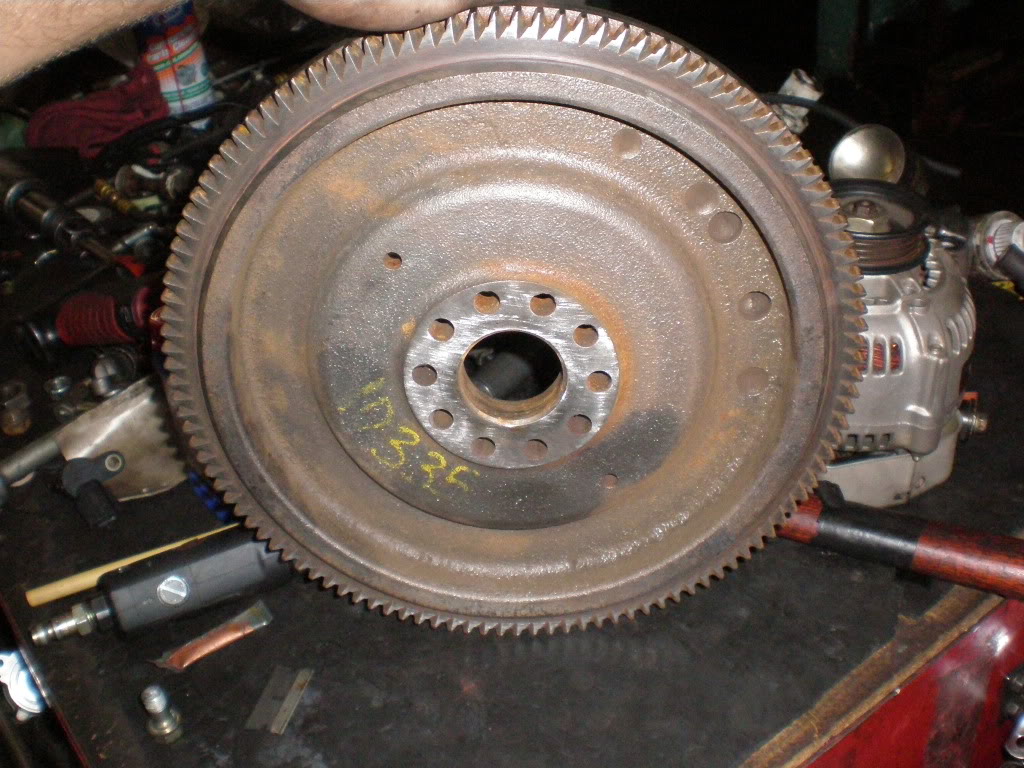
Rusty 3RZ flywheel I bought. We machined it a second time later to remove some heat spots.
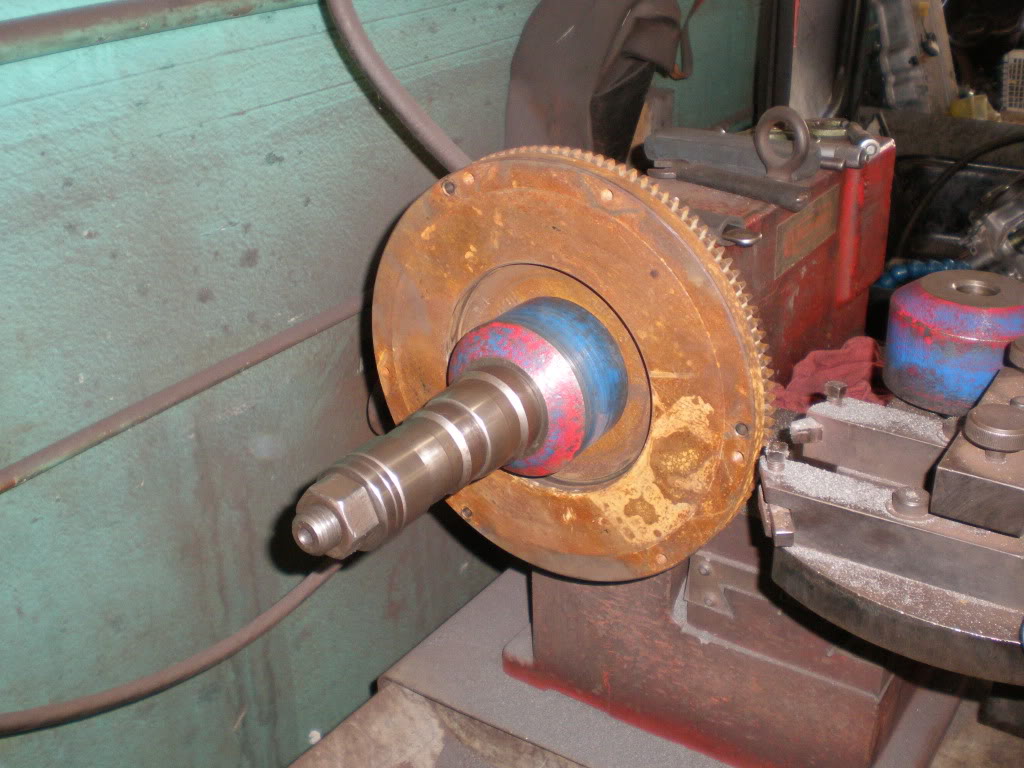

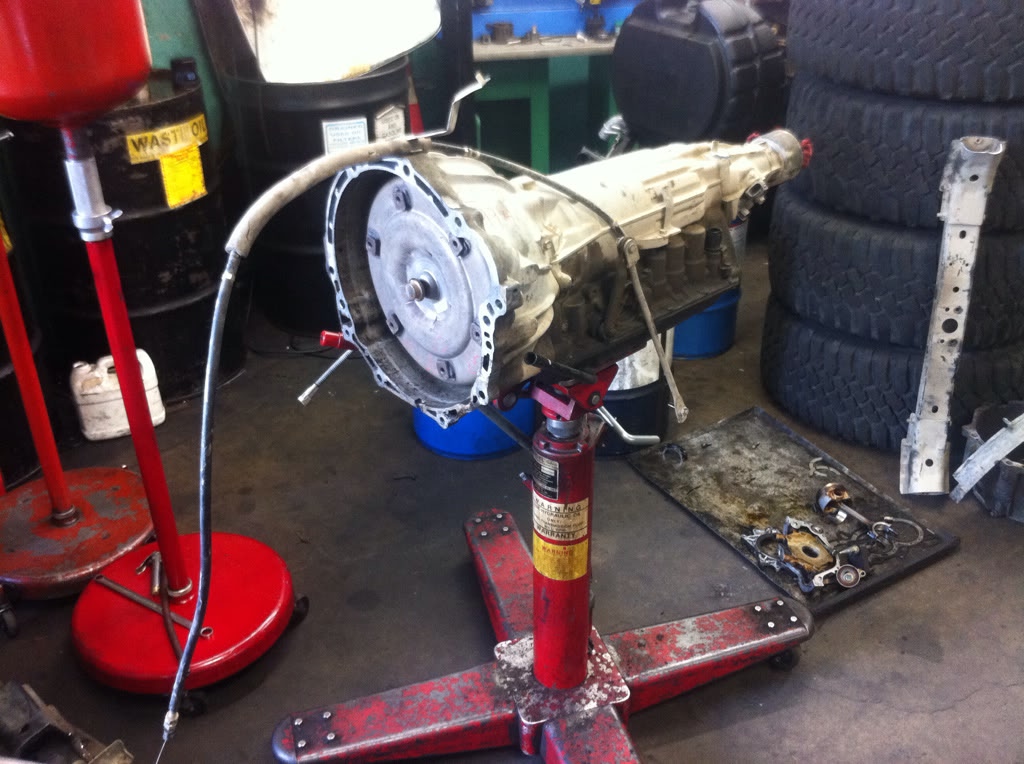
Trans soon to be mated with 2TR-FE bell housing.
8AM Tomorrow, back in to remove the rest of what I need. We're gonna figure out some crossmember stuff before starting on my 2WD, but it shouldn't be long.
As far as my 2WD goes, I received a Dash Designs cover today. I want to hide my dash, even though it's not cracking. The top part is slightly discolored (not from sun) and there's some obvious sagging. Looks 100% better covered. I also got my Outdoor Logic antenna mount which I'll install tomorrow probably... sorry no pics of the mount yet.
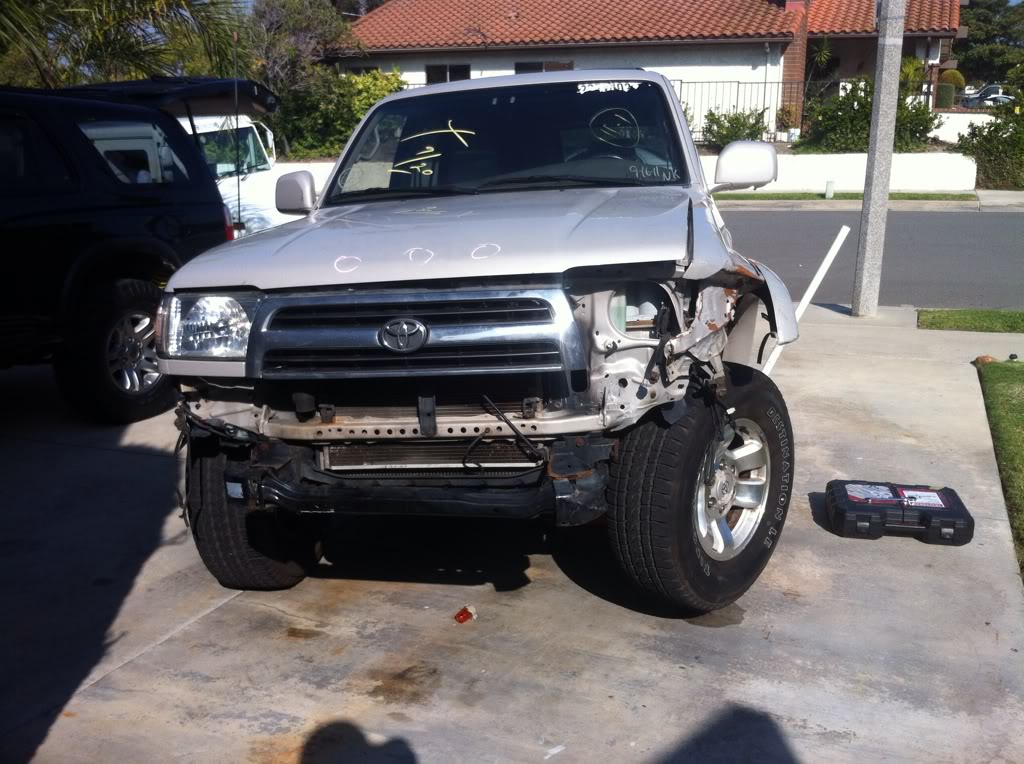
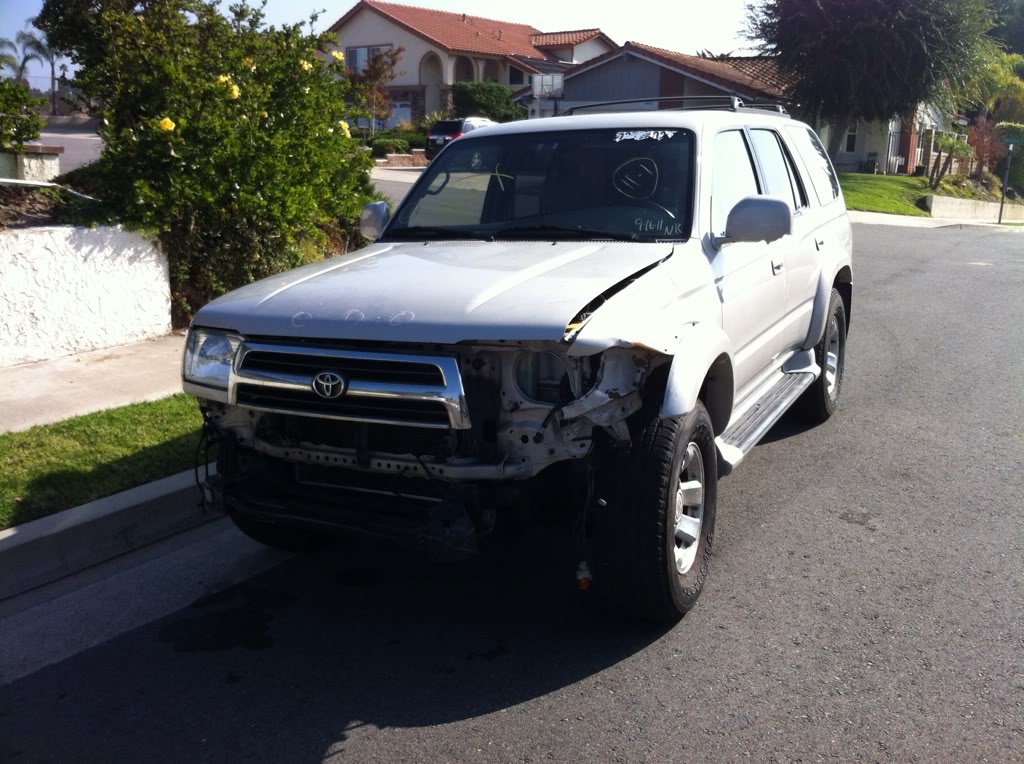
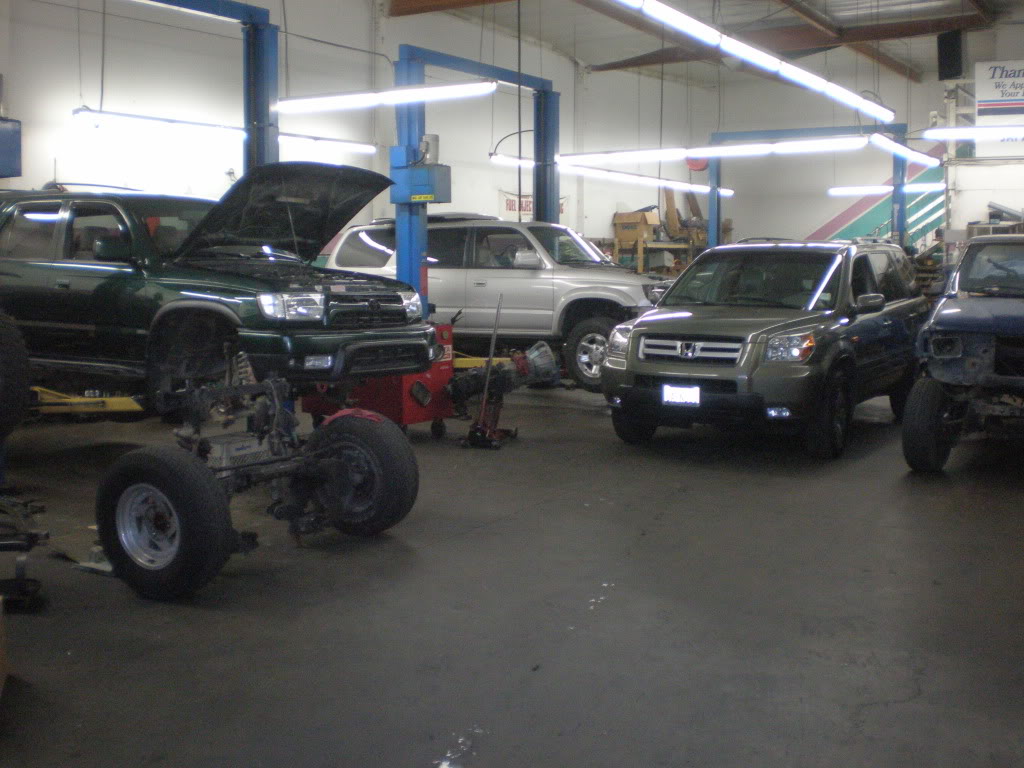
It sat on it's ass outside all day
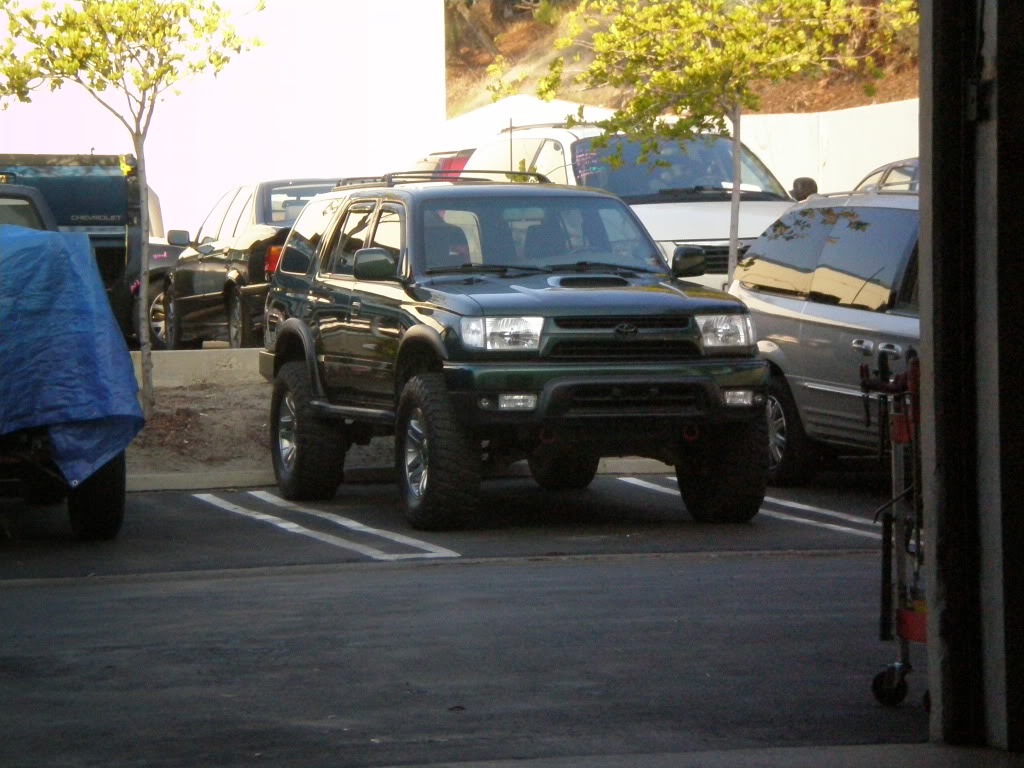
I hope you know that she felt neglected, me putting my hands all over another 4Runner...
----------------------------------------
11/17/11
I'm really worn out, but here's today's progress:
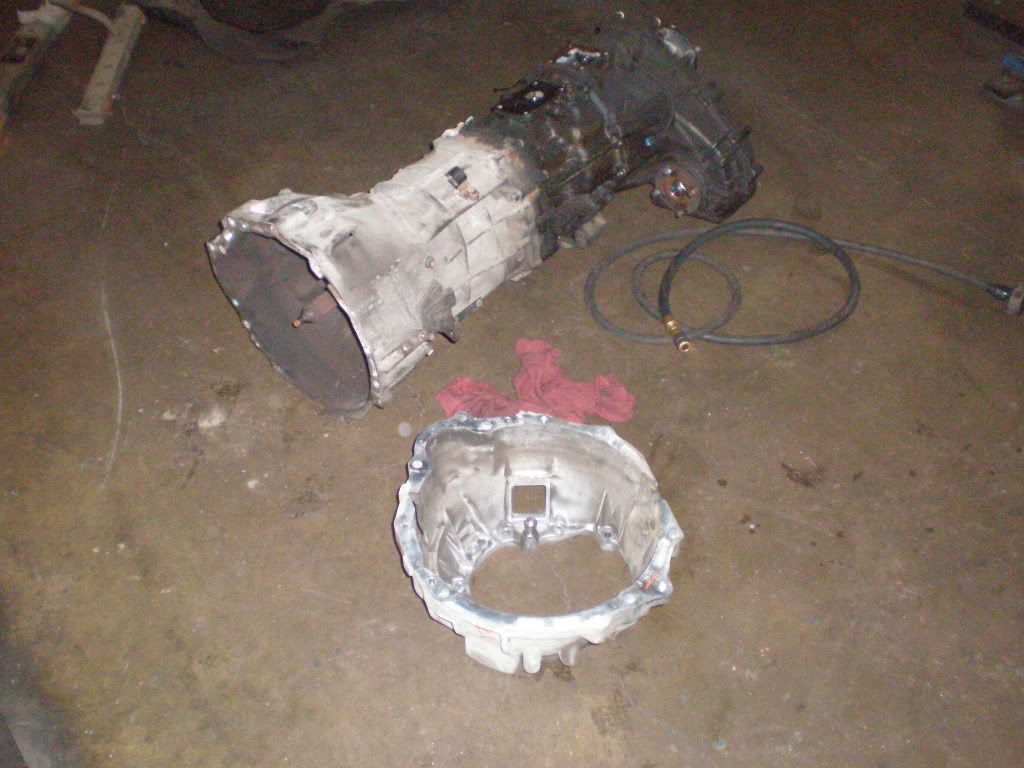
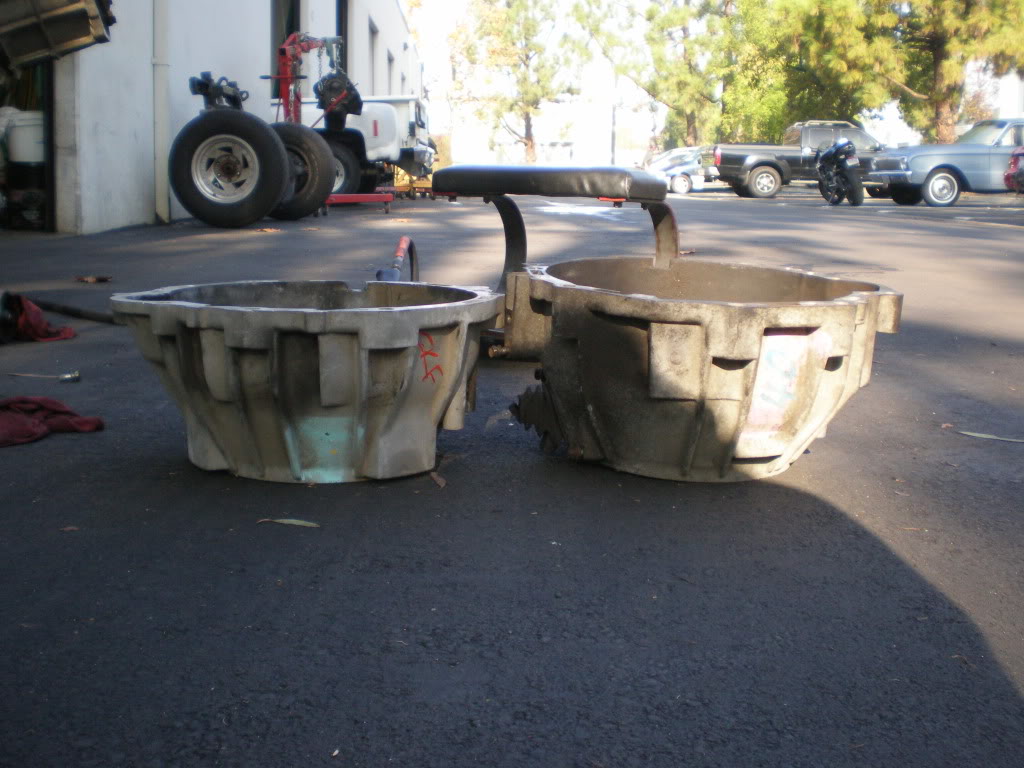
Started off the day by swapping the original V6 bell housing with that of a 2TR-FE bell housing for the R155 transmission that Toyota uses in the 2005+ 2.7l Tacoma.
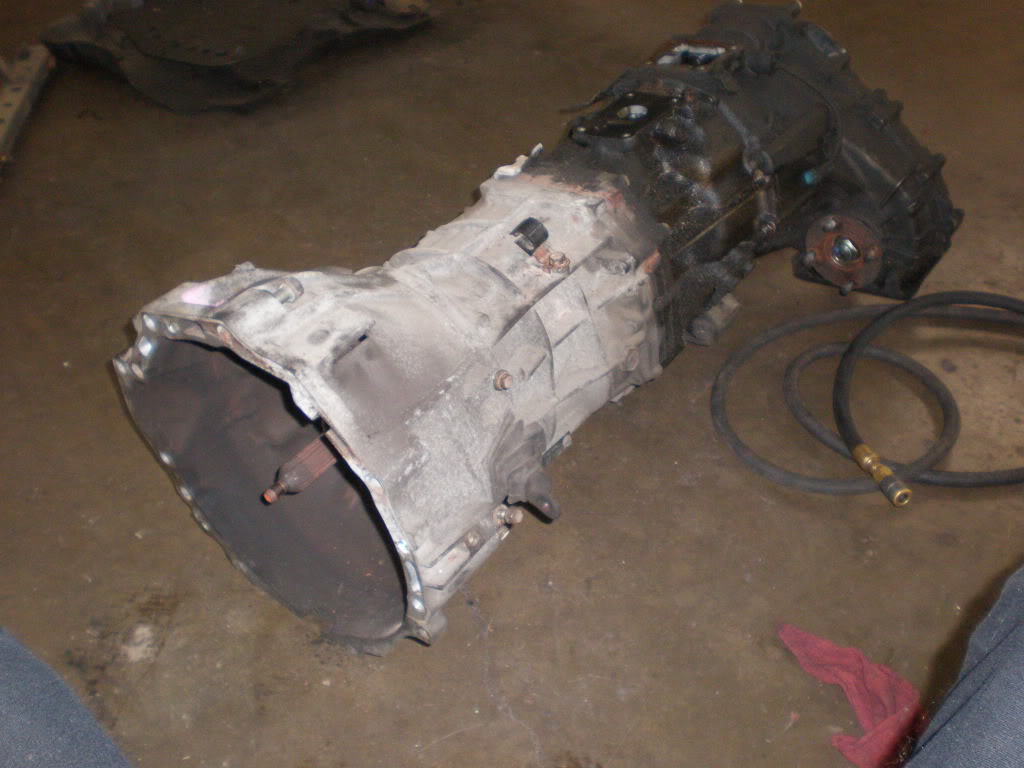
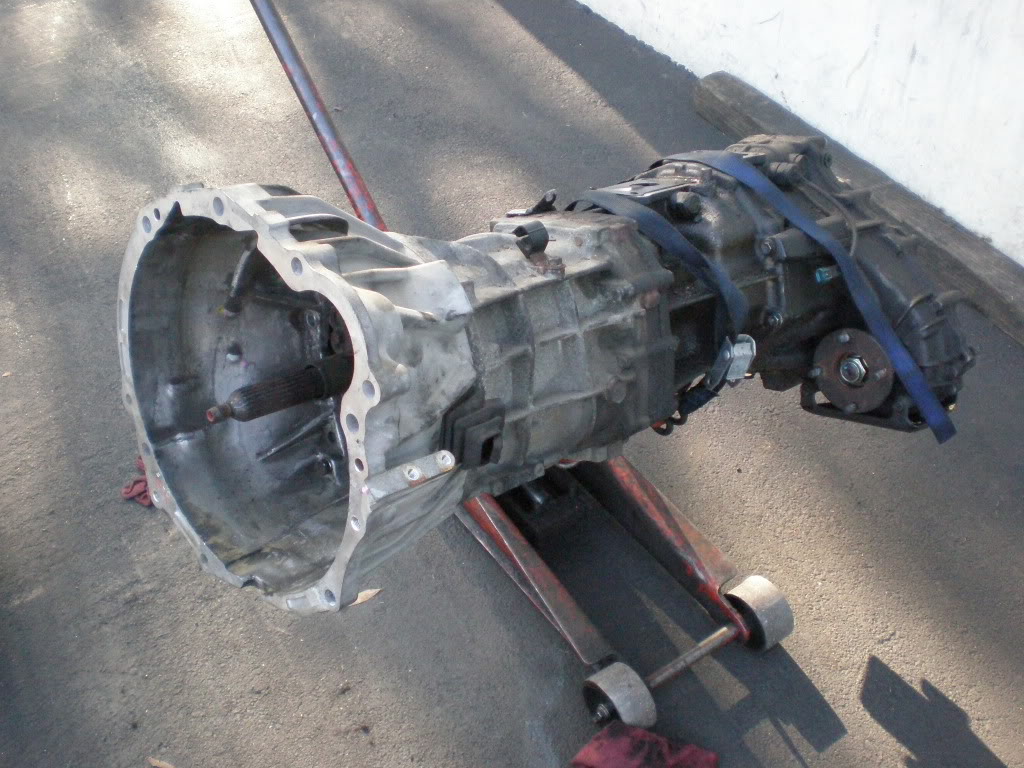
The transmission in its original form:
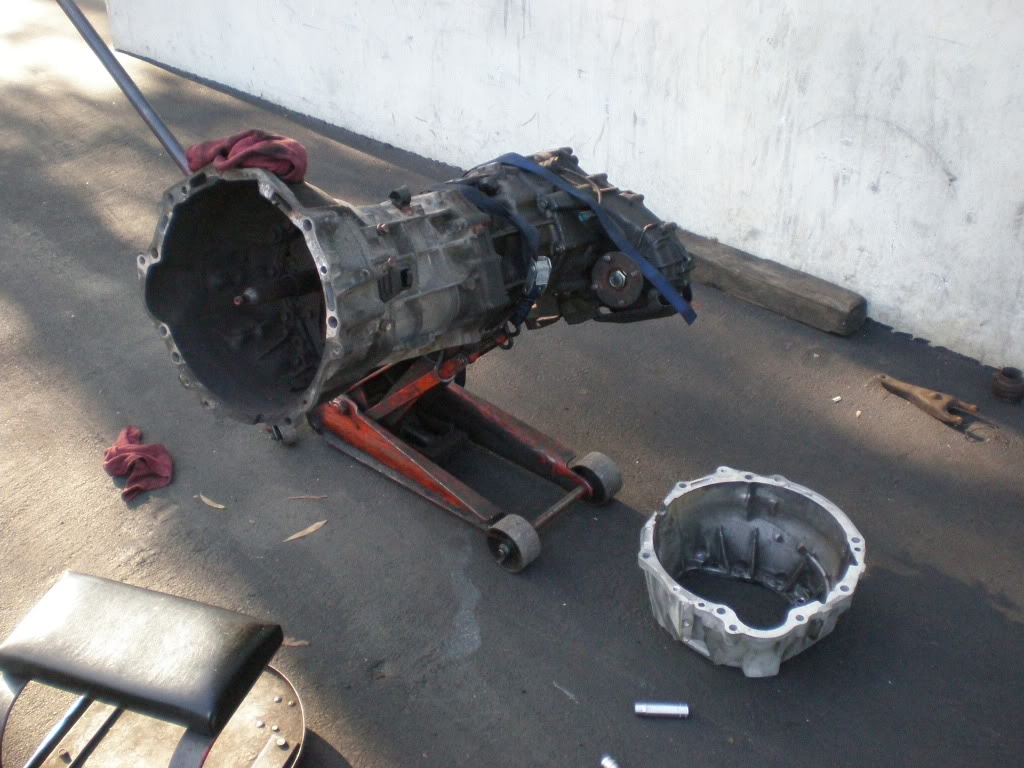
V6 Bell on the left, about 7 1/2" tall. 2.7 Bell on right, about 6 1/2" tall.
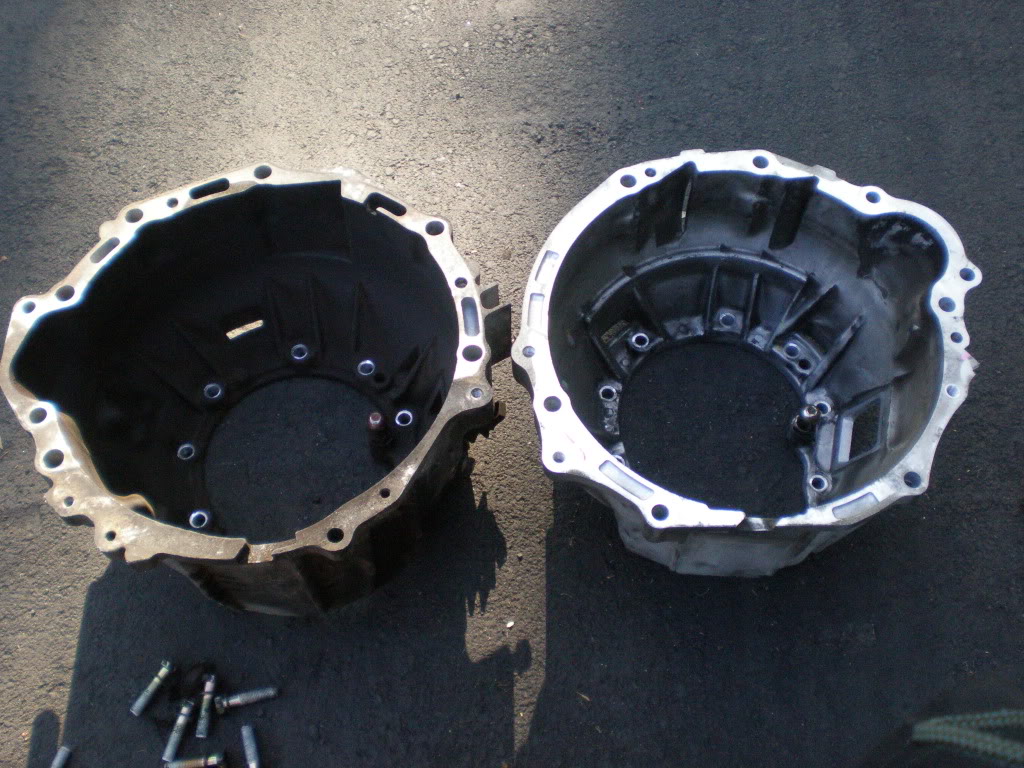
2TR Bell mounted:
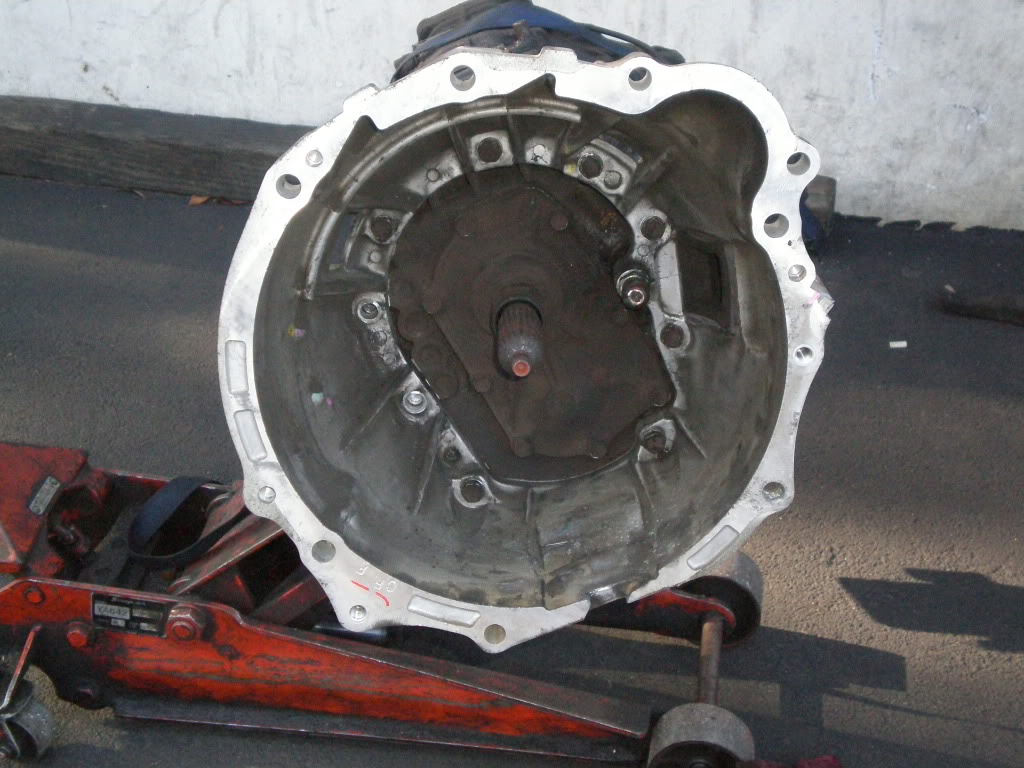
2TR clutch fork matched the 5VZ clutch fork exactly. New Koyo throwout bearing.
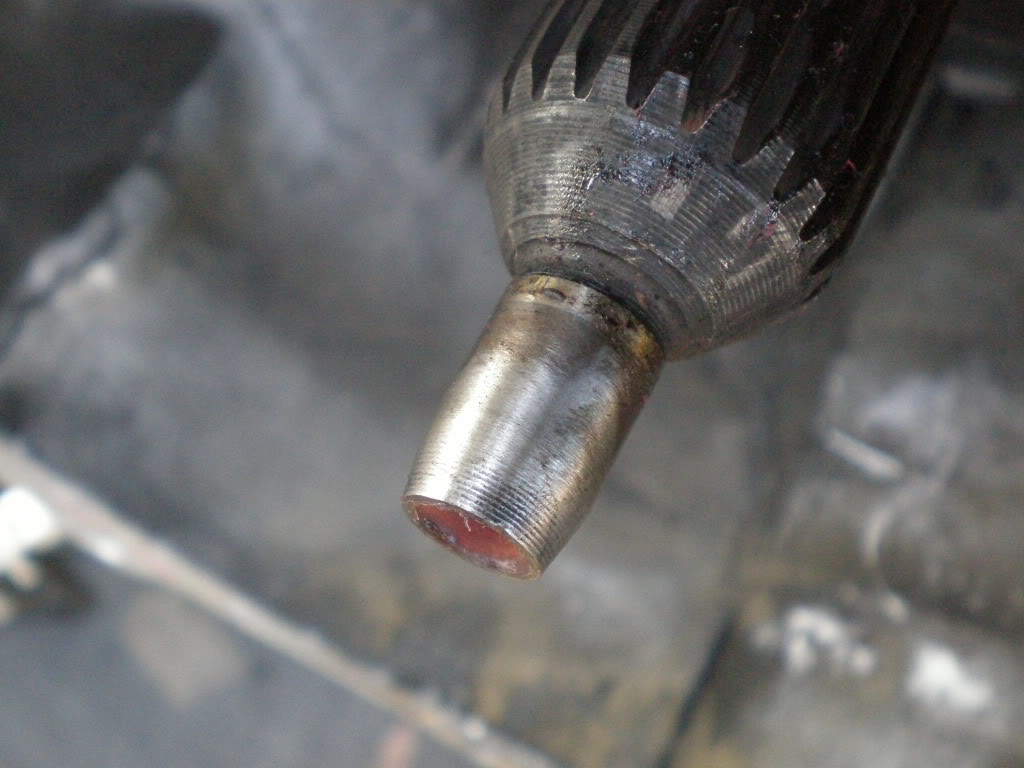
The input shaft had a small edge on the tip where the old pilot bearing sat. This is after it was fixed with a polishing wheel
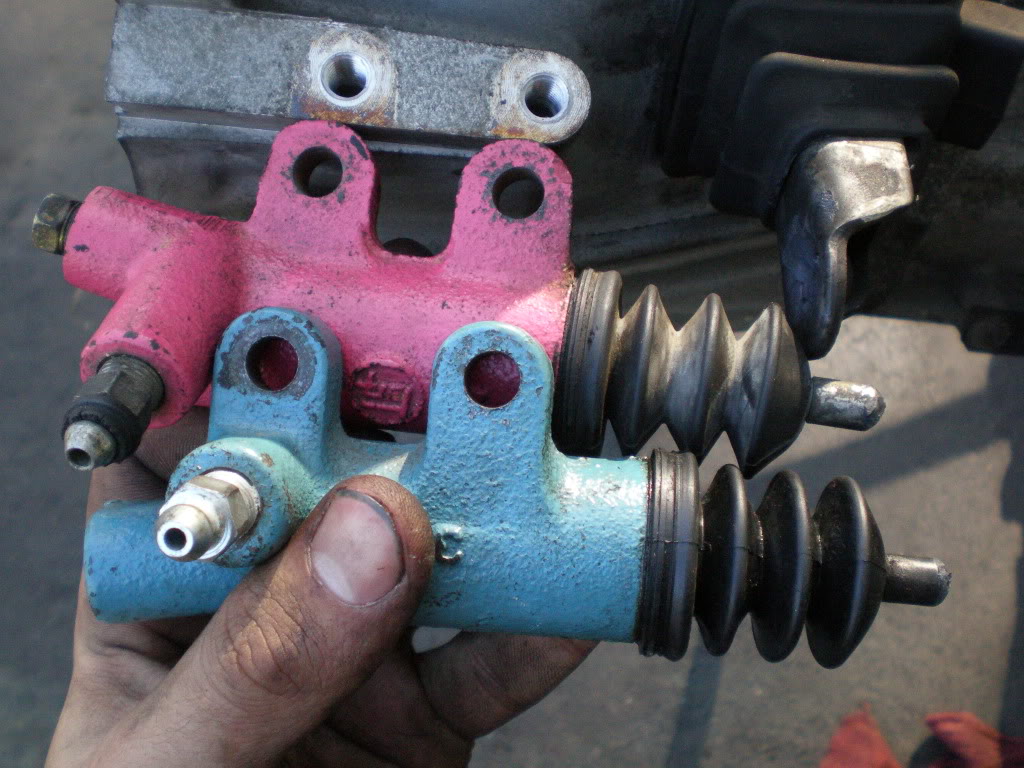
Removed the vacuum solenoids for the ADD front diff and slave cylinder.
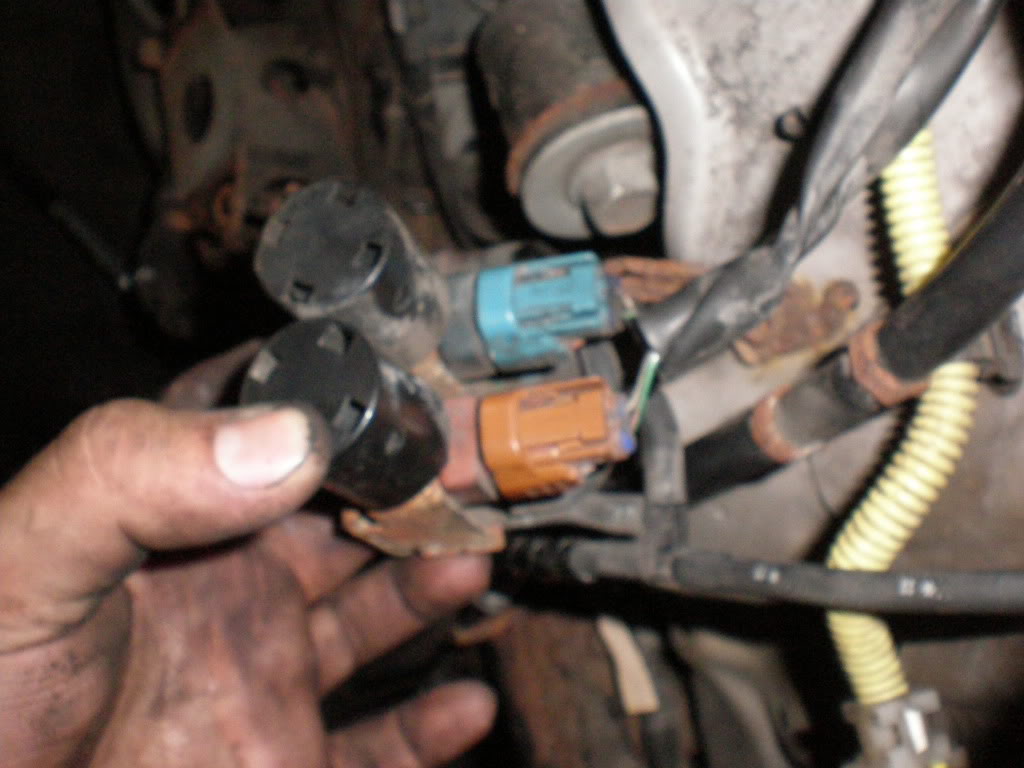
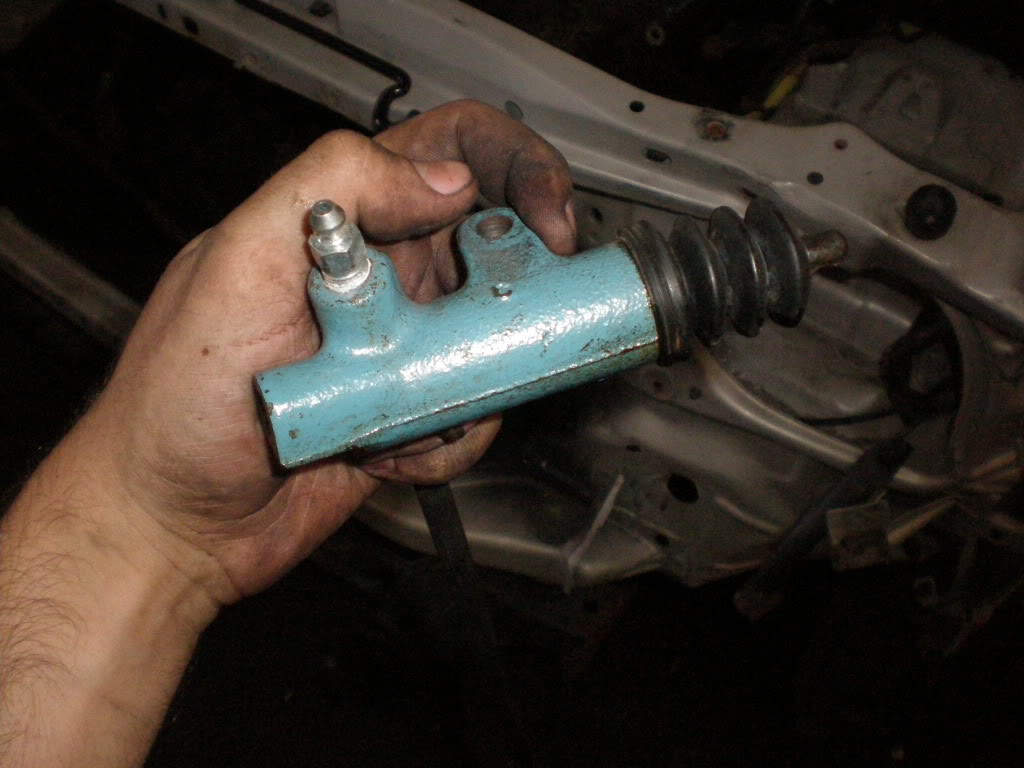
Red is a 3RZ slave, blue is 5VZ slave cylinder.

The difference is that the 3RZ slave fits the bell I bought at an angle, with the correct length. The 5VZ slave is way too big.
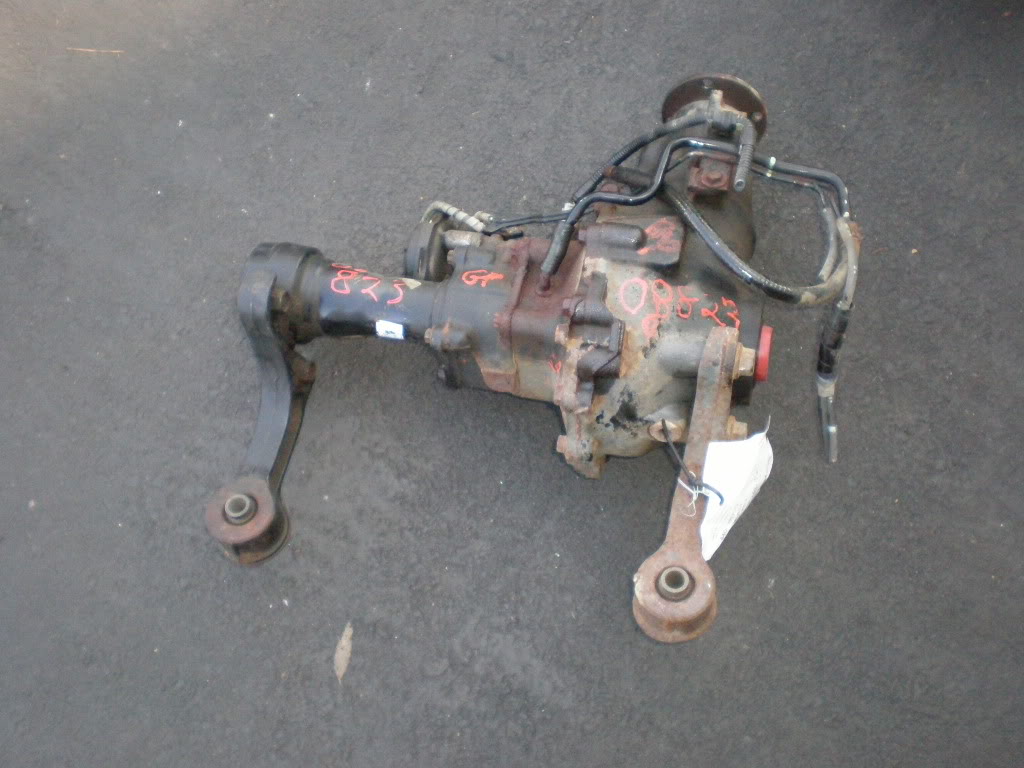
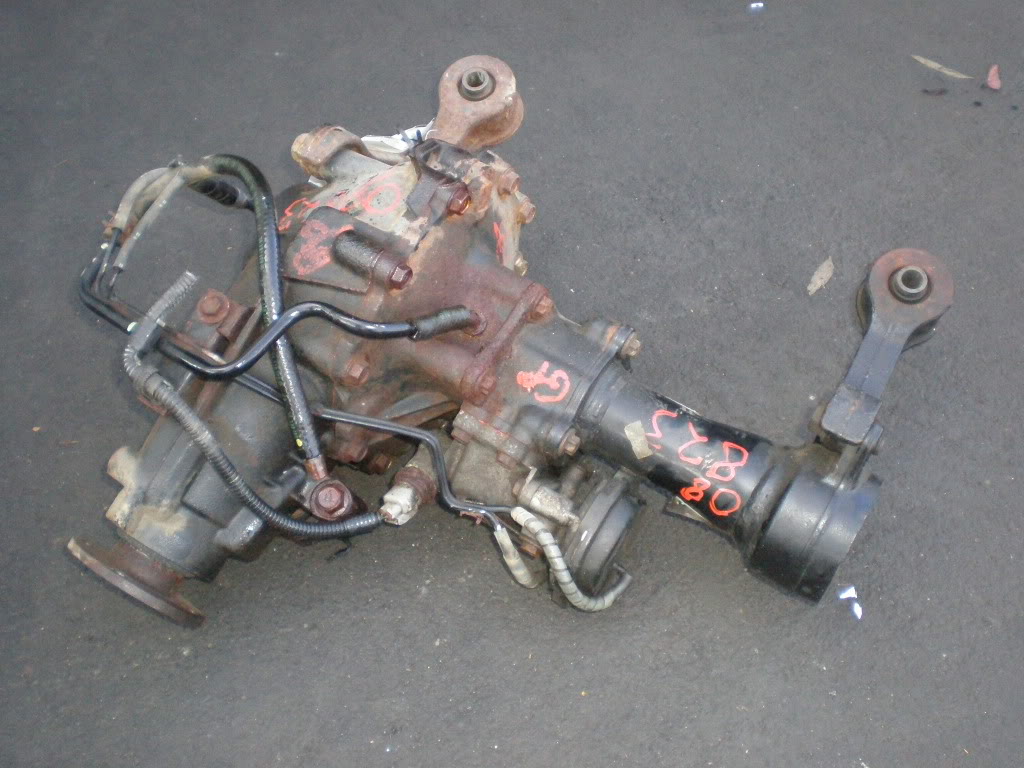
4.56 front differential:
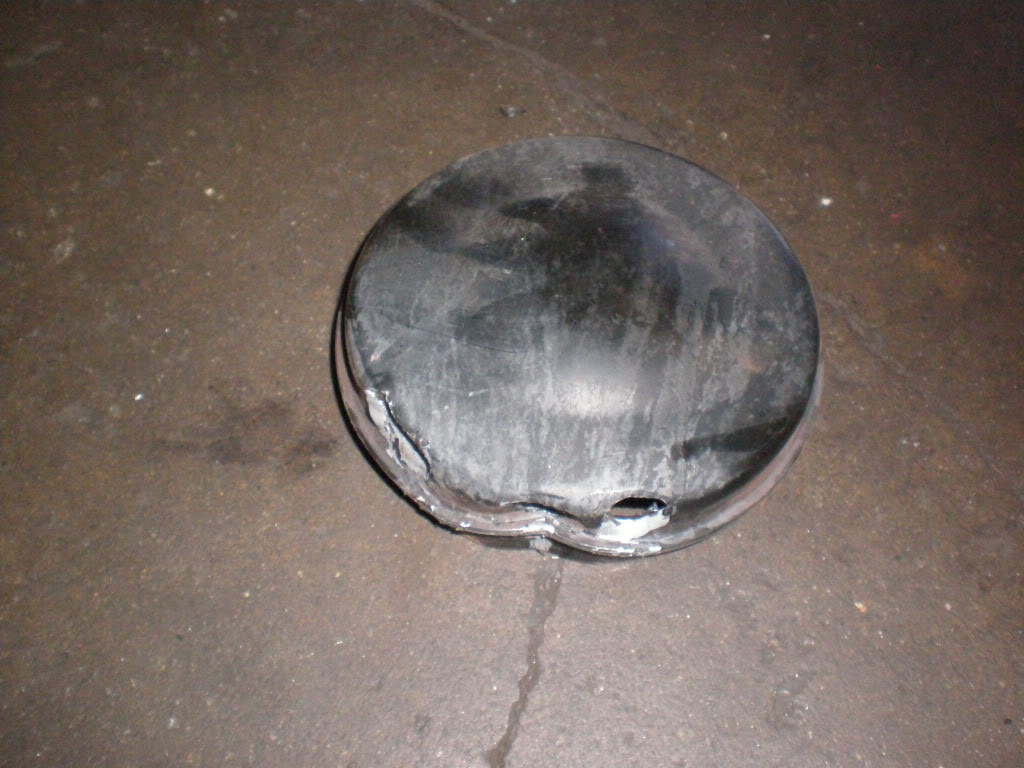
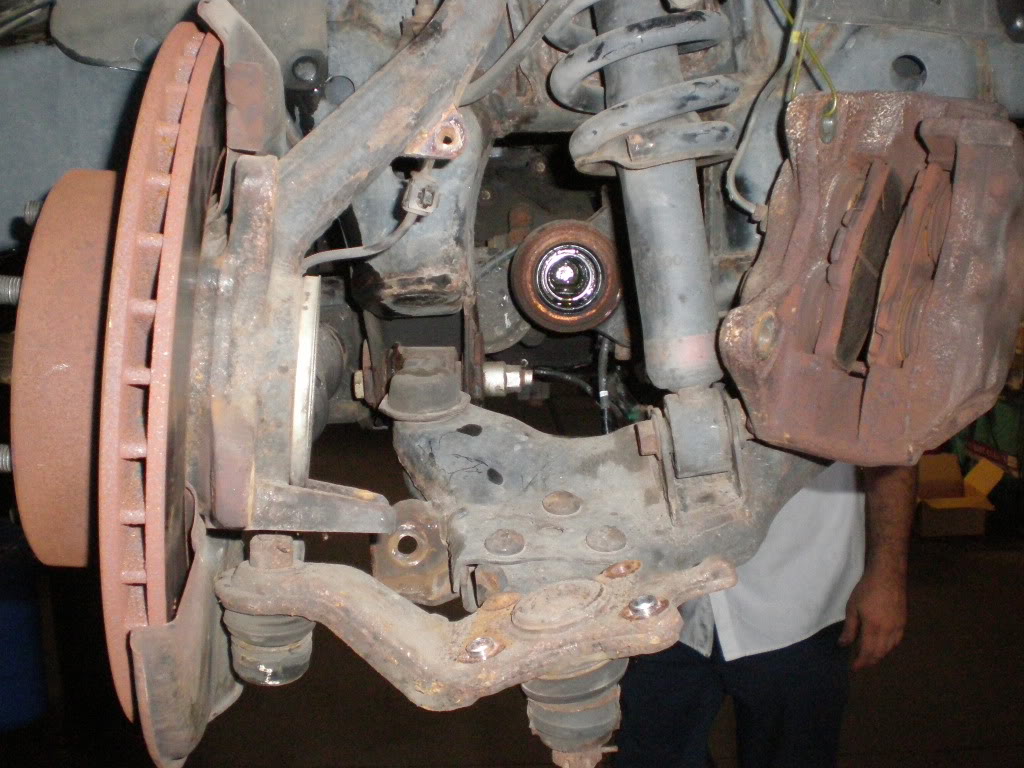
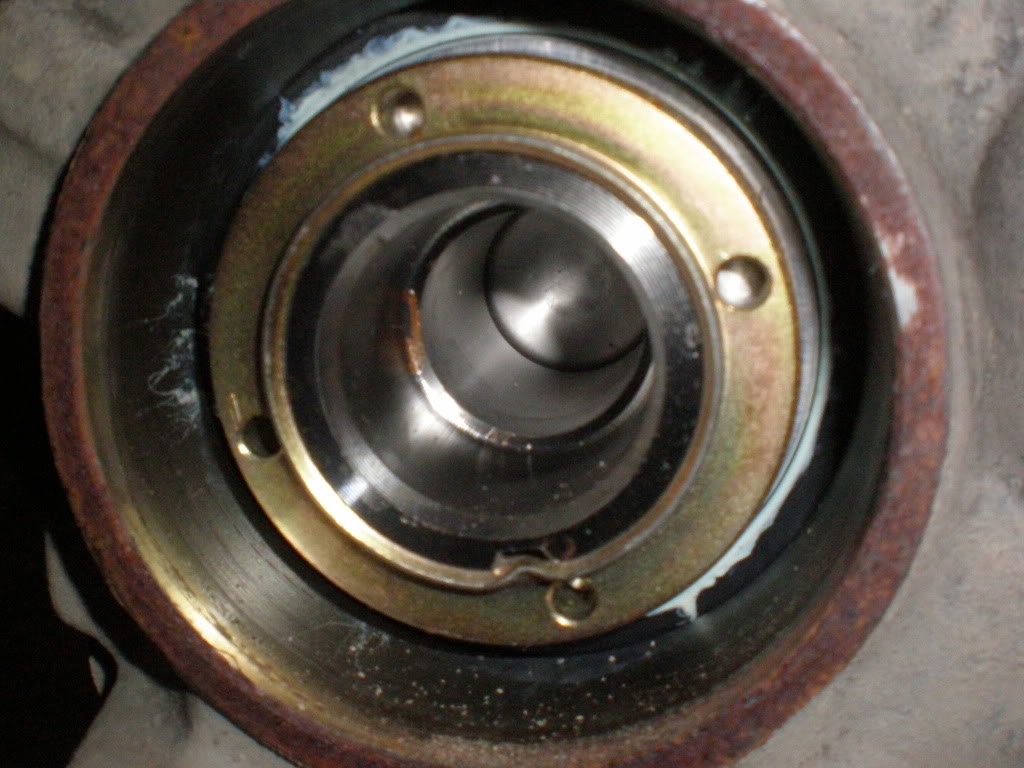
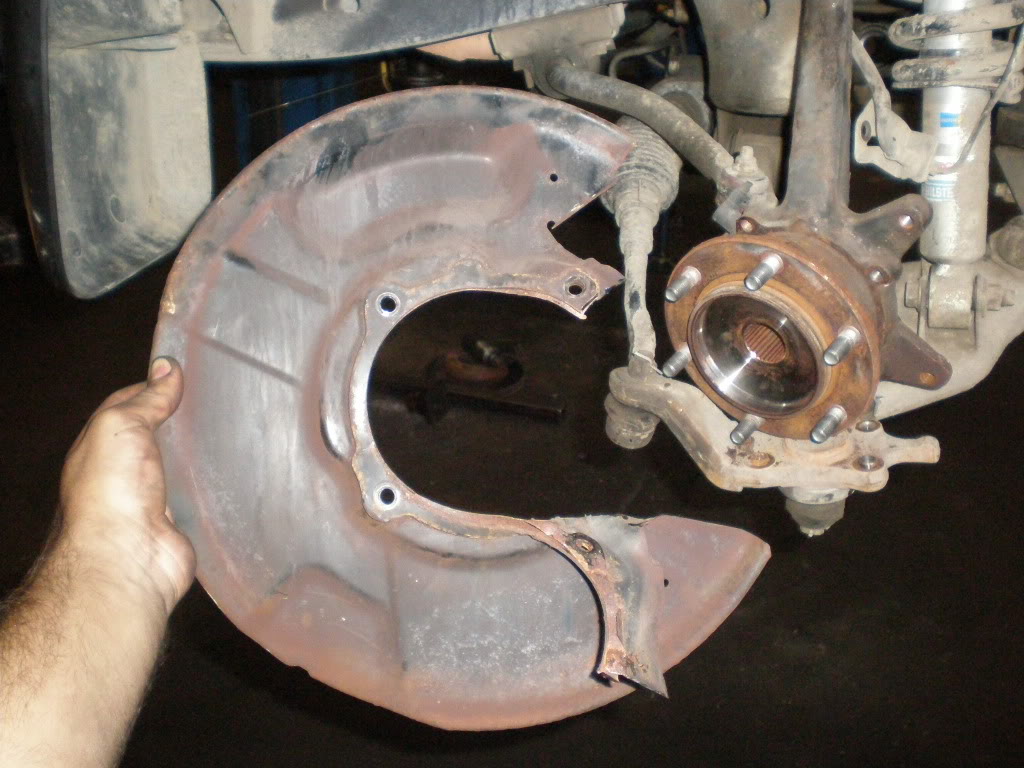
4WD hub on donor truck:

The cover was so stuck on with rust that we had no choice but to destroy it.
Ball joints unbolted, CVs out.
Resurfaced 3RZ flywheel:

Tested the new diff to double check ratio. 4.56 is correct. The ADD also works.
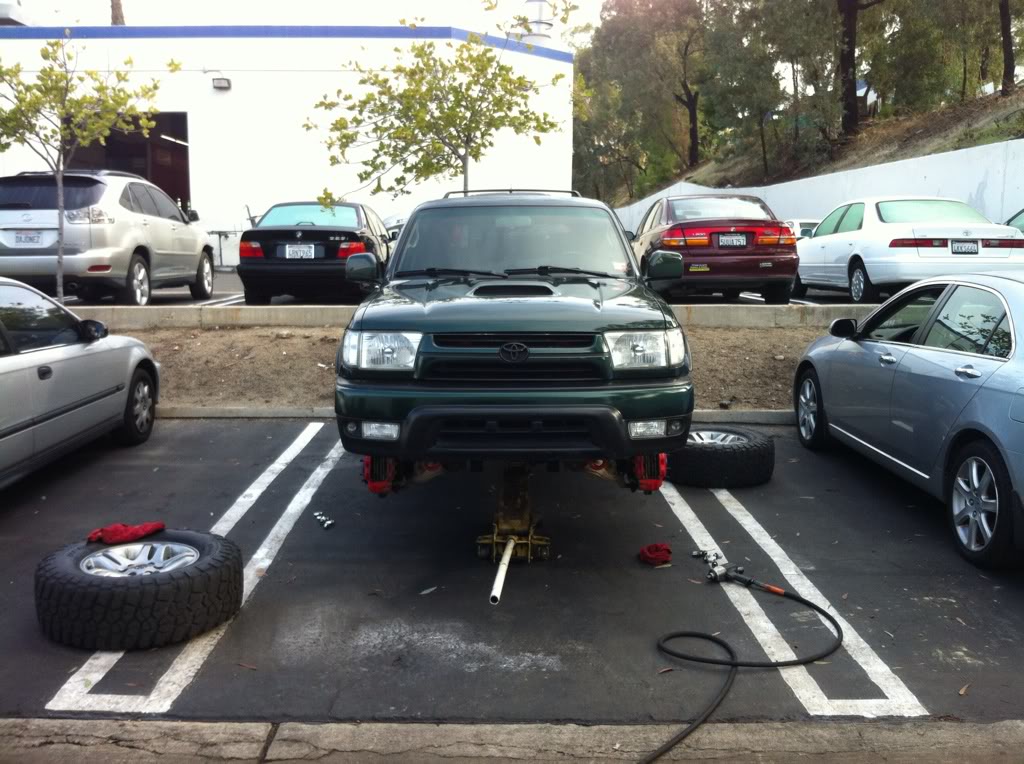
Time to get this show on the road...
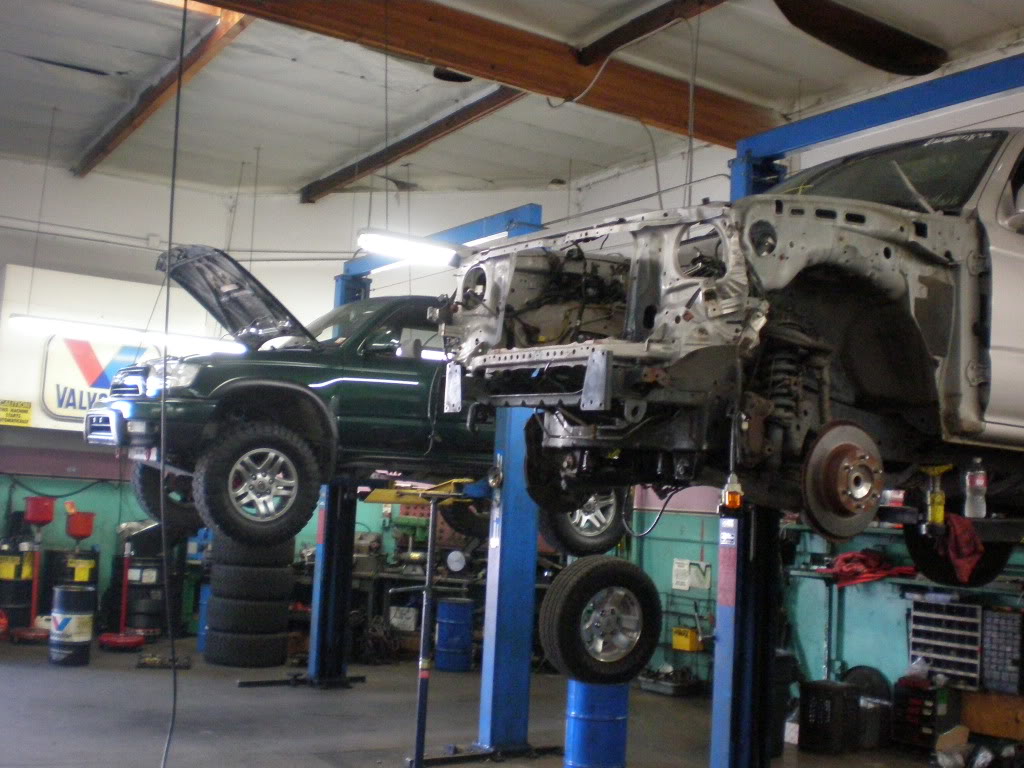
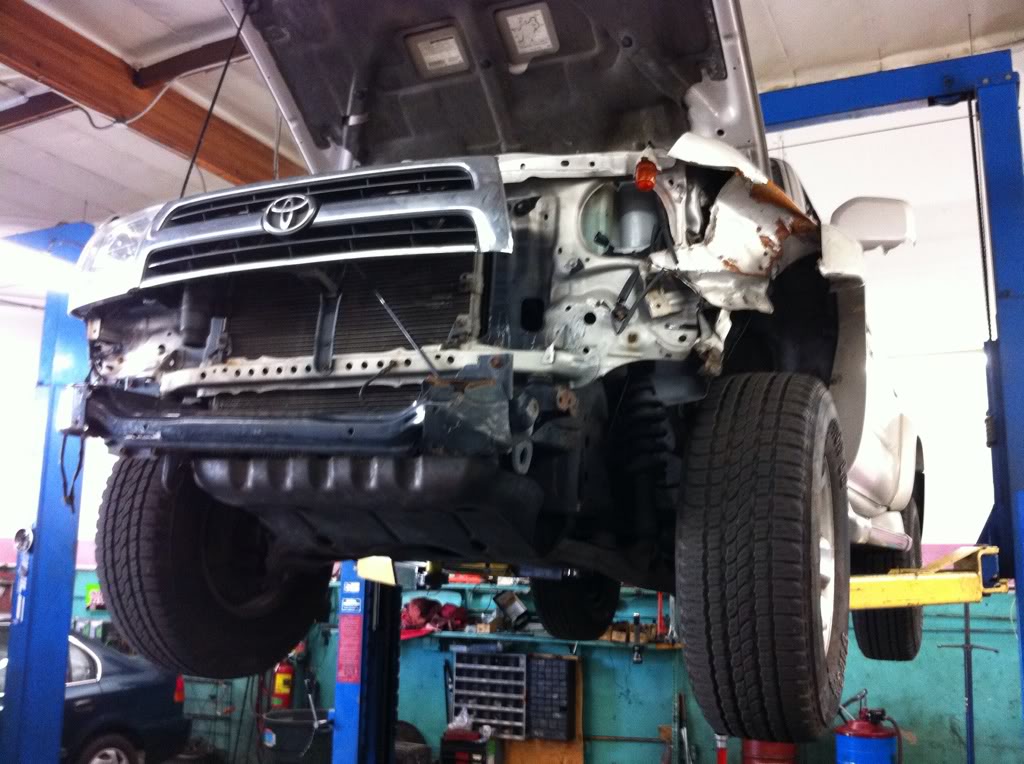
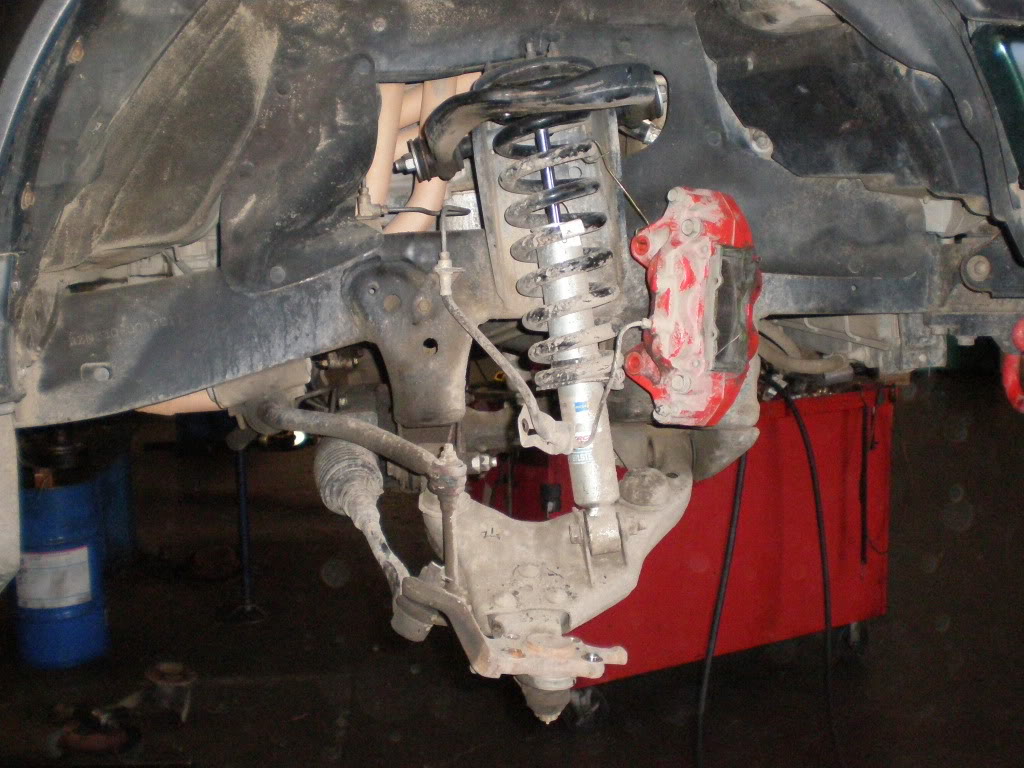
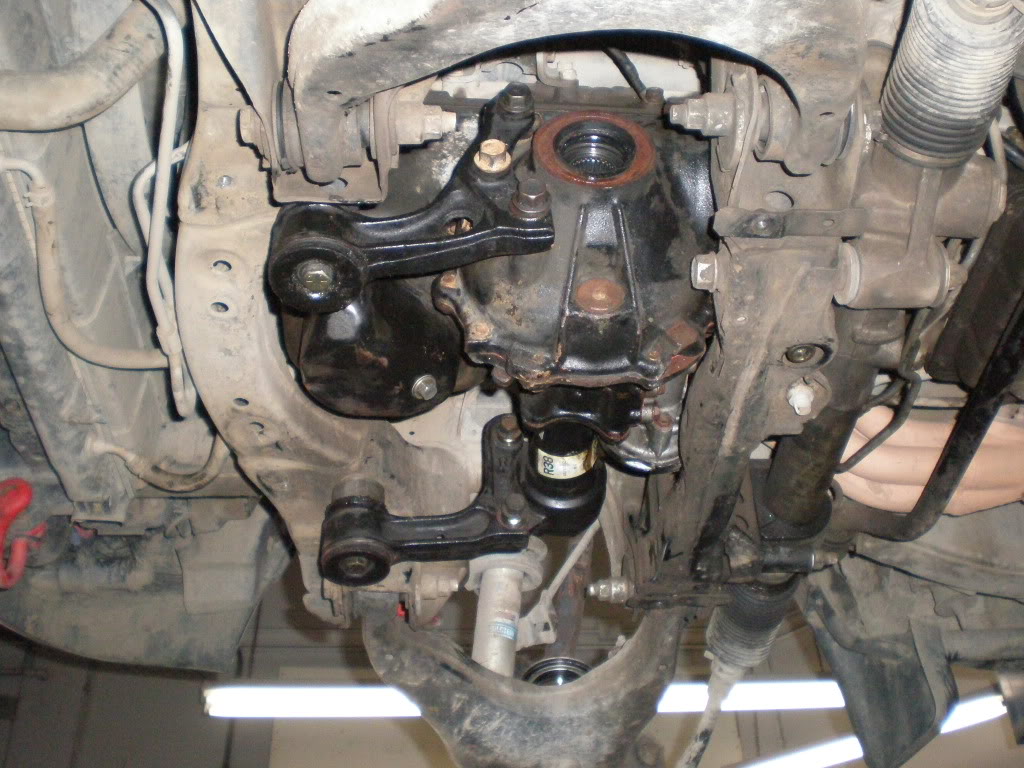
Skid off, wheels off. Notice the void where a front diff should be.

Notice that the 2WD hubs are not splined behind the cover... which required us swap the spindles.
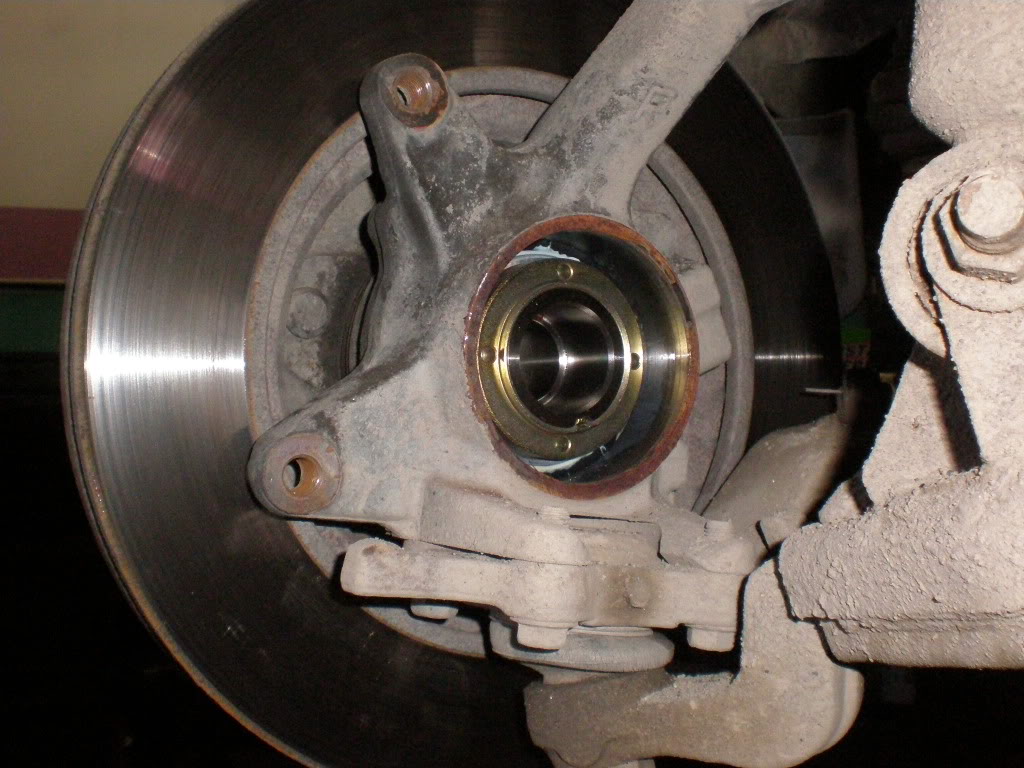
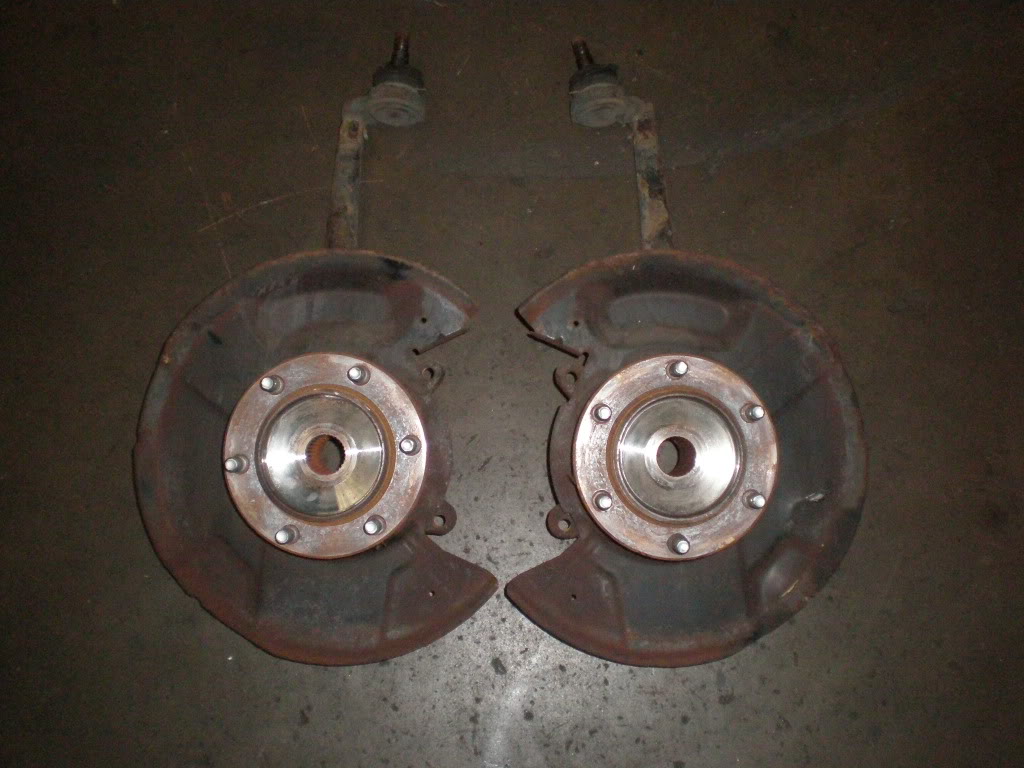
Spindles off:
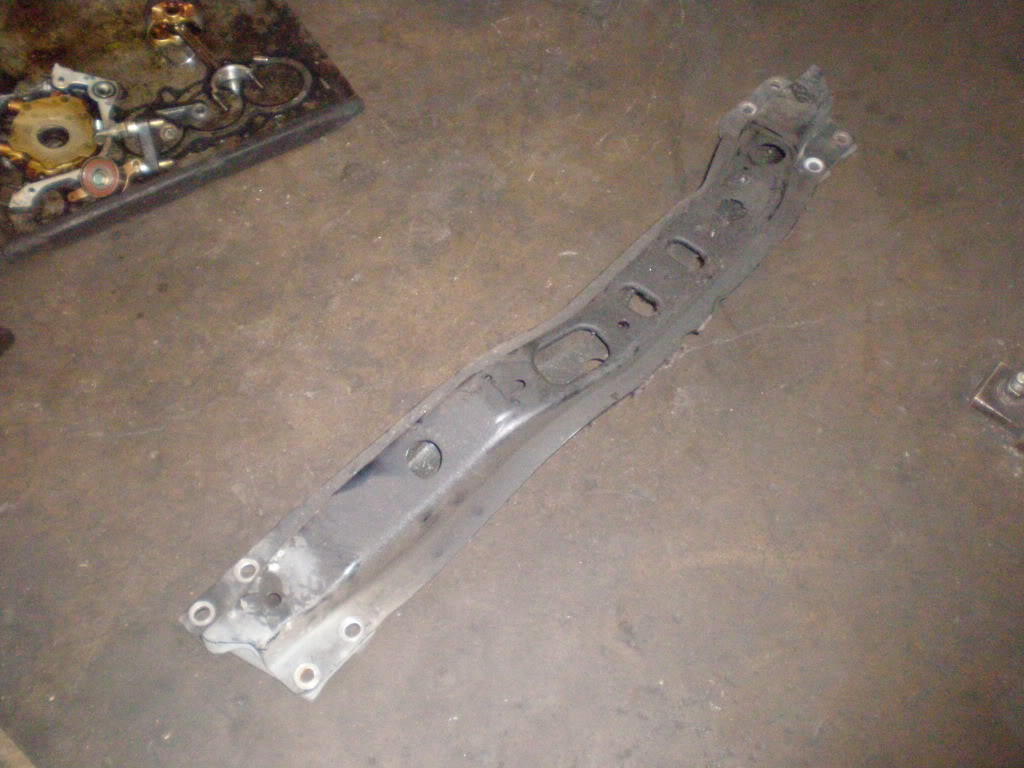
I have a crossmember for the new transmission, from a 2nd gen. We're gonna fab it to fit.
My 4Runner doesn't have ABS, and my spindles don't have ABS sensors. I had to just cut the wire for the ABS speed sensor and leave it in.
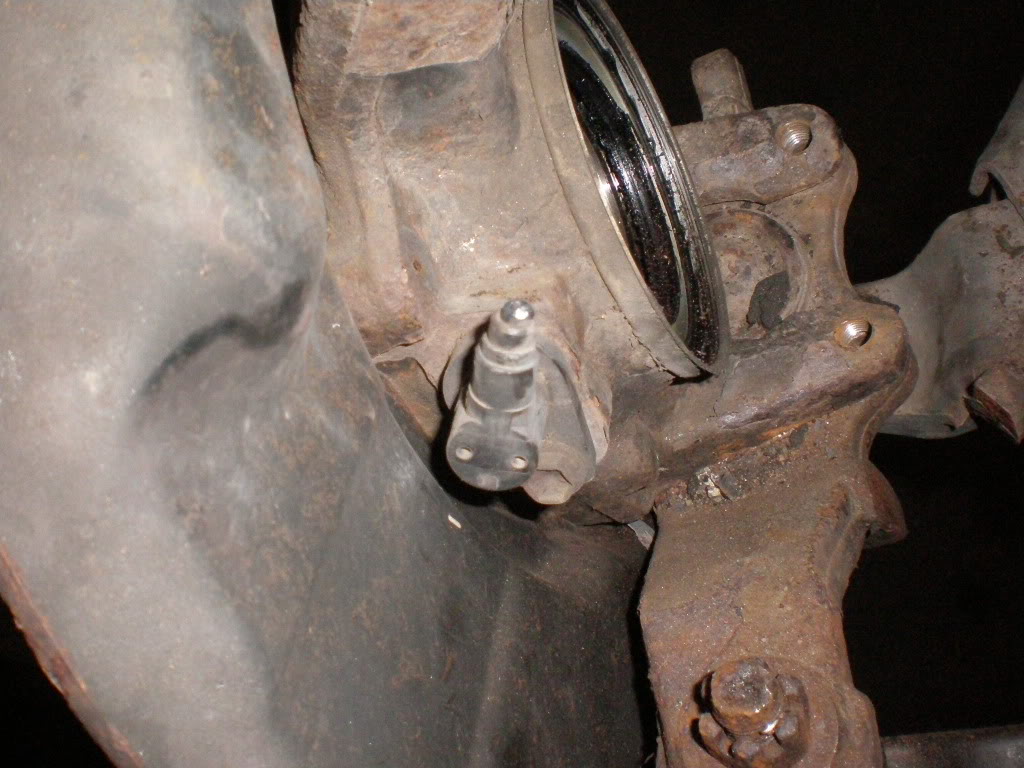
4WD spindles:
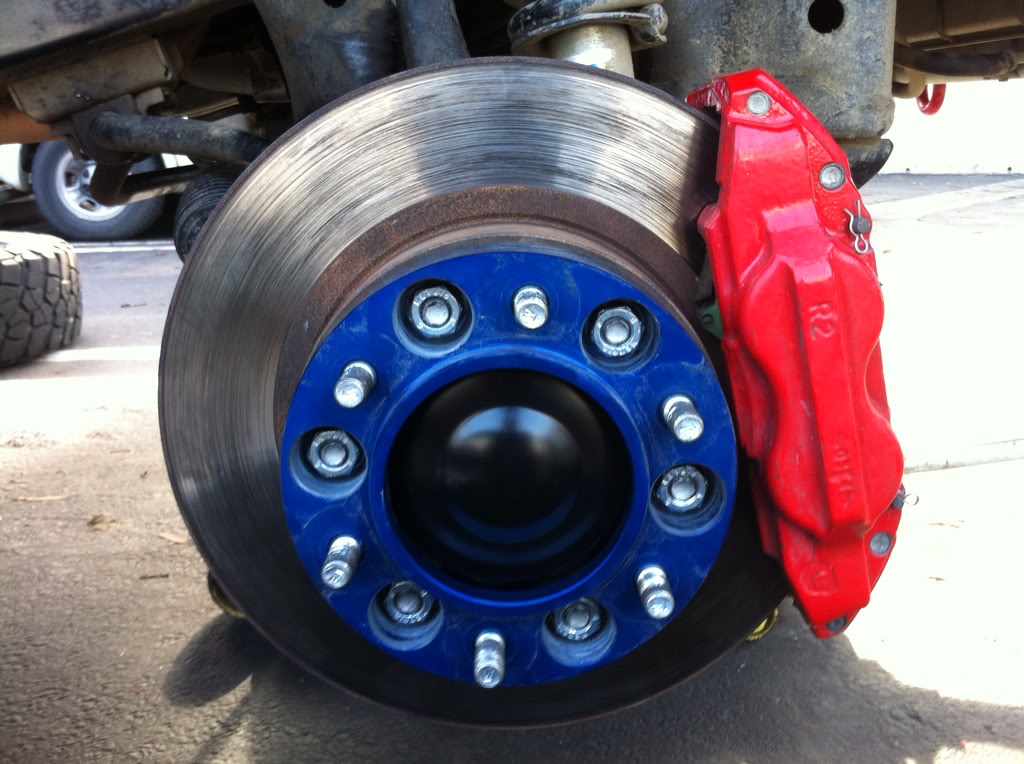
2WD spindles (missing brake dust shield due to Tundra Brake upgrade)
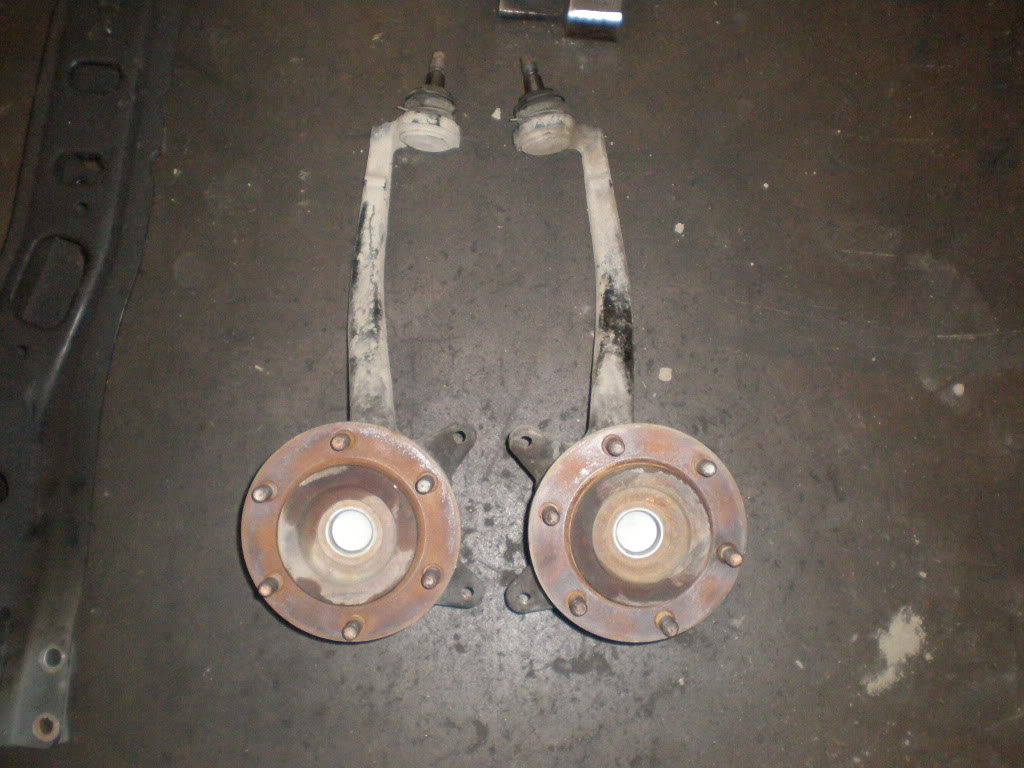
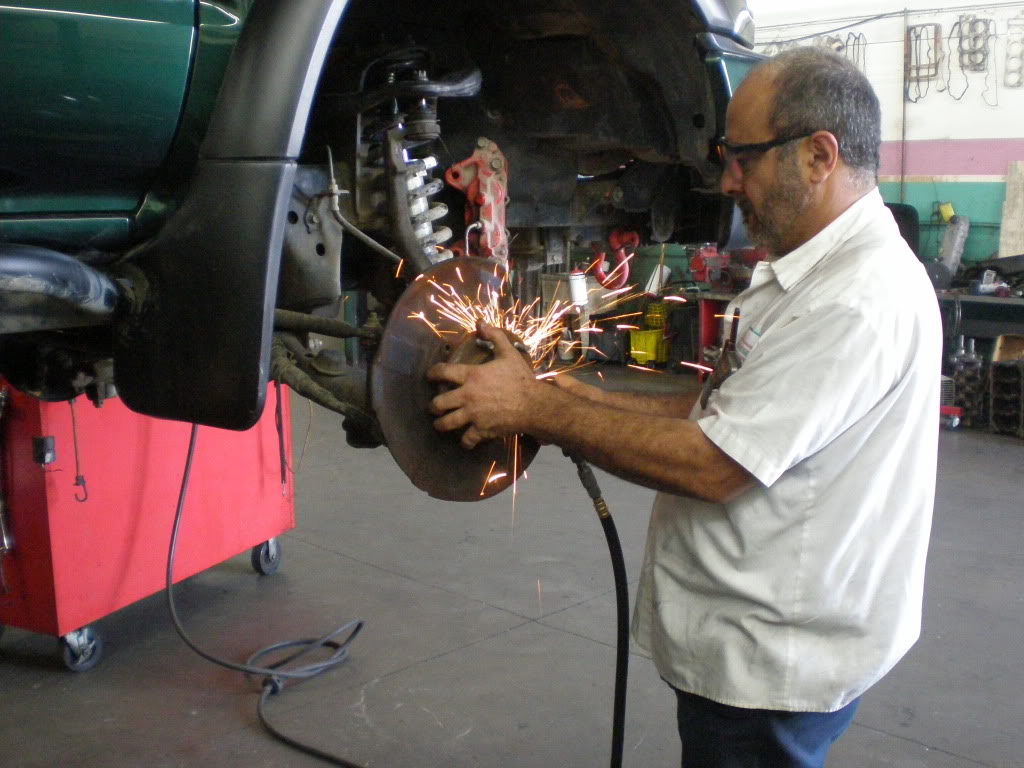
This is John, the owner of the shop, cutting the shields off of the 4WD spindles. I removed the 4 bolts, but the shield wouldn't fit over the hub.
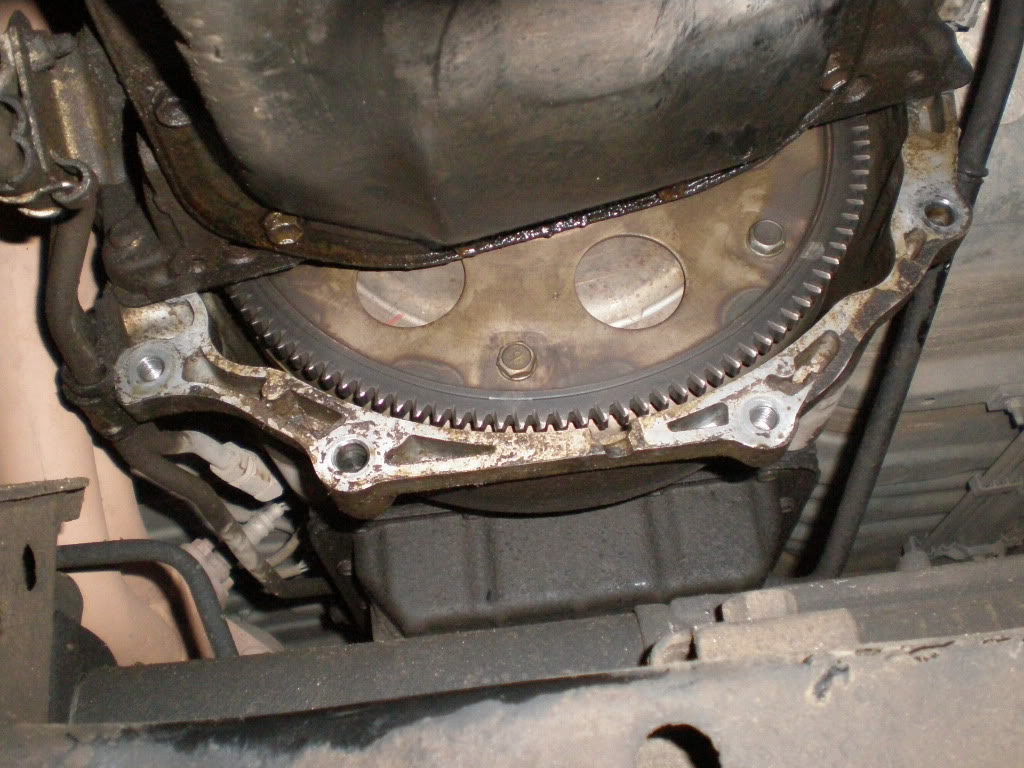
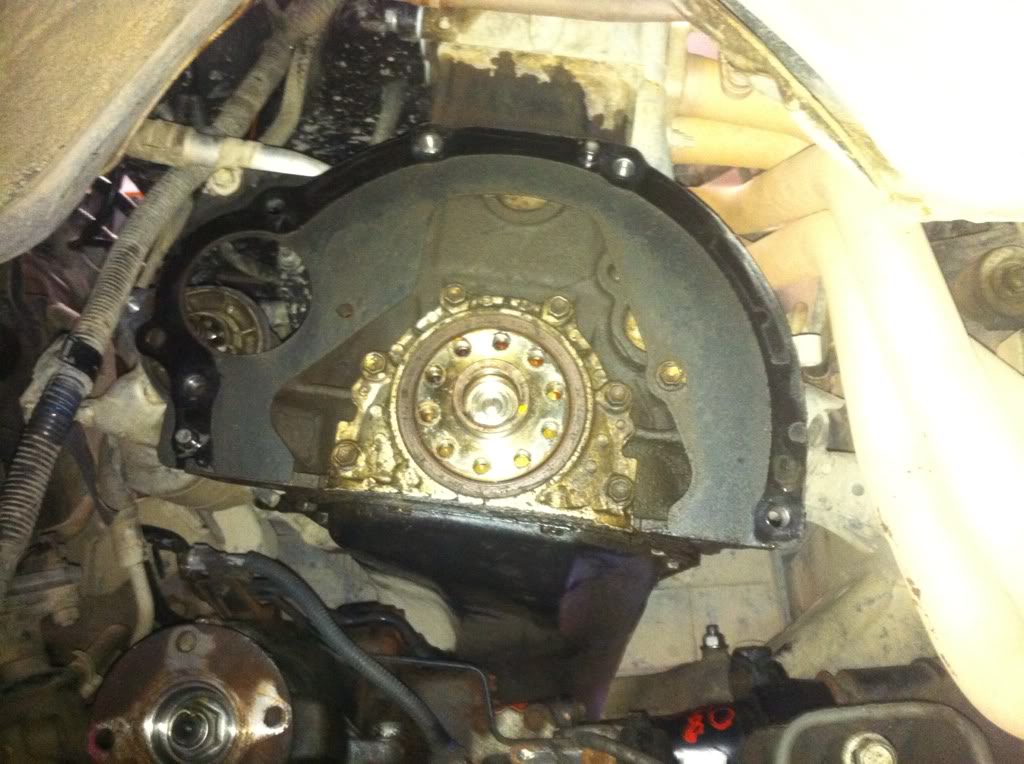
Removed transmission inspection cover and tightened the oil pan (it was loose and leaking a bit. There's a cork gasket in there that shouldn't be there)
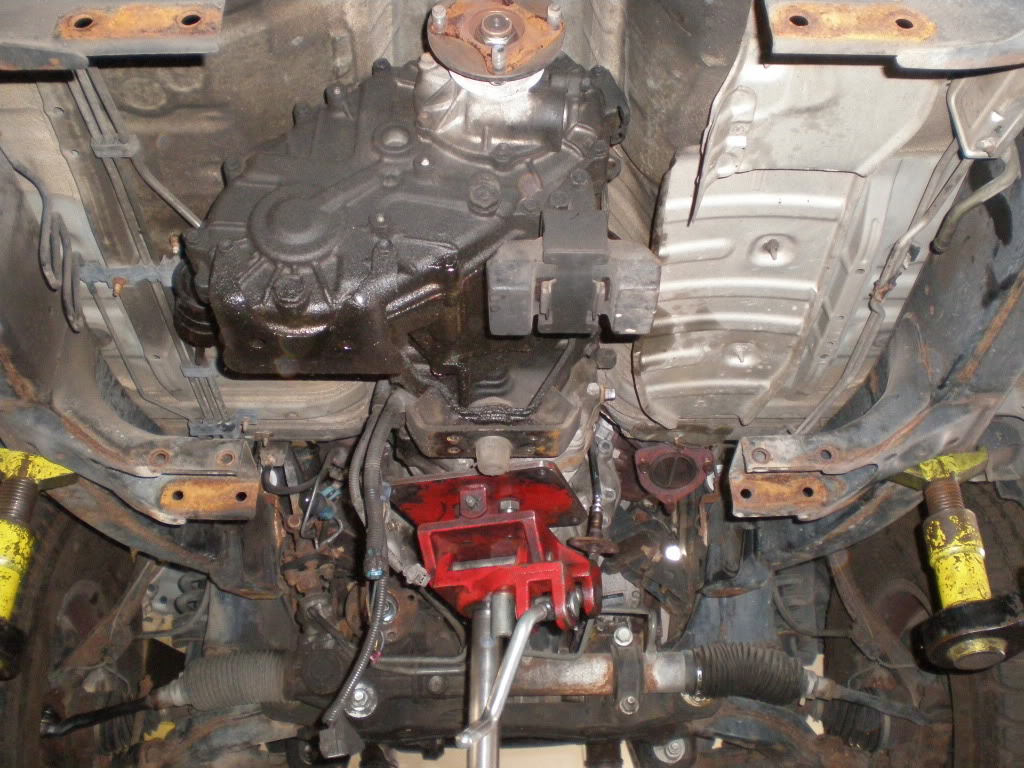
Front diff installed with Toytec Diff drop:
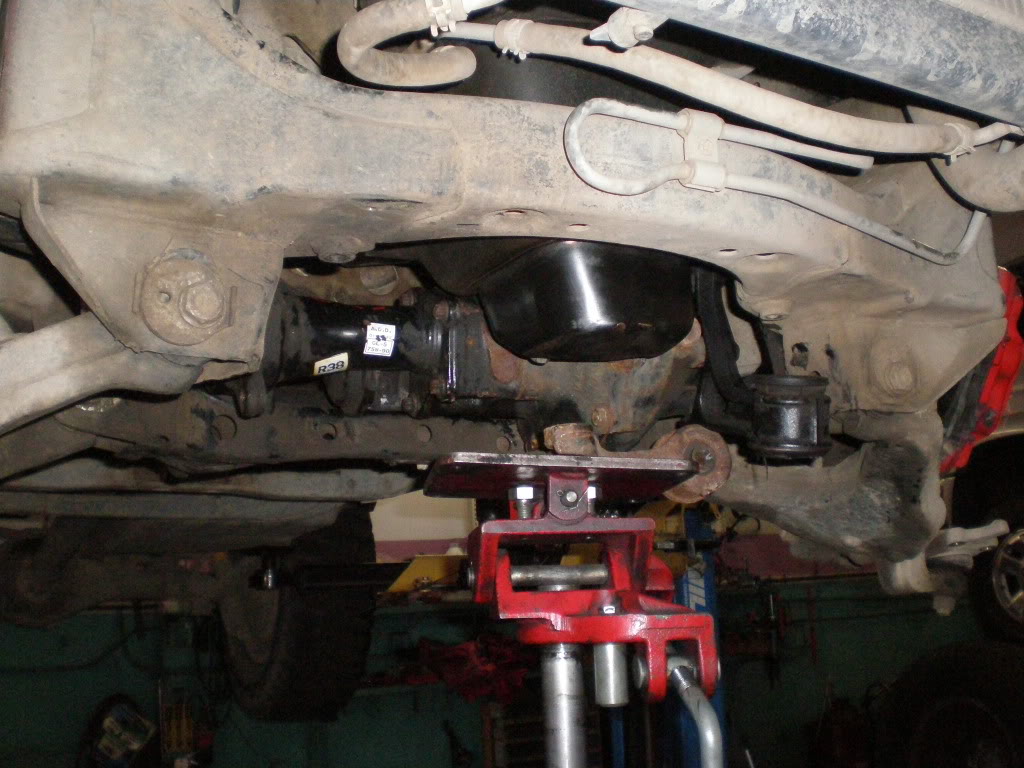
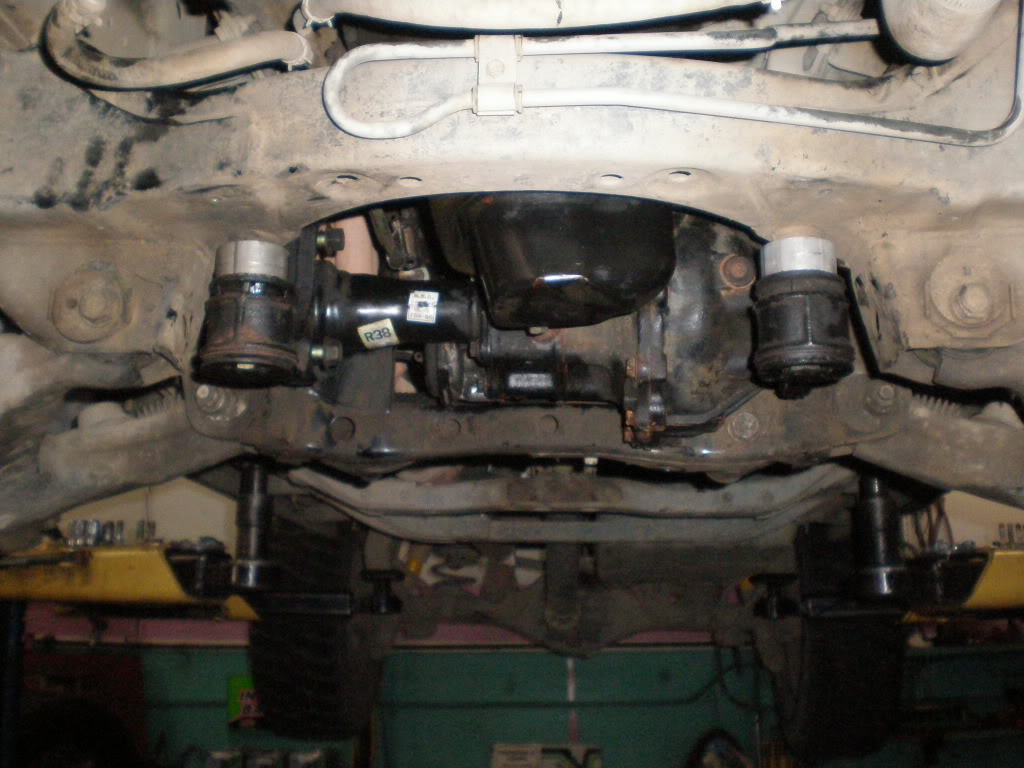
This was a real pain to get in, it's a very tight squeeze.
Reinstalled spindles, rotors, calipers, and wheels with 2WD spindles on the donor truck, so it'll roll.
My 99 wasn't reassembled with the CV's yet because there was a bad seal in both 4WD spindles. Ordering them tomorrow and then installing them.
Shop is packed up for night and we'll be back tomorrow!
Thanks guys!
Here's a pic of the tie rod from yesterday.
Todays updates. I'm lazy tonight, so I'll probably go through and revise later.
Started taking off most of the stuff on the core support to make it easier to pull the motor.
Pulled the ECU to get engine wire harness out.
The wires go straight out into the engine bay
Still removing stuff on the front. A lot of the bolts and studs broke because of rust
I wanted to remove the damaged fender, which meant removing the running board to get access to some bolts. I just removed both for the hell of it.
Anyway, the good stuff:
Removed exhaust, driveshafts, crossmembers, front sway bar, etc:
Slave cylinder removed:
Awesome
Removed all of the transmission bolts and starter:
Took out both shifters, lined up the transmission jack and pulled the sucker out.
It looks good other than some leaking from the shifter seal. We're gonna fix the leaks while they're easily accessible off the vehicle.
Here's the completely fried clutch disk. The rivets in the disk were worn down.
Drained the power steering fluid so we didn't have to remove the power steering pump from the motor:
The engine soon followed:
Rusty 3RZ flywheel I bought. We machined it a second time later to remove some heat spots.
Trans soon to be mated with 2TR-FE bell housing.
8AM Tomorrow, back in to remove the rest of what I need. We're gonna figure out some crossmember stuff before starting on my 2WD, but it shouldn't be long.
As far as my 2WD goes, I received a Dash Designs cover today. I want to hide my dash, even though it's not cracking. The top part is slightly discolored (not from sun) and there's some obvious sagging. Looks 100% better covered. I also got my Outdoor Logic antenna mount which I'll install tomorrow probably... sorry no pics of the mount yet.
It sat on it's ass outside all day
I hope you know that she felt neglected, me putting my hands all over another 4Runner...
----------------------------------------
11/17/11
I'm really worn out, but here's today's progress:
Started off the day by swapping the original V6 bell housing with that of a 2TR-FE bell housing for the R155 transmission that Toyota uses in the 2005+ 2.7l Tacoma.
The transmission in its original form:
V6 Bell on the left, about 7 1/2" tall. 2.7 Bell on right, about 6 1/2" tall.
2TR Bell mounted:
2TR clutch fork matched the 5VZ clutch fork exactly. New Koyo throwout bearing.
The input shaft had a small edge on the tip where the old pilot bearing sat. This is after it was fixed with a polishing wheel
Removed the vacuum solenoids for the ADD front diff and slave cylinder.
Red is a 3RZ slave, blue is 5VZ slave cylinder.
The difference is that the 3RZ slave fits the bell I bought at an angle, with the correct length. The 5VZ slave is way too big.
4.56 front differential:
4WD hub on donor truck:
The cover was so stuck on with rust that we had no choice but to destroy it.
Ball joints unbolted, CVs out.
Resurfaced 3RZ flywheel:
Tested the new diff to double check ratio. 4.56 is correct. The ADD also works.
Time to get this show on the road...
Skid off, wheels off. Notice the void where a front diff should be.
Notice that the 2WD hubs are not splined behind the cover... which required us swap the spindles.
Spindles off:
I have a crossmember for the new transmission, from a 2nd gen. We're gonna fab it to fit.
My 4Runner doesn't have ABS, and my spindles don't have ABS sensors. I had to just cut the wire for the ABS speed sensor and leave it in.
4WD spindles:
2WD spindles (missing brake dust shield due to Tundra Brake upgrade)
This is John, the owner of the shop, cutting the shields off of the 4WD spindles. I removed the 4 bolts, but the shield wouldn't fit over the hub.
Removed transmission inspection cover and tightened the oil pan (it was loose and leaking a bit. There's a cork gasket in there that shouldn't be there)
Front diff installed with Toytec Diff drop:
This was a real pain to get in, it's a very tight squeeze.
Reinstalled spindles, rotors, calipers, and wheels with 2WD spindles on the donor truck, so it'll roll.
My 99 wasn't reassembled with the CV's yet because there was a bad seal in both 4WD spindles. Ordering them tomorrow and then installing them.
Shop is packed up for night and we'll be back tomorrow!
Thanks guys!
11-17-2011, 10:30 PM
#87
Registered User
Join Date: Jul 2009
Location: California City, CA
Posts: 198
Likes: 0
Received 0 Likes
on
0 Posts
Hey what color are the Limited flares on the donor truck? If they are silver and if you are not planning on using them, Will you sell the right side front bumper flare piece? How much do you want for it?
11-18-2011, 06:36 PM
#89
Registered User
Thread Starter
Will do, thank you!
Short day today. I came down with the flu and I was really tired.
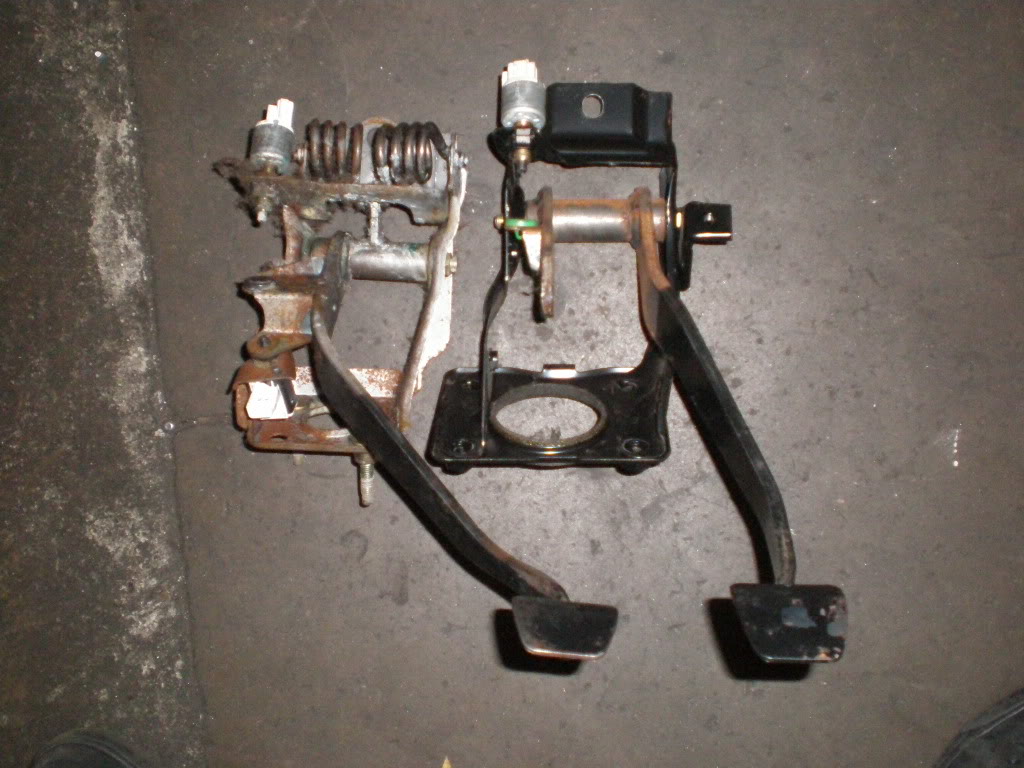
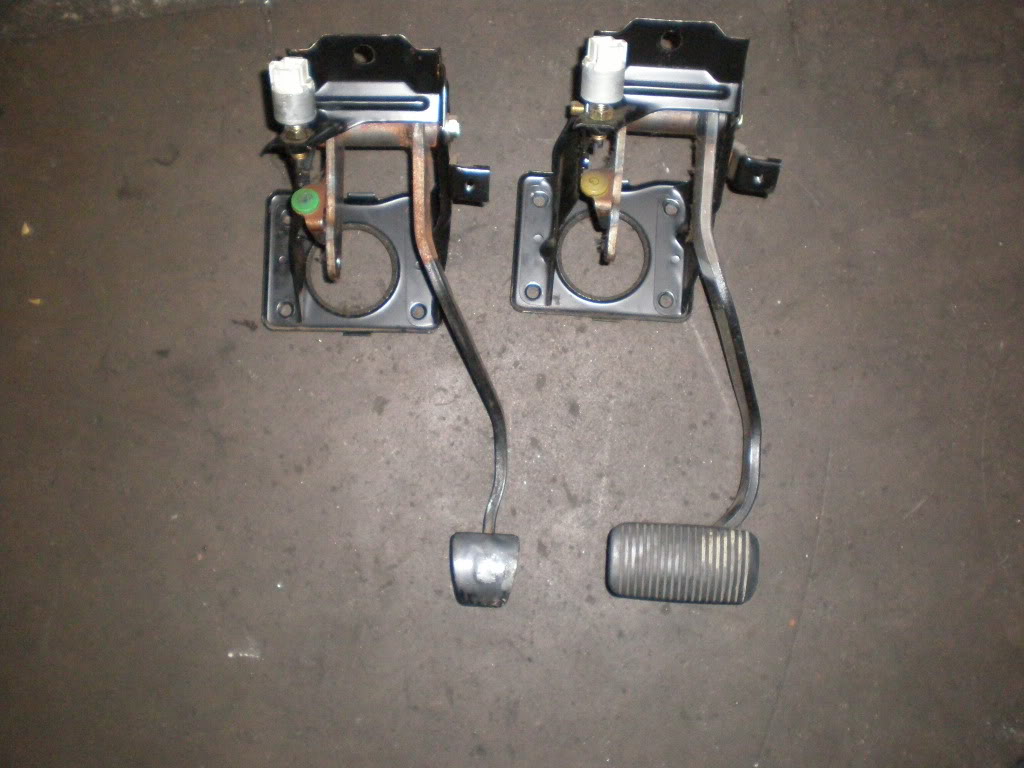
Took out the clutch and brake pedals
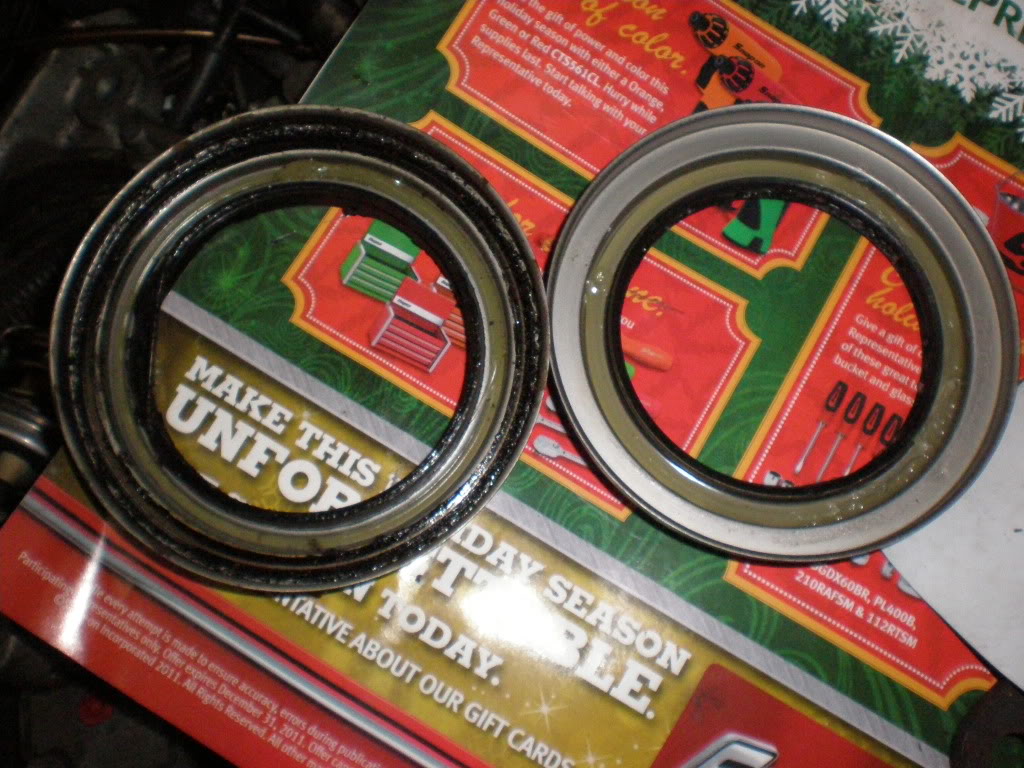
Old seal (left) vs new seal (right) for the hub/CV axles
Manual vs Auto brake pedal
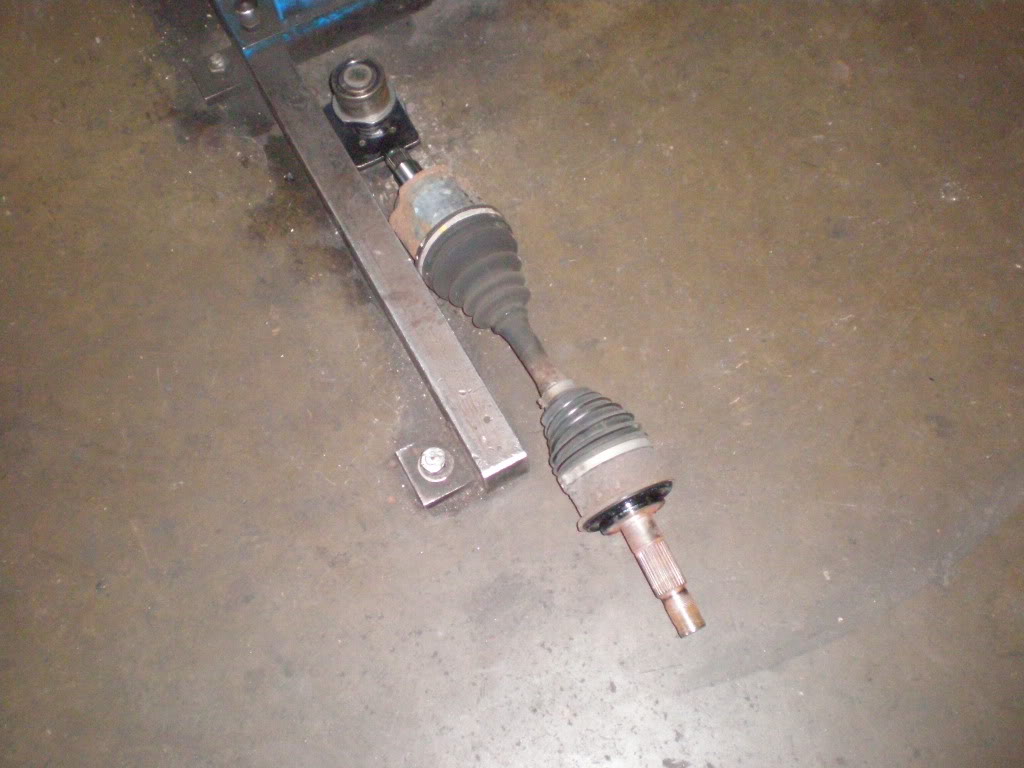
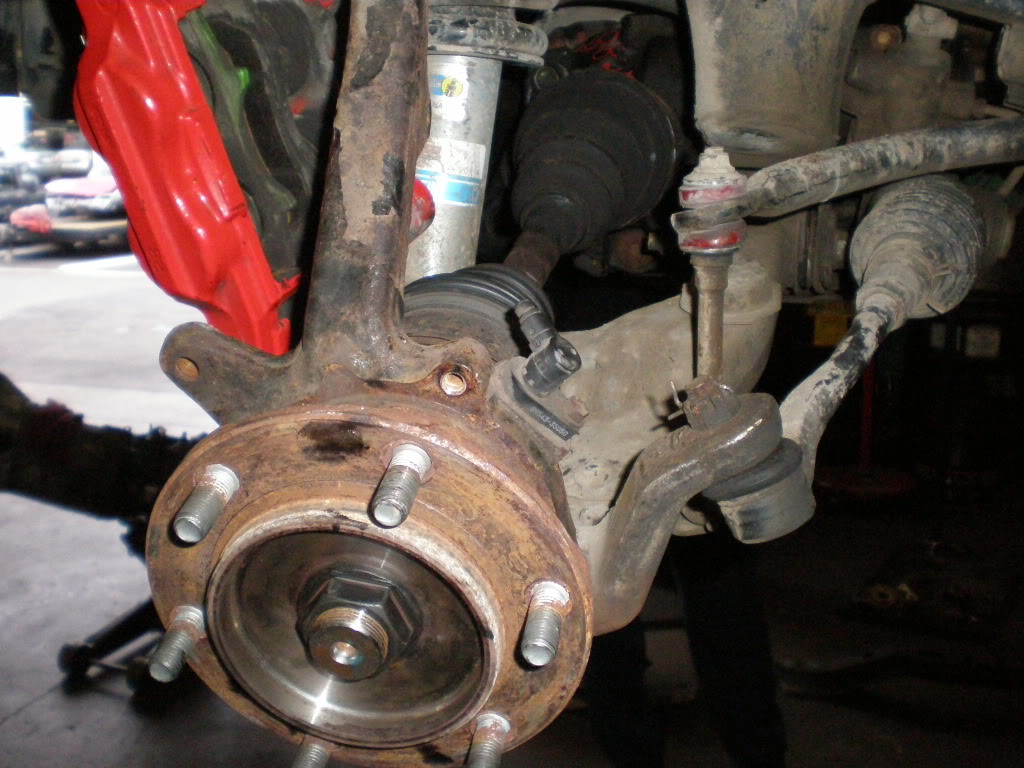
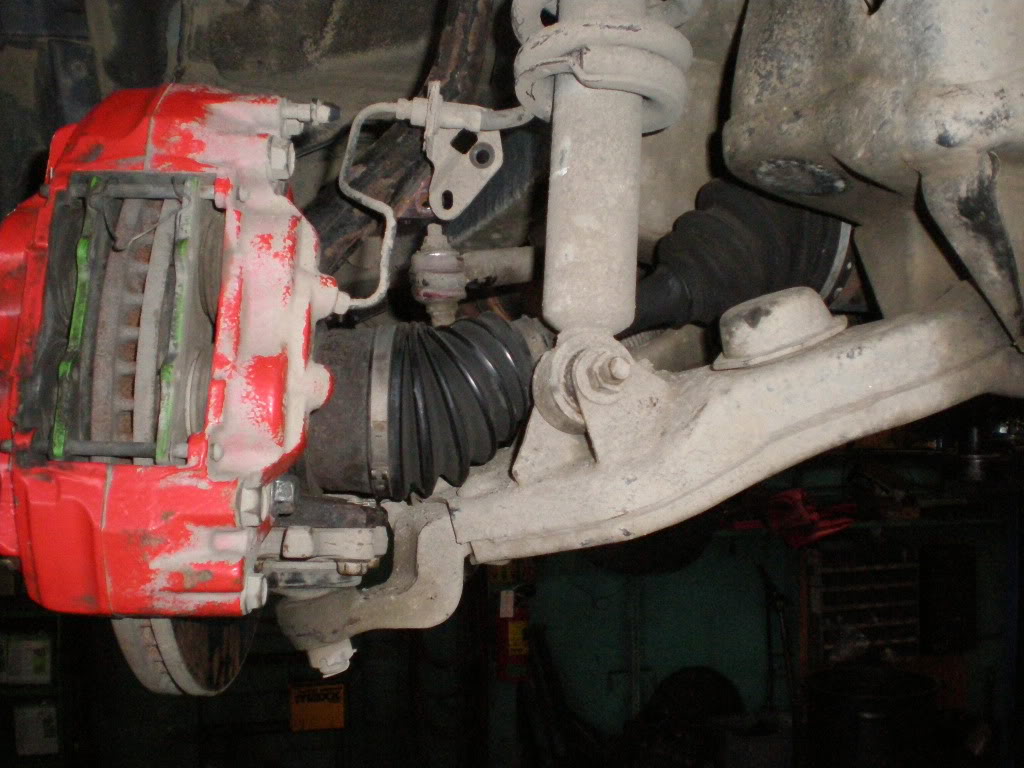
CV's in
Cut out a template for the clutch master
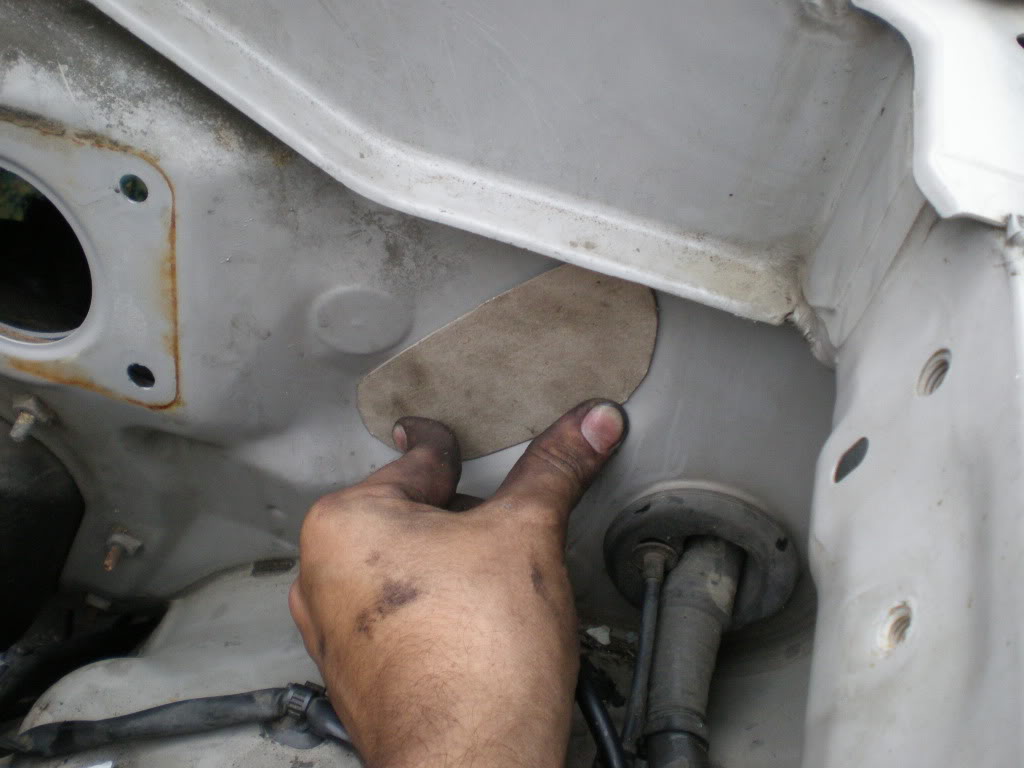
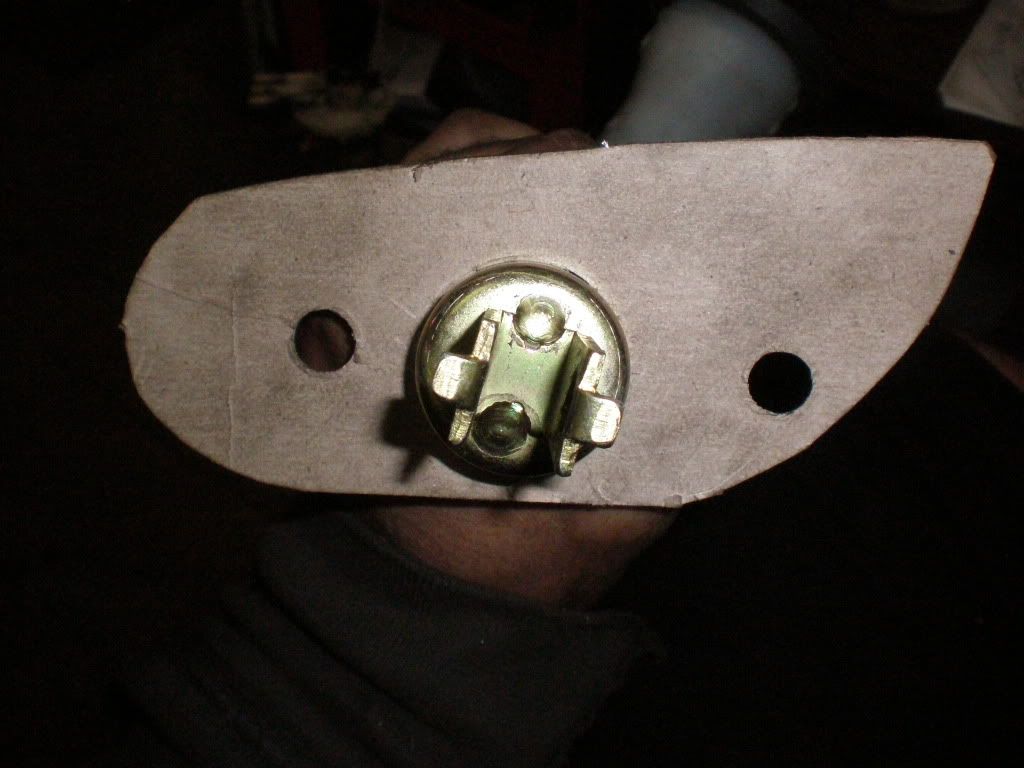
Holes cut
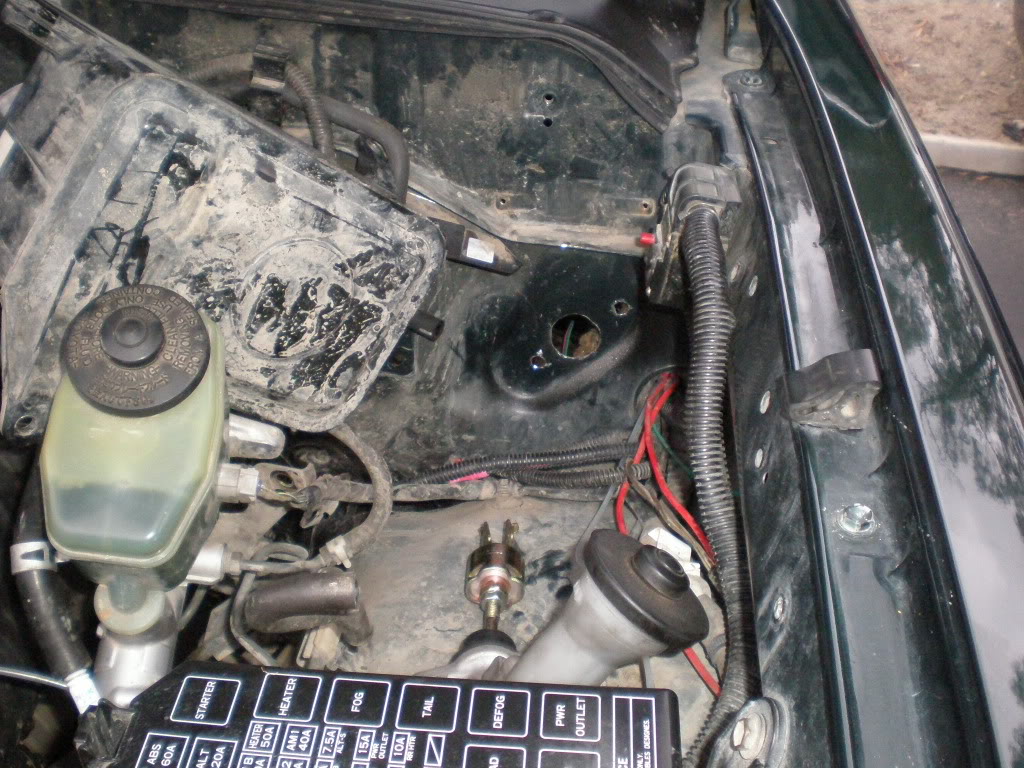
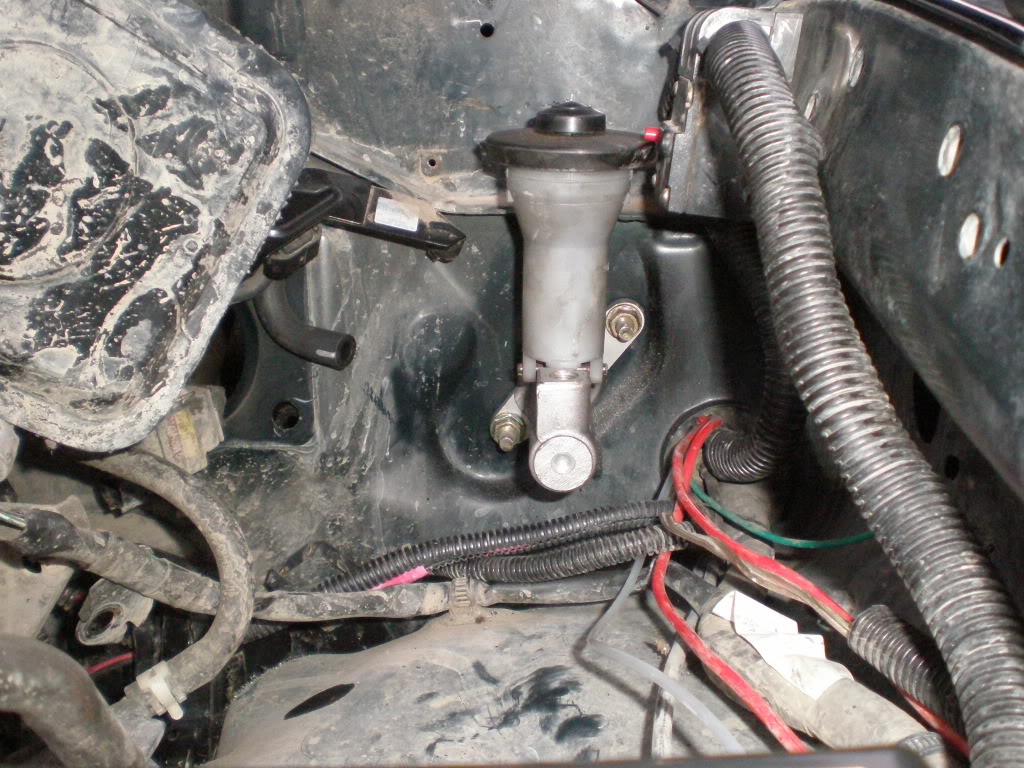
Master installed
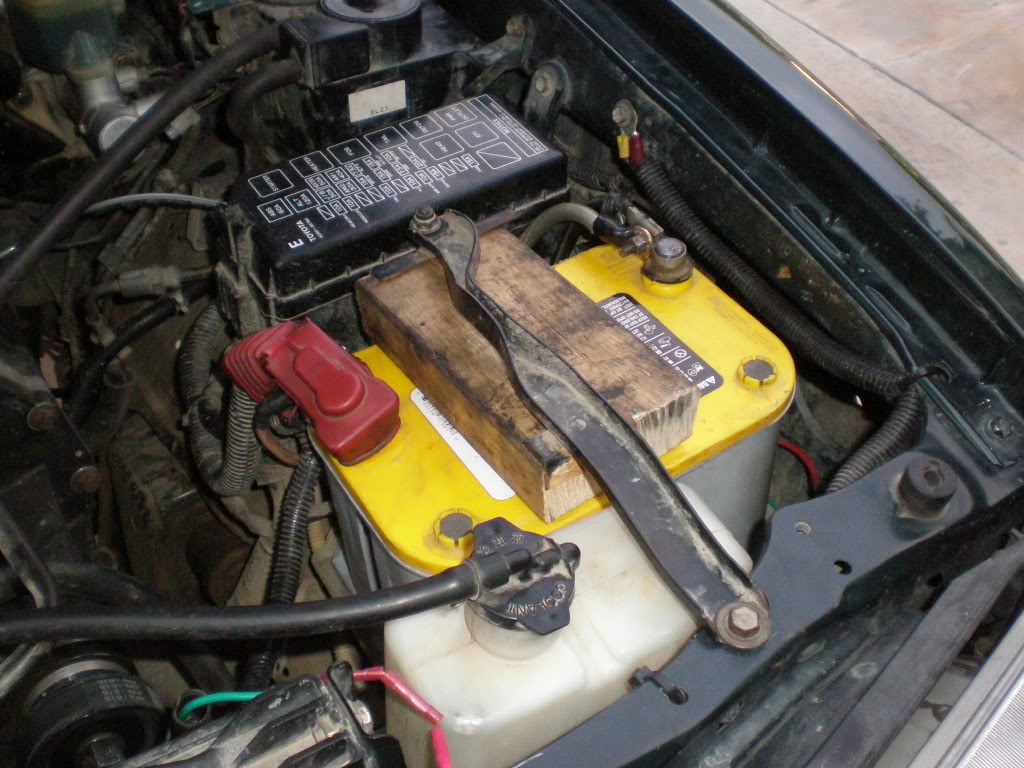
Put in an Optima Yellow top from the donor with a lovely spacer for the bracket
Skid is staying off for now. The transmission will be underway next week.
Thanks guys, I'll update you Monday!
What the hell is that...?
 11-19-2011, 12:38 PM
#92
Registered User
Thread Starter
I don't want to lose my headers or intake, just spent 2k on a fully rebuilt supercharger set up. It's original at 190k, but better condition than the V6 in the donor. I don't have enough money to rebuild the V6.
Weird, I know... but I am no longer interested in a 5VZ like I used to be. No timing belts to replace and it's cool being unique. Stays true to the heritage and history of the truck.
If I ever consider swapping engines, I won't waste the time and effort only to end up with less power than I have now, I'd probably mess around with the idea of a 1UZ, Sequoia V8, or a 2JZ-GTE.
As of now, though, I have no plans for an engine swap.
Thanks for your compliments, man
11-19-2011, 04:06 PM
#94
Registered User
Join Date: Nov 2011
Location: Grand Junction, Colorado
Posts: 52
Likes: 0
Received 0 Likes
on
0 Posts
Awesome project! I love the look of your 4runner. I really dig the stock Tundra wheels on there. I'm shooting for the same stance on the '96 I just picked up. 
Last edited by russ_; 11-19-2011 at 04:54 PM.
11-21-2011, 05:57 PM
#95
Registered User
Thread Starter
I already sold it... sorry.
Thanks man. Show me if you get a set!
Update time!
Unfortunately, most of the easy stuff has been taken care of. The rest of the swap is the hard part. The transmission won't likely be in until the end of this week or next week. I spent 8 hours on the truck today and I barely got anywhere... this is tough!
I woke up this morning at about 7AM... took a shower and went to the Home Depot for some metal sawzall blades.
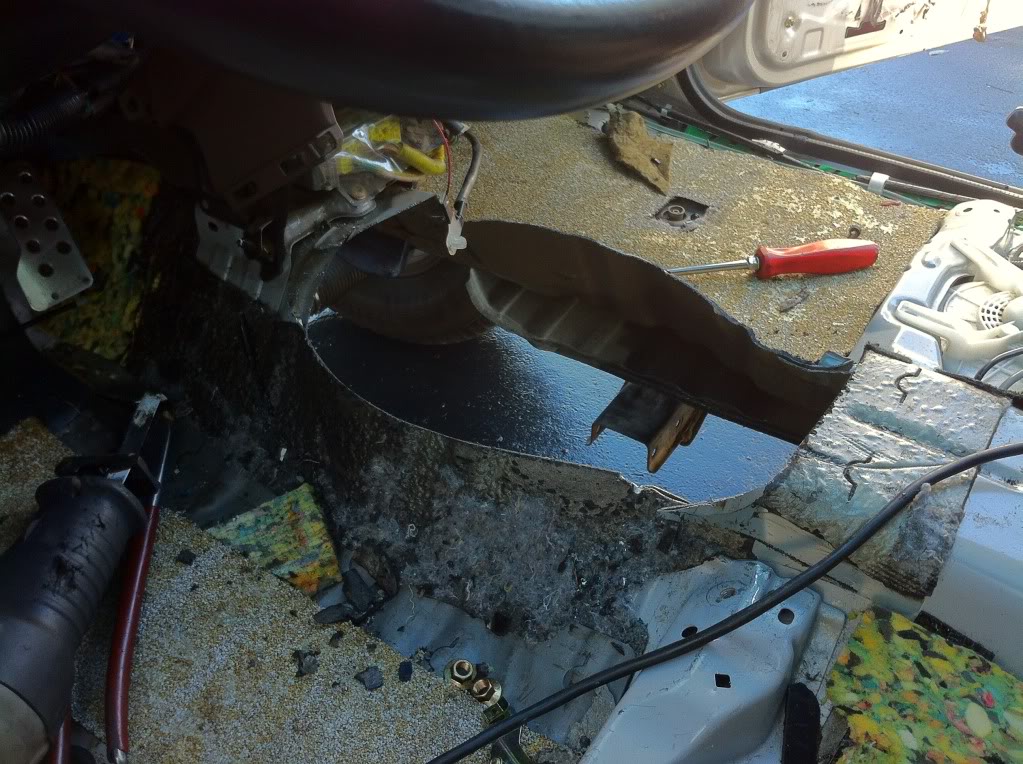
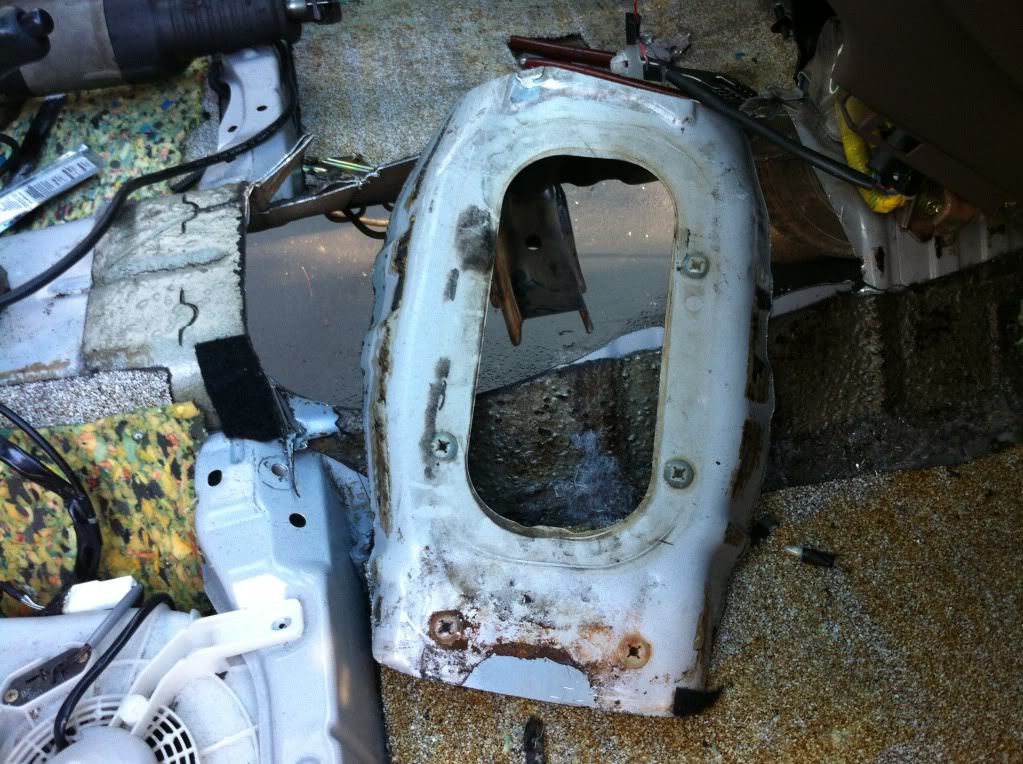
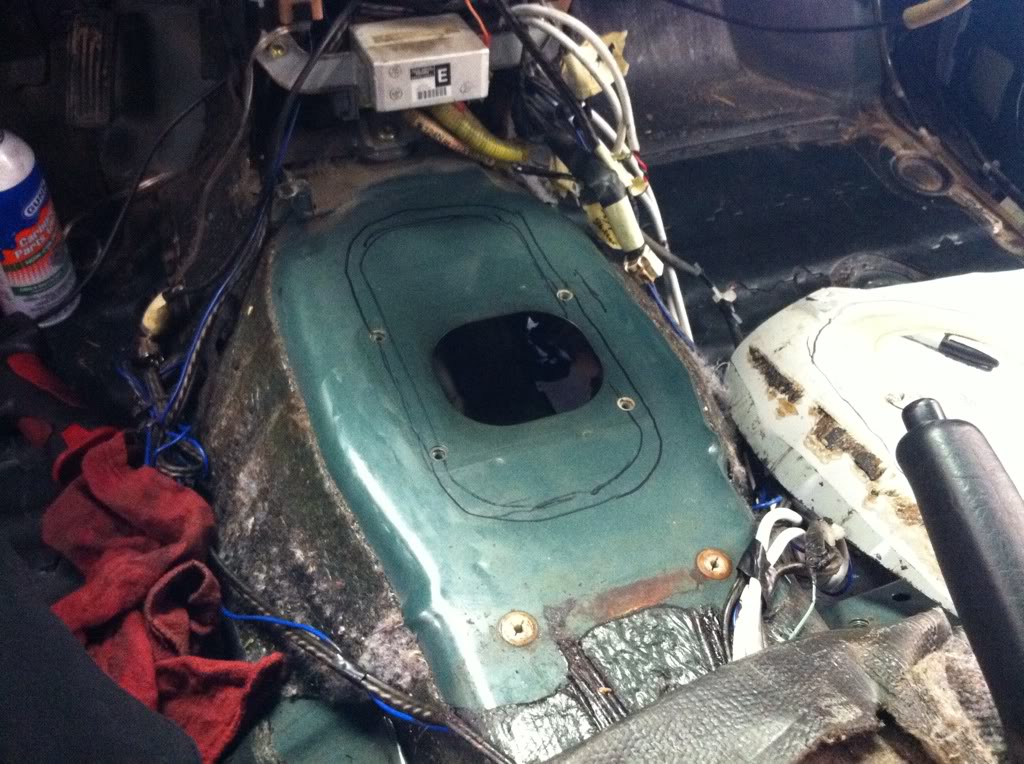
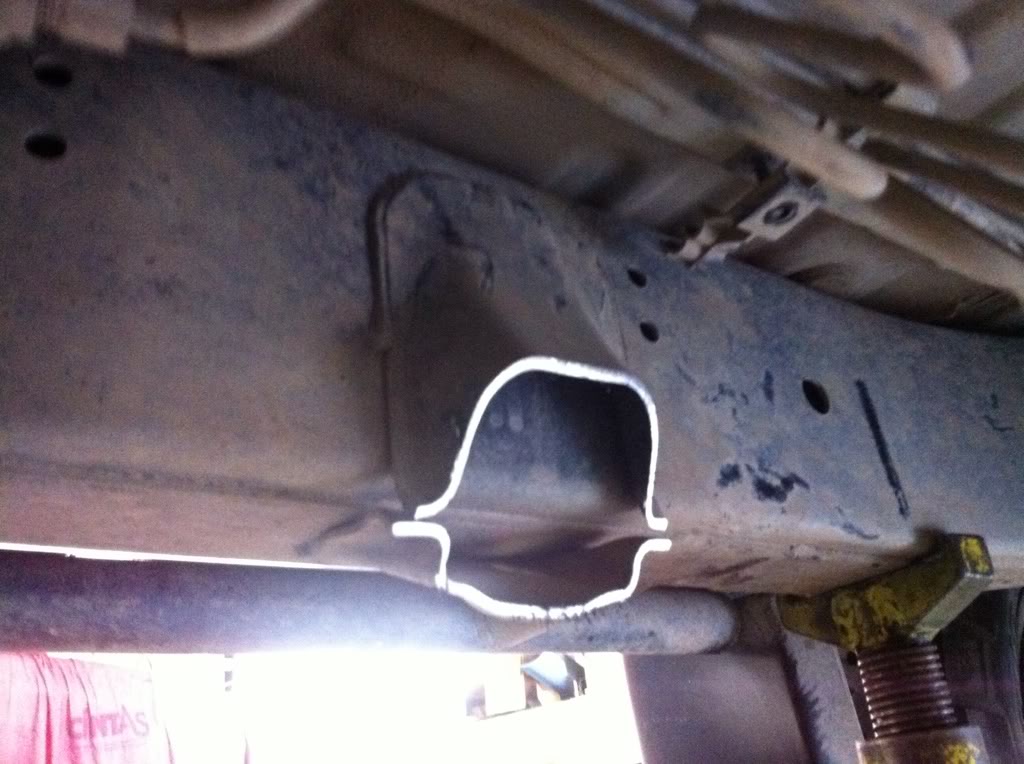
My plan for the shifter is simple. I cut the trans tunnel out as shown, and I will cut out just enough for this to fit on the 99. I'm going to lay the pictured cutout over the 99's soon to be cut out tunnel and silicone it. This will allow me to keep the OEM cutout, and I can retain the original mounting points for the shifter boots.
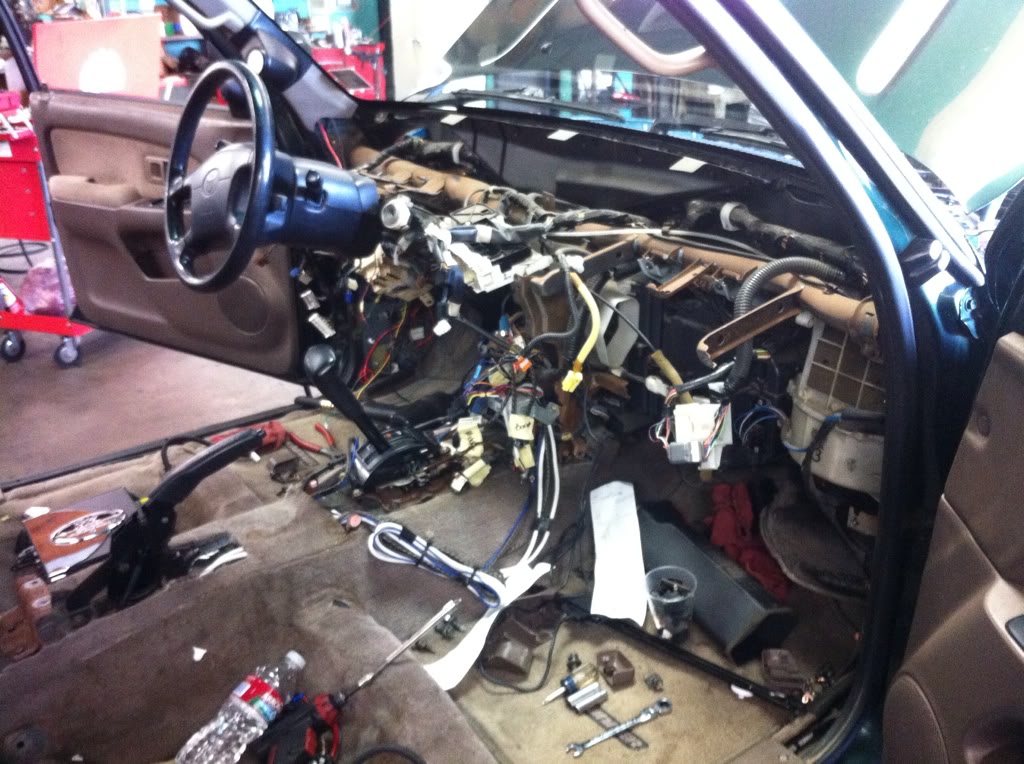
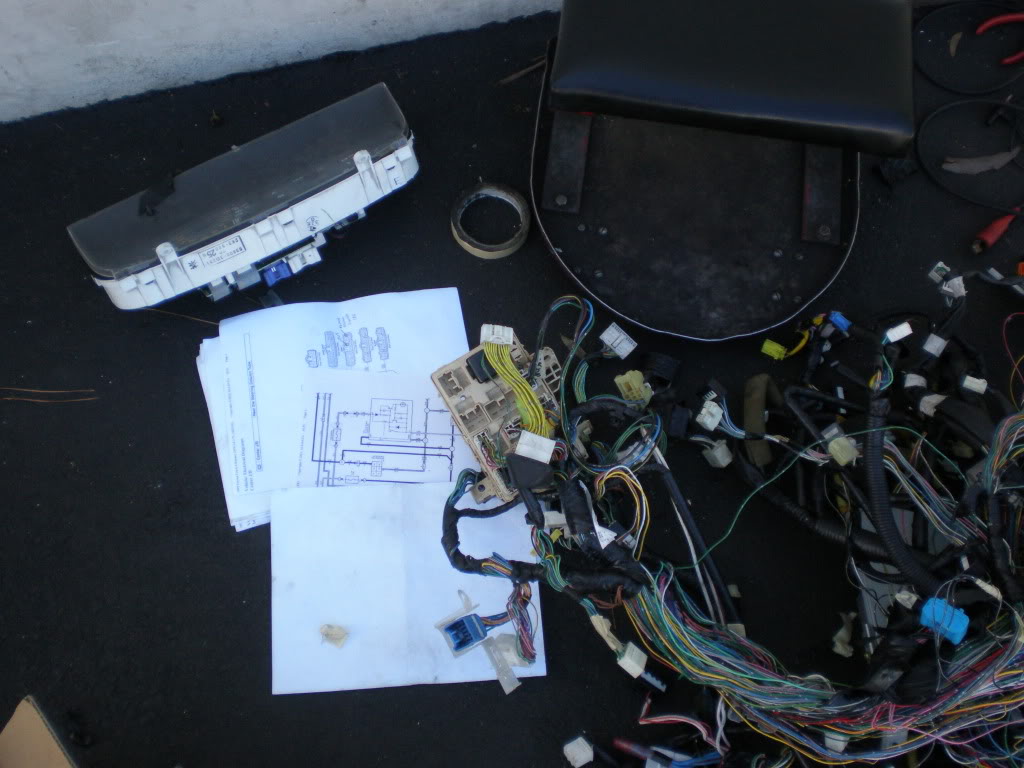
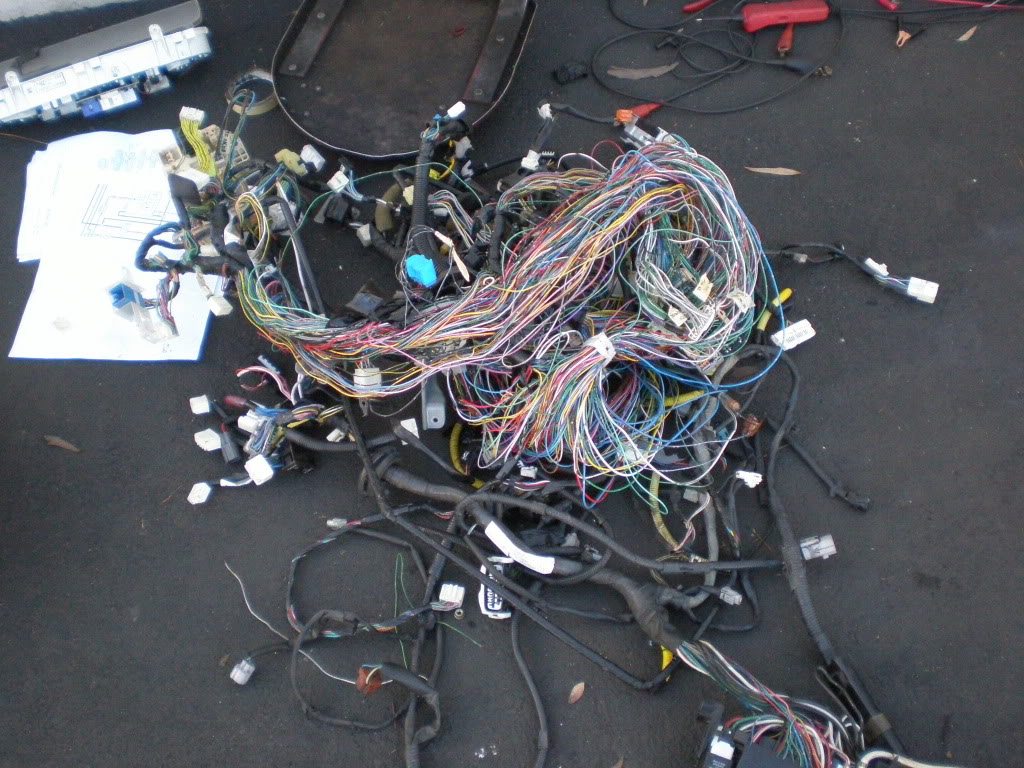
Next up, dash came out and the wiring mayhem began. I removed the entire wiring harness from the B-pillar forward.
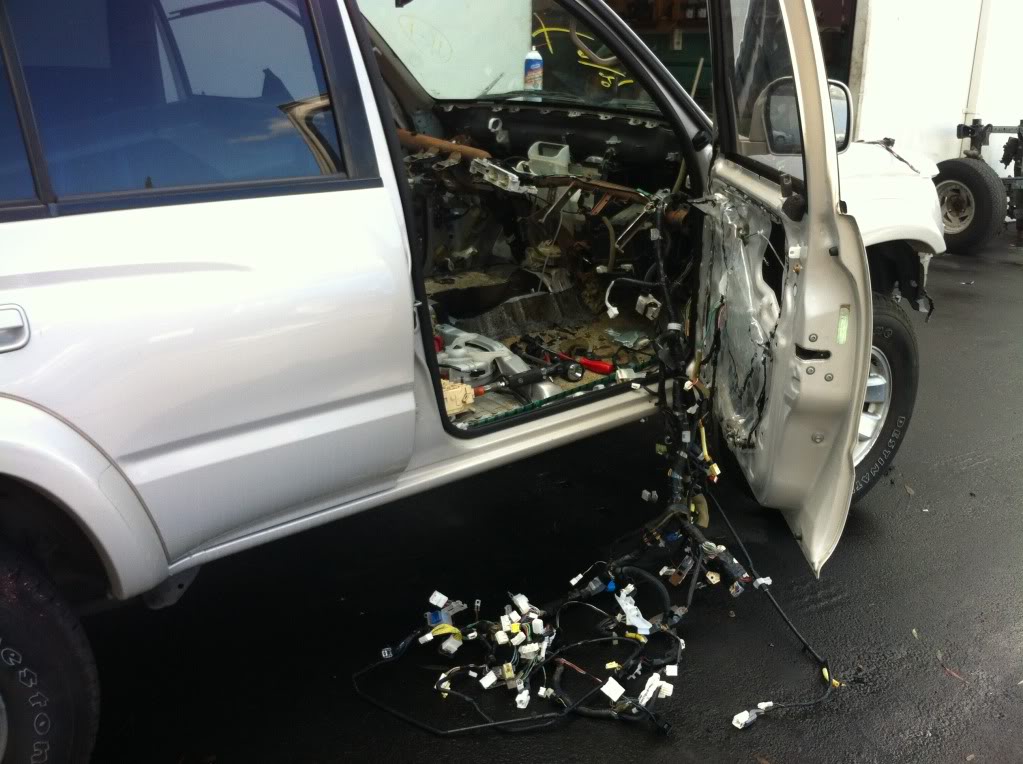
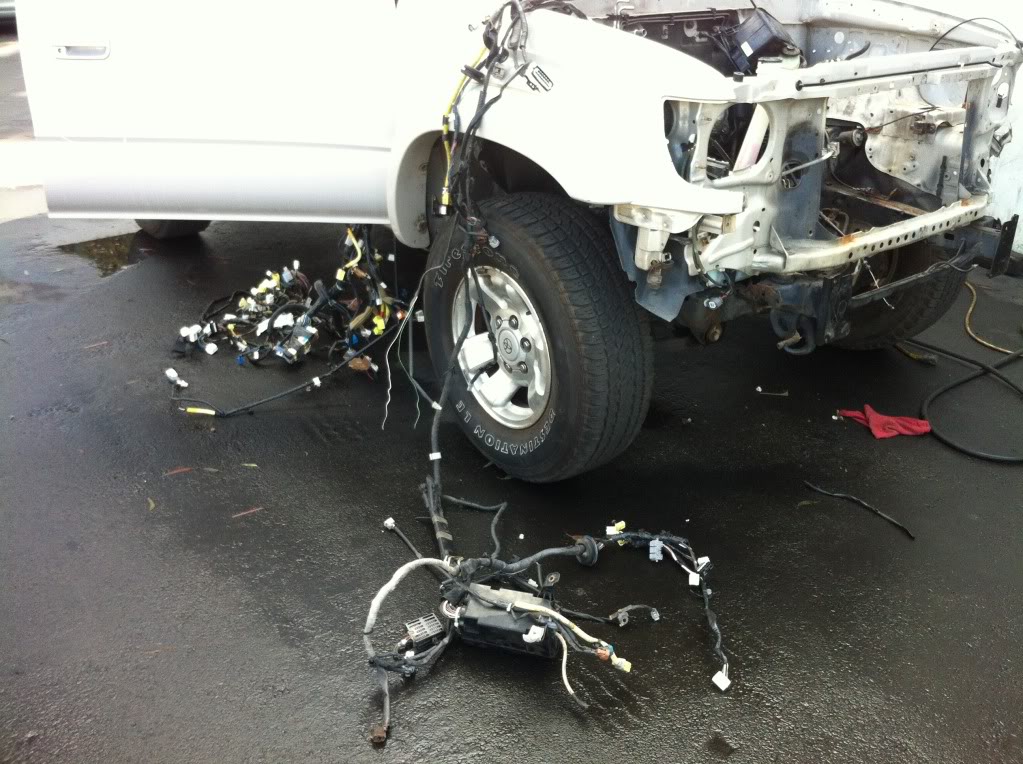
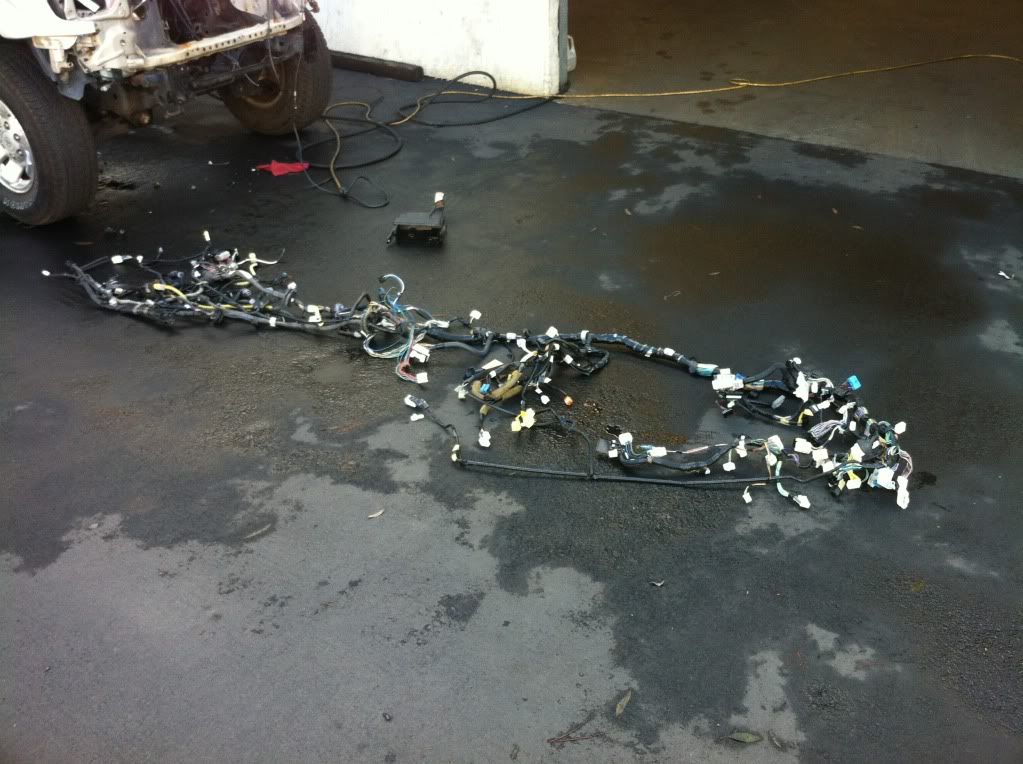
I've got wiring diagrams-a-plenty to study... I'm basically going to remove all of the wires I need and run a 2nd custom harness using OEM wires/colors/length. I've already figured out a bunch of what I need to take, but this will take me a while.
The wiring harness in my base model lacks so many options. I'm transplanting more than just the 4WD and 5 Spd related wires, I'm running all of the SR5 wires for the options that I don't have, such as rear heat, lighted sun visors, and heated rear mirrors.
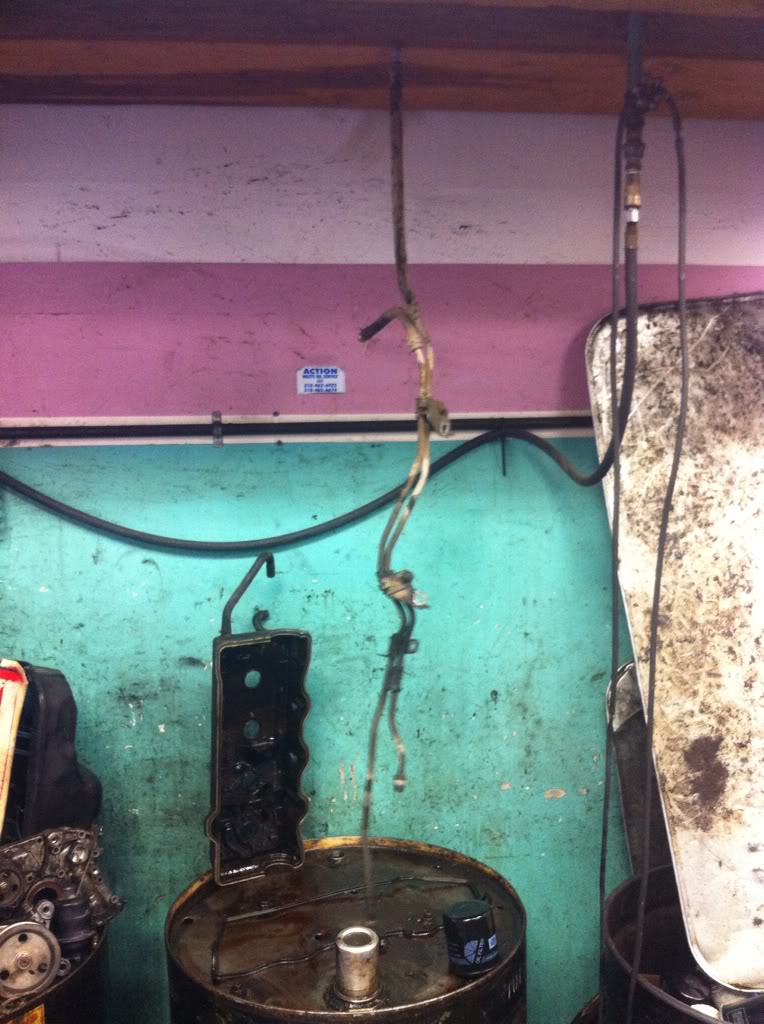
Speaking of heated rear mirrors... I have mirrors from a wreck that do have a heating element in them. My original mirrors did not. One of them had a missing pigtail when I got it, so I spliced on a pigtail from one of the donor mirrors and wired up the doors to support the heated mirrors. This basically meant removing all of the wiring from both front doors and replacing with that of the donor. The donor's wiring harnesses were all cut up because of bad stereo installations... but I took parts from both harnesses to make one good one for each door.
Old mirror with bad pigtail, notice the extra wires.
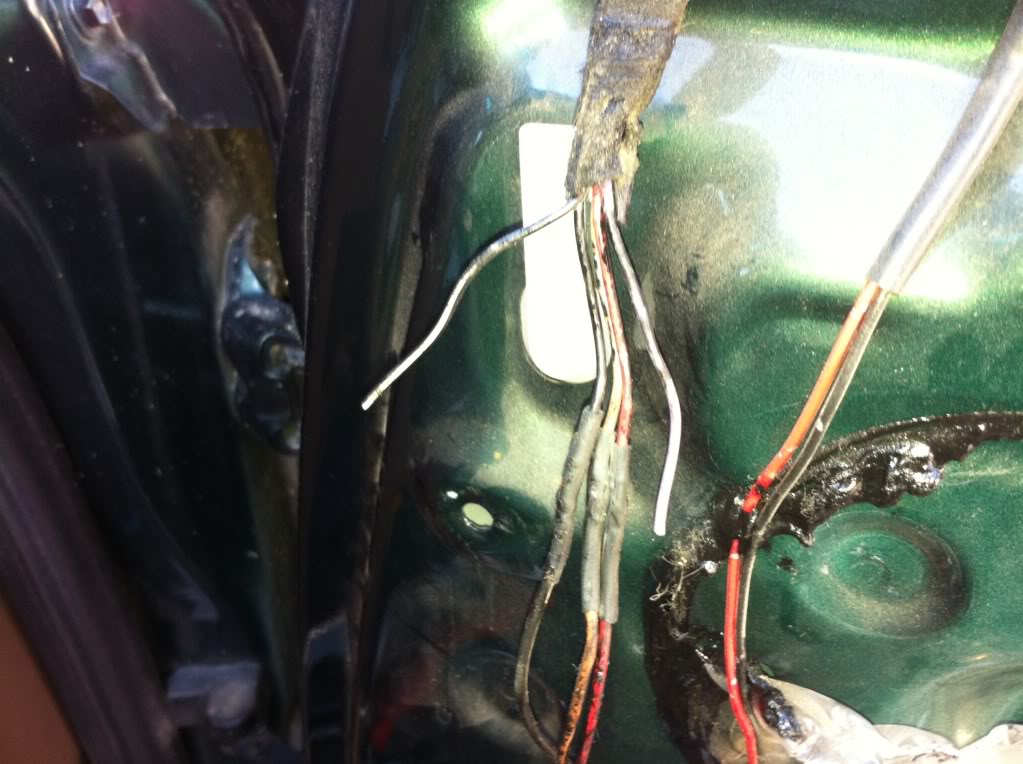
Donor pigtail.

It's all installed and the mirrors will be heated once I can finish my "slave" harness.
I also swapped over the door stay holder-opener-mabob to my drivers door while it was apart.
Next up, wiring harness! Loom and electrical tape are in my future!
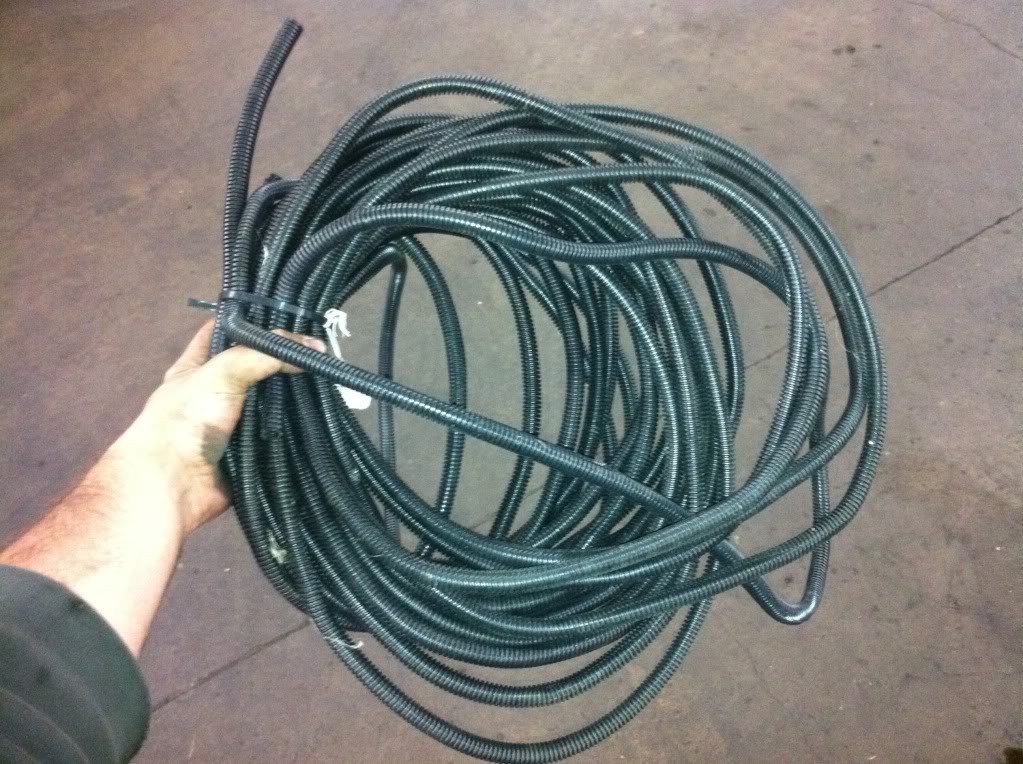
Goodies for later:
Update time!
Unfortunately, most of the easy stuff has been taken care of. The rest of the swap is the hard part. The transmission won't likely be in until the end of this week or next week. I spent 8 hours on the truck today and I barely got anywhere... this is tough!
I woke up this morning at about 7AM... took a shower and went to the Home Depot for some metal sawzall blades.
My plan for the shifter is simple. I cut the trans tunnel out as shown, and I will cut out just enough for this to fit on the 99. I'm going to lay the pictured cutout over the 99's soon to be cut out tunnel and silicone it. This will allow me to keep the OEM cutout, and I can retain the original mounting points for the shifter boots.
Next up, dash came out and the wiring mayhem began. I removed the entire wiring harness from the B-pillar forward.
I've got wiring diagrams-a-plenty to study... I'm basically going to remove all of the wires I need and run a 2nd custom harness using OEM wires/colors/length. I've already figured out a bunch of what I need to take, but this will take me a while.
The wiring harness in my base model lacks so many options. I'm transplanting more than just the 4WD and 5 Spd related wires, I'm running all of the SR5 wires for the options that I don't have, such as rear heat, lighted sun visors, and heated rear mirrors.
Speaking of heated rear mirrors... I have mirrors from a wreck that do have a heating element in them. My original mirrors did not. One of them had a missing pigtail when I got it, so I spliced on a pigtail from one of the donor mirrors and wired up the doors to support the heated mirrors. This basically meant removing all of the wiring from both front doors and replacing with that of the donor. The donor's wiring harnesses were all cut up because of bad stereo installations... but I took parts from both harnesses to make one good one for each door.
Old mirror with bad pigtail, notice the extra wires.
Donor pigtail.
It's all installed and the mirrors will be heated once I can finish my "slave" harness.
I also swapped over the door stay holder-opener-mabob to my drivers door while it was apart.
Next up, wiring harness! Loom and electrical tape are in my future!
Goodies for later:
11-29-2011, 10:50 PM
#99
Registered User
Thread Starter
I think I'm gonna sell the whole rack together. They'll be available as soon as I'm done with the swap.
Here goes:
Wednesday, Nov 23:
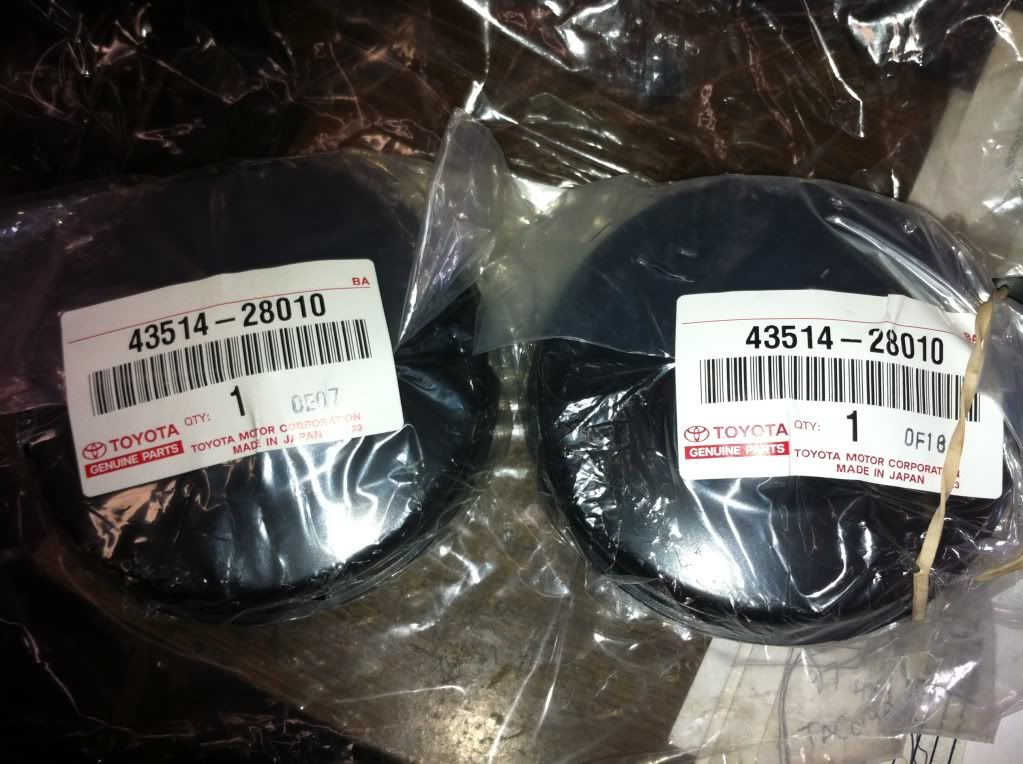
New pedal covers. $5 each from Toyota. Part Number 31321-14020
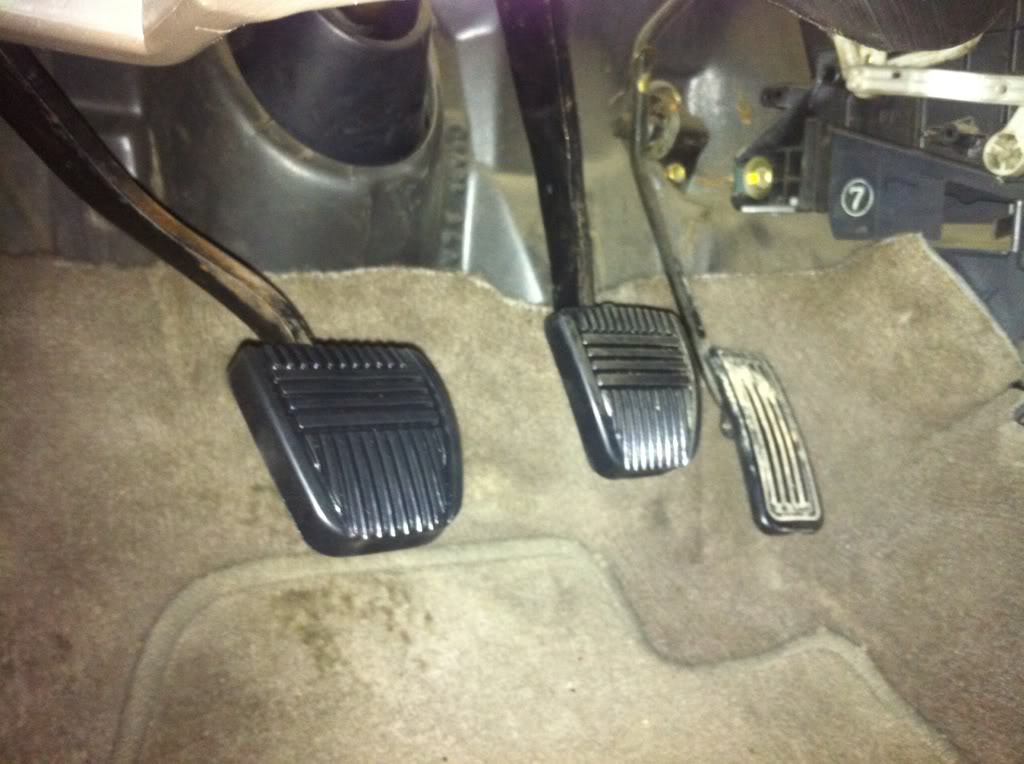
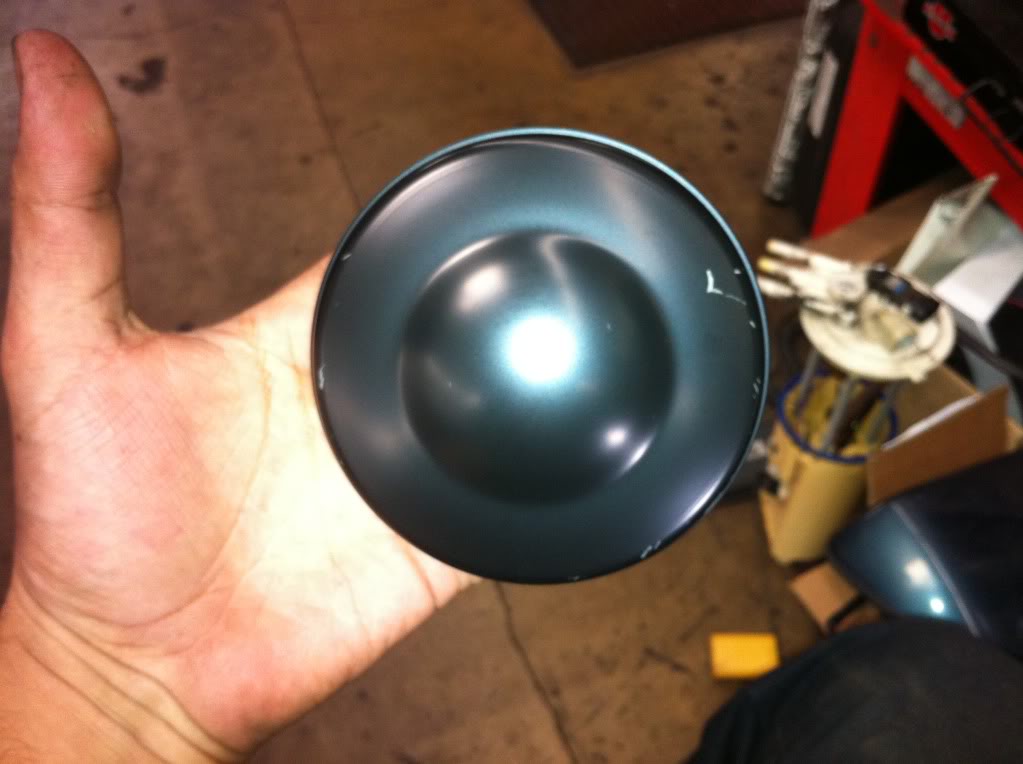
I won't be doing anything for rest of this week because of thanksgiving weekend. I will do some more wiring related stuff, but nothing else. There's some grease leaking from both inner CV's at the outer clamp... I'm gonna watch it and see how it holds. If it doesn't stop leaking excess, I might have to get a tighter clamp... easy peasy
This morning, I installed the new hub covers.
It was very interesting to find that the donor did not come with a 4WD ECU 89533-35070... apparently, according to my wiring diagram, if you didn't have push button 4WD with Hi/Lo selection, you don't get a 4WD ECU... you get an ADD relay! hooray J-shifter...
-----------------------
Monday Morning. It was weird... that was the last morning that I'd ever drive my 4Runner as a 2WD automatic.
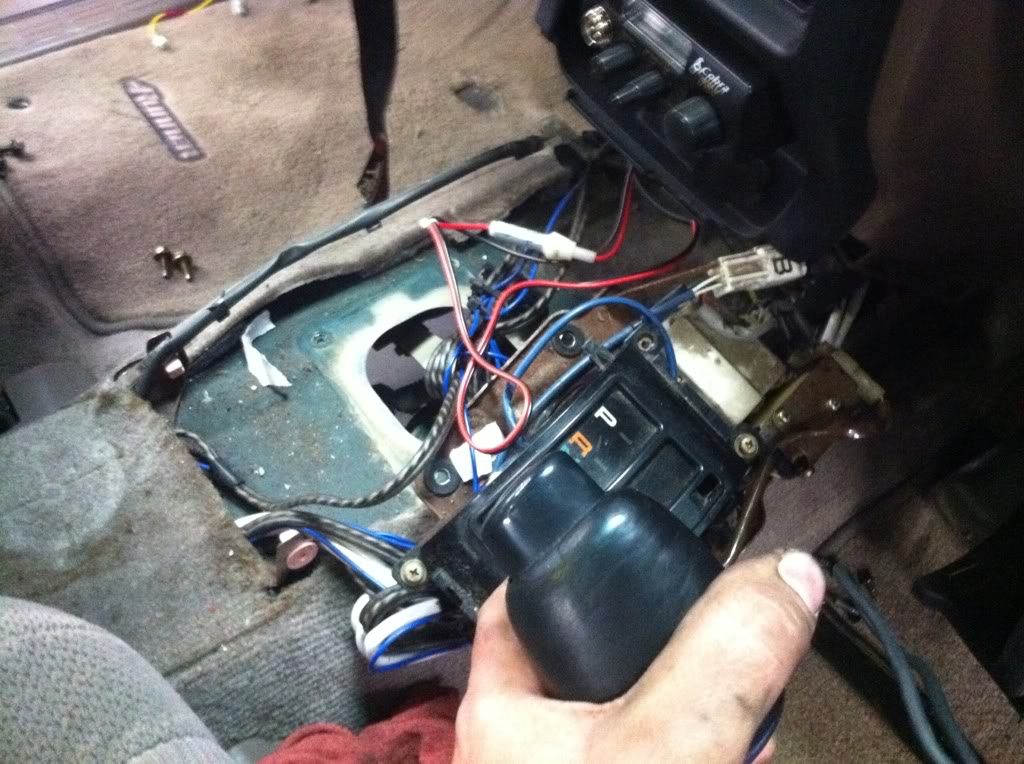
Started the day pulling the auto shifter:
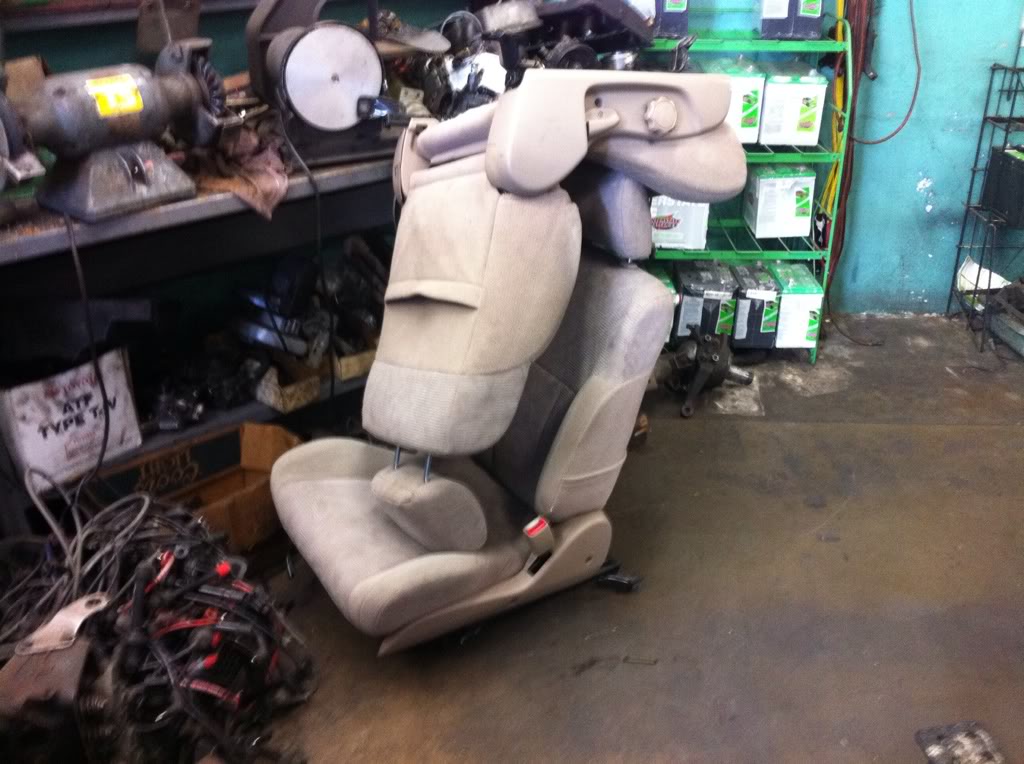
Pulled the seats:
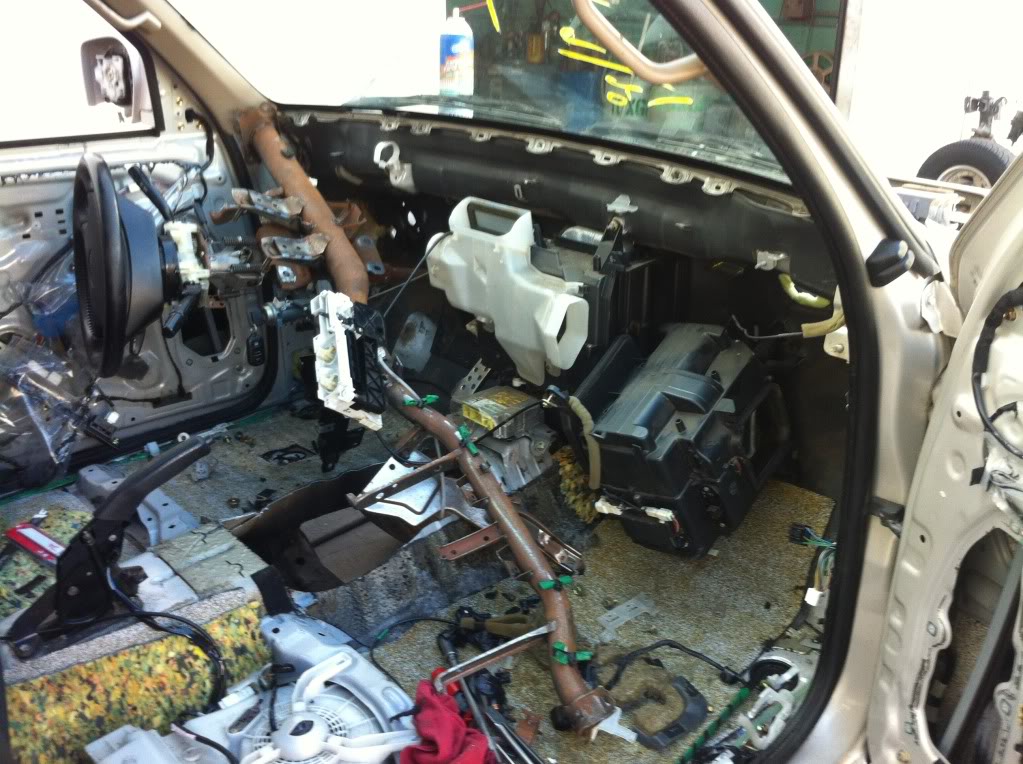
Goodbye, dashboard!
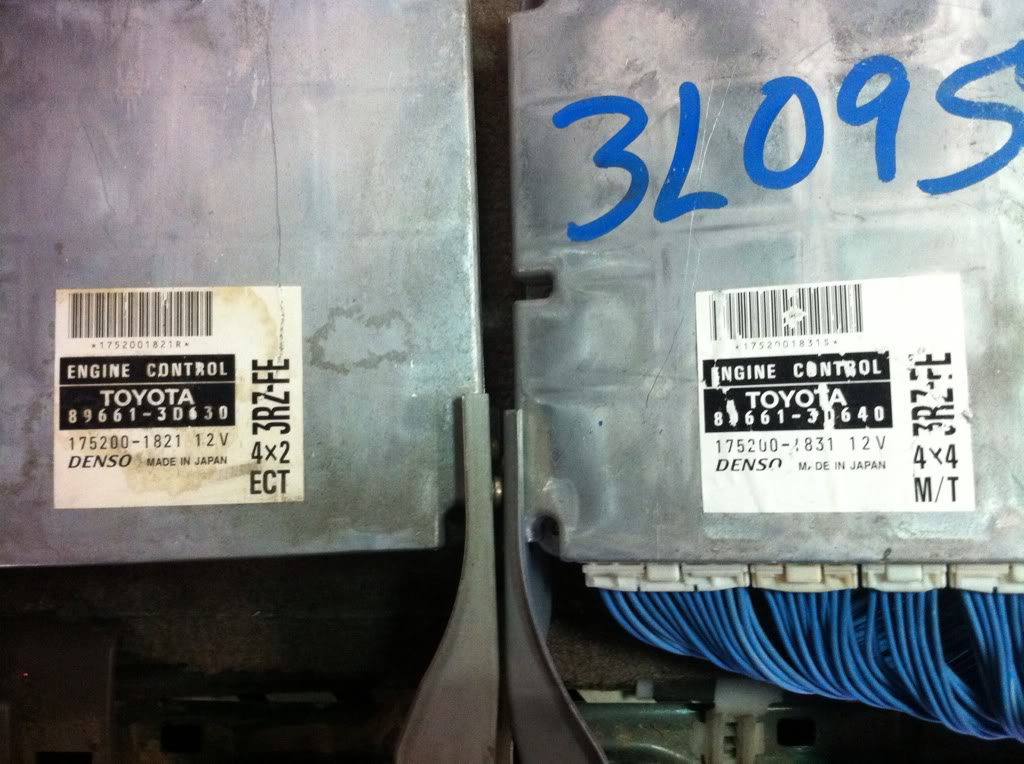
3RZ 2WD A/T ECU VS 3RZ 4WD M/T, notice that the part numbers are nearly identical.
The inner trace is the shifter cutout for the manual transmission shifters. I'm going to cut about an inch around it.
Exhaust, driveshaft, and catalytic converter are removed.
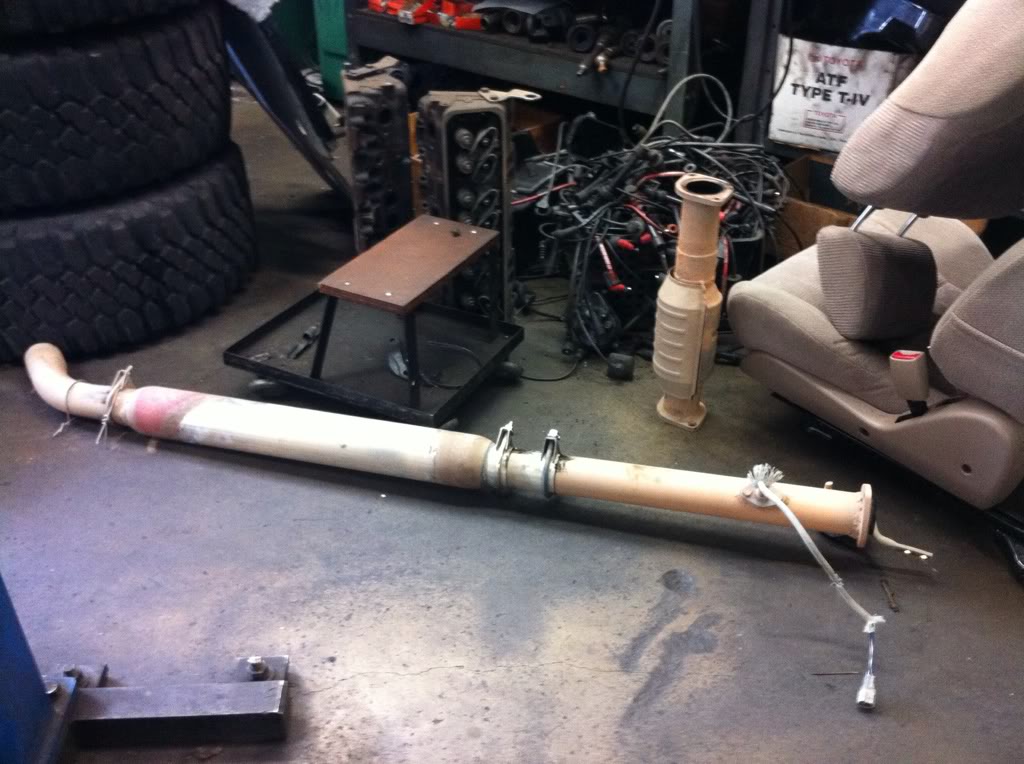
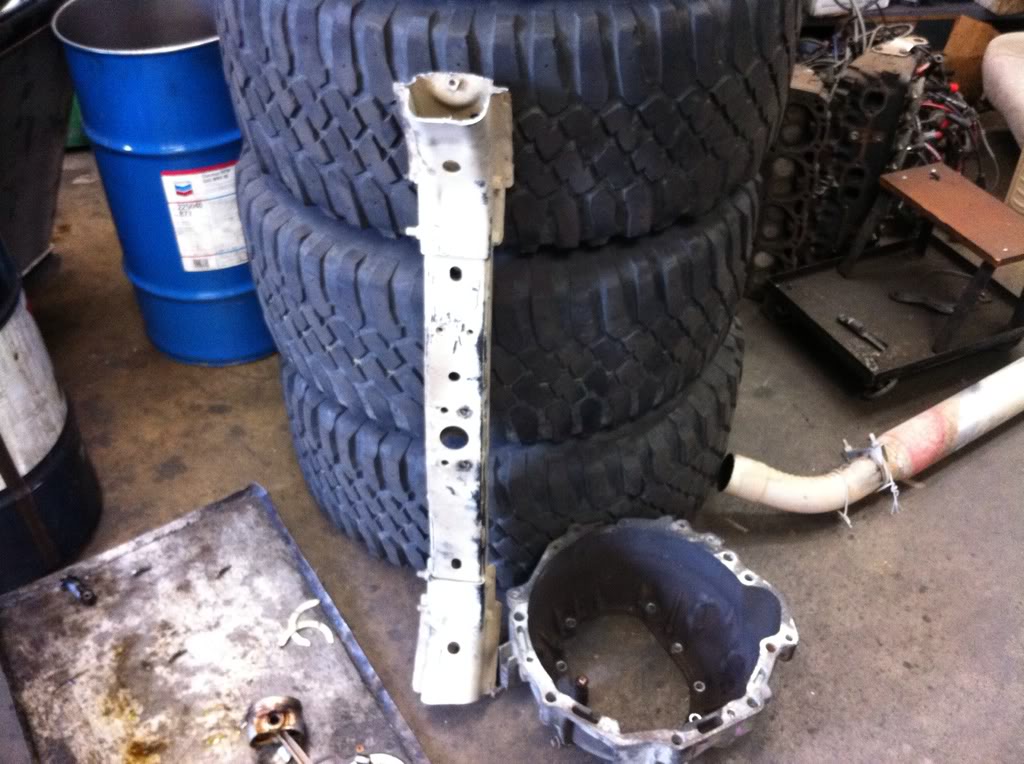
The crossmember for the transmission mount for my 2WD 4 cylinder transmission gets in the way of a transfer case, so Mr. Sawzall paid a visit.
ATF lines removed from transmission to radiator:
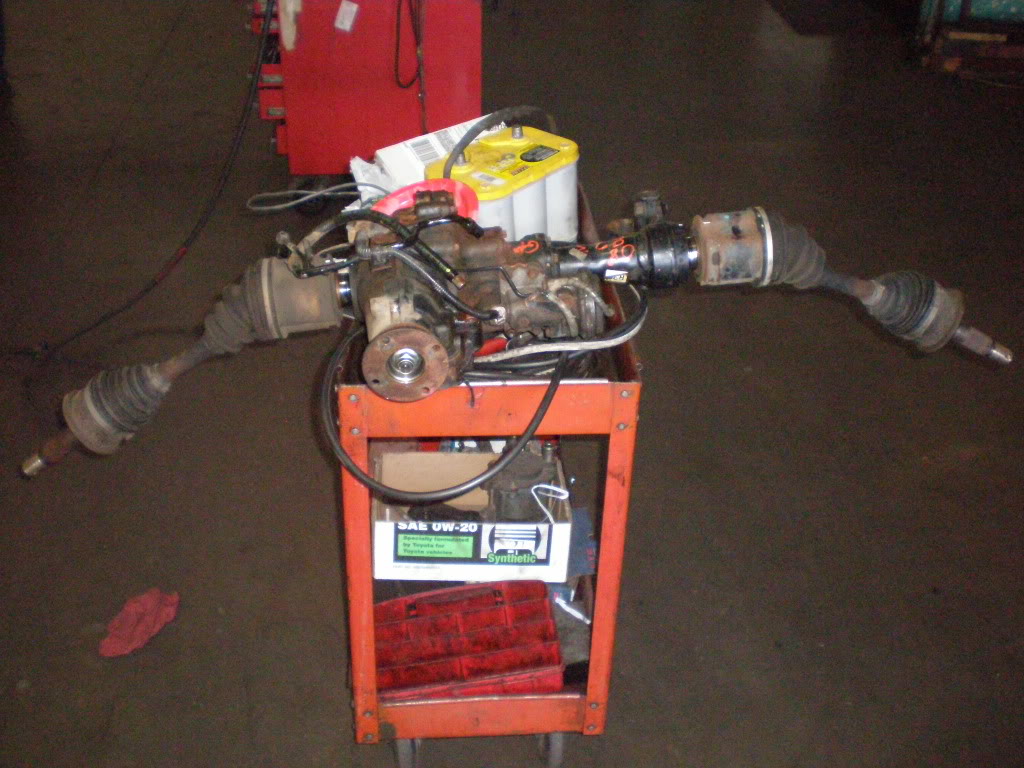
Transmission:
With the transmission finally out of the way, the wires for the speed sensor (for non ABS 4Runners only) needed to be extended with factory color wires from the donor harness.

The donor truck did have ABS, so the gear driven speed sensor on the back of the tranny was no needed. It had a cap:
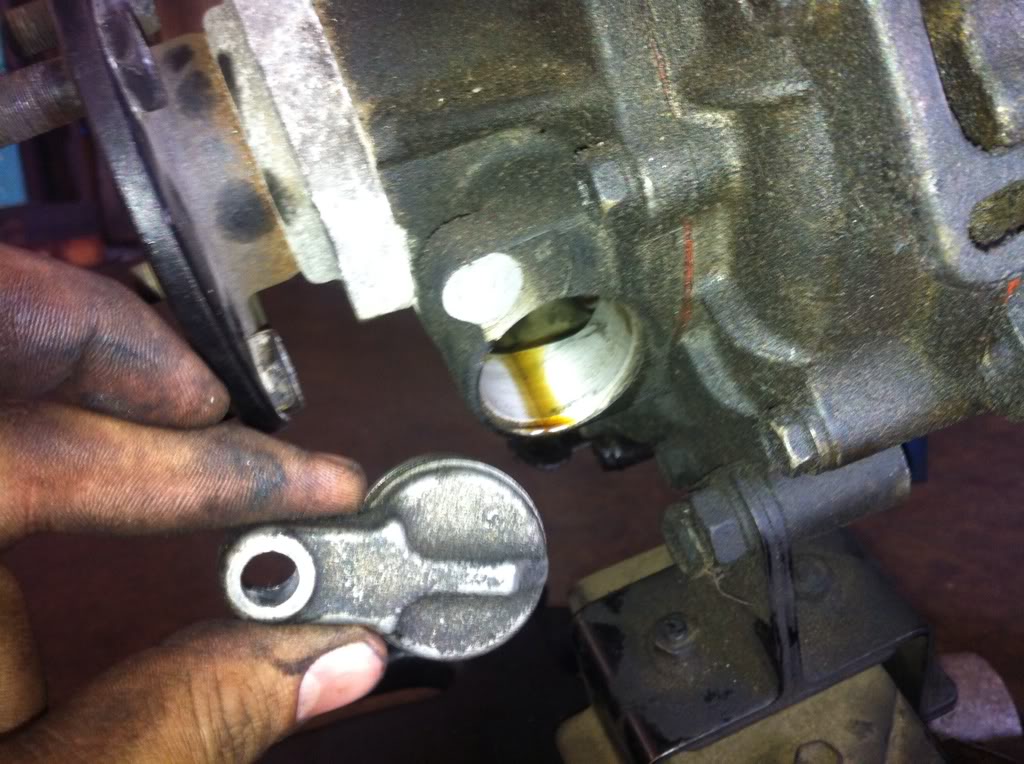
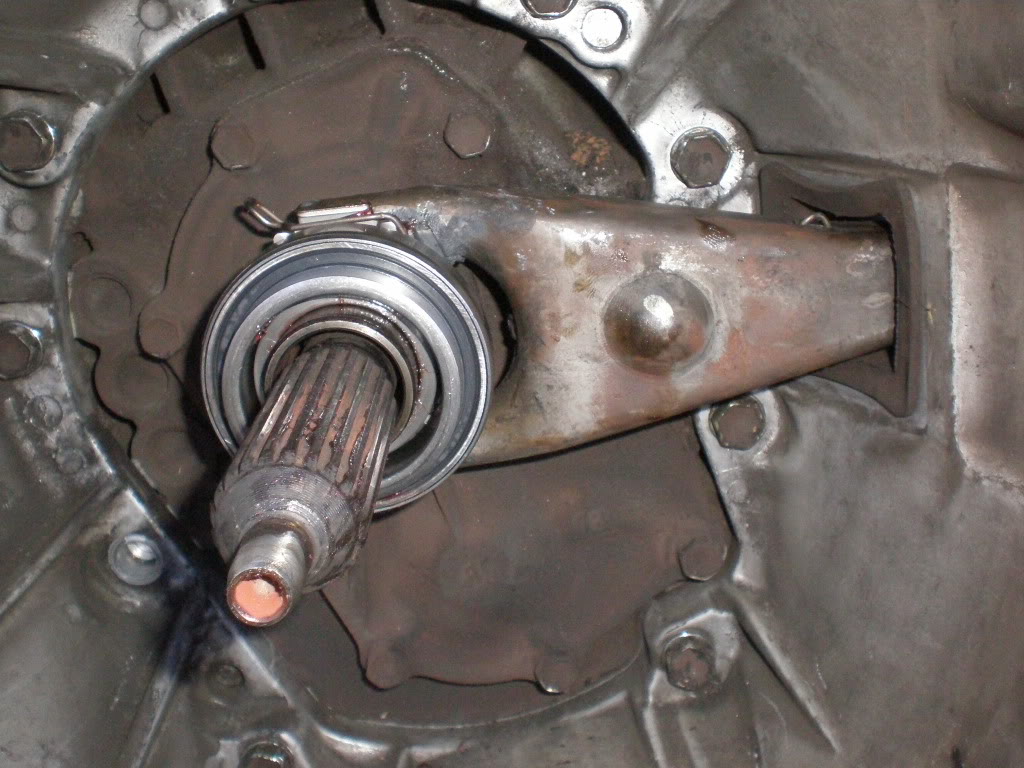
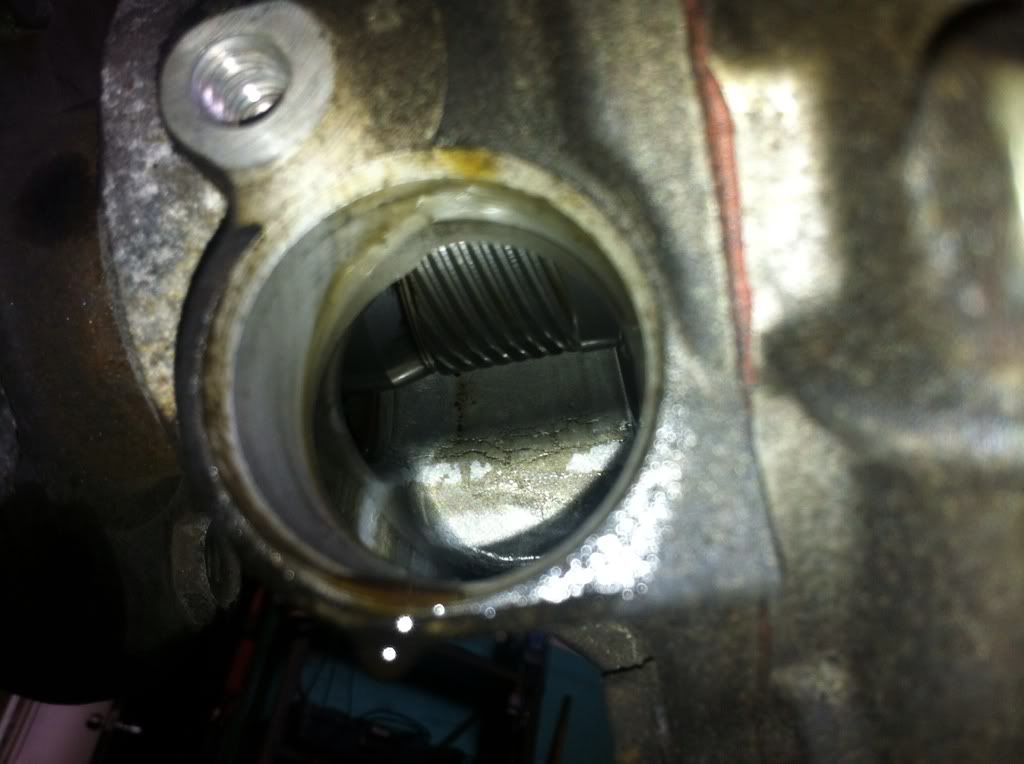
You can see the splines in the output shaft:
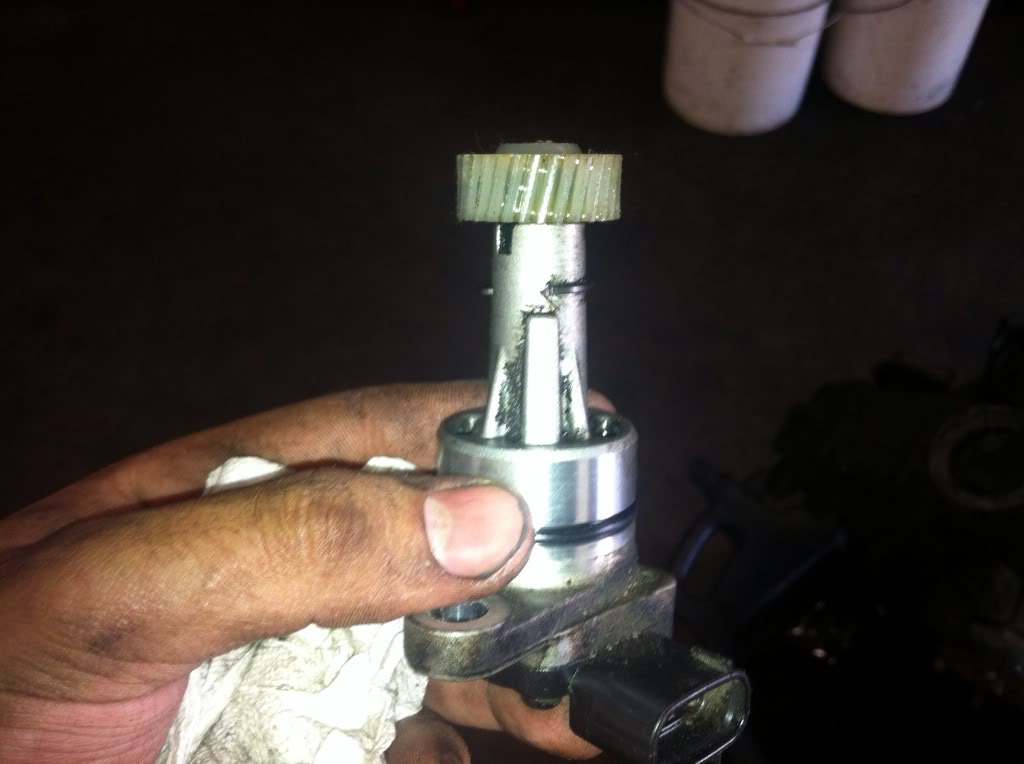
John had two speed sensors laying around. One was just the right length and the other had a 29 tooth gear. We combined the parts to make one good speed sensor. We're not sure if this will work as of yet, as the 4Runner requires a 33 tooth gear. The speedometer will likely be way off.
One of the speed sensors:
Flexplate off:
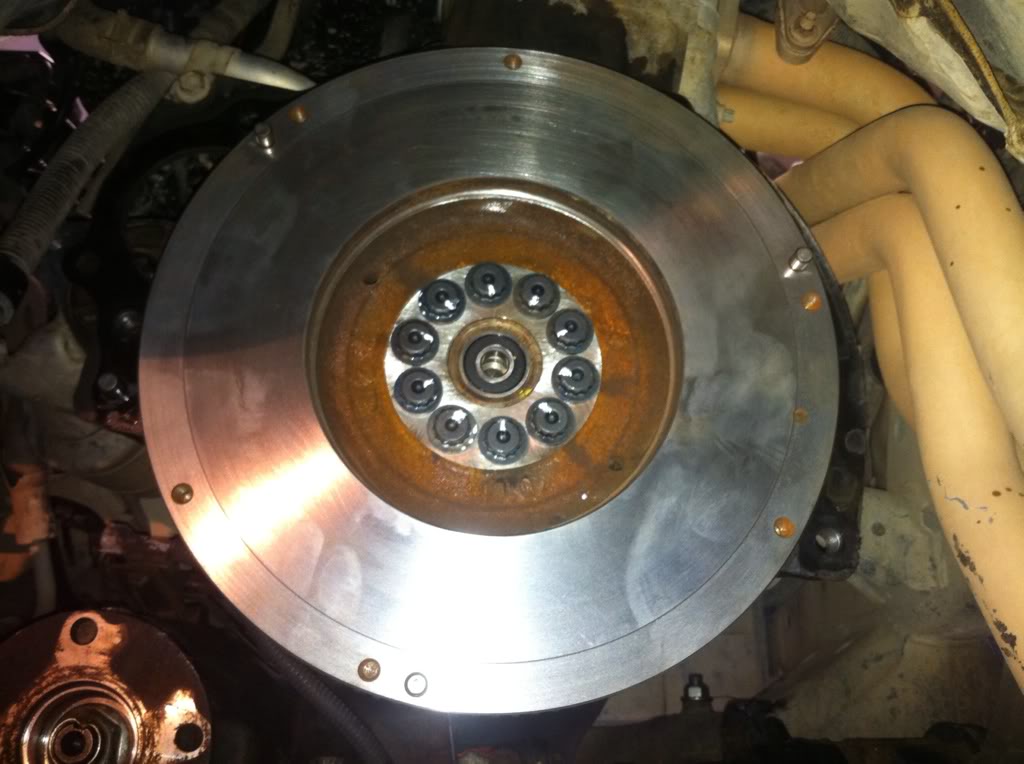
Flywheel, bolts torqued to 19.5lbs, then turned 90 degrees. I used new bolts as mentioned when I purchased the flywheel. New pilot bearing.
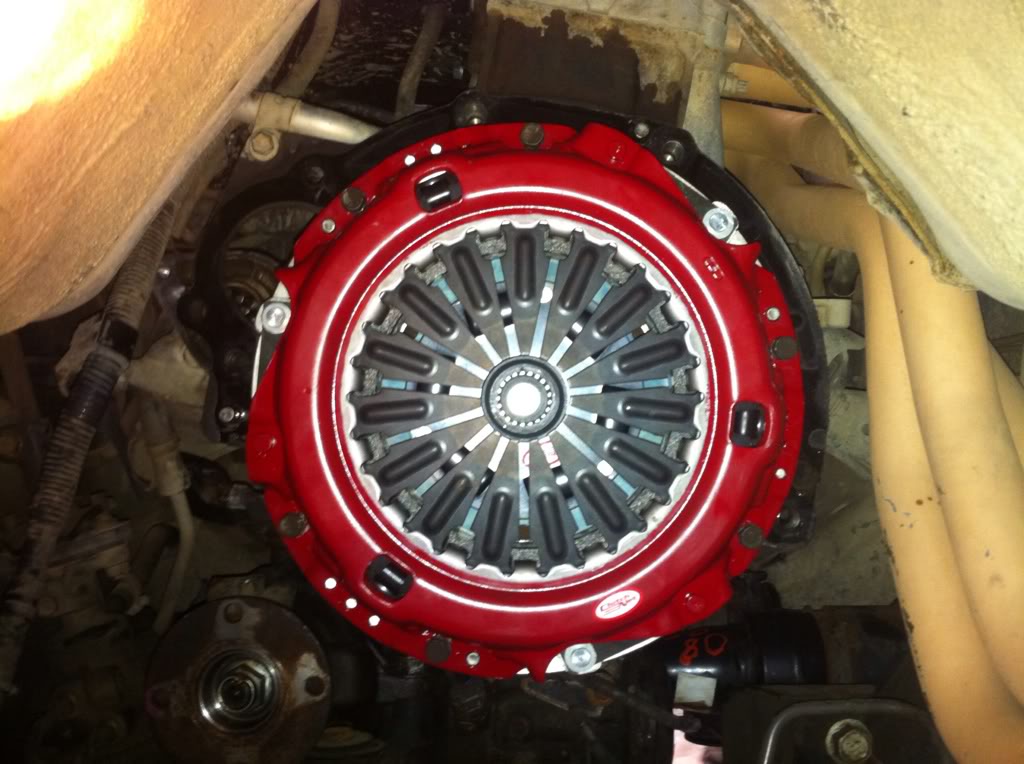
Clutch disk and pressure plate installed:
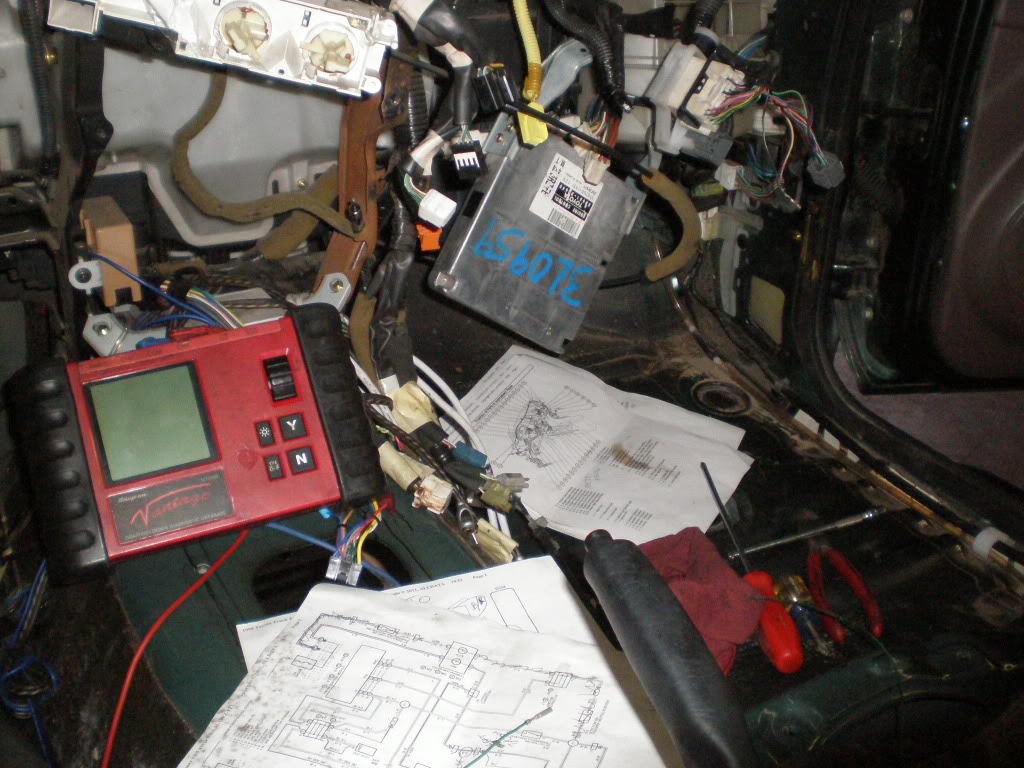
So... many... wires...
So many confusing diagrams...
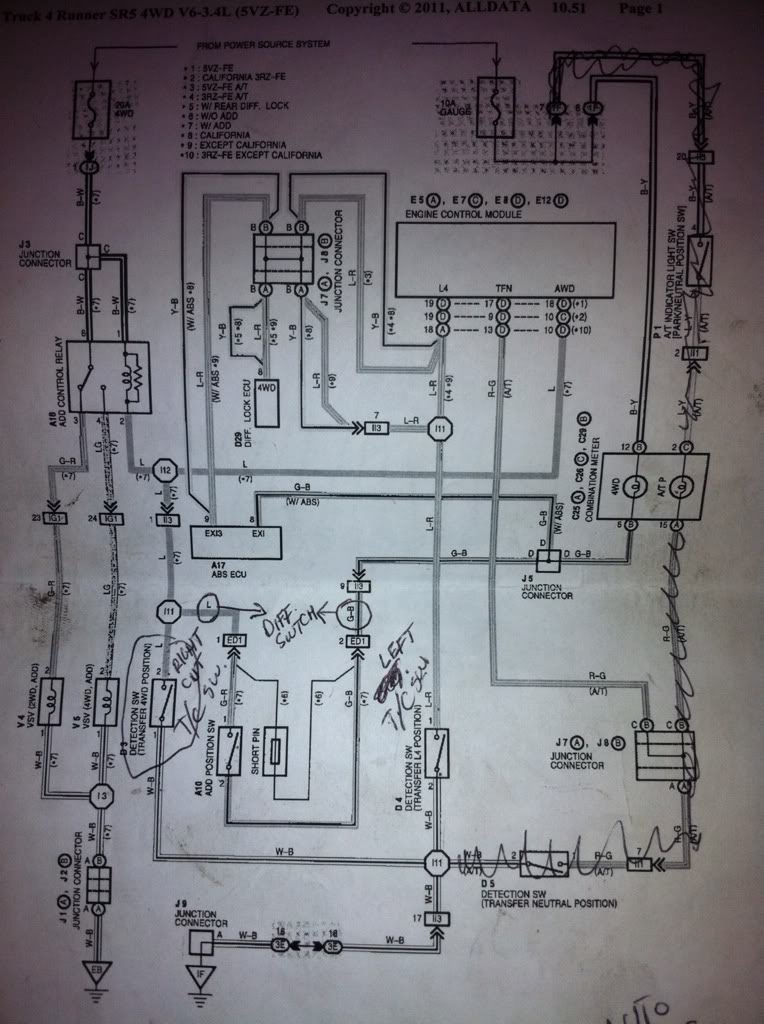
Most of the photos I took from here on were of wires... I doubt many of you want to see wires with labels on them.
Basically, we had to trace all of the wires using diagrams for the clutch start cancel switch, the clutch pedal switch, remove the wires going to the dash cluster for PRND2L, wire up reverse lights, test for 4WD indicator light wires, test which wires go where, etc, etc... it's basically been encompassing my entire last week with the truck.
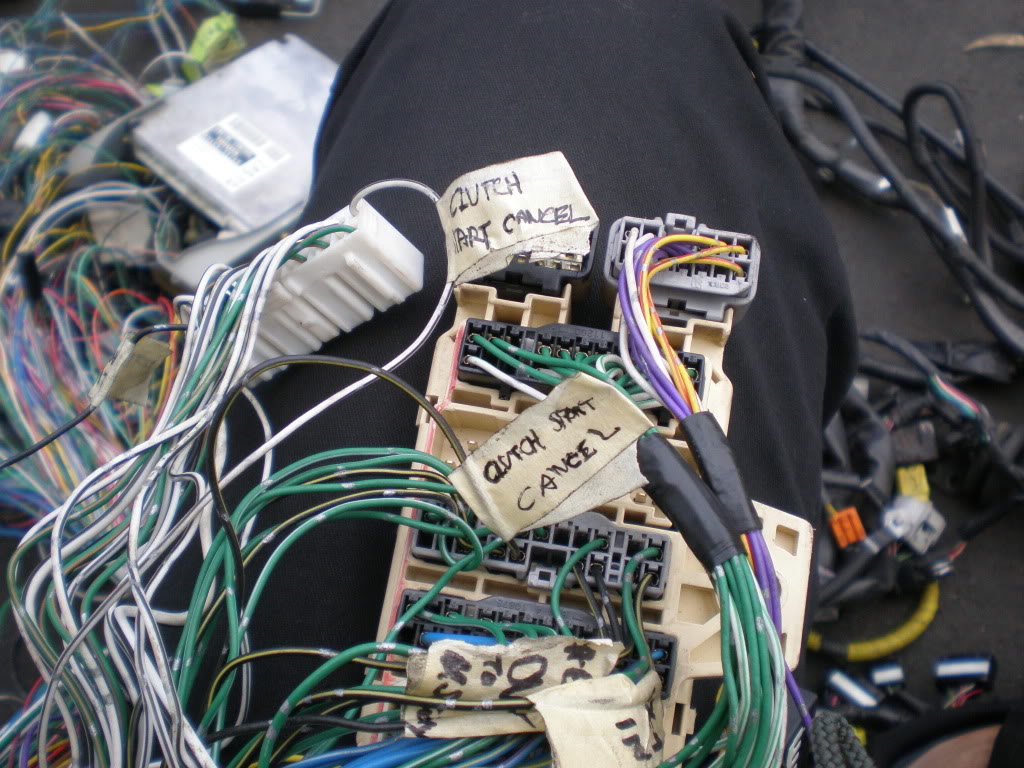
Pulling pins and whole wires to swap...
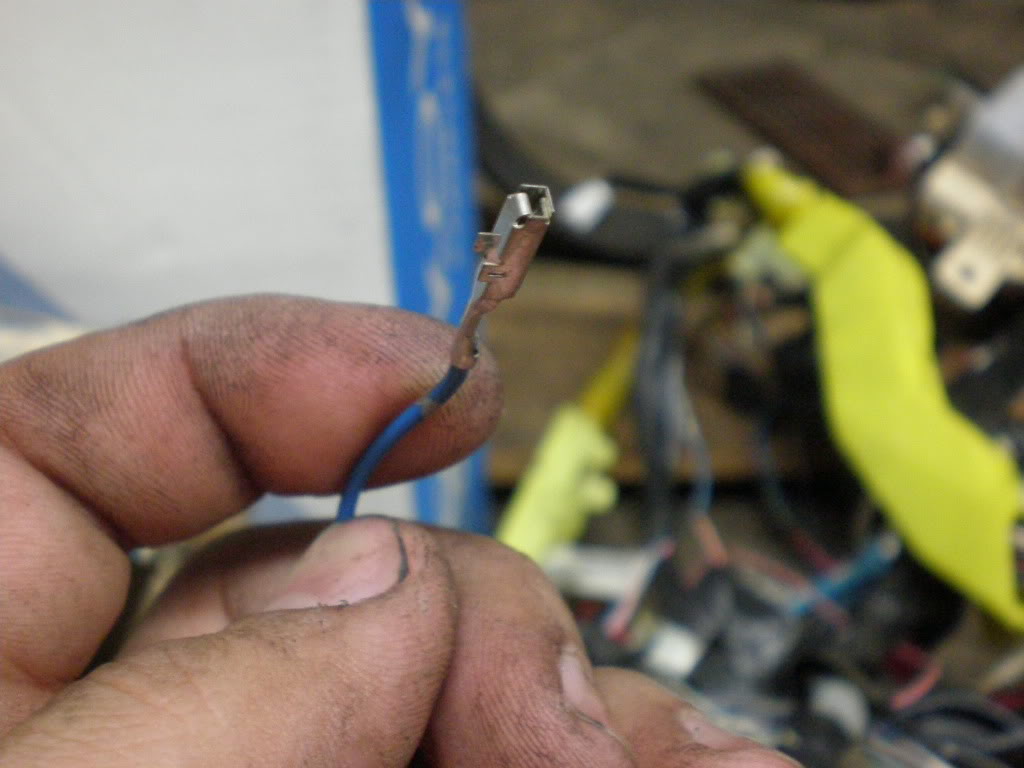
Showing some removed pins, these specifically being L, 2, and R indicator lights to the gauge cluster. Instead of removing these wires completely, we will instead cut the tips off and solder on a new, properly colored wire end corresponding to what it's being used for. These wires used to run to the automatic transmission, instead will be relocated to the front differential to run the ADD mechanism. No harness removal required
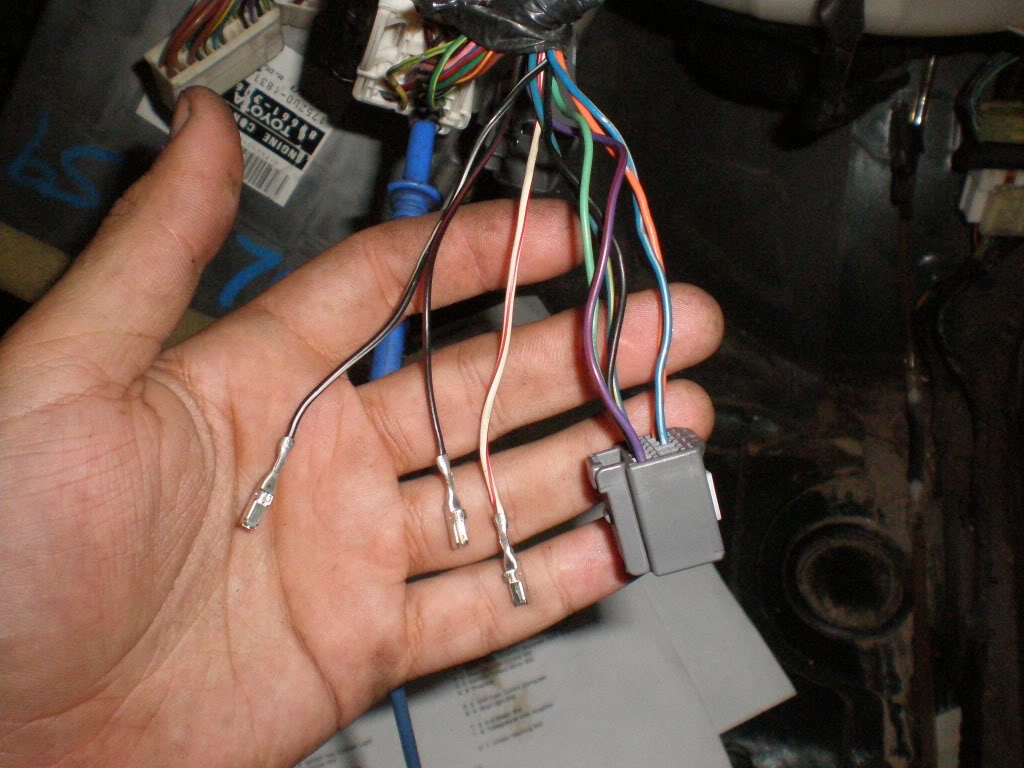
The engine harness for the V6 needed to be hacked up a little bit. I had to take the transfer case and transmission plugs with to complete my harness. This includes reverse indicator light, transfer case switch (tells the ECU what mode you're in), and all of the differential and ADD wires.
Back again tomorrow! Finishing up wiring and hoping to get the transmission bolted up...
Here goes:
Wednesday, Nov 23:
New pedal covers. $5 each from Toyota. Part Number 31321-14020
I won't be doing anything for rest of this week because of thanksgiving weekend. I will do some more wiring related stuff, but nothing else. There's some grease leaking from both inner CV's at the outer clamp... I'm gonna watch it and see how it holds. If it doesn't stop leaking excess, I might have to get a tighter clamp... easy peasy
This morning, I installed the new hub covers.
It was very interesting to find that the donor did not come with a 4WD ECU 89533-35070... apparently, according to my wiring diagram, if you didn't have push button 4WD with Hi/Lo selection, you don't get a 4WD ECU... you get an ADD relay! hooray J-shifter...
-----------------------
Monday Morning. It was weird... that was the last morning that I'd ever drive my 4Runner as a 2WD automatic.
Started the day pulling the auto shifter:
Pulled the seats:
Goodbye, dashboard!
3RZ 2WD A/T ECU VS 3RZ 4WD M/T, notice that the part numbers are nearly identical.
The inner trace is the shifter cutout for the manual transmission shifters. I'm going to cut about an inch around it.
Exhaust, driveshaft, and catalytic converter are removed.
The crossmember for the transmission mount for my 2WD 4 cylinder transmission gets in the way of a transfer case, so Mr. Sawzall paid a visit.
ATF lines removed from transmission to radiator:
Transmission:
With the transmission finally out of the way, the wires for the speed sensor (for non ABS 4Runners only) needed to be extended with factory color wires from the donor harness.
The donor truck did have ABS, so the gear driven speed sensor on the back of the tranny was no needed. It had a cap:
You can see the splines in the output shaft:
John had two speed sensors laying around. One was just the right length and the other had a 29 tooth gear. We combined the parts to make one good speed sensor. We're not sure if this will work as of yet, as the 4Runner requires a 33 tooth gear. The speedometer will likely be way off.
One of the speed sensors:
Flexplate off:
Flywheel, bolts torqued to 19.5lbs, then turned 90 degrees. I used new bolts as mentioned when I purchased the flywheel. New pilot bearing.
Clutch disk and pressure plate installed:
So... many... wires...
So many confusing diagrams...
Most of the photos I took from here on were of wires... I doubt many of you want to see wires with labels on them.
Basically, we had to trace all of the wires using diagrams for the clutch start cancel switch, the clutch pedal switch, remove the wires going to the dash cluster for PRND2L, wire up reverse lights, test for 4WD indicator light wires, test which wires go where, etc, etc... it's basically been encompassing my entire last week with the truck.
Pulling pins and whole wires to swap...
Showing some removed pins, these specifically being L, 2, and R indicator lights to the gauge cluster. Instead of removing these wires completely, we will instead cut the tips off and solder on a new, properly colored wire end corresponding to what it's being used for. These wires used to run to the automatic transmission, instead will be relocated to the front differential to run the ADD mechanism. No harness removal required
The engine harness for the V6 needed to be hacked up a little bit. I had to take the transfer case and transmission plugs with to complete my harness. This includes reverse indicator light, transfer case switch (tells the ECU what mode you're in), and all of the differential and ADD wires.
Back again tomorrow! Finishing up wiring and hoping to get the transmission bolted up...
Last edited by ChildrenOfBodom; 11-29-2011 at 11:04 PM.


