Sin's 91 SR5 P/U Build-Up Thread
 05-29-2011, 06:12 PM
#1
Registered User
Thread Starter
Join Date: May 2011
Location: Tucson, AZ
Posts: 130
Likes: 0
Received 0 Likes
on
0 Posts
Sin's 91 SR5 P/U Build-Up Thread
Welcome to my build thread!
Back in April I picked up my first Toyota PU, it was dirt cheap and needs alot of work! My purpose for buying this yota is to explore the vast SW Arizona deserts, ghost towns and abandoned mines. I already know that I will go overboard with the mods, just like I have with every vehicle I've owned!
Specs:
1991 Toyota PU Excab SR5 V6 5spd
LIST UPDATED 06/10/2012
Needs:
Starter
A/C Lines
eBrake Cable
Interior Carpet
Deck Plate Mod
Replace Shift Boots
Hood Release Lever
Fix Speedometer/Tach
Matching Set of Lug Nuts lol
Regular Maint (fluid changes)
Front Diff - purchased (not installed)
Front Axles - purchased (not installed)
Manual Hubs - purchased (not installed)
Front Drive Shaft - purchased (not installed)
Hood - done
Plugs - done
Battery - done
Tailgate - done
All Belts - done
ISR Mod - done
Sunroof - - done
Fix Ignition - done
Plug Wires - done
Wiper Arms - done
Radio Wiring - - done
Radiator Hoses - done
Battery Tie Down - done
P/S Pump Rebuild - done
Running Lights, etc - done
Radiator/Thermostat - done
PCV change and relocate - done
Bolt the bed down (lol) - partially done
Quick Disconnects (for battery) - done
Drivers Seat won't move forward or back - done
Wants:
E-Fan Taurus Mod - on hold
Front Bumper w/ winch
Aux Lighting
HID's
Bed Bob
SAS
Chevy 63's
Rock Sliders
Rear Armor
Desert Tan Paint job - done
On to the pics!
At the sellers home:
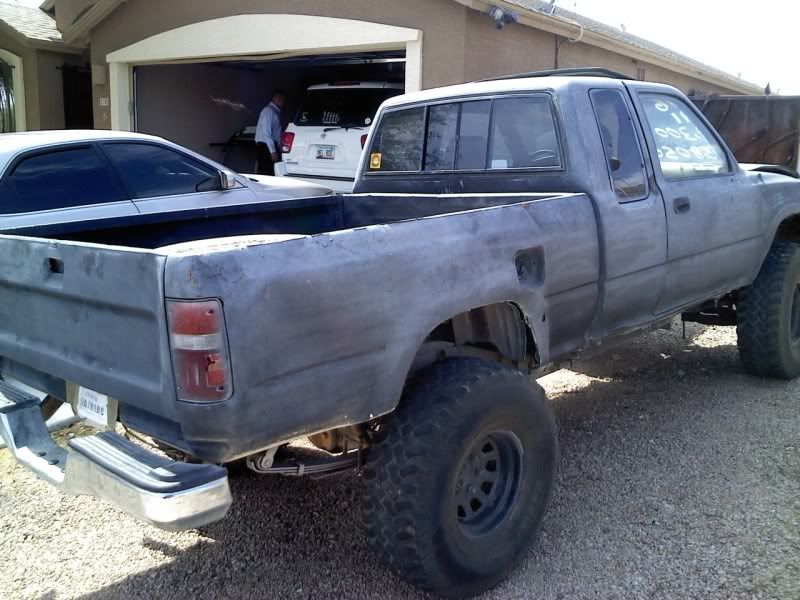
It's New Home:
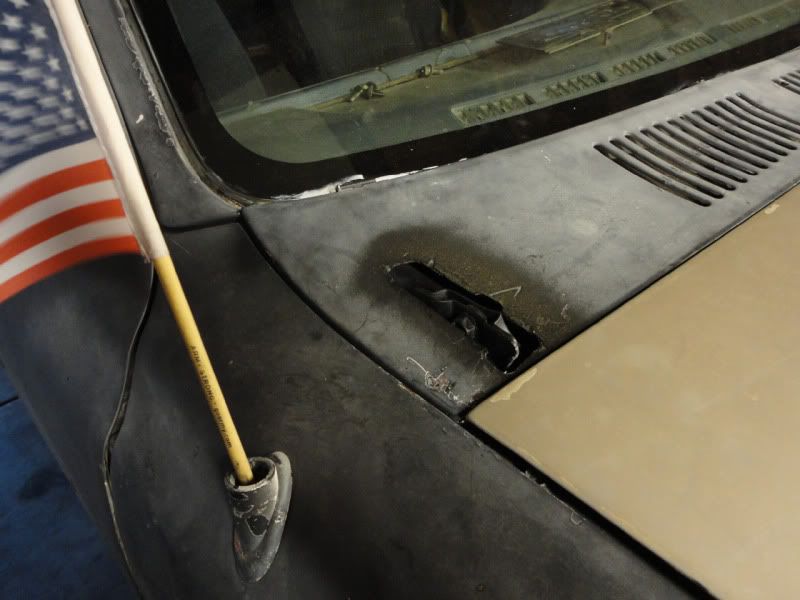
Notice the hood doesn't fit, it had cracked on either side, it was also sitting on top of the cowl by about 3/4":
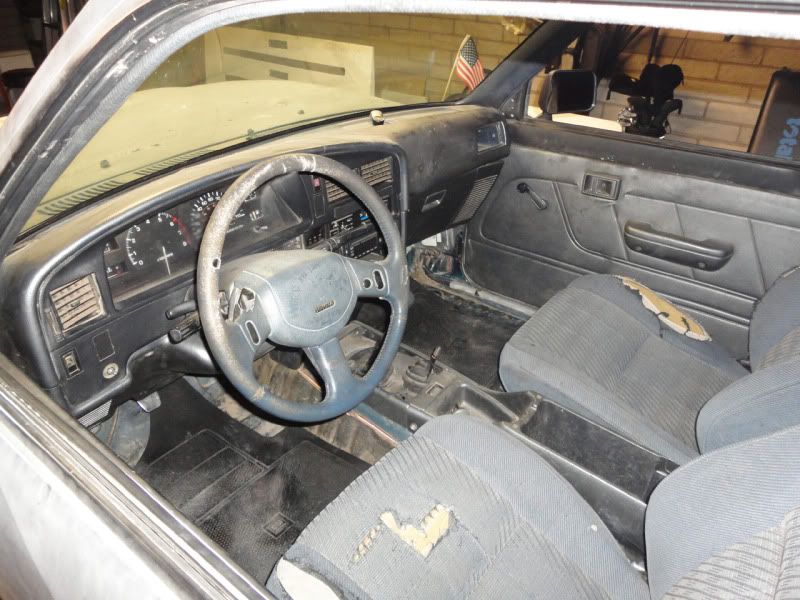
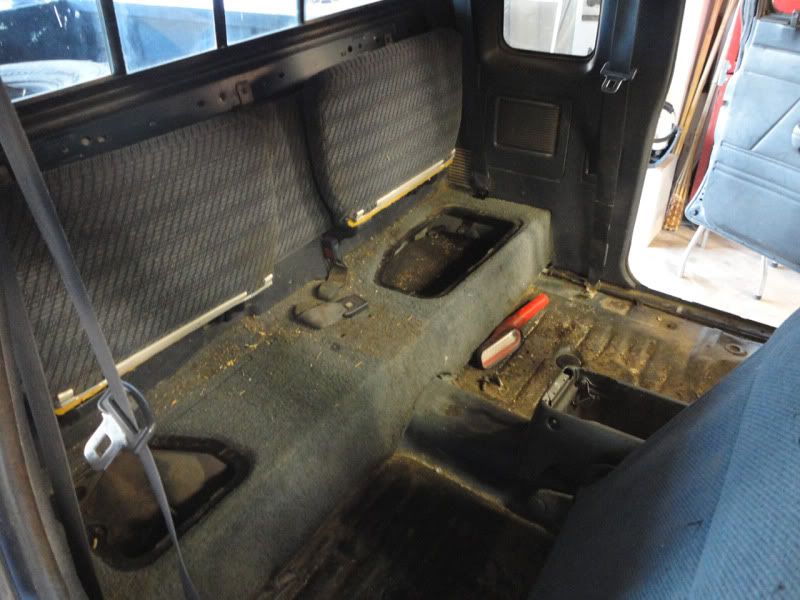
Interior:
Back in April I picked up my first Toyota PU, it was dirt cheap and needs alot of work! My purpose for buying this yota is to explore the vast SW Arizona deserts, ghost towns and abandoned mines. I already know that I will go overboard with the mods, just like I have with every vehicle I've owned!
Specs:
1991 Toyota PU Excab SR5 V6 5spd
LIST UPDATED 06/10/2012
Needs:
Starter
A/C Lines
eBrake Cable
Interior Carpet
Deck Plate Mod
Replace Shift Boots
Hood Release Lever
Fix Speedometer/Tach
Matching Set of Lug Nuts lol
Regular Maint (fluid changes)
Front Diff - purchased (not installed)
Front Axles - purchased (not installed)
Manual Hubs - purchased (not installed)
Front Drive Shaft - purchased (not installed)
Hood - done
Plugs - done
Battery - done
Tailgate - done
All Belts - done
ISR Mod - done
Sunroof - - done
Fix Ignition - done
Plug Wires - done
Wiper Arms - done
Radio Wiring - - done
Radiator Hoses - done
Battery Tie Down - done
P/S Pump Rebuild - done
Running Lights, etc - done
Radiator/Thermostat - done
PCV change and relocate - done
Bolt the bed down (lol) - partially done
Quick Disconnects (for battery) - done
Drivers Seat won't move forward or back - done
Wants:
E-Fan Taurus Mod - on hold
Front Bumper w/ winch
Aux Lighting
HID's
Bed Bob
SAS
Chevy 63's
Rock Sliders
Rear Armor
Desert Tan Paint job - done
On to the pics!
At the sellers home:
It's New Home:
Notice the hood doesn't fit, it had cracked on either side, it was also sitting on top of the cowl by about 3/4":
Interior:
Last edited by Sin; 06-10-2012 at 09:03 PM.

 05-29-2011, 06:34 PM
#3
Registered User
Thread Starter
Join Date: May 2011
Location: Tucson, AZ
Posts: 130
Likes: 0
Received 0 Likes
on
0 Posts
Memorial Day weekend update*
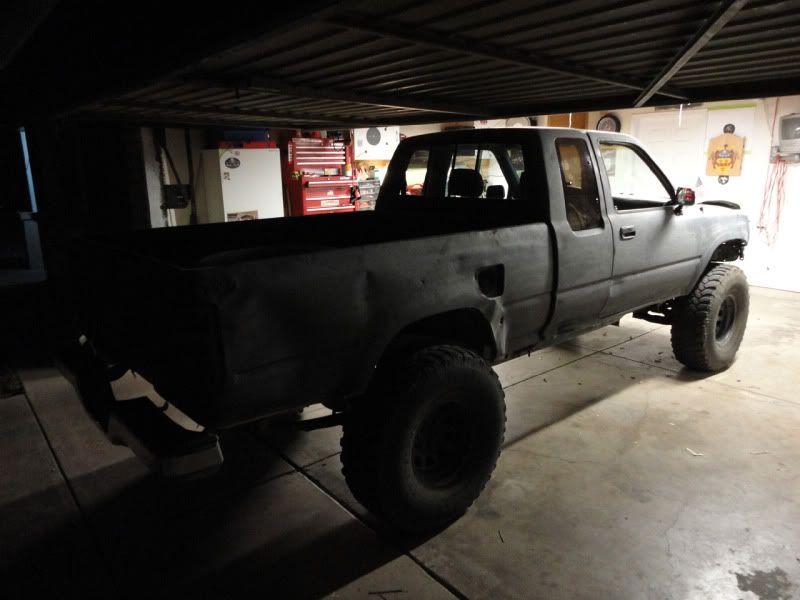
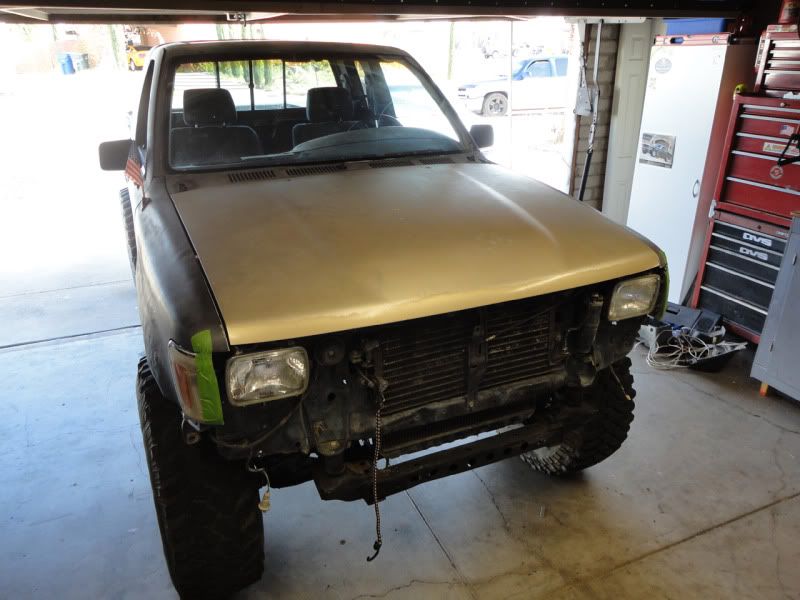
On Saturday I installed the used hood, come to find out the hinges are severely bent! I don't have any project money right now, so I hammered them into submission, mounted them with slight modification to the cowl since it had been cut before. I had the elongate the holes on the hinges to move it forward, to clear the cowl. As well as add many shims towards the rear to get the hood to pivot forward even more!
Well I got the hood to fit great, had to modify the cowl to clear the hinges though! Not pretty but it works!
Last edited by Sin; 05-29-2011 at 06:45 PM.
05-29-2011, 06:59 PM
#4
Registered User
Thread Starter
Join Date: May 2011
Location: Tucson, AZ
Posts: 130
Likes: 0
Received 0 Likes
on
0 Posts
Also worked on the seats today! The drivers side wouldn't move forward or backward and the passenger side moved, just not smoothly.
I pulled both seats, cleaned and re-greased the pass. seat and re-wired the toothed channels on the driver side, then greased as well. Works great now! Also both seat only had two bolts holding them to the floor, I chased the threads and put some 3 in 1 oil on some new bolts, feels nice and sturdy now! I'm 6'5" 300lbs, so they'd better be bolted right!
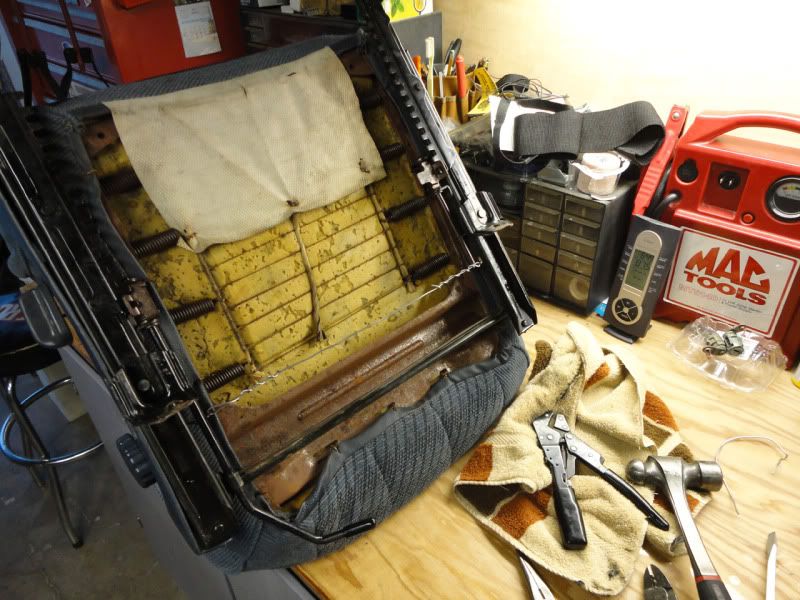
I pulled both seats, cleaned and re-greased the pass. seat and re-wired the toothed channels on the driver side, then greased as well. Works great now! Also both seat only had two bolts holding them to the floor, I chased the threads and put some 3 in 1 oil on some new bolts, feels nice and sturdy now! I'm 6'5" 300lbs, so they'd better be bolted right!
 05-29-2011, 07:51 PM
#6
Registered User
05-29-2011, 08:16 PM
#7
Registered User
Thread Starter
Join Date: May 2011
Location: Tucson, AZ
Posts: 130
Likes: 0
Received 0 Likes
on
0 Posts

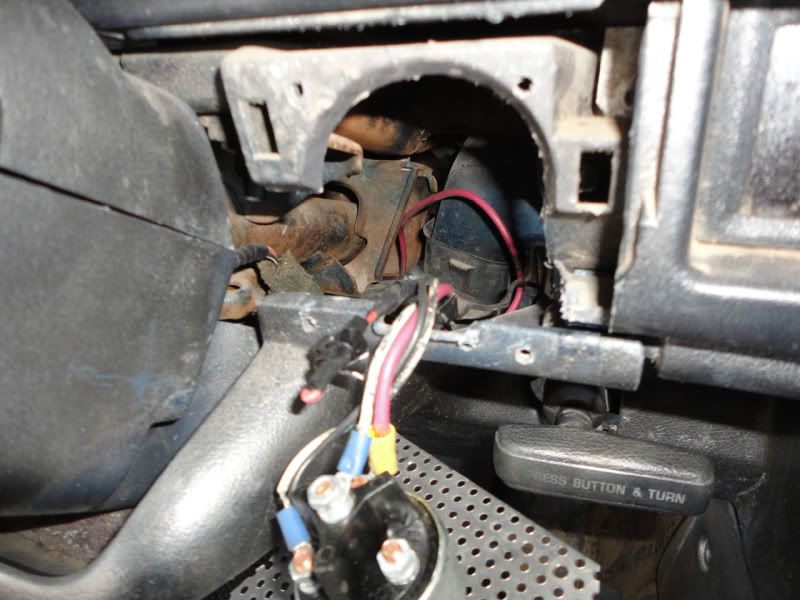
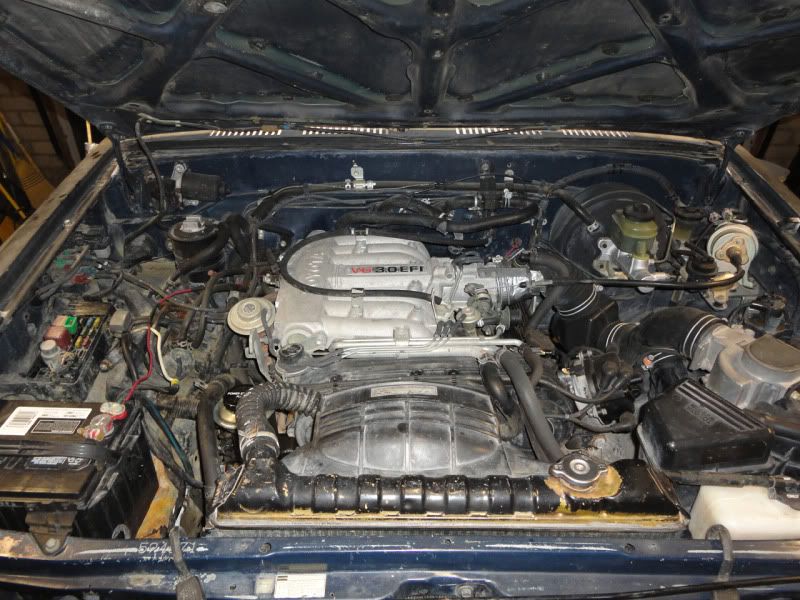
I don't have any kind of records for this truck, the previous owner had it a year and "maybe" did plugs/wires and a distributor cap, possibly did slave cylinder work too (judging by how clean the wires look compared to all the others in the bay.
Trending Topics
05-30-2011, 07:46 AM
#9
Registered User
Thread Starter
Join Date: May 2011
Location: Tucson, AZ
Posts: 130
Likes: 0
Received 0 Likes
on
0 Posts
 05-30-2011, 07:52 AM
#10
Registered User
James
05-30-2011, 08:14 AM
#11
Registered User
Thread Starter
Join Date: May 2011
Location: Tucson, AZ
Posts: 130
Likes: 0
Received 0 Likes
on
0 Posts
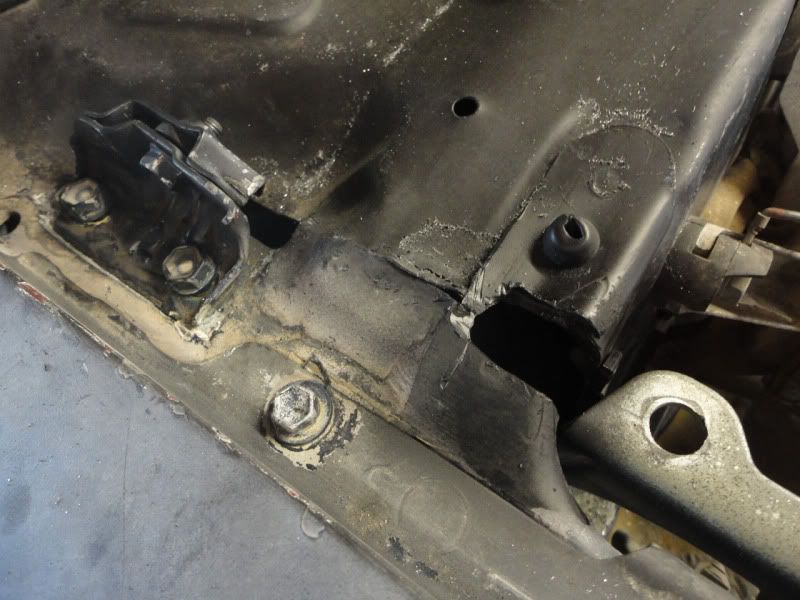
Well VIN tags are an easy swap on Toyota trucks. The vin should be on the frame in the left front wheel well just rear of the control arms. That does not mean if the numbers do not match it is stolen. People swap these frames and body parts all the time especially in that region of the United States.
James
James
05-30-2011, 09:03 PM
#13
Registered User
Thread Starter
Join Date: May 2011
Location: Tucson, AZ
Posts: 130
Likes: 0
Received 0 Likes
on
0 Posts
Hey Thanks!
I bought it for $1200, it was probably too much considering all it needs - but oh well, it'll be a VAST learning experience!
And I bought it to explore abandoned mines and ghost towns around here!
This is my first Toyota PU, I'm more familar with 99-07' Chevy Silverado's. My daily driver is a lowered, shaved, satin two tone Silverado, so this is all new to me!
Last edited by Sin; 06-08-2011 at 09:06 PM.
06-08-2011, 09:04 PM
#14
Registered User
Thread Starter
Join Date: May 2011
Location: Tucson, AZ
Posts: 130
Likes: 0
Received 0 Likes
on
0 Posts
*Small Update*
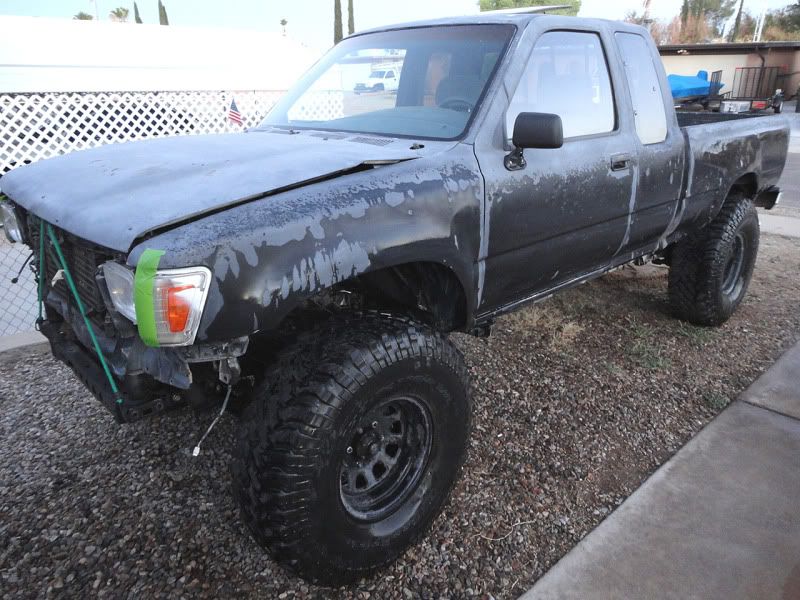
On Sunday I scotch-brited the body, Tues/Wed nights I painted the truck - Rustoleum Camouflage Khaki (basically desert tan). Afterwards I went through an satin blacked the undercarriage - looks like a new truck!!!
Also tomorrow I'll be getting a new radiator, then I'll start work on a Taurus fan mod and over the weekend I hope to cutout the bed sides to match the fenders...
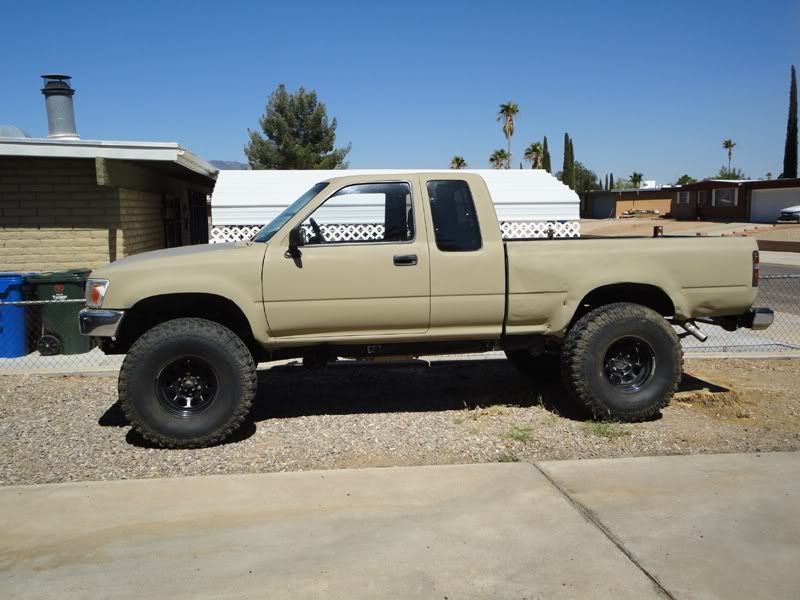
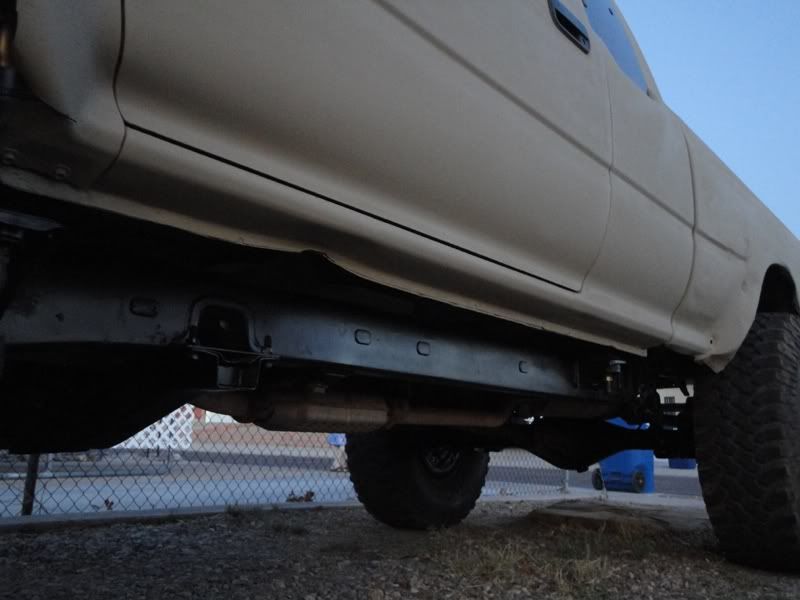
06-09-2011, 03:08 PM
#15
06-09-2011, 06:20 PM
#16
Registered User
Thread Starter
Join Date: May 2011
Location: Tucson, AZ
Posts: 130
Likes: 0
Received 0 Likes
on
0 Posts
Thanks Terry, this build is more of a "get it to pass emissions and make it reliable" build - but I figure once I obtain those two things I'll be getting the "modification bug" and go all out! 
Well I got the radiator today, it's the all metal kind - no plastic end tanks! Tomorrow I'm picking up new upper and lower radiator hoses, I've already got the coolant. Also I'm gonna cut up my old hood to make an e-fan shroud! And I need to pick up some shorter bolts, since I'll be doing away with the clutch fan. Busy weekend, plus I might be entering my Silverado in a car show on Saturday...
Well I got the radiator today, it's the all metal kind - no plastic end tanks! Tomorrow I'm picking up new upper and lower radiator hoses, I've already got the coolant. Also I'm gonna cut up my old hood to make an e-fan shroud! And I need to pick up some shorter bolts, since I'll be doing away with the clutch fan. Busy weekend, plus I might be entering my Silverado in a car show on Saturday...
06-09-2011, 07:09 PM
#18
Registered User
Thread Starter
Join Date: May 2011
Location: Tucson, AZ
Posts: 130
Likes: 0
Received 0 Likes
on
0 Posts


