Nothingbetters 85 pickup
 01-14-2013, 08:42 PM
#41
Registered User
Thread Starter
Join Date: Jul 2009
Location: Rocky Mtn. House AB, Canada
Posts: 727
Likes: 0
Received 1 Like
on
1 Post
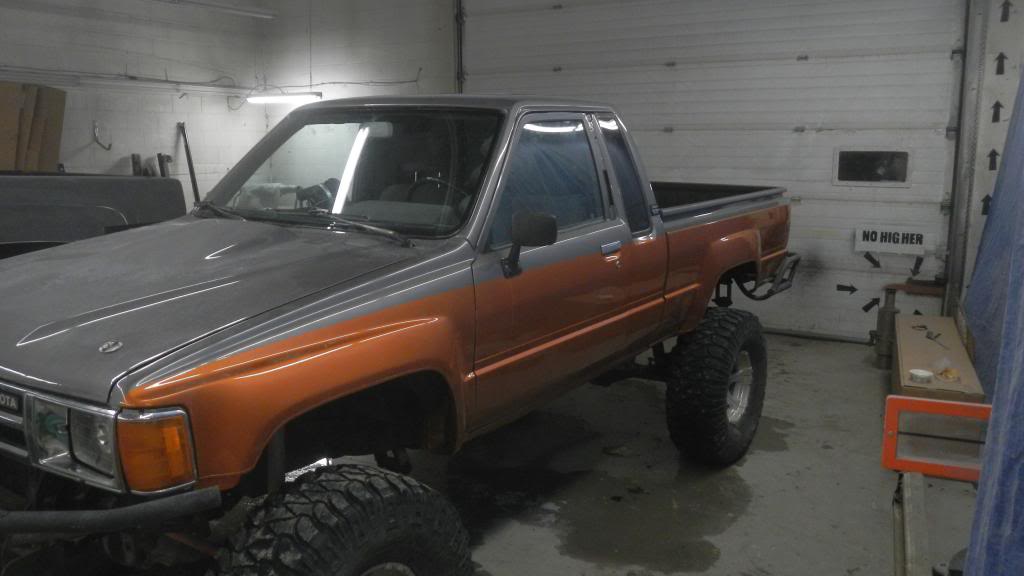
so after a few weeks off from the truck, stage 2 has been started tonight. Time to get the cab done. I got most of it taken apart tonight. Pretty easy to do on this old thing compared to the new vehicles I'm used to. My main goal for the cab is rust repair and making it straight. It has lots of little dent all over the place. The good thing is there are no big, flat panels to work with so that will make the body work much more simple.
The areas that need the most attention are the rockers and the drip rails as they are rusting from the inside. I hate rust. The rest is basic, strip, fill, and prime.
My goal is to have it painted in 2 weeks. Cross your fingers for me. Pics starting as of tomorrow.
The areas that need the most attention are the rockers and the drip rails as they are rusting from the inside. I hate rust. The rest is basic, strip, fill, and prime.
My goal is to have it painted in 2 weeks. Cross your fingers for me. Pics starting as of tomorrow.
 01-14-2013, 08:47 PM
#42
Registered User
Thread Starter
Join Date: Jul 2009
Location: Rocky Mtn. House AB, Canada
Posts: 727
Likes: 0
Received 1 Like
on
1 Post
Over my christmas break my girlfriend wanted to learn more about what I do, so we finished prepping and painted the tailgate. I had forgotton how much I hate those letters on the tailgate. It came out much cleaner than last time I did one. Must be the extra practice. So it took about 7 hours total and looks good! Only got 2 pics of it in progress. They'll be posted later.
01-18-2013, 09:27 PM
#43
Registered User
Thread Starter
Join Date: Jul 2009
Location: Rocky Mtn. House AB, Canada
Posts: 727
Likes: 0
Received 1 Like
on
1 Post
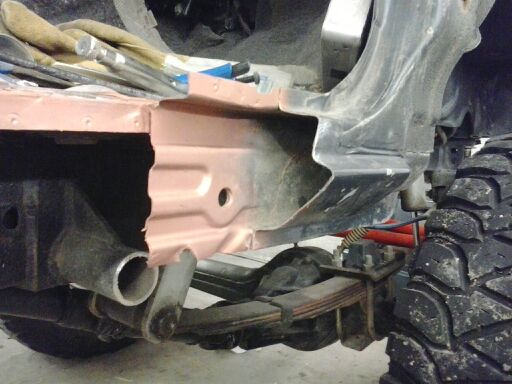
So monday was taking the truck apart. Tuesday I pulled the box off and started cutting into the rockers to see what I was up against. The drivers side wasn't too bad. about as good as you'll get with a 28 year old truck with a sunroof drain pointed into the rocker. It was mostly surface rust directly below the door, but farther back below the extended cab part it got worse. Then I opened up the passanger side. which was much worse. Someone had definatly been in here before and they had no idea what they were doing. probally 3 times as rusty as the drivers side. before I got too carried away and made mistakes I went home for the night and asked the other body men their thoughts and how they would attack it.
Wednesday. I cut out everything rusty that I could see. That simple. I ended up cutting out the inner rockers as well after seeing how easy it would be to get them out and make some. Using an 8mm spot weld bit, my seam buster and hammer they were straight forward to take out. These bits don't dig into the second layer of steel (if your careful) so you can reuse it without compromising strength.
Thursday. I had to run around a bit to find it, but I eventually got my hands on some 18 gauge steel. Started cutting and bending and pretty soon I had my inners built. I only have access to a 3 foot break so I had to section 2 peices together to get the full length on the passanger side. By the time I got both fitting perfectly it was time to go home.
Friday. Got them suckers welded on today. I used our shops resistance welder. SO much faster, easier and you can put seam sealer in between the sheets to steel your welding together so you greatly limit potential corrosion. Of course our shop had to pay $20,000 to get it. Not something everyone has access to.
Passenger side

Driver side (much shorter section)
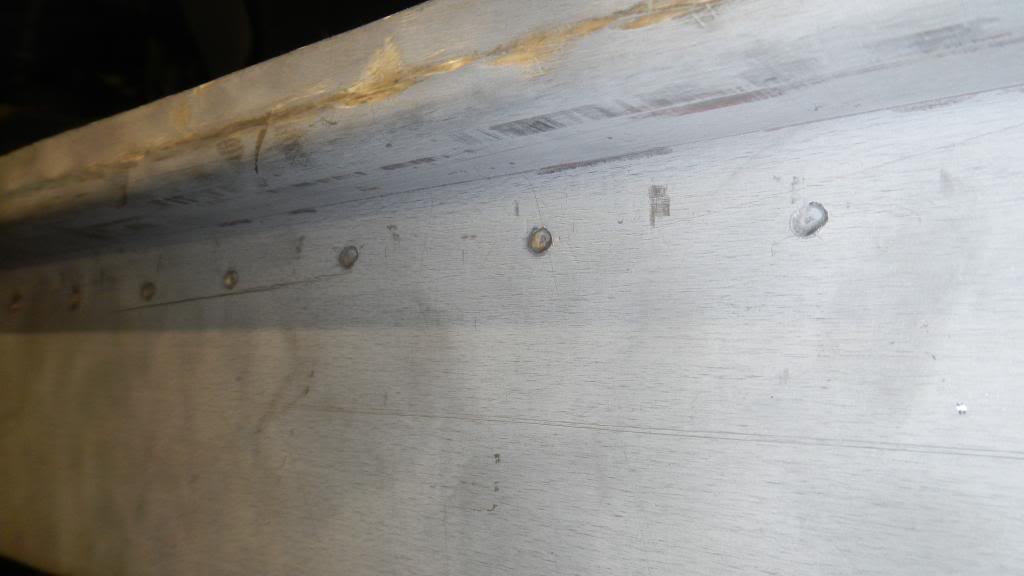
resistance spotweld marks. Just like factory!
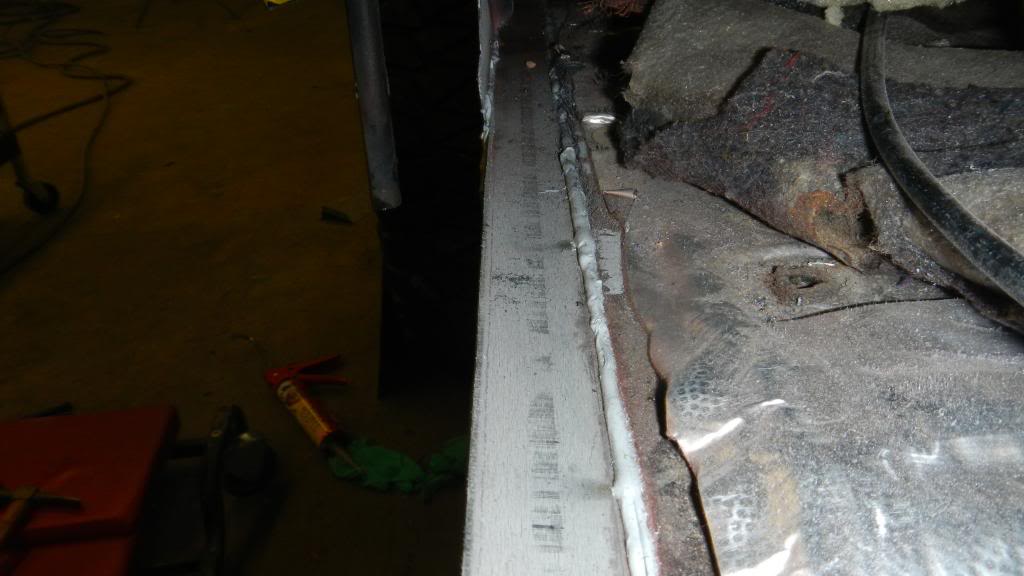
You can see the seam sealer being squished out between the two layers of steel in this pic. Hard to complain with no heat effect zone, no grinding, and a fully sealed seam.
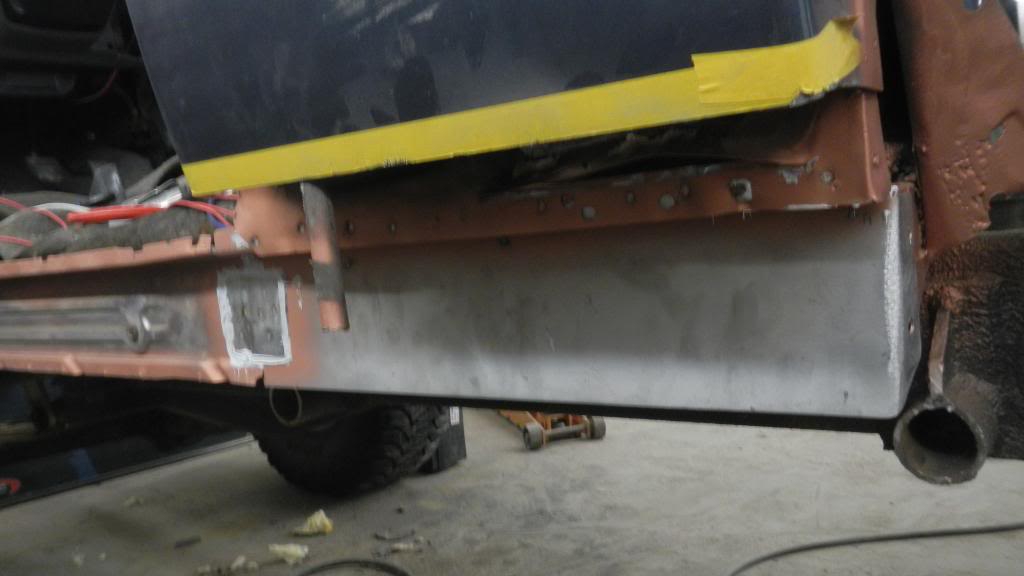
So with those on, I started getting the outers ready to go on. On our trucks its a 2 piece design. the rocker goes on first, and the cab corner/extra cab section goes on top of that. I'm going to try and match that. After seeing the inside of the door jams I knew it would take a looooong time to make some of those fancy bends. So I'm saving the old peices.
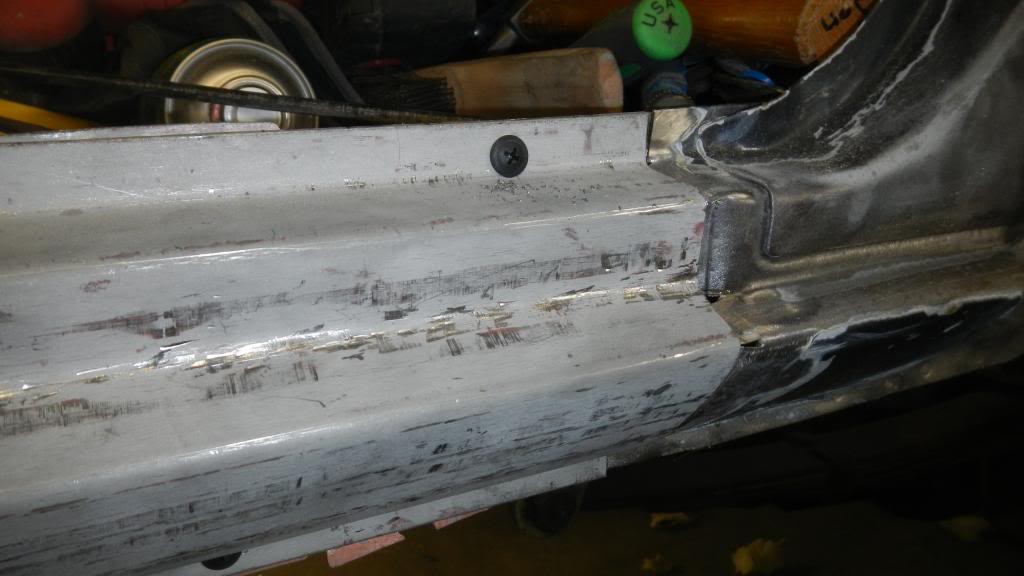
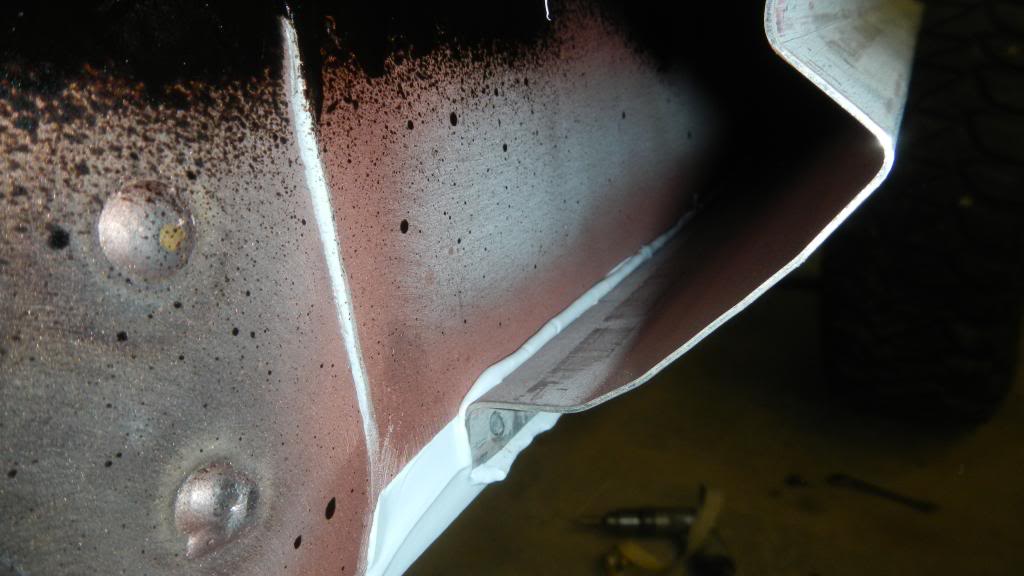
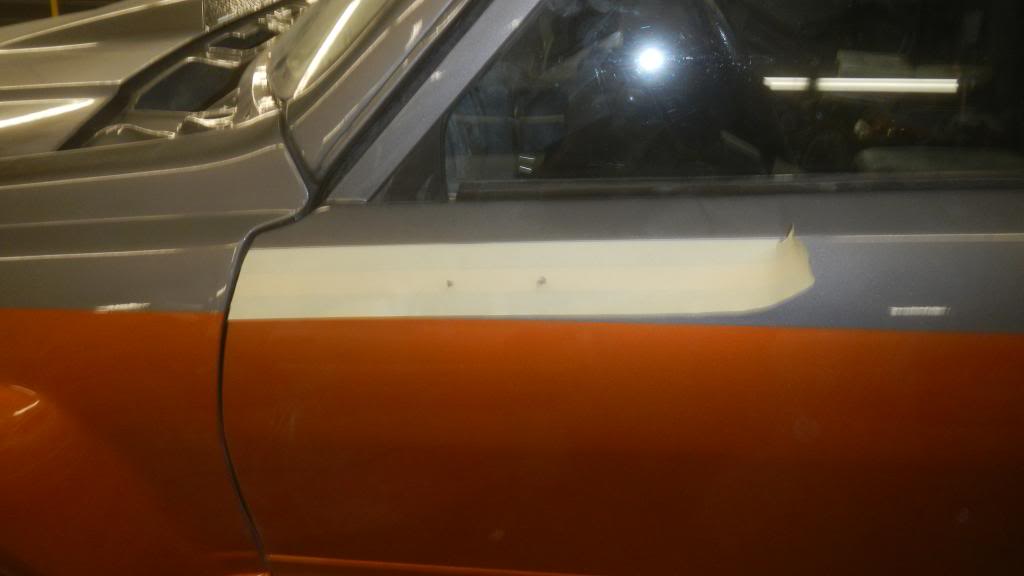
So this is what I started with.This side has actually been patched twice, once by a bodyman (or someone who knew what they were doing) and once by the Previous owner (who had no idea what he was doing) This pic shows both patches on the passanger side. The bad one is obvious, the good one...can you find it?
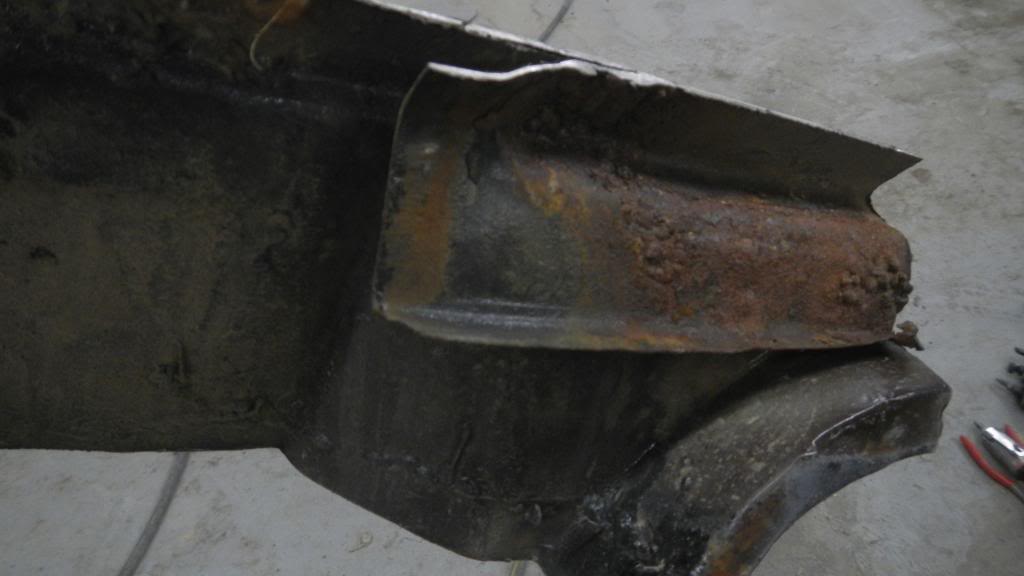
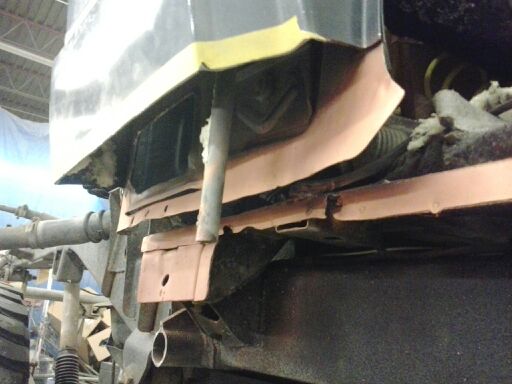
so after some careful cutting, wire wheel-ing and using our parts blasting cabinet to get rid of the rust, I ended up with this.
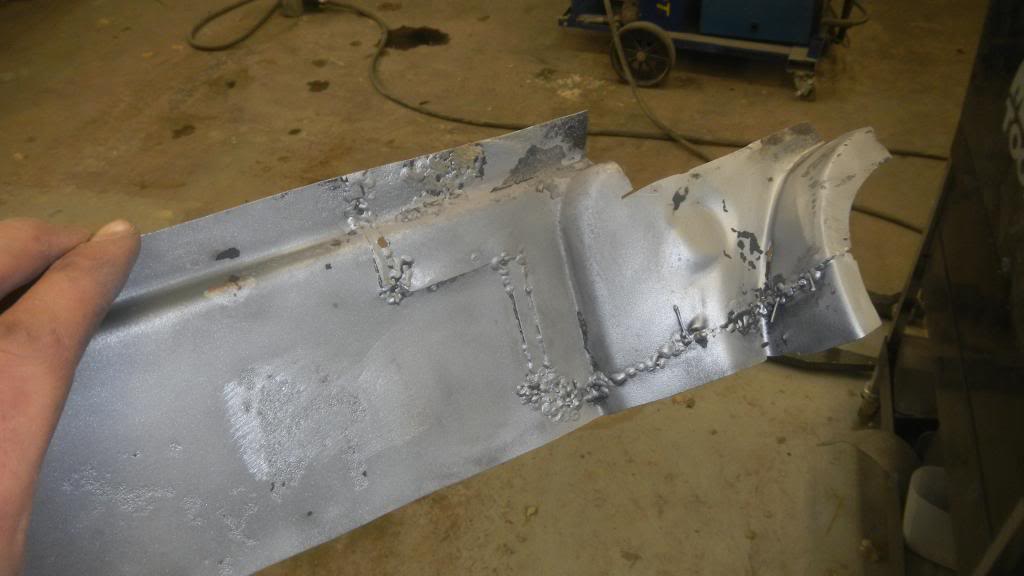
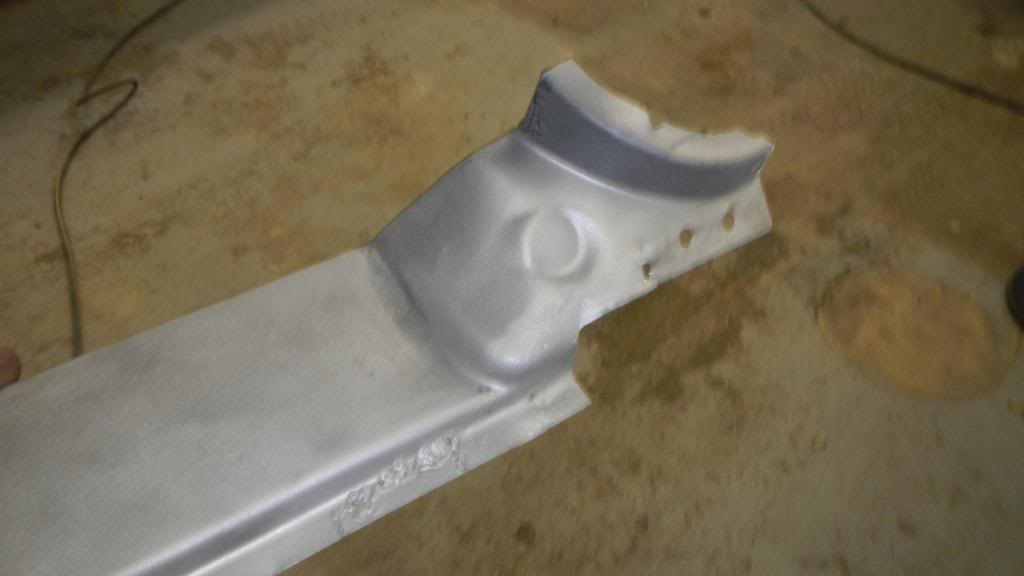
Its not 100% but its close enough. I then coated it in a "rust converter" spray and am letting it sit overnight to do its thing.
Tomorrows plan is to bend up the outer rockers, get everything fitting, sleeve it all and maybe start welding it on.
Wednesday. I cut out everything rusty that I could see. That simple. I ended up cutting out the inner rockers as well after seeing how easy it would be to get them out and make some. Using an 8mm spot weld bit, my seam buster and hammer they were straight forward to take out. These bits don't dig into the second layer of steel (if your careful) so you can reuse it without compromising strength.
Thursday. I had to run around a bit to find it, but I eventually got my hands on some 18 gauge steel. Started cutting and bending and pretty soon I had my inners built. I only have access to a 3 foot break so I had to section 2 peices together to get the full length on the passanger side. By the time I got both fitting perfectly it was time to go home.
Friday. Got them suckers welded on today. I used our shops resistance welder. SO much faster, easier and you can put seam sealer in between the sheets to steel your welding together so you greatly limit potential corrosion. Of course our shop had to pay $20,000 to get it. Not something everyone has access to.
Passenger side
Driver side (much shorter section)
resistance spotweld marks. Just like factory!
You can see the seam sealer being squished out between the two layers of steel in this pic. Hard to complain with no heat effect zone, no grinding, and a fully sealed seam.
So with those on, I started getting the outers ready to go on. On our trucks its a 2 piece design. the rocker goes on first, and the cab corner/extra cab section goes on top of that. I'm going to try and match that. After seeing the inside of the door jams I knew it would take a looooong time to make some of those fancy bends. So I'm saving the old peices.
So this is what I started with.This side has actually been patched twice, once by a bodyman (or someone who knew what they were doing) and once by the Previous owner (who had no idea what he was doing) This pic shows both patches on the passanger side. The bad one is obvious, the good one...can you find it?
so after some careful cutting, wire wheel-ing and using our parts blasting cabinet to get rid of the rust, I ended up with this.
Its not 100% but its close enough. I then coated it in a "rust converter" spray and am letting it sit overnight to do its thing.
Tomorrows plan is to bend up the outer rockers, get everything fitting, sleeve it all and maybe start welding it on.
Last edited by nothingbetter; 01-18-2013 at 09:29 PM.
 02-05-2013, 08:27 PM
#47
Registered User
Thread Starter
Join Date: Jul 2009
Location: Rocky Mtn. House AB, Canada
Posts: 727
Likes: 0
Received 1 Like
on
1 Post
Sorry! I've finished the body so I've been enjoying sitting on my arse and looking at it out the window.
So I had to bend up my rockers.
Step 1: Get my sheet metal
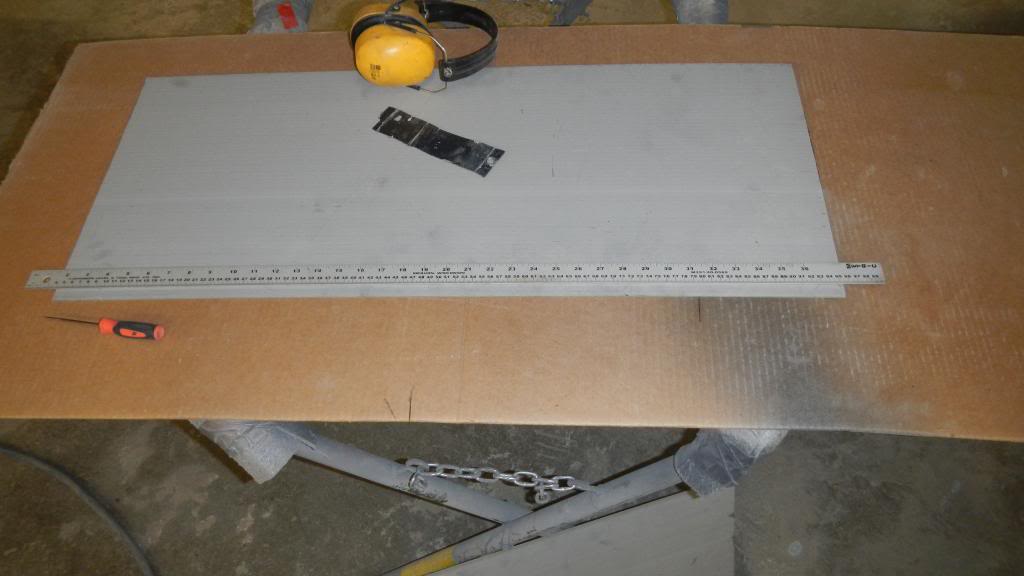
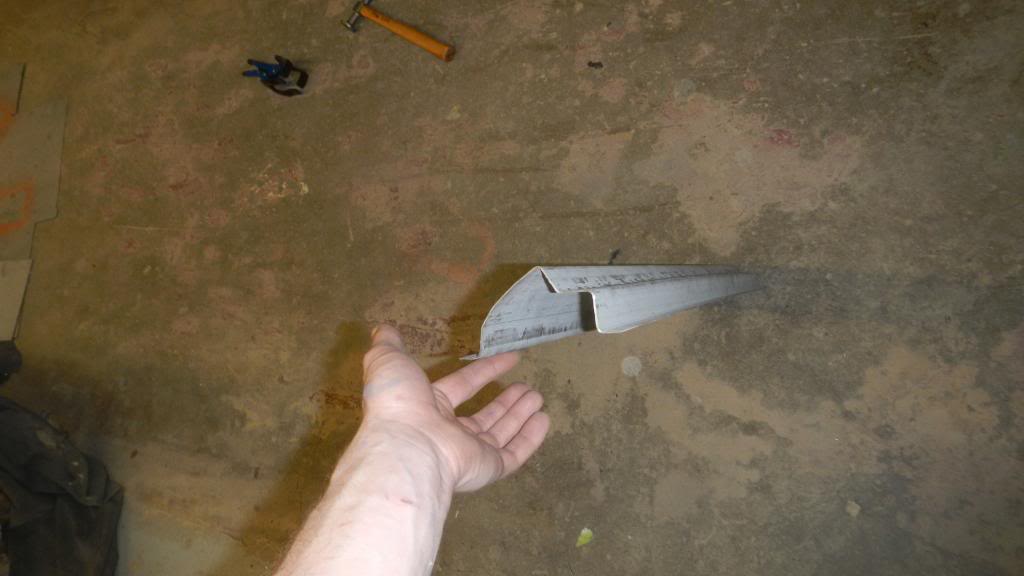
Step 2: Mark the bends. I took a piece of old rocker, made a cut in the middle of each bend, straightened it so it was flat. layed it on top of my sheet metal and marked where I had to bend.
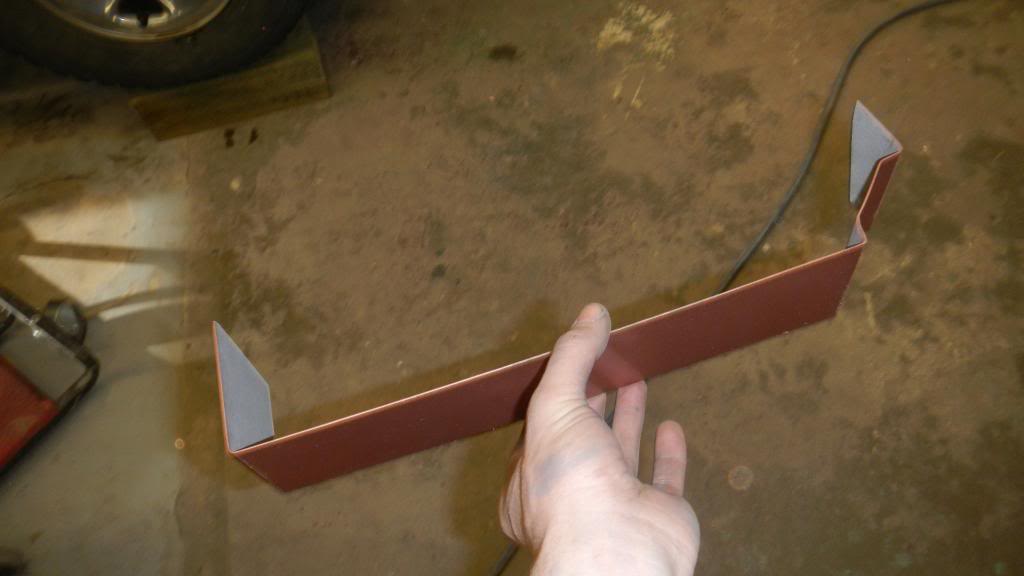
Step 3: bend. I used our shops 3 foot break. Not exactly high quality but it worked for what I needed.

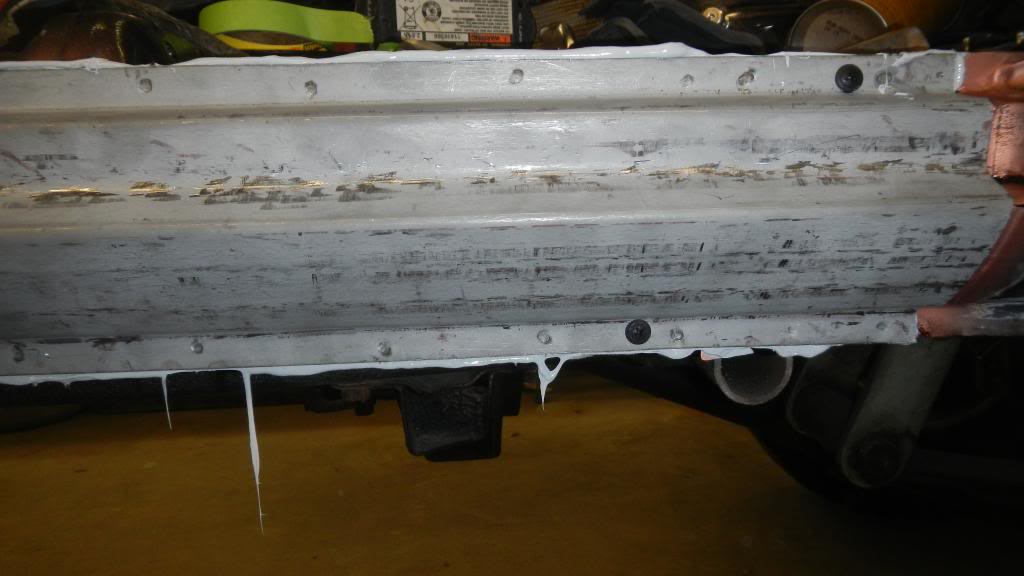
I then test fit them with my door in place and decided it was good enough to boxliner over.

Then I made my sleeves for my cab. Simple enough process.
Then resistance welded the sleeves in place.
http://i224.photobucket.com/albums/d...psfdf59637.jpg
For those who don't know...a sleeve is used behind where 2 panels will be welded together. So instead of butt welding the thin sheet metal, burning holes and having excessive warpage, you have extra support, can have proper gap between your panels to be welded and another piece of metal to absorb heat to avoid warping.
So with my sleeves in place, I put on the seam sealer, fit my rockers into place and resistance welded them on.
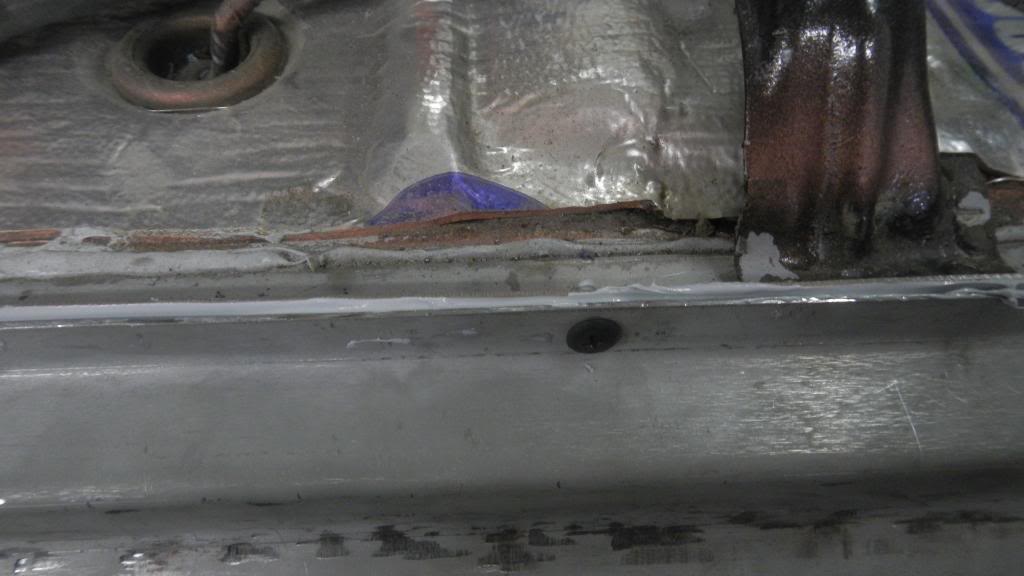
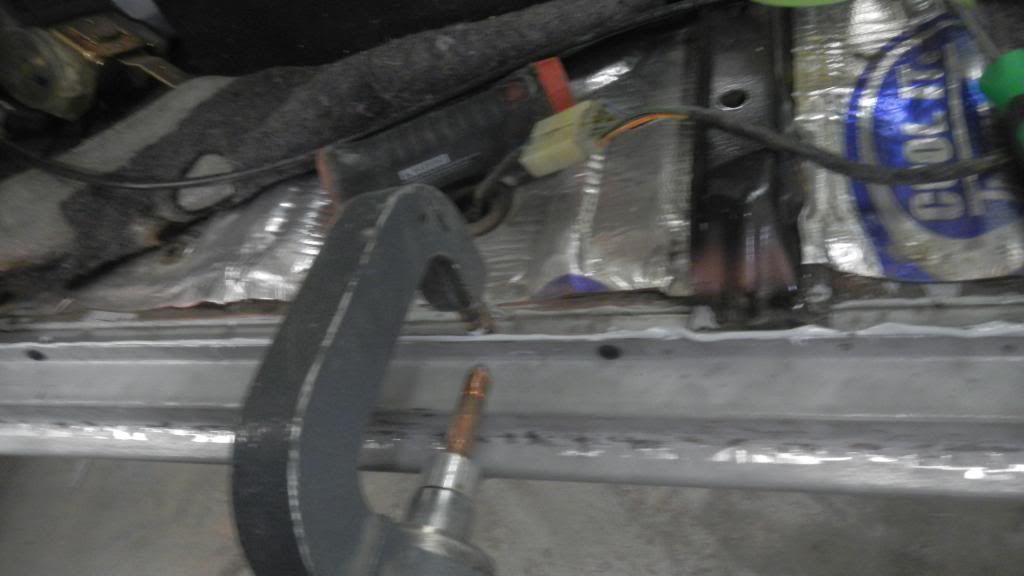
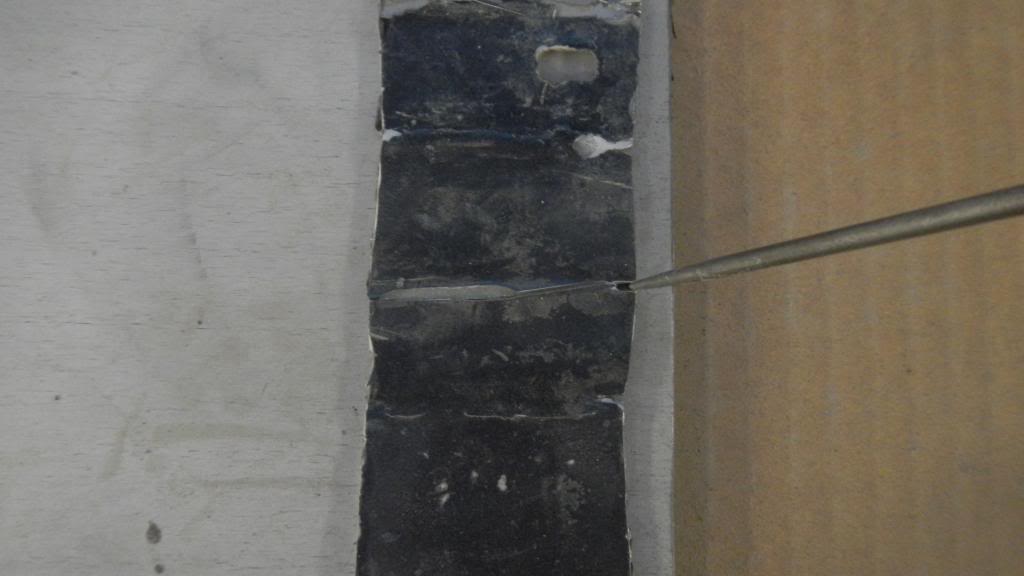
This is a shot of inside my rocker after its been welded. notice the nice, fat, bead of seam sealer oozing out between the panels. Perfect.
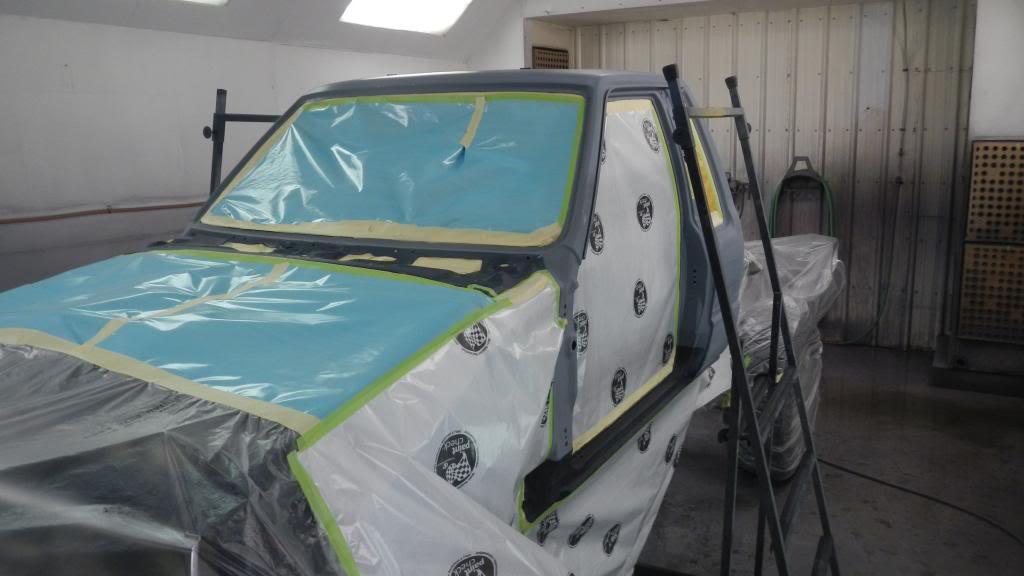
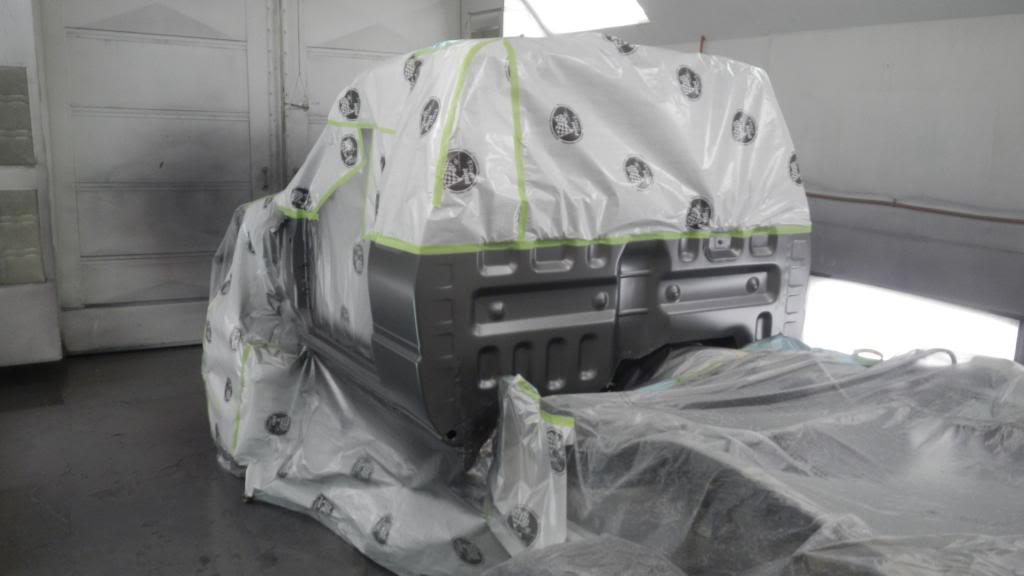
This is where I become a bad yotatech member. I gave up on taking pictures and just got it done. I welded on my cab corner lowers, test fit everything again, stripped the whole cab down to bare metal, made my drip rails which were hiding rust, welded those on, did all my filler work, stressed, added some more seam sealer, forgot to sleep, primed it, blocked it, stressed some more, prepped it, sprayed the boxliner on the rockers, put it in the booth, masked it and this is where we end up.
So I had to bend up my rockers.
Step 1: Get my sheet metal
Step 2: Mark the bends. I took a piece of old rocker, made a cut in the middle of each bend, straightened it so it was flat. layed it on top of my sheet metal and marked where I had to bend.
Step 3: bend. I used our shops 3 foot break. Not exactly high quality but it worked for what I needed.
I then test fit them with my door in place and decided it was good enough to boxliner over.
Then I made my sleeves for my cab. Simple enough process.
Then resistance welded the sleeves in place.
http://i224.photobucket.com/albums/d...psfdf59637.jpg
For those who don't know...a sleeve is used behind where 2 panels will be welded together. So instead of butt welding the thin sheet metal, burning holes and having excessive warpage, you have extra support, can have proper gap between your panels to be welded and another piece of metal to absorb heat to avoid warping.
So with my sleeves in place, I put on the seam sealer, fit my rockers into place and resistance welded them on.
This is a shot of inside my rocker after its been welded. notice the nice, fat, bead of seam sealer oozing out between the panels. Perfect.
This is where I become a bad yotatech member. I gave up on taking pictures and just got it done. I welded on my cab corner lowers, test fit everything again, stripped the whole cab down to bare metal, made my drip rails which were hiding rust, welded those on, did all my filler work, stressed, added some more seam sealer, forgot to sleep, primed it, blocked it, stressed some more, prepped it, sprayed the boxliner on the rockers, put it in the booth, masked it and this is where we end up.
Last edited by nothingbetter; 02-05-2013 at 09:13 PM.
02-05-2013, 08:59 PM
#48
Registered User
Thread Starter
Join Date: Jul 2009
Location: Rocky Mtn. House AB, Canada
Posts: 727
Likes: 0
Received 1 Like
on
1 Post
So now the painting part, Same as the box.
Sealer
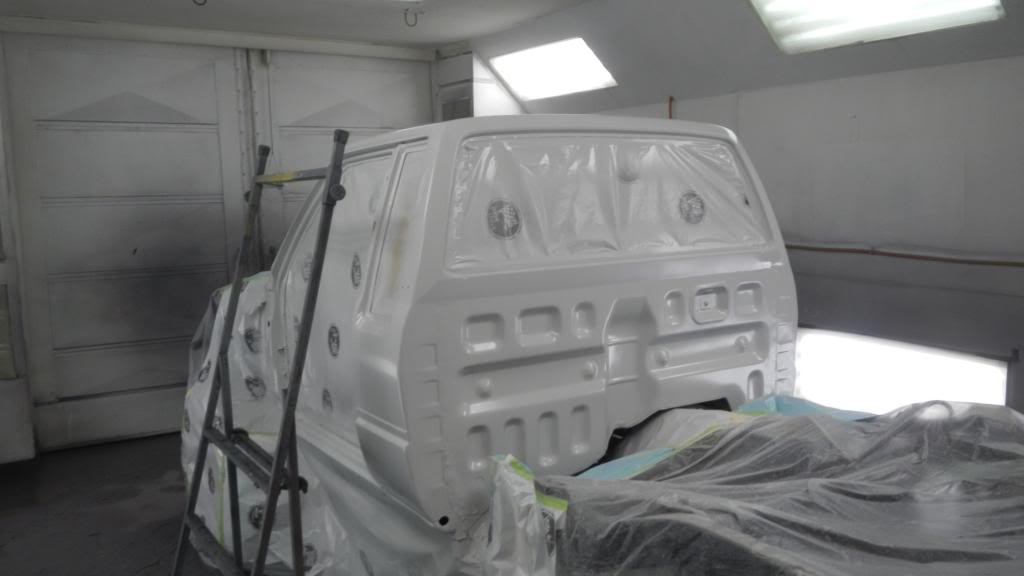
Silver
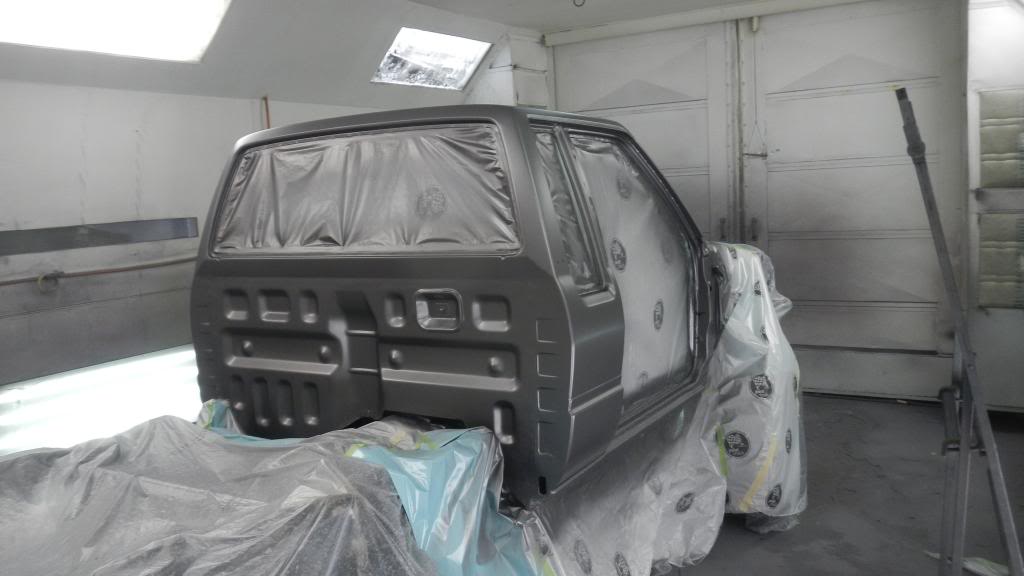
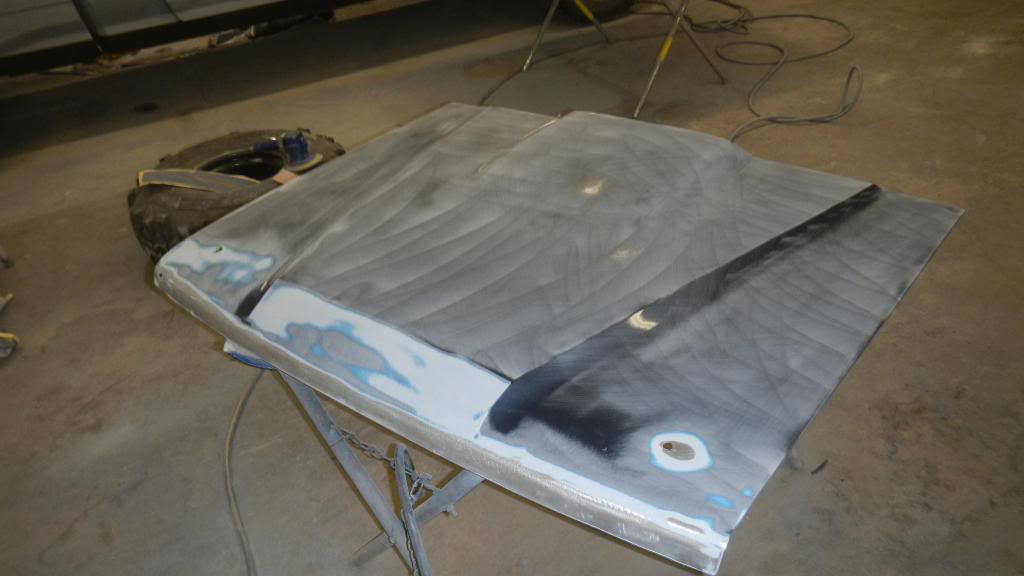
wait four hours so I don't mess the metallics with the tape. In that time I fixed the dent and the rock chips on the hood. I primed it and the cowl panel as well.
ate some food, once my 4 hours was up I masked off my line.
sprayed my orange
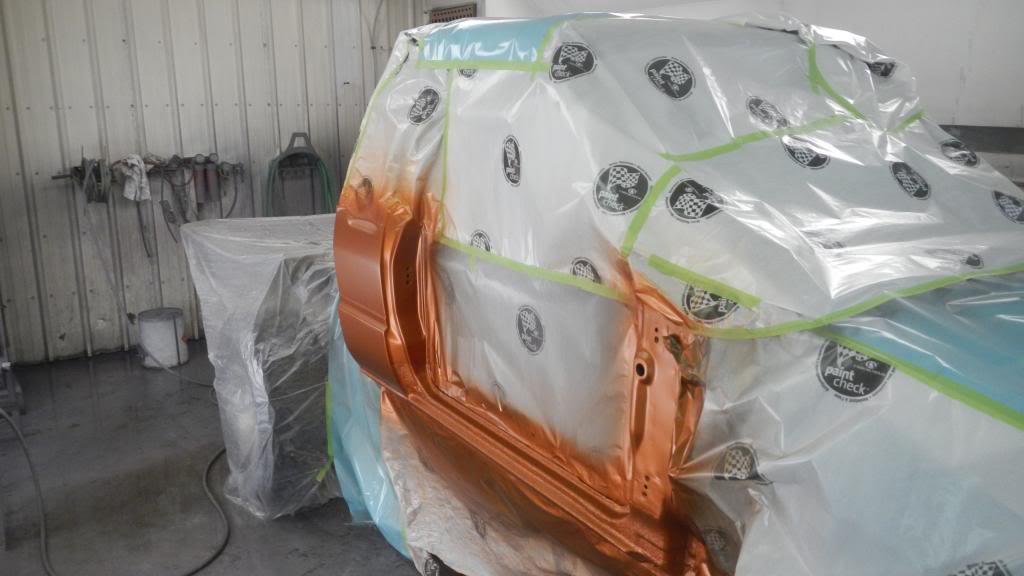
unmasked my silver and sprayed my clearcoat
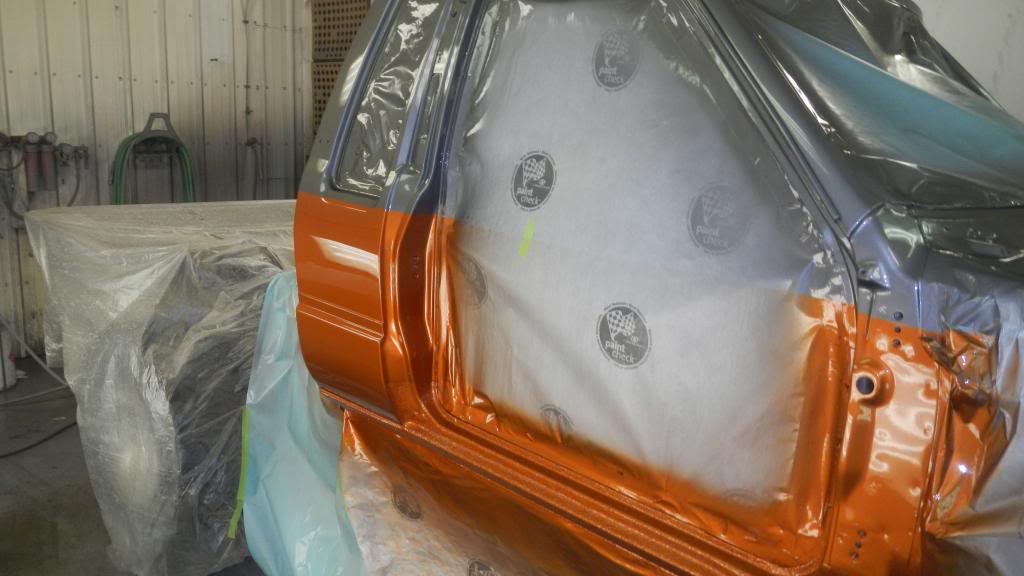
I stuck around the shop for an hour, cleaned up my mess, once that hour was up I unmasked it and let it sit overnight.
The next day, sunday, in the morning I fit the doors and fenders, blocked out and prepped my hood, masked off the cab again, and repeated the whole painting process for the other stuff.
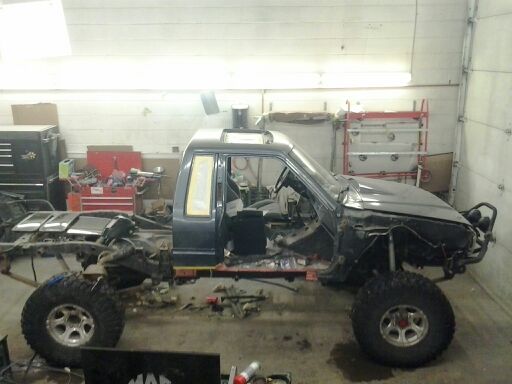
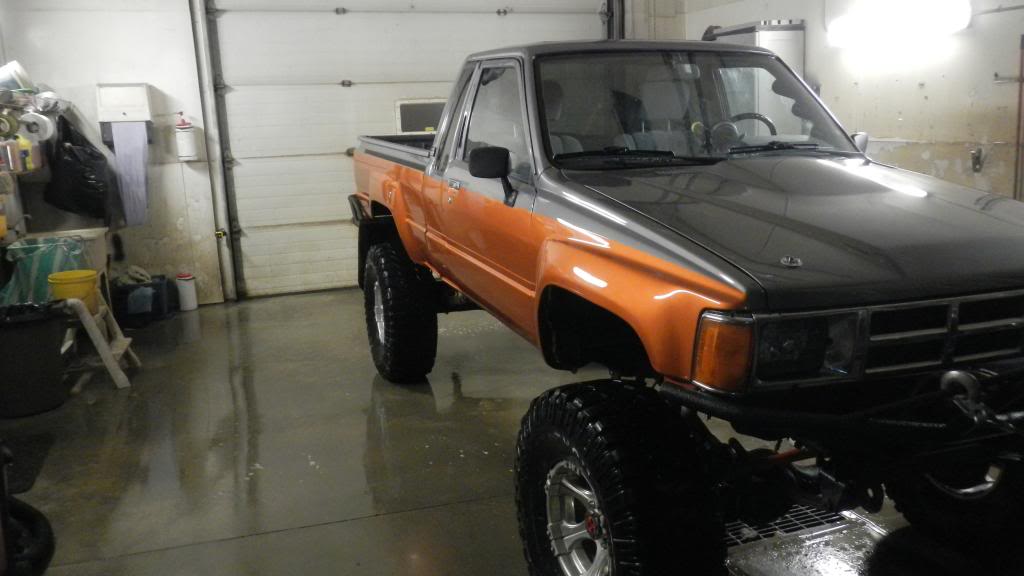
I ended up with this.
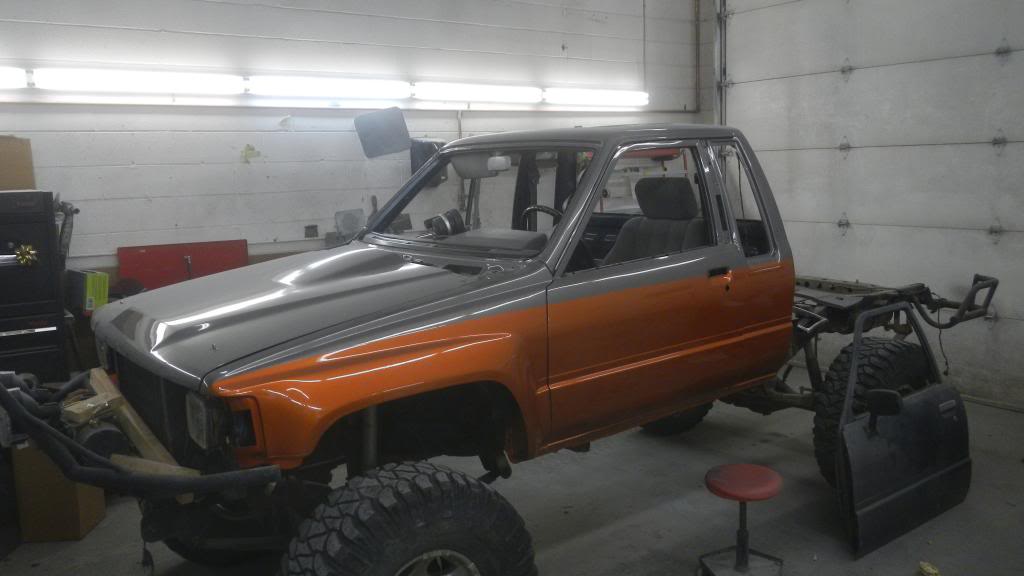
So I drooled for a bit, then started putting it back together.
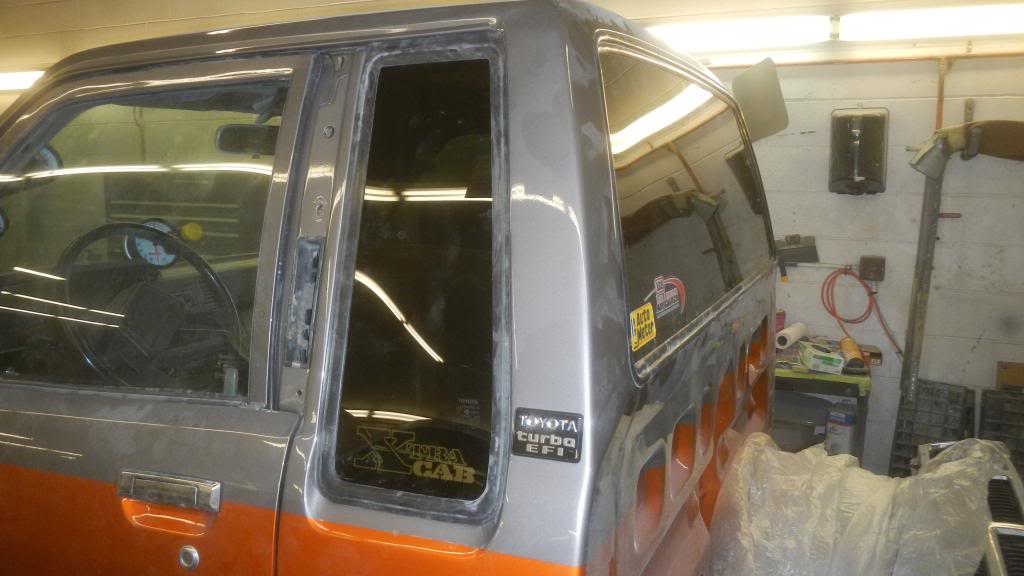
I put in my fancy tinted windows and the rest of the glass first so I could leave it outside during the day so I could use the space for real work.
This meant I had to put the doors together. Broke a few plastic bits but thats to be expected. I also had to make the holes for my mirrors. No big deal. Layed down some tape following the bodylines on the old doors, marked the holes, placed the tape in the new doors and drilled my holes.
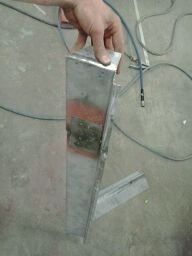
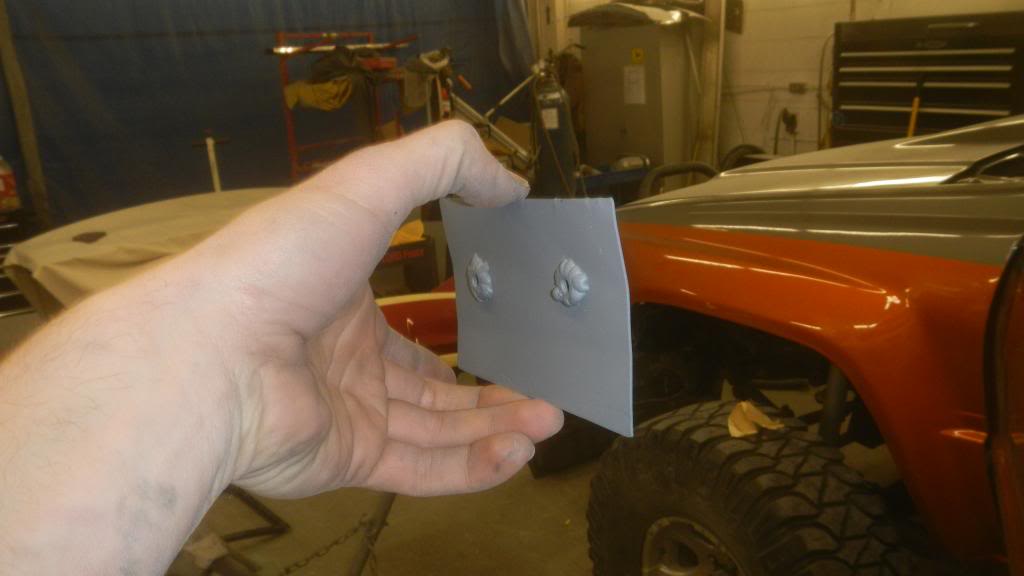
Now the factory doors have a support for the mirror on the inside of the doors. My new doors do not. So I made some. I welded a bolt with the same thread that the mirror screws have into a piece of sheet metal, bent it to fit nicely and I had this.
to attatch it to the inside of the doors I decided seam sealer would be strong enough. So I gooped on the seam sealer, held the support on the inside the door with one hand, held the mirror in place the the other, and threaded in the screws with the other, snugged them down gently and let them sit overnight for the seam sealer to cure.
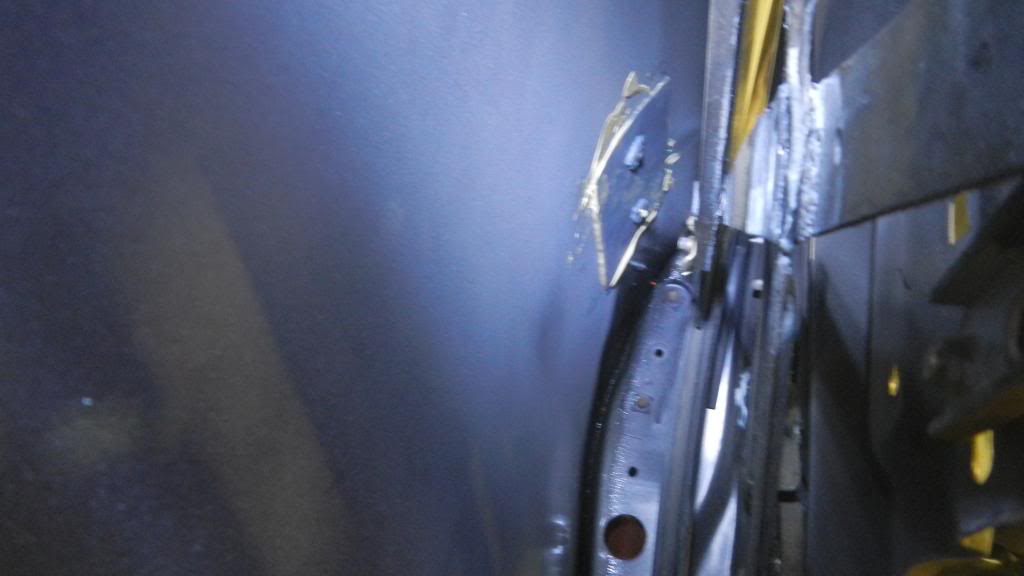
Shot of inside the door at my support.
After that I put corrosion protection in everywhere I could get it. So much it was dripping out onto my paint. A little bit of clean up and you'd never know. Theres more protection in the cab of this truck than a fleet of 50 new vehicles.
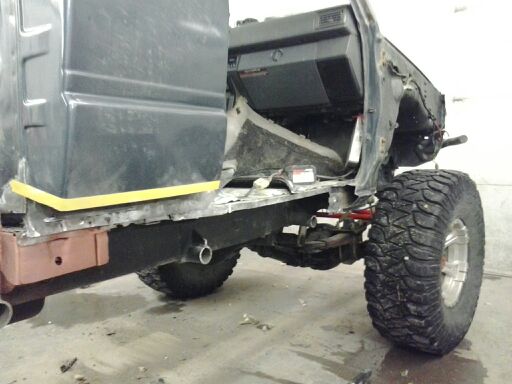
After getting the interior put back together, all the panels aligned, other little thigns done I put on the box
and some advertising
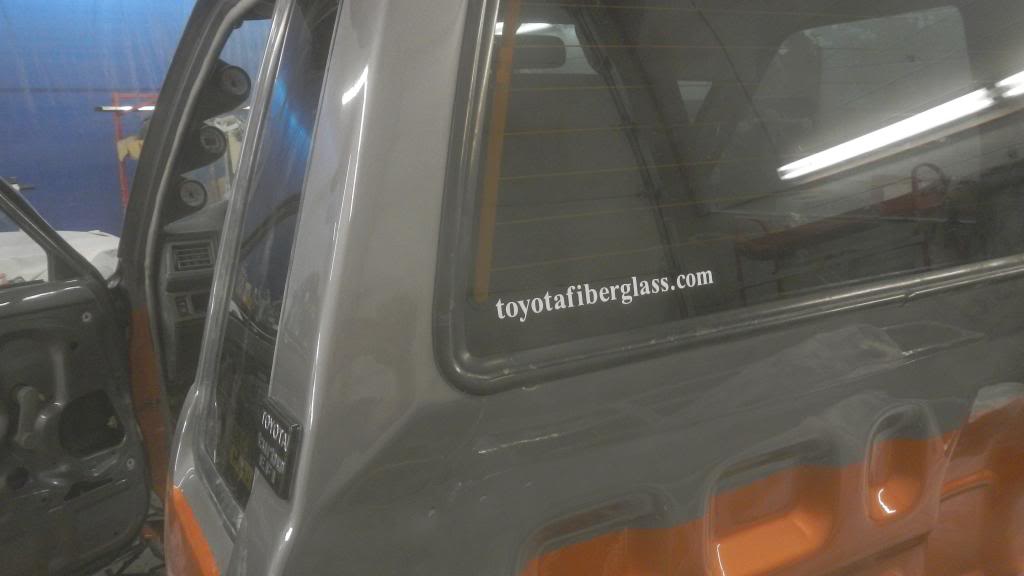
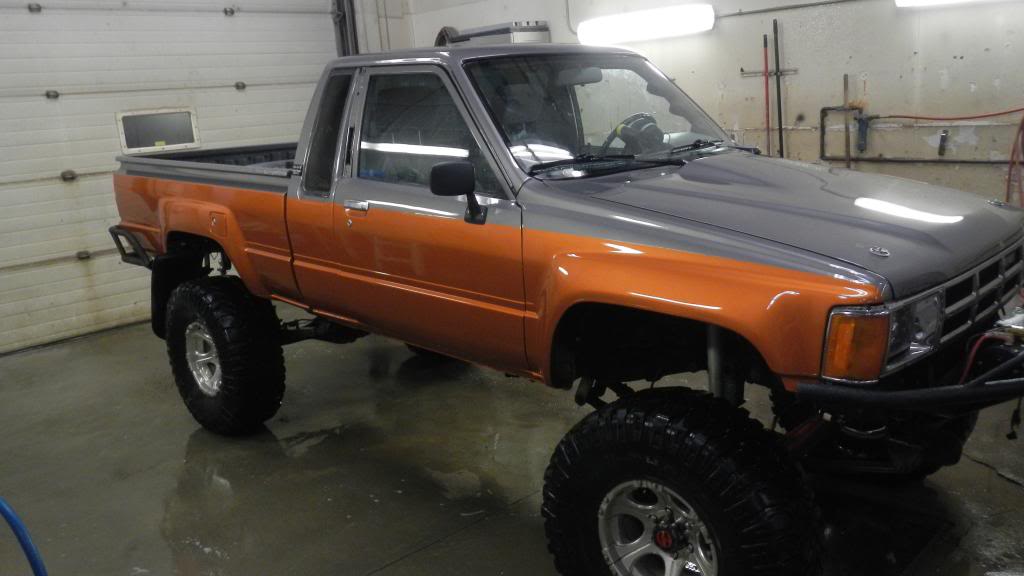
and a solid cleaning and I ended up with this
Now I still have to remove my bumpers, strip the old boxliner off them and my rock sliders, paint black over it so it stays shiny, and put them back on. along with a bunch of other little things but I won't bore you with details.
Sealer
Silver
wait four hours so I don't mess the metallics with the tape. In that time I fixed the dent and the rock chips on the hood. I primed it and the cowl panel as well.
ate some food, once my 4 hours was up I masked off my line.
sprayed my orange
unmasked my silver and sprayed my clearcoat
I stuck around the shop for an hour, cleaned up my mess, once that hour was up I unmasked it and let it sit overnight.
The next day, sunday, in the morning I fit the doors and fenders, blocked out and prepped my hood, masked off the cab again, and repeated the whole painting process for the other stuff.
I ended up with this.
So I drooled for a bit, then started putting it back together.
I put in my fancy tinted windows and the rest of the glass first so I could leave it outside during the day so I could use the space for real work.
This meant I had to put the doors together. Broke a few plastic bits but thats to be expected. I also had to make the holes for my mirrors. No big deal. Layed down some tape following the bodylines on the old doors, marked the holes, placed the tape in the new doors and drilled my holes.
Now the factory doors have a support for the mirror on the inside of the doors. My new doors do not. So I made some. I welded a bolt with the same thread that the mirror screws have into a piece of sheet metal, bent it to fit nicely and I had this.
to attatch it to the inside of the doors I decided seam sealer would be strong enough. So I gooped on the seam sealer, held the support on the inside the door with one hand, held the mirror in place the the other, and threaded in the screws with the other, snugged them down gently and let them sit overnight for the seam sealer to cure.
Shot of inside the door at my support.
After that I put corrosion protection in everywhere I could get it. So much it was dripping out onto my paint. A little bit of clean up and you'd never know. Theres more protection in the cab of this truck than a fleet of 50 new vehicles.
After getting the interior put back together, all the panels aligned, other little thigns done I put on the box
and some advertising
and a solid cleaning and I ended up with this
Now I still have to remove my bumpers, strip the old boxliner off them and my rock sliders, paint black over it so it stays shiny, and put them back on. along with a bunch of other little things but I won't bore you with details.
02-05-2013, 09:10 PM
#49
Registered User
Thread Starter
Join Date: Jul 2009
Location: Rocky Mtn. House AB, Canada
Posts: 727
Likes: 0
Received 1 Like
on
1 Post
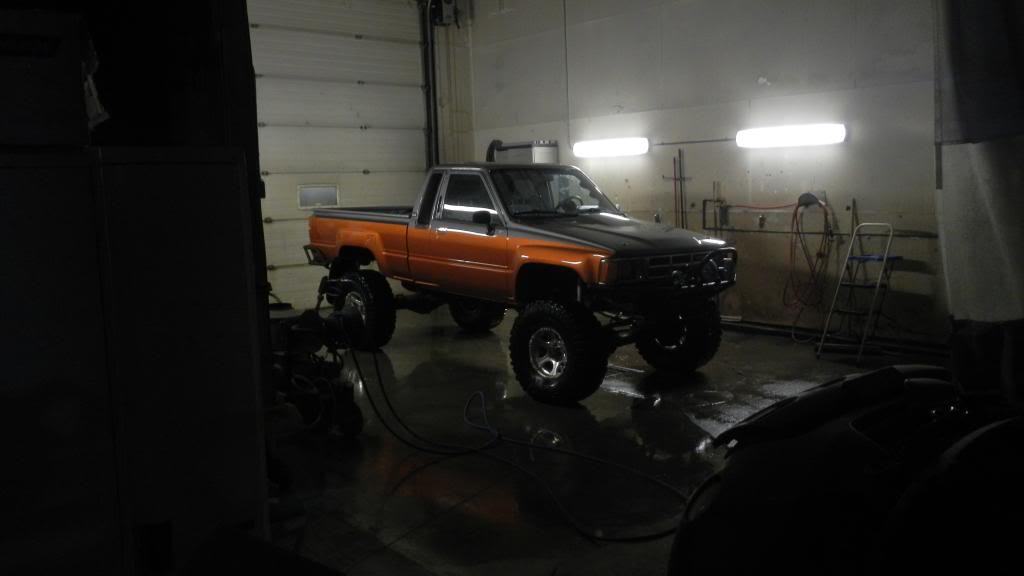
the day after I cleaned it so nicely I took it on a road trip to the big city. the 2.5 hour drive was great. It was so nice to be in my truck again after 3 weeks. I really enjoyed all the looks I got. Whether you like toyota or not, everyone can appreciate shiny. I also pulled my muffler off while the box was off. If its going to look good it may as well make a bunch of noise too. It really helps expose the sound of the turbo which turns even more heads. I love it.
So at this point, from when I first pulled it into the shop and it was blue, to when I detailed it. I have 170 hours into it. At our shop rate of $80 an hour that comes out to $13,000. Thankfully labour is free for me since I do it myself So when a body shop tells you, "I can have that rust fixed and paint the whole thing for $3000" you know they're not doing a good job.
I added up the cost of paint, and it came out to $1400. That doesn't include primer. So around $1800 would be a good rough number. If you came into our shop and had this done you would be charged %20 on top of all the product costs.
Once I get a final cost I'll do a breakdown and how its all split up, what my final cost was, and what your final cost would be if you brought your identical truck to me.
So at this point, from when I first pulled it into the shop and it was blue, to when I detailed it. I have 170 hours into it. At our shop rate of $80 an hour that comes out to $13,000. Thankfully labour is free for me since I do it myself
So when a body shop tells you, "I can have that rust fixed and paint the whole thing for $3000" you know they're not doing a good job. I added up the cost of paint, and it came out to $1400. That doesn't include primer. So around $1800 would be a good rough number. If you came into our shop and had this done you would be charged %20 on top of all the product costs.
Once I get a final cost I'll do a breakdown and how its all split up, what my final cost was, and what your final cost would be if you brought your identical truck to me.
02-07-2013, 10:08 PM
#56
 02-08-2013, 05:31 AM
#57
Registered User
Thread Starter
Join Date: Jul 2009
Location: Rocky Mtn. House AB, Canada
Posts: 727
Likes: 0
Received 1 Like
on
1 Post
Sure, you can have it. But everything has a price!
that 25mpg is based on the imperial gallon. I get around 21-22 using the american gallon. It has turned into a challenge with myself to see what I can do to improve that even more. My record was 30mpg (imperial) so I know its possible. But what I have to do to make it consistent...I dunno.
that 25mpg is based on the imperial gallon. I get around 21-22 using the american gallon. It has turned into a challenge with myself to see what I can do to improve that even more. My record was 30mpg (imperial) so I know its possible. But what I have to do to make it consistent...I dunno.


