Logan's '81 Pickup Build Thread
 11-04-2012, 09:34 AM
#61
Registered User
Thread Starter
So, anyways, I've been doing alot of reading up on getting power from the 22RE series motors.
Alot of people say >200 hp is impossible to get for a streetable motor, as you'd have to turn ~7k rpm, and you'd need an extremely aggressive cam that's undriveable below 3k rpm.
Now, while this may be true for a N/A motor, forced induction may change that. From what I've gathered, the main obstacle for power in a 22RE is the head, as it flows a tiny 130 CFM stock.
So, in order to hit, say, 200 rwhp (this is a 22re mind you, torque will be a bit higher than that), you'd need to first get bigger valves put in, then an extreme port job. You'd also need a good cam (I have no idea what this entails, haven't read much on it.)
Anyways, the bottom end on these motors is forged and extremely tough, so that shouldn't be a problem unless you're going for an extreme 400+ HP target.
So then in order to get the amount of air required to make 200 hp, you'd need a sort of forced induction. Turbo + intercooler if you want to get good boost. Now, the 22RET (Motor I'm starting with), comes with a tiny CT20 turbo stock, and a not optimally designed manifold. This leads to alot of lag, and the manifold design can help contribute to turbo failure.
Now, there's just one aftermarket turbo manifold that I'm aware of. It is made for a T3/T4 hybrid turbo, which offers way less lag than the stock CT 20.
The OTHER main obstacle to power is that the 22RE's engine management system is not good for more power, as in it doesn't react well to changes that would result in a large % increase in horsepower. In order to hit a 200 hp target, you'd need a standalone system such as megasquirt.
Now there's some more stuff that goes into it, but the main obstacles for large horsepower gains are air movement, and engine management.
So, if I want to re-build the 22RET I have now with stronger bottom end parts, and leave the head and turbo stock for now, so I can get it in my truck and running good. THEN once I have my truck on the road I can start concentrating on giving it more power.
This is what I've gathered from everything I've read. Information on this is kind of scarce as engine swaps are a lot more common than high power builds.
 11-05-2012, 05:42 PM
#63
Registered User

Join Date: Oct 2012
Location: Oklahoma
Posts: 171
Likes: 0
Received 0 Likes
on
0 Posts
I got another idea about your knock noise, if the cam saddles are really worn on the two ends the cam will rock and make a pretty deep noise. That's what what mine did anyway, bad head and cam, not sure if the head can even be worked.
11-05-2012, 06:50 PM
#64
Registered User
iTrader: (1)
Join Date: Dec 2010
Location: new mexico
Posts: 393
Likes: 0
Received 0 Likes
on
0 Posts
One of my co-workers has a 88 22rte truck, bone stock. He blew up the turbo a few years ago and got a turbo off of a mitsu diesel. No Idea which one, but the truck gets up and goes, not a ton of lag. Then Last week, he hooked up a manual boost control that he got off the net. Not sure what kind of boost he is hitting, but the thing dips.
11-09-2012, 02:56 PM
#65
Registered User
Thread Starter
http://www.ebay.com/itm/Toyota-20R-2...2791cd&vxp=mtr
Thinking about getting one of these to make my own manifold instead of buying one. They're 5/8" mild steel so it's good for 1000000000000 PSI boost. IF I were to make a manifold, would using steel tubing be better than just using 3/16" plate? I'm thinking about making one with a T3 flange (no idea where to find a pattern for that) then making an adapter for the CT20 so I can run the stock turbo setup while I collect parts for more power.
I may draw something up in paint or on paper to show you guys what I'm talking about. As for progress on my truck our shop is being renovated so I moved it out and I can't work on it much.
11-11-2012, 03:41 PM
#67
Registered User
Thread Starter
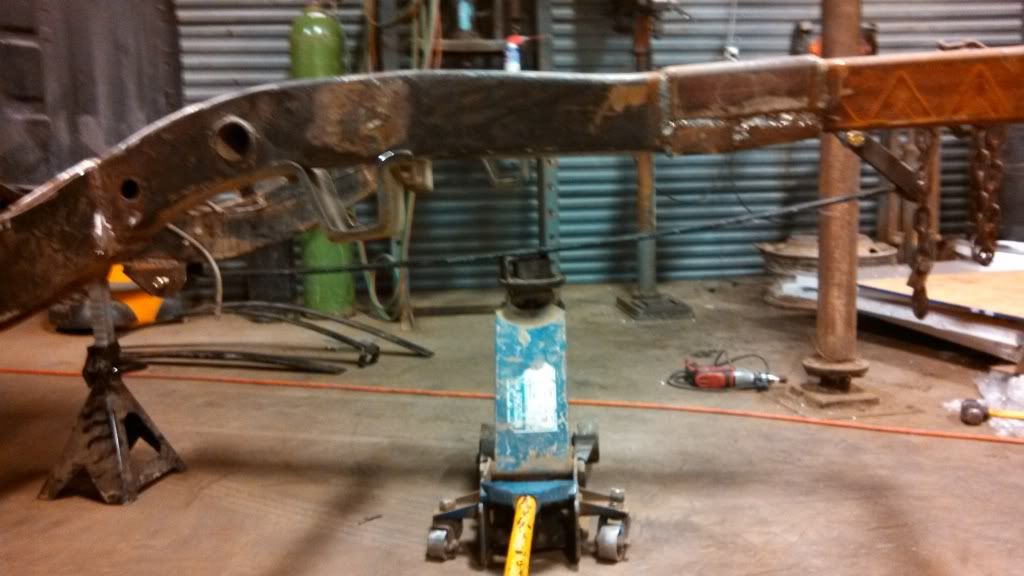
Getted some stuffs done this weekend. Round 2 on the back end went well. Used a chopsaw to cut it off this time. I got them pretty close last night, but then the left side was off this morning, so I heated it with a torched then hammered it into place, tack welded one of the welds that broke after heating/hammering, then cut and tacked the back piece on before I rewelded the left side. I've finished the outside reinforcement on the left side, I'm going to put some 1/8" plate on the inside, then do the same on the right side.
I also put a plate over my front/rear hangars, so I could get more weld on it.

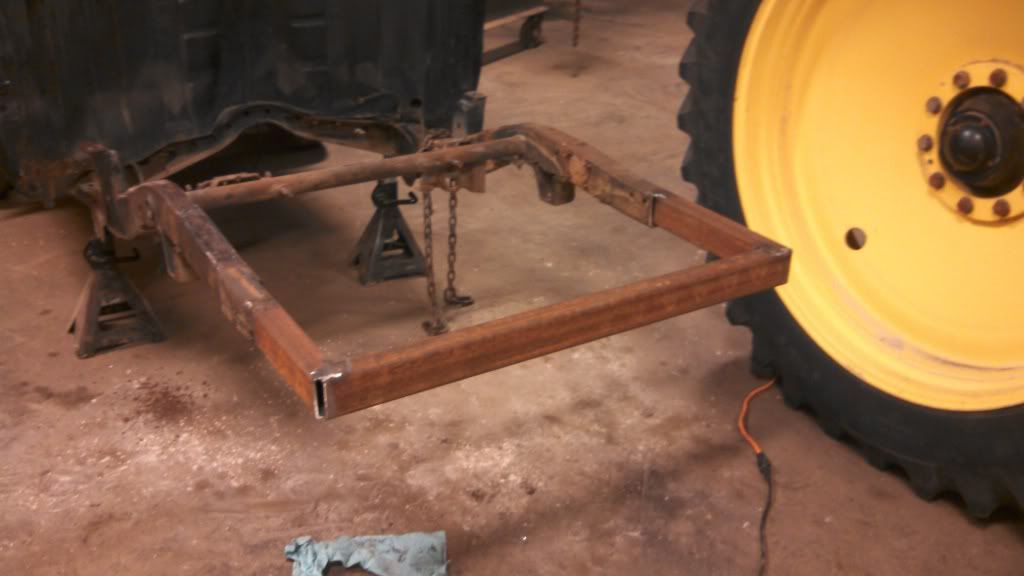
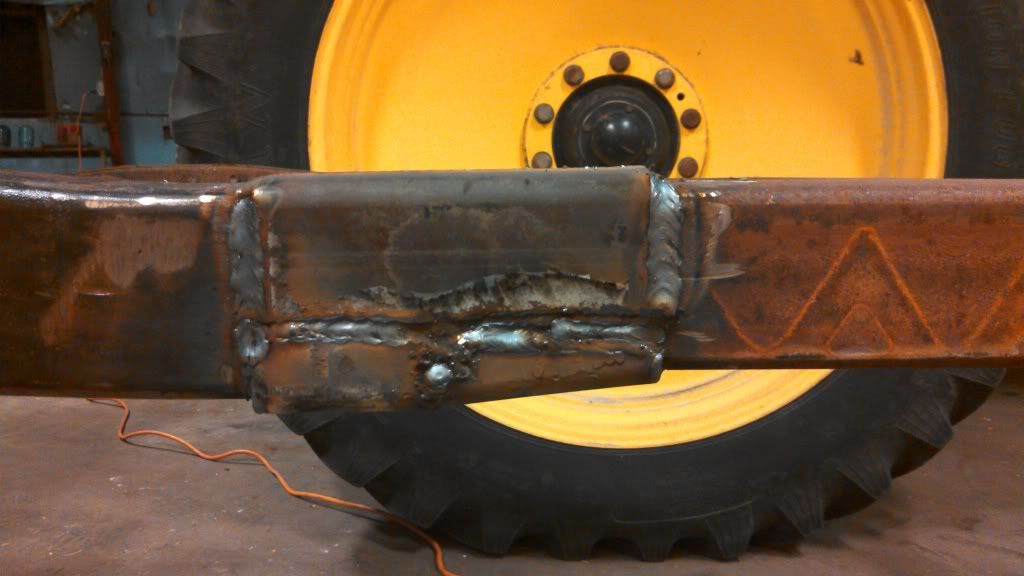

The gap between those pieces in the 3rd pic will probably be filled with weld and ground smooth.
I also put a plate over my front/rear hangars, so I could get more weld on it.
The gap between those pieces in the 3rd pic will probably be filled with weld and ground smooth.
11-14-2012, 07:05 AM
#68
Registered User
Thread Starter
Ok guys, I need some help making front spring packs. I have 1981 rear springs and 1986 rear springs. If I were to put these two packs together would it be able to support the weight of the engine + kinda heavy bumped I plan on putting on this truck?
I can cut the leaves down to whatever configuration I need, I just need to have enough spring to hold the weight of the engine.
I can cut the leaves down to whatever configuration I need, I just need to have enough spring to hold the weight of the engine.
11-14-2012, 07:17 AM
#69
Registered User
iTrader: (1)
Join Date: Dec 2010
Location: new mexico
Posts: 393
Likes: 0
Received 0 Likes
on
0 Posts
This should help,
http://www.pirate4x4.com/forum/toyot...front-faq.html
http://www.therangerstation.com/tech...springrate.htm
http://littlekeylime.com/MrN/mrnimages/leaf_springs.png
http://www.pirate4x4.com/forum/toyot...front-faq.html
http://www.therangerstation.com/tech...springrate.htm
http://littlekeylime.com/MrN/mrnimages/leaf_springs.png
Last edited by toastyjosh; 11-14-2012 at 07:23 AM.

 11-16-2012, 04:53 PM
#73
Registered User
Thread Starter
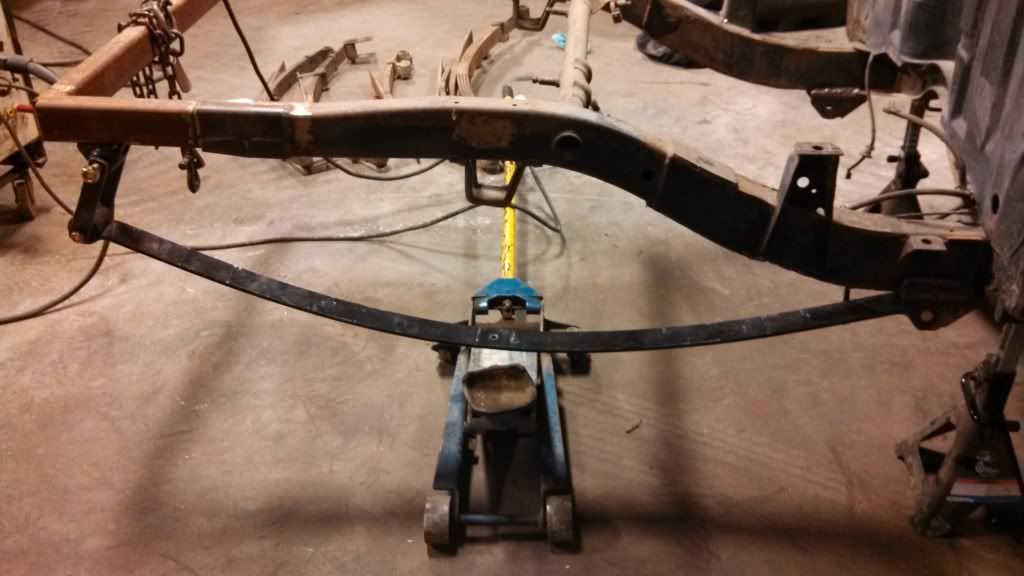
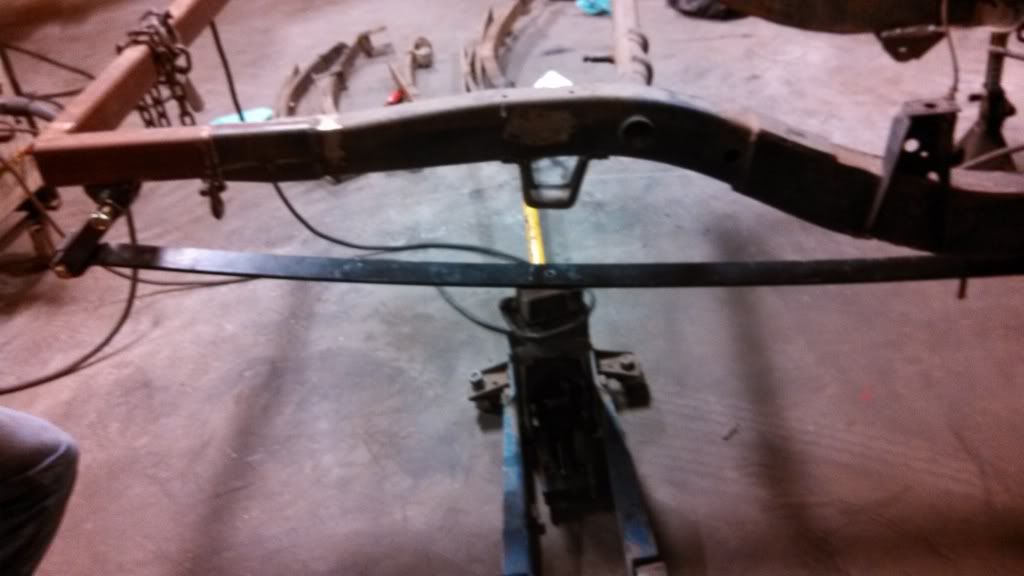
Almost ready to put my rear springs on. I still need to get center pin bolts, front and back bolts, make shackles, and put the other spring pack together. I'm just going to put them on temporarily with the axle and tires to get shackle placement, then it's all coming back off for bushings and stuff. Also, what bolt do I need for a center pin on the RUFs? And shorter springs are stiffer right? I have the steering box, and I'm going to make a drop hangar, then start on that next. However, I can't really afford high steer right now so It'll probably have no steering, not that I can drive it anyways lol.
11-17-2012, 03:38 PM
#74
Registered User
Thread Starter
Ok so I spent $30 in bolts alone, then another $35 or so for a 3/4" drill bit. Stuff is still expensive, however, I charged it to the farm since technically it is a farm expense.
And so I've got the red hooks welded on the front of my frame, where someone welded a strip of 1/2". Should I weld it on better, then weld my hangar to that, or should I cut it off? Or even replace it with more 2x3? I think I'm falling in love with 2x3x3/16" btw, it's just such a great invention.
And so I've got the red hooks welded on the front of my frame, where someone welded a strip of 1/2". Should I weld it on better, then weld my hangar to that, or should I cut it off? Or even replace it with more 2x3? I think I'm falling in love with 2x3x3/16" btw, it's just such a great invention.
11-18-2012, 04:50 PM
#76
Registered User
Thread Starter
Sadly the sickle pattern is just rust from the sickle sitting on top of it. Tonight I did manage to get the FUBARD bushings out of the springs and put new ones in temporarily. I made a 6" shackle tonight, and hopefully next time I can get the hangar welded on there. Then I once that's done I can do the other spring and get it lightly bolted to the axle so I can roll it around again.
11-18-2012, 05:00 PM
#78
Registered User
Thread Starter
Well I've found one site that sells a single bushing, but it's... RED. Oh well, I guess I'll just put it in the front, you can't see it there anyways.
11-29-2012, 04:44 PM
#79
Registered User
Thread Starter
It's been a while since an update. Tomorrow I'm going to get a 1/2" drill bit, (2) 1/2"x3 1/2" grade 8 bolts for center pins. The holes are rusted out a bit I'd like to have a nice tight fit. Then I need a grinding stone thing for a drill, so I can clean out the spring eyes. I'm going to drill another shackle, put crossbraces on both, then hook the axle up loosely so I can measure for shocks. I see alot of you mount shocks at a 45 degree angle. Is that best or should I try to mount them straight? I'm going to build a flatbed so I can either mount the bed higher or make the shocks go into the bed floor a bit.
Going to make sure the pinion angle and all that is up to snuff, then clean the hell out of the housing so it's ready for paint. I will try to get flex pics, even if it means temporarily mounting something heavy to the back of the truck.
Also, when you mount leaf spring bushings, MAKE SURE there is no rust in the spring eyes if you plan on taking the bushings out again. If you can't get them in by hand you need to clean more. I learned that the hard way, luckily I didn't mess up the bushing too bad getting it back out.
11-30-2012, 05:45 PM
#80
Registered User
Thread Starter
Got something mocked up. I stood on that spring alone ~ 160 lbs, and so 2 packs w/ an axle and tires should be a bit less than that right? Because the shackle was 5 or so degrees off negative. I think that is about the shackle angle I want. Total spring travel was 9" from fully compressed to me standing on it. Does that sound about right? Should I buy shocks now or wait until I can put an axle under it and test?
Also, never buy craftsman cobalt drill bits. Mine went to ˟˟˟˟ after drilling halfway through the overload. It wasn't even hard drilling, barely anything was actually being drilled. Just trying to get the rust out for a good fitting center pin.
Last edited by Logan81Pickup; 11-30-2012 at 05:47 PM.


