Yota army guys 1990 4runner 3.4l swap
 11-07-2010, 06:24 PM
#81
Registered User
Thread Starter
More accomplished
Since I couldn't install the body lift I decided to go ahead and paint all the chrome on the front black, to include the bumper.
I only accomplished removing everything and getting it sanded and the primer on so I will be painting it tomorrow.
I only accomplished removing everything and getting it sanded and the primer on so I will be painting it tomorrow.
Last edited by YOTAARMYGUY; 11-07-2010 at 06:30 PM.
 11-10-2010, 06:59 PM
#82
Registered User
Thread Starter
Update
Spray painting isnt as easy as I thought. It actually looked really good after the primer and paint. The clear coat is what got me...I will not be spraying a clear coat on it again! I have spent the better part of last night and this afternoon scraping, scrubing, and sanding all the paint and primer back off. I used Easy Off Heavy Duty oven cleaner to eat away most of the paint.
I was going to take pictures but I was too ashamed. I will get pics up of the final product.
On a side note. Got my ball joint spacers, panhard drop bracket, and body lift hardware from 4 crawler in the mail today!! also got my 60" hi-lift jack in. Now all im waiting for is my wiring harness and fj80 coils to come in!!!!!!!!!
11-10-2010, 07:33 PM
#83
Registered User
Spray painting isnt as easy as I thought. It actually looked really good after the primer and paint. The clear coat is what got me...I will not be spraying a clear coat on it again! I have spent the better part of last night and this afternoon scraping, scrubing, and sanding all the paint and primer back off. I used Easy Off Heavy Duty oven cleaner to eat away most of the paint.
I was going to take pictures but I was too ashamed. I will get pics up of the final product.
On a side note. Got my ball joint spacers, panhard drop bracket, and body lift hardware from 4 crawler in the mail today!! also got my 60" hi-lift jack in. Now all im waiting for is my wiring harness and fj80 coils to come in!!!!!!!!!
I was going to take pictures but I was too ashamed. I will get pics up of the final product.
On a side note. Got my ball joint spacers, panhard drop bracket, and body lift hardware from 4 crawler in the mail today!! also got my 60" hi-lift jack in. Now all im waiting for is my wiring harness and fj80 coils to come in!!!!!!!!!
I read this book:
http://www.amazon.com/How-Paint-Your.../dp/0879385235
It changed my perception on painting myself. I have achieved better paint jobs that many I have paid for, from spray cans no less.
The secrets are in the area prep and the follow-through. Worst case scenario, you are going back to square one like you just did anyways.
What did you paint? If it was the chrome bumpers, you have to really rough those suckers up to get a lasting finish.
11-11-2010, 07:48 AM
#84
Registered User
Thread Starter
I'm going to go to books a million today to see if they have that book. I tried the wet sand with 1000 grit paper. I think th problem was my spray technique. I was spraying in the dark so there were blotches and all kinds of nasty stuff. What kind of spray can clear coat would you recommend?
11-11-2010, 09:46 AM
#85
Registered User
Thread Starter
I just went up to books a million and couldnt find it so I may have to order it. It is suppose to thunderstorm today so I may not be able to get as much done as I had hoped. I still need to strip the skid plate so I will probably be doing that today. Also, is there a clear coat that doesnt put a shine to the paint. All I could find was the "gloss" kind.
11-12-2010, 07:51 AM
#86
Registered User
I just went up to books a million and couldnt find it so I may have to order it. It is suppose to thunderstorm today so I may not be able to get as much done as I had hoped. I still need to strip the skid plate so I will probably be doing that today. Also, is there a clear coat that doesnt put a shine to the paint. All I could find was the "gloss" kind.
I have never found a semi-clear or dull clear finish in a can yet. I usually just shoot semi-gloss black (which is usually the color of what I want to not be glossy) straight with no final coat.
11-22-2010, 10:52 AM
#87
Registered User
Thread Starter
Update!
Got all the suspension stuff on so I figured I would post some pics...
Stock......
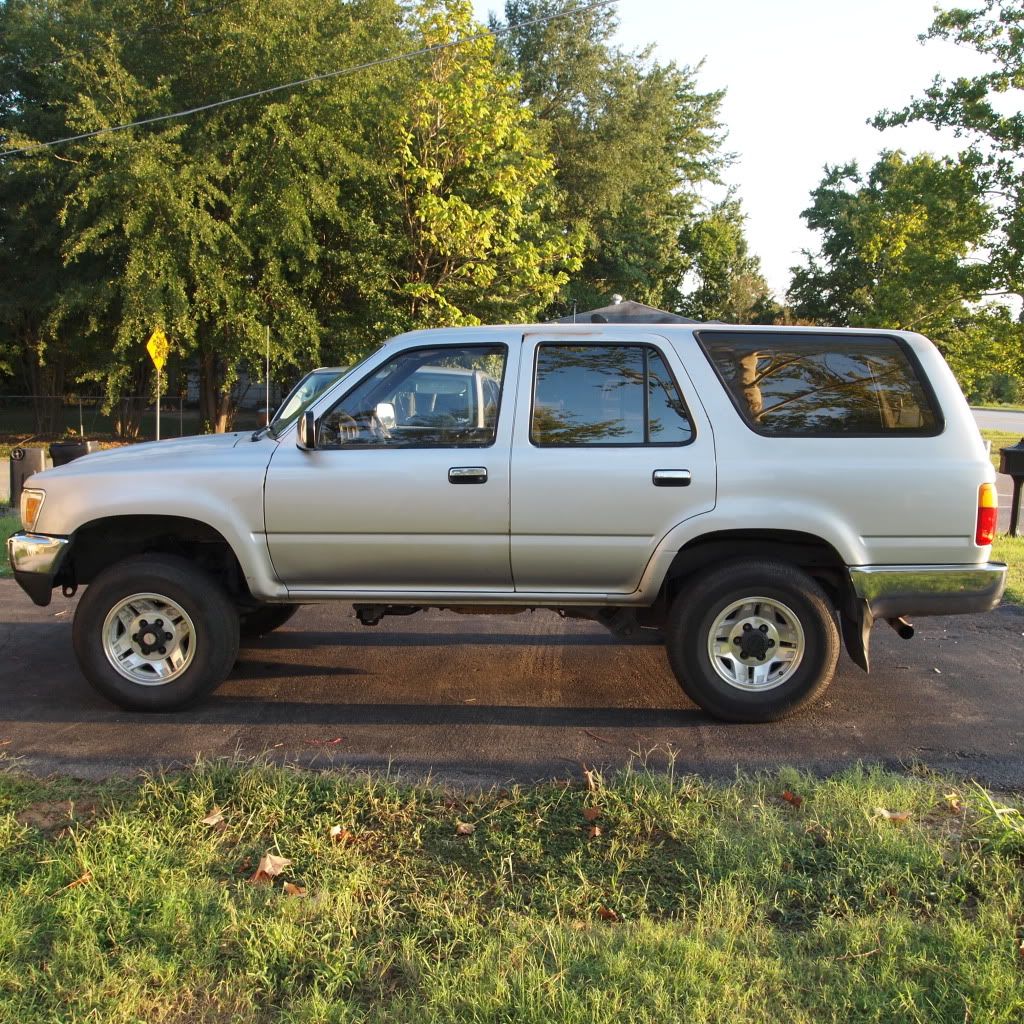
Stock with 33x12.5R15.....
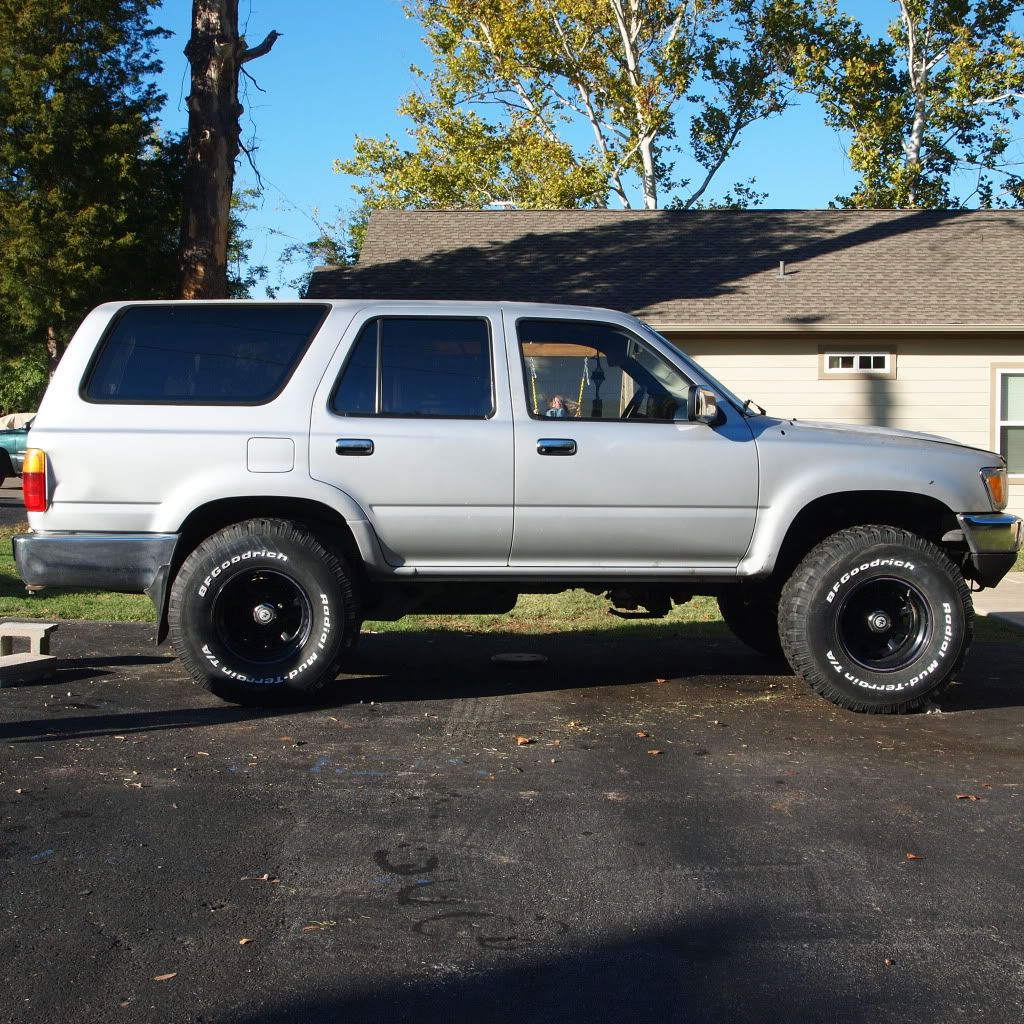
33x12.5R15 and 2" body lift....
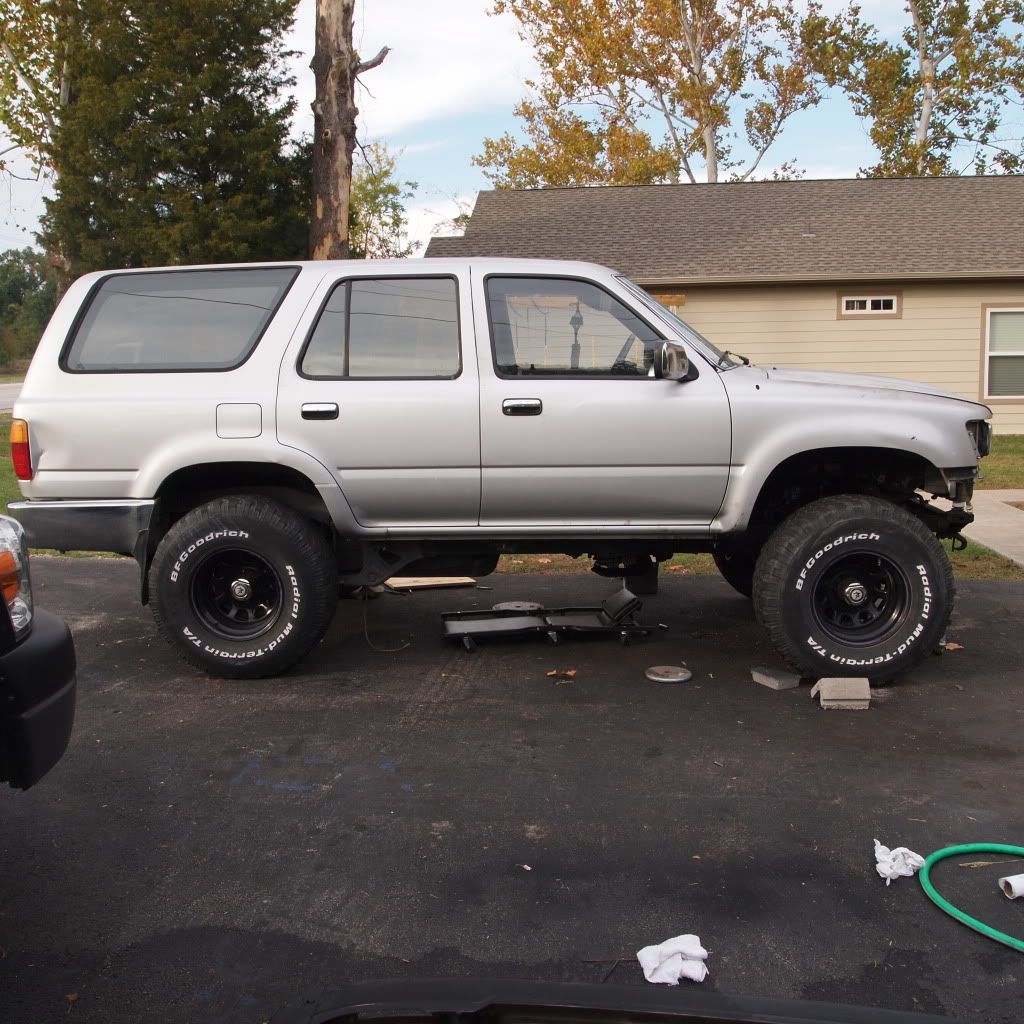
33x12.5R15, 2" body lift, 97 LC coils 7 wrap (2x passenger side coils) and 1.5" Ball joint spacers
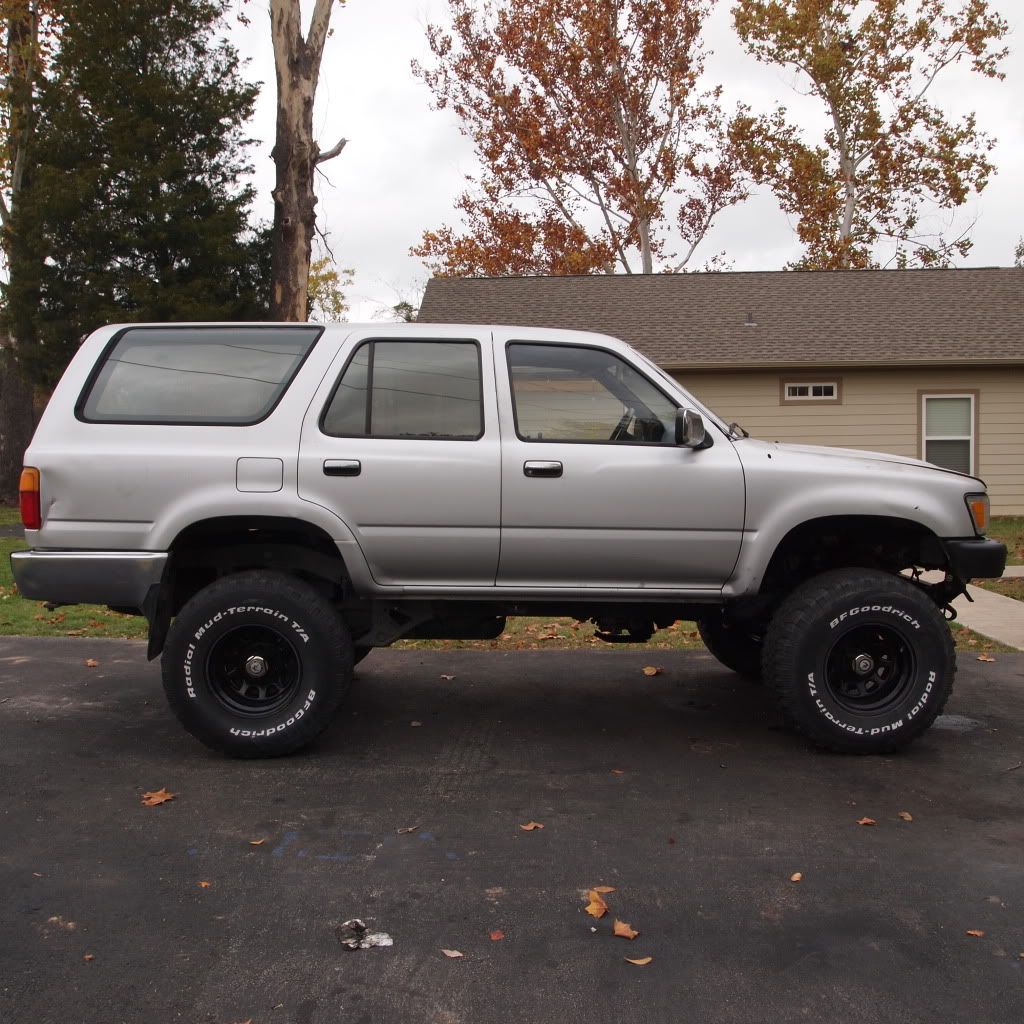
I would like to get some wheel spacers but I'm going to check the tuck room. I'm also thinking about switching to 10.5's instead of 12.5s due to the distance driving I plan to do with it. While ism waiting on the wiring harness to come back in I think im going to start on the interior.
oh and bumper and grill are painted.....I will be redoing it though once/if I get a warn bumper for Christmas/ next year.

Stock......
Stock with 33x12.5R15.....
33x12.5R15 and 2" body lift....
33x12.5R15, 2" body lift, 97 LC coils 7 wrap (2x passenger side coils) and 1.5" Ball joint spacers
I would like to get some wheel spacers but I'm going to check the tuck room. I'm also thinking about switching to 10.5's instead of 12.5s due to the distance driving I plan to do with it. While ism waiting on the wiring harness to come back in I think im going to start on the interior.
oh and bumper and grill are painted.....I will be redoing it though once/if I get a warn bumper for Christmas/ next year.
11-22-2010, 04:03 PM
#88
Registered User
Thread Starter
Ooooooohhhhhhh yeeeeeaaahhhh!
Just got an email from Cliff over at Toyonlyswaps,.....MY HARNESS IS ON ITS WAY!!!!!!! Holy Jesus I cant wait to get this thing running!!!!!!!!

 :bow down:

:bow down:
11-22-2010, 05:38 PM
#89
Registered User
Out of curiosity, what did that harness cost you?
11-22-2010, 05:57 PM
#90
Registered User
Thread Starter
Thanks! I am really satisfied with the stance, I am just not so happy about the height. I am going to be looking at some wheel spacers as soon as I take it somewhere to check the tire tuck clearance. I am also going to see how low the bumpers and sleeper platform take it before I do anything crazy.
Out the door was 670.00 650.00 without shipping. Really beat the upper 7 hundreds ORS was going to charge w/o shipping.
The way I understood is you pay the 650.00 and cliff will source anything missing....i.e. obd2 plug, broken plugs, missing wires, etc.... He had to fix and find quite a few things for my harness and didn't up the price at all. He also 100% guarantees it to be a plug and plug and play harness upon completion. And BY FAR, the BEST customer service I have come across so far. Hopefully his excellent customer service holds up if there is anything wrong with the harness.
Oh, and he sends back any unused plugs, wires, etc from your original harnesses that he doesn't use.
Last edited by YOTAARMYGUY; 11-22-2010 at 06:05 PM.
11-22-2010, 06:01 PM
#91
Registered User
Thread Starter
Coil springs
Here is the difference between my runners coils and the LC coils. (I got two passenger side coils from cruiserparts.net for 90.00). I used a small ratchet strap to compress the coil......tons of fun!!!!
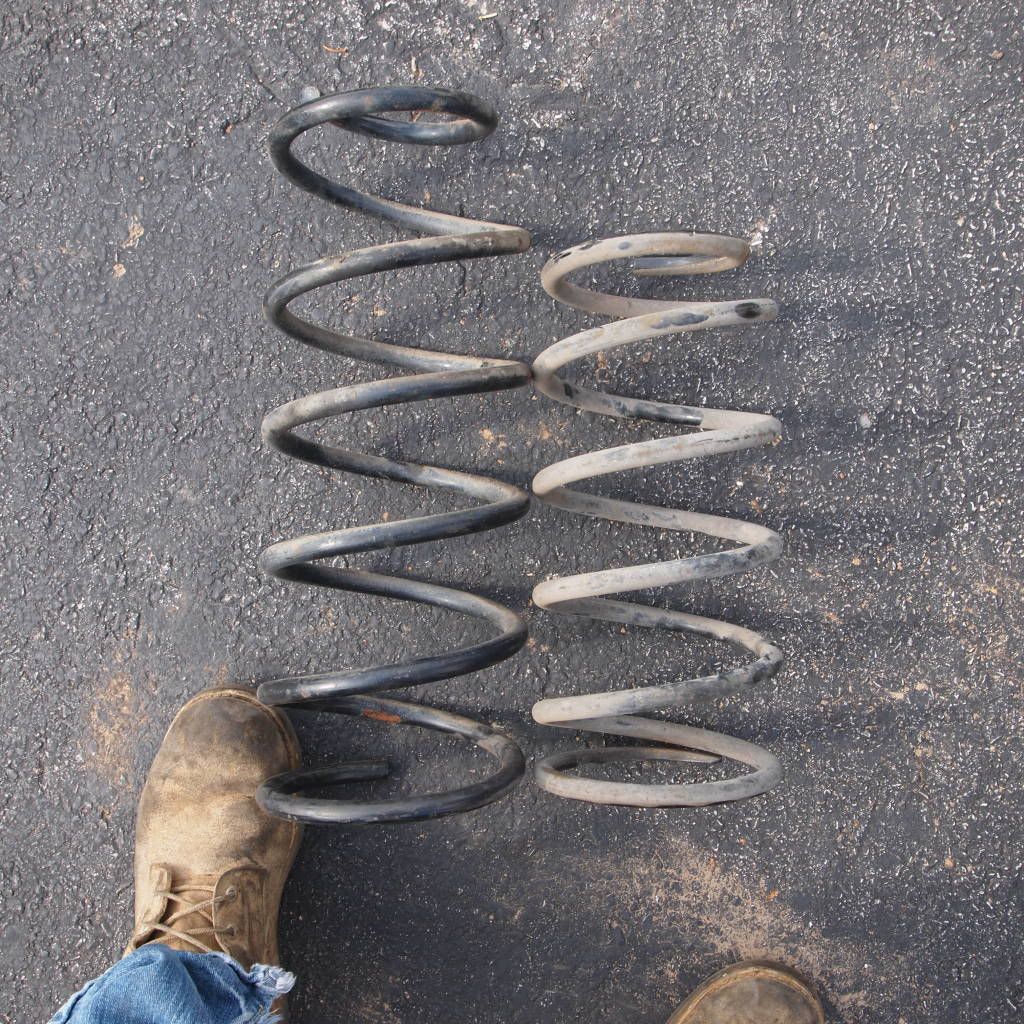
Last edited by YOTAARMYGUY; 11-22-2010 at 06:03 PM. Reason: added pic lol
12-12-2010, 12:31 AM
#93
Registered User
Thread Starter
Hey Man,
Sorry to leave you guys hangin! Yes, I got the harness in, I want to say about two weeks ago, give or take. I hope to finish installing it tomorrow (I have had like no time!). I started to install it last week but had to send cliff a few questions before I felt comfortable with going any further. The 3.0 transmission harness, as im sure everyone knows, runs down the passenger side. The T100 transmission harness, runs down the drivers side. So, I called cliff to see if he purposely left it that way or if I needed to send it back. He says it should work as is....I will be confirming this tomorrow. I have already got all the transmission plugs hooked up, I am just needing to see if the Starter plug reaches from the transmission harness (The starter plug is no longer within the battery harness).
Wish me luck! Tomorrow very well could be the first day I get to drive my baby around!!!
01-08-2011, 02:54 PM
#95
Registered User
Thread Starter
Well, I was hoping that my next post in here would be about how great my 4runner is running...That is definitely not the case! I finally had some time to finish up getting the wiring harness installed. I extended the starter plug wire and wired in the 3.4's alternator plug and got it all plugged in to its appropriate ports. However, now I am completely lost! I can not for the life of me remember where the positive batter went / goes. I also can not figure out how the others have hooked up there igniters and Evap stuff. Here is a few pictures of what im talking about:
Where does the smaller wire go? Do I extend it and Hook it up to the negative terminal? Or, do I extend it and hook it up to the positive terminal (The 3.4 fuse box has a positive wire coming out of it....The 3.0 fuse box has a negative wire coming out)?

What else hooks up to this positive terminal? Right now there is only a big fat black/Red wire that goes down to the starter........

I guess what I am confused about is where is the positive wire in all of this????
Where does the smaller wire go? Do I extend it and Hook it up to the negative terminal? Or, do I extend it and hook it up to the positive terminal (The 3.4 fuse box has a positive wire coming out of it....The 3.0 fuse box has a negative wire coming out)?
What else hooks up to this positive terminal? Right now there is only a big fat black/Red wire that goes down to the starter........
I guess what I am confused about is where is the positive wire in all of this????
01-08-2011, 03:31 PM
#96
Registered User
I can't imagine how that wire going into your fuse panel is a ground. I would think that its the positive feed from the battery.
Wouldnt hurt to open it up though and have a look. Yours is a bit different that mine.
https://www.yotatech.com/forums/f160...23/index7.html
Off the positive of my battery I have a 4ga to the starter, 4 gauge to the alternator, and 4 gauge over to the fuse block that you show in your pic.
Wouldnt hurt to open it up though and have a look. Yours is a bit different that mine.
https://www.yotatech.com/forums/f160...23/index7.html
Off the positive of my battery I have a 4ga to the starter, 4 gauge to the alternator, and 4 gauge over to the fuse block that you show in your pic.
01-08-2011, 04:04 PM
#97
Registered User
Thread Starter
I'm thinkin im going to have to crack it open tomorrow too. I found some pictures in evoltas thread where I think he is doing what i need to do.
Here are the pics from his thread. I think that red wire he is installing is the black wire on my set-up. I still cant figure out why its on the ground cable of the 3.0 though.


Here are the pics from his thread. I think that red wire he is installing is the black wire on my set-up. I still cant figure out why its on the ground cable of the 3.0 though.
01-08-2011, 08:57 PM
#99
Registered User
Yeah, if that first pict of yours is the ground then it is weird that it would be leading into the 3.0 fuse block. Most I have seen go to the inner fender for a secondary ground.
You should have the following when done:
Positive:
From battery to starter large lug.
From battery to alternator large lug.
From battery to fuse block main feed.
(This one would have Y'ed off of the old positive cable)
Negative: (ground)
From battery to engine block
(usually a bolt right above the oil pan level)
From engine block to firewall
(usually right in the back of motor center)
If you are relocating the battery to the driver side of vehicle, it is much easier to just use the 3.4 battery/alternator harness. Then all you should have to do is extend the 3.0 fuse block feed around to the passenger side and all will be good.
The larger the better on the gauge wire.
01-08-2011, 09:17 PM
#100
Registered User
you didnt happen to have a dual post battery did you? two positive cables?
This was your truck from the start? Not something you bought as is.
Also, can you take some wider shots of the battery wiring and post them up
This was your truck from the start? Not something you bought as is.
Also, can you take some wider shots of the battery wiring and post them up


