
W56 Top Shift Rebuild With Marlins Kit - Pics Along the Way
 09-07-2012, 12:13 AM
#81

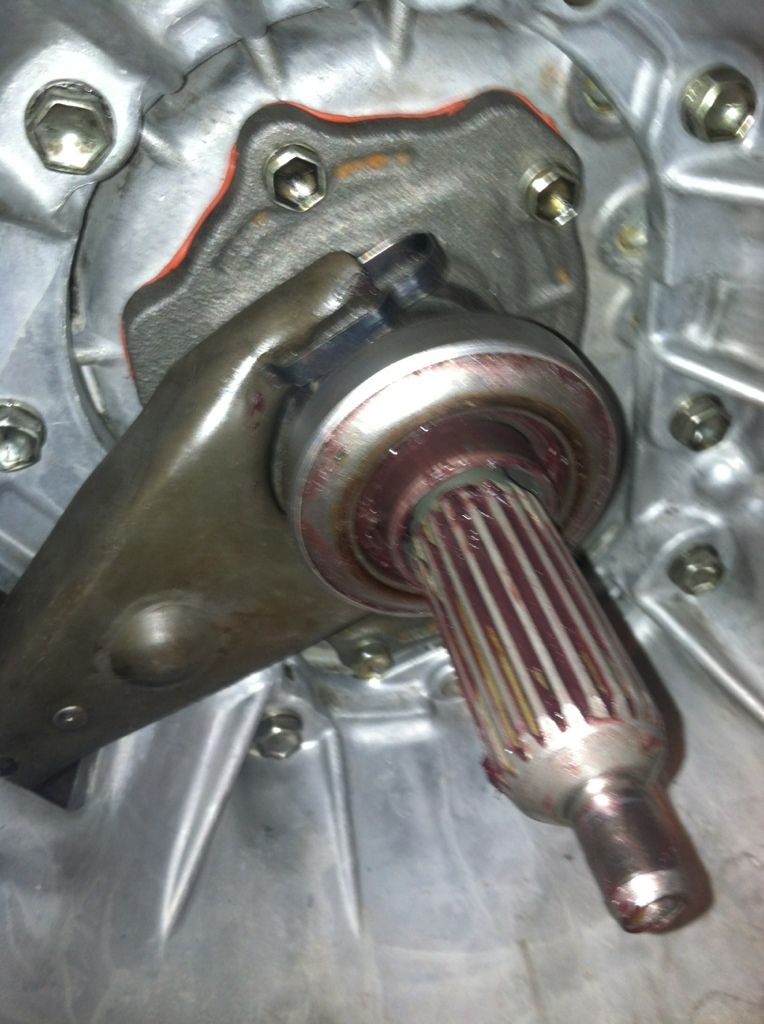
Fork being installed, be sure to grease the "ball" that it slides onto.
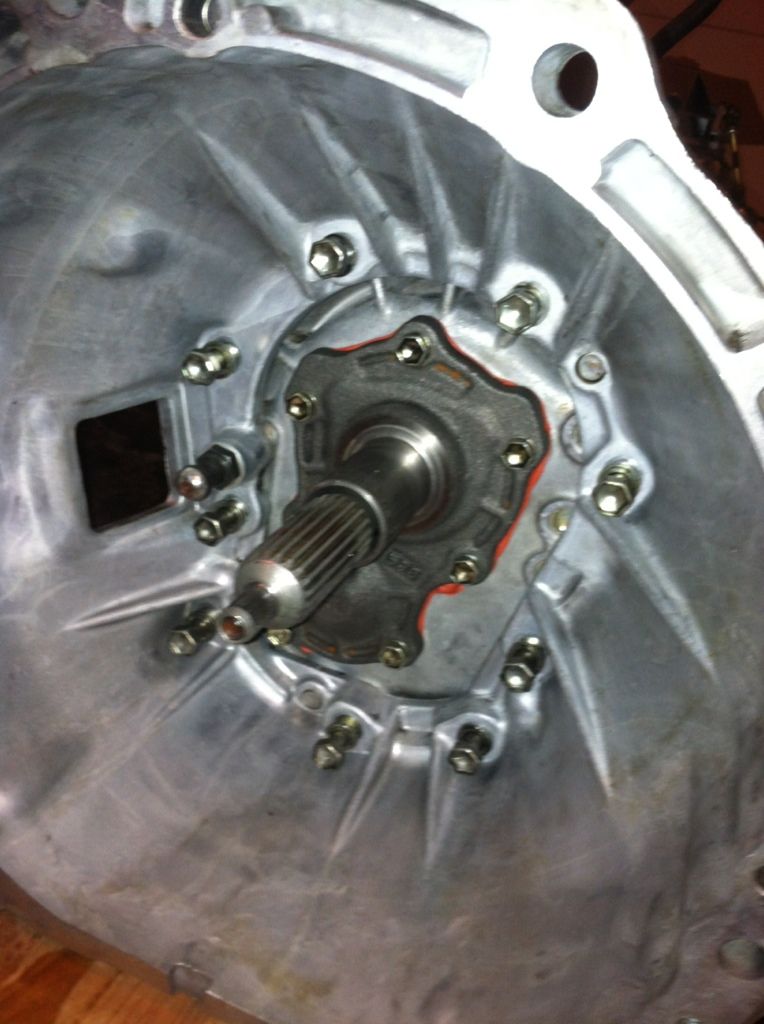
The throwout bearing installed. Look at the orientation of the bearing and clips. I greased it well too.
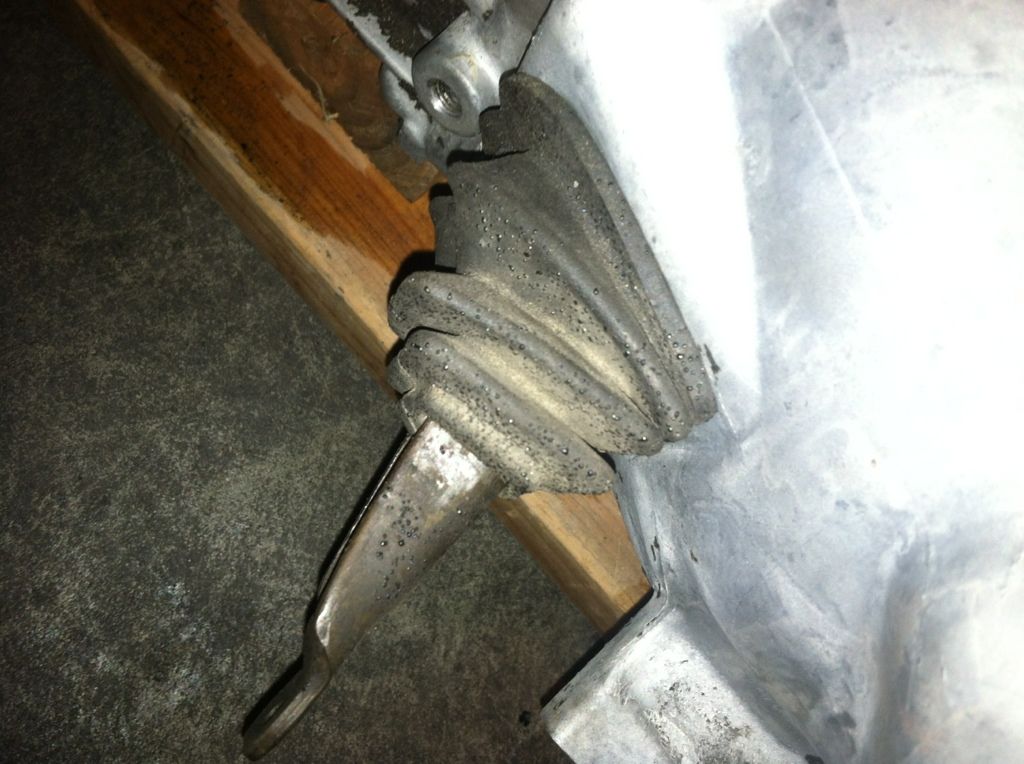
Picture of the shift boot installed:
The tranny rebuild is finished and appears to be working correctly when tested without power. It shifts well (just going through the gears. It will hopefully be installed tomorrow and then hopefully a test drive in the next week or so. I'm waiting for a few more parts that I will likely install before test driving it. I also have to pick of some cheaper oil to run in the tranny and transfer since the transfer was likely contaminated with some of the oil that was in the tranny. I will drive 250-500 miles and then change it out for full synthetic goodness.

 09-07-2012, 10:07 AM
#84
Thanks, I tried to take as many as possible, but sometimes when you start working on something you forget to take a some pics because you get caught up in the assembly. The only thing left to test now is the actual driving ability of the new tranny. Everything seems "A OK".
09-07-2012, 08:42 PM
#85
Got the tranny installed today. Should have oil in the tranny and tcase tomorrow or sunday and take it for a test drive to see how well it works. I'll post up the experience then. If anyone has questions, let me know. I'd be more than happy to share what I know.
09-08-2012, 04:03 PM
#86
What do you guys think for oil in it for the first 500 miles or so? I don't really want to put MT90 in there just to change it out after a few hundred miles. Seems like a waste to me.
I was thinking of something like this: http://www.walmart.com/ip/Super-Tech...allon/16795067
I would fill the tranny and tcases with it and then change it over to mt90 when the first few hundred miles are over. I know everyone says that GL4 for the tranny is the way to go. Any thoughts on using the product for about 500 miles or so and then change it out for good stuff after that?
09-09-2012, 07:38 PM
#87
Well..... the final outcome of the tranny rebuild was determined tonight. I took it for a drive and I must say, IT IS 1000 TIMES BESTTER! It shifts perfectly and is as quiet as a mouse. Can't wait to get the break in period of about 500 miles over and put some MT90 in there and make the tranny even happier. The project was a success. I must say that it was a very good experience and learning project as well.
Is it worth the time and effort to rebuild it, maybe? For me, I know what's in it and that it should have a TON of great miles left on the tranny's gears and bearings now. I also know how they work exactly, which is actually pretty interesting and not such a complicated thing once you learn.
Let me know if anyone has any questions, you can send a pm and I'll do my best to help out. Don't forget to follow the FSM the ENTIRE way of your rebuild.
If you want to follow along on the build thread that this w56 goes in, check it out: Live4soccer7's 84runner Build
Last edited by live4soccer7; 09-09-2012 at 07:51 PM.
 09-10-2012, 09:00 AM
#89
Thanks... A slightly stressful project considering all the time that goes into it (and some money for tools/rebuild kit) and it's pretty much an all or nothing type of deal.
10-01-2012, 08:26 PM
#90
Registered User
Dude! You're awesome. I was looking for something like this a couple of months ago and only found that first thread where the guy gets almost done tearing it apart. Here I am searching again today and I find your thread. Thank you.
10-02-2012, 07:03 AM
#91
You are very welcome. That is why I made the thread. I couldn't find anything anywhere, with the exception of the first thread I listed where it was half way torn apart, an r150/1 by 4 wire and then I used a youtube video as well to help a little (listed in the thread as well). Mostly though, just follow the FSM word for word and read along with this thread and you should be able to do it, granted you have all the necessary tools.
Update: the tranny is still shifting like butter, feels nice and tight, and so far is great. Not a grind or odd noise in sight. I will update again with how it is doing.
Update: the tranny is still shifting like butter, feels nice and tight, and so far is great. Not a grind or odd noise in sight. I will update again with how it is doing.
10-10-2012, 12:06 PM
#92
Registered User

Join Date: Oct 2012
Posts: 2
Likes: 0
Received 0 Likes
on
0 Posts
Tearing into my first transmission now, W56-B.
Anyone have any tips on the best way to remove that output sleeve that isn't mentioned in the FSM?
Anyone have the factory part number for that pin that resides in the shift fork (the smallest diameter one)? Nevermind found it...
Anyone have any tips on the best way to remove that output sleeve that isn't mentioned in the FSM?
Anyone have the factory part number for that pin that resides in the shift fork (the smallest diameter one)? Nevermind found it...
Last edited by Bill_in_VA; 10-10-2012 at 12:58 PM.
10-10-2012, 12:21 PM
#93
I believe someone posted a site where you can get part #'s because I lost a shift rail c-clip upon removal.
What I did was get a bearing puller, then put the back side of it (flat side) against the lip on the sleeve and then pull it off that way. There were a couple items on the disassembly that we were using pullers for and had to get the impact gun to turn the puller further. Once we did this, it worked perfectly and came right off. I can't remember if we had to use the impact on this particular piece though. Good luck and let me know if you have any questions. I will help the best I can. Post up pics and add to the thread.
What I did was get a bearing puller, then put the back side of it (flat side) against the lip on the sleeve and then pull it off that way. There were a couple items on the disassembly that we were using pullers for and had to get the impact gun to turn the puller further. Once we did this, it worked perfectly and came right off. I can't remember if we had to use the impact on this particular piece though. Good luck and let me know if you have any questions. I will help the best I can. Post up pics and add to the thread.
 10-10-2012, 08:35 PM
#97
edit: tranny still working well. Been about 150 miles or so.
Last edited by live4soccer7; 10-10-2012 at 08:36 PM.
11-23-2012, 01:11 PM
#98
Update: It has now been about 500 miles and still running well (I don't drive it that much). It shifts well and still sounds good. If anyone has any questions, let me know and I'll do my best to help out.
11-23-2012, 10:55 PM
#99
Registered User
very nice write up, it makes me feel easier as soon as i dive into the tranny i just got and setting up the duals ive gotten the parts for, (even though i sold my truck) one of the best writeups i have seen, congrtz


