Slow 3.0 Snorkel Build-Up
 08-08-2013, 08:37 PM
#1
Registered User
Thread Starter

Join Date: Dec 2010
Location: Beaufort, SC
Posts: 152
Likes: 0
Received 0 Likes
on
0 Posts
Slow 3.0 Snorkel Build-Up
So this is a work in progress and will be slow, just forewarning you
Not a whole lot of 3.0 snorkel build ups, so I thought I would add mine to the knowledge base to help someone looking for ideas.
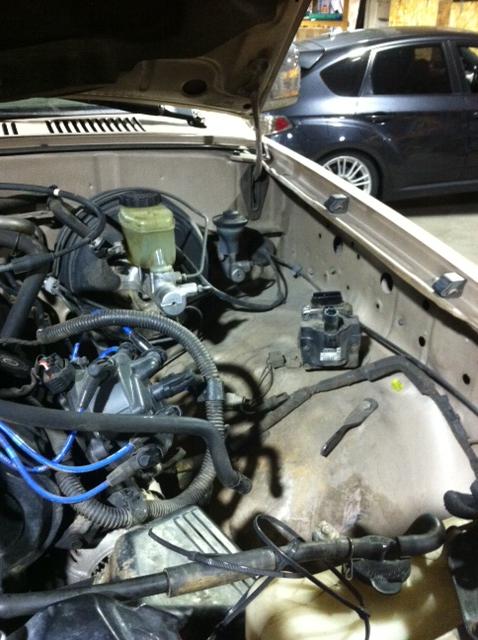
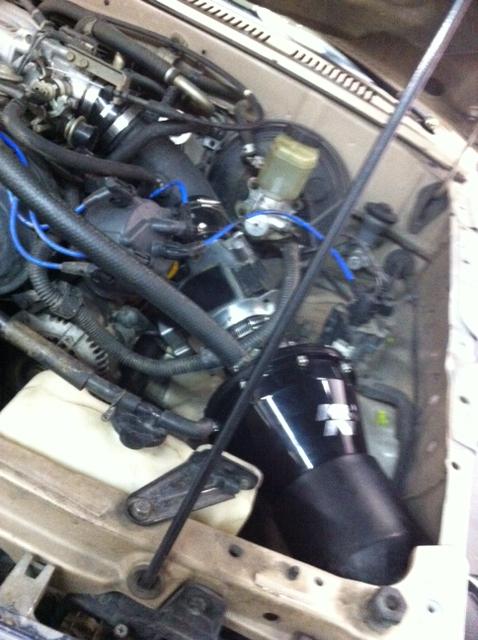
Not wanting to put the stock airbox back in the engine bay, I decided that I would try and run an inline filter with this build. After a lot of searching I picked up a K&N Apollo for the filter element and got started.
Mediocre Iphone pics to follow (hey if a picture is worth a thousand words these are like 450 words?
What I have so far
Pulled K&N FIPK (biggest waste of $100 bucks...), only thing worth keeping out of that whole kit was the molded plastic elbow which came in handy
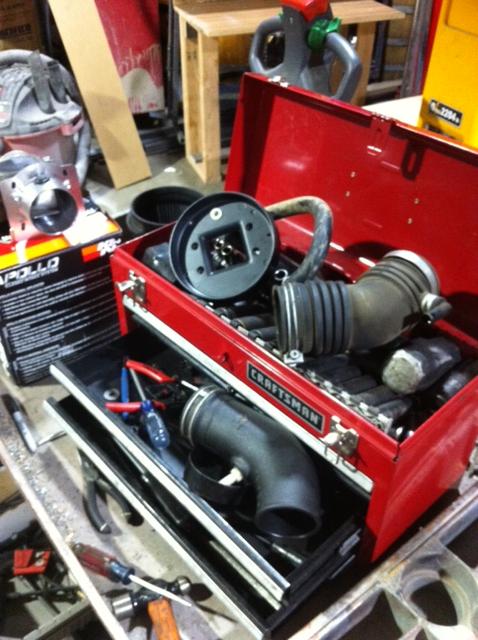
FIPK junk apparently found a new home in my toolbox,
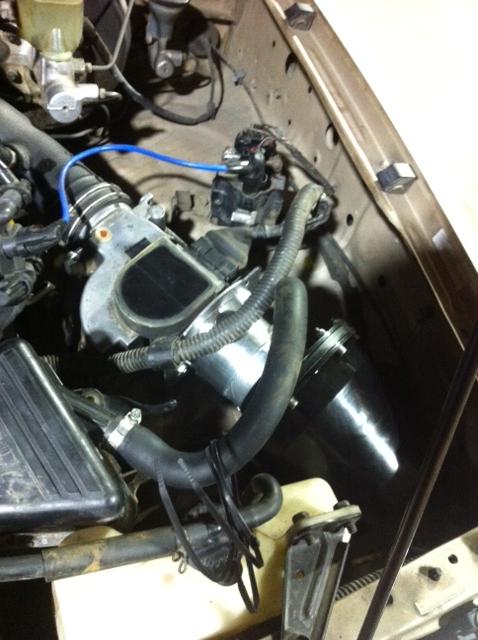
Mounted a 3" inlet adapter (spectre) from Advance Auto to the MAF. This was a 'Universal" part which meant I expected it to not fit at all and I was right. The pre-drilled holes in the aluminum adapter were spaced too far apart. However it came with a plastic insert which had perfectly spaced holes (this part is meant to be a fit for the Camry MAF which I know people have swapped in)... So a quick whirl with a sharpie and a trip to the drill press and boom... On it went
Next hurdle... The K&N apollo enclosed/inline air filter I had purchased to be the main filter element had a 70mm outlet on the MAF side... and the adapter was 3"... So my temporary Mcgyver fix was the magical duct tape to increase the diameter of the filter outlet to make it fit snug in the adapter
On everything went for a trip to the parts store take 2
As you can see... It is a tight fit with the adapter adding enough length to push the long filter element/housing up into the back of the headlight... This just would not do, as I need room for an elbow through the fender wall.
This was the solution I came up with
Junked OEM rubber flexy downtube thing for a 3"-3" rubber adapter from Intake Body to reused K&N FIPK tube (handily tapped for a vacuum hose already), once the hose clamps cinched down they fit snugly. A 3"-2.5" rubber adapter for plastic FIPK tube to MAF which required nothing other than a little persuasion. And a 3"-3" rubber adapter worked great for the MAF-filter outlet tube, the hose clamp was tightened down around the neck of the K&N and it is solidly attached and sealed.
Last thing to note was I (as seen in pic) tilted the MAF so the sensor is tilted to about 0130... This made it clear both the master cylinder and distributor cap and positioned it so there isn't anything fragile for it to bounce on/around come the inevitable offroad jolting.
I also routed the valve cover breather tube up and over the FIPK tube, under the throttle cable to a small filter element right underneath the upper portion of the hood, I figure if I am in water that deep I've got bigger problems than water in there
Now there is plenty of room for fiddling around with the inevitable erector set of PVC to come
Not a whole lot of 3.0 snorkel build ups, so I thought I would add mine to the knowledge base to help someone looking for ideas.
Not wanting to put the stock airbox back in the engine bay, I decided that I would try and run an inline filter with this build. After a lot of searching I picked up a K&N Apollo for the filter element and got started.
Mediocre Iphone pics to follow (hey if a picture is worth a thousand words these are like 450 words?
What I have so far
Pulled K&N FIPK (biggest waste of $100 bucks...), only thing worth keeping out of that whole kit was the molded plastic elbow which came in handy
FIPK junk apparently found a new home in my toolbox,
Mounted a 3" inlet adapter (spectre) from Advance Auto to the MAF. This was a 'Universal" part which meant I expected it to not fit at all and I was right. The pre-drilled holes in the aluminum adapter were spaced too far apart. However it came with a plastic insert which had perfectly spaced holes (this part is meant to be a fit for the Camry MAF which I know people have swapped in)... So a quick whirl with a sharpie and a trip to the drill press and boom... On it went
Next hurdle... The K&N apollo enclosed/inline air filter I had purchased to be the main filter element had a 70mm outlet on the MAF side... and the adapter was 3"... So my temporary Mcgyver fix was the magical duct tape to increase the diameter of the filter outlet to make it fit snug in the adapter
On everything went for a trip to the parts store take 2
As you can see... It is a tight fit with the adapter adding enough length to push the long filter element/housing up into the back of the headlight... This just would not do, as I need room for an elbow through the fender wall.
This was the solution I came up with
Junked OEM rubber flexy downtube thing for a 3"-3" rubber adapter from Intake Body to reused K&N FIPK tube (handily tapped for a vacuum hose already), once the hose clamps cinched down they fit snugly. A 3"-2.5" rubber adapter for plastic FIPK tube to MAF which required nothing other than a little persuasion. And a 3"-3" rubber adapter worked great for the MAF-filter outlet tube, the hose clamp was tightened down around the neck of the K&N and it is solidly attached and sealed.
Last thing to note was I (as seen in pic) tilted the MAF so the sensor is tilted to about 0130... This made it clear both the master cylinder and distributor cap and positioned it so there isn't anything fragile for it to bounce on/around come the inevitable offroad jolting.
I also routed the valve cover breather tube up and over the FIPK tube, under the throttle cable to a small filter element right underneath the upper portion of the hood, I figure if I am in water that deep I've got bigger problems than water in there
Now there is plenty of room for fiddling around with the inevitable erector set of PVC to come
Last edited by noble; 08-13-2013 at 03:35 PM.
 08-13-2013, 03:16 PM
#3
Registered User
Thread Starter
Join Date: Dec 2010
Location: Beaufort, SC
Posts: 152
Likes: 0
Received 0 Likes
on
0 Posts
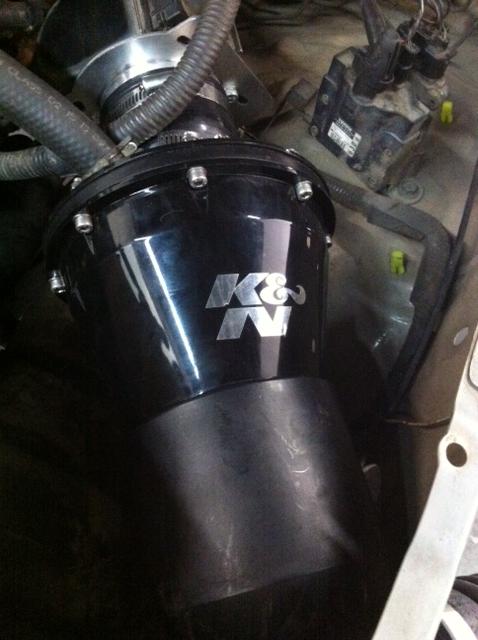
Got some more progress done on the snorkel today (and thank you to the good samaritan who saw me laboring with dull snips and lent me his small air powered sheet metal saw)
With the filter element sitting where I liked it, and at an angle with the fender I thought manageable and after yanking the upper intake silencer because it was bulky and annoying and had a broken attachment point, I went shopping (intake growls now like a dog... but only at obnoxious Prius drivers
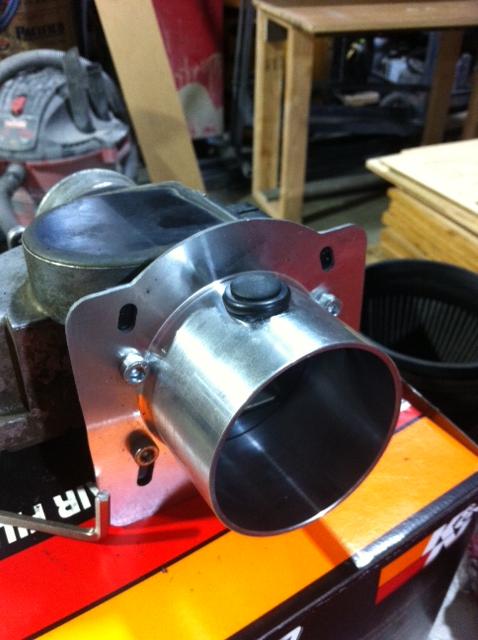
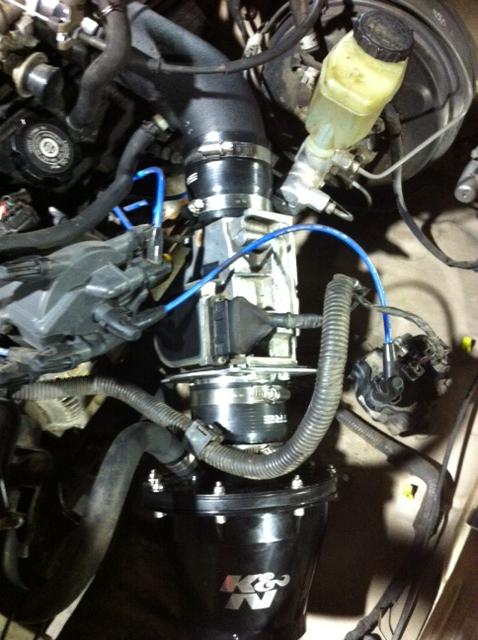
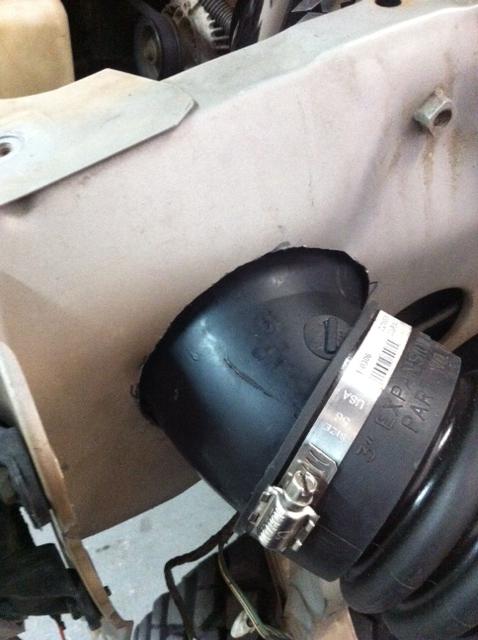
This is what I used to connect the K&N Apollo into the snorkel body. The outlet on the K&N is huge, and there wasn't room to route pipe reducers before an elbow so I needed both. This piece is a 4"-3" 90* reduction elbow, with long (4-5") runout on the large side and a 3" coupling end on the 3" side.

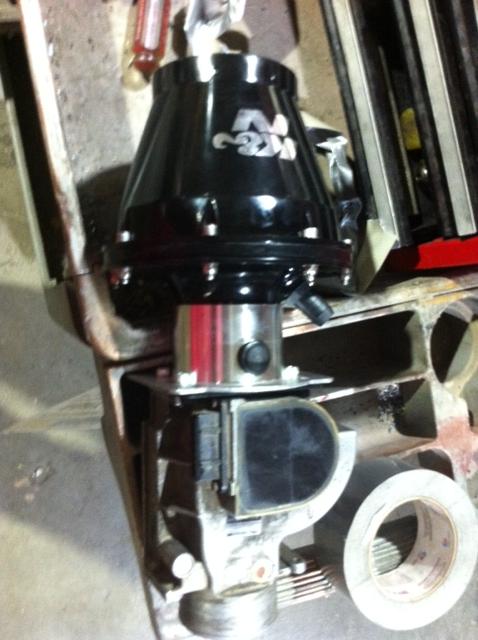
And coming off the K&N
The 4" side attached snugly to the K&N (add a little silicone sealer and it will be bombproof)
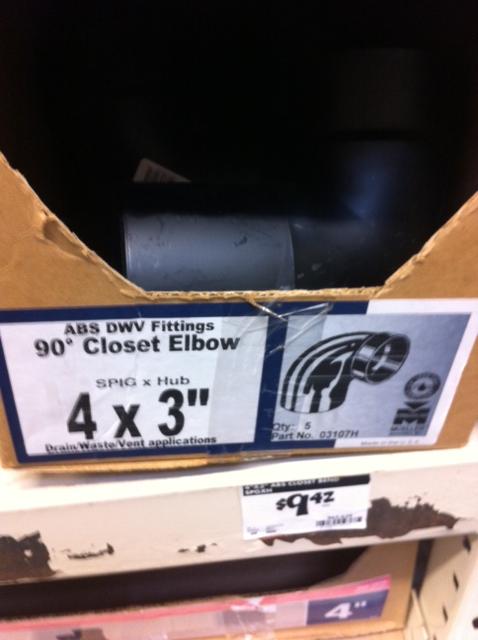
I then picked up a flexible hose coupling at a local plumbing supply shop, tough (and a little pricey) piece of neoprene that has a ton of flex if needed. I cut off the enlarged OD bushing end of the ABS 90* closet elbow and the neoprene flex fit perfectly. I then cut a hole in the inner fender (measure, cut, measure, cut, etc etc) till I could slide the elbow through
The next step was to put the outer fender on to check fitment, and it's snug, but it fits.
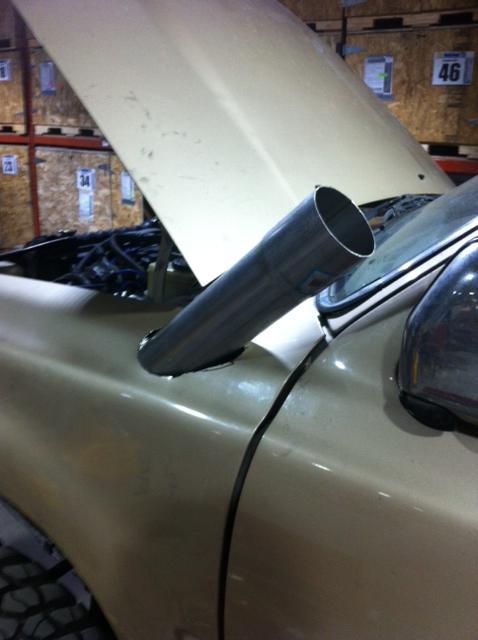
Then it was a simple matter of routing the piping I wanted to the back of the fender, where progress halted for the day. I ended up reducing the piping to 2" ABS after the flexible hose portion for fitment issues w/ 3", I may go back up to 3", all depends but this seems to work for now
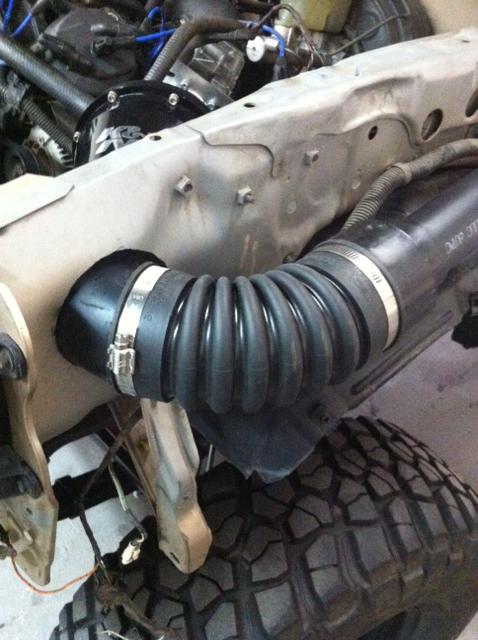
The last thing I did was grab a 2" pipe clamp, bolt one end into the fender and bend it 90* so it holds the 2" ABS pipe securely (unless I go upside down in which case I have bigger issues
A crappy picture of inside the engine bay and everything attached (I am singlehandedly helping spectre intakes turn a profit this quarter)
Next step is deciding if I want to route it up the A-Pillar to the roof or just pop it through the fender straight up. I have decided at this juncture to run a pre-cleaner or scoop. Anyone with experience can chime in right... NOW
Any my last question, is 2" ID ABS a large enough pipe to keep from robbing precious horsies from an already under-powered engine?
With the filter element sitting where I liked it, and at an angle with the fender I thought manageable and after yanking the upper intake silencer because it was bulky and annoying and had a broken attachment point, I went shopping (intake growls now like a dog... but only at obnoxious Prius drivers
This is what I used to connect the K&N Apollo into the snorkel body. The outlet on the K&N is huge, and there wasn't room to route pipe reducers before an elbow so I needed both. This piece is a 4"-3" 90* reduction elbow, with long (4-5") runout on the large side and a 3" coupling end on the 3" side.
And coming off the K&N
The 4" side attached snugly to the K&N (add a little silicone sealer and it will be bombproof)
I then picked up a flexible hose coupling at a local plumbing supply shop, tough (and a little pricey) piece of neoprene that has a ton of flex if needed. I cut off the enlarged OD bushing end of the ABS 90* closet elbow and the neoprene flex fit perfectly. I then cut a hole in the inner fender (measure, cut, measure, cut, etc etc) till I could slide the elbow through
The next step was to put the outer fender on to check fitment, and it's snug, but it fits.
Then it was a simple matter of routing the piping I wanted to the back of the fender, where progress halted for the day. I ended up reducing the piping to 2" ABS after the flexible hose portion for fitment issues w/ 3", I may go back up to 3", all depends but this seems to work for now
The last thing I did was grab a 2" pipe clamp, bolt one end into the fender and bend it 90* so it holds the 2" ABS pipe securely (unless I go upside down in which case I have bigger issues
A crappy picture of inside the engine bay and everything attached (I am singlehandedly helping spectre intakes turn a profit this quarter)
Next step is deciding if I want to route it up the A-Pillar to the roof or just pop it through the fender straight up. I have decided at this juncture to run a pre-cleaner or scoop. Anyone with experience can chime in right... NOW
Any my last question, is 2" ID ABS a large enough pipe to keep from robbing precious horsies from an already under-powered engine?
Last edited by noble; 08-13-2013 at 09:11 PM.
 08-13-2013, 04:10 PM
#7
Registered User
Join Date: Sep 2008
Posts: 522
Likes: 0
Received 0 Likes
on
0 Posts
I used flat metal straps, from Lowes (in the hardware section) held down with 4 self tapping screws and hose clamps.. the snorkel has been on the truck for 4 years with no issues other than knocking the head off it a few times... I think the adapter I used was the problem there.. I have a rubber one now so it flexes better and I try harder to watch for low hanging limbs...
If you want I will try to get a close up picture for you tomorrow..
If you want I will try to get a close up picture for you tomorrow..
Trending Topics
08-15-2013, 06:29 PM
#11
Registered User
Thread Starter
Join Date: Dec 2010
Location: Beaufort, SC
Posts: 152
Likes: 0
Received 0 Likes
on
0 Posts
Ya have definitely read through your build-up a couple times... Inspired me to finally do mine... Although mine might miss out on the stove top awesomeness
 08-16-2013, 04:00 PM
#13
Registered User

Great project. I really like this and have been thinking about eventually doing the same. (Not sure I would go w/ the K&N air filter, but that's another discussion, haha).
You want to ensure your intake pipe is sized appropriately, same area or greater, as your AFM flapper as well as in spec w/ your exhaust.
The stock exhaust is 2 1/8". Recommended exhaust for our engine's displacement is 2 1/4 to 2 1/2".
On the AFM:
-stock 3vze, AFM has a 2.585" internal diameter and has a flapper w/ an area of 3.69 inches squared, exhaust area of 3.55 inches squared -- ideally, i'd think you'd want your exhaust slightly larger than your intake due to expansion of gas/air when hot, etc...
But to your question a 2" diameter pipe has an area of 3.14 inches squared (smaller than your stock flapper), while a 2.25" diameter pipe has an area of 3.97 inches squared, and a 2.5" diameter pipe has an area of 4.9 inches squared. A pipe slightly larger than your AFM flapper essentially just provides an air reserve that allows air to be pulled from w/in the intake pipe, not having to pull all air immediately needed through your snorkel, if that makes sense. The air will be replaced through the snorkel, it just isn't as dependent on optimized bends like mandrel, etc, to preserve that same area/rate of flow, etc.
And if looking at the popular supra swap (the camry afm is in between these two but still a better option than stock):
-2.9" inside diameter supra AFM and has a flapper w/ an area of 4.79 inches squared
Source on flapper sizes: https://www.yotatech.com/forums/f88/...54/#post409801
*That link is also someone else's snorkel mod... Never completed, but a start.
Last edited by RSR; 08-16-2013 at 04:21 PM.
08-20-2013, 05:34 PM
#14
Registered User
Thread Starter
Join Date: Dec 2010
Location: Beaufort, SC
Posts: 152
Likes: 0
Received 0 Likes
on
0 Posts
Well progress has halted for a few days, mountain vacations will do that so not much of and a lot of  ... And am currently researching head/pre-cleaner options. There seems to be a significant lack of heads with inlet ID's of anything close to 3.5" (OD of 3" PVC/ABS pipe)... Am currently looking into options and a way of adapting it w/o making it into a telephone pole of adapters/brush snagger. OD of ABS pipe is 88mm (avg) and all the "3.5" heads are 85mm... Inquiries sent to multiple places
And as far as pipe diameter I have driven with it a couple hundred miles (hwy commuting) and not really noticed any problems or lack of power, will prolly stick with the 2" (or 2.5" if I can find it) for now and a ram head... Great info though and when I can get around the rear inner fender support and pipe fitment I will look toward larger piping later down the road... There is a rear leaf swap imminent (waiting on parts) and a homebrew swing away has been drawn up, waiting for the swap to check shackle clearances on any bumper supprots... this is sort of a side project to take up the intervening time... Hehe... There are perks to only partial gainful employment
Will be back in the shop Monday to start measuring and hopefully cutting!
and a lot of ... And am currently researching head/pre-cleaner options. There seems to be a significant lack of heads with inlet ID's of anything close to 3.5" (OD of 3" PVC/ABS pipe)... Am currently looking into options and a way of adapting it w/o making it into a telephone pole of adapters/brush snagger. OD of ABS pipe is 88mm (avg) and all the "3.5" heads are 85mm... Inquiries sent to multiple placesAnd as far as pipe diameter I have driven with it a couple hundred miles (hwy commuting) and not really noticed any problems or lack of power, will prolly stick with the 2" (or 2.5" if I can find it) for now and a ram head... Great info though and when I can get around the rear inner fender support and pipe fitment I will look toward larger piping later down the road... There is a rear leaf swap imminent (waiting on parts) and a homebrew swing away has been drawn up, waiting for the swap to check shackle clearances on any bumper supprots... this is sort of a side project to take up the intervening time... Hehe... There are perks to only partial gainful employment
Will be back in the shop Monday to start measuring and hopefully cutting!
Last edited by noble; 08-20-2013 at 05:35 PM.
08-20-2013, 05:49 PM
#15
Registered User
Thread Starter
Join Date: Dec 2010
Location: Beaufort, SC
Posts: 152
Likes: 0
Received 0 Likes
on
0 Posts
@BigPluePile, put that stove topper back on, if I saw a 4runner with a stove pipe coming out of it, I would only assume it'a attached to a pot belly stove keeping warm a family of gnomes on hamster wheels under the hood keeping it going 35 up slight inclines 
Last edited by noble; 08-20-2013 at 06:03 PM.
08-20-2013, 09:25 PM
#17
Registered User
Join Date: Sep 2008
Posts: 522
Likes: 0
Received 0 Likes
on
0 Posts
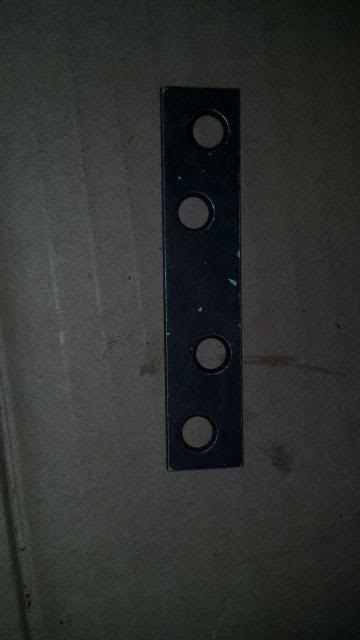
I searched and searched for this post..... I did get you pics of how I secured the snorkel to the A-pillar.
Plate:
Secured to the A-pillar with self tapping screws:
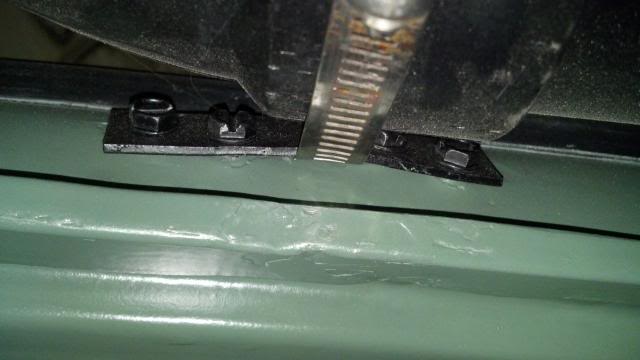
I will help any way I can if you have any questions..
Plate:

Secured to the A-pillar with self tapping screws:

I will help any way I can if you have any questions..
08-22-2013, 01:19 PM
#18
Registered User
Thread Starter
Join Date: Dec 2010
Location: Beaufort, SC
Posts: 152
Likes: 0
Received 0 Likes
on
0 Posts
That helps immensely! Thanks for the help as this takes shape and digging up that post for me, I've played the post digging game, less than fun
08-27-2013, 07:22 PM
#20
Registered User
Thread Starter
Join Date: Dec 2010
Location: Beaufort, SC
Posts: 152
Likes: 0
Received 0 Likes
on
0 Posts
Alright, back with updates...
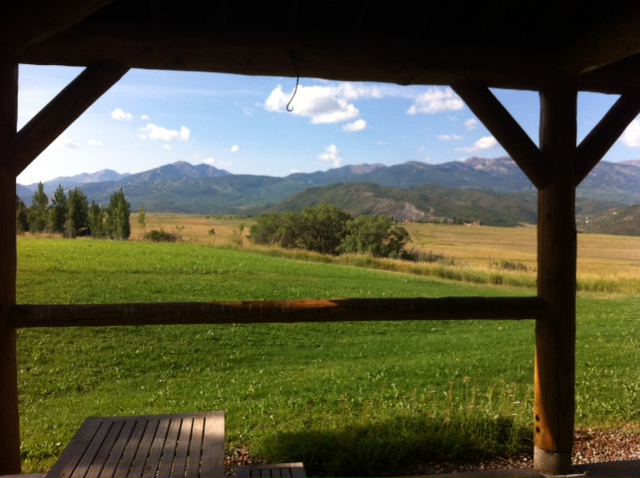
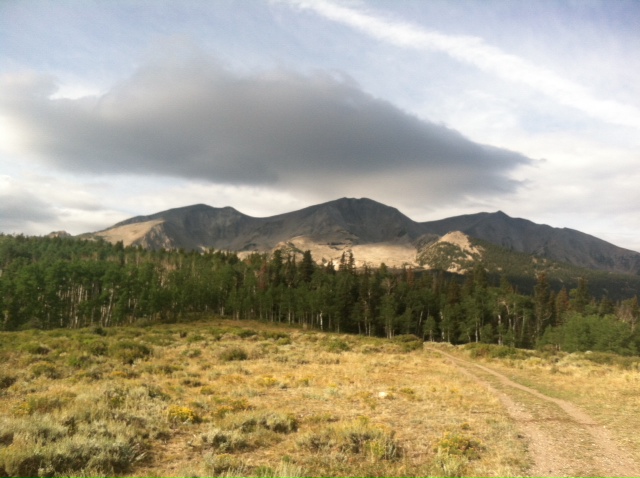
So after hanging out in a place that looks like this all weekend...
Hiking this (Mt. Sopris, 12,966")
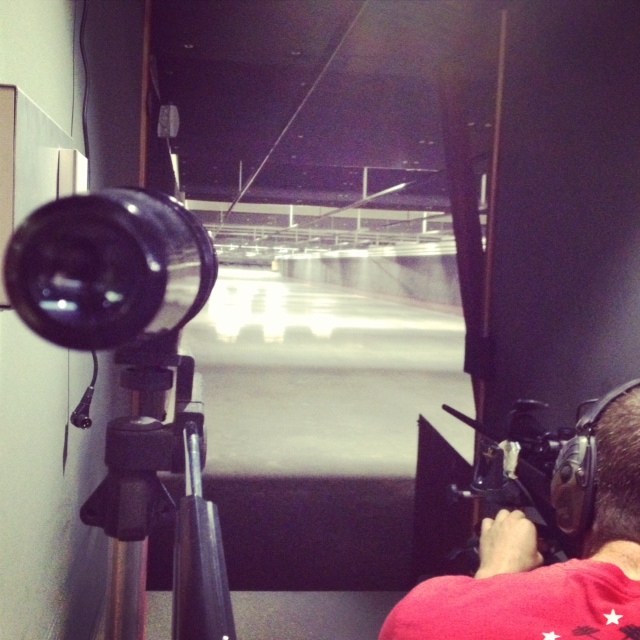
And doing some of this (that is me working up .30-06 loads for the upcoming hunting season)
Work proceeded tonight on the snorkel... After exploring lots of different options, I decided that the only way I was getting a 3" ID pipe to fit under the fender cleanly was going to be some
So... To work!
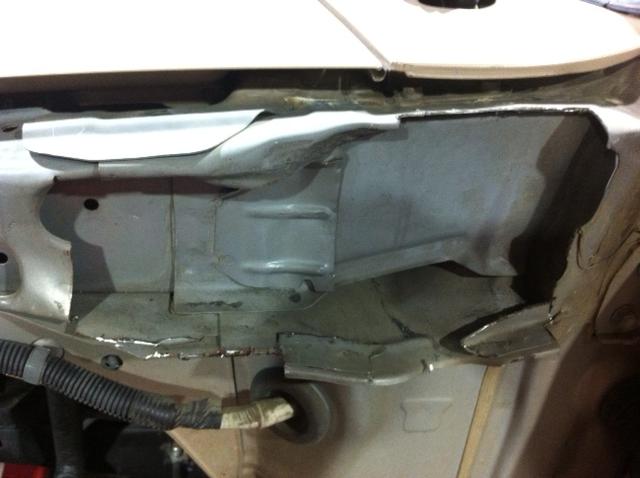
This is the under fender support I cut out, as you can see... It freed up quite a bit of space and would be impossible to fit otherwise... Taking inspiration from here...
https://www.yotatech.com/forums/f88/...uild-up-79074/
I chopped!
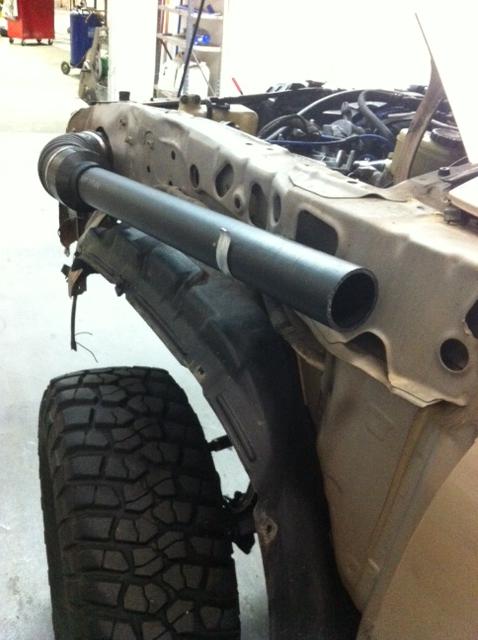
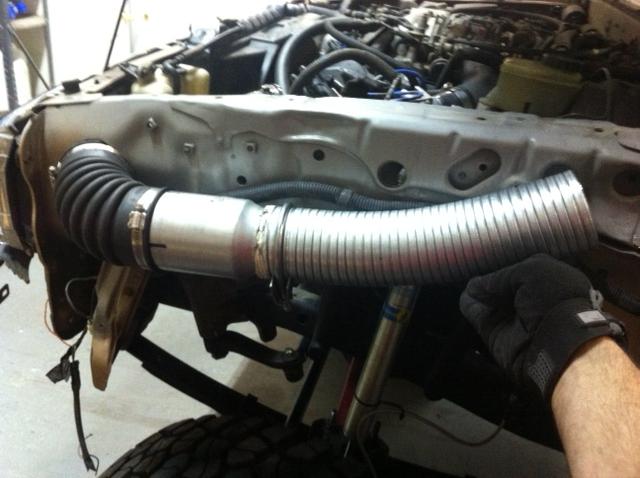
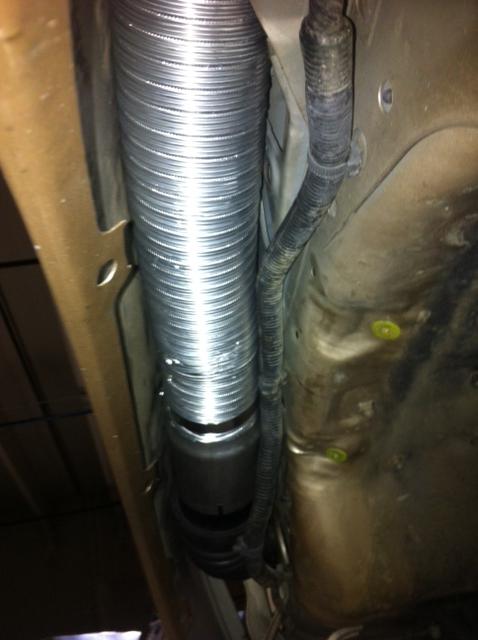
This is a picture of the pipe I routed underneath the fender once the chop was complete... It is the bendy neoprene to a 3" ABS piece of pipe, and then a 3.5" (the OD of 3"ABS pipe) to a 3" reducer. I then got a piece of flexible dryer tubing (which is surprisingly tough) and routed it from the coupler to a 18" long 3" exhaust pipe I was using as a test piece, I originally tried using flexy exhaust tubing but it wasn't bendy enough
I than cut the pipe piece to the angle i wanted, traced it out on the fender and!!!
It routes fairly far away from the A-Pillar, I am going to go to a exhaust pipe shop to get some pipe bent for the snorkel body and see if that can be remedied or if I will need to chop the fender some more...
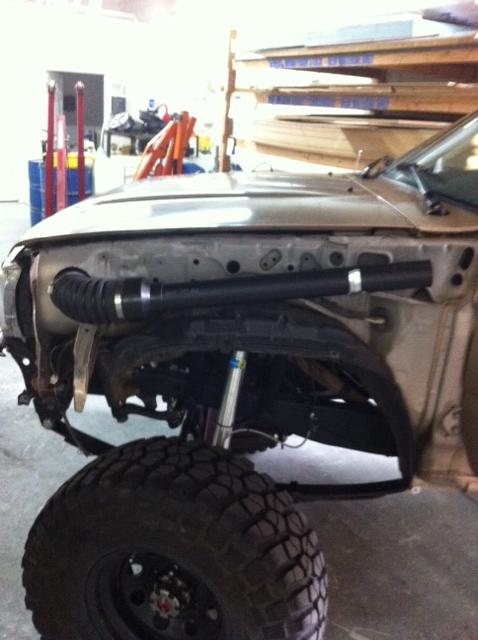
Picture of how it lays under the fender
Starting to take shape, next is getting the tube bent, securing it to the pillar and getting some rubber to cover the edges of the hole in the fender
So after hanging out in a place that looks like this all weekend...
Hiking this (Mt. Sopris, 12,966")
And doing some of this (that is me working up .30-06 loads for the upcoming hunting season)
Work proceeded tonight on the snorkel... After exploring lots of different options, I decided that the only way I was getting a 3" ID pipe to fit under the fender cleanly was going to be some
So... To work!
This is the under fender support I cut out, as you can see... It freed up quite a bit of space and would be impossible to fit otherwise... Taking inspiration from here...
https://www.yotatech.com/forums/f88/...uild-up-79074/
I chopped!
This is a picture of the pipe I routed underneath the fender once the chop was complete... It is the bendy neoprene to a 3" ABS piece of pipe, and then a 3.5" (the OD of 3"ABS pipe) to a 3" reducer. I then got a piece of flexible dryer tubing (which is surprisingly tough) and routed it from the coupler to a 18" long 3" exhaust pipe I was using as a test piece, I originally tried using flexy exhaust tubing but it wasn't bendy enough
I than cut the pipe piece to the angle i wanted, traced it out on the fender and
!!!It routes fairly far away from the A-Pillar, I am going to go to a exhaust pipe shop to get some pipe bent for the snorkel body and see if that can be remedied or if I will need to chop the fender some more...
Picture of how it lays under the fender
Starting to take shape, next is getting the tube bent, securing it to the pillar and getting some rubber to cover the edges of the hole in the fender


