Single Cab Bumper Build

 08-27-2012, 07:20 PM
#42
Registered User
Thread Starter
Its wired correct. Everything is good now. The Shackle hangers were welded and they came out great.
I was wrong about the mix, its just CO2.
I was wrong about the mix, its just CO2.
08-30-2012, 11:24 AM
#44
Registered User
that looks great!! if ur gonna powder it iwould go ahead and add the holes and notches for the winch but if ur just rattle caning or home painting i would leave it as is till u get the winch
08-30-2012, 08:37 PM
#45
Registered User
Thread Starter
Thanks. Thats what i plan on doing. I want to powder coat but thats $100 dollars or so i dont want to put into this thing. Im just going to resand it with 220, primer once more, add texture paint and then add about 3 coats of rustoleam*.
09-05-2012, 09:48 PM
#46
Registered User
Thread Starter
Took a long trip with the bumper on and i noticed the truck was running un-normally hot. So i think i need to put holes in the front so the the radiator can breath better. Any suggestions?
 09-16-2012, 09:49 PM
#49
Registered User
Thread Starter
Im still thinking about a small hoop. Dont know yet.
I cut the holes for the fairlead* today. Going to finish with some cuts and the next day i have off, hopefully have this thing back on by october.
I want to start a new project lol.
I cut the holes for the fairlead* today. Going to finish with some cuts and the next day i have off, hopefully have this thing back on by october.
I want to start a new project lol.


 10-21-2012, 05:14 PM
#56
Registered User
Thread Starter
I dont know to be honest. I have not drove it long enough distances to get it hot, And its been like 45 degrees here. So that helps keep it cool. I sure hope it keeps its cool enough. I also cut out two tenis ball size holes under the shackle mounts. In theory the air should hit the bottom corners of the radiator.
11-14-2012, 05:21 PM
#57
Registered User

Join Date: Mar 2012
Location: Denver, CO
Posts: 108
Likes: 0
Received 0 Likes
on
0 Posts
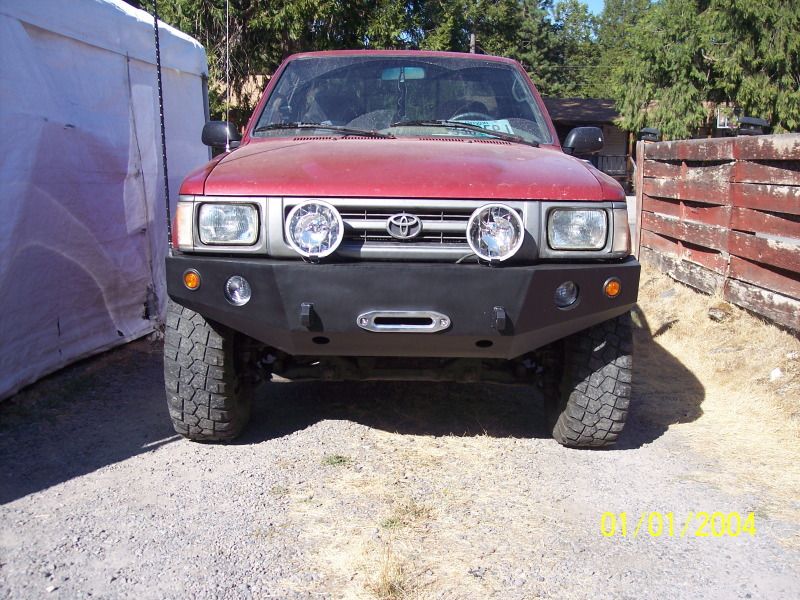
thats a really nice bumper you made.
What size steel did you use, 1/4" 3/8" or did you use the thicker stuff for the reinforcements and thinner stuff for the shell of the bumper.
Just asking that because that is going to be my next project soon after i get done with the york compressor on a 3rz with AC.
What size steel did you use, 1/4" 3/8" or did you use the thicker stuff for the reinforcements and thinner stuff for the shell of the bumper.
Just asking that because that is going to be my next project soon after i get done with the york compressor on a 3rz with AC.
11-17-2012, 05:53 PM
#58
Registered User
Thread Starter
Its 99% 3/16 steel which i kinda regret. Everything is gusseted and braced very well. The only 1/4 steel is the bottom mounting brackets. The reason i used it there is cause i had to take the bumper off every night and most the time that was the only thing holding it up. This thing weighs around 100 lbs so i didnt want that steel to bend.
If i could do it over i would of used more 1/4 on the main structural points. And also on the winch plate. I dont know how that is going to hold up being 3/16.
If i could do it over i would of used more 1/4 on the main structural points. And also on the winch plate. I dont know how that is going to hold up being 3/16.


