Fabbing crossmember
 11-22-2008, 04:24 PM
#1
Registered User
Thread Starter

Join Date: Sep 2008
Location: Ellensburg, WA
Posts: 48
Likes: 0
Received 0 Likes
on
0 Posts
Fabbing crossmember
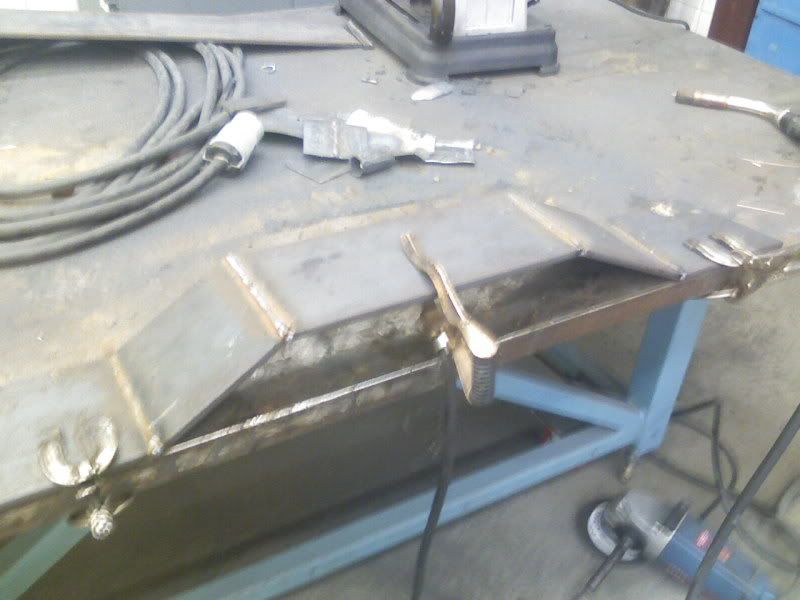
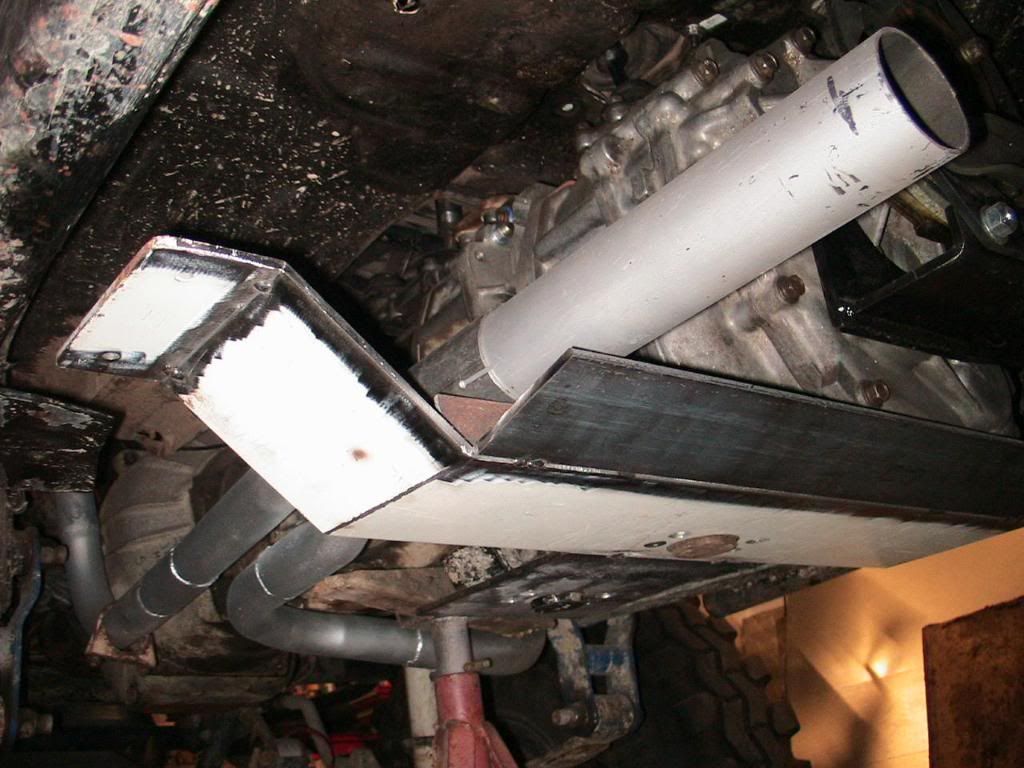
I finally got my '85 SFA offroad the other weekend and for being a stock longbed with just some 30" AT Duelers on it, I was impressed. I didn't like the shovel aka crossmember though. So I thought I'd try my hand at fabbing one up. I'm still in the midst of the armor part, but the crossmember itself is done.
I wanted to copy the budbuilt crossmember, but since i didn't want to spend my life trying to bend 3/8s steel with an oxy torch, i just cut and welded instead.
I pulled the old crossmember and used that as my templet. I cut the pieces and set them on top/inside of the old crossmember, then welded it up. I tripple beaded all the welds and got pretty good penetration.
Heres a crappy picture:
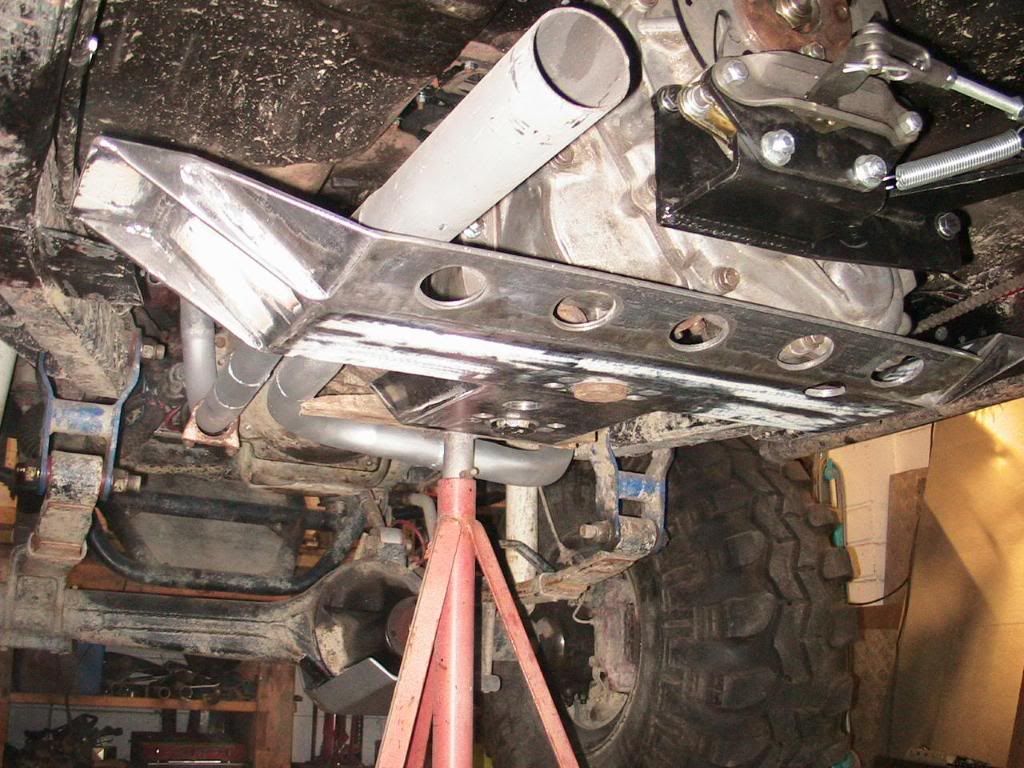
Once it was welded up I tossed it on the Bridgeport mill (gotta love being able to use the schools shops). It was a bit tricky to figure out how to attach it to the mill table, but I got it on there. I cut the 8 main bolt holes at 5/8s and ran them in long slots, like the budbuilt. Cutting the main hole for the motormount did not go well though. I didn't have an easy way to cut a nice 2" dia circle, so I made it a square hole instead with the mill. I then cut the 1/2" holes for the motor mount bolts, then milled the steel down around those bolts to 1/8" so I could not only re-use the stock bolts, but also sink the heads so they wouldnt stick out.
and here is how it sits now.
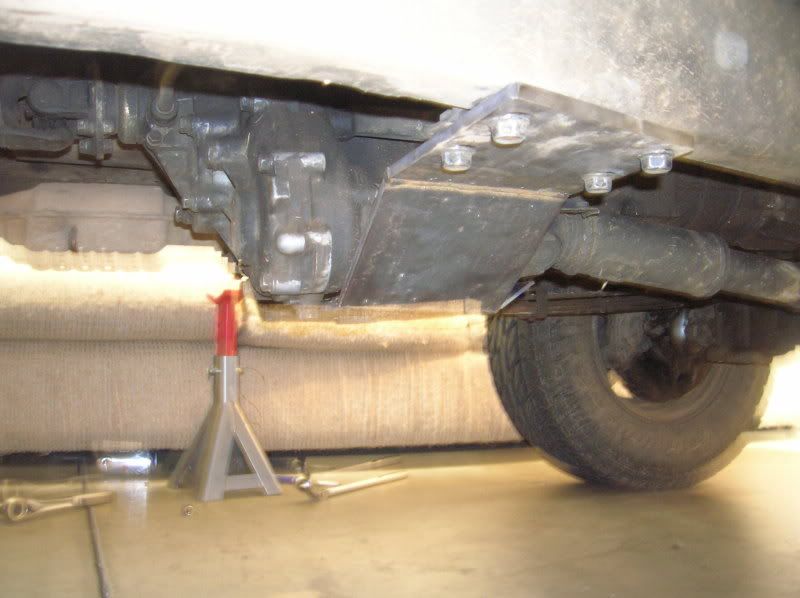
The top of the member sits about an inch higher then the original member did, and with it now only being 3/8" I netted around 3.25" of clearance.
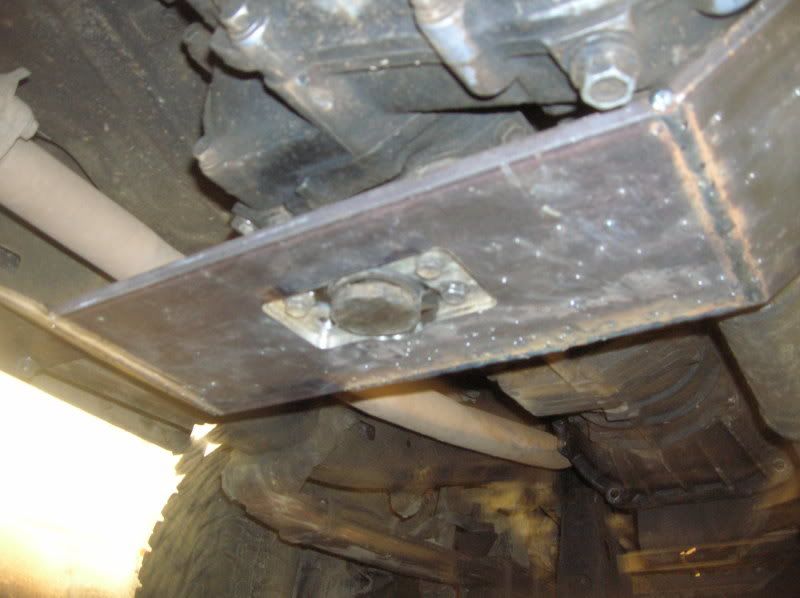
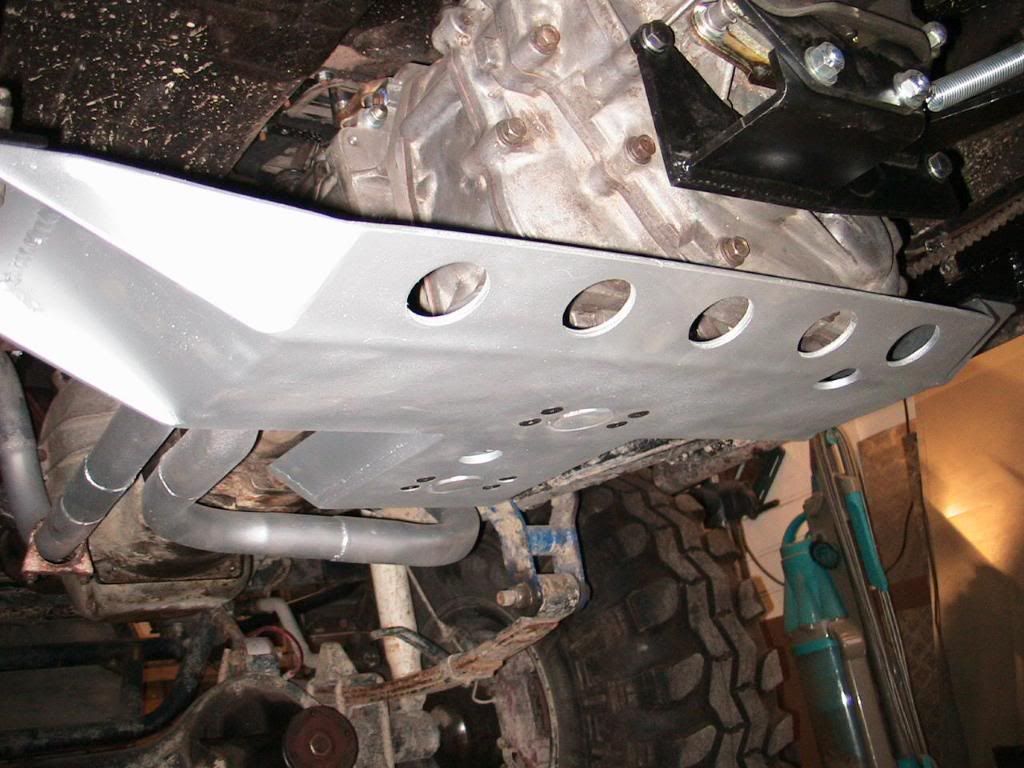
I still need to make one solid skid front to back like the budbuilt member to protect the back end of the t-case and the driveshaft u-joint. Then I'll get to the quenching as soon as I figure out how to heat and cool and 45" piece of steel and paint.
Anyway, just thought I'd share and see if anyone had any slick ideas for the armor piece
I wanted to copy the budbuilt crossmember, but since i didn't want to spend my life trying to bend 3/8s steel with an oxy torch, i just cut and welded instead.
I pulled the old crossmember and used that as my templet. I cut the pieces and set them on top/inside of the old crossmember, then welded it up. I tripple beaded all the welds and got pretty good penetration.
Heres a crappy picture:
Once it was welded up I tossed it on the Bridgeport mill (gotta love being able to use the schools shops). It was a bit tricky to figure out how to attach it to the mill table, but I got it on there. I cut the 8 main bolt holes at 5/8s and ran them in long slots, like the budbuilt. Cutting the main hole for the motormount did not go well though. I didn't have an easy way to cut a nice 2" dia circle, so I made it a square hole instead with the mill. I then cut the 1/2" holes for the motor mount bolts, then milled the steel down around those bolts to 1/8" so I could not only re-use the stock bolts, but also sink the heads so they wouldnt stick out.
and here is how it sits now.
The top of the member sits about an inch higher then the original member did, and with it now only being 3/8" I netted around 3.25" of clearance.
I still need to make one solid skid front to back like the budbuilt member to protect the back end of the t-case and the driveshaft u-joint. Then I'll get to the quenching as soon as I figure out how to heat and cool and 45" piece of steel
and paint. Anyway, just thought I'd share and see if anyone had any slick ideas for the armor piece
Last edited by Ares; 11-22-2008 at 04:25 PM.
 11-24-2008, 10:24 AM
#4
Registered User
Thread Starter
Join Date: Sep 2008
Location: Ellensburg, WA
Posts: 48
Likes: 0
Received 0 Likes
on
0 Posts
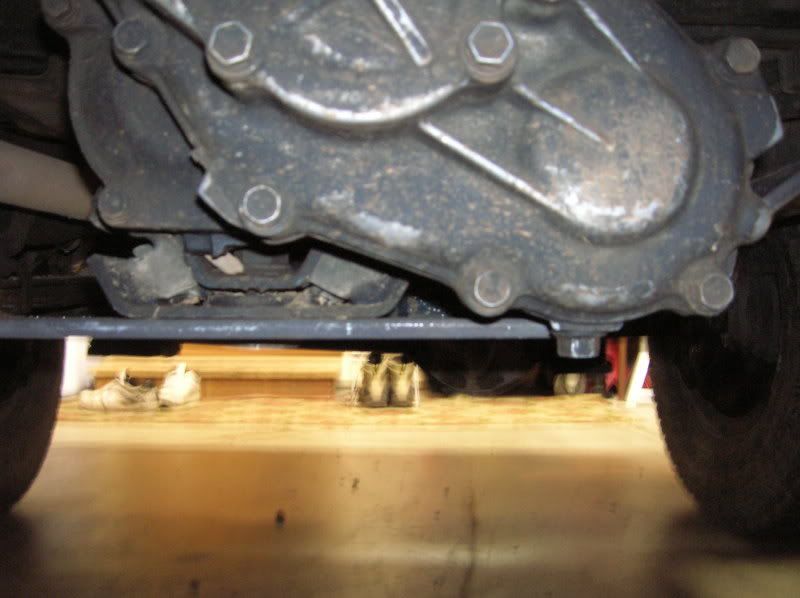
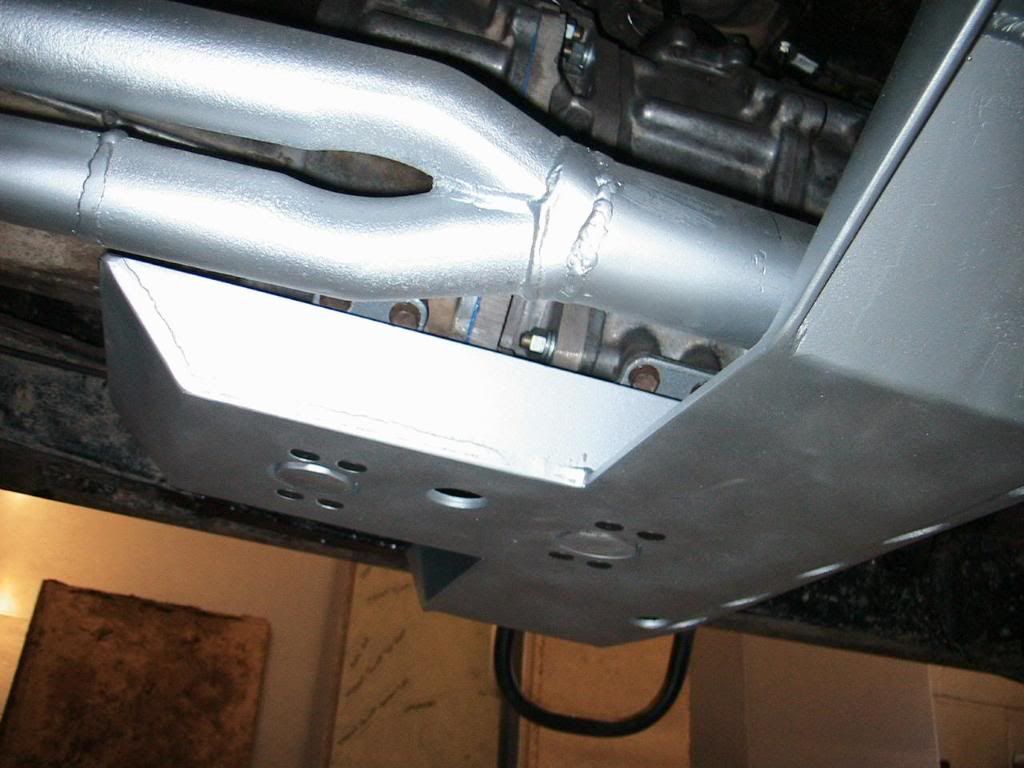
I was a little worried. I've basically only taken the welding class here on campus and welded up a few small things before, never anything thats an actual structural member of the truck, or if it breaks I'll be screwed type of thing. But it turned out really well. I accidentally dropped the t-case/tranny on the member from about 1/2" up (it got stuck then slipped) while I was under it, and all the welds held.....so I was happy
11-24-2008, 10:50 AM
#5
Registered User
great job! might want to add a extra piece where the t-case drain bolt is (alum is not that strong against rocks  ) nice job again how about a drawn up sketch of the dimensions of the holes and angles etc...
) nice job again how about a drawn up sketch of the dimensions of the holes and angles etc...
 11-24-2008, 01:07 PM
#7
Registered User
Thread Starter
Join Date: Sep 2008
Location: Ellensburg, WA
Posts: 48
Likes: 0
Received 0 Likes
on
0 Posts
Hahaha, for some reason one of my roommates insist on having a couch in the garage for parties....just takes up too much space if you ask me
Thanks for the compliments. It was a little bit of a PITA but totally worth it. Cost of materials was only around $40, so not bad
Thanks for the compliments. It was a little bit of a PITA but totally worth it. Cost of materials was only around $40, so not bad
Trending Topics

Thread
Thread Starter
Forum
Replies
Last Post
justdifferentials
Just Differentials
5
06-13-2022 07:40 PM
live4soccer7
84-85 Trucks & 4Runners
3
05-11-2016 06:52 PM


