Terrys87 86 4Runner with a 2nd Chance
 01-15-2012, 02:09 AM
#21
Super Moderator
Staff
Thread Starter
iTrader: (1)
Join Date: Aug 2008
Location: Anderson Missouri
Posts: 11,788
Likes: 0
Received 21 Likes
on
19 Posts
I finally got the inner fenders off of the core support. That was a first for me drilling out spot welds. Luckily I have a nice stash of drill bits. Now I need to buy a bit sharpner. I hear they have a spot weld remover tool. That is definitely on my list now. I had several hours in removing the spot welds. But I now have my core support ready. It will be a while before I put it in. Like the idea of being able to get to the motor easily.
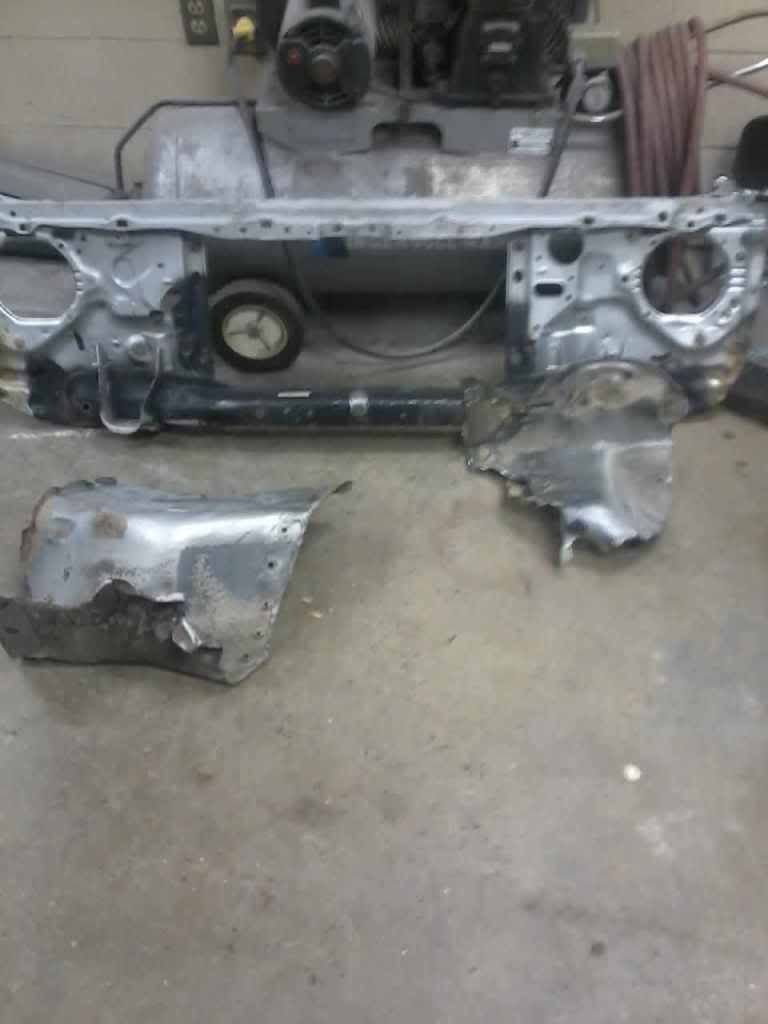
I am starting to work on my fuel system. Every project I tie into seems to have a tank issue. I used the tank out of this truck for my last build. Each tank I have worked on has always had the long "J" line either plugged or really slow flowing. Usually clogged at the elbow. I got this one cleared and flowing nice now. I keep soaking it with PB Blaster and other rust removers and hit with the air hose til it is flowing. Using a small wire helps also.
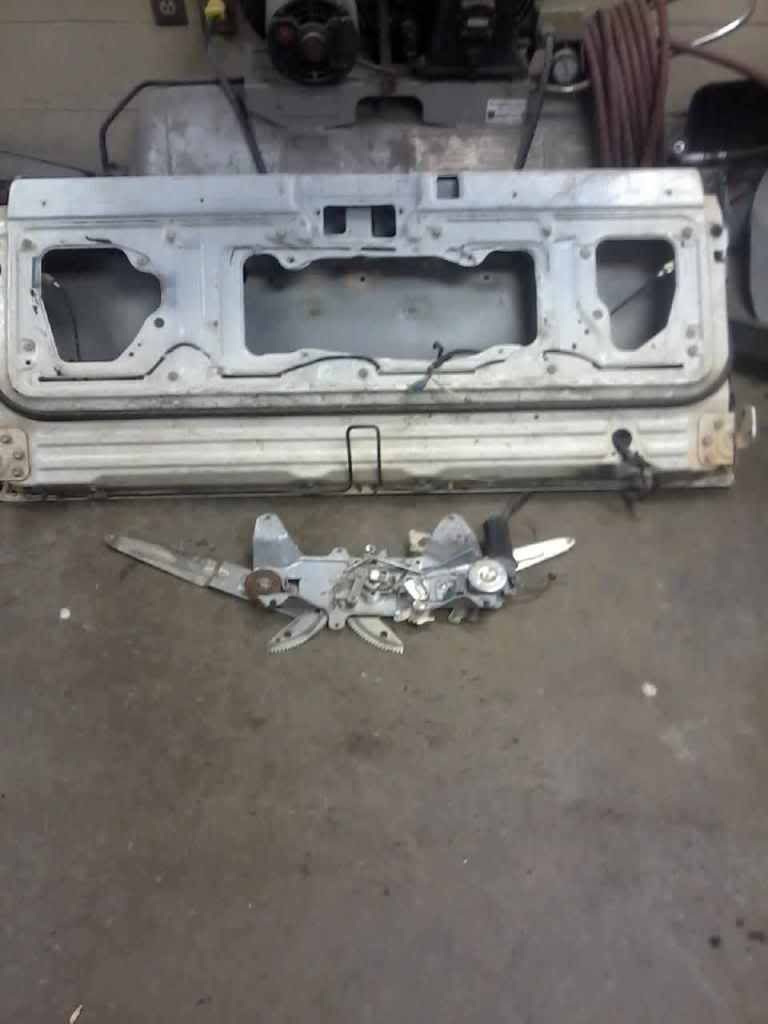
I used the backhatch off of this truck on my last build. Not sure if I have everything to put it back together. If I need to I can take the panel off of the 88 and see what I might be missing. Some say it is not as bad as it looks to assemble. I am starting to read up on it and see what all is needed. Hoping it goes easy, but am wondering about the difficulty. Had one on Craigslist to pop up a few months ago that worked great for $100. It was 2 hours away, wondering if it would of been worth it in the long run.
I am starting to work on my fuel system. Every project I tie into seems to have a tank issue. I used the tank out of this truck for my last build. Each tank I have worked on has always had the long "J" line either plugged or really slow flowing. Usually clogged at the elbow. I got this one cleared and flowing nice now. I keep soaking it with PB Blaster and other rust removers and hit with the air hose til it is flowing. Using a small wire helps also.
I used the backhatch off of this truck on my last build. Not sure if I have everything to put it back together. If I need to I can take the panel off of the 88 and see what I might be missing. Some say it is not as bad as it looks to assemble. I am starting to read up on it and see what all is needed. Hoping it goes easy, but am wondering about the difficulty. Had one on Craigslist to pop up a few months ago that worked great for $100. It was 2 hours away, wondering if it would of been worth it in the long run.
Last edited by Terrys87; 03-16-2016 at 12:30 PM.
 01-15-2012, 02:17 PM
#22
Super Moderator
Staff
Thread Starter
iTrader: (1)
Join Date: Aug 2008
Location: Anderson Missouri
Posts: 11,788
Likes: 0
Received 21 Likes
on
19 Posts
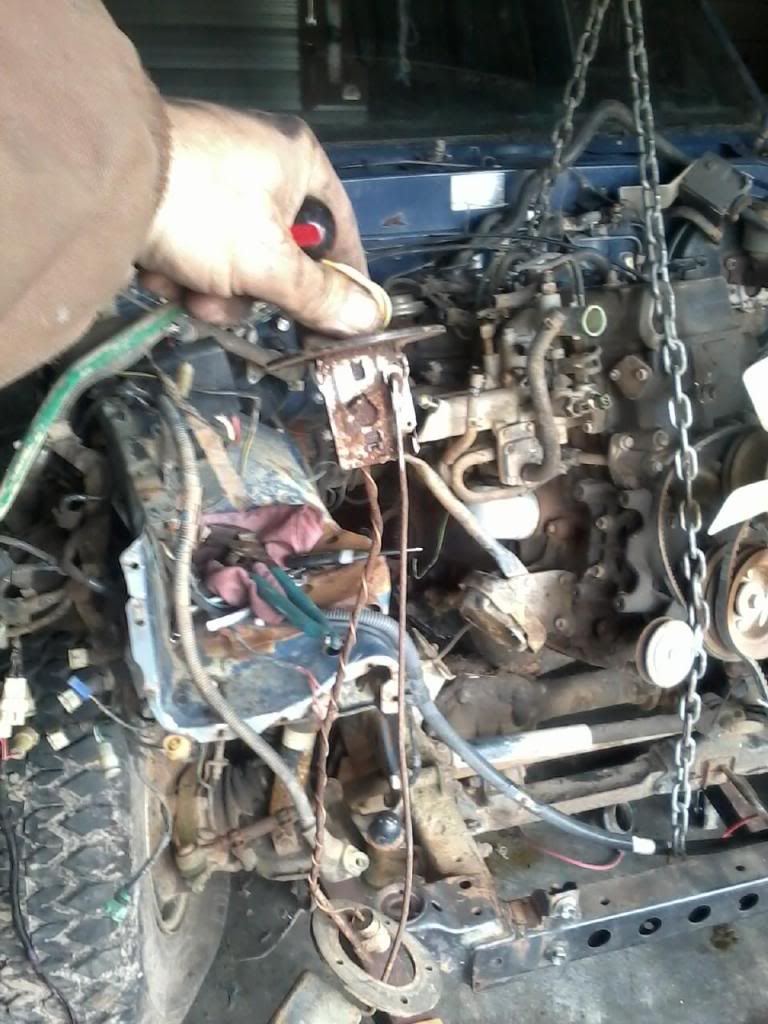
Just about got most of the wiring fixed. Still have some to get that come from under the plenum. This is just a reference picture for me when I go to put it back togther.
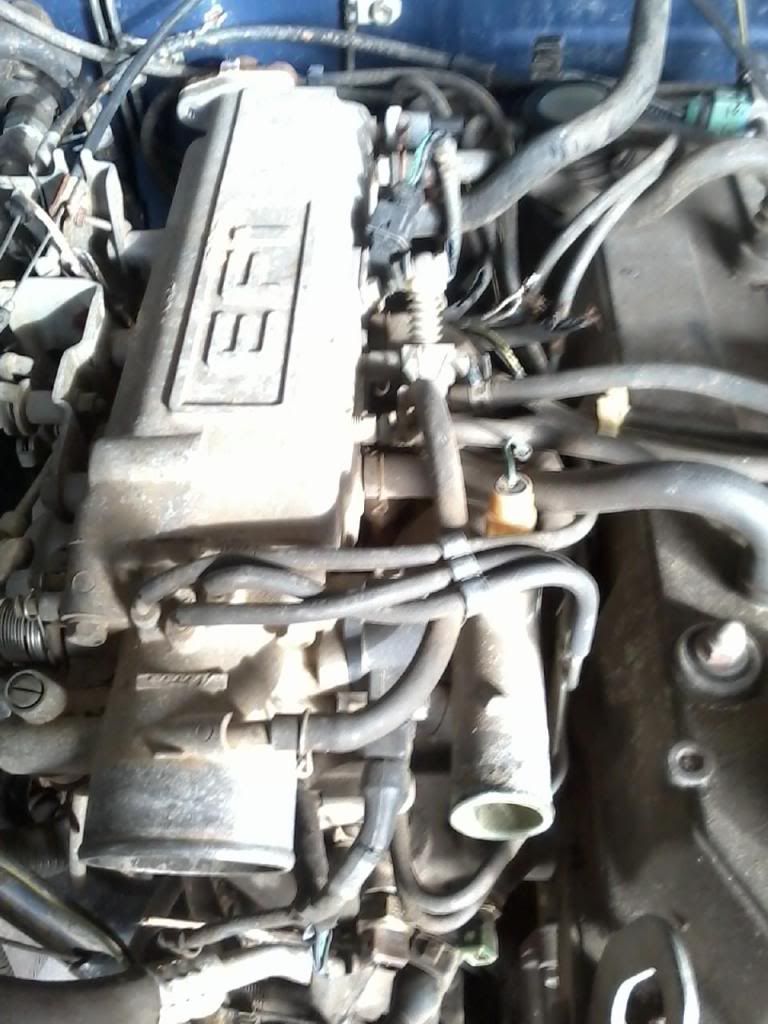
I was hoping to just replace some gaskets to fix the leaks, but now the back of the exhaust manifold has been stripped from a previous owner and I have found some wrong bolts that are not from Toyota.
The bottom has a bolt in it that is wrong also. My finger is just blocking it.One reason I grab every bolt that I can get a hold of when I am in a bone yard. Got a whole stash of them.
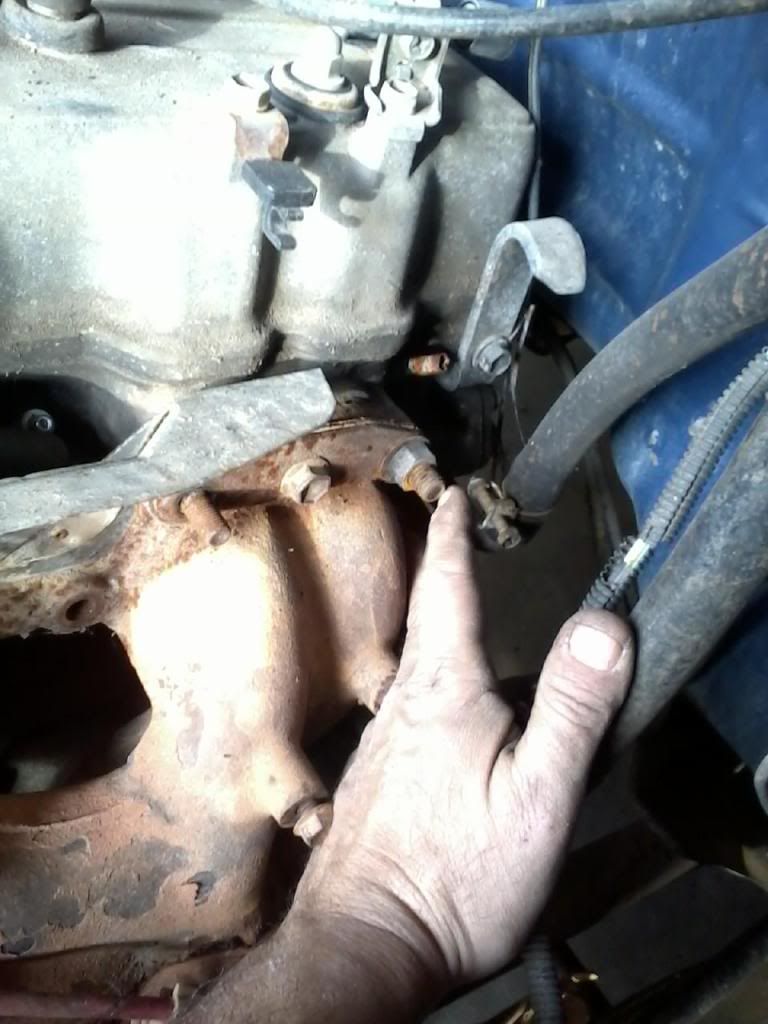
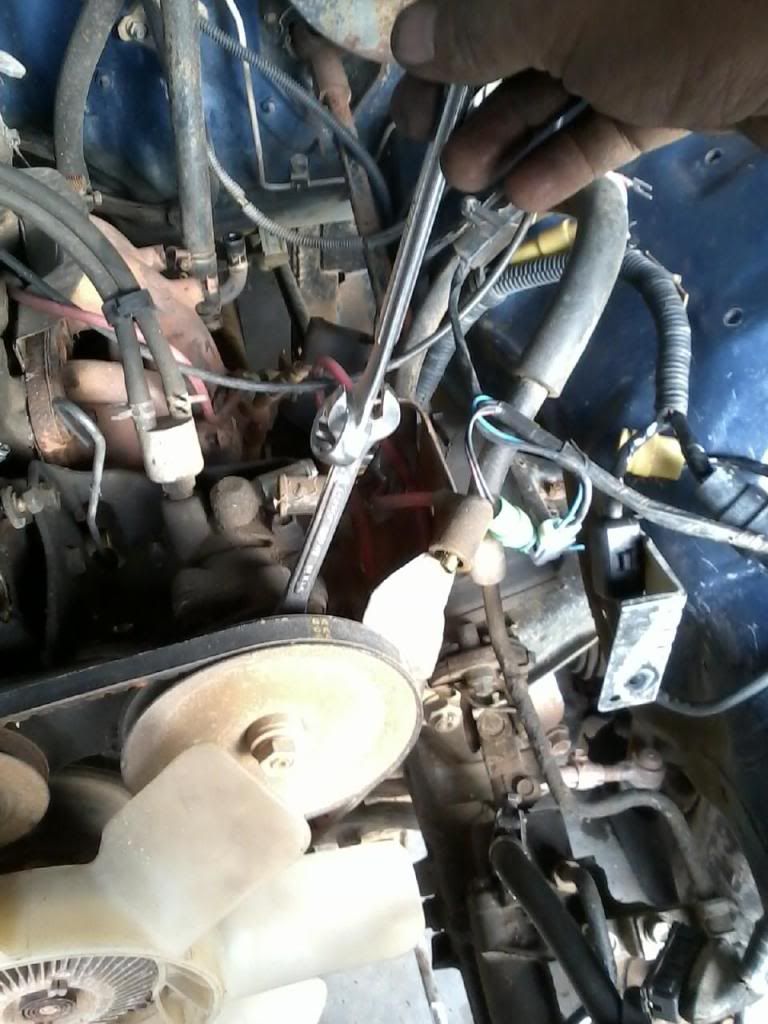
A PO over torqued alot of these bolts. Here is a little trick I use to help get a little more leverage. Keep everything flush with each other and you can really get a good pull. This is another reason I am going to do a top end rebuild on this motor. I was hoping I wouldnt have to. If you do things the right way, these little motors are really dependable. Also they have some missing ground wires so want to go through and see what else they may have wrong. Seems like every one of these trucks I have worked on, people are always taking a short cut.grrr....
I was hoping to just replace some gaskets to fix the leaks, but now the back of the exhaust manifold has been stripped from a previous owner and I have found some wrong bolts that are not from Toyota.
The bottom has a bolt in it that is wrong also. My finger is just blocking it.One reason I grab every bolt that I can get a hold of when I am in a bone yard. Got a whole stash of them.
A PO over torqued alot of these bolts. Here is a little trick I use to help get a little more leverage. Keep everything flush with each other and you can really get a good pull. This is another reason I am going to do a top end rebuild on this motor. I was hoping I wouldnt have to. If you do things the right way, these little motors are really dependable. Also they have some missing ground wires so want to go through and see what else they may have wrong. Seems like every one of these trucks I have worked on, people are always taking a short cut.grrr....
01-15-2012, 05:11 PM
#24
Registered User
Join Date: Jul 2009
Location: Eastern NC
Posts: 832
Likes: 0
Received 0 Likes
on
0 Posts
Terry when you get the head out, if you can get the old studs out, try and see if a 7/16 tap will work in the hole. If it does you can pick up some 7/16-7/20 studs at your local parts store. Will save you some $$ over a heli coil set, or the better option of a time cert. my back two were stripped and it worked for me.
Edit, the studs you want are 7/16x14-7/16x20 3" long. Sorry for my bad typing skills.
Edit, the studs you want are 7/16x14-7/16x20 3" long. Sorry for my bad typing skills.
Last edited by TinMan; 01-15-2012 at 05:45 PM.
01-16-2012, 01:00 AM
#26
Super Moderator
Staff
Thread Starter
iTrader: (1)
Join Date: Aug 2008
Location: Anderson Missouri
Posts: 11,788
Likes: 0
Received 21 Likes
on
19 Posts
Hello takeitoutgetitdirty..Thanks, I try to make my builds cheap and informative. Some of this will be quite similar to my last build, but hopefully I can add some new stuff as I find it. Sure there will be some that didnt see my last build so maybe it will help them.
Thanks TinMan..A helicoil set really isnt in the budget right now. I really appreciate it. I sure hope those studs work. If it is going to be a stripped hole, it is always the back ones. At least it will be easy to get to here soon.
Hello twistedyota..Glad to see you are back online. My wife has been on me to do your cupholders. I am going to be trying it soon as I can get some scrap metal. I hear you on the budget thing. It can be done. Since I got rid of carpayments a few years ago, it has helped in so many ways and gives a dollar or two for projects that serve a purpose. One reason I stay in the stock builds.
01-16-2012, 01:09 AM
#27
Super Moderator
Staff
Thread Starter
iTrader: (1)
Join Date: Aug 2008
Location: Anderson Missouri
Posts: 11,788
Likes: 0
Received 21 Likes
on
19 Posts
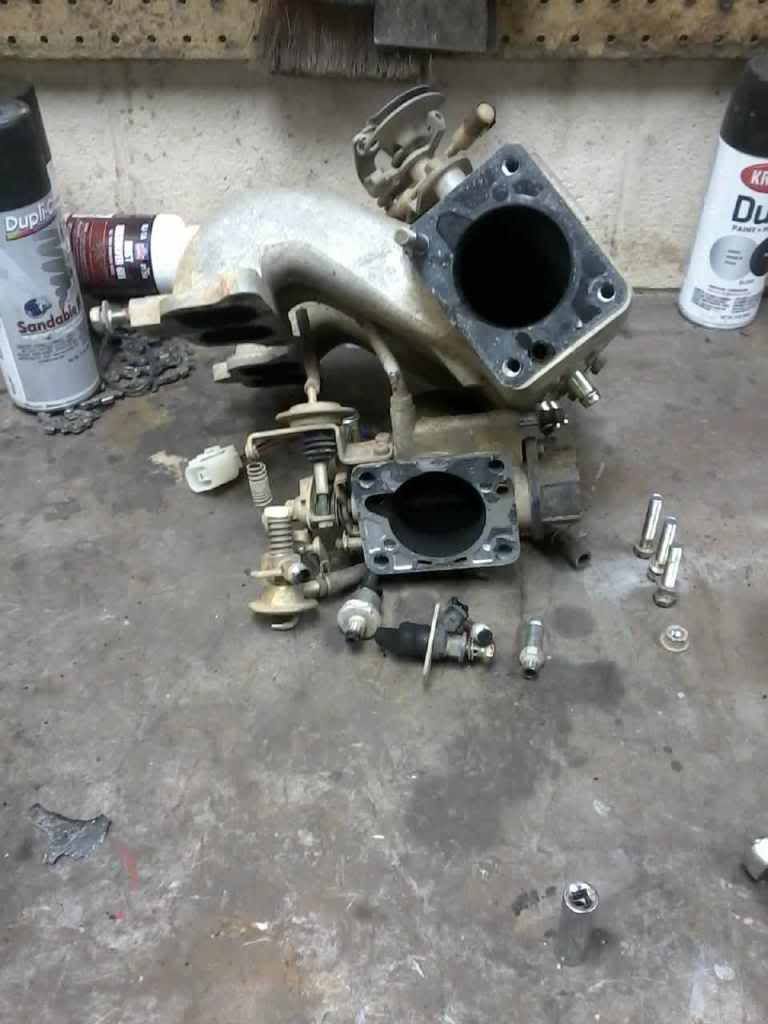
Started getting ready to pull the motor hopefully tomorrow. I got the plenum off and as usual it has alot of carbon build up in it. This is one reason I block off the EGR. I find the best way to take it to the carwash and get it good and clean. Will clean it tomorrow. Several of the hose connections were plugged. Just to show how dirty it is. No matter how hard I try, I alway get this carbon in the cracks of my hands and have a tough time getting it out.
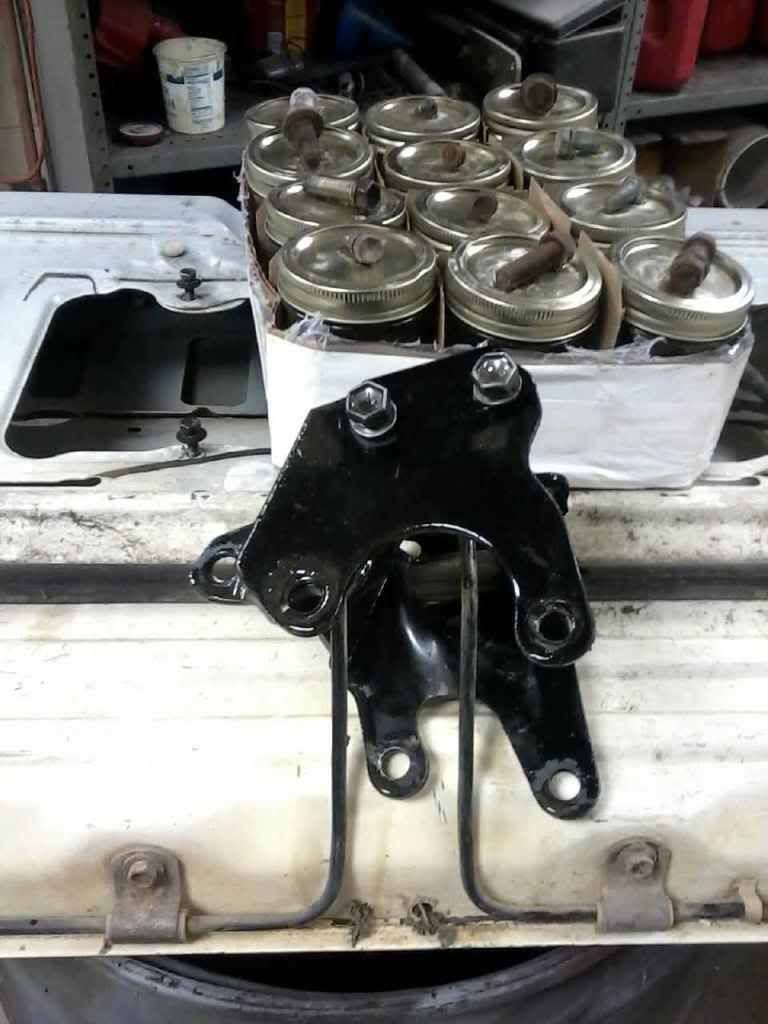
Still looking into getting the backhatch together. Basicially posting this picture to help others with ideas on how to help stay organized and help with their build.
I grab all of the bolts I can and store them in these canning jars and spray a little WD-40 on top to keep from rusting. I have another flat of these and a gallon jug of more bolts I need to seperate and store. When I got this backhatch it was completely apart and here is where I used the bolts as they were missing.
Also I keep my bolts in the parts they come from when doing a tear down. That way I know what goes where and saves keeping track of them. I have tried to tag and bag but that can get confusing. I still do when I have to but not nearly as many bags. Hope this helps someone out there.
Last edited by Terrys87; 09-15-2015 at 03:04 PM.
01-16-2012, 01:18 AM
#28
Super Moderator
Staff
Thread Starter
iTrader: (1)
Join Date: Aug 2008
Location: Anderson Missouri
Posts: 11,788
Likes: 0
Received 21 Likes
on
19 Posts
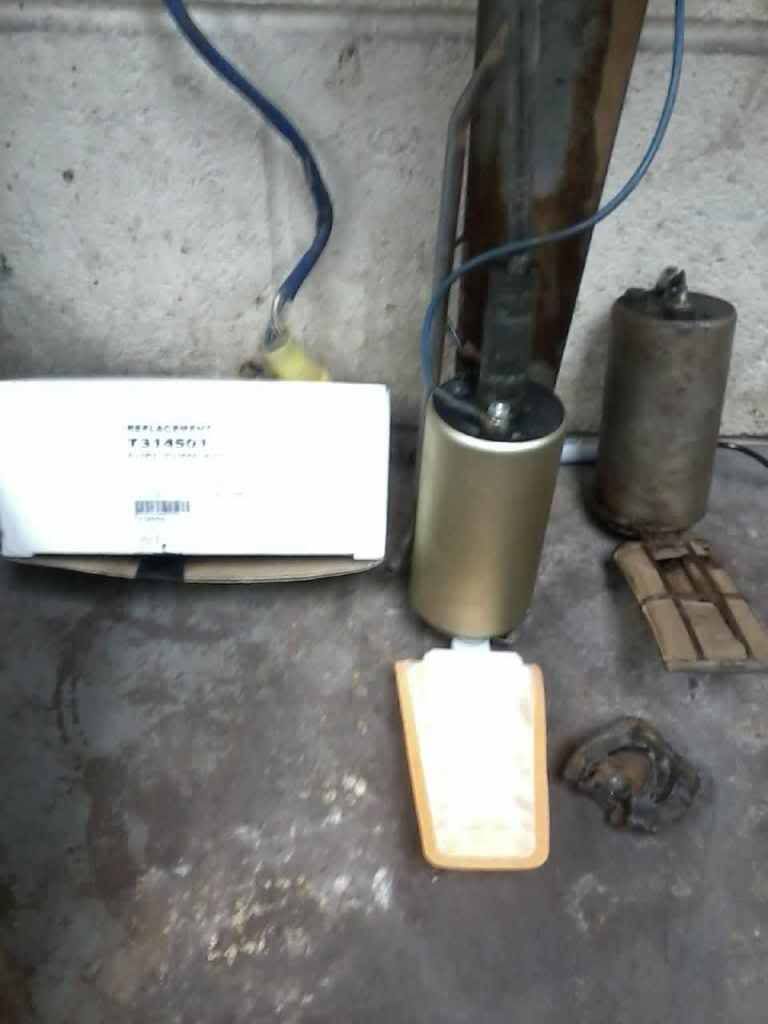
I have posted this in my last build, but I needed to replace the fuel pump these can be expensive. I get mine off of ebay and including shipping it is around $30. This is my 5th one. 3 of these on my different projects and 2 fixings some friends. A parts store will want $150 or so. I have not had one problem with these. It comes with everything. The posting on ebay is not the best picture of what you are getting but I am completely happy with these pumps. The one on the right is what you will typically find in your own truck. The socks/filter are even worse then what this one looks like.
Also while putting up links www.sparkplugs.com is the cheapest I have found for O2 sensors.
My power steering pulley is froze up, it wont adjust but I will post the part for the bearing on it on this post. Toyota is expensive and sells the whole assembly. This is about $5 for the bearing.
I will be going back and editing this post later on with links and such. I am on my laptop and have the info on my desk top.
Pump I am talking about.
01-16-2012, 01:00 PM
#29
Super Moderator
Staff
Thread Starter
iTrader: (1)
Join Date: Aug 2008
Location: Anderson Missouri
Posts: 11,788
Likes: 0
Received 21 Likes
on
19 Posts
Got quite a bit done for my speed. For as long as I was out there felt I should of gotten a little bit more done.
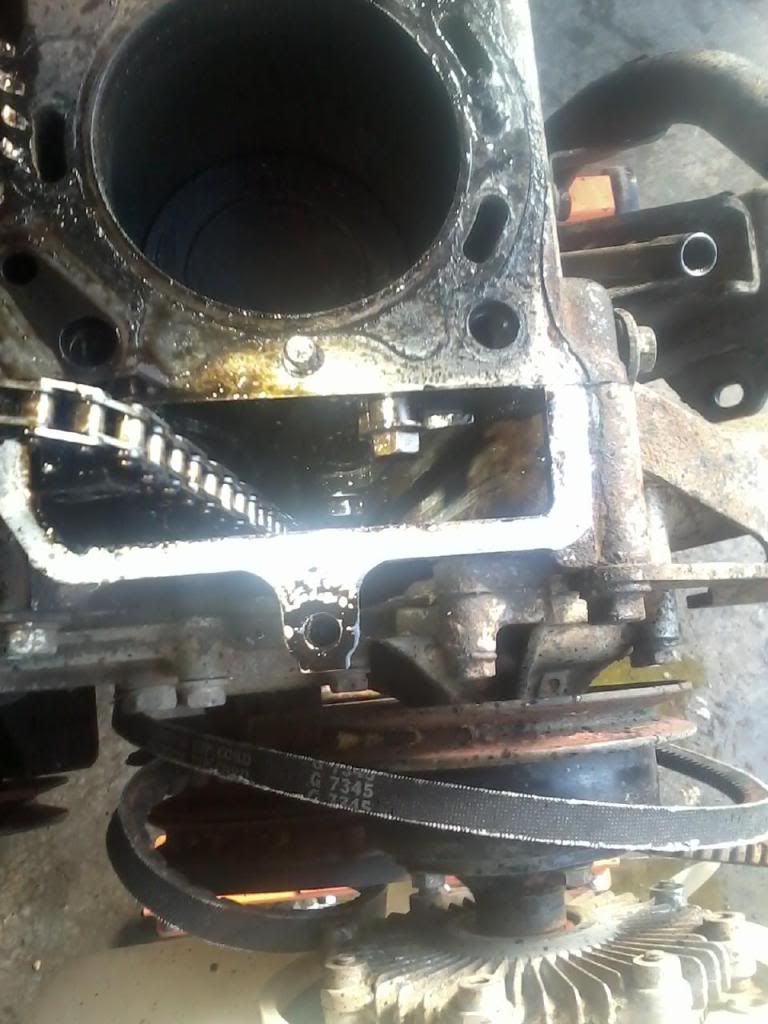
Did get the motor out and cleaned. Orginally wasnt going to tear the motor apart, but after seeing some shabby work done on it previous, thought I better. Here it as several leaks and is just pulled.
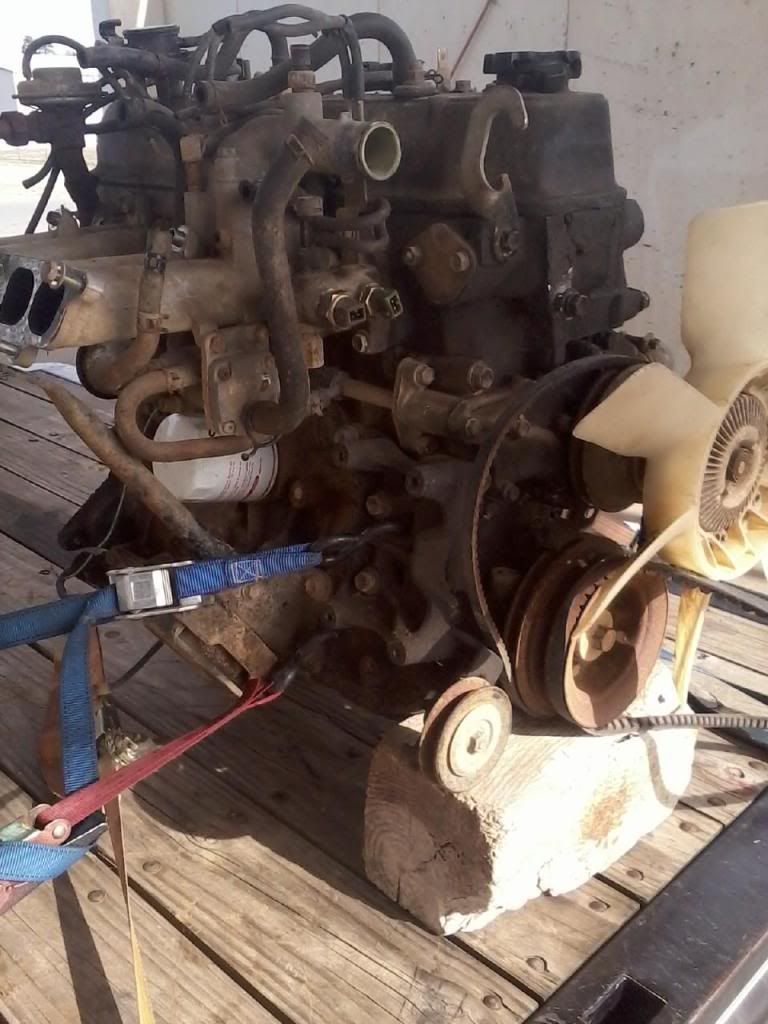
Got it cleaned. Luckily I have a carwash about 2 miles form me. Alot cleaner. Rear main is leaking bad. The engine compartment had a lot of build up in it. Started getting it soaking in Purple Power and scrapping. MESSY.
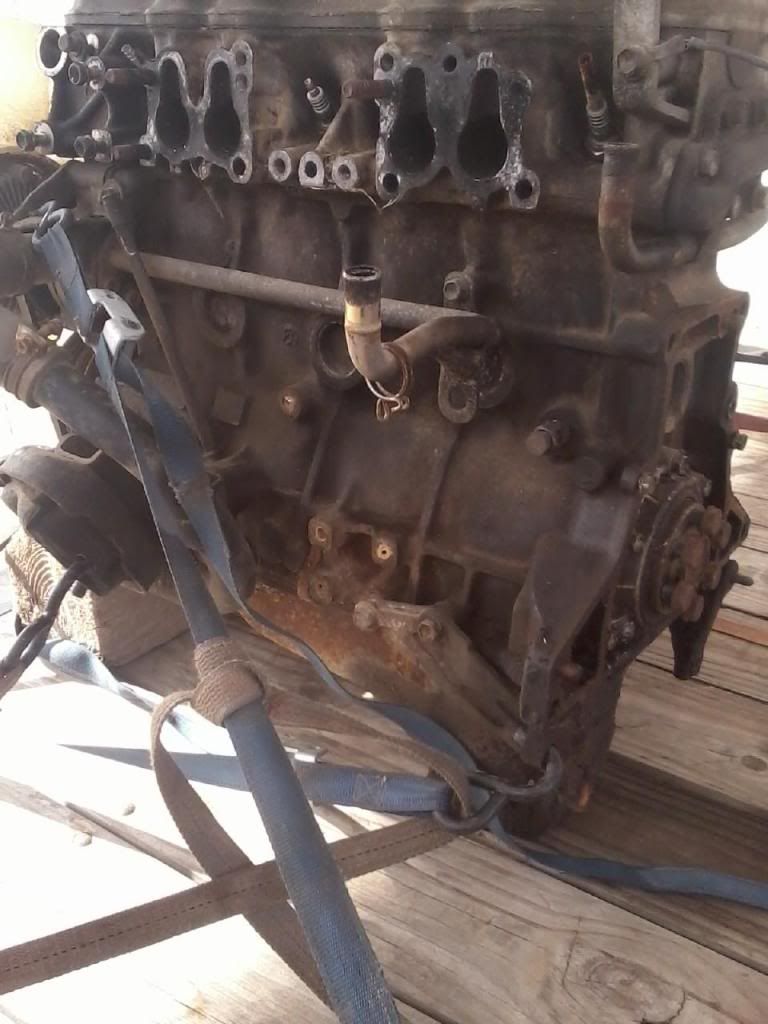
Got the head off and it looks okay for now. I have never had such difficulty getting a head off. 3 head bolts were really stuck on. I will send it to the machine shop next week and have it looked at.
Timing chain has worn into the cover. Cant tell if it got into the water jacket. Dont think so at this time. The right guide is completely gone.
Dont have pictures but I did get the Plenum cleaned at the carwash. The carbon that was in there was really thick. Had the carwash floor completly black for a little bit as it was floating off to the drain.
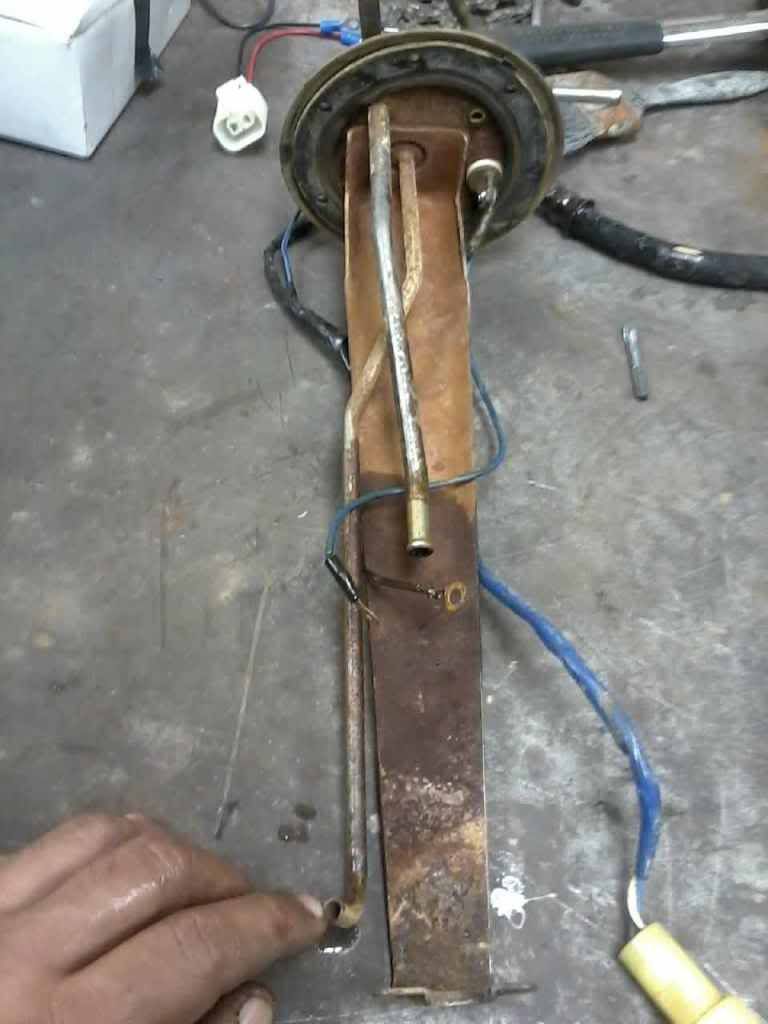
The other day I was working on getting my fuel level sending unit freed up. I use a rust dissolver on it and a wire tooth brush. It moves freely now.
This stuff works great.
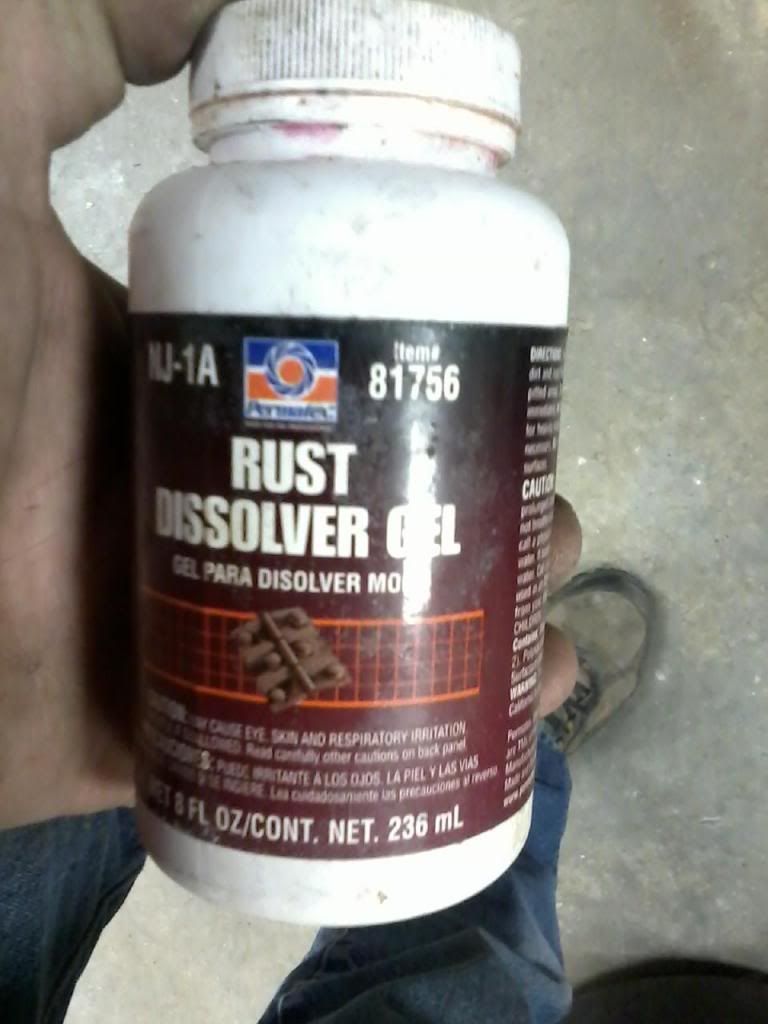
Float level I was working on, this is most likely your problem if fuel guage isnt working. Easy fix, once you get the bed off or on a runner, you have to drop the tank as it is located behind the acess panel.
Did get the motor out and cleaned. Orginally wasnt going to tear the motor apart, but after seeing some shabby work done on it previous, thought I better. Here it as several leaks and is just pulled.
Got it cleaned. Luckily I have a carwash about 2 miles form me. Alot cleaner. Rear main is leaking bad. The engine compartment had a lot of build up in it. Started getting it soaking in Purple Power and scrapping. MESSY.
Got the head off and it looks okay for now. I have never had such difficulty getting a head off. 3 head bolts were really stuck on. I will send it to the machine shop next week and have it looked at.
Timing chain has worn into the cover. Cant tell if it got into the water jacket. Dont think so at this time. The right guide is completely gone.
Dont have pictures but I did get the Plenum cleaned at the carwash. The carbon that was in there was really thick. Had the carwash floor completly black for a little bit as it was floating off to the drain.
The other day I was working on getting my fuel level sending unit freed up. I use a rust dissolver on it and a wire tooth brush. It moves freely now.
This stuff works great.
Float level I was working on, this is most likely your problem if fuel guage isnt working. Easy fix, once you get the bed off or on a runner, you have to drop the tank as it is located behind the acess panel.
Last edited by Terrys87; 09-10-2015 at 01:54 PM.
01-16-2012, 09:31 PM
#32
Registered User
Join Date: Mar 2009
Location: (LSD) Lower Slower Delaware
Posts: 1,169
Likes: 0
Received 0 Likes
on
0 Posts
Wow, getting a lot of work done, I had to work this weekend and the holiday so off one day today then the weekend coming I'm off. Great job with the motor, looks good.
01-17-2012, 12:42 AM
#33
Super Moderator
Staff
Thread Starter
iTrader: (1)
Join Date: Aug 2008
Location: Anderson Missouri
Posts: 11,788
Likes: 0
Received 21 Likes
on
19 Posts
Thanks twisted.. I got after it today. We are getting cold weather soon and trying to get a big jump on it.
Thanks Jason.. I learned alot of little tricks on my last build that is making this one alot quicker in the long run. Trying to get all of the little fixes done at once.
Thanks RMP8080..I kept thinking that I would finish one step and call it quits.One thing led to another and time really flew by. Also trying to take advantage of the warm weather we had and we are to get some cold weathter soon. Last Thursday I was locked up inside the house and that nearly drove me nuts. Didnt get to do anything but play on the computer. Hope this cold spell will pass soon. When I finally did stop, I was whipped.
01-17-2012, 01:05 AM
#34
Super Moderator
Staff
Thread Starter
iTrader: (1)
Join Date: Aug 2008
Location: Anderson Missouri
Posts: 11,788
Likes: 0
Received 21 Likes
on
19 Posts
While cleaning the Plenum, I got a big chunk of carbon out of it. It is at least a 1/4 inch thick. It was dirtyyyy. It was all through the Plenum and had hoses blocked. This is why I block off the EGR.

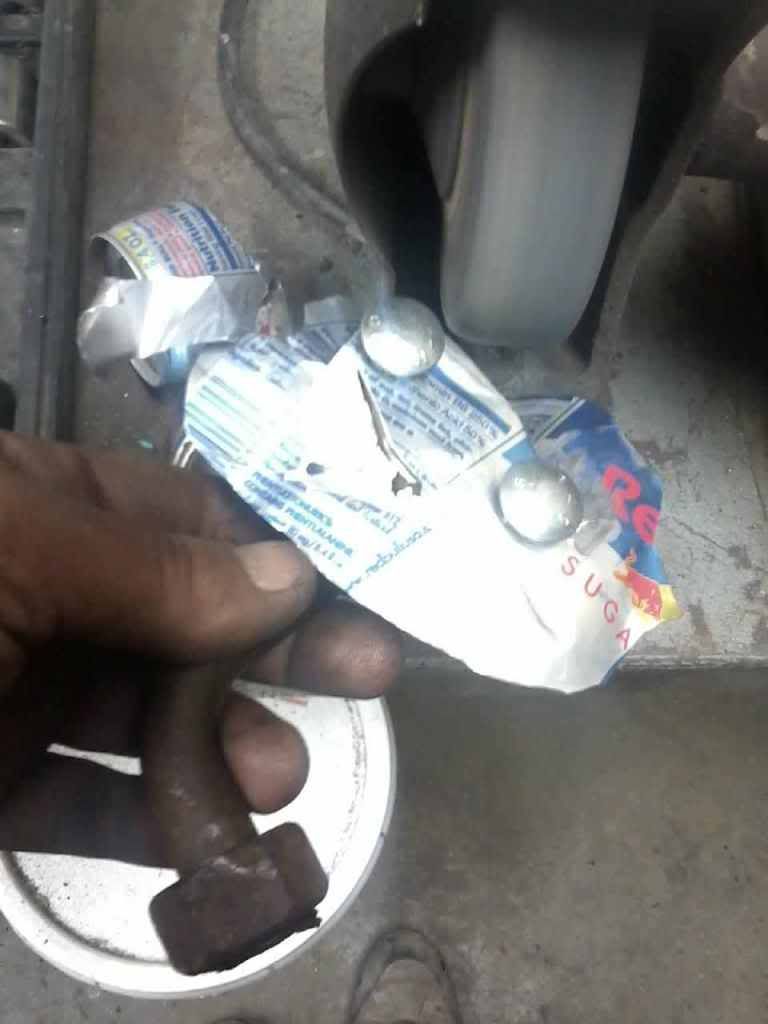
When cleaning the EGR, this pipe will usually be plugged. I clean the EGR and put the block off plate in it to trick the computer into thinking it is working. No error codes and a cleaner motor. While trying to seperate the EGR, the pipe broke. I think I have a spare in the shed. But using this picture to show where to check.

My high tech block off plate. Using a Red Bull can. Here you can see where the pipe broke.
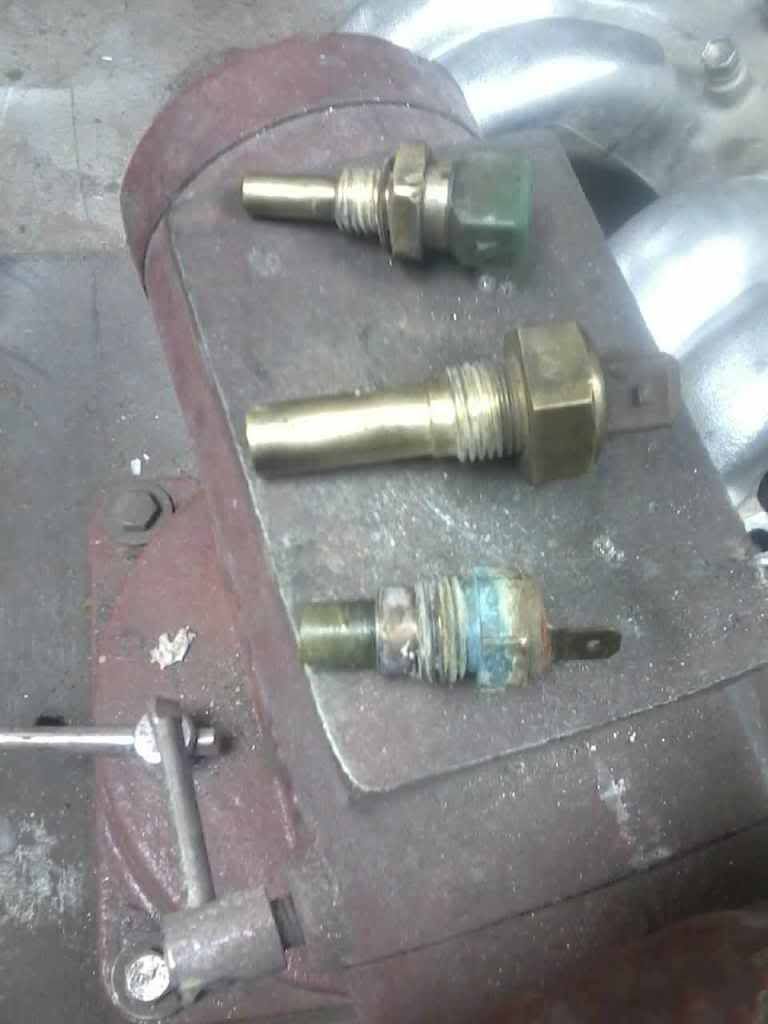
While tearing down the head, I cleaned the sensors. The top two are cleaned, but the bottom one isnt clean. This one goes to your water temp guage. I have had some gauges jumping from cold to hot. This one isnt as bad as some I have seen, Cleaning this one can solve your erratic readings. I just use a wire brush or a green scrub pad.
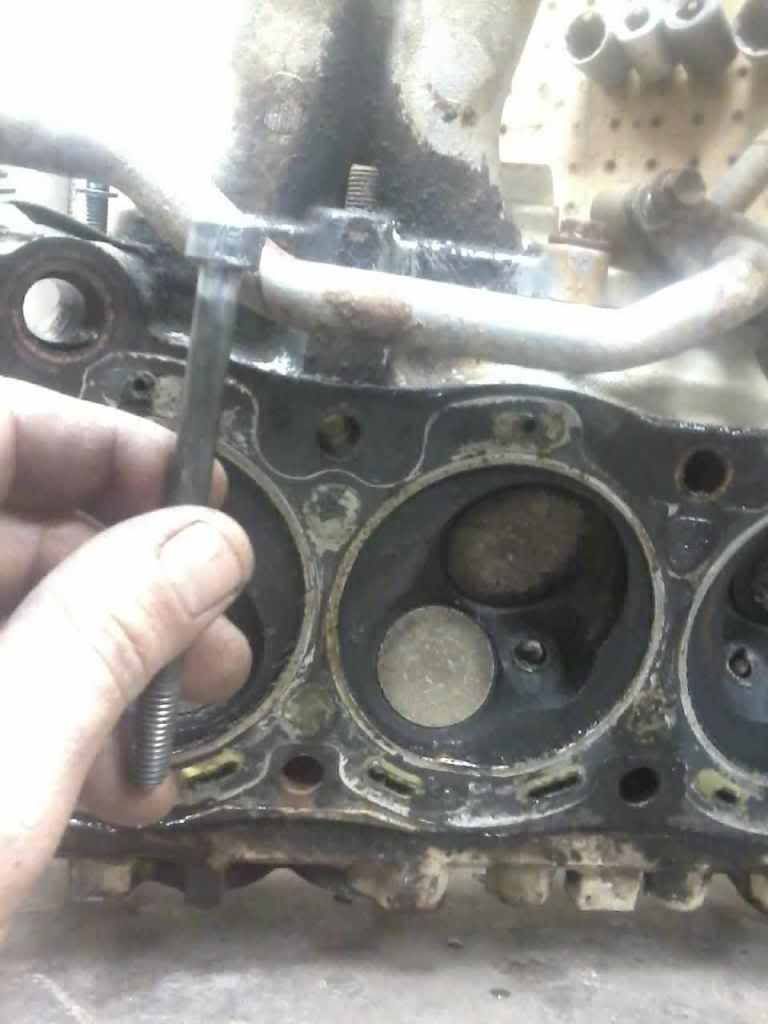
This picture is to show the PO missed a nut. Another reason I am glad that I am going through this motor.
I have had the hex allen bolt to strip out on me on past builds. Now I just use vise grips to get it out on the first time I tear one down. Then oil it up when I reinstall it. Just dont torque it so hard. I have never had a problem doing it this way when I have to go back and service the intake side later on.
Also I keep the old head gasket to compare to my new head gasket when I get it. Just to make sure everything lines up. I had a build several years ago that gave me a lot of problems. One of the coolant holes didnt get punched out and the motor kept over heating. It was a tough one to find. Another thing that is shown but I like to keep all of my head parts in plastic bins so as not to loose anything. It really helps keeping things together.
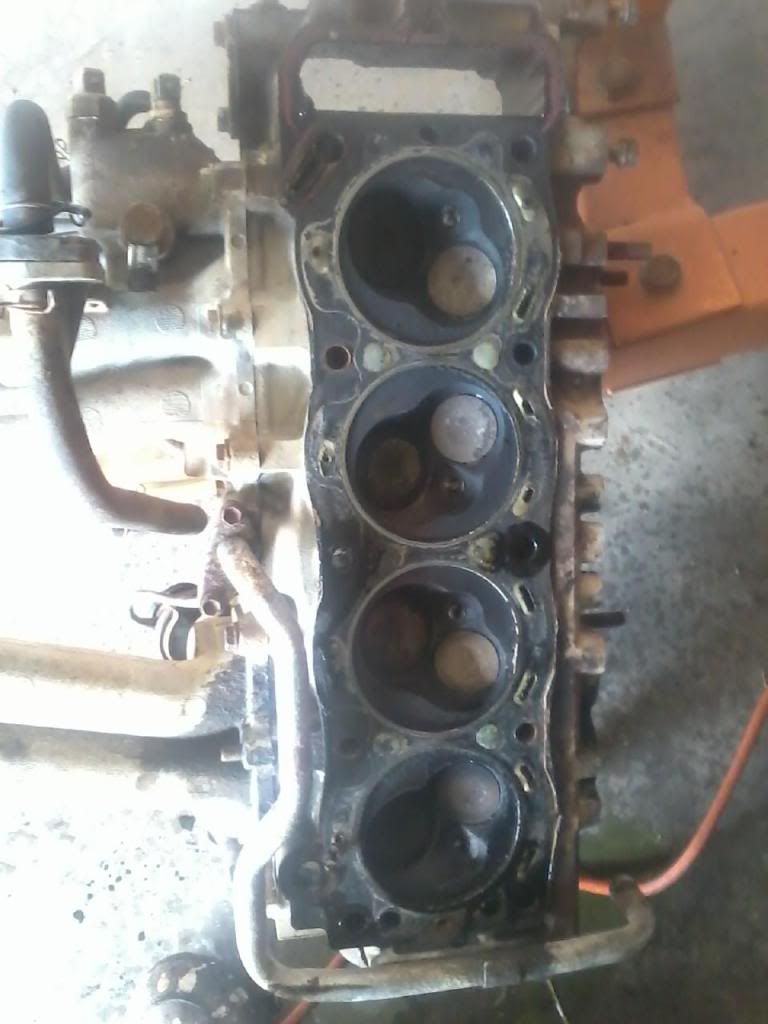
I am feeling better about this head. I think alot of the gunk on the pistons was just carbon build up. Still trying to get the head cleaned to see if all is well. My cam turns so that is a good sign. No warped camshaft.
When cleaning the EGR, this pipe will usually be plugged. I clean the EGR and put the block off plate in it to trick the computer into thinking it is working. No error codes and a cleaner motor. While trying to seperate the EGR, the pipe broke. I think I have a spare in the shed. But using this picture to show where to check.
My high tech block off plate. Using a Red Bull can. Here you can see where the pipe broke.
While tearing down the head, I cleaned the sensors. The top two are cleaned, but the bottom one isnt clean. This one goes to your water temp guage. I have had some gauges jumping from cold to hot. This one isnt as bad as some I have seen, Cleaning this one can solve your erratic readings. I just use a wire brush or a green scrub pad.
This picture is to show the PO missed a nut. Another reason I am glad that I am going through this motor.
I have had the hex allen bolt to strip out on me on past builds. Now I just use vise grips to get it out on the first time I tear one down. Then oil it up when I reinstall it. Just dont torque it so hard. I have never had a problem doing it this way when I have to go back and service the intake side later on.
Also I keep the old head gasket to compare to my new head gasket when I get it. Just to make sure everything lines up. I had a build several years ago that gave me a lot of problems. One of the coolant holes didnt get punched out and the motor kept over heating. It was a tough one to find. Another thing that is shown but I like to keep all of my head parts in plastic bins so as not to loose anything. It really helps keeping things together.
I am feeling better about this head. I think alot of the gunk on the pistons was just carbon build up. Still trying to get the head cleaned to see if all is well. My cam turns so that is a good sign. No warped camshaft.
Last edited by Terrys87; 09-10-2015 at 05:06 PM.
01-17-2012, 04:14 AM
#35
Registered User
Join Date: Jul 2009
Location: Eastern NC
Posts: 832
Likes: 0
Received 0 Likes
on
0 Posts
Terry I used your soda can trick the last time I blocked off an EGR. Except I made it a little different way. I layed the aluminum on the Yflange, then tapped the holes with a ball pean hammer until they fell out. Makes a nice round hole in the aluminum. Then insert some bolts, then tap around the outside of the flange until the unused aluminum falls off. Makes a nice pretty block off plate.
01-17-2012, 04:35 AM
#36
Super Moderator
Staff
Thread Starter
iTrader: (1)
Join Date: Aug 2008
Location: Anderson Missouri
Posts: 11,788
Likes: 0
Received 21 Likes
on
19 Posts
I will give that a try. That would probably make a nicer looking plate. Thanks for the idea. It doesnt take much to block it off. I wish I could of gotten pictures at the carwash yesterday. The pistons and valves were really coated up with carbon.
01-17-2012, 05:45 AM
#37
Registered User
Join Date: Jul 2009
Location: Eastern NC
Posts: 832
Likes: 0
Received 0 Likes
on
0 Posts
Yeah when I rebuilt this last one, I pulled the cold start injector out, it was like pulling he core out of an apple. Took it to work and used the steam genny to clean it. Not a good idea at work. Could have Goren in a lot of trouble for the run off but we were able to catch it.
01-18-2012, 08:19 PM
#38
Super Moderator
Staff
Thread Starter
iTrader: (1)
Join Date: Aug 2008
Location: Anderson Missouri
Posts: 11,788
Likes: 0
Received 21 Likes
on
19 Posts
Tinman..awhile back we were talking about torpedo heaters and dont know if you know about this or not. I was at the hardware store and pricing some kerosene. Around here it goes for 8-11 dollars a gallon. The store manager was telling me to use farm diesel, the one with red dye in it. I used it today and it worked great. Since it is not to be used for driving on the road it was $3.20 a gallon. It can be hard to find but I was really happy how it worked. No fumes that I noticed, but that doesnt mean I have the greatest sense of smell. Did have a puff of smoke when it first started, but after that it ran like a champ.
Hello Jason.. I was talking to you last nite and I think you will like the farm diesel in your heater. I tried to see if I could smell an odor from it and couldnt. My shop has air drafts in it and like the store manager told me that he has worked for hours in his shop with his and doenst get smells or headache with his. Just thought I would pass this along to others that might be in the same situation.
Today I spent some time in the shop just cleaning my engine bay. It was cold so I didnt use any water. Just used a drill an a wire brush for getting the gunk off of the frame and front axle. I actually have a vent relief valve on my front axle after getting the crud off of it.
This being a week of not spending anything on my projects, I have been able to find several different things that I can do without spending money. One is getting the shop cleaned back up after today, but found 2 or 3 partially used gasket kits from previous projects that would nearly make up a full set, so will be able to finish the bottom end of the motor.
Found a roll of Peel and Seal and want to get it in soon. Got a lot of little things to rattle can paint once I get them cleaned. It all adds up. Alot of this I just posted on my 83 build, but even without funds this week, it has really been a good week for me. I could probably go another week if I have to without spending. Maybe this will help someone out when funds are tight. Just got to get creative.
01-18-2012, 09:05 PM
#40
Registered User
iTrader: (2)
Join Date: Dec 2009
Location: Pleasanton, CA - SF Bay Area
Posts: 2,159
Likes: 0
Received 7 Likes
on
5 Posts
Doesn't it make you fail smog here in CA? I failed this year and it turned out my EGR was clogged/hoses were messed up. Cleaned it, fixed hoses, and clean as a whistle!


