Gevo's 91 4Runner Build Thread
 08-04-2014, 10:04 AM
#221
Registered User
Thread Starter

Well, I purchased a new pigtail from the dealer, but it was the wrong one. So, I just made my own plug. The knock sensor only has ONE pin to connect to, however the shielding starts at the knock sensor end which doesn't connect to anything on this side, and the other end of the pigtail there are two pins. The shielding connects to the harness (or if you install new wiring it will connect to the shielding of the new wire, and then it gets grounded to the E1 (BROWN) wire at the ECU end. Now, all my reading on there said "at the ECU end" but really it turns out that the shield is grounding somewhere before you get to the ECU. I never found exactly where, so I spliced into the E1 wire a few inches away from the ECU harness end connector. It works well!
I suggest to force your engine to knock after the install and check to see that the knock sensor is reading the knocking and giving you code 51. This confirms that at least at some level of knocking the knock sensor works in the new location.
I suggest to force your engine to knock after the install and check to see that the knock sensor is reading the knocking and giving you code 51. This confirms that at least at some level of knocking the knock sensor works in the new location.
 08-04-2014, 11:00 AM
#222
Registered User

BTW, this is the dome light I used for replacement. It's a little blue in the cool blue (fluorescent light blue tint), but very bright.
http://www.superbrightleds.com/morei...d-festoon/238/
The clip tensioners in my dome unit were a little tight for this so I had to bend them out slightly as the metal end clips started to bend in towards the led circuit board when I tried to install.
I left my map lights off the rearview mirror in the standard more yellow configuration.
I have thought about trying the warm white as well but from most of what I've seen reviewed, it's less bright visually despite being a less harsh color...
 08-05-2014, 08:26 AM
#226
Registered User
Thread Starter
BTW, this is the dome light I used for replacement. It's a little blue in the cool blue (fluorescent light blue tint), but very bright.
http://www.superbrightleds.com/morei...d-festoon/238/
The clip tensioners in my dome unit were a little tight for this so I had to bend them out slightly as the metal end clips started to bend in towards the led circuit board when I tried to install.
I left my map lights off the rearview mirror in the standard more yellow configuration.
I have thought about trying the warm white as well but from most of what I've seen reviewed, it's less bright visually despite being a less harsh color...
http://www.superbrightleds.com/morei...d-festoon/238/
The clip tensioners in my dome unit were a little tight for this so I had to bend them out slightly as the metal end clips started to bend in towards the led circuit board when I tried to install.
I left my map lights off the rearview mirror in the standard more yellow configuration.
I have thought about trying the warm white as well but from most of what I've seen reviewed, it's less bright visually despite being a less harsh color...
 08-08-2014, 10:41 PM
#227
Registered User
08-11-2014, 01:12 PM
#228
Registered User
Thread Starter
Some more work last week on the 4Runner. I had my temp light go on on the way back from camping, few 2nd gear shifts going up the 6% grade I guess overpowered the stock cooling system. Engine was solid though. ANyway, bunch of research later I decided I need to get fresh unburnt oil in the tranny and finally install my B&M oil cooler I've had for many months.
I followed some advice I found on here and after draining the tranny and transfer case, I put a bucket under the feeder oil line to the cooler and started the engine and stopped after about a 1quart, until I put 116 liters through it.
I was a little surprised to find so much sludge in the oil pan as seen below. Only about 5500 miles on the rebuilt tranny with new oil. Did the shop just put really ˟˟˟˟ty oil? Did the oil just wash up dirt and grime leftover from the rebuilt and deposit in pan?
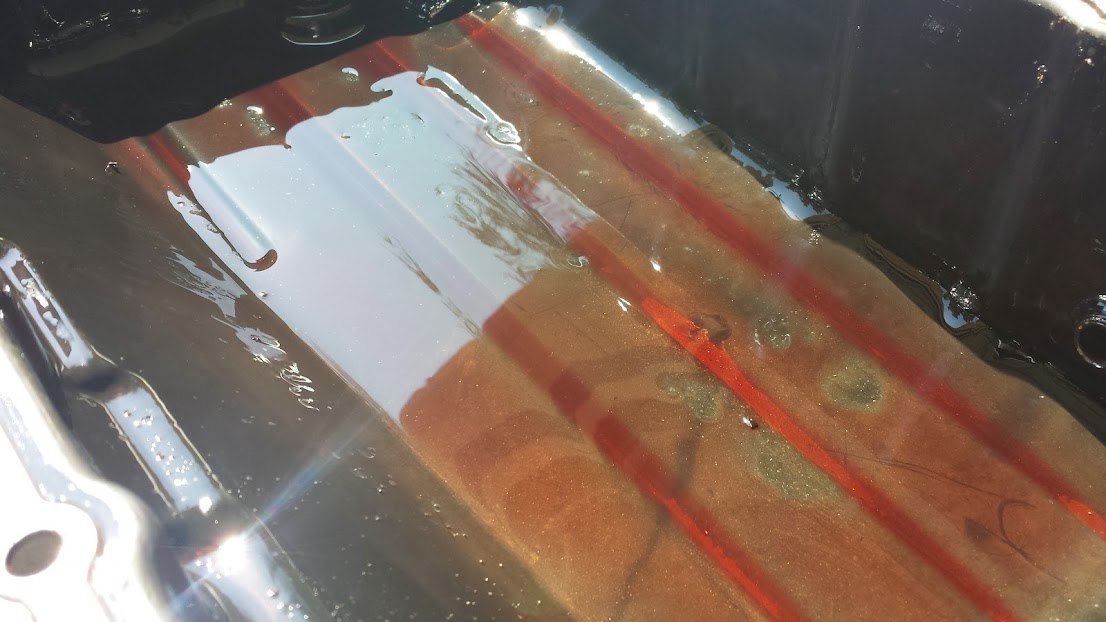


There were no metal shaving luckily, just the regular very fine metallic dust... interesting kind of magnet btw.

Put a new kickdown cable in, old one, as seen, was all jacked up.

Well, new filter and gaskets in.. pan on.. two stripped bolts that the rebuild shop said they fixed... which they didn't!!!
Then I broke off one of the stub outs on the tranny oil cooler, the one built into the radiator, oops... luckily i'm not going to be using it anymore...
NEXT TASK.. mount the oil cooler somewhere... doesn't fit in the grille area
I followed some advice I found on here and after draining the tranny and transfer case, I put a bucket under the feeder oil line to the cooler and started the engine and stopped after about a 1quart, until I put 116 liters through it.
I was a little surprised to find so much sludge in the oil pan as seen below. Only about 5500 miles on the rebuilt tranny with new oil. Did the shop just put really ˟˟˟˟ty oil? Did the oil just wash up dirt and grime leftover from the rebuilt and deposit in pan?
There were no metal shaving luckily, just the regular very fine metallic dust... interesting kind of magnet btw.
Put a new kickdown cable in, old one, as seen, was all jacked up.
Well, new filter and gaskets in.. pan on.. two stripped bolts that the rebuild shop said they fixed... which they didn't!!!
Then I broke off one of the stub outs on the tranny oil cooler, the one built into the radiator, oops... luckily i'm not going to be using it anymore...
NEXT TASK.. mount the oil cooler somewhere... doesn't fit in the grille area
08-12-2014, 11:03 AM
#229
Registered User
Join Date: Jul 2014
Posts: 11
Likes: 0
Received 0 Likes
on
0 Posts
Gevo, when you spliced in to the knock sensor wire down by the ECU, how did you connect the wires? Did you just twist them together and tape them, solder-less connector or solder them together and did you just ground the shield wire to the body? I am getting ready to put a wire in and was wondering how you connected them. I actually went to a salvage yard and found a wire in way better shape than mine and pulled it out of the harness and I am going to splice it in. I will test it first before I start and make sure its in good shape.
Last edited by shdwrdr; 08-12-2014 at 11:05 AM.
08-12-2014, 11:15 AM
#230
Registered User
Thread Starter
Well, the sensor wire I simply cut at the ecu harness, leaving a few inches to play with. Ideally, I was looking for a new pin to use in the harness connector, but that's hard to find. Just cut the existing sensor wire and use a solderless connector. Find the best quality one you can. You can solder to if you want, as long as the wires are in good clean condition. Either way, it should work.
Where to connect/splice the shielding wire is a little less straight forward. The shielding wire itself never makes it to the ECU harness, best I can tell from the wiring diagrams it connects to the E1 wire near the firewall grounding point at the end of the right side fuel rail. But, that's an annoying location to access, and after discussing with an electrical engineer buddy of mine we decided that I can connect the shielding wire to the E1 wire at the ECU harness. SPlice into this one of course, don't cut it. I used a splicing connector, the push type, and did as clean a job as possible. It worked out well
sorry long response, but I spent a lot of time dealing with this so.. there.
08-13-2014, 04:45 AM
#231
Registered User
Join Date: Jul 2014
Posts: 11
Likes: 0
Received 0 Likes
on
0 Posts
Cool thanks. That helps a bunch. My wire I got I pulled all the way out of the harness and looks in great shape and the shield wire actually comes all the way down the harness to just before the wires split to the different pin connectors and is blended into some other shielded wires. When I took the one I got out I didn't pay closer attention to how it connected to those wires so I will do the best I can and hope I can cure what ales it.
08-13-2014, 06:36 AM
#232
Registered User
Thread Starter
Cool thanks. That helps a bunch. My wire I got I pulled all the way out of the harness and looks in great shape and the shield wire actually comes all the way down the harness to just before the wires split to the different pin connectors and is blended into some other shielded wires. When I took the one I got out I didn't pay closer attention to how it connected to those wires so I will do the best I can and hope I can cure what ales it.
PS: I am procrastinating from starting work....
08-16-2014, 10:53 PM
#234
Registered User
Thread Starter
Today I installed the aussie locker in the rear dif. All instructions sucked. Most of my time was spent on trying to determine if being at the min tolerance was acceptable. Lol. I will post the story with some pics soon. Fun day. Lots learned!!
Last edited by Gevo; 08-19-2014 at 06:30 AM.
08-19-2014, 07:35 AM
#235
Registered User
Thread Starter
As promised to the few that may stray in this thread.
The install pics. Actually, not very many pics because as you imagine it is a heck of a messy job.
To start with, everything was cleaned and parts in the way were removed/bolted and tied away. All the internals seemed to be in good condition. The gear oil in there was only about 5500 miles old and I could say there were no metal particles to worry about. The differential case had the number 99 written on it, I couldn't figure out why.. perhaps this isn't the original axle from 1991?

Marked the parts. the I side and the II side

Since I would not be able to measure backlash, the plan was to put everything back in the same position, so I tried to take pictures of the gaps and tolerances.

Admittedly, we took a few measurements that were pointless in the end. lol

Didn't want to remove the gear as the aussie instruction suggest, so we came up with another way to measure this tolerance. It was at the min limit, which I supposed is better than the max limit.

My buddies sniffing gear oil.

As i said earlier, the condition of all the internals was excellent. No visible wear on the bearings, bushings.. etc. The seals had not been leaking either, no noise or vibration. So, expect the same after install.

From there, no more pics. After installation of gear set back into the case, we tried various methods to measure the backlash as a garage mechanic would do. We were unable to get a solid measurement, but it was roughly about .008. At this point, admittedly, it was getting late and we rushed the rest of the installation and didn't do a pattern check which is easy to do and would show somewhat if things were in the right place. Well as part of the bad decisions made during re-assembly and installation, we didn't even add any more load on the bearing adjuster nuts. Anyway, with the axles put back, there was a bit more backlash. I imagine the tolerances added and I had about an inch of play at the brake drum, as seen below.

I think this is more than it should be, because in some cases during reverse and forward shifts it slightly clunks.
The plan is, after a few hundred miles or so to remove, check everything, freshen up the bearing loads and find a real way to check backlash and pattern. Regardless, soon enough I will be getting new gears, probably 4.88 ratio for 32 inch tires. But that's far enough down the road (current tires are new) that I am afraid of doing damage to the internals. I spoke with ZUK, who I will be sending my differentials to for re-gear in the future, he also doesn't think that the installation would cause damage to the locker, which is pretty much what I'm mostly worried about.
OTHERWISE, everything seems to be working really well. Locker passed all tests, works in the streets, works on the dirt. Haven't wheeled yet so... No vibrations from the rear end, no noises... no leaks... I'm gonna give it a couple more weeks and see if maybe I can wait and not touch it at all until re gear time.
The install pics. Actually, not very many pics because as you imagine it is a heck of a messy job.
To start with, everything was cleaned and parts in the way were removed/bolted and tied away. All the internals seemed to be in good condition. The gear oil in there was only about 5500 miles old and I could say there were no metal particles to worry about. The differential case had the number 99 written on it, I couldn't figure out why.. perhaps this isn't the original axle from 1991?
Marked the parts. the I side and the II side
Since I would not be able to measure backlash, the plan was to put everything back in the same position, so I tried to take pictures of the gaps and tolerances.
Admittedly, we took a few measurements that were pointless in the end. lol
Didn't want to remove the gear as the aussie instruction suggest, so we came up with another way to measure this tolerance. It was at the min limit, which I supposed is better than the max limit.
My buddies sniffing gear oil.
As i said earlier, the condition of all the internals was excellent. No visible wear on the bearings, bushings.. etc. The seals had not been leaking either, no noise or vibration. So, expect the same after install.
From there, no more pics. After installation of gear set back into the case, we tried various methods to measure the backlash as a garage mechanic would do. We were unable to get a solid measurement, but it was roughly about .008. At this point, admittedly, it was getting late and we rushed the rest of the installation and didn't do a pattern check which is easy to do and would show somewhat if things were in the right place. Well as part of the bad decisions made during re-assembly and installation, we didn't even add any more load on the bearing adjuster nuts. Anyway, with the axles put back, there was a bit more backlash. I imagine the tolerances added and I had about an inch of play at the brake drum, as seen below.
I think this is more than it should be, because in some cases during reverse and forward shifts it slightly clunks.
The plan is, after a few hundred miles or so to remove, check everything, freshen up the bearing loads and find a real way to check backlash and pattern. Regardless, soon enough I will be getting new gears, probably 4.88 ratio for 32 inch tires. But that's far enough down the road (current tires are new) that I am afraid of doing damage to the internals. I spoke with ZUK, who I will be sending my differentials to for re-gear in the future, he also doesn't think that the installation would cause damage to the locker, which is pretty much what I'm mostly worried about.
OTHERWISE, everything seems to be working really well. Locker passed all tests, works in the streets, works on the dirt. Haven't wheeled yet so... No vibrations from the rear end, no noises... no leaks... I'm gonna give it a couple more weeks and see if maybe I can wait and not touch it at all until re gear time.
09-02-2014, 09:04 PM
#236
Registered User
Thread Starter
I found an oppertunity to score some 1995 parts for a good price. I found the wheels I want . !!!
I bought a 1995 4x4 4runner with 156k miles. Its been garaged for longer than my 1991, shows in less sun damage to plastics and such. Anyway. It has the 4.88. I put a list of things im selling from it in classifides section here. Oh, engine starts but loooots of loud banging.. valves?
Im excited to swap some things out and clean up my 1991
. !!! I bought a 1995 4x4 4runner with 156k miles. Its been garaged for longer than my 1991, shows in less sun damage to plastics and such. Anyway. It has the 4.88. I put a list of things im selling from it in classifides section here. Oh, engine starts but loooots of loud banging.. valves?
Im excited to swap some things out and clean up my 1991
 09-11-2014, 02:39 PM
#239
Registered User
Thread Starter
Live update from the tire shop. Swapping my rims! Old rims and tires ff of car. New (stock) rims mounted by current tires on current rim. Old rims mounted with old tires removed from new stock rims. Thats not confusing, right? Well, the guys here took a second...
Point being.. finally u get rid of these rims and go to the awesome stock rims from 1989
Point being.. finally u get rid of these rims and go to the awesome stock rims from 1989


