Dutchbelly's 1988 4runner Build-up

 06-12-2011, 10:54 AM
#162
Registered User
Thread Starter
Join Date: Apr 2011
Location: Southern Ontario
Posts: 428
Likes: 0
Received 0 Likes
on
0 Posts
So I pulled the fuel pump from the tank just now and everything is caked with rust. I'm thinking I should just find a replacement tank with a working pump and sending unit from a junk yard or something. anyone know if the 2nd gen runners use the same tanks? Or am I stuck searching for 1st gen part trucks
06-12-2011, 05:20 PM
#163
Registered User
Thread Starter
Join Date: Apr 2011
Location: Southern Ontario
Posts: 428
Likes: 0
Received 0 Likes
on
0 Posts
Went back to work on the truck again today. It was pretty dark when I was painting the frame yesterday, and I missed a few spots on the front end:
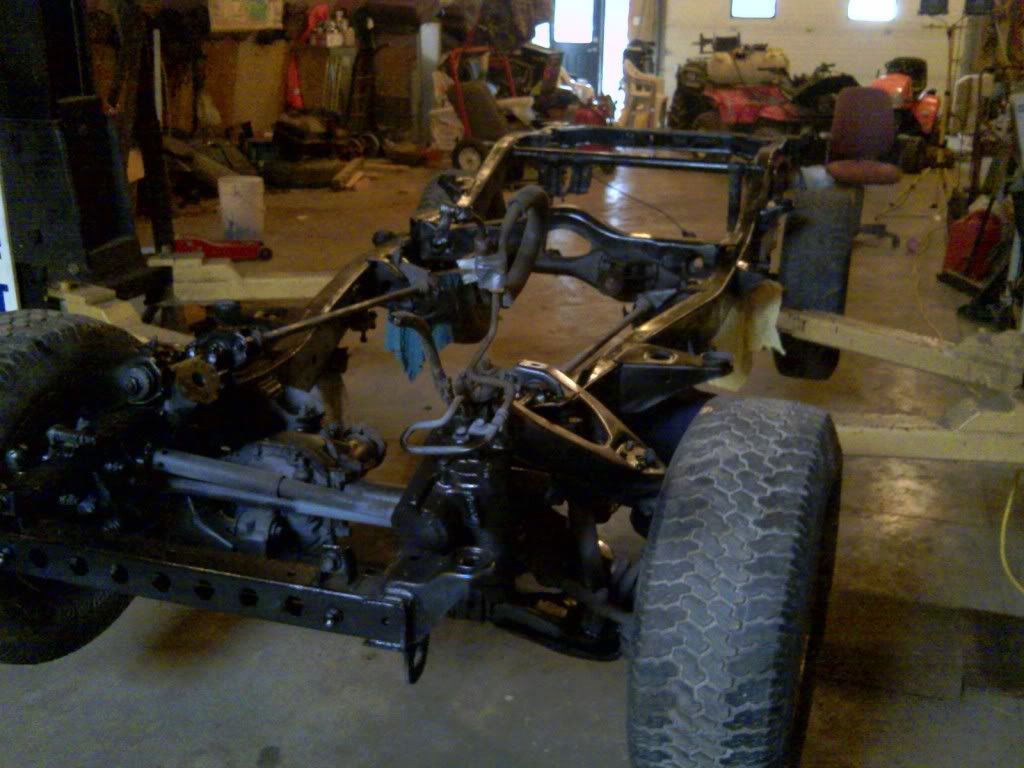
I wanted to touch up what I had missed and throw a second coat on the thing, but I had neglected to pick up paint thinner, so I wouldn't have been able to clean out the gun after I was done. I ended up looking for other things to do. I sandblasted the bracket for the gas tank skid plate and a few brake fitting/brackets:
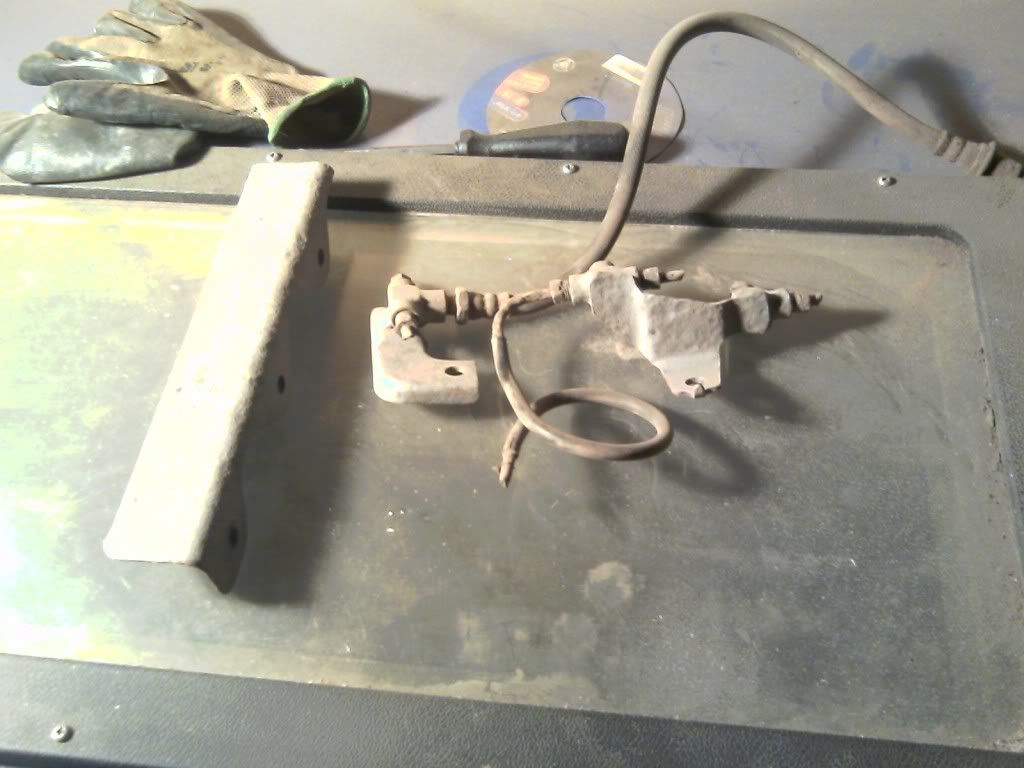
I then decided to pull out the fuel pump so I could see what I was dealing with. If you read my previous post this won't be a surprise:
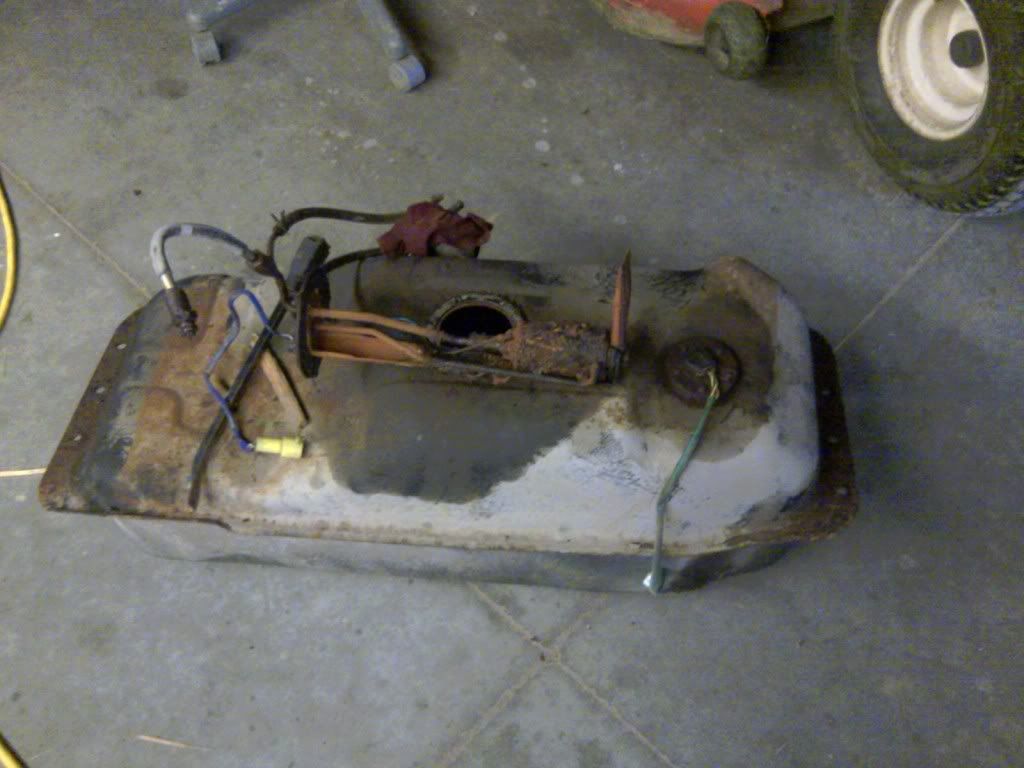
Needless to say I wasn't too thrilled with what I saw. I'll be calling the yards nearby hoping for a deal on a tank with everything on it. I looked it up, the 2nd gen runners apparently don't use the same tanks, which is unfortunate. There are much less of the 1st gen ones around here, and I don't want to spend too much money. The only other thing I had to work on at this point was removing the front tires, and it was becoming very clear I wouldn't be getting them off without torching and smashing the rims. I got lucky and found a deal on kijiji. There was a guy selling 4 aluminium rims and a spare steel rim with 31x10.5" rubber on them for 150 bucks. I sent him a reply saying I was only really interested in the rims, and would he consider selling just the rims for a lower price. He replied saying I could have the whole deal for 100 bucks. I jumped on it and went out to pick them up:
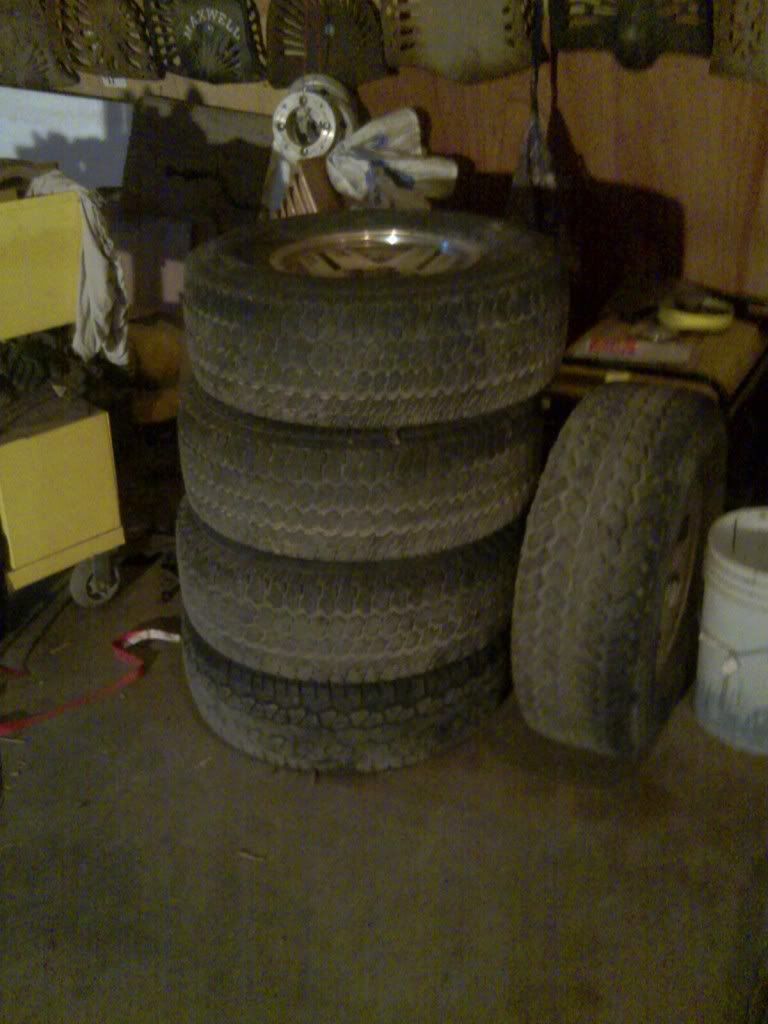

If I have time tomorrow I want to finish painting the frame if the weather is good. Otherwise I'll be beating the crap out of the front rims to remove them now that I have replacements.
It was a pretty good day. I didn't get done what I was hoping to, but ended up dealing with other things instead.
I wanted to touch up what I had missed and throw a second coat on the thing, but I had neglected to pick up paint thinner, so I wouldn't have been able to clean out the gun after I was done. I ended up looking for other things to do. I sandblasted the bracket for the gas tank skid plate and a few brake fitting/brackets:
I then decided to pull out the fuel pump so I could see what I was dealing with. If you read my previous post this won't be a surprise:
Needless to say I wasn't too thrilled with what I saw. I'll be calling the yards nearby hoping for a deal on a tank with everything on it. I looked it up, the 2nd gen runners apparently don't use the same tanks, which is unfortunate. There are much less of the 1st gen ones around here, and I don't want to spend too much money. The only other thing I had to work on at this point was removing the front tires, and it was becoming very clear I wouldn't be getting them off without torching and smashing the rims. I got lucky and found a deal on kijiji. There was a guy selling 4 aluminium rims and a spare steel rim with 31x10.5" rubber on them for 150 bucks. I sent him a reply saying I was only really interested in the rims, and would he consider selling just the rims for a lower price. He replied saying I could have the whole deal for 100 bucks. I jumped on it and went out to pick them up:
If I have time tomorrow I want to finish painting the frame if the weather is good. Otherwise I'll be beating the crap out of the front rims to remove them now that I have replacements.
It was a pretty good day. I didn't get done what I was hoping to, but ended up dealing with other things instead.
06-13-2011, 12:29 AM
#165
Super Moderator
Staff
iTrader: (1)
Join Date: Aug 2008
Location: Anderson Missouri
Posts: 11,788
Likes: 0
Received 21 Likes
on
19 Posts
Wow Dutch!! You sure can move quick. The frame is looking great. It is alot nicer working on clean things and going back together is the fun part.
After all of the soaking and work you have done on your front rims, that is unbelievable. Guess you dont need any lug nuts. Never seen anything like that. Great deal on the wheels.
On the fuel tank, I went to 2 junk yards and there were quite a few 2nd gen 4Runners and they told me they werent interchangeable. Found a first gen that had one, but it was carberated so it wouldnt work either. Other then new they are hard to find. I would of liked to kept the tank out of the one we parted, but it was way beyond repair.
You cant use a truck tank either looking at my flat bed. The tanks look the same but the filler neck is across from the fuel guage. On yours the filler neck is across the fuel pump. Also the salvages told me they werent interchangeable. Guessing that is the reason. The fuel level guage can be corroded up really good and not move. I tried PB Blaster and a brass toothbrush and got mine working great. These tanks can get in bad shape.
06-13-2011, 05:38 AM
#166
Registered User
Thread Starter
Join Date: Apr 2011
Location: Southern Ontario
Posts: 428
Likes: 0
Received 0 Likes
on
0 Posts
Thanks guys. it really feels like the frame painting and seized wheels have really held me up so I really needed that reminder that yes, I'm still making progress. I expected the wheels to give me trouble but the back ones came off fine so I was amazed at the front ones. Different type of metal touching for long periods of time is a bad scene. It's why they had to replace the bolts in the statue of liberty the statue I think is all copper, and the bolts werent so the bolts rotted out because of the reaction between the two metals. aluminium on steel creates a reaction called electrolysis. They've been on there so long they've actually welded together. it's going to take a serious amount of heat and shock to break them free. and apparently the fuel pump brackets are different for the 4 cylinder truck and the 6 cylinder truck. It's going to be a lot of searching.
Last edited by Dutchbelly; 06-14-2011 at 07:45 PM.
06-13-2011, 07:59 AM
#167
Can't remove the entire hub with the tire attached, right? Just thought that if you can separate the studs from the rotors, MAYBE you could use a tool to grab each side, then rap on the tool on the back side to try and break it free from the wheel???????? lol... Probably sounds silly..... and I'm sure you've tried everything...Just thinking out loud for ya! lol.
06-13-2011, 10:54 AM
#168
Registered User
Thread Starter
Join Date: Apr 2011
Location: Southern Ontario
Posts: 428
Likes: 0
Received 0 Likes
on
0 Posts
Can't remove the entire hub with the tire attached, right? Just thought that if you can separate the studs from the rotors, MAYBE you could use a tool to grab each side, then rap on the tool on the back side to try and break it free from the wheel???????? lol... Probably sounds silly..... and I'm sure you've tried everything...Just thinking out loud for ya! lol.
06-13-2011, 02:14 PM
#169
Registered User
Frame looks great man, as said by others your really moving on this, sounds like a good deal on the wheels you picked up, still frustrating about the ones you have on there, but I've seen aluminum wheels on semis weld themselves on like that so it does happen but wow. Anyway looking forward to more progress.
06-13-2011, 07:24 PM
#170
Registered User

Before you sacrifice those rims jack up the one side of the front and try blows on the tire from a 5lb. sledge hammer rotating the tire so that you work your way around the wheel. The aluminum wheels and the hub have such close tolerances, that any oxidation of the wheel will weld them to the hub, but the sledge usually breaks them free and where you have the body off, you should be able to get a good swing!
From your earlier posts about the 4 cyl vs v6 calipers, both have 4 pistons, the v6 have 4 large pistons, the 4 cylinder calipers have one large and one small on each side. The upgrade is a direct bolt on, but you have to change the rotors too. Standard 4cylinder master cylinder is 7/8" bore, but an 88 cressida has a 15/16" bore and I used the one off of a cressida when I upgraded to the V6 calipers and I had great brakes!
Also when you start building brake lines...a few pointers on using a double flaring tool. the KD Tools one that you bought probably has good instructions but you need to follow the following to the letter.
Make sure the face of your brake line is flat, file off any raised part after you have deburred the line from using a tube cutter. Chamfer the outside edge at a 45 degree angle, make sure that the pipe above the clamp is exactly at the line on the tube adapter and if you put a drop or two of brake fluid on the inside of the pipe adapter where it contacts the brake line, your line will be easier to flare and your results will be perfect flares each time.
Good luck and you are doing a great job!
06-13-2011, 08:16 PM
#171
Registered User
Thread Starter
Join Date: Apr 2011
Location: Southern Ontario
Posts: 428
Likes: 0
Received 0 Likes
on
0 Posts
I need to say this:  I FINISHED PAINTING MY FRAME!!! Not sure what that emote means but he seems like he's about as excited as I am. I didn't take any pics cause it looks the same as the ones I posted earlier. It's black. Only blackerish. Anyway I'm just glad the frame's done so I can continue. I also primed and painted the pieces I sandblasted in my last progress post, and then realized I'd spent time making the rear skidplate bracket clean, and I'm not sure if I'll be using it. I might make my own skidplate that covers more of the belly of the truck, maybe out of stainless but I'm torn because I plan on making custom bumpers out of stainless, and I don't want to overdo it. I'm not looking for a showtruck full of "bling" or whatever the cool kids are calling it. I'm a big fan of a clean looking truck with a few details that stand out. Here's my favourite 4runner pic to date:
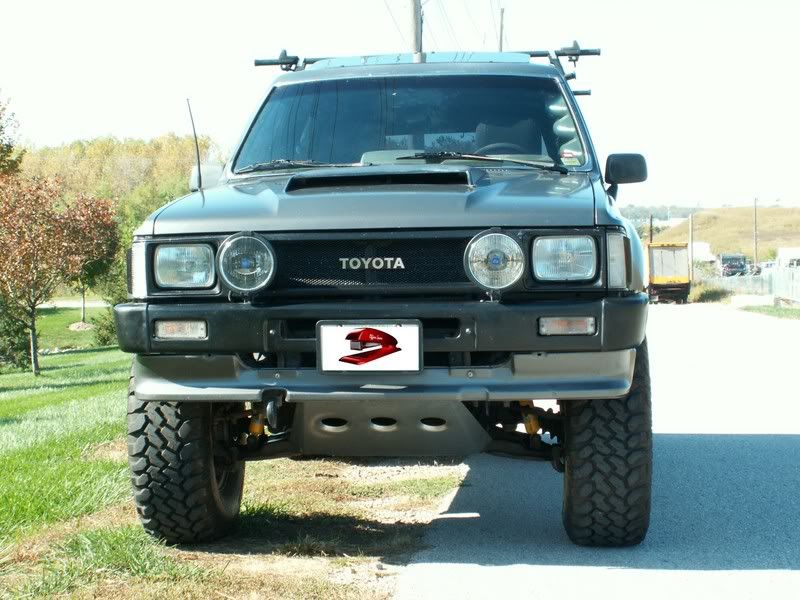
I think it's close to the perfect balance. Blacked out chrome-I'm not a big fan of chrome and prefer stainless or polished aluminium- valance and skid plate the same colour as the truck, clean custom grille, and it almost looks like OME shocks under there... Side note: I really can't stand yellow. I'm really disappointed that the OME shocks only come in yellow, wish they came a dark forest or metallic green instead. That would make a nice accent colour. But I digress.
So try to picture that with a stainless bumper and probably no hood scoop. I'm not opposed to making something functional look good, but I'm not a fan of putting something completely without use on a truck just for looks, so I probably wont be sporting the hood scoop unless I can get it to supply cold air to my intake without moisture on rainy days. It does look pretty good though... I'm thinking I'll go with the same type of metallic grey or one close to the grey on my avatar.
Kinda went on a dream tangent there, but it's probably necessary to dream of the truck that could become while I work for hours on end on something that doesn't even have an engine on it yet. Getting back on track:
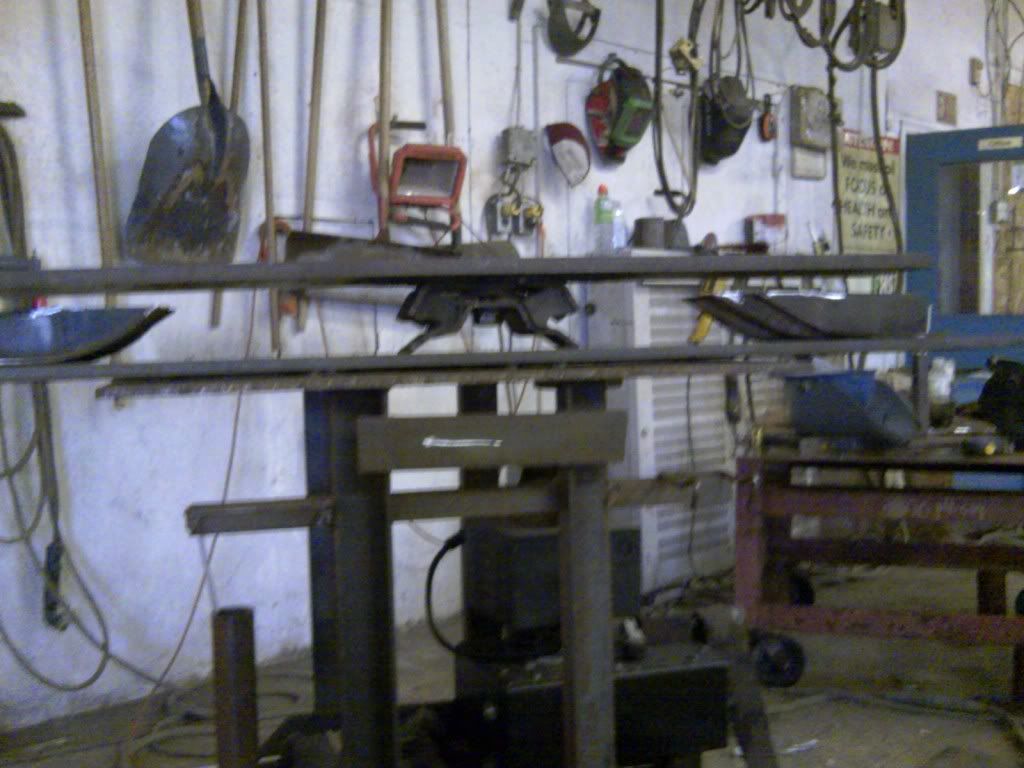
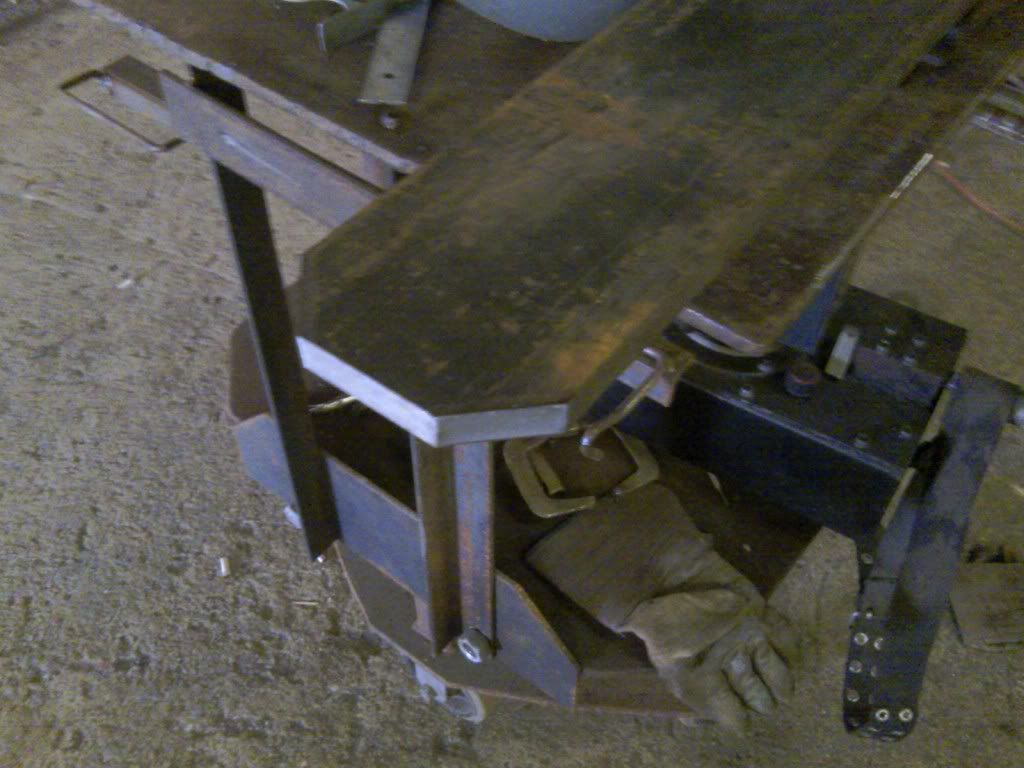
That's where I left off on the transfer case xmember. I screwed up because I didn't allow for enough clearance for the new lower plate to touch the outer tubing I was saving during the process because my jig plate was in the way. That's the plate on the bottom that's holding together the remaining pieces of the transfer case crossmember. The whole point of the jig plate was to ensure the connection would retain it's factory spacing during the process, so I came up with this as a solution:
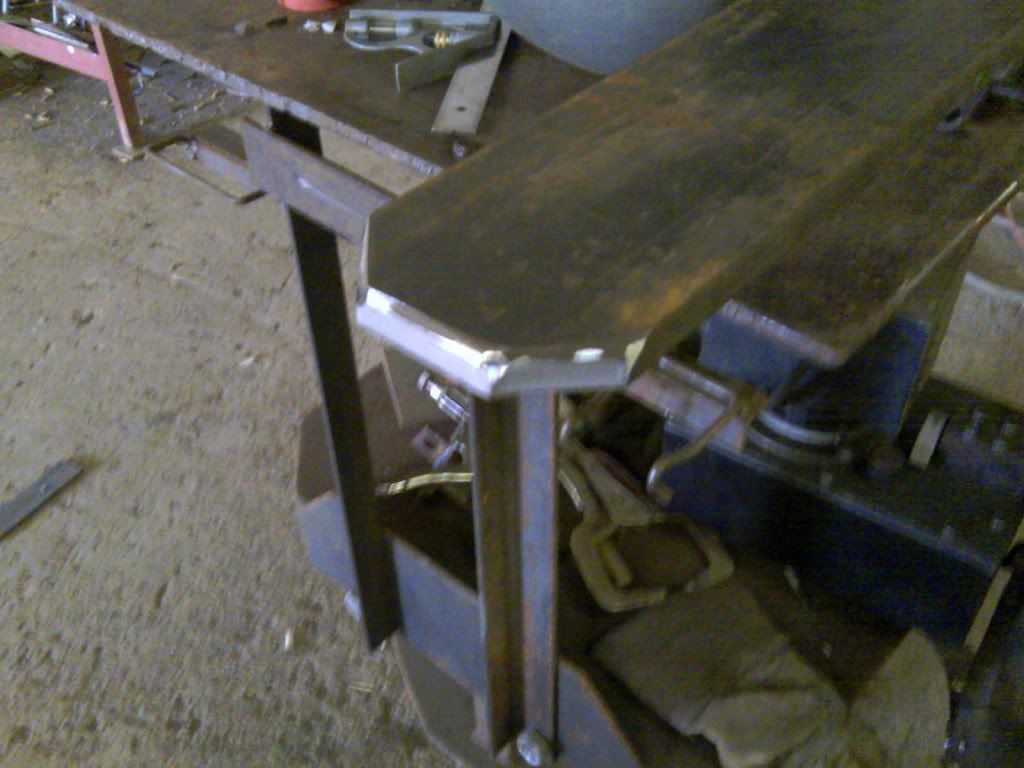
I shimmed up the jig plate with a pair of 3/4" pieces of plate from the scrap rack, tacked the whole arrangement to a work table and cut out the centre of the jig to allow me to do this:
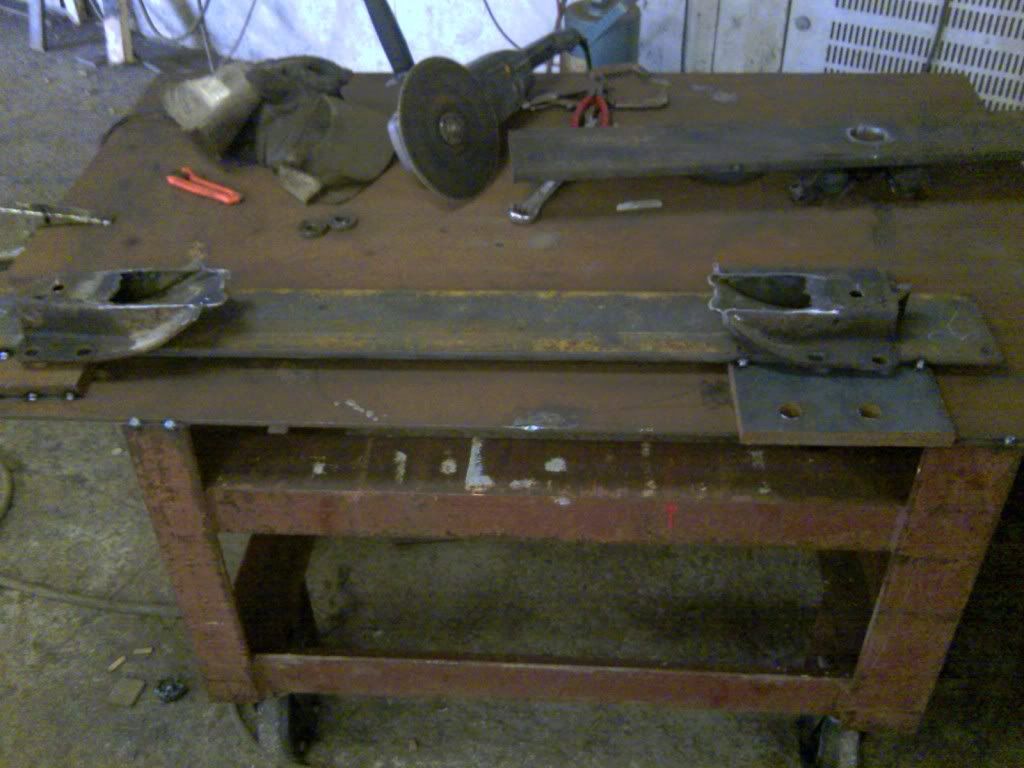
You can see from the pic my new xmember plate has been cut shorter and modified slightly. I cut it shorter so it would look less blocky and amateur when it's on the truck, and chopped off the corners and bevelled them slightly for the same reason:
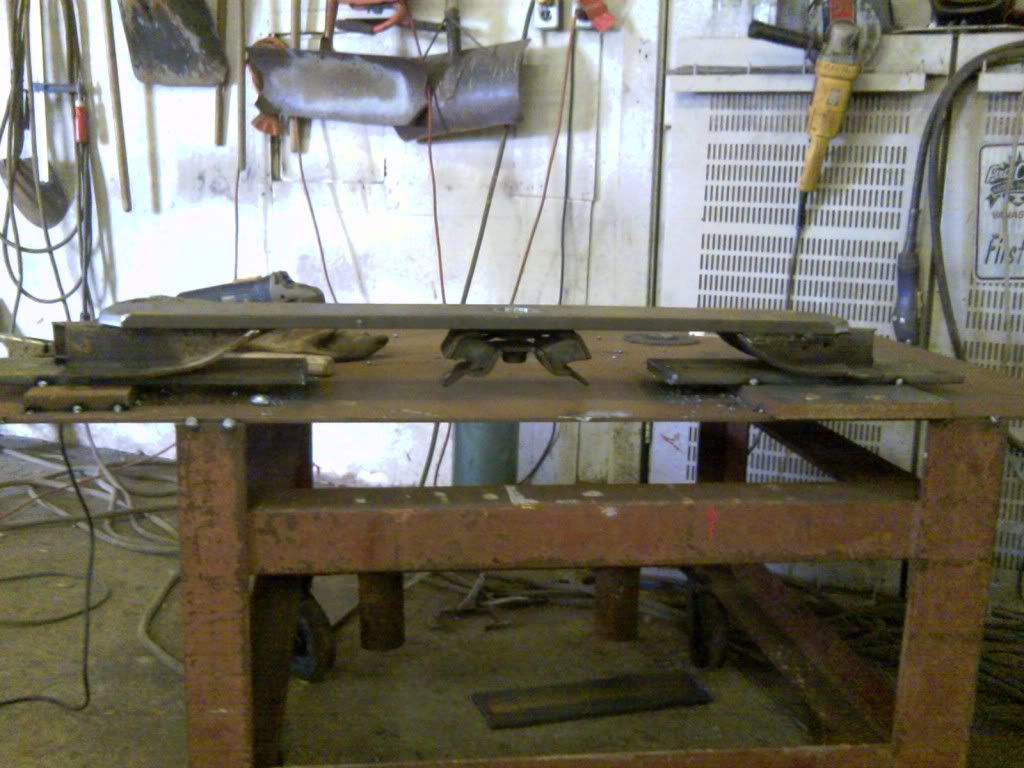
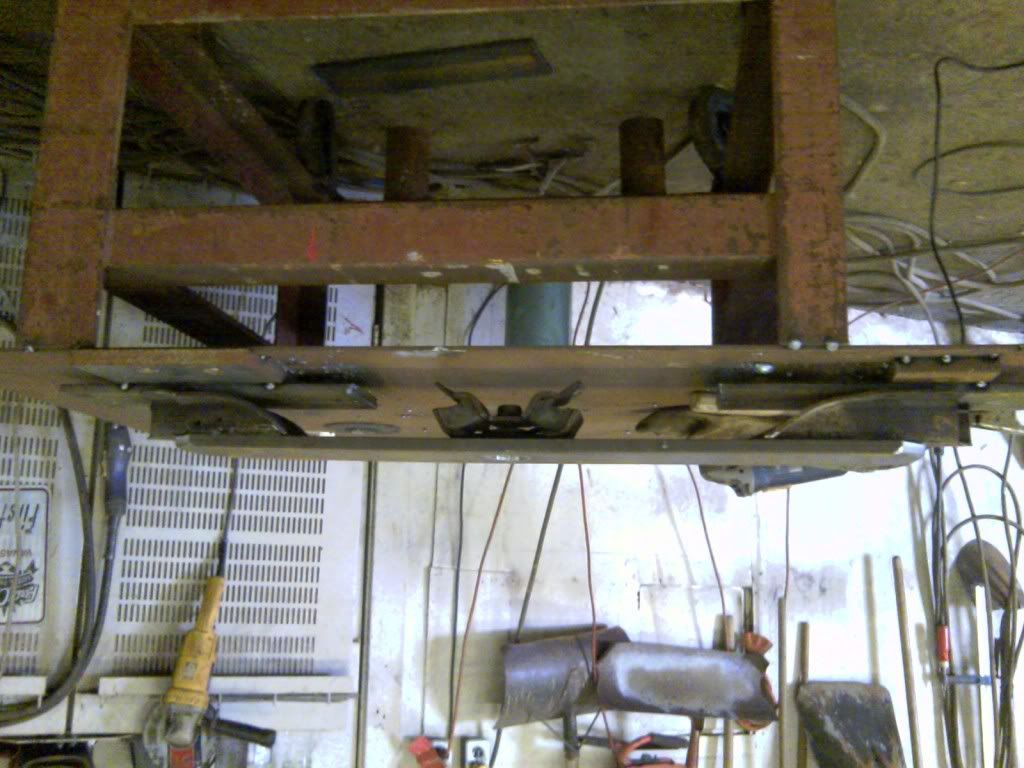
After it's done it should look like this flipped version of a previous pic under the truck:
As opposed to the factory xmember:
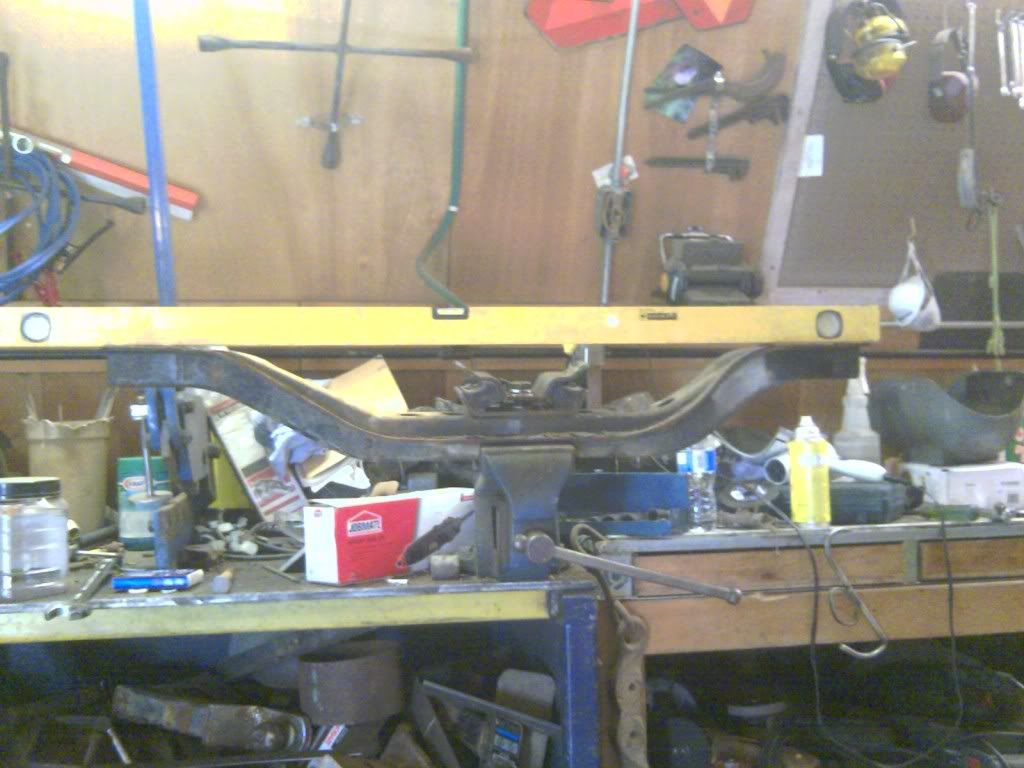
I'd say that's a lot of clearance gained. If all goes well tomorrow night is a date between a few unsuspecting spheres of aluminium and a 15 pound sledge driven by a few weeks of frustration. After that I should be back on track.
Jump to next drivetrain lift post >>
I FINISHED PAINTING MY FRAME!!! Not sure what that emote means but he seems like he's about as excited as I am. I didn't take any pics cause it looks the same as the ones I posted earlier. It's black. Only blackerish. Anyway I'm just glad the frame's done so I can continue. I also primed and painted the pieces I sandblasted in my last progress post, and then realized I'd spent time making the rear skidplate bracket clean, and I'm not sure if I'll be using it. I might make my own skidplate that covers more of the belly of the truck, maybe out of stainless but I'm torn because I plan on making custom bumpers out of stainless, and I don't want to overdo it. I'm not looking for a showtruck full of "bling" or whatever the cool kids are calling it. I'm a big fan of a clean looking truck with a few details that stand out. Here's my favourite 4runner pic to date:I think it's close to the perfect balance. Blacked out chrome-I'm not a big fan of chrome and prefer stainless or polished aluminium- valance and skid plate the same colour as the truck, clean custom grille, and it almost looks like OME shocks under there... Side note: I really can't stand yellow. I'm really disappointed that the OME shocks only come in yellow, wish they came a dark forest or metallic green instead. That would make a nice accent colour. But I digress.
So try to picture that with a stainless bumper and probably no hood scoop. I'm not opposed to making something functional look good, but I'm not a fan of putting something completely without use on a truck just for looks, so I probably wont be sporting the hood scoop unless I can get it to supply cold air to my intake without moisture on rainy days. It does look pretty good though... I'm thinking I'll go with the same type of metallic grey or one close to the grey on my avatar.
Kinda went on a dream tangent there, but it's probably necessary to dream of the truck that could become while I work for hours on end on something that doesn't even have an engine on it yet. Getting back on track:
That's where I left off on the transfer case xmember. I screwed up because I didn't allow for enough clearance for the new lower plate to touch the outer tubing I was saving during the process because my jig plate was in the way. That's the plate on the bottom that's holding together the remaining pieces of the transfer case crossmember. The whole point of the jig plate was to ensure the connection would retain it's factory spacing during the process, so I came up with this as a solution:
I shimmed up the jig plate with a pair of 3/4" pieces of plate from the scrap rack, tacked the whole arrangement to a work table and cut out the centre of the jig to allow me to do this:
You can see from the pic my new xmember plate has been cut shorter and modified slightly. I cut it shorter so it would look less blocky and amateur when it's on the truck, and chopped off the corners and bevelled them slightly for the same reason:
After it's done it should look like this flipped version of a previous pic under the truck:
As opposed to the factory xmember:
I'd say that's a lot of clearance gained. If all goes well tomorrow night is a date between a few unsuspecting spheres of aluminium and a 15 pound sledge driven by a few weeks of frustration. After that I should be back on track.
Jump to next drivetrain lift post >>
Last edited by Dutchbelly; 07-16-2011 at 10:51 AM.
06-13-2011, 08:28 PM
#172
Registered User
Thread Starter
Join Date: Apr 2011
Location: Southern Ontario
Posts: 428
Likes: 0
Received 0 Likes
on
0 Posts
Before you sacrifice those rims jack up the one side of the front and try blows on the tire from a 5lb. sledge hammer rotating the tire so that you work your way around the wheel. The aluminum wheels and the hub have such close tolerances, that any oxidation of the wheel will weld them to the hub, but the sledge usually breaks them free and where you have the body off, you should be able to get a good swing!
From your earlier posts about the 4 cyl vs v6 calipers, both have 4 pistons, the v6 have 4 large pistons, the 4 cylinder calipers have one large and one small on each side. The upgrade is a direct bolt on, but you have to change the rotors too. Standard 4cylinder master cylinder is 7/8" bore, but an 88 cressida has a 15/16" bore and I used the one off of a cressida when I upgraded to the V6 calipers and I had great brakes!
Also when you start building brake lines...a few pointers on using a double flaring tool. the KD Tools one that you bought probably has good instructions but you need to follow the following to the letter.
Make sure the face of your brake line is flat, file off any raised part after you have deburred the line from using a tube cutter. Chamfer the outside edge at a 45 degree angle, make sure that the pipe above the clamp is exactly at the line on the tube adapter and if you put a drop or two of brake fluid on the inside of the pipe adapter where it contacts the brake line, your line will be easier to flare and your results will be perfect flares each time.
Good luck and you are doing a great job!
From your earlier posts about the 4 cyl vs v6 calipers, both have 4 pistons, the v6 have 4 large pistons, the 4 cylinder calipers have one large and one small on each side. The upgrade is a direct bolt on, but you have to change the rotors too. Standard 4cylinder master cylinder is 7/8" bore, but an 88 cressida has a 15/16" bore and I used the one off of a cressida when I upgraded to the V6 calipers and I had great brakes!
Also when you start building brake lines...a few pointers on using a double flaring tool. the KD Tools one that you bought probably has good instructions but you need to follow the following to the letter.
Make sure the face of your brake line is flat, file off any raised part after you have deburred the line from using a tube cutter. Chamfer the outside edge at a 45 degree angle, make sure that the pipe above the clamp is exactly at the line on the tube adapter and if you put a drop or two of brake fluid on the inside of the pipe adapter where it contacts the brake line, your line will be easier to flare and your results will be perfect flares each time.
Good luck and you are doing a great job!
Edit: trust me, I've done exactly what you've mentioned, and more with the rims. I've spun them gradually while beating the rubber at 50 psi, shimmed the rims with wood and done the same, put bottle jacks across the bottom of the two tires with a 4x4 spacer while I slammed the tops with the sledge, and all this after almost two weeks of soaking them with penetrating oil. I've done my darndest to save them because I love these rims, but there's a good chance they've been on there since '97 when the previous owner mentioned he'd bought the truck and never finished it, so I'm sentencing them to a night of torch and sledge on rim fury.
Last edited by Dutchbelly; 06-14-2011 at 07:48 PM.
06-13-2011, 11:35 PM
#174
Registered User
Join Date: Oct 2008
Location: northen nevada
Posts: 326
Likes: 0
Received 0 Likes
on
0 Posts
man you and chef make the rest of us look really slow lol
good job man i think that the truck of the same years uses the same fuel tank and possibly the third gen single cabs but not sure
good job man i think that the truck of the same years uses the same fuel tank and possibly the third gen single cabs but not sure
06-14-2011, 02:12 AM
#175
Super Moderator
Staff
iTrader: (1)
Join Date: Aug 2008
Location: Anderson Missouri
Posts: 11,788
Likes: 0
Received 21 Likes
on
19 Posts
You are fast. I try to be, it just doesnt happen. There are somethings I like on the pic above. Will be glad to get to the upgrade stage.
I havent looked into the brake upgrade. Doesnt sound to bad from what little I do know.
I added some links to cleaning a tank if you have to go that route. #2 post on my build.
I havent looked into the brake upgrade. Doesnt sound to bad from what little I do know.
I added some links to cleaning a tank if you have to go that route. #2 post on my build.
06-14-2011, 10:35 AM
#177
Registered User
Thread Starter
Join Date: Apr 2011
Location: Southern Ontario
Posts: 428
Likes: 0
Received 0 Likes
on
0 Posts
Lol it's just a personal preference thing. You've got to paint your truck the colour that makes you happy. I've got no issues with other people driving around in yellow trucks, but pretty low on my list of colour preferences when it comes to my own vehicle. It didn't stop my wife from painting our downstairs bathroom yellow, though. She says it's supposed to make it cheery in there. I've never thought of a bathroom as a cheery place, so the only logic I could think of to paint the walls in there yellow was it would be less noticeable if you had a history of bad aim. If you know what I mean...
06-14-2011, 10:45 AM
#178
Registered User
Lol it's just a personal preference thing. You've got to paint your truck the colour that makes you happy. I've got no issues with other people driving around in yellow trucks, but pretty low on my list of colour preferences when it comes to my own vehicle. It didn't stop my wife from painting our downstairs bathroom yellow, though. She says it's supposed to make it cheery in there. I've never thought of a bathroom as a cheery place, so the only logic I could think of to paint the walls in there yellow was it would be less noticeable if you had a history of bad aim. If you know what I mean...
Haha.
06-15-2011, 12:20 PM
#179
Registered User
Thread Starter
Join Date: Apr 2011
Location: Southern Ontario
Posts: 428
Likes: 0
Received 0 Likes
on
0 Posts
These rims will be the death of me. i've taken the torch to them now heated them up and beat on them with a sledge. heated them again shock cooled them with water beat on them again and they won't budge. i'm running out of ideas
06-15-2011, 12:31 PM
#180
Hey Dutch, ....
Don't think anyone could say I'm a defeatist type of guy, ...that I give up easily, lol... BUT, I would MAYBE, at this point, cut the rims off. You can get those on the CHEAP, and might save yourself some serious drama with injury, etc., by continuing to try and bake it, etc. ?????
Can you get the wheel off with the hub? Then try to work on it off the frame?


