Clarions 90 4runner build
 07-06-2012, 12:14 PM
#41
Registered User
Thread Starter
Join Date: Apr 2012
Posts: 94
Likes: 0
Received 0 Likes
on
0 Posts
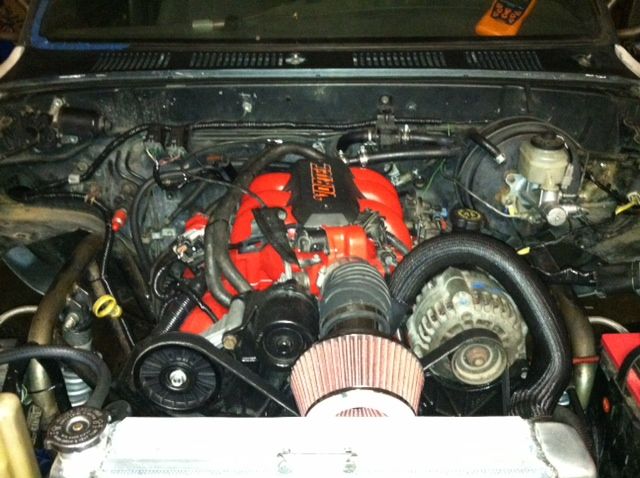
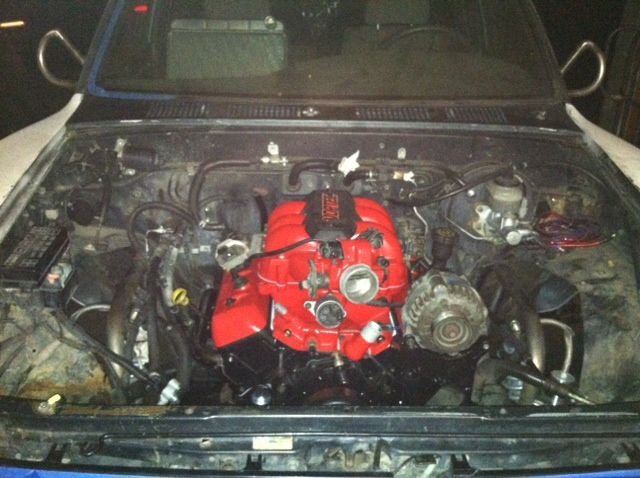
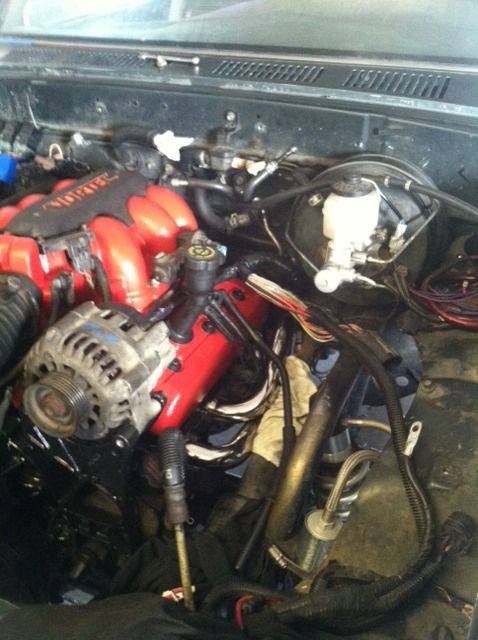
Pulleys on headers on and up we go
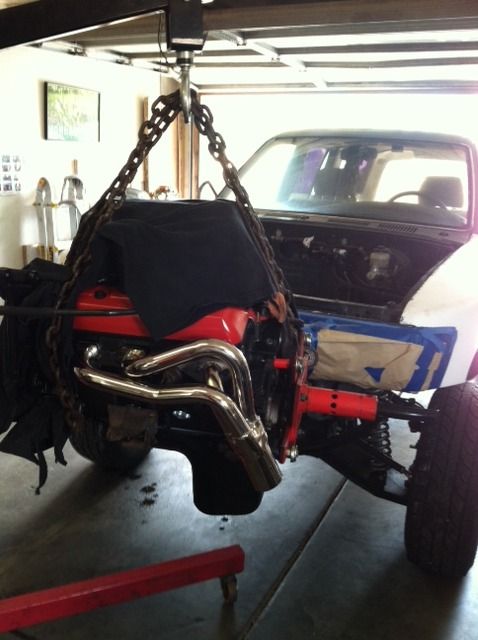
I was very impressed how easy she set in there. Was every smooth install
Did run into a little bit of a fitting issue the driver side header is rubbing the steering shaft but that should be an easy fix. But other than that I have ample room for the new radiator and the electric fan
 07-06-2012, 12:25 PM
#42
Registered User
Thread Starter
Join Date: Apr 2012
Posts: 94
Likes: 0
Received 0 Likes
on
0 Posts
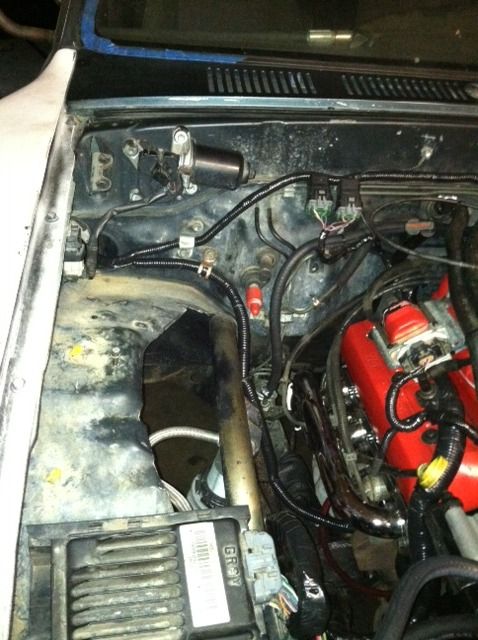
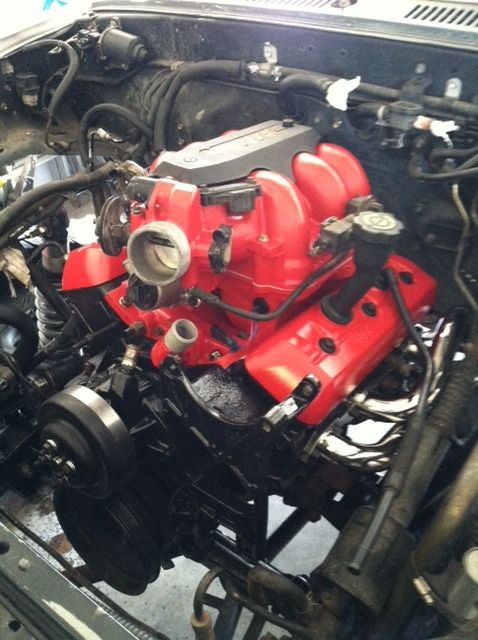
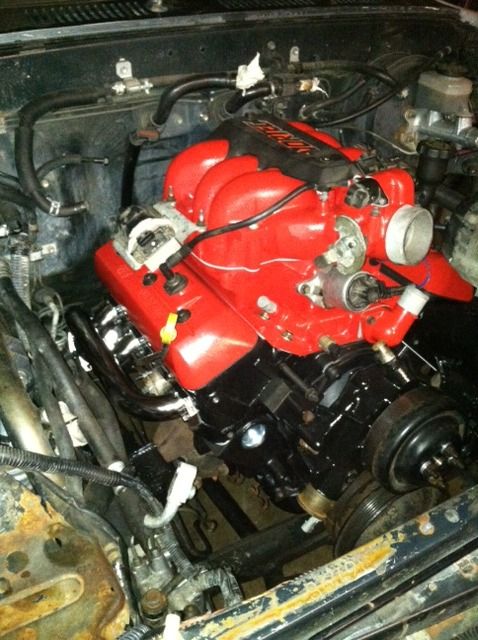
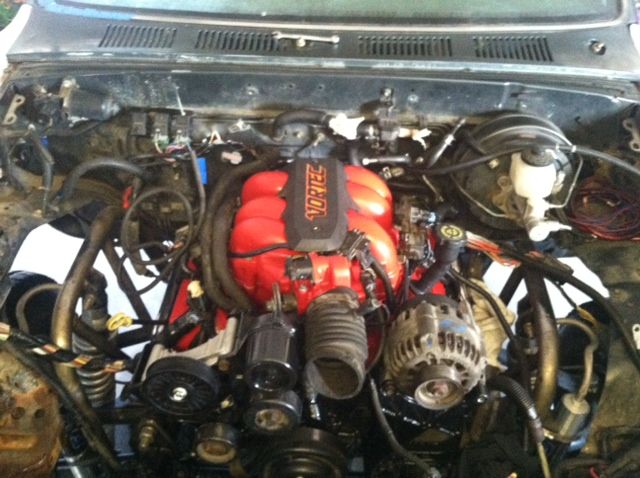
All of the accessories are installed just need to press the pulley for the PS pump and belt can go on. Started on the wiring, everything for the engine harness is plugged in and routed but still need to tap into the toy harness and mount my computer
Taped and routed
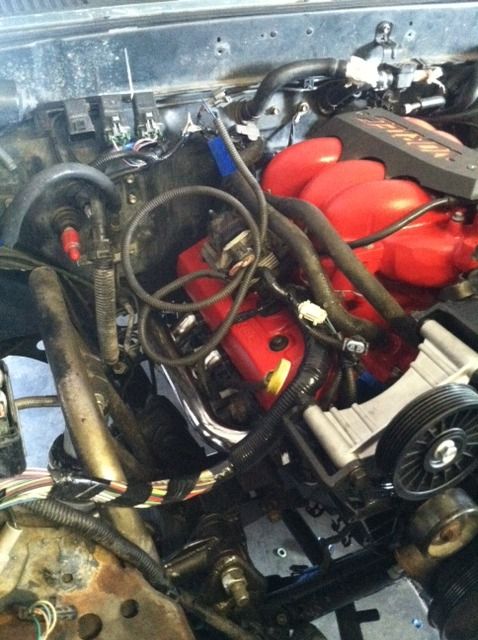
Once I have everything wired and I know it's right I'll finish routing the harness and get it all tidy
Taped and routed
Once I have everything wired and I know it's right I'll finish routing the harness and get it all tidy
Last edited by clarion69374; 07-06-2012 at 12:27 PM.
07-06-2012, 12:38 PM
#43
Registered User
Thread Starter
Join Date: Apr 2012
Posts: 94
Likes: 0
Received 0 Likes
on
0 Posts
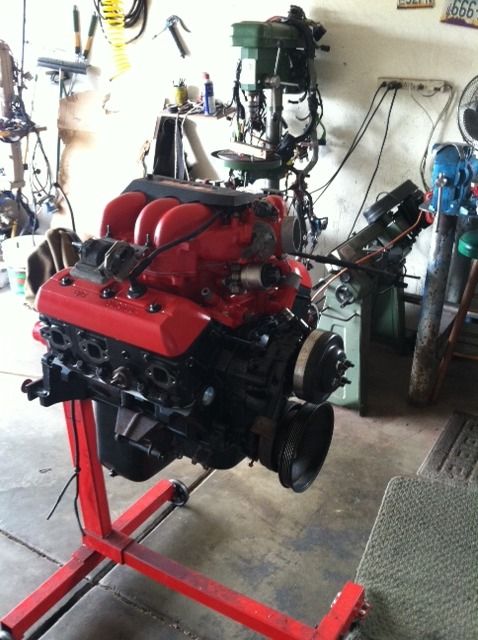
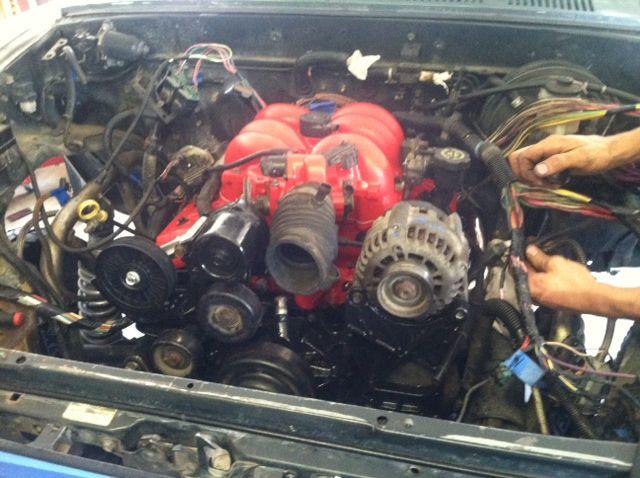
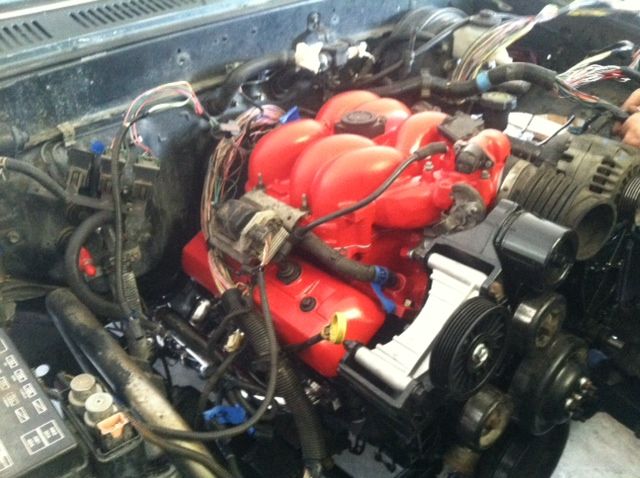
Since this motor doesn't have near the crap on it that the 3.0 had I wanted to make the engine bay as simple and clean as possible. So while I was at it I ditched the A/C and condenser which made a ton of room for the e fan and I got rid of the funky brake/steering distro block. I think it was intended to keep the rear tires from locking under steering input. Useless to me and a waste of space so be gone.
07-06-2012, 12:47 PM
#44
Registered User
Thread Starter
Join Date: Apr 2012
Posts: 94
Likes: 0
Received 0 Likes
on
0 Posts
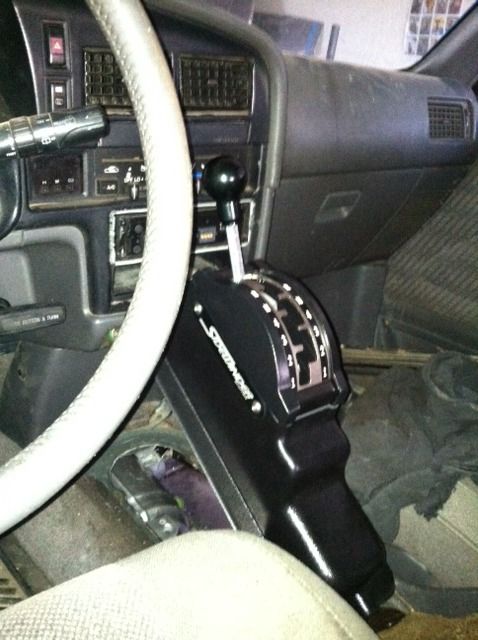
A shot of the new shifter. I hoping that it will sit sorta close to the way it is in the pic but only time will tell. Gotta build a center console that ties into the existing console. Gonna be a project but motor first.
07-06-2012, 12:56 PM
#45
Registered User
Thread Starter
Join Date: Apr 2012
Posts: 94
Likes: 0
Received 0 Likes
on
0 Posts
Ok so now I think I have everyone up to speed. I will definitely keep the updates coming.
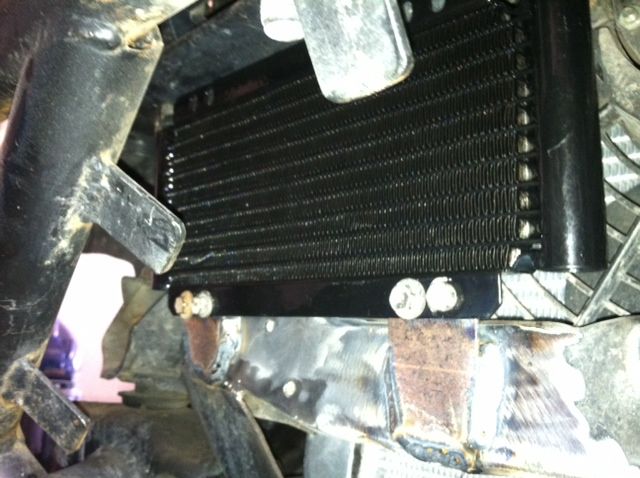
Last night I got the radiator installed. I was pretty stoked on the way it turned out. I have a 16" flexalite fan IN FRONT of the Northern aluminum race radiator. Unit is 22x19 2 1" rows GM style with an oil cooler. My aux. tranny cooler should be here today.
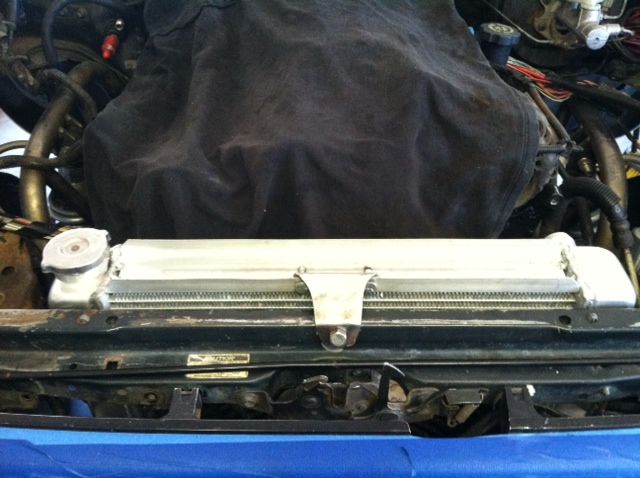

Last night I got the radiator installed. I was pretty stoked on the way it turned out. I have a 16" flexalite fan IN FRONT of the Northern aluminum race radiator. Unit is 22x19 2 1" rows GM style with an oil cooler. My aux. tranny cooler should be here today.
Last edited by clarion69374; 07-06-2012 at 12:57 PM.
07-06-2012, 04:55 PM
#46
Registered User

Join Date: Jul 2012
Posts: 2
Likes: 0
Received 0 Likes
on
0 Posts
Would just like to point some things out, hopefully for the sake of avoiding bs. And encouraging positive and or constructive feedback. clarion works a full time job, has 3 kids, and until 2 weeks ago was planning his wedding. there is no timeline on here but we did not start this project until nov of last year. I would say that for him being a hella busy sob hes been able to complete a massive amount of work being on a relatively speaking "small" budget and only working on "free" time. And with only the help of me, mech inclined enough for him to trust but by all means a rookie. ftr we have talked alot about spindles but more so as a lift than extra beef stock spindles gusseted are plenty beef for now. unfortunatly have to do things one at a time.  Thank you to all of you who have posted positively! We are very proud of what we have accomplished and being able to put it out to be appreciated is a beautiful thing. Stay tuned for more updates in the next few days, and if all goes well maybe some GoPro video of this beast in action in next coupla weeks.
Thank you to all of you who have posted positively! We are very proud of what we have accomplished and being able to put it out to be appreciated is a beautiful thing. Stay tuned for more updates in the next few days, and if all goes well maybe some GoPro video of this beast in action in next coupla weeks.
07-06-2012, 05:06 PM
#47
Registered User

Join Date: Jun 2012
Posts: 21
Likes: 0
Received 0 Likes
on
0 Posts
Would just like to point some things out, hopefully for the sake of avoiding bs. And encouraging positive and or constructive feedback. clarion works a full time job, has 3 kids, and until 2 weeks ago was planning his wedding. there is no timeline on here but we did not start this project until nov of last year. I would say that for him being a hella busy sob hes been able to complete a massive amount of work being on a relatively speaking "small" budget and only working on "free" time. And with only the help of me, mech inclined enough for him to trust but by all means a rookie. ftr we have talked alot about spindles but more so as a lift than extra beef stock spindles gusseted are plenty beef for now. unfortunatly have to do things one at a time. Thank you to all of you who have posted positively! We are very proud of what we have accomplished and being able to put it out to be appreciated is a beautiful thing. Stay tuned for more updates in the next few days, and if all goes well maybe some GoPro video of this beast in action in next coupla weeks.
Thank you to all of you who have posted positively! We are very proud of what we have accomplished and being able to put it out to be appreciated is a beautiful thing. Stay tuned for more updates in the next few days, and if all goes well maybe some GoPro video of this beast in action in next coupla weeks.Last edited by 4runnedup; 07-06-2012 at 05:08 PM.
07-06-2012, 05:39 PM
#48
Registered User
Join Date: Jul 2012
Posts: 2
Likes: 0
Received 0 Likes
on
0 Posts
Not just for you... for anyone who comes across the thread to understand and appreciate the circumstances fully. nothing is bolt on so it all takes time. Appreciate your input and do not deny its authenticity. just not where we are at and i think clarion made that clear in his first response. not trying to be a D but tired of running into same questions and arguments. Project has been thought out with same attention as motor assembly... borderline OCD.
NO 4x4 NO v8 nothing purchased that can be made with the tools available, including spindles. but in due time. thank you and others for input.
NO 4x4 NO v8 nothing purchased that can be made with the tools available, including spindles. but in due time. thank you and others for input.
Last edited by Jolim; 07-06-2012 at 05:43 PM.
07-06-2012, 11:48 PM
#49
Registered User
Thread Starter
Join Date: Apr 2012
Posts: 94
Likes: 0
Received 0 Likes
on
0 Posts
Not just for you... for anyone who comes across the thread to understand and appreciate the circumstances fully. nothing is bolt on so it all takes time. Appreciate your input and do not deny its authenticity. just not where we are at and i think clarion made that clear in his first response. not trying to be a D but tired of running into same questions and arguments. Project has been thought out with same attention as motor assembly... borderline OCD.
NO 4x4 NO v8 nothing purchased that can be made with the tools available, including spindles. but in due time. thank you and others for input.
NO 4x4 NO v8 nothing purchased that can be made with the tools available, including spindles. but in due time. thank you and others for input.
07-12-2012, 10:39 AM
#50
Registered User
Thread Starter
Join Date: Apr 2012
Posts: 94
Likes: 0
Received 0 Likes
on
0 Posts
Ok so making progress nothing pic worthy but progress none the less. Installed a new GM fuel pump in place of the stock toy pump. No need for an inline pump now. Will put the tank back up in the truck today. I've cut down all the unnecessary crap on the toy harness. I ditched the toy fuse block and am rerouting everything to the GM in cab fuse block. The fuse block will be in the engine bay with the headlight and fuel pump relay. Using the GM fuel pump relay (thanks numbchux). Everything is tied into the new fuse block I just need to make my final 12v connections, finish wiring in the fuel pump relay, wire in the DLC then that should be it for wiring until it fires.
I have the tranny hard lines ran just need to mount my cooler then run my rubber lines.
Still need to run the oil cooler lines but should be pretty straight forward and the same with the fuel lines.
A hefty list but it's getting closer. Will try to get some pics today or tomorrow
I have the tranny hard lines ran just need to mount my cooler then run my rubber lines.
Still need to run the oil cooler lines but should be pretty straight forward and the same with the fuel lines.
A hefty list but it's getting closer. Will try to get some pics today or tomorrow
Last edited by clarion69374; 07-12-2012 at 10:44 AM.
08-02-2012, 02:06 PM
#51
Registered User
Thread Starter
Join Date: Apr 2012
Posts: 94
Likes: 0
Received 0 Likes
on
0 Posts
Update. Well ive been slacking big time on posting any updates or pictures lol sorry. I will try to get pics up tonight but so far so GREAT, motor fired without any issues did need to adjust the timing a little and after the second fire it has popped off every time no problem. AWESOME!!! Also moving under its own power now  gotta do a valve adjustment tonight then I should be able to get it to my uncles shop to do a crank relearn, tune yada yada. Again sorry for the lack of updates but will try to get pics and more details up soon. I do on the other hand have a video of the second fire on YouTube so I will try to get that link up too. Stay tuned......
gotta do a valve adjustment tonight then I should be able to get it to my uncles shop to do a crank relearn, tune yada yada. Again sorry for the lack of updates but will try to get pics and more details up soon. I do on the other hand have a video of the second fire on YouTube so I will try to get that link up too. Stay tuned......
08-02-2012, 02:34 PM
#52
Registered User
Thread Starter
Join Date: Apr 2012
Posts: 94
Likes: 0
Received 0 Likes
on
0 Posts

Last edited by clarion69374; 09-11-2012 at 03:40 PM.
09-07-2012, 09:31 AM
#53
Registered User
Thread Starter
Join Date: Apr 2012
Posts: 94
Likes: 0
Received 0 Likes
on
0 Posts
Sorry guys and gals long time no post. I've had a lot going on lately but motor is running strong and all is well. I do finally have so pics to put up.
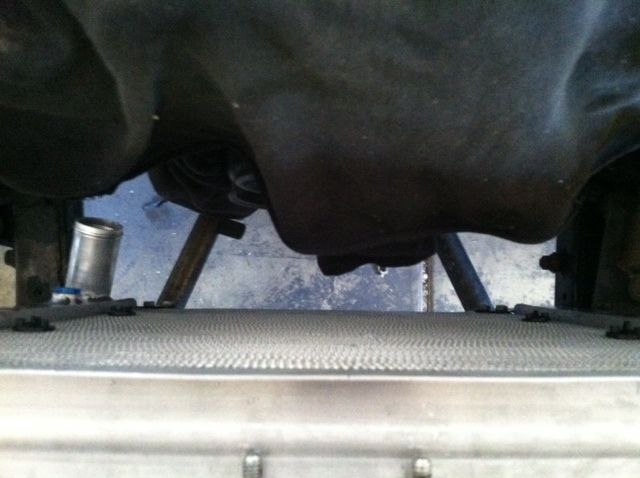
So last post was the radiator install, very clean and simple, hose routing was easy too. Next was the tranny cooler
Tabs
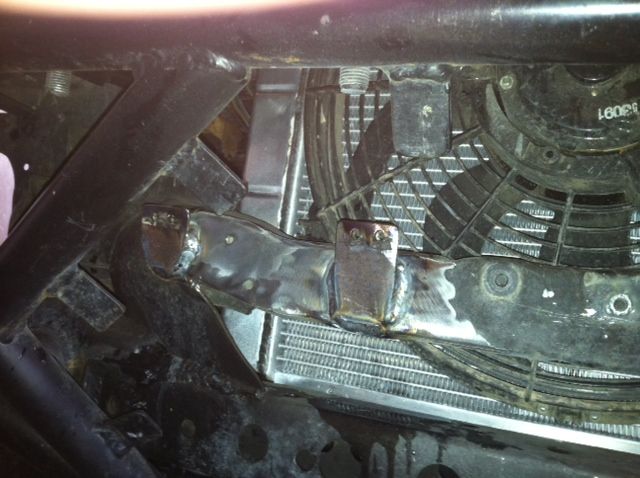
Cooler installed
So last post was the radiator install, very clean and simple, hose routing was easy too. Next was the tranny cooler
Tabs
Cooler installed
Last edited by clarion69374; 09-11-2012 at 03:24 PM.
09-07-2012, 09:34 AM
#54
Registered User
Thread Starter
Join Date: Apr 2012
Posts: 94
Likes: 0
Received 0 Likes
on
0 Posts
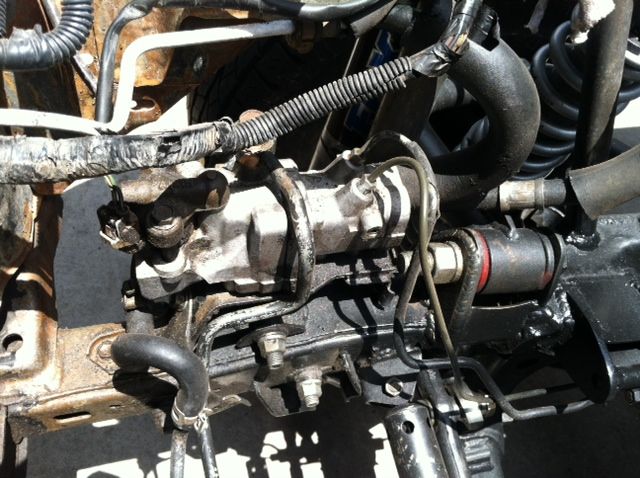
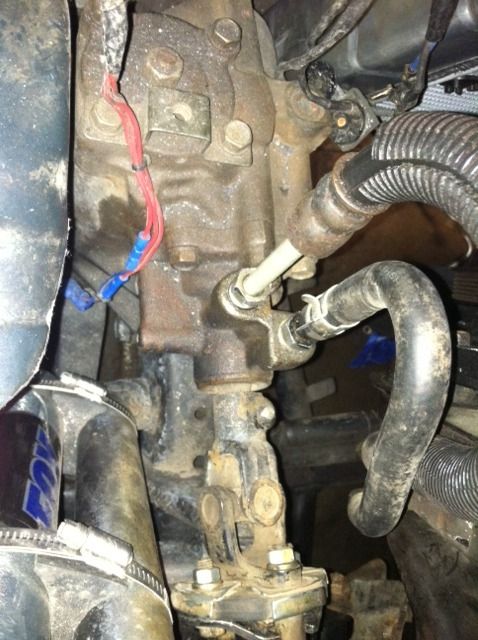
To finish up the rest of the plumbing I needed to run the power steering lines. Again very straightforward. Used the GM feed line, cut off the bend used Toy fitting for the stock Toy box and reflared. Return line was clamped onto the stock Toy line.
09-07-2012, 09:42 AM
#55
Registered User

Join Date: Jul 2012
Posts: 9
Likes: 0
Received 0 Likes
on
0 Posts
i know this doesnt belong here but im getting a little upset here, the "post new thread" is not poping up and i cant find where to post!!! so just a quick question.the nuts/grommits on valve cover of 22re, where can i get em???
thank you!!
thank you!!
09-07-2012, 10:25 AM
#57
Registered User
Thread Starter
Join Date: Apr 2012
Posts: 94
Likes: 0
Received 0 Likes
on
0 Posts
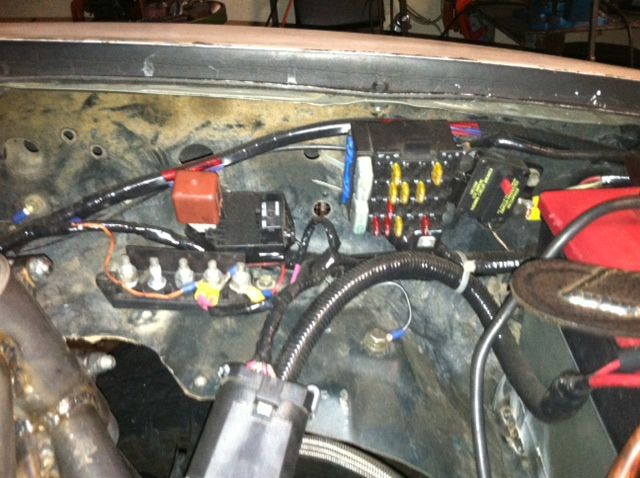
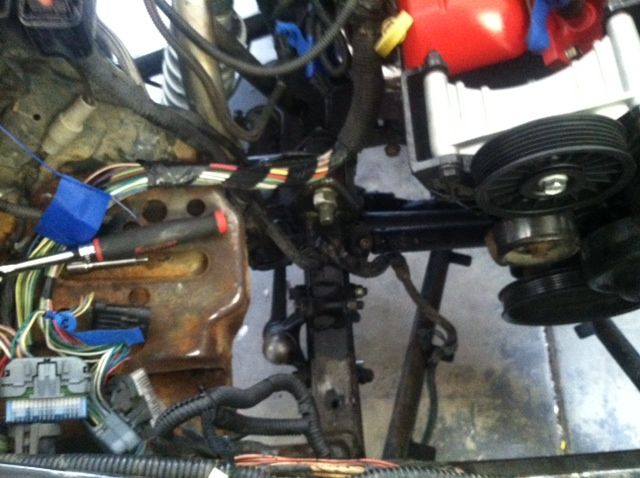
I didnt get any pics of the fuel lines when I did them but was very simple. Used the stock toy lines up to the manifold and adapted to the Chevy lines. With plumbing done it was time to tackle the wiring.... Which

Was an obvious mess still at this point
Was an obvious mess still at this point
09-07-2012, 10:32 AM
#58
Registered User
Thread Starter
Join Date: Apr 2012
Posts: 94
Likes: 0
Received 0 Likes
on
0 Posts
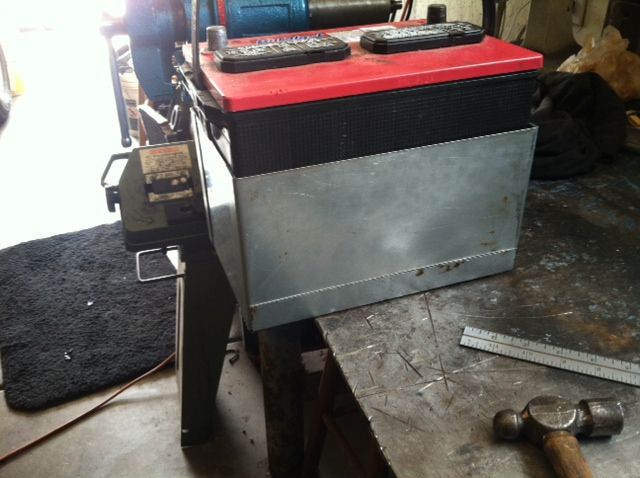
The wiring for this swap all in all was simple. I took it a little more in depth with using the fuse block off the donor vehicle for all of the engine management fuses. Nice part about it is I have a ton of voids for other accessories when the time comes. Now since I've already tossed a couple of batteries before in this engine bay it was time for something to ACTUALLY keep the battery in place. So we made a custom battery box to meet the bill.