Brett823's 1986 4Runner Build -up thread
 12-04-2010, 04:53 AM
#21
Registered User
iTrader: (2)
Join Date: Mar 2010
Location: Massachusetts
Posts: 133
Likes: 0
Received 0 Likes
on
0 Posts
regarding the clutch:
honestly it’s up to you whether you want to replace the clutch now or wait until it starts to slip. if you aren't planning on taking your truck apart again anytime soon after this, you might as well do it now because you already have everything apart. speaking from experience (i've done 2 clutches in my 88' runner in its life) its kindof a pain in the butt to do the clutch, so my personal bias is just do it while you can!
the clutch looks okay from what i can see, but it I’d say put a new one in. It’s not so much a matter of the splines (triangle pieces) from the front so much as the splines from the sides. There should be no bent splines and they all should have comparable wear on all their tips. The splines should also have the same spacing between all of them to ensure equal pressure all around. If they don't that means the throw-out bearing is not centered and you'll need to replace the clutch. If you do end up replacing the clutch, make sure you replace the throw-out bearing as well as take a look at the clutch fork (y-shaped piece) to make sure the piston on the clutch slave cylinder is not punching a hole through the bump on the fork (happened to me before). if that has wear and tear, you might as well replace that too while you have everything apart. And after all that, it probably wouldn’t be a bad idea to look at the flywheel behind the throw-out bearing too! And clean everything!
Hopefully this helped.
bad clutch springs:
http://leonardaveryt.com/Dodge%20Neon/BAD_CLUTCH.jpg
your plate:
http://s1121.photobucket.com/albums/...lutchplate.png

 12-04-2010, 05:22 AM
#23
Registered User
Nice work so far! So for future reference, what was your machine shop bill and what did you have done besides the clean and hone? Did you have head work or a valve job done? x2 on replacing the clutch, I am no expert (mine is auto) but the fingers on your pressure plate do seem to be worn funny and appear to have a purple color indicating that they have been hot. You did good using which hunter and engine builder for parts. Ted has excellent customer service ad quality parts. Some will say that you should use a Toyota head gasket instead of EB's (rock auto if I recall), but I used the one from EB and haven't had any problems yet. Good luck getting it all back together.
12-04-2010, 08:08 AM
#24
Registered User
Thread Starter
Join Date: Nov 2010
Location: Vale Oregon
Posts: 32
Likes: 0
Received 0 Likes
on
0 Posts
I guess from what im hearing i will go and order a new clutch. I knew i didnt look right. As for the partol, that is a project that will consume more money than i have now, but i will take a few more pictures. Its kind of under a pile of stuff haha.
Rob i was really worried about the machine bill, but in this small town he gave me a great deal. All parts cleaned(all engine parts as well as all brackets) honed, and the head was bead blasted, cleaned, and the valves ground and the crank polished all for $230 bucks. He also put the valve seats from the engebldr rebuild kit. I am getting close to a $1000 bucks total.
Well im going to get after it. Will post pictures later tonight.
12-04-2010, 03:24 PM
#25
Registered User
Thread Starter
Join Date: Nov 2010
Location: Vale Oregon
Posts: 32
Likes: 0
Received 0 Likes
on
0 Posts
Well today was a disaster day. I guess thats what i get for working on the runner and not watching college football. I broke a set of rings. killed some bearings FML. now i have to wait another week for parts. Since i did make another order i also bought a master clutch. Just a all around bad day in the shop.
Can anyone well me the secrete to putting the round bearing in the connecting arms where you attach the piston??? i can not get them in there for the life of me. I smashed one in there and now i cant get the wrist pins in.
Will take any suggestions. Thanks
Can anyone well me the secrete to putting the round bearing in the connecting arms where you attach the piston??? i can not get them in there for the life of me. I smashed one in there and now i cant get the wrist pins in.
Will take any suggestions. Thanks
12-08-2010, 06:27 PM
#26
Registered User
Thread Starter
Join Date: Nov 2010
Location: Vale Oregon
Posts: 32
Likes: 0
Received 0 Likes
on
0 Posts
Back in action.
After many days of constant trouble and disappointment, I finally got some things going back together. My engine is almost all of the way back together. I did decide to get a new clutch. Im sure this will save me a hassle later on.
Here is a list of things i have done, and a very close price for each.
Engbldr master rebuild kits with RV cam- $298
Machine shop bill (included: Hot tank of all parts, Block hone, valve grind, valve seats installed, and he also put in my cam. $250 (small town)
Master clutch kit from and flywheel grind Napa- $85
New rotor cap, spark plugs, rotor, and wire set from Napa, $50
Pacesetter header from ebay- $180
Rebuild fuel injectors from whichhunter- $86
And a few odd others im sure i cant remember. I will also need to take it to the muffler shop as well.
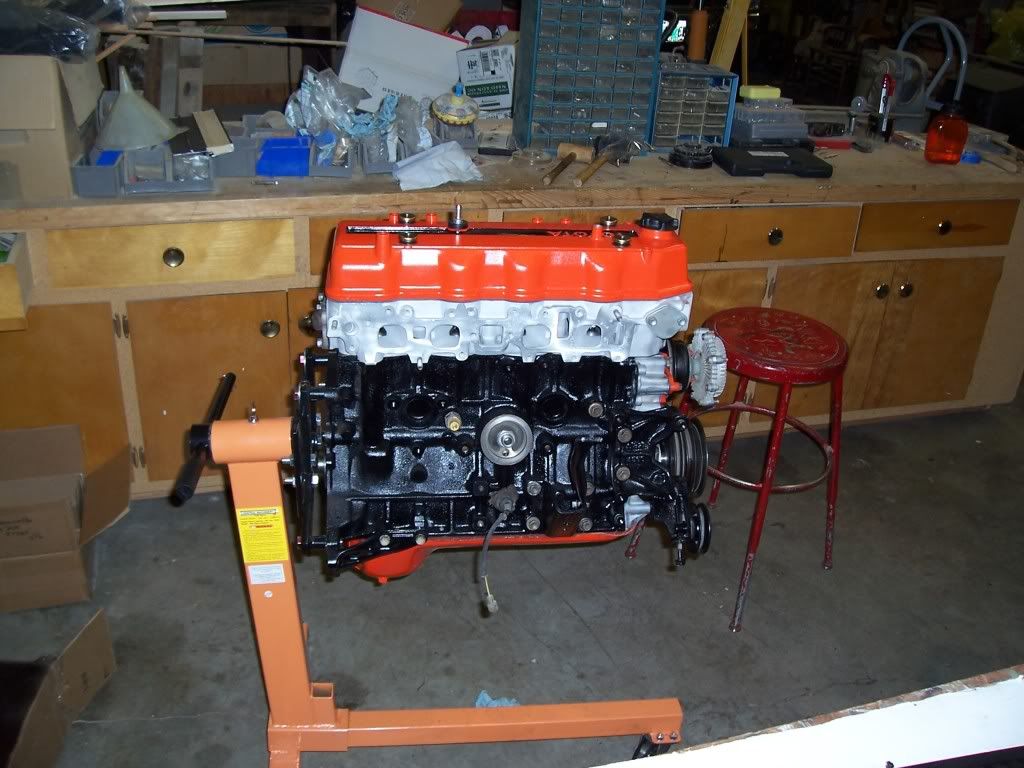
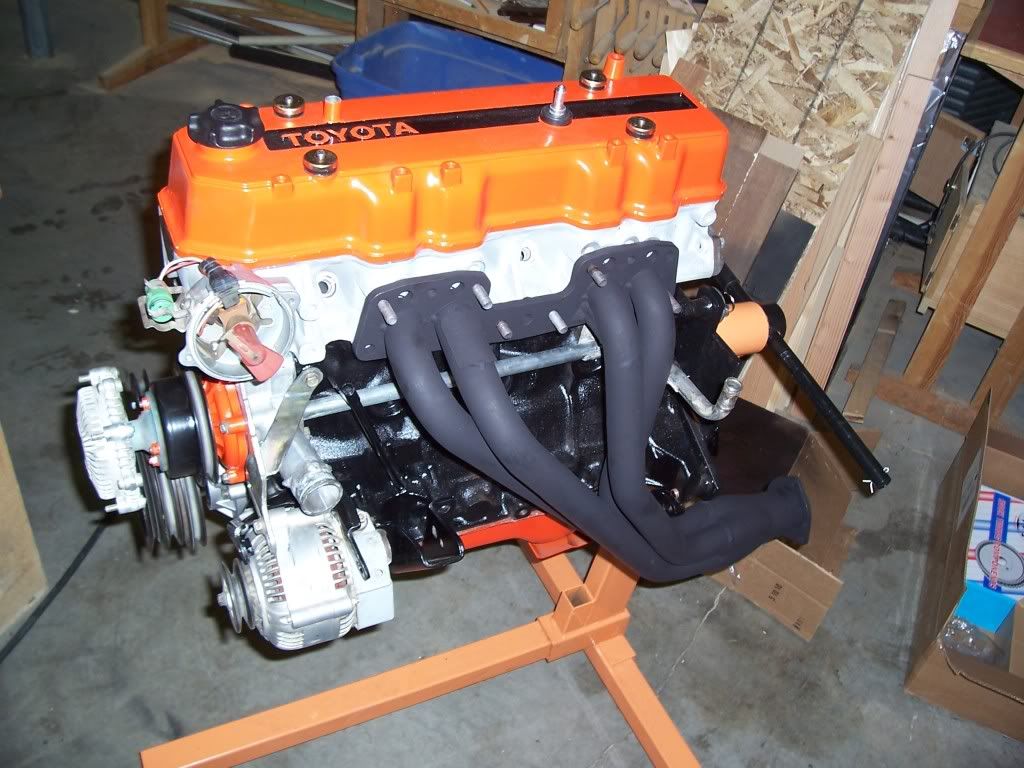
So here are a few pictures of the last few days of progress. Thank you guys for all the help and positive input.
I found out very quickly that the rist pin bushings were a PITA and needed to me honed by machine shop.
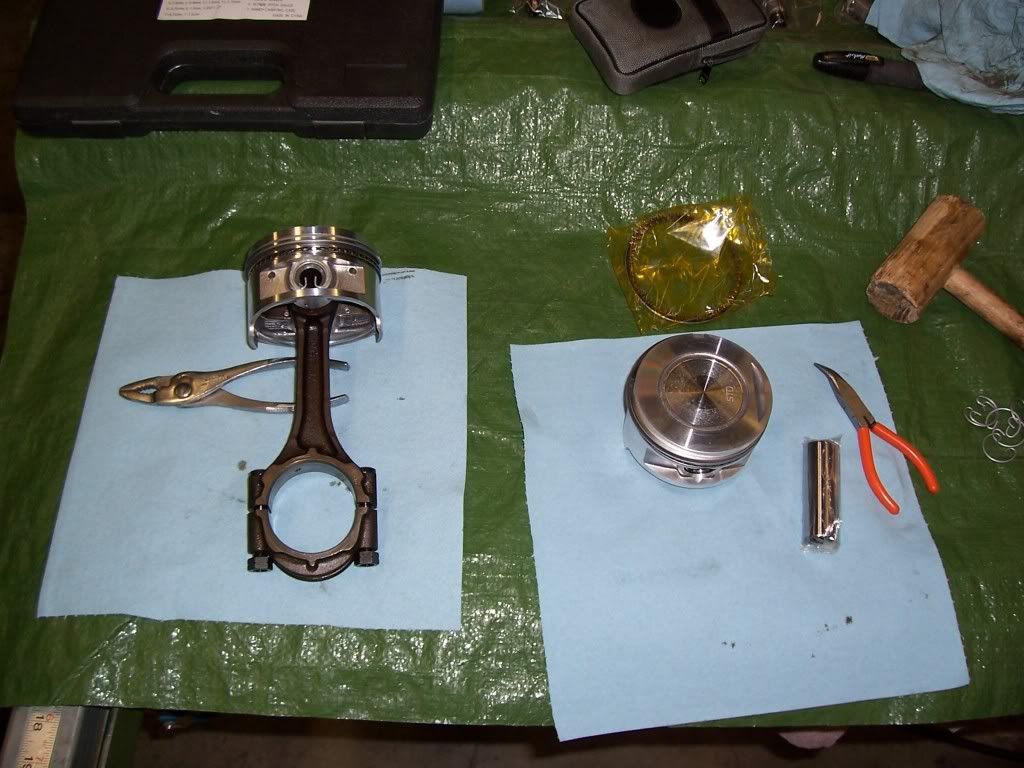
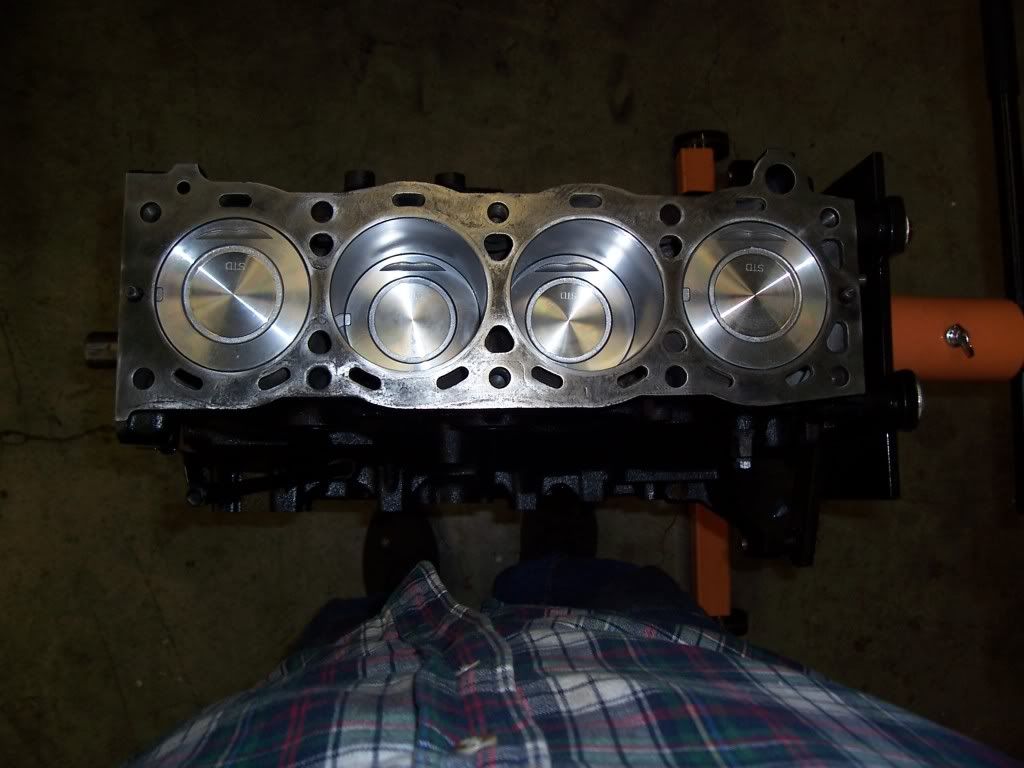
New pistons!
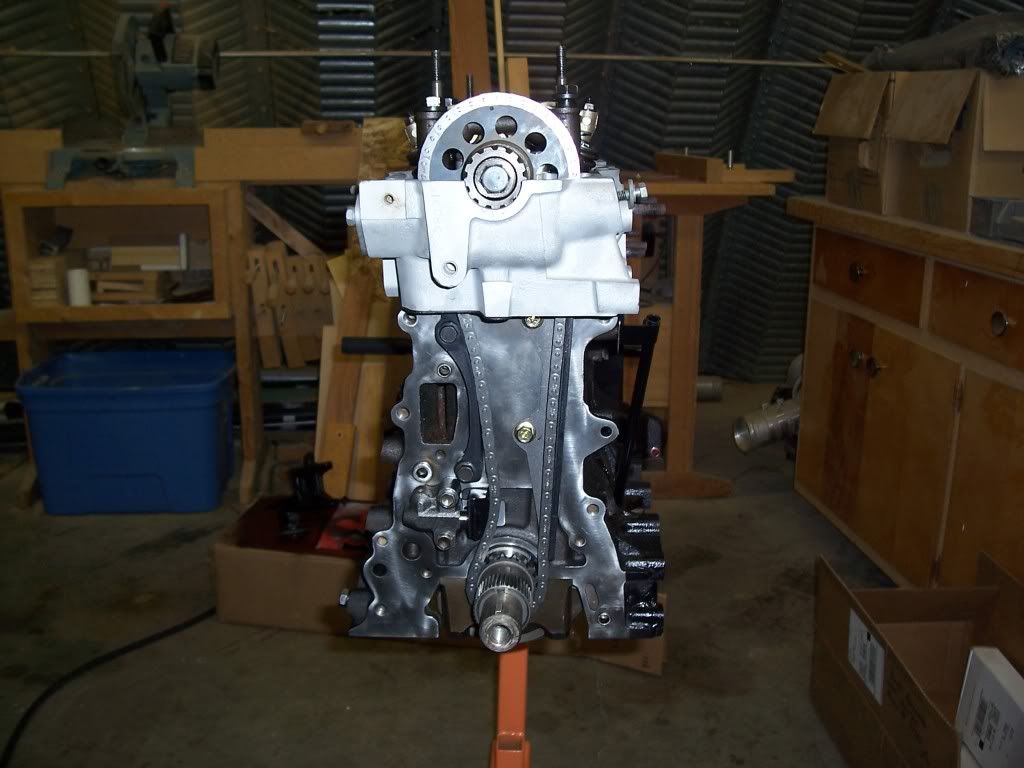
New timing chain kit coming together.
Rocker assembly Back on.
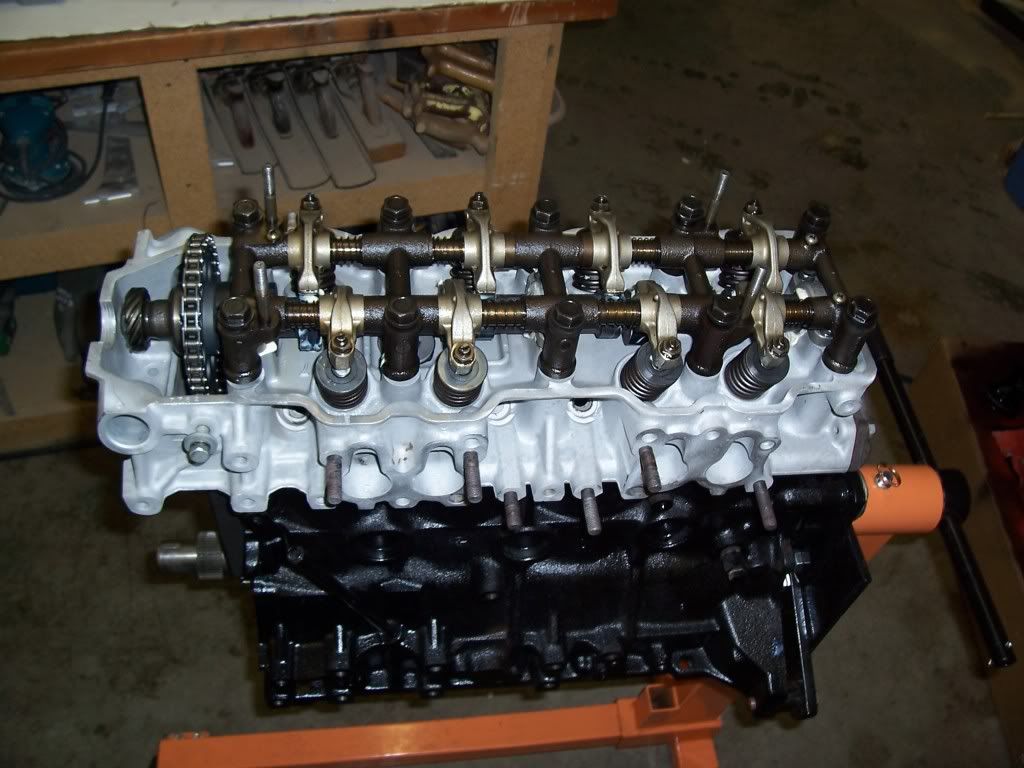
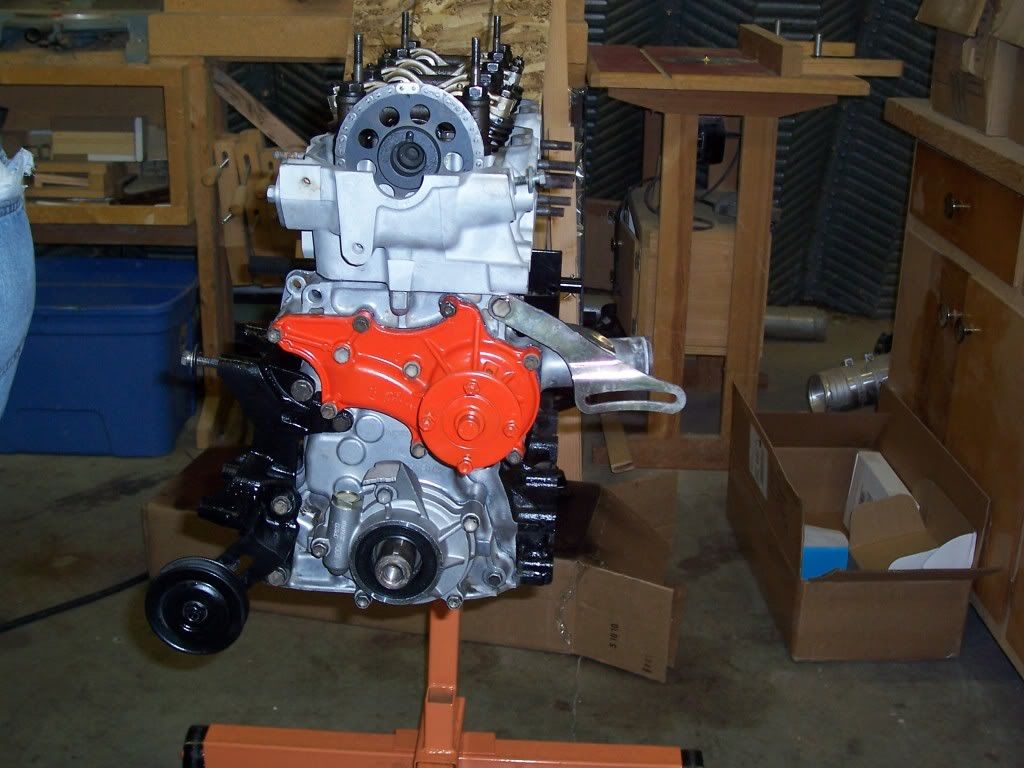
Double checked the torque wrench always!!!!
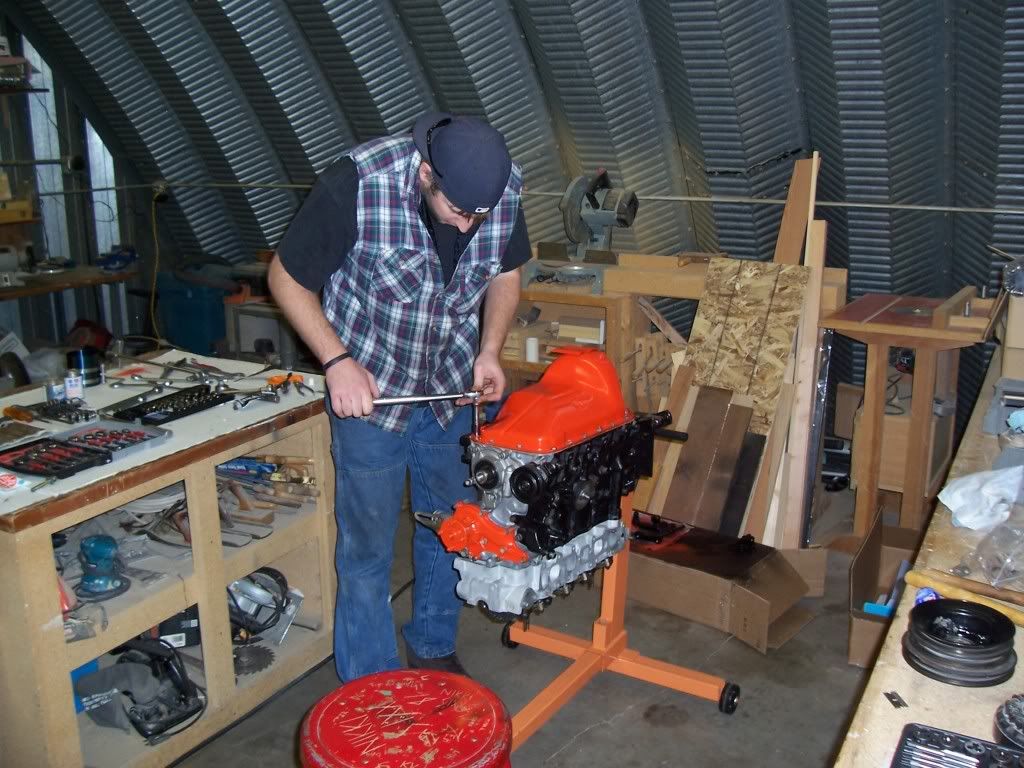
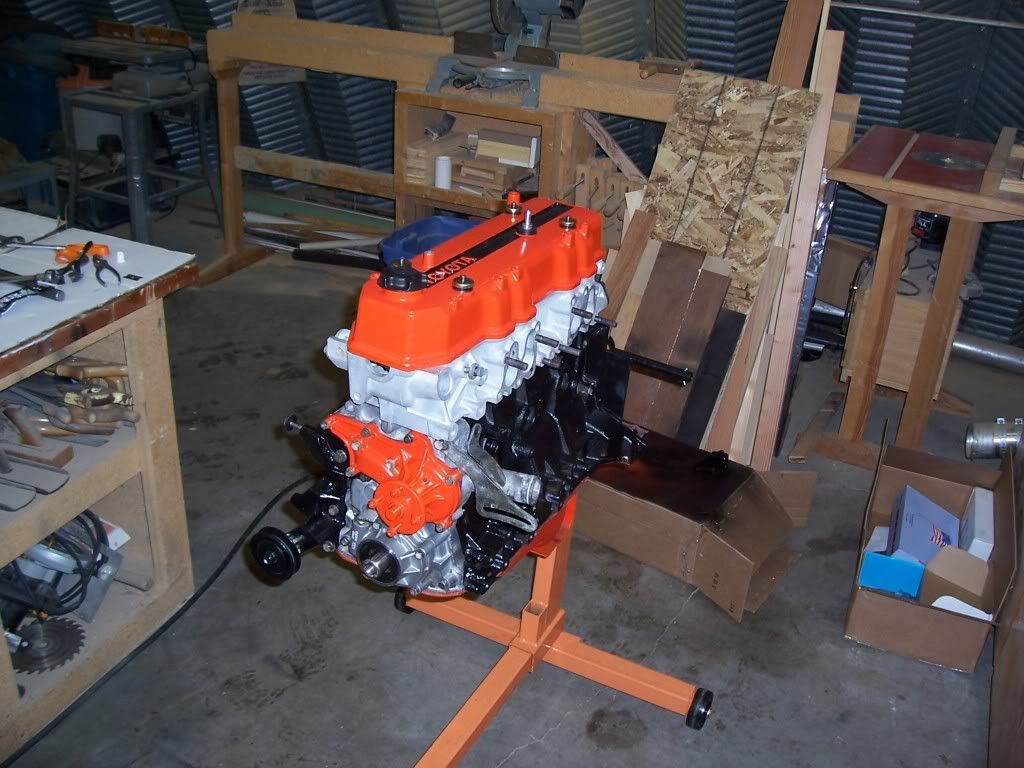
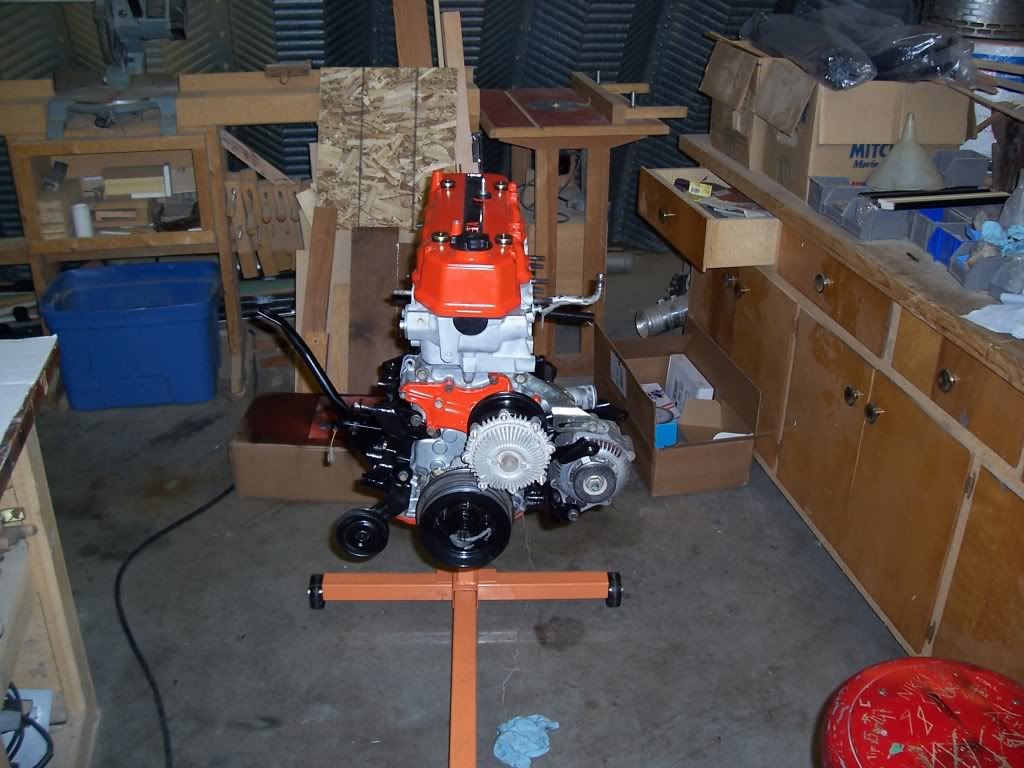
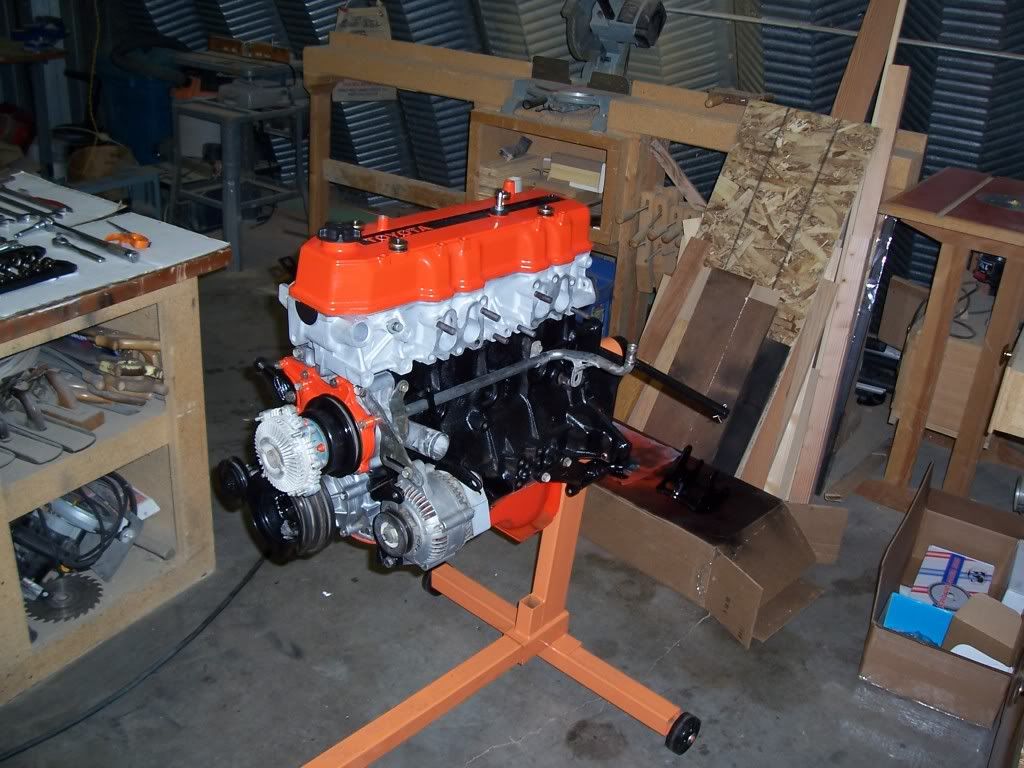
Slaped on the header for fun to see what it would look like.
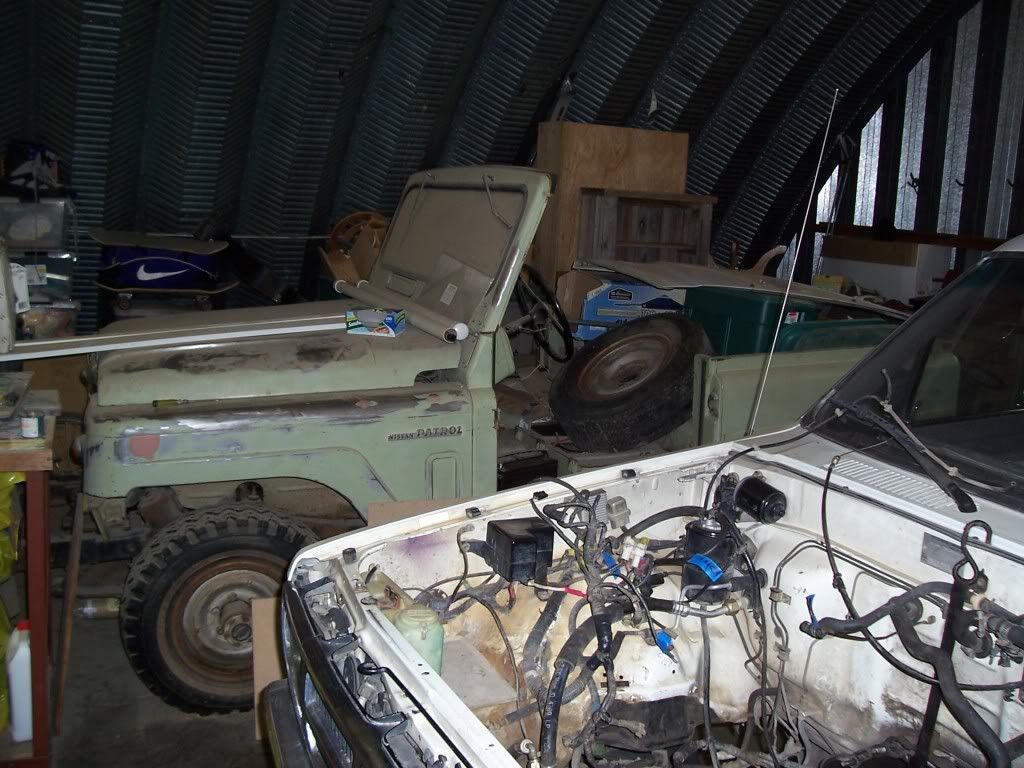
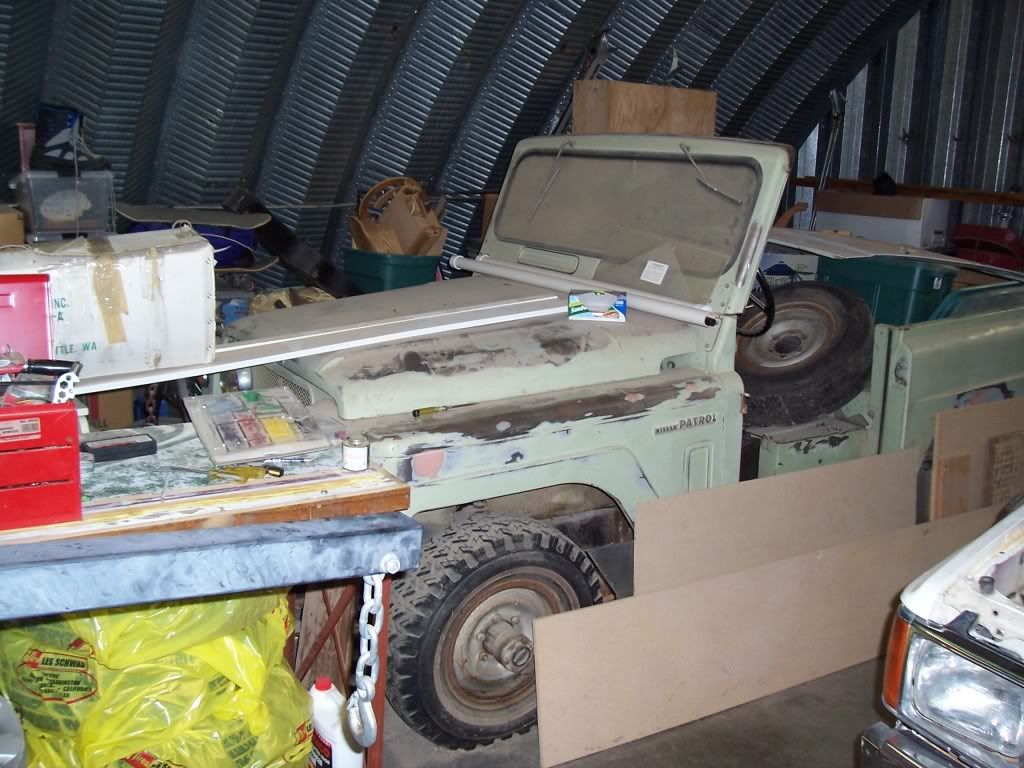
Here are the only patrol pictures i could get due to it being piled under a ton of stuff.
1968 Nissan Patrol.
Here is a list of things i have done, and a very close price for each.
Engbldr master rebuild kits with RV cam- $298
Machine shop bill (included: Hot tank of all parts, Block hone, valve grind, valve seats installed, and he also put in my cam. $250 (small town)
Master clutch kit from and flywheel grind Napa- $85
New rotor cap, spark plugs, rotor, and wire set from Napa, $50
Pacesetter header from ebay- $180
Rebuild fuel injectors from whichhunter- $86
And a few odd others im sure i cant remember. I will also need to take it to the muffler shop as well.
So here are a few pictures of the last few days of progress. Thank you guys for all the help and positive input.
I found out very quickly that the rist pin bushings were a PITA and needed to me honed by machine shop.
New pistons!
New timing chain kit coming together.
Rocker assembly Back on.
Double checked the torque wrench always!!!!
Slaped on the header for fun to see what it would look like.
Here are the only patrol pictures i could get due to it being piled under a ton of stuff.
1968 Nissan Patrol.
 . nice engine work!
12-08-2010, 09:18 PM
. nice engine work!
12-08-2010, 09:18 PM
#28
Registered User
iTrader: (2)
Join Date: Dec 2009
Location: Pleasanton, CA - SF Bay Area
Posts: 2,159
Likes: 0
Received 7 Likes
on
5 Posts

Your engine is looking fantastic - so clean (and I bet you're glad you got the stand!!). Did you use Toyota FIPG for the oil pan? It's worth the money - dealer only stuff.
I'm a Datsun guy, but never knew about the Patrol - that thing looks killer! You've got to post more pics of that soon....
12-08-2010, 10:48 PM
#29
Registered User
Thread Starter
Join Date: Nov 2010
Location: Vale Oregon
Posts: 32
Likes: 0
Received 0 Likes
on
0 Posts
Philbert i used the Engblr gasket along with a napa gasket silicone on both sides of the gasket to get a good seal. I hope that will do the trick. I also have some stuff called hi-tac, but have not used it yet. I hope this stuff will work. I have used it on all my gaskets so far.
 12-16-2010, 02:17 PM
#33
Registered User
Thread Starter
Join Date: Nov 2010
Location: Vale Oregon
Posts: 32
Likes: 0
Received 0 Likes
on
0 Posts
Finally finished!!!
Well the last days i have been zoned in finishing up and did not take any photos, so i did make a quick video.
I got the engine back in fairly easy, but did run into a few problem. I had many problems with threads striping in the head. Two in the exguast side and two in camshaft housing. They were re taped.
Once that was fixed and i was ready to do my first start my starter took a crap. Bought a new one and it turned over fine. Did a little timing and the engine has ran well since.
Here is a quick video i took this morning.
http://www.youtube.com/watch?v=THrURnHcmvI
Last edited by Brett823; 12-16-2010 at 02:25 PM.
12-16-2010, 03:40 PM
#36
Registered User
Thread Starter
Join Date: Nov 2010
Location: Vale Oregon
Posts: 32
Likes: 0
Received 0 Likes
on
0 Posts
thanks guys. I like projects like this, especially when it runs in the end haha. So many more things to do with no money to do them. I guess thats the never ending battle.
01-06-2011, 12:02 PM
#39
Registered User
Thread Starter
Join Date: Nov 2010
Location: Vale Oregon
Posts: 32
Likes: 0
Received 0 Likes
on
0 Posts
Thanks for all the comments. I have over 1000 miles on her and all is well for the most part.
I have one minor issue i need some advice on. With the header i bought it relocated the o2 sensor. Well i just did my own half ass wire extension and im pretty sure that it does not work correctly. My check engine light comes on when im running at 50-65 mph. I also have been getting very poor fuel mileage. I bought a new bosch o2 sensor and it also has a very short wire. Does anyone know how to properly extend this wire???
Thanks


