Aaron17's 1986 4Runner Build Up Thread
 04-15-2010, 02:15 PM
#1
Registered User
Thread Starter
Join Date: Apr 2010
Location: Alberta, Canada
Posts: 85
Likes: 0
Received 0 Likes
on
0 Posts
Aaron17's 1986 4Runner Build Up Thread
Just got my 4runner a couple weeks ago so i thought i'd start a thread about it to get some input from you more experienced people. My 4runner has a bone stock 22RE with 60,000km, the body and everything else has around 480,000km.
Attachment 81001
Attachment 81002
Attachment 81003
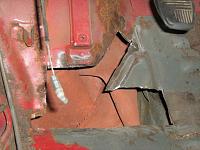
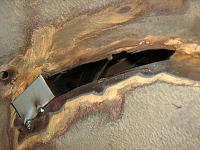
The body is far from perfect, the owner before me attempted to fix the rust by slaping some bondo over it but that doesn't pass the safety inspection. so here's some pictures of the rust that i have found and patched. I am by no means a body man so this is pretty much my first crack at it.

These pictures are kinda old, i have the floor pan finished now, ill post some more pics soon.
Attachment 81001
Attachment 81002
Attachment 81003
The body is far from perfect, the owner before me attempted to fix the rust by slaping some bondo over it
but that doesn't pass the safety inspection. so here's some pictures of the rust that i have found and patched. I am by no means a body man so this is pretty much my first crack at it.


These pictures are kinda old, i have the floor pan finished now, ill post some more pics soon.
 04-19-2010, 01:35 PM
#2
Registered User
Thread Starter
Join Date: Apr 2010
Location: Alberta, Canada
Posts: 85
Likes: 0
Received 0 Likes
on
0 Posts
Im now finished patching the seemingly infinite amount of rust on this truck and im about to start slapping the bondo on.
I also decided to start refinishing the front skid plate, got it all primered up and ready for a coat of paint now.
Sorry guys for some reason none of my pictures are working for some reason, does anybody know how to fix this? Thanks. Anyway,time to go out and do some more work!
and im about to start slapping the bondo on.I also decided to start refinishing the front skid plate, got it all primered up and ready for a coat of paint now.
Sorry guys for some reason none of my pictures are working for some reason, does anybody know how to fix this? Thanks. Anyway,time to go out and do some more work!
09-23-2010, 02:26 PM
#3
Registered User
Thread Starter
Join Date: Apr 2010
Location: Alberta, Canada
Posts: 85
Likes: 0
Received 0 Likes
on
0 Posts
I just realized that i haven't been that active on this forum, so i decided to post some decent pictures of what i have done to my rig and where its at now...hopefully i can figure out how to post them this time.
Here's where i started and what i have done.
[IMG]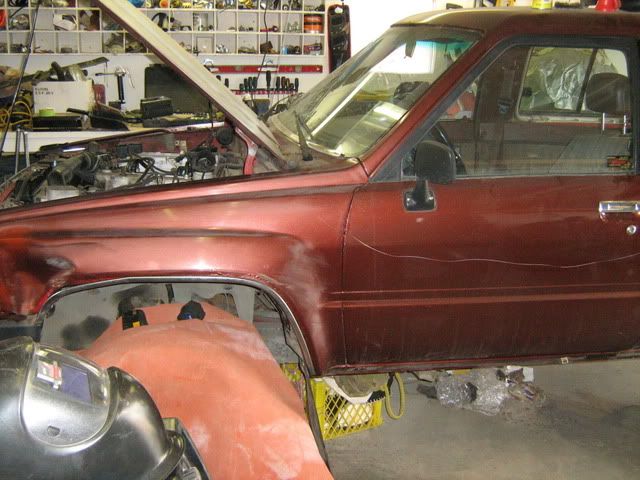 [/IMG]
[IMG]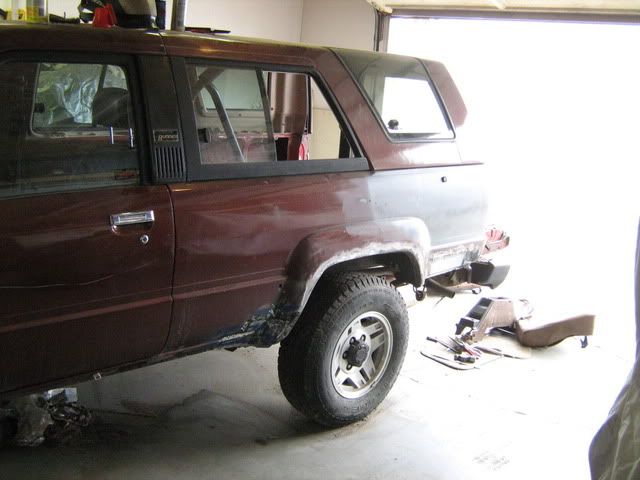 [/IMG]
[IMG]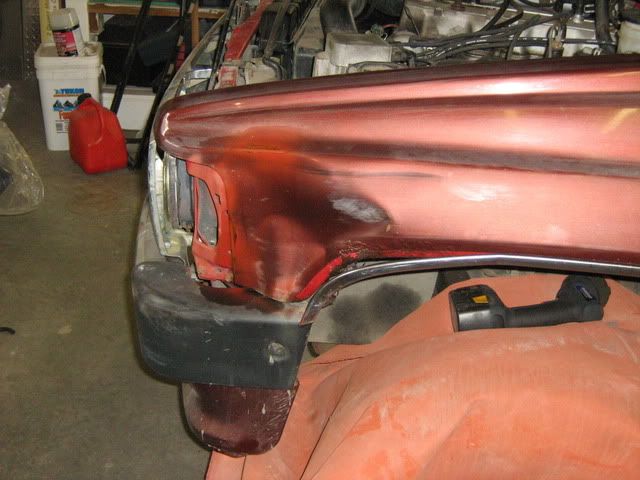 [/IMG]
[IMG] [/IMG]
[IMG]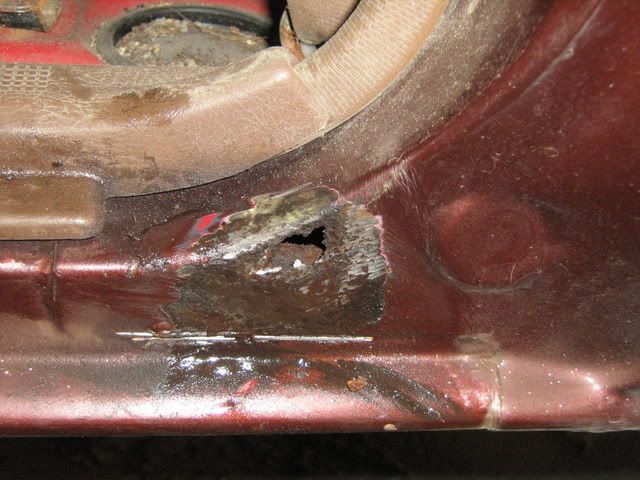 [/IMG]
[IMG]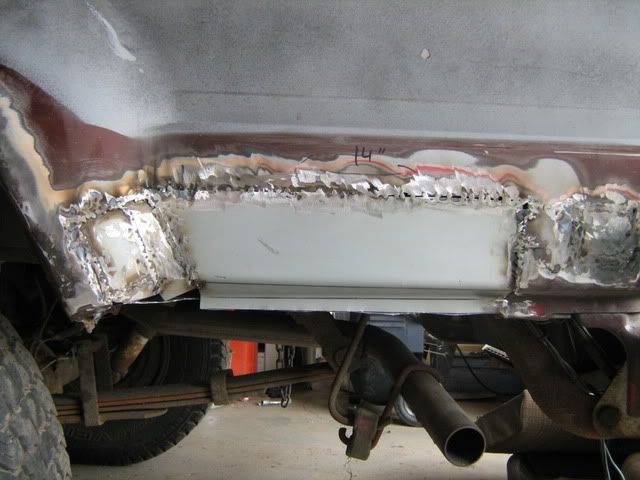 [/IMG]
[IMG]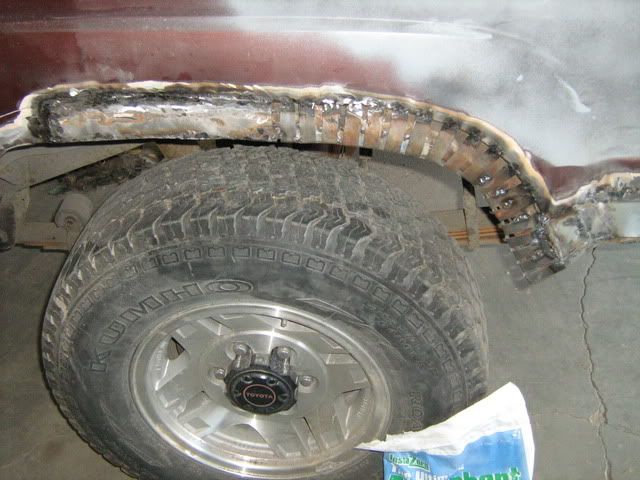 [/IMG]
And here's where im at now, plus some 32's that i got for free.
[IMG]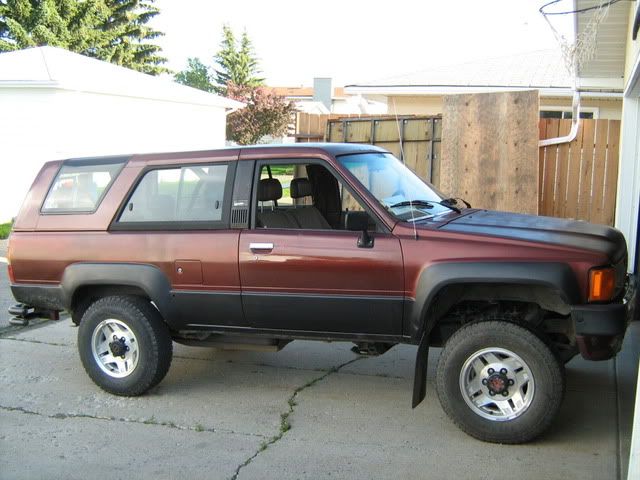 [/IMG]
[IMG]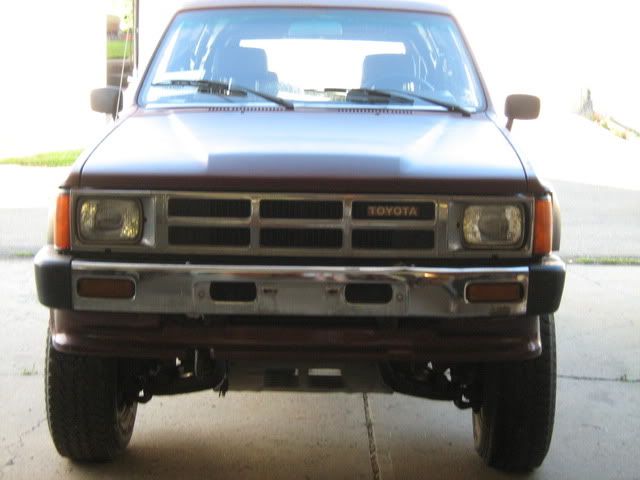 [/IMG]
[IMG]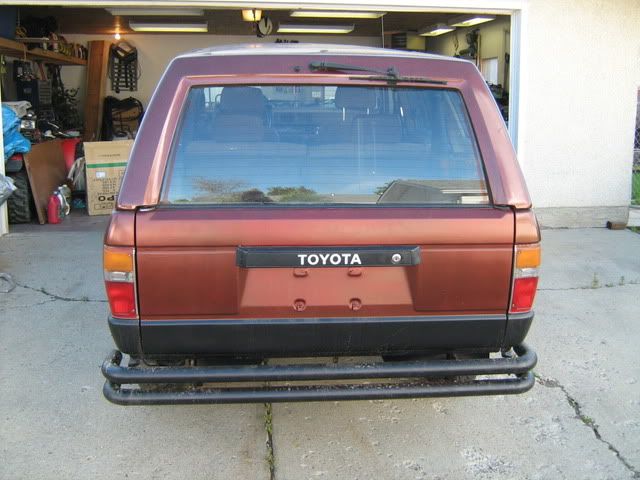 [/IMG]
Here's where i started and what i have done.
[IMG]
[/IMG][IMG]
[/IMG][IMG]
[/IMG][IMG]
[/IMG][IMG]
[/IMG][IMG]
[/IMG][IMG]
[/IMG]And here's where im at now, plus some 32's that i got for free.
[IMG]
[/IMG][IMG]
[/IMG][IMG]
[/IMG]
09-23-2010, 02:48 PM
#4
Registered User
 09-23-2010, 03:07 PM
#7
Registered User
Thread Starter
Join Date: Apr 2010
Location: Alberta, Canada
Posts: 85
Likes: 0
Received 0 Likes
on
0 Posts
Thanks, I start my welding apprenticeship in a week so I'm finally gonna have some cash to play with. I'm currently building a front bumper (pics soon) and I'm gonna do some engine mods in the near future.
Trending Topics
09-24-2010, 04:15 PM
#8
Registered User
Thread Starter
Join Date: Apr 2010
Location: Alberta, Canada
Posts: 85
Likes: 0
Received 0 Likes
on
0 Posts
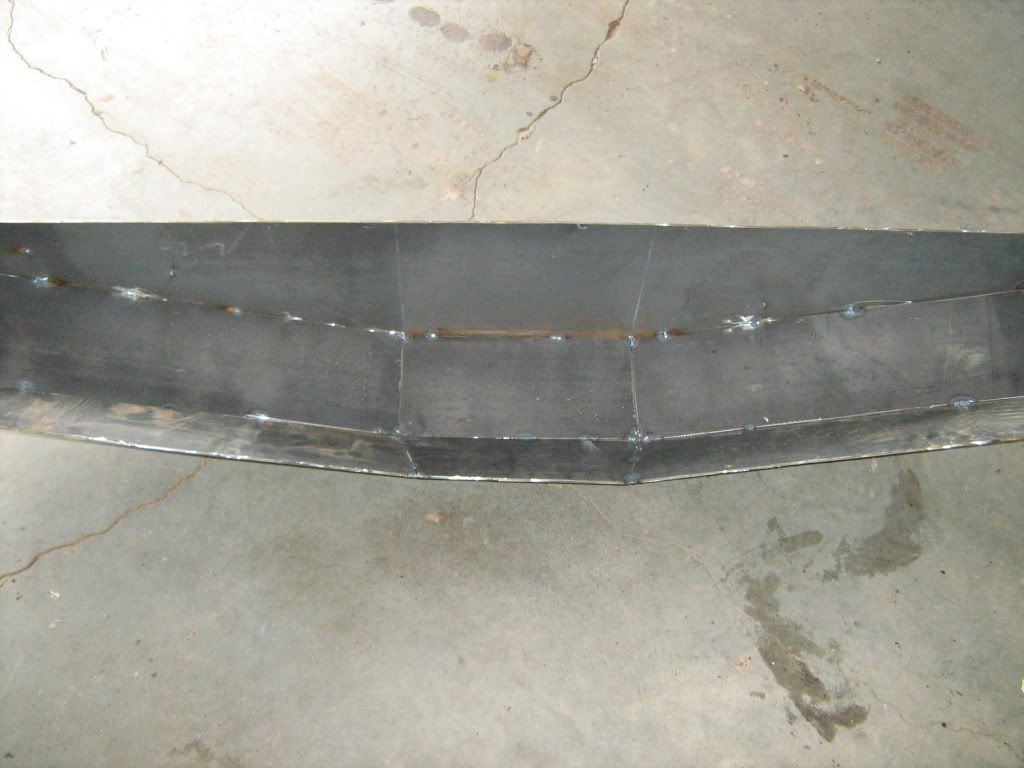
I finished tacking my front bumper together today, i need to trim it back in a couple places but overall it fits pretty good.
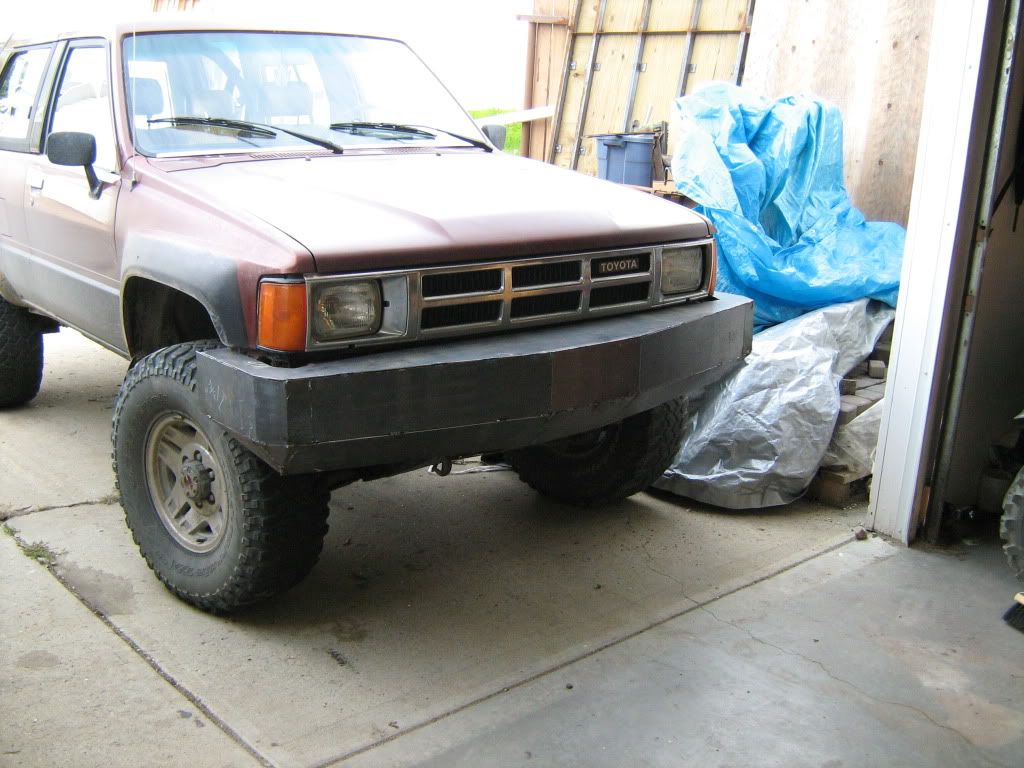
New bumper sitting on top of the stock bumper
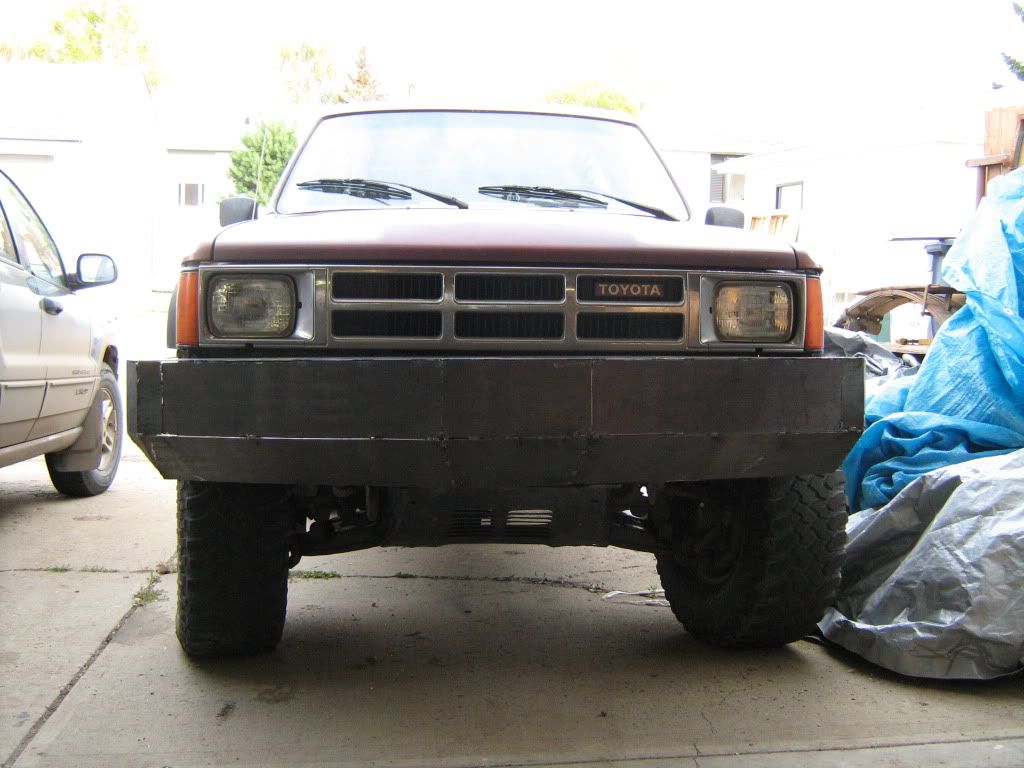
here's a better view of the shape
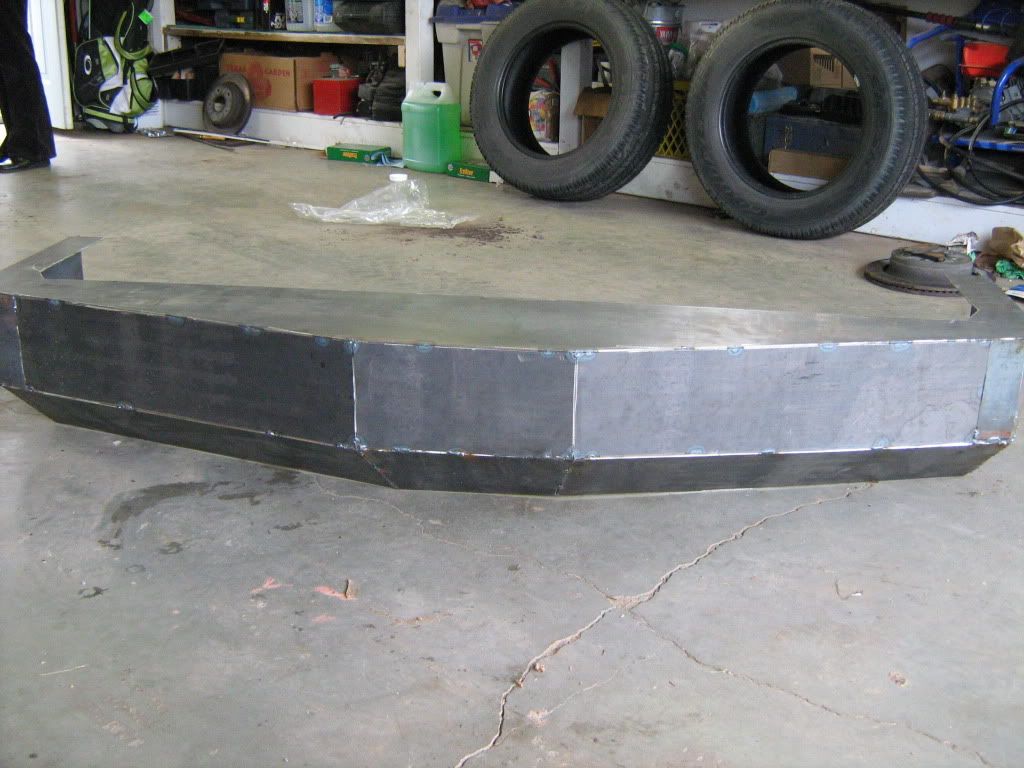
Still gotta figure out the how i want to mount it, im not sure if the stock mounts will be enough.
here's what the inside looks like
New bumper sitting on top of the stock bumper
here's a better view of the shape
Still gotta figure out the how i want to mount it, im not sure if the stock mounts will be enough.
here's what the inside looks like
09-24-2010, 04:19 PM
#9
Registered User
Going to town arent you....so you will be super welder in a couple weeks then huh?
Kinda like the basic shape of your bumper...cant wait to see her done.
Kinda like the basic shape of your bumper...cant wait to see her done.
09-24-2010, 05:34 PM
#11
Registered User
Thread Starter
Join Date: Apr 2010
Location: Alberta, Canada
Posts: 85
Likes: 0
Received 0 Likes
on
0 Posts
i want to try to get it welded up tomorrow but its a toss up between that and goin wheeling so we'll see what happens.
 09-24-2010, 05:59 PM
#13
Registered User
Thread Starter
Join Date: Apr 2010
Location: Alberta, Canada
Posts: 85
Likes: 0
Received 0 Likes
on
0 Posts
i went with 10gauge because i wasn't really sure how much weight the front end could handle, looking back now i think i would have gone with 3/16"(not sure what the gauge is)
09-24-2010, 06:54 PM
#15
Registered User
Thread Starter
Join Date: Apr 2010
Location: Alberta, Canada
Posts: 85
Likes: 0
Received 0 Likes
on
0 Posts
09-25-2010, 06:15 PM
#16
Registered User
Thread Starter
Join Date: Apr 2010
Location: Alberta, Canada
Posts: 85
Likes: 0
Received 0 Likes
on
0 Posts
i got the bumper welded out today and man it is waaay stronger than i thought it was going to be, anyway im off to my dads welding shop on monday to start on the mounts.
11-03-2010, 10:15 AM
#17
Registered User
great work love to see people build what they want not just buy somone elses work. looks like you did a good job on the rust repair, mine still isnt done.
11-14-2010, 02:46 PM
#19
Registered User
Thread Starter
Join Date: Apr 2010
Location: Alberta, Canada
Posts: 85
Likes: 0
Received 0 Likes
on
0 Posts
Thanks for the feedback guys, i haven't been doing much on the runner lately because of work. But im gonna try to get the mounts figured out this weekend.
01-23-2011, 03:08 PM
#20
Registered User
Thread Starter
Join Date: Apr 2010
Location: Alberta, Canada
Posts: 85
Likes: 0
Received 0 Likes
on
0 Posts
Well, i finally got around to finishing the bumper mounts. Work has been eating up alot of my quality time with the 4runner but we were recently knocked back to a 4 day week at the shop so i can finally get some stuff done. I also have a new camshaft from engnbldr on the way so i can turn my 32's a little easier.
I also aquired a new 220v stick/tig welder and a drill press for my garage, my fab projects should go a little more smothely now. More pics on the way.
I also aquired a new 220v stick/tig welder and a drill press for my garage, my fab projects should go a little more smothely now. More pics on the way.


