DIRTCO's 1985 4Runner Build-Up Thread
 02-03-2008, 08:30 PM
#41
Registered User
Thread Starter
Join Date: May 2007
Location: Summit County, Colorado
Posts: 1,441
Likes: 0
Received 0 Likes
on
0 Posts
I've also had these parts waiting to be installed for a couple weeks.
A few parts from Trail-Gear
Axle truss
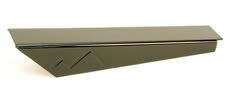
Diff. Armor
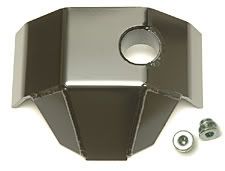
Brake plate spacers (Remove's stock brake plate)
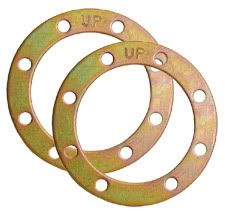
Knuckle ball gussets
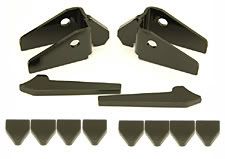
Knuckle Re-build kit

Front shackles, 5"

Rock Rings
And of course, the ARP Knuckle studs
A few parts from Trail-Gear
Axle truss
Diff. Armor
Brake plate spacers (Remove's stock brake plate)
Knuckle ball gussets
Knuckle Re-build kit
Front shackles, 5"
Rock Rings
And of course, the ARP Knuckle studs
Last edited by DIRTCO; 02-03-2008 at 08:31 PM.
 02-03-2008, 08:45 PM
#42
Registered User
Thread Starter
Join Date: May 2007
Location: Summit County, Colorado
Posts: 1,441
Likes: 0
Received 0 Likes
on
0 Posts
You'll love the 30 spline Longfields. Just knowing the weakest link isn't the birfields and having to carry spares is great!! I need to order up the hub gears soon as well as some ARP knuckle studs and APR hub studs.
How's the snow been in Summit County? From the looks of it, you've been getting hammered this year
How's the snow been in Summit County? From the looks of it, you've been getting hammered this year
 .
.It's snowing right now, and has been the last couple days. The snow is great right now, I just wish I had time to go snowboarding. Between work and getting the truck fixed I have not been able to get out.
 02-03-2008, 08:49 PM
#43
Registered User
Thread Starter
Join Date: May 2007
Location: Summit County, Colorado
Posts: 1,441
Likes: 0
Received 0 Likes
on
0 Posts
 . A couple of my friends are running them and they seem to be well worth the money!
02-06-2008, 05:04 PM
. A couple of my friends are running them and they seem to be well worth the money!
02-06-2008, 05:04 PM
#44
Registered User
Thread Starter
Join Date: May 2007
Location: Summit County, Colorado
Posts: 1,441
Likes: 0
Received 0 Likes
on
0 Posts
I got Marlin's new front axle seals ordered, along with a pair of front brake lines. I had the Superlift lines but one of them was damaged when the leafspring broke and I don't really trust it. I will keep the other old one as a spare.
That should take care of the new parts for a while (I hope). Now it's time to start getting some work done.
That should take care of the new parts for a while (I hope). Now it's time to start getting some work done.
02-07-2008, 04:40 PM
#45
Registered User
Looks like youve got some goodies to install  get er done like I need to with mine. I want those ARP or dana studs you can use. I was looking at the 6stud nuckles but i hear they are a bit weaker than the 4stud plus since your using the 5th stud that long sells youll be golden with that front axle
Ya you wont really have to worry about the 30spline and if you get then inner hub too they are garenteed for life no question which is good to know.

get er done like I need to with mine. I want those ARP or dana studs you can use. I was looking at the 6stud nuckles but i hear they are a bit weaker than the 4stud plus since your using the 5th stud that long sells youll be golden with that front axleYa you wont really have to worry about the 30spline and if you get then inner hub too they are garenteed for life no question which is good to know.
02-08-2008, 08:23 PM
#46
Registered User
Thread Starter
Join Date: May 2007
Location: Summit County, Colorado
Posts: 1,441
Likes: 0
Received 0 Likes
on
0 Posts
Looks like youve got some goodies to install get er done like I need to with mine. I want those ARP or dana studs you can use. I was looking at the 6stud nuckles but i hear they are a bit weaker than the 4stud plus since your using the 5th stud that long sells youll be golden with that front axle
Ya you wont really have to worry about the 30spline and if you get then inner hub too they are garenteed for life no question which is good to know.
get er done like I need to with mine. I want those ARP or dana studs you can use. I was looking at the 6stud nuckles but i hear they are a bit weaker than the 4stud plus since your using the 5th stud that long sells youll be golden with that front axleYa you wont really have to worry about the 30spline and if you get then inner hub too they are garenteed for life no question which is good to know.
02-10-2008, 04:11 PM
#47
Registered User
02-10-2008, 06:16 PM
#48
Registered User
Thread Starter
Join Date: May 2007
Location: Summit County, Colorado
Posts: 1,441
Likes: 0
Received 0 Likes
on
0 Posts
I've working on the truck a little bit. Here's what has been done.
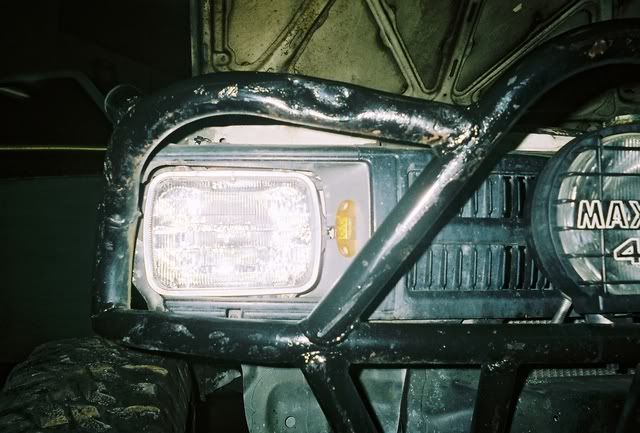
I started with a few simple projects. When I got my new daily driver I had to rob some parts off this truck. First item was the headlights, I had some really nice IPF H4 conversions, but since this is no longer my daily driver I did not need anything that fancy. Those went in the daily driver and got replaced with a set of Walmart specials They are suposed to be brighter but after the lights I had they seem pretty regular 
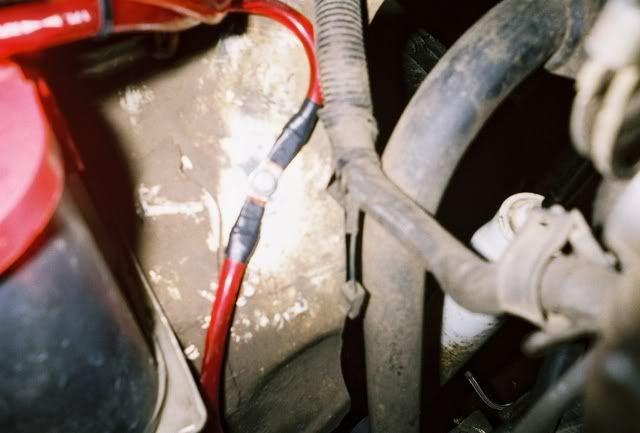
I also had to steal the battery cables when the daily driver had some problems. Made up some new ones the same way I made the old set. The cables are 4 gauge with standard copper ring terminals, I covered the ends with tape to prevent shorts.
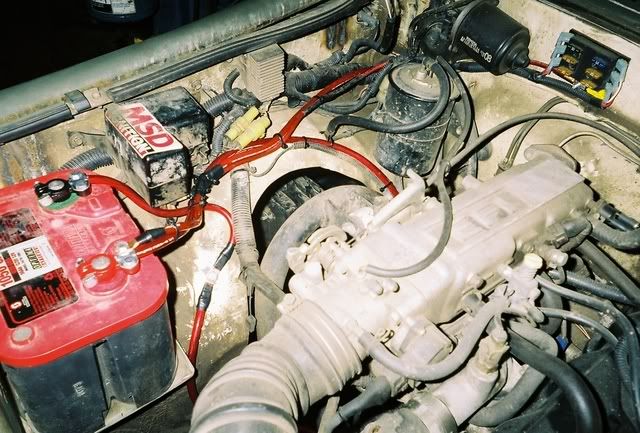
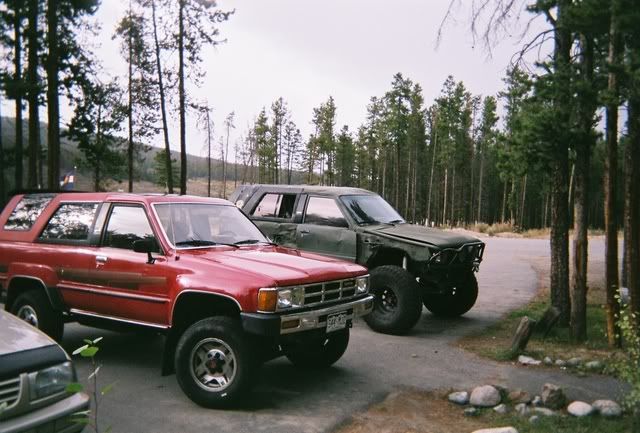
And here is the daily driver that got all the goodies
1986 Turbo SR5 4Runner

I started with a few simple projects. When I got my new daily driver I had to rob some parts off this truck. First item was the headlights, I had some really nice IPF H4 conversions, but since this is no longer my daily driver I did not need anything that fancy. Those went in the daily driver and got replaced with a set of Walmart specials
They are suposed to be brighter but after the lights I had they seem pretty regular I also had to steal the battery cables when the daily driver had some problems. Made up some new ones the same way I made the old set. The cables are 4 gauge with standard copper ring terminals, I covered the ends with tape to prevent shorts.
And here is the daily driver that got all the goodies
1986 Turbo SR5 4Runner
02-10-2008, 06:43 PM
#49
Registered User
Thread Starter
Join Date: May 2007
Location: Summit County, Colorado
Posts: 1,441
Likes: 0
Received 0 Likes
on
0 Posts
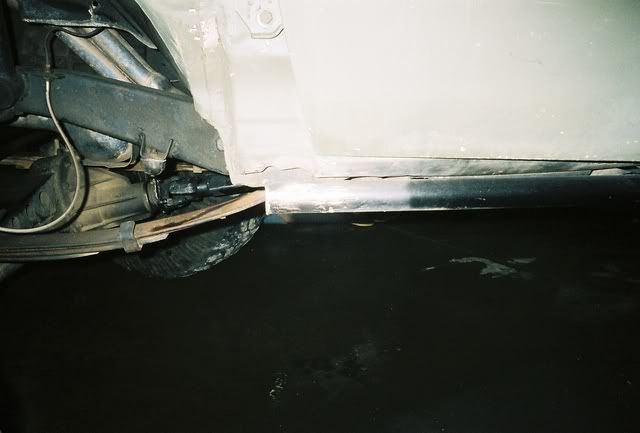
Then I went to work on cutting down the driver's side rockslider, after cutting a couple of the bars the whole thing sprung apart. It seems that after a couple of years beating the crap out of them, they had some stored up energy Here is how much it moved.
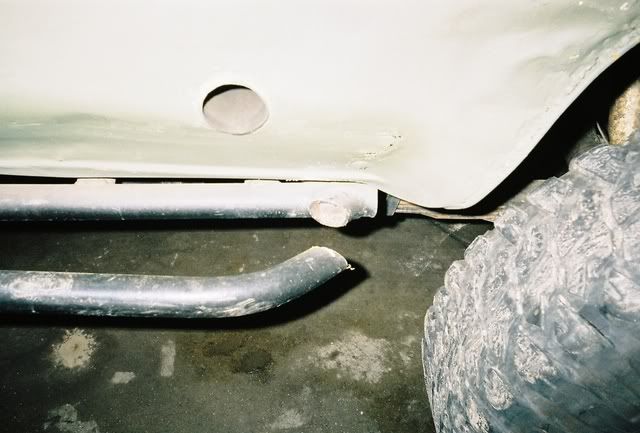
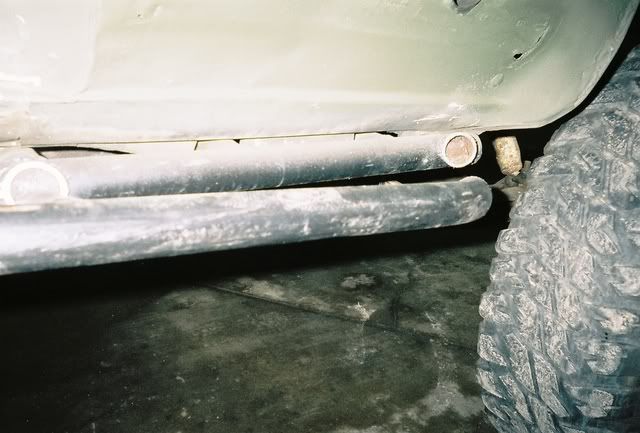
After a bunch of grinding (of which I am really being to hate) this is how it looks.
I then cleaned up the old welds for the rear cage section.
Here is how much it moved.After a bunch of grinding (of which I am really being to hate) this is how it looks.
I then cleaned up the old welds for the rear cage section.
02-10-2008, 07:05 PM
#50
Registered User
Thread Starter
Join Date: May 2007
Location: Summit County, Colorado
Posts: 1,441
Likes: 0
Received 0 Likes
on
0 Posts
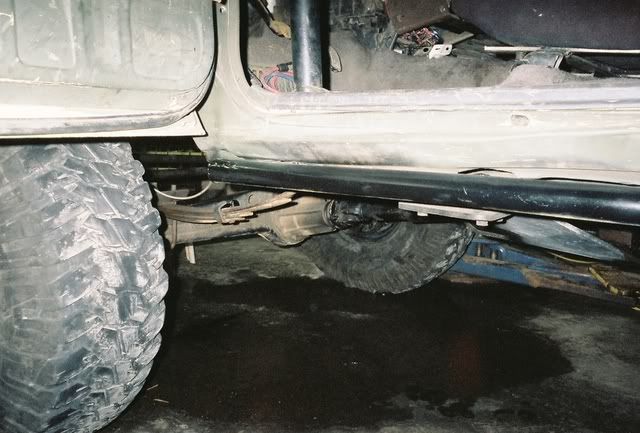
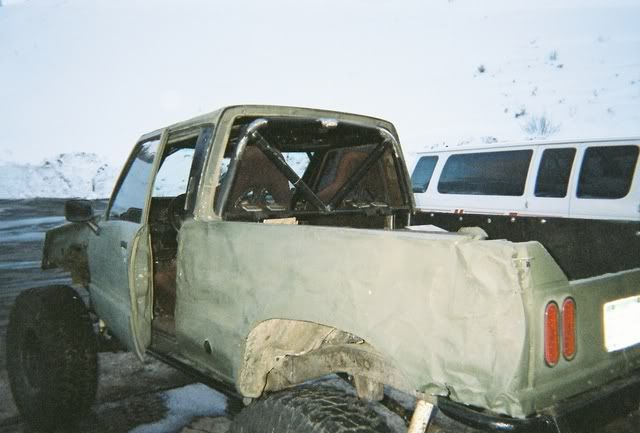
Here's another picture of the front leafspring, or what's let of it I removed the shackle and the broken leaf just to get it out of the way.
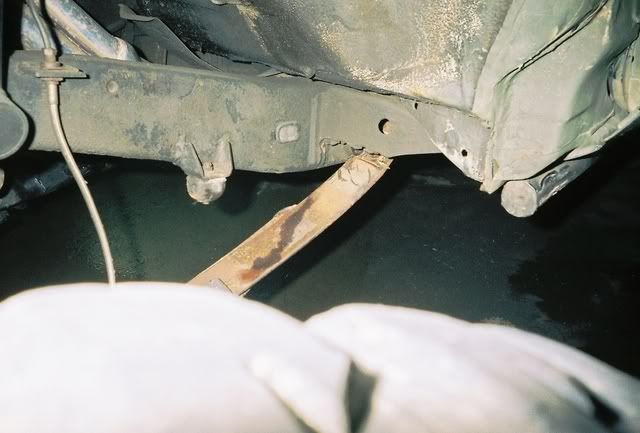
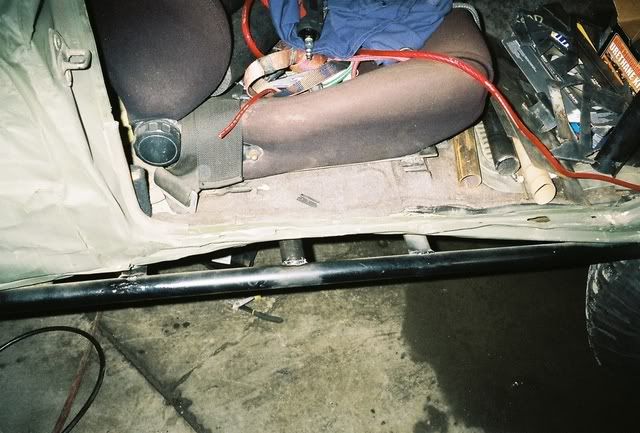
I then added an extra rockslider support to the passenger side. It probably doesn't need it but I want to make some door bars off of the roll cage and these will be used as an extra suport.
You also have to love the dent in the frame
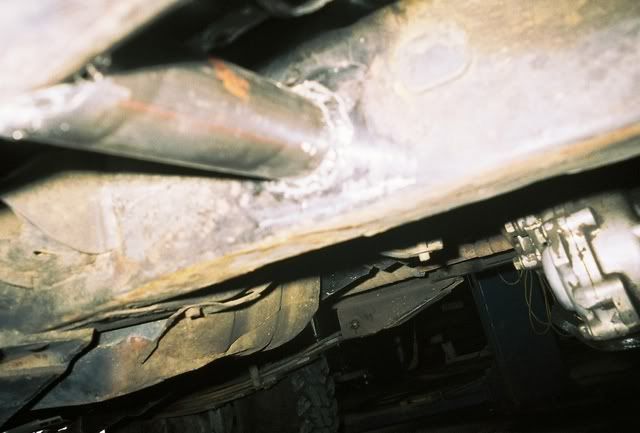
I removed the shackle and the broken leaf just to get it out of the way.I then added an extra rockslider support to the passenger side. It probably doesn't need it but I want to make some door bars off of the roll cage and these will be used as an extra suport.
You also have to love the dent in the frame
02-10-2008, 08:14 PM
#51
Registered User
Thread Starter
Join Date: May 2007
Location: Summit County, Colorado
Posts: 1,441
Likes: 0
Received 0 Likes
on
0 Posts
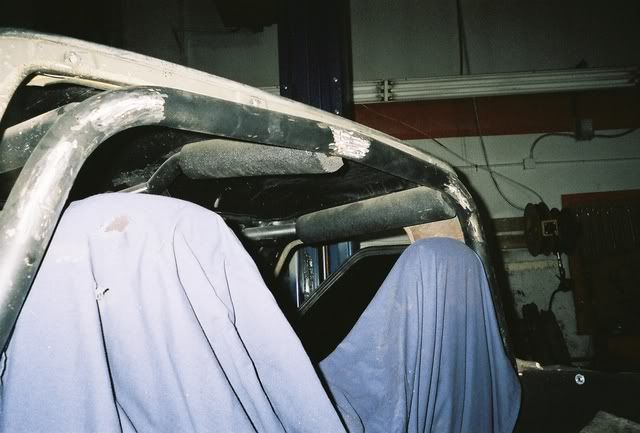
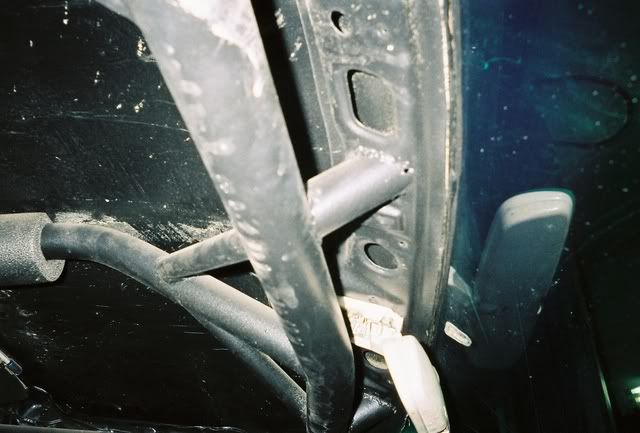
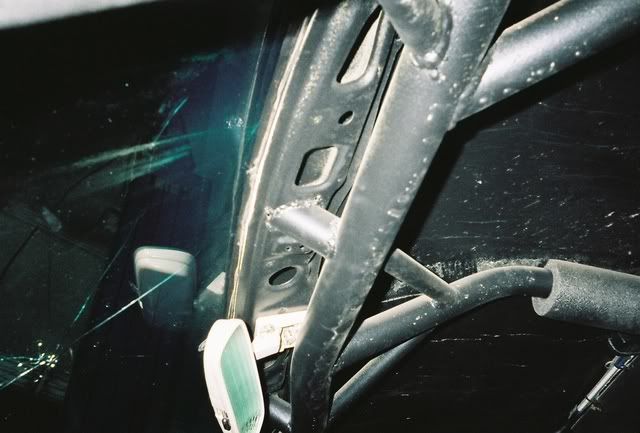
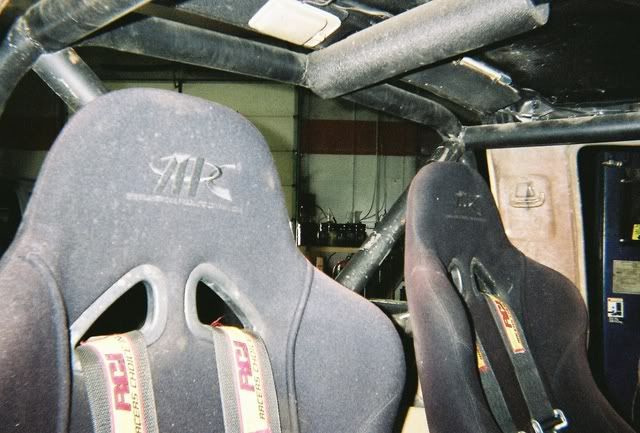
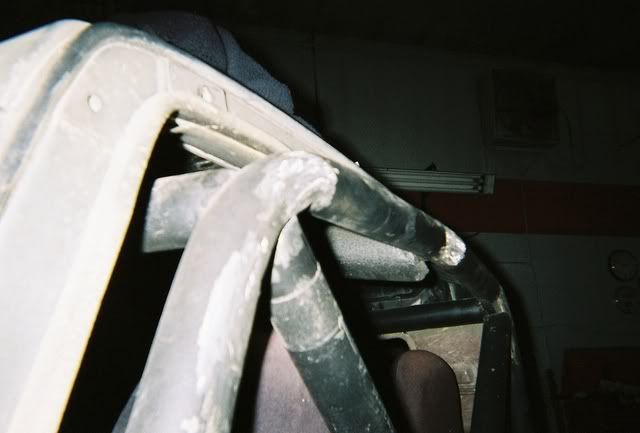
And last, I started working the cage some more. I don't have any pictures of the progess yet (should have some tommorrow) but this will give you an idea of what I have so far.
I designed the cage to go through the dash.
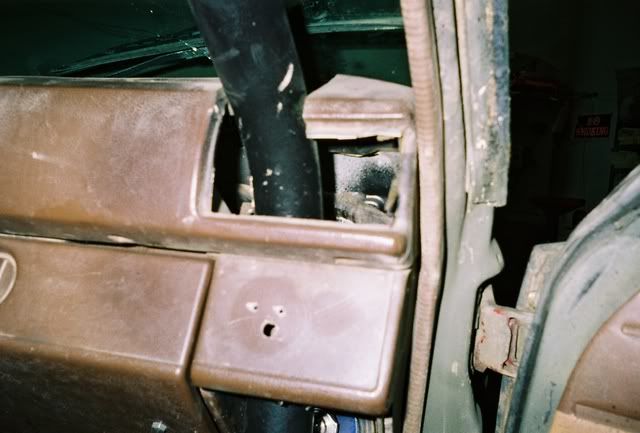
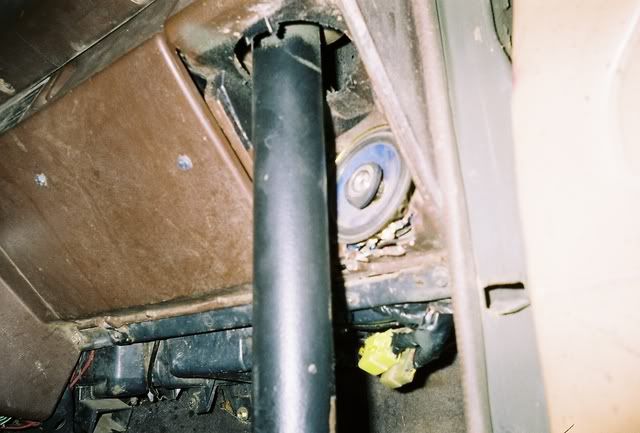
Middle brace and supports
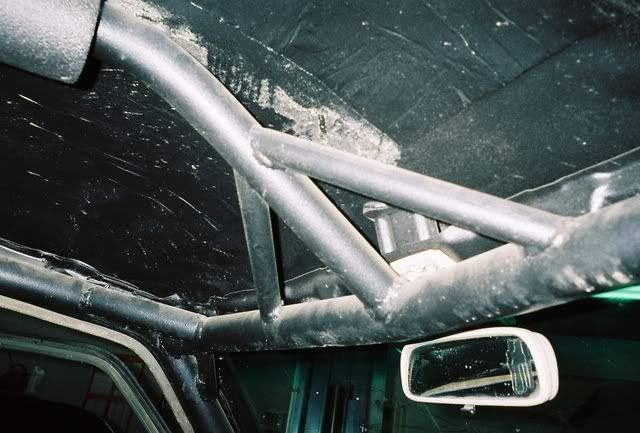
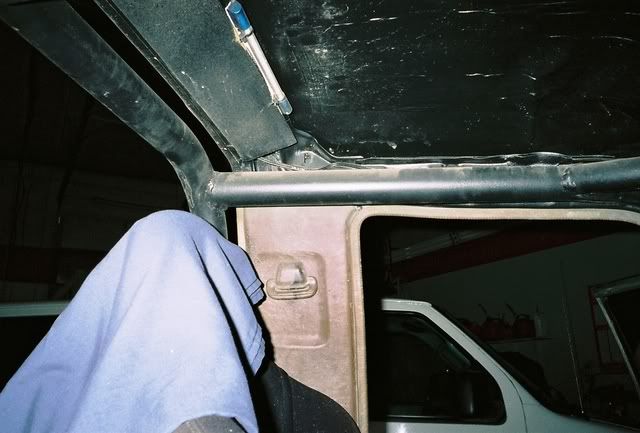
And why the doors still kind of work
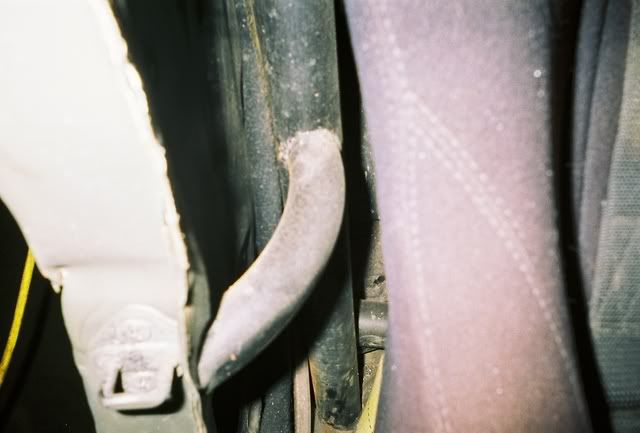
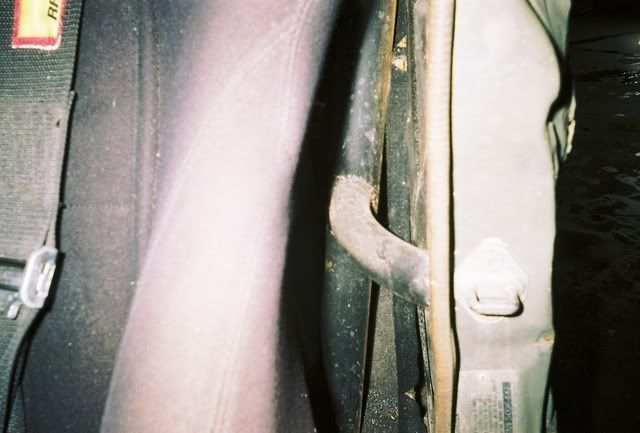
I put these in to keep a windshield in the tuck (I hope)
I designed the cage to go through the dash.
Middle brace and supports
And why the doors still kind of work
I put these in to keep a windshield in the tuck (I hope)
Last edited by DIRTCO; 02-10-2008 at 08:21 PM.
 02-11-2008, 08:03 PM
#53
Registered User
Thread Starter
Join Date: May 2007
Location: Summit County, Colorado
Posts: 1,441
Likes: 0
Received 0 Likes
on
0 Posts
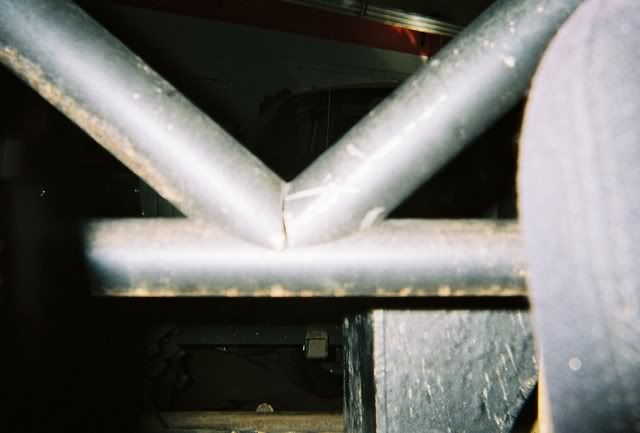
Then I started working on some of the tube work. I wanted to get the main cage section ready for the new rear cage.
This is a trick I used for complex tube work.
Start with a couple paper towel rolls, take two pieces and cut them down the middle. Then place them on top of each other on the tube and tape them together.
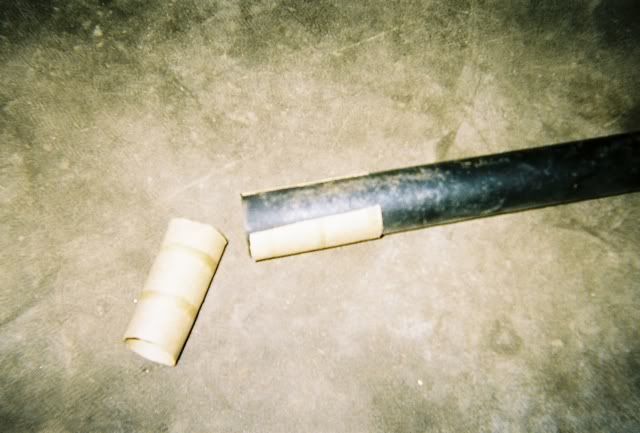
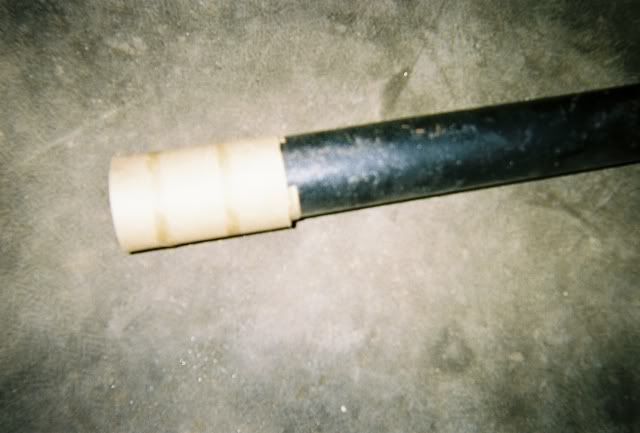
Then slide it off, hold up to where you want the tubing to be and start trimming until fits the way you want. Slide it back on the tube and trace the pattern out. Then start cutting
This is a trick I used for complex tube work.
Start with a couple paper towel rolls, take two pieces and cut them down the middle. Then place them on top of each other on the tube and tape them together.
Then slide it off, hold up to where you want the tubing to be and start trimming until fits the way you want. Slide it back on the tube and trace the pattern out. Then start cutting
 02-12-2008, 03:09 PM
#56
Registered User
You should check into getting one of these
Pipemaster tube fitting tool

You could save yourself some TP and TP rolls
Cage looks sick. Love the dove-tail as well!! Nice work, can't wait to see it this summer on Indy
Pipemaster tube fitting tool
You could save yourself some TP and TP rolls
Cage looks sick. Love the dove-tail as well!! Nice work, can't wait to see it this summer on Indy
02-12-2008, 05:53 PM
#57
Registered User
Thread Starter
Join Date: May 2007
Location: Summit County, Colorado
Posts: 1,441
Likes: 0
Received 0 Likes
on
0 Posts
You should check into getting one of these
Pipemaster tube fitting tool
You could save yourself some TP and TP rolls
Cage looks sick. Love the dove-tail as well!! Nice work, can't wait to see it this summer on Indy
Pipemaster tube fitting tool
You could save yourself some TP and TP rolls
Cage looks sick. Love the dove-tail as well!! Nice work, can't wait to see it this summer on Indy
Thanks, I still have a lot of work to complete on the cage and dovetail. I'm looking forward to getting some new dents and scratches.
02-12-2008, 06:52 PM
#58
Registered User
My brother has the 1.75" tube version. He loves it and helped him with his cage big time! I need to borrow it when I go to build mine.
Nice front bumper also! Did you end up making your winch removable and just using a cradle?
Nice front bumper also! Did you end up making your winch removable and just using a cradle?
02-13-2008, 04:26 PM
#59
Registered User
Thread Starter
Join Date: May 2007
Location: Summit County, Colorado
Posts: 1,441
Likes: 0
Received 0 Likes
on
0 Posts
On another note, I don't know if you have a design for your cage but I love how I ran mine through the dash. A couple of my friends have the All-Pro cage and (while it's a good product) it's a real pain getting in and out of the truck. The heater still works great and if I would have spent some extra time I could have put the heater grills back in. It does take more time, but well worth it, a cage is one of those things that you usually only build once.
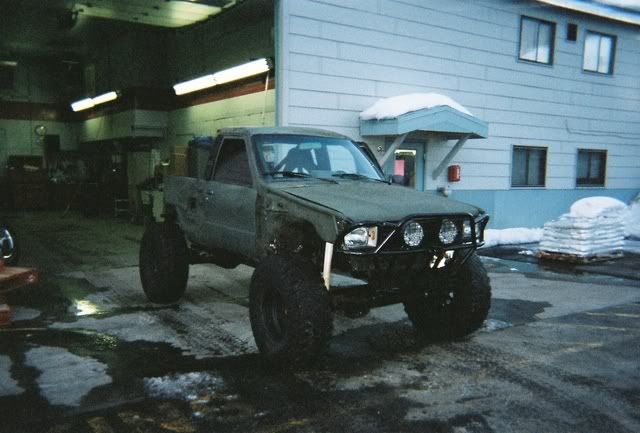
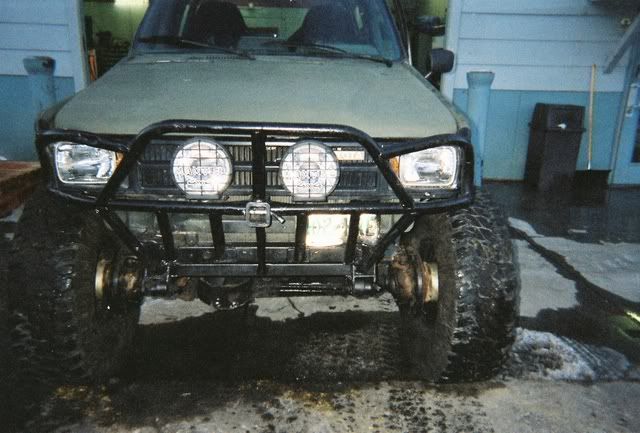
Thanks, the front bumper is one of my favorte parts of the truck. It just looks "mean" in person. I made it so that I can used a multi-mount winch, but I just havn't got one yet (it's going on 3 years
) You can also bash it into the rocks as much as you want and not have to woory about it. You can see all the rock rash in the photo, but I still have a headlight and nothing to worry about 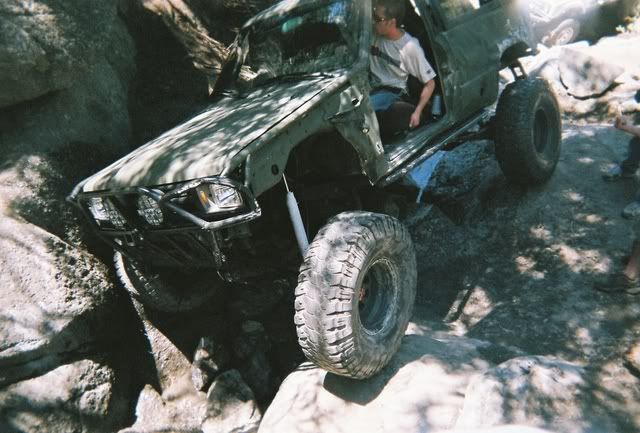 02-18-2008, 05:44 PM
#60
Registered User
Thread Starter
Join Date: May 2007
Location: Summit County, Colorado
Posts: 1,441
Likes: 0
Received 0 Likes
on
0 Posts
I got some more work done this weekend, I don't have pictures yet but should in the next day or two.
While working on the truck I ran into a issue. Ever since I deciced to under take this project, I've had a pretty clear picture of how the truck was going to look. I'm now having a hard time figuring out what to do.
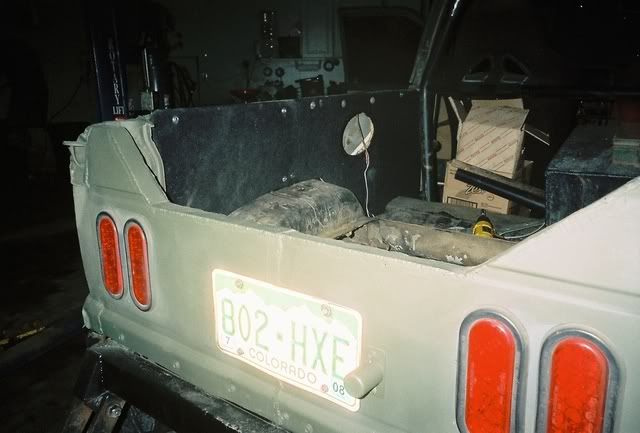
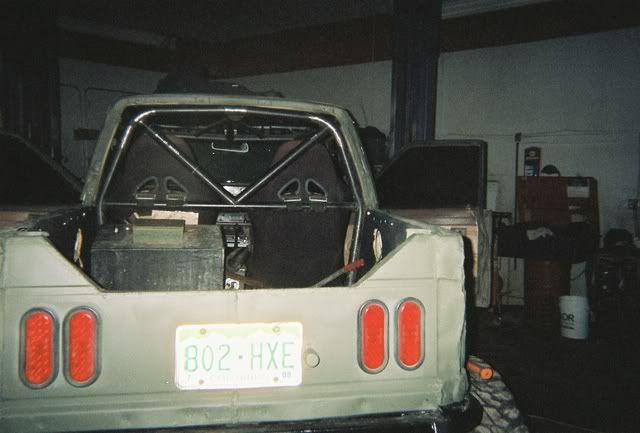
Here is my original plan for the rear tube work, very buggy like, and I felt that the sloped back along with the dovetailed bed would follow each other. There will be more bracing and tubing, this is just to give you an idea (the passenger side looked really weird when I added the supports, so there is only the driver side).
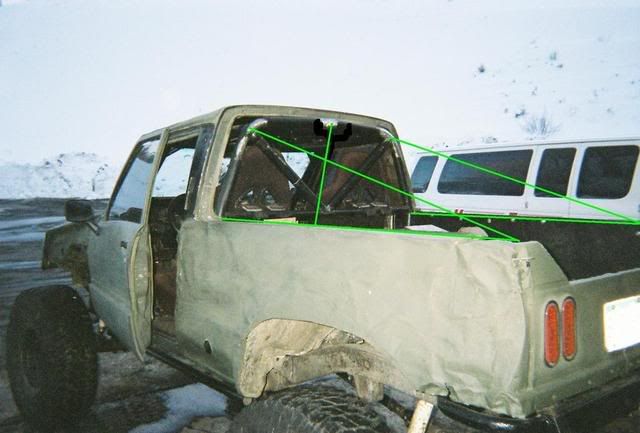
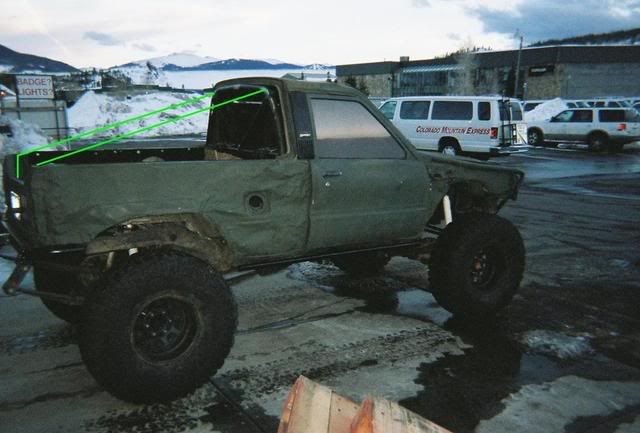
Well, after climbing in and out of the truck two dozen times, I realized that there was a major flaw to my oringal idea. After I chopped the rock sliders down, it was a major PITA to get into the back of the truck. I then thought about how much fun it would as a jungle gym.
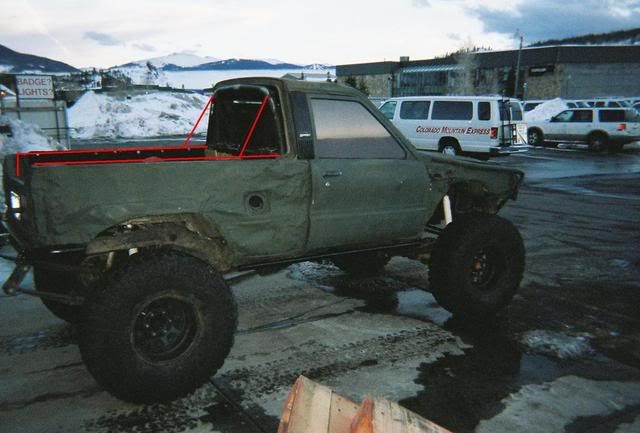
So this is the idea I had, super simple and should be just as strong for the main cage section. Again there will be more tubing, this is just the idea. It should make getting into the back of the truck a lot easier.

While working on the truck I ran into a issue. Ever since I deciced to under take this project, I've had a pretty clear picture of how the truck was going to look. I'm now having a hard time figuring out what to do.
Here is my original plan for the rear tube work, very buggy like, and I felt that the sloped back along with the dovetailed bed would follow each other. There will be more bracing and tubing, this is just to give you an idea (the passenger side looked really weird when I added the supports, so there is only the driver side).
Well, after climbing in and out of the truck two dozen times, I realized that there was a major flaw to my oringal idea. After I chopped the rock sliders down, it was a major PITA to get into the back of the truck. I then thought about how much fun it would as a jungle gym.
So this is the idea I had, super simple and should be just as strong for the main cage section. Again there will be more tubing, this is just the idea. It should make getting into the back of the truck a lot easier.


