350 V8 swap pictures and info
 02-07-2012, 08:06 AM
#21
Registered User
Just a passing thought, couldn't you put in a prestone 3-way t in a heater core line and reverse bleed the air out? By pumping into the heater core line the air would be forced upwards to the higher point of the upper radiator tank.
 03-06-2012, 06:16 AM
#25
Registered User

Join Date: Nov 2009
Location: nowhere
Posts: 6
Likes: 0
Received 0 Likes
on
0 Posts
350 swap
nice swap where did u get the engine mounts and brackets for ur swap i plan on doin one myself and also what type transmission and transfer case did u use im assuming u didnt use the factory stuff thanks
03-06-2012, 08:22 PM
#26
Registered User
Thread Starter
Join Date: Jan 2012
Posts: 55
Likes: 0
Received 0 Likes
on
0 Posts
I got the engine mounts from NWOR, but be careful from there products and service because I did not enjoy their business. And I actually did keep the stock standard transmission with the transfer case. I'm not sure how it will hold up under abuse but so far she is doing good.
03-07-2012, 05:58 AM
#27
Registered User
Join Date: Nov 2009
Location: nowhere
Posts: 6
Likes: 0
Received 0 Likes
on
0 Posts
thanks for the info man and i have heard of people keepin the stock tranny and t-case but they hardly ever went off road but they did hold up with regular PM ,and i have looked at NWOR i found that there site is extremely hard to navigate but it might jus be me i found that advanced adapter makes brackets for the swap to but i cudnt find headers on advanced adapters i found some on NWOR is that where u got the ones for ur project or r they custom i own 7 yotas but i have never attempted a swap like this i have all the tools and a lift on a scale of 1-10 how hard wud u say this swap is jus by looking at pics of ur swap and others it doesnt seem to hard but ive always found out jus cause it looks simple doesnt always mean it is but thanks for the info
03-07-2012, 04:17 PM
#28
Registered User
Thread Starter
Join Date: Jan 2012
Posts: 55
Likes: 0
Received 0 Likes
on
0 Posts
Yea I will go off road a lot once I get my SAS completed but I don't have a heavy foot so we will see how much damage I cause. I can definitely tell you it would be cheaper just to find you a used transmission that would mate with the 350. I did go with the NWOR headers, they are expensive but they fit well under the hood. The only problem I had with the headers was I had to get a steering shaft made so that I could clear them on the driver side. I did my swap under my friends carport with basic tools and a engine lift, but I also kept it pretty simple. I used an old style carburetor and a simple HEI distributor so my wiring was simple. I would probably say it was a 6 in difficulty.
03-08-2012, 06:29 AM
#29
Registered User
Join Date: Nov 2009
Location: nowhere
Posts: 6
Likes: 0
Received 0 Likes
on
0 Posts
ok cool well this clears alot up for me so far and i shouldnt have a problem with the steering shaft i hope because ill be running a full hydraulic steering setup with a orbital valve so hopefully i want have that issue but i was also wondering if u knew on the new process 205 which side the front driveshaft is on because im doing a rockwell swap on one of my 85 yotas and i was trying to do everything while the axle outside of the truck cuz everythings so heavy like which side the pinion needs to be on and which way my knuckles shud be flipped im pretty sure the front shaft is on the passenger side like the factory yota but im not sure jus wanted and extra opinion before i get it under the truck and find out i have to flip haha
03-10-2012, 06:42 AM
#30
Registered User
Thread Starter
Join Date: Jan 2012
Posts: 55
Likes: 0
Received 0 Likes
on
0 Posts
I have a friend of mine doing the full hydraulic steering, which he ended up mounting the orbital valve on a custom plate that he welded on the side of the frame to clear everything and he had enough room. Also yes everything is on the passenger side so you will be good. I'm guessing your putting some pretty large tires under the old 85 huh? goodluck with everything!
03-11-2012, 02:33 PM
#31
Registered User

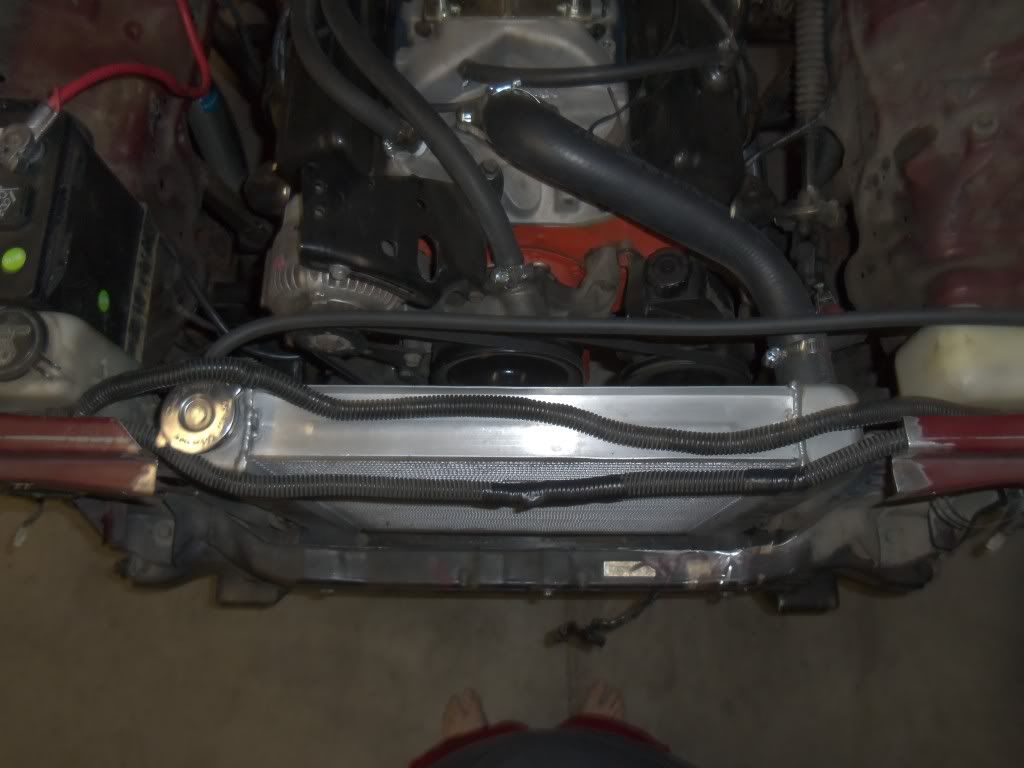
It is entirely possible to fit the radiator up front. You will have to shift the radiator forward and go with electric fans. It involves some cutting but I have a bigger aftermarket radiator upfront and it fits nicely, and it looks much better than that truck bed doohickey you got there. In the long run you will never be happy with that radiator placement and unless you run some expanded metal over the top/front of it then eventually you will bend the fins flat and it will be useless anyways.
03-11-2012, 03:18 PM
#32
Registered User
Thread Starter
Join Date: Jan 2012
Posts: 55
Likes: 0
Received 0 Likes
on
0 Posts
<a href="http://s1076.photobucket.com/albums/w446/jhf006/?action=view&current=116.jpg" target="_blank"><img src="http://i1076.photobucket.com/albums/w446/jhf006/116.jpg" border="0" alt="Photobucket"></a>
 03-11-2012, 03:24 PM
#34
Registered User
Thread Starter
Join Date: Jan 2012
Posts: 55
Likes: 0
Received 0 Likes
on
0 Posts
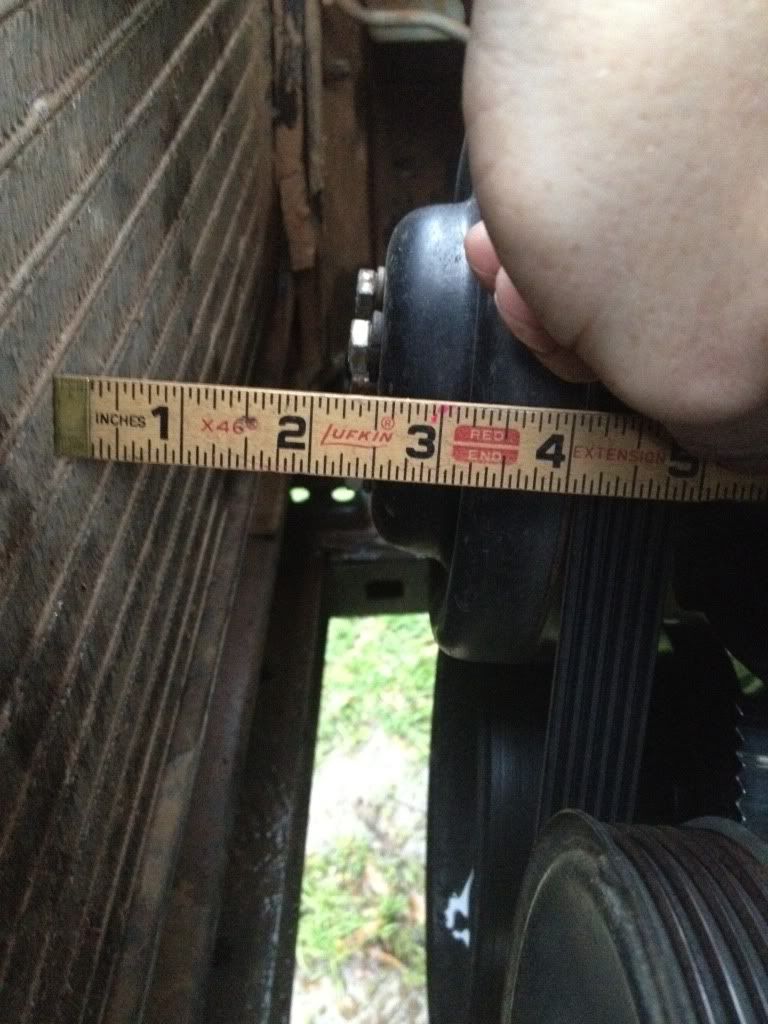
As the picture shows above I only had about 2.5inches of room between the engine and the condenser. I had a few options to go with, one was to remove the condenser and relocate the radiator mounts further forward and have no a/c, but I'm a fan of a/c because Louisiana is just too hot. My other option was to use all corvette style brackets and water pump which would have gave me an extra 2 inches or so, but the brackets and accessories were just to hard to find and too expensive brand new. I plan on putting a cage of some sort around the radiator and probably make it look sleek in some way. What kind of set up did you go with to make the radiator work in the front?
03-18-2012, 02:55 PM
#36
Registered User
Join Date: Aug 2010
Location: Dayton,NV
Posts: 231
Likes: 0
Received 0 Likes
on
0 Posts
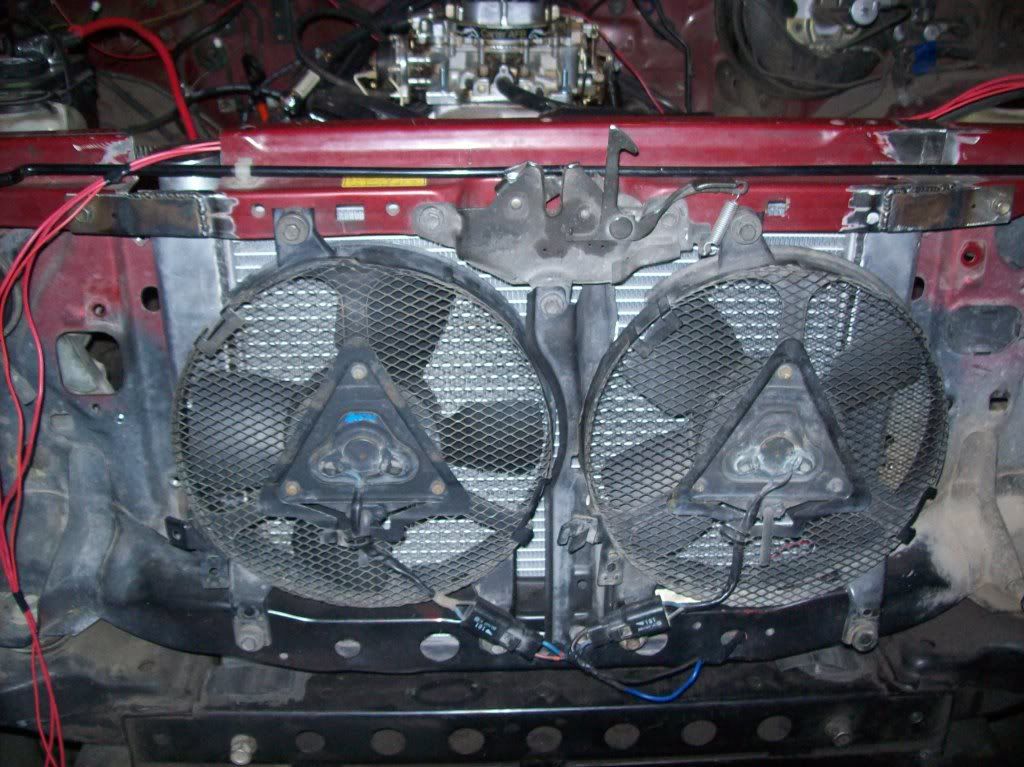
As you can see, no A/C. I moved it forward about an inch and still only have about 2 inches from the water pump pulley and balancer pulley.
I also need to build a custom shroud fro the fans. I have been toying with the idea of getting rid of those fans and using a single 14'' fan, to do that i would have to use hood pins and get rid of the upper cross support that i have bolted in.
Last edited by Dras16; 03-18-2012 at 02:57 PM.
03-21-2012, 01:33 PM
#37
Registered User
Thread Starter
Join Date: Jan 2012
Posts: 55
Likes: 0
Received 0 Likes
on
0 Posts
That does look pretty good.
Yea earlier in this thread I said that was one of my options, but Louisiana just gets too hot to take the condenser out and I'm still gonna drive mine on the road. It looks like you have a lot more custom work that gonna have to be done to fit everything together. Is your front grill gonna fit back on or do you have to make adjustments?
Yea earlier in this thread I said that was one of my options, but Louisiana just gets too hot to take the condenser out and I'm still gonna drive mine on the road. It looks like you have a lot more custom work that gonna have to be done to fit everything together. Is your front grill gonna fit back on or do you have to make adjustments?
03-21-2012, 01:35 PM
#38
Registered User
Thread Starter
Join Date: Jan 2012
Posts: 55
Likes: 0
Received 0 Likes
on
0 Posts
I also see you went with the v-belt design which allows for some extra room as well. With my serpentine belt it made the fit pretty close but serpentine set ups are easier and cheaper to come by in my area so it was a no brainer.
03-22-2012, 03:36 PM
#40
Registered User
Join Date: Aug 2010
Location: Dayton,NV
Posts: 231
Likes: 0
Received 0 Likes
on
0 Posts
I used the v belt setup just because that is what was on there and didnt want to have to make too many changes. I understand the heat thing but my a/c didnt work very well anyways so i just ditched it. My grill still fits fine, I did have to trim down one little piece on the back but thats it. I didnt have to make too many modifications to get it all back together besides making tabs for that center brace for the hood latch. What did you do for a fuel pump and lines? I didnt have room for a mechanical so i put in an in-line pump. I hate it. It has to be positioned a certain way to pump, so downhill it cuts out. I am going to take that out and wire the stock pump to a switch and run braided line all the way up.


