82 toyota turning into 82 chevota
 12-11-2010, 02:20 PM
#21
Registered User

Join Date: Dec 2010
Posts: 1
Likes: 0
Received 0 Likes
on
0 Posts
98 chevtoy
i'm putting to gather a little one to . mine was a 1979 hilux 4x4 but as with all the trucks i've found it was badly rusted out body wise not frame rot oddly enuff it has no frame rot. so now it has a 98 s-10 4dr blazer body on it and i want to add a sbc v-8 or a 4cly diesel and a 700r4 and a 205 transfurcase it sits on a fact 3in lift and 33x12.50s . i want to make the motor mounts but i can't seam to find blueprints for it any help would be awsome . i love the toyota 4x4 trucks from 1979-1985 i,m looking for more of them
 01-02-2011, 01:30 PM
#22
Registered User
Thread Starter
Join Date: Mar 2009
Location: Clearfield, UT
Posts: 145
Likes: 0
Received 0 Likes
on
0 Posts
i have been on a small vacation so i haven't gotten much done.. I am working on cutting the spring perches and shock mounts off the rear axle so far so good.. ill post a pic of the axle after all is removed...
01-08-2011, 08:49 PM
#23
Registered User
Thread Starter
Join Date: Mar 2009
Location: Clearfield, UT
Posts: 145
Likes: 0
Received 0 Likes
on
0 Posts
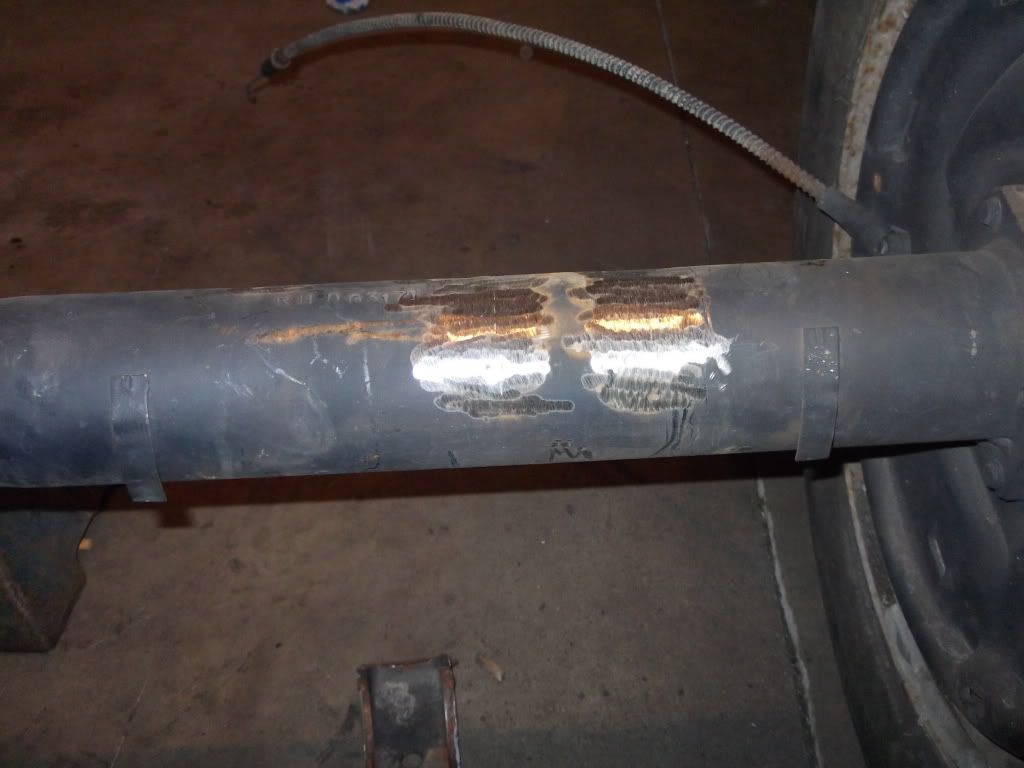
ok so i have gotten a little done and here are some pics..
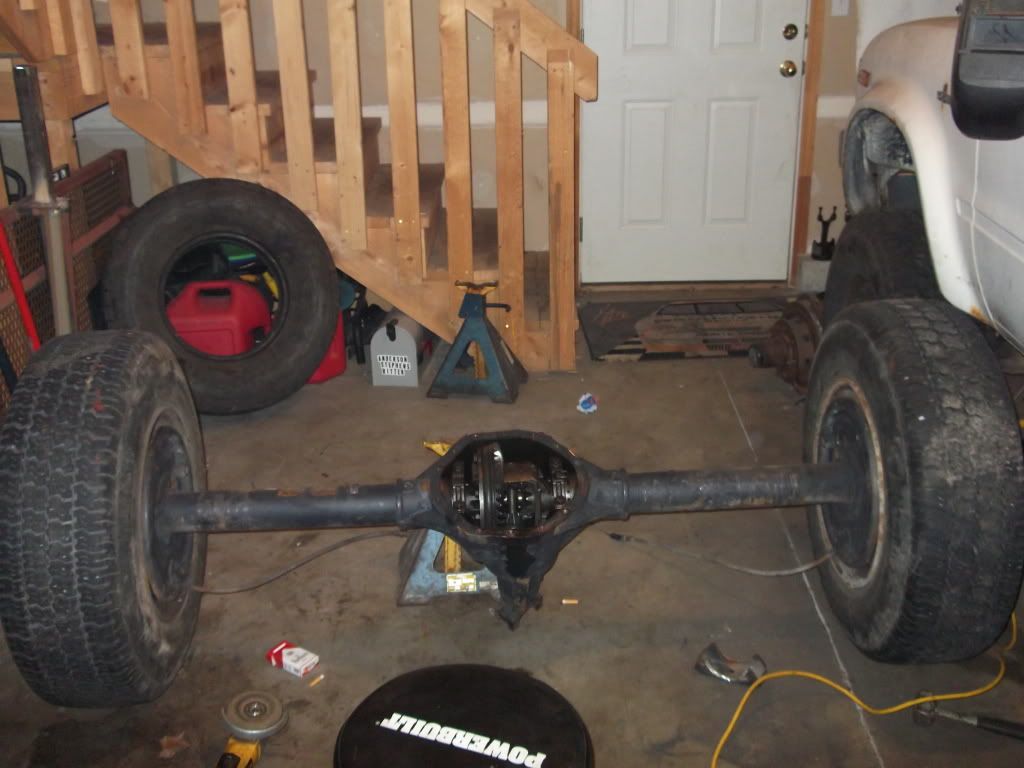

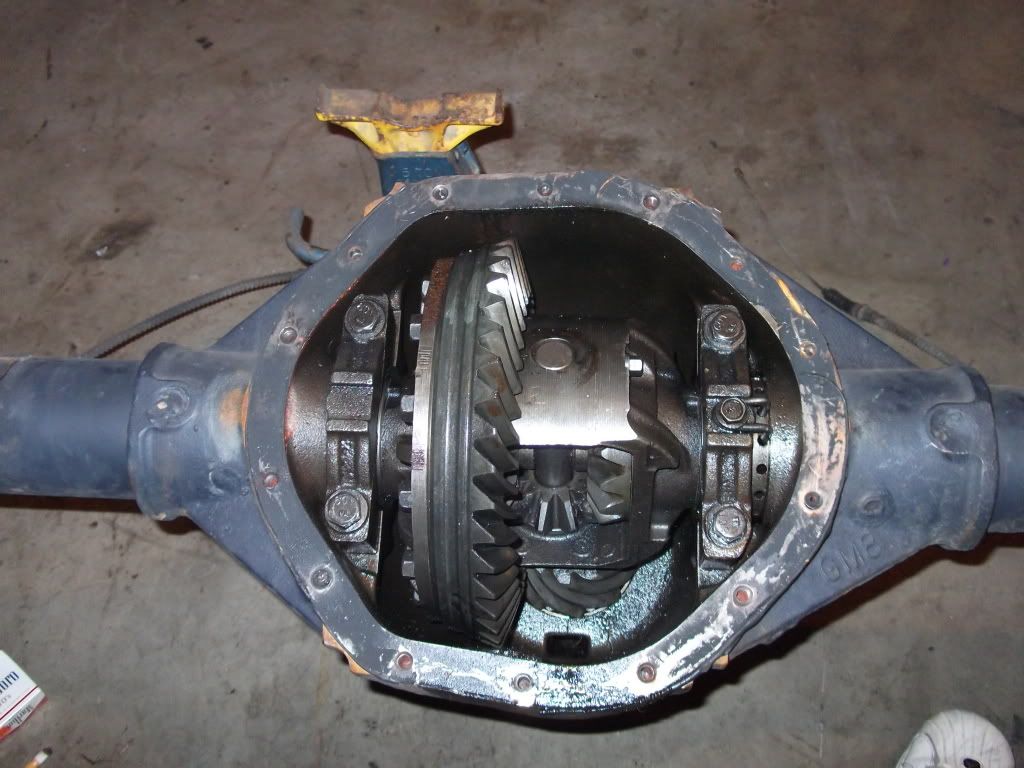
and here are some pictures of the spiders that i found are welded so i guess i dont need a locker for the rear end just yet.

Next up is getting the old one out and putting the new one under and taking measurements for the spring perches and shock mounts so i can weld them on..
and here are some pictures of the spiders that i found are welded so i guess i dont need a locker for the rear end just yet.
Next up is getting the old one out and putting the new one under and taking measurements for the spring perches and shock mounts so i can weld them on..

 01-09-2011, 10:12 AM
#26
Registered User
Thread Starter
Join Date: Mar 2009
Location: Clearfield, UT
Posts: 145
Likes: 0
Received 0 Likes
on
0 Posts
01-09-2011, 10:16 AM
#27
Registered User
Thread Starter
Join Date: Mar 2009
Location: Clearfield, UT
Posts: 145
Likes: 0
Received 0 Likes
on
0 Posts
I'm sure I will! The plan is to get the engine in and then measure and see what I can fit fairly easy! I think that the Toyota v6 booster and master with 1" rod will be sufficient but not sure! Any ideas? The booster is where my space will be limited the most
01-22-2011, 05:50 PM
#28
Registered User
Thread Starter
Join Date: Mar 2009
Location: Clearfield, UT
Posts: 145
Likes: 0
Received 0 Likes
on
0 Posts
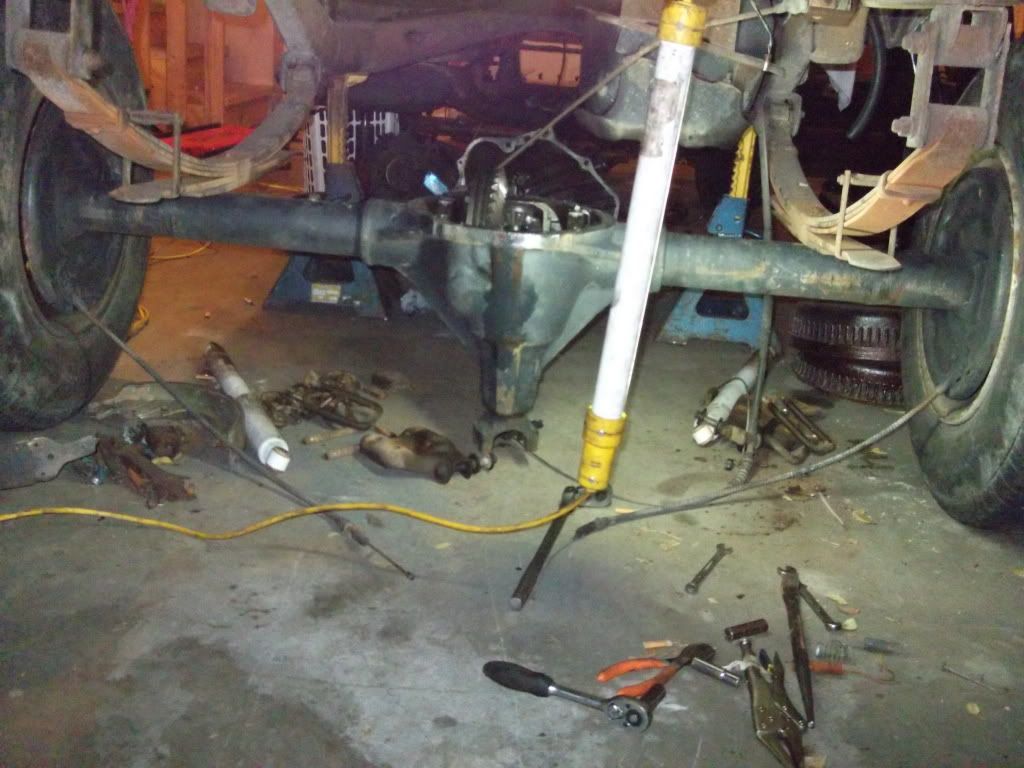
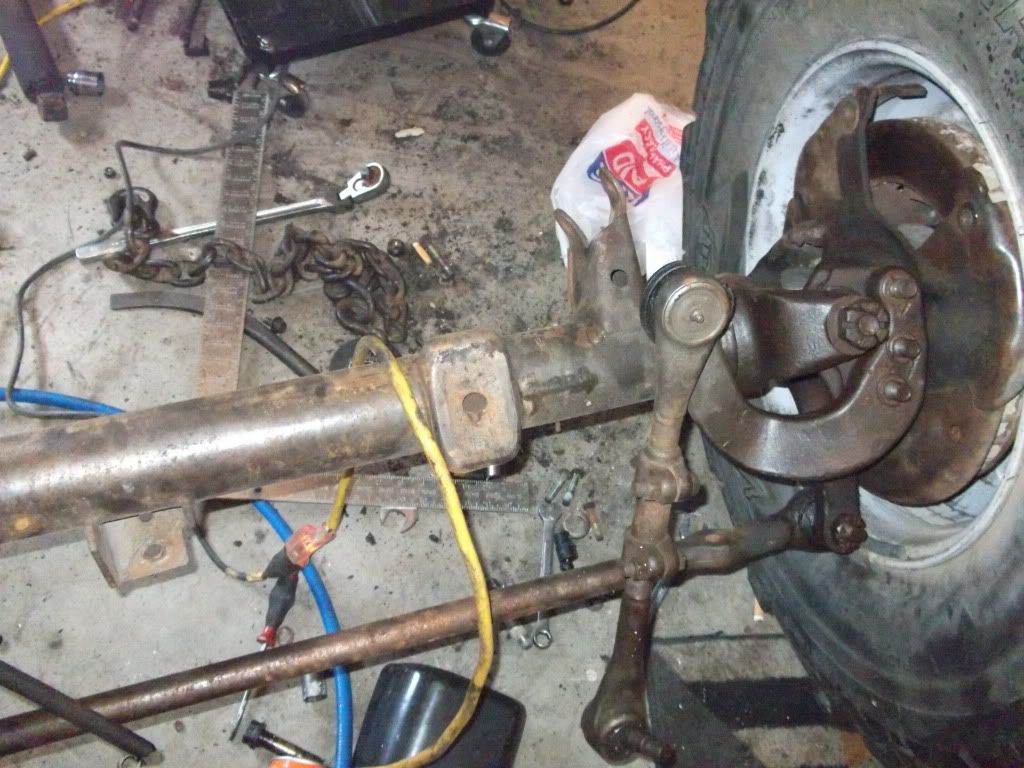
Ok so i know the pictures aren't the greatest and there will be some better ones taken at a later date but for now this is what i have. i got the toyota axle out and the chevy axle under, don't have the spring perches mounted yet but i put the axle under to measure and get an idea of the actual width difference.. I like the width but i cant wait to get some different rims and tires on it cause those road tires look like dog doodoo......

01-28-2011, 02:05 PM
#29
Registered User
Thread Starter
Join Date: Mar 2009
Location: Clearfield, UT
Posts: 145
Likes: 0
Received 0 Likes
on
0 Posts
Ok so i got 4 16.5x12 rims with bald but holding air 36x14.50r16.5 tires for $250, couldn't pass it up. LOVED them and couldn't wait to see what it looked like so i went ahead and got my measurements and tacked on my spring perches for the rear axle.... then i put the axle in place not u-bolted in place just springs sitting on the axle and then i put the tires on and this is what i have..


02-05-2011, 07:27 AM
#30
Registered User
i like it and i disagree with an earlier post you cant do a swap right for under a grand. right after i graduated high school i bought my buddies rolled k5 with 383 th350 and random chevy t case. i bought the whole truck for 600 bucks. has a sawzall angle grinder and welder for my fab tools, swapped whole drivetrain in 84 4runner, 3 months later i was layin down stripes through third gear and doing dry donuts. if you get a donor truck like i did i had everything i needed and swapped and fabbed it all over. so you can do it and do it right, mine is still on the road, for less than you think but be careful you might open a can of worms and nickel and dime yourself to death
02-08-2011, 02:06 PM
#31
Registered User
Thread Starter
Join Date: Mar 2009
Location: Clearfield, UT
Posts: 145
Likes: 0
Received 0 Likes
on
0 Posts
Latest news is front end is out and gonna be a bit more work to do than the rear was and that not including the steering mods!!!!!!! So what im looking at is a 3 or 4 link up front with coilovers! So if anyone knows of a 1st gen yota with a 3 or 4 link in the front some ideas and or pictures would be very helpful at this point!
02-20-2011, 04:28 AM
#32
Registered User
Thread Starter
Join Date: Mar 2009
Location: Clearfield, UT
Posts: 145
Likes: 0
Received 0 Likes
on
0 Posts
So upon weeks of looking and changing my mind back and forth I decided to go ahead and put the leafs back under the truck until I get the motor and tranny stuff all situated. So on friday I purchased a sasfw kit from sky offroad designs which comes with new offset shackles for the back of the springs and a front spring hanger, together they push the springs out to have a 31.5" center to center for springs. This will allow me to bolt them up to the dana44 front. I was unable to move the spring perchs on the front axle due to the right side perch being part of the cast casing, so therefore it was move the leafs out or completely modify for coils or 4link and coilovers. As I said until the motor and other stuff are in place I can't do the 4link so leafs are going to be moved out for now. Tomorrow I will post some pics of how the front is sitting and what issues I ran into and I will put up pics of the parts when they arrive.
02-23-2011, 11:53 AM
#33
Registered User
Thread Starter
Join Date: Mar 2009
Location: Clearfield, UT
Posts: 145
Likes: 0
Received 0 Likes
on
0 Posts
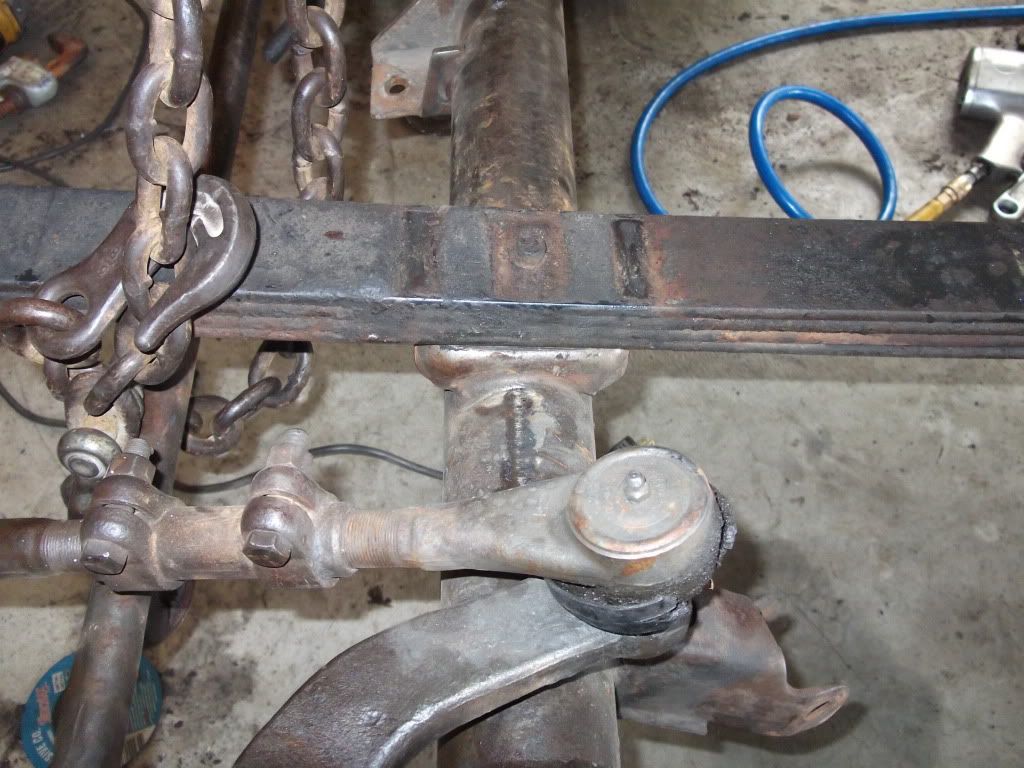
Ok so Im a day late and a dollar short sorry!!! Here is the pics of the front with small explanations.

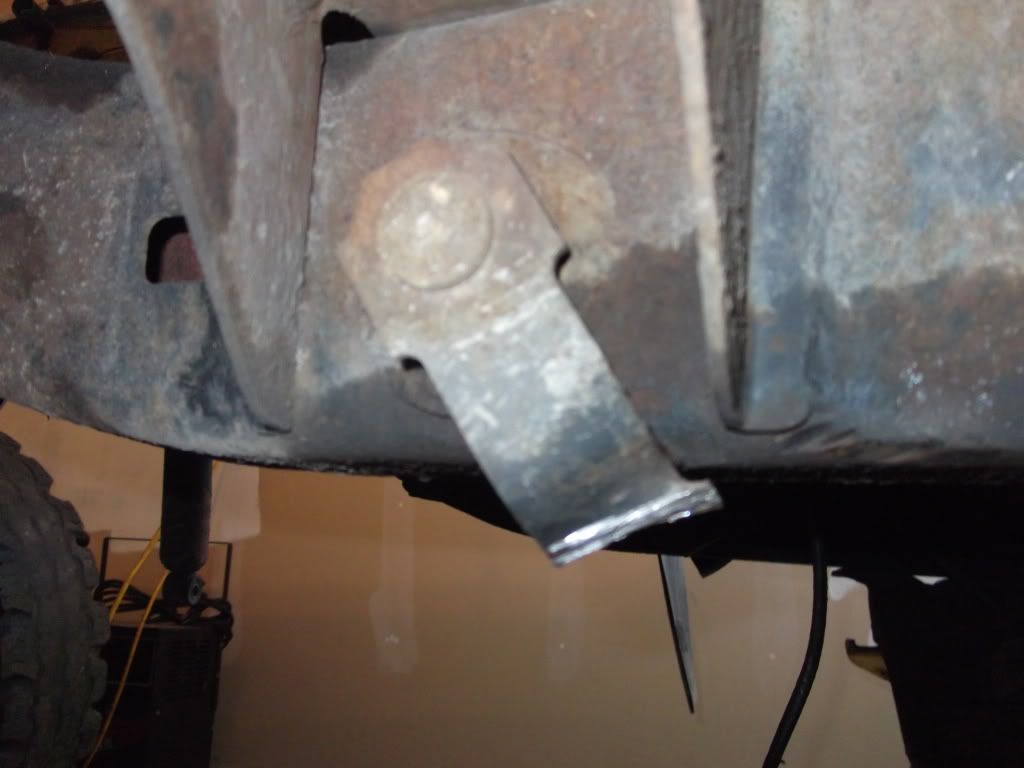
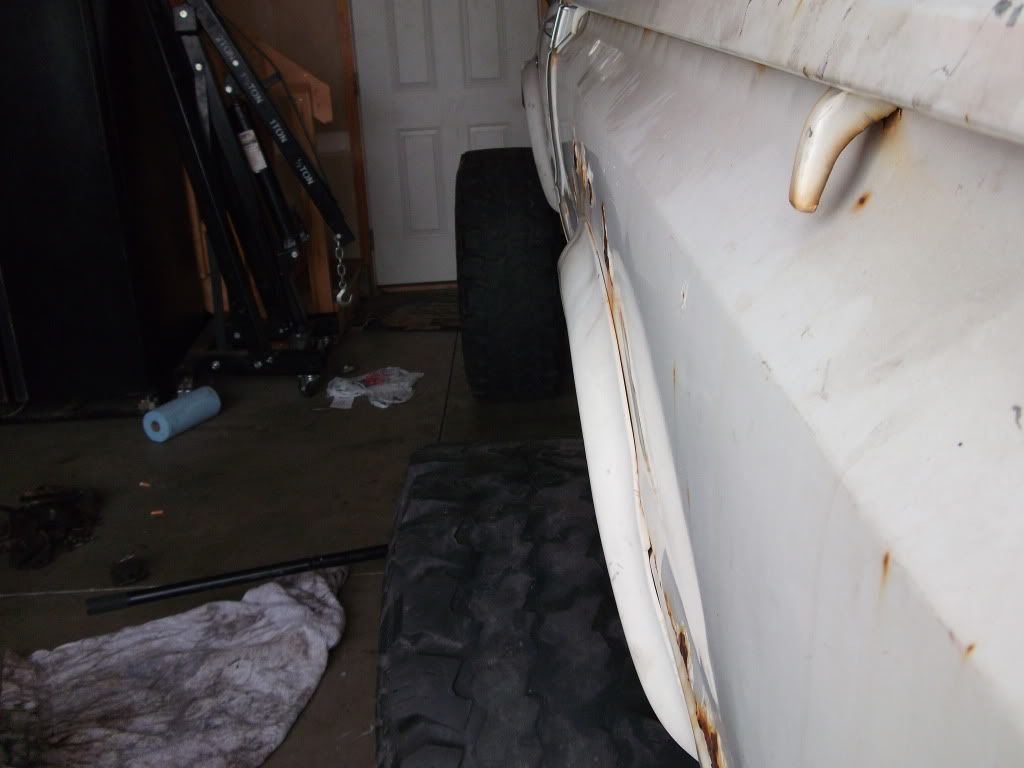
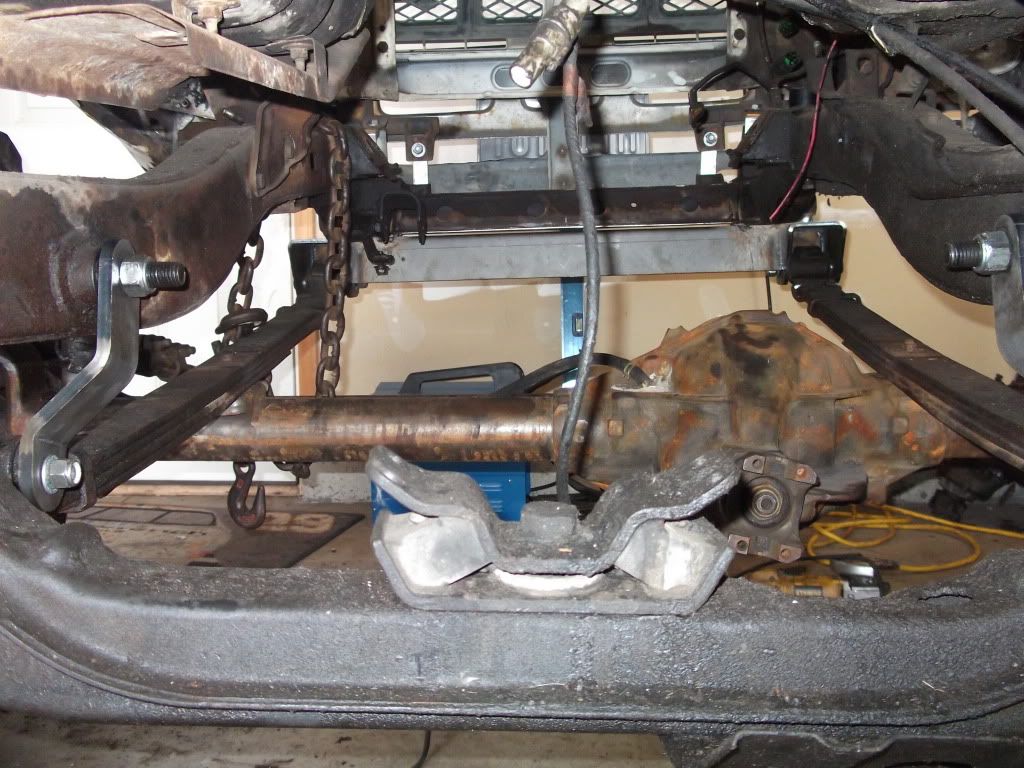
These ones show the difference between spring perches on the front axle. as you can see (sorry the pic came out kinda bad) The passenger side perch is a part of the pumpkin case and cannot be moved. So from there its either move springs out on frame or go with a completely different suspension setup.

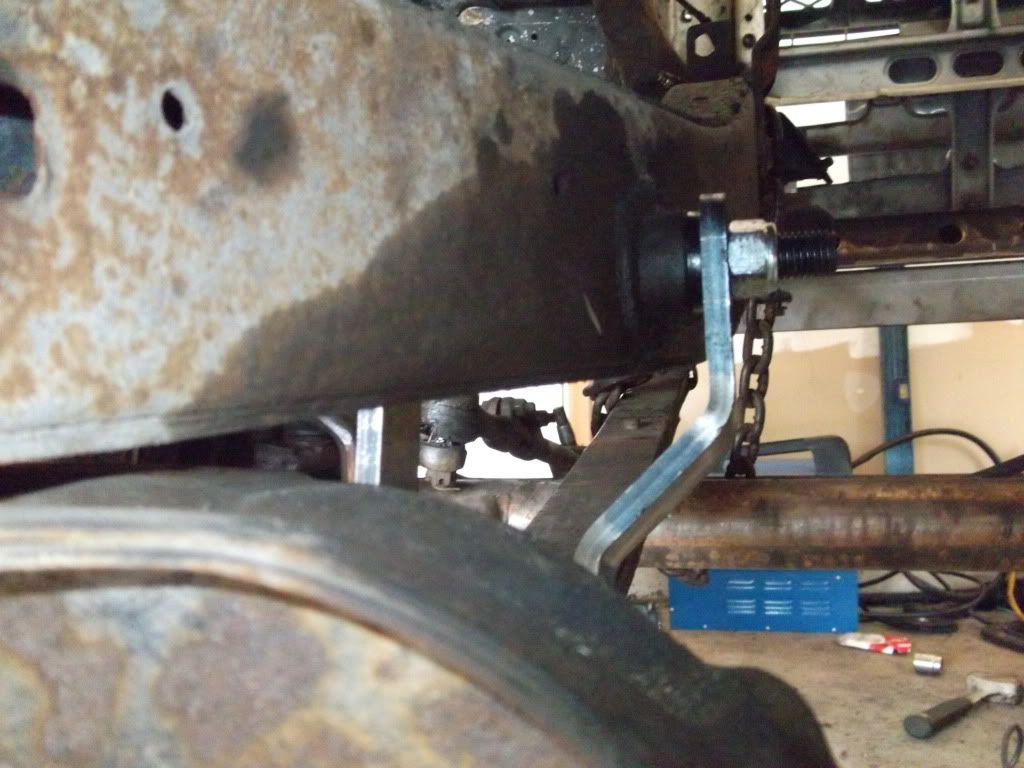
These are pictures of the current/old hangers and shackles. I had to cut the shackles because they wouldn't budge.
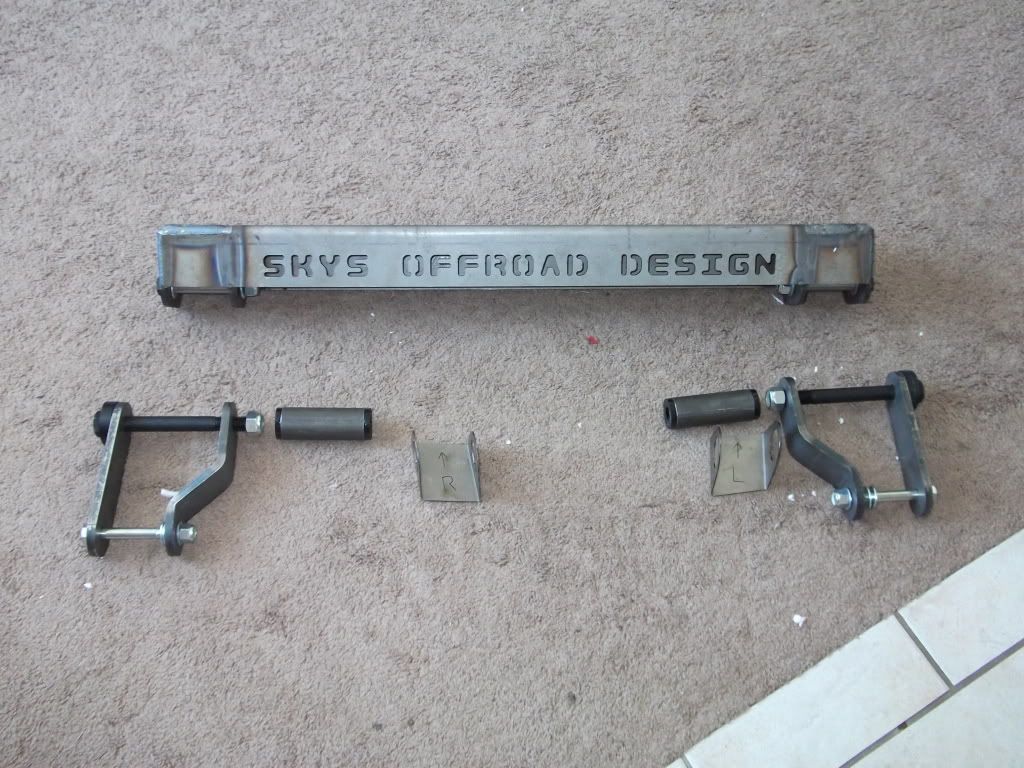
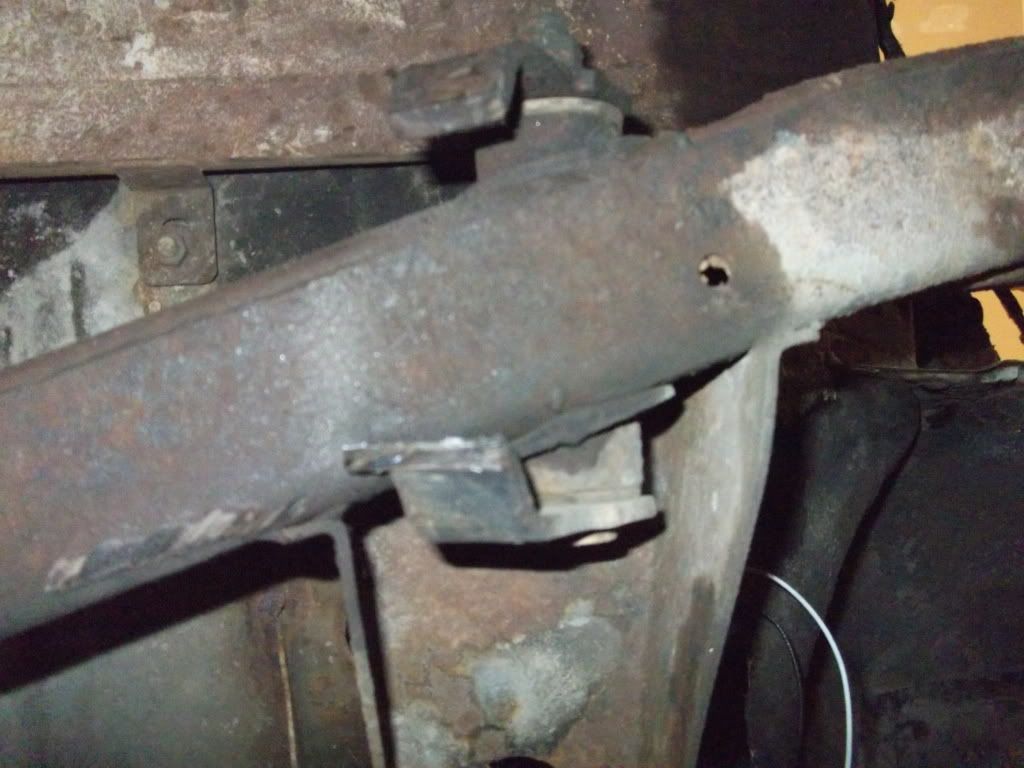
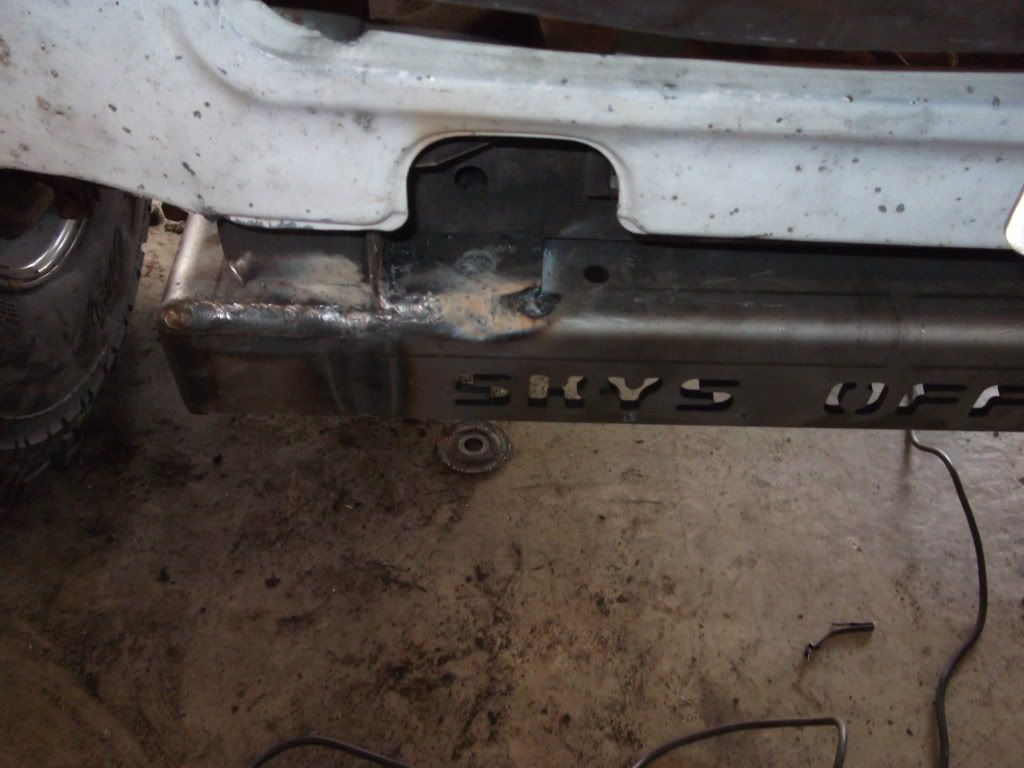
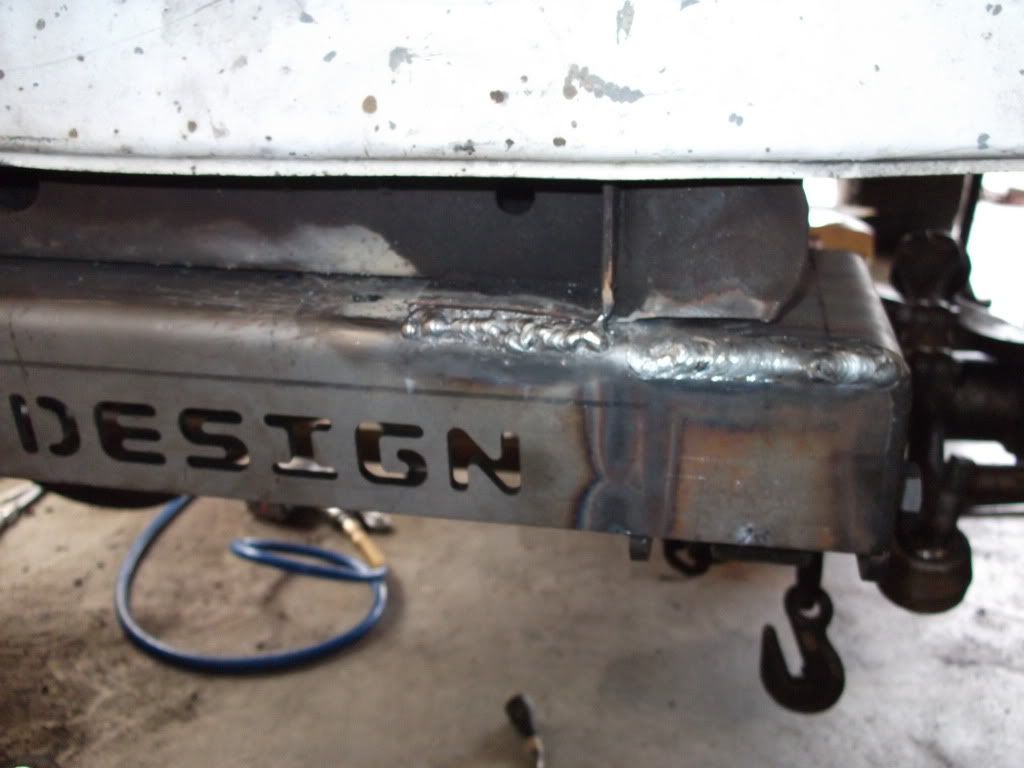
This is a picture of the SASFW kit from SKY DESIGNS. The shackles in the rear push the leafs out where they need to be. the other part is the front spring hanger which gets welded on to replace current hangers and it spreads the front of the leafs out to the needed 31.5" center for the chevy axle.
I am working nights right now so wont get much done for a few days hoping to get on it this weekend and get some work done.
These ones show the difference between spring perches on the front axle. as you can see (sorry the pic came out kinda bad) The passenger side perch is a part of the pumpkin case and cannot be moved. So from there its either move springs out on frame or go with a completely different suspension setup.
These are pictures of the current/old hangers and shackles. I had to cut the shackles because they wouldn't budge.
This is a picture of the SASFW kit from SKY DESIGNS. The shackles in the rear push the leafs out where they need to be. the other part is the front spring hanger which gets welded on to replace current hangers and it spreads the front of the leafs out to the needed 31.5" center for the chevy axle.
I am working nights right now so wont get much done for a few days hoping to get on it this weekend and get some work done.
02-25-2011, 07:29 AM
#36
Registered User
Thread Starter
Join Date: Mar 2009
Location: Clearfield, UT
Posts: 145
Likes: 0
Received 0 Likes
on
0 Posts
I set the motor in before I tore it apart tight fit but it fit!!! As far as trans and transfercase no I haven't!! I'm sure it's gonna be interesting and honestly not sure it the sm465 is going to be doable it's such a short and tall trans, but we will see, if not I'll find a th350 or 400 which I know can fit!! You say your neck of the woods? Where you at?
02-26-2011, 11:06 AM
#37
Registered User
that manual trans you have if you want it to fit you need to cut the "tunnel" in the cab as far as you can to the front I'm not sure how the 1st gen is but my second has a blower motor kinda in my way and some of the console that i just ripped out and cut with a grinder. but i have about an inch or two behind the distributor and its a really tight fit but completely do its all in the matter on how bad you want it in there lol.
yea man i work at AeroTech Mfg on 1100 north and i live in kearns.
yea man i work at AeroTech Mfg on 1100 north and i live in kearns.
02-26-2011, 03:52 PM
#38
Registered User
Thread Starter
Join Date: Mar 2009
Location: Clearfield, UT
Posts: 145
Likes: 0
Received 0 Likes
on
0 Posts
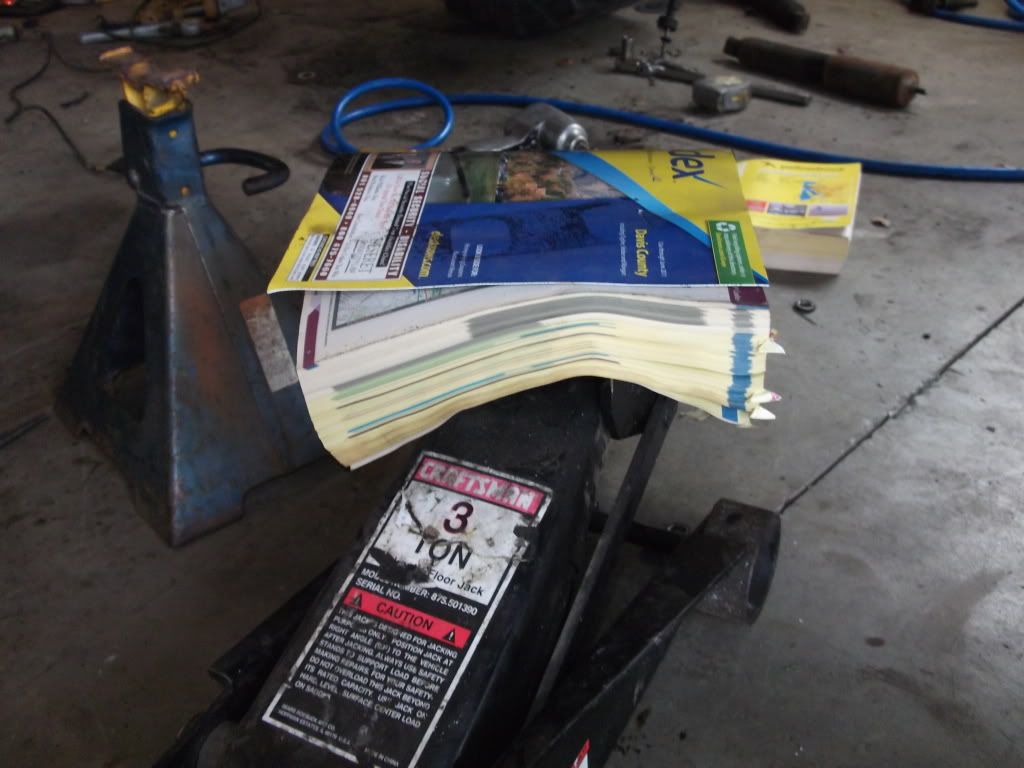
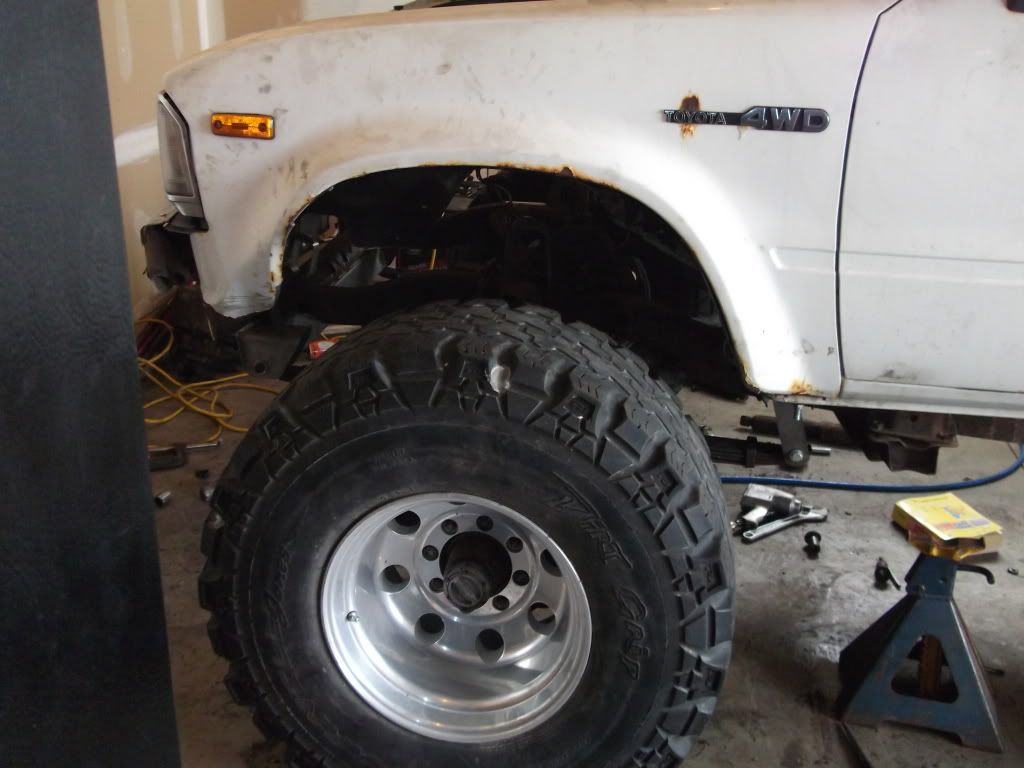
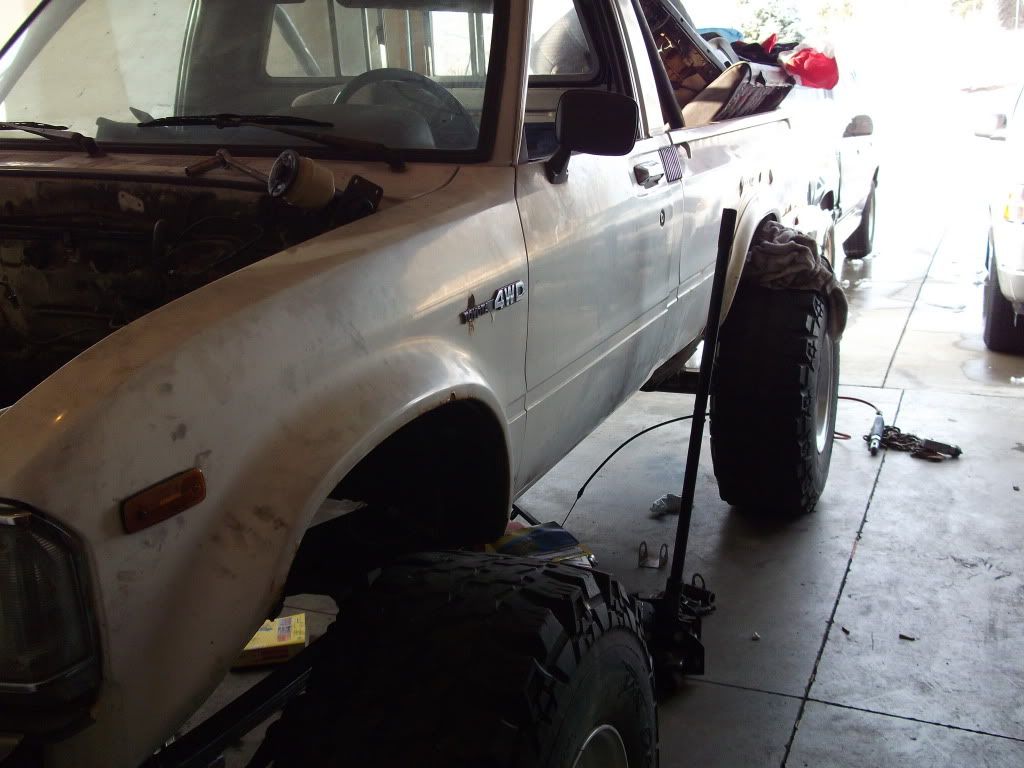
Ok so I got started and made SOME progress today! I was able to get the rear shackles out and the new ones from SKY DESIGNS bolted right up went very well. Then i finished cutting and prepping the front for the new hanger. Its not that heavy but trying to hold it up while measuring and centering and stuff was kind of a bitch. SO i went ahead and bolted the leaf springs up in the back then bolted them into the "uninstalled" front hanger. Lifted the hanger up and used a C-clamp to hold it up while i tapped it to center and straight. Then i started tacking it up. after tacking and double checking position i started welding. I am just using a wire feed and got half way into it and my spool of wire ran out!!! PISSED ME OFF!!! LOL. So anyway i got enough done that i removed the C-clamp and rolled the axle under and set it down (because i am weird and it makes me feel like i got more accomplished). ANYWHO my floor jack wasn't quite tall enough to get it off the jackstands so i just threw a phonebook on top of the jack (it worked ok). so here are pictures of the progress..

02-26-2011, 04:08 PM
#39
Registered User
looking really good man I'm glad you had motivation today. its too cold for me! props on the phone bookin. THOSE RIMS AND TIRES LOOK SO SICK! i am extremely jealous
02-26-2011, 05:31 PM
#40
Registered User
Thread Starter
Join Date: Mar 2009
Location: Clearfield, UT
Posts: 145
Likes: 0
Received 0 Likes
on
0 Posts
ya i have a propane heater in the garage that helped with the heat. And the tires are trash they are bald as hell but thanks.. plan to go to a 39-40" tire though i do like the tread pattern on these and might look into getting the same ones.


