
Overheating in 22RE 3,000 miles after ENGBLDR FEK install
 05-10-2010, 11:14 AM
#21
Registered User
Thread Starter
iTrader: (2)
Join Date: Dec 2009
Location: Pleasanton, CA - SF Bay Area
Posts: 2,159
Likes: 0
Received 7 Likes
on
5 Posts
Anyone have any suggestions on how to best seal it back up when I put the water pump and timing cover back on? I'm assuming the leak occurred from the holes in the pump where the bolts go, since those bolts were so gunked up... I used RTV AND the provided gaskets for my seals back in December.
Also, what's a good source for finding new metric studs/nuts to replace the ones I have (just a few smaller ones)....?
 05-10-2010, 01:04 PM
#22
Registered User
It is so hard to get a good seal on the timing cover with the head and oil pan still on. The only way I have found to do it is put "the right stuff" gasket maker on both sides of the gaskets for the timing cover gaskets. Then take out the the two bolts on the front of the oil pan (in addition to the two that screw into the timing cover itself) and wedge it open a little bit. Put the gasket maker on the top and bottom of the timing cover and carfully put it in making sure the seal bewteen the head and timing cover is good.
As far as the water pump, I always put it on the cover before I install the timing cover on the truck. I have always smeared a little gasket maker on the gasket and torqued it down. It has never leaked.
Like I said before, if you don't want your bolts to come loose on you, use blue locktite on every bolt and on both sides of the studs that thread into the water pump. Don't worry if you need to take anything off in the future, blue loctite will break free.
05-10-2010, 02:04 PM
#23
Registered User
Thread Starter
iTrader: (2)
Join Date: Dec 2009
Location: Pleasanton, CA - SF Bay Area
Posts: 2,159
Likes: 0
Received 7 Likes
on
5 Posts
Thanks Snobdds!
I will have the timing cover off for the helicoil anyway and had planned to attach the water pump while it was off, to ensure a secure seal, torque, etc.
I had removed the oil pan when I did the install of the timing cover in December...not sure if I'll remove for thsi job too but likely will since everything else is coming off!
Thanks for the tip on the lock tite - I bought some....just wanted to ensure it was the right move -I'll use it.
05-10-2010, 02:25 PM
#24
Registered User
Join Date: Sep 2007
Location: Bremerton, WA
Posts: 180
Likes: 0
Received 0 Likes
on
0 Posts
I had gotten a new timing chain cover off of ebay and I was less than impressed with the quality. Not sure where Ted gets his from, but I had one of my bolt holes for the oil pump strip half the threads out and the main oil channel coming from the oil pump looked like it had been drilled out with a broken bit. So I wouldn't be surpised if someone out there is peddling shoddy timing chain covers through the market. 
05-10-2010, 03:08 PM
#25
Registered User
Thread Starter
iTrader: (2)
Join Date: Dec 2009
Location: Pleasanton, CA - SF Bay Area
Posts: 2,159
Likes: 0
Received 7 Likes
on
5 Posts
I had gotten a new timing chain cover off of ebay and I was less than impressed with the quality. Not sure where Ted gets his from, but I had one of my bolt holes for the oil pump strip half the threads out and the main oil channel coming from the oil pump looked like it had been drilled out with a broken bit. So I wouldn't be surpised if someone out there is peddling shoddy timing chain covers through the market.
Pretty sure it's a Rock one - came in a "Rock" box...and looks just like this:

we'll see how the thing looks (and its threads) when I take it off, clean it, and re attach everything.
05-10-2010, 03:08 PM
#26

The hi-tack stuff is good. It keeps things lined up and save disaster. I would never use rtv or FIPG with a paper gasket. Unless some voodoo magic directions told me to, I would not. They went 20 years with the first paper gasket.
I'd use the medium locktite. Not the permanent stuff.
I'd use the medium locktite. Not the permanent stuff.
05-10-2010, 03:58 PM
#27
Registered User
Thread Starter
iTrader: (2)
Join Date: Dec 2009
Location: Pleasanton, CA - SF Bay Area
Posts: 2,159
Likes: 0
Received 7 Likes
on
5 Posts
The hi-tack stuff is good. It keeps things lined up and save disaster. I would never use rtv or FIPG with a paper gasket. Unless some voodoo magic directions told me to, I would not. They went 20 years with the first paper gasket.
I'd use the medium locktite. Not the permanent stuff.
I'd use the medium locktite. Not the permanent stuff.
So, don't use paper gasket AND silicone together??
05-10-2010, 04:26 PM
#28
Registered User
Not that I know much... but lookin' good so far! I am putting my engine together after a complete rebuild, so this is good to see.
I 3rd or 4th the Heli-coil!
I 3rd or 4th the Heli-coil!
05-11-2010, 07:20 AM
#29
Registered User
Thread Starter
iTrader: (2)
Join Date: Dec 2009
Location: Pleasanton, CA - SF Bay Area
Posts: 2,159
Likes: 0
Received 7 Likes
on
5 Posts
Day 2 of teardown
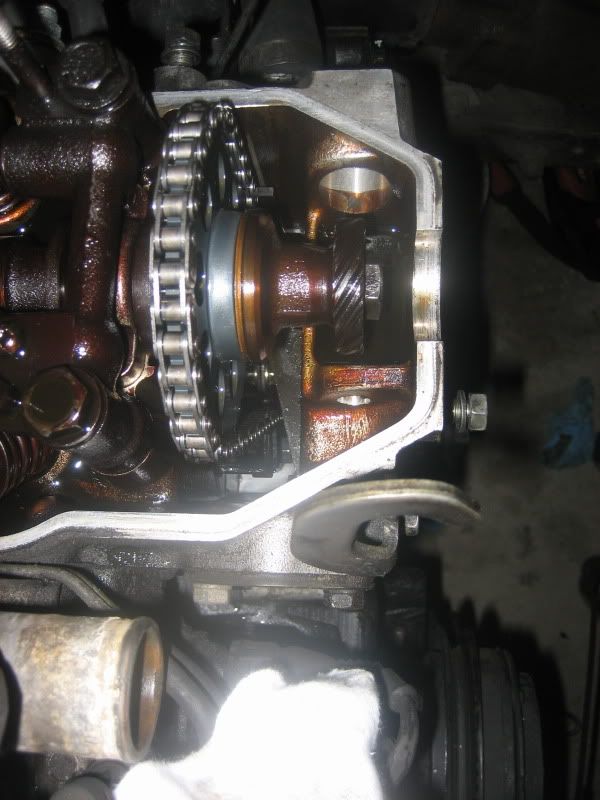
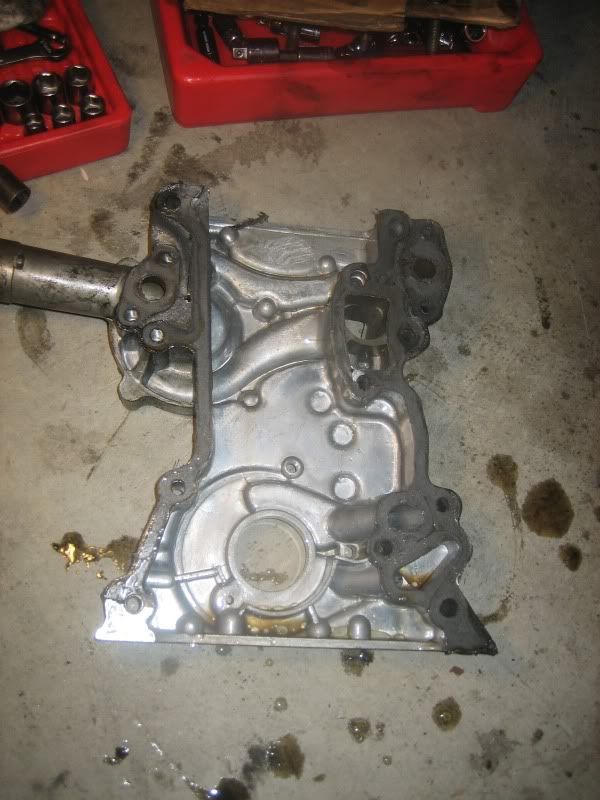
Thanks guys for the support and advice along the way here. Last night I had a couple hours so I went to the garage and finished up taking off the timing cover and oil pump, and started scraping gaskets.
I noticed that the gaskets I'd installed before stuck OUT of the edges of the cover a little on both sides...not sure if this is normal?
I also noticed that the head gasket on the front of the head (part that goes between timing cover and head) was crushed in a little toward the block/head. Now, this tore when I took off the timing cover in December, but since it was still intact where it met the block, I felt it was OK to leave as is, and try to set it back into place as much as I could (any recommendations here that don't involve a new gasket??).
The timing chain, etc look great otherwise....
Onto the the truck porn!
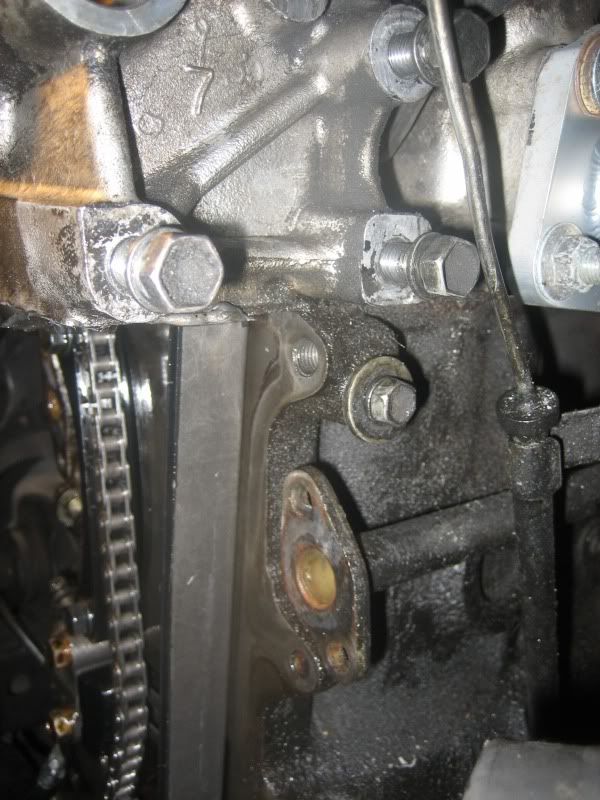
Looking down the timing cover you can see the front part of the head gasket angling in toward the block/head.
On the passenger side, you can see the December installed gasket sticking out a little on the side:
And on the driver's side, you can see the gasket sticking out too:

That is one dirty motor!
Make sure you keep track of where the timing cover bolts go!
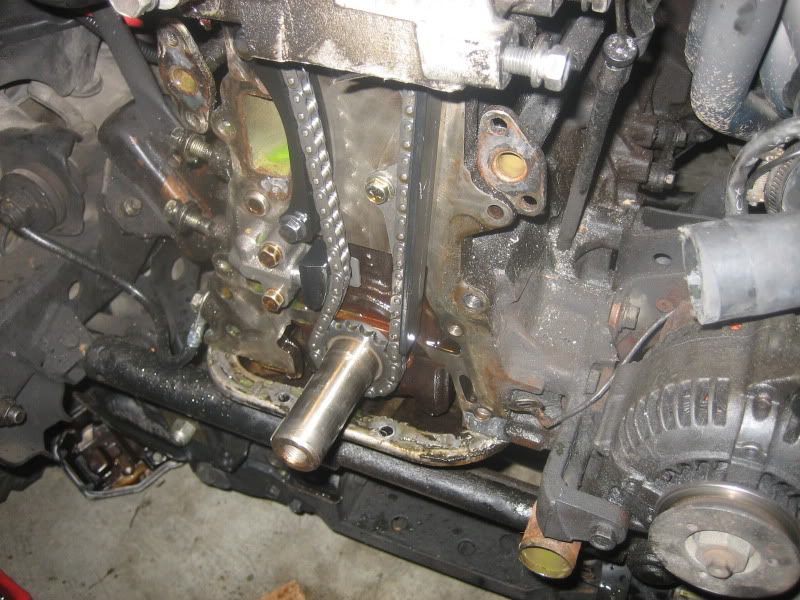
Hammer time! Just tap it off....tappity, tap tap tap....

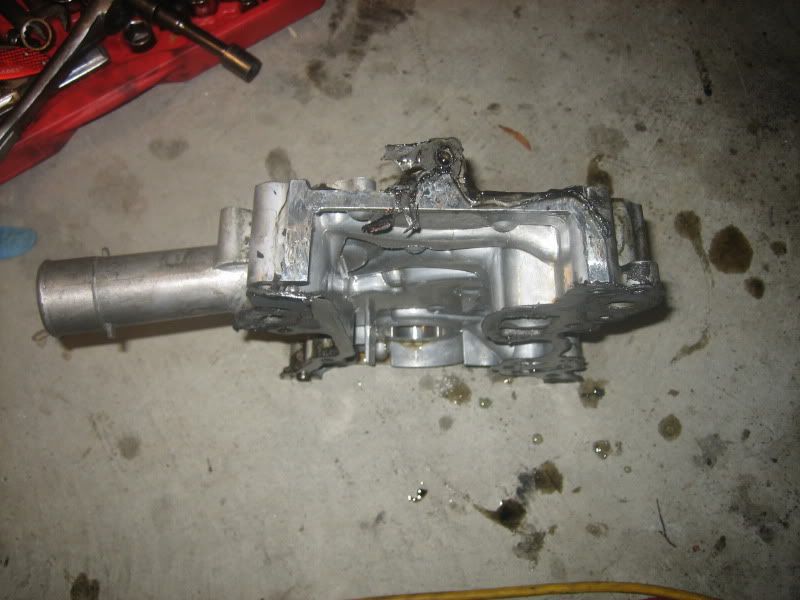
Cover is OFF!
This is the broken head gasket part you saw sticking into the timing chain earlier...
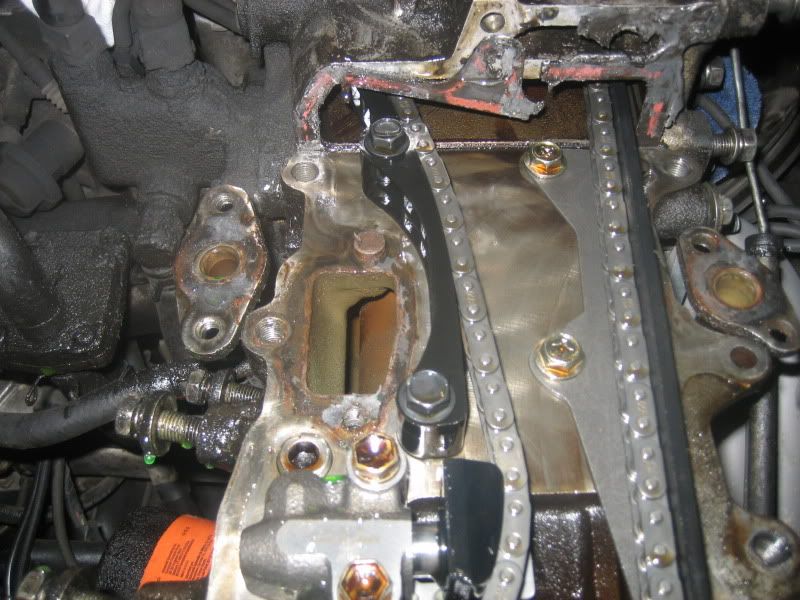
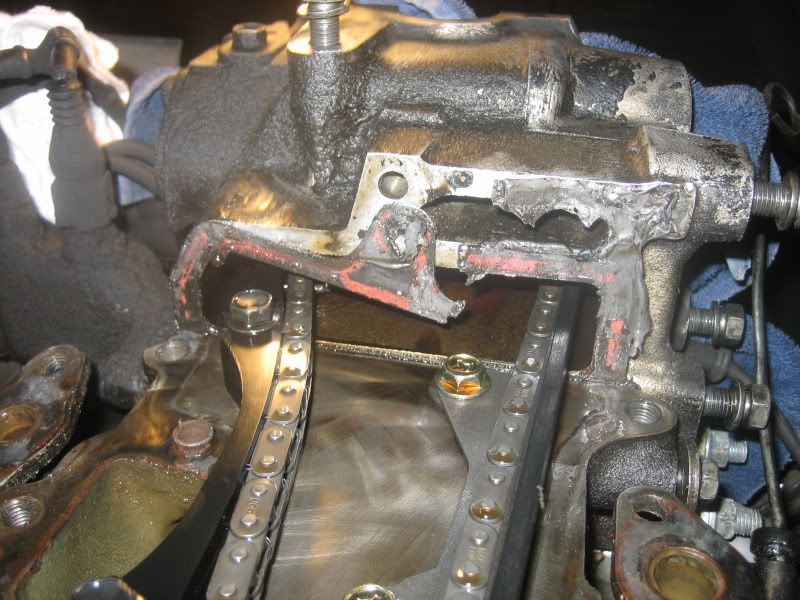
Cover actually looks pretty good:
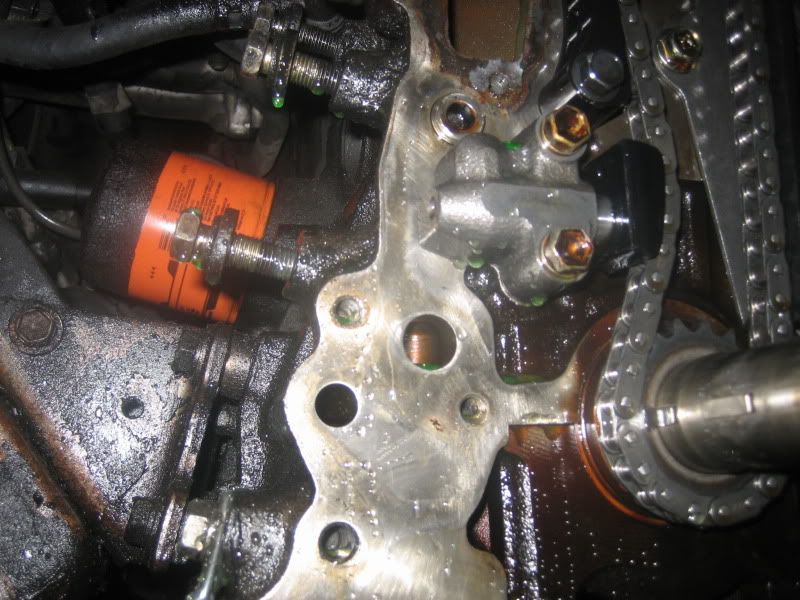
More yuckiness (driver side):
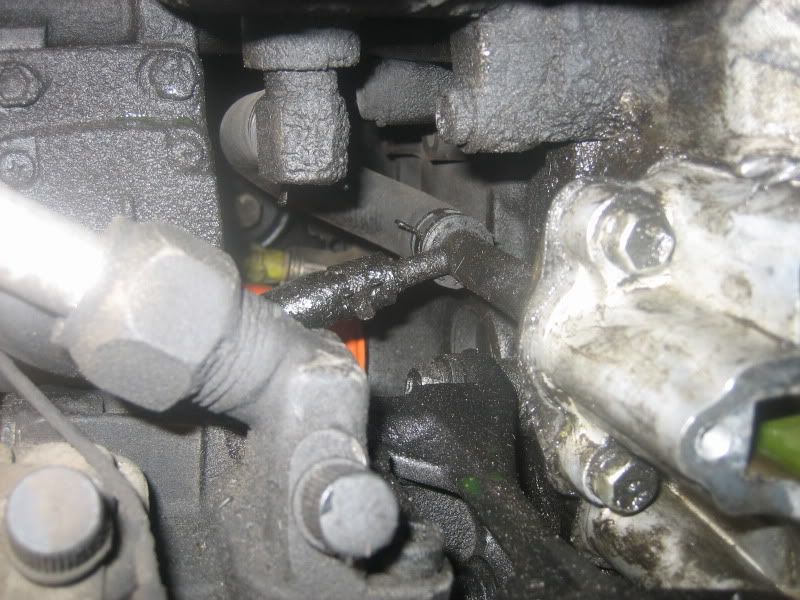
I pulled this T fitting off - going to clean it.
That's it for today....probably won't get to it again till next week (company in town this weekend). I'm likely going to drop the oil pan again and re-seal it. Anything I should do/look for while it's off this time? Shall I put on BEFORE the timing cover, or after? I believe I did after in December. I was planning on using RTV for the oil pan, and then the "tacky" stuff with paper gaskets for the water pump and timing cover...any recommendations on what to use/not to use when buttoning this all back up again?
Also, I want to do some general cleaning up of the gunky/grimey areas you see...I have brake cleaner and carb cleaner. I think carb cleaner eats rubber, so should I just use brake cleaner and rags in there?
Thanks again everyone!
05-11-2010, 07:35 AM
#30
Registered User
Looks good Phil!! I can't recommend anything for you, sorry. I am not in the boat of shooting advice out my arse, and I haven't had to dive that far into my RE yet. *knock on wood, for the 2nd time today*
Although I must say I my motor is close to having as much dirt and grime on it as yours.
And really dude? I spy......... a Fram filter!! I just read up on those purolator pure one filters. I will probably get one of those next time around, and upgrade from the bosch and Napa gold I usually use.
Keep it up! And BTW, I ended up hacking out that muffler, the freeway drone killed me. Put a flowmaster 50 suv in its place, life is much quieter on the freeway.
Although I must say I my motor is close to having as much dirt and grime on it as yours.
And really dude? I spy......... a Fram filter!!
I just read up on those purolator pure one filters. I will probably get one of those next time around, and upgrade from the bosch and Napa gold I usually use. Keep it up! And BTW, I ended up hacking out that muffler, the freeway drone killed me. Put a flowmaster 50 suv in its place, life is much quieter on the freeway.
05-11-2010, 07:40 AM
#31
Registered User
Thread Starter
iTrader: (2)
Join Date: Dec 2009
Location: Pleasanton, CA - SF Bay Area
Posts: 2,159
Likes: 0
Received 7 Likes
on
5 Posts
Looks good Phil!! I can't recommend anything for you, sorry. I am not in the boat of shooting advice out my arse, and I haven't had to dive that far into my RE yet. *knock on wood, for the 2nd time today*
Although I must say I my motor is close to having as much dirt and grime on it as yours.
And really dude? I spy......... a Fram filter!! I just read up on those purolator pure one filters. I will probably get one of those next time around, and upgrade from the bosch and Napa gold I usually use.
Keep it up! And BTW, I ended up hacking out that muffler, the freeway drone killed me. Put a flowmaster 50 suv in its place, life is much quieter on the freeway.
Although I must say I my motor is close to having as much dirt and grime on it as yours.
And really dude? I spy......... a Fram filter!!
I just read up on those purolator pure one filters. I will probably get one of those next time around, and upgrade from the bosch and Napa gold I usually use. Keep it up! And BTW, I ended up hacking out that muffler, the freeway drone killed me. Put a flowmaster 50 suv in its place, life is much quieter on the freeway.
Thanks Jason!
Yeah, busted...I have a FRAM filter on there....I need to be schooled on oil filters since i don't know a good one from my lefft foot - not sure what to look for/avoid in that department...
Good news on your muffler - glad it got fixed. I got mine welded finally - right before this happened :-/
05-11-2010, 08:35 AM
#32
Contributing Member
Join Date: Dec 2002
Location: Helena, Mt.
Posts: 389
Likes: 0
Received 0 Likes
on
0 Posts
Being as your HG is broken.....
IS this the way to go??
"cut HG off flush at head and use some "magic rubber urethane vulcanizing juice" to mate the t- cover to the head??"
Repo
IS this the way to go??
"cut HG off flush at head and use some "magic rubber urethane vulcanizing juice" to mate the t- cover to the head??"
Repo
05-11-2010, 08:37 AM
#33
Registered User
Thread Starter
iTrader: (2)
Join Date: Dec 2009
Location: Pleasanton, CA - SF Bay Area
Posts: 2,159
Likes: 0
Received 7 Likes
on
5 Posts

Have you tried this before...or know someone who has and it worked?
Is the "juice" you speak of just RTV or something else?
I do want to address this better this time - it could break and fall into the oil pan...
06-02-2010, 04:35 PM
#34
Registered User
Thread Starter
iTrader: (2)
Join Date: Dec 2009
Location: Pleasanton, CA - SF Bay Area
Posts: 2,159
Likes: 0
Received 7 Likes
on
5 Posts
First of all, the forum thread tools are messing up my formatting when I write this (or my internet explorer settings are...I'm not trying to write in free consciousness with not spacing or new paragraphs - honestly!)Guys,Finally put it all back together today...started it up but it idled really rough from the beginning, diving down below 500 RPMs several times before finally dying at idle. The oil pressure looked fine, according to the dash gauge, and the thermostat seemed to open after a couple tries of this. I did about 4 starts, and every one lasted less time before the engine cut out.HERE'S a video of the rough idle - you can hear it dip REALLY low toward the end of the video - it did this a few times before dying. I'd imagine it was at about 300-400 RPMs when it got the "very low" sound in the video. Other than that, it idled around 600-800 just fine in between all the dips(for some reason, the thread tools won't let me click on the video/photo insert icons...)http://www.youtube.com/watch?v=rLhn2x9XEhkI checked for vacuum hoses and all seem connected where they should. I primed the oil pump with vasoline, like I did when I did the timing chain job in December, and used fresh oil and coolant. I installed a new thermostat and radiator cap as well.I'm stumped guys. Could it be bad timing? Where should I start please? I want to get this thing on the road and out of the garage soon!Thanks in advance,Phil
06-02-2010, 05:09 PM
#35
YotaTech Milestone-Two Millionth Post
have you timed it already? i've heard soooo many times about "being a tooth off" as the first suspect, but technically, i'm not sure.
i know i got mine together already and i consider myself pretty lucky.....i'm not sure if my photos from my new thread can help you out but i think the last post is about the distributor install...maybe it will help you.
likewise, if you need pics, i have lots of them.
here's the thread see if it's any help. the thread itself is not complete yet https://www.yotatech.com/forums/f116...cement-212688/ and yes...the text is messing up when posting and editing
06-02-2010, 05:40 PM
#36
Registered User
Thread Starter
iTrader: (2)
Join Date: Dec 2009
Location: Pleasanton, CA - SF Bay Area
Posts: 2,159
Likes: 0
Received 7 Likes
on
5 Posts
thanks 92 Toy - I've seen your writeup and admired it several times - great work and thanks for all the pics and walk through!
You know, it may be a skipped tooth because....when I was going to torque the "hidden" bolt under the distributor drive gear, the cam sprocket kind of slipped off (not all the way I thought - just enough that the keyway would not align and snug up on the sprocket...). I was terrified that I might have slipped a tooth on the crank sprocket below (cover was on already so I couldn't tell). I zip tied the cam sprocket to the chain so it would not slip and then, with the cam bolt on the camshaft (not tight, just snug enough not to let the sprocket come off), I used my 19mm socket to turn the crank to TDC, and the "dot" on the cam gear seemed to line up with the key on the crank (when the key was pointing straight up).
I was able to, using a punch in the camshaft when at TDC, wiggle things enough to snug the cam sprocket back on (whew I thought!). But after putting it all togther with the crank pulley, it seemed off a little (the crank pulley showed about 5 degrees AFTER TDC when the "dot" on the cam sprocket seemed to show at 12:00). I could have been imagining things, but I was in panic mode then...
So, if I missed a tooth, is that enough to kill the engine or can I retard it enough to match up? Is there anything else that could lend to this issue and be solved without taking the whole damn thing apart AGAIN? I think I will scream (as will my wife with all the garage space I've taken over) if I have to pull this whole thing apart again
06-02-2010, 08:03 PM
#37
Registered User

I love this forum for all the attention to detail (and photos galore) and the pathos of people's righteous struggles to get their machines right. I am that way too and I celebrate it. Thanks for documenting your efforts Pilbert, it reminds me of my own 22R timing chain adventures. I use an engnbldr timing cover and chain kit back in 2006. The chain broke in 2007 (maybe I over torqued the tensioner bolts). Second time, plus a head swap,and it worked until the truck frame gave out (rusted) in early 2010. All in all, I got over 300k miles out of that '84 xtra cab. -- Matt
06-02-2010, 08:29 PM
#38
Registered User
Join Date: Feb 2009
Location: Milwaukie, Oregon
Posts: 63
Likes: 0
Received 0 Likes
on
0 Posts
I know the nagging feeling that I may have screwed something up. I hate that feeling! If the chain went slack when you were setting the timing, it could have skipped a tooth on the crank sprocket. You suspect the timing is off, right? I would say pull the timing cover and check. It'll go a lot faster the second time around. I just replaced my head, timing chain, and a bunch of other stuff on my 22re. I assembled it in this order to make sure the timing was correct: head, timing chain and sprockets, timing chain cover, and then the oil pan. It runs great. I haven't even checked the ignition timing yet.
06-02-2010, 08:53 PM
#39
Registered User
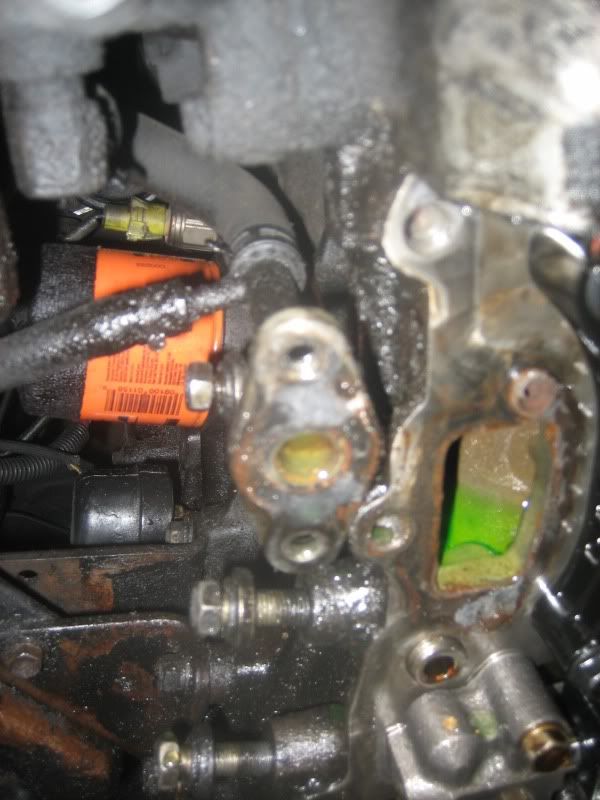
http://i99.photobucket.com/albums/l3...0/IMG_6165.jpg
http://i99.photobucket.com/albums/l3...0/IMG_6168.jpg
both of these bolts should have silicone sealant on the non threaded parts. other wise it will leak..
thats most likely the "gunk" u are seeing.
http://i99.photobucket.com/albums/l3...0/IMG_6168.jpg
both of these bolts should have silicone sealant on the non threaded parts. other wise it will leak..
thats most likely the "gunk" u are seeing.
06-03-2010, 06:22 AM
#40
Registered User
Thread Starter
iTrader: (2)
Join Date: Dec 2009
Location: Pleasanton, CA - SF Bay Area
Posts: 2,159
Likes: 0
Received 7 Likes
on
5 Posts
http://i99.photobucket.com/albums/l3...0/IMG_6165.jpg
http://i99.photobucket.com/albums/l3...0/IMG_6168.jpg
both of these bolts should have silicone sealant on the non threaded parts. other wise it will leak..
thats most likely the "gunk" u are seeing.
http://i99.photobucket.com/albums/l3...0/IMG_6168.jpg
both of these bolts should have silicone sealant on the non threaded parts. other wise it will leak..
thats most likely the "gunk" u are seeing.
Just wondering for those who've done this (and thanks 92 toy for your response on my thread):
1) How do I know it's jumped without taking off the cover?
2) Is there anything else that would cause this issue besides timing chain?
3) Could it be the dizzy is off a couple degrees?
4) If it's jumped a tooth, is there anyway to fix/address/makeup for this without pulling the timing cover off again, as I just buttoned it all back up?
I believe that, when I put the crank pulley back on mine, when the "dot" on the cam gear was at 12:00, the notch on the crank pulley showed about 5 degrees *beyond* the "0" mark, which leads me to believe that the chain may have skipped down below. If it's the case, I'm thinking perhaps I can do this:
1) set engine at TDC using crank pulley notch (and lock it there in gear!)
2) remove valve cover, mark current link that is associated with the "dot" on cam sprocket
3) slowly and carefully remove cam sprocket while keeping tension on chain the whole time...
4) With tension on the chain, slowly and carefully move reseat the cam sprocket one link CLOCKWISE on the chain, then reseat the cam sprocket
Is this crazy? I figure the worst that could happen is I screw it up and have to take off the cover again anyway, but I really don't want to do that if I don't have to....


