
Flyfishexpert's profile
 Nov 7, 2007 | 09:11 AM
#1
Thread Starter
Registered User
Joined: Aug 2006
Posts: 375
Likes: 0
From: The Big Wonderful
Flyfishexpert's profile
I would like to introduce you to 'June' the stink bug.
I will be using this thread to document the very slow transformation of my 1998 4Runner SR5. Hope you enjoy
The 'Current State' of my 4Runner
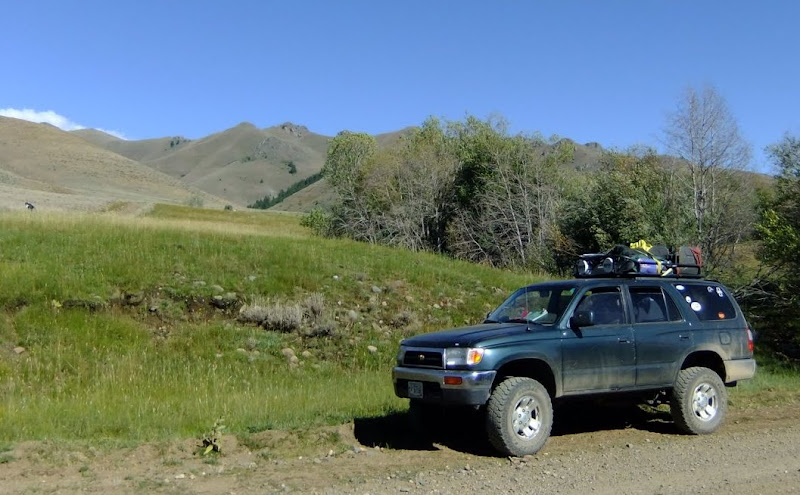
Current list of modifications in the order I completed them:
- Deckplate and ISR mods
- 3-Cell Mag-Lite mounted below driver's seat
- Fire extinguisher mounted below passenger rear seat
- Running boards removed
- Unhappy99 Spring Mod
- IPF 968's installed on front bumper
- 265/75R16 Cooper Discoverer ST tires mounted to factory Al wheels
- Yaesu 1802 2m radio
- Tundra rotor and caliper upgrade
- LED Aux. backup light
- Marlin Crawler clutch kit
- Custom built rear drawer system and sleeping platform extension
- Custom built chromoly roof basket with built-in light hoop
- IPF 968's relocated to roof basket
- Front Lift: OME N91S/OME 882/ToyTec Diff Drop
- Rear Lift: LX450 Front Coils ('96), OEM LC80 Shocks
- 265/75R16 TreadWright Guard Dog Tires
Recovery Gear/Accessories:
- 48" Cast/Steel Hi-Lift Jack
- Hi-Lift Lift-Mate
- Hi-Lift Off-Road Kit
- 30' Strap
- 10' Tree saver
- Harbor Freight 12V compressor
- Shovel-Mounted to Roof Basket
- Safety Seal Tire Repair Kit
Future Plans:
- New Skid Plate
- High-Output Alternator
- Sliders
- Custom Front and Rear Tube Bumpers
- Toyota E-Locker
The day we brought her home.

Last edited by flyfishexpert; Aug 10, 2011 at 02:38 PM.
Mar 14, 2008 | 10:45 AM
#2
Thread Starter
Registered User
Joined: Aug 2006
Posts: 375
Likes: 0
From: The Big Wonderful
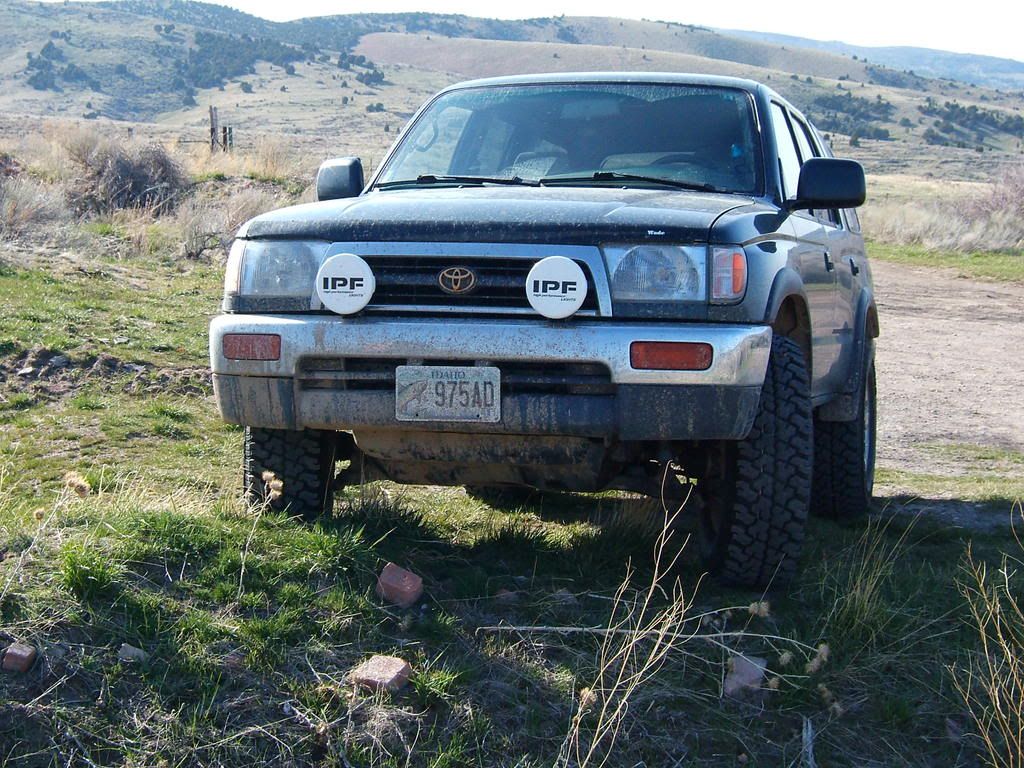
IPF 968 Driving Lights Installed
Nothing fancy, but here you go. I followed the 4runners.org writeup, but spaced my lights out to 12" instead of 10.5

55watt bulbs


55watt bulbs
Last edited by flyfishexpert; Apr 4, 2008 at 12:37 PM.
Apr 29, 2008 | 10:40 AM
#3
Thread Starter
Registered User
Joined: Aug 2006
Posts: 375
Likes: 0
From: The Big Wonderful
Fish got some new shoes!
Well it was time for new tires and after much research, I decided to purchase the Cooper Discoverer S/T in 265/75R16. I gained 1" of clearence thanks to the larger diameter and the fact the 245/75R16 Discoverer ATR's were completely worn down.
Here are the before and after pictures:


UPDATE:6-16-08
I am impressed with these tires. Since purchasing them in April, I driven through snow and rain covered roads, made a couple trips out to the desert and a road trip rockhounding south of Jackpot, NV. What a huge incrase in traction from my old Discoverer ATR's. These tires offer a lot more grip over the ATR's, and the same amount if not more than the BFG AT's I had on my Jeep. Granted vehicle dynamics are at play here too, but I do believe they may be better.
Here are my impressions:
Pavement: The noise from these tires isn't as bad as people make it out to be. It peaks at 55-65mph and then the general wind noise takes over. The reduction in pavement traction is noticible in corners and cross winds on the interstate, we usualy get gusts up to 40mph. In all I am pleased with the pavement traction.
Wet Traction: Wet traction was quite good and I have not experienced any hydroplaning as of yet. I believe this is due to the radial voids clearing out water.
Snow Traction: Not driven enough to know
Off-Road: I am really impressed with the traction of these tires off-road. Believe I have only had the tires slip once and that was while crawling up a mud and snow covered trail to one of the near by buttes. They really just dig in and go. Times when I figured I would get some wheel spin, they just crawled right up. So far I have had them on dusty desert trails, rocky mountain trails, and loose gravel roads. They do throw rocks, but I don't believe as bad as my old BFG ATs did. These tires rock!!!
Here are the before and after pictures:
UPDATE:6-16-08
I am impressed with these tires. Since purchasing them in April, I driven through snow and rain covered roads, made a couple trips out to the desert and a road trip rockhounding south of Jackpot, NV. What a huge incrase in traction from my old Discoverer ATR's. These tires offer a lot more grip over the ATR's, and the same amount if not more than the BFG AT's I had on my Jeep. Granted vehicle dynamics are at play here too, but I do believe they may be better.
Here are my impressions:
Pavement: The noise from these tires isn't as bad as people make it out to be. It peaks at 55-65mph and then the general wind noise takes over. The reduction in pavement traction is noticible in corners and cross winds on the interstate, we usualy get gusts up to 40mph. In all I am pleased with the pavement traction.
Wet Traction: Wet traction was quite good and I have not experienced any hydroplaning as of yet. I believe this is due to the radial voids clearing out water.
Snow Traction: Not driven enough to know
Off-Road: I am really impressed with the traction of these tires off-road. Believe I have only had the tires slip once and that was while crawling up a mud and snow covered trail to one of the near by buttes. They really just dig in and go. Times when I figured I would get some wheel spin, they just crawled right up. So far I have had them on dusty desert trails, rocky mountain trails, and loose gravel roads. They do throw rocks, but I don't believe as bad as my old BFG ATs did. These tires rock!!!
Last edited by flyfishexpert; Jul 23, 2008 at 09:18 AM.
Nov 6, 2008 | 10:51 AM
#4
Thread Starter
Registered User
Joined: Aug 2006
Posts: 375
Likes: 0
From: The Big Wonderful
Thanks to jeffryscott and Paul R from expeditionportal.com, I was able to install the Yaesu 1802 into the 4Runner with out any issues.
I ordered the radio from Universalradio.com along with the antenna and antenna mounting do-dads I would need. Here is my order:
qty order manufact. model description
1 1802 YAESU FT1802M XCVR 2M 50W
1 1067 LARSEN NMO-QC 2M 1/4W ANT & W200
1 1274 LARSEN NMO-K MTG .5IN TO 17FT RG58 PL
1 1077 LARSEN TMB34 TRUNK L-BRACKET CHROME.75
I installed the transceiver in the lower DIN slot below my stereo. I used 4 8-32x1" machine screws plus 8 8-32 nuts and drilled an extra hole in the factory DIN bracket per the measurement I took off of the transceiver:

I then secured the transceiver to the DIN bracket with the above hardware.
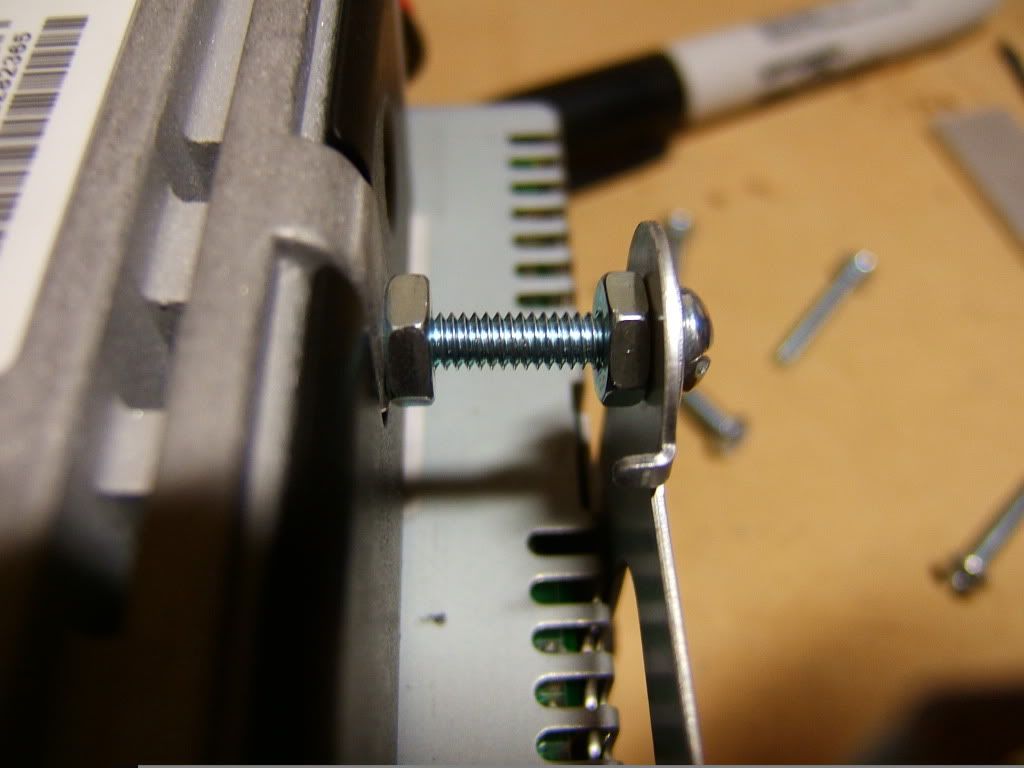
The resulting DIN assembly:

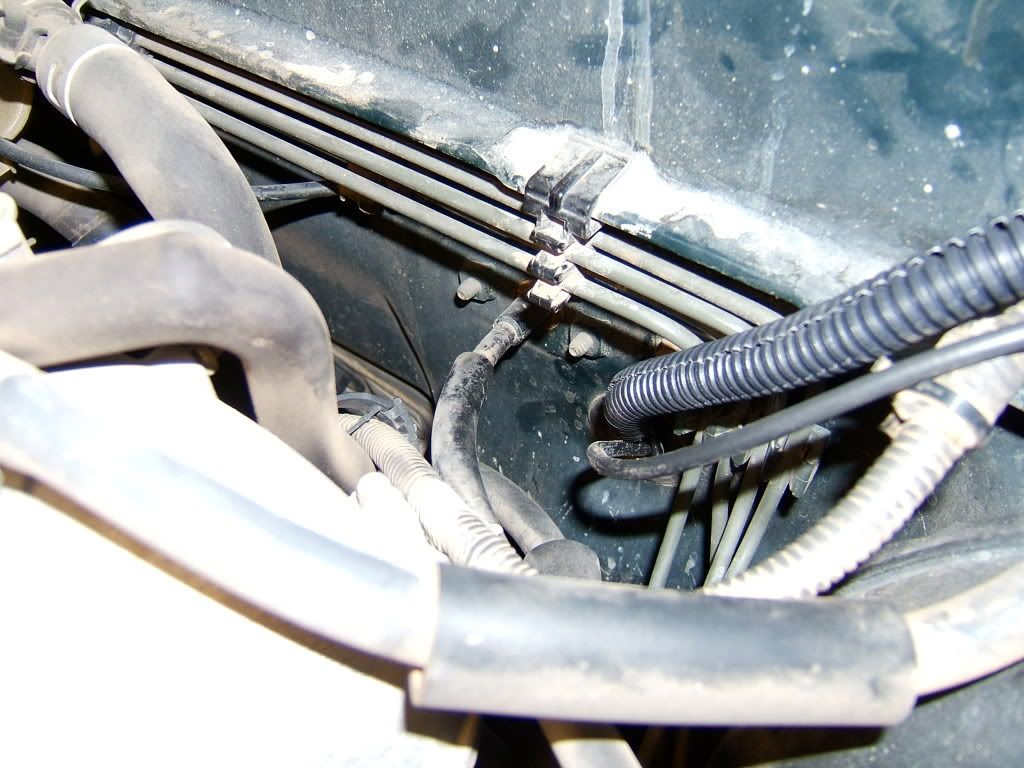
I attached the antenna bracket to the front driver-side fender using two of the supplied screws and ran the coax cable through the firewall.

I bunched the remaining coax in a bow and cinched it down with a zip-tie. Using a razor blade, I cut the insulation back as per the instructions and soldered the supplied plug to the end. (sorry no picture)
I was forced to cut the fuses off of the supplied wiring harness to fit the wiring through the fire wall. I later reattached them and soldered the connections.
After running the wiring through the firewall, I routed it through some corrugated tubing along with the wiring for my off-road lights.

I installed the DIN back into the dash and now all I have to do is cut some 26 ga sheet to create a fill panel around the transceiver and I am home free.

I installed the mic clip using one of the 3M poster adhesive strips, the ones with the tab that allows them to be pulled back off of the wall, just to the right of the head-unit.
I ordered the radio from Universalradio.com along with the antenna and antenna mounting do-dads I would need. Here is my order:
qty order manufact. model description
1 1802 YAESU FT1802M XCVR 2M 50W
1 1067 LARSEN NMO-QC 2M 1/4W ANT & W200
1 1274 LARSEN NMO-K MTG .5IN TO 17FT RG58 PL
1 1077 LARSEN TMB34 TRUNK L-BRACKET CHROME.75
I installed the transceiver in the lower DIN slot below my stereo. I used 4 8-32x1" machine screws plus 8 8-32 nuts and drilled an extra hole in the factory DIN bracket per the measurement I took off of the transceiver:
I then secured the transceiver to the DIN bracket with the above hardware.
The resulting DIN assembly:
I attached the antenna bracket to the front driver-side fender using two of the supplied screws and ran the coax cable through the firewall.
I bunched the remaining coax in a bow and cinched it down with a zip-tie. Using a razor blade, I cut the insulation back as per the instructions and soldered the supplied plug to the end. (sorry no picture)
I was forced to cut the fuses off of the supplied wiring harness to fit the wiring through the fire wall. I later reattached them and soldered the connections.
After running the wiring through the firewall, I routed it through some corrugated tubing along with the wiring for my off-road lights.
I installed the DIN back into the dash and now all I have to do is cut some 26 ga sheet to create a fill panel around the transceiver and I am home free.
I installed the mic clip using one of the 3M poster adhesive strips, the ones with the tab that allows them to be pulled back off of the wall, just to the right of the head-unit.

Thread
Thread Starter
Forum
Replies
Last Post
justdifferentials
Just Differentials
14
Sep 24, 2017 08:32 PM
Swampwalker
95.5-2004 Tacomas & 96-2002 4Runners
5
Oct 12, 2015 09:49 AM


