
I will be tackling the HG project starting this weekend on my 86' 4Runner UT, maybe as early as Thursday. I have read a lot of great information on this site, a big thanks to the guys who have posted their handy work with pics and notes. Besides taking pics and using ziplock bags and tape so I won't lose any bolts or nuts, etc., is there any else I should get before I tear into my engine? I also have some good threads from here I will be referring too...
http://personal.utulsa.edu/~nathan-b.../7cylinder.pdf
http://www.4x4wire.com/toyota/maintenance/timingchain/
http://www.4crawler.com/4x4/CheapTri...ingChain.shtml
My Toy has a 22re EFI with about 122,000 miles. I really look forward to doing this job, call me crazy but I like knowing how to do things myself. Right now money is very tight but this needs to be done. It seems like all the threads I have read, money is tight, it sucks that this happens to anyone but even more so to those of us on hard times. I'll look back here for some more help and will post where I am at as I get going. Thanks for all help and suggestions in advance.
Quote:
this one might come in handy too--
FSM Links
Yes, that is a great thread. Thanks for posting it, I had forgot all about it.Originally Posted by ocdropzone
those are all great links--this one might come in handy too--
FSM Links
YotaTech Milestone-Two Millionth Post
I like pizza boxes.....or any cardboard for that matter, to use as a place to securely store bolts that need to be in a certain configuration...IE:timing cover / power steering.
I used paper lunch bags with a sharpie...that way i wrote right on the bags no prob.
I have a tablet that I jotted (like a journal) everything I did....so hopefully i just have to go in reverse to get everything back together.
yep, lots of pictures.....take them from every crazy angle before you do anything, because, when it comes to putting the vac hoses back on you will be thankful you did that.
lastly, and I know I may be the exception because my truck is NOT a primary vehicle so I am in no specific hurry, if you become frustrated, walk away.....or clean up and take a break.
Contributing Member
Quote:
...
...
lastly, and I know I may be the exception because my truck is NOT a primary vehicle so I am in no specific hurry, if you become frustrated, walk away.....or clean up and take a break.
Originally Posted by 92 TOY
......
...
lastly, and I know I may be the exception because my truck is NOT a primary vehicle so I am in no specific hurry, if you become frustrated, walk away.....or clean up and take a break.
I usually throw something at the wall

Time off helped many an obvious problem, obvious the next day that is...
Repo
Contributing Member
Check head for flatness
Get a head shim if needed to make sure your piston to head quench is at 0
check your rocker arms for wearing cam lobes as well
timing set ready to be redone? now would be a good time
Get a head shim if needed to make sure your piston to head quench is at 0
check your rocker arms for wearing cam lobes as well
timing set ready to be redone? now would be a good time
YotaTech Milestone-Two Millionth Post
Quote:
Originally Posted by MyBlueToy
Had some delays, will be starting soon.
that happens....read my thread and you will understand.
All set to go on Saturday. The 4runner will be towed to the pole barn on Friday evening and then on Saturday morning I'll start tearing it down. Any suggestions?
Contributing Member
I've been reading posts about rebuilding 22re and making a link list for those that have pics, directions or tips I think will help my dumb a$$.
I think studding up and getting the correct parts is key...
Label parts bags,
draw pictures,
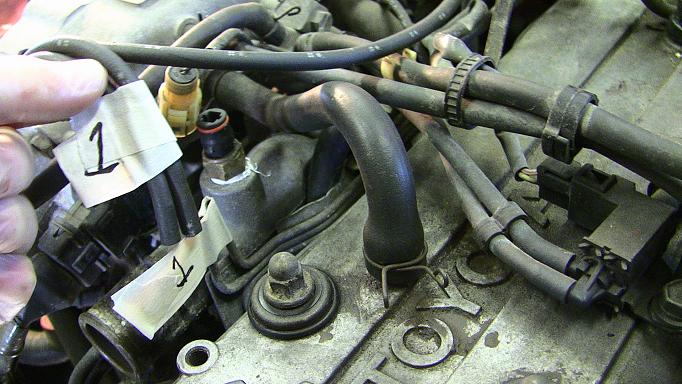
tape and number hoses, wires, tubes,
take pis w/ notes of what the pics are reminding you to do.
Have FUN
Repo
I think studding up and getting the correct parts is key...
Label parts bags,
draw pictures,
tape and number hoses, wires, tubes,
take pis w/ notes of what the pics are reminding you to do.
Have FUN
Repo
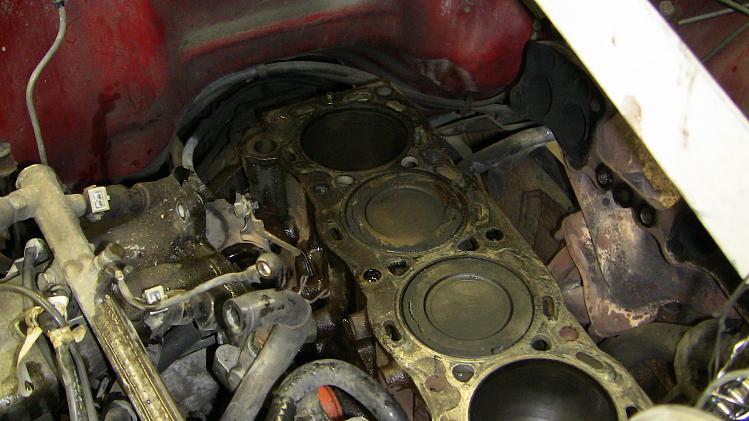
Well I'm thinking the easy part is over? Started Saturday morning around 10:30 and got the head off sometime in the later afternoon, it's ready to go on Monday to the machine shop. Will post some pics soon. Only problems I had were; first the hood bolts on the passenger side broke (both), then was some smooth sailing. The #8 head bolt was tough all the way out, any thoughts on that? I talked to Dan at Holland Automotive Machine and he said bring it in the morning and we'll have it ready for you in the afternoon. So Monday evening and Tuesday morning it should be done if all goes well. Will post more later.
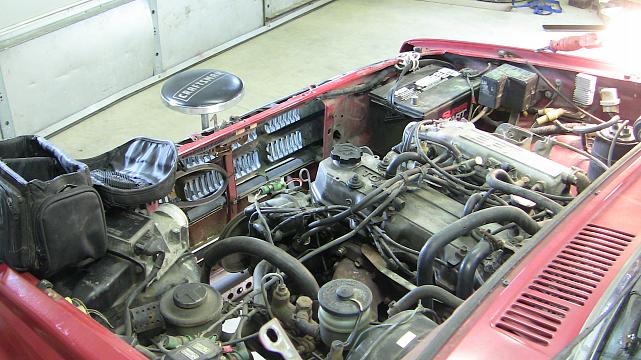
Found out I was going to fast to take a lot of pics. Here are the ones I did take.

Here is the rest of the pics. When putting it back together any suggestions?

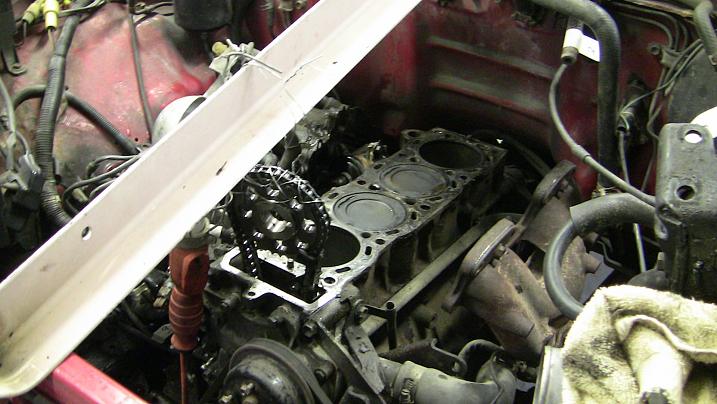
Just dropped the head off. It will be tested for cracks, then if ok, it will be machined and clean. Should have it this afternoon and start putting it back together.
Picked the head up and started to put things back together last night. Trying to take a bit more time putting it back together. Hope to have it ready sometime today, but it always seems like something can go wrong. So I'll just keep my fingers crossed.
YotaTech Milestone-Two Millionth Post
holy cow, you're flying along.
Quote:
Thanks, hope today goes just as smooth.Originally Posted by 92 TOY
holy cow, you're flying along.
Everything went great until after I had the EFI bolted on, I noticed some wires couldn't reach their outlet. I'll have to take it off and redirect the wire
Finished! Runs great except that now I think I have a sticky t-stat. Ran it up and down the street, until it started to get warm and the needle got a little above half way and then dropped. Yea the t-stat worked. No leaks. Started to clean up and put tools away, finished with that. Drove it to the store and on the way the temp gauge kept going up and up. Pulled over to let it cool and then continued to drive and pull over to let it cool. When I got back home I parked it to let it cool. Just took the t-sat out and I am going to Toyota to get one. Oh I do have heat once again, that will come in handy when it is 10 above in December.


