When you click on links to various merchants on this site and make a purchase, this can result in this site earning a commission. Affiliate programs and affiliations include, but are not limited to, the eBay Partner Network.
My wife and I have been searching for a clean-ish 1st gen 4Runner to turn into a full-time travel rig for several years and we finally found what we were looking for. We discovered a love for vehicle based travel while exploring most of the Western US this summer (April-October) in our short bus conversion. You can see all of our posts about that trip and rig on www.okienomads.com, our blog where we post about places and our vehicles. We also have a YouTube Channel
that we are working on and will be posting videos there as we progress.
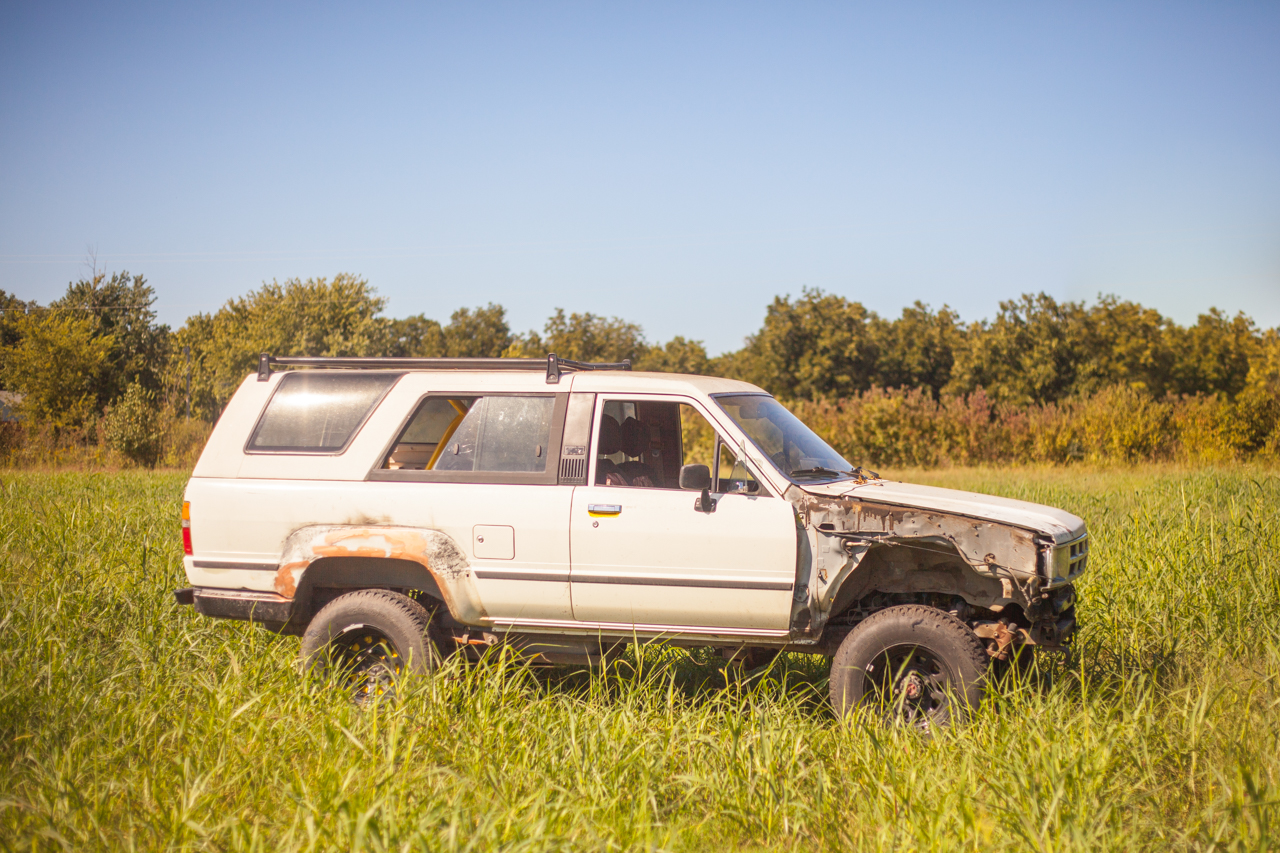
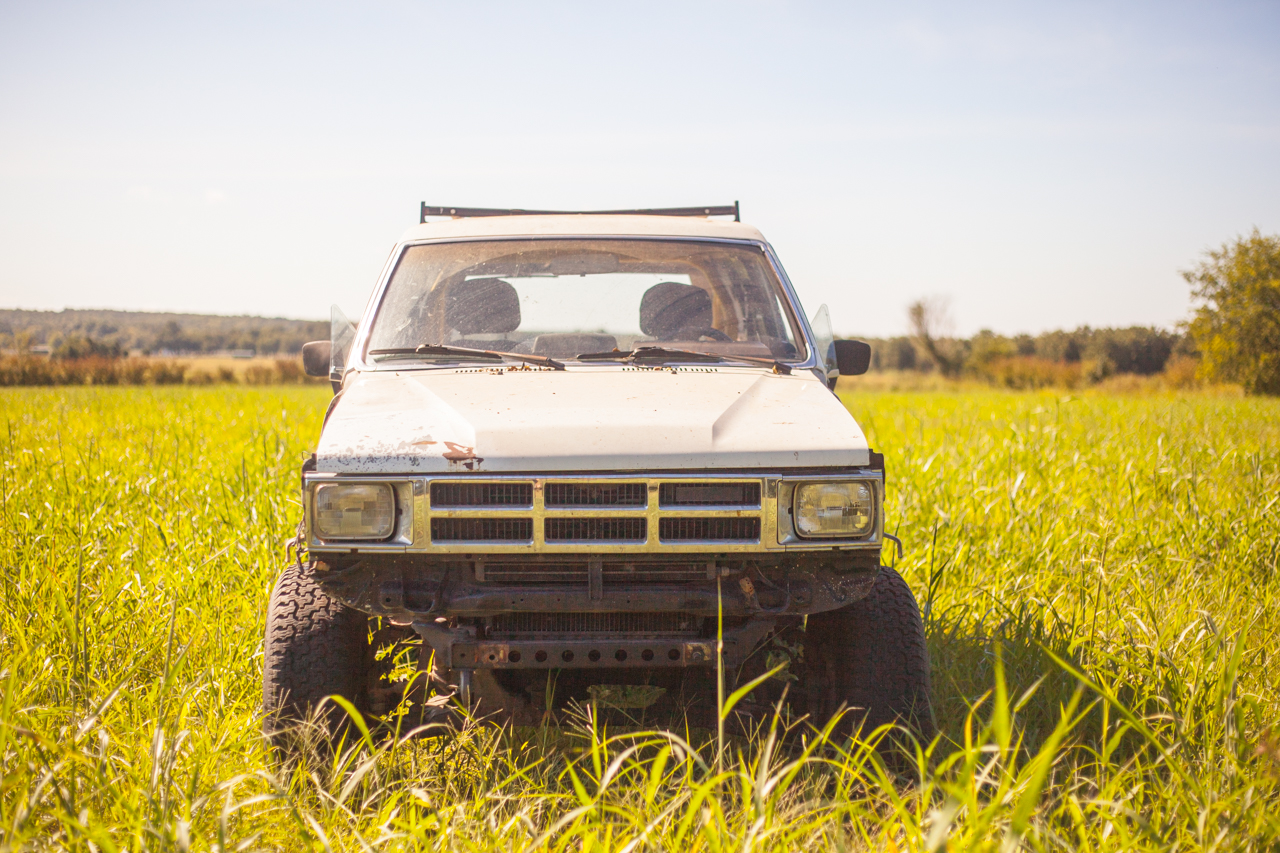
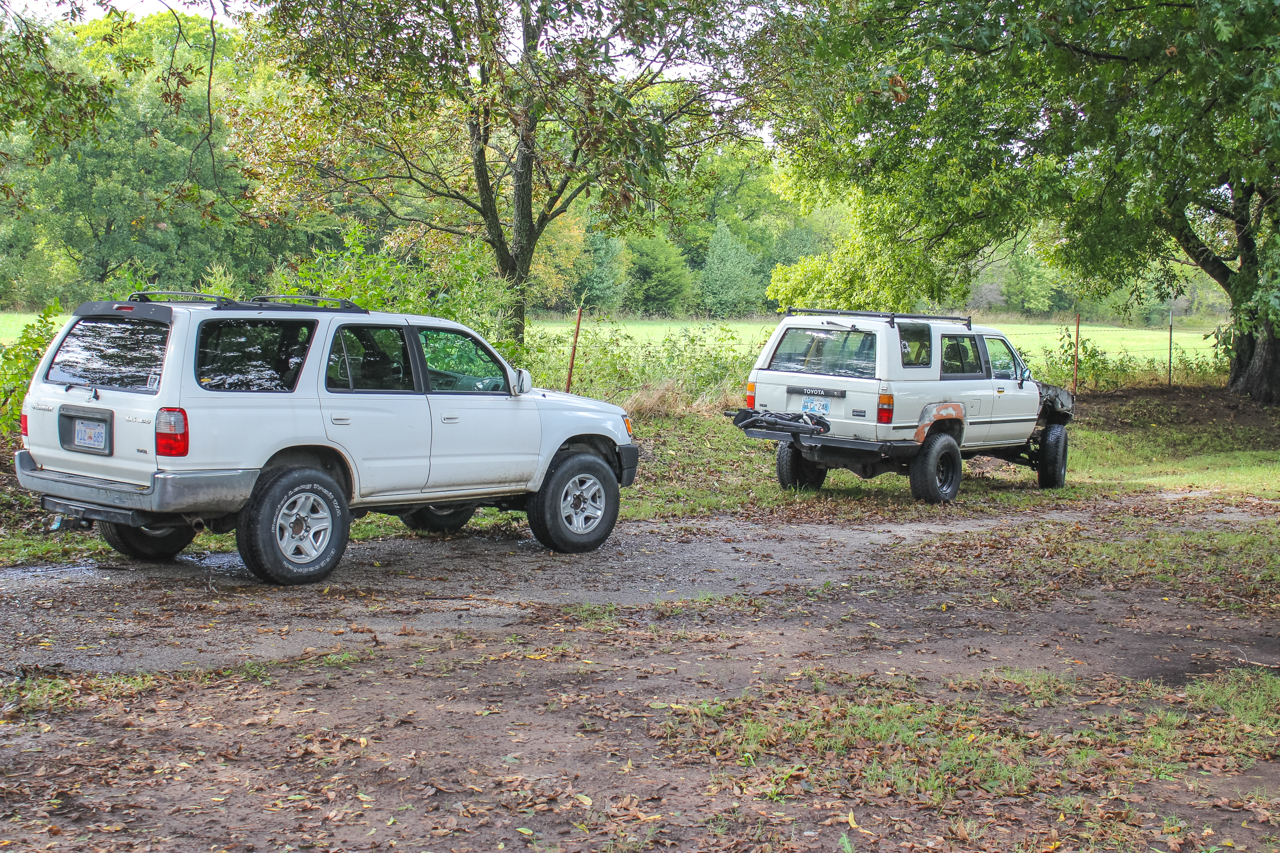
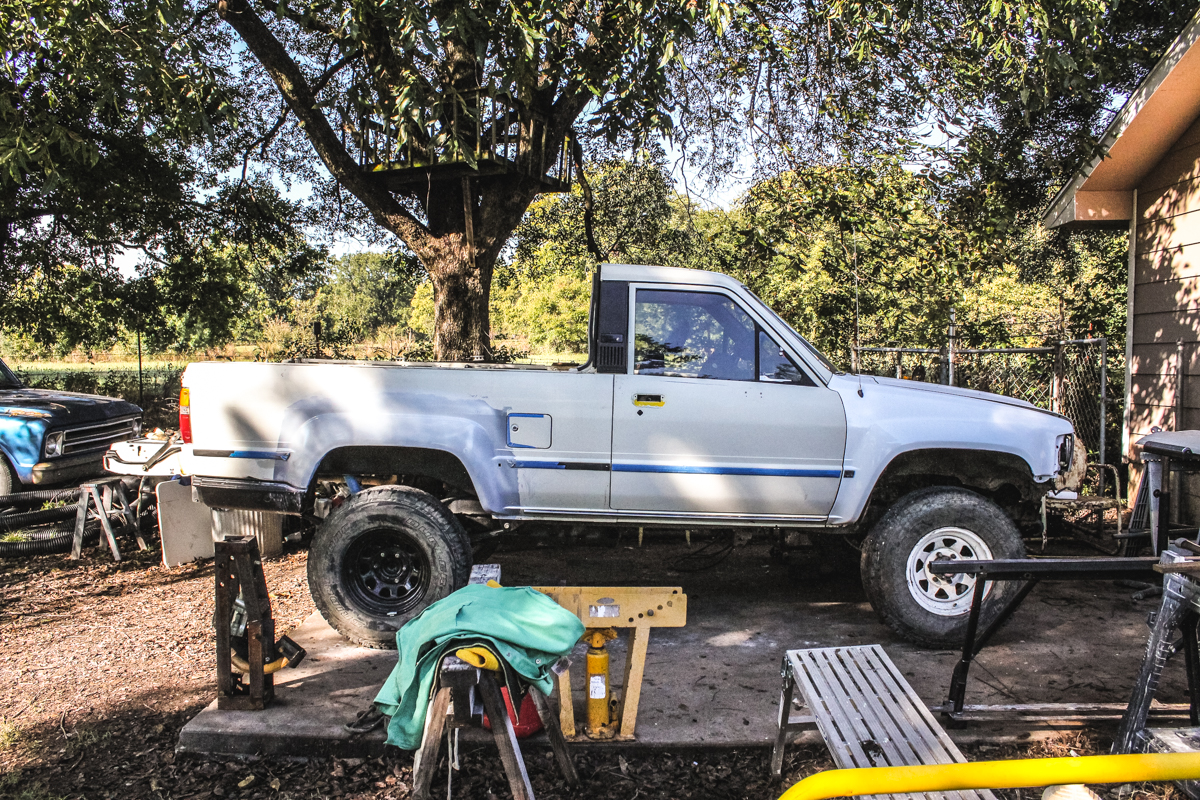
While we were in rural Montana, my father-in-law did us a huge favor and went to check out a 4Runner local to him. He brought it home because it matched all of our criteria for a rig: it was mechanically sound, hadn't been abused too much, and had little rust. He spent much less than most 4Runners in our area are going for on Craigslist and Facebook. These are the photos that we got while we were 1000 miles away:
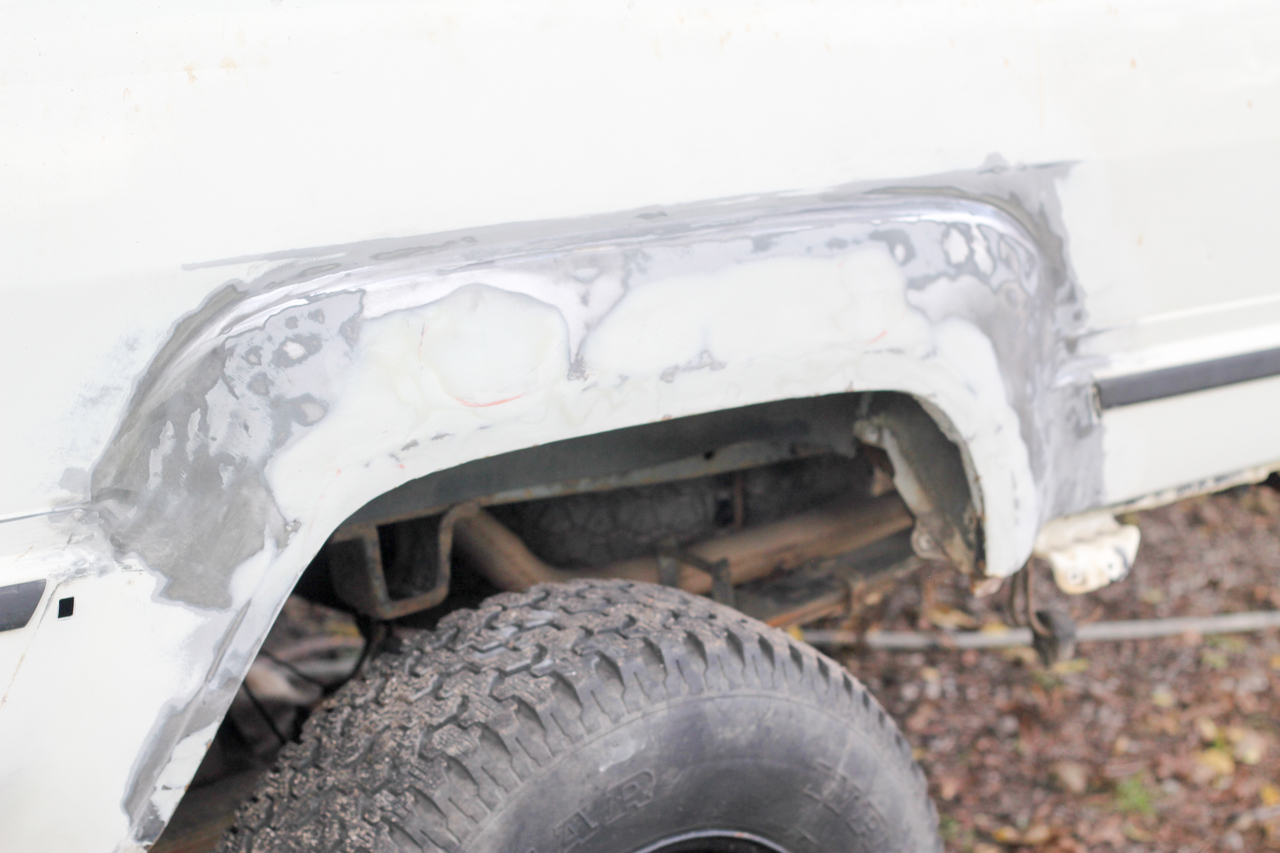
There are some obvious issues like the yellow accents all over, the bedlinered fenders/quarters, the 100lb. front bumper, and the block-lifted rear end. All of that will be resolved sooner rather than later.
We are home from our 6-months on the road in our Skoolie and now the build for the 4Runner can begin. We will park our school bus for a while and eventually turn it into a tiny house cabin in the woods somewhere. Until then it will rest in the in-laws field for a while. This build will take place over a short period of time as some of the changes have to be done in order to get to Overland Expo East in November and the rest will have to be done before January 1 in order to make the trip to seasonal jobs in LaPaz. I will update this thread with a plan, but as your can see it will need some work, but we are pumped and ready to get into it. First thing is first, remove the bedliner from the fender and quarter panel!
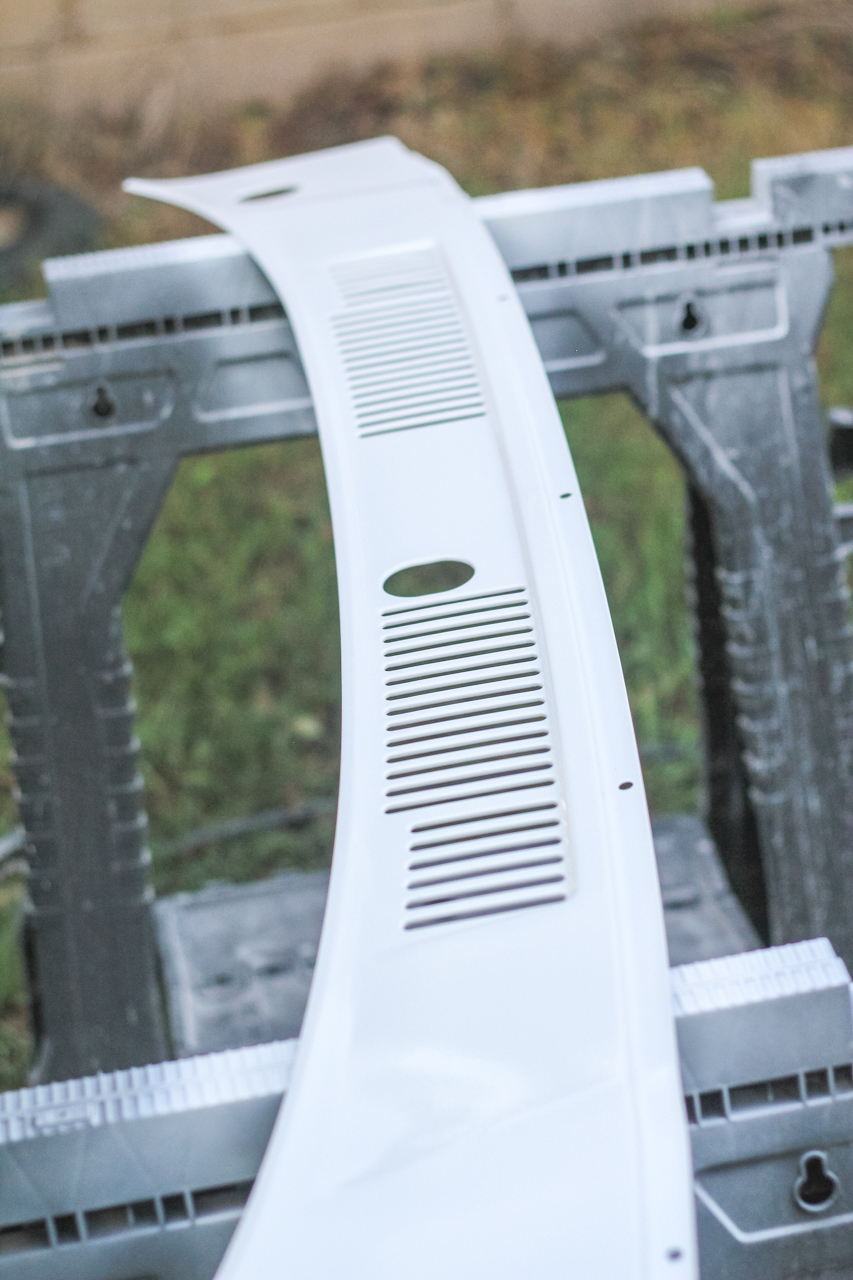
I finally got my hands on the 4Runner after returning to Oklahoma from being on the road for a while. My father in law had already gotten started on removing the bedliner that had been sprayed on the fenders and quarters. He tried to sand it and angle grind it, with no success. He ended up using a propane torch and we need to prime them before putting them back on. I wanted to get some BEFORE photos before we start the build, so here they are.
The exterior is imperfect to say the least, and most dents will be filled and the entire truck will be painted Toyota Super White. Plans for the rest of the exterior involve a front bumper and potentially a swing away on the rear bumper. Window tint will be removed and new 10-15% tint will be installed.
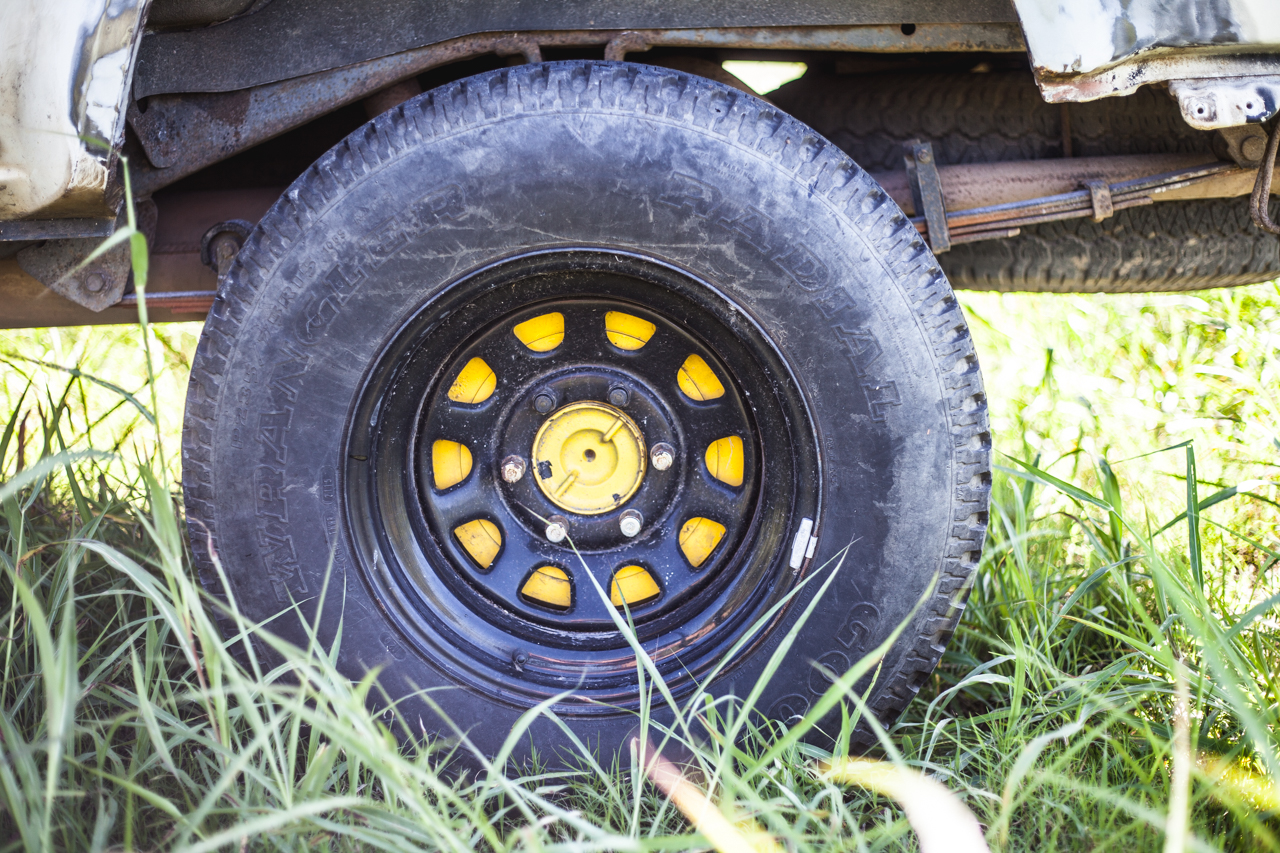
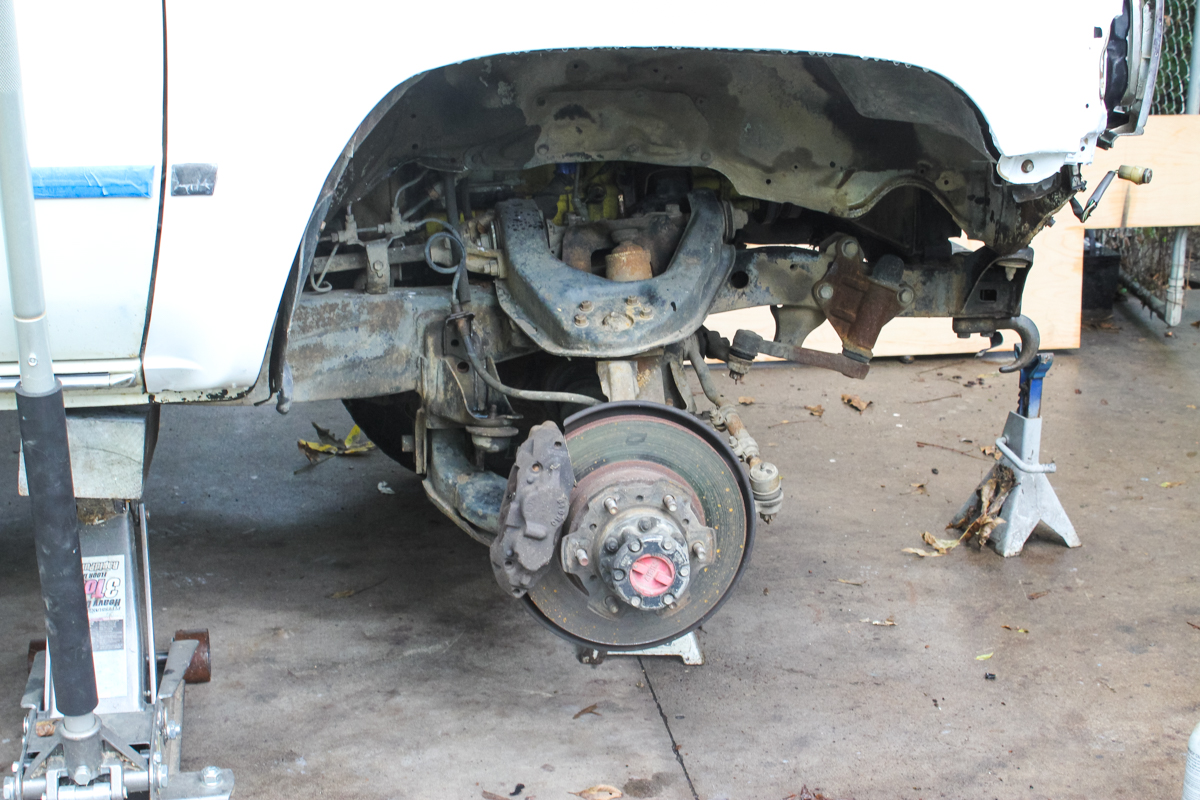
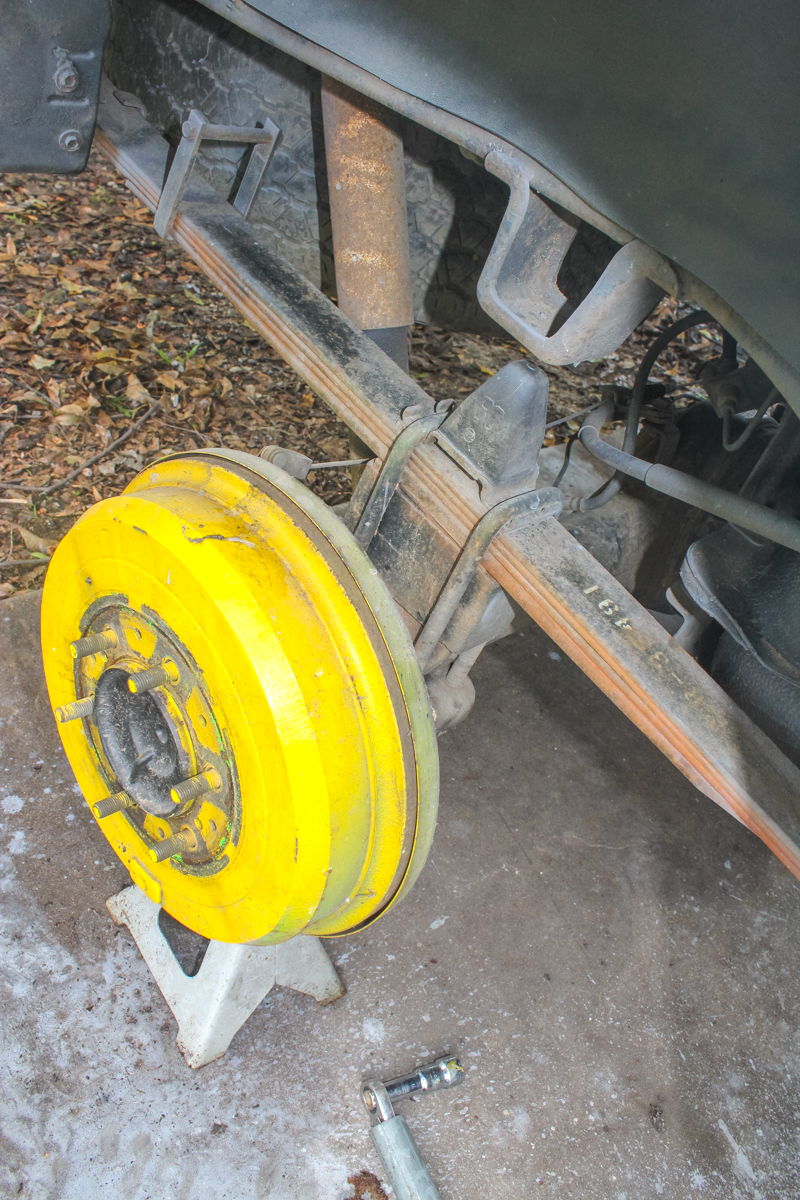
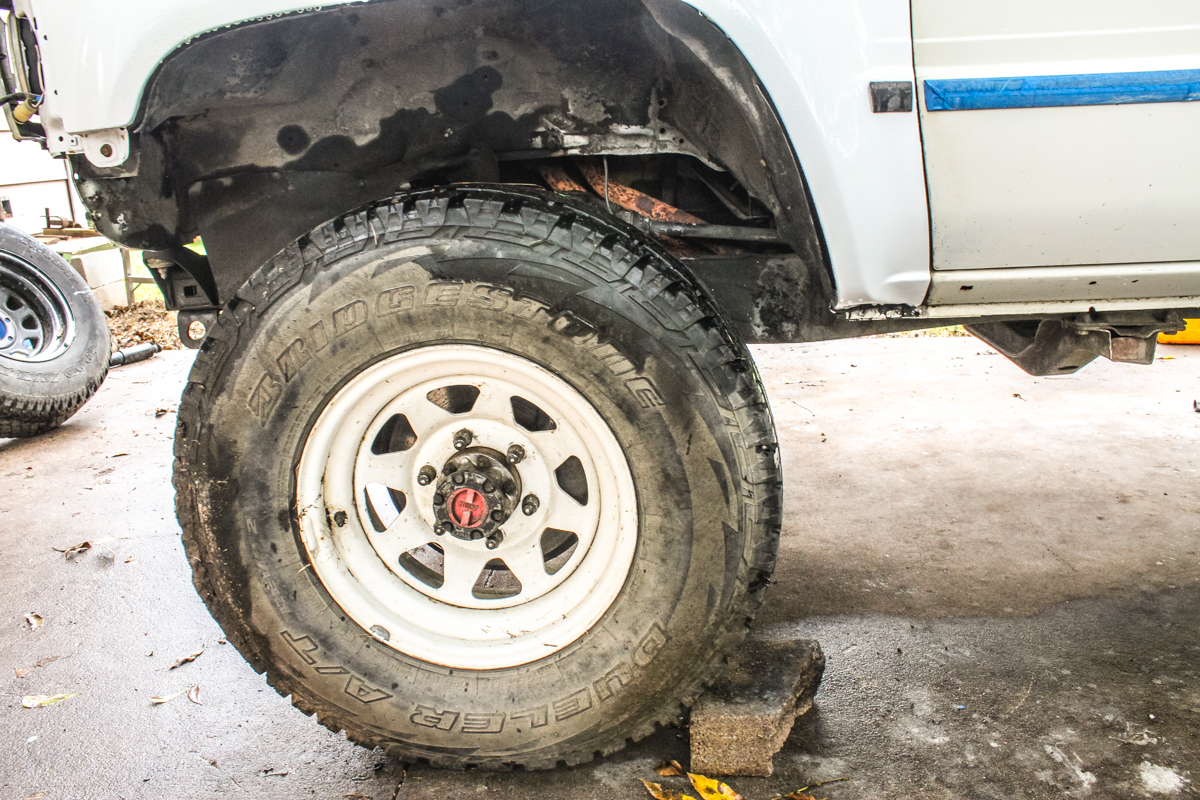
The tires are small and don't look to be in the best shape, so we will be swapping them with some 31x10.5x15 AT's that we have laying around. The brakes will get new pads and shoes and the drums and calibers will be painted black instead of yellow. CV boots will be re-greased and replaced.
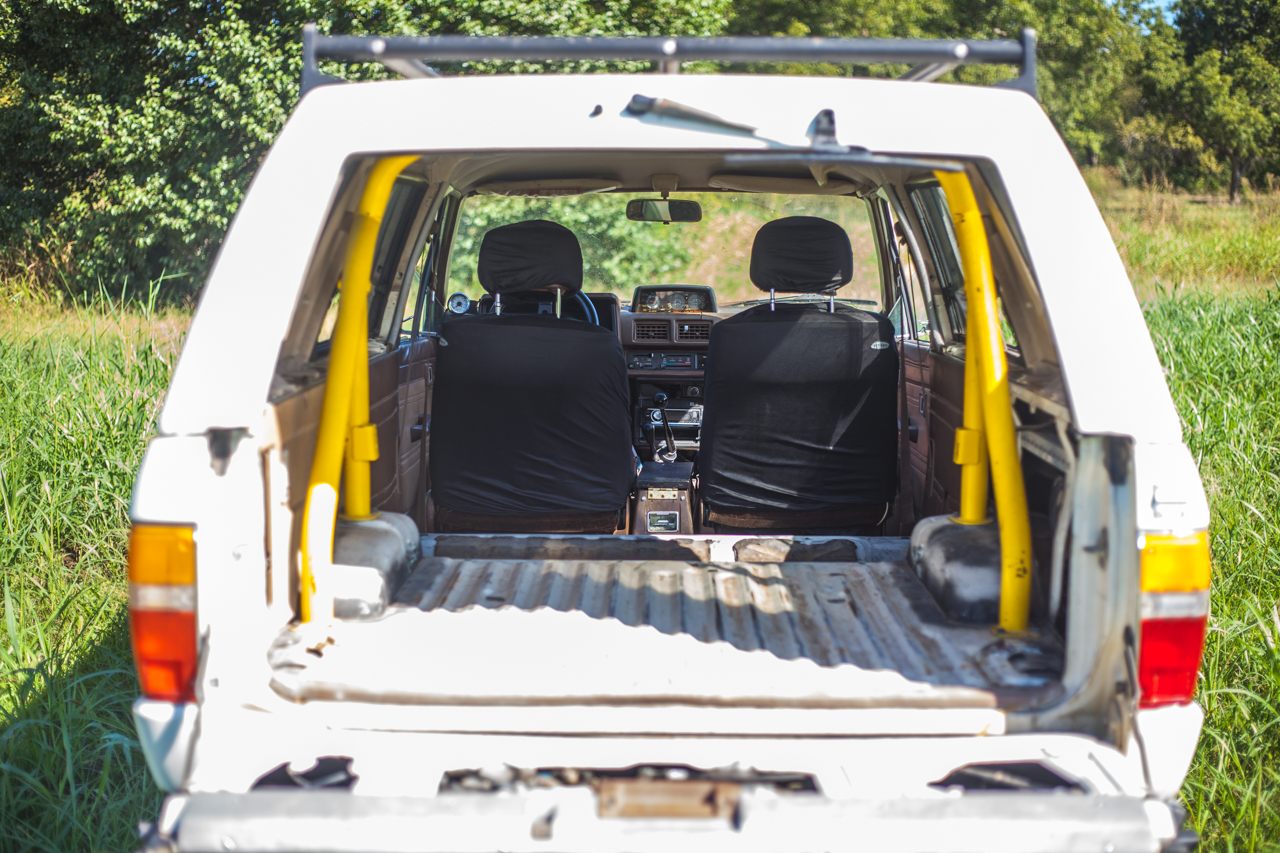
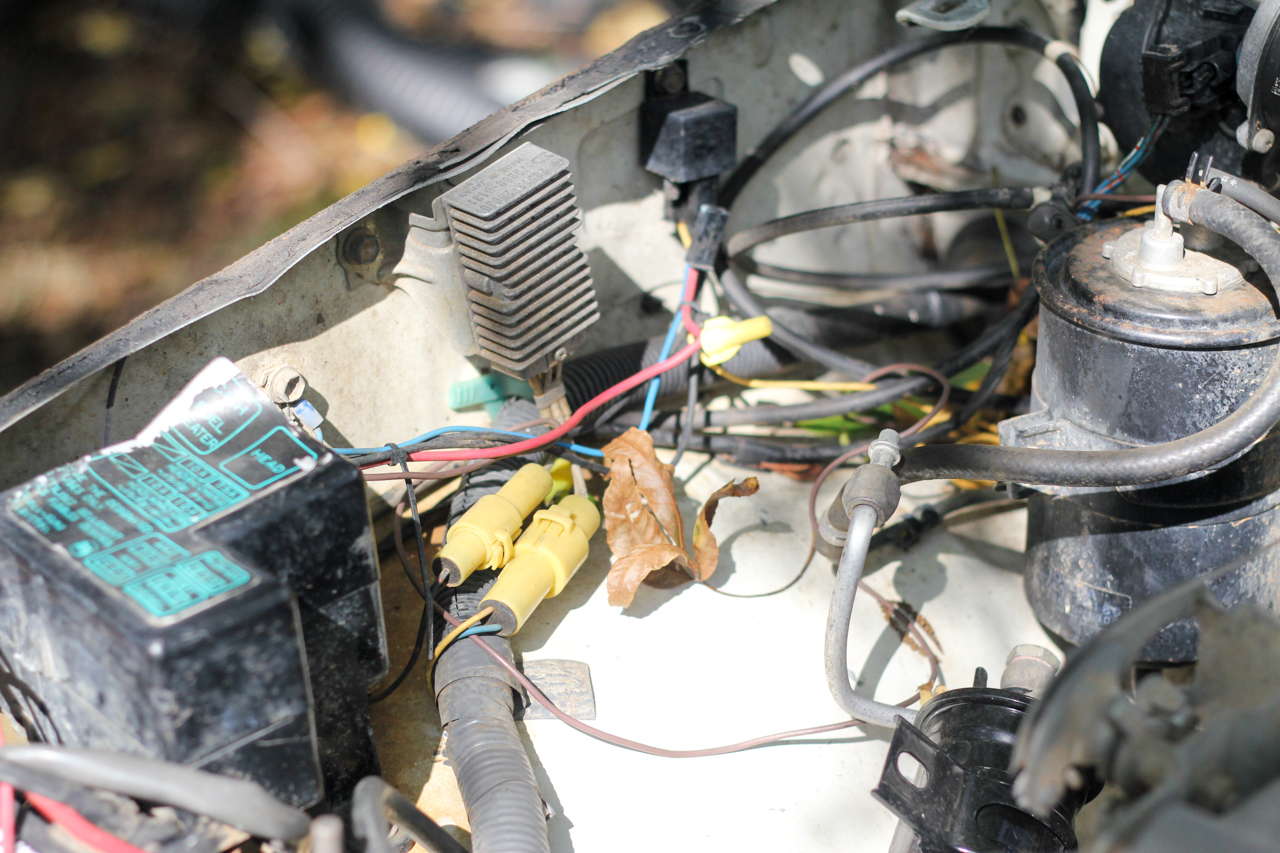
The interior will be coated with POR15 and bedliner, including the roll-bar (something about all that yellow). We will be fabricating a cover plate for the rear lift gate after we thoroughly clean and grease the rear window parts. We have the interior rear side panels and will be replacing the speakers all around as well. The CD player is not getting power or doesn't work, so I need to look into that too. Anyone know why headlights would work fine, but activating the brights turns the headlights off completely?
The rear will get a wood platform for the fridge slide out and drawers on the opposite side. Behind the front seats will be the house battery, gear storage, and room for the inverter. We will not use the rear seats, but will try to retain the stock mounting points in case we ever want to put them back in.
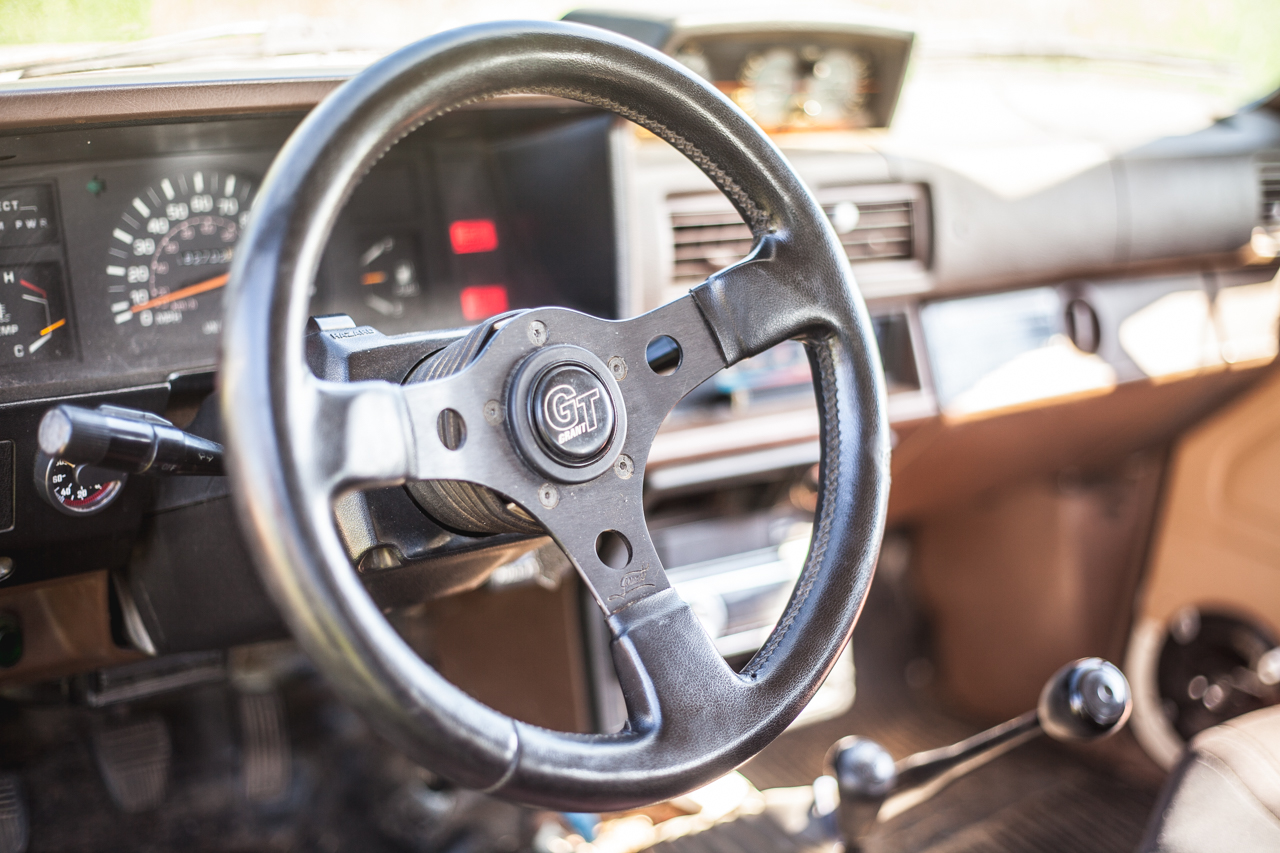
I think the cheesy Grant wheel will stay for now since it is more comfortable than stock and I don't want to spend money on something that works fine as is.
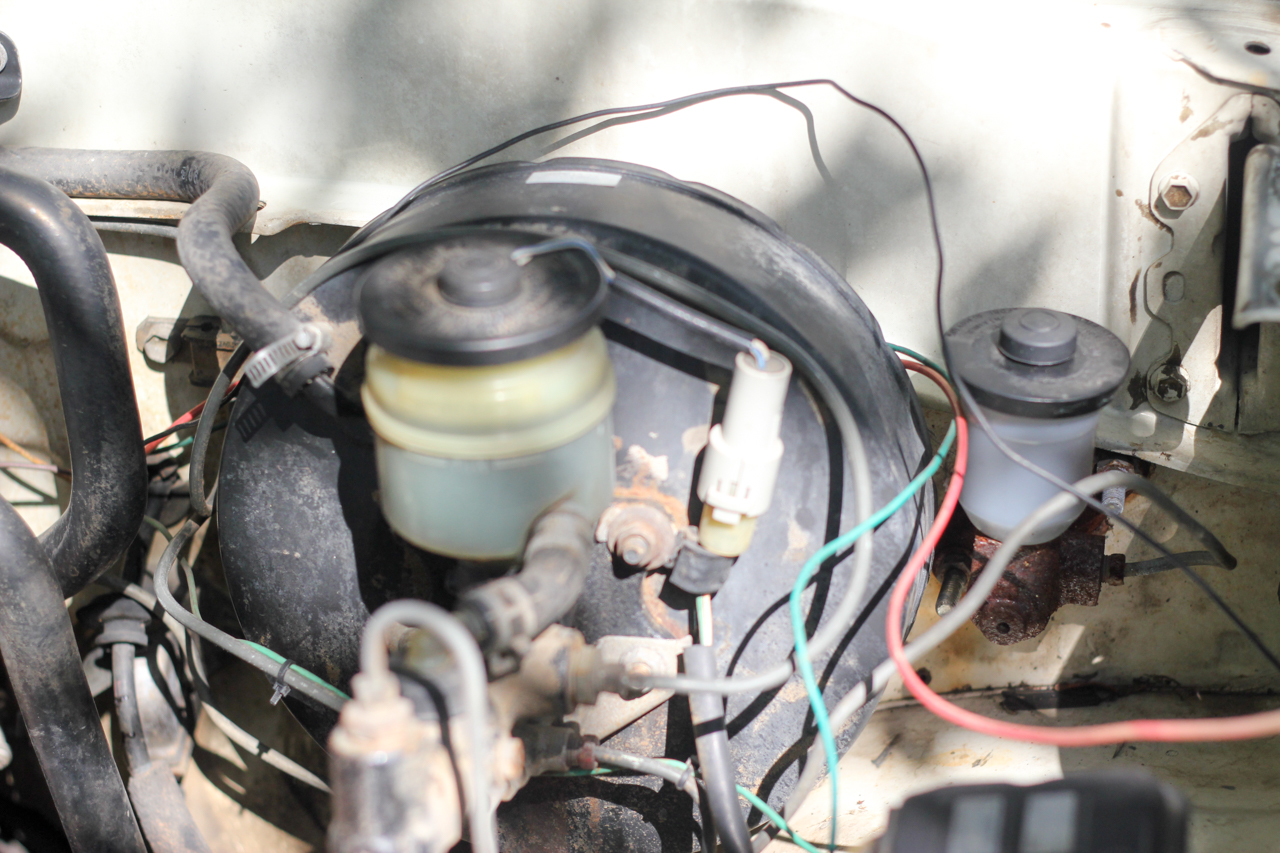
The engine has been rebuilt and runs really well and there are no plans but to tidy it up under the hood and add a dual battery and a compressor. Someday we might invest in upgrading the cooling system as preventive maintenance.
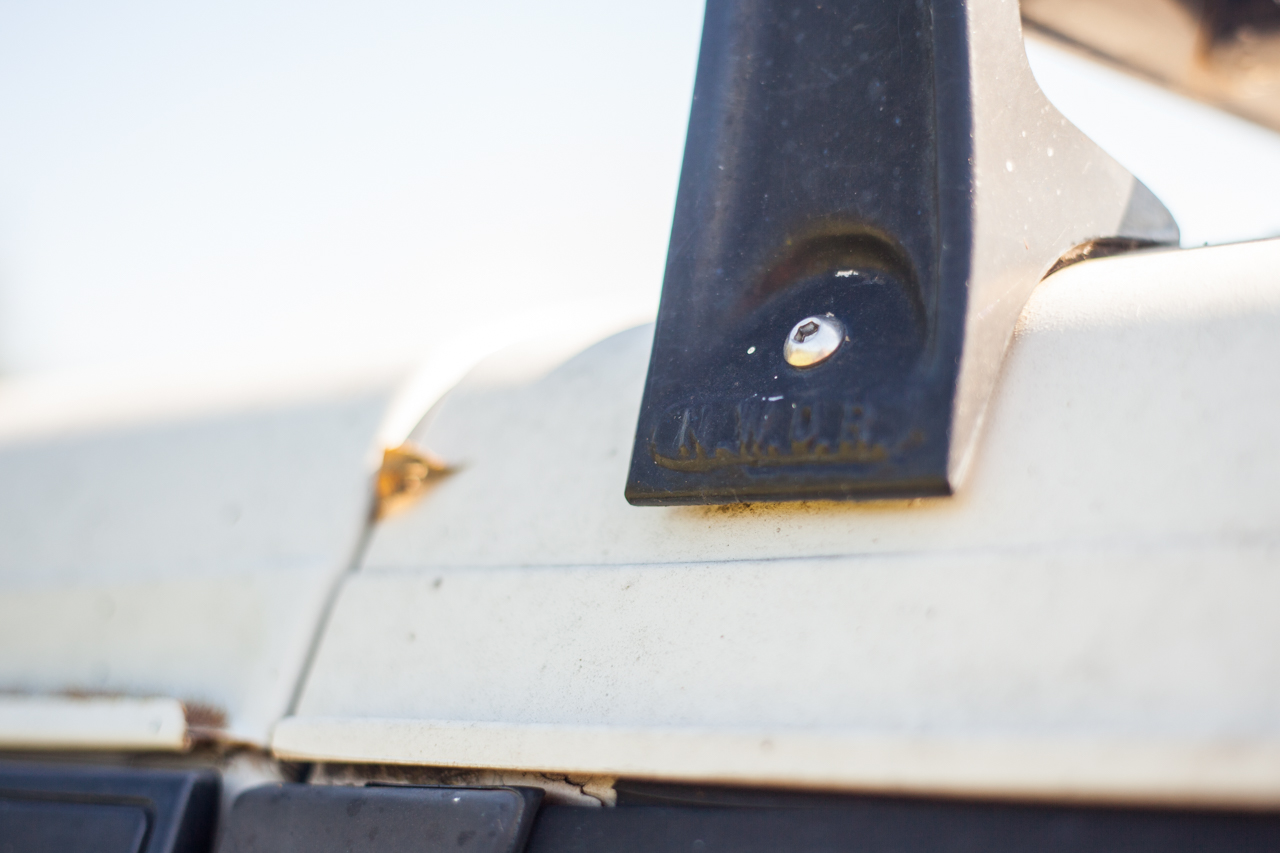
The roof has a Northwest Overland roof rack that will eventually hold our roof top tent and awning. We plan to drill the holes out and secure them to the inside of the shell with washers and bigger hardware. It seems like a really solid design that will likely get a fresh coat of paint.
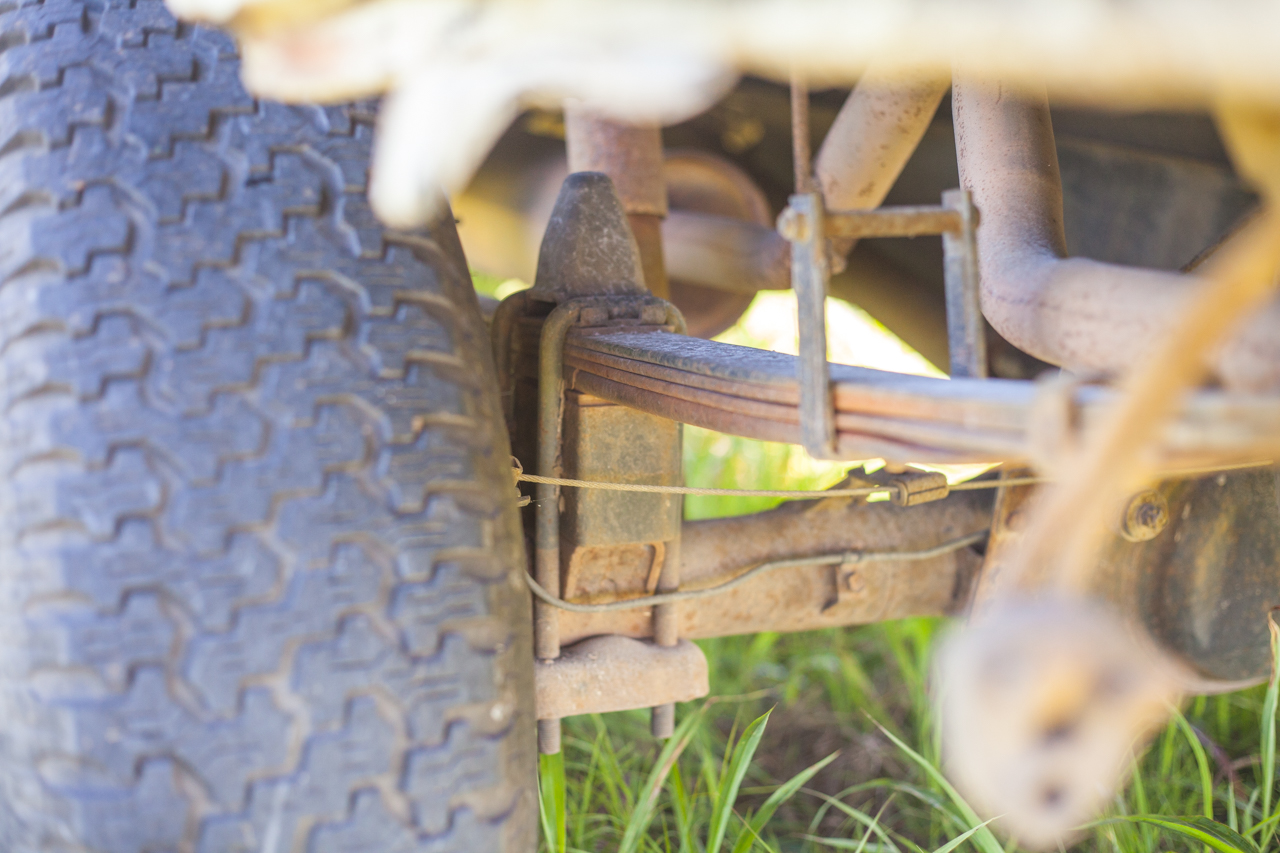
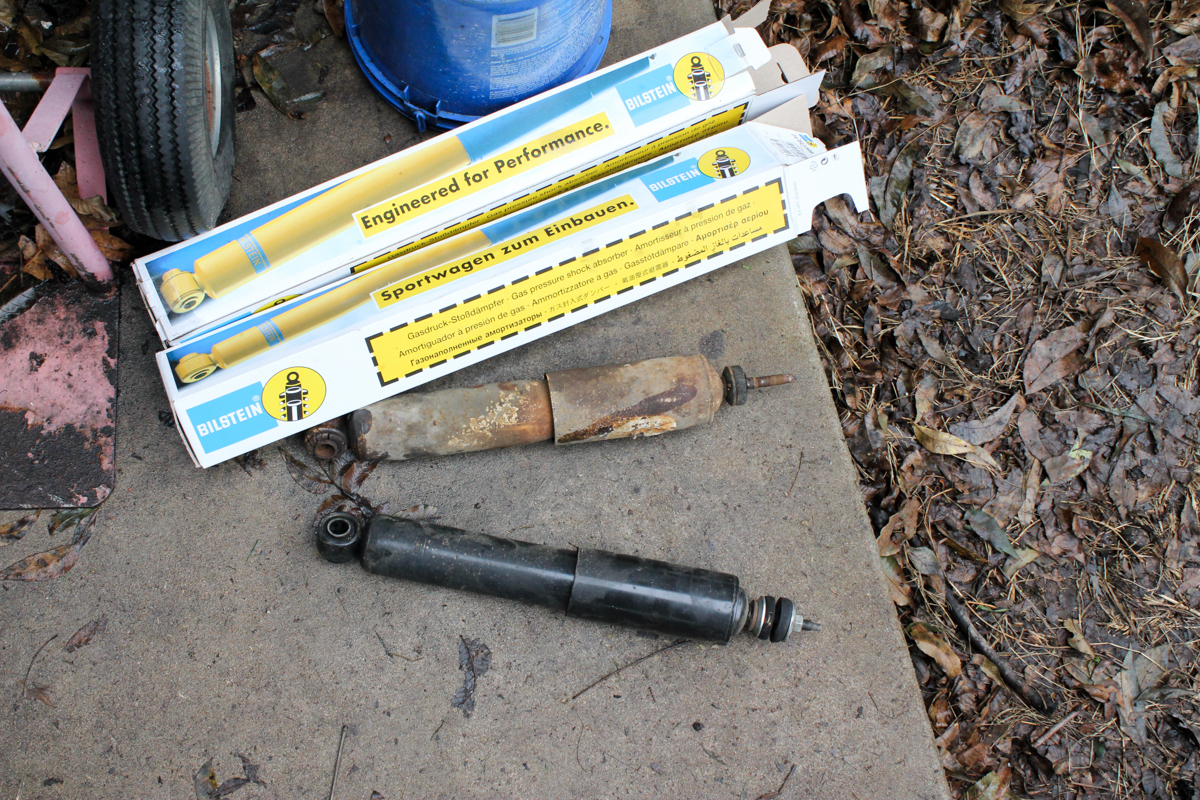
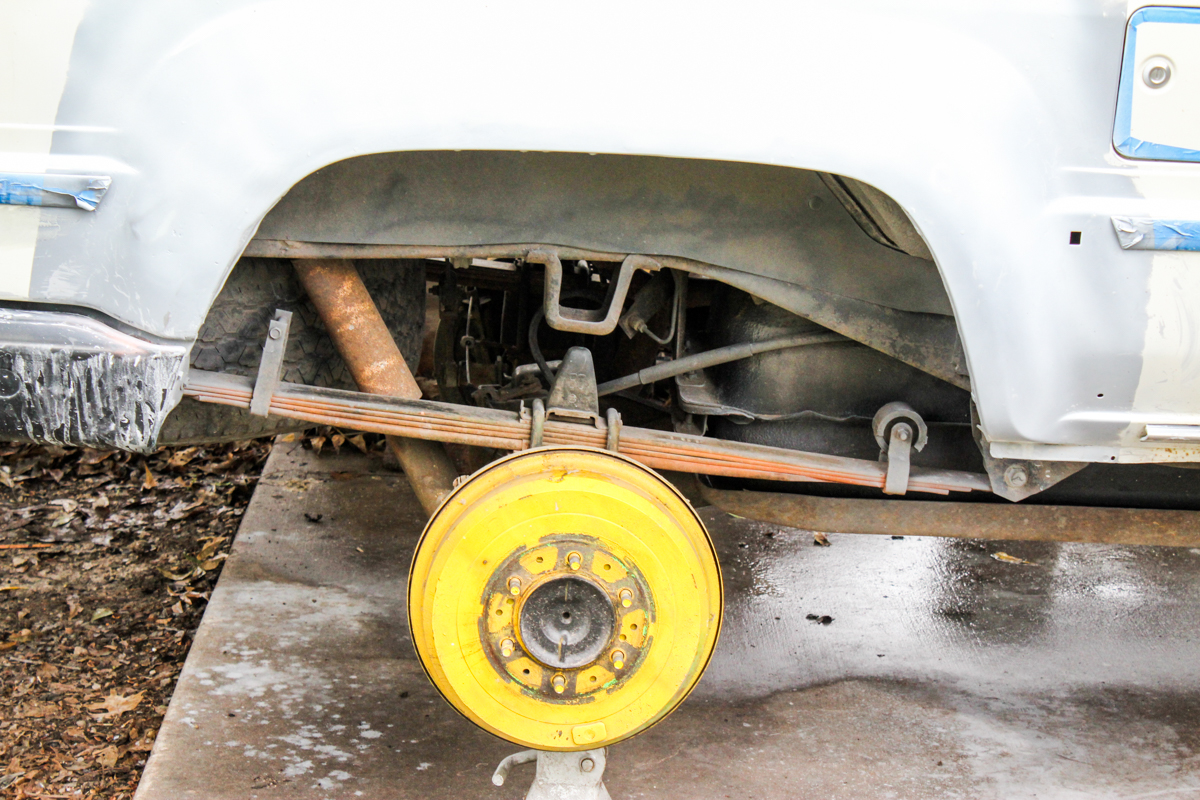
The rear suspension needs some attention. The springs are worn and cracked. The block lift is rough and flexes very little. It will be replaced with bilstein shocks, old man emu heavy springs (with bushings and ubolts), and adjustable shackles. We are trying for a slightly higher than stock lift with good ride quality that can handle the weight of our tent and rear cargo area and still flex offroad.
We are planning to get most of this done within the month to be ready for Expo East in Ashville, then we will return for a month before heading to LaPaz to work winter seasonal jobs. This truck will be our home on wheels in Baja and throughout the West when we return to the states. Keep checking back here for updates as parts arrive and I will be posting videos to our YouTube channel of the build and the traveling.
I am not a fan of those "race car" steering wheels, but you are right, they work just fine!
Do you have any backstory on the yellow engine block, roll bar, and brake drums? They sure do stand out...
The headlight issue sounds like it is switch related, but we need to test the circuit to be sure.
Do you have a multimeter and know how to use it?
Are you planning on keeping the stock headlights or do you plan to upgrade?
There are headlight harness improvements / upgrades that many people do when upgrading the headlights themselves which is usually necessary when using more power-hungry bulbs than factory.
Our resident electrical guru, RAD4Runner, created a headlight troubleshooting thread here that explains how the headlight circuits work, how to test the circuits, and some improvements / upgrades that you can do to make the circuit better.
I would first find where the existing problem is and what is causing the problem first before doing any upgrades.
For what it's worth, my truck still has the factory wiring and is working fine, but I only have the standard replacement sealed beam, low power headlights.
I am not a fan of those "race car" steering wheels, but you are right, they work just fine!
I am not either, but since this is a budget build, it can wait. I have a blue interior steering wheel but something tells me that it will clash with the brown interior worse than the Grant will.
Do you have any backstory on the yellow engine block, roll bar, and brake drums? They sure do stand out...
No idea! The previous owner just drove it and parked it, it was the owner before that that lifted it, put yellow "Toyota" decals down the side, and painted the block and brakes. It is interesting to say the least, but not surprising for rural Oklahoma.
The headlight issue sounds like it is switch related, but we need to test the circuit to be sure.
Do you have a multimeter and know how to use it?
Are you planning on keeping the stock headlights or do you plan to upgrade?
There are headlight harness improvements / upgrades that many people do when upgrading the headlights themselves which is usually necessary when using more power-hungry bulbs than factory.
Our resident electrical guru, RAD4Runner, created a headlight troubleshooting thread here that explains how the headlight circuits work, how to test the circuits, and some improvements / upgrades that you can do to make the circuit better.
I would first find where the existing problem is and what is causing the problem first before doing any upgrades.
For what it's worth, my truck still has the factory wiring and is working fine, but I only have the standard replacement sealed beam, low power headlights.
Thanks for the guide, I will get started soon! We have no plans to upgrade headlights as we will be adding a small lightbar when we pick up the bumper and it will make it look like there are no headlights on. We drove last night in the dark and the headlights are sufficient, much better than our 2000 Chevy school bus!
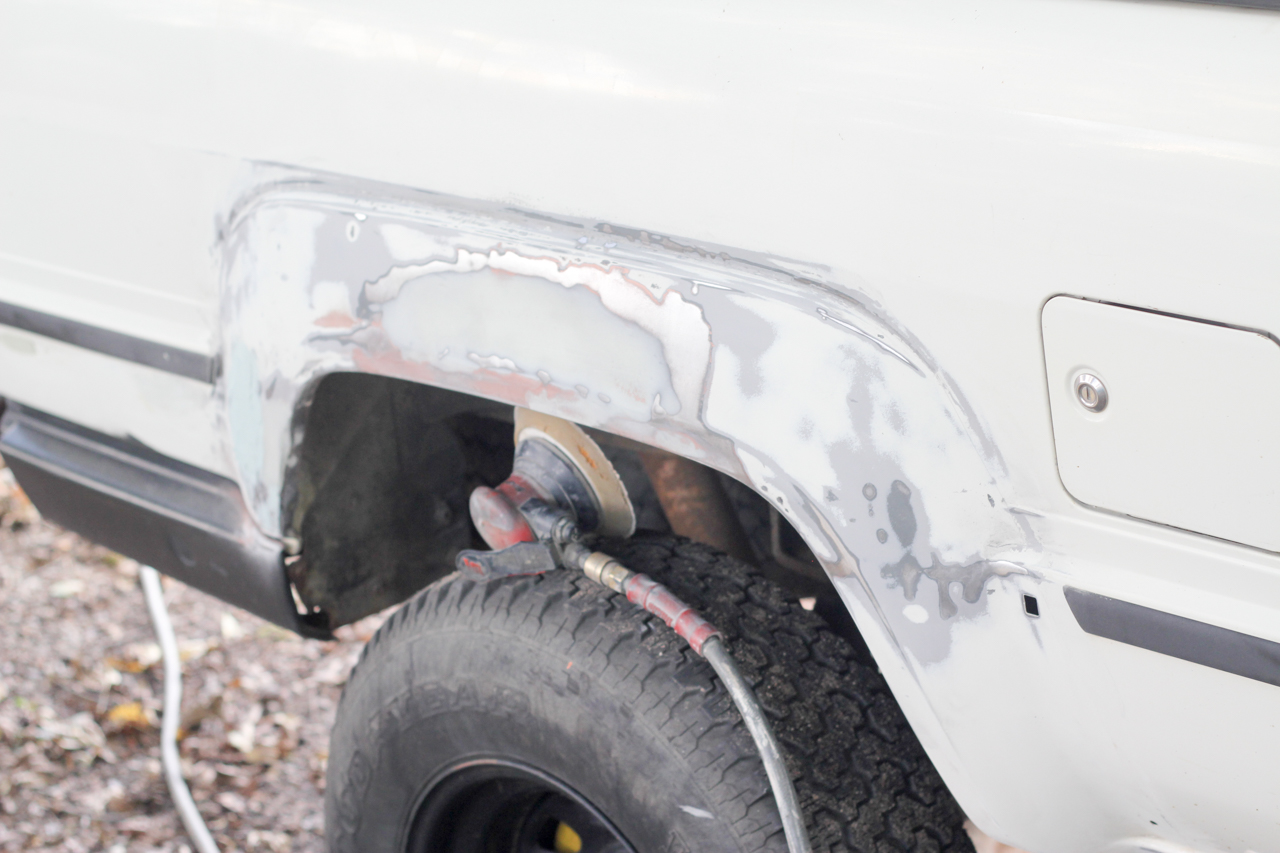
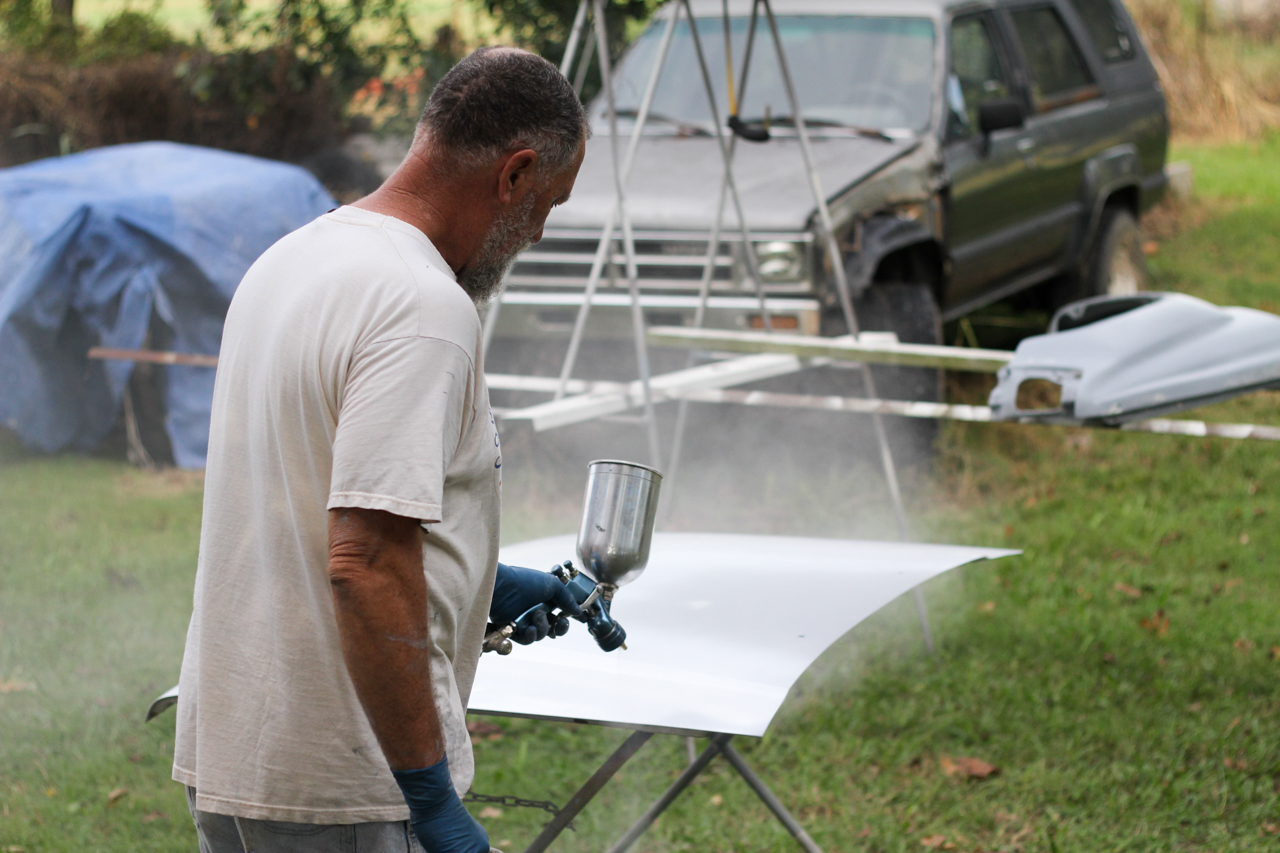
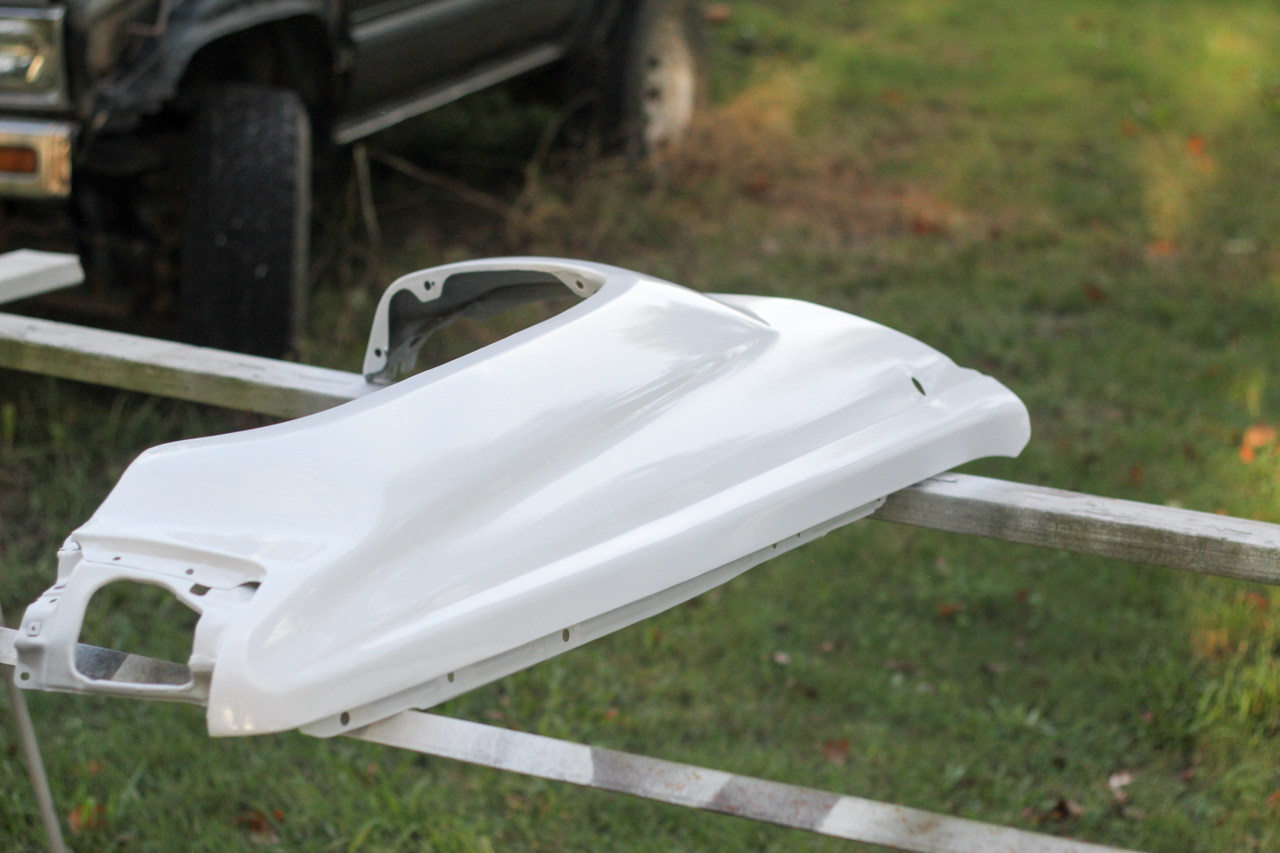
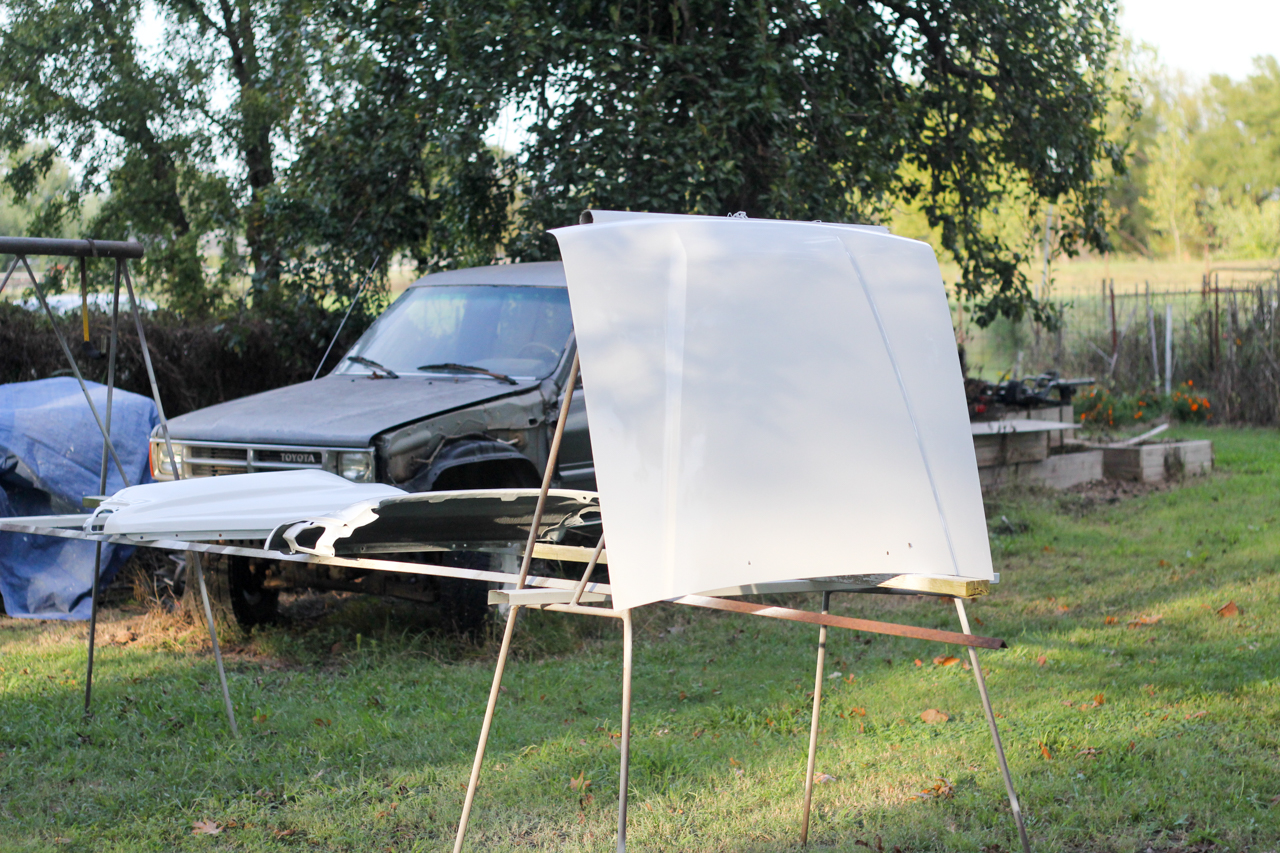
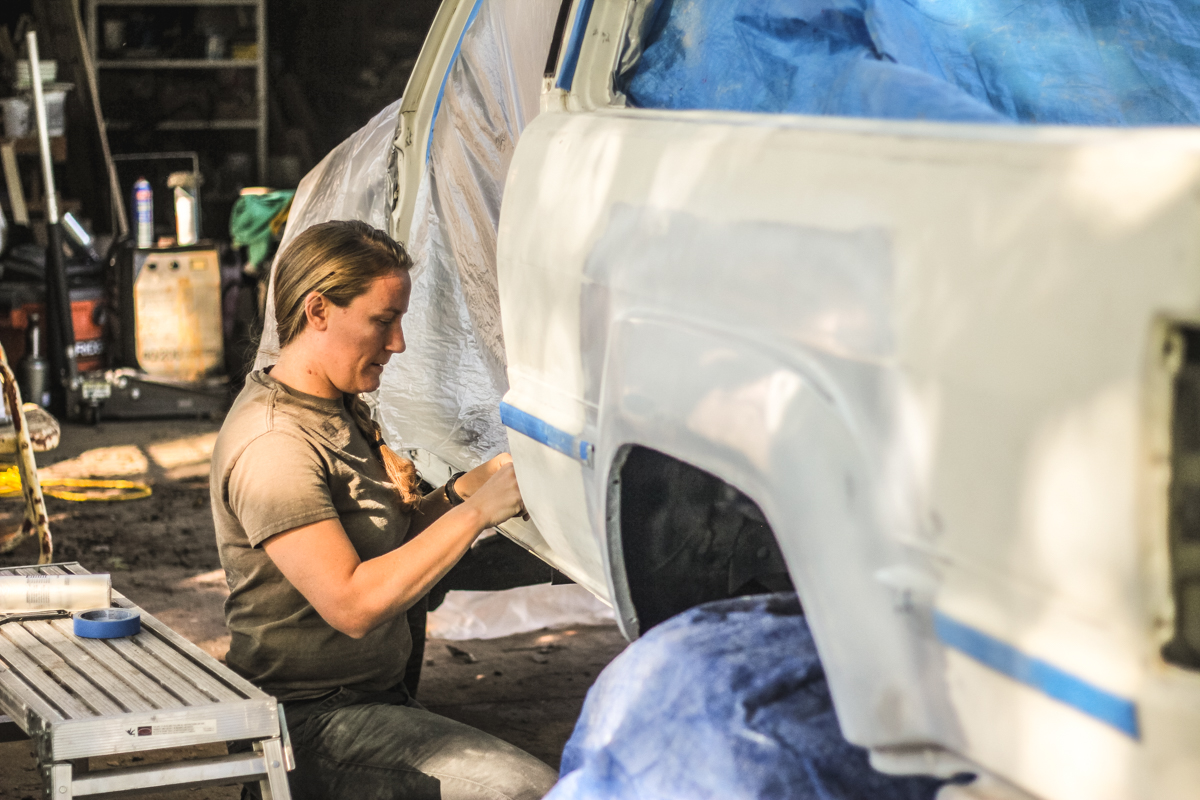
We started on some body work and paint for the 4Runner this week. The plan was to repair and prep the fenders, quarters, hood cowl and hood and get them painted to make sure we liked the color and that our backyard paint booth was going to work. Prep was pretty simple as this won't be a show truck, it will be used and driven through tree trails and have plenty of pinstripes. I understand that there are still small dings that we could have put hours of tedious work into, but that's just not our style of build. Function all the way.
We used a fair amount of filler on the rear quarters and had to weld in some new metal on the fenders. All in all, the body work hasn't been that bad for this old of a rig and considering the treatment from the previous owner, we are lucky that the body wasn't worse.
I didn't get photos of the primer going on a couple of days ago. The weather has been crazy in NE Oklahoma for the past few weeks, so when it isn't raining, you paint.
My Father in Law is the painter, I am the assistant, and my wife is the supervisor.
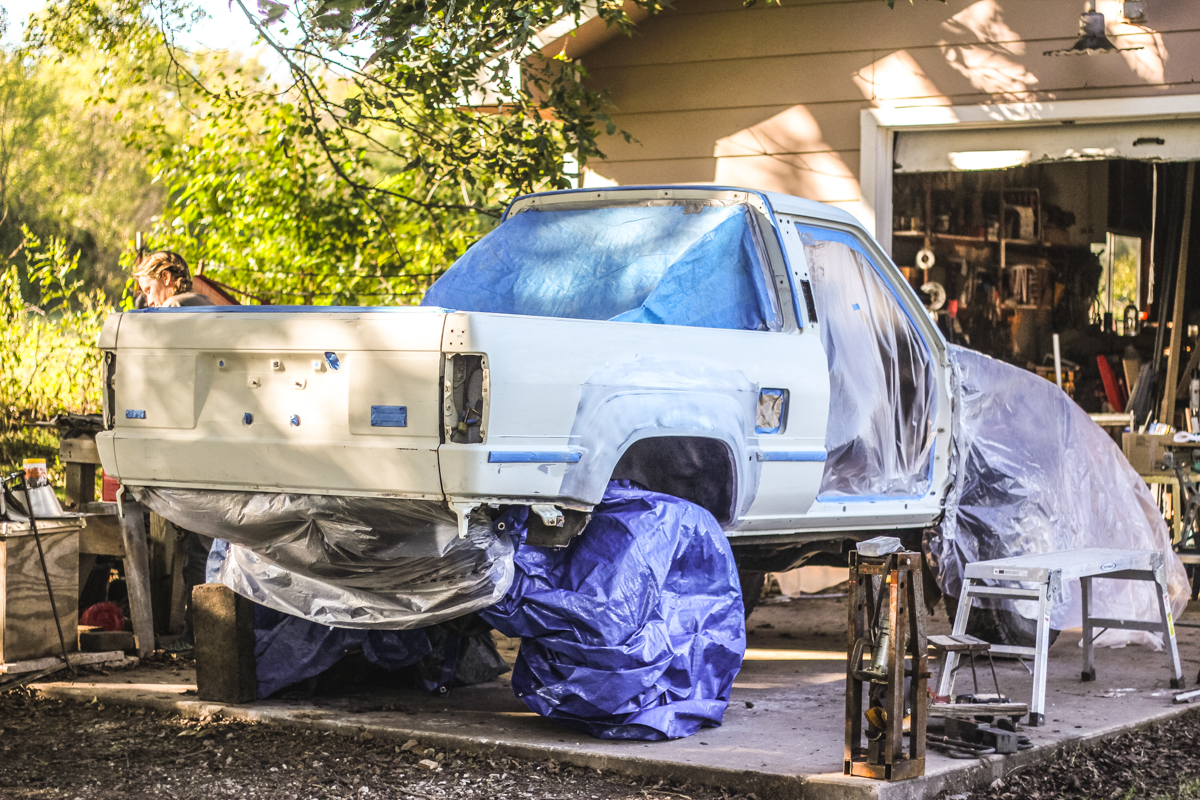
In this photo you can see one of the spare 1st gens in the yard. It will eventually be a build for my Father in Law, but it needs some work and maybe a swap. Also you can see the roof top tent under the tarp to the left...very soon!
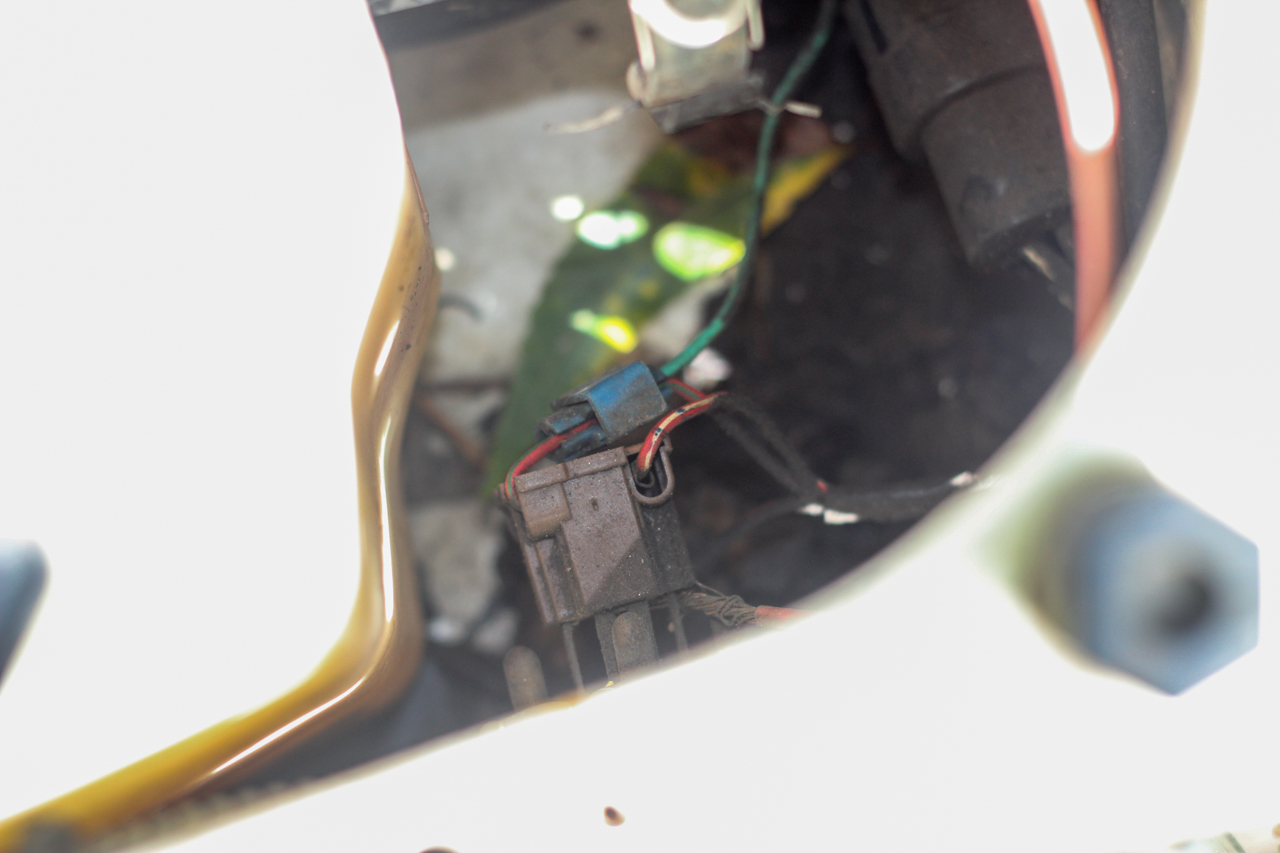
And that is how she sits for now. We will let the paint cure and re-install the front end in a couple of days. In the meantime I got started yanking out all of the hack-job wiring that the previous owner added. It was a mess to say the least. The hot-wire coming off of the headlight was for the aftermarket tachometer's illumination wire. There are useless grounds everywhere and a thrown together fog light harness up front that will be gone soon as well. I bet I pulled 30 feet of wire out of the truck in about an hour.
Plans are to re-wire everything that needs it with properly sized wire, soldered connections and heat shrink as well as adding a blue sea fuse box to keep everything organized and safe. The stereo will also need to be rewired as there is not much of a body harness left. Simple enough, just time consuming. Dual batteries are in the future and parts are on order, just trying to figure out where they will fit under the hood.
While the 4Runner is under the knife, we have parked our skoolie conversion and are bumming a vehicle for a couple of months. My uncles spare 3rd gen makes a pretty solid get-around rig. The 3.4 is so nice! We will do a 5VZ swap someday in a 1st gen.
That's all for this weekend, hopefully we will have some suspension parts here on Thursday and can wrench under the 4Runner this coming weekend.
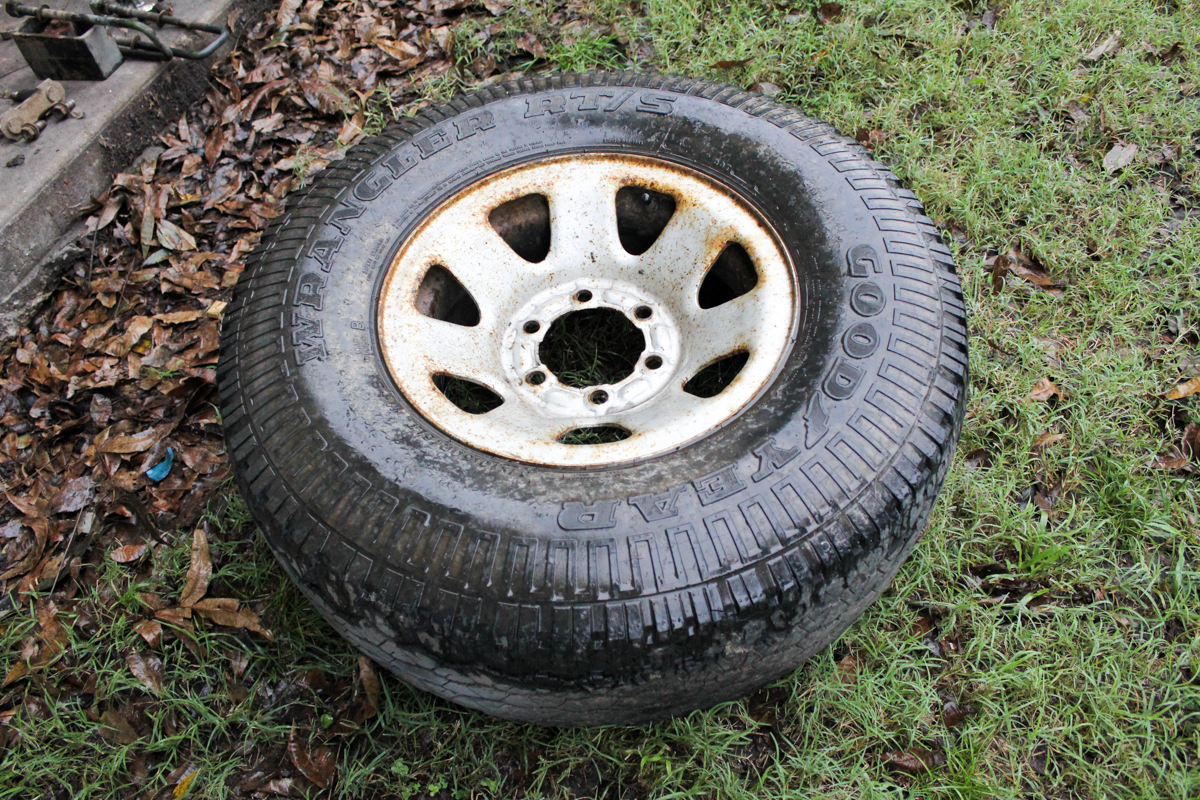
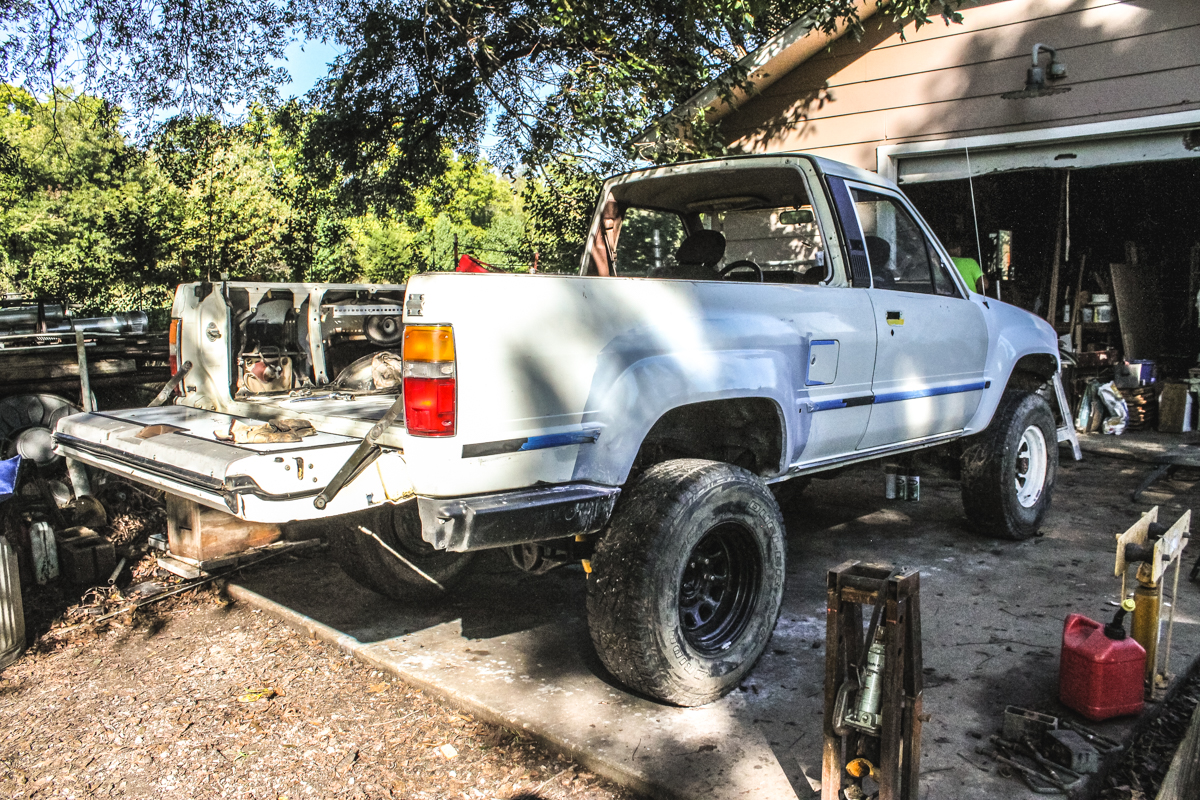
We have had really bad, rainy weather since we have started this project, so today we worked in the drizzle. The plan was to replace the front shocks and play some musical tires. Currently there are 29” street tires on it and we are switching them with some 31x10.5x15 AT’s. I really like the black wheels with the white paint, so we are switching the wheels soon to the 31’s.
There are tired shocks all around, but only one side has rusted. The driver’s side looked nearly untouched. The passenger side was rusted all over. The front was much easier than the rear.
This is the look with the 31’s, which fit perfect for our setup. We are swapping the wheels for the set that are in the first photos. These are just spare wheels that need some love, but I think that will be another project for my father in laws rig…
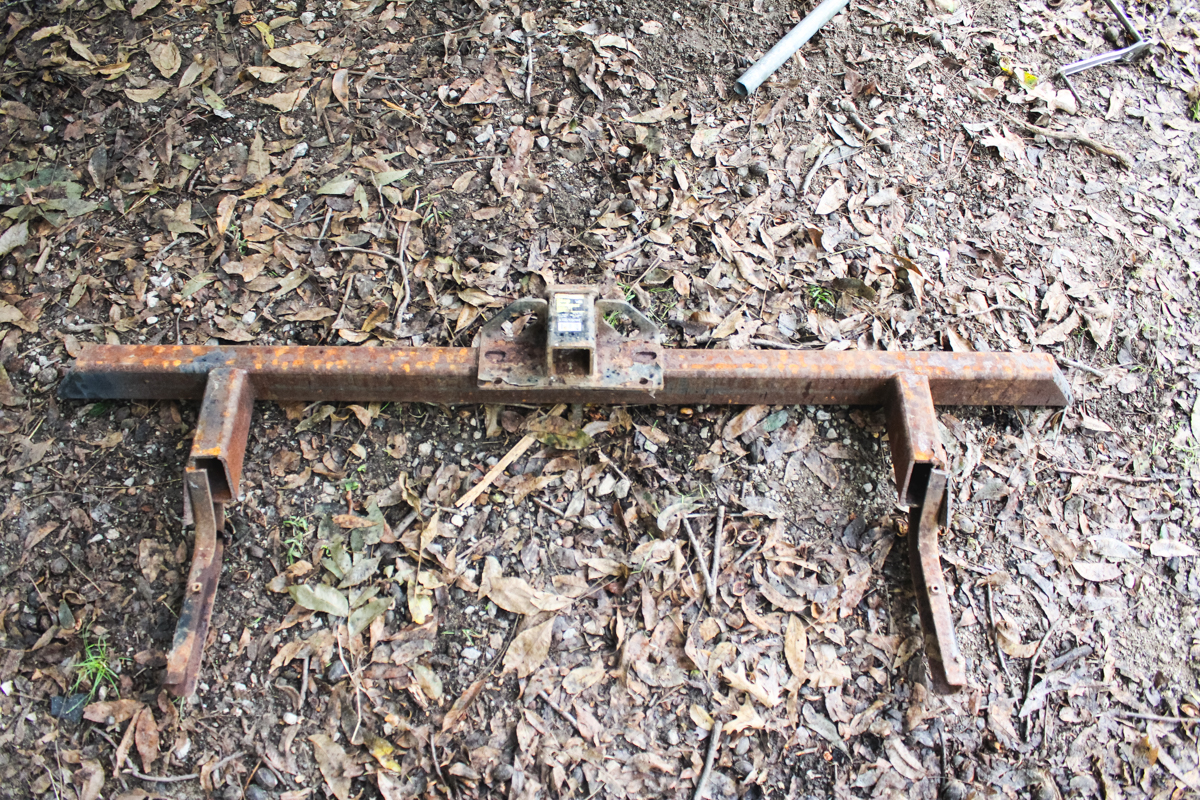
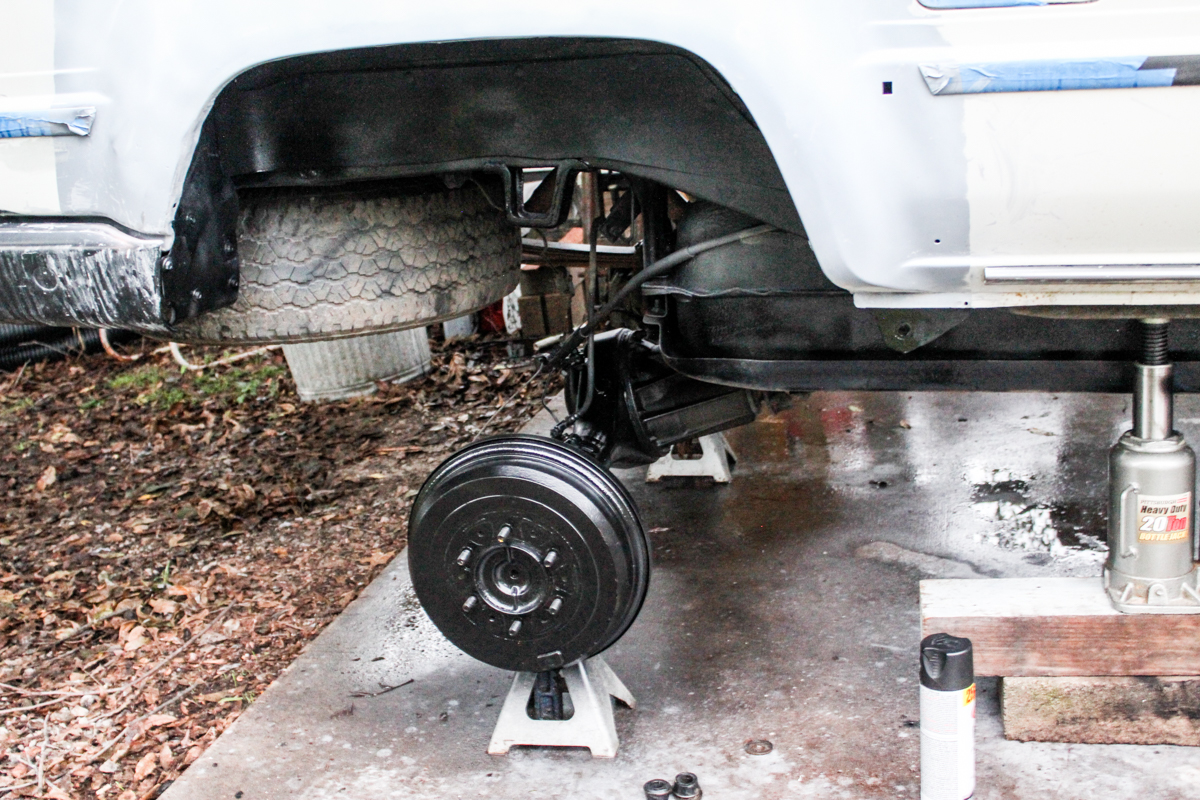
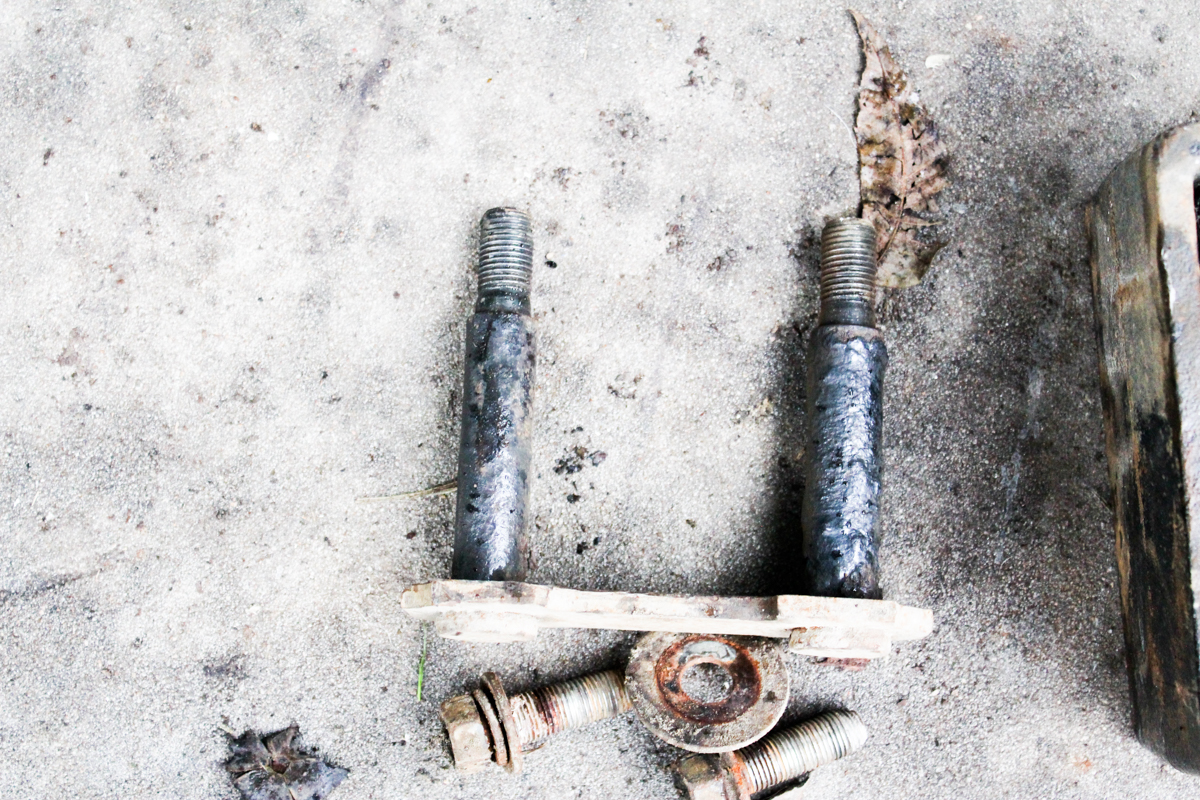
We had to pull the spare tire to get access to the shackles and to generally clean up the area under the bed. The previous own had installed a really simple rear bumper that will be the foundation for our tire carrier bumper. Unfortunately, his design did not account for removal of the spare. So off comes the bumper. It will be getting a rework to hold a spare tire and two jerry cans of fuel, so I am not worried about the paint job, for now. Notice the overspray from when he painted it after install...some people.
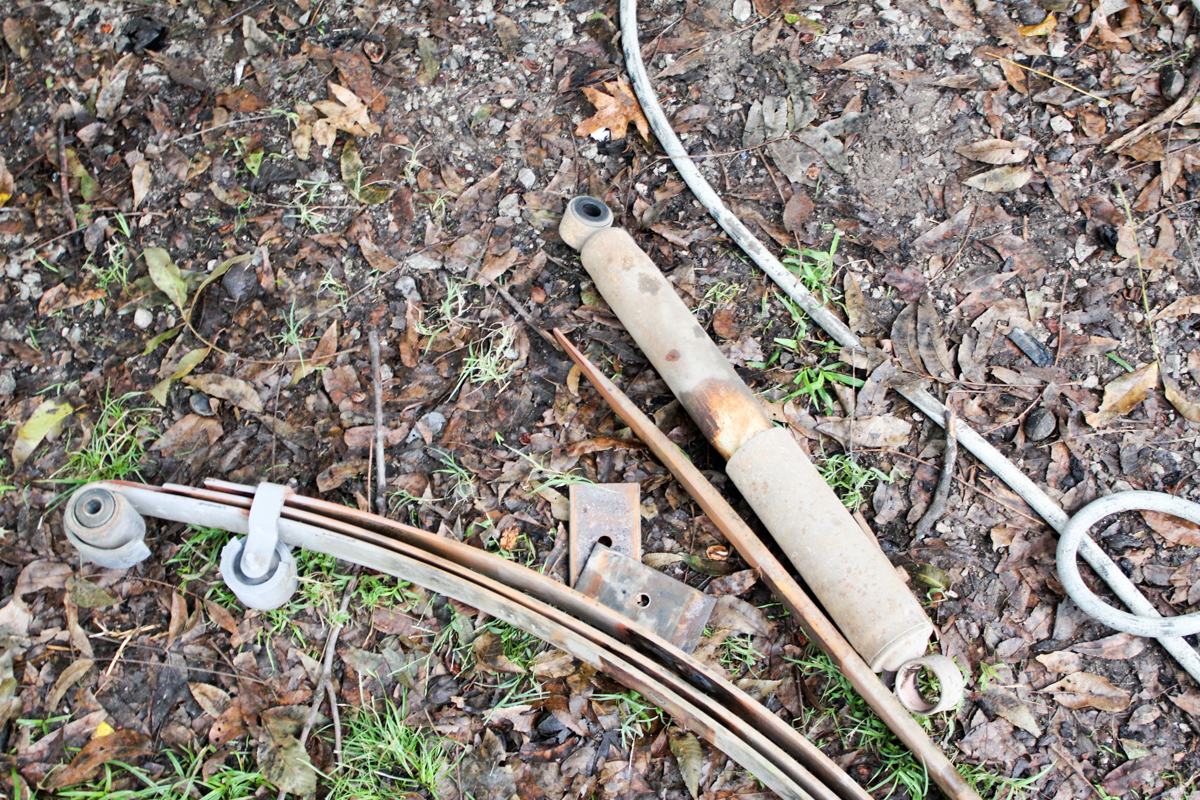
The fronts came off relatively easy and the bils went in perfect. The rears were not that easy. The shocks came off well enough, but the leaf springs and ubolts were pretty rusty and seized so I got to work with the PB Blaster and breaker bar/impact. Everything came off in one piece and then it was time for degreaser and paint to try and curb some of the surface rust. Black paint is great compared to the yellow that the PO used.
The shackles have some surface rust so I will hit it with the wire wheel and black paint before installing. I bought the bushing kit and u bolts for the leaf springs, so everything should operate like new when installed. At least it will be much better than 5-inch blocks in the back.
My order from Toyota Parts 4U was shipped from Jacksonville, FL (because ARB is in Florida?) and one of my leaf packs didn’t show up. It shows a weather delay online and UPS hasn’t responded to my e-mails. I will give it a couple of days and if I still don’t have springs, I will call Toyota of Dallas and figure something out. In the meantime, the driver’s side will stay put together in case I need to move the truck for some reason.
The spare is a 31x10.5x15 and is starting to crack and rot so we will be picking up a matching spare for the truck in the next couple of weeks before we leave. The spare will likely get a coat of black paint to match the wheels since it will be on a tire carrier.
Our spring arrived! Finally, UPS showed up with our driver's side leaf spring after waiting a week for hurricane delays. Getting the springs on was easy after doing the other side, and the shock only gave us a little bit of trouble. A word of caution on OLD MAN EMU springs for the 1st gen 4Runner: OME advertises a 2" lift, and this is more like 4" AT LEAST. My Bilstein 4600 shocks are the limiting factor in the suspension right now. We will see how it looks with 500+lbs of junk in the back, but for right now I am not thrilled with the spring height. Hopefully they ride okay and I will forget all about my truck being too high.
You can check out more in-depth photos, part numbers, and words on our most recent blog post.
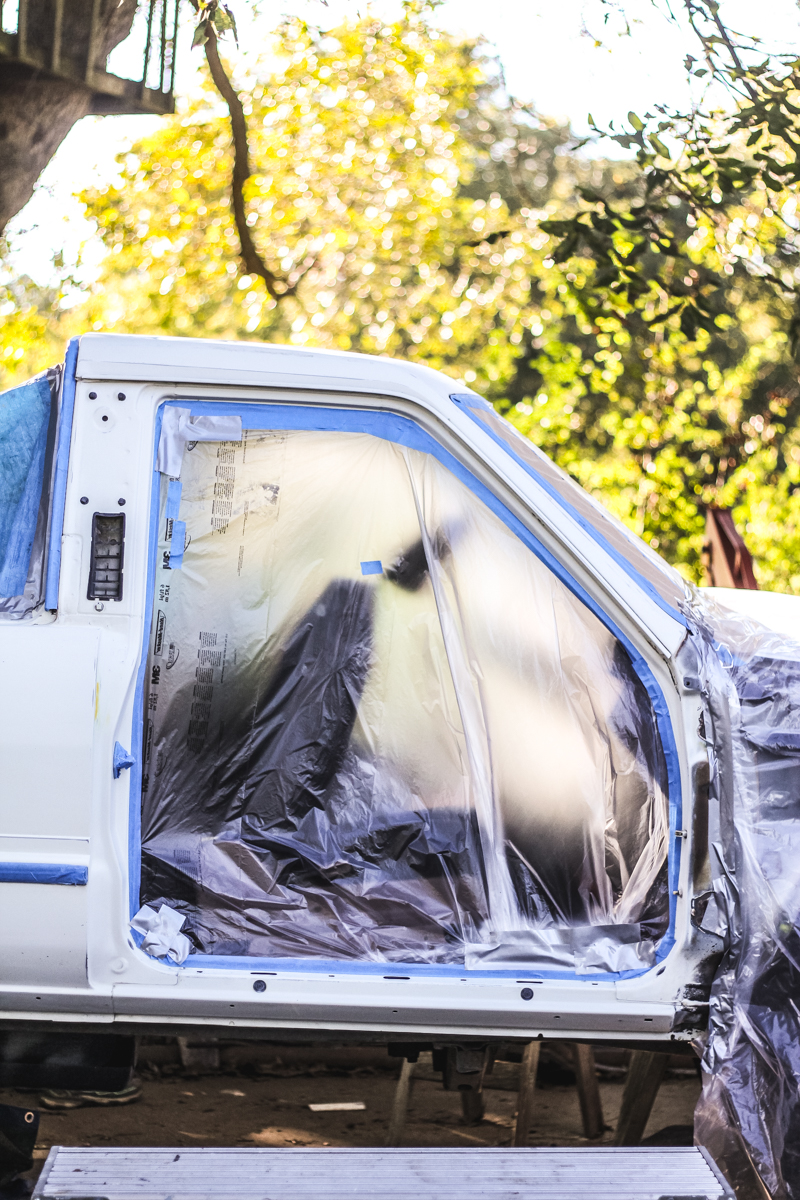
Next up on the agenda is the paint. We sanded all weekend and got everything taped up just in time for the wind to gust to 10 MPH. We made due with what we had. Will have more photos when everything is put back together in a couple of days.
A lot of pics!
The painted fender look perfect. Those yellow details're disappeairing, it's better now!
What did you spay underneath the truck?
All of the paint booth work is my Father in Law, so I can't take any credit for the spraying. Most of the prep work was me though! Ha I have done all of the rattle can work though.
All of the yellow is officially gone with the roll bar painted flat black. When I started sanding the yellow, I found neon green on top of the stock black. Silly people.
I haven't decided if I want to paint the bed black or just leave it. It will be covered up with a wooden drawer platform anyways. Decisions, decisions,...
The underside is just flat black paint. I have been experimenting with undercoating, but nothing worth mentioning.
Originally Posted by dropzone
looks like you guys are off to a great start on the new project
Long range plans for mods?
Thanks! We have been cranking on it pretty hard. Now that the paint and body is wrapping up, we should be on the final stretch before EXPO East.
Long range plans are kinda solidified. By December we will have front and rear bumpers, rear tire carrier, rear drawer for the fridge and gear/food storage, and an exo-cage style roof rack. We will also have the dual battery and inverter installed before Christmas as well. The plan is to be fully self sufficient in the rig "between the Expo's". We will spend the winter in Baja and return to Arizona in time for Expo West '19. Once tires are worn down, we will opt for 32's or 33's, but that's a ways down the road.
Cool project, following!
i have long term goals of making my 86 a distance travel/camping rig as well! It's ended up taking the backburback because of my full-time rig
Cool skoolie build, my wife and i full-time in an 83 airstream class-A Motorhome, doing a schoolie or van conversion sounds like a lot of fun, we'll hopefully give it a try someday
http://www.airforums.com/forums/f311/magnet18s-1983-310-a-178802.html
Cool project, following!
i have long term goals of making my 86 a distance travel/camping rig as well! It's ended up taking the backburback because of my full-time rig
Cool skoolie build, my wife and i full-time in an 83 airstream class-A Motorhome, doing a schoolie or van conversion sounds like a lot of fun, we'll hopefully give it a try someday http://www.airforums.com/forums/f311...-a-178802.html
Thanks for the kind words!
My wife and I have been full-time in the bus since April and are loving it so far. Your Airstream is slick, I love that model of RV! Converting the skoolie is one of the most fun things we have done together and we will likely convert another one someday.
Head on over to www.okienomads.com and eat your heart out. We have taken that bus all over the West and even some places that it shouldn't have gone. I love that thing!
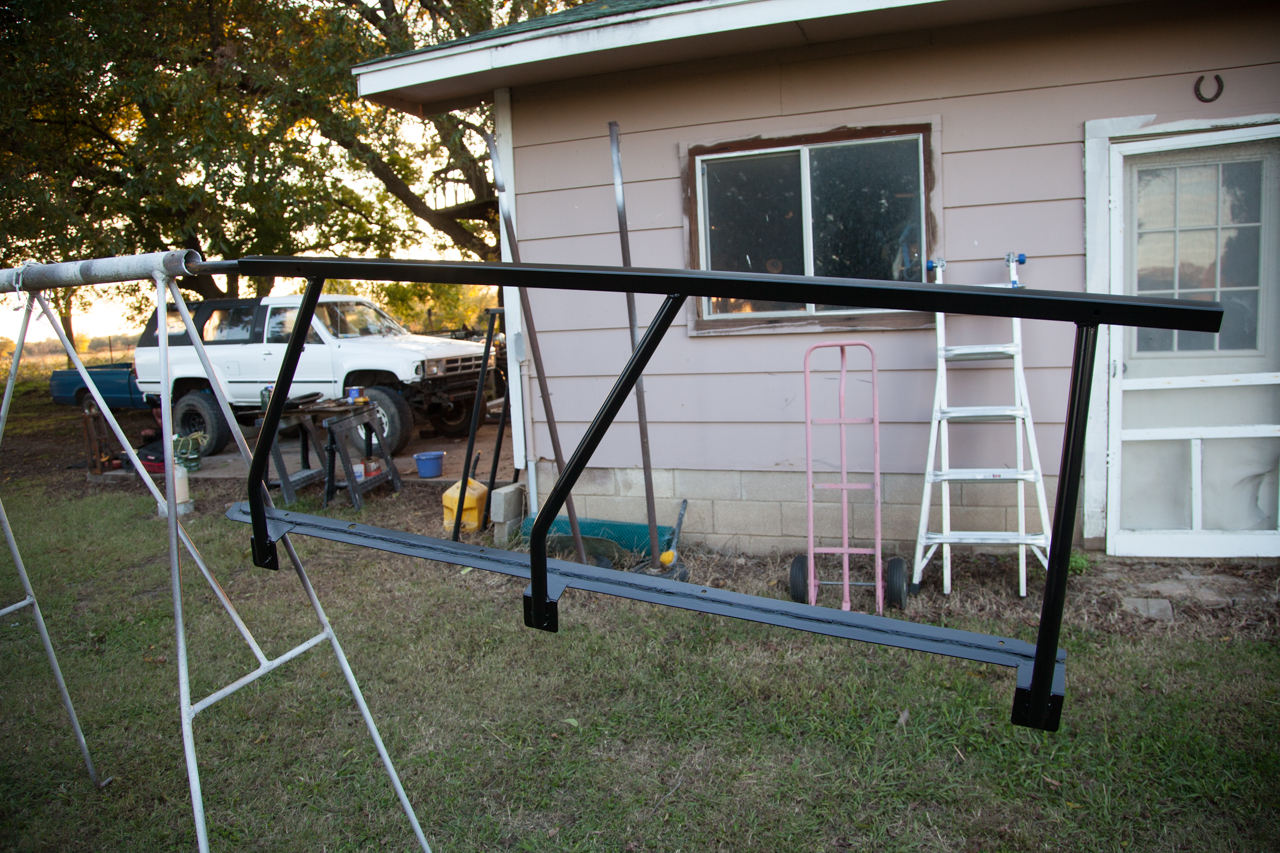
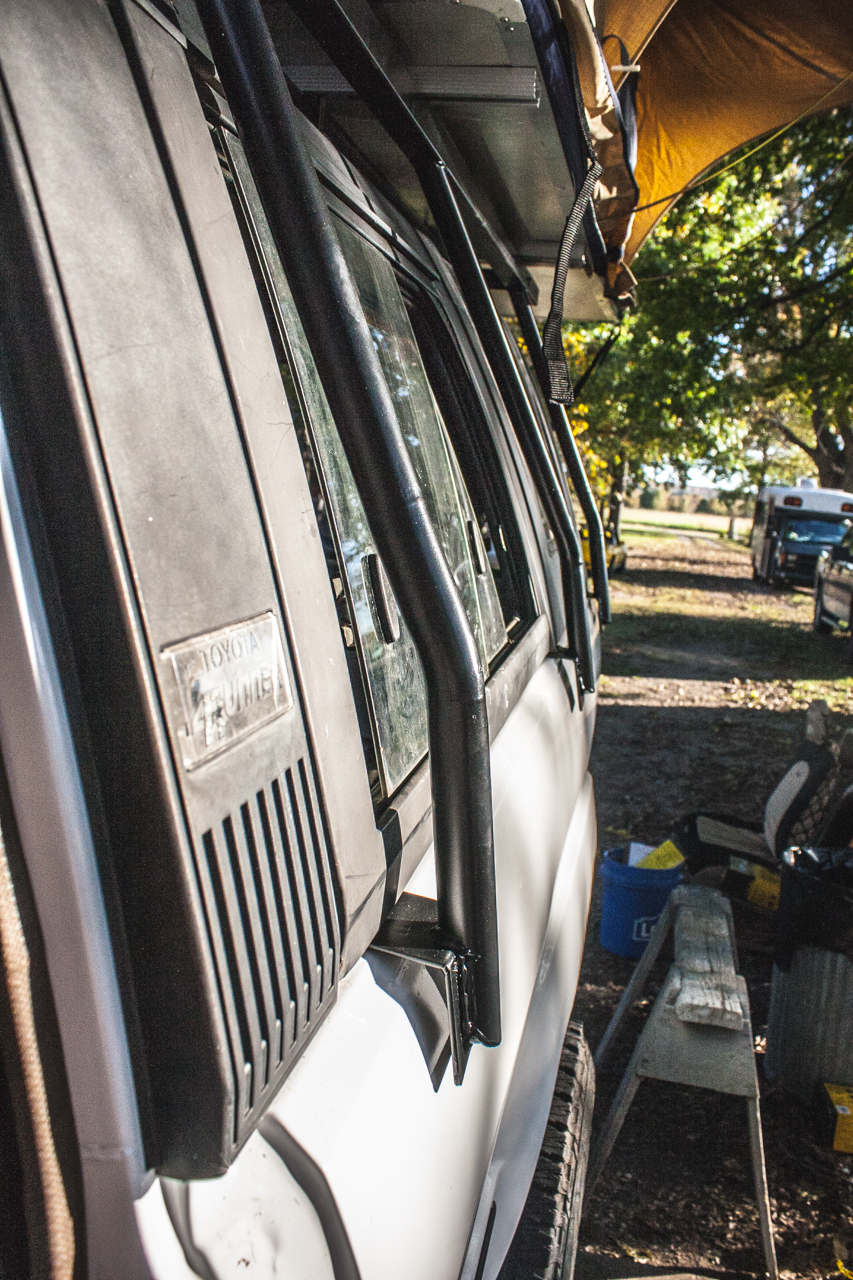
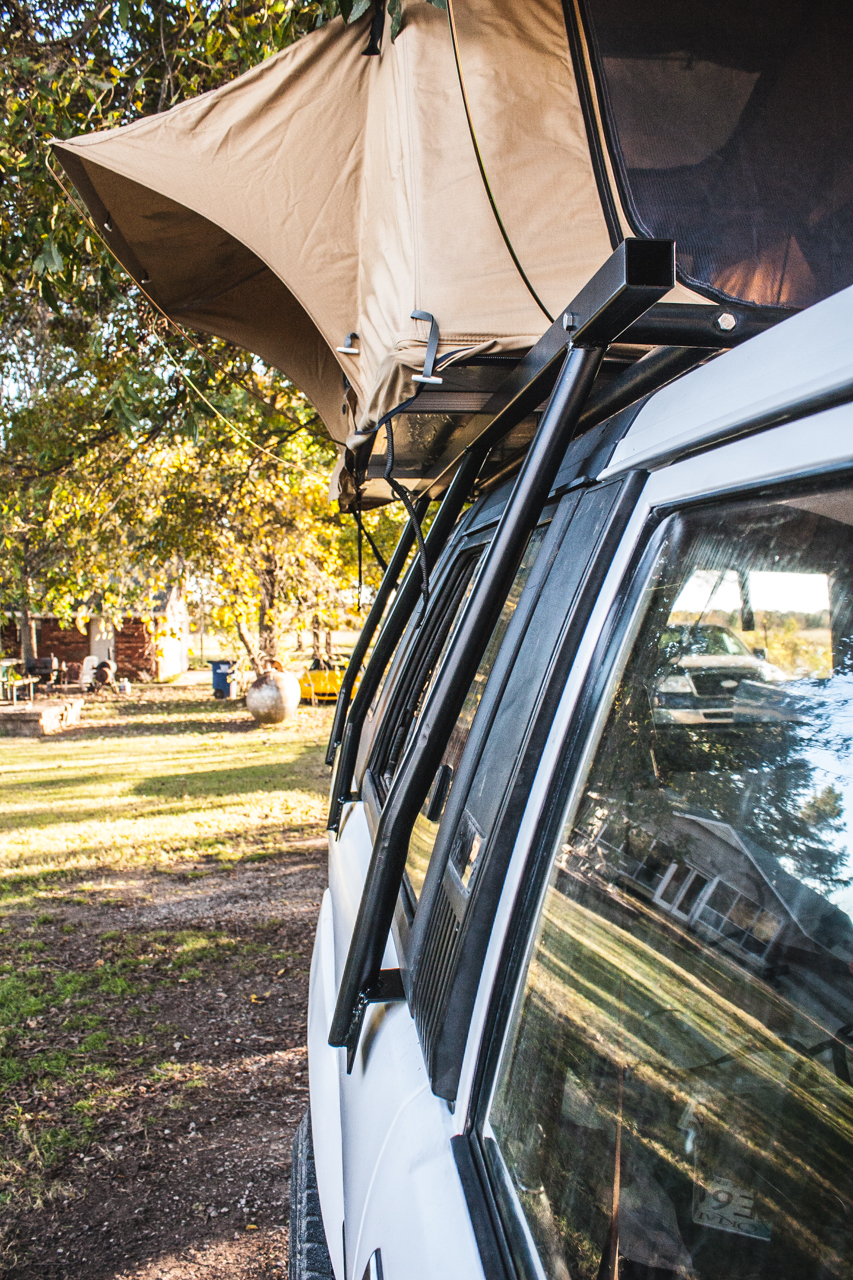
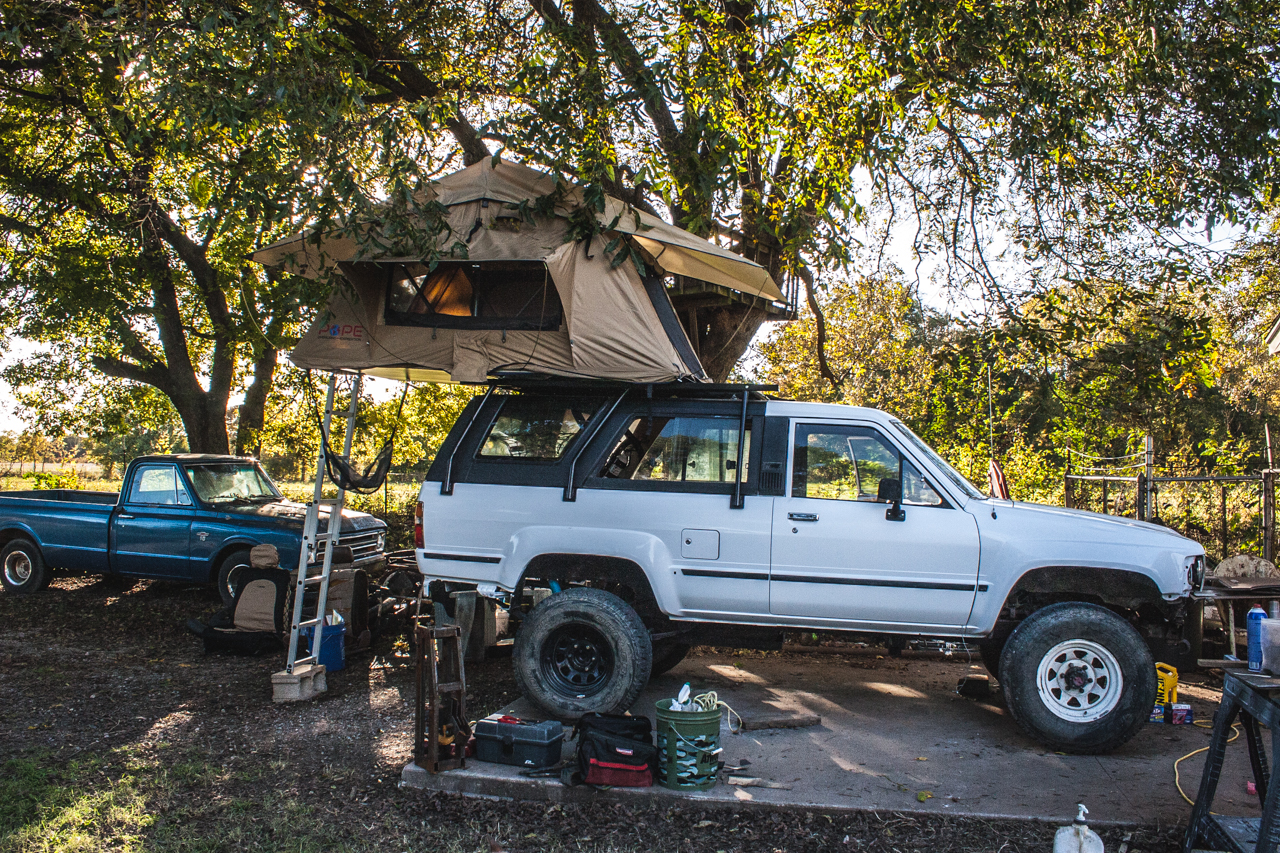
We have been working on a solution that would allow us to run a roof top tent with two adults in it on the 4Runner without worrying about the fiberglass cracking or having issues. I've seen a lot of rigs running simple baskets that are drilled into the fiberglass and more guys that have run gutter mounts with standard bars, but then the weakness becomes the fiberglass gutters. The truck came installed with a NWOR (Northwest Off-Road) rack and part of that rack will survive in our new creation.
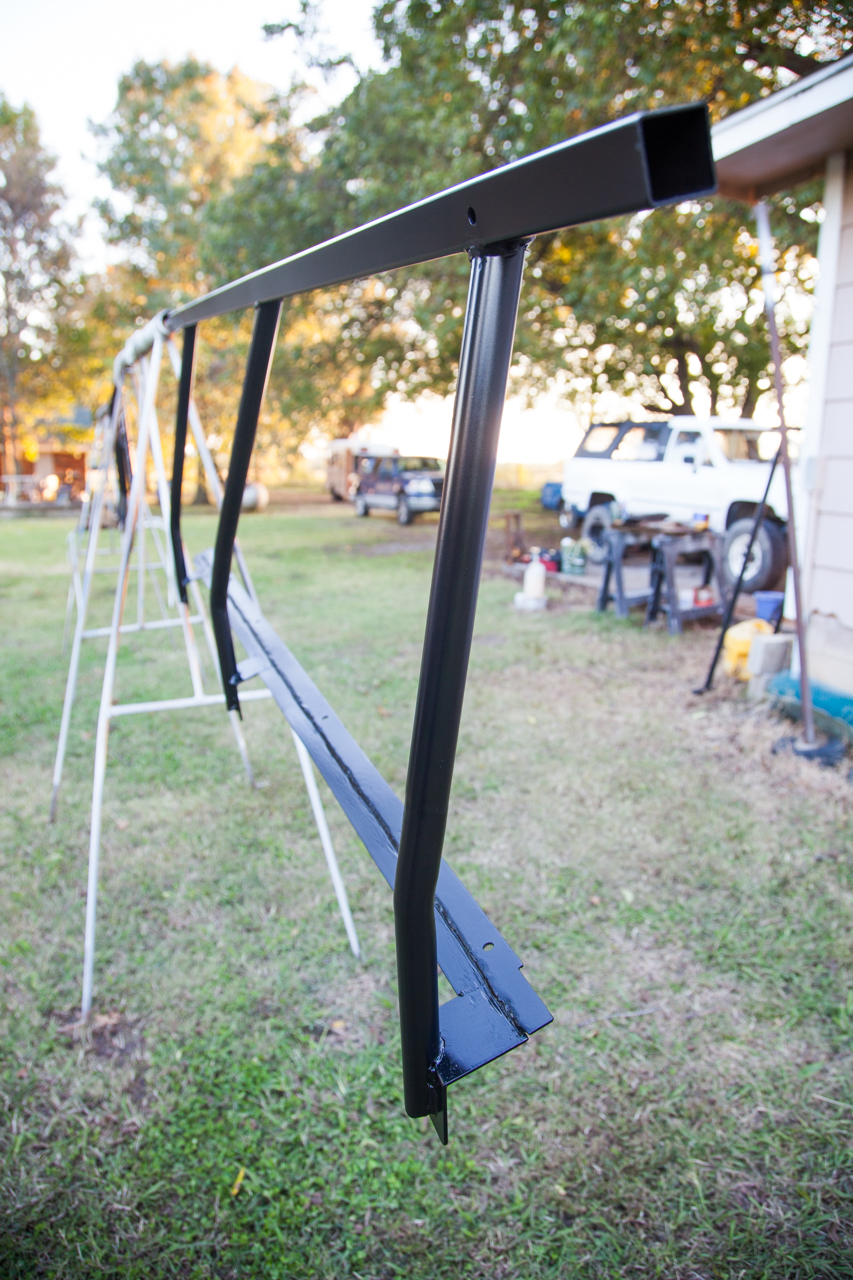
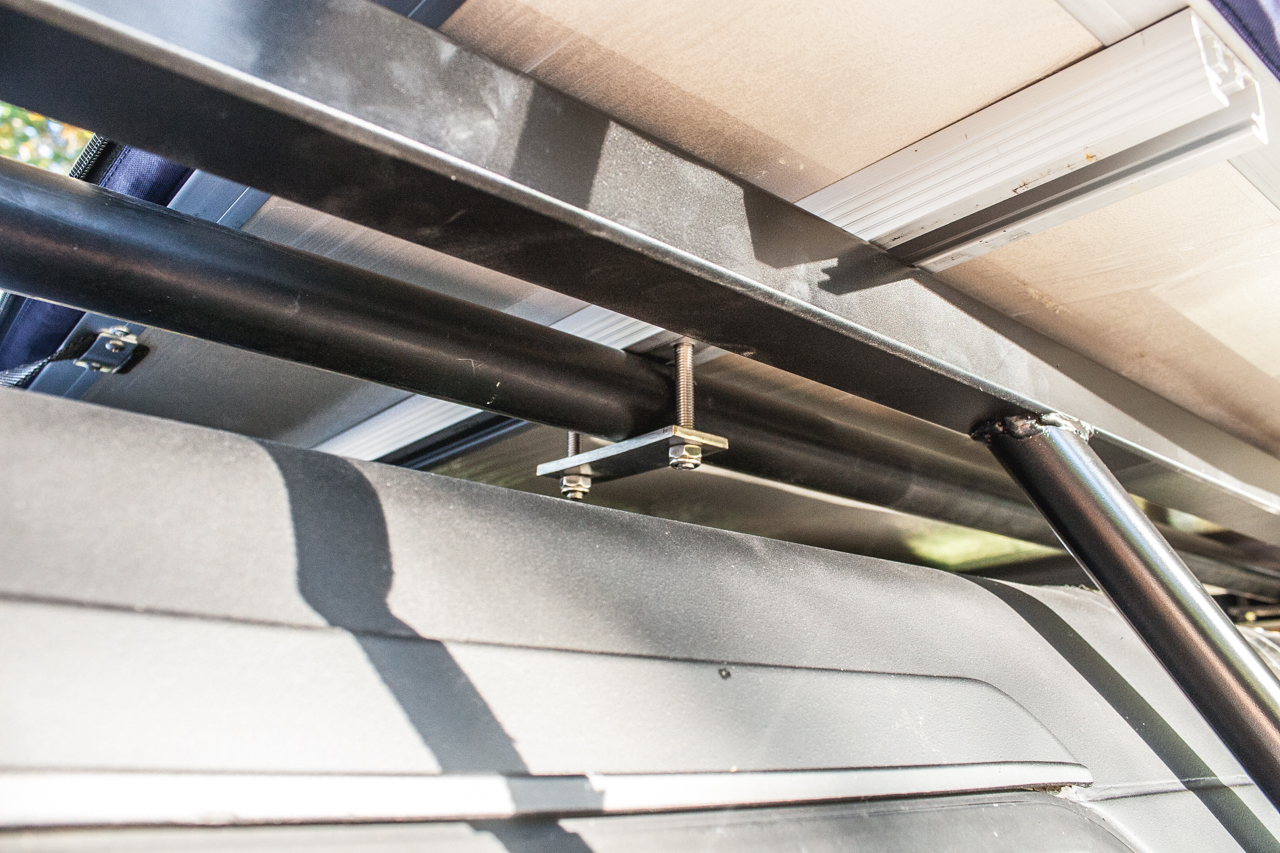
We decided to design the rack to rest on the bedsides of the truck instead of the topper. My father-in-law got busy drawing up plans and tacked some welds together. This is what we ended up with.
My father in law is an engineer by trade and an all around handyman , so a lot of the welding is mostly self taught. I am really happy with how it turned out and was even more excited to get it on and see how it works. We added some camper tape to the underside and set it on the truck.
The rack wasn't on for a couple of minutes before we threw our roof top tent up top. We neglected to remember the concrete slab that the truck has been parked on and needed a cinder block to gain access to the RTT.
We kept the original roof tubing from the NWOR rack and tied it into the new stuff to make a really sturdy and solid rack. Still hoping the rear springs settle a bit so we don't have to climb so high at night.
I got wheels swapped today on the front so everything matches now. Will post photos tomorrow if I get time.
 10-03-2018, 05:08 PM