When you click on links to various merchants on this site and make a purchase, this can result in this site earning a commission. Affiliate programs and affiliations include, but are not limited to, the eBay Partner Network.
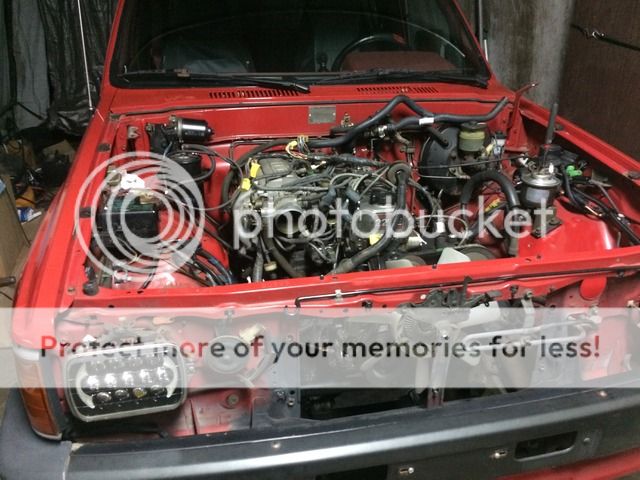
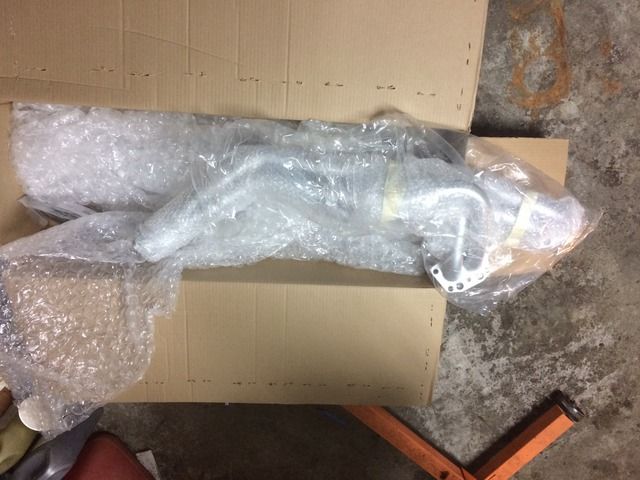
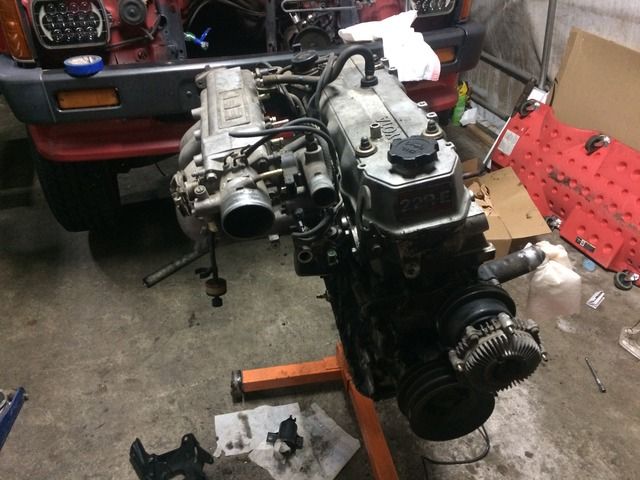
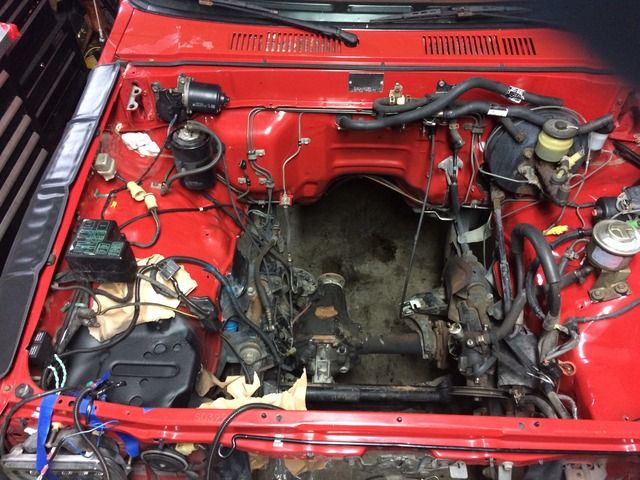
Had plans to yank this motor out last year and today was the day to do it. I ran into a problem, i rounded a blot on the exhuast off on the down pipe. I might cut it off the or see if i can remove the whole cat. if the bolt will work for me :3 Ive got a lot of stuff to install on this 4runner and a new motor coming in November. Will redue brakes and go to rotors on the rear if i can find wut i need to work with the stock wheels. Moar pics coming to.
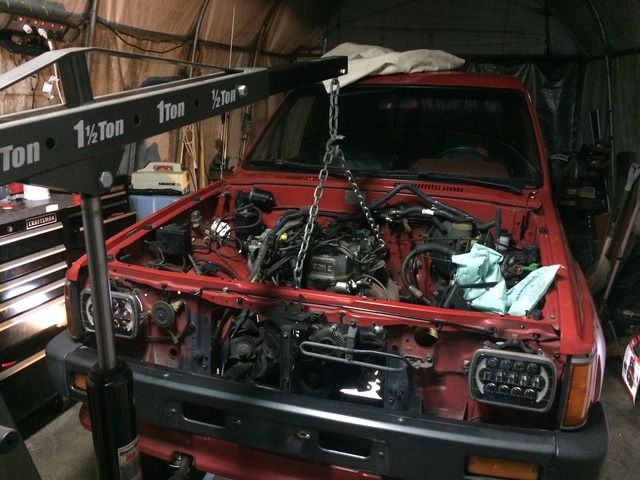
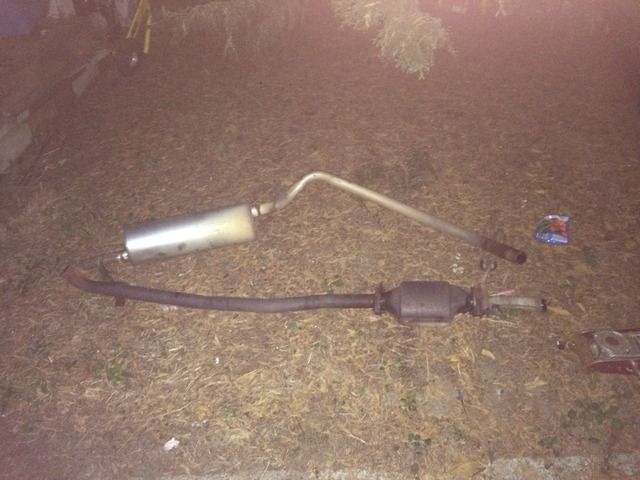
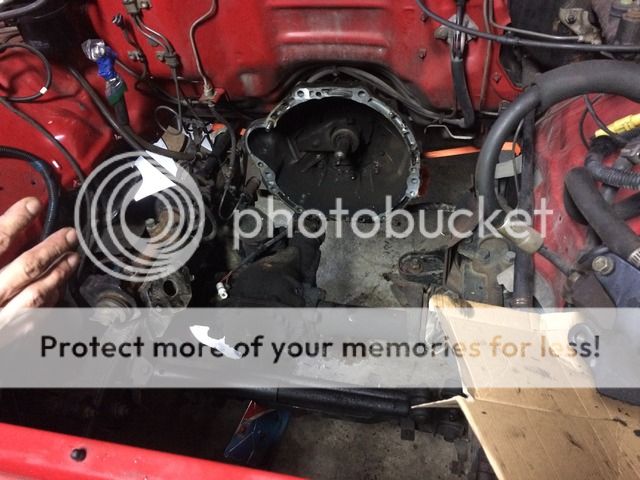
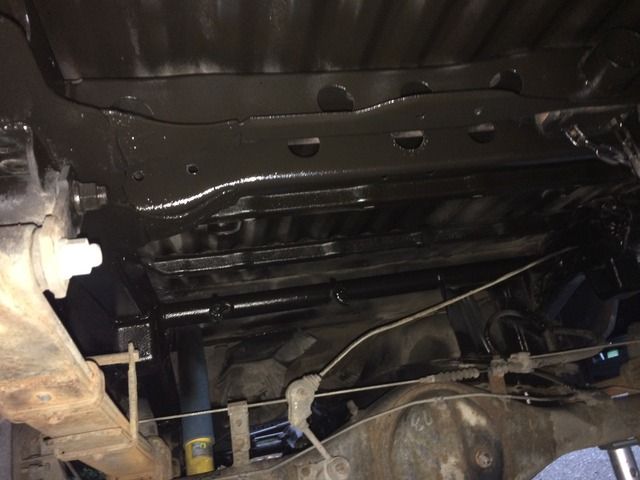
Well i seem to have a problem of getting the motor split from the transmission. All the bolts have been removed but might be the angle its at. Its like glued on good. The exhaust is completely gutted out and going with an aftermarket one with a new header and someone who had this cut the header in to two pieces. I'm not sure if its stocked like that. I have tons of new parts two add on the vehicle for the time being once i get this thing pull out, transmissions is going to.
Enjoying your thread so far!
I like a handy 2x4 between the engine block and firewall for leverage.
Keeps the hands clear.
I'd try lifting the trans a bit with the jack as you pull the engine up with the cherry picker, then encourage the separation with the 2x4.
But first, reconfirm no remaining bolts!
Thank you. i will try that good sir. All bolts are off. i decide i am pulling the transmission for a rebuild as well.
What you need is an engine leveler hooked at all four corners it makes removal trivial.. Chain is old school. Hit up the local harbor freight or part store it's cheaper than ordering pizza and will make you laugh at how fast they come apart..
What you need is an engine leveler hooked at all four corners it makes removal trivial.. Chain is old school. Hit up the local harbor freight or part store it's cheaper than ordering pizza and will make you laugh at how fast they come apart..
Will go back in like butter also.
i will remember when i go to harbor freight again.
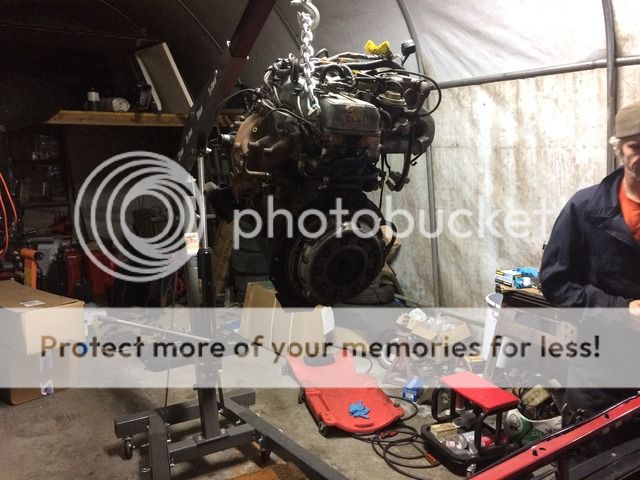
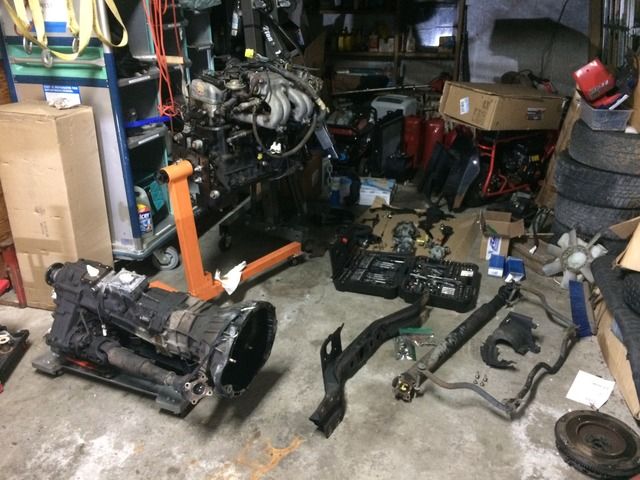
So i got the motor pulled with my friend to help and went easier then i thought when i put a strap around me and each side of the engine worked great..
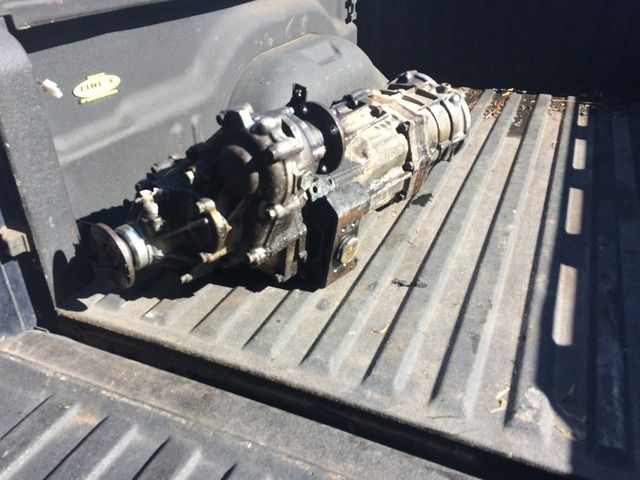
Took my time on the transmission and had to raise the truck in order to roll it out on the tranny lift.
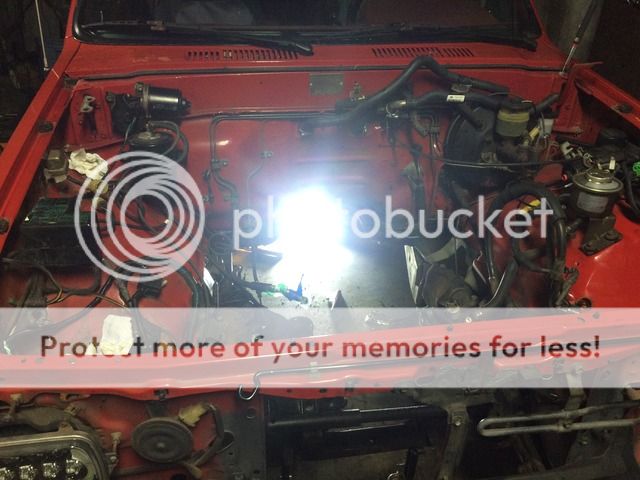
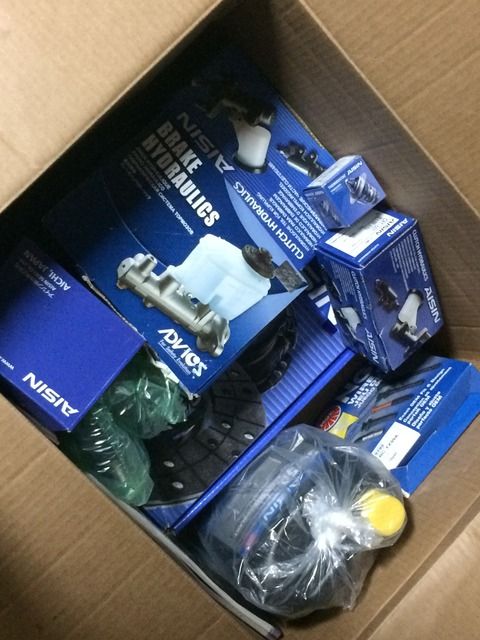
At this point im going to clean out the engine bay and repaint some surface rust on some spots. Tranny will be going out for a rebuild today after i yank the bellhousing and drain the fluids. Going to be cleaning all the mud/dirt off the rest of these parts i pulled. oh and new parts :3
Go to the dollar store and get a couple of these, spray the transmission/t-case down, let soak for no longer than 5 minutes and then thoroughly wash off (preferably with a powerwasher.) It will get 99% of that crud off without a lot of scrubbing.
I didn't have the overhead clearance to use an engine leveler when I did mine so I went old school with chains and removing the engine was difficult when it came to breaking the block free from the input shaft on the trans but I jacked up the transmission a few inches then got a good angle and the engine just slid right off. Putting the engine back in we had issues lining up the splines on the input shaft to the clutch disk until I adjusted the chain to give the engine a bit more tilt leaning down in the back then I jacked up the trans a couple of inches again and everything mated smoothly. An engine leveler would have made it a piece of cake but my truck was in a car port and I only had limited clearance for the hoist to rise. that extra 10-12" that a leveler would have added in the mix would have caused my hoist to hit the roof of the car port and since my car port was slightly on a slope and the truck was backed in there wasn't any way for me to temporarily roll the truck out of the port to gain more clearance. It was what it was but just wanted to mention that if you don't have a leveler then setting up the engine so it's tilting backward (flywheel side tilting down about 15 degrees or so) helped when trying to get the input shaft mated with the clutch plate and pilot bearing. I used one of these which has the capability to level the engine how you want it but it requires a few attempts to get it right, meaning you gotta hoist the engine back out, take the load off the chain, then adjust and re-try. https://www.oreillyauto.com/detail/b...w41032/4614284
Last edited by outdoorjunky; 09-14-2018 at 08:56 AM.
Still have to get it back in so not to bad of a hijack..
The two point chain connection also makes the engine want to twist the rear end towards the vehicle's right side.
On my engine hoist I've shortened the chain to just the hook sticking out of the end, it's not in the little slot cut hole they provide because you can only thread a single like into it that way.
I wasnt trying to hijack this thread since he still needs to get the engine back in and he has chains which technically will work with some patience. I pulled the factory hangers from my head then went down to ace and got longer grade 8 bolts that fit those hanger holes, ran the bolts through a few 10mm washers and a couple 12mm washers then bolted up the chain links to the head, bypassing the drilled out fittings that come on the end of the chains and hoisted it in to the engine bay. It worked quite well after getting the right tilt on the engine. I needed to do it that way to get every bit of clearance but regardless of the clearance issues it worked so I thought I�d share that.
I'm just noticing your photos are hosted on photo bucket, because one if them turned into that stupid cat!
Please consider using the free storage provided on the yotatech server. This means your thread will still have photos so long as YT exists and never turn into a page full of cats or photo bucket advertising as tends to happen.
Got back today to work on the 4runner and finished stripping the motor to send it off. Transmissions is at the shop for a rebuild and a hot tank. Will be scrubbing the engine bay/tunnel tomorrow completely :3. Have some pics.
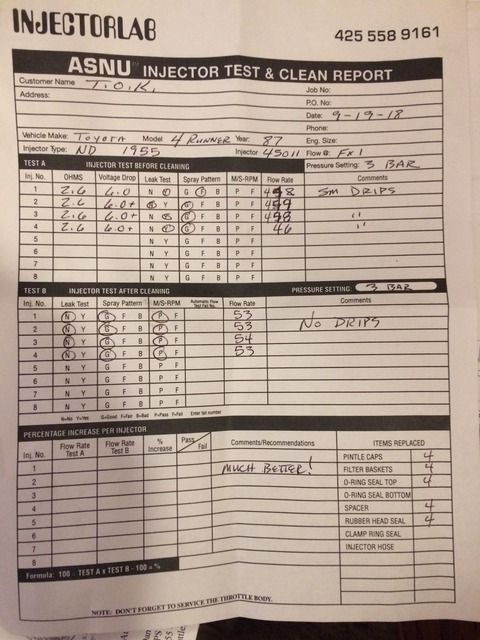
Cleaned the engine bay up when it was sunny and washed it then i painted the rust spot where the battery tray was to prevent the spread of cancer. Motor send the heart of already and transmission is getting hot tanked and should be back next week. I sent the fuel injectors off to get cleaned and rebuilt as well in which it needed it.
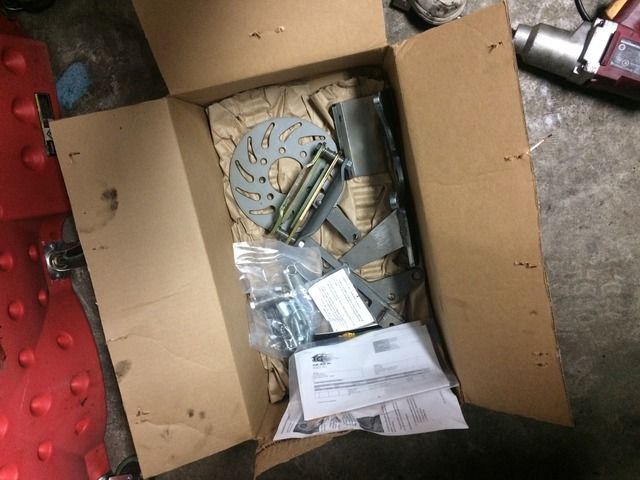
Oh, i was going to ask if anyone know what i options i have for a rear rotor conversion while being able to retain the stock 15 inch wheels, that would be great. More to come.
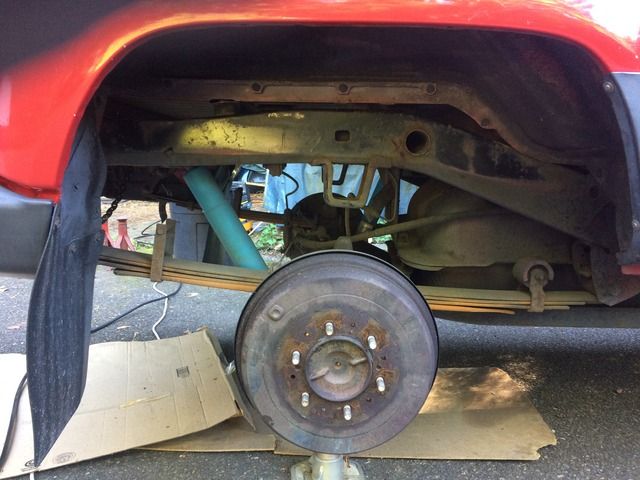
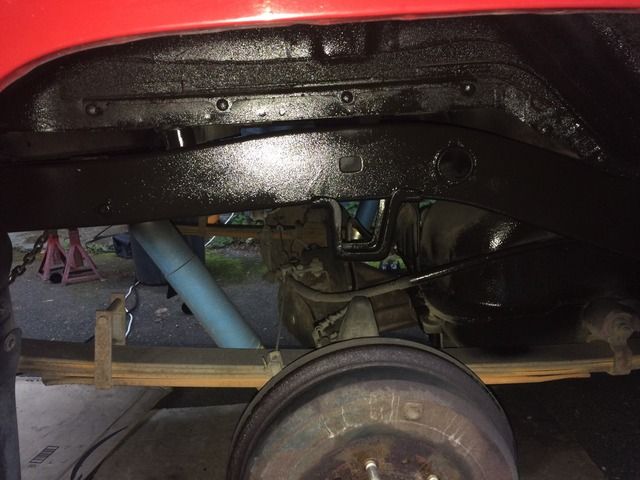
Been busy respraying the frame and digging through the car and found some original stuff hiding in the side compartments. Got some before and after shots on the frame.
 09-12-2018, 12:25 AM