Redeth's Overland Trailer Build
 09-22-2015, 10:39 PM
#1
Registered User
Thread Starter
Redeth's Overland Trailer Build
Hey guys. I've been away from yotatech due to being in school for the past 2 years. And now that i am finally finished and graduating as a Certified Surgical technologist and getting hired at UCLA hospital to work in the operating room i am finally going to have an income again. One thing that i started wanting a lot over this recent year is having the need to explore! Being stuck in a classroom setting with very little off-road trips in that time really make me want to get out more. Not only that but During our sponsored BF Goodrich trip, by Internet Brands, last November (in 2014) i realized how much i liked overland stuff. IT wasn't even that long of a trip. IT was only from Barstow CA to Las Vegas NV. But that short trip was so much fun and it made me want more.
After Many camping trips i have realized how much i hate setting up tents.
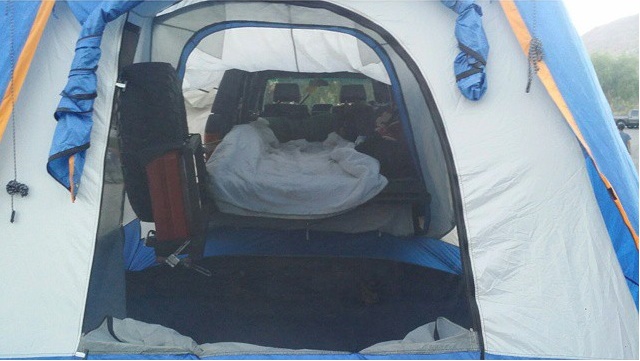
Small tents like this one down below aren't too bad....
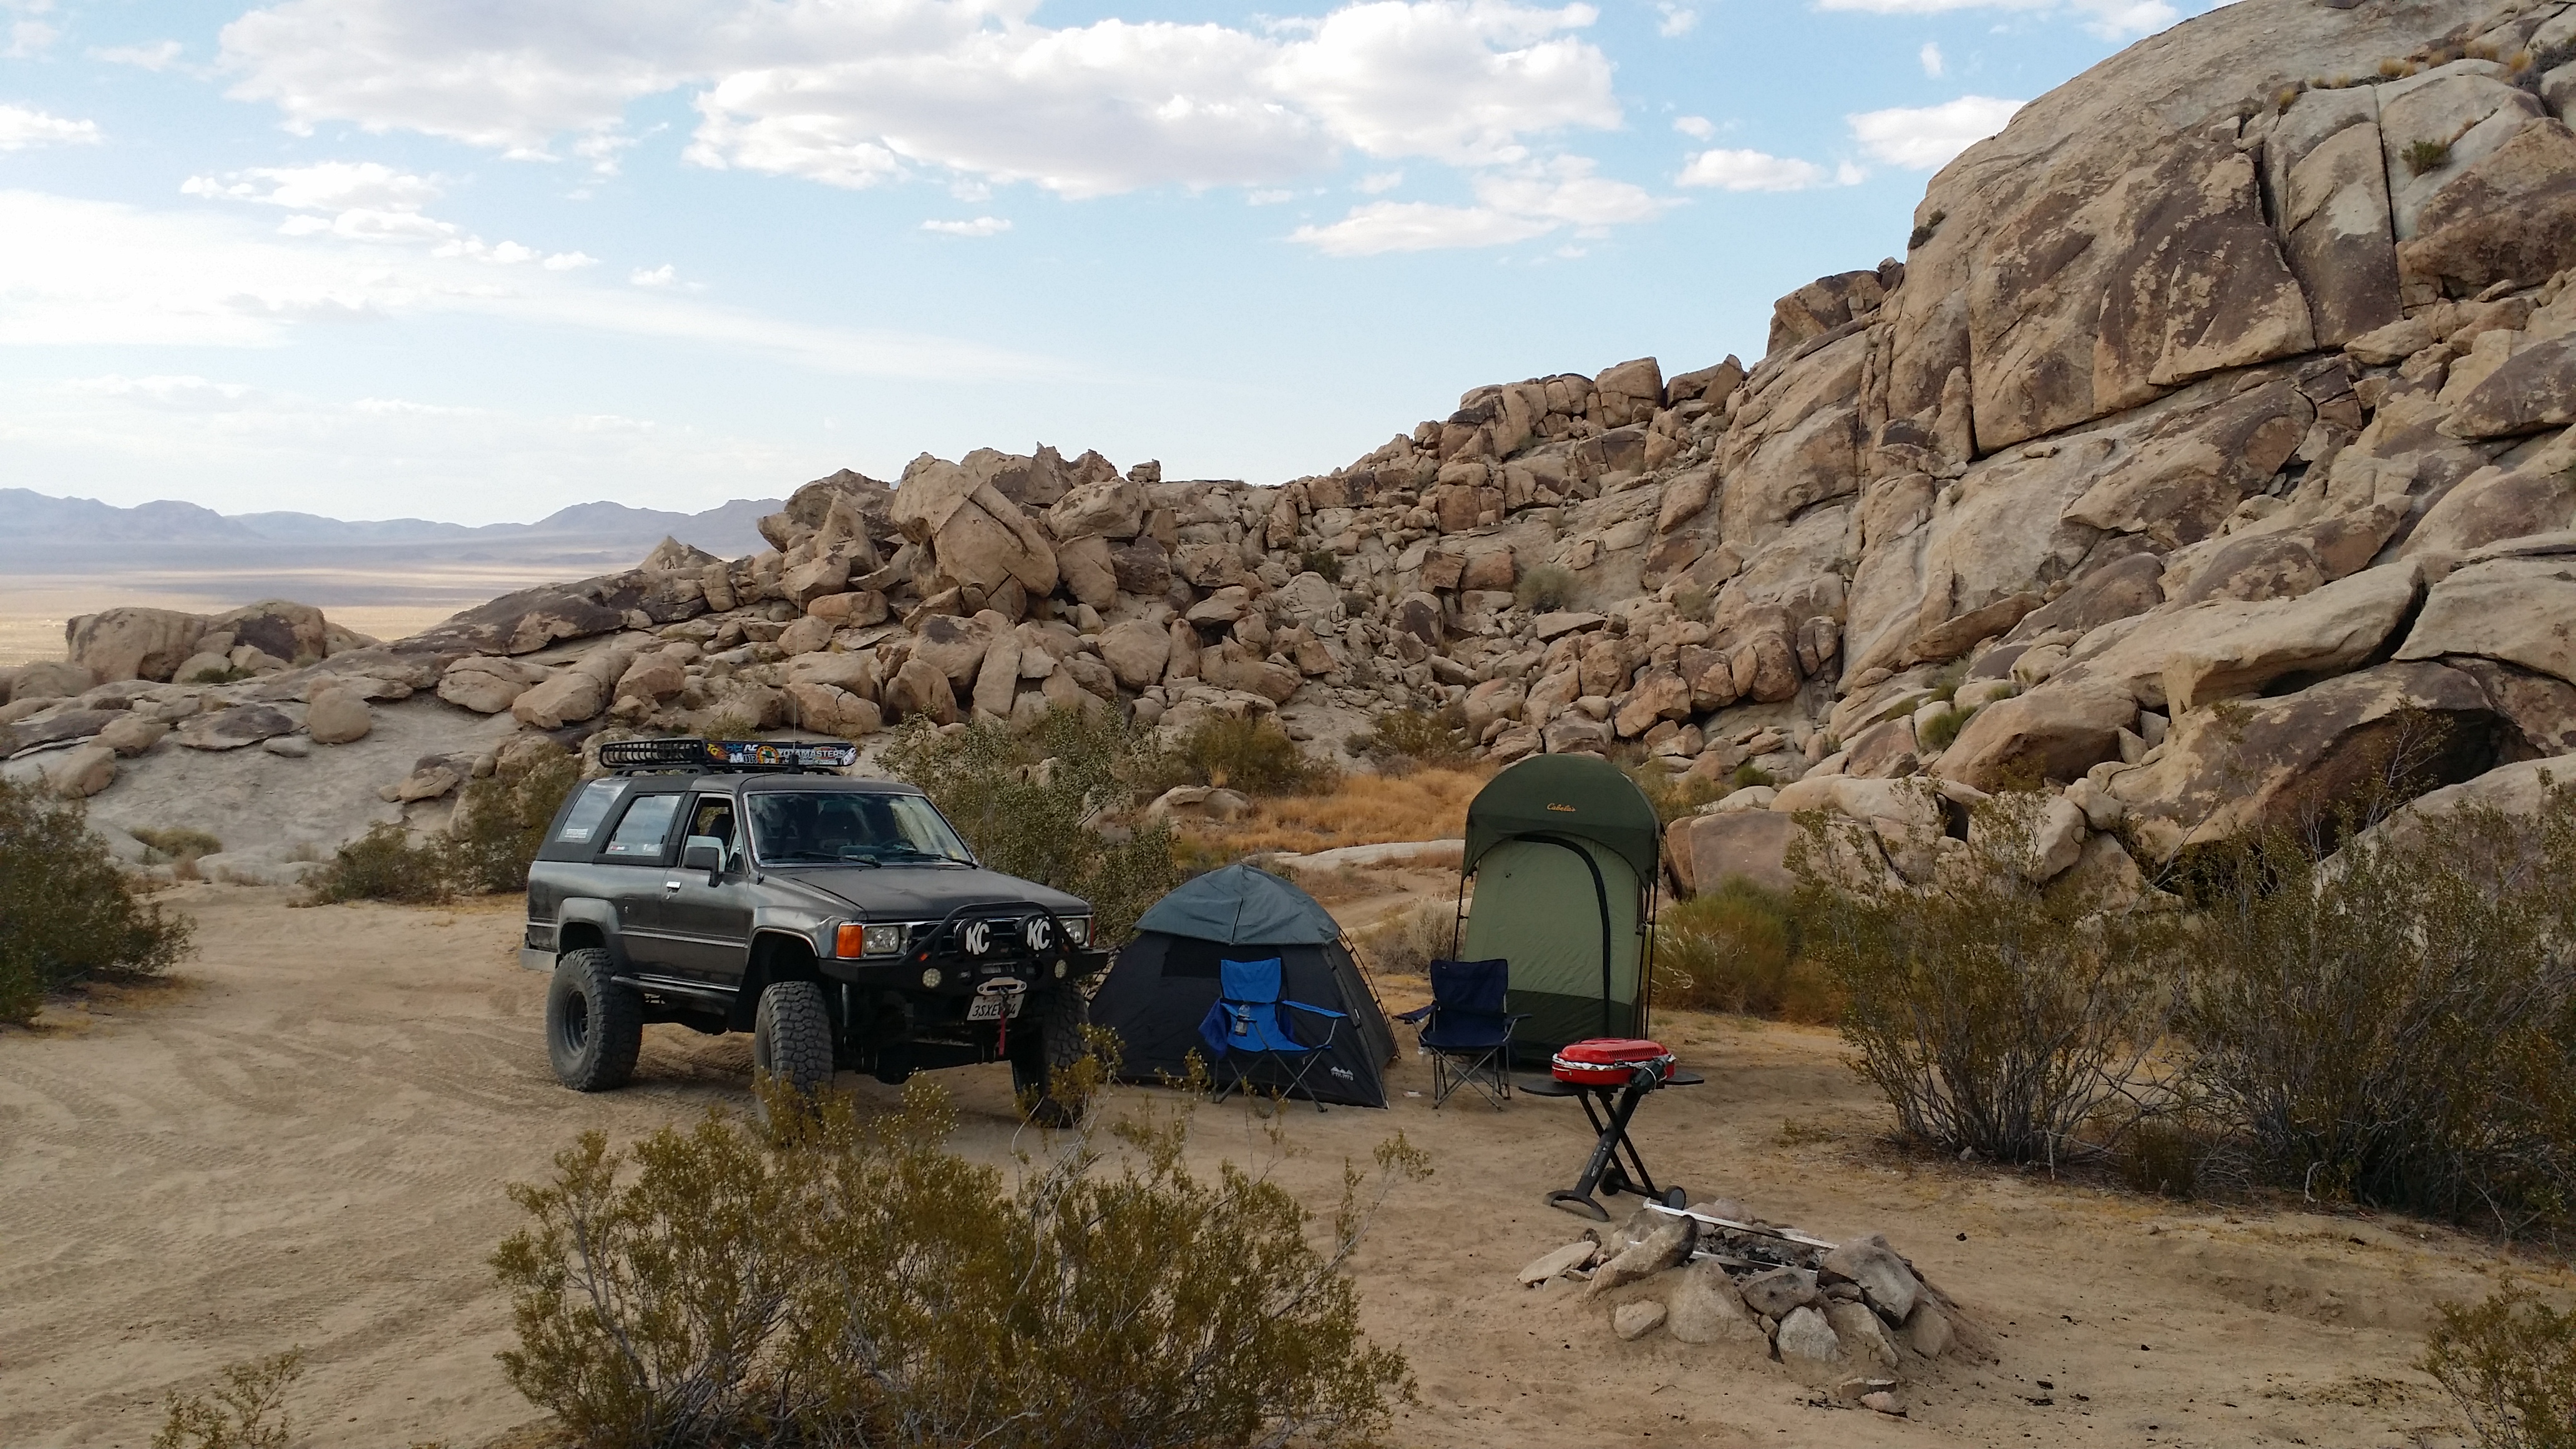
...but i'm just tired of getting super dirty all the time and uncomfortable floors even with my memory foam mattress toppers. Air mattresses get too hot or lose their air half way through the night. I just rather not deal with it.
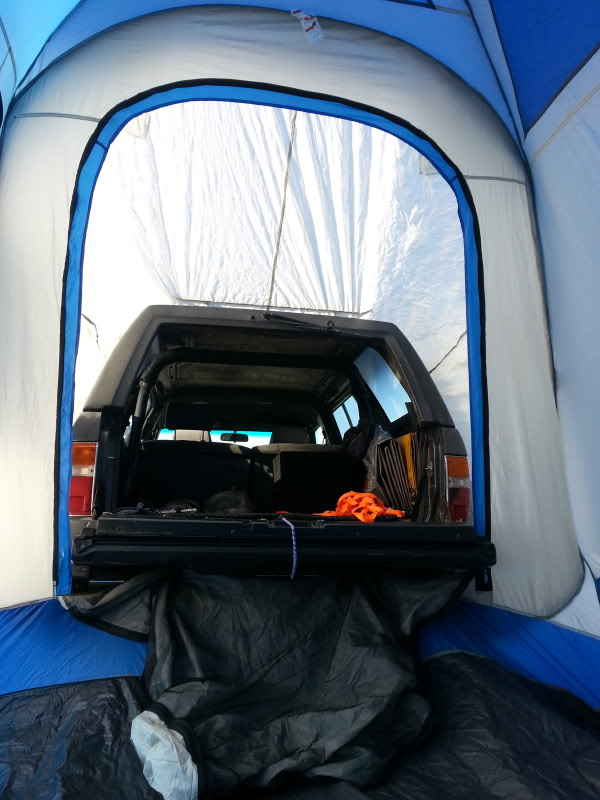
I didnt give up there. I figured i would buy this cool Napier Sportz SUV Tent that attaches to the rear of my 1st gen 4Runner.
Here it is in the most recent trip for fathers day 2015
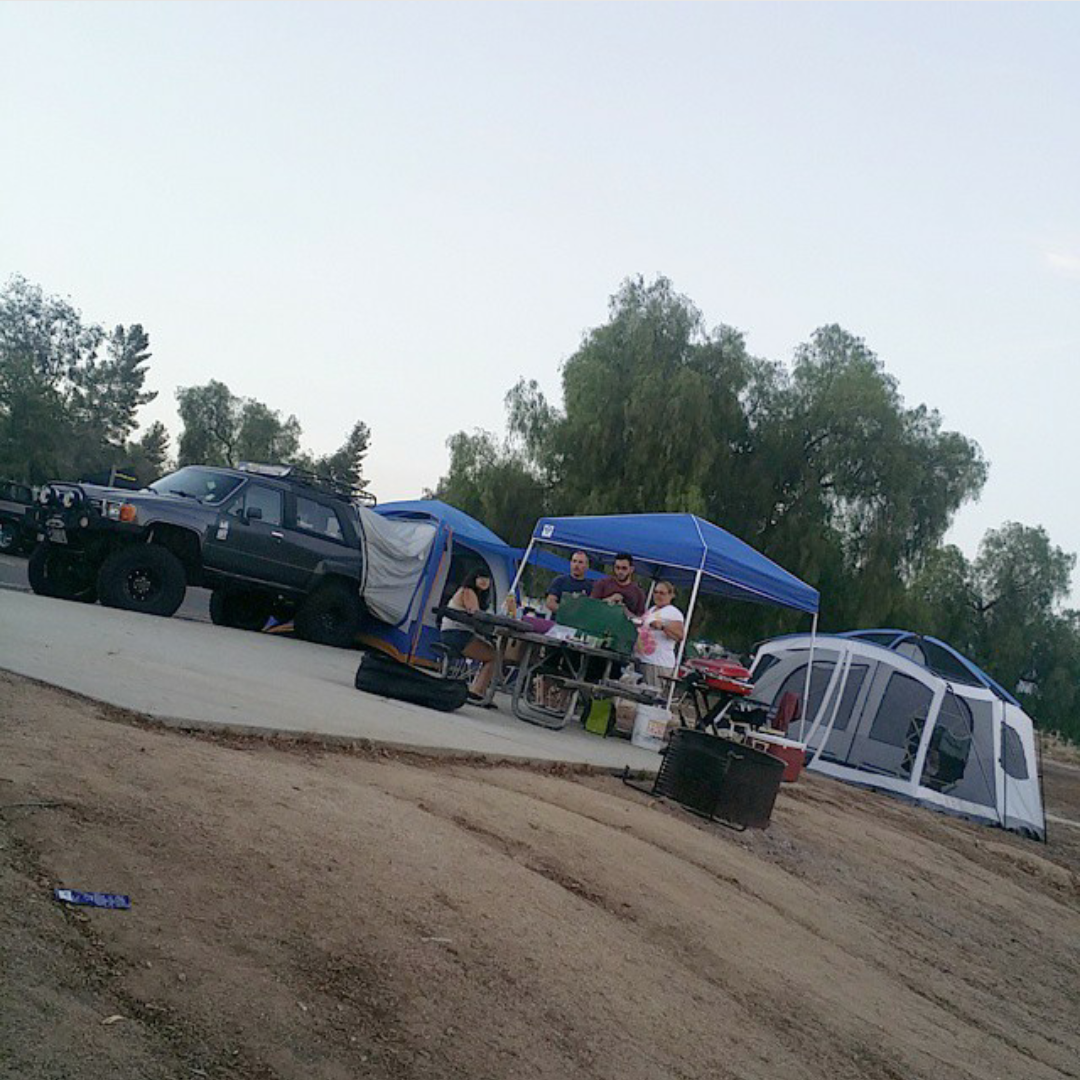
Before when the truck was IFS it was fine.
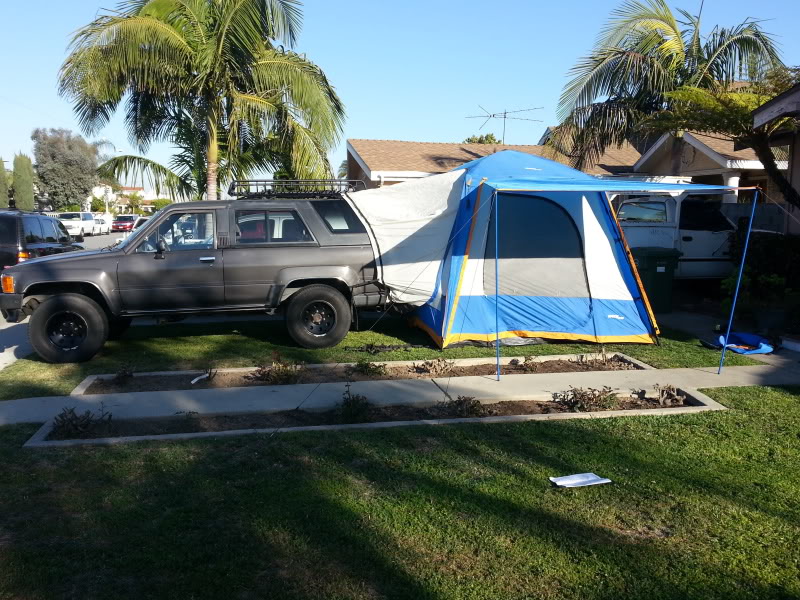
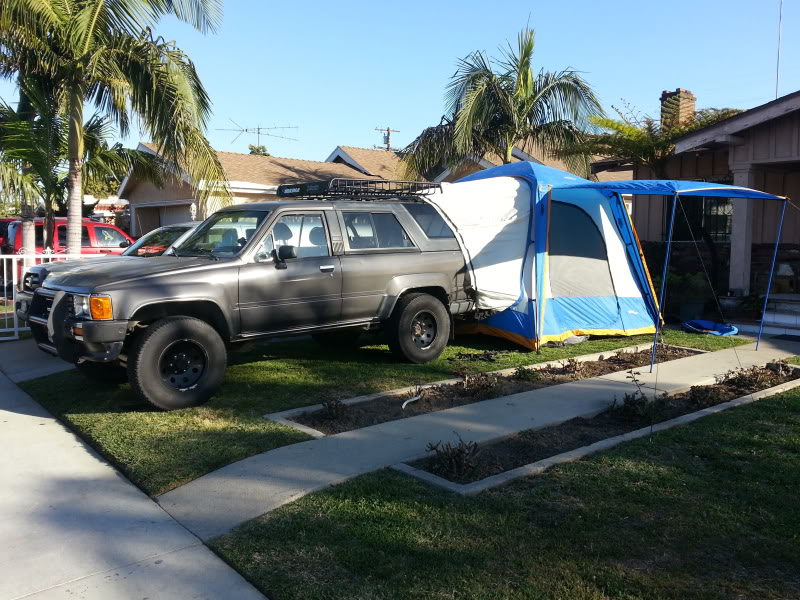
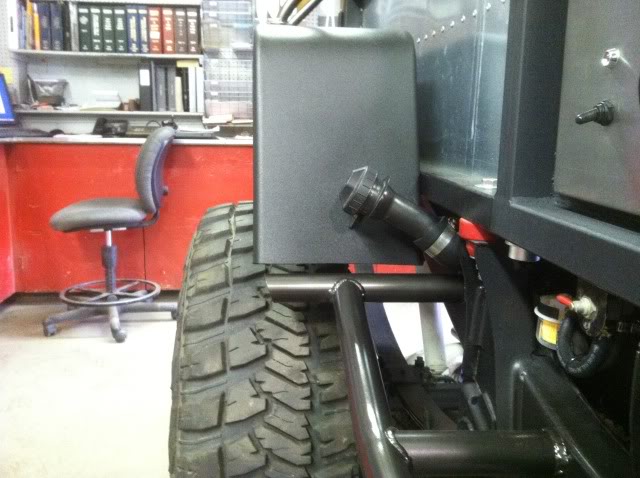
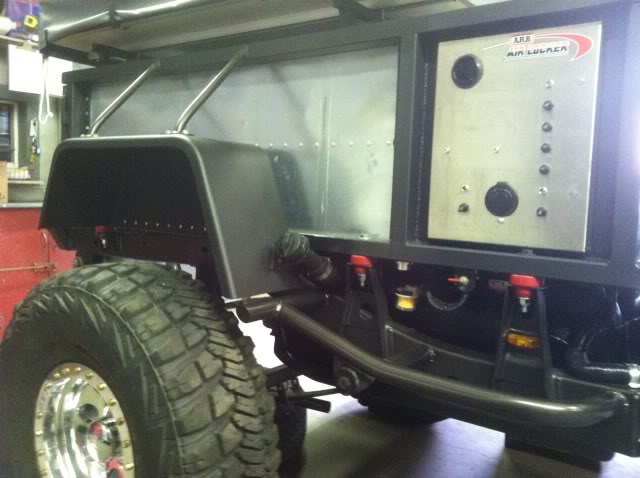
As you can see this tent creates a nice seal around the rear of the body

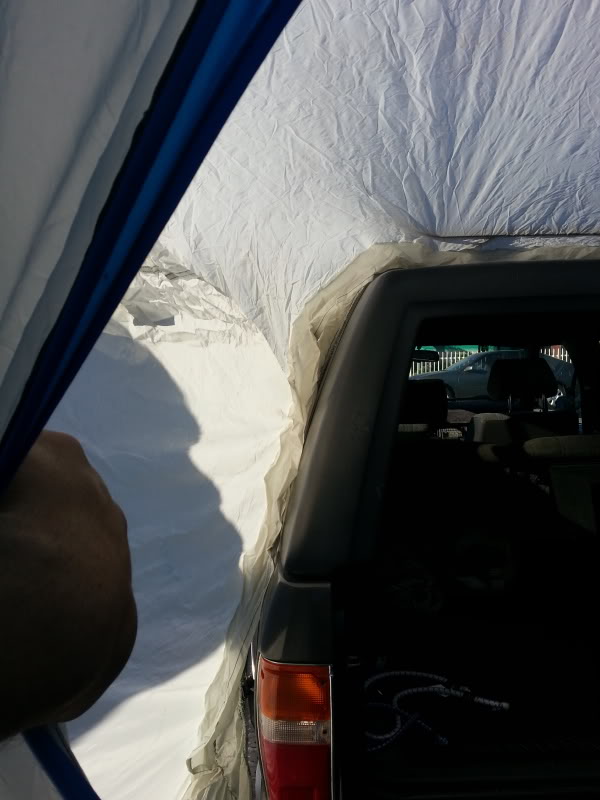
This tent was awesome for the times i used it. but once i added the rear bumper that i built with the tire carrier i found that the swing out leans too much on the tent and will potentially cause damage to the tent.
you can see for yourself here:
One of the things i liked about this tent was that i could always leave the tent back at camp while i went off rock crawling and when i get back i could just back it up into the tent again and re-strap everything to wrap around the 4runner. Simple enough right? WRONG! i hate it. too many straps and too many hooks to properly seal everything. This tent is only good if you plan to stay in one location for a few days. But its a huge pain in the butt when you gotta come and go like i had to. You gotta redo everything and on the bottom side you literally need to go under the bed of the 4runner and strap things off good there too. Any mistake and the mosquitoes will be eating you alive! ANd rolling around under my truck on a dirt ground so i could mosquito-proof the tent is the last thing i want to do after a long day of wheeling. So that got my mind wondering. I began to research Teardrop trailers. Some which i found were pretty awesome. But none are ever built with a 29" size tire or larger. Biggest i found was 31" but the trailers are very simple and i question the integrity of the wooden build. So next choice is a rooftop tent. Well i own a 1st gen 4runner with a fiberglass top. and i want to be able to wheel still without being top heavy due to a roof tent. So that is out of the question. I still liked the ability to leave camp at the campsite and take off at a moments notice. So i finally had a mind set on what i wanted to build. I seen lots of people have offroad trailers.
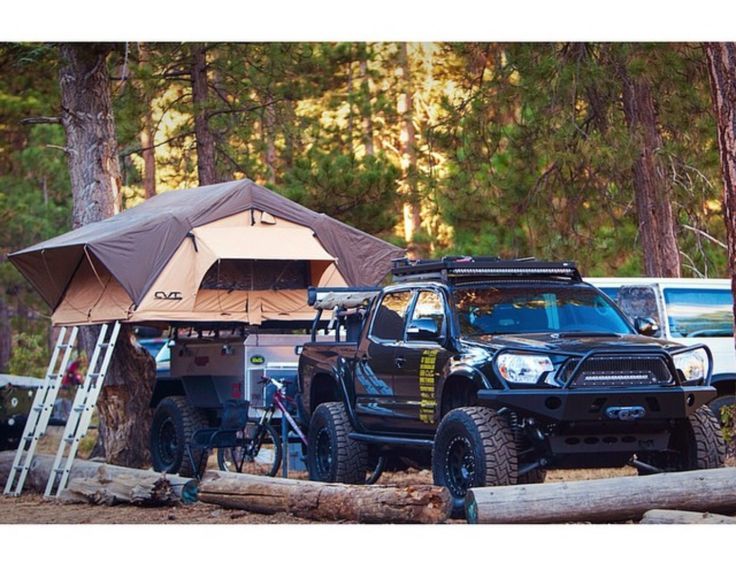
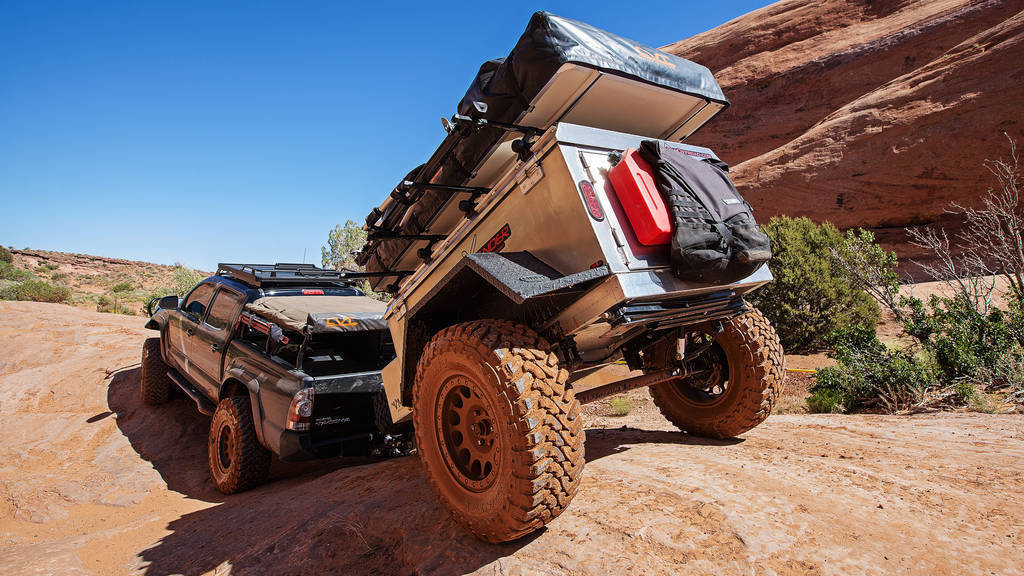
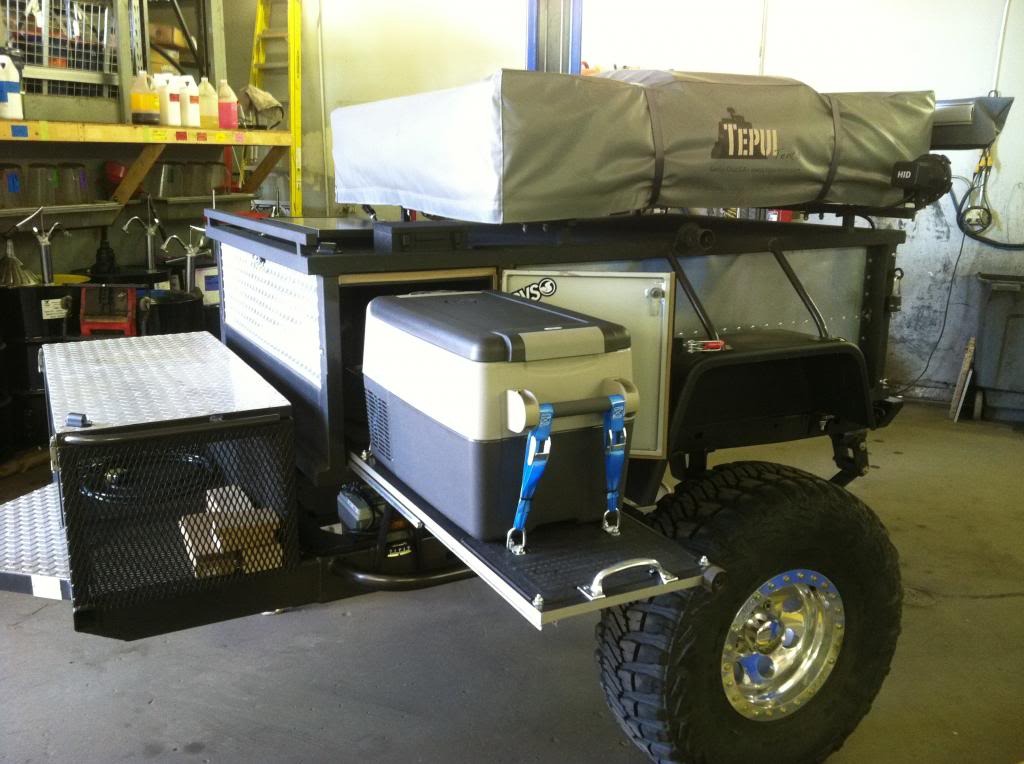
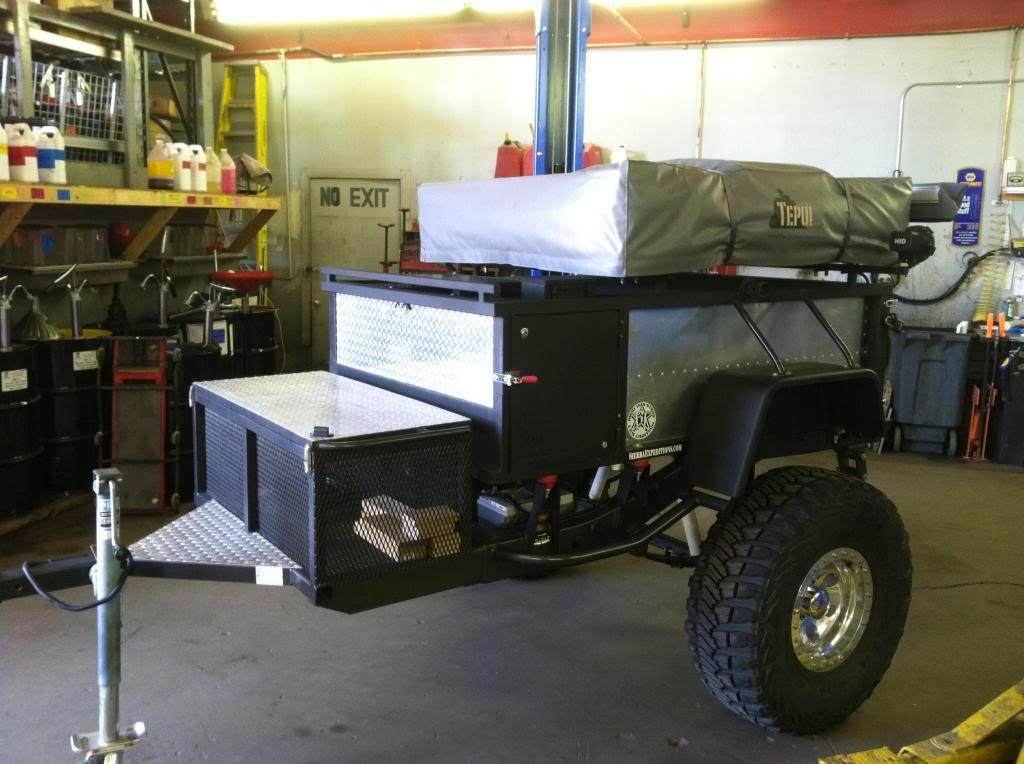
So I would see Instagram User: Defconbrix always uploading awesome pix of his VMI offroad trailer. I wouldnt mind buying one of these if the base model wasnt so dang expensive. So im stuck having to build my own. here is his tacoma and his trailer.
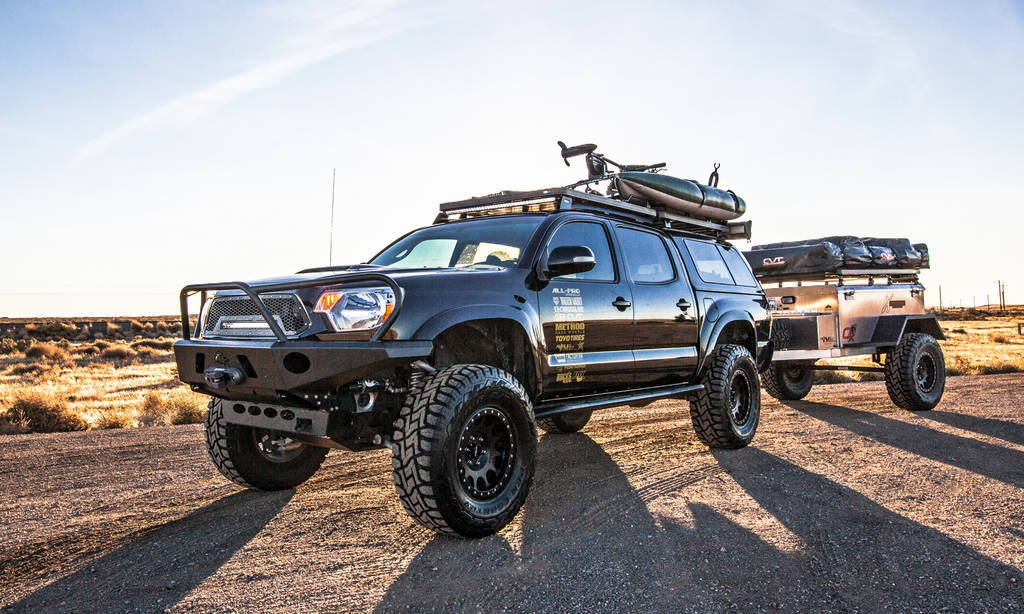
He has one of the biggest rooftop tents that CVT offers.
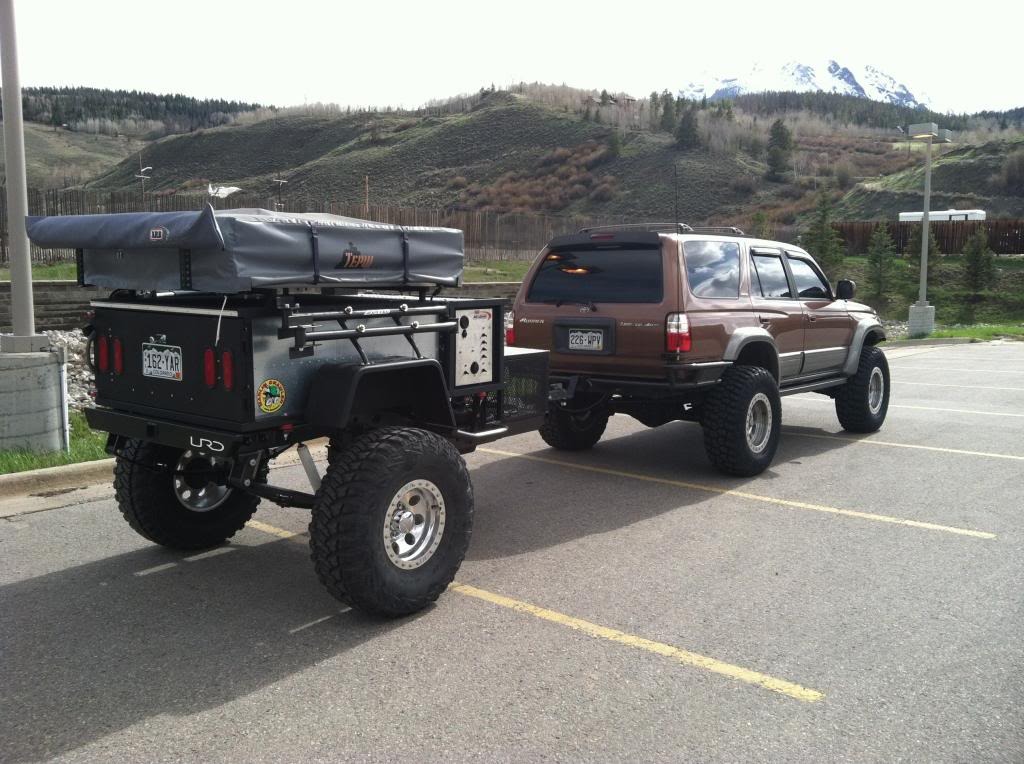
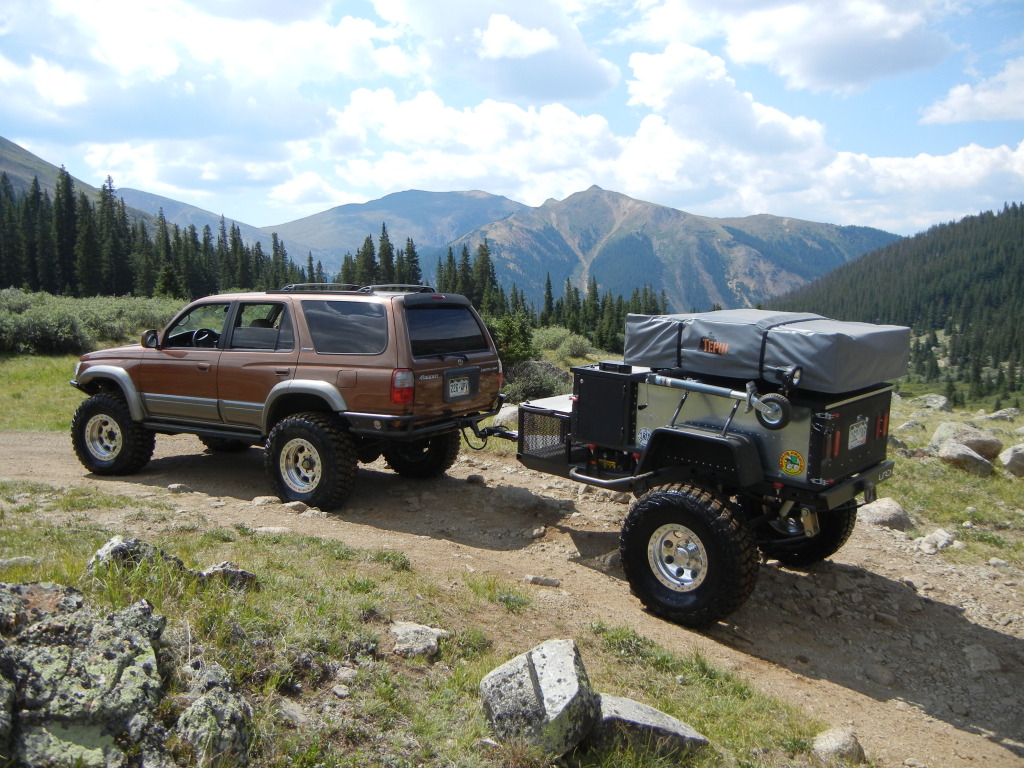
So after researching home made builds i came across "Dirtco" and his trailer build on Yotatech and continued on a few other forums. Here is his trailer:

--->
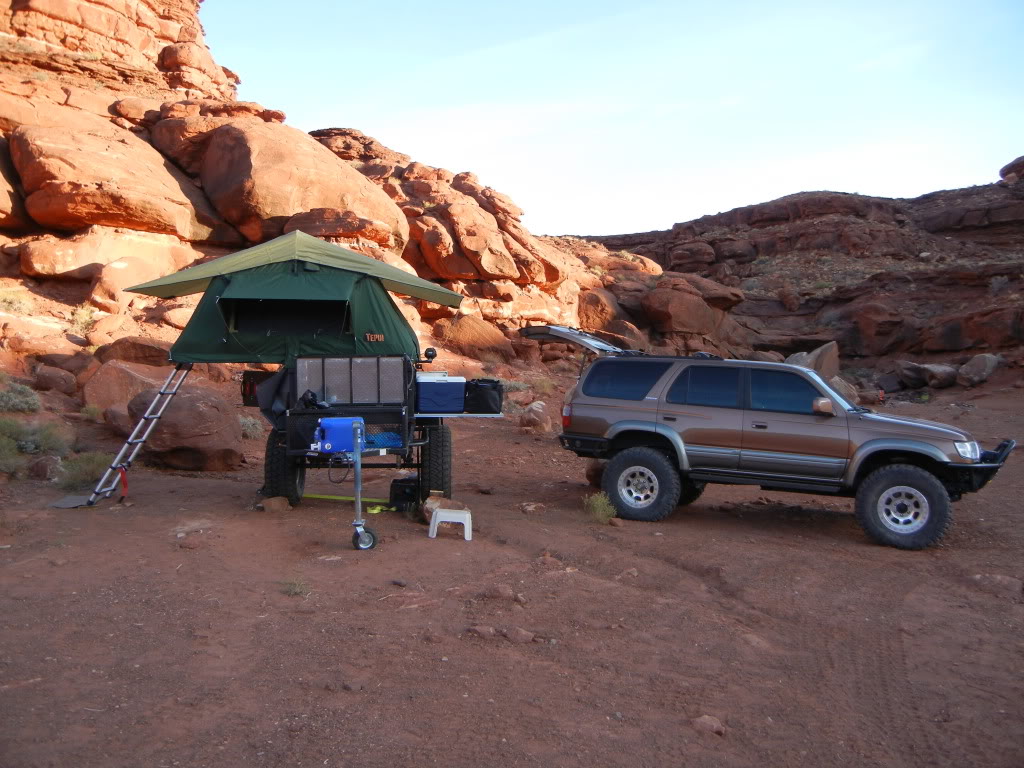
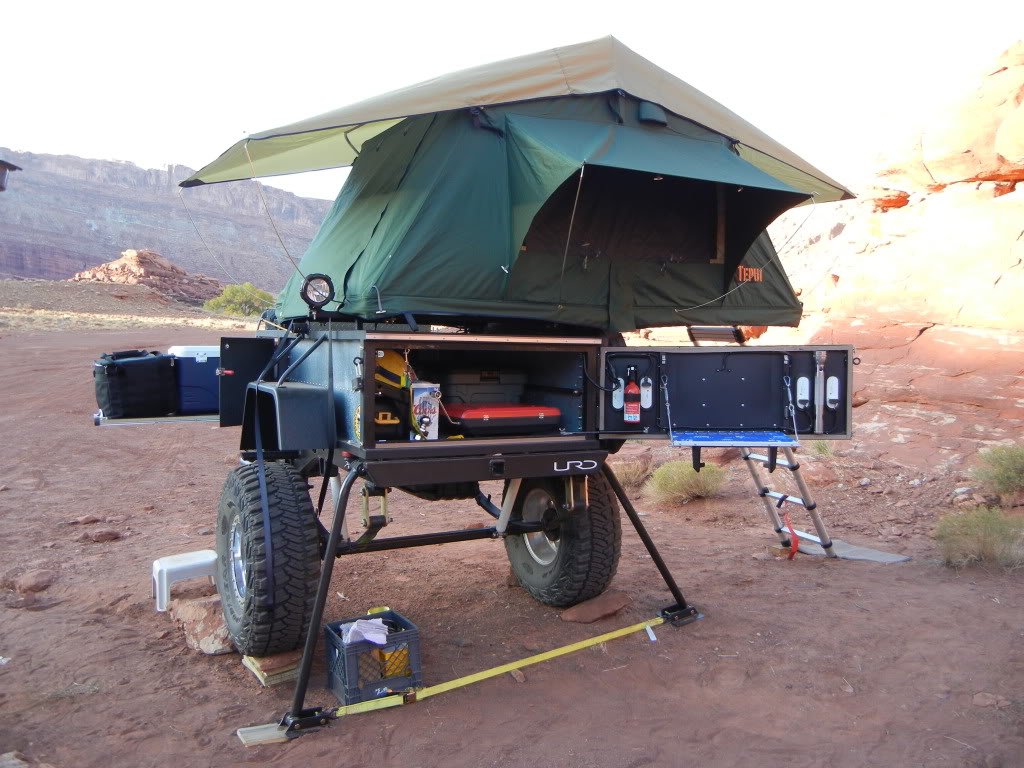
You can actually find Dirtco's trailer build Here:
https://www.yotatech.com/forums/f88/...roject-219053/
---------------------------------------------------------------------------------
So After much research and lots of drooling over these awesome builds it drove me to want to have a trailer project of my own. I figured i would take my time and get the main things to begin this trailer foundation for free. And luckily on instagram i have lots of followers willing to help
My buddy Ruben(Pisarunner on Instagram) Donated a near mint condition IFS 4runner chassis to me for free! He just made me promise i build something really cool with it and i intend to. This trailer has very minimal surface rust. Literally nothing that cant be wiped off with a rag. im very happy with the condition of this frame.
Also another buddy (LivingTheDream138 on instagram) in planning to donate his used, broken in 4" lift trail-gear leaf springs that now sit at about a 3" lift. Theyre broken in and he is planning to install his new ones in the next 2 weeks some time. and he told me that he'd let me have them for free as well once he has them off his truck. And I still have my old 4" shackles in the garage that i plan to use for this trailer as well. So far im off to an amazing start and what better way to start off with then a toyota frame as my foundation.
After Many camping trips i have realized how much i hate setting up tents.
Small tents like this one down below aren't too bad....

...but i'm just tired of getting super dirty all the time and uncomfortable floors even with my memory foam mattress toppers. Air mattresses get too hot or lose their air half way through the night. I just rather not deal with it.
I didnt give up there. I figured i would buy this cool Napier Sportz SUV Tent that attaches to the rear of my 1st gen 4Runner.
Here it is in the most recent trip for fathers day 2015

Before when the truck was IFS it was fine.


As you can see this tent creates a nice seal around the rear of the body


This tent was awesome for the times i used it. but once i added the rear bumper that i built with the tire carrier i found that the swing out leans too much on the tent and will potentially cause damage to the tent.
you can see for yourself here:

One of the things i liked about this tent was that i could always leave the tent back at camp while i went off rock crawling and when i get back i could just back it up into the tent again and re-strap everything to wrap around the 4runner. Simple enough right? WRONG! i hate it. too many straps and too many hooks to properly seal everything. This tent is only good if you plan to stay in one location for a few days. But its a huge pain in the butt when you gotta come and go like i had to. You gotta redo everything and on the bottom side you literally need to go under the bed of the 4runner and strap things off good there too. Any mistake and the mosquitoes will be eating you alive! ANd rolling around under my truck on a dirt ground so i could mosquito-proof the tent is the last thing i want to do after a long day of wheeling. So that got my mind wondering. I began to research Teardrop trailers. Some which i found were pretty awesome. But none are ever built with a 29" size tire or larger. Biggest i found was 31" but the trailers are very simple and i question the integrity of the wooden build. So next choice is a rooftop tent. Well i own a 1st gen 4runner with a fiberglass top. and i want to be able to wheel still without being top heavy due to a roof tent. So that is out of the question. I still liked the ability to leave camp at the campsite and take off at a moments notice. So i finally had a mind set on what i wanted to build. I seen lots of people have offroad trailers.
So I would see Instagram User: Defconbrix always uploading awesome pix of his VMI offroad trailer. I wouldnt mind buying one of these if the base model wasnt so dang expensive. So im stuck having to build my own. here is his tacoma and his trailer.

He has one of the biggest rooftop tents that CVT offers.


So after researching home made builds i came across "Dirtco" and his trailer build on Yotatech and continued on a few other forums. Here is his trailer:


--->


You can actually find Dirtco's trailer build Here:
https://www.yotatech.com/forums/f88/...roject-219053/
---------------------------------------------------------------------------------
So After much research and lots of drooling over these awesome builds it drove me to want to have a trailer project of my own. I figured i would take my time and get the main things to begin this trailer foundation for free. And luckily on instagram i have lots of followers willing to help
My buddy Ruben(Pisarunner on Instagram) Donated a near mint condition IFS 4runner chassis to me for free! He just made me promise i build something really cool with it and i intend to. This trailer has very minimal surface rust. Literally nothing that cant be wiped off with a rag. im very happy with the condition of this frame.
Also another buddy (LivingTheDream138 on instagram) in planning to donate his used, broken in 4" lift trail-gear leaf springs that now sit at about a 3" lift. Theyre broken in and he is planning to install his new ones in the next 2 weeks some time. and he told me that he'd let me have them for free as well once he has them off his truck. And I still have my old 4" shackles in the garage that i plan to use for this trailer as well. So far im off to an amazing start and what better way to start off with then a toyota frame as my foundation.
 09-22-2015, 11:31 PM
#2
Registered User
Thread Starter
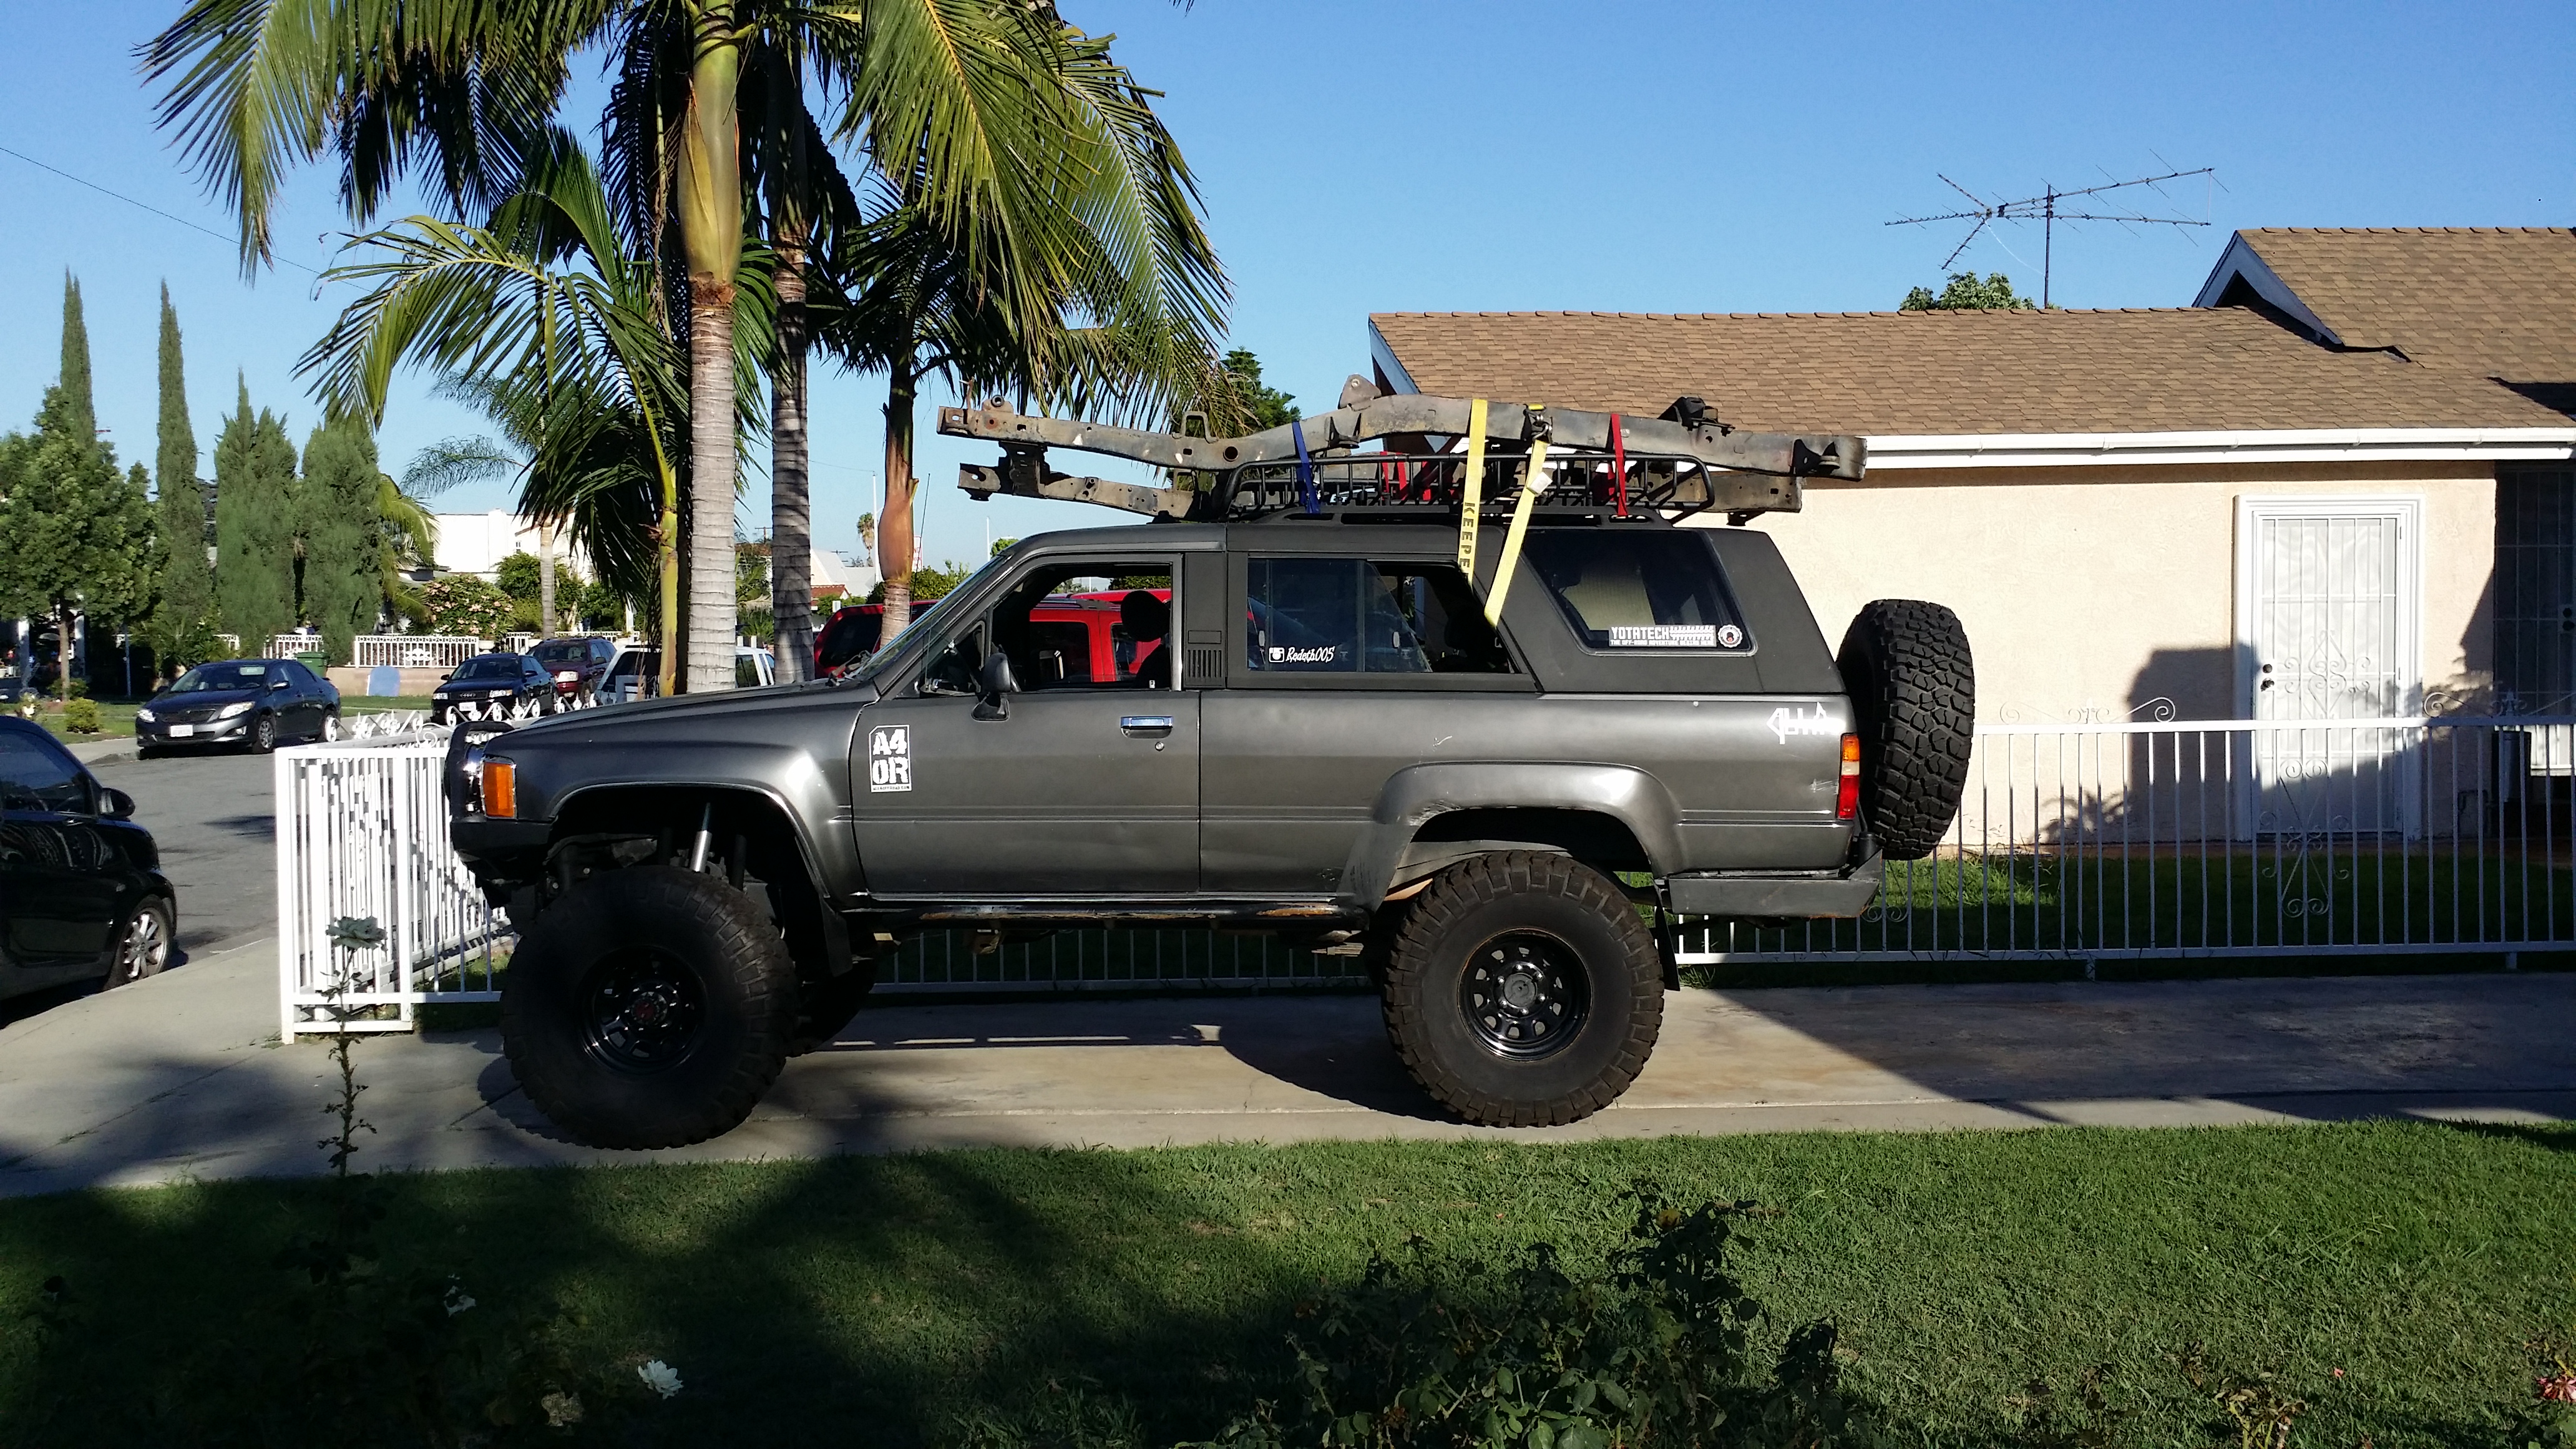
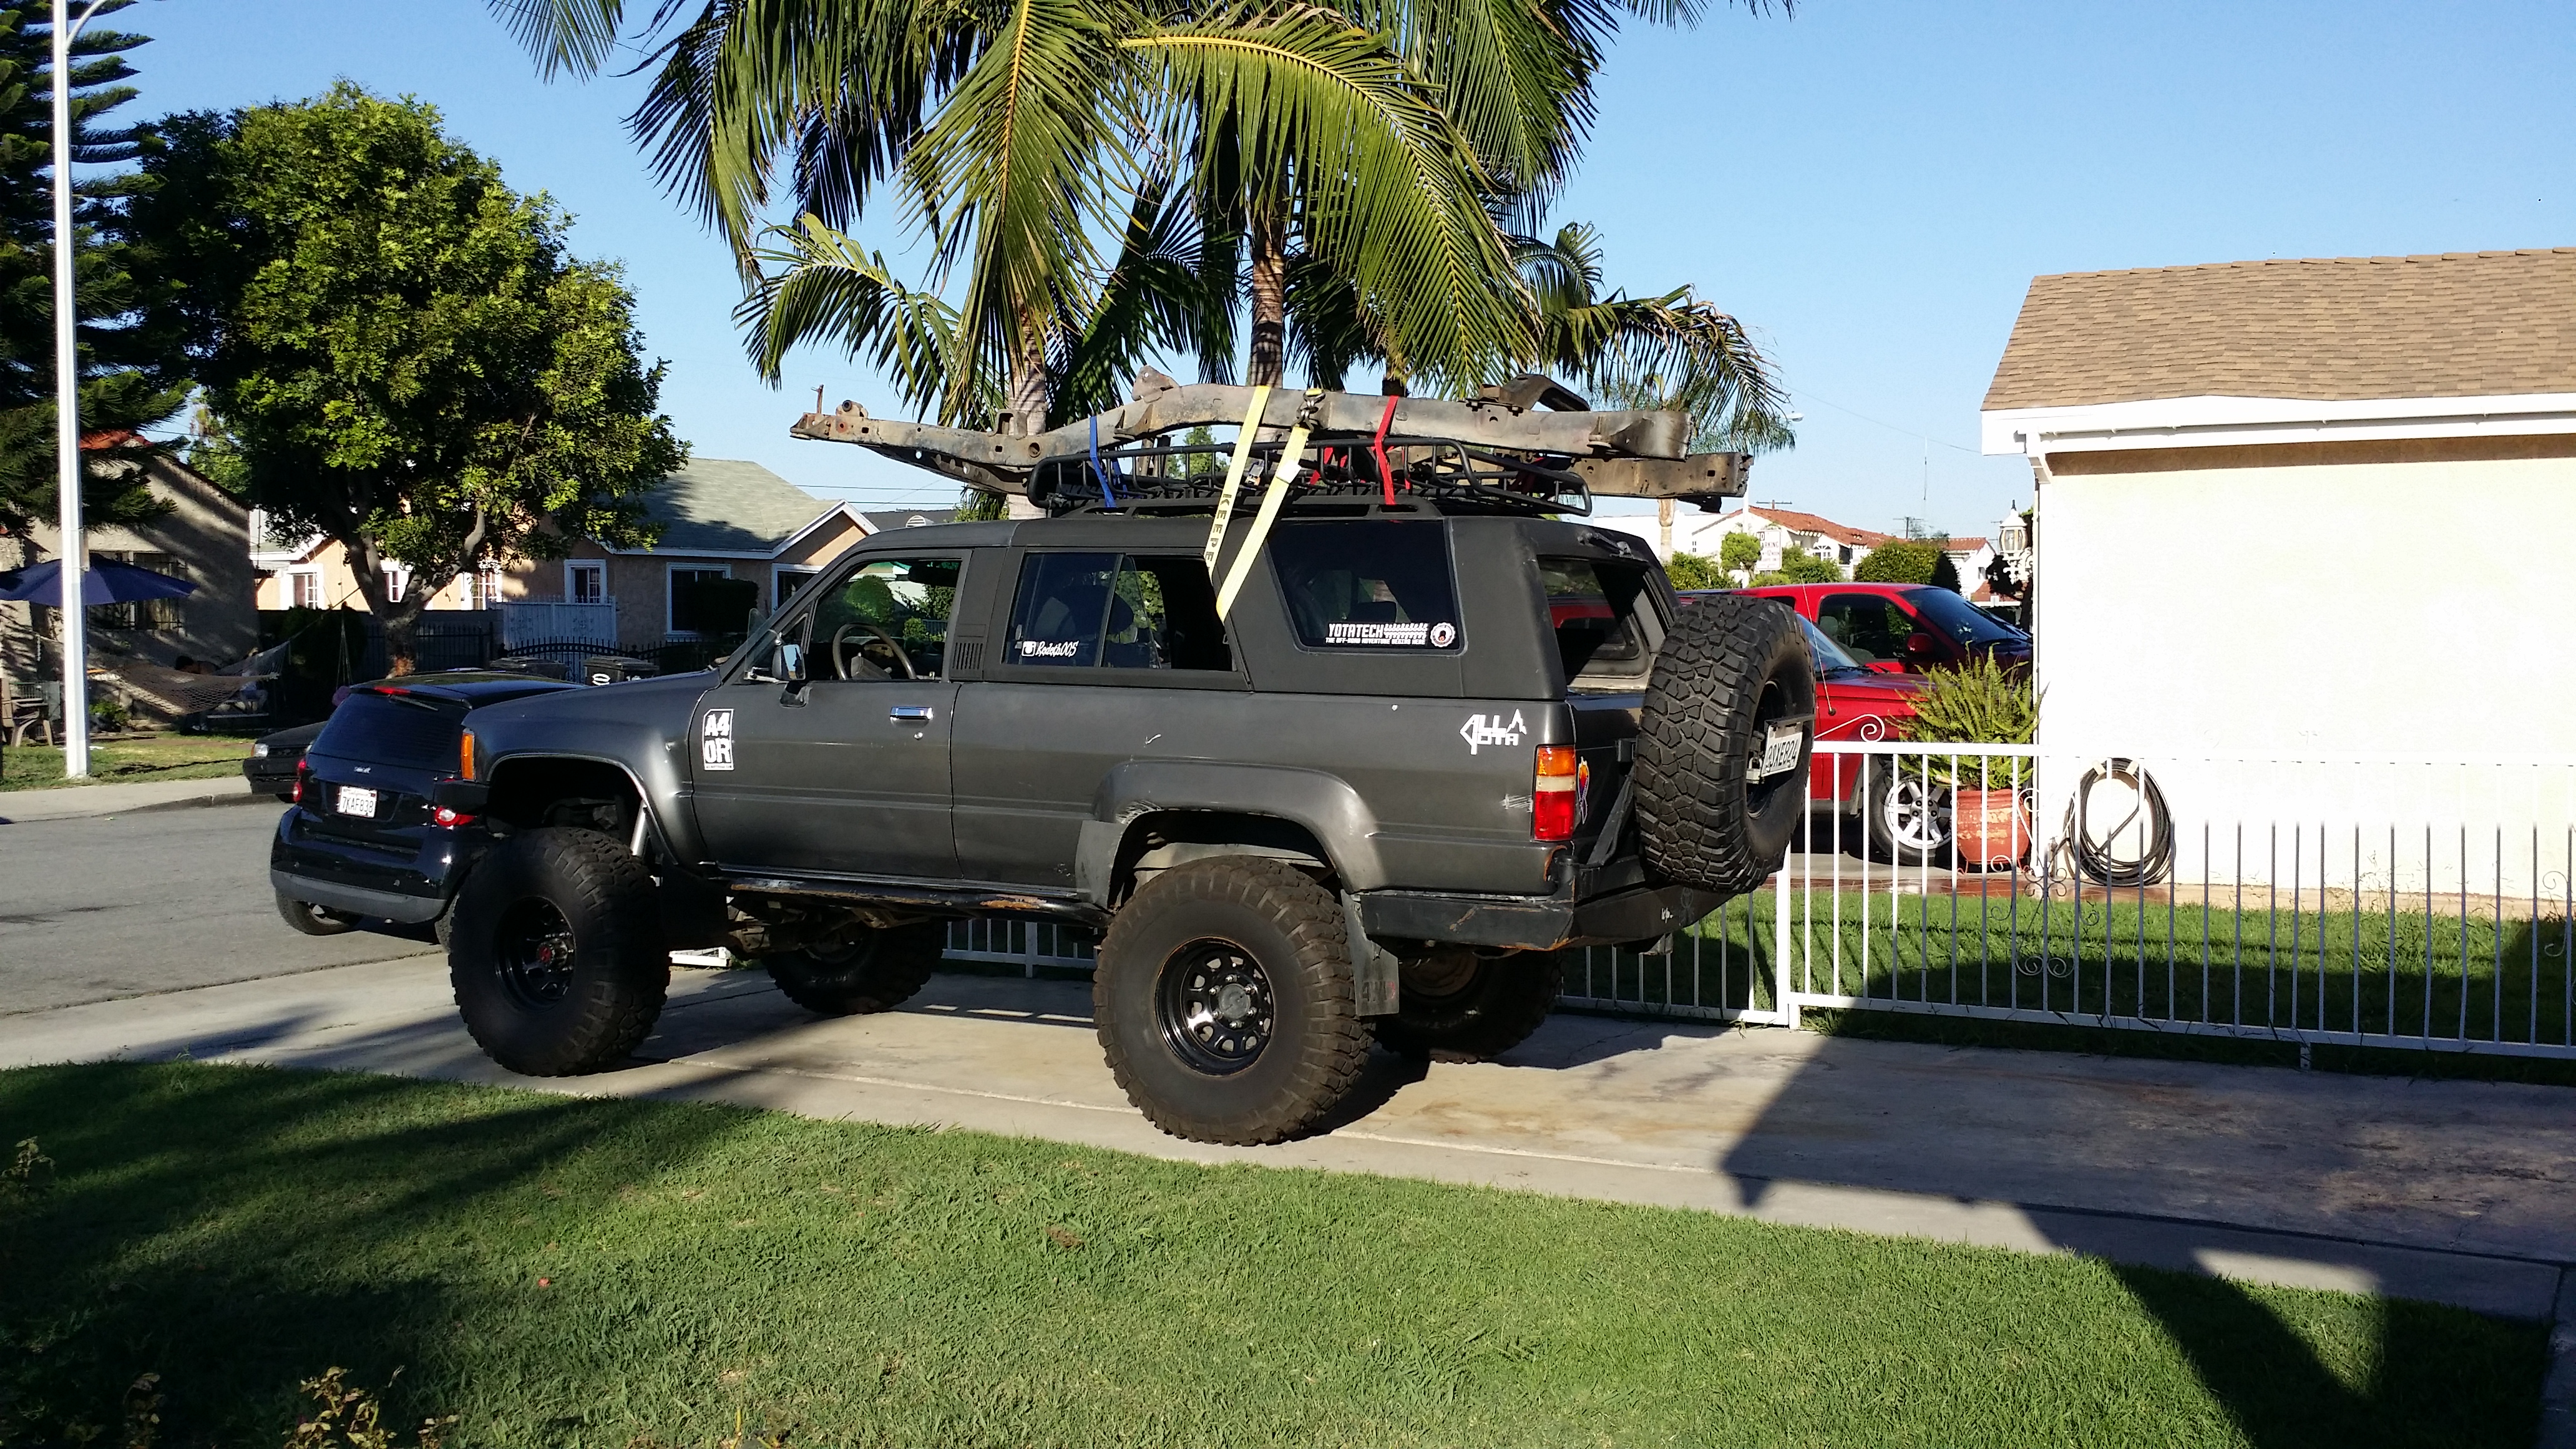
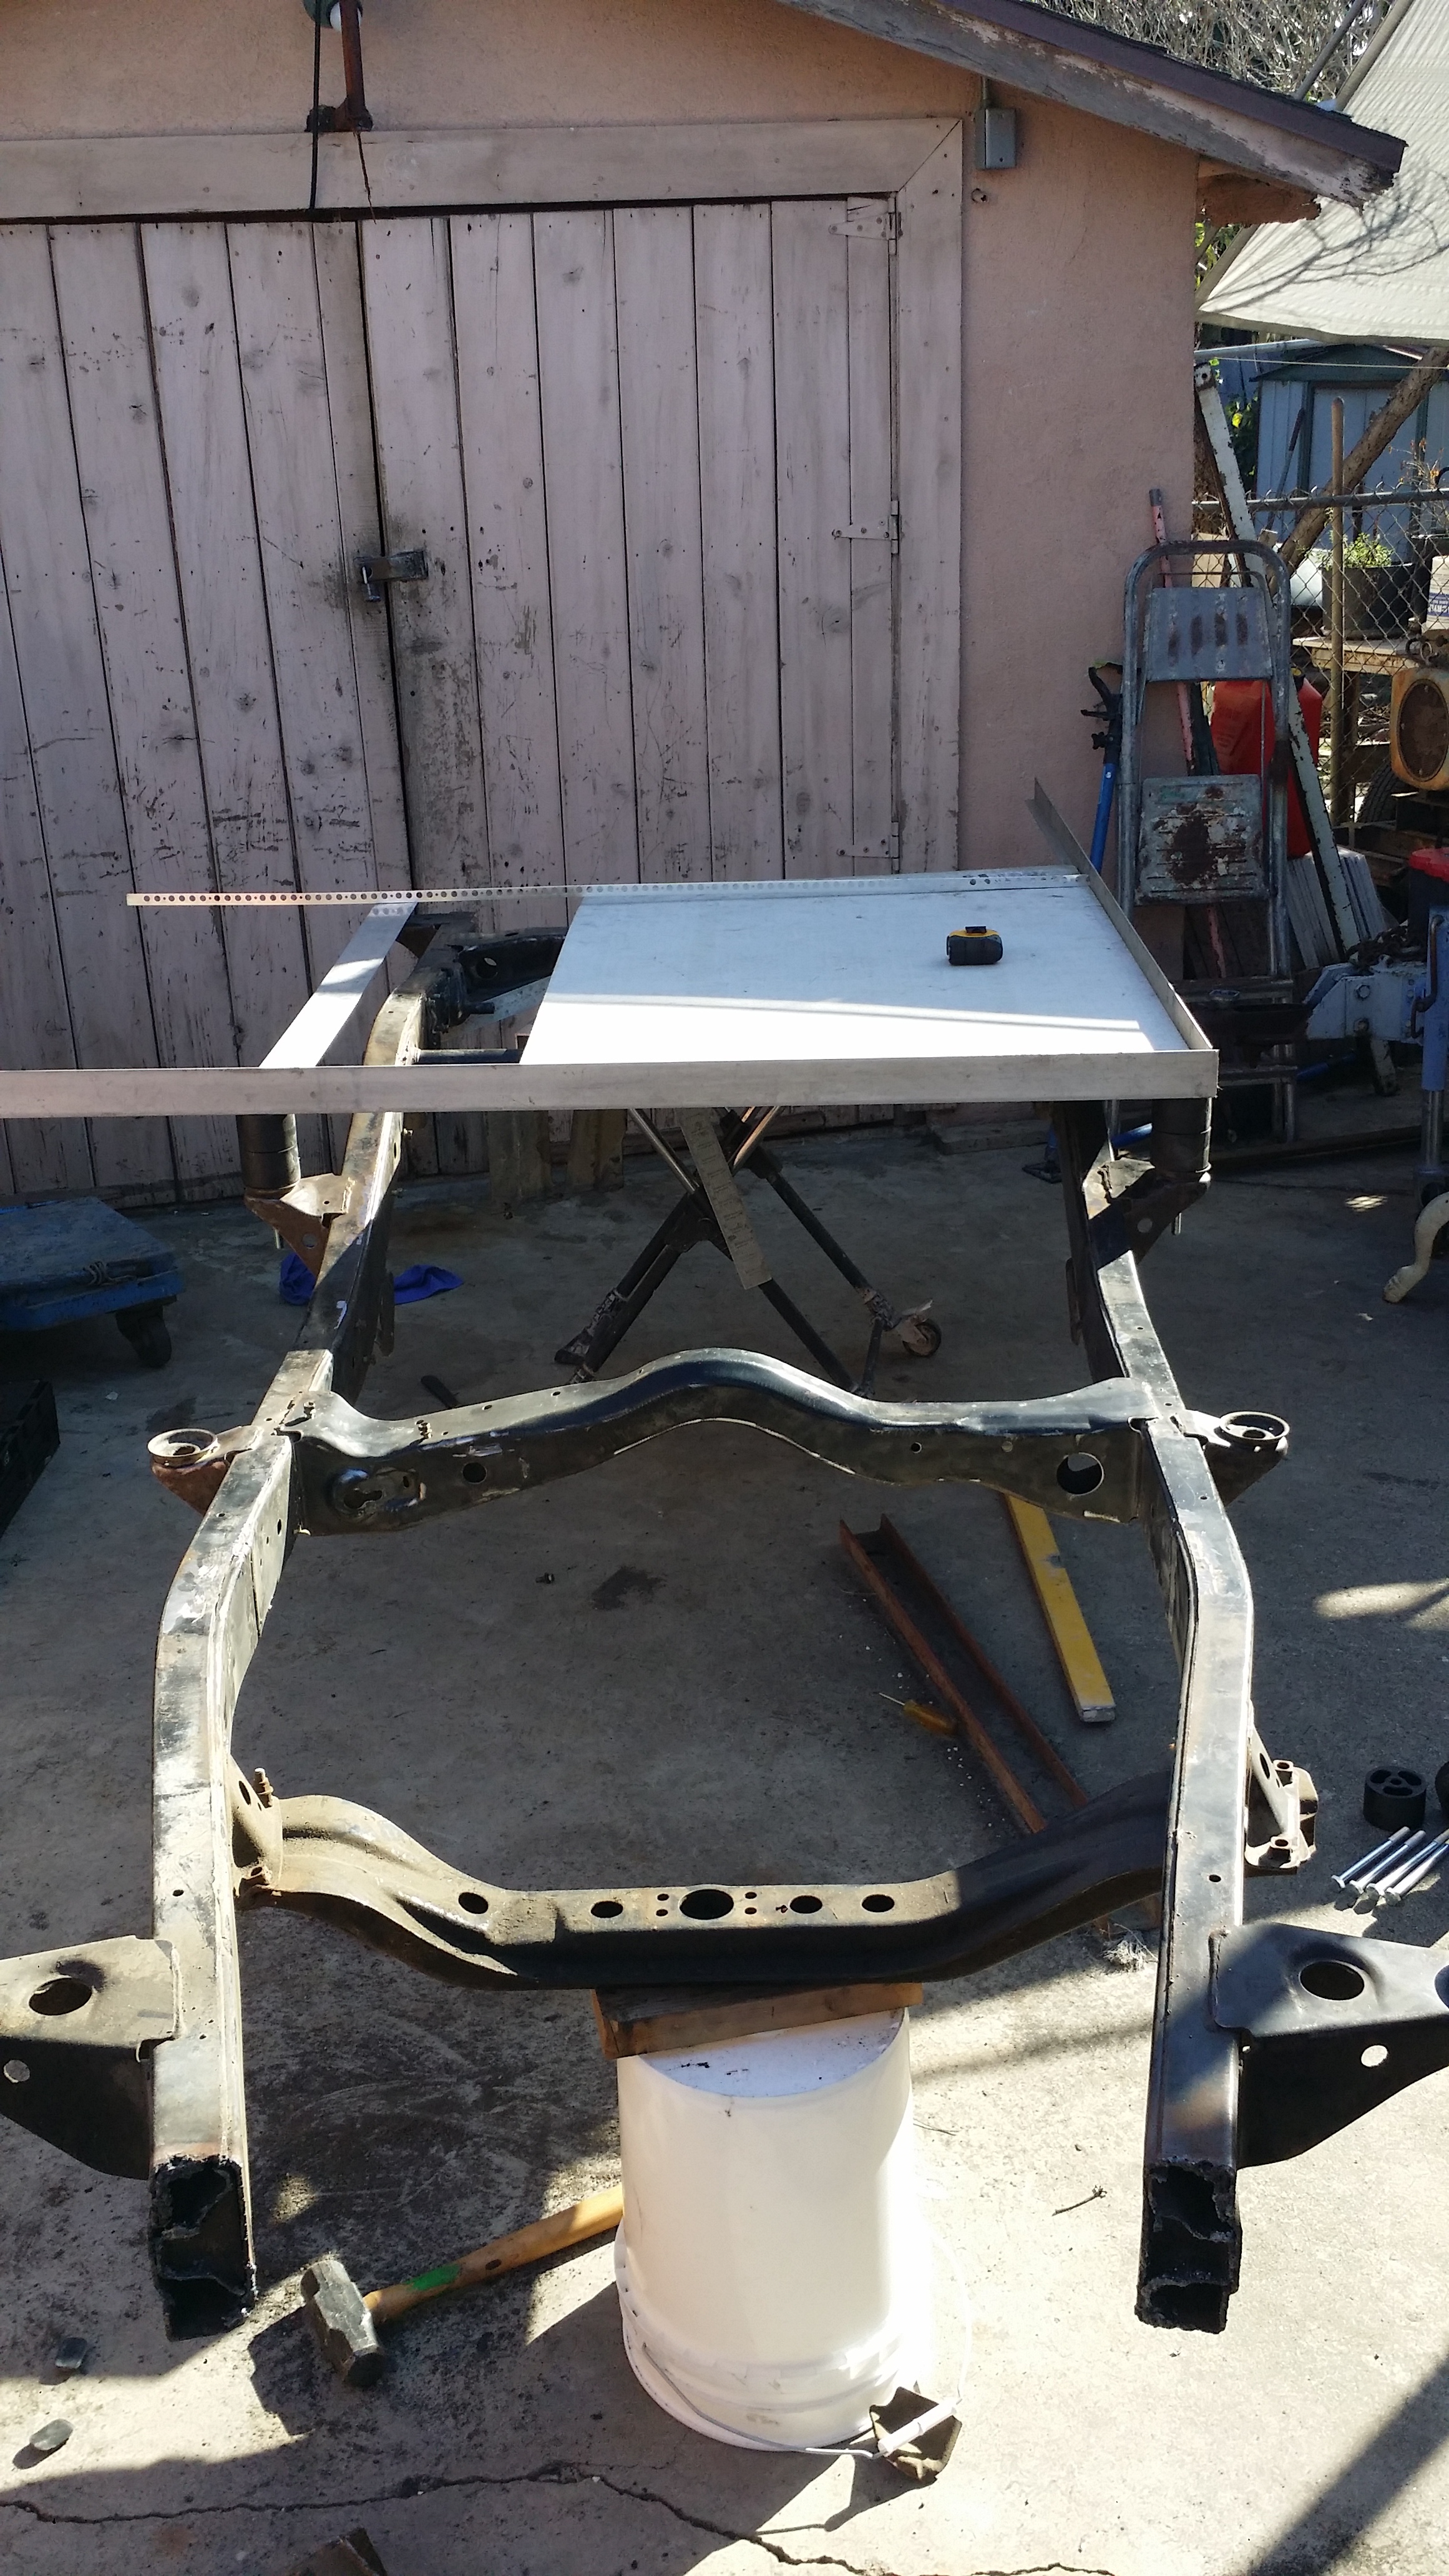
Here i am after bringing the 4runner chassis home. I drove the entire trip on the street and was still scared of having that weight up on top. But luckily nothing happened. i wish i had access to a flatbed. its okay though it was secured on really good. for the 15mile drive on the street home.
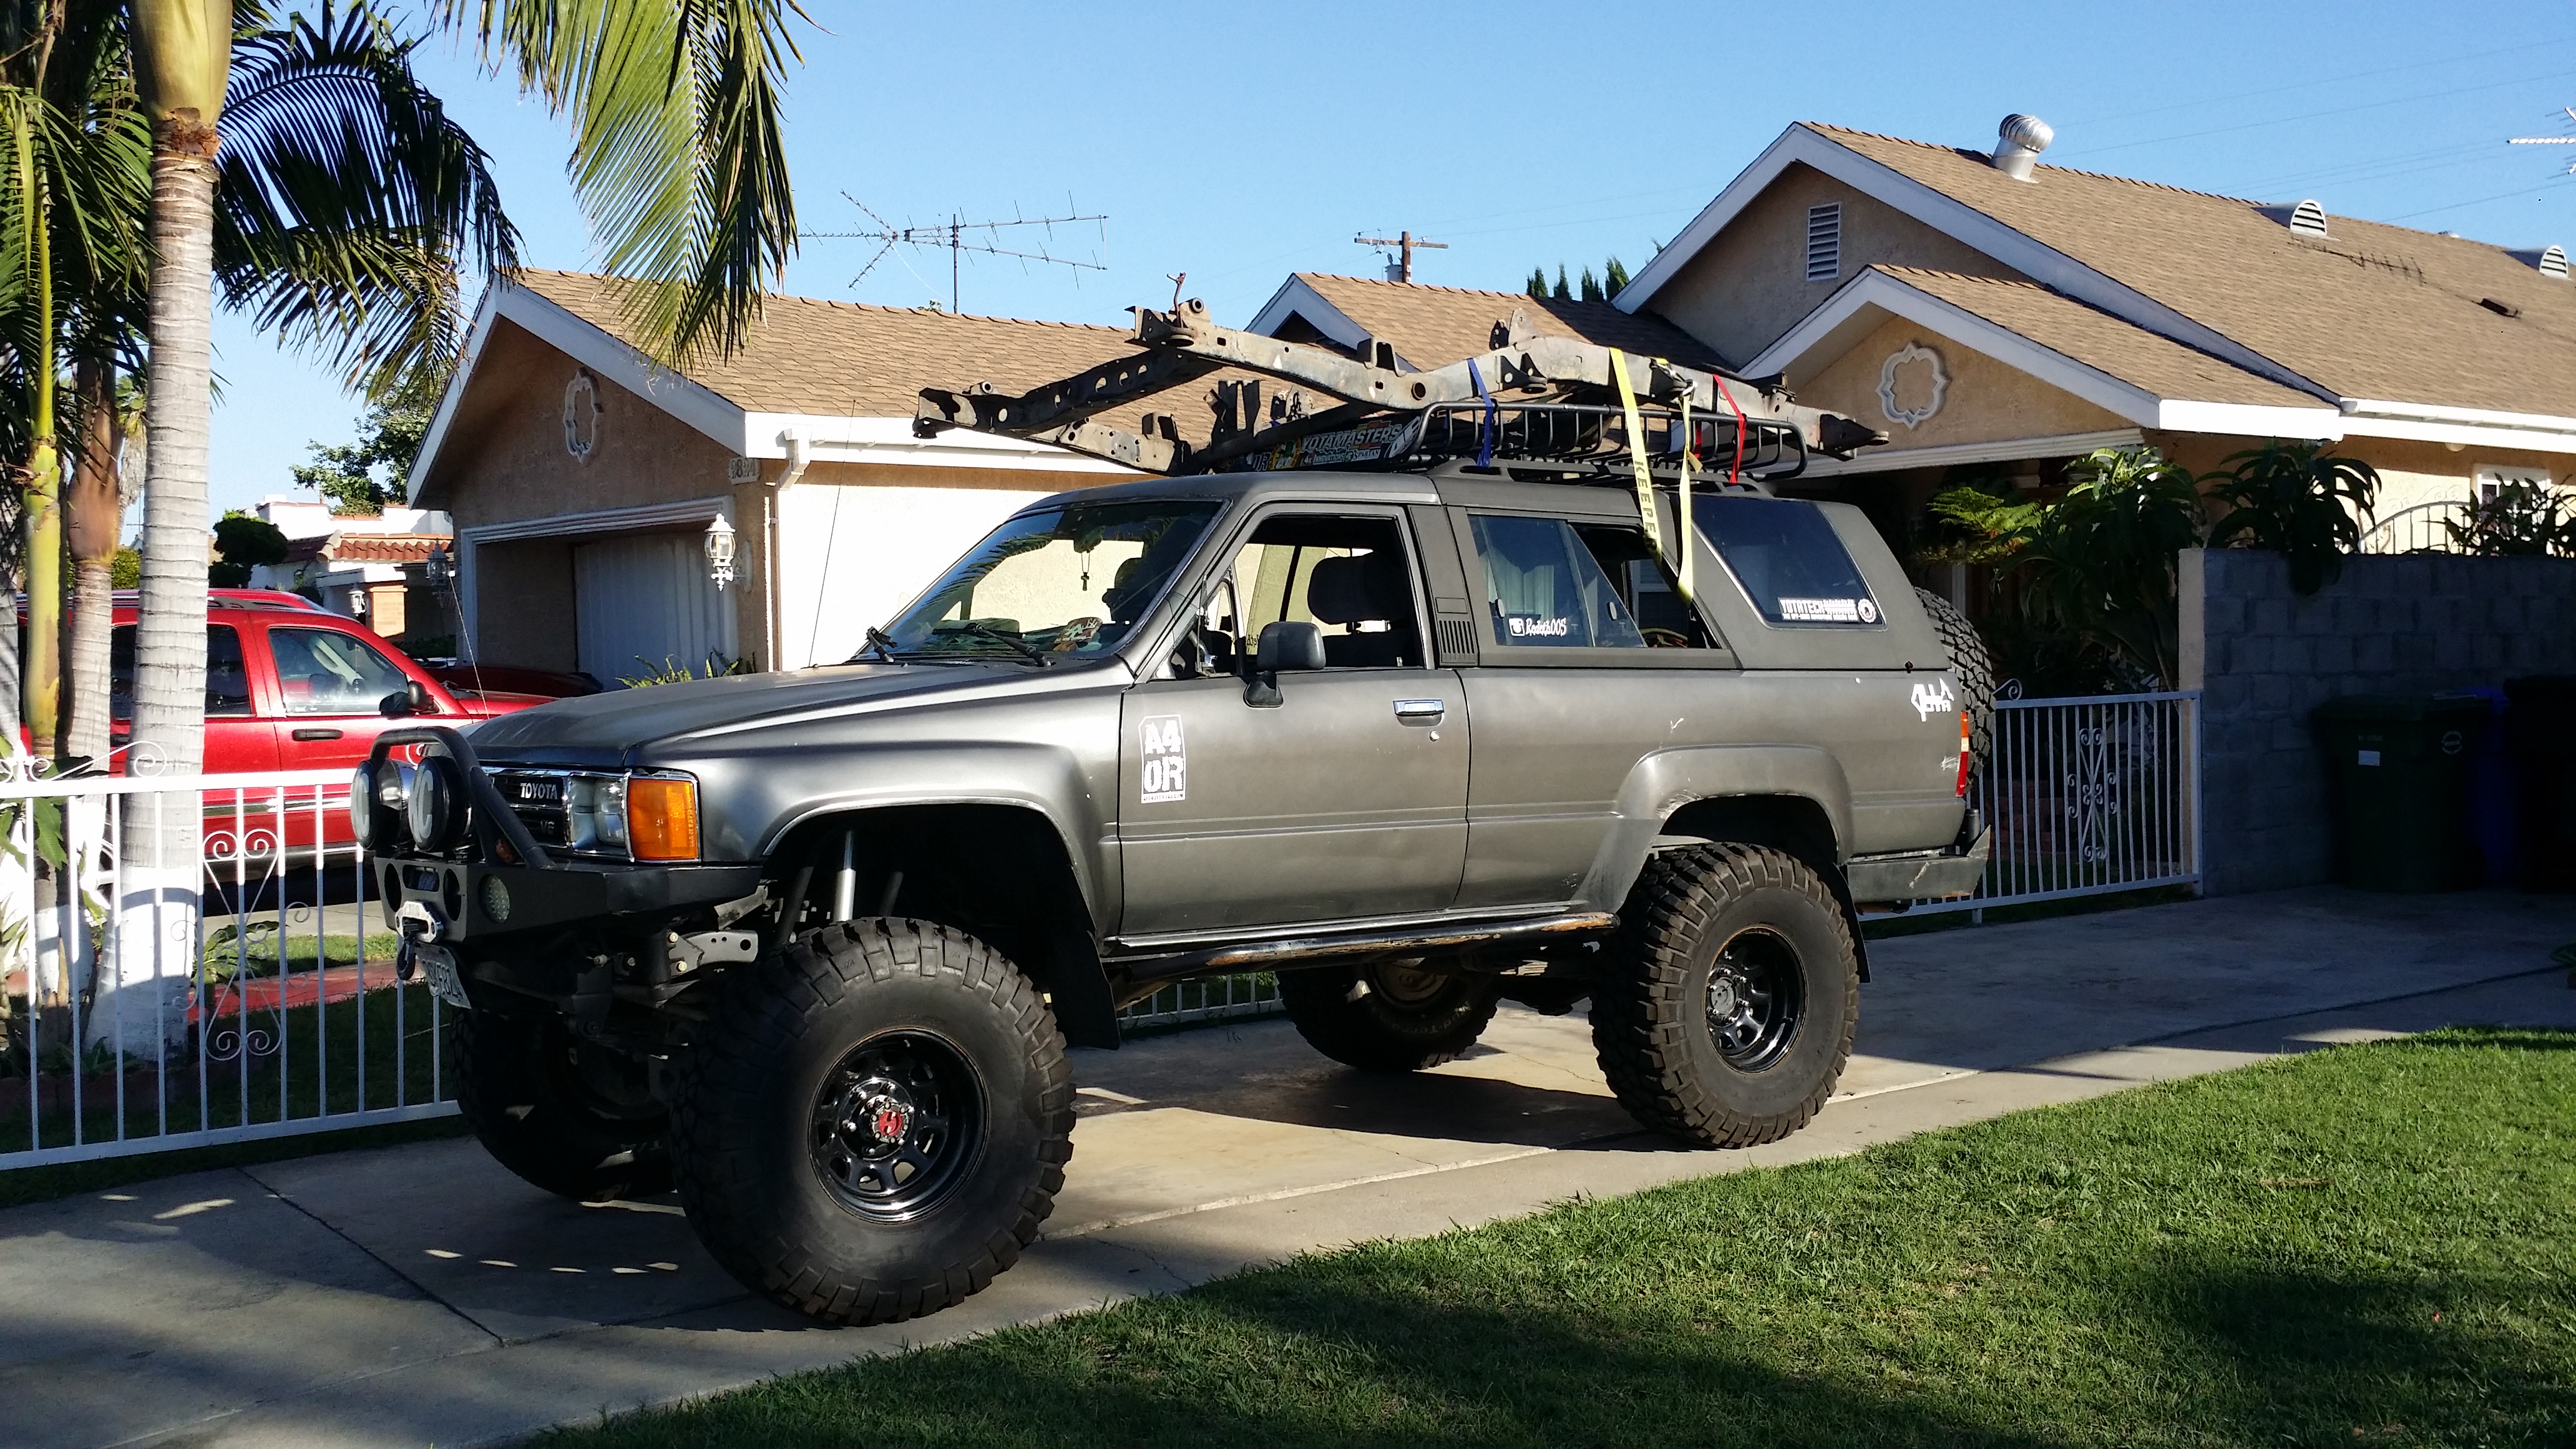
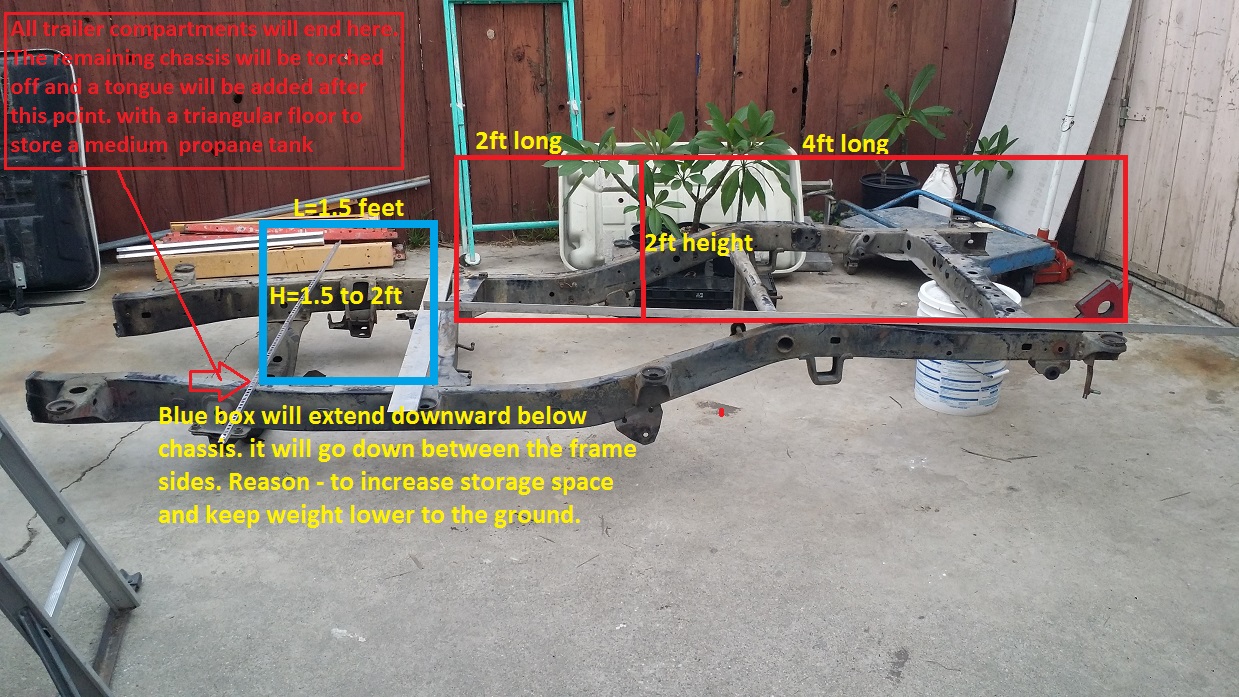
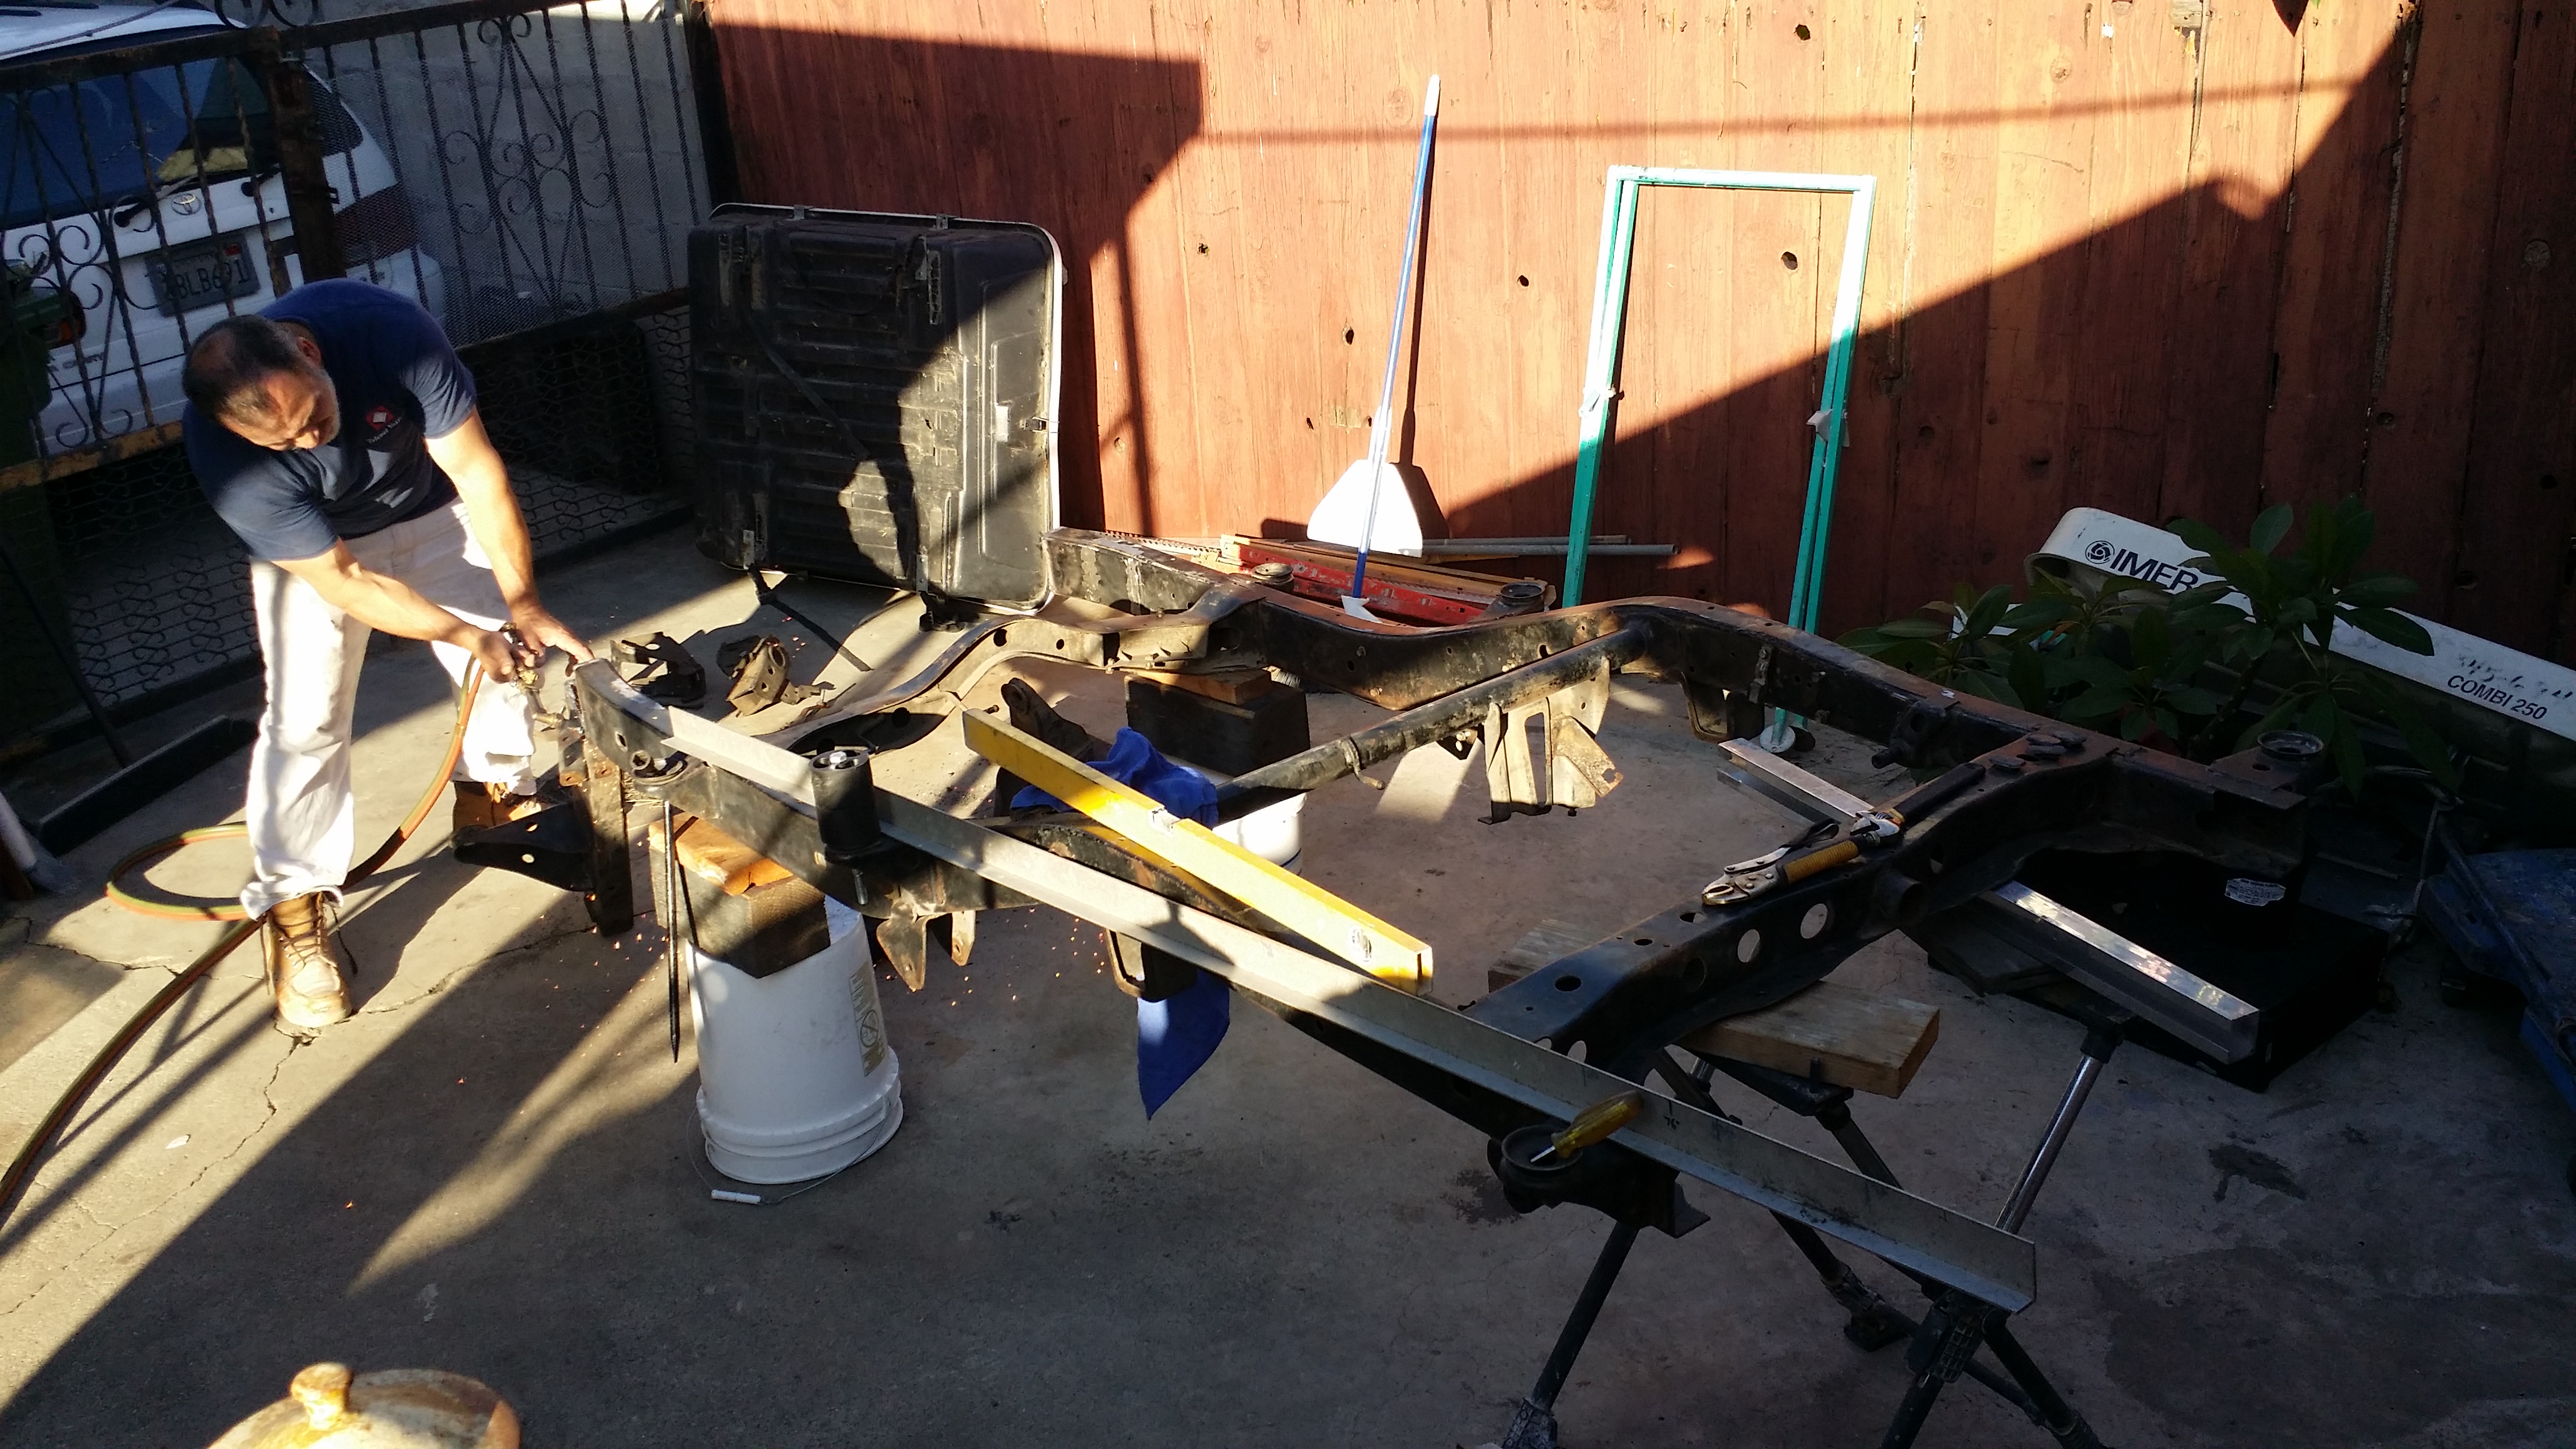
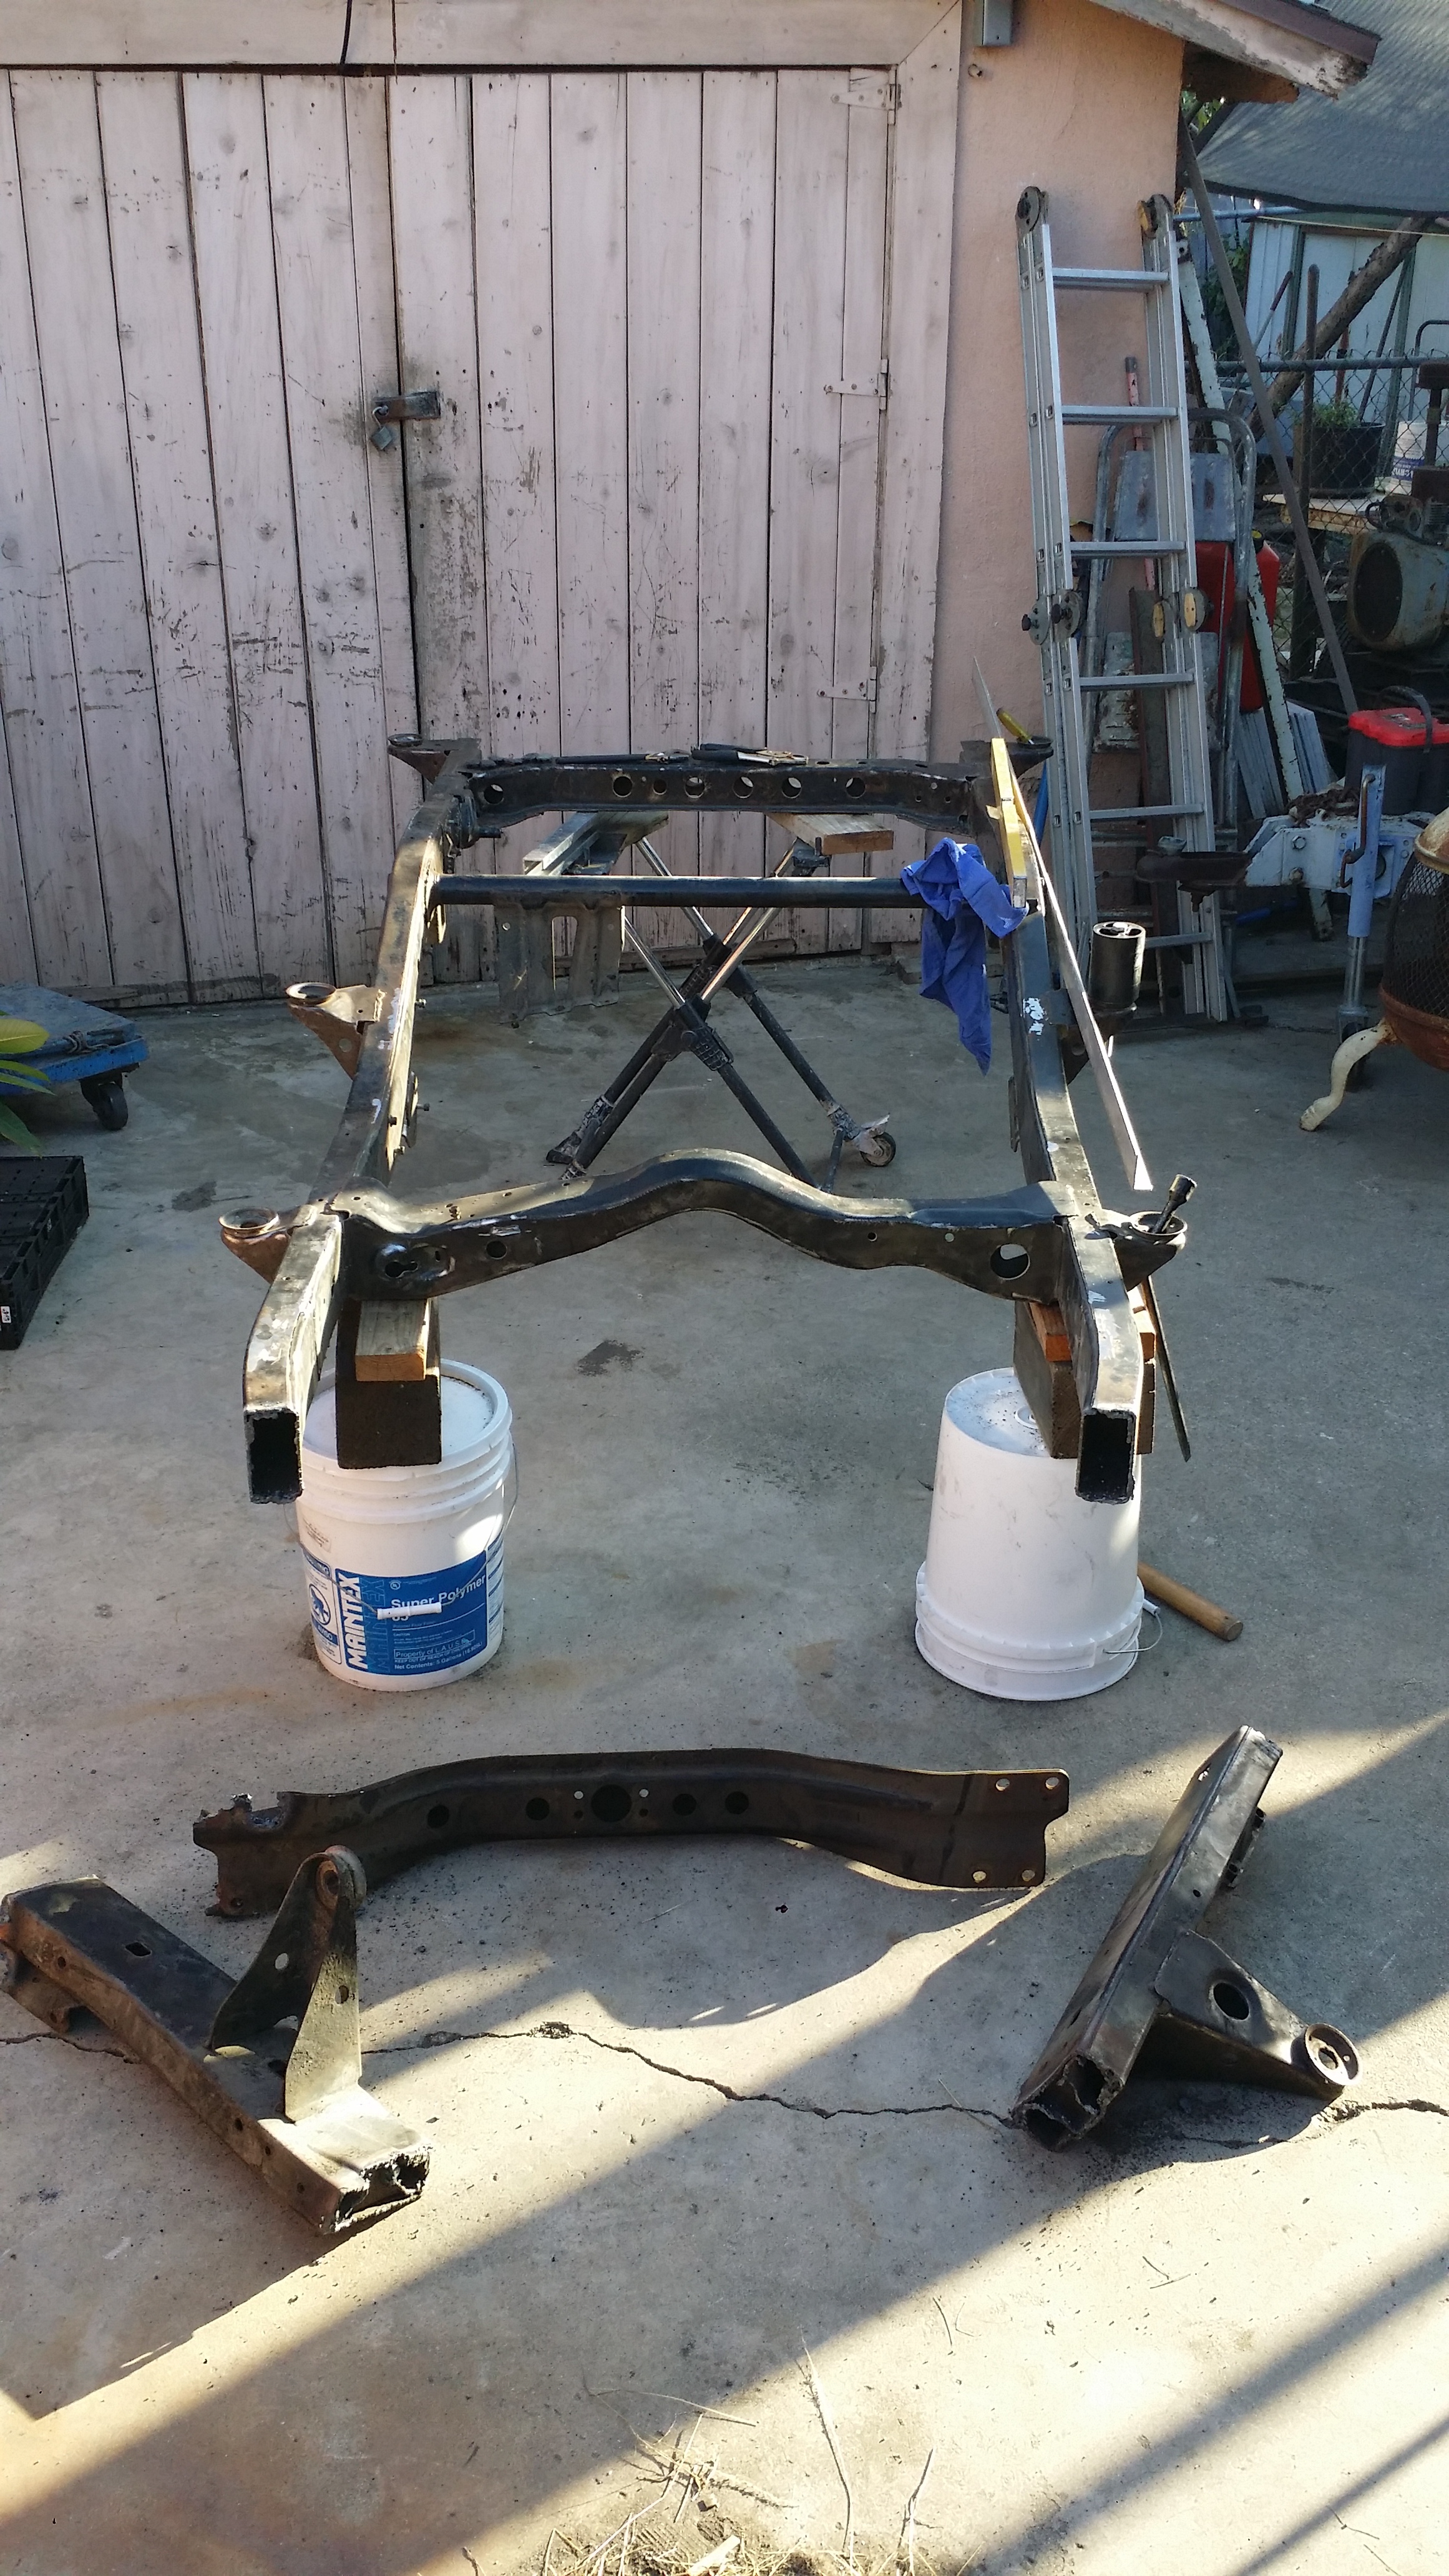
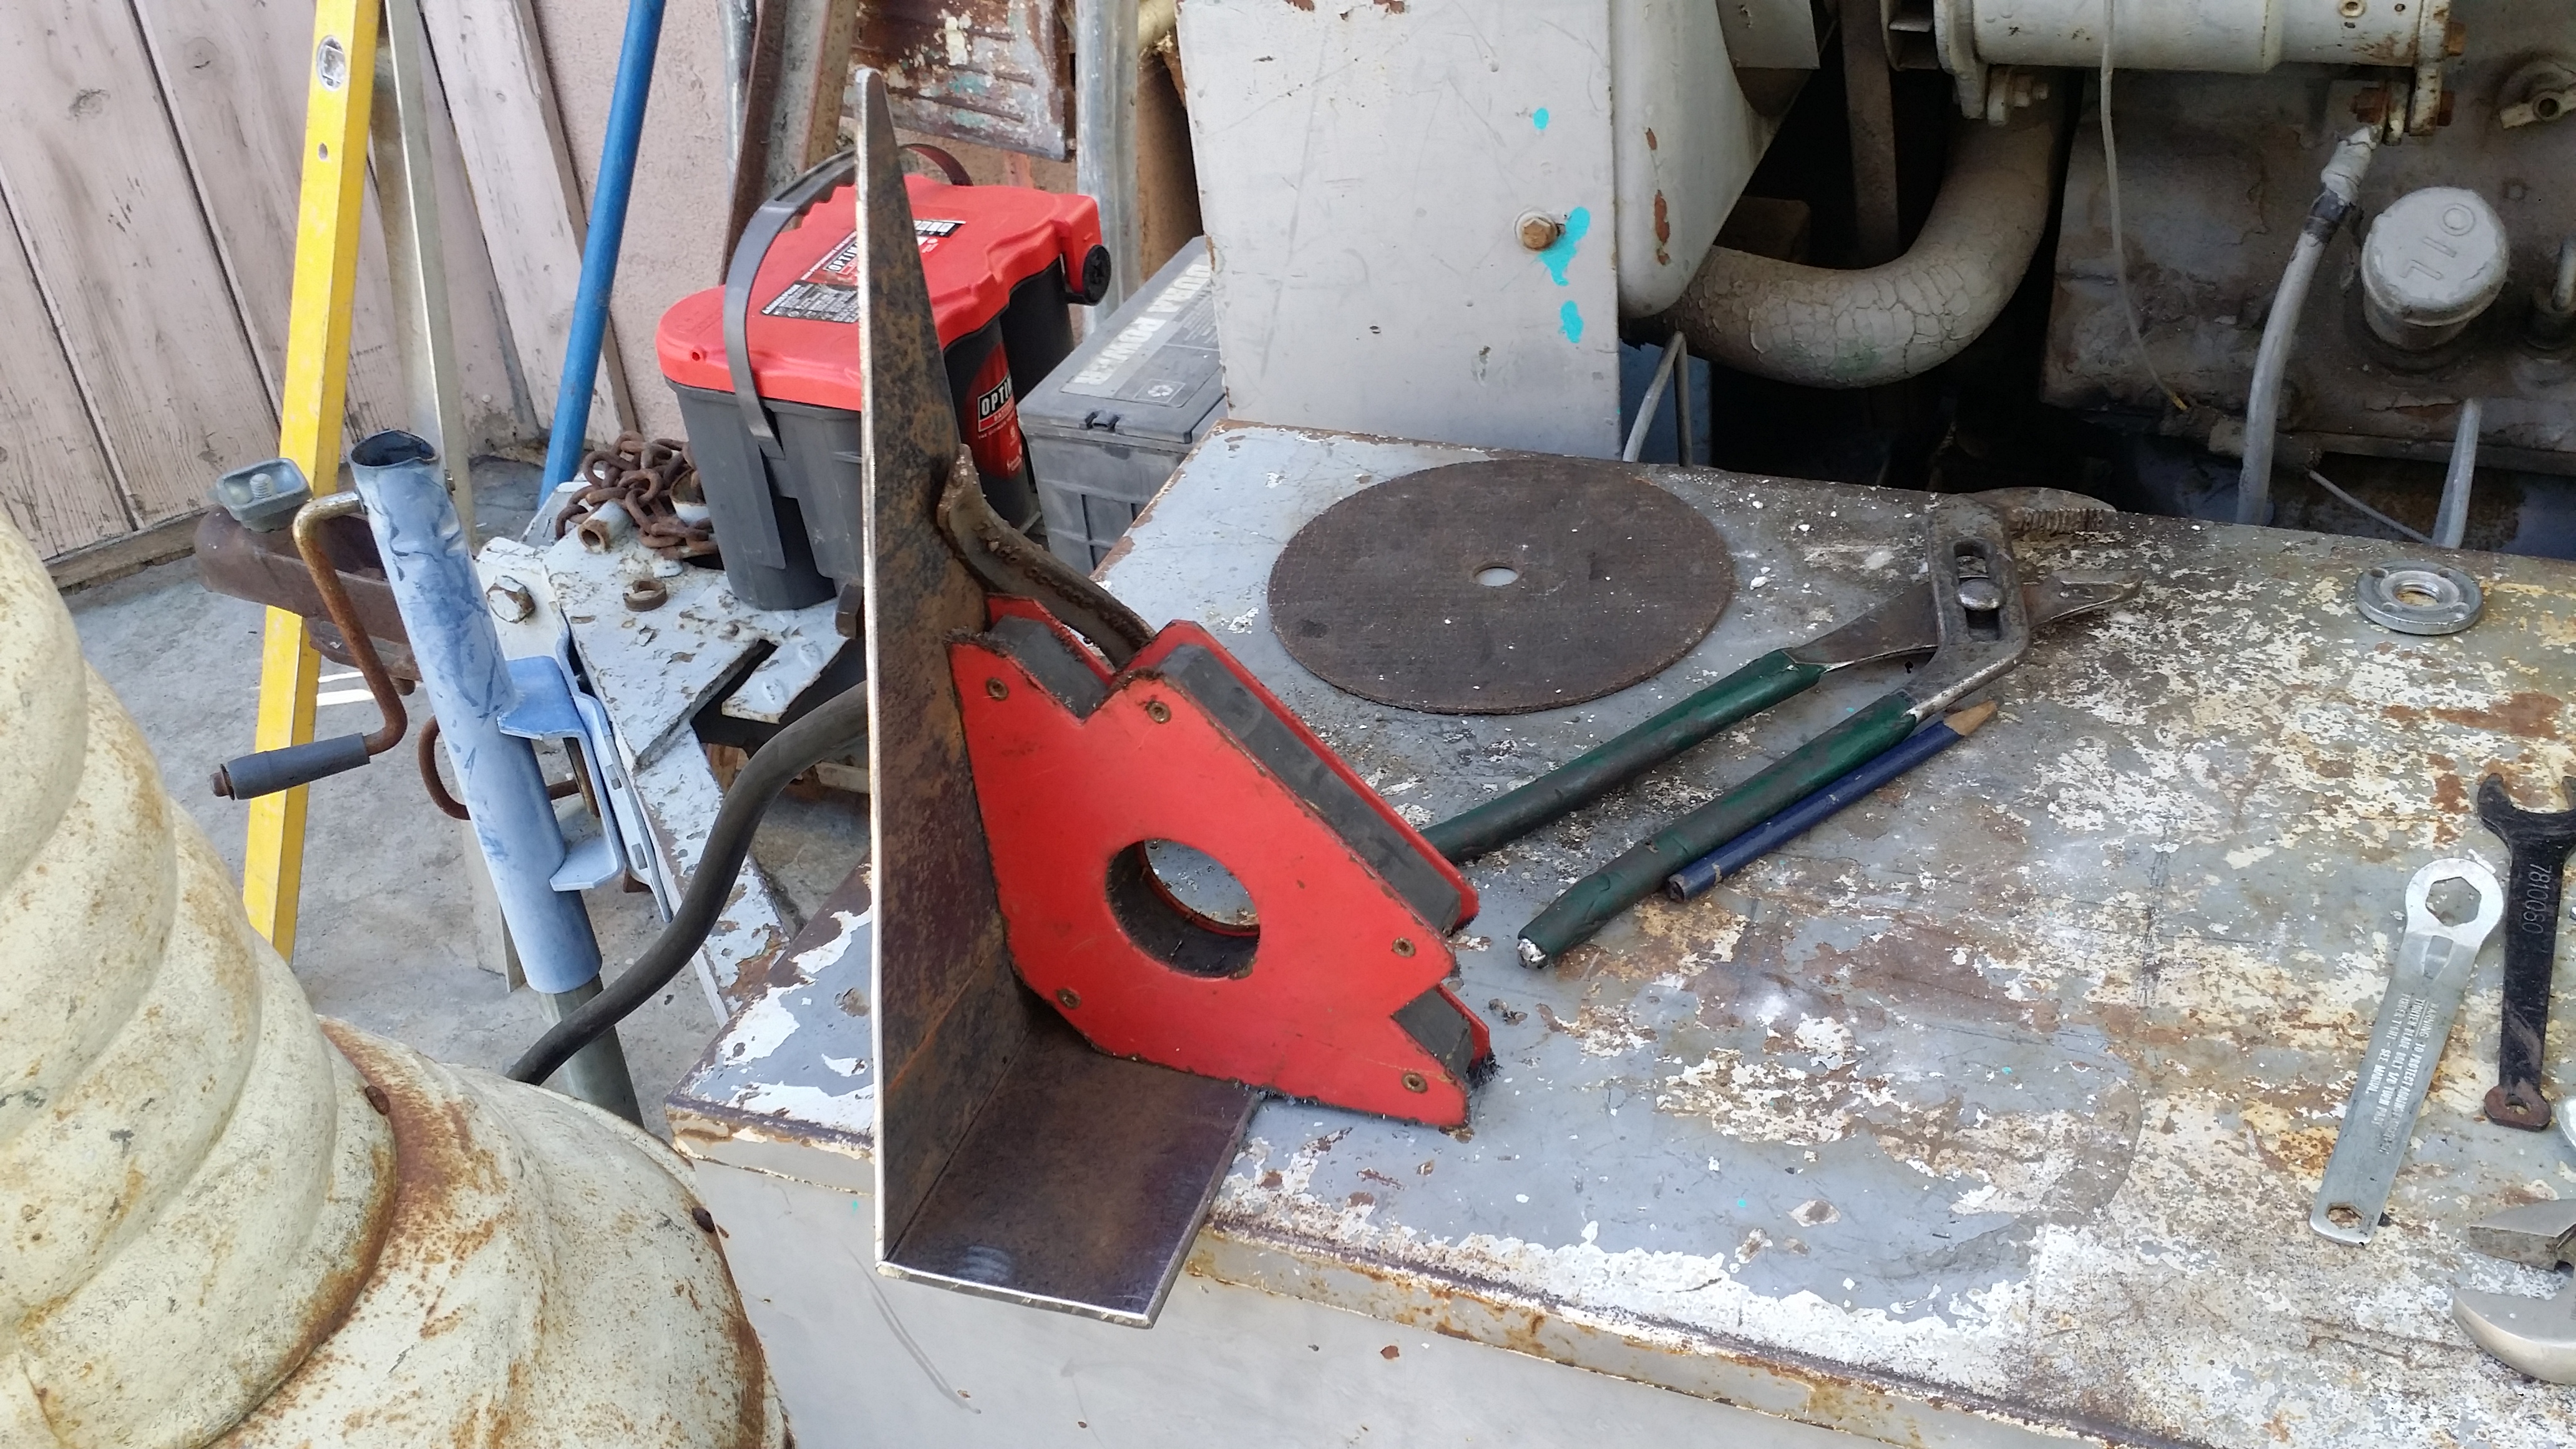
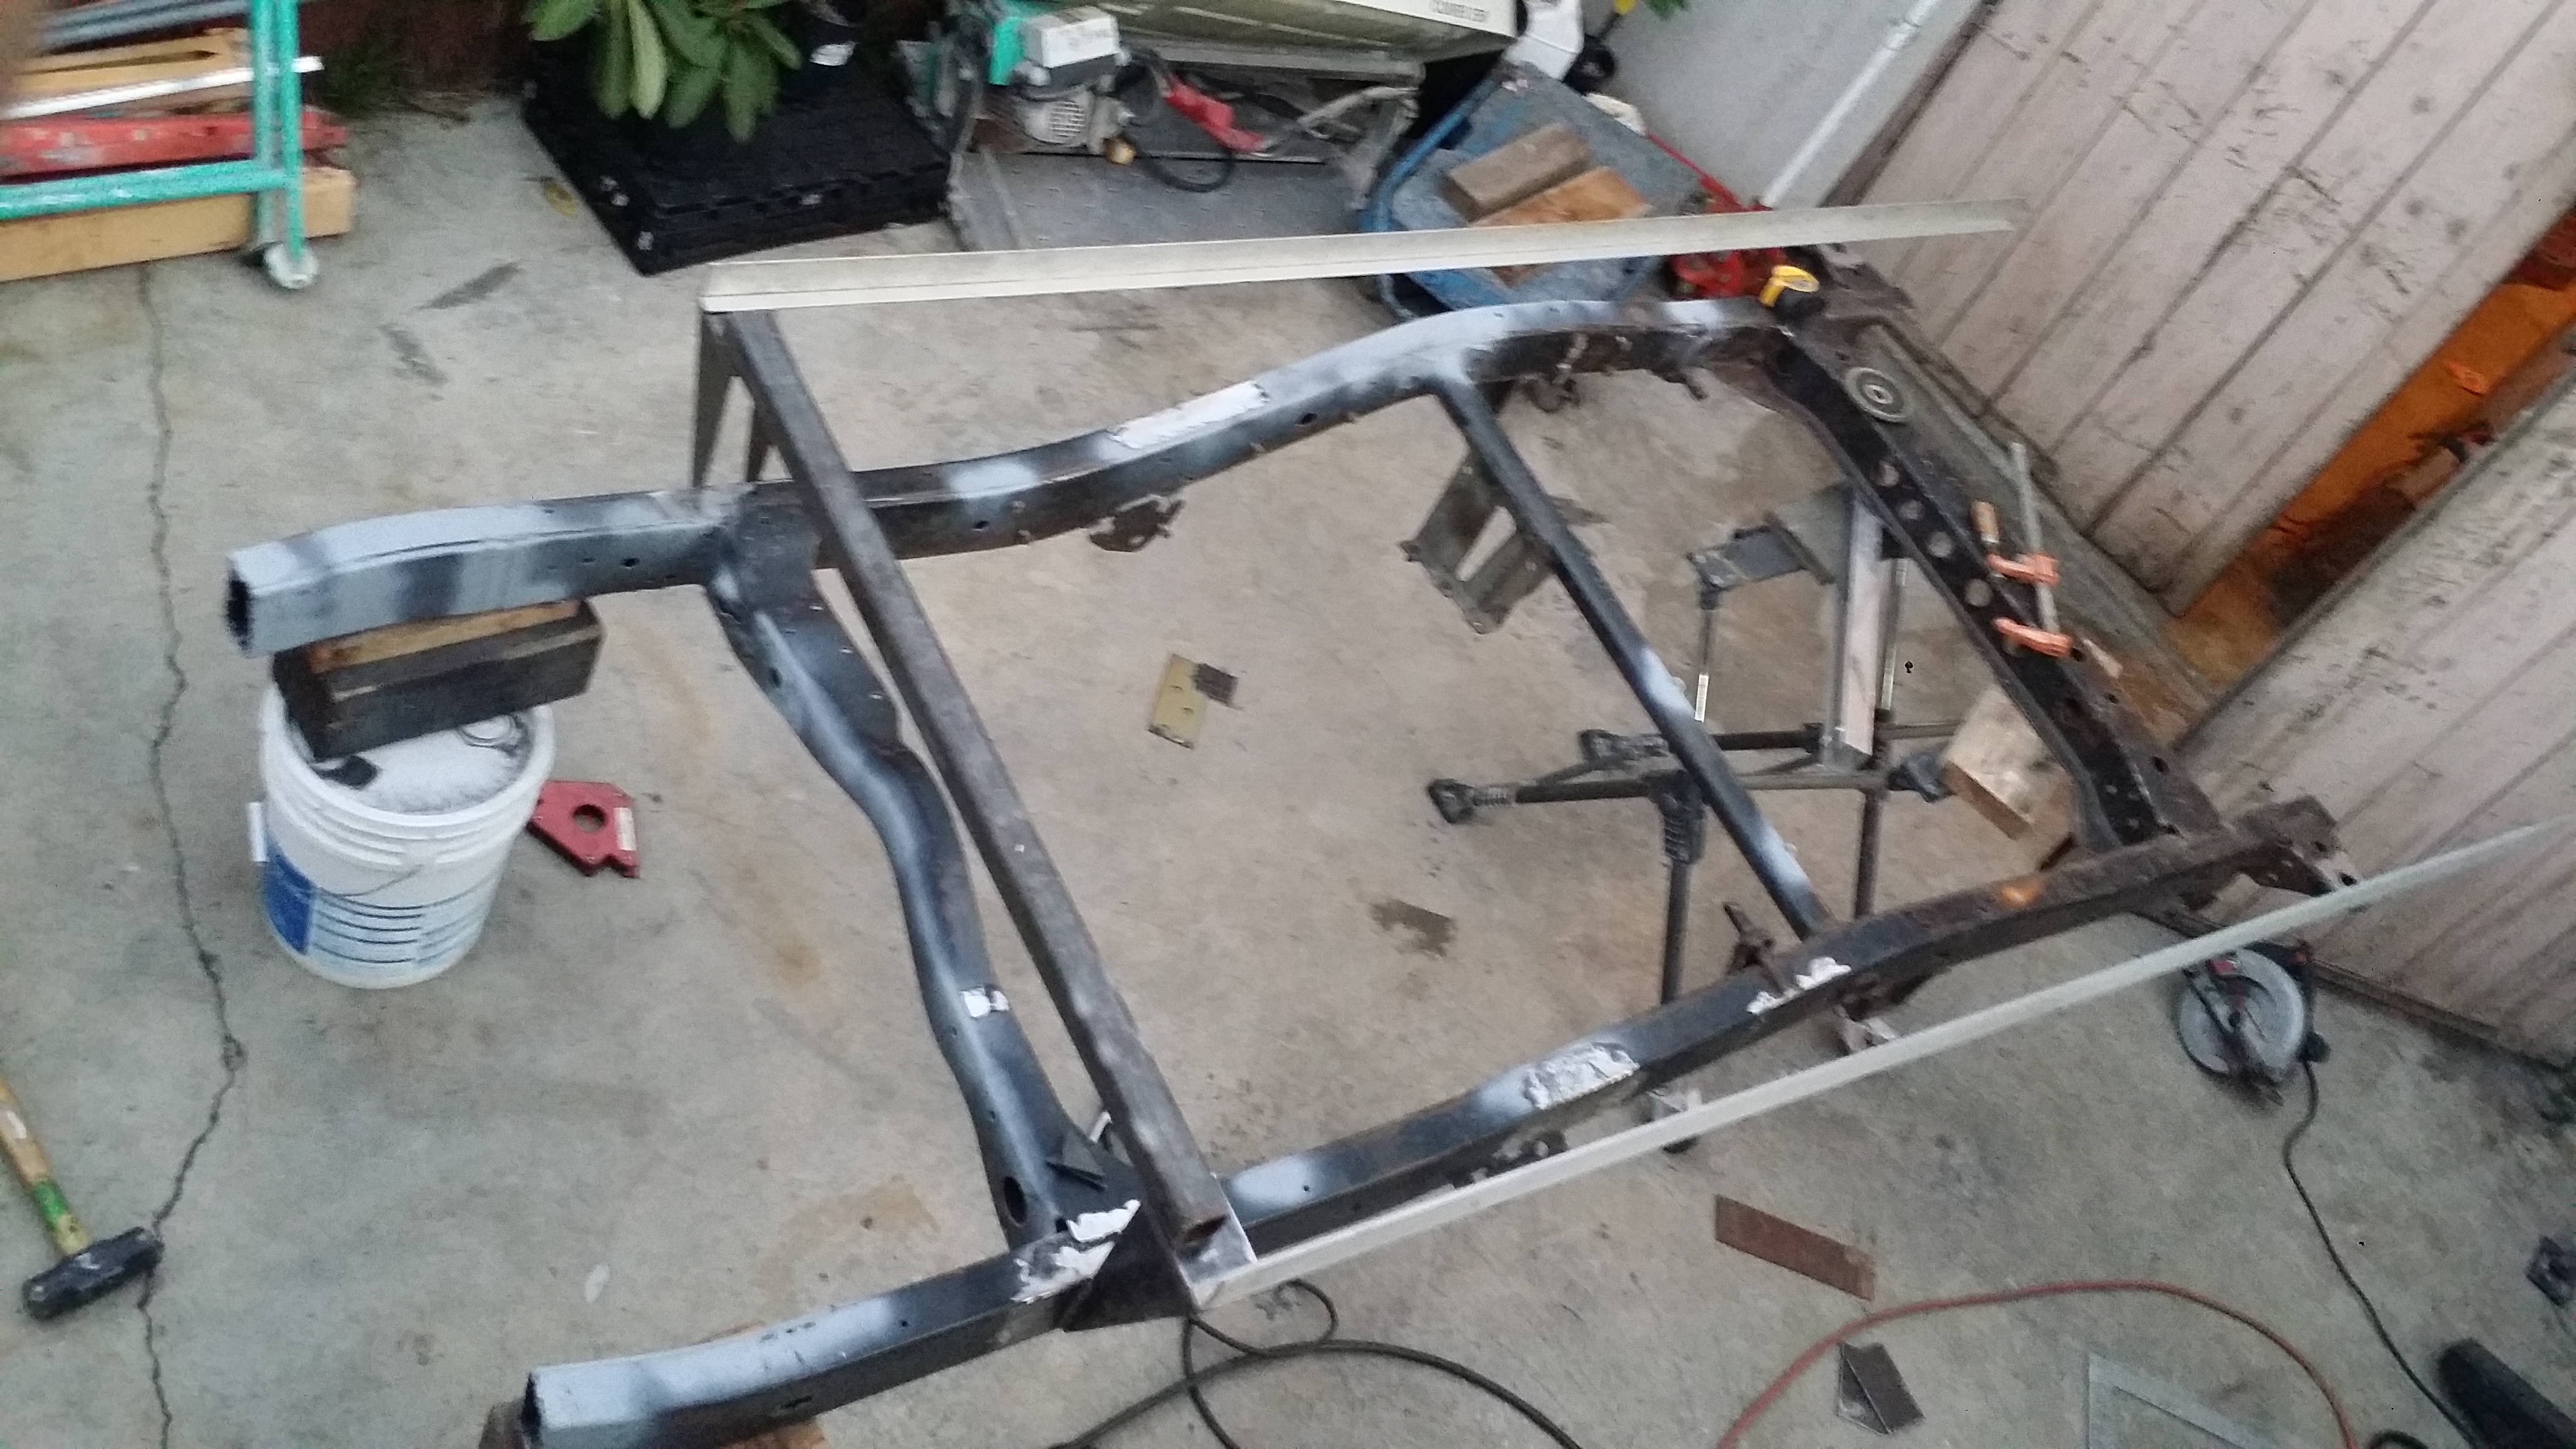
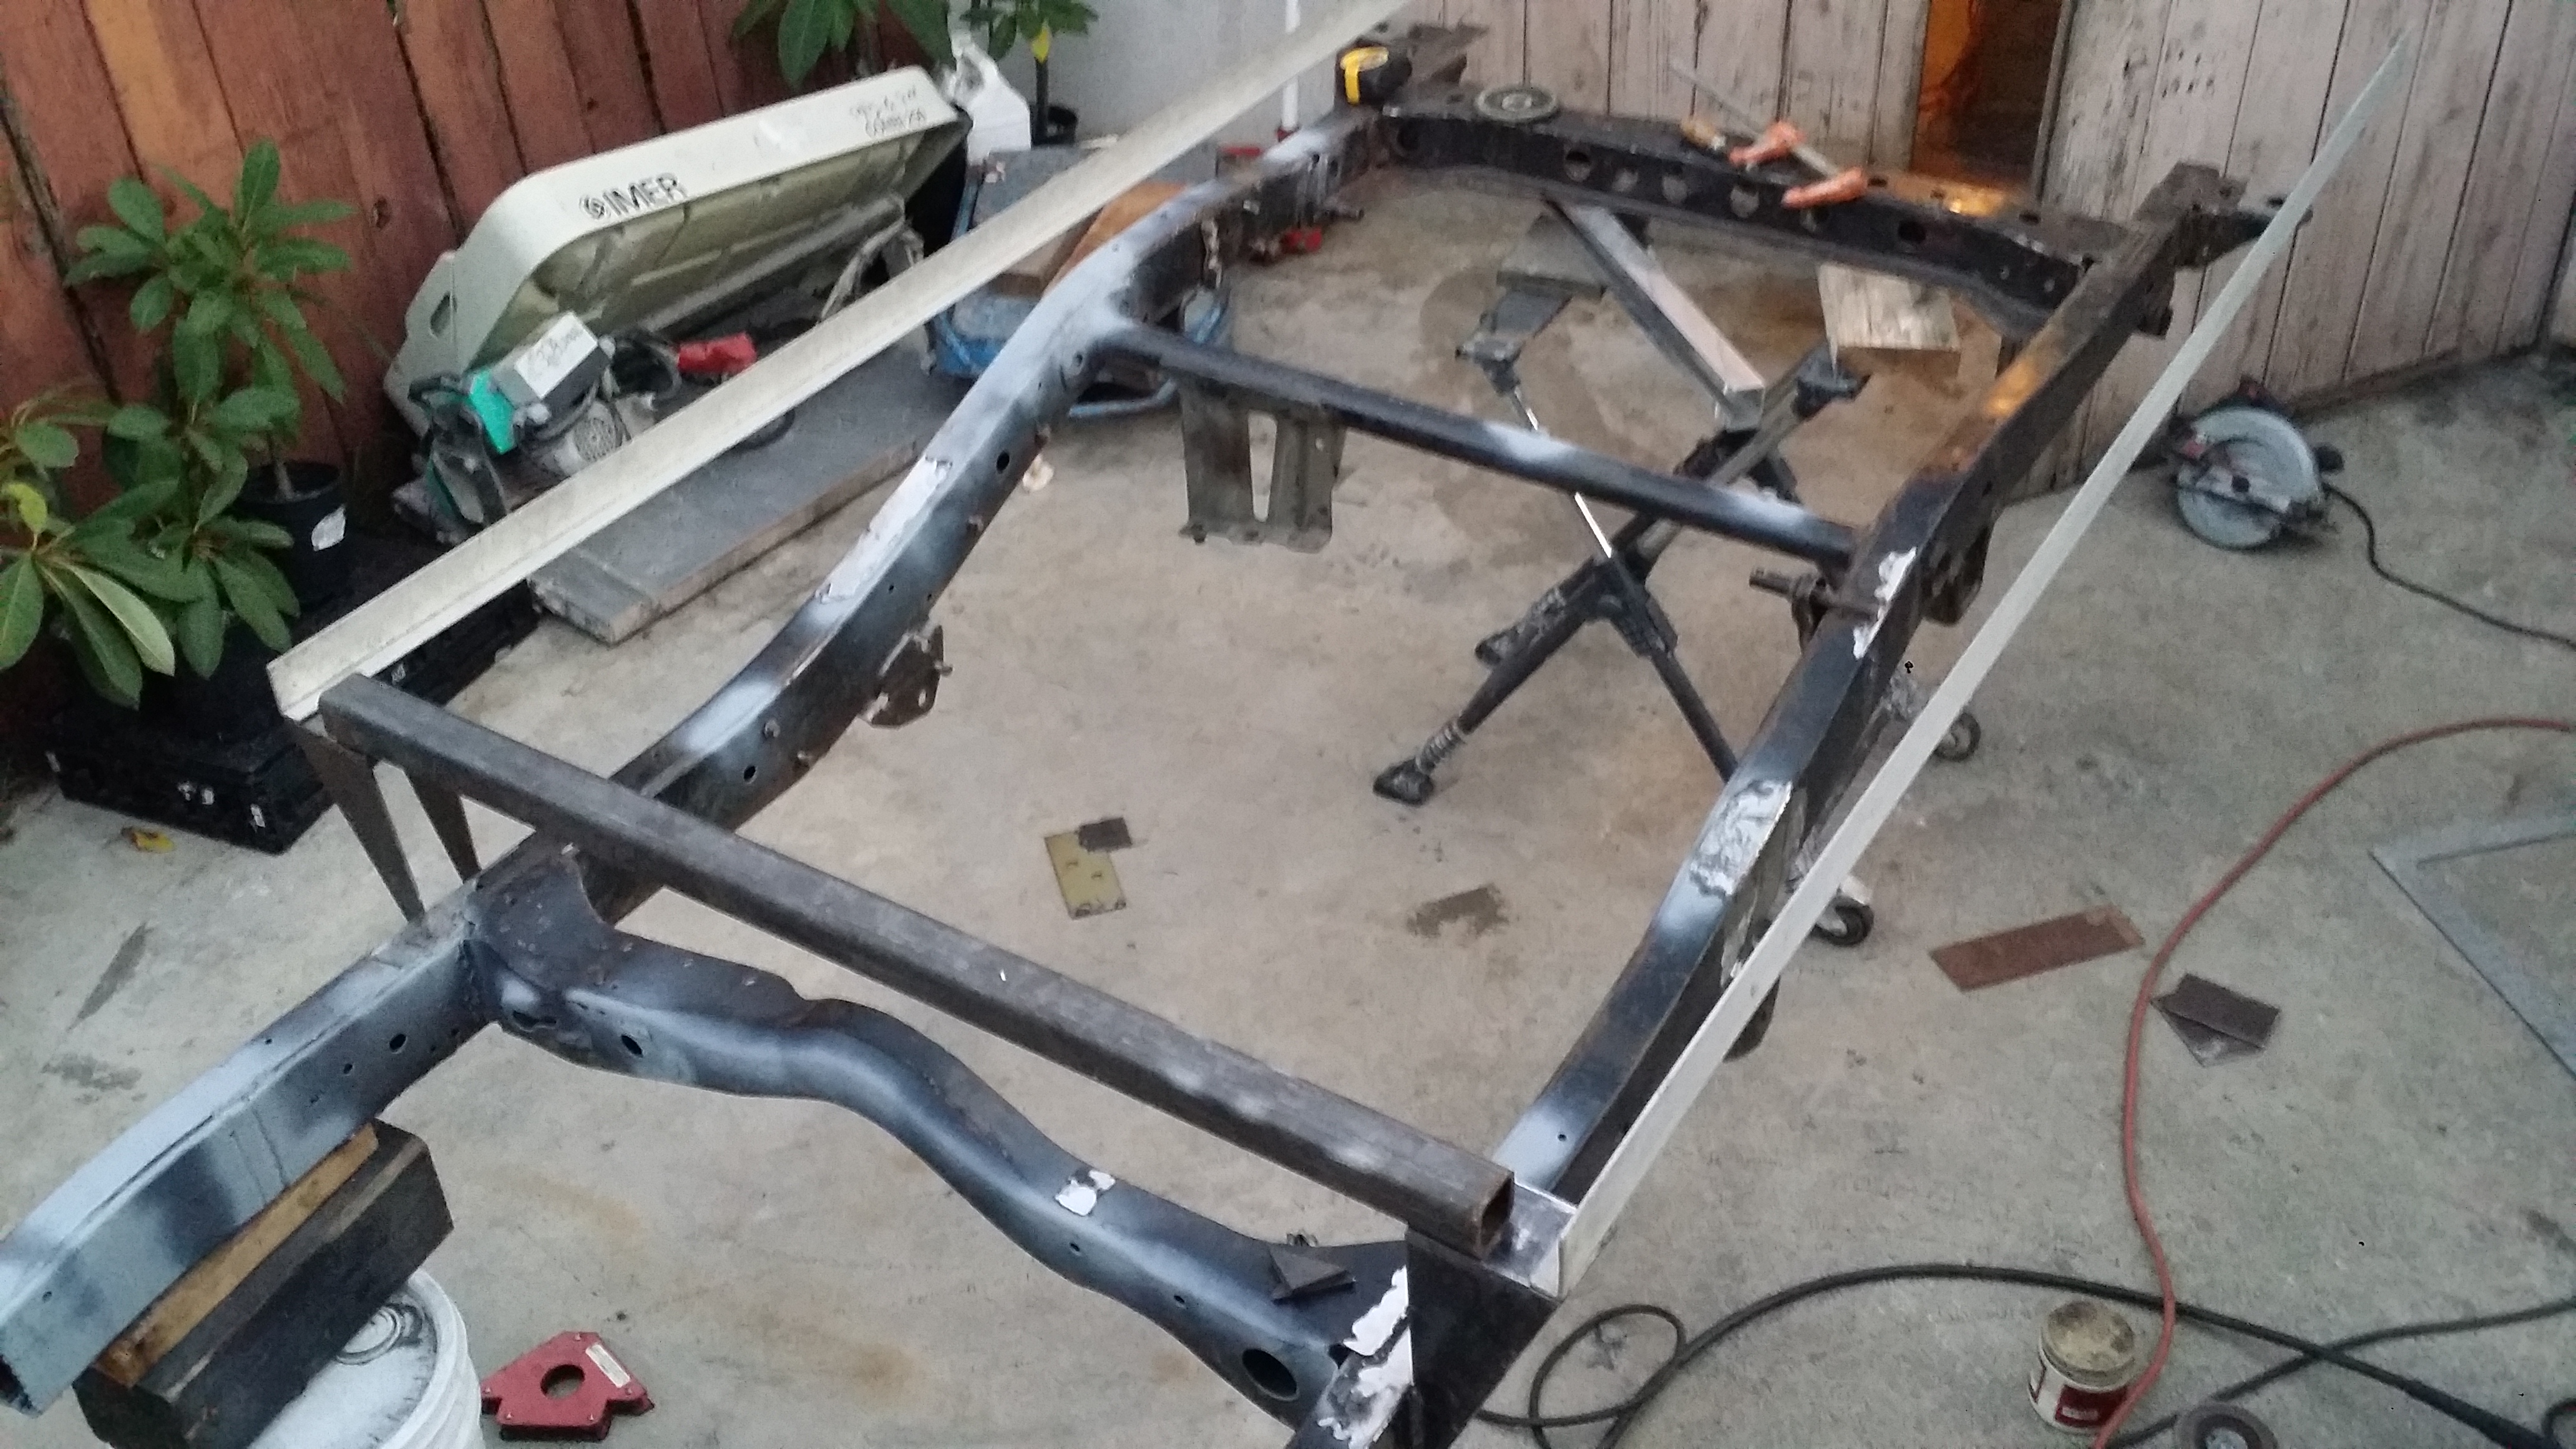
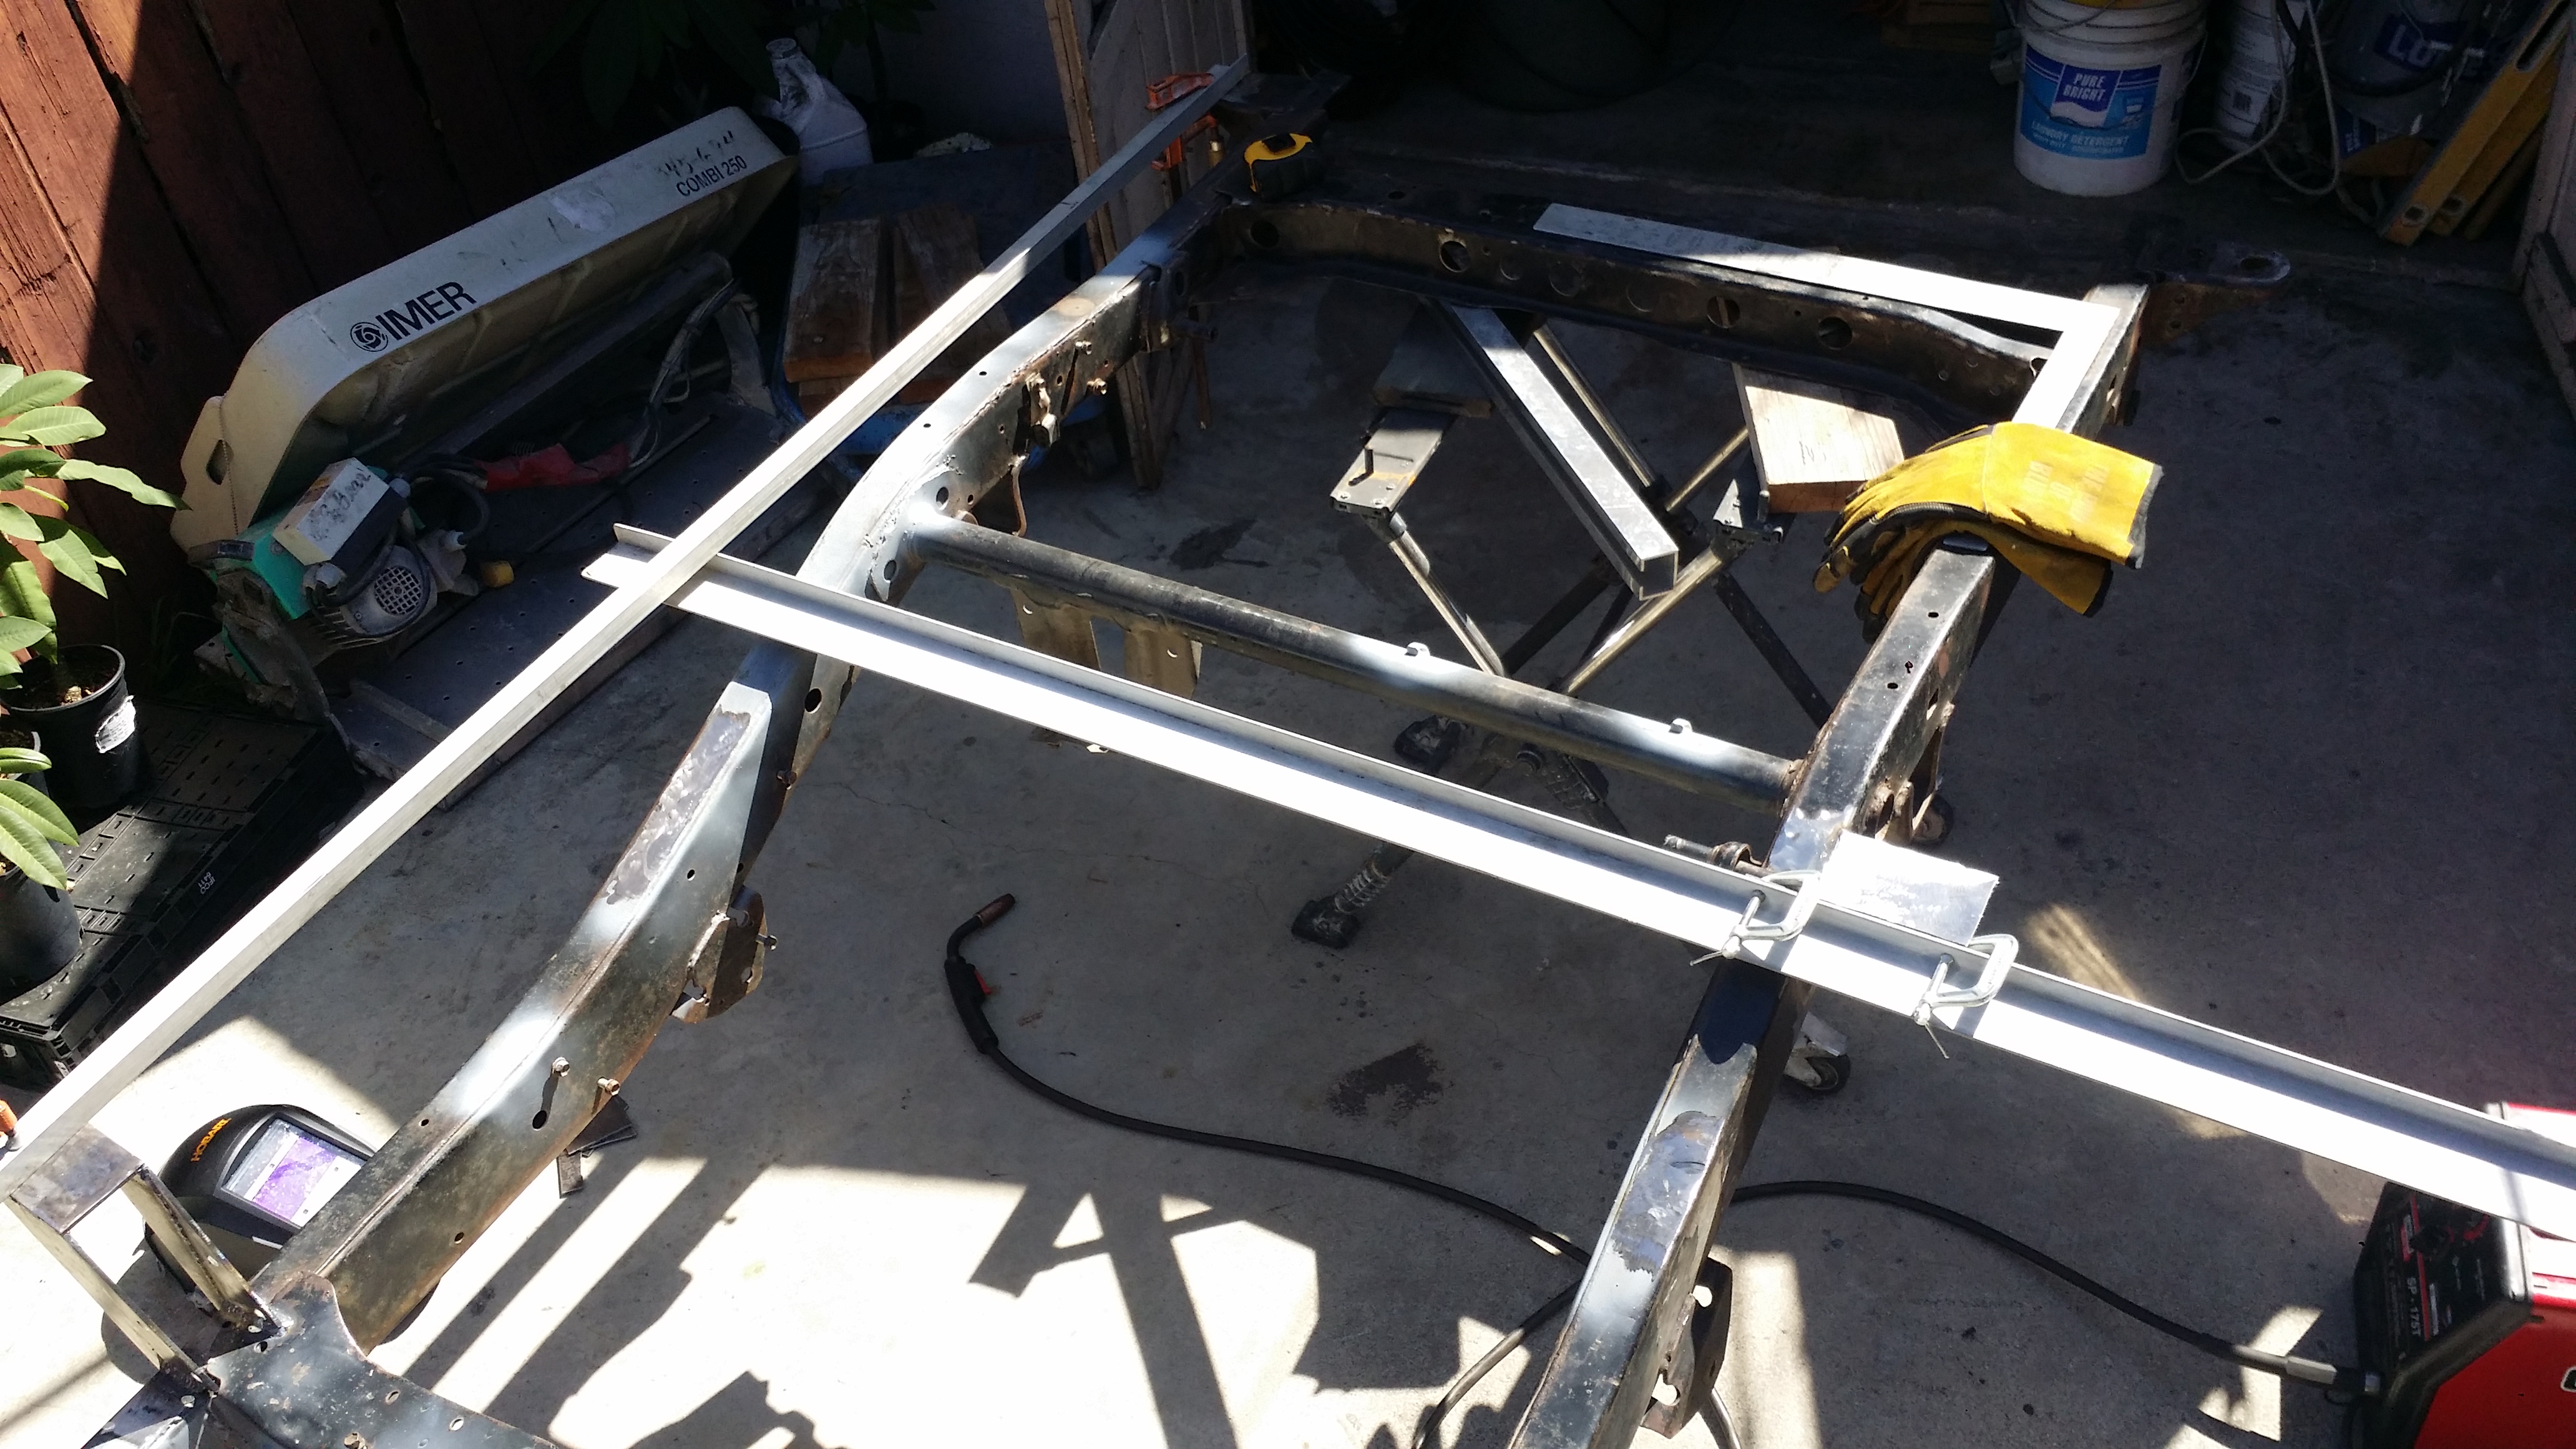
Here is my frame. I am planning to chop off the front end of this chasis some more. I will be cutting where the thin aluminum bar is near where that front cross member is at.
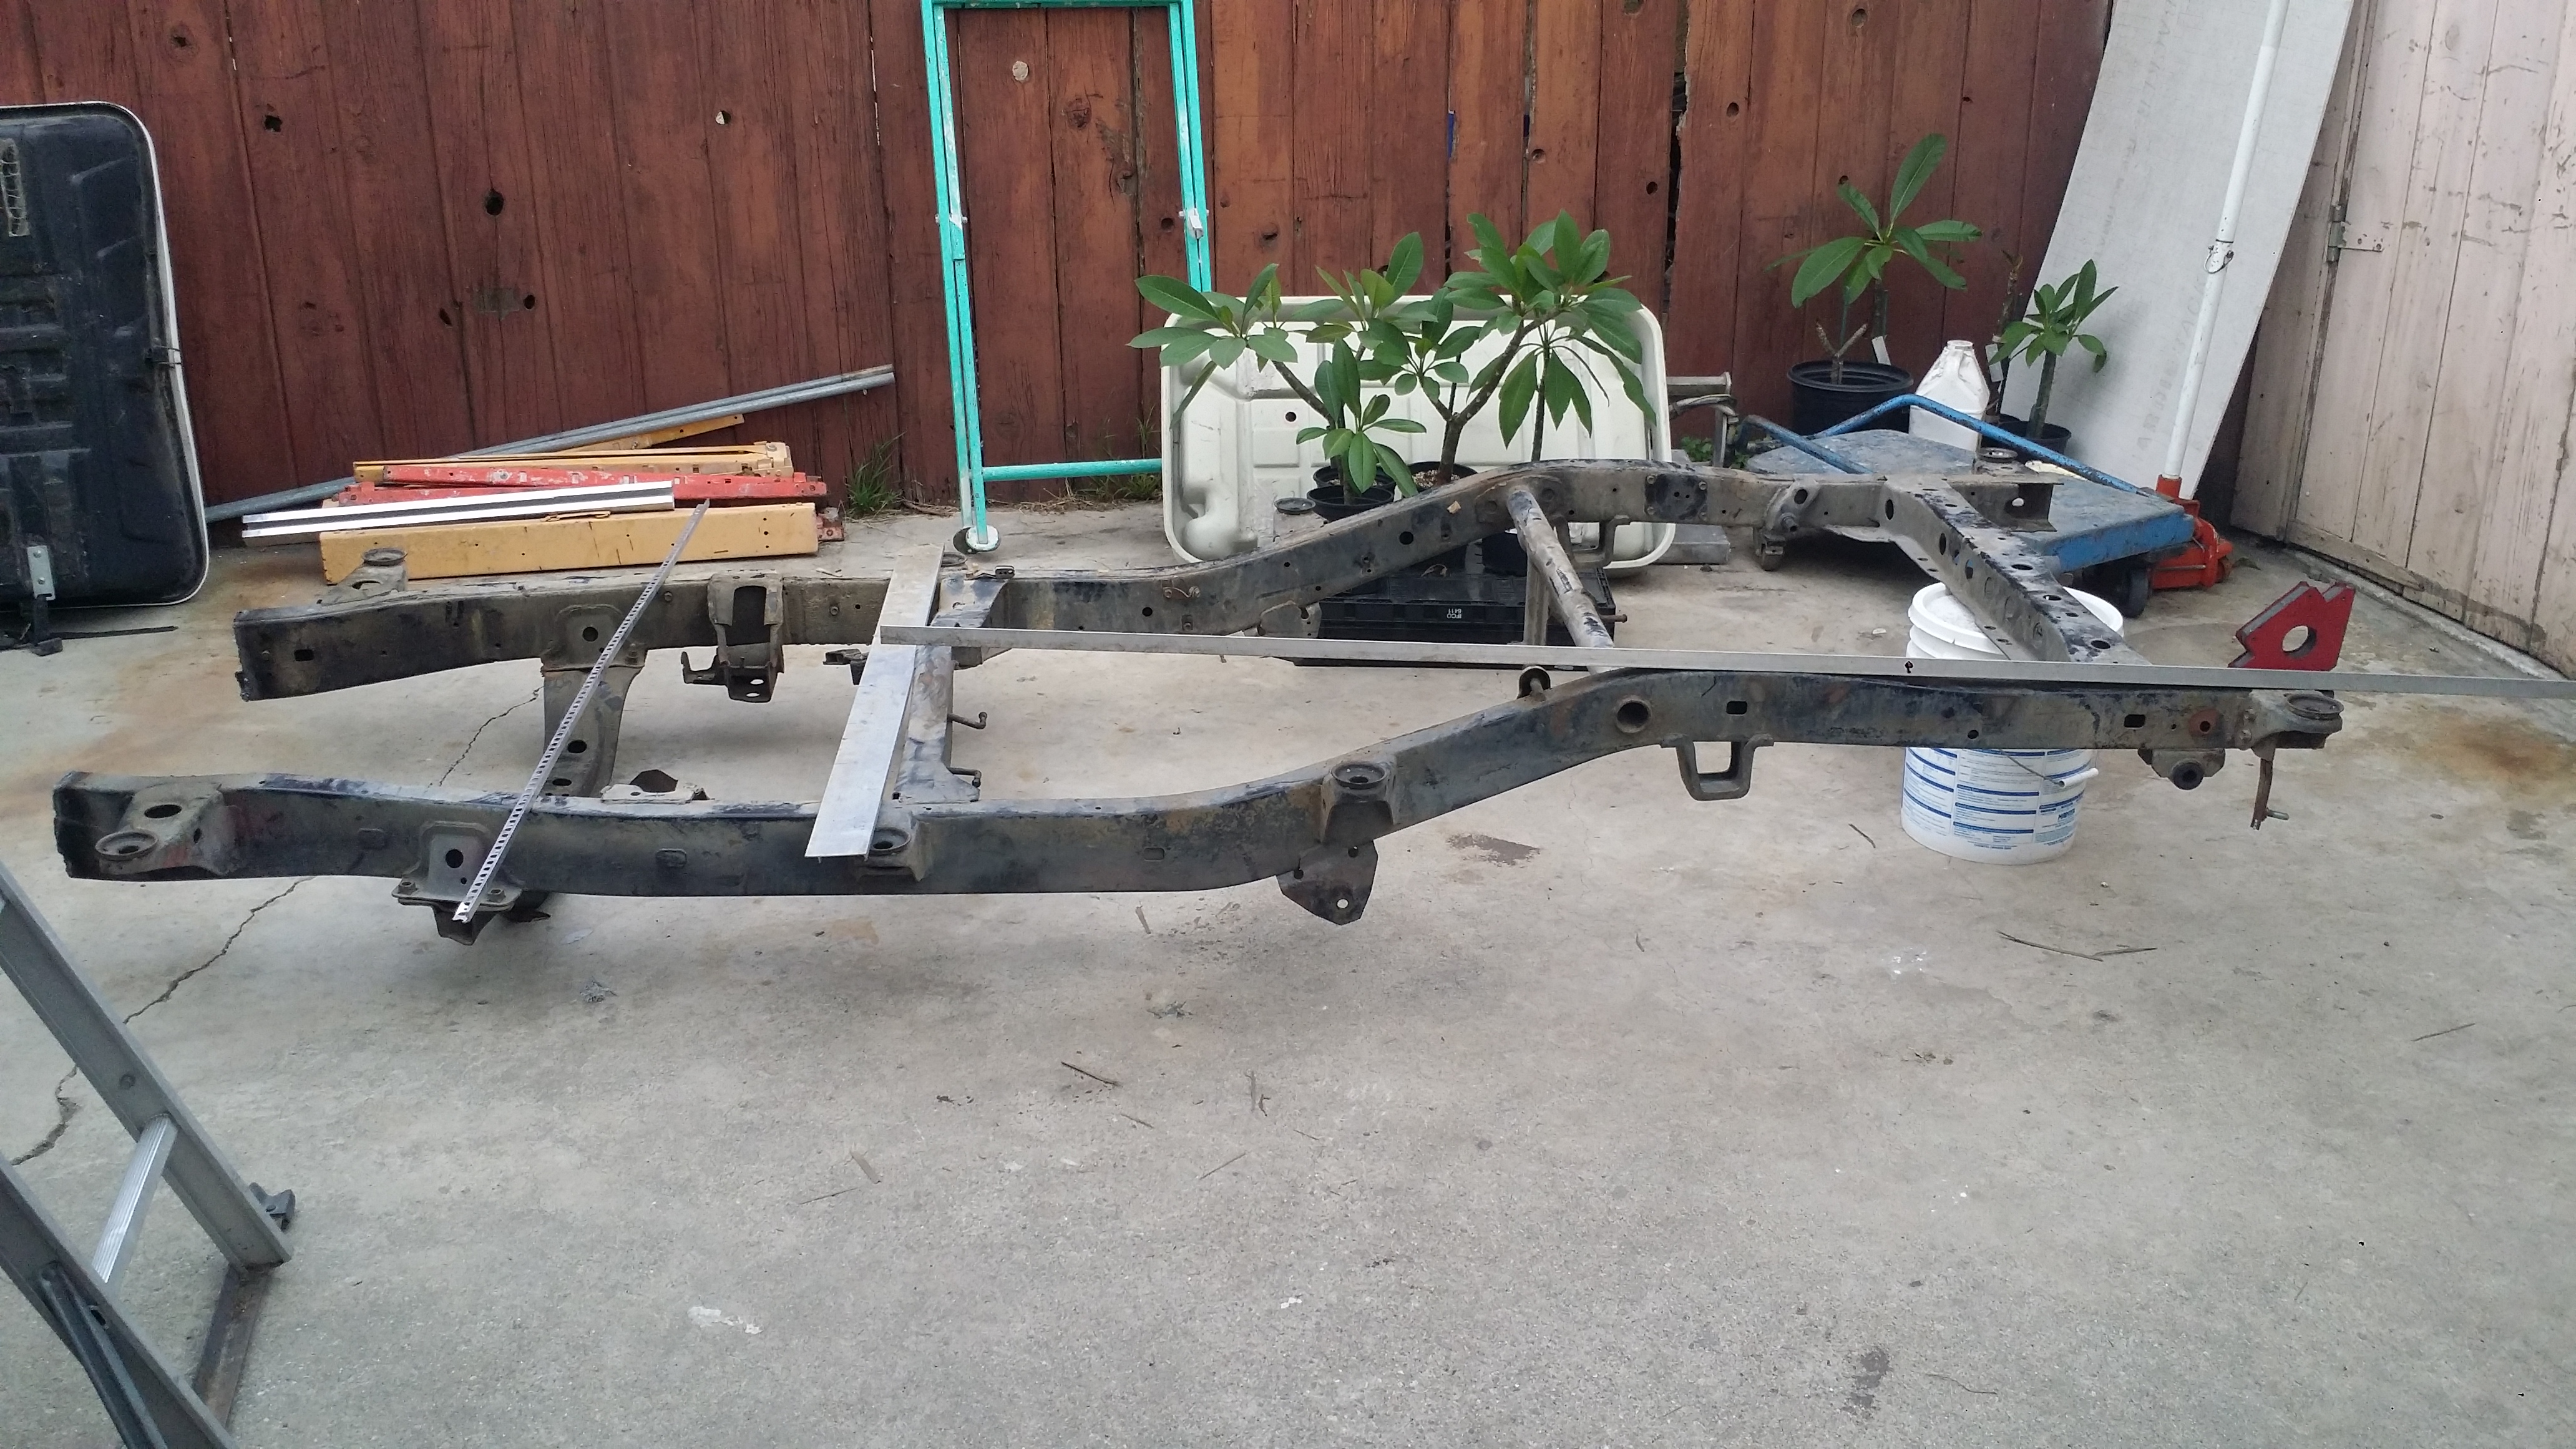
I plan to make the main storage box 6ft long by 4ft&3" wide and 2ft tall.
In this next pic you can see the lateral aluminum ruler begins at the drop of the frame and i plan to end it where the red 'arrow' welding magnet is at toward the rear of the chassis.
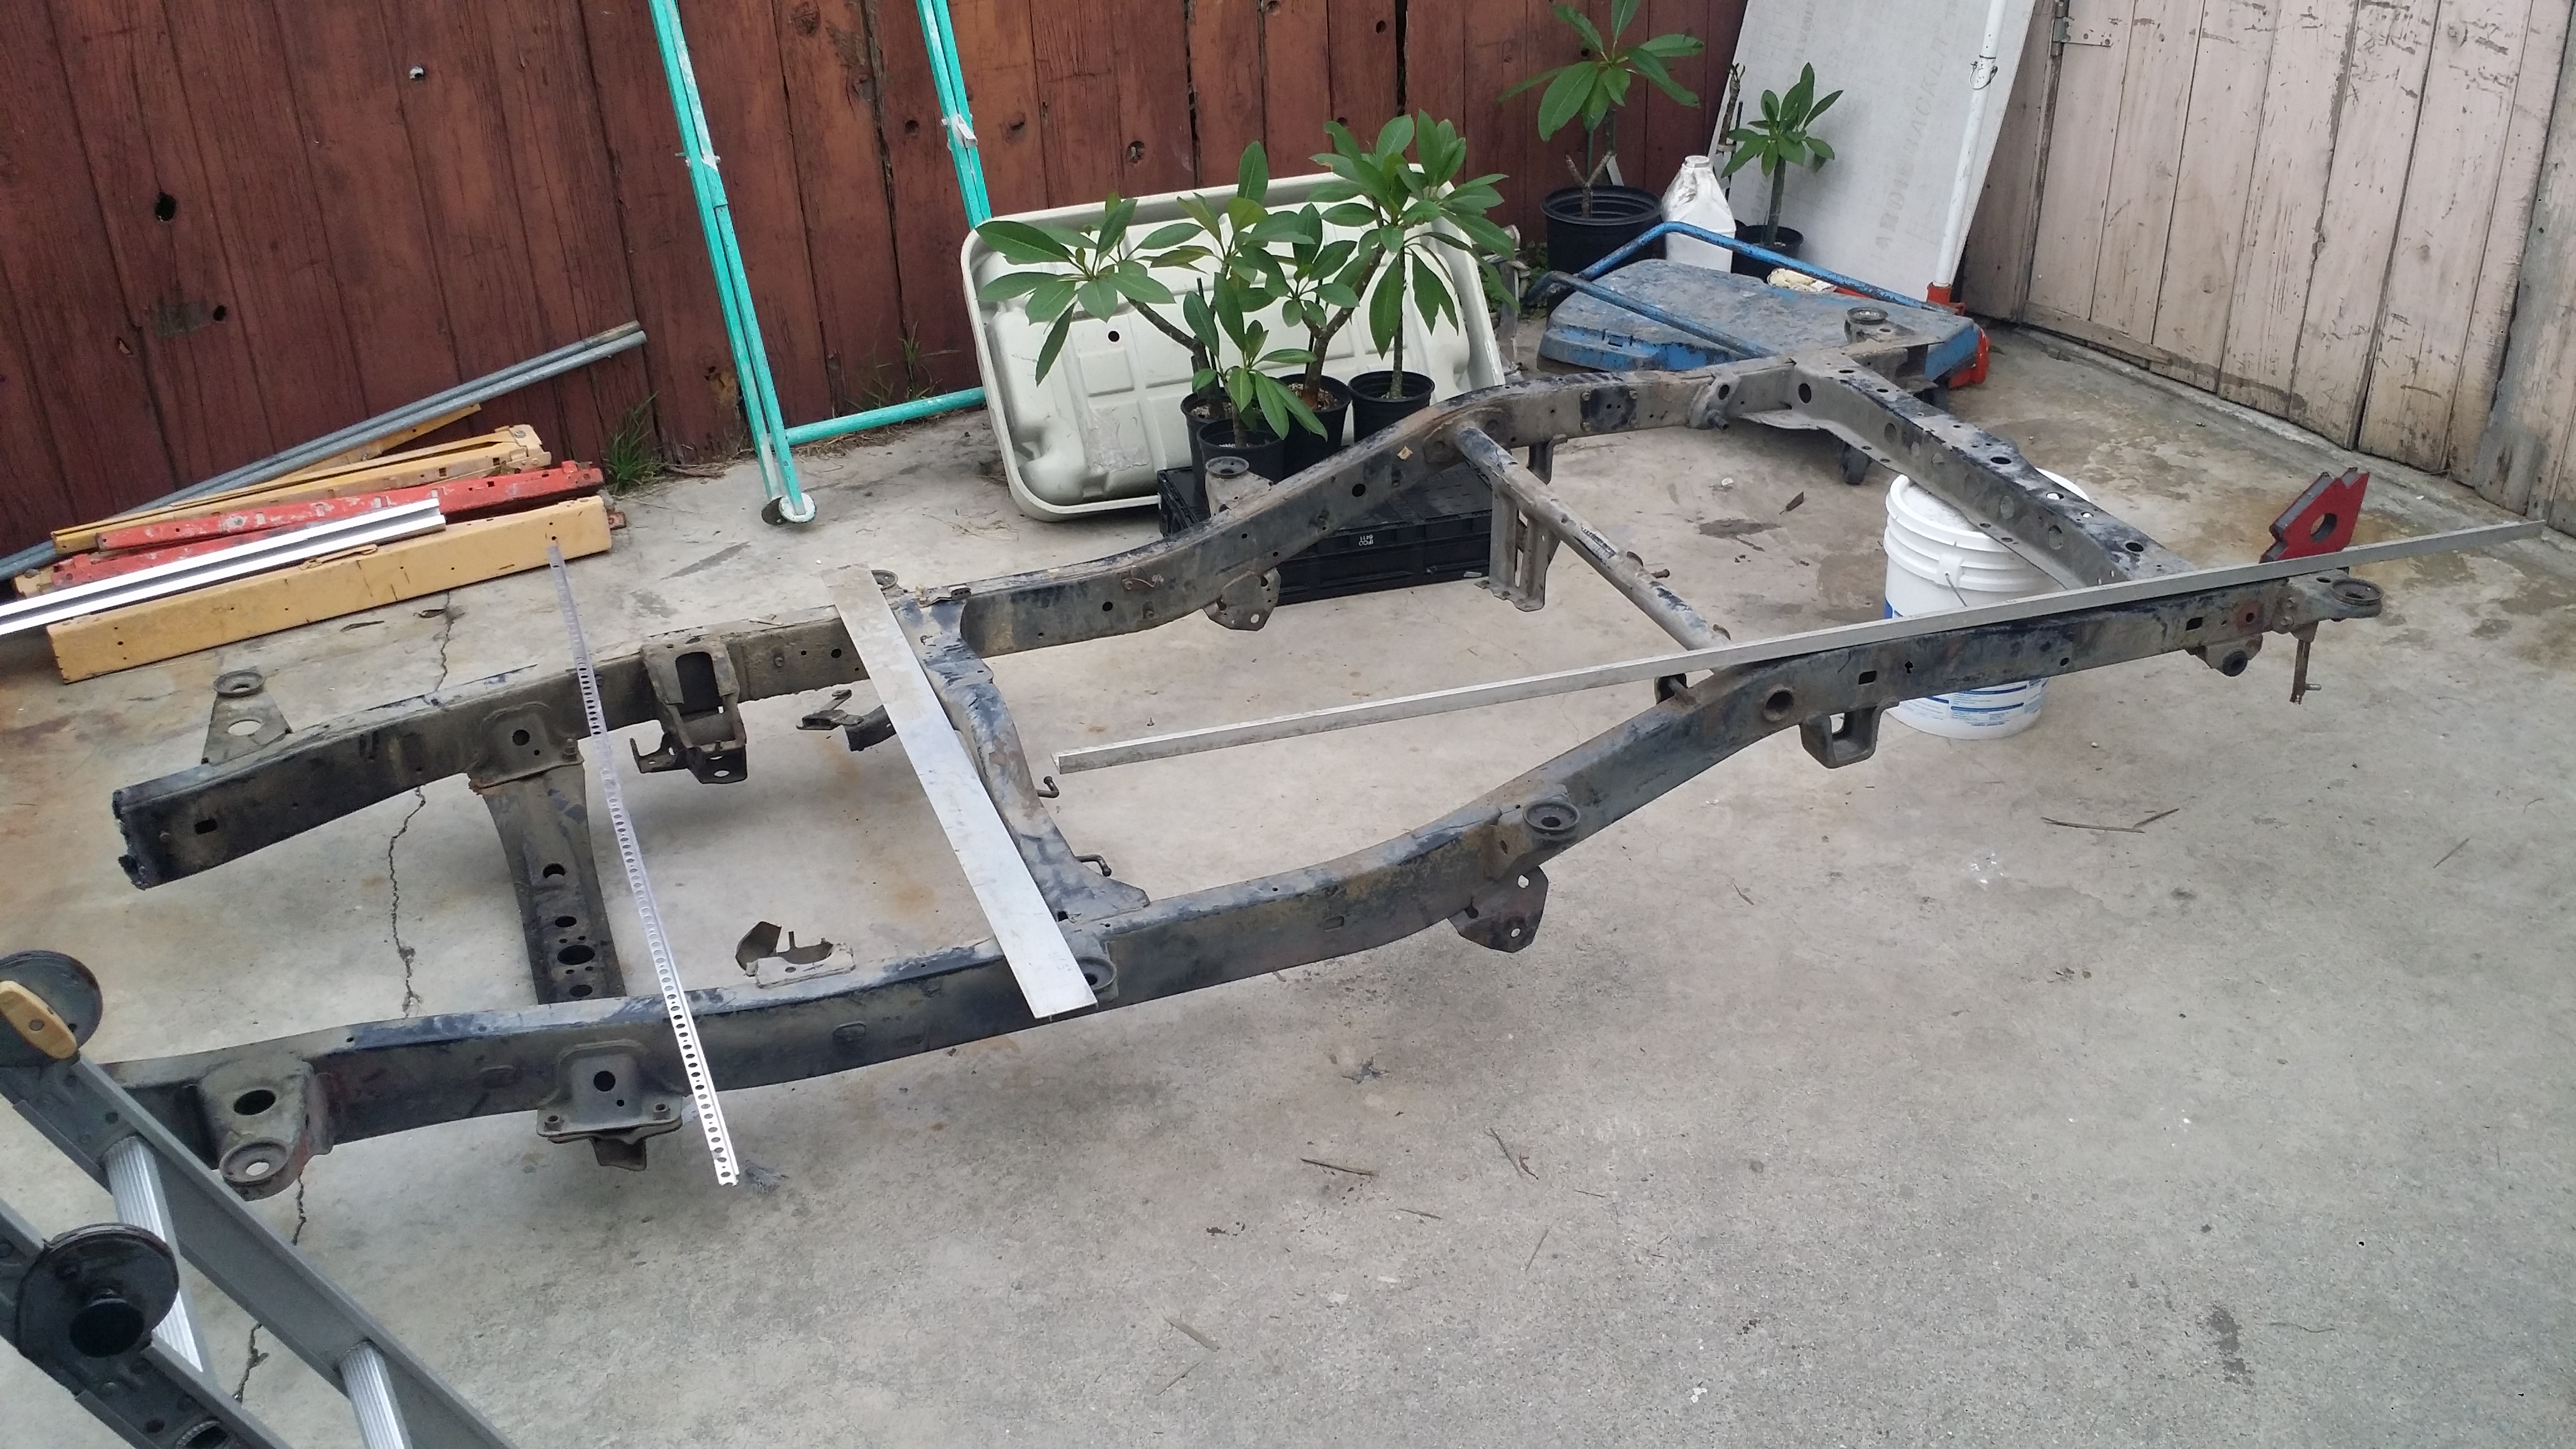
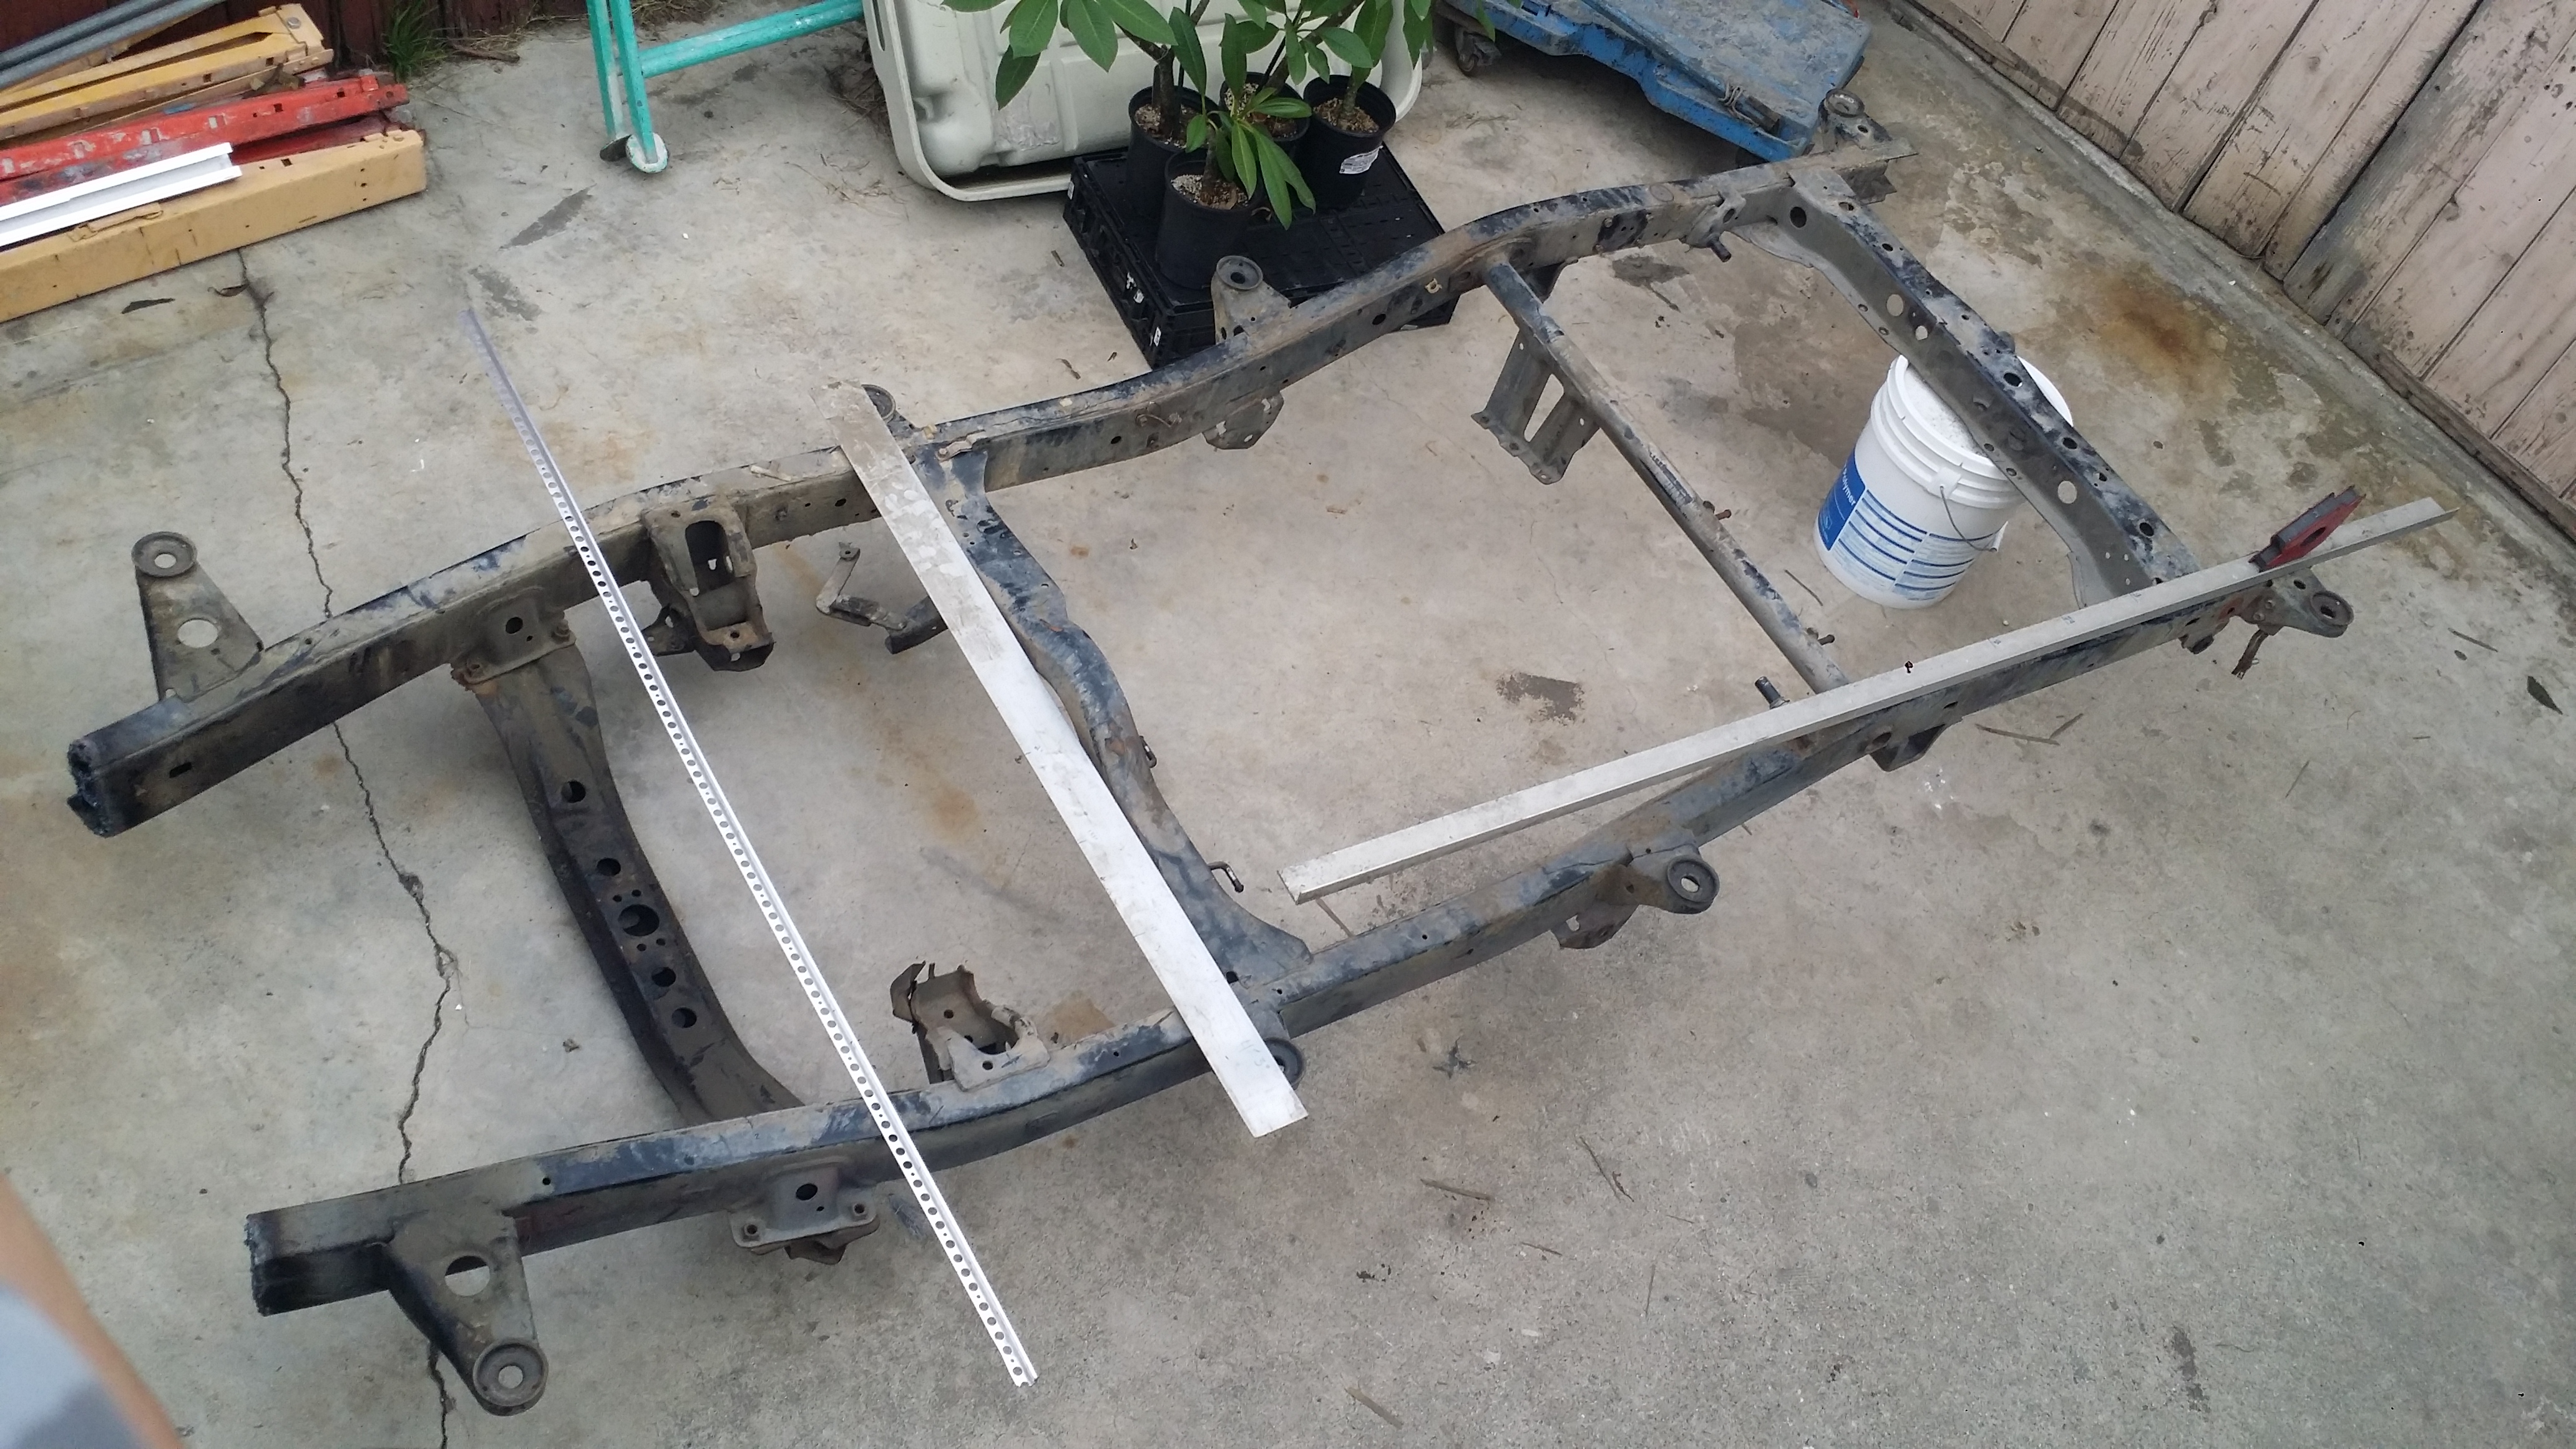
Heres a better view from above.
So the longest compartment is going to be 6ftx4'3". But im going to cut it in 2. I want the smaller of the 2 located toward the front for the 12v fridge. I'm not sure on the exact side yet but i plan to make it 2ft. and leave the remainder 4 ft for storage. Like Dirtco i like the idea of having firewood storage in the front of the trailer. So i'll be having a compartment for that there as well. Maybe it all sounds like jibberish so heres a quick basic idea of what i want. side view.


Here is my frame. I am planning to chop off the front end of this chasis some more. I will be cutting where the thin aluminum bar is near where that front cross member is at.

I plan to make the main storage box 6ft long by 4ft&3" wide and 2ft tall.
In this next pic you can see the lateral aluminum ruler begins at the drop of the frame and i plan to end it where the red 'arrow' welding magnet is at toward the rear of the chassis.

Heres a better view from above.

So the longest compartment is going to be 6ftx4'3". But im going to cut it in 2. I want the smaller of the 2 located toward the front for the 12v fridge. I'm not sure on the exact side yet but i plan to make it 2ft. and leave the remainder 4 ft for storage. Like Dirtco i like the idea of having firewood storage in the front of the trailer. So i'll be having a compartment for that there as well. Maybe it all sounds like jibberish so heres a quick basic idea of what i want. side view.
 09-23-2015, 05:31 AM
#3
Hey Richard, looks like you're off to a good start, I like the idea of starting with a frame, that will give you a good platform to start with and can be easily modified to suit your needs! It s awesome that you have friends that donated to the project, that already saved you alot of time and money! I'll be following your build, maybe you'll motivate me to continue working on mine, lol!
09-24-2015, 07:47 PM
#6
Registered User
Thread Starter
Hey Richard, looks like you're off to a good start, I like the idea of starting with a frame, that will give you a good platform to start with and can be easily modified to suit your needs! It s awesome that you have friends that donated to the project, that already saved you alot of time and money! I'll be following your build, maybe you'll motivate me to continue working on mine, lol!
As for people donating yea man. It is really nice of them. The guy that donated this frame really believes in passing on kindness and it working as a domino effect. Like i said he told me so long as i can make a bad as$ trailer with it it is all mine. He also told me that i can have it so long as i do the same for somebody else in need some day. He's a really good guy. we need more people like him in this world.
By the way, a trailer would look great behind your 4runner. It's practically begging you to start a build!
Hoping the entire thread will be Friggen sweet too
Last edited by Redeth005; 09-24-2015 at 09:53 PM.
09-24-2015, 08:41 PM
#7
Registered User
Thread Starter
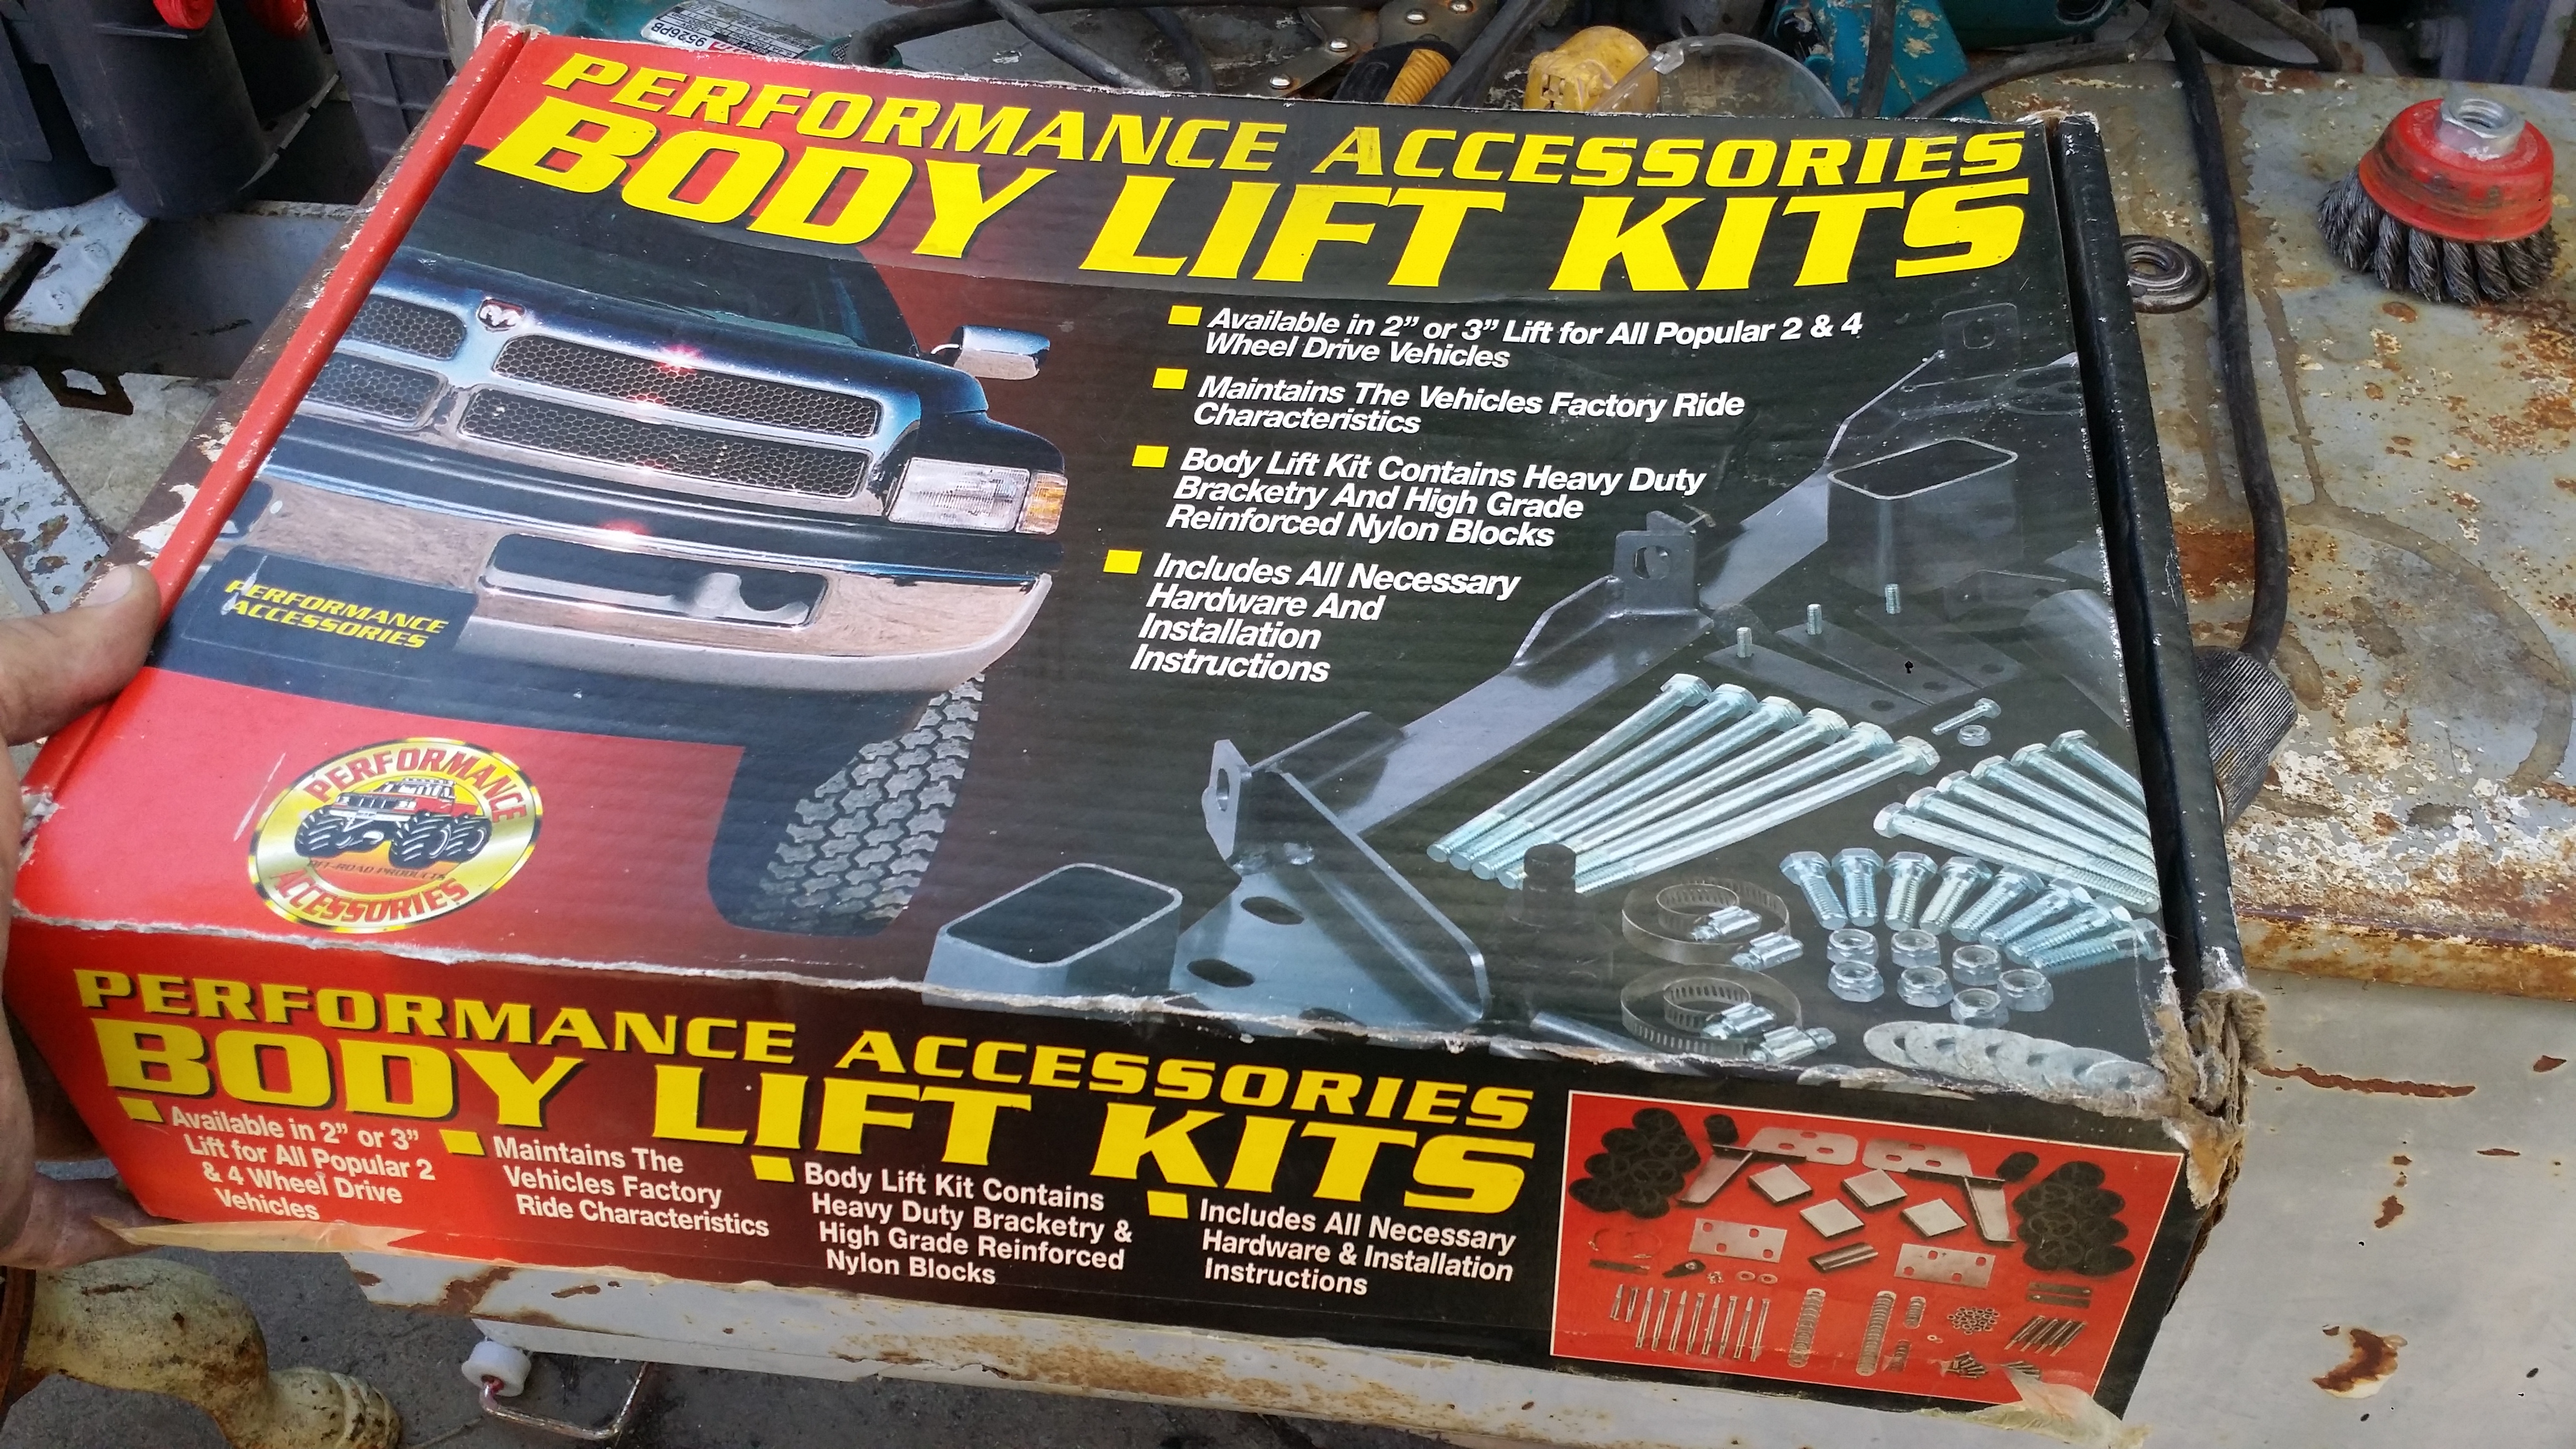
So yesterday i was wondering how i would build or weld higher platform to extend the body mounts up more because the chassis sits 0.5" taller then those body mounts and then it dawned on me that my next door neighbor, who i usually go offroad rock crawling with from time to time, had a COMPLETE 3" BODY LIFT KIT. Not for a 4runner but for an early ford explorer which he sold a long long time ago. So he has had this brand new kit, never been used, in his garage for the past mmmm 10-15 years or so lol So i knocked on his door and asked him if by any chance he had it. AND HE DID. All i gotta do is modify a plate to center those body lift mounts onto my frame so it doesnt move out of place. That was a real score on that kit. FREE FREE FREE FEEE
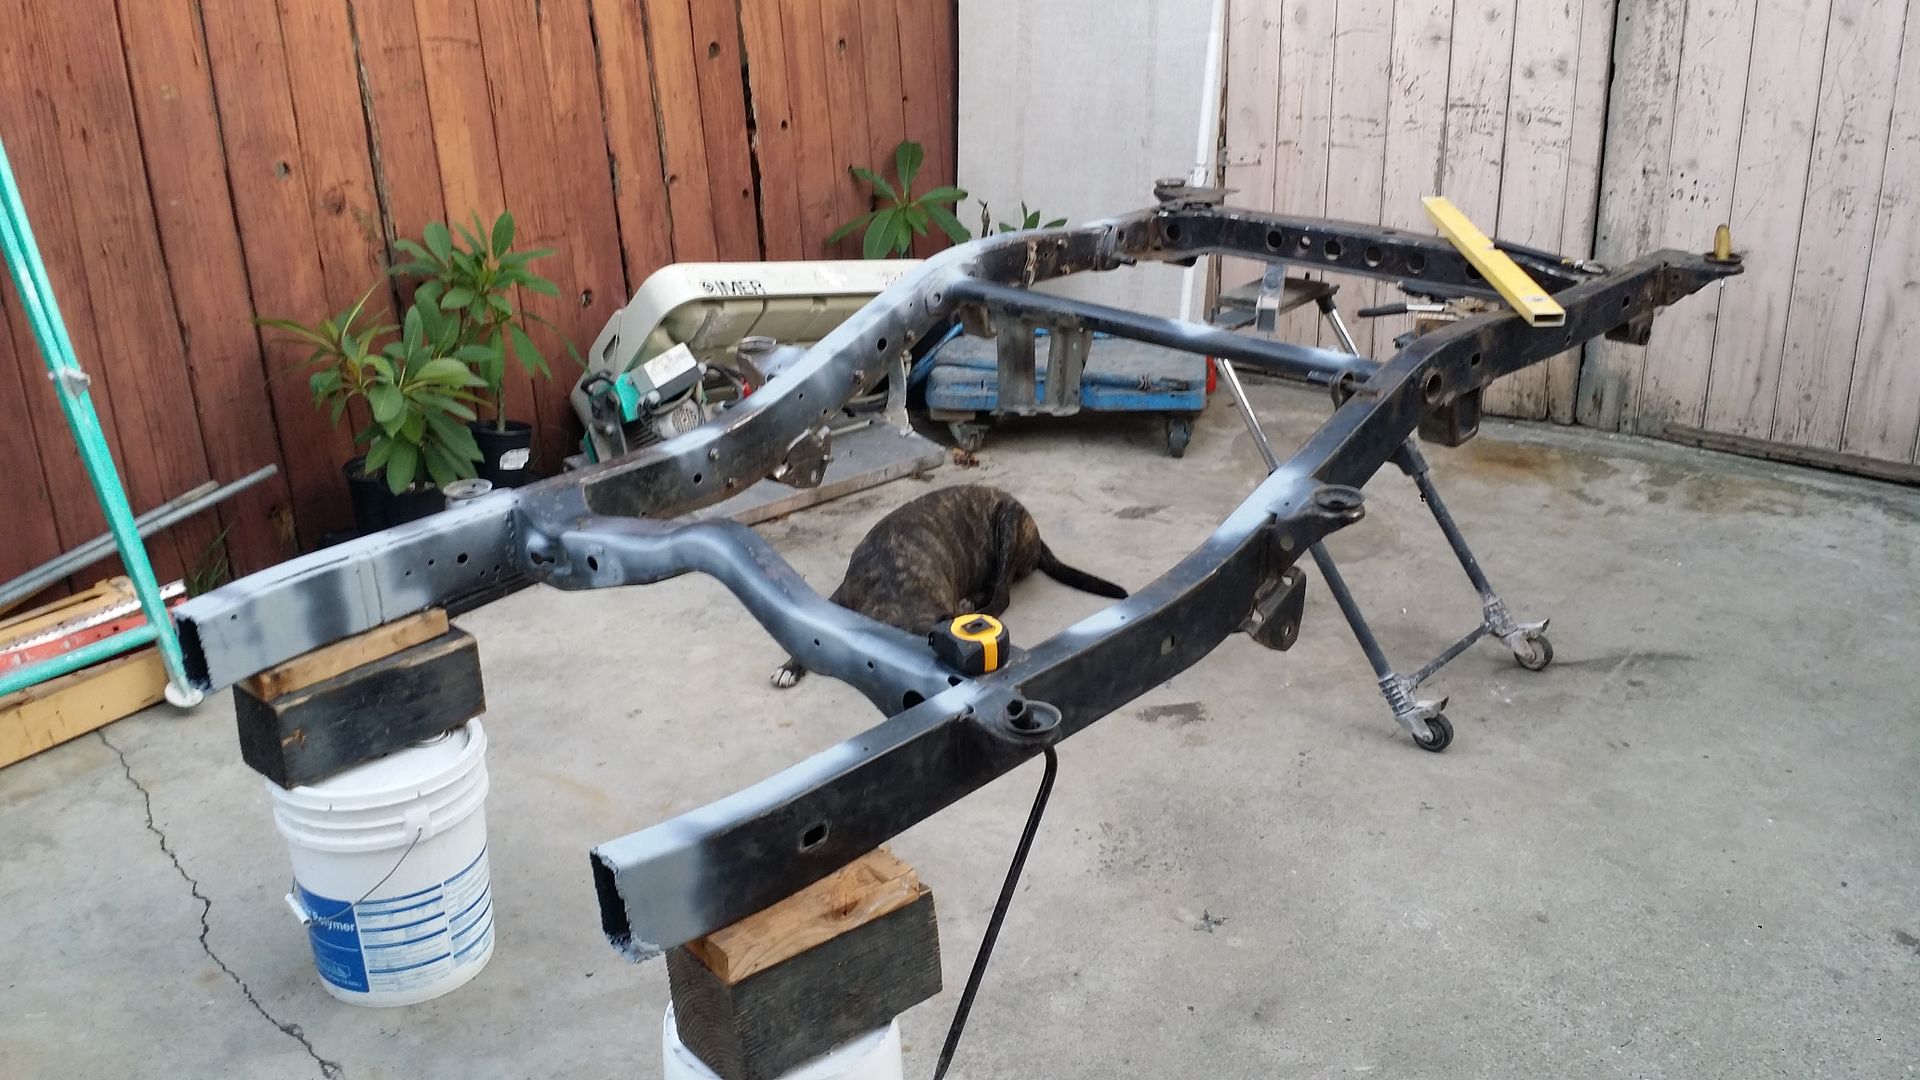
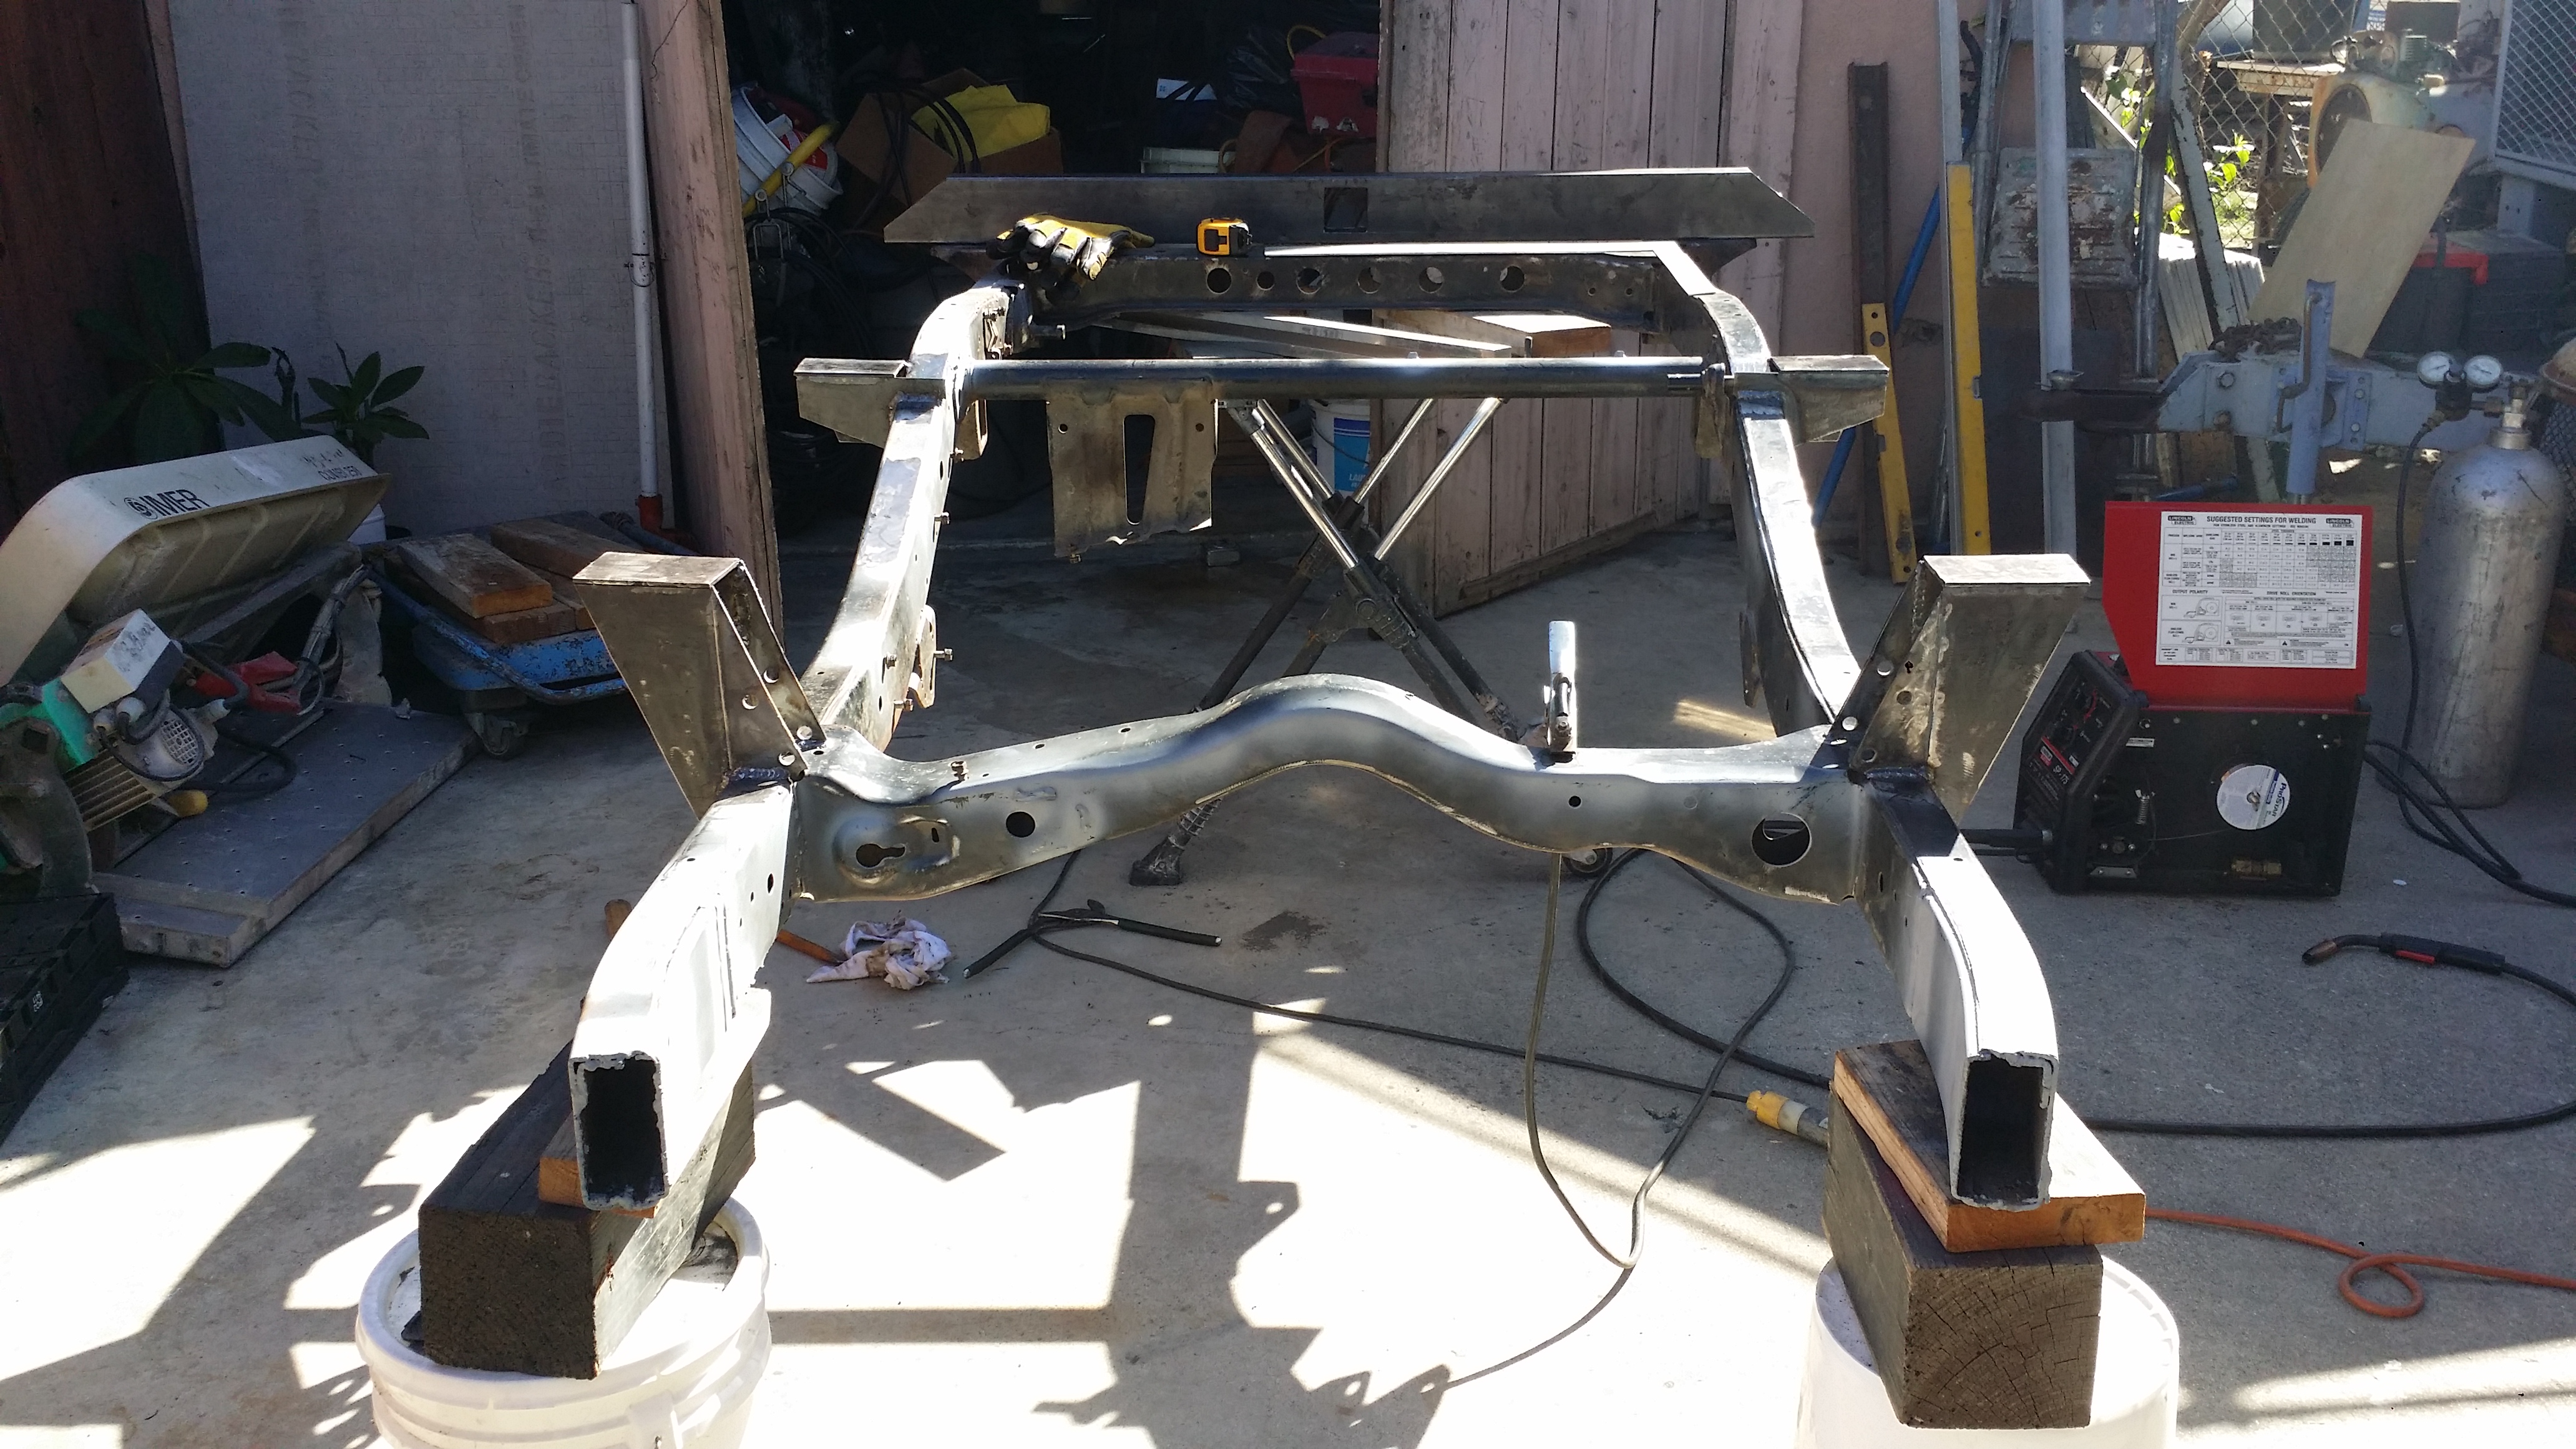
Right now the trailer is completely level i literally took a leveling ruler to make sure the bubble was centered forward, across and diagonal. So this is with the use of 2 body lift blocks stacked up. was still left perfect. I like the idea of using these. But I'm not sure i like the idea of having 2 stacked. I may need to weld up some higher towers and just weld the plate for the block to sit on nicely. We will see what i decide. I could always just end up welding some steel bars upward to keep those stacked blocks from moving. I need to see if they move while under pressure first. But you can really see how straight that thing is. It really doesnt look bad at all.
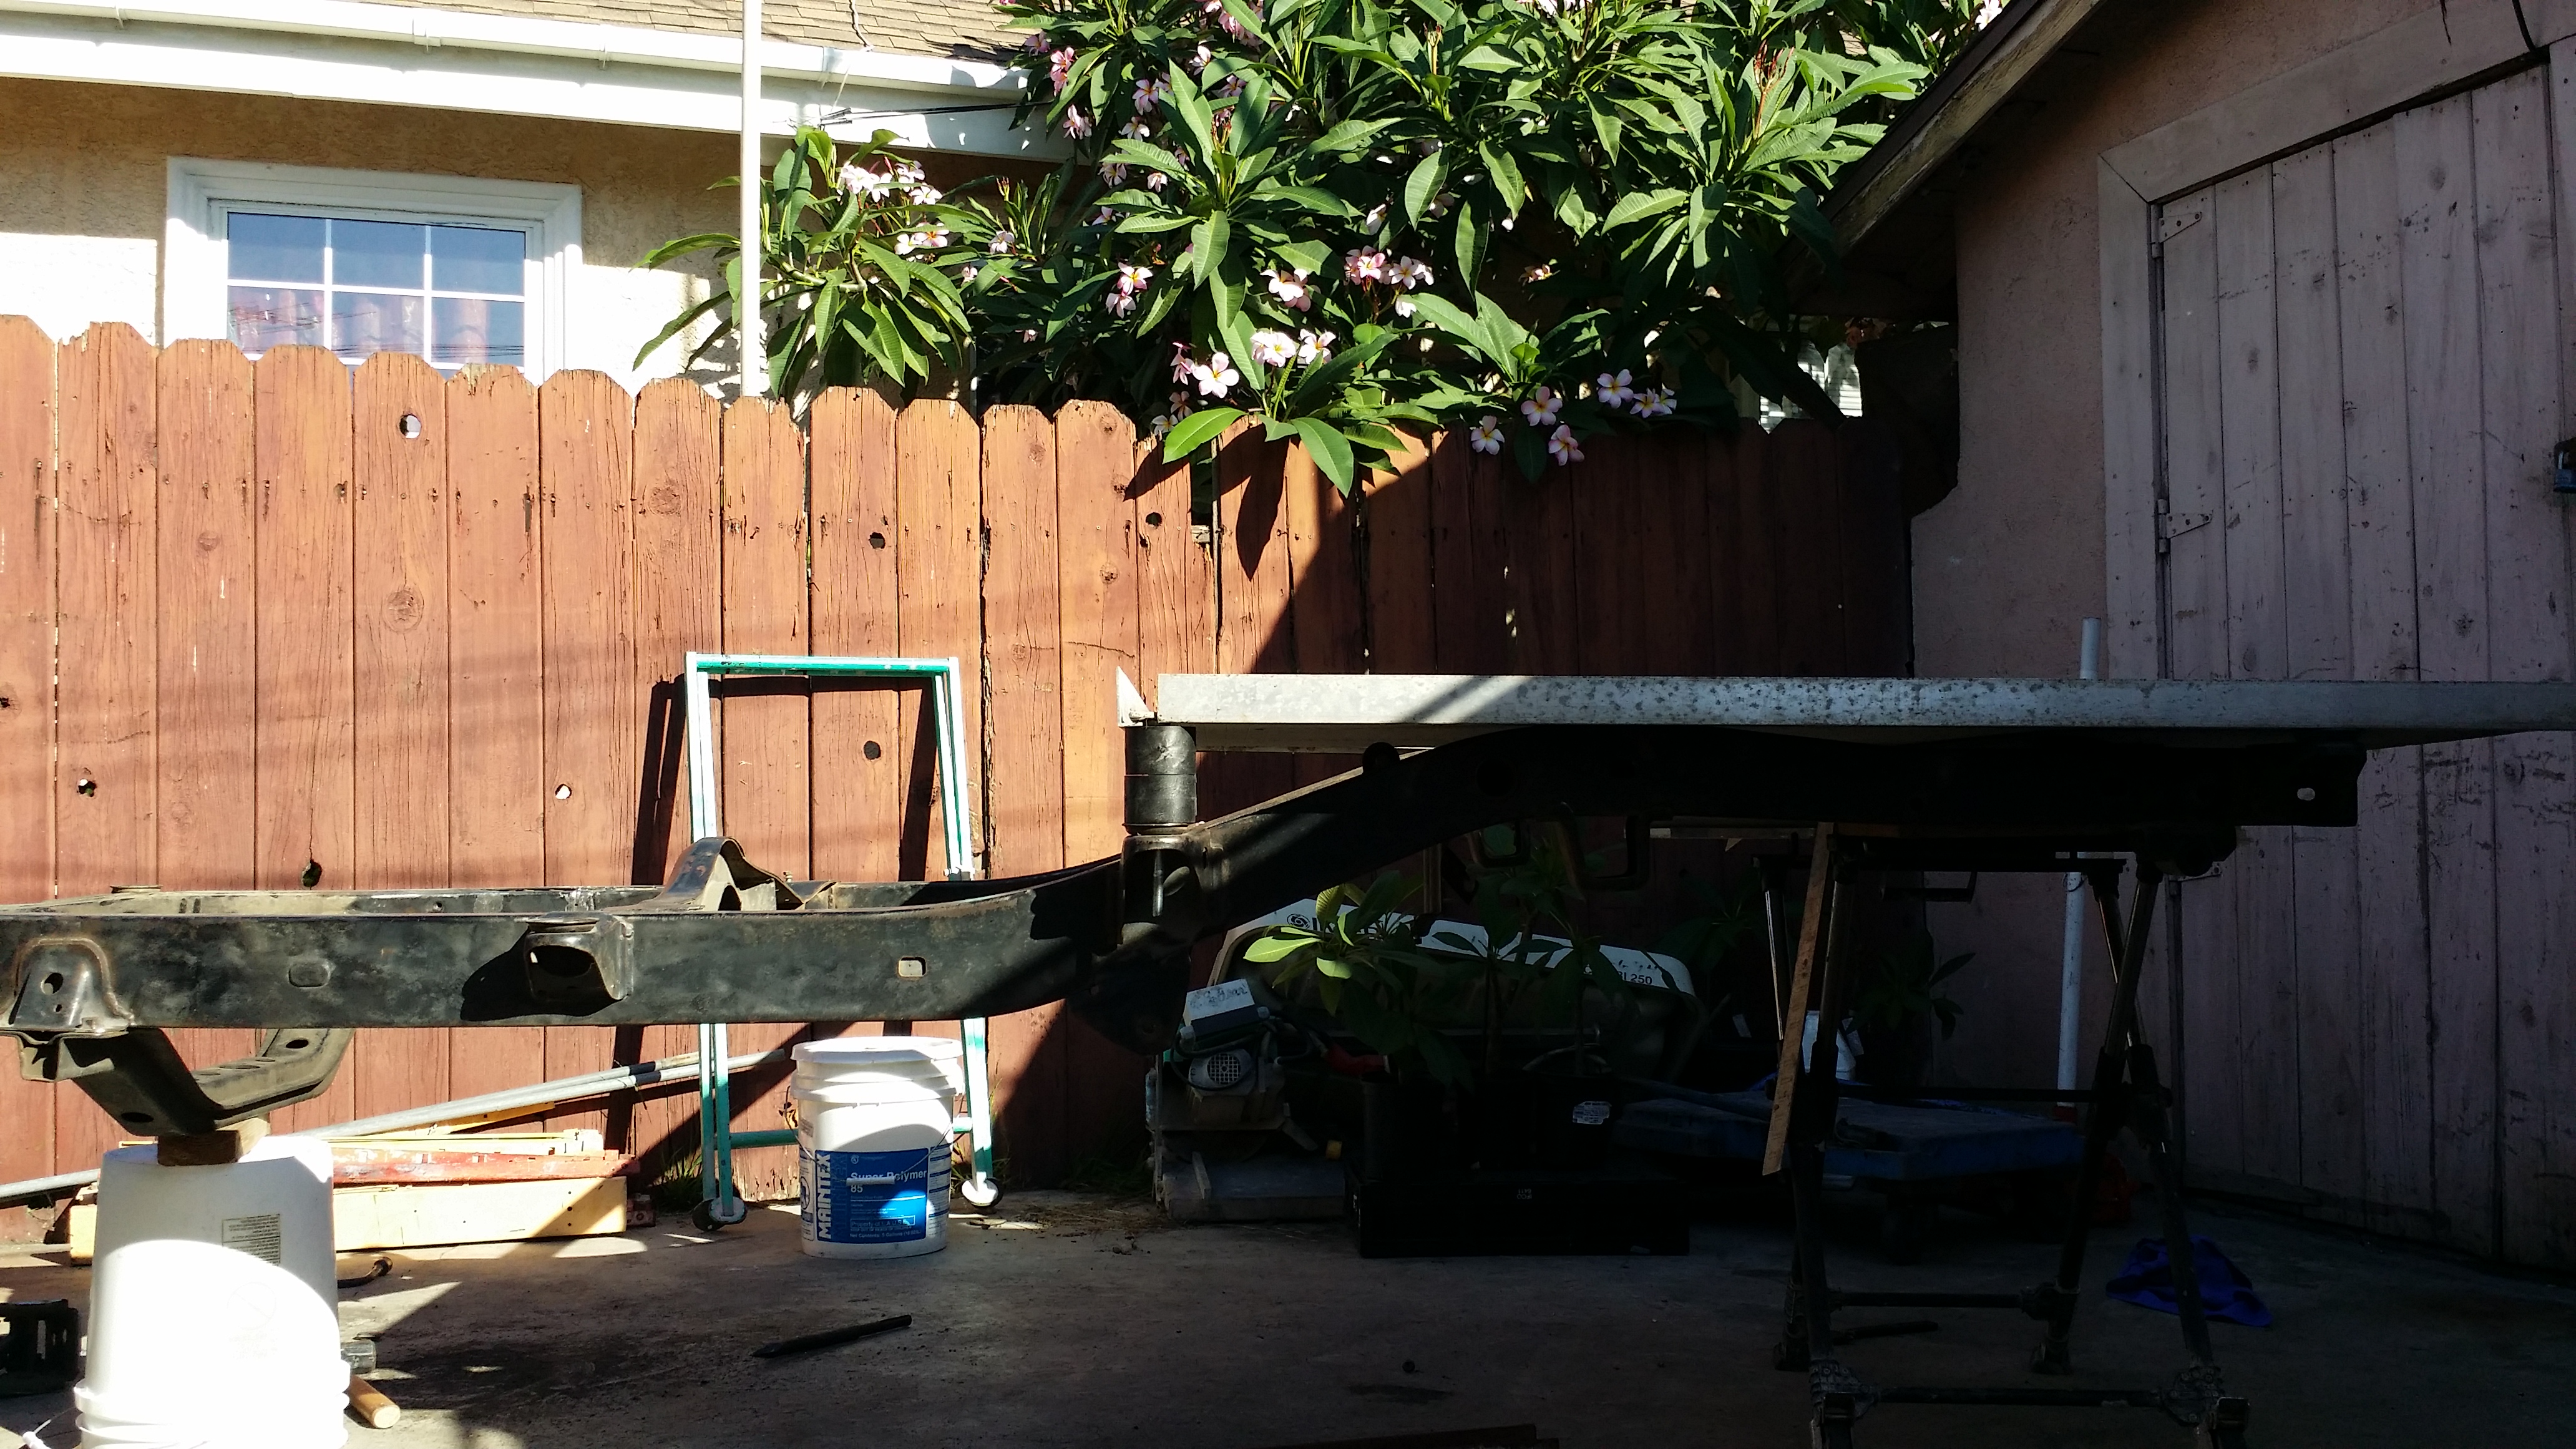
I was just playing around with the aluminum rulers today to get more of a feel at how large this bigger box is going to be. And it is pretty dang big. I'm sure i wont have a hard time using up the space when i go camping but it is pretty big. and i still have the 2' space in front of that plus the 1.5' wood box in front of this lol This is gonna be a hell of alot of fun to build.
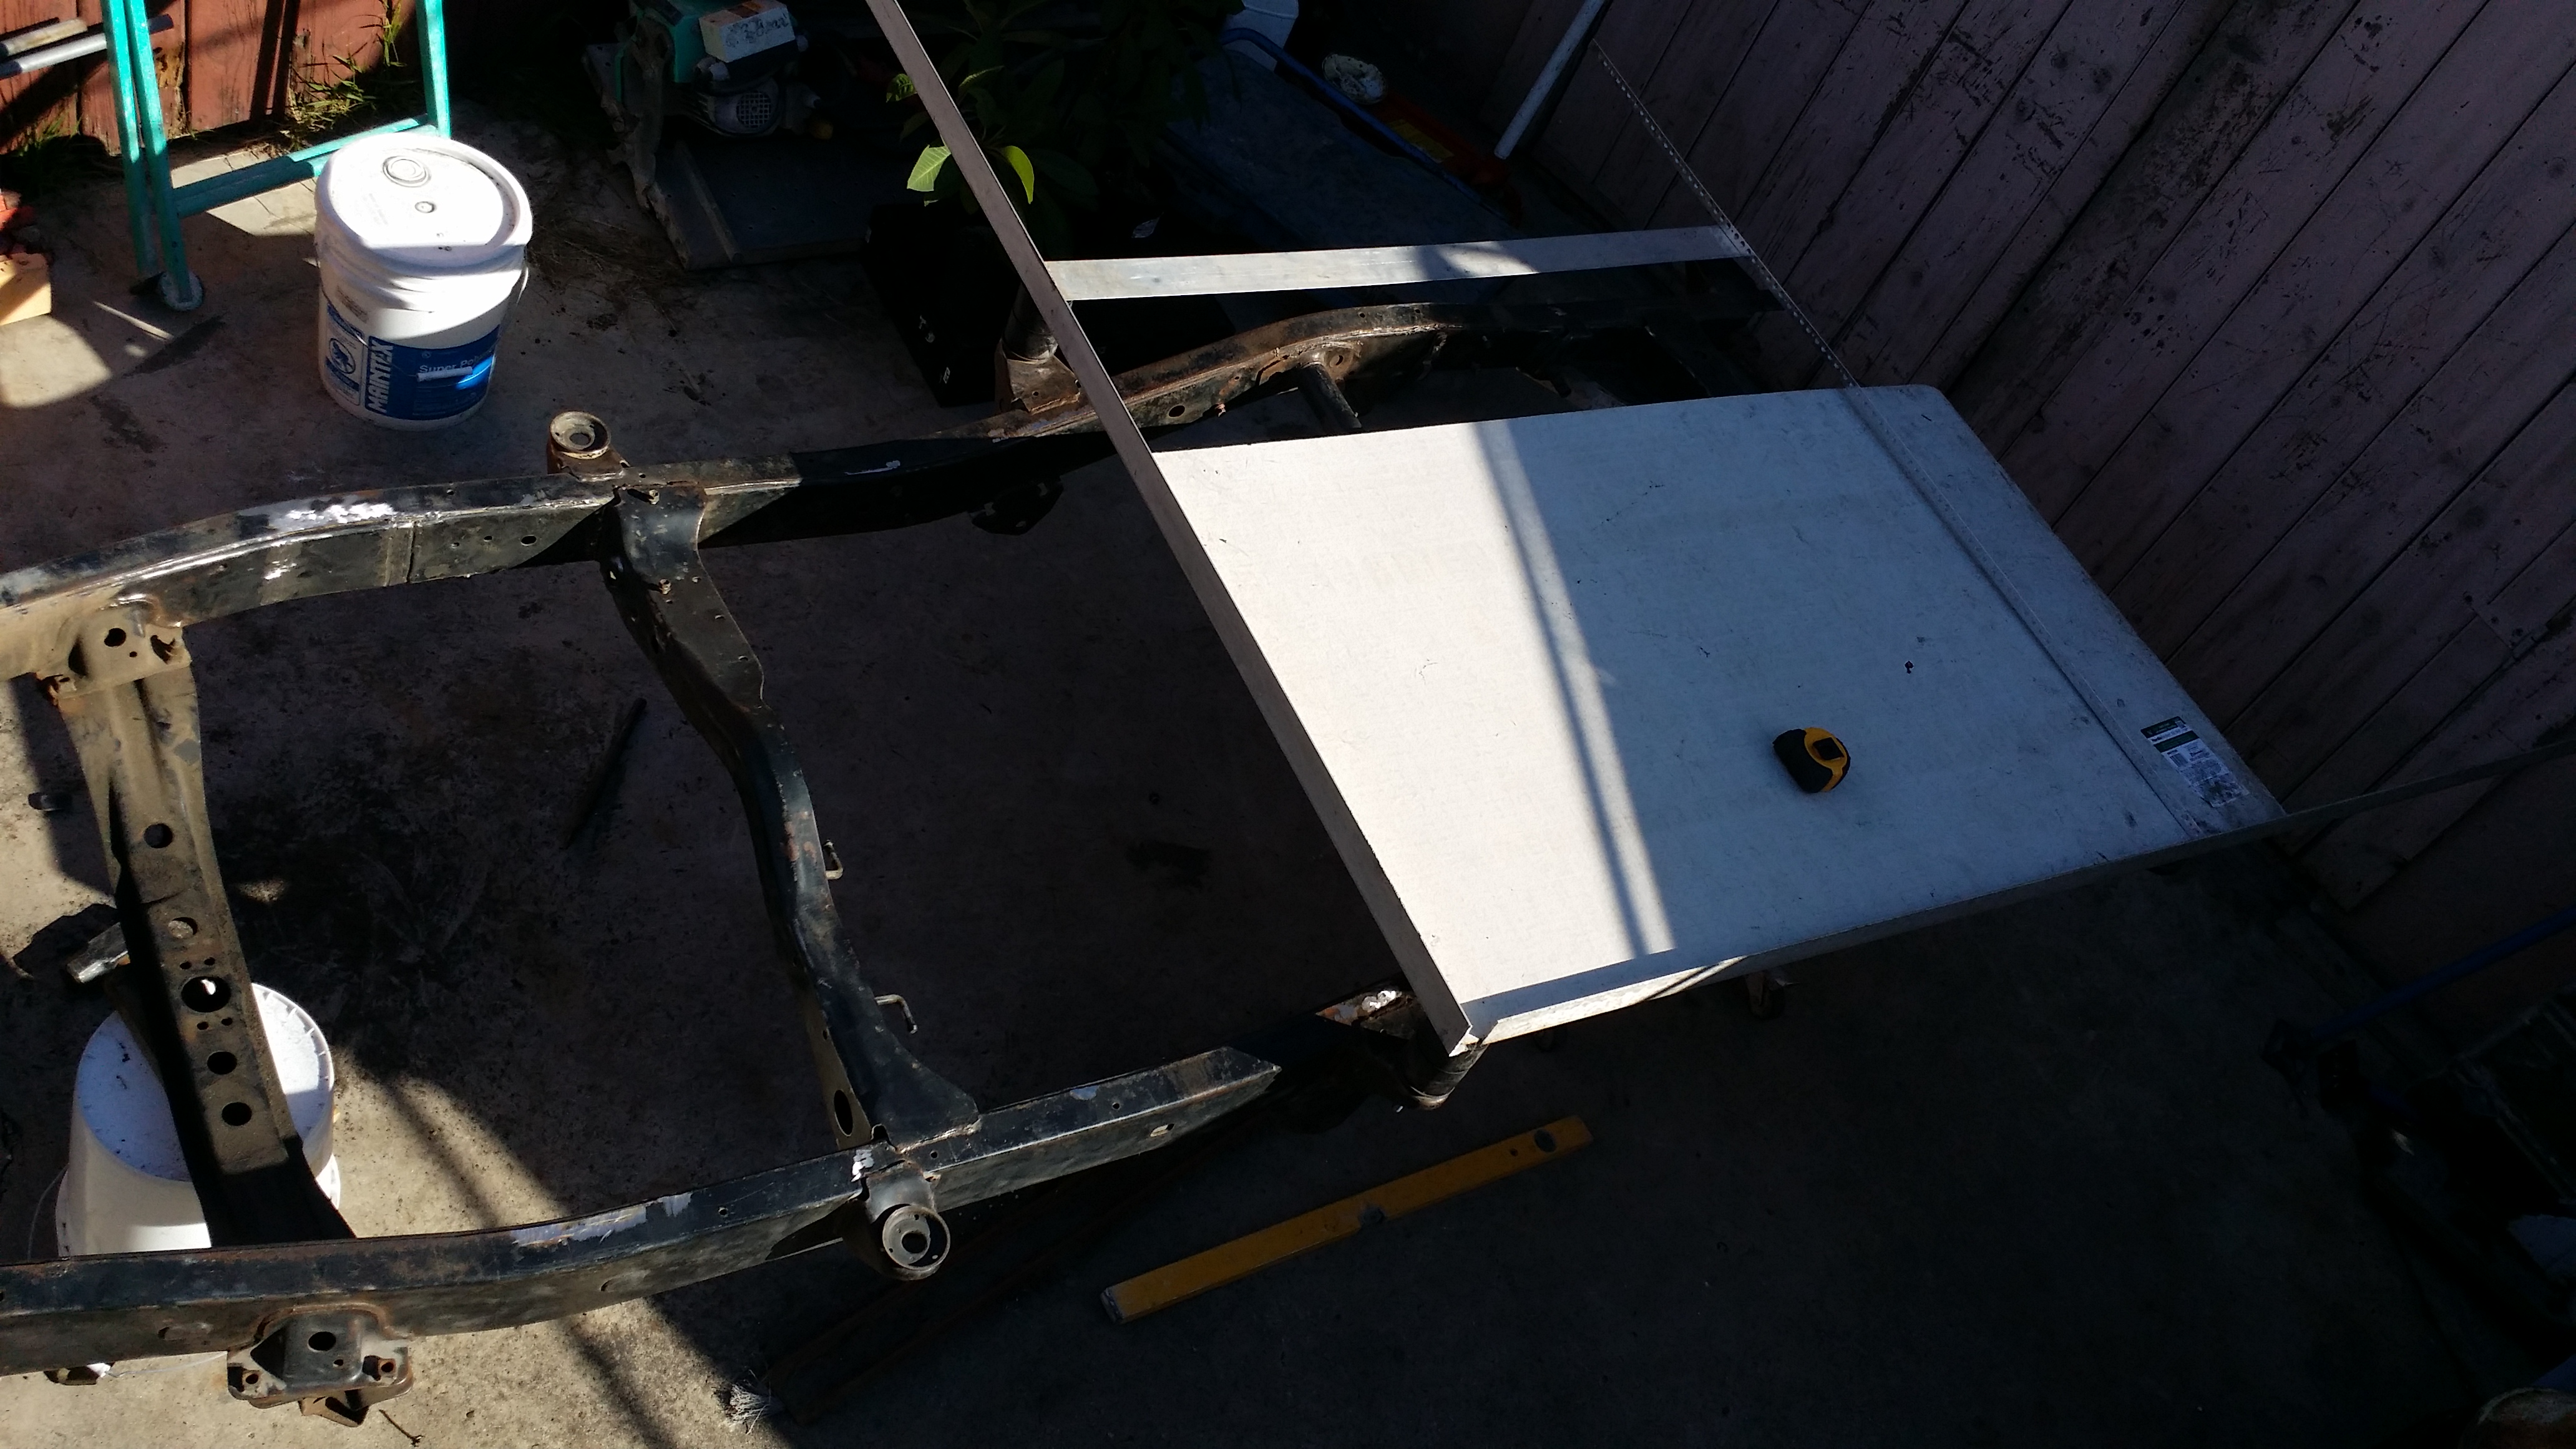
same pic different view.
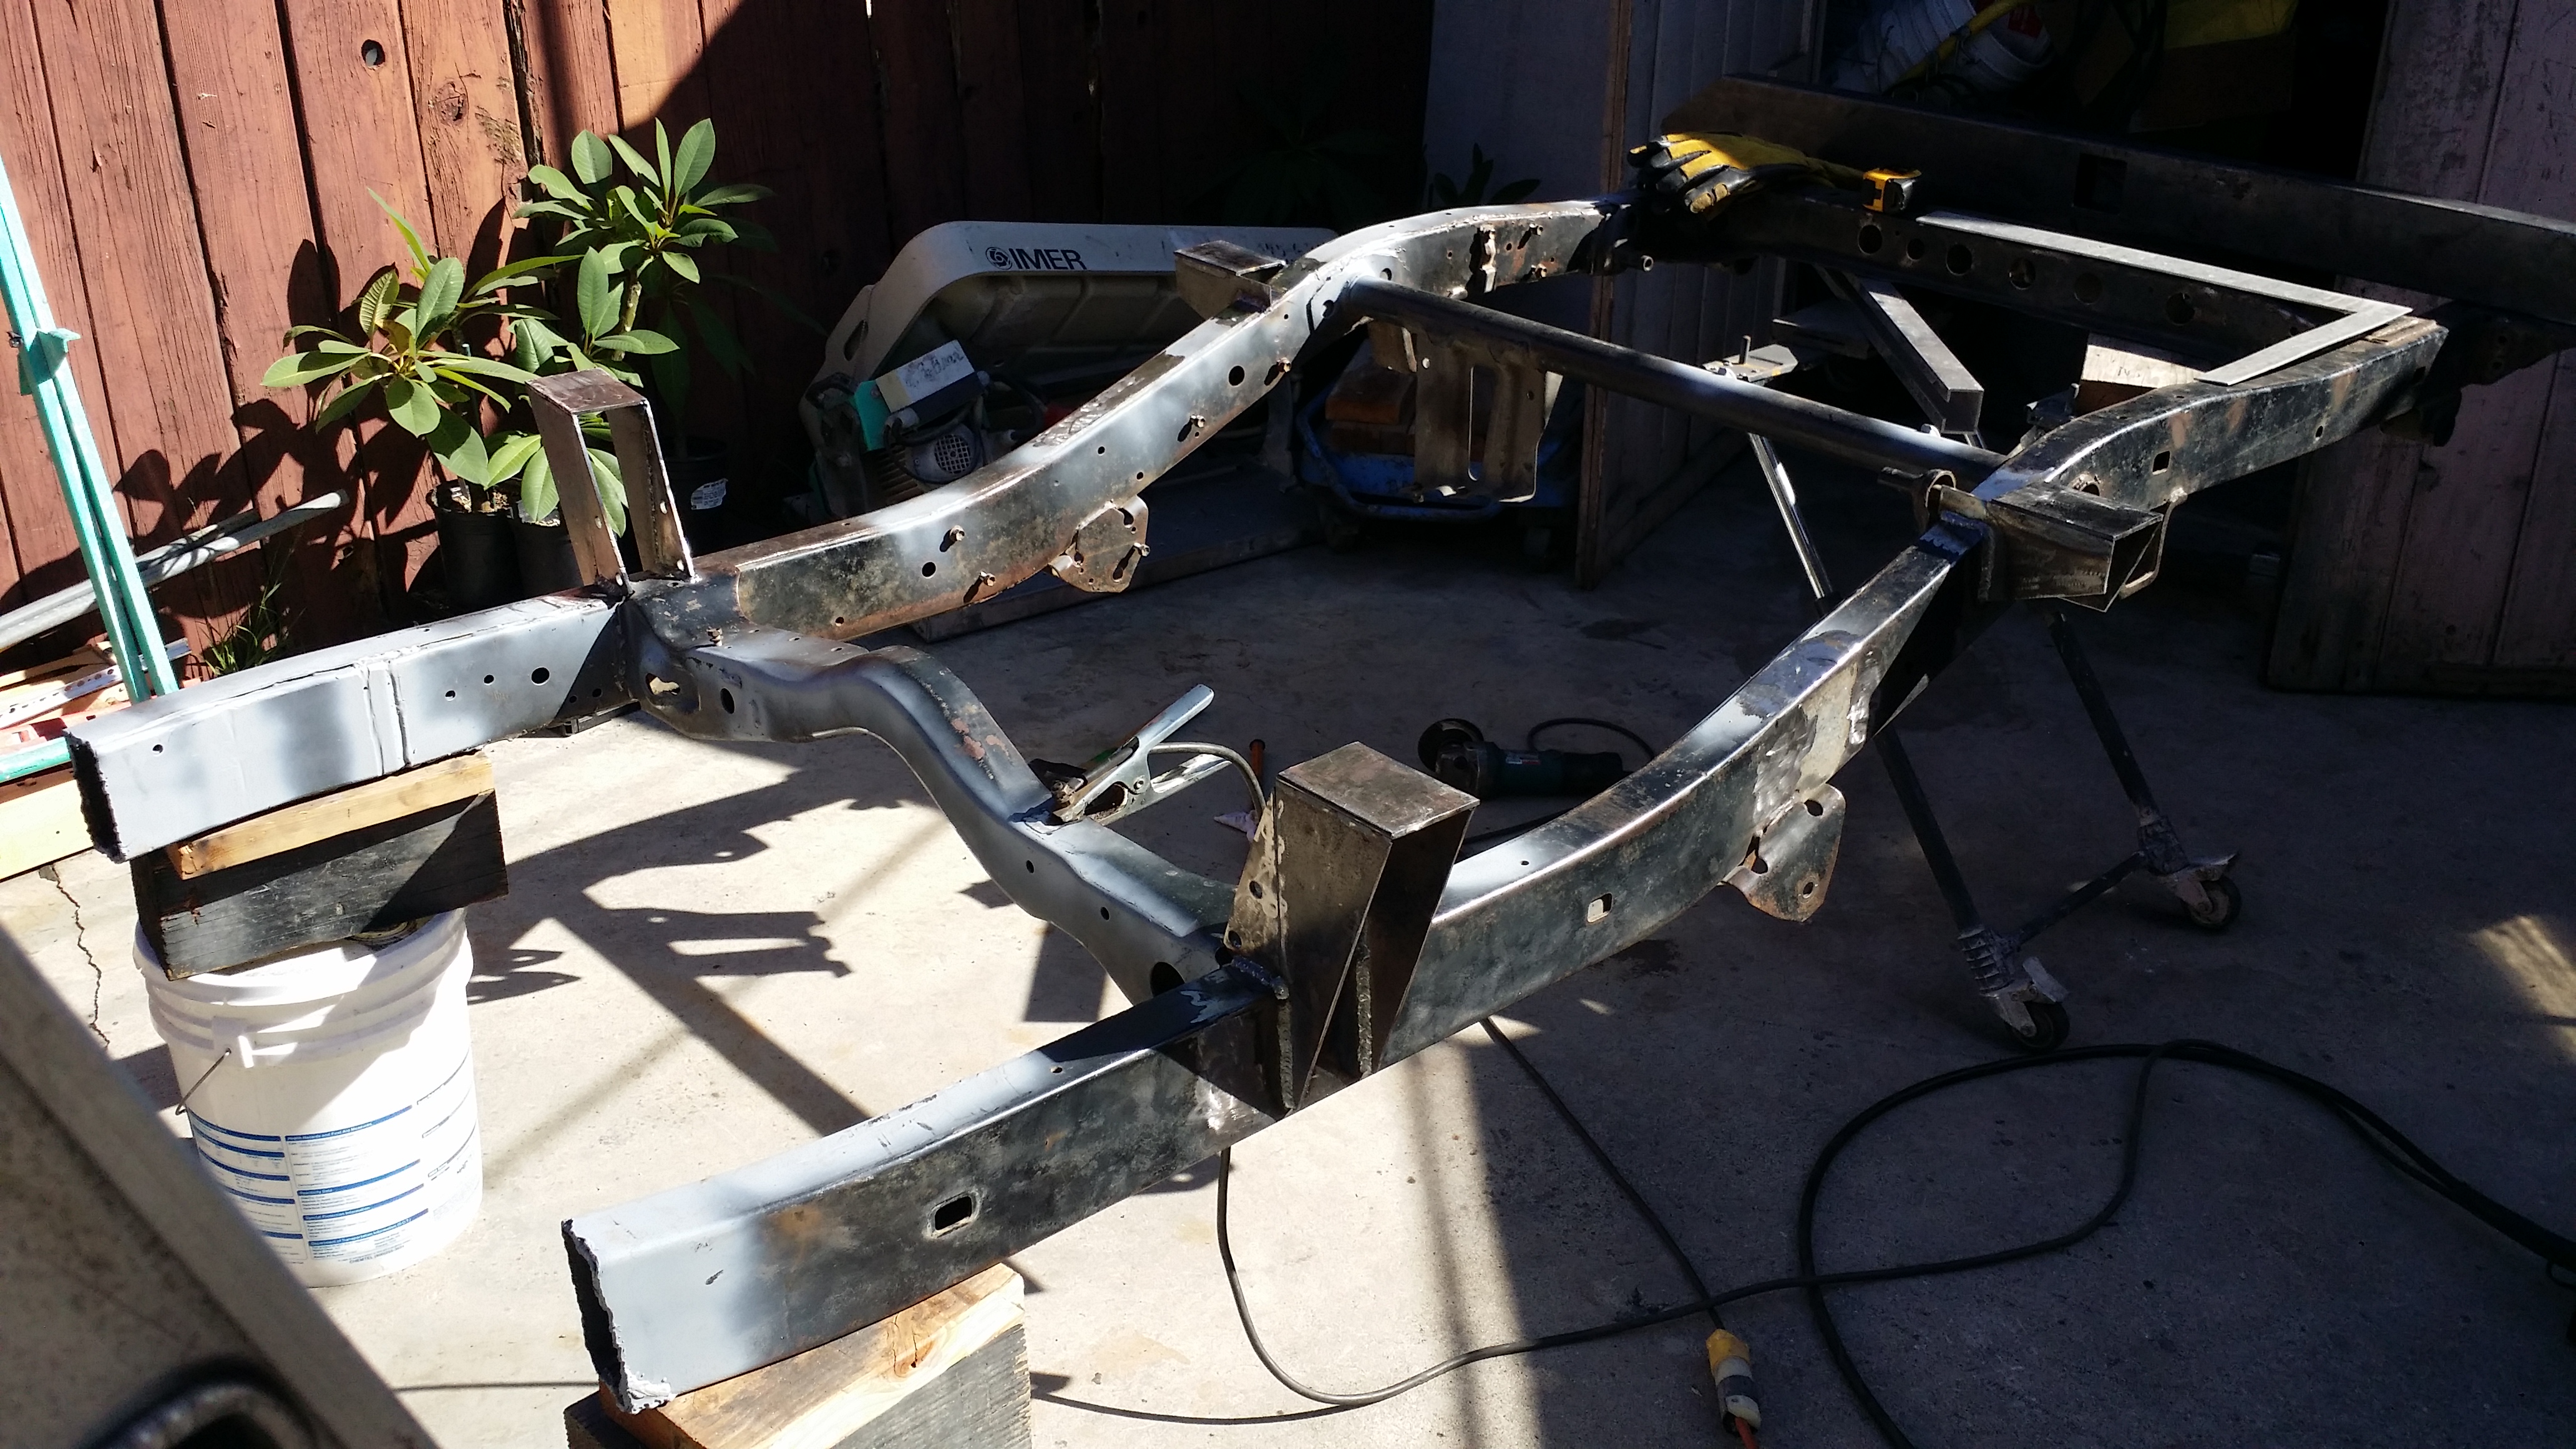
Here you can see that i already cut off the IFS torsion bar brackets
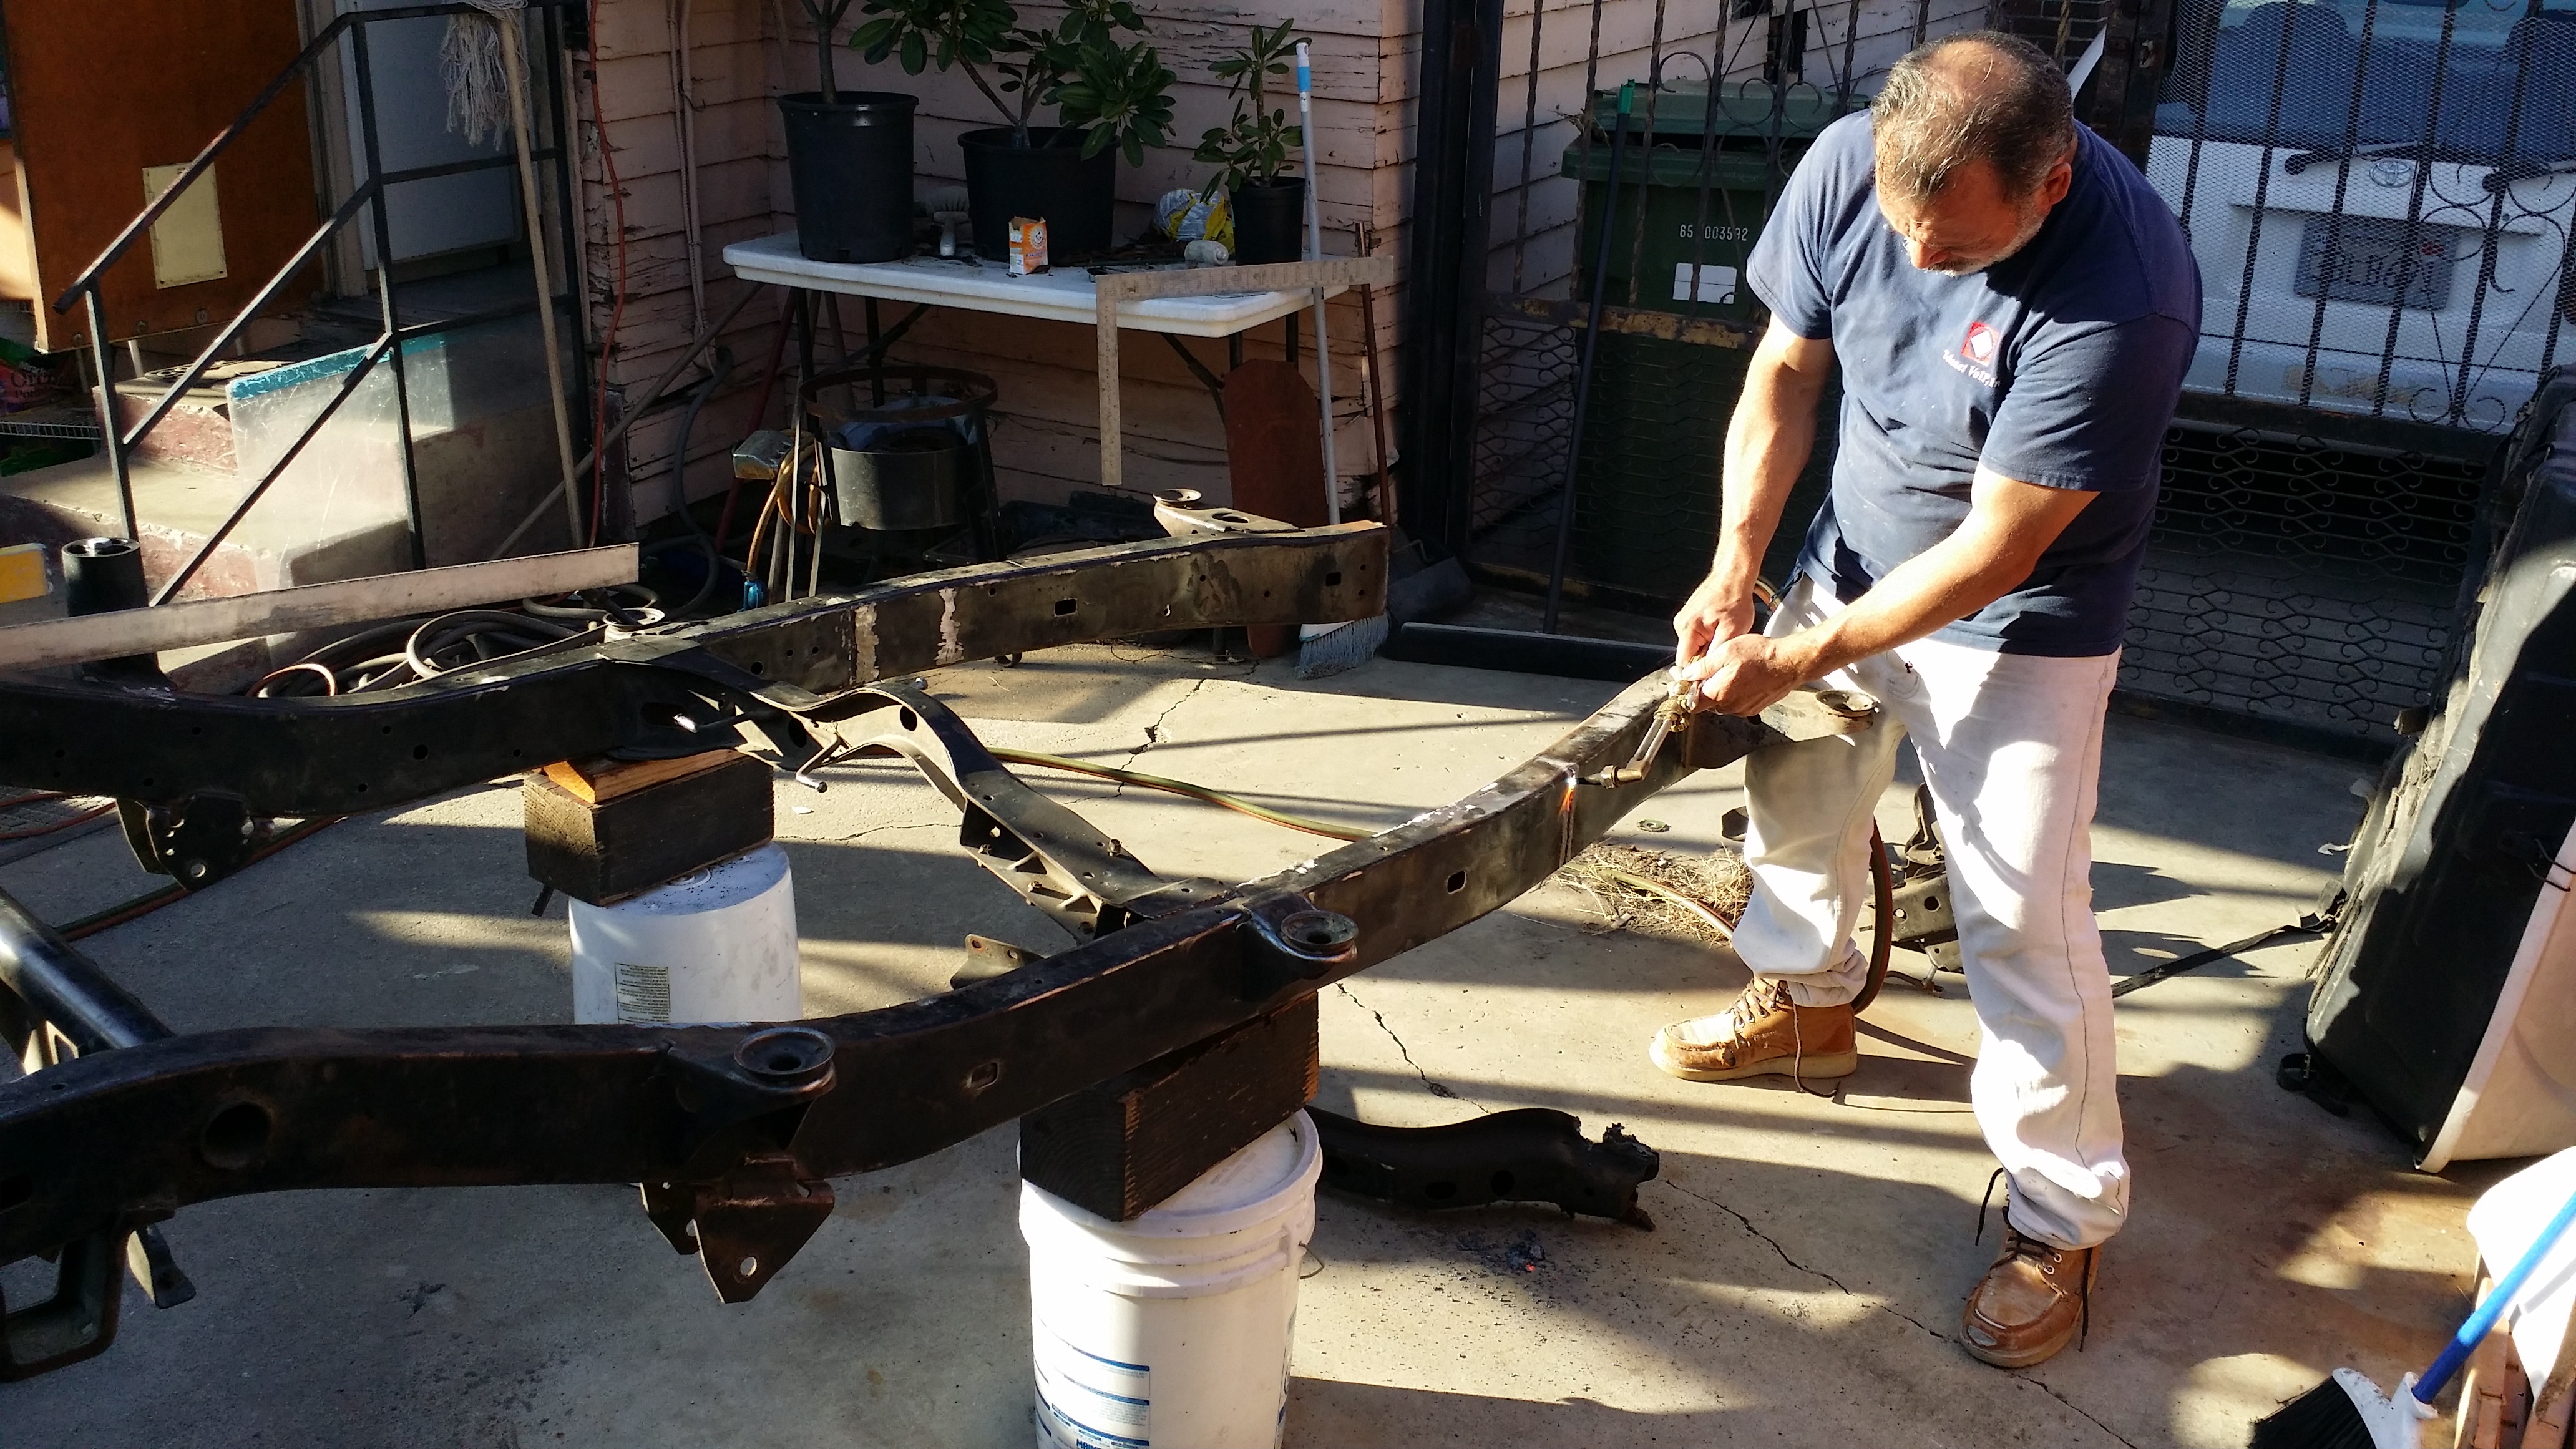
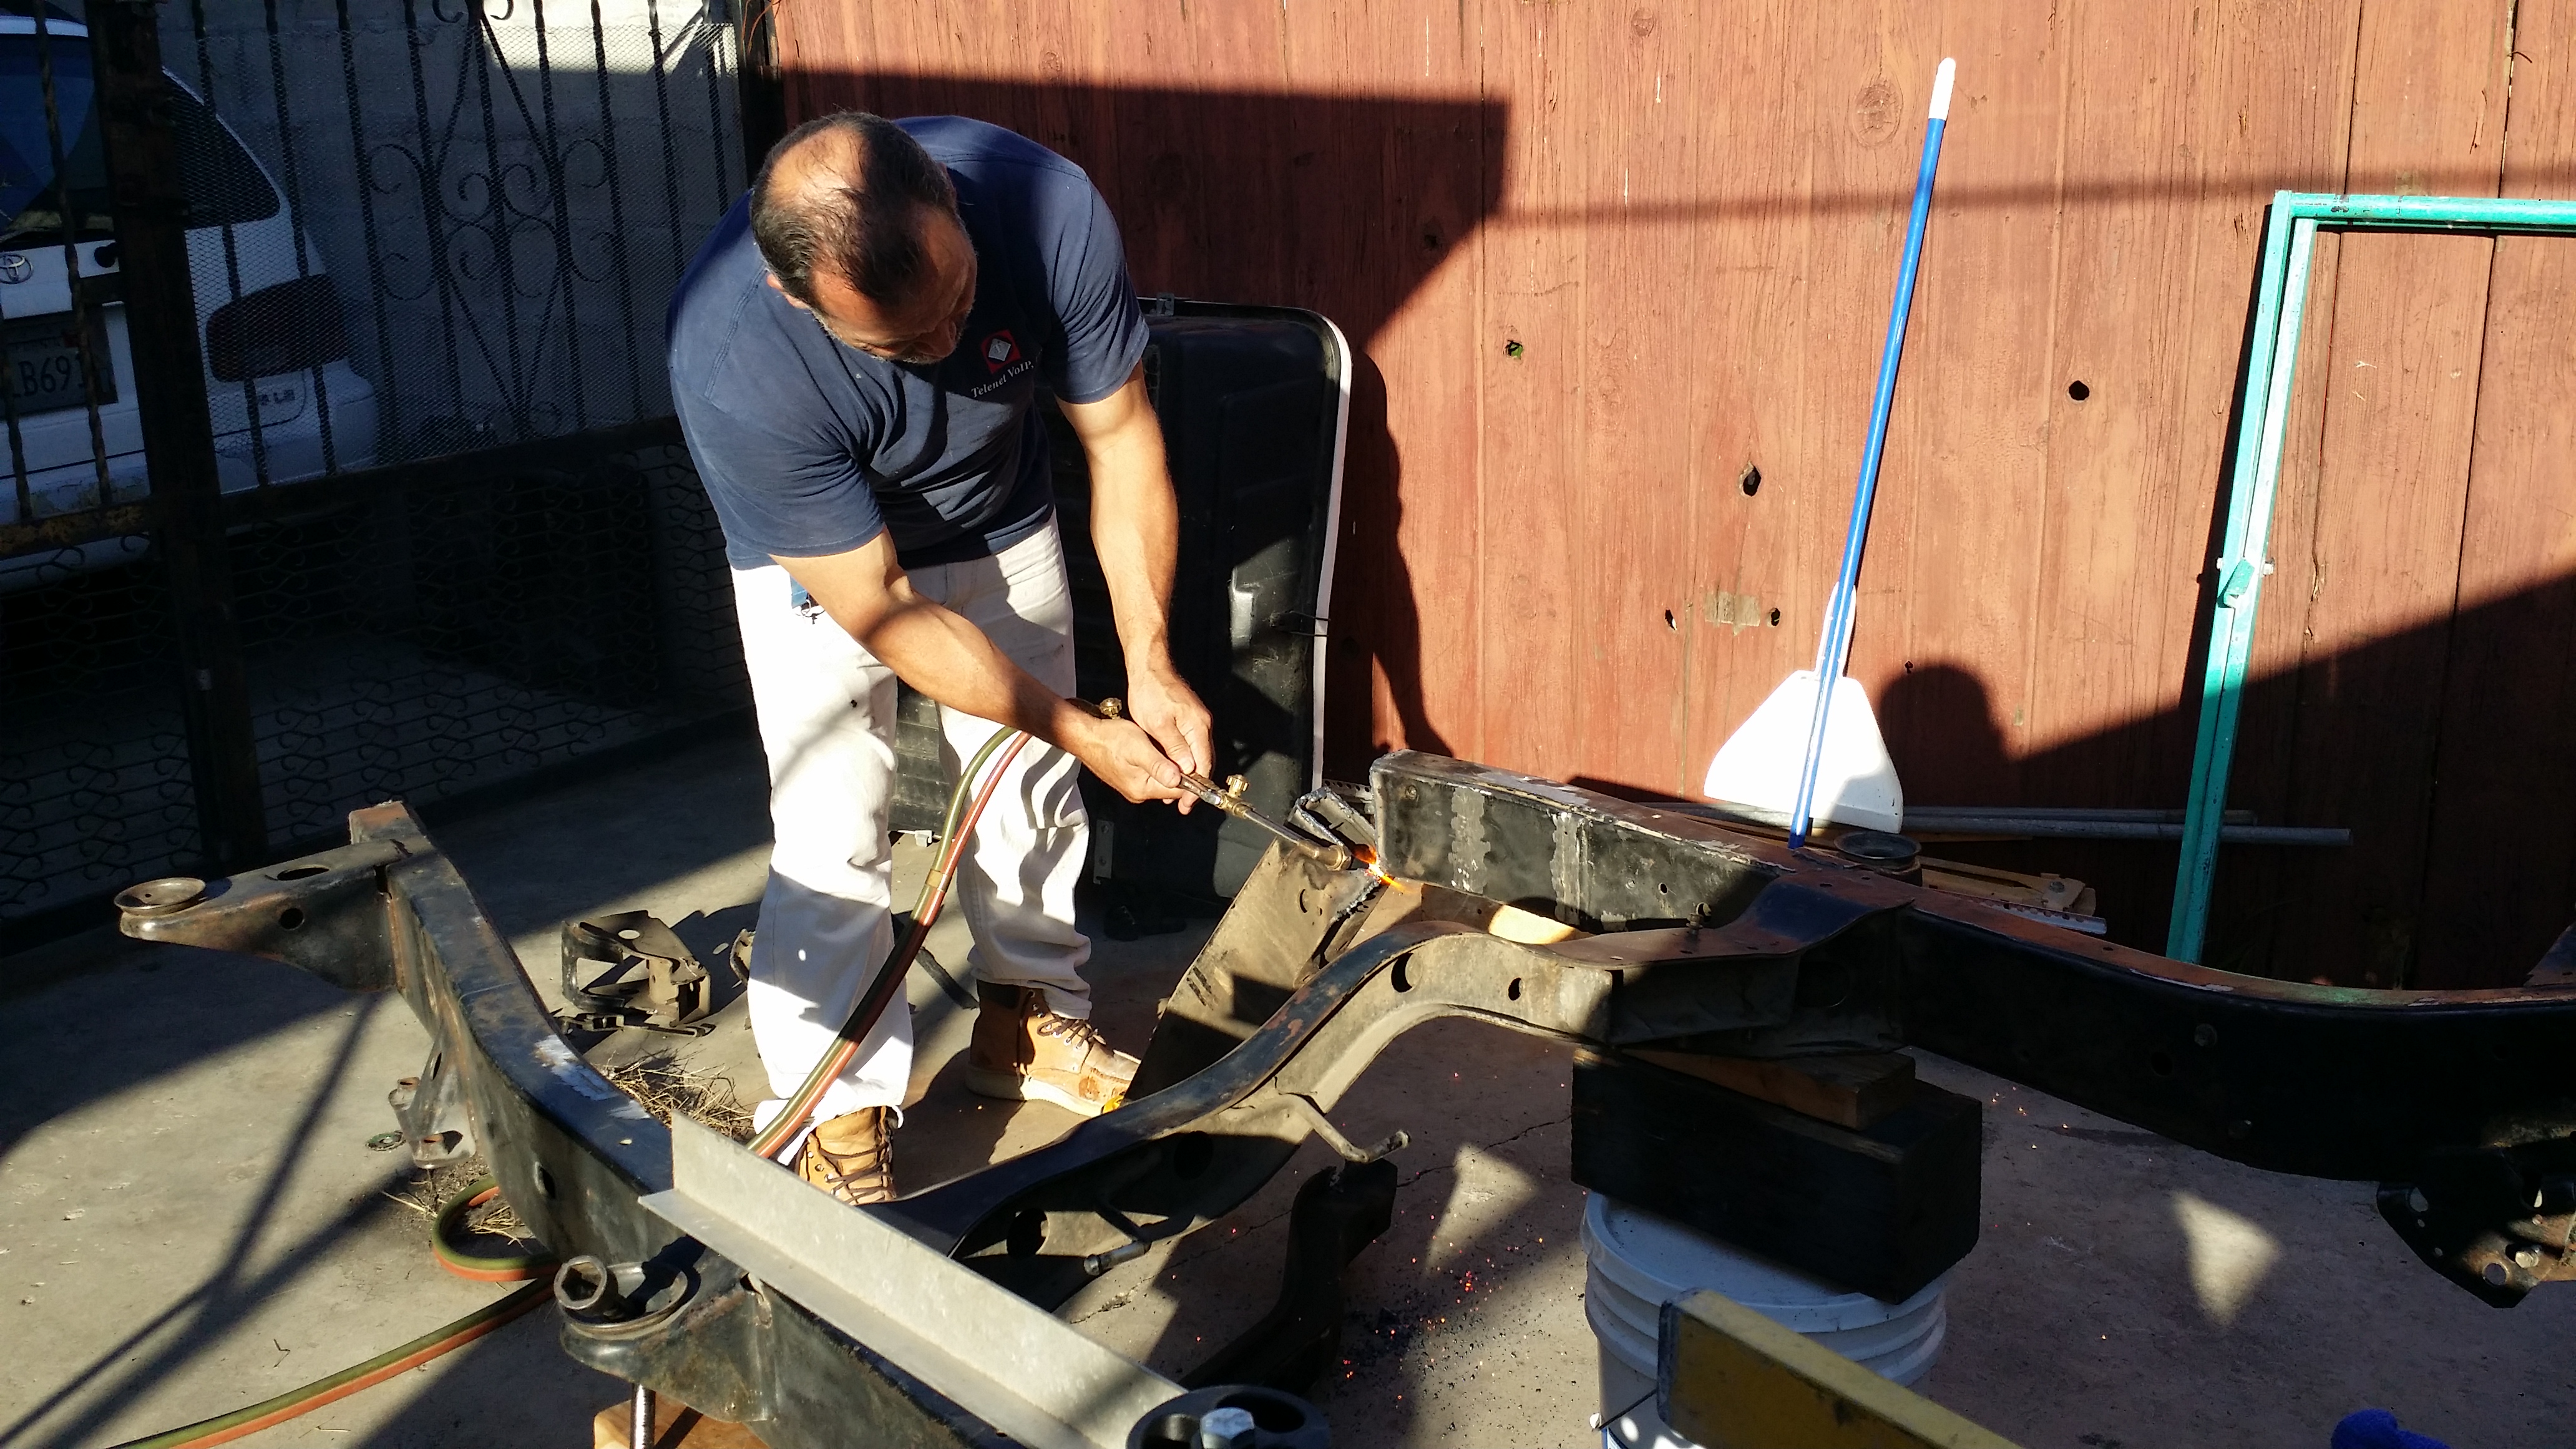
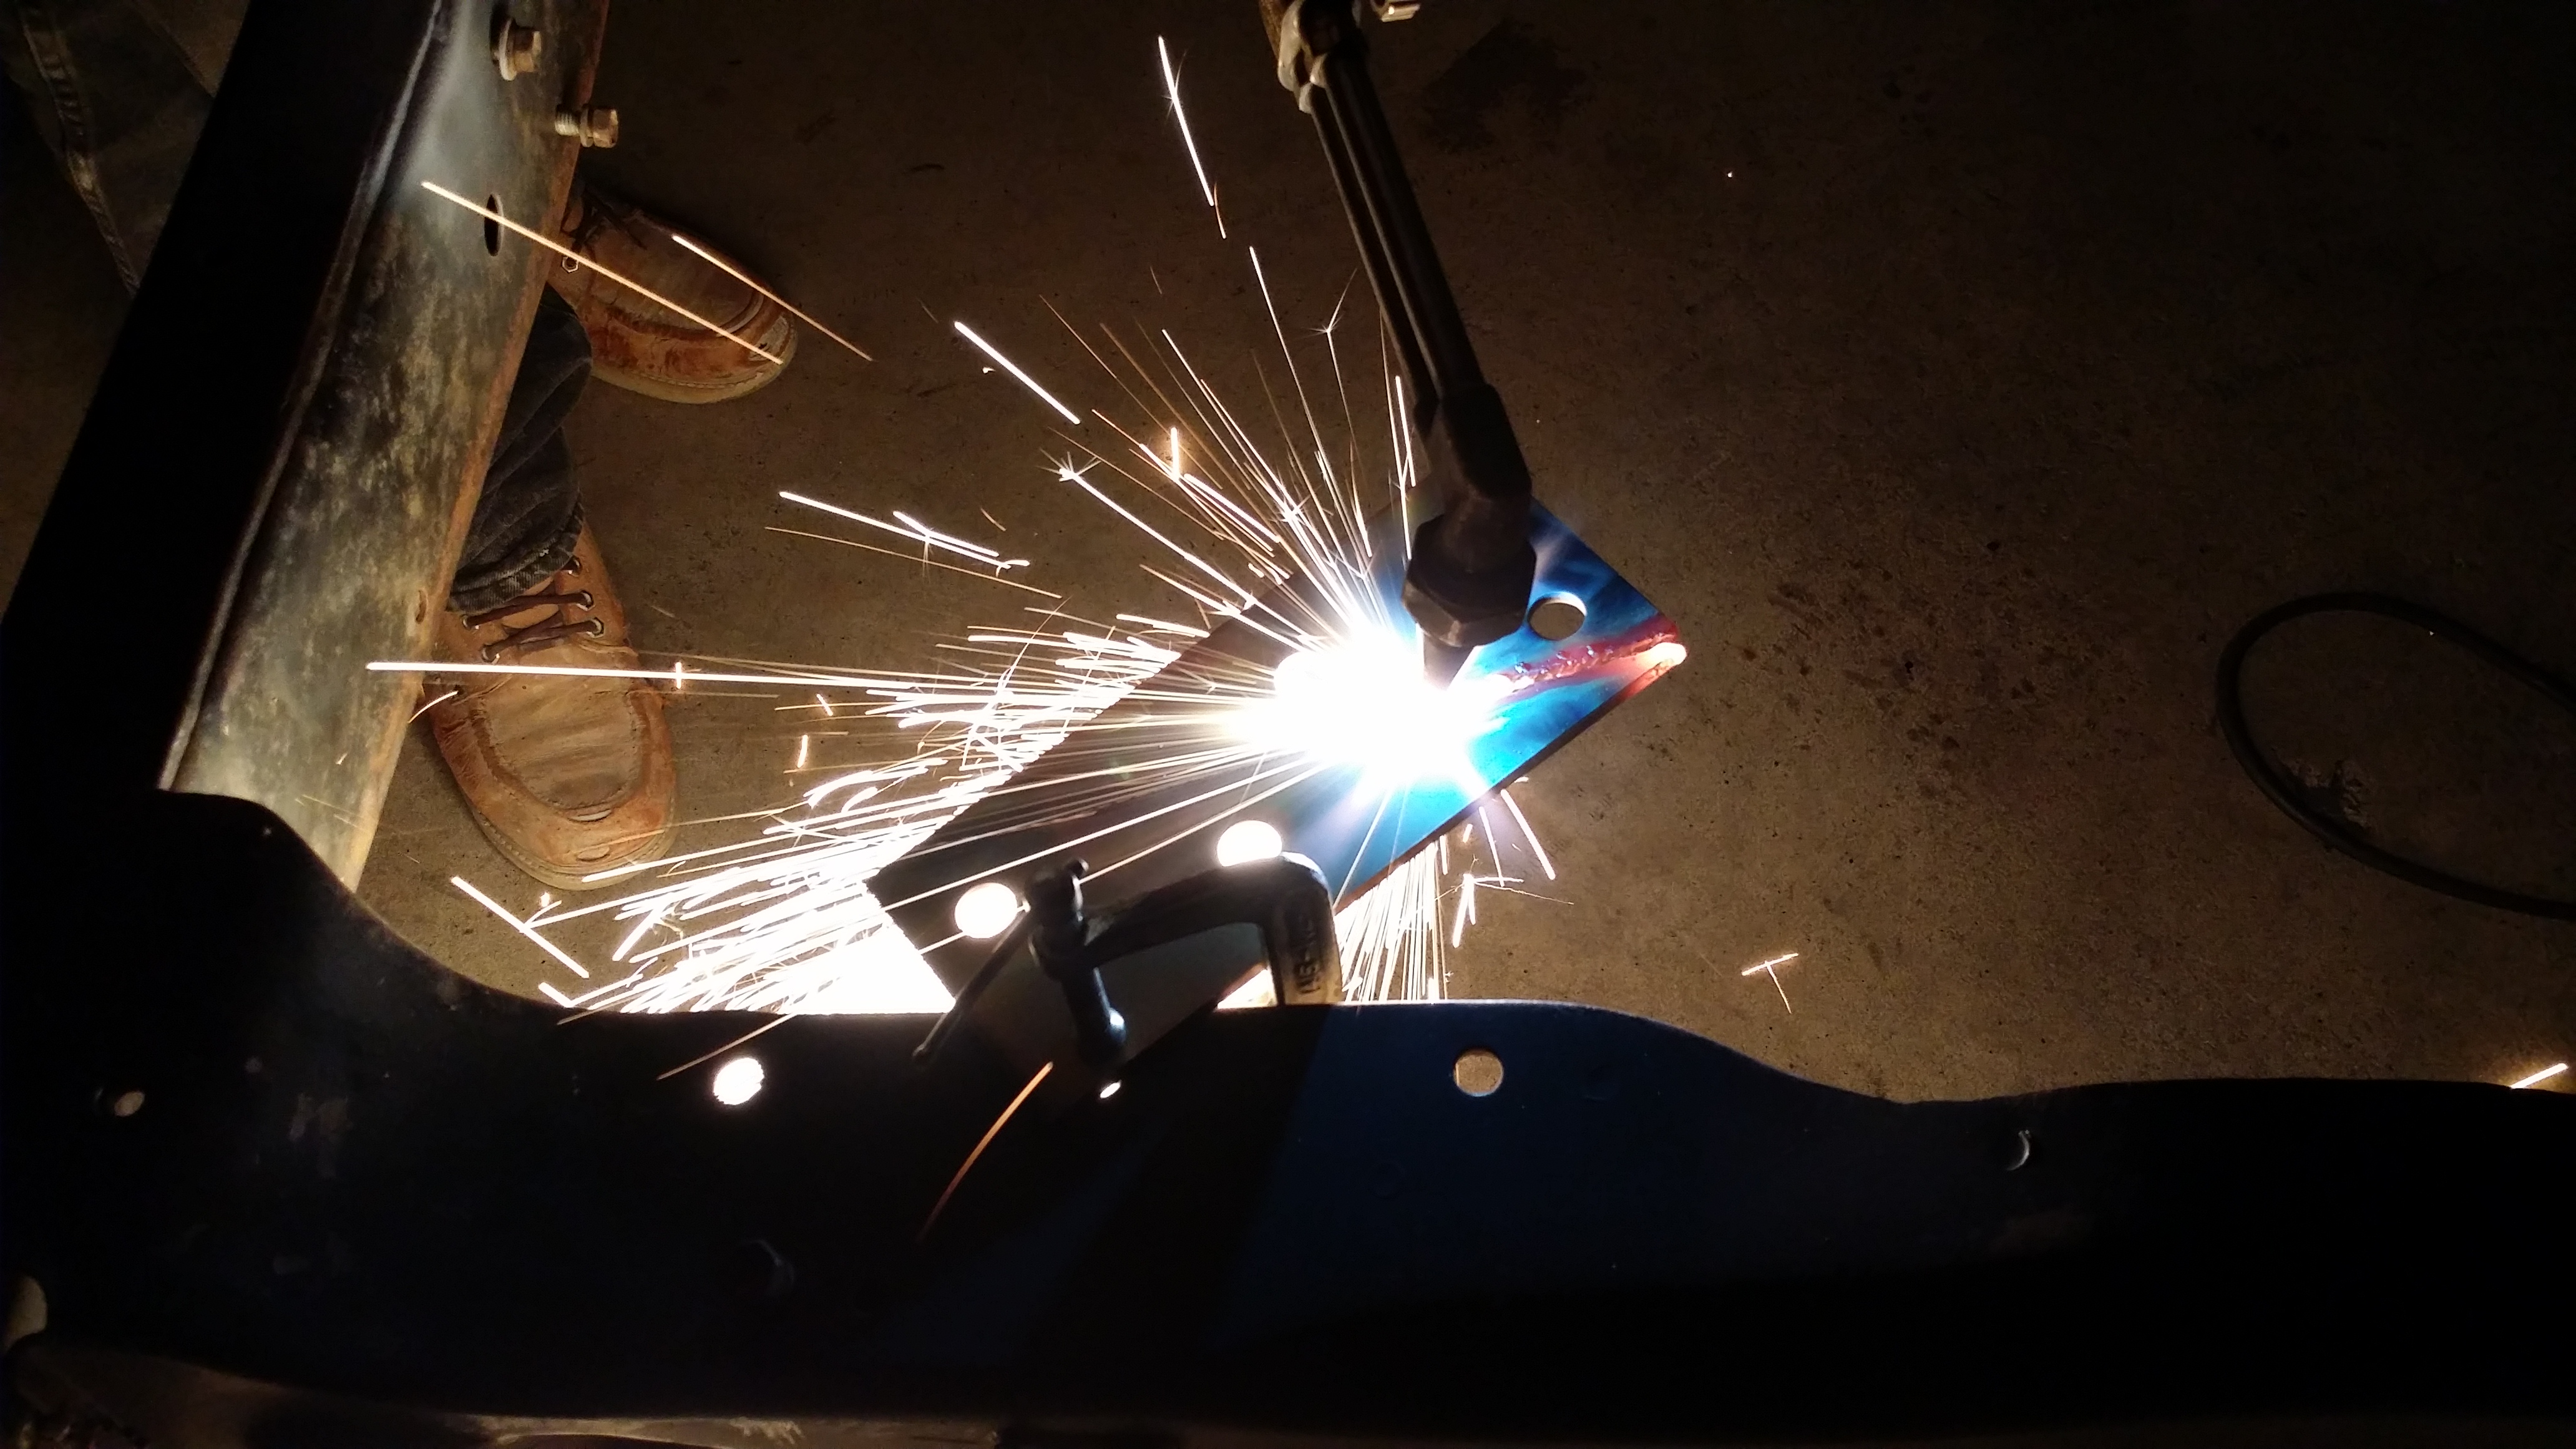
After getting a better idea of what this was going to turn out like it was time to bring out the Acetylene torch. My dad saw me bringing the gear out and he insisted on cutting the frame himself. So i took the liberty of taking surprise work shots of him doing his thing.
Cutting off a couple of feet from the passenger side.
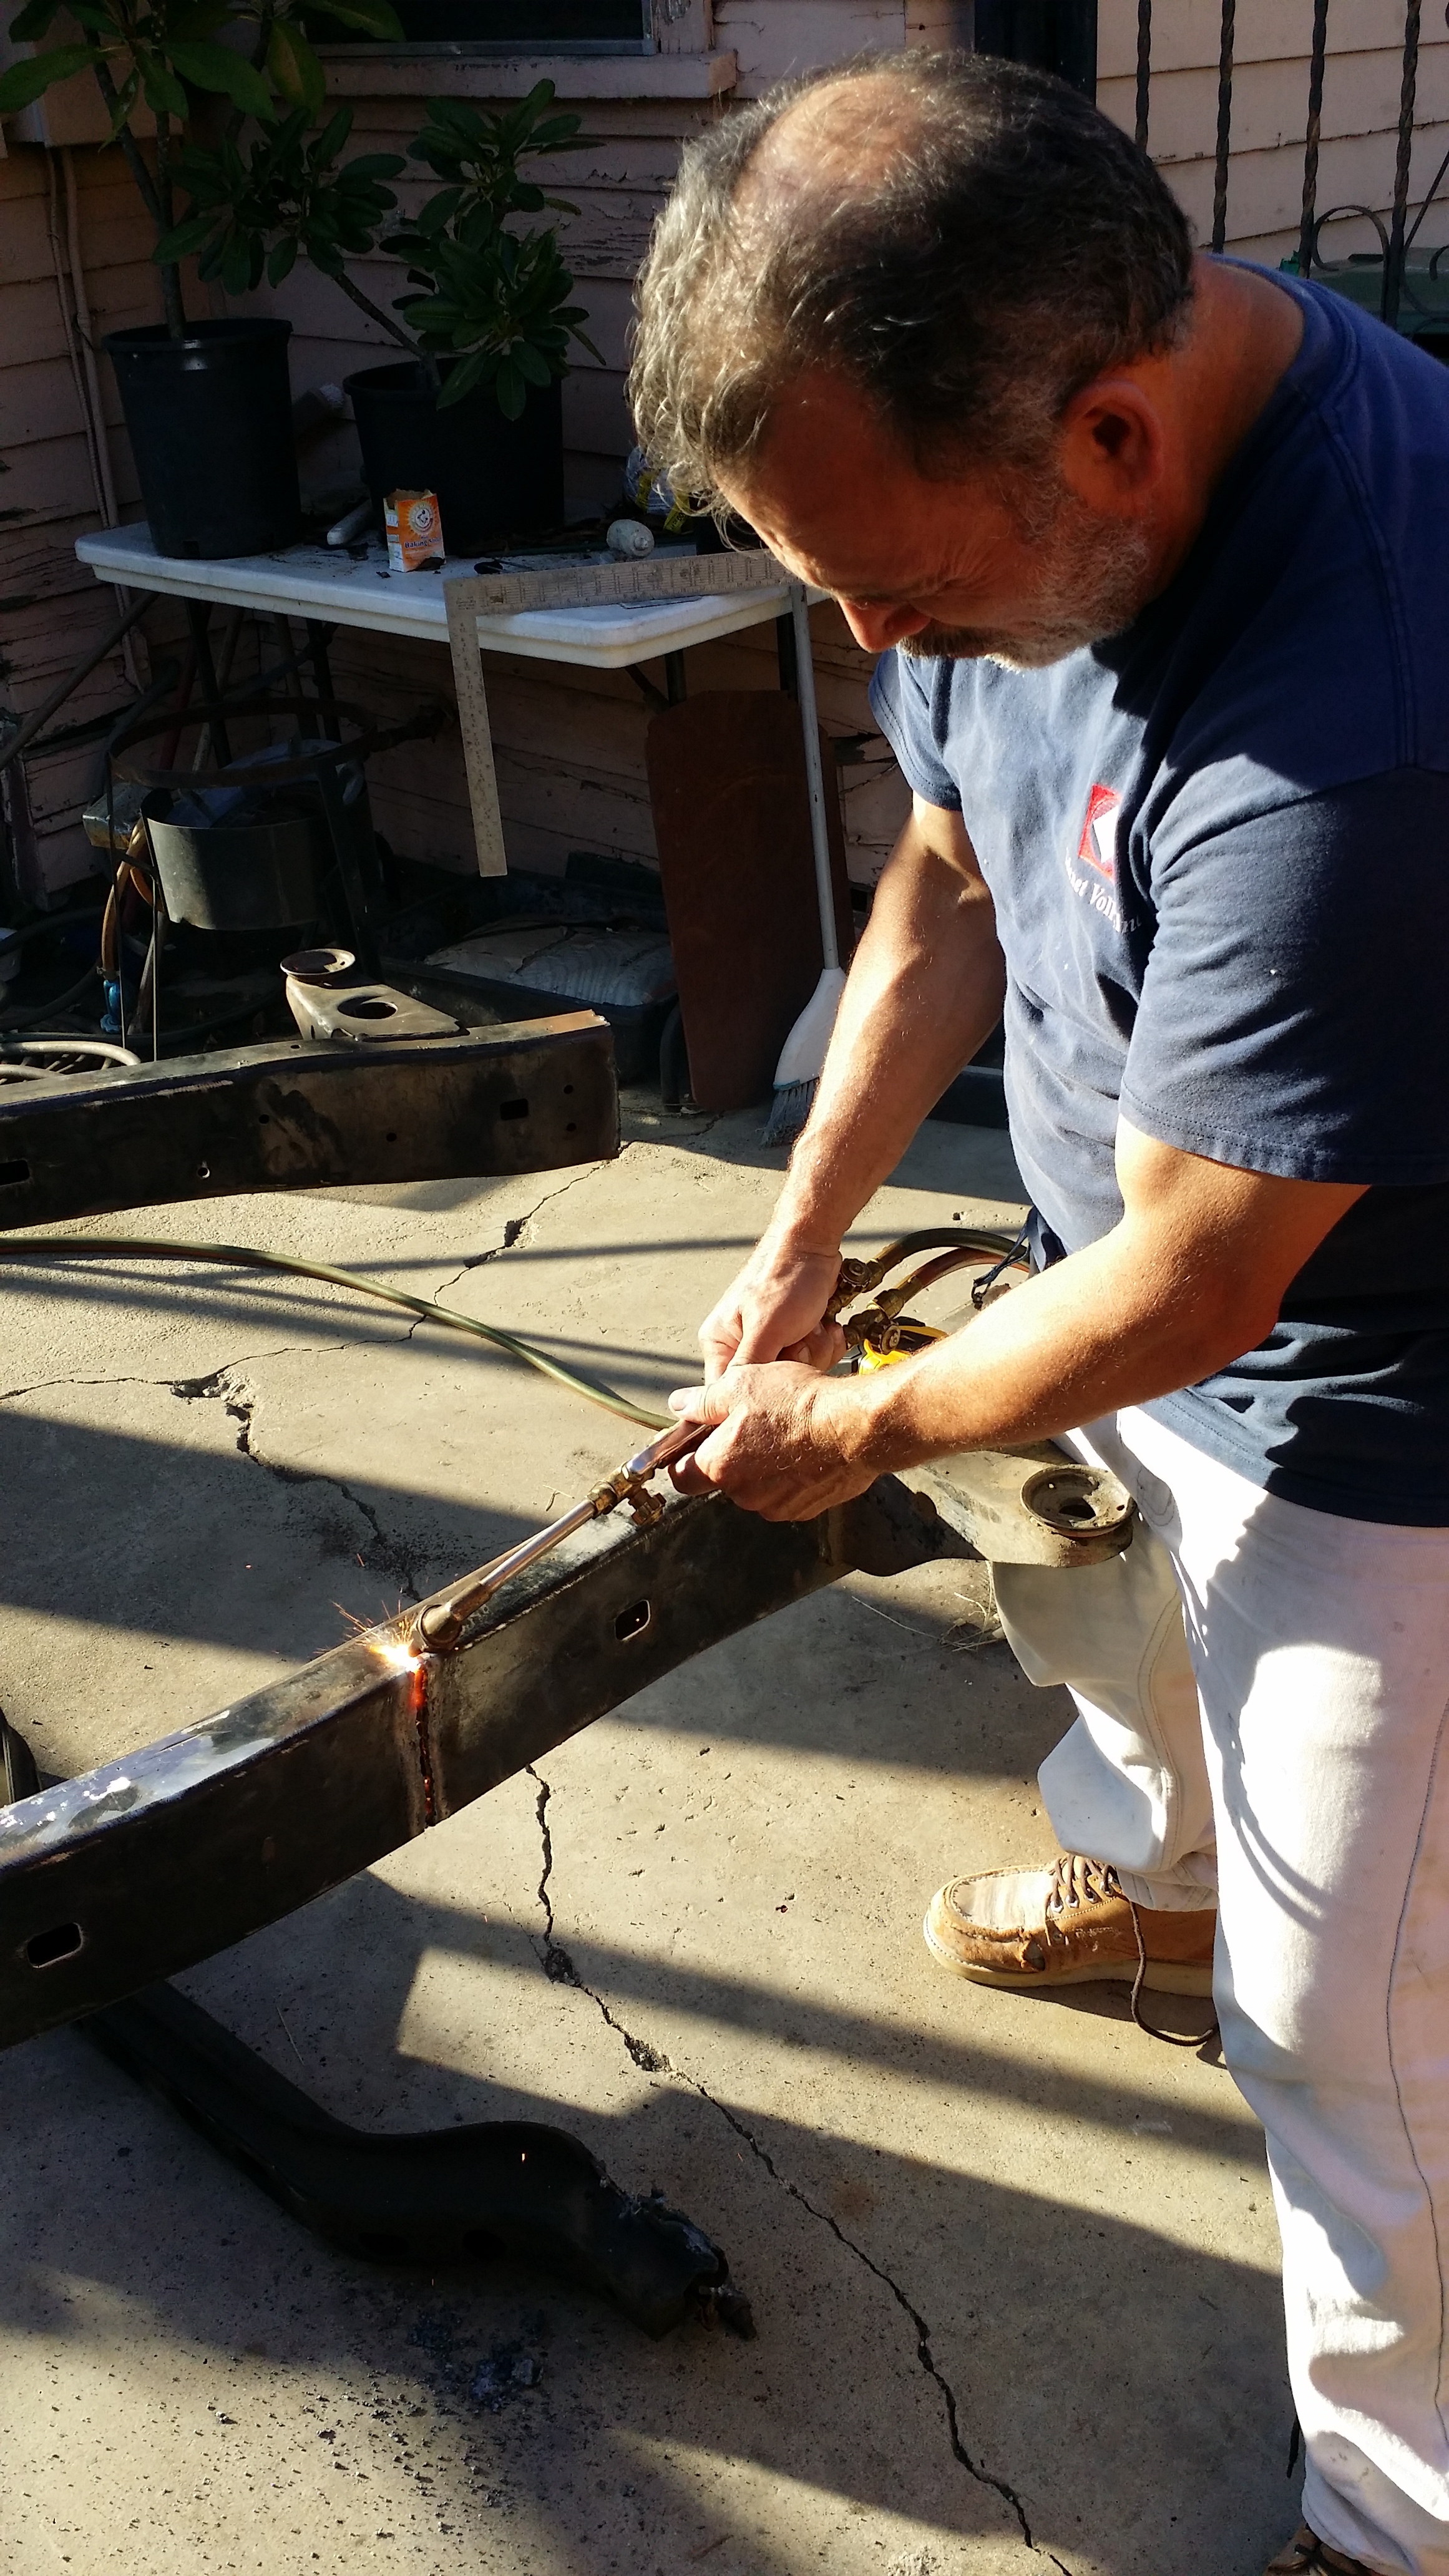
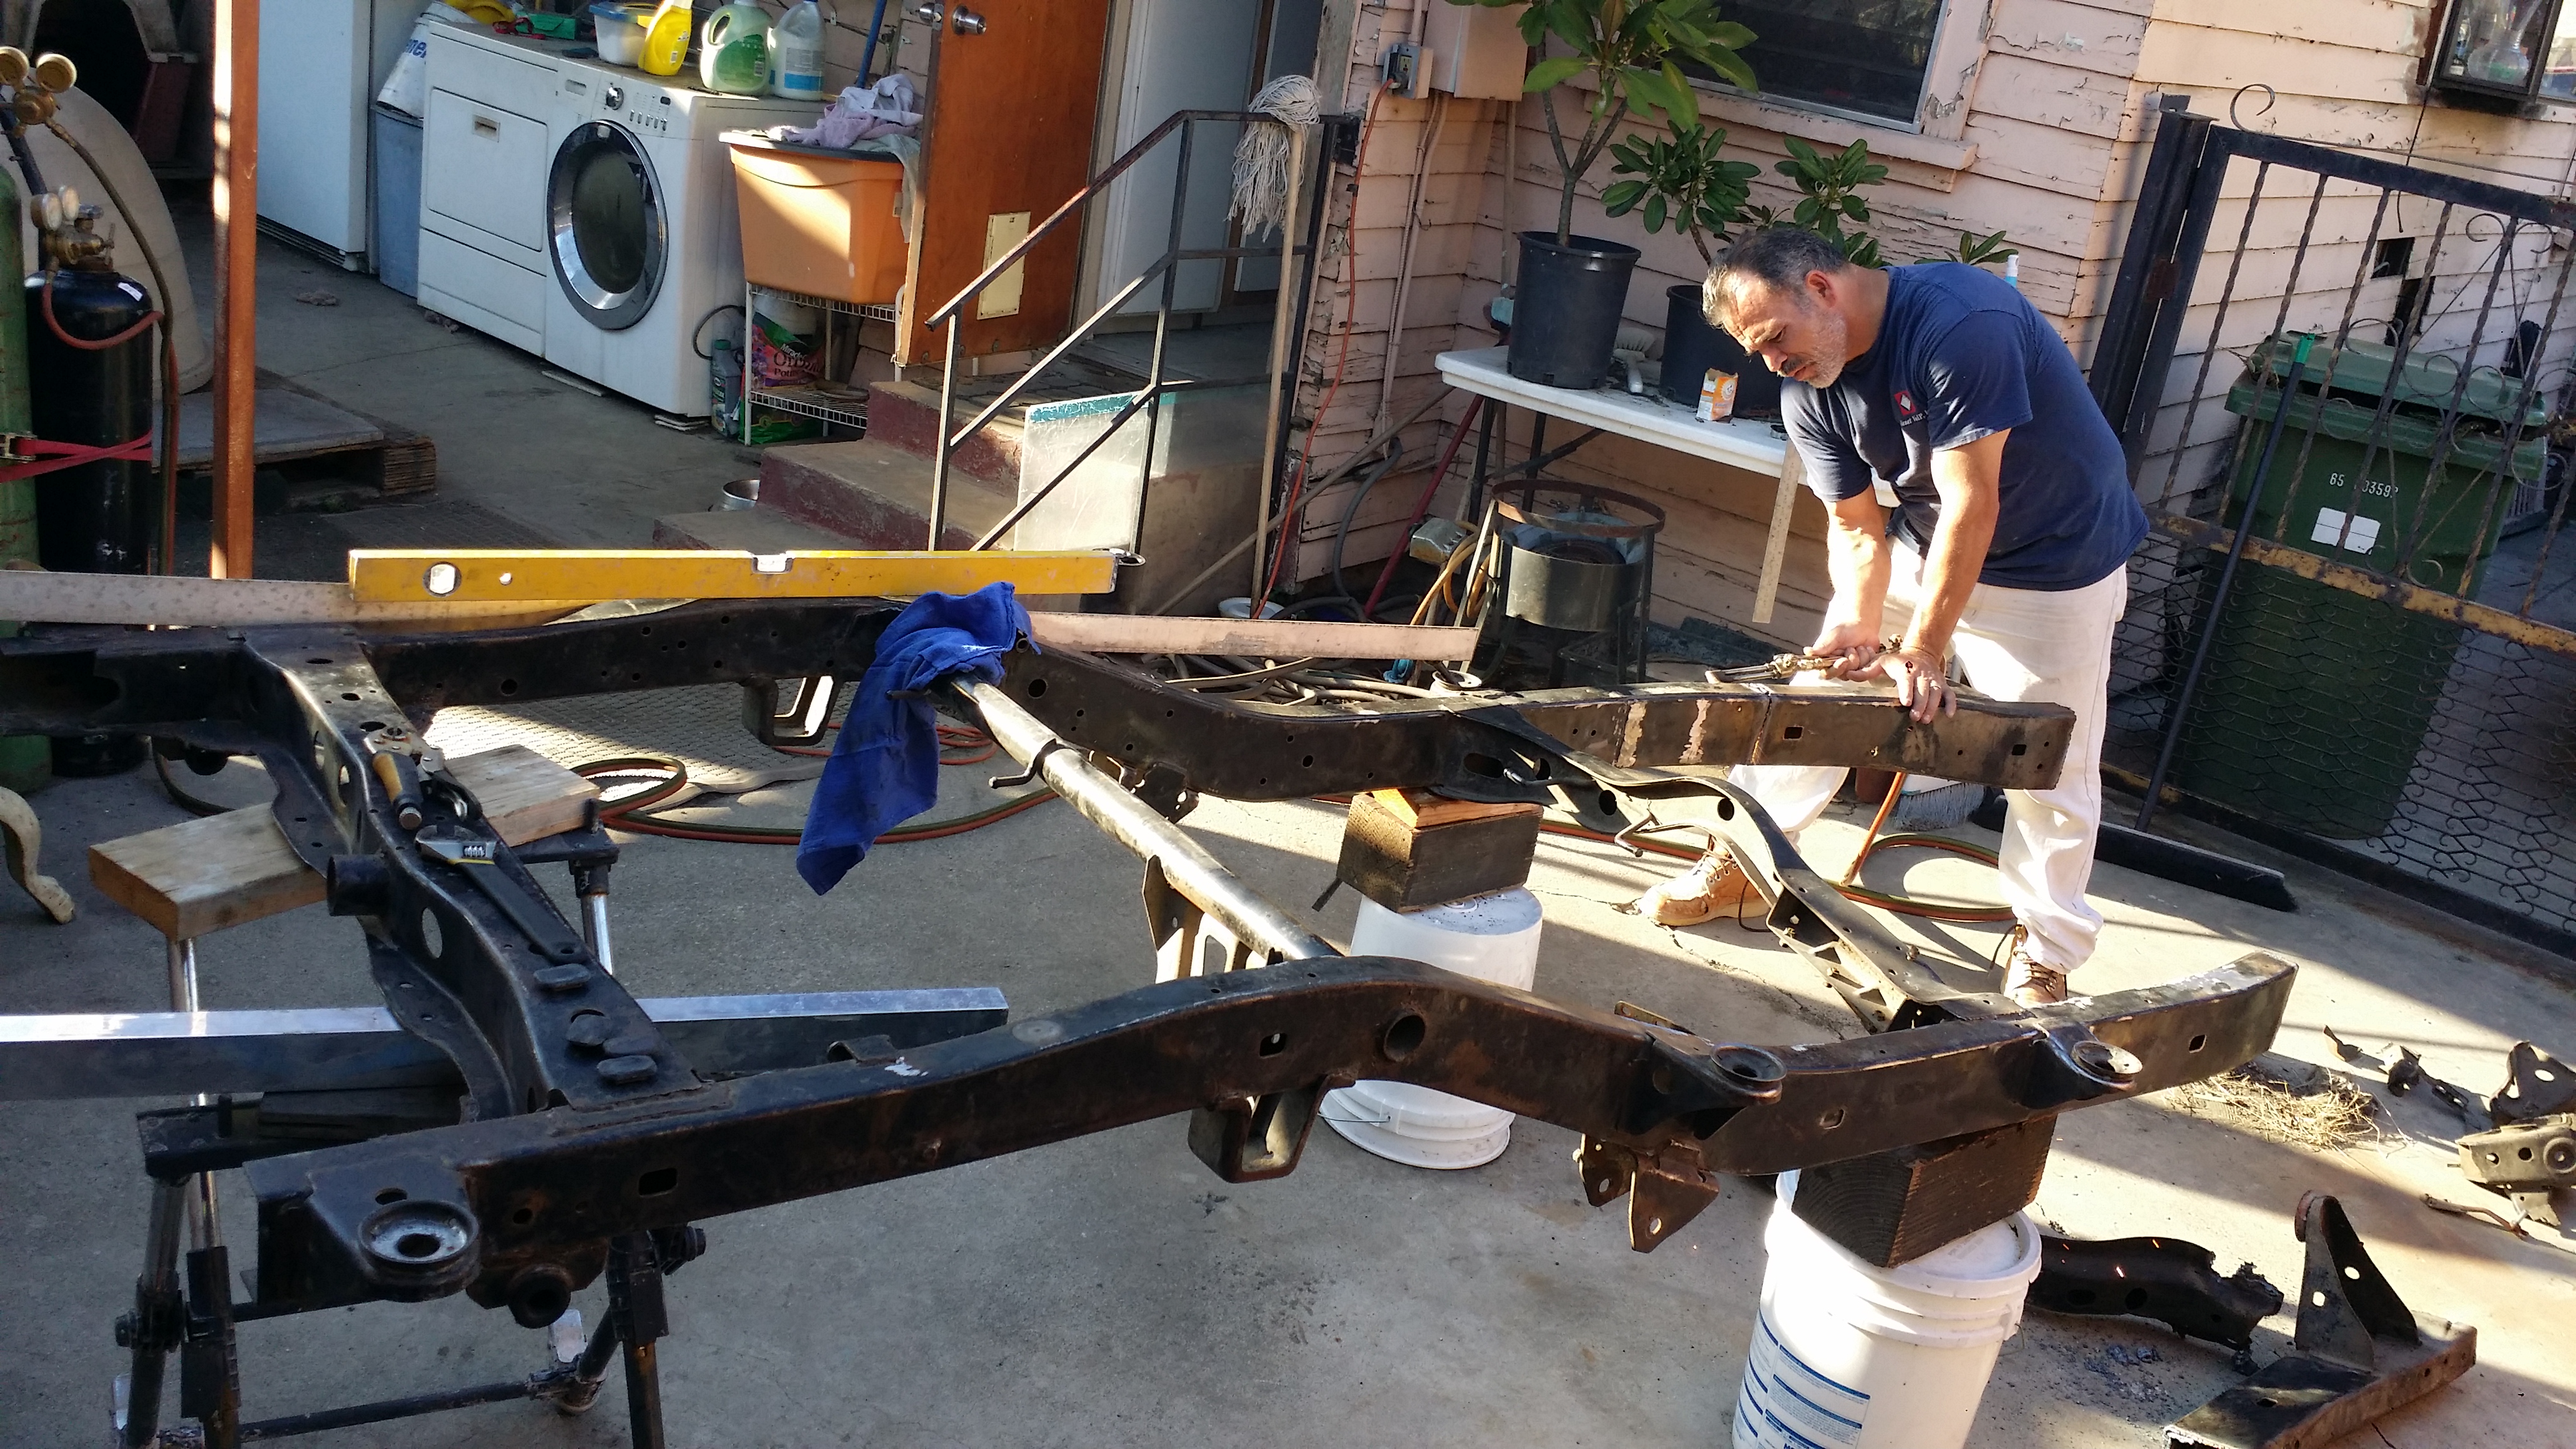
Driver side
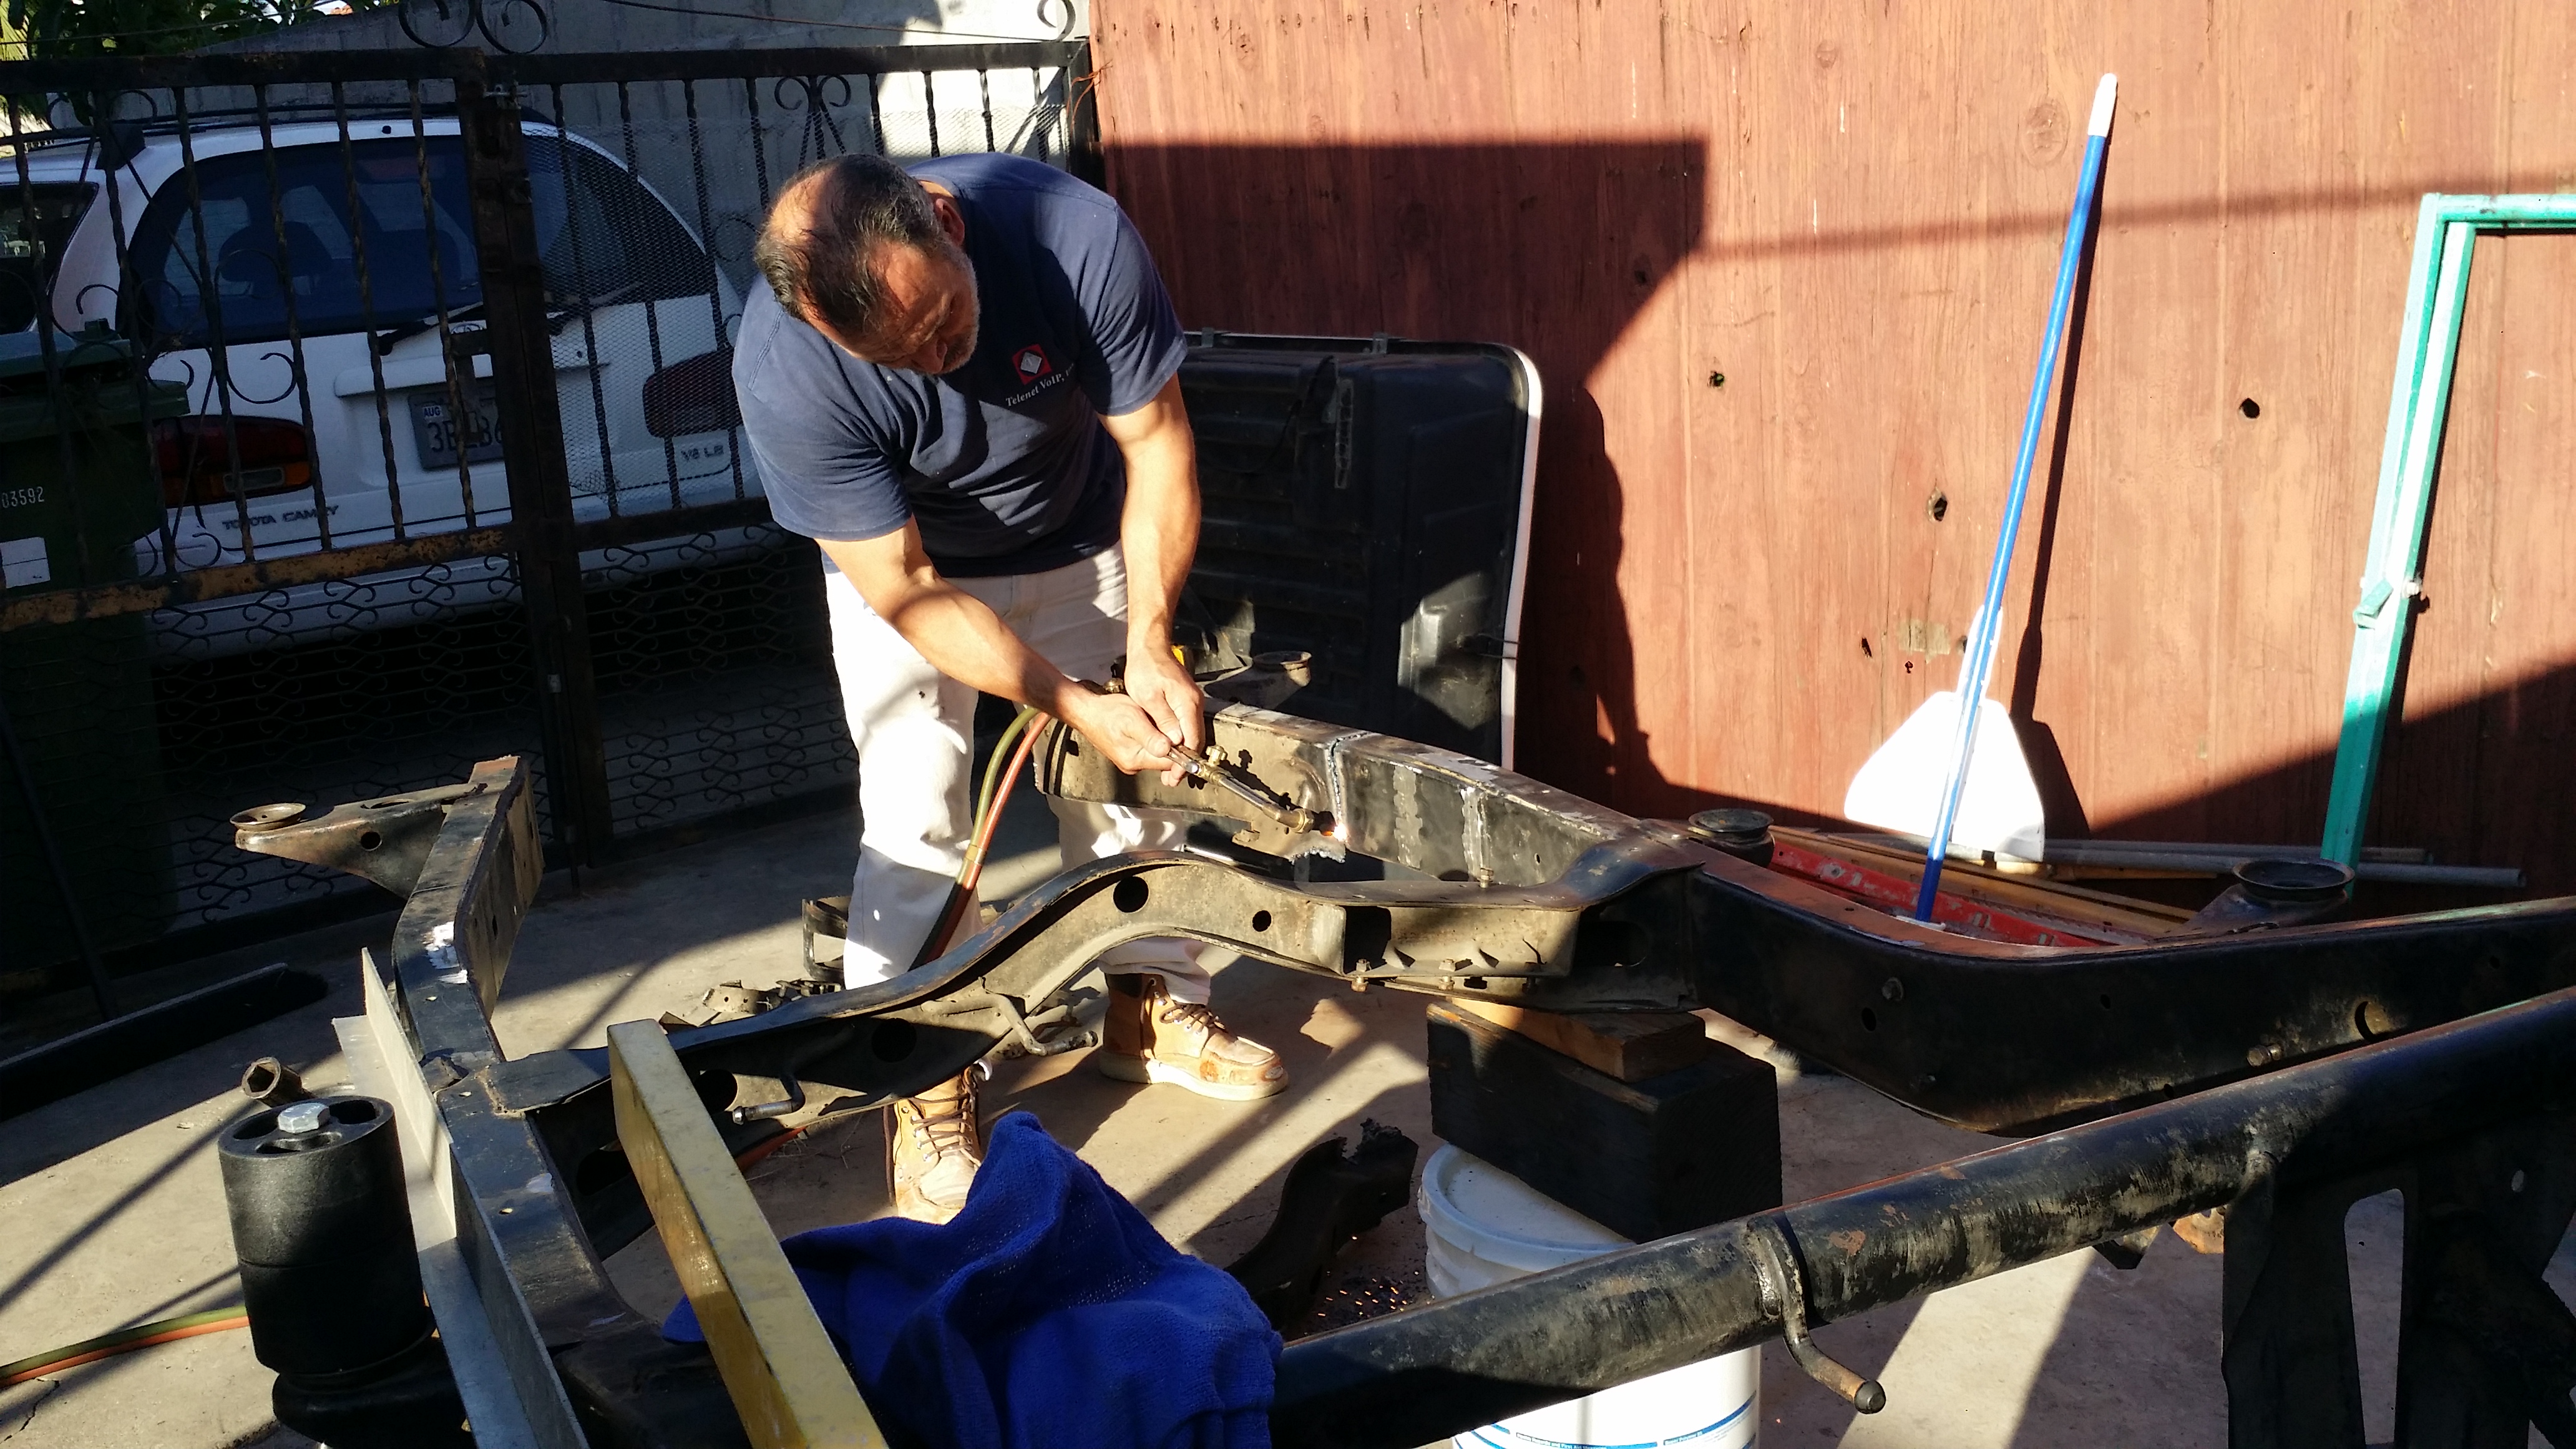
After the chassis i cut off small brackets that i suspect would be in my way. the top 2 are the brackets that hold on the stock 4runner muffler. the bottom pic is the brake like bracket that mounts on the back side of the stock gas tank. Which reminds me i need to go look for a gas tank with the fuel pump so i can use these stock mounts. It'll work perfectly and will be so convenient to have that stock gas tank there.
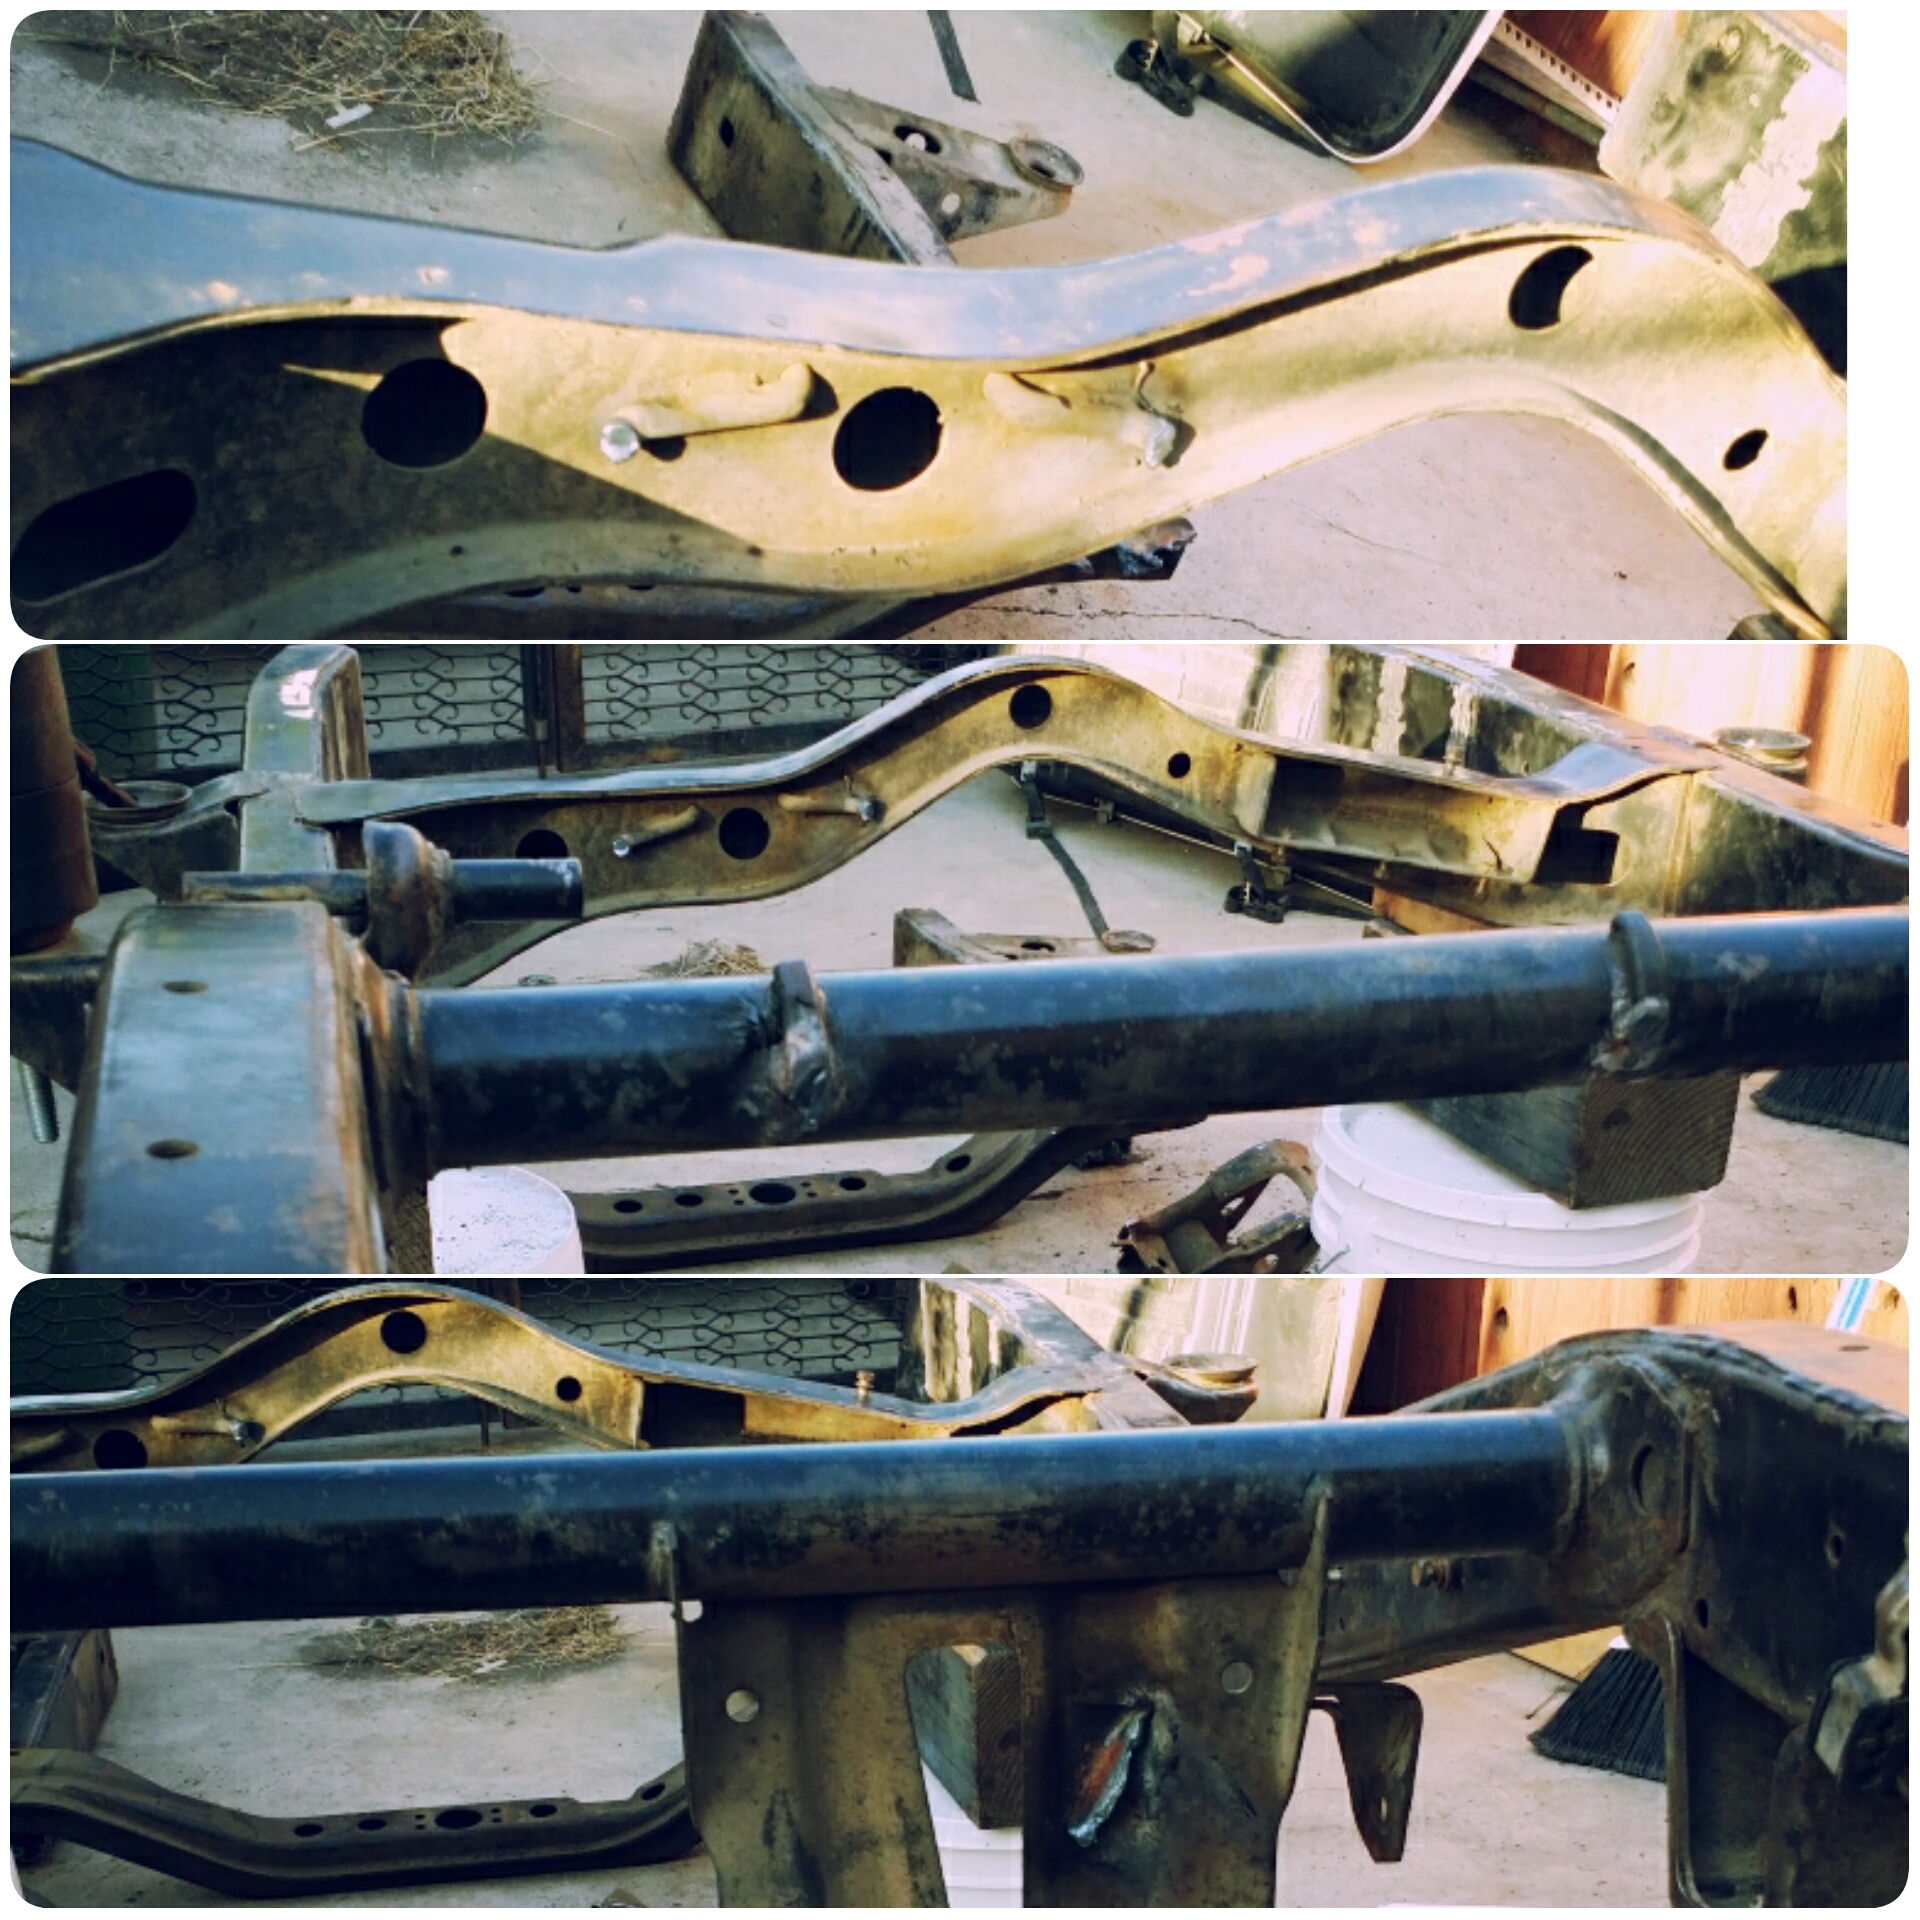
BAM! Now there's something i can work with! This portion that got cut off was also the part that had heavy reinforcements within the chassis toward where all the IFS stuff was mounted to. We pretty much cut everything off from directly behind the transmission mount. There is a guy that lives accross the street from me. He's a retired Vietnam veteran and on the side he collects metal to sell at recycling places. I figured he could put these to good use to help him out make a few bucks. Those side portions weigh a ton!
after torching off the frame took a wire wheel to clean off all the dirt, light oil, and surface rust off. I am really happy with what i saw. The truck has very minimal rust. Literally a few passes with the wire wheel exposed the nice clean black powder coat underneath. The passenger side had a bit of rust but nothing serious. It must had been stored on its side for a while and the moisture was probably allowed to sit on the metal for a while. But its all good I just kept going with the wire wheel to expose the metal underneath then i primed the exposed areas. (I ran out of primer so i only did the larger exposed patches. I'm debating if i should hold off on priming the entire frame since i am still going to have to weld brackets and mounts for my upcoming water tank, and water heater with compressor stuff. YES YOU HEARD RIGHT! WATER HEATER AND COMPRESSED WATER! Yea yea so what call me a glamper i dont care. At least i'll be clean and sleep comfortably in my future CVT Mt Rainer roof top tent http://www.cascadiatents.com/Mt-Rainier-Roof-Top-Tent.htm?m=87&s=615&&id=117 lol
I cant wait to show you guys the water system set up that i am planning to get. It is all rated 5 stars and it's super cheap. I've seen a few people use this system on expedition portal. I'll share this info later just to leave you all in suspense lol

Right now the trailer is completely level i literally took a leveling ruler to make sure the bubble was centered forward, across and diagonal. So this is with the use of 2 body lift blocks stacked up. was still left perfect. I like the idea of using these. But I'm not sure i like the idea of having 2 stacked. I may need to weld up some higher towers and just weld the plate for the block to sit on nicely. We will see what i decide. I could always just end up welding some steel bars upward to keep those stacked blocks from moving. I need to see if they move while under pressure first. But you can really see how straight that thing is. It really doesnt look bad at all.

I was just playing around with the aluminum rulers today to get more of a feel at how large this bigger box is going to be. And it is pretty dang big. I'm sure i wont have a hard time using up the space when i go camping but it is pretty big. and i still have the 2' space in front of that plus the 1.5' wood box in front of this lol This is gonna be a hell of alot of fun to build.

same pic different view.
Here you can see that i already cut off the IFS torsion bar brackets

After getting a better idea of what this was going to turn out like it was time to bring out the Acetylene torch. My dad saw me bringing the gear out and he insisted on cutting the frame himself. So i took the liberty of taking surprise work shots of him doing his thing.
Cutting off a couple of feet from the passenger side.


Driver side


After the chassis i cut off small brackets that i suspect would be in my way. the top 2 are the brackets that hold on the stock 4runner muffler. the bottom pic is the brake like bracket that mounts on the back side of the stock gas tank. Which reminds me i need to go look for a gas tank with the fuel pump so i can use these stock mounts. It'll work perfectly and will be so convenient to have that stock gas tank there.

BAM!
Now there's something i can work with! This portion that got cut off was also the part that had heavy reinforcements within the chassis toward where all the IFS stuff was mounted to. We pretty much cut everything off from directly behind the transmission mount. There is a guy that lives accross the street from me. He's a retired Vietnam veteran and on the side he collects metal to sell at recycling places. I figured he could put these to good use to help him out make a few bucks. Those side portions weigh a ton! 
after torching off the frame took a wire wheel to clean off all the dirt, light oil, and surface rust off. I am really happy with what i saw. The truck has very minimal rust. Literally a few passes with the wire wheel exposed the nice clean black powder coat underneath. The passenger side had a bit of rust but nothing serious. It must had been stored on its side for a while and the moisture was probably allowed to sit on the metal for a while. But its all good I just kept going with the wire wheel to expose the metal underneath then i primed the exposed areas. (I ran out of primer so i only did the larger exposed patches. I'm debating if i should hold off on priming the entire frame since i am still going to have to weld brackets and mounts for my upcoming water tank, and water heater with compressor stuff. YES YOU HEARD RIGHT! WATER HEATER AND COMPRESSED WATER! Yea yea so what call me a glamper i dont care. At least i'll be clean and sleep comfortably in my future CVT Mt Rainer roof top tent http://www.cascadiatents.com/Mt-Rainier-Roof-Top-Tent.htm?m=87&s=615&&id=117 lol

I cant wait to show you guys the water system set up that i am planning to get. It is all rated 5 stars and it's super cheap. I've seen a few people use this system on expedition portal. I'll share this info later just to leave you all in suspense lol
Last edited by Redeth005; 09-25-2015 at 10:08 AM.
Trending Topics
09-25-2015, 10:06 AM
#8
Nice start. How heavy is that frame. Surpised you had it on the roof. I know newer Toyota frames are extremely heavy.
I been toying with the idea of building an enclosed trailer where I can keep my RZR inside and double as kitchen/shower/bedroom (base camp) when RZR is pulled out for play
My last trip to pismo was sweet. My truck was base camp with solar on top keeping my battery charged and my 12v fridge running. Play all day and night in the RZR. Come back to camp and bed was ready to go. Didn't drive my truck once it was parked. Was pretty nice. You will love the base camp trailer. Just make sure no one can take it and watch the weight.
09-25-2015, 10:24 AM
#9
Registered User
Thread Starter
Nice start. How heavy is that frame. Surpised you had it on the roof. I know newer Toyota frames are extremely heavy.
I been toying with the idea of building an enclosed trailer where I can keep my RZR inside and double as kitchen/shower/bedroom (base camp) when RZR is pulled out for play
My last trip to pismo was sweet. My truck was base camp with solar on top keeping my battery charged and my 12v fridge running. Play all day and night in the RZR. Come back to camp and bed was ready to go. Didn't drive my truck once it was parked. Was pretty nice. You will love the base camp trailer. Just make sure no one can take it and watch the weight.
I been toying with the idea of building an enclosed trailer where I can keep my RZR inside and double as kitchen/shower/bedroom (base camp) when RZR is pulled out for play
My last trip to pismo was sweet. My truck was base camp with solar on top keeping my battery charged and my 12v fridge running. Play all day and night in the RZR. Come back to camp and bed was ready to go. Didn't drive my truck once it was parked. Was pretty nice. You will love the base camp trailer. Just make sure no one can take it and watch the weight.
To answer your question. YES the frame is very heavy. especially toward the front stuff because there is so much zigzagged plates welded inside the frame in the front to support all the IFS, engine, and torsion bar stuff.
I didnt even put the entire frame up on top of the truck. we torched off the frame right were all the IFS stuff ends such as where the arms mount to the frame. That part that got cut off was the heaviest part of it all. But even with cutting this stuff off the whole frame was really heavy. i read somewhere that a 4runner chassis could weigh up to 700 to 900 pounds. i dont know if thats true but in between my younger brother who is 20yo and my dad, we had a hard time lifting the frame up to the top of the truck. I wouldnt doubt if the frame really was 800-900 to begin with. I'm sure with the IFS part of the frame still intact it probably is. I noticed once we cut up to the portion where the transmission mount is at the entire frame seens alot lighter because we got rid of all the interior zigzagged welded chassis portion of the frame. I think the way the frame sits right now it probly only weighs 300-400 pounds. Definitely no more then 500 right now. it is defintely a manageable weight. I wish i would have cut that frame in that location to begin with when i threw it up on top of the 4runner. We wouldnt have struggled as much. lol
Just keep in mind if you plan to build something with a toyota chassis off a pick up or 4runner i highly recommend cutting off the part of the frame right where the transmission cross-member ends (on the back side of it) It will be so much lighter and easier to handle. Also One thing i realized is that 4runner body mounts go downward on the frame to compensate for the rear seats and feet area. IF you have access to a Toyota pick up GET THAT! the body mounts for the bed are all up high at equal level with the rear top body mount so there will be no need for fabricating any higher mounts or body lift blocks like im going to need to do. you will be able to get started on building your large storage box just like that.
09-26-2015, 02:50 PM
#11
Registered User
Thread Starter
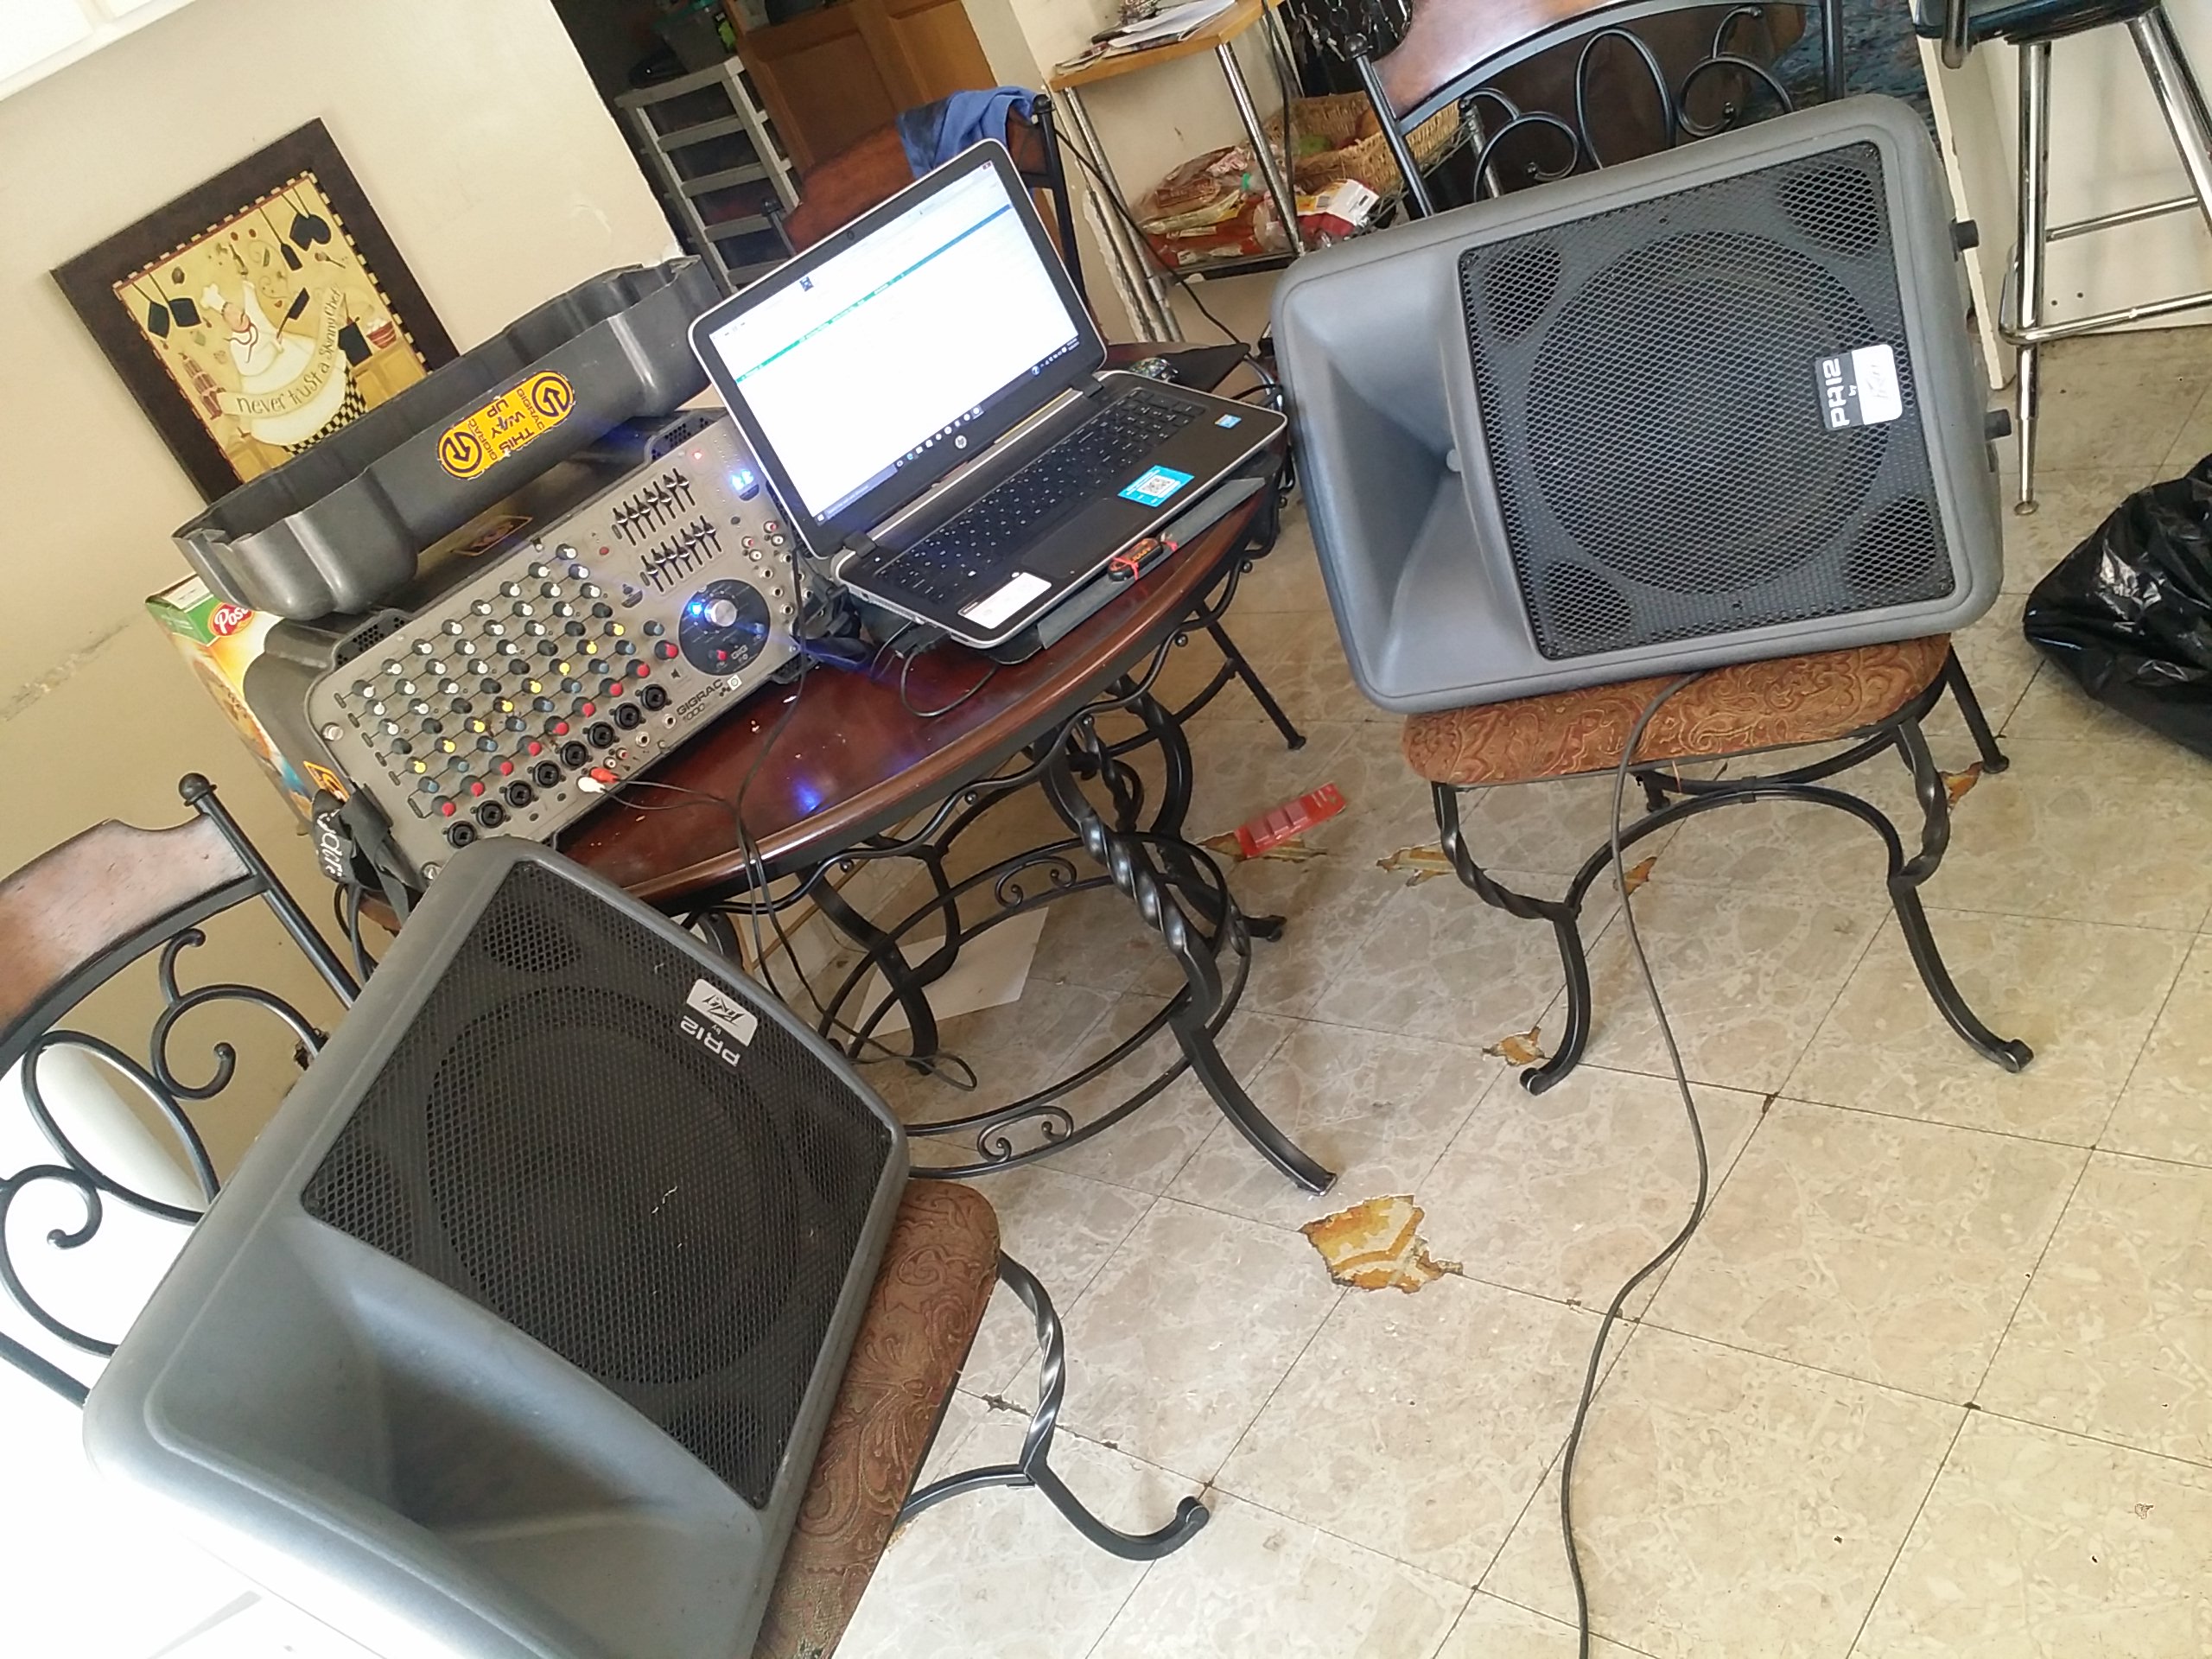
I don't know what you guys use for a sound system when working on truck/trailer projects while outdoors, garage, or shop but I can sure tell you not many of you guys can top my 1000watt 8 channel SoundCraft PA system with Peavey PR12 speaker combo.
This thing is the best! Especially when grinding and cutting metal I don't like my music to be overpowered. I'm sure my next door neighbors are gonna be pissed off today but I don't care they put on their music and sing crappy kareoke all the time so this is payback! lol
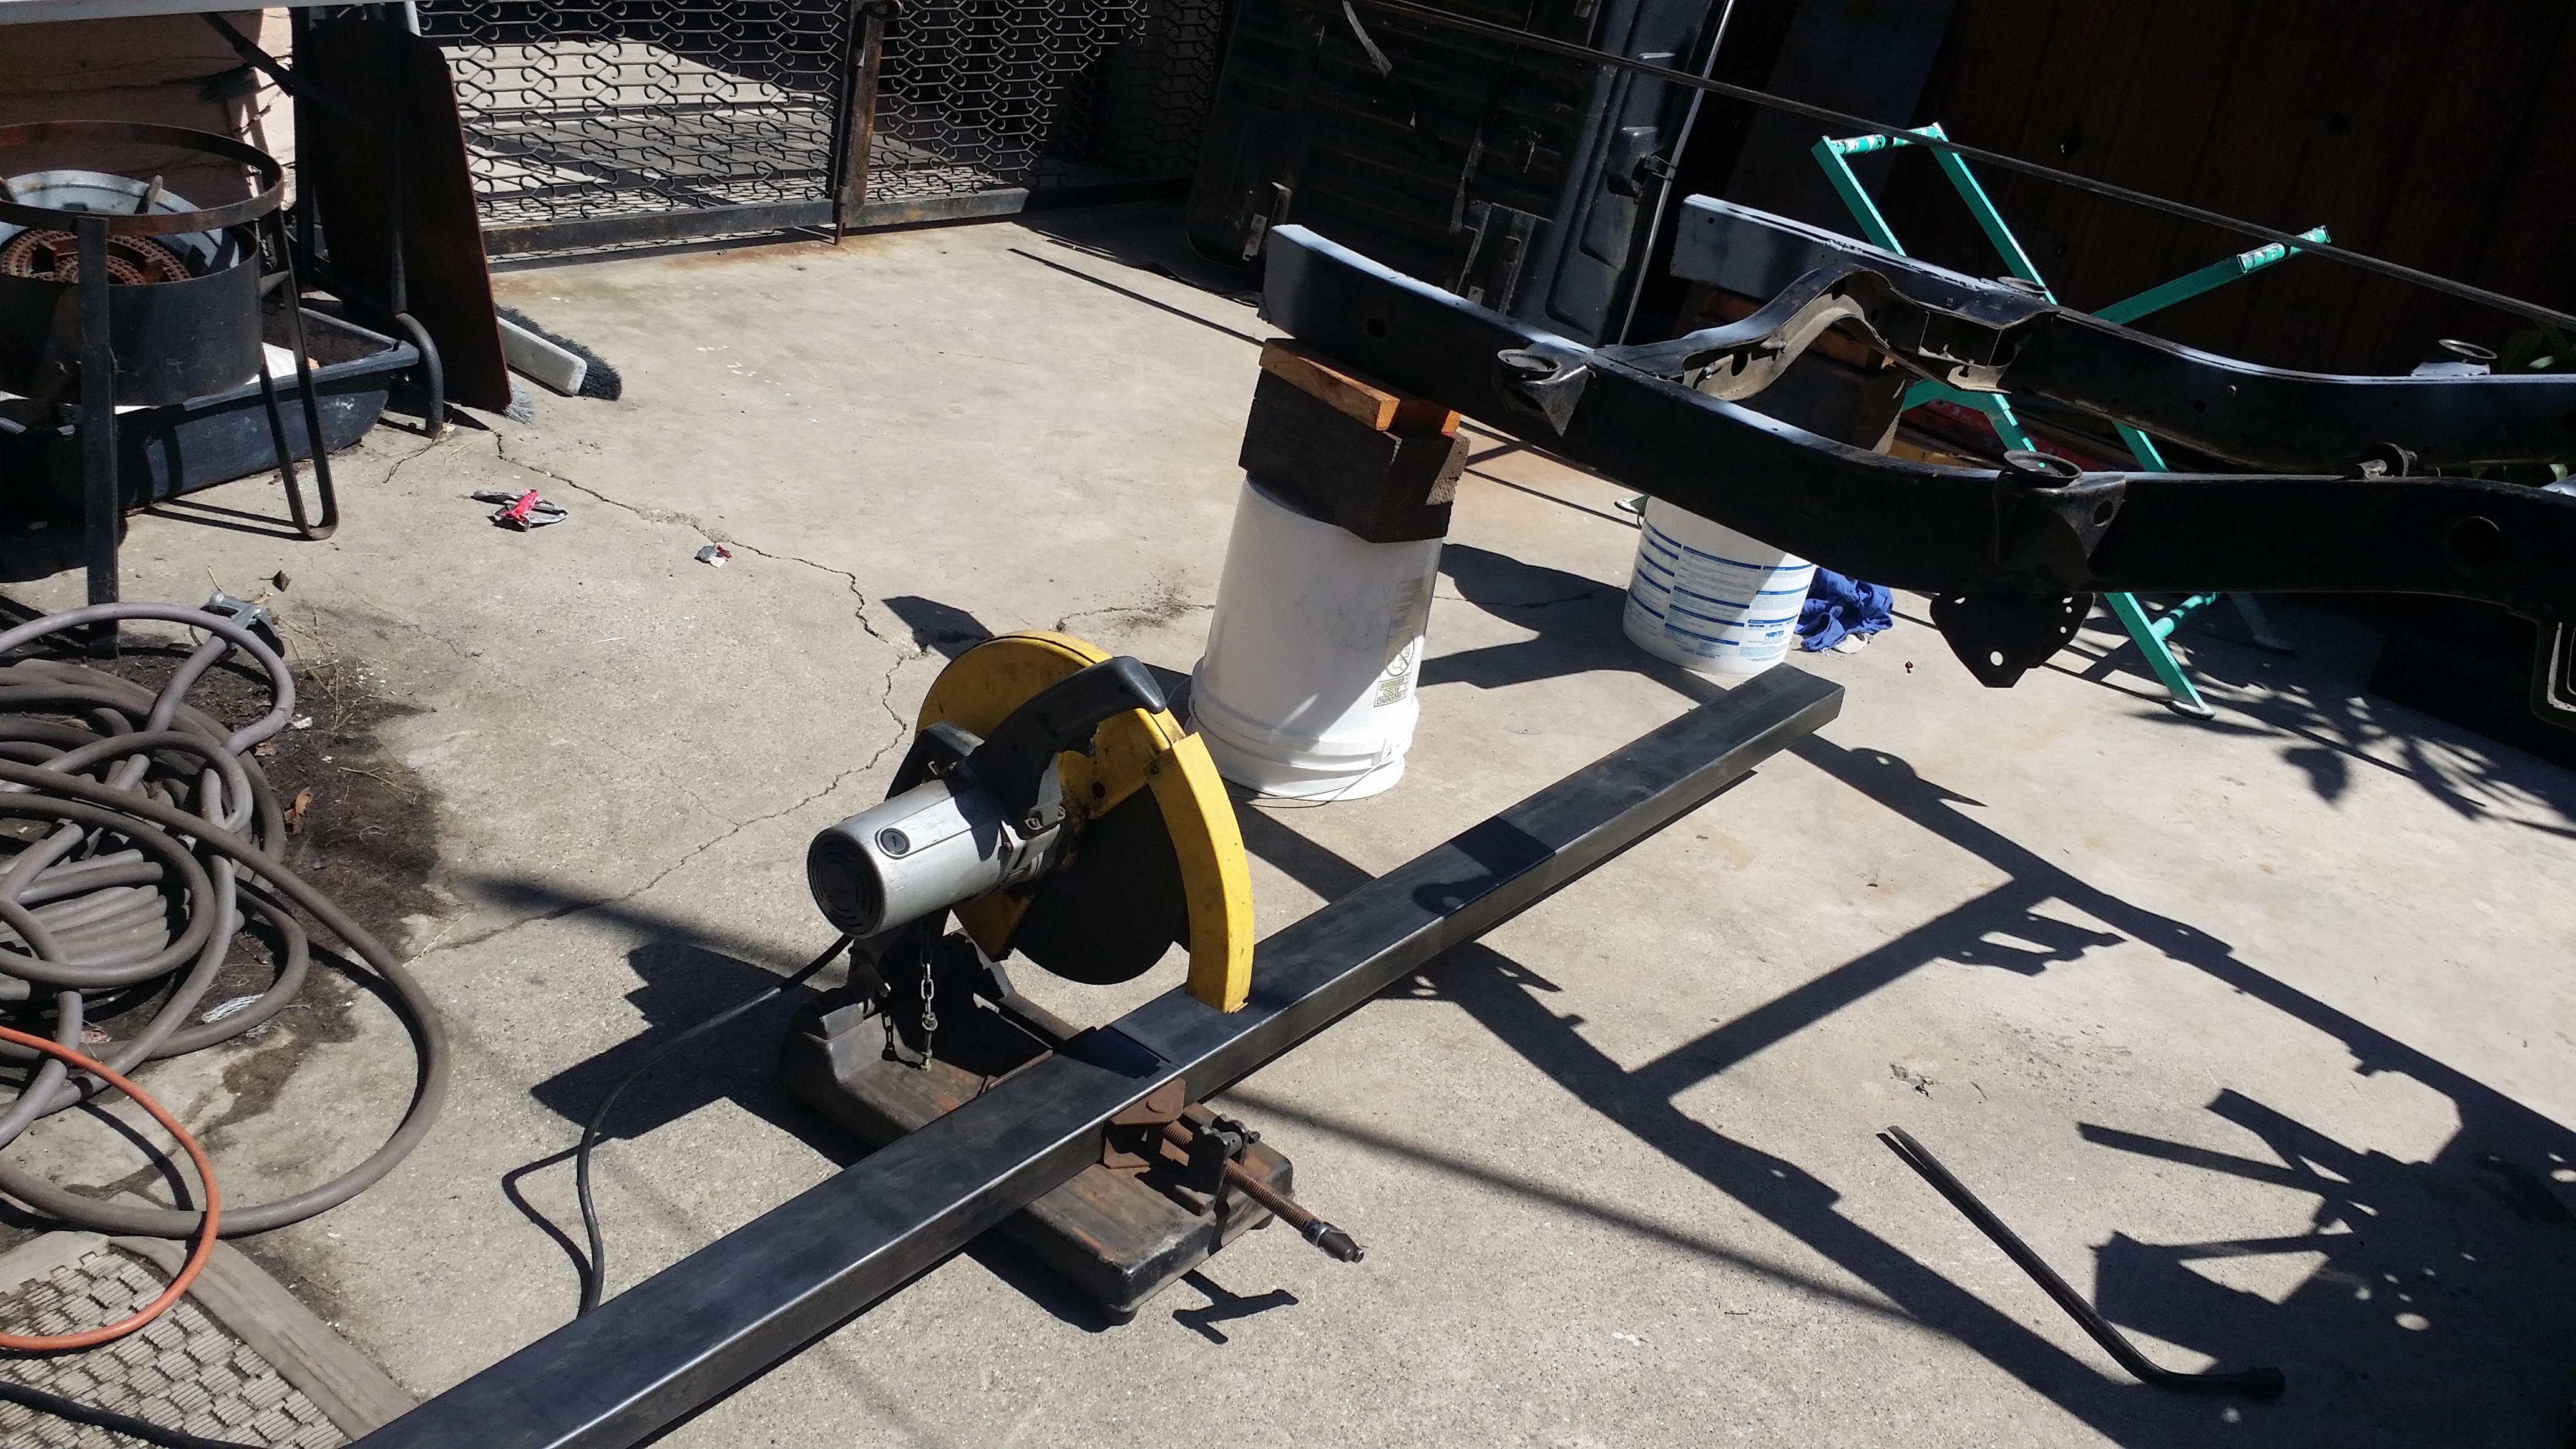
Swung by the local steel shop (BOBCO metal) in Vernon Ca to pick up some metal for the trailer build. Gotta fab up the rear bumper to the trailer and raise those body mounts by 4 and 8 inches to make level with the rear body mounts. All the steel you see on that green stand and a 3'x1.5' 1/8" thick plate sheet cost me 30 bucks. Soon when i get the cash i want to go back and buy 2 or 3 sticks of 20ft 1/8" thick square tube so i can begin working on the main storage compartment box.
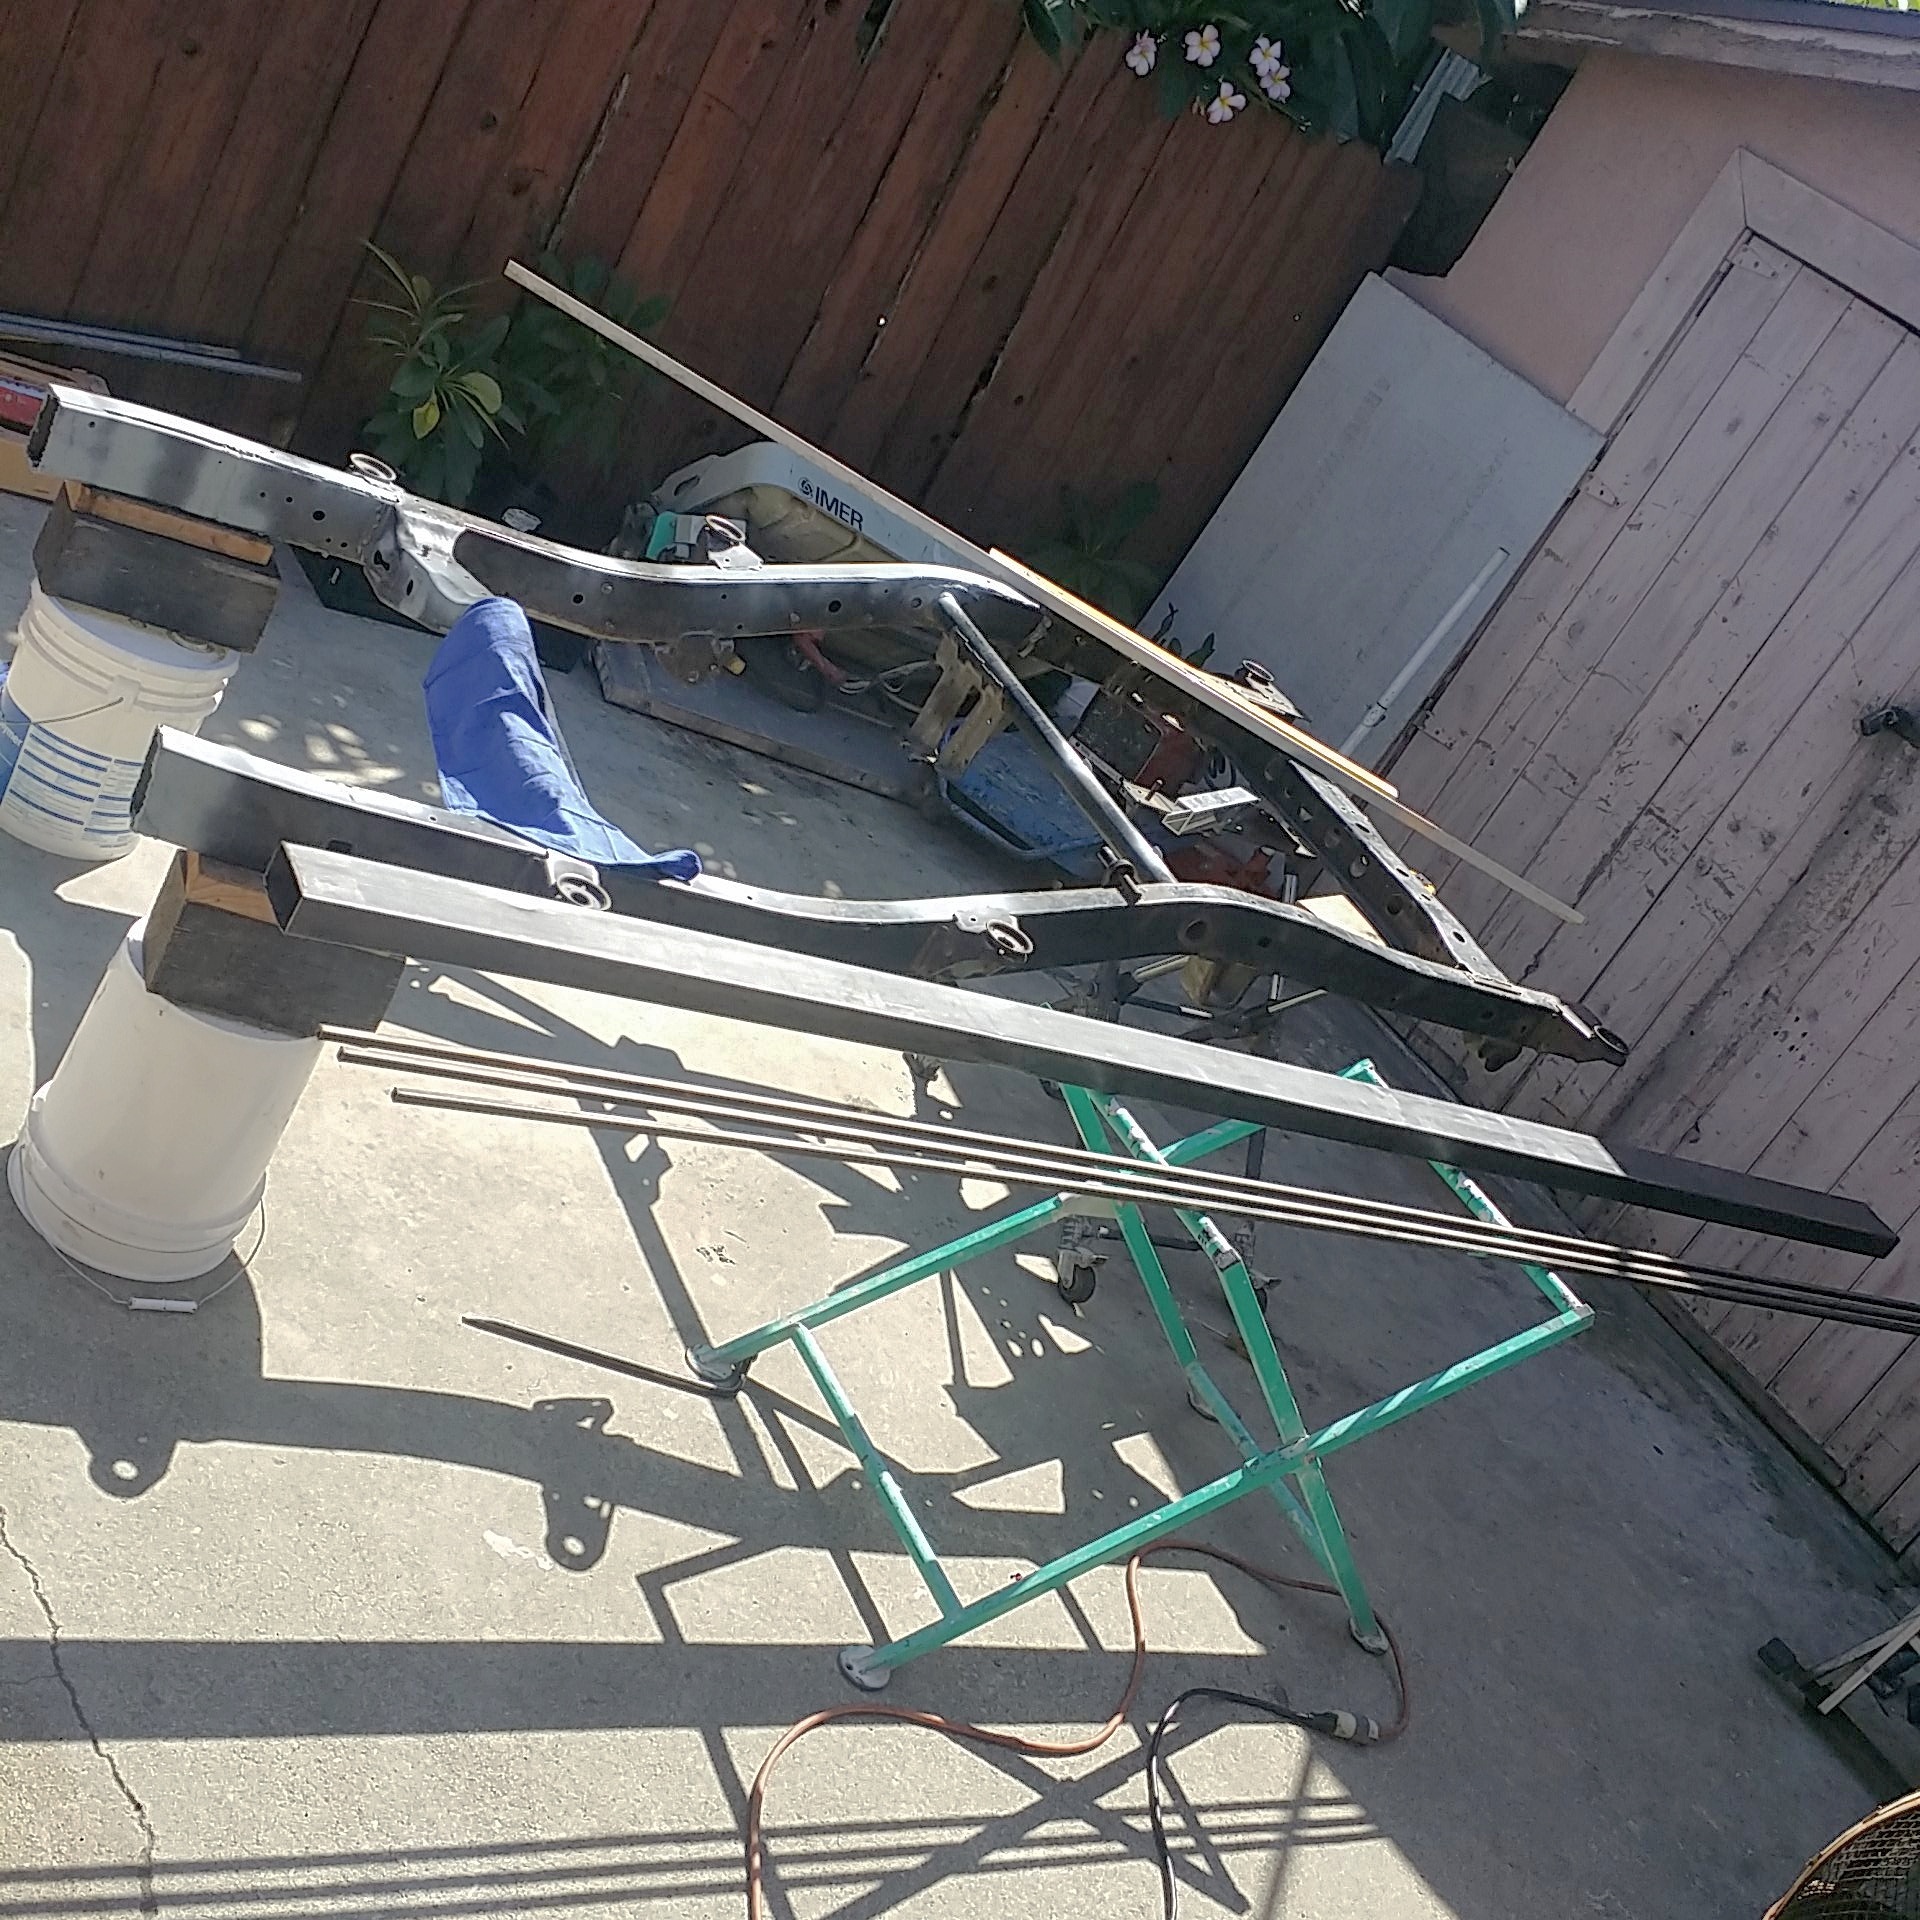
Cutting the bumper to size.
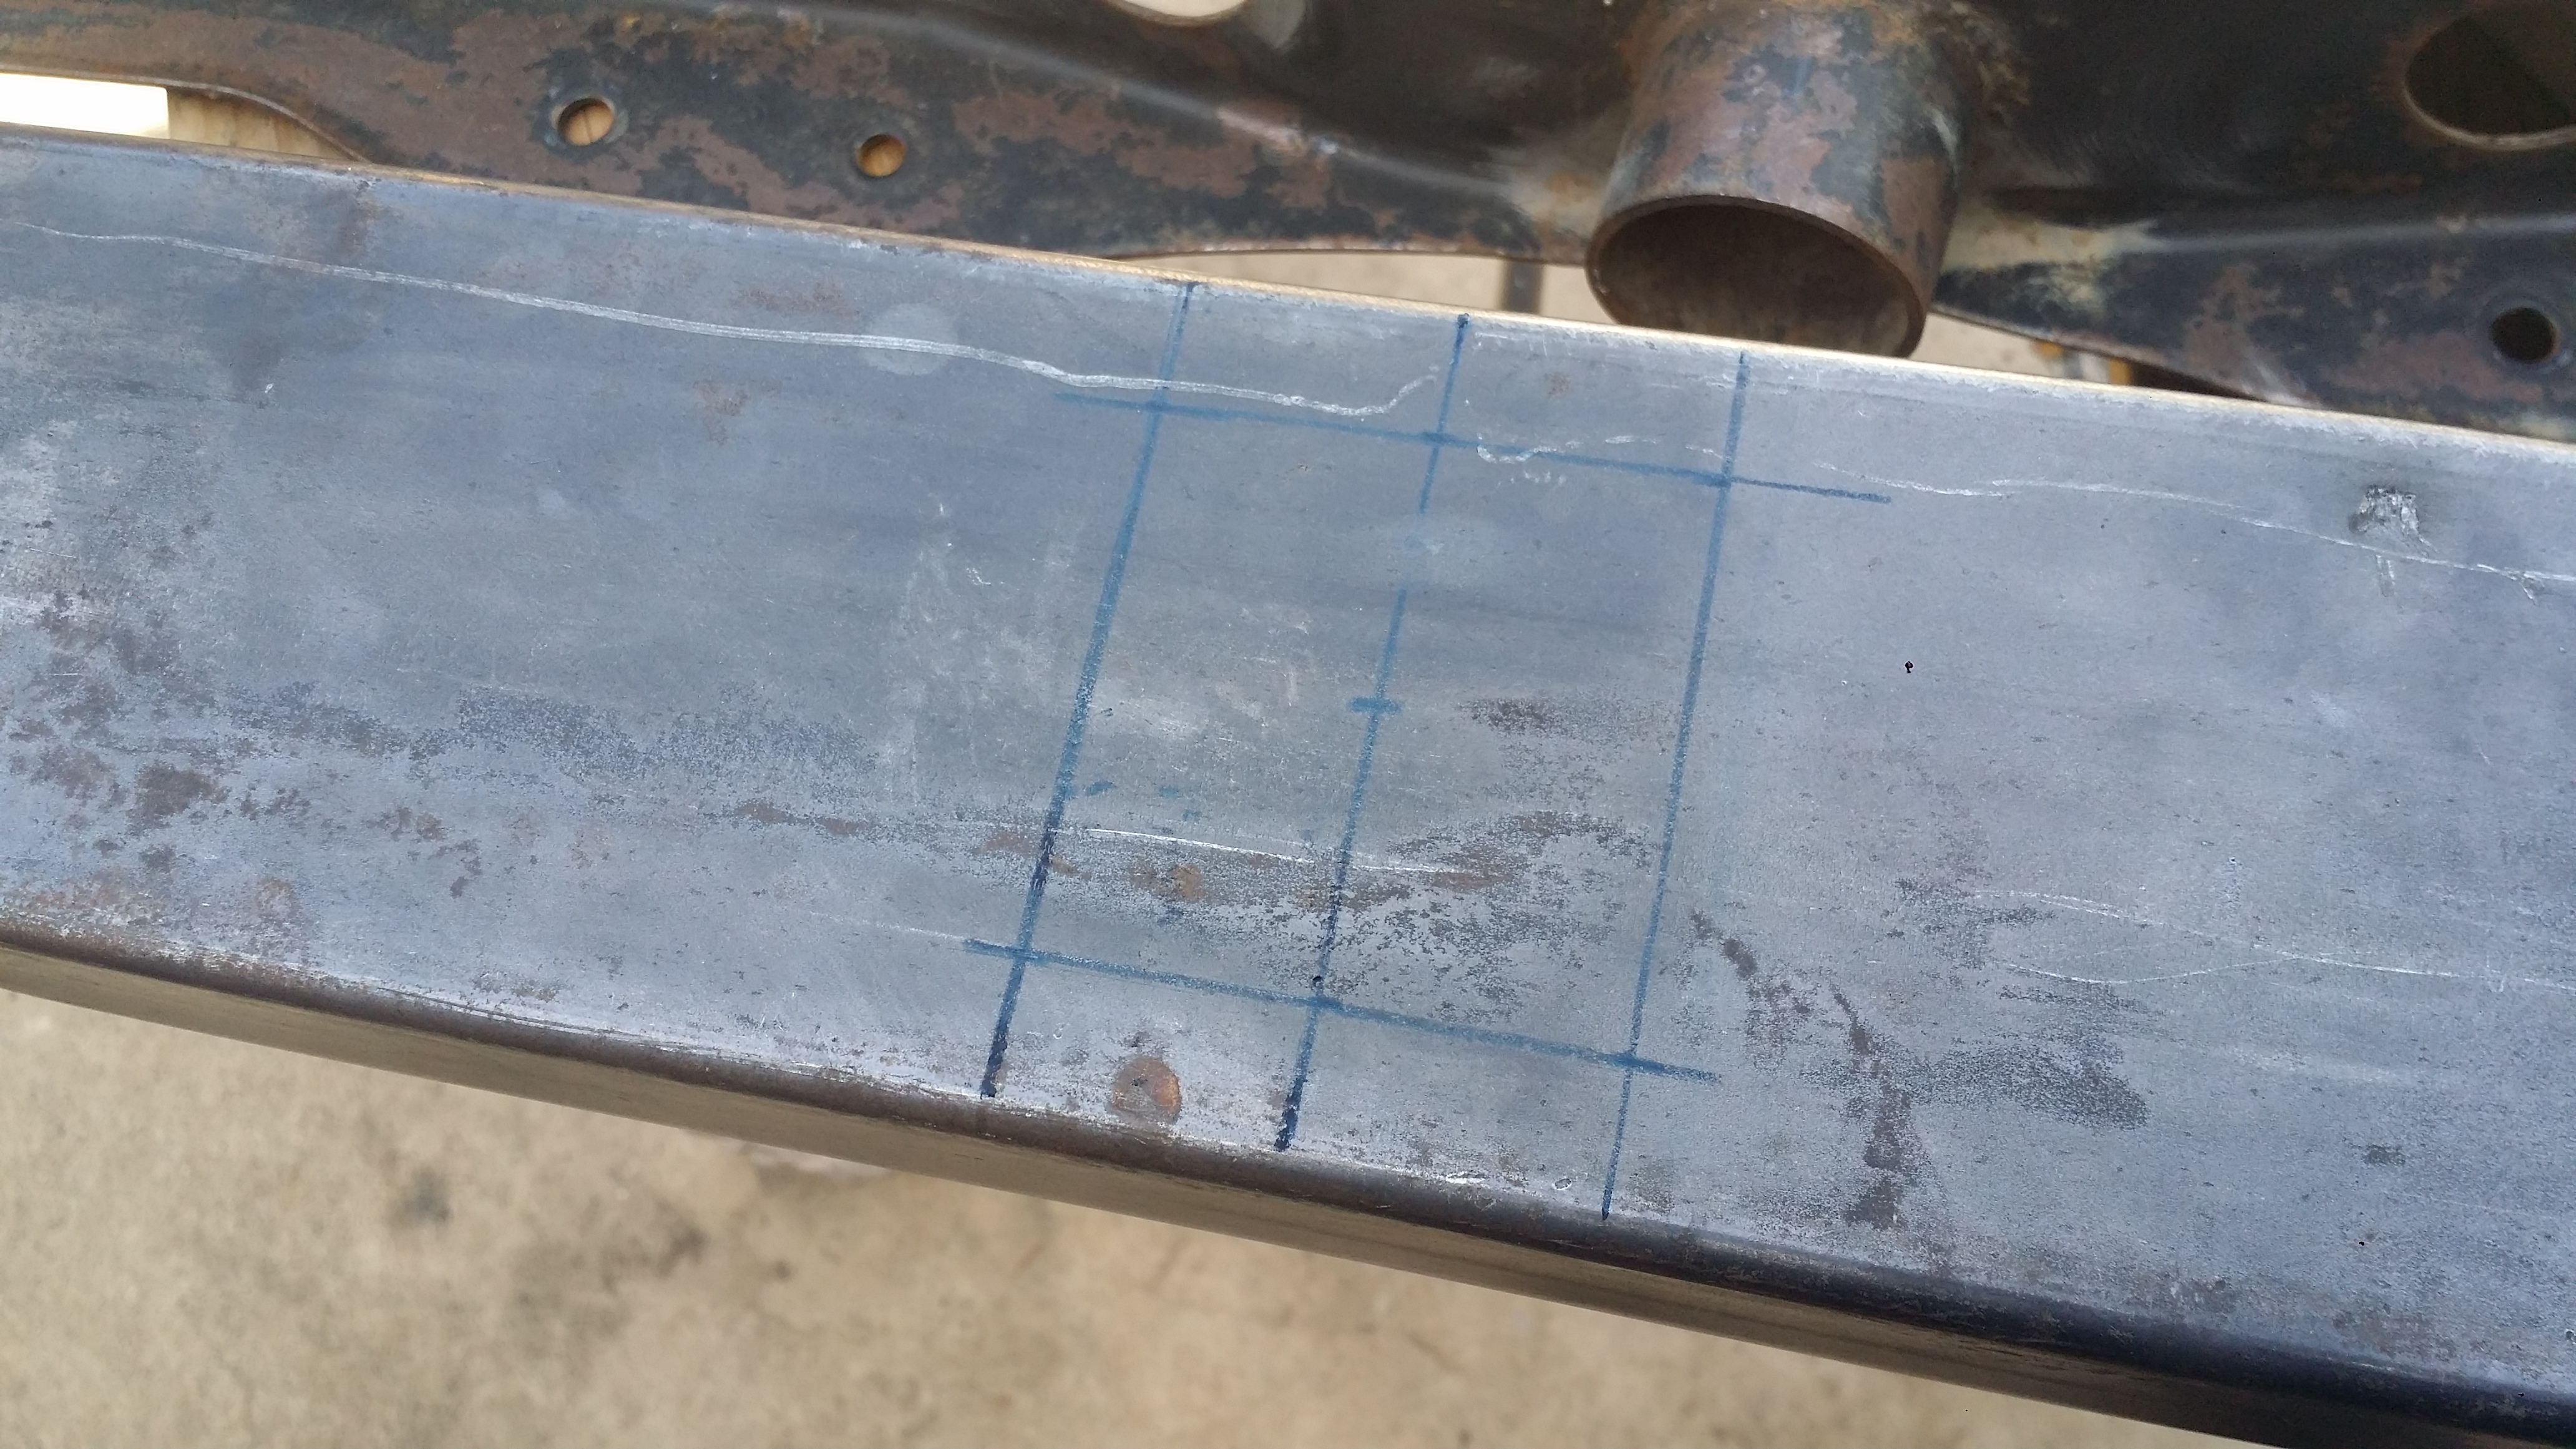
Cutting out the 2.5" square dead smack in the center of the bumper so i can add a trailer receiver for carrying bikes, or extra cargo basket if needed or even recovery D-Ring.
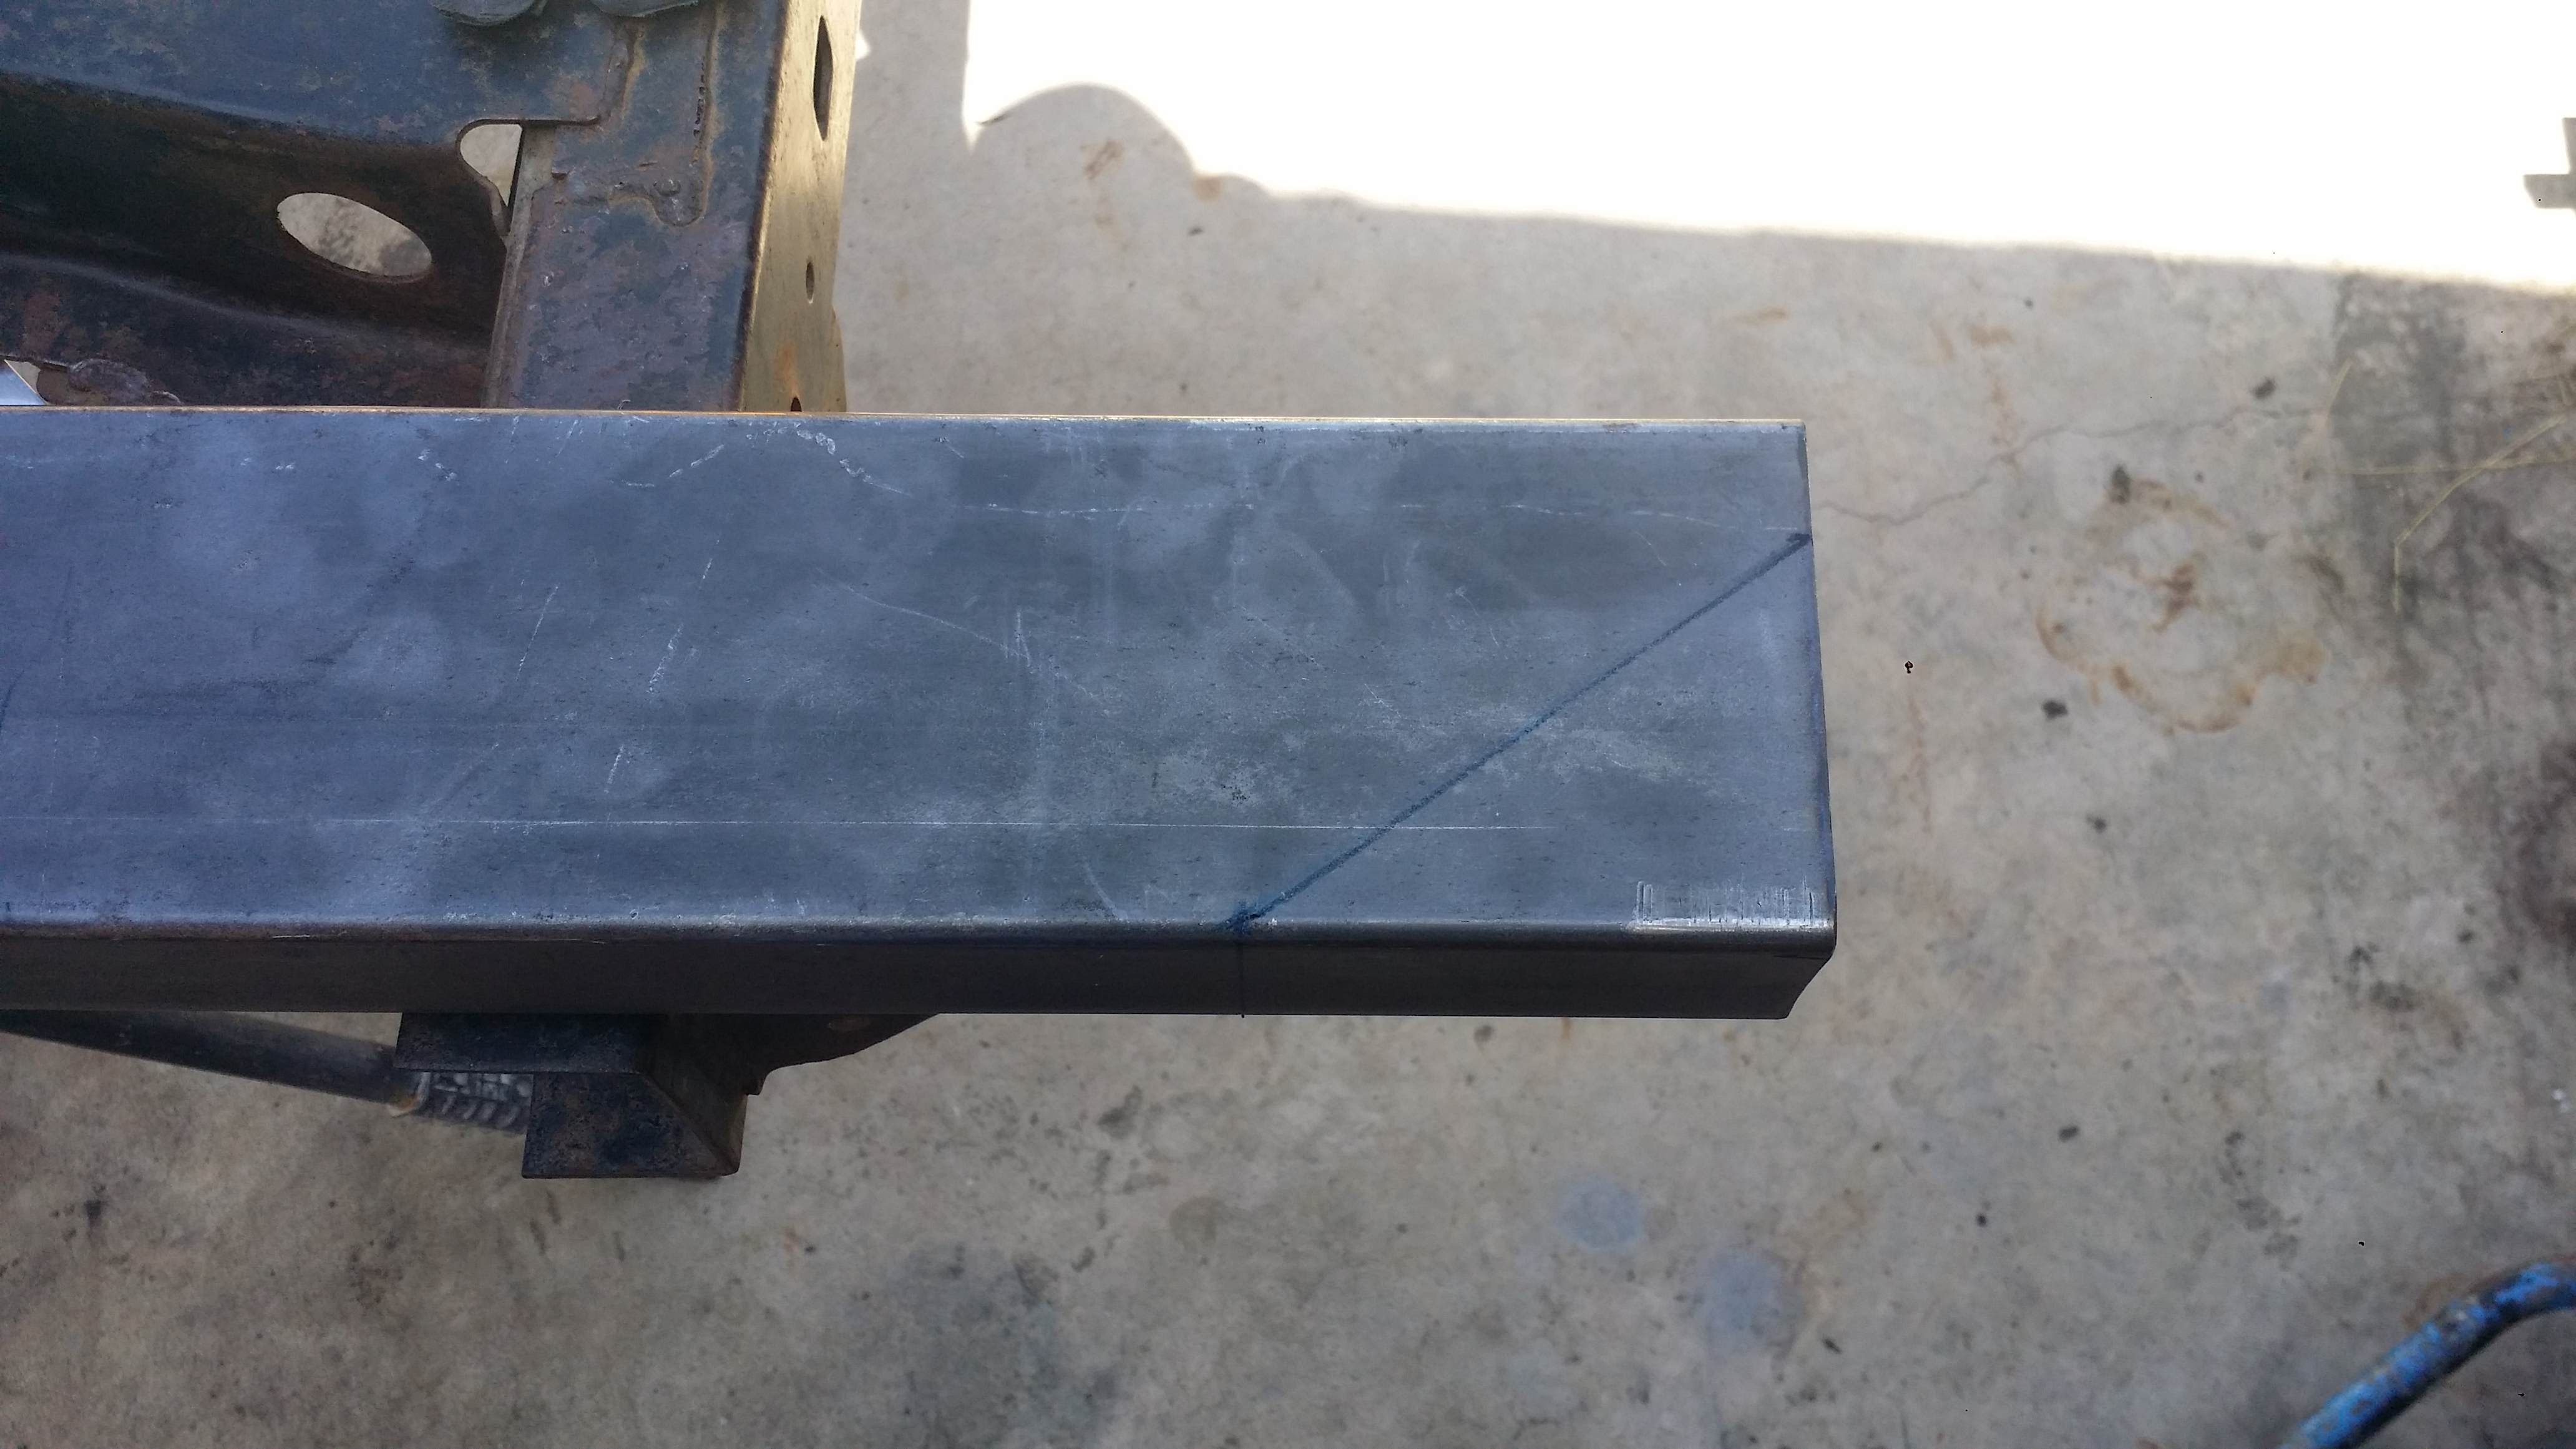
Gave the sides a more bumper like look vs just a straight 2x4 lol
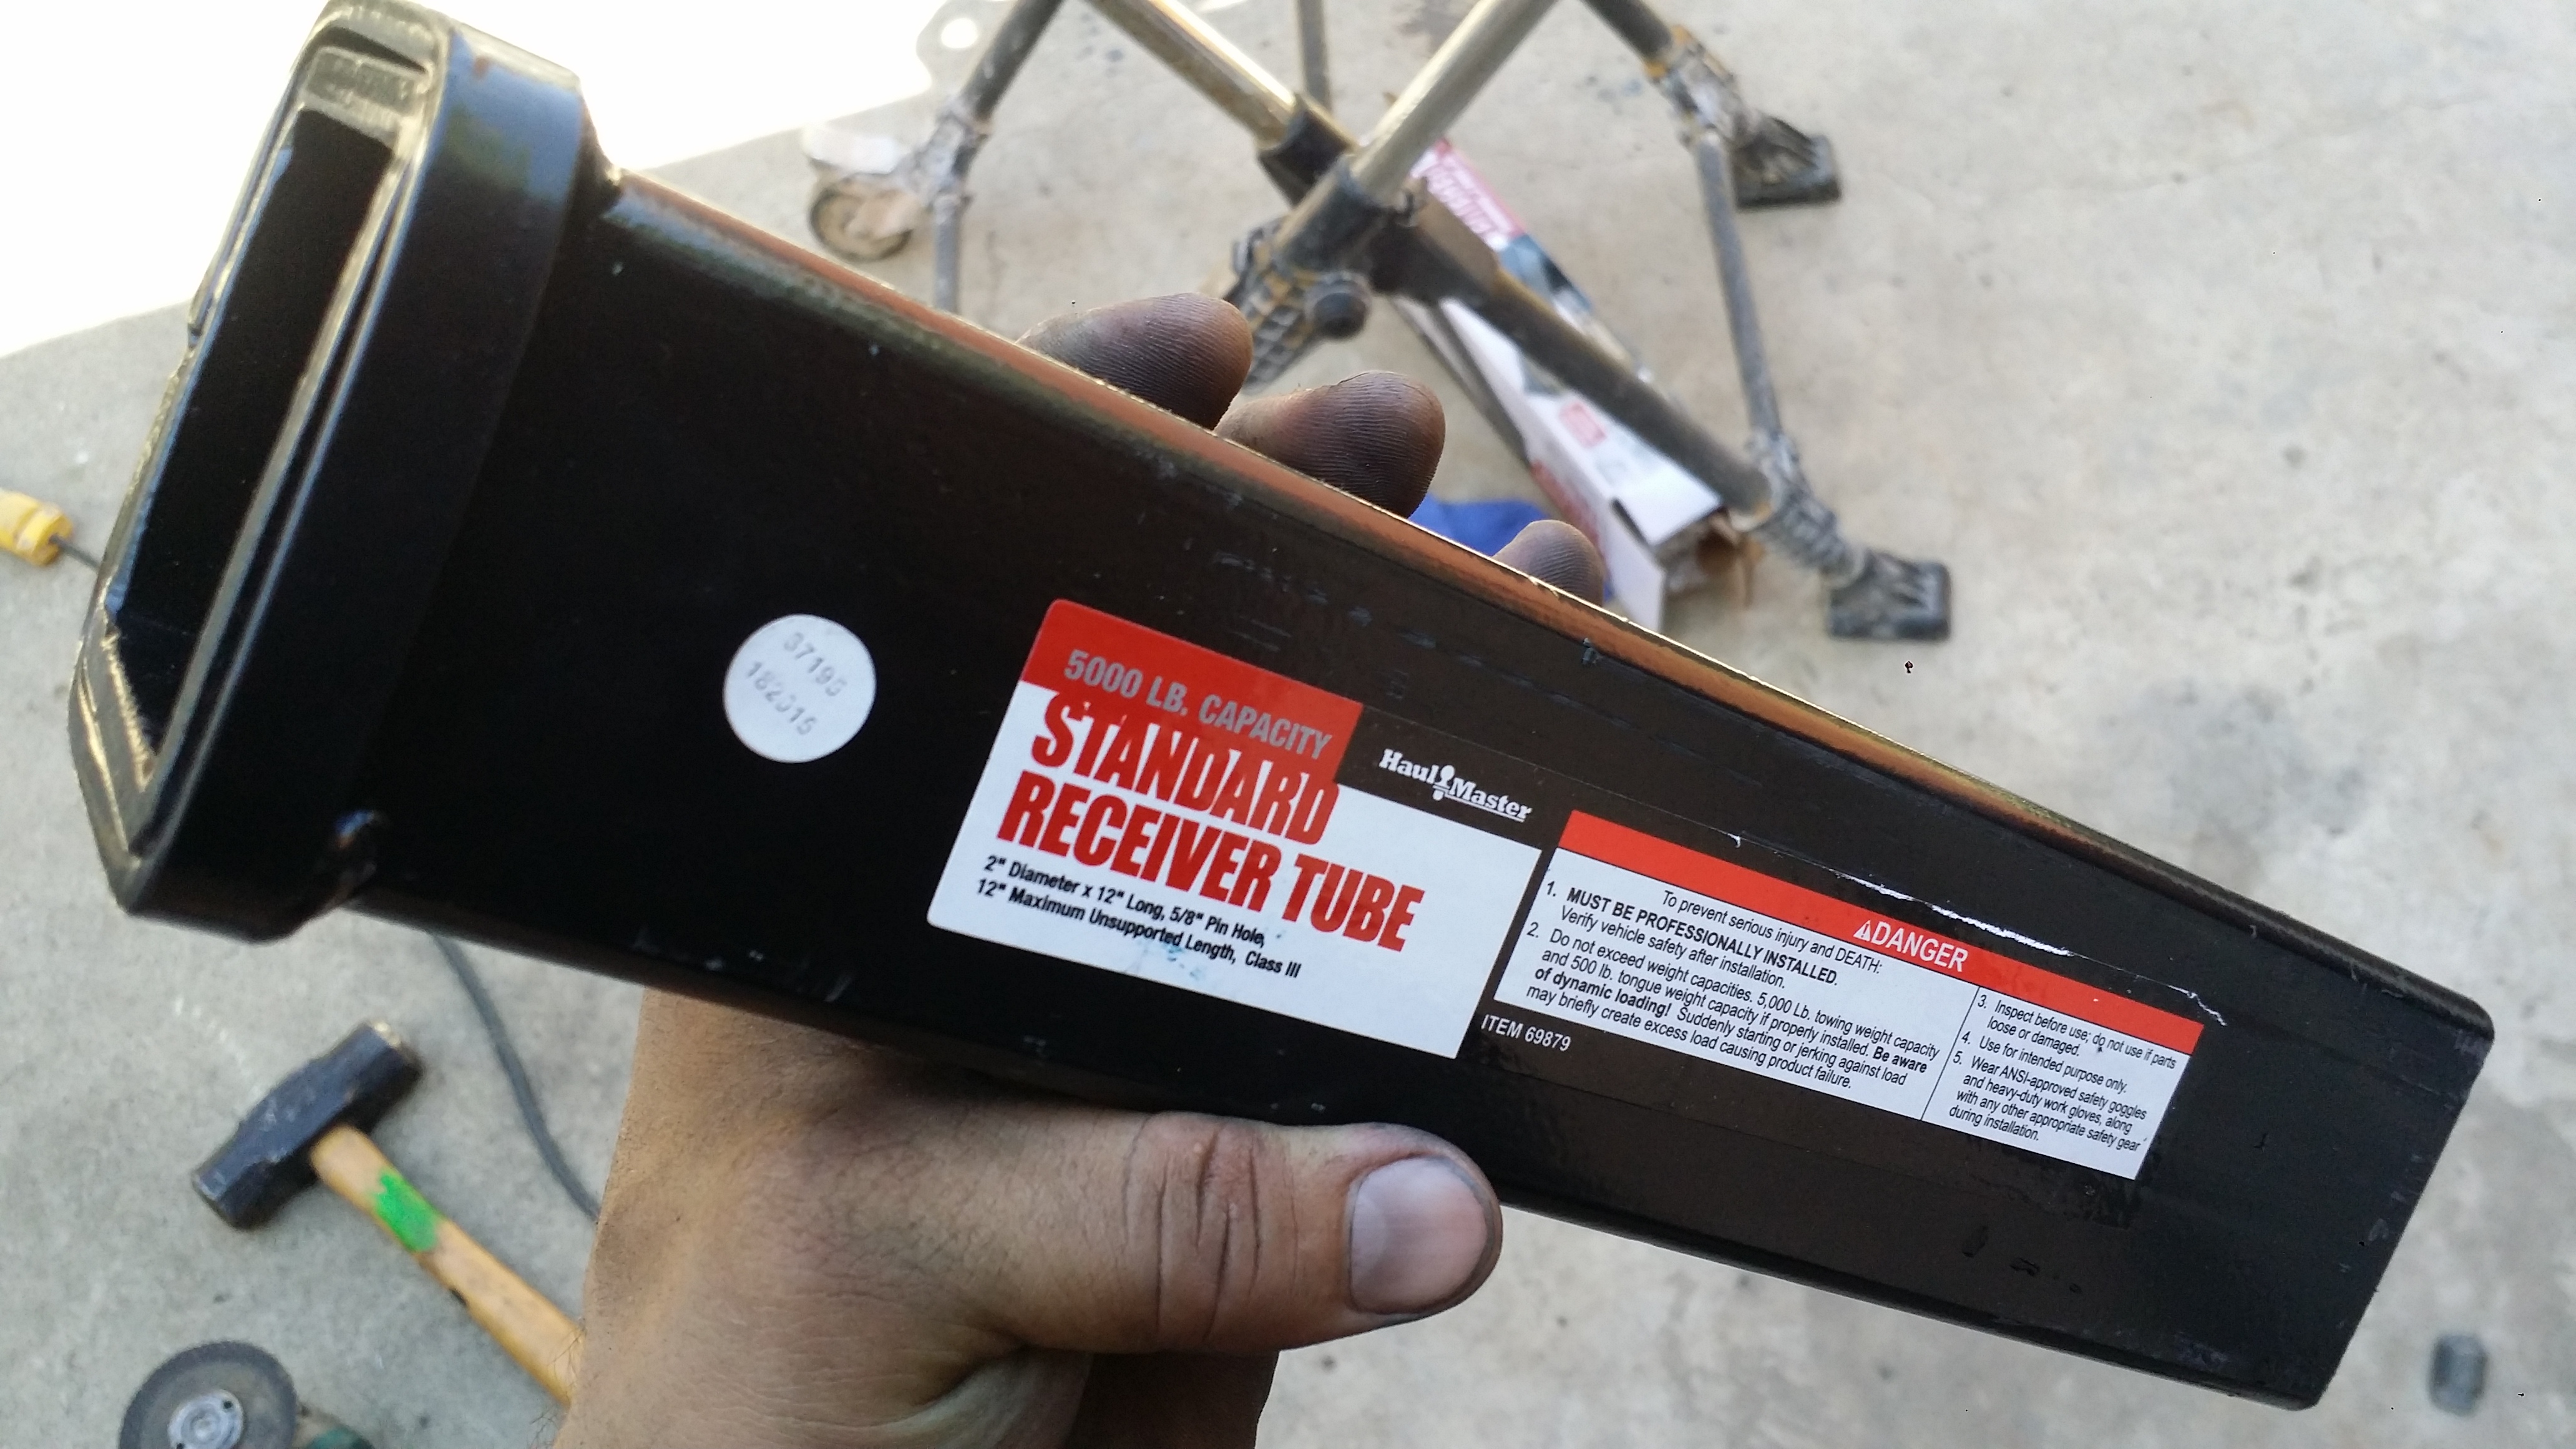
Bought this 12" trailer receiver from Harbor Freight for $16.34 I want to go back later today or tomorrow to pick up another one for the front.
There she is Boys n' Girls. Bumper shape is all cut out. Made of 2"�4" rectangular tube 1/8" thick. Now I just need to weld on some plates to the sides to plug the holes I cut out to give the bumper shape. And add that 2" receiver onto the bumper as well as onto the cross member that is behind. This will be good for carrying extra stuff, like a =n extra cargo basket (if needed), small generator unless i figure out this solar battery bank i want to put in it is also good for adding a bikerack(s).
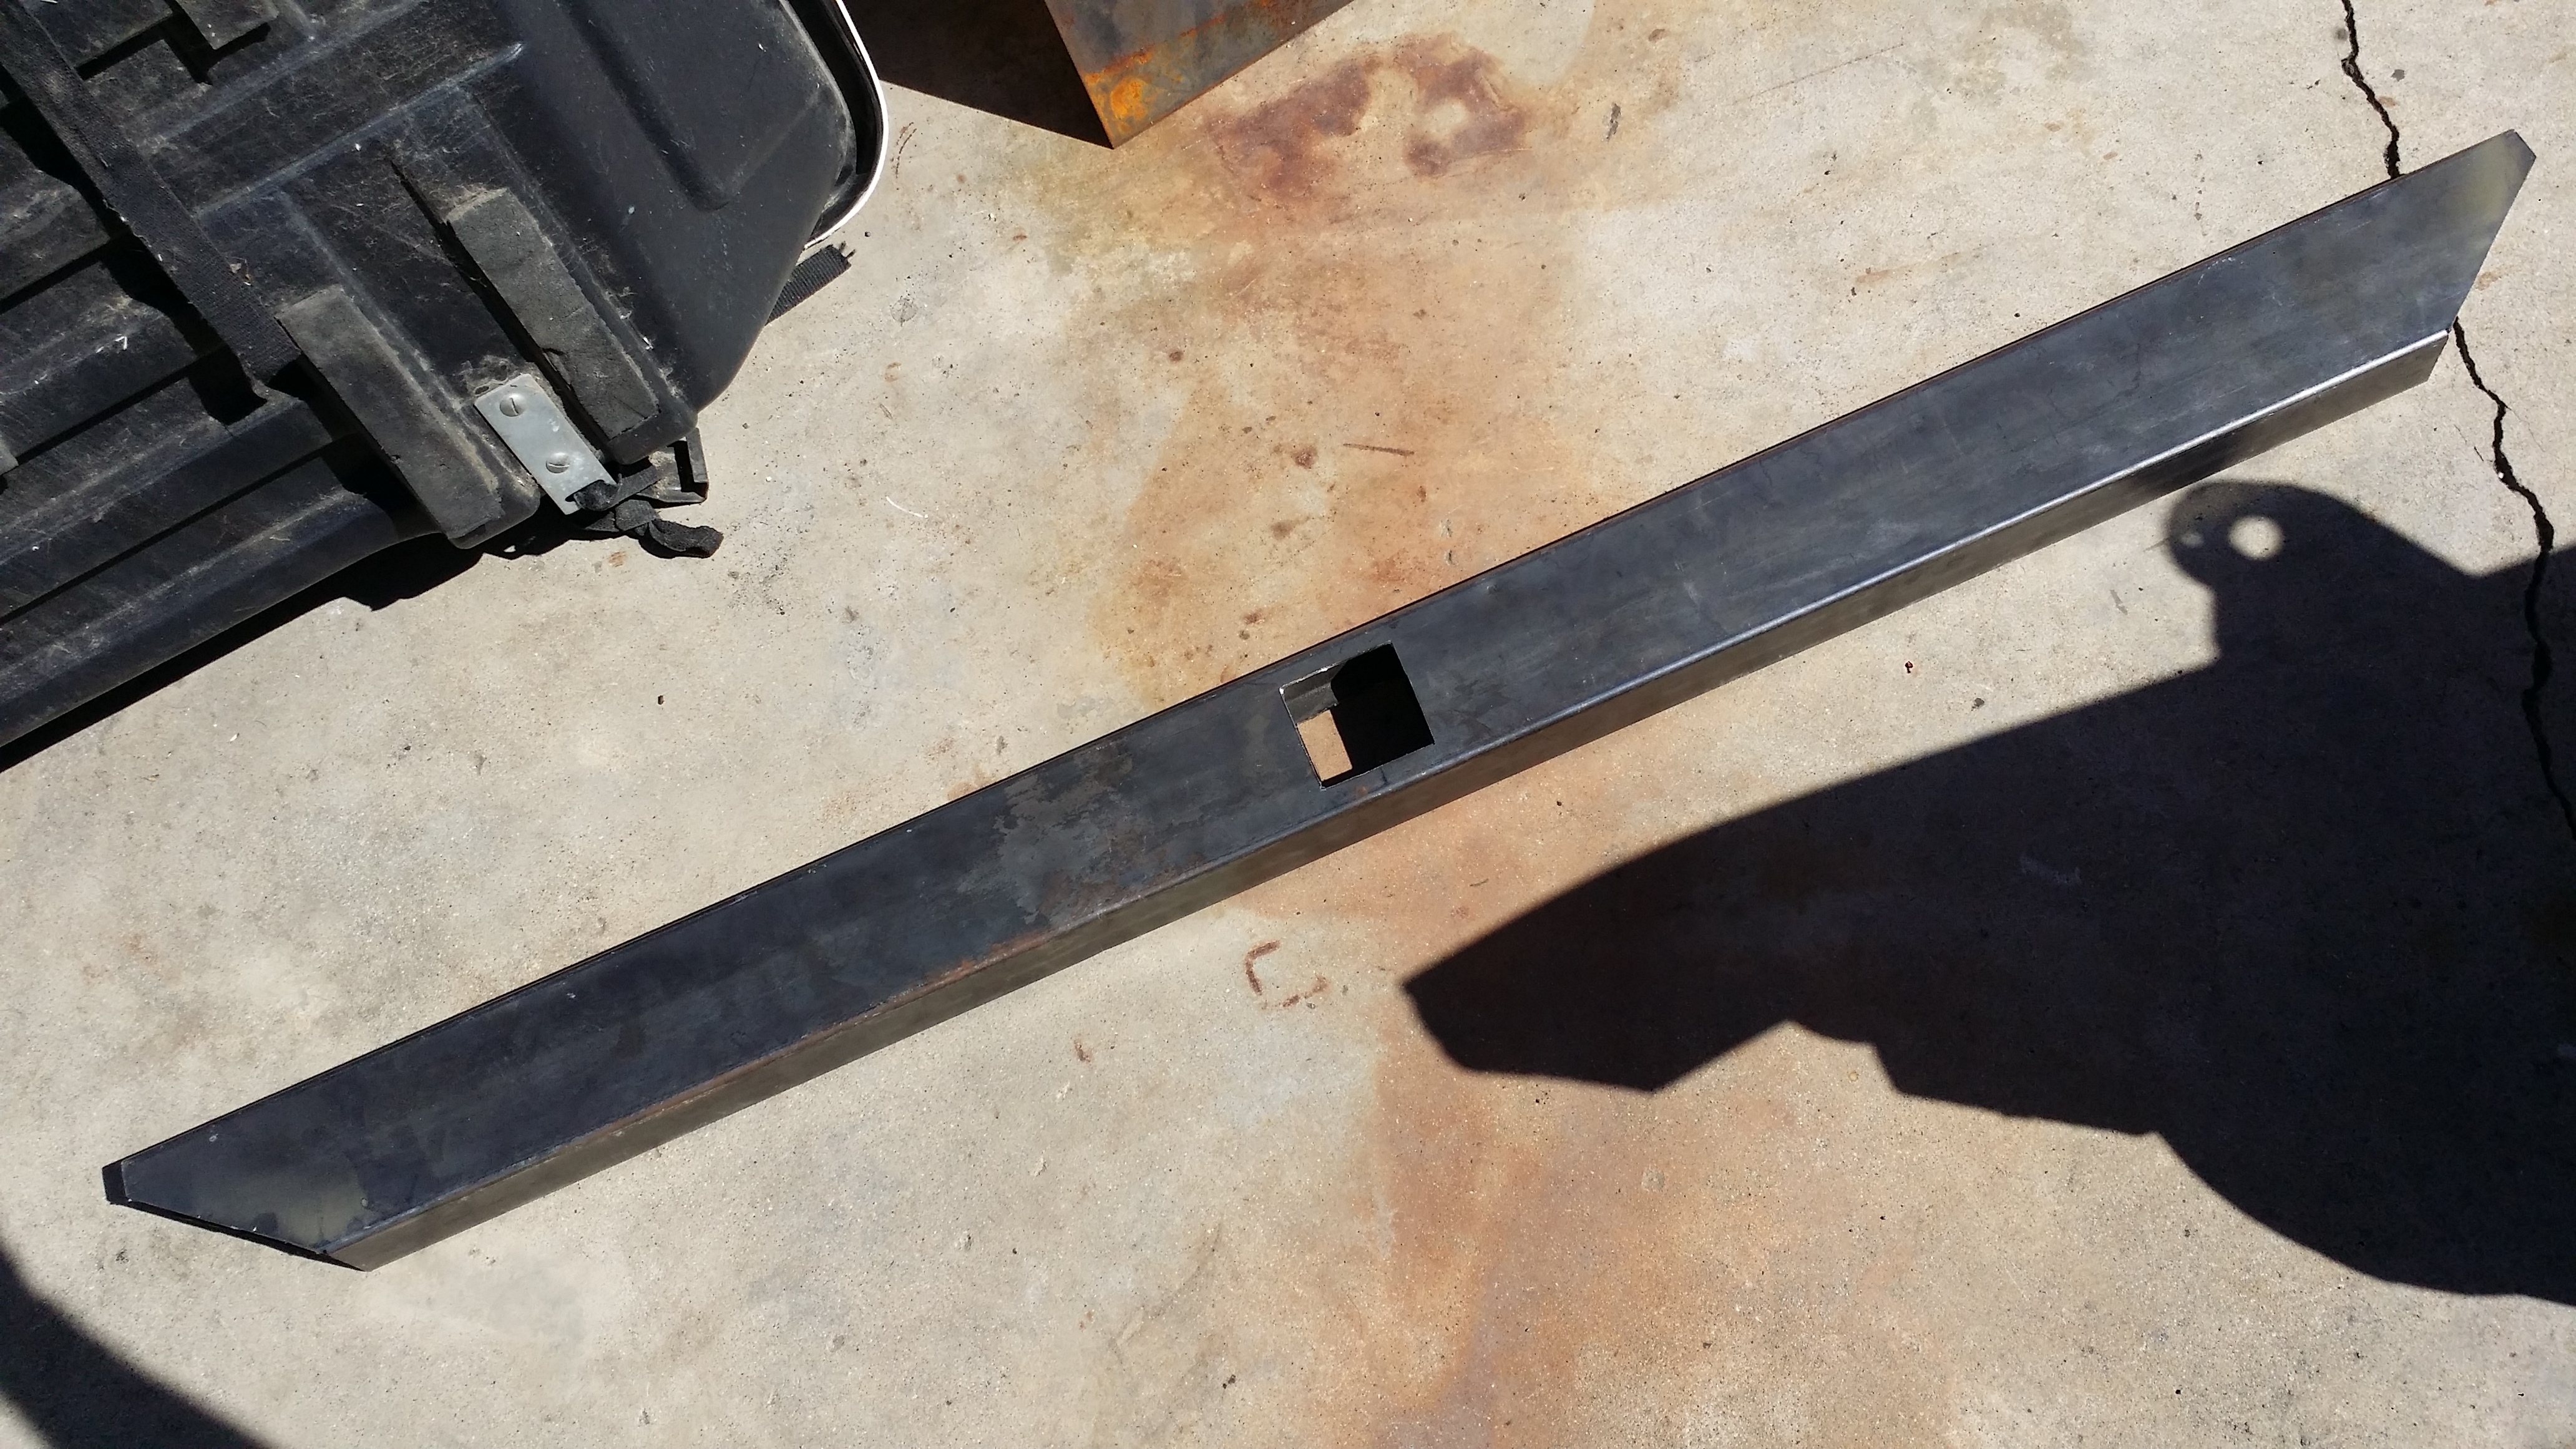
Here is how it looks on the frame.
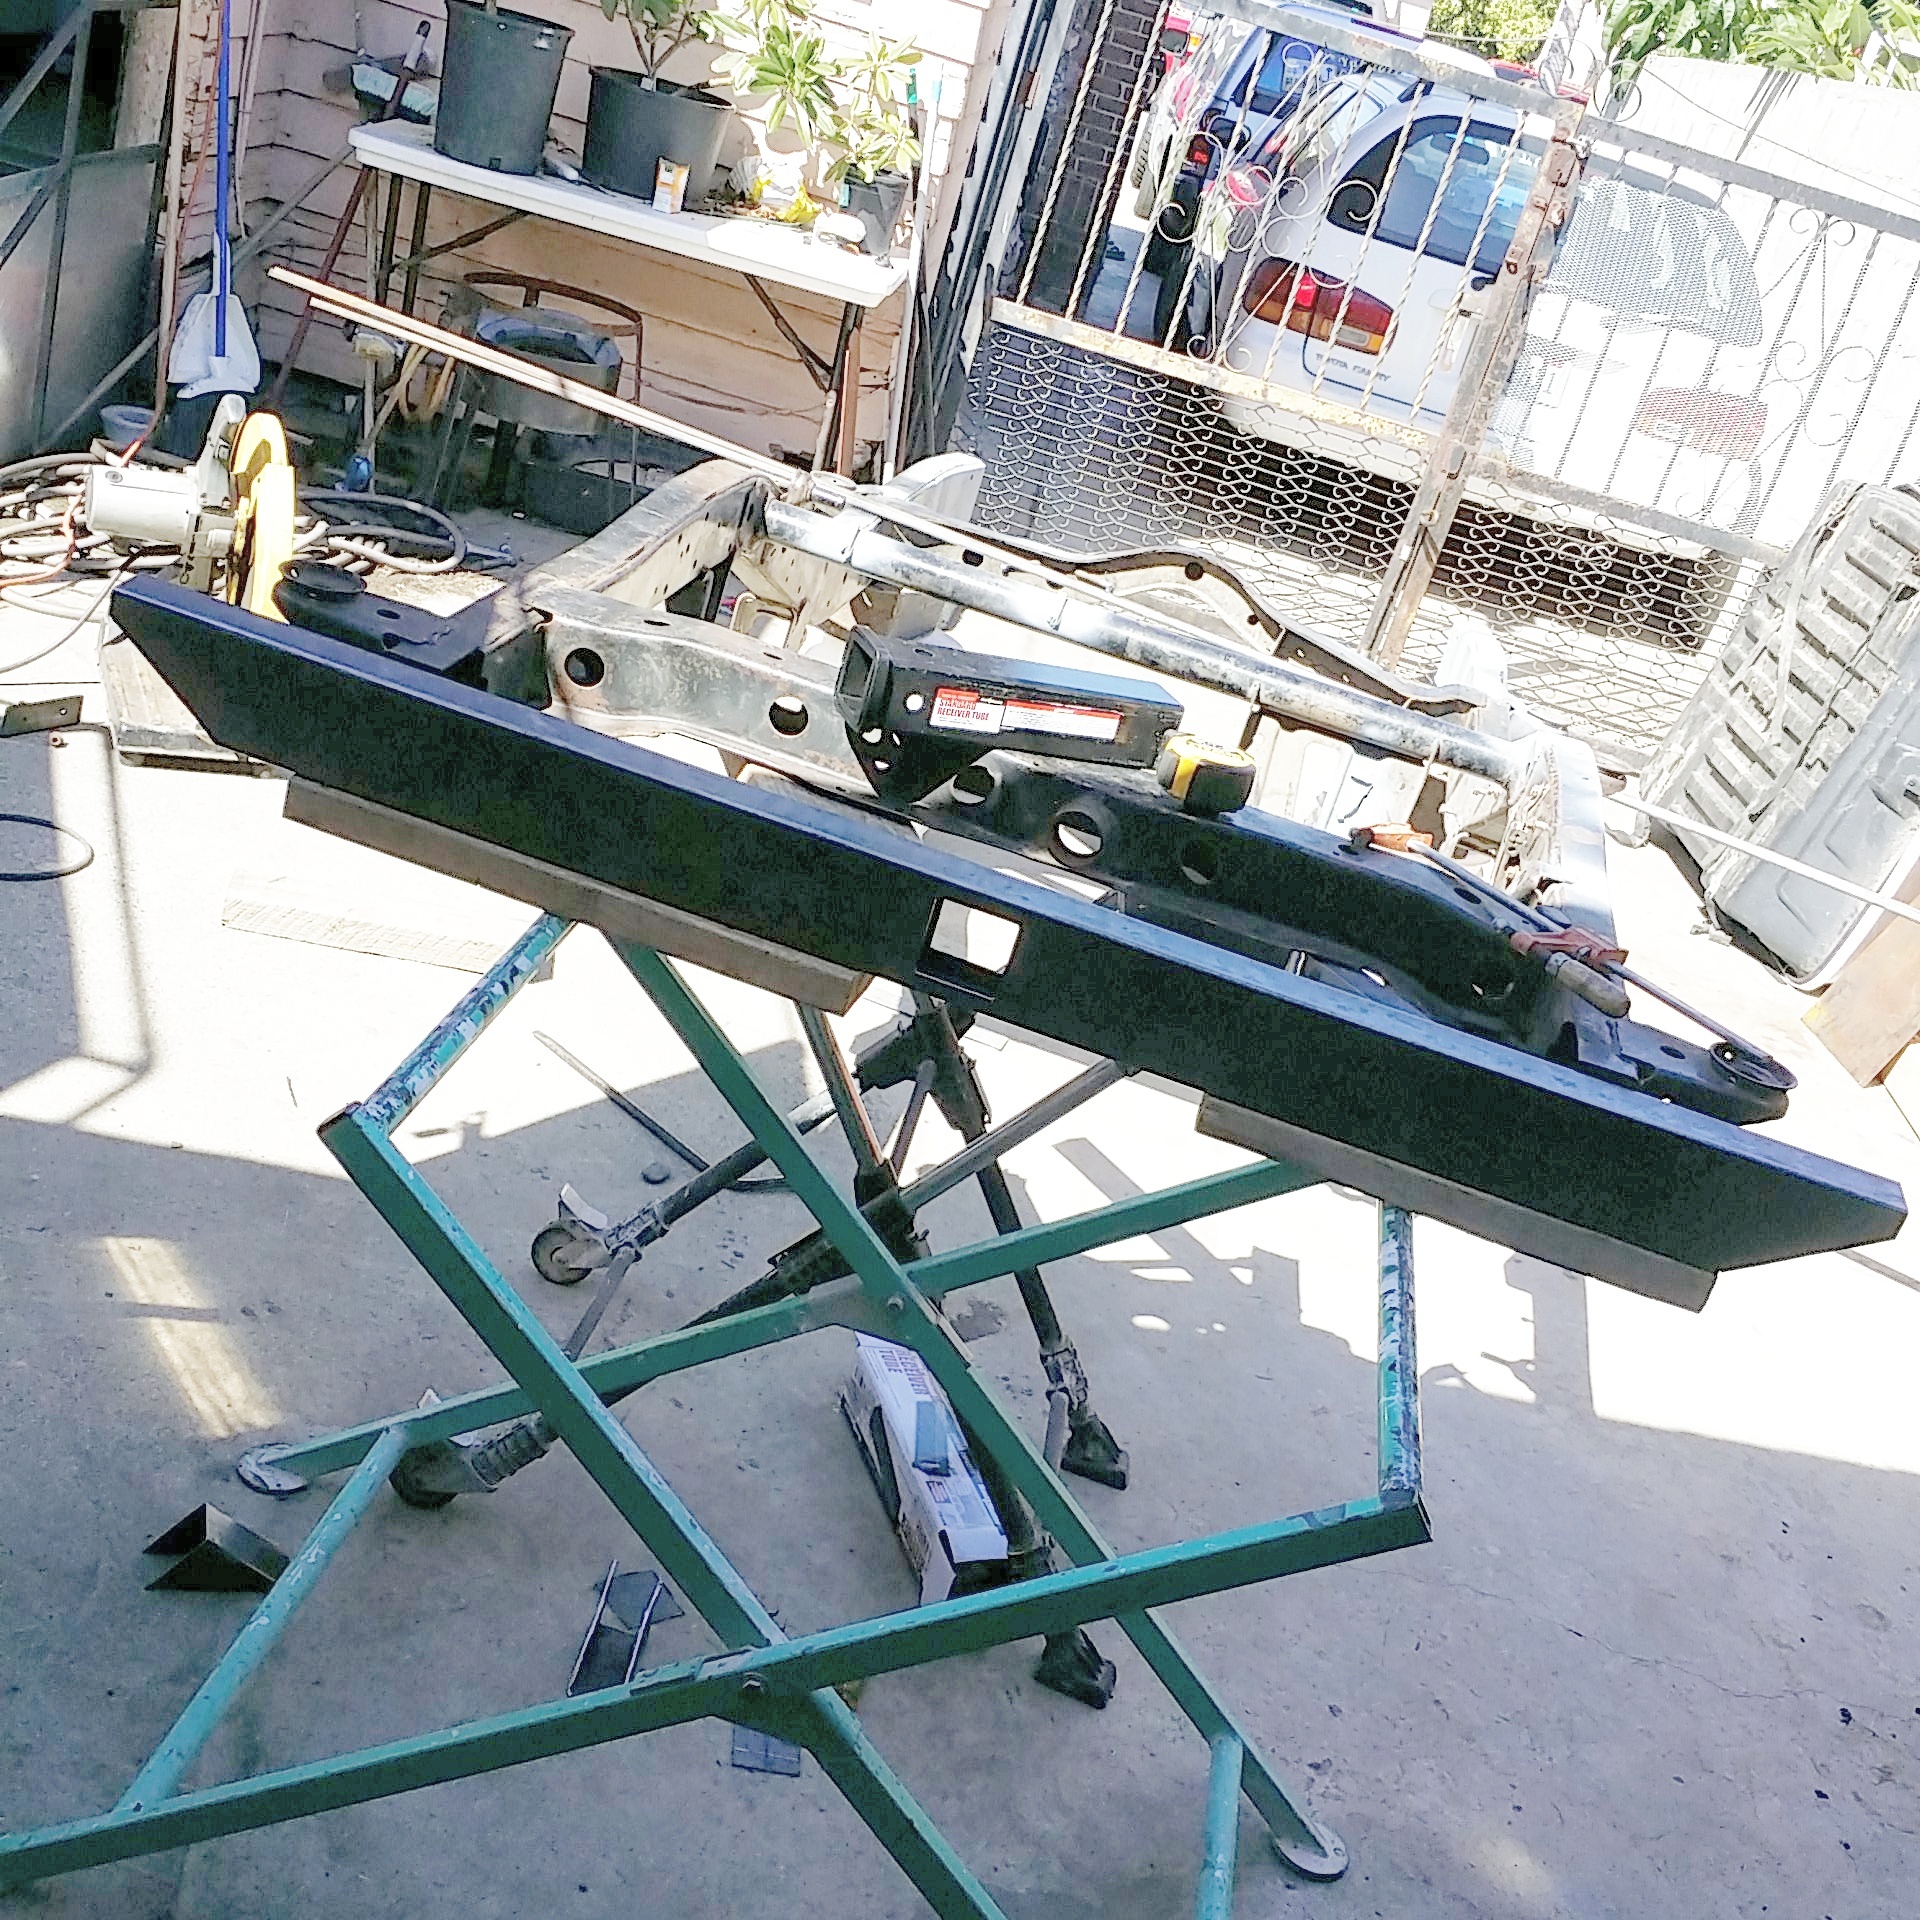
It sticks out 9" and 7/8ths on each side from the outer wall of the chassis. I think it is a perfect length. It'll still be shorter then how far out the tires are going to protrude to the sides. But it wont look too bad at all.
That is all i got done today. Next up is to plug the sides of the bumper and add the receiver hitch. Then i can get to work on building the new body mount towers. I need that done before i can start on my cargo box.
This thing is the best! Especially when grinding and cutting metal I don't like my music to be overpowered. I'm sure my next door neighbors are gonna be pissed off today but I don't care they put on their music and sing crappy kareoke all the time so this is payback! lol

Swung by the local steel shop (BOBCO metal) in Vernon Ca to pick up some metal for the trailer build. Gotta fab up the rear bumper to the trailer and raise those body mounts by 4 and 8 inches to make level with the rear body mounts. All the steel you see on that green stand and a 3'x1.5' 1/8" thick plate sheet cost me 30 bucks. Soon when i get the cash i want to go back and buy 2 or 3 sticks of 20ft 1/8" thick square tube so i can begin working on the main storage compartment box.

Cutting the bumper to size.

Cutting out the 2.5" square dead smack in the center of the bumper so i can add a trailer receiver for carrying bikes, or extra cargo basket if needed or even recovery D-Ring.

Gave the sides a more bumper like look vs just a straight 2x4 lol

Bought this 12" trailer receiver from Harbor Freight for $16.34 I want to go back later today or tomorrow to pick up another one for the front.

There she is Boys n' Girls. Bumper shape is all cut out. Made of 2"�4" rectangular tube 1/8" thick. Now I just need to weld on some plates to the sides to plug the holes I cut out to give the bumper shape. And add that 2" receiver onto the bumper as well as onto the cross member that is behind. This will be good for carrying extra stuff, like a =n extra cargo basket (if needed), small generator unless i figure out this solar battery bank i want to put in it is also good for adding a bikerack(s).

Here is how it looks on the frame.

It sticks out 9" and 7/8ths on each side from the outer wall of the chassis. I think it is a perfect length. It'll still be shorter then how far out the tires are going to protrude to the sides. But it wont look too bad at all.
That is all i got done today. Next up is to plug the sides of the bumper and add the receiver hitch. Then i can get to work on building the new body mount towers. I need that done before i can start on my cargo box.
09-27-2015, 10:17 AM
#14
Registered User
Thread Starter

I noticed my dad couldnt envision what i wanted to do with this chassis either. but after i showed him pix of Dirtco's trailer then he understood a general idea of what i wanted and he agreed that it is going to be an awesome build.
09-27-2015, 10:26 AM
#15
Registered User
Thread Starter
As for the Music, i switch it up to so blues and rock, or country music too. I love Hardcore and metal but trust me i get tired of it after a while too. Pandora is really great at discovering new music!
09-27-2015, 03:44 PM
#16
You know what, maybe i should wear earplugs to save my ears in the log run lol My hearing is already gone down since all those years in my band days playing loud music at practice, shows, concerts. It has already taken a toll and i'm only 26. It isn't super bad, but i do gotta ask people to repeat themselves from time to time. My girlfriend hates it lol
As for the Music, i switch it up to so blues and rock, or country music too. I love Hardcore and metal but trust me i get tired of it after a while too. Pandora is really great at discovering new music!
As for the Music, i switch it up to so blues and rock, or country music too. I love Hardcore and metal but trust me i get tired of it after a while too. Pandora is really great at discovering new music!
Good luck on your build, been watching and will learn. Thanks for sharing
09-28-2015, 12:27 PM
#17
Registered User
Thread Starter
Hey, that's the same rig I use for my gigs. Those PR12 are great for me to haul around being lightweight and still sound good. Yeah, my hearing has gone down after working for 20 years on jet engines, so my low frequency hearing is good for me playing bass. Wife tells me to turn up hearing aid, don't wear one, and I tell her my hearing filter is at the right.
Good luck on your build, been watching and will learn. Thanks for sharing
Good luck on your build, been watching and will learn. Thanks for sharing
My girlfriend tells me the same thing, turn up your hearing aid! and i'll say "what" purposely to make the situation worse hahaha
 09-28-2015, 10:30 PM
#19
Registered User
Thread Starter
Today i cut off the the lower 4 body mount towers and made 2 new ones to match the height of the ones in the far back of the chassis.
First i added this mock up piece just to get the correct height all the way across.
Once i made sure it was all level i then took measurements from the front side of the transmission cross-member. I want the new body mount towers to be at the exact face of that transmission mount because that is where i want the large storage box to end. and the smaller box in front will begin at the face too.
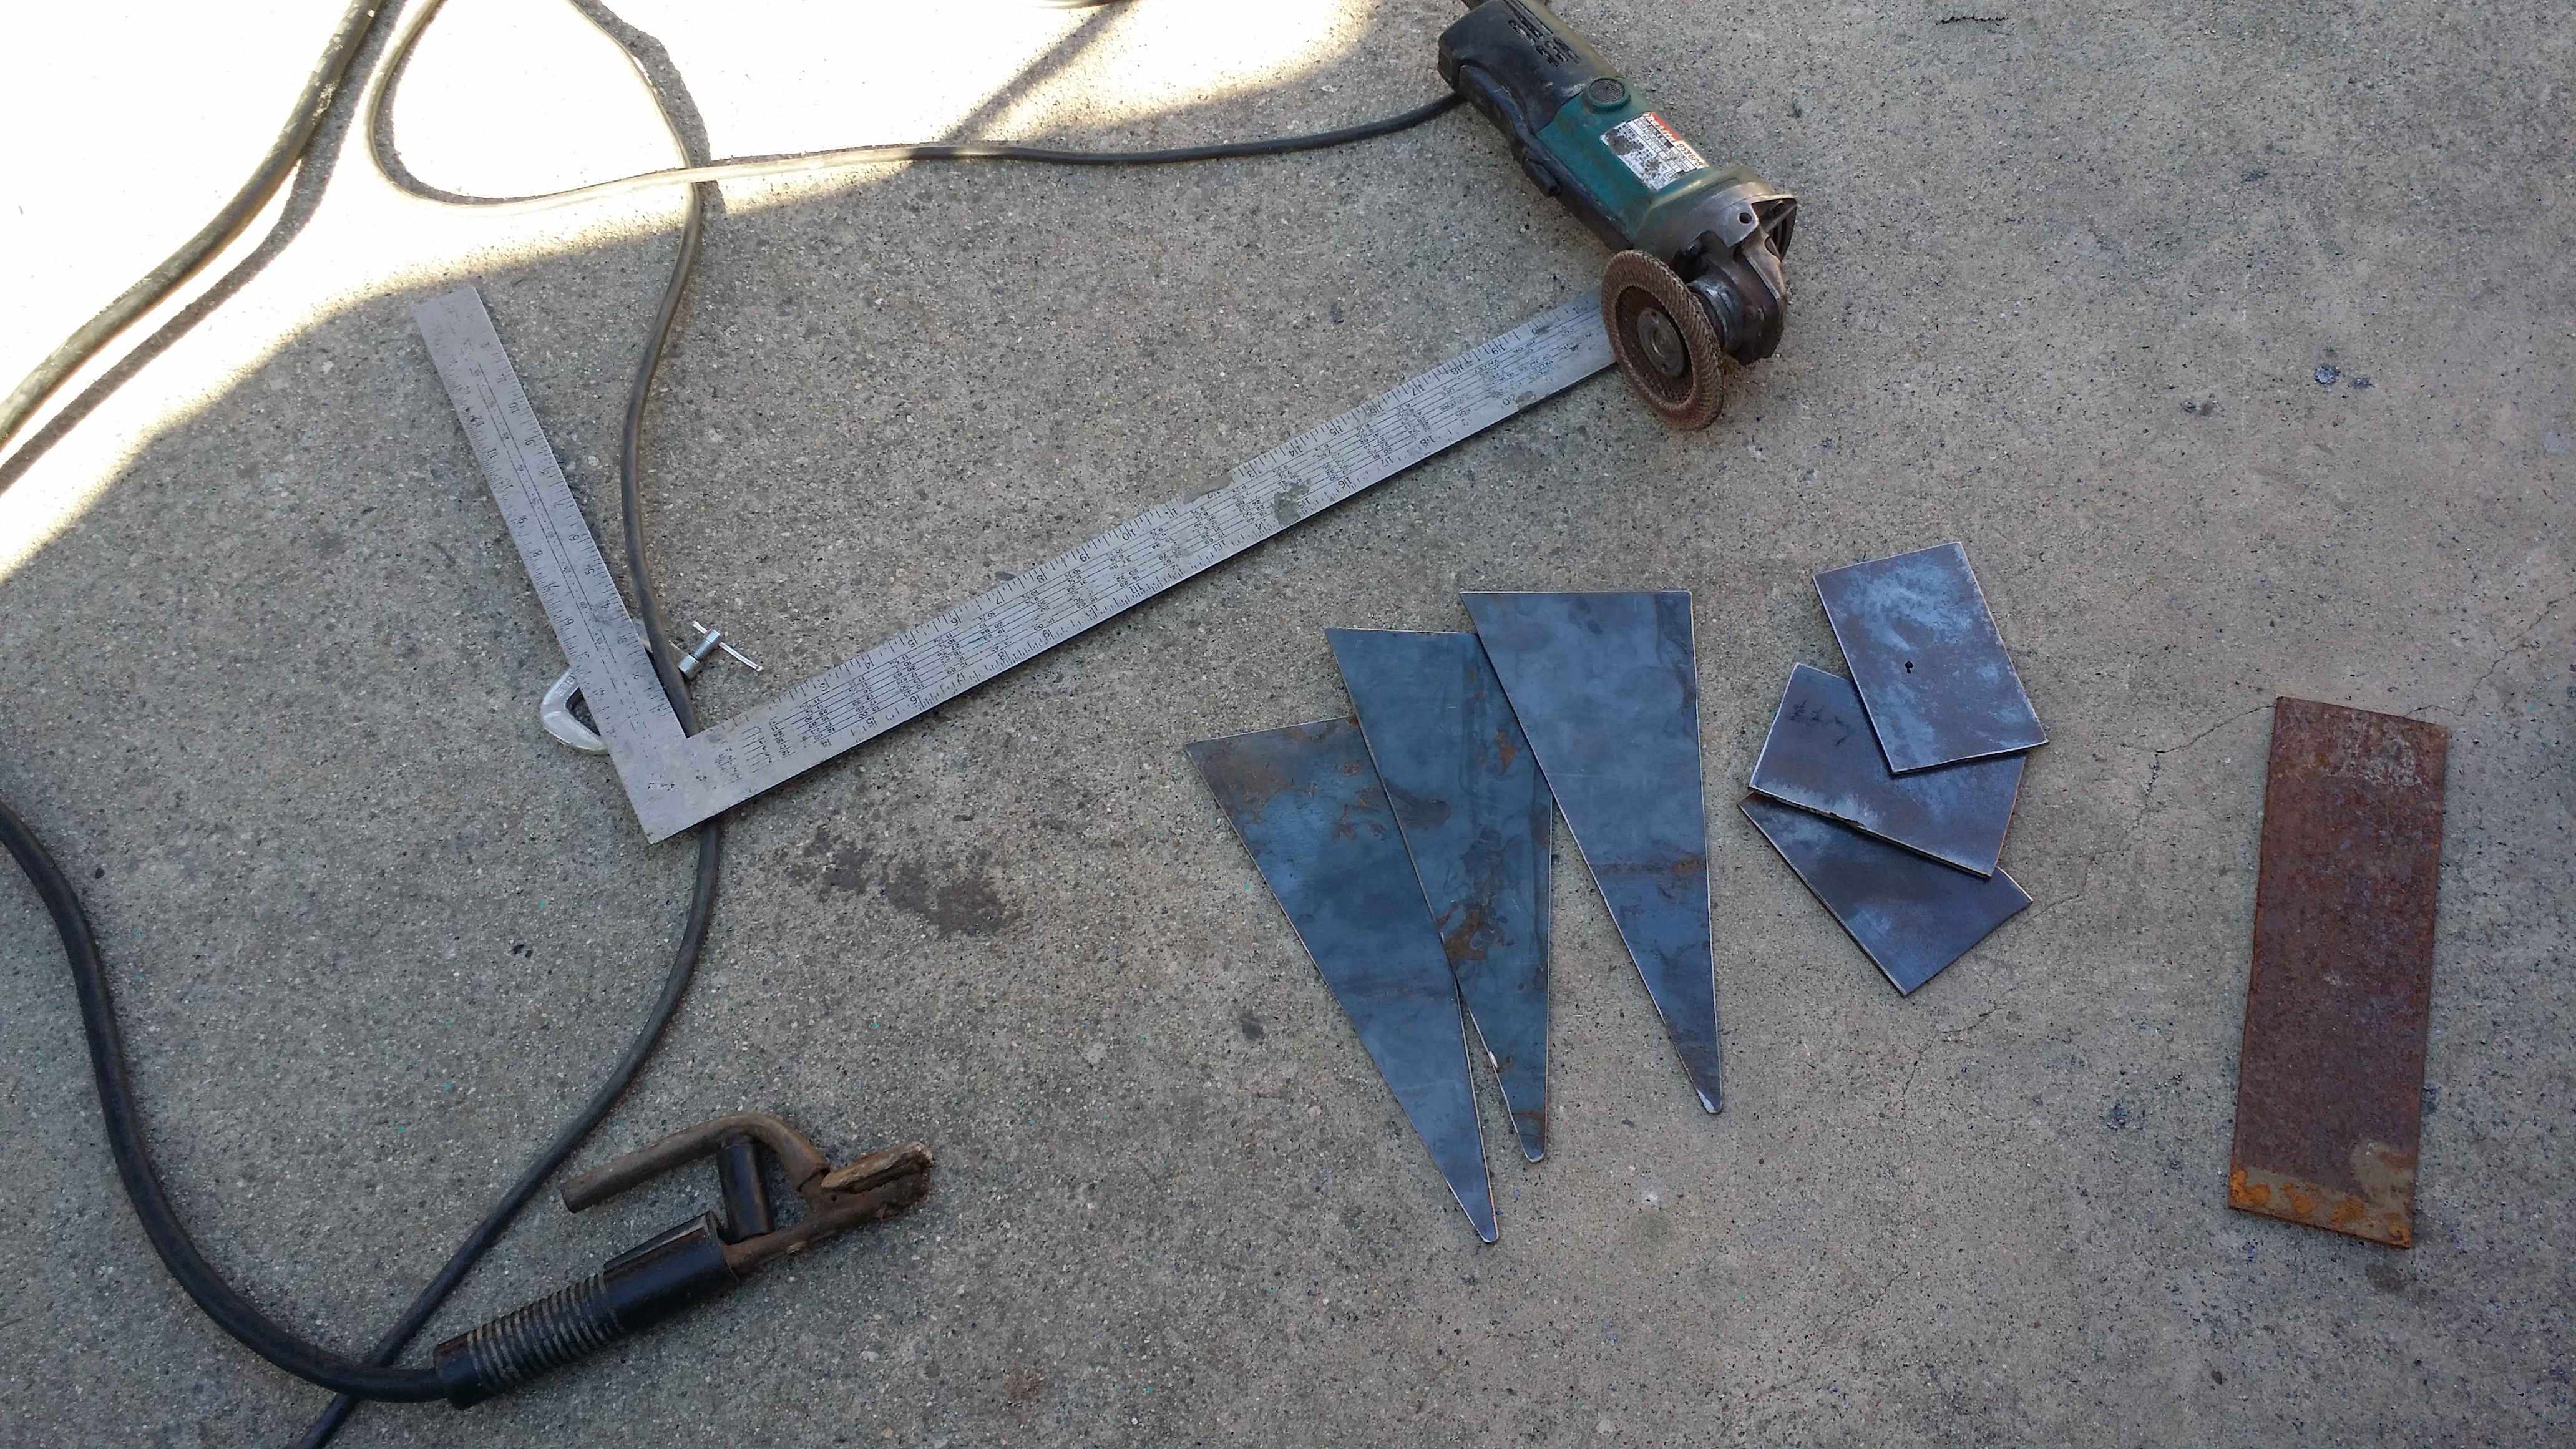
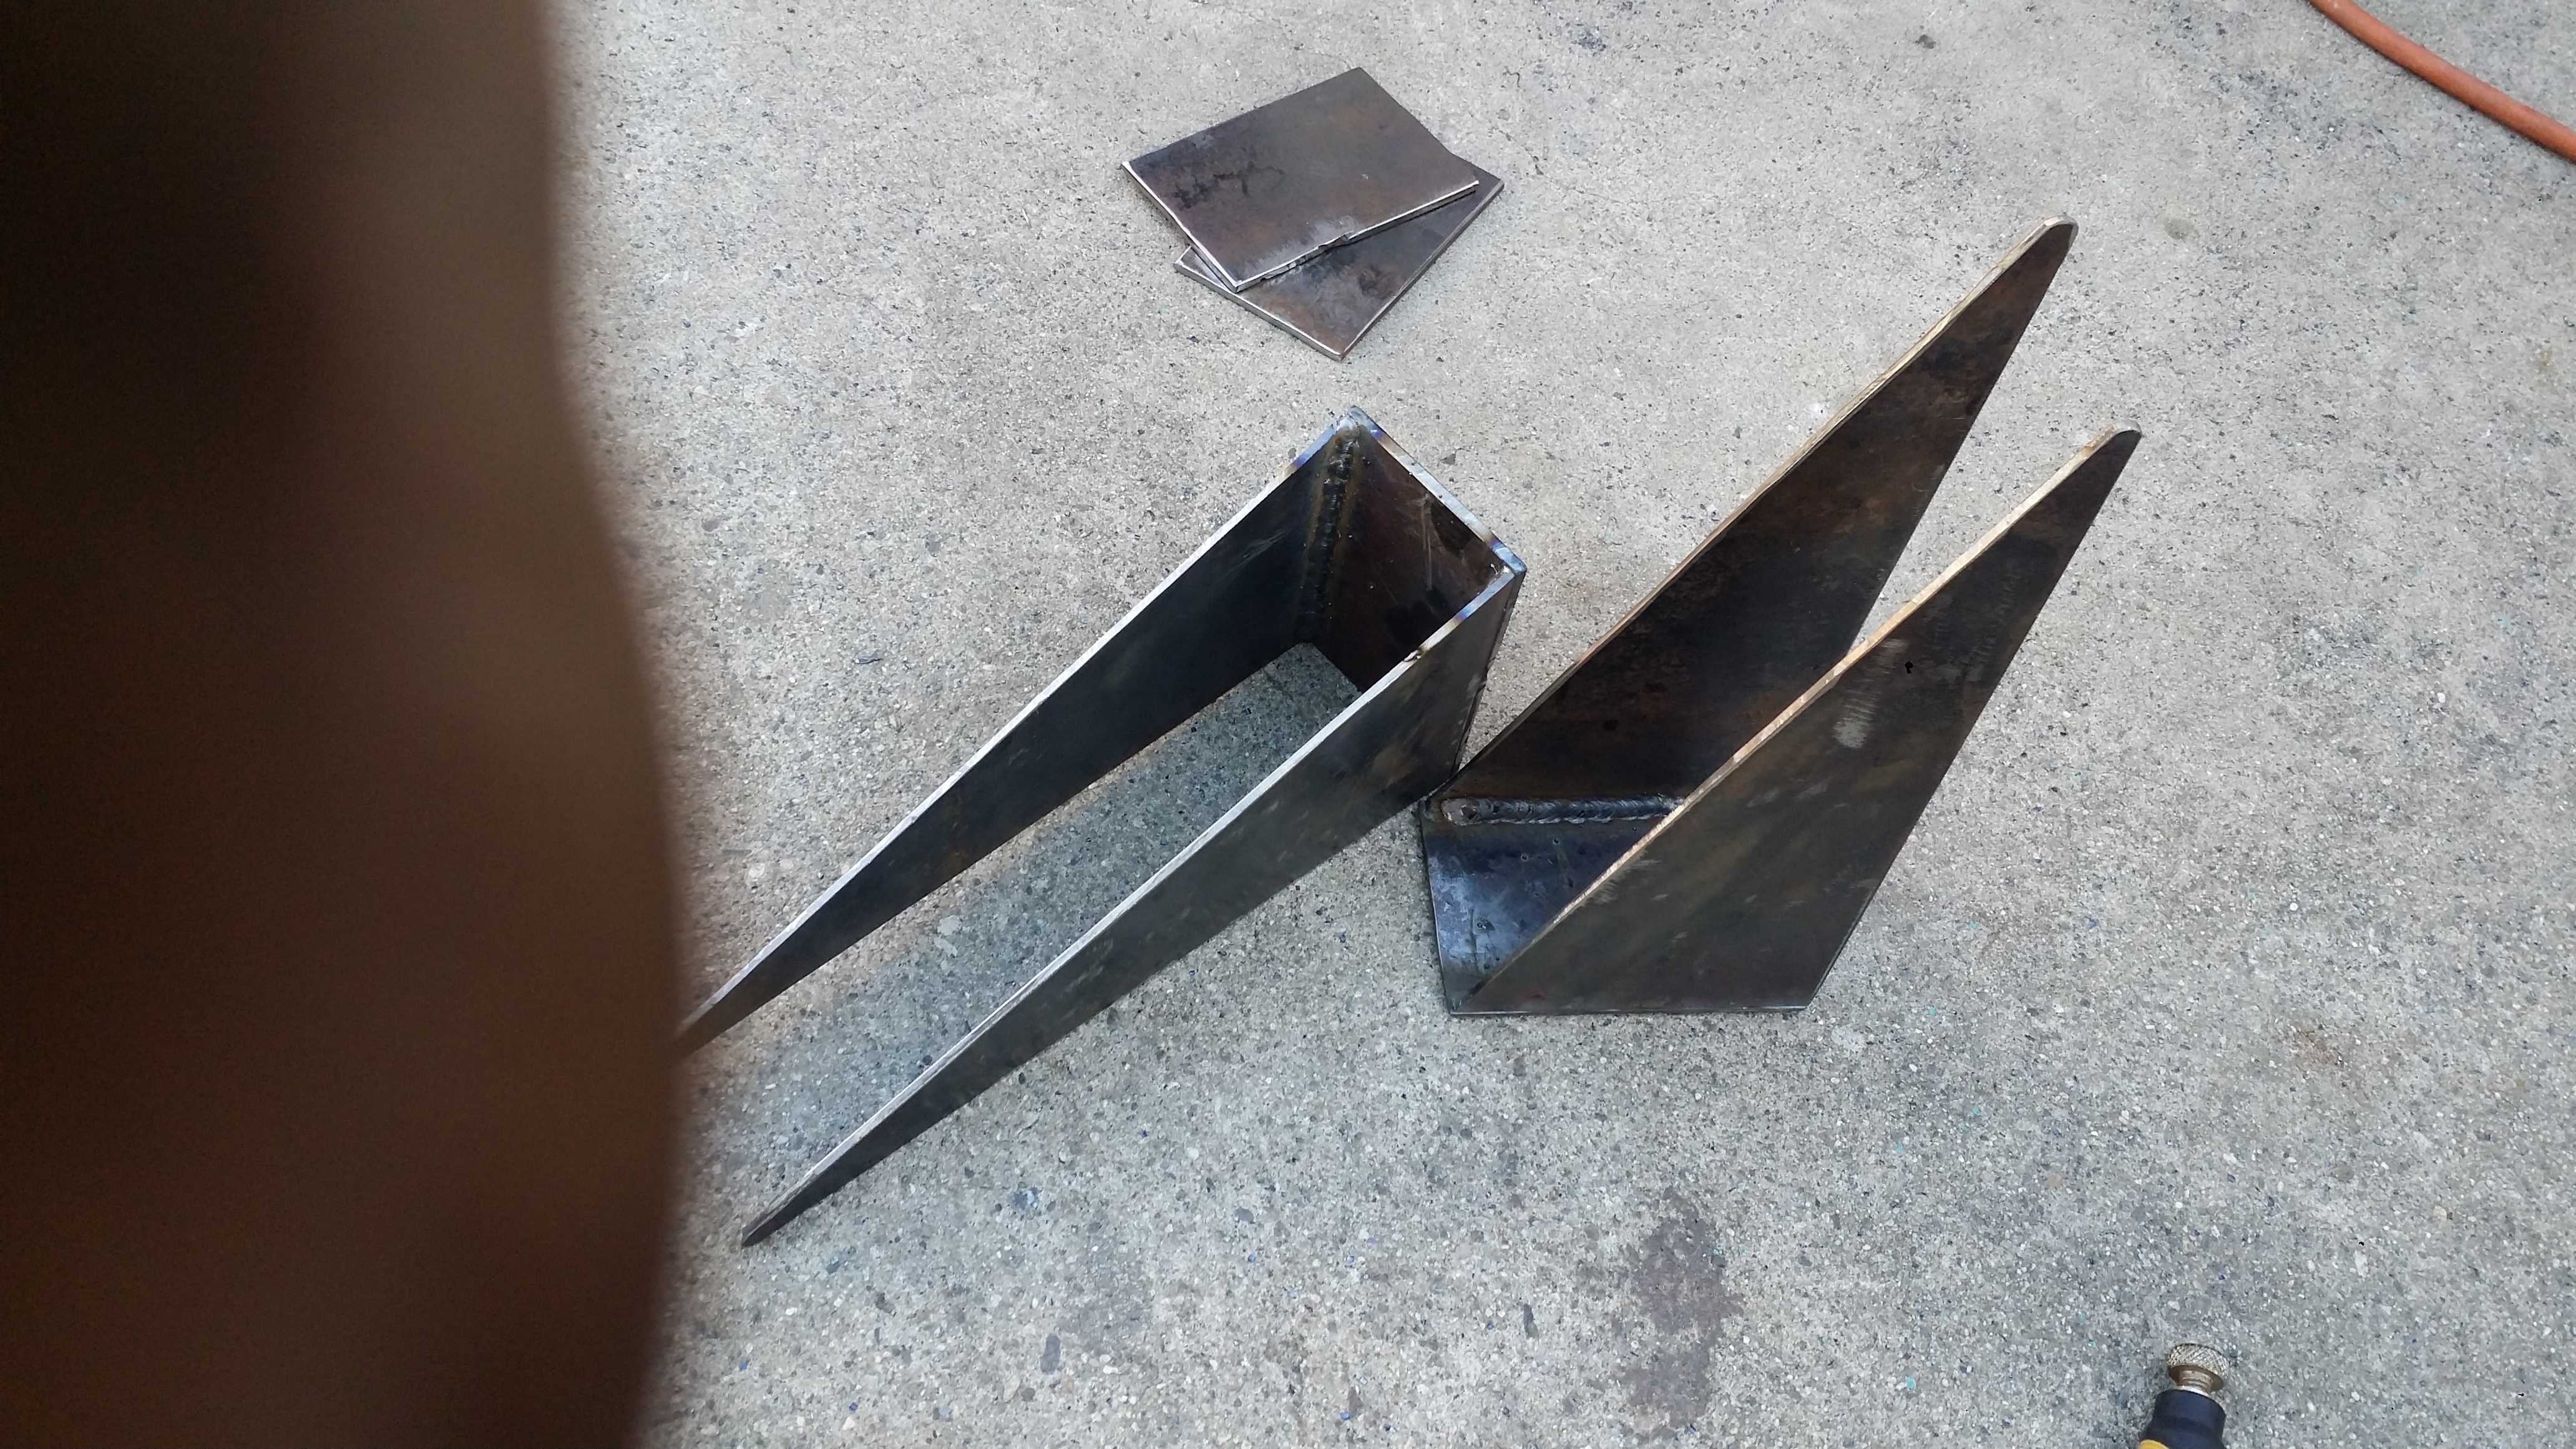
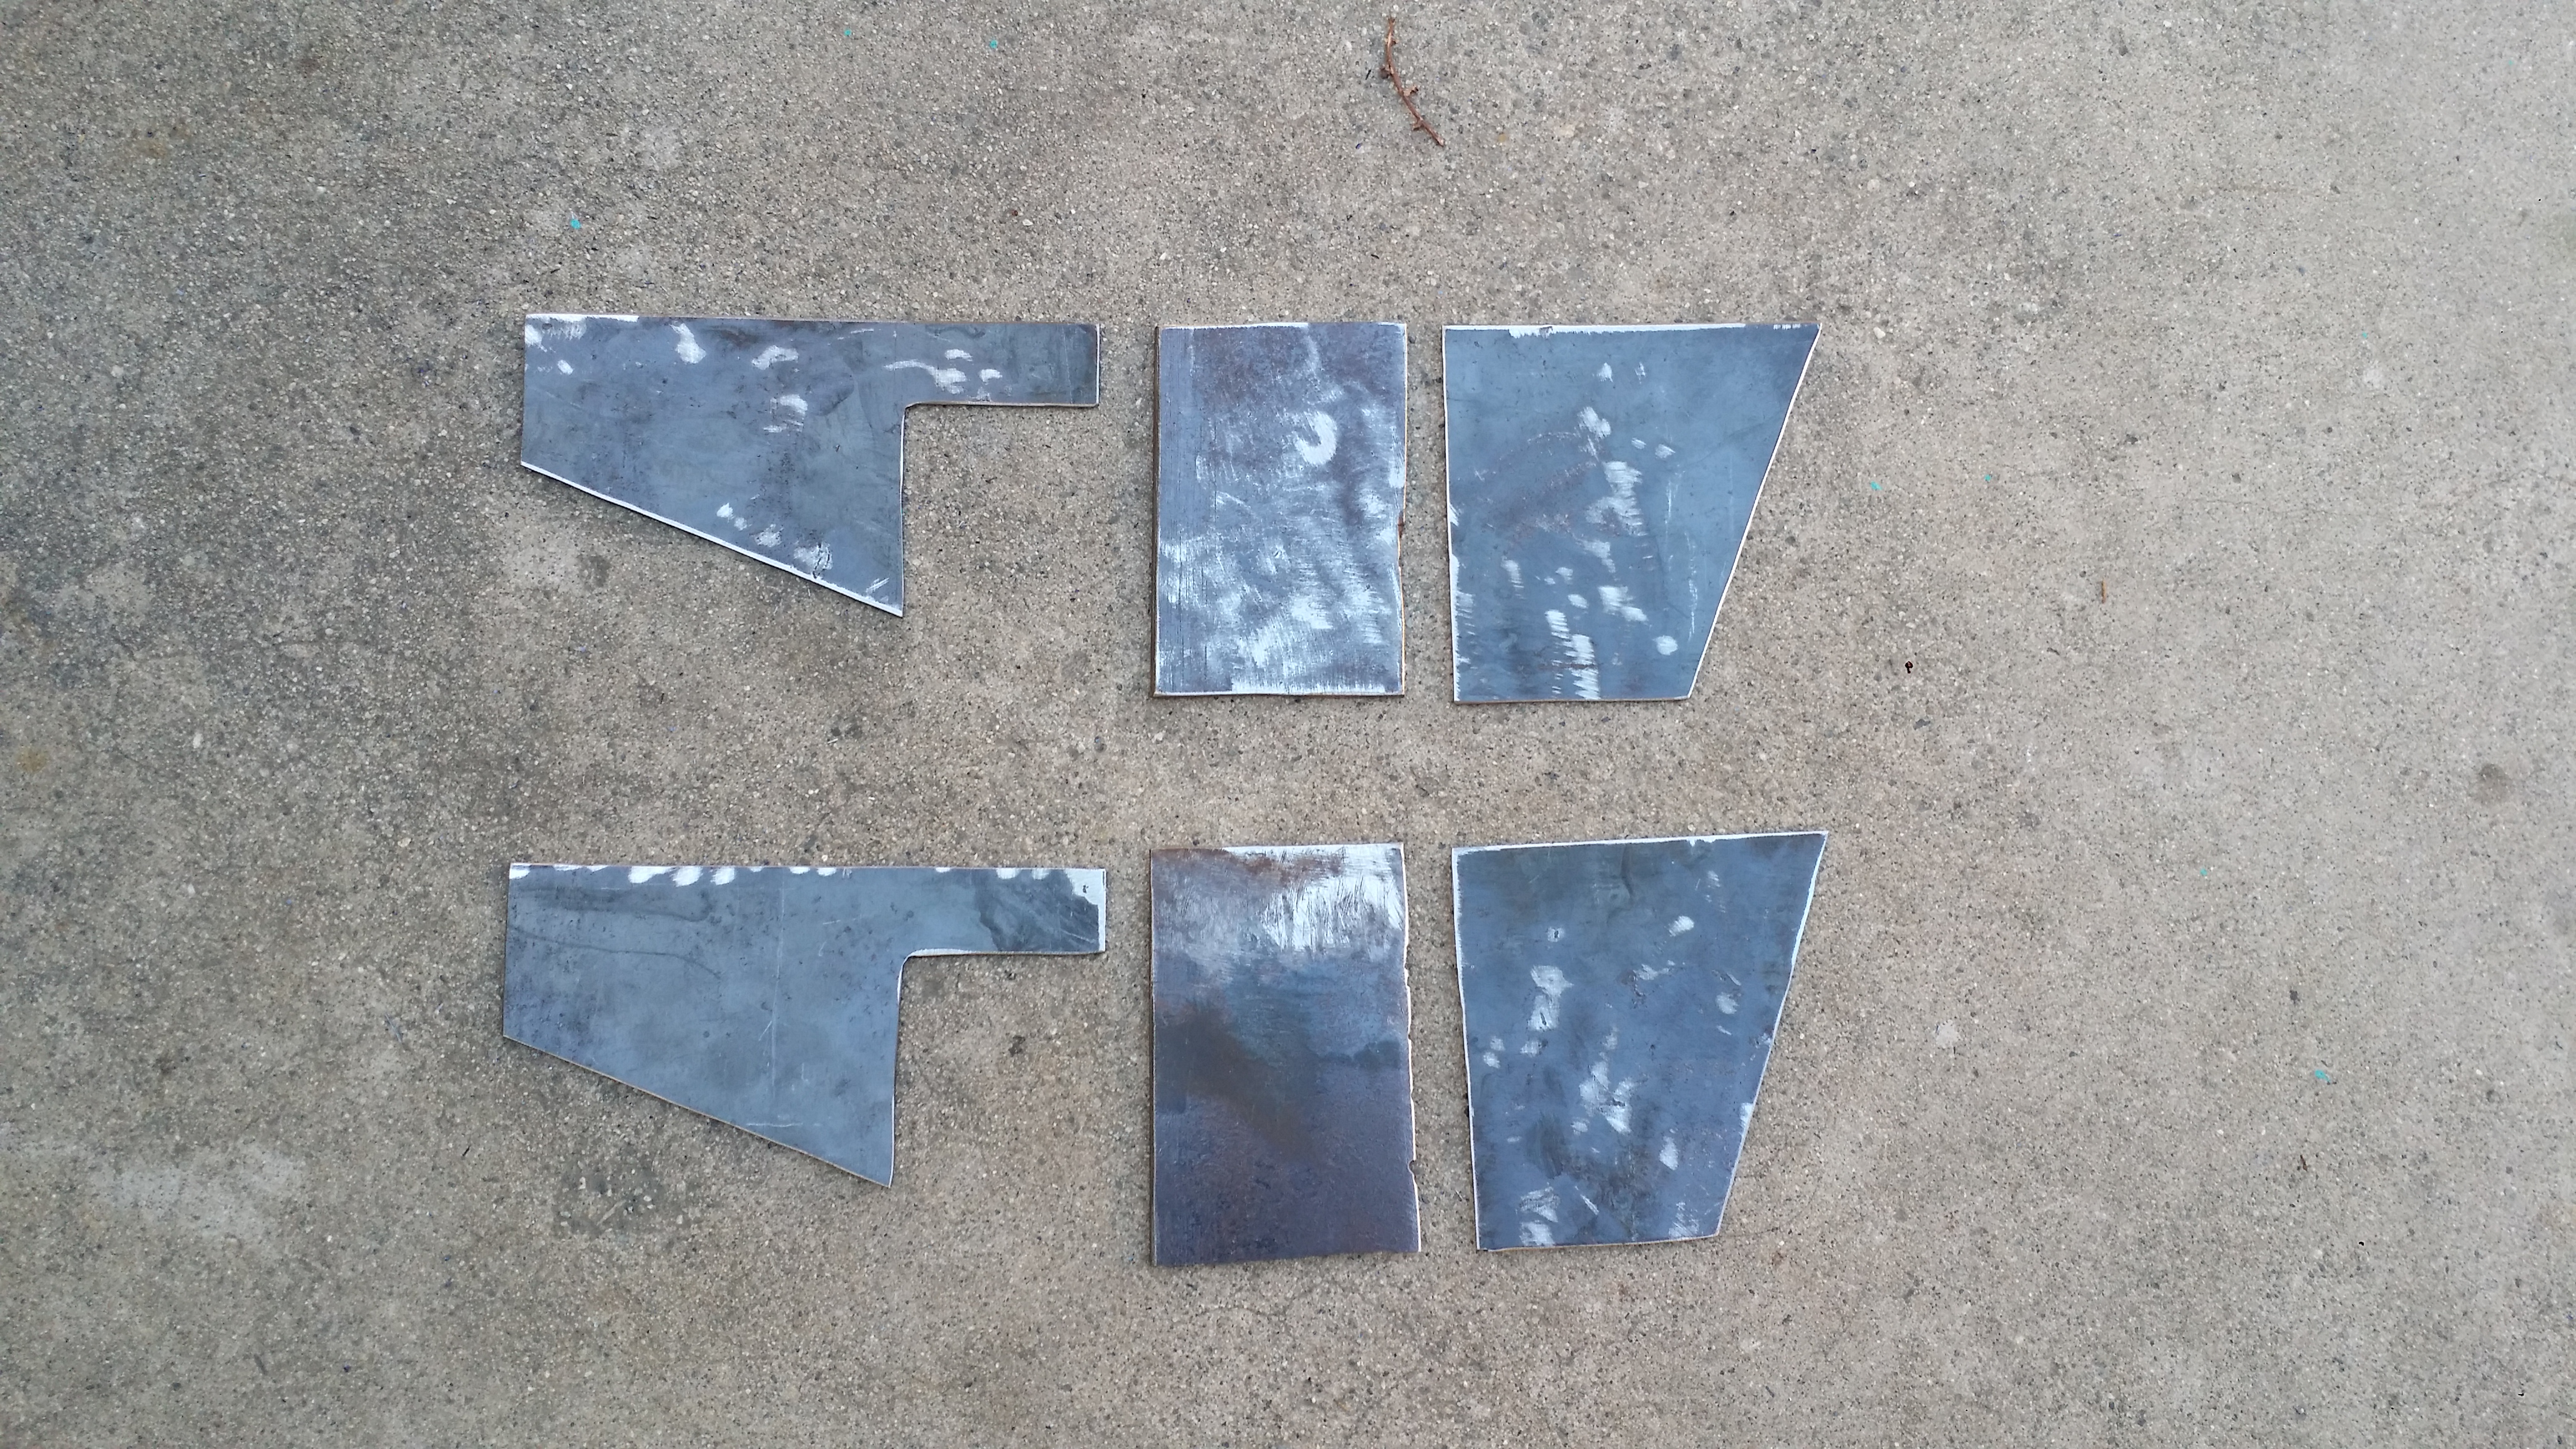
Here i cut out the pieces to make the new mounts.
Getting it angled right.
Here I welded a temporary right angle so i could have a level surface from front to back
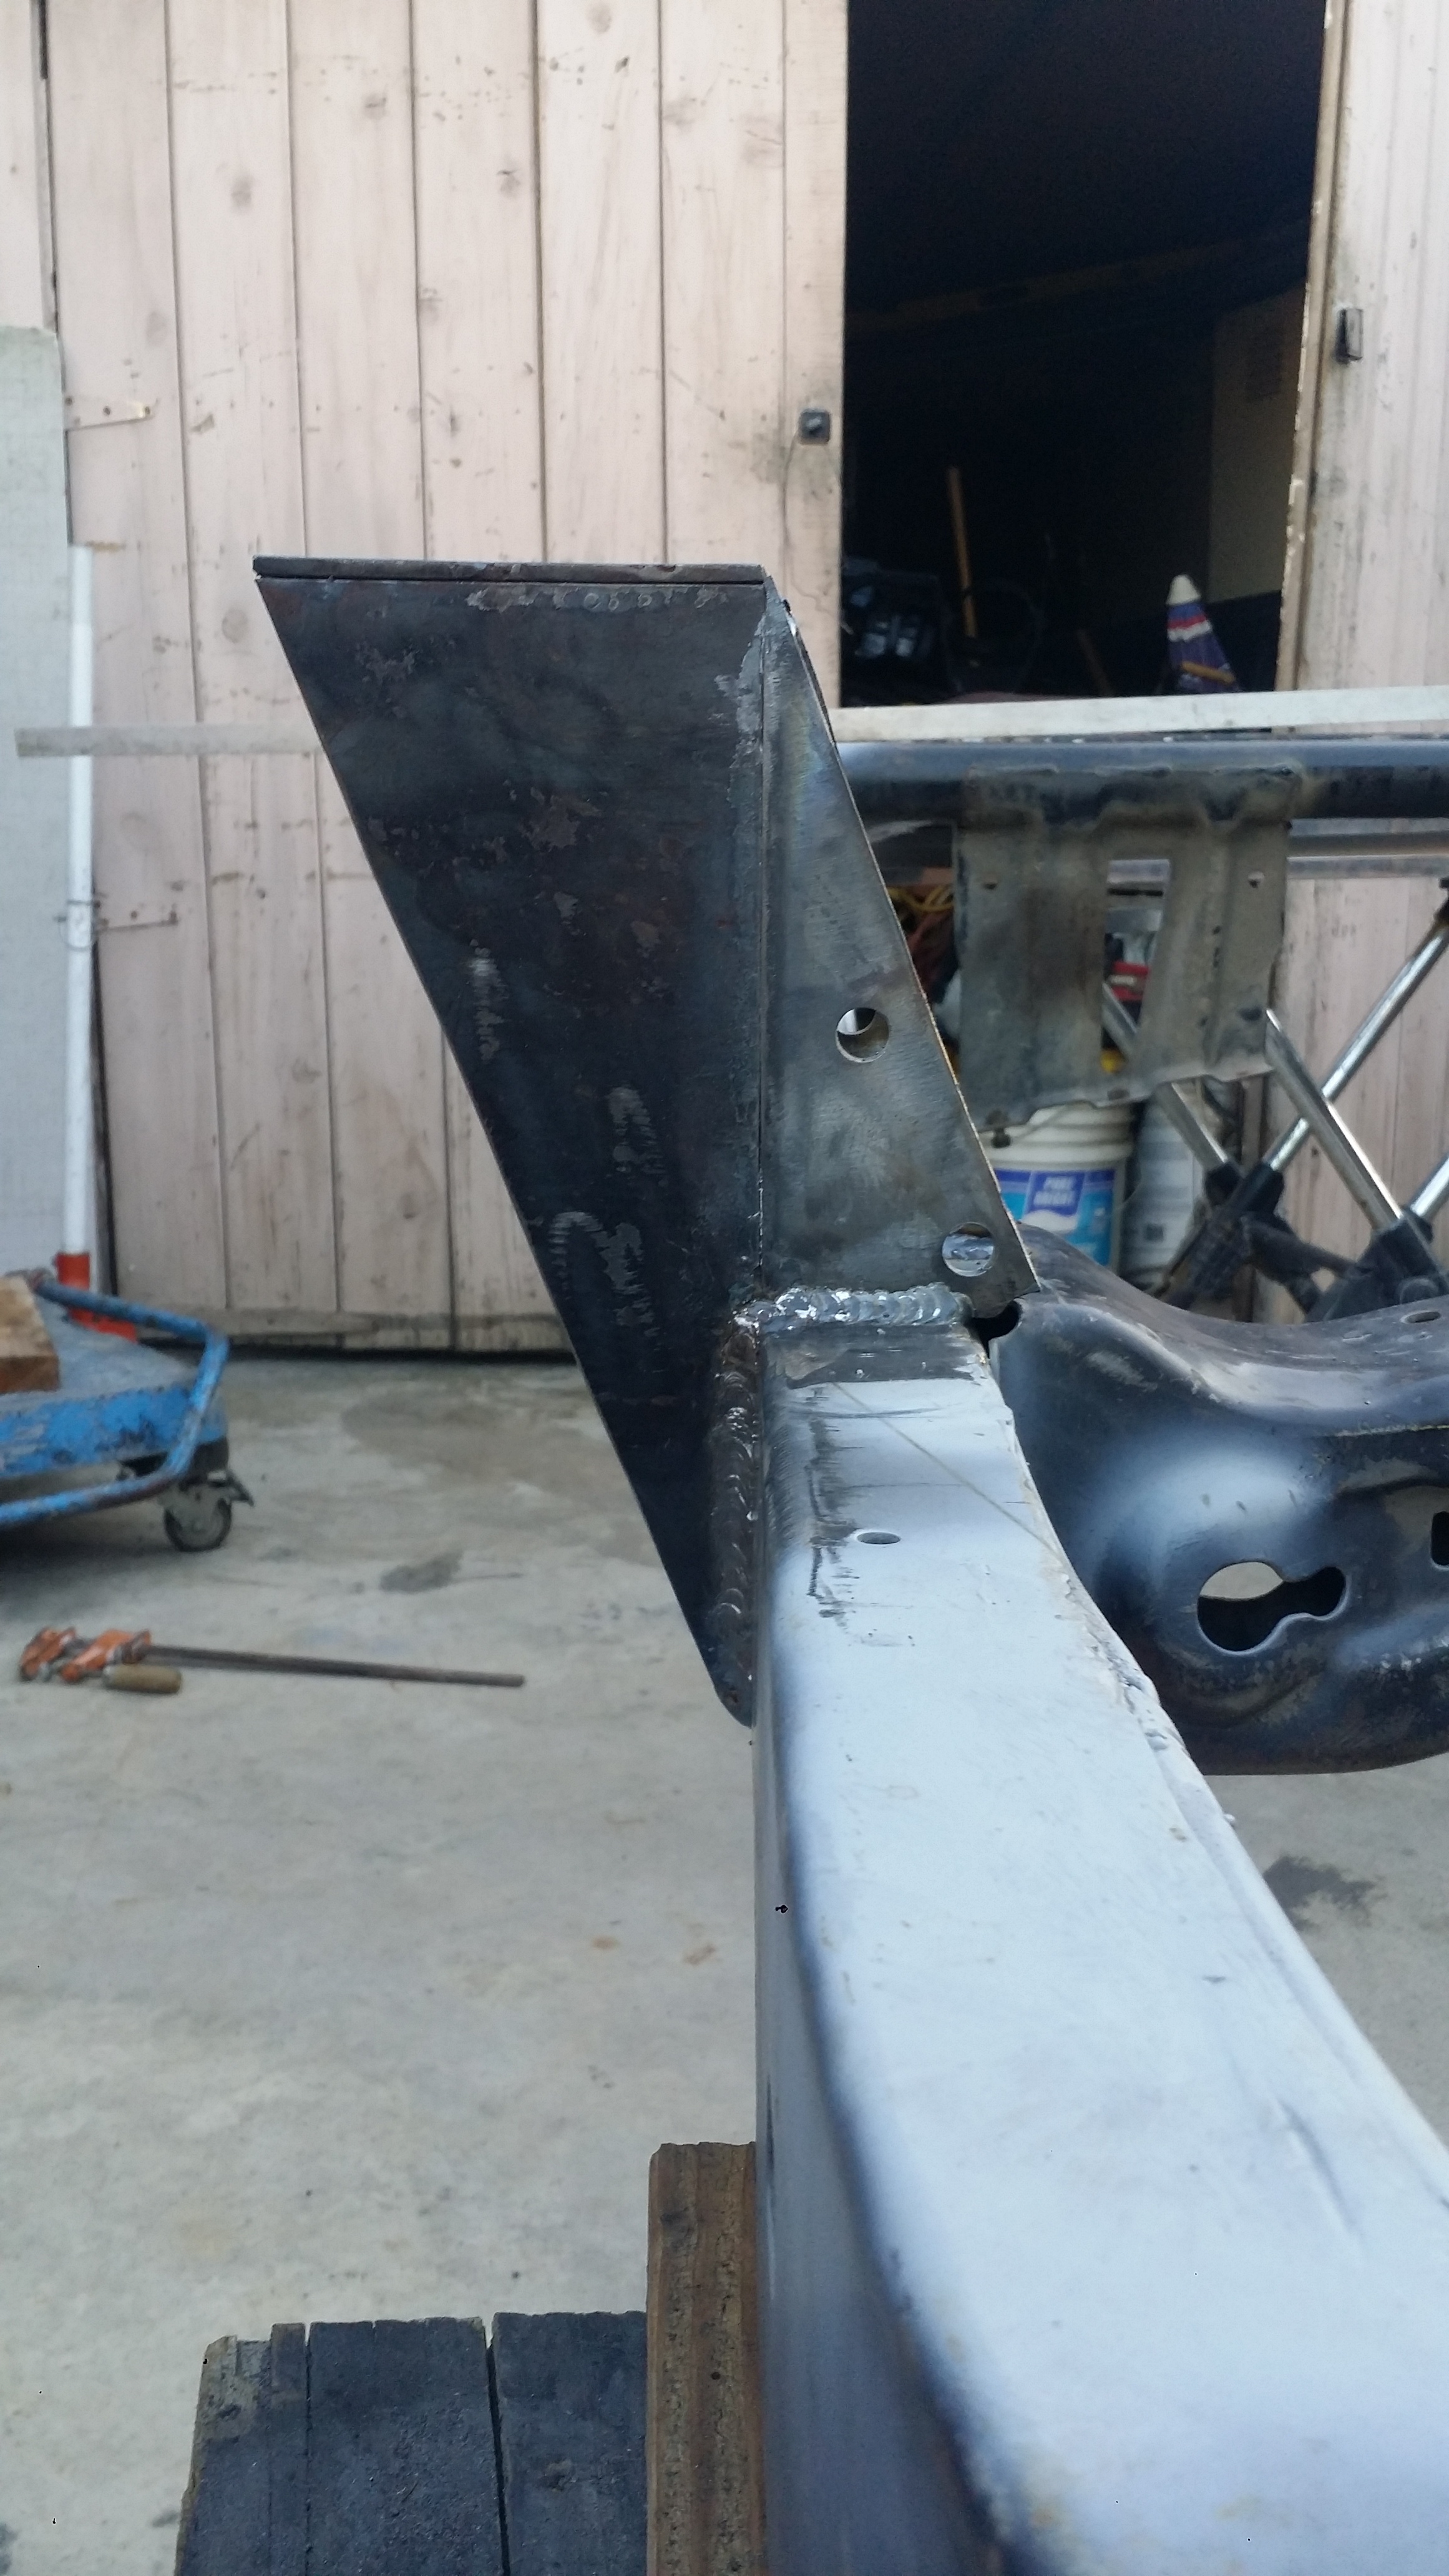
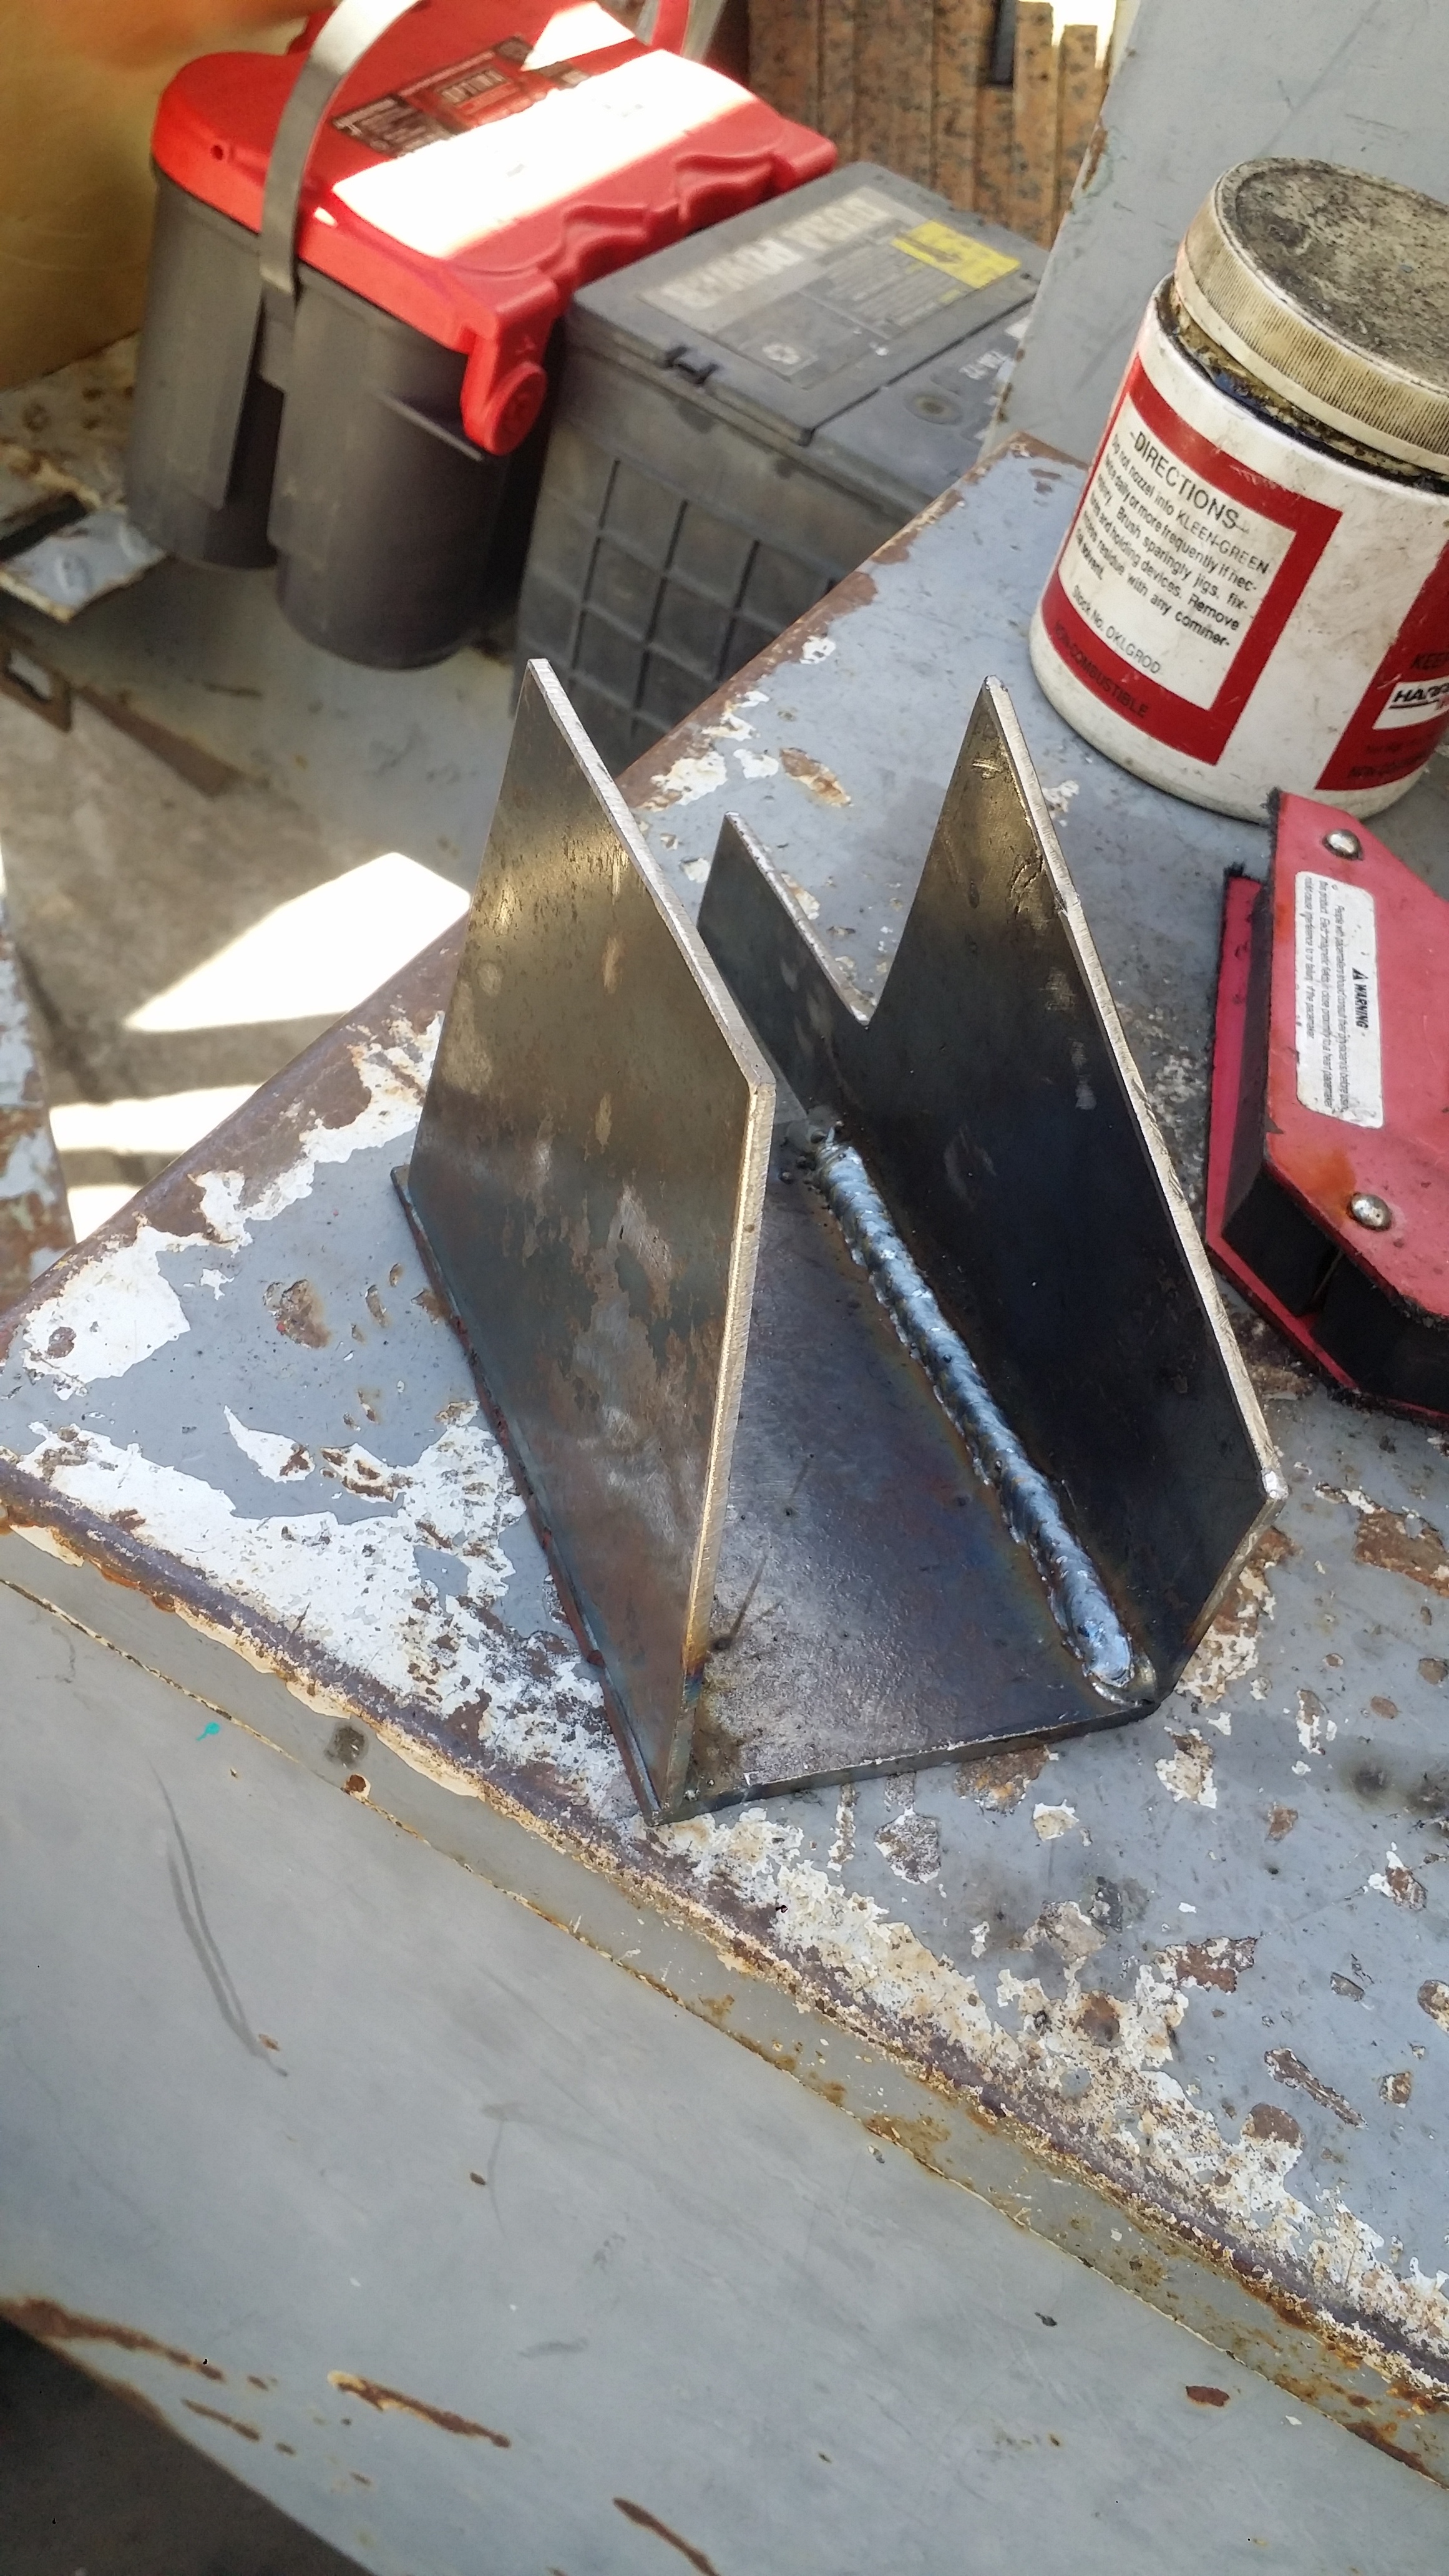
Tall towers finally welded together
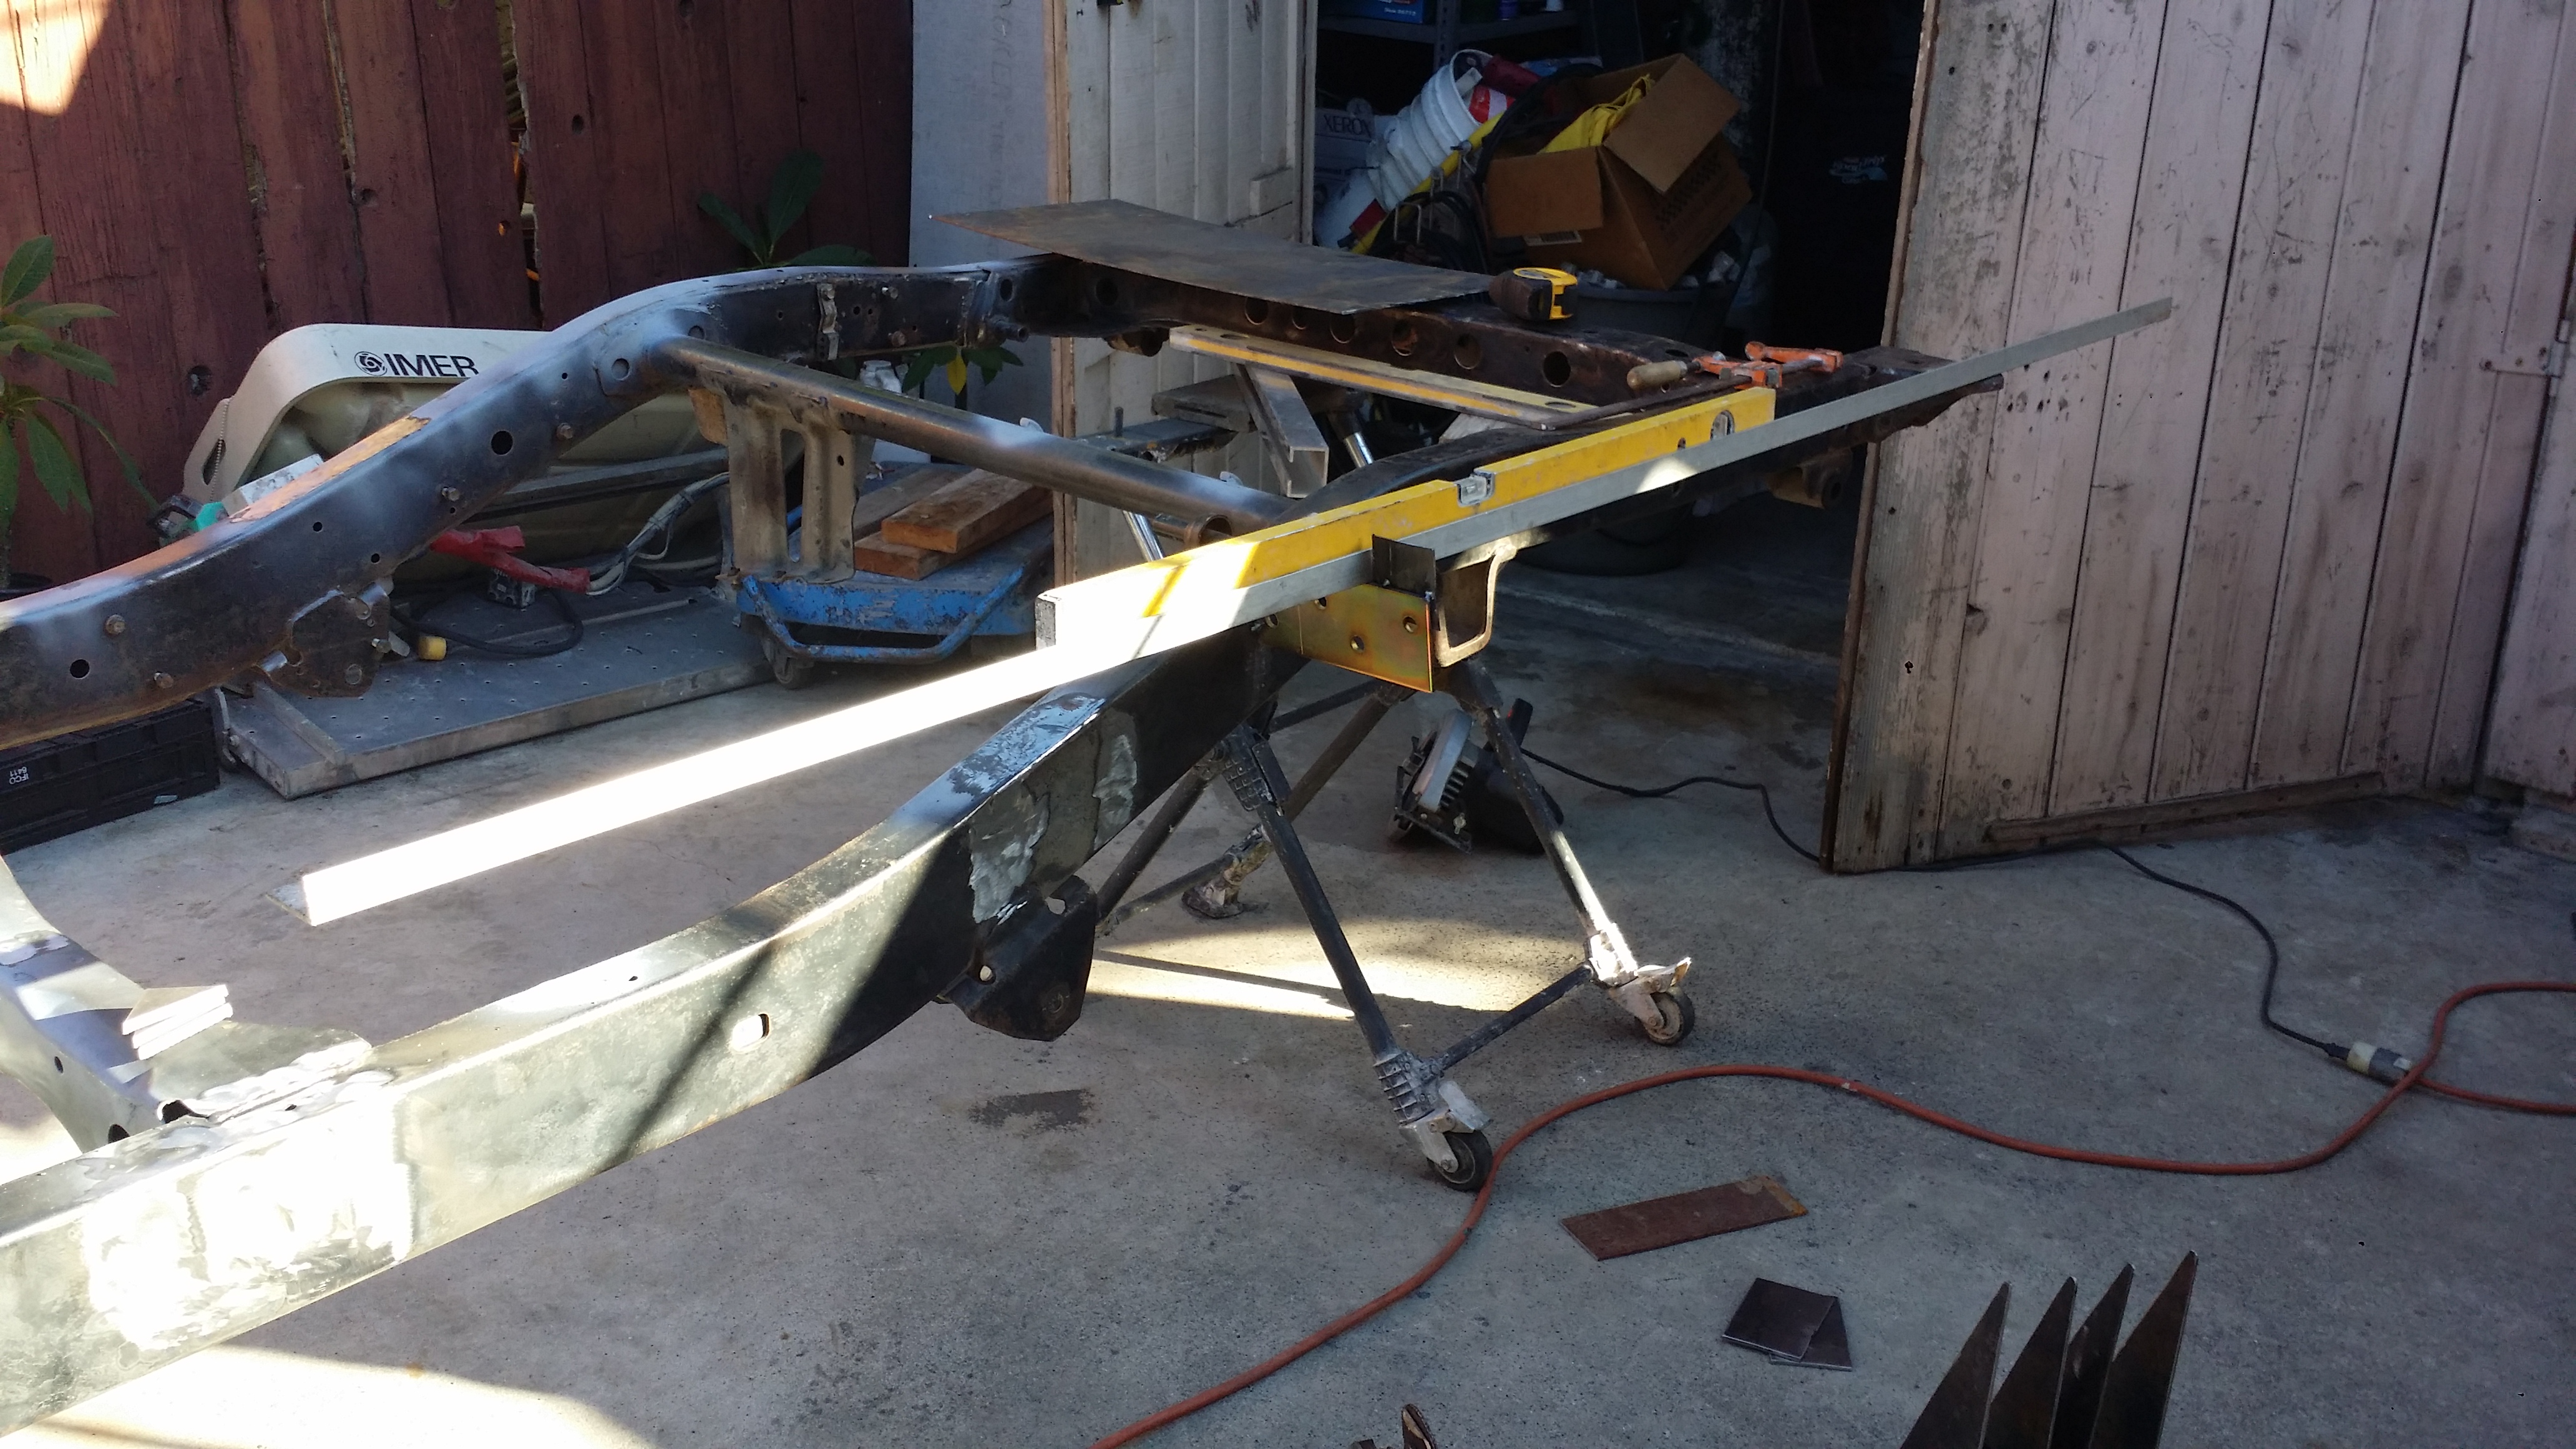
So here i have the long ruler extending from the rear all the way to the front of the chassis ending where that 2nd right angle ruler is. I have it mounted on the face of the transmission mount because this is where i want the long ruler extending from back to front to end. This creates a 90 degree angle and gives me a good surface so i know i am properly welding on these new towers onto the frame. I hope that makes sense because its hard for me to explain but you'll understand better once you see more pix.
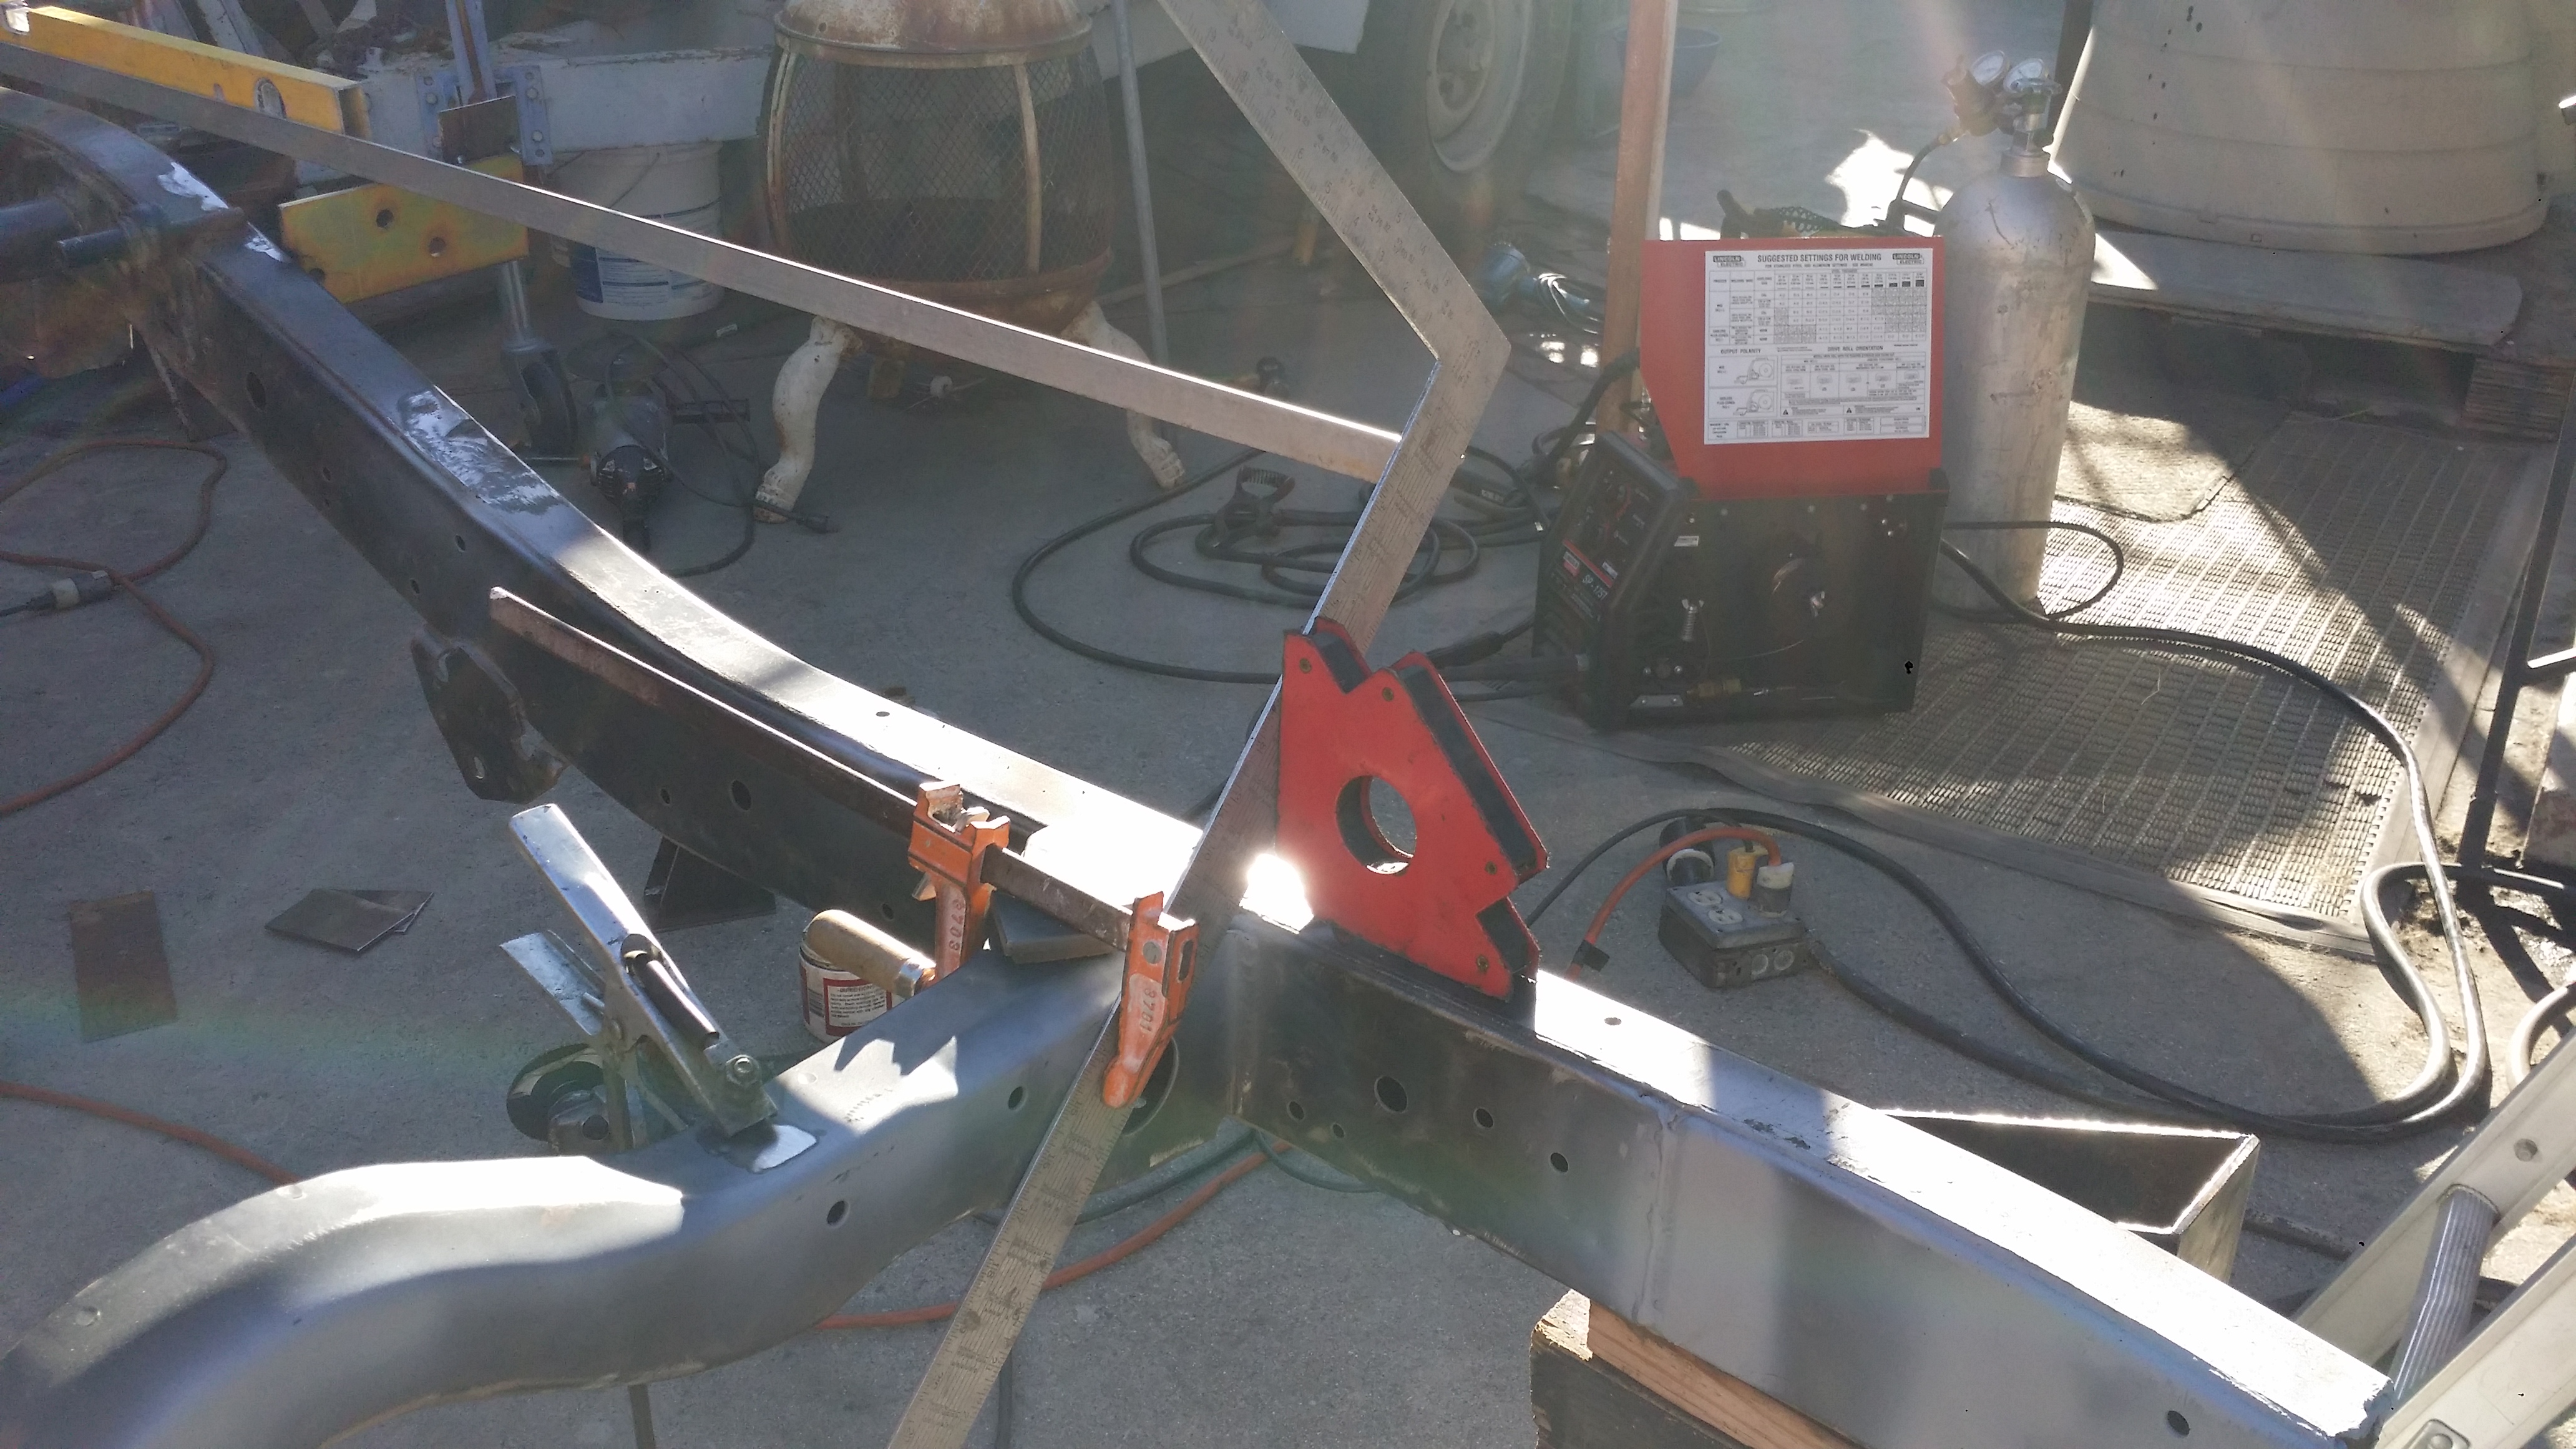
There they are tack welded into place.
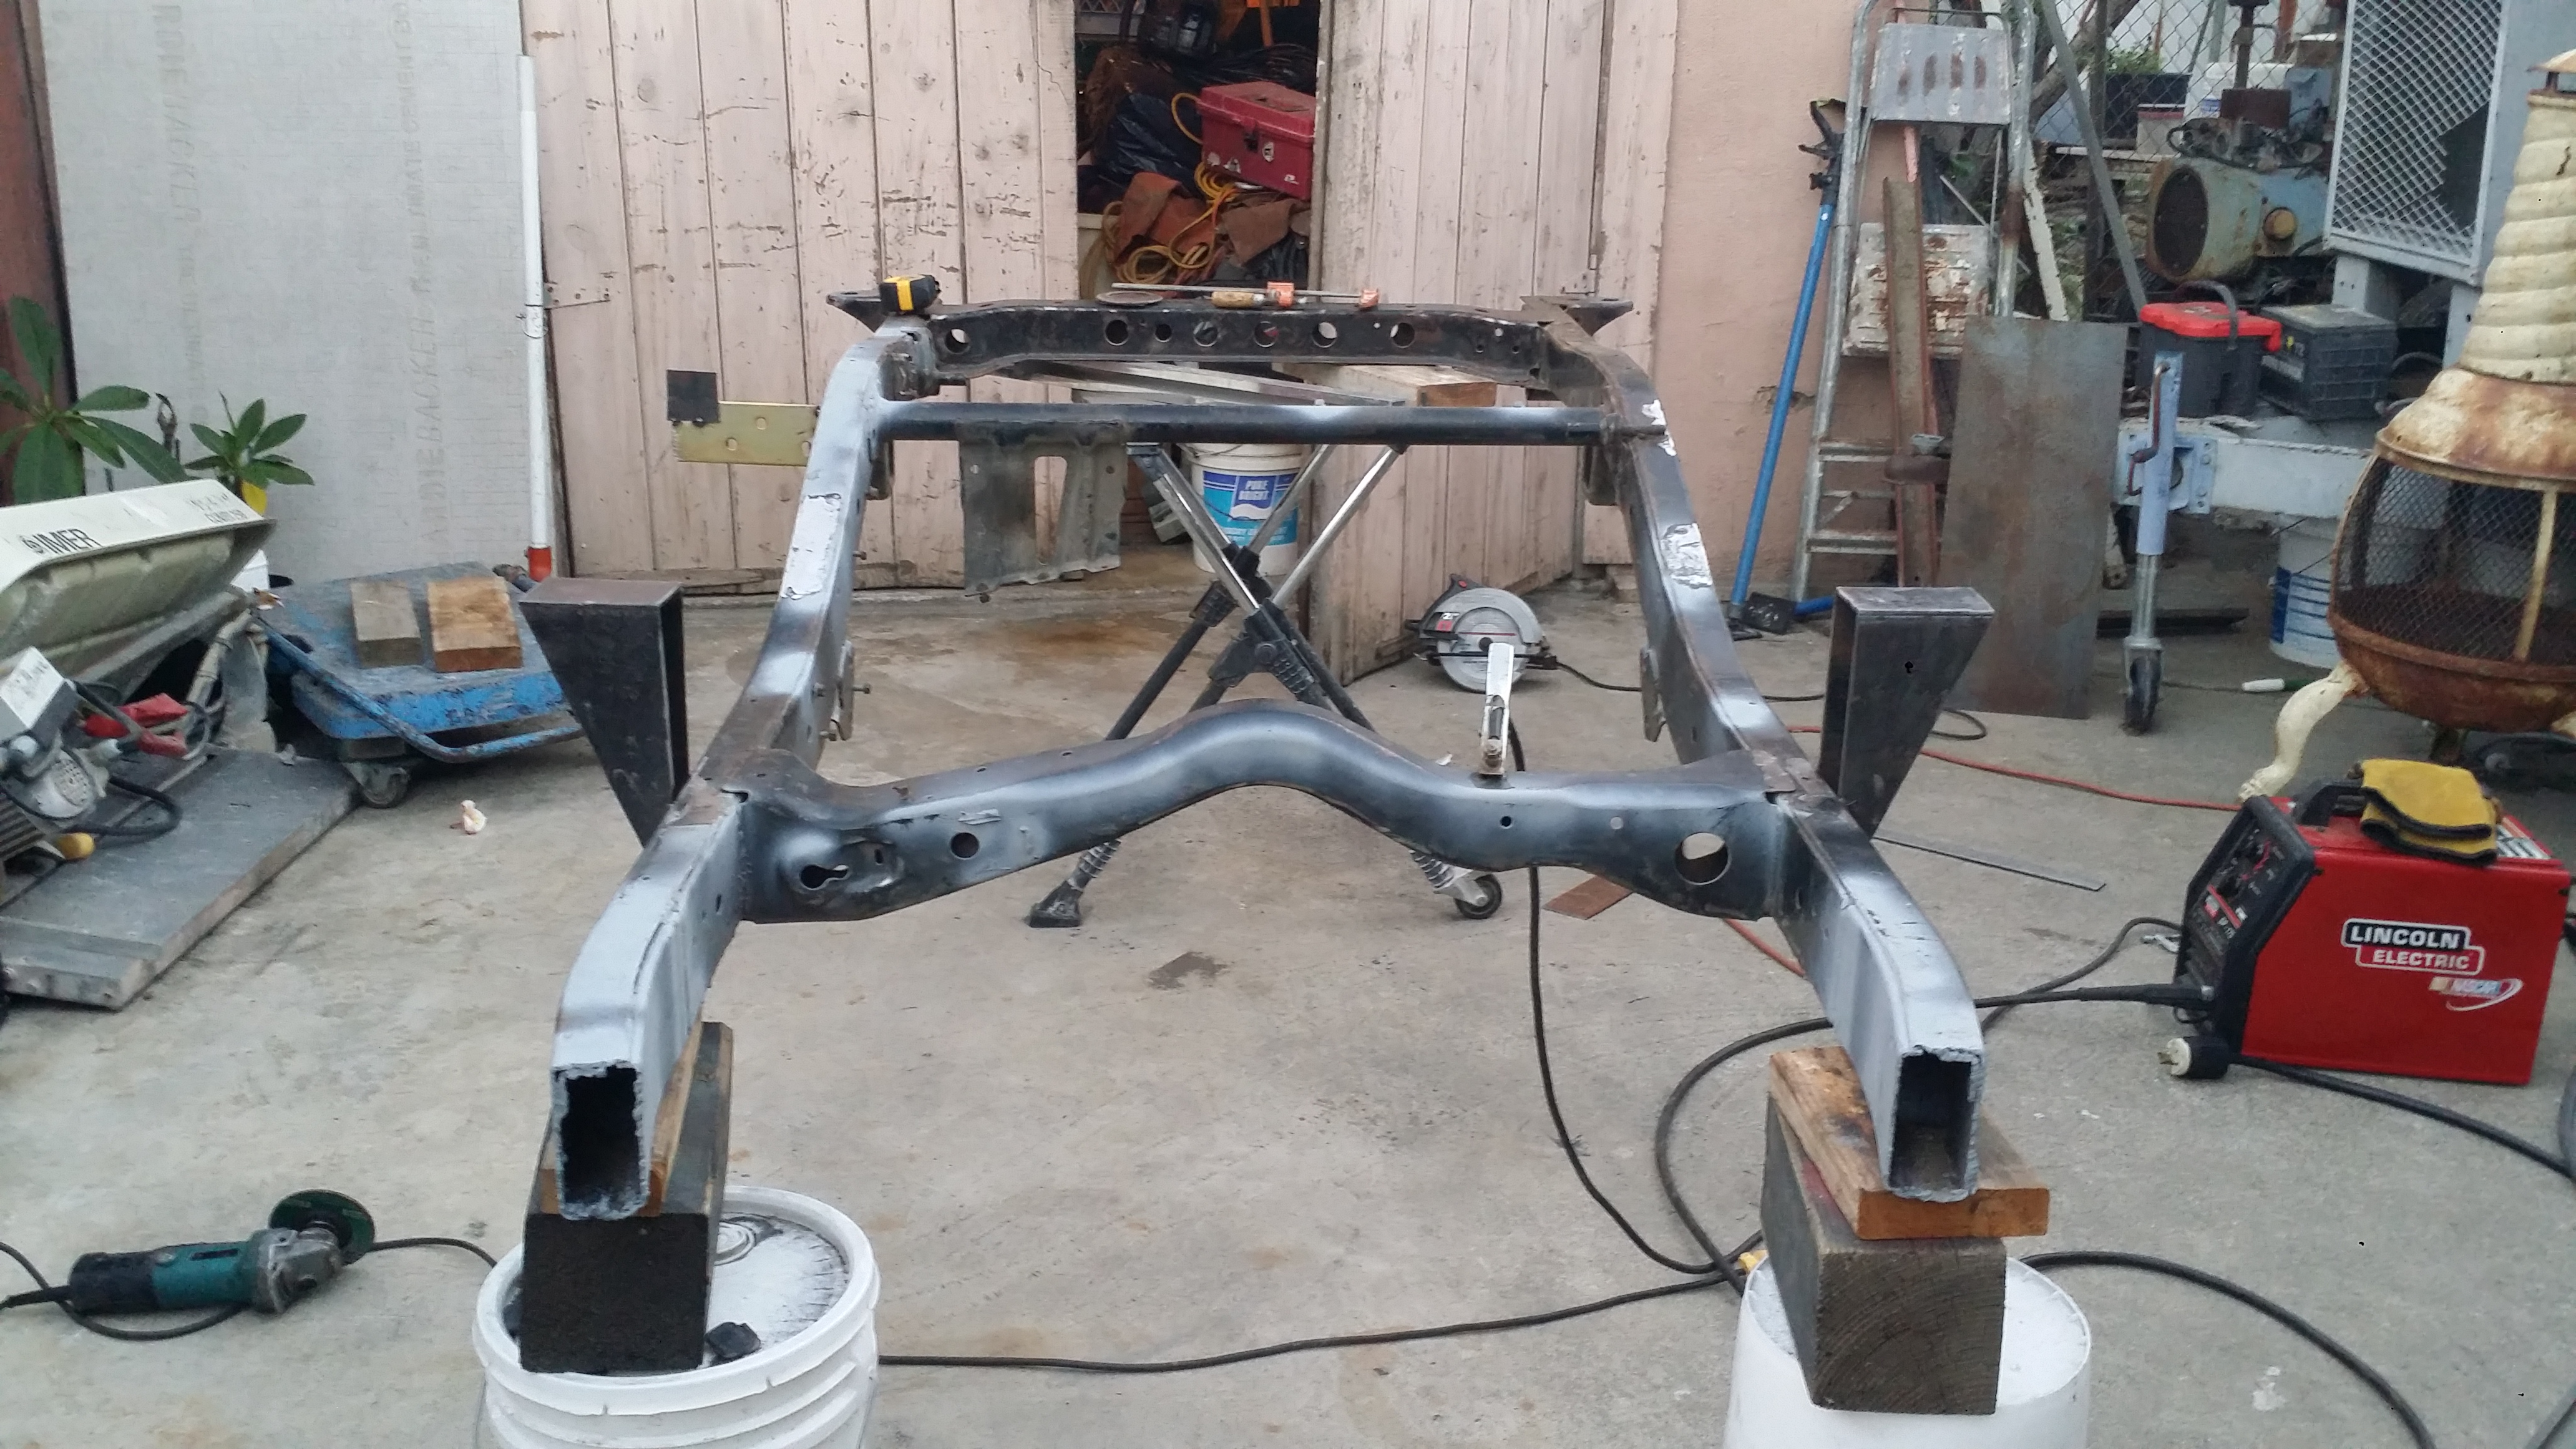
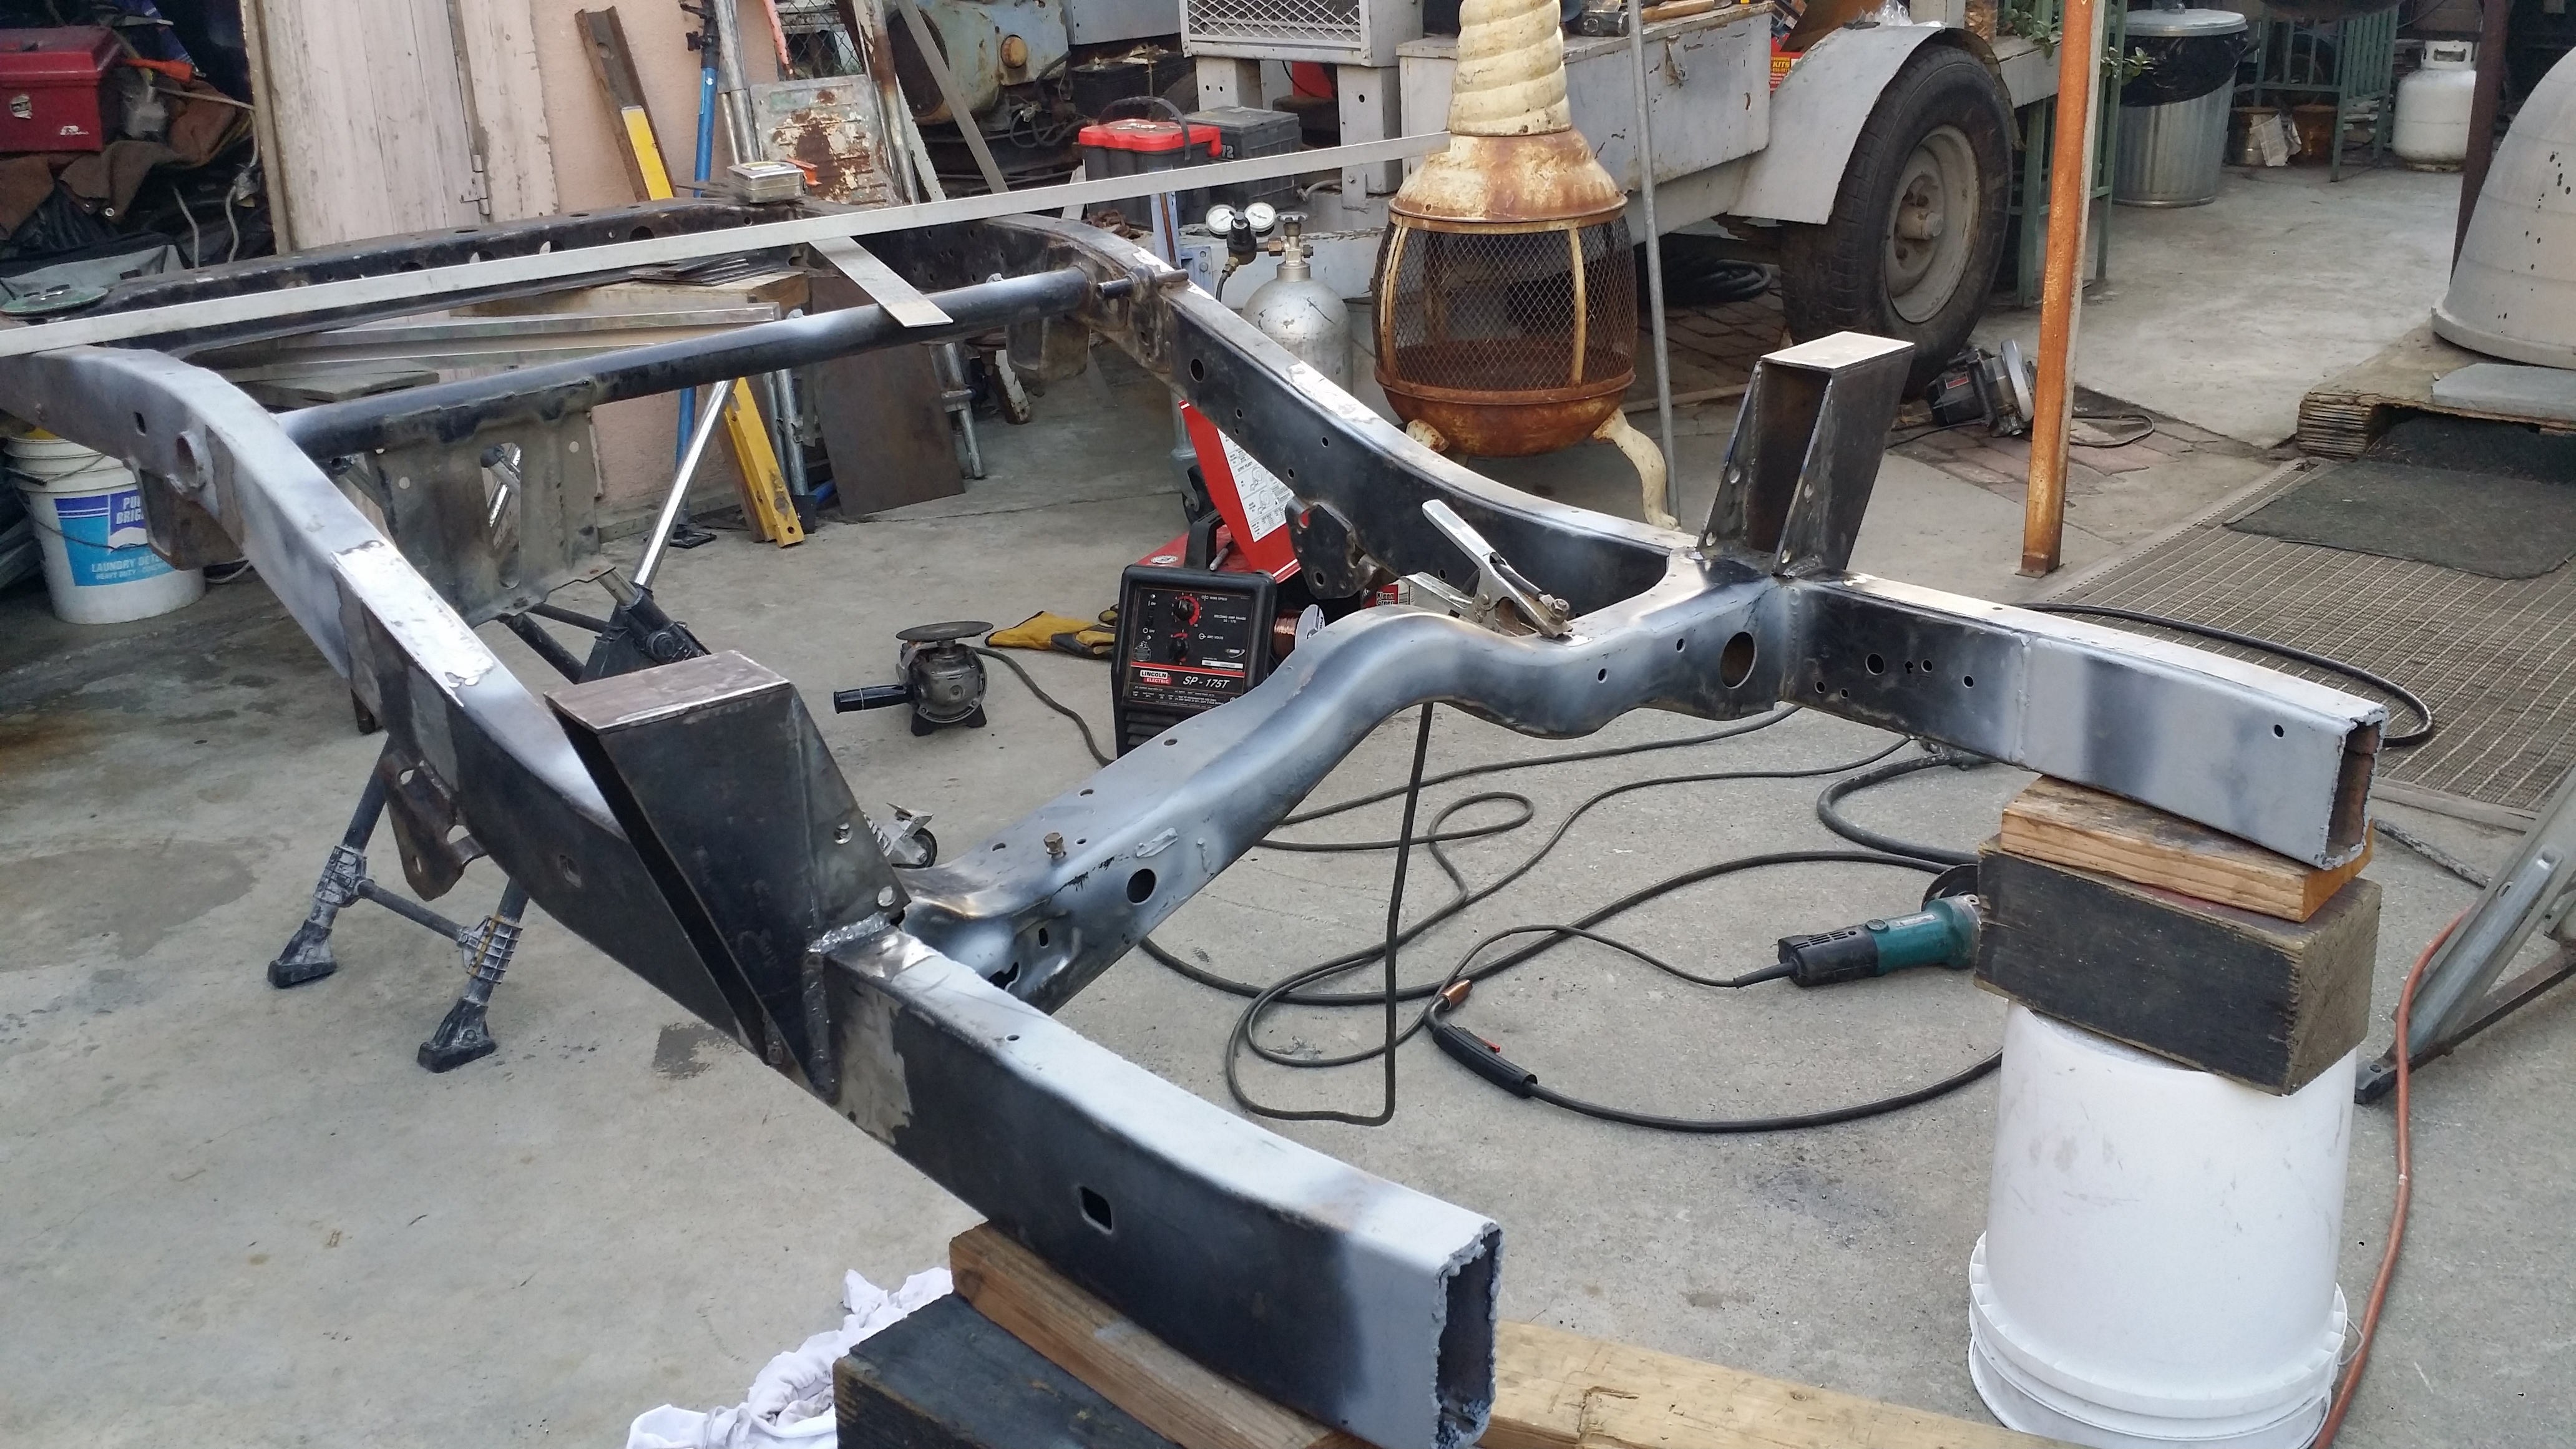
After making sure that everything was the correct height and leveled out throughout the entire frame. then i can finally weld them in permanently.
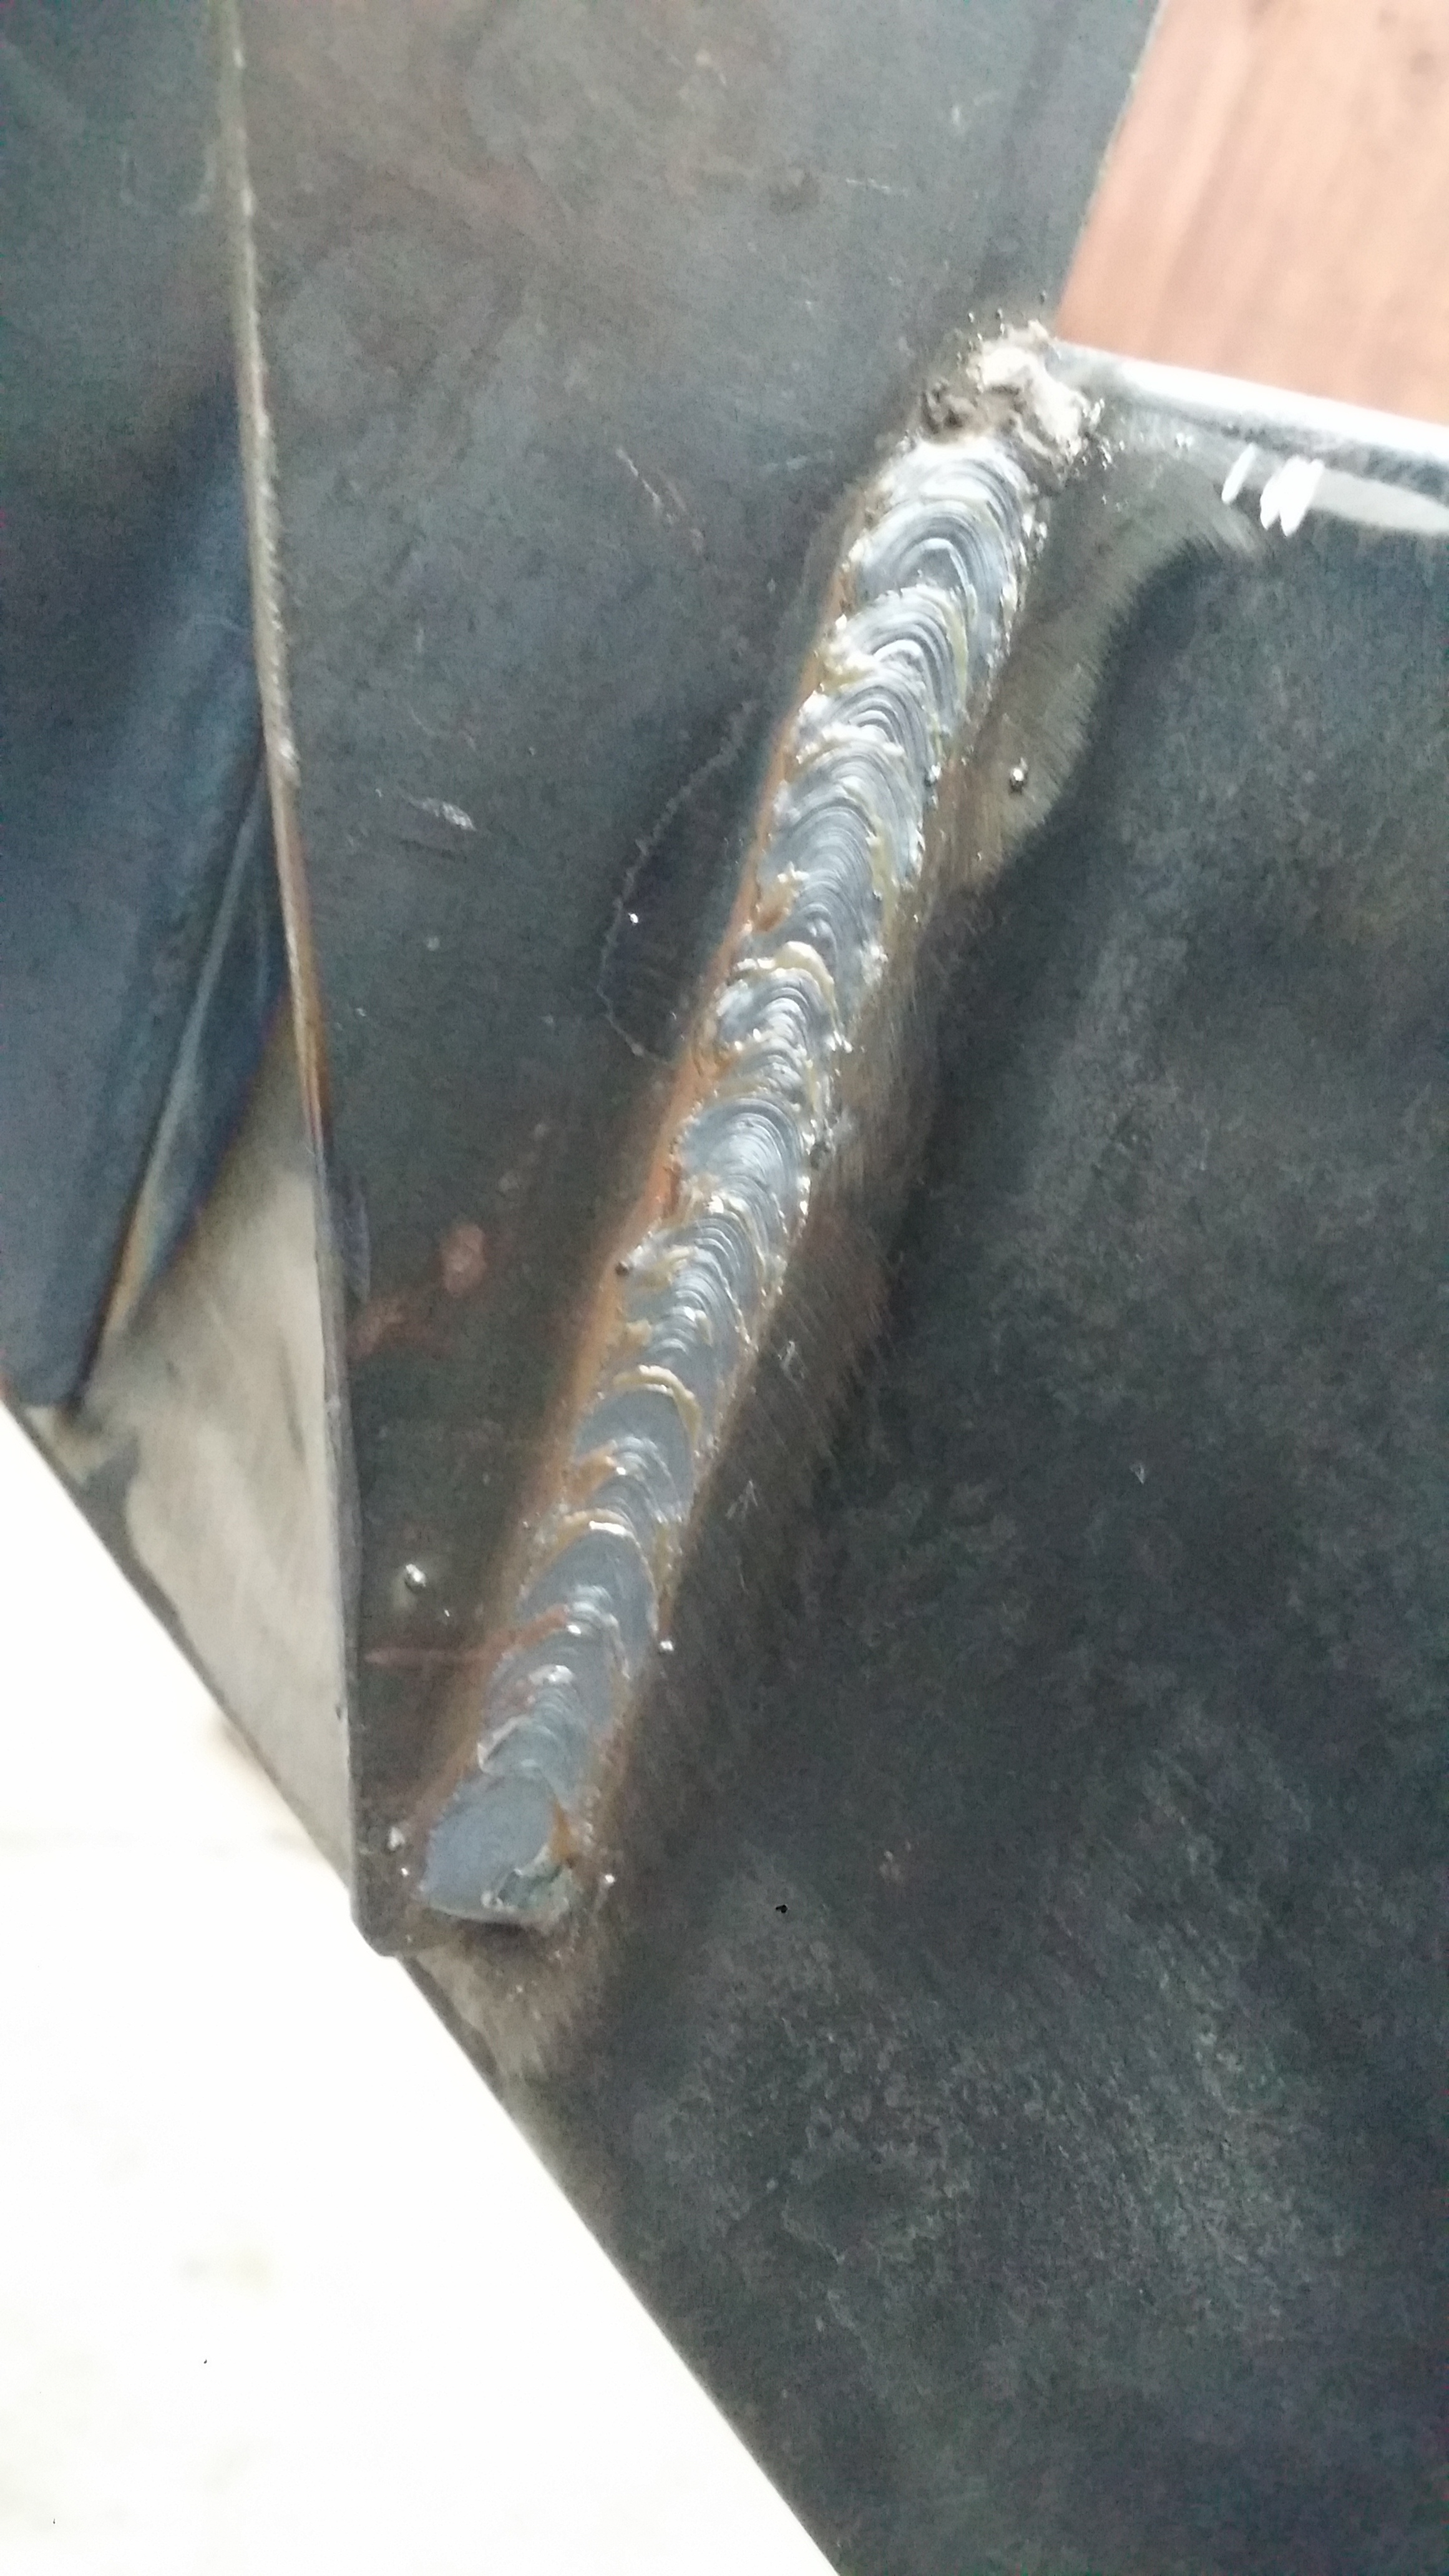
 Not too bad for not having a welding project since my front bumper. It's been almost 2 full years since I last welded something on my own. Those are freekin' solid. They aren't going anywhere. What do my expert welding friends have to say about this? (This is MIG welding with co2) Soon I'm going to learn how to Arc weld. I never really got the hang of advancing the sticks because I finished the last project before i was able to get the hang of it.
Here is a better idea for you of what the perimeter of the box will be.
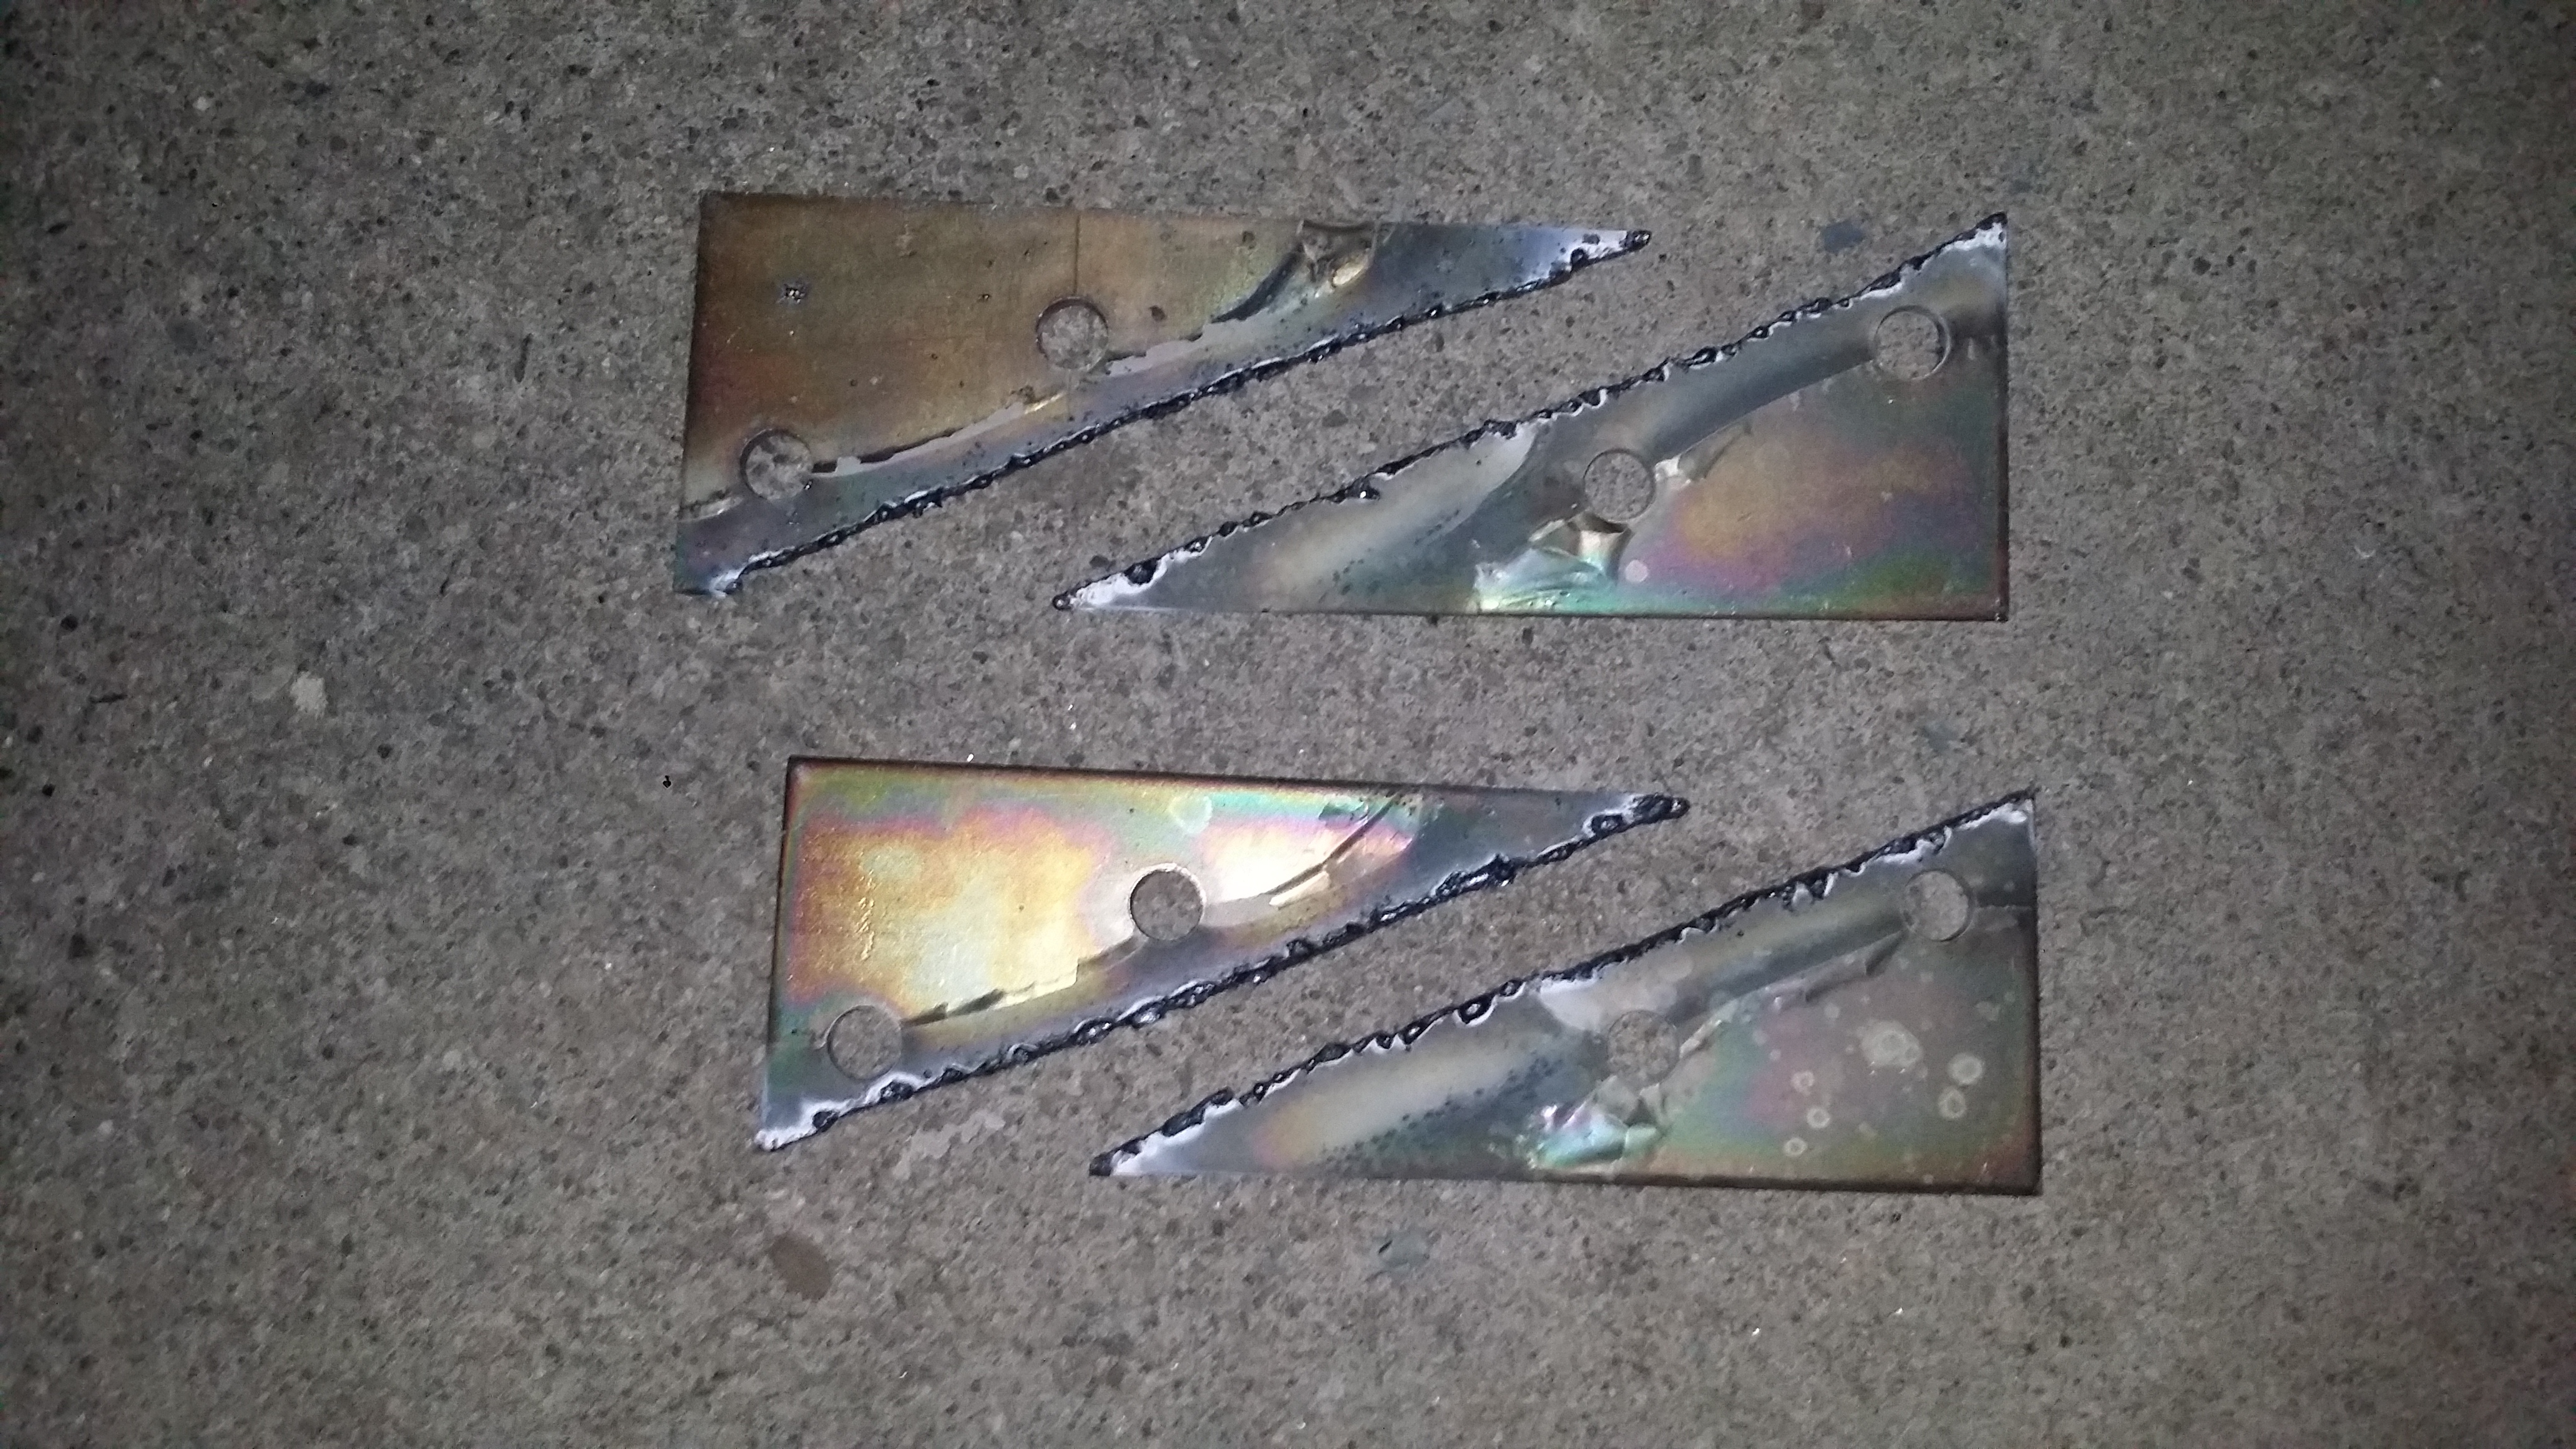
Because the backside of those new towers do not have any support further up toward the top side i decided to cut up some gussets that will give more support to them. They're gonna be mounted on the back side of those towers and sit on top of the frame. I'll get to welding those on tomorrow. For now, at least everything on the body is completely level all the way around and now I'll finally have a base to build off of. I also need to make 2 more body mounts for the middle section of the sides(from front to rear). So there isn't a "bow" when it has weight on it.
By the way if you're wondering why i used a torch to cut the gussets its because i ran out of those black cutting wheels for metal. and i didn't want to make the trip to harbor freight to buy another stack. Plus i didn't want to cut my good pieces of metal. i had these small rectangular pieces of metal from that body lift kit that my neighbor gave me. I didn't plan to use them but they are the perfect height to use on this application so i just figured why waste them.
Just need to grind them down a bit and sand them smooth again where the molted metal dripping solidified.
First i added this mock up piece just to get the correct height all the way across.

Once i made sure it was all level i then took measurements from the front side of the transmission cross-member. I want the new body mount towers to be at the exact face of that transmission mount because that is where i want the large storage box to end. and the smaller box in front will begin at the face too.
Here i cut out the pieces to make the new mounts.

Getting it angled right.

Here I welded a temporary right angle so i could have a level surface from front to back
Tall towers finally welded together

So here i have the long ruler extending from the rear all the way to the front of the chassis ending where that 2nd right angle ruler is. I have it mounted on the face of the transmission mount because this is where i want the long ruler extending from back to front to end. This creates a 90 degree angle and gives me a good surface so i know i am properly welding on these new towers onto the frame. I hope that makes sense because its hard for me to explain but you'll understand better once you see more pix.

There they are tack welded into place.

After making sure that everything was the correct height and leveled out throughout the entire frame. then i can finally weld them in permanently.
Not too bad for not having a welding project since my front bumper. It's been almost 2 full years since I last welded something on my own. Those are freekin' solid. They aren't going anywhere. What do my expert welding friends have to say about this? (This is MIG welding with co2) Soon I'm going to learn how to Arc weld. I never really got the hang of advancing the sticks because I finished the last project before i was able to get the hang of it. 
Here is a better idea for you of what the perimeter of the box will be.


Because the backside of those new towers do not have any support further up toward the top side i decided to cut up some gussets that will give more support to them. They're gonna be mounted on the back side of those towers and sit on top of the frame. I'll get to welding those on tomorrow. For now, at least everything on the body is completely level all the way around and now I'll finally have a base to build off of. I also need to make 2 more body mounts for the middle section of the sides(from front to rear). So there isn't a "bow" when it has weight on it.

By the way if you're wondering why i used a torch to cut the gussets its because i ran out of those black cutting wheels for metal. and i didn't want to make the trip to harbor freight to buy another stack. Plus i didn't want to cut my good pieces of metal. i had these small rectangular pieces of metal from that body lift kit that my neighbor gave me. I didn't plan to use them but they are the perfect height to use on this application so i just figured why waste them.
Just need to grind them down a bit and sand them smooth again where the molted metal dripping solidified.

Last edited by Redeth005; 09-28-2015 at 11:07 PM.
09-30-2015, 06:56 PM
#20
Registered User
Thread Starter
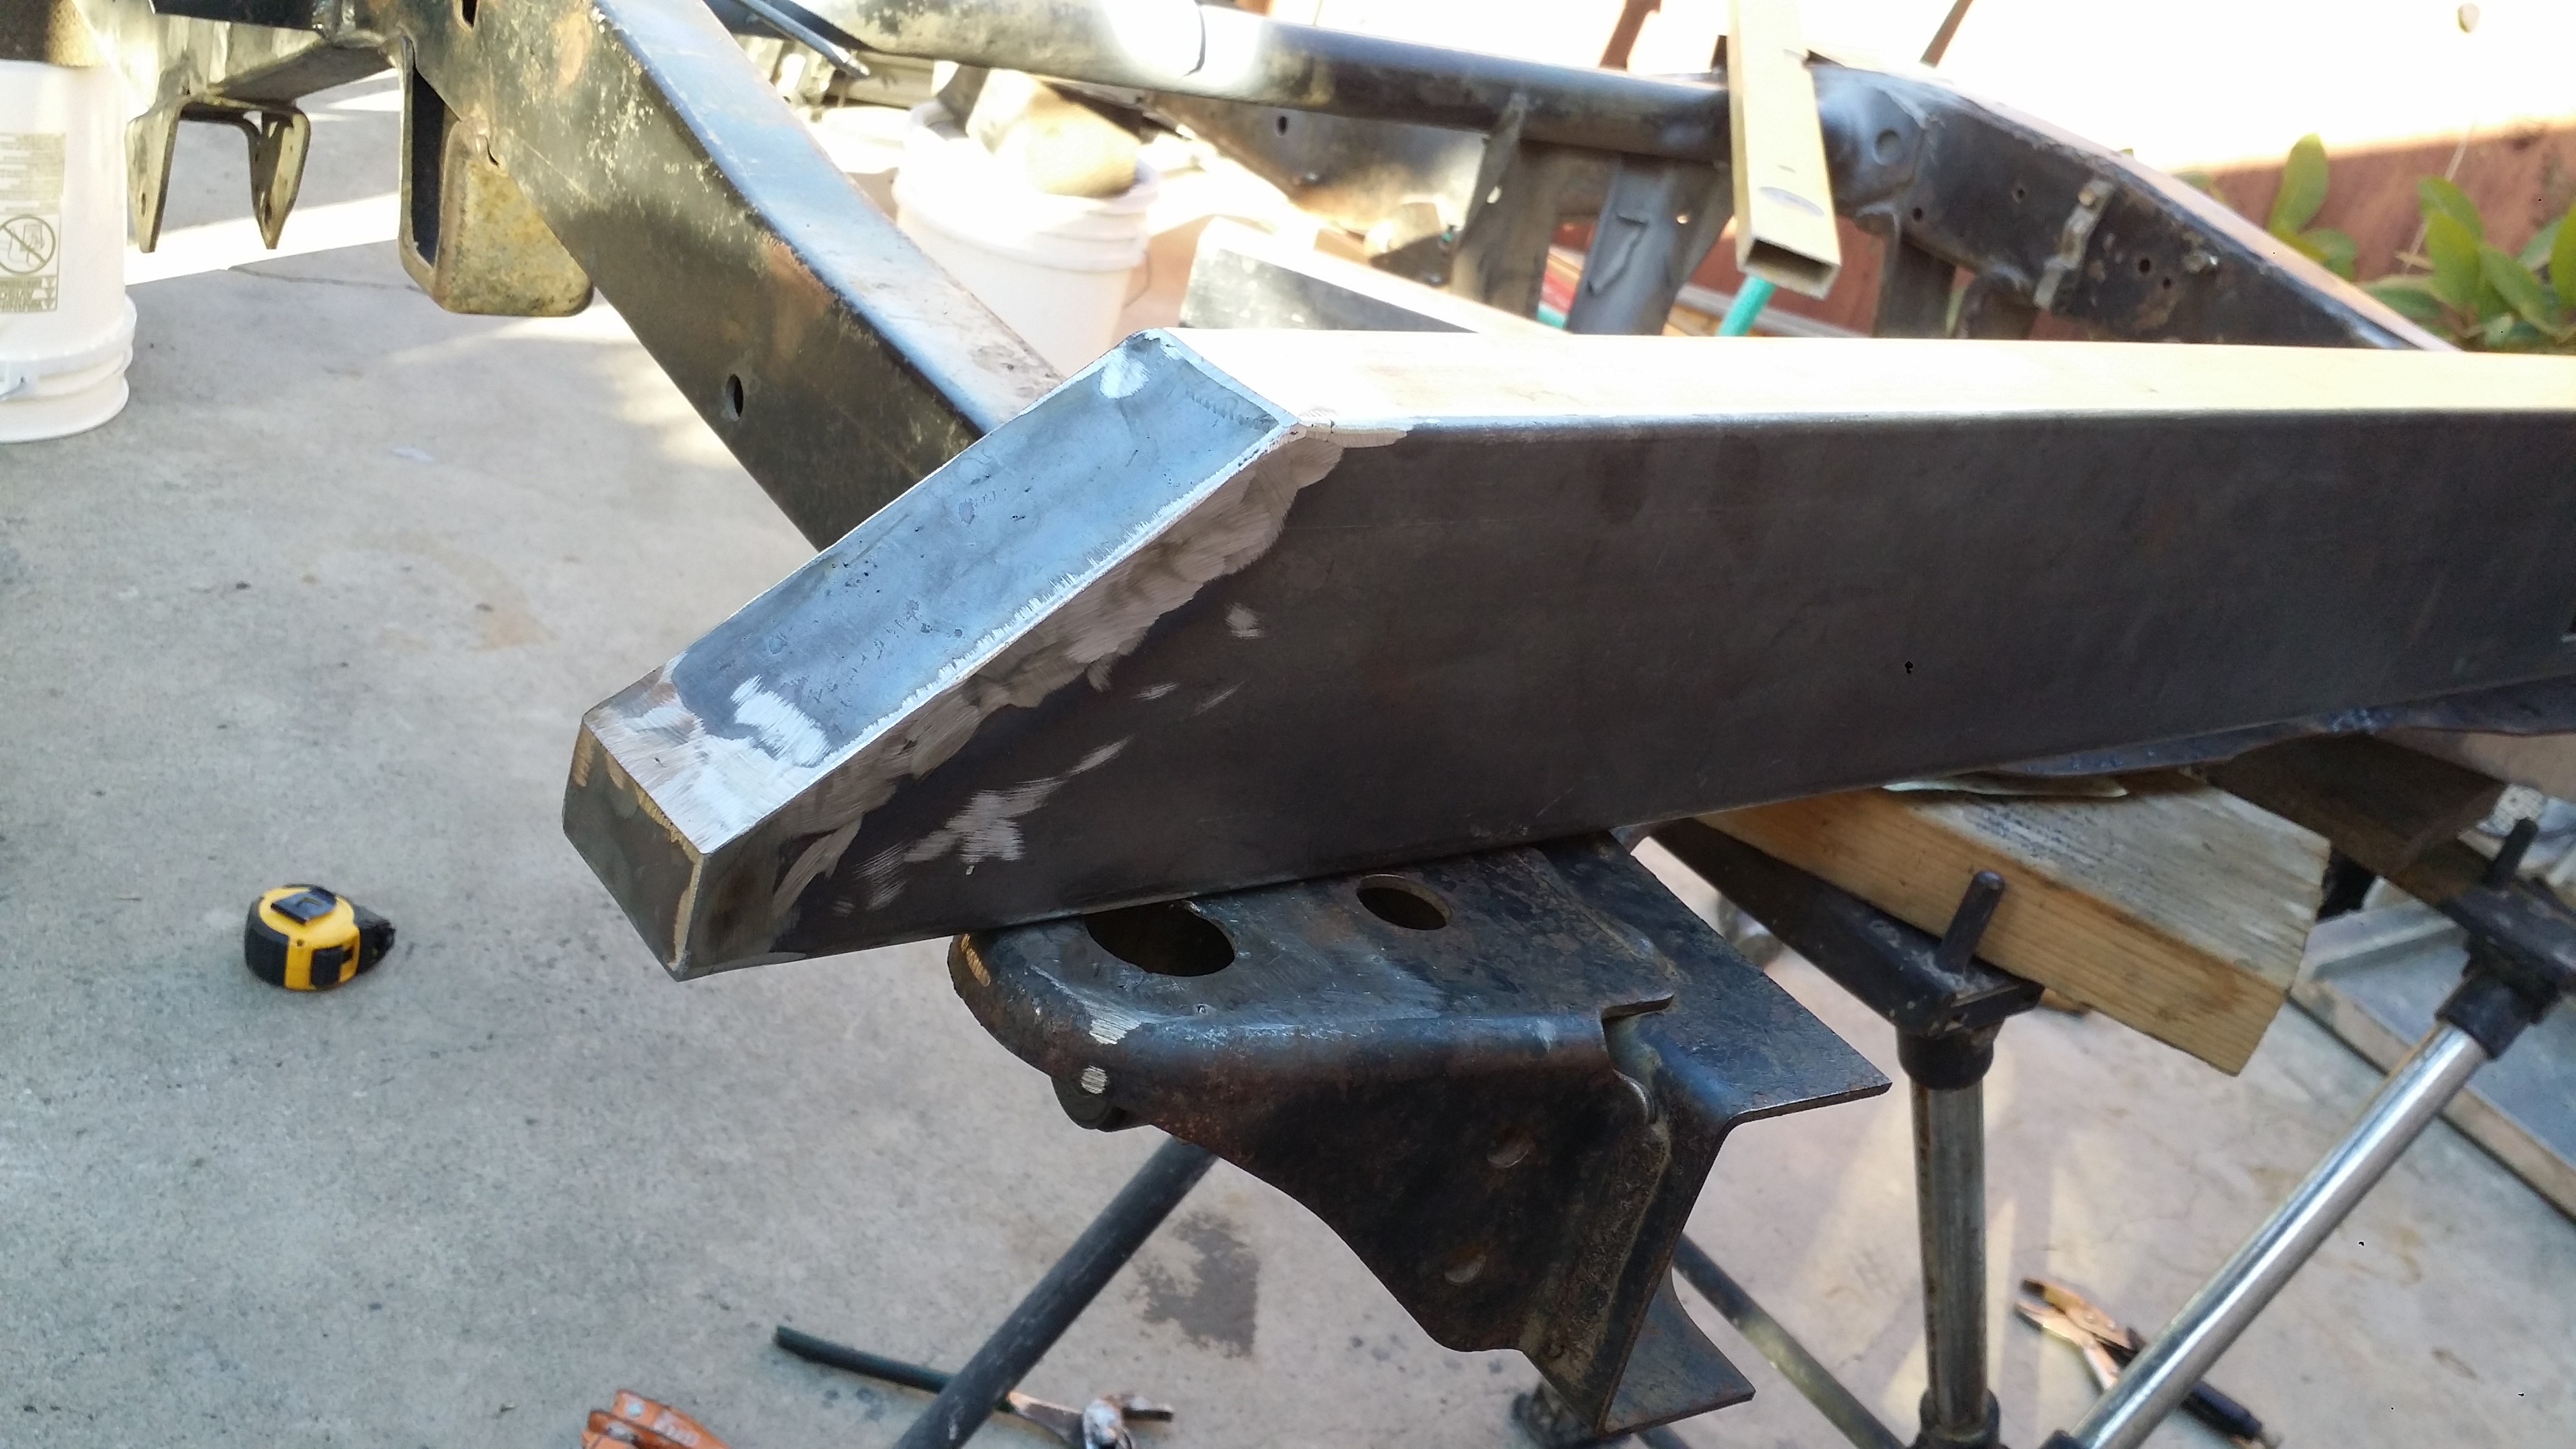
Here are the new gussets on the back side of the first tall body mount towers i made the other day.
Time to begin the smaller (middle) body mounts.
All cut out:
Squaring out the passenger side and making sure these mounts are parallel to each other.
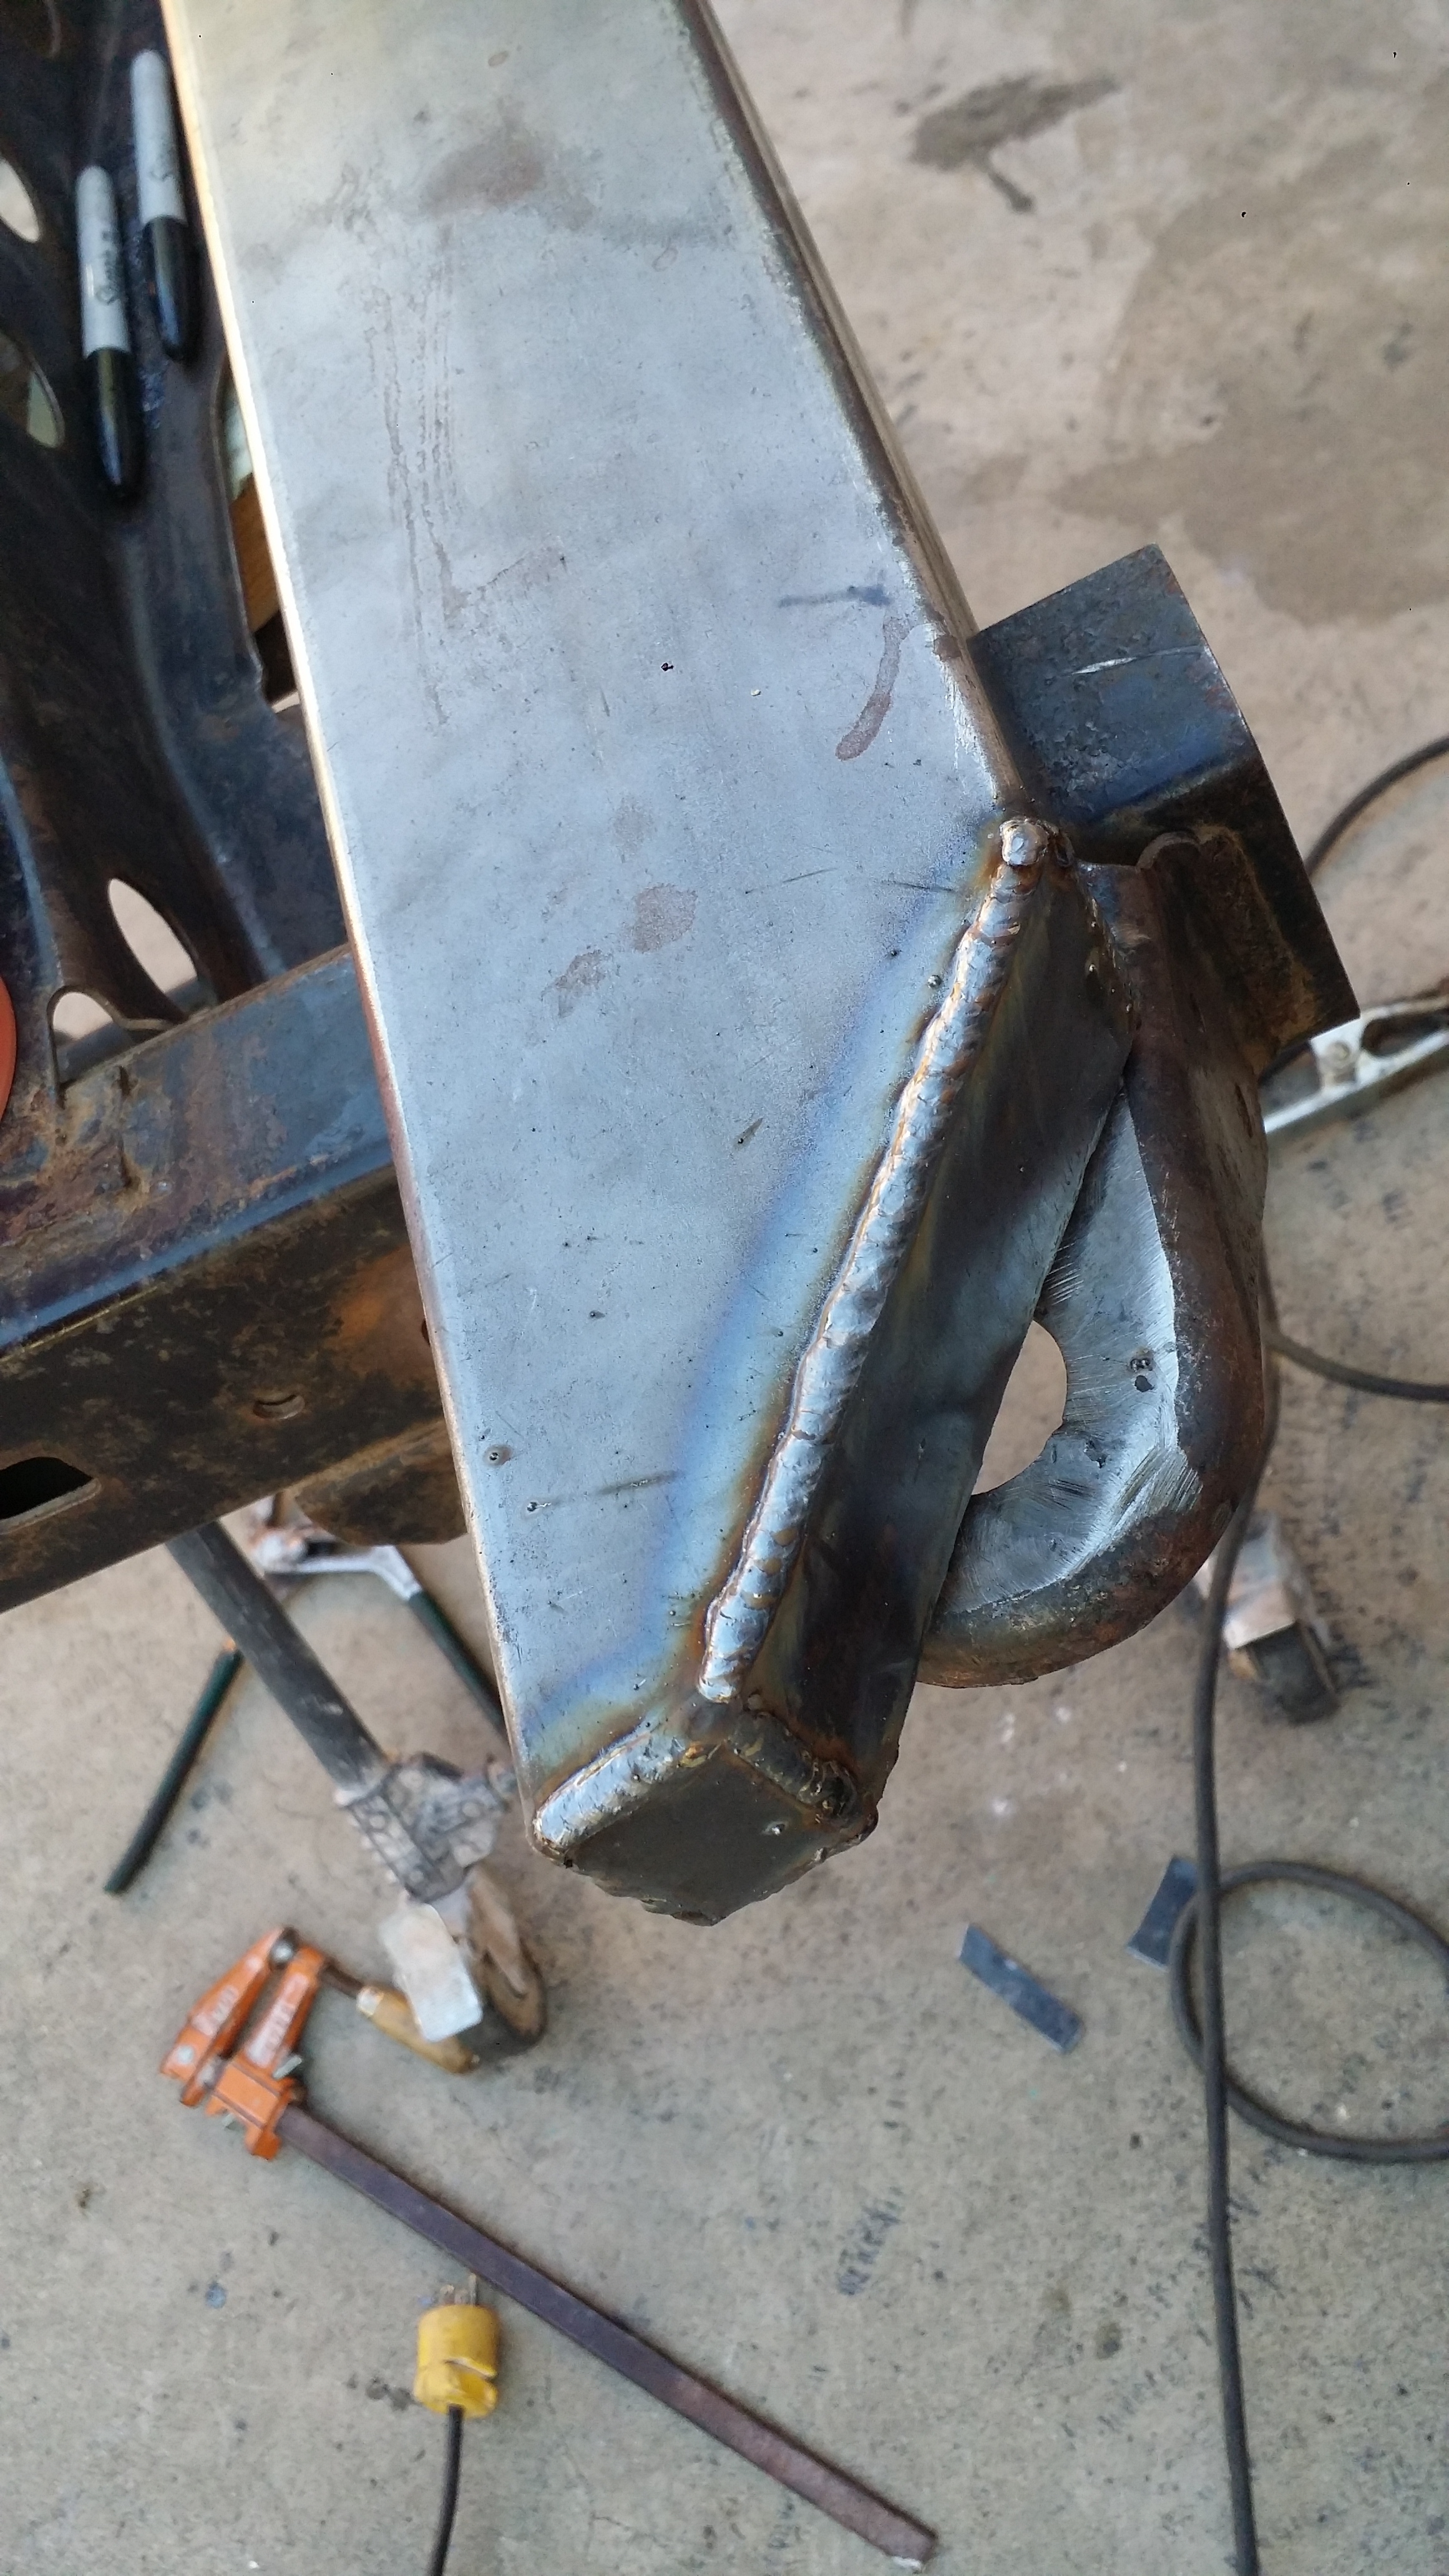
Center mounts nicely welded into place.
Welds are starting to look a lot better! I just needed practice.
You cant see here but i have both the inside and outside parts of these mounts welded for a much more secure mount.
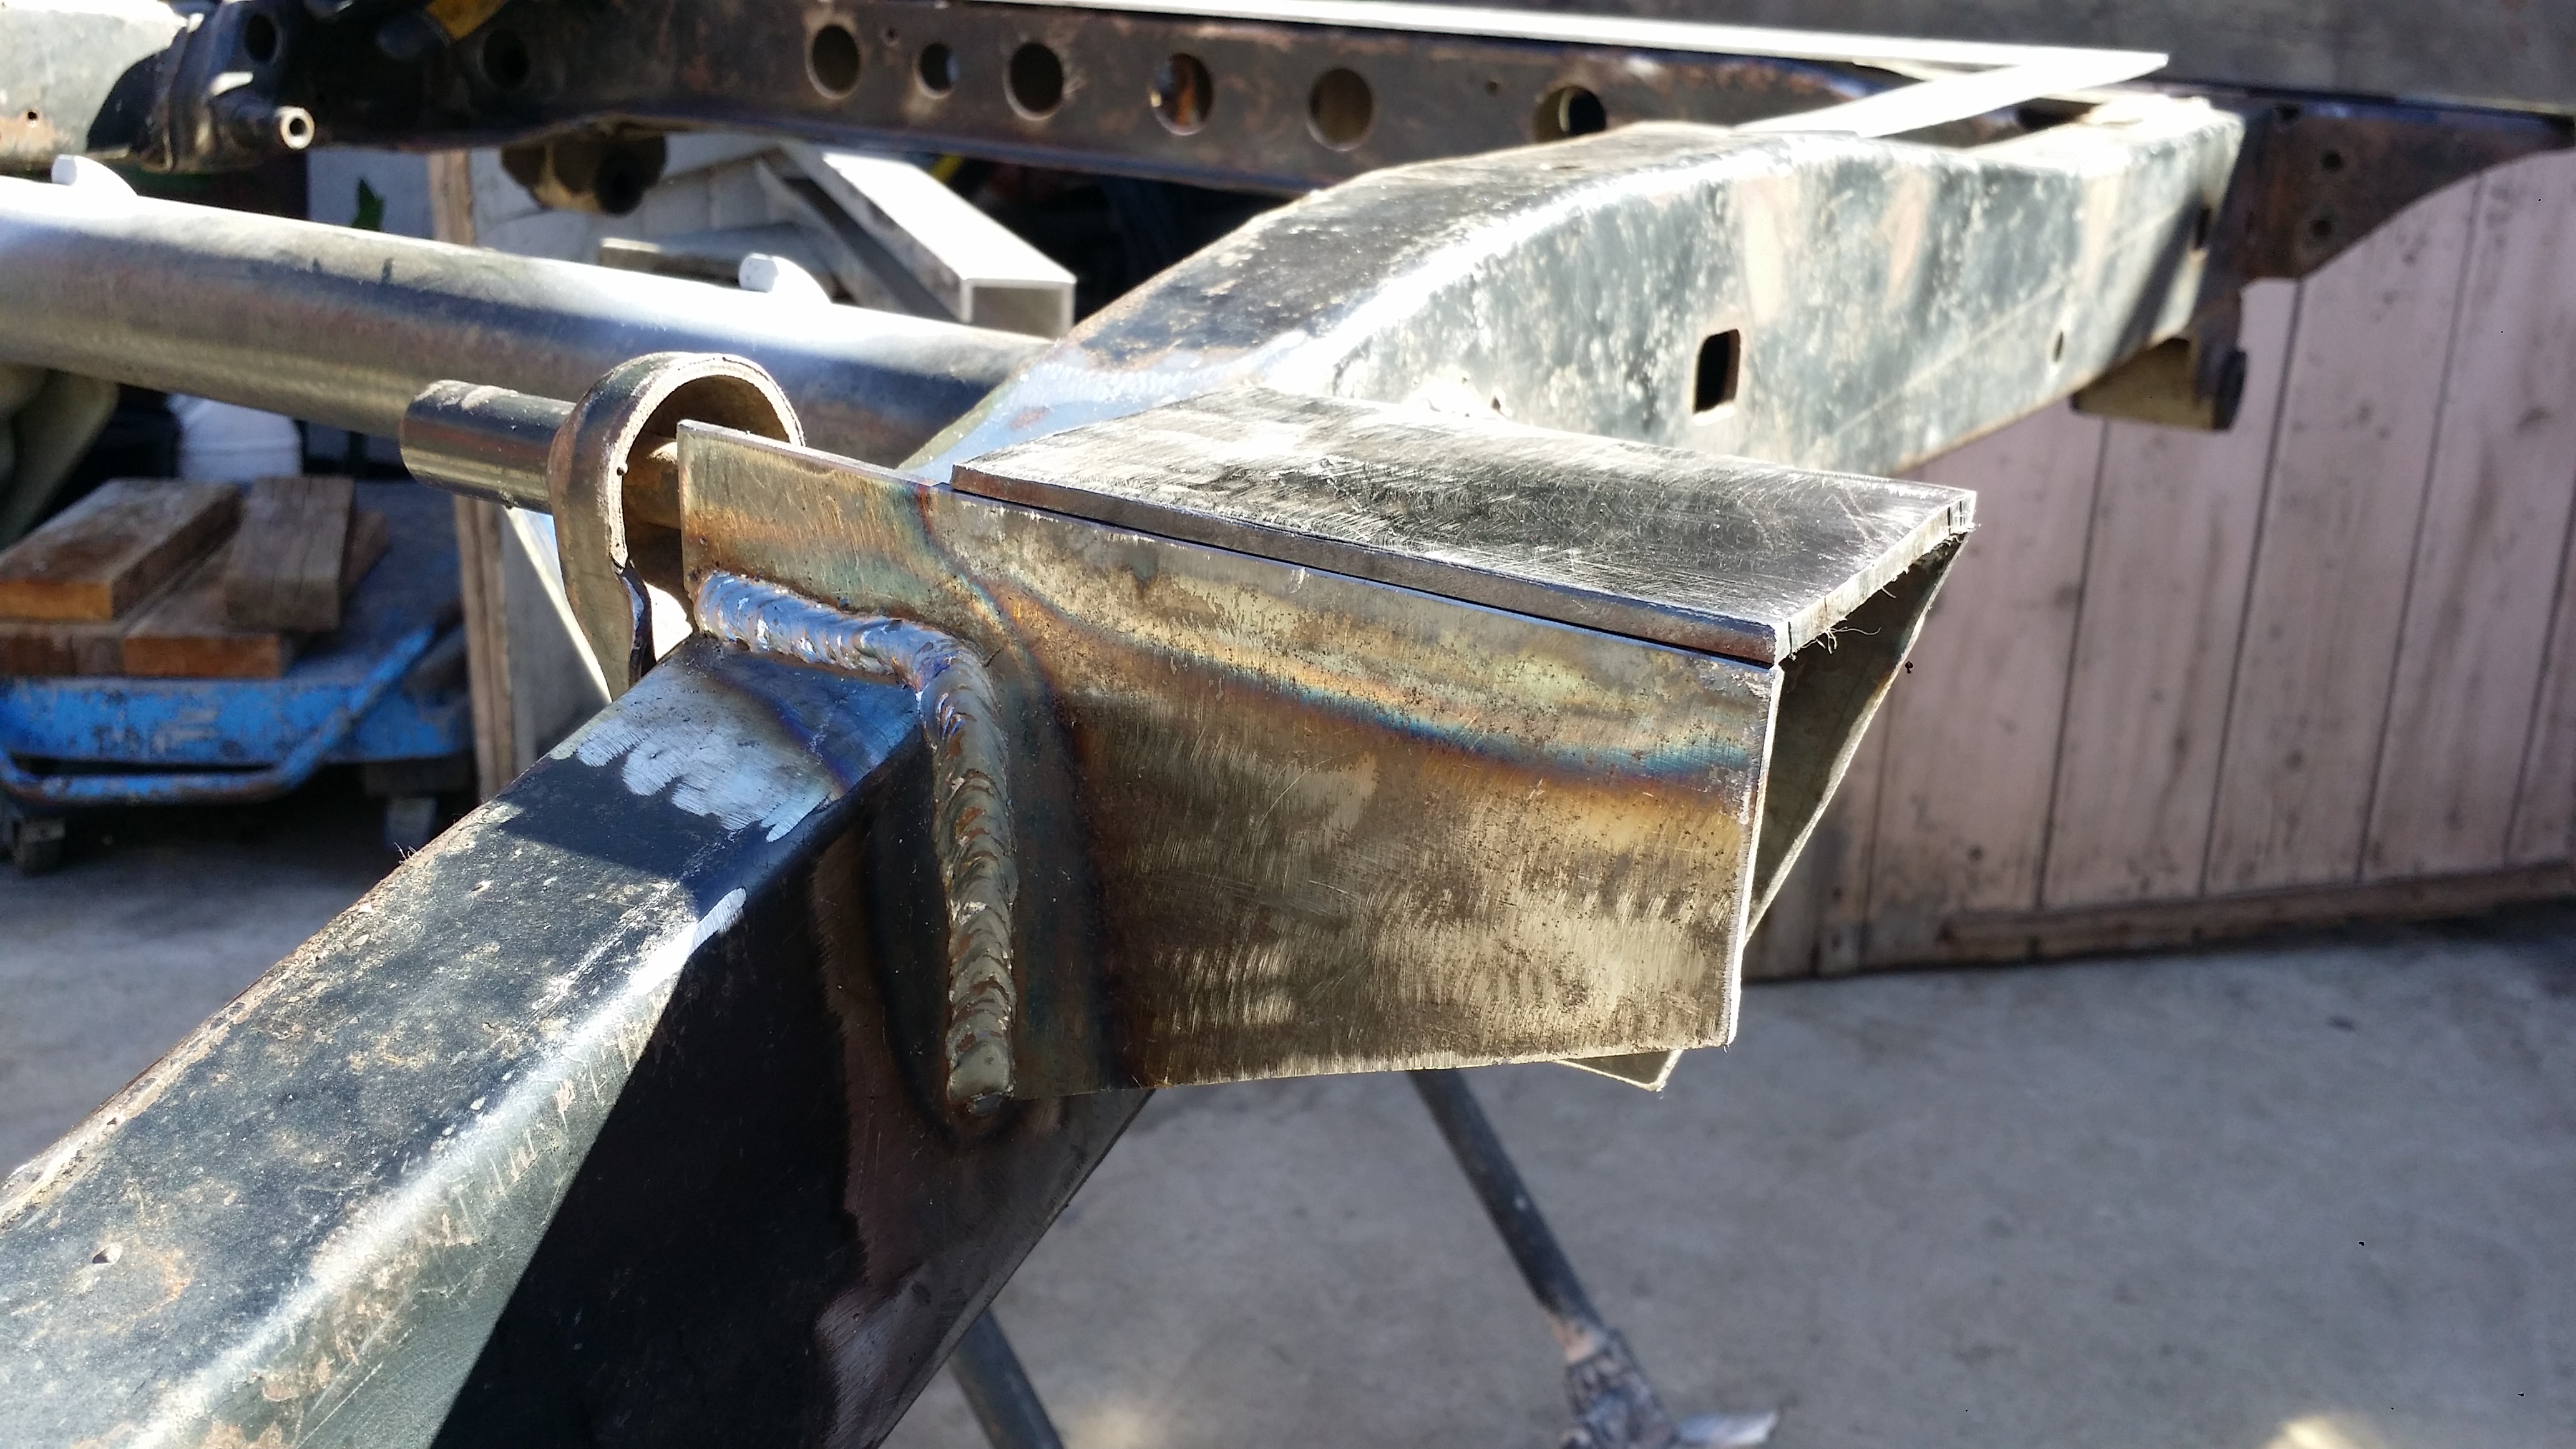
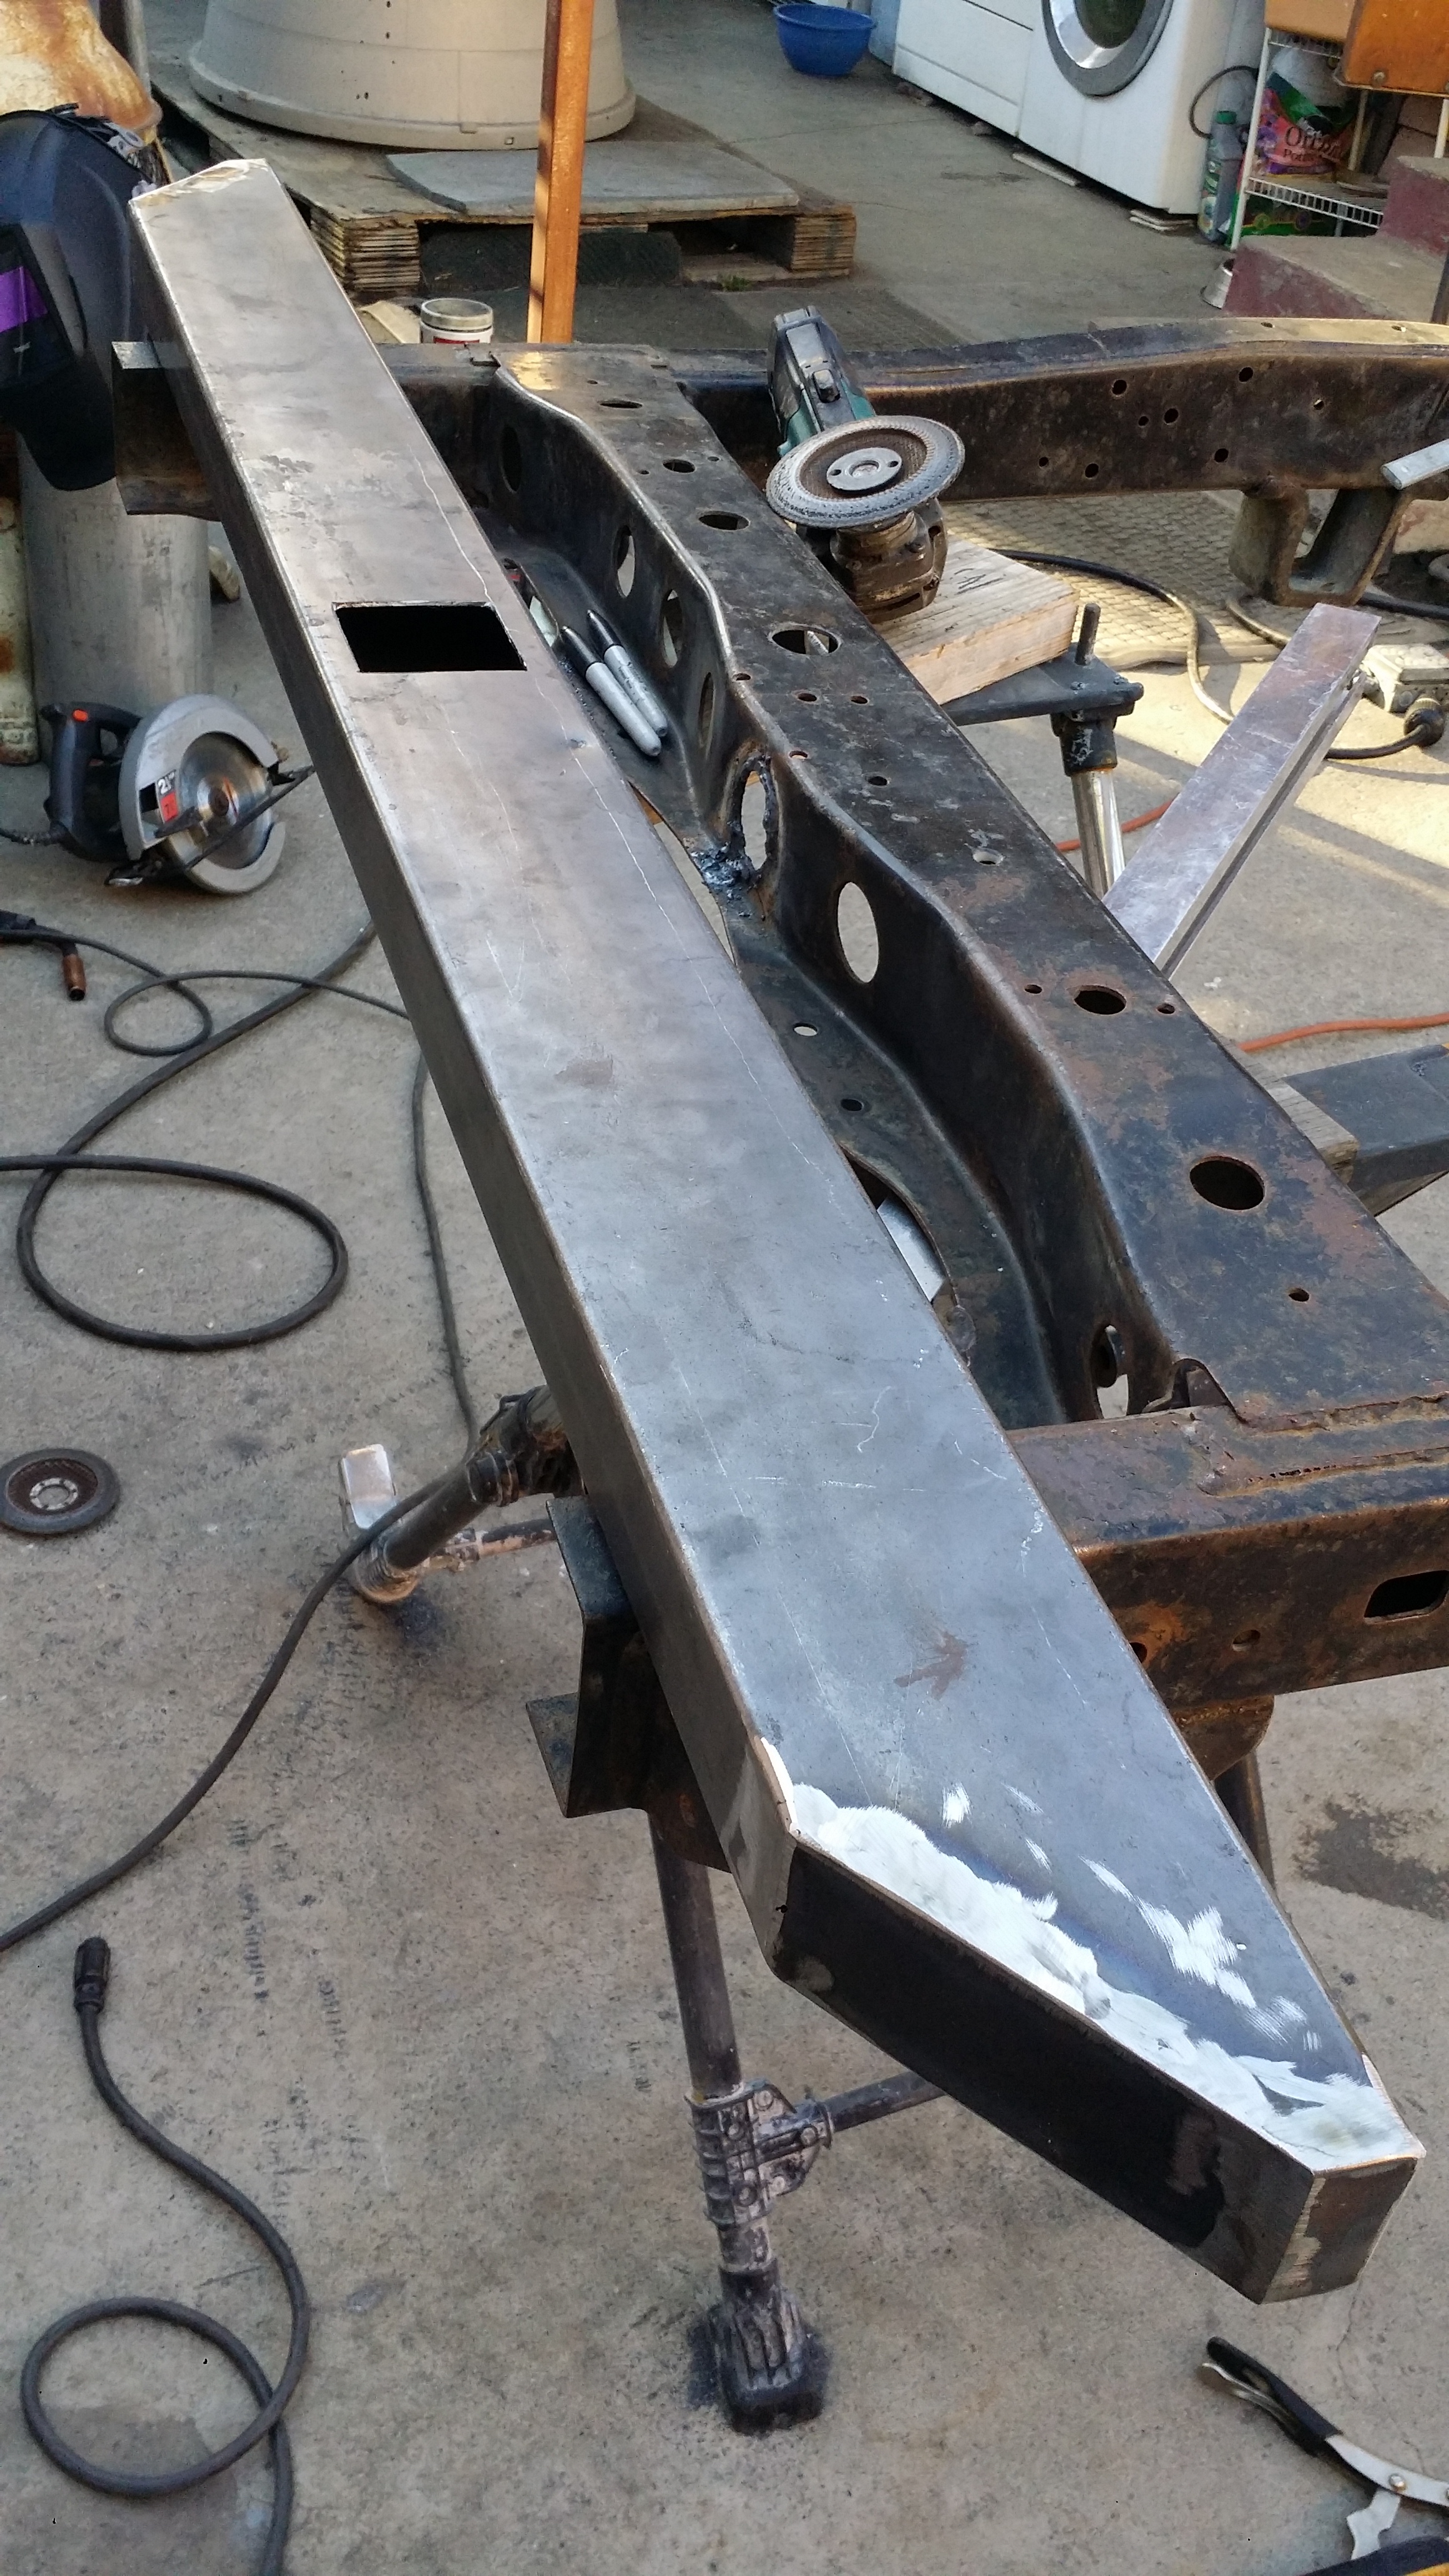
Ends of the bumper have been capped now. Welds came out okay but unfortunately i wasn't prepared to weld on such thin metal so the welds came up a bit more elevated the i would have liked. So i had to grind down the welds and just give it clean angles. I would have liked to just leave it as is but it wouldn't have looked so good.
Looks hella clean now!
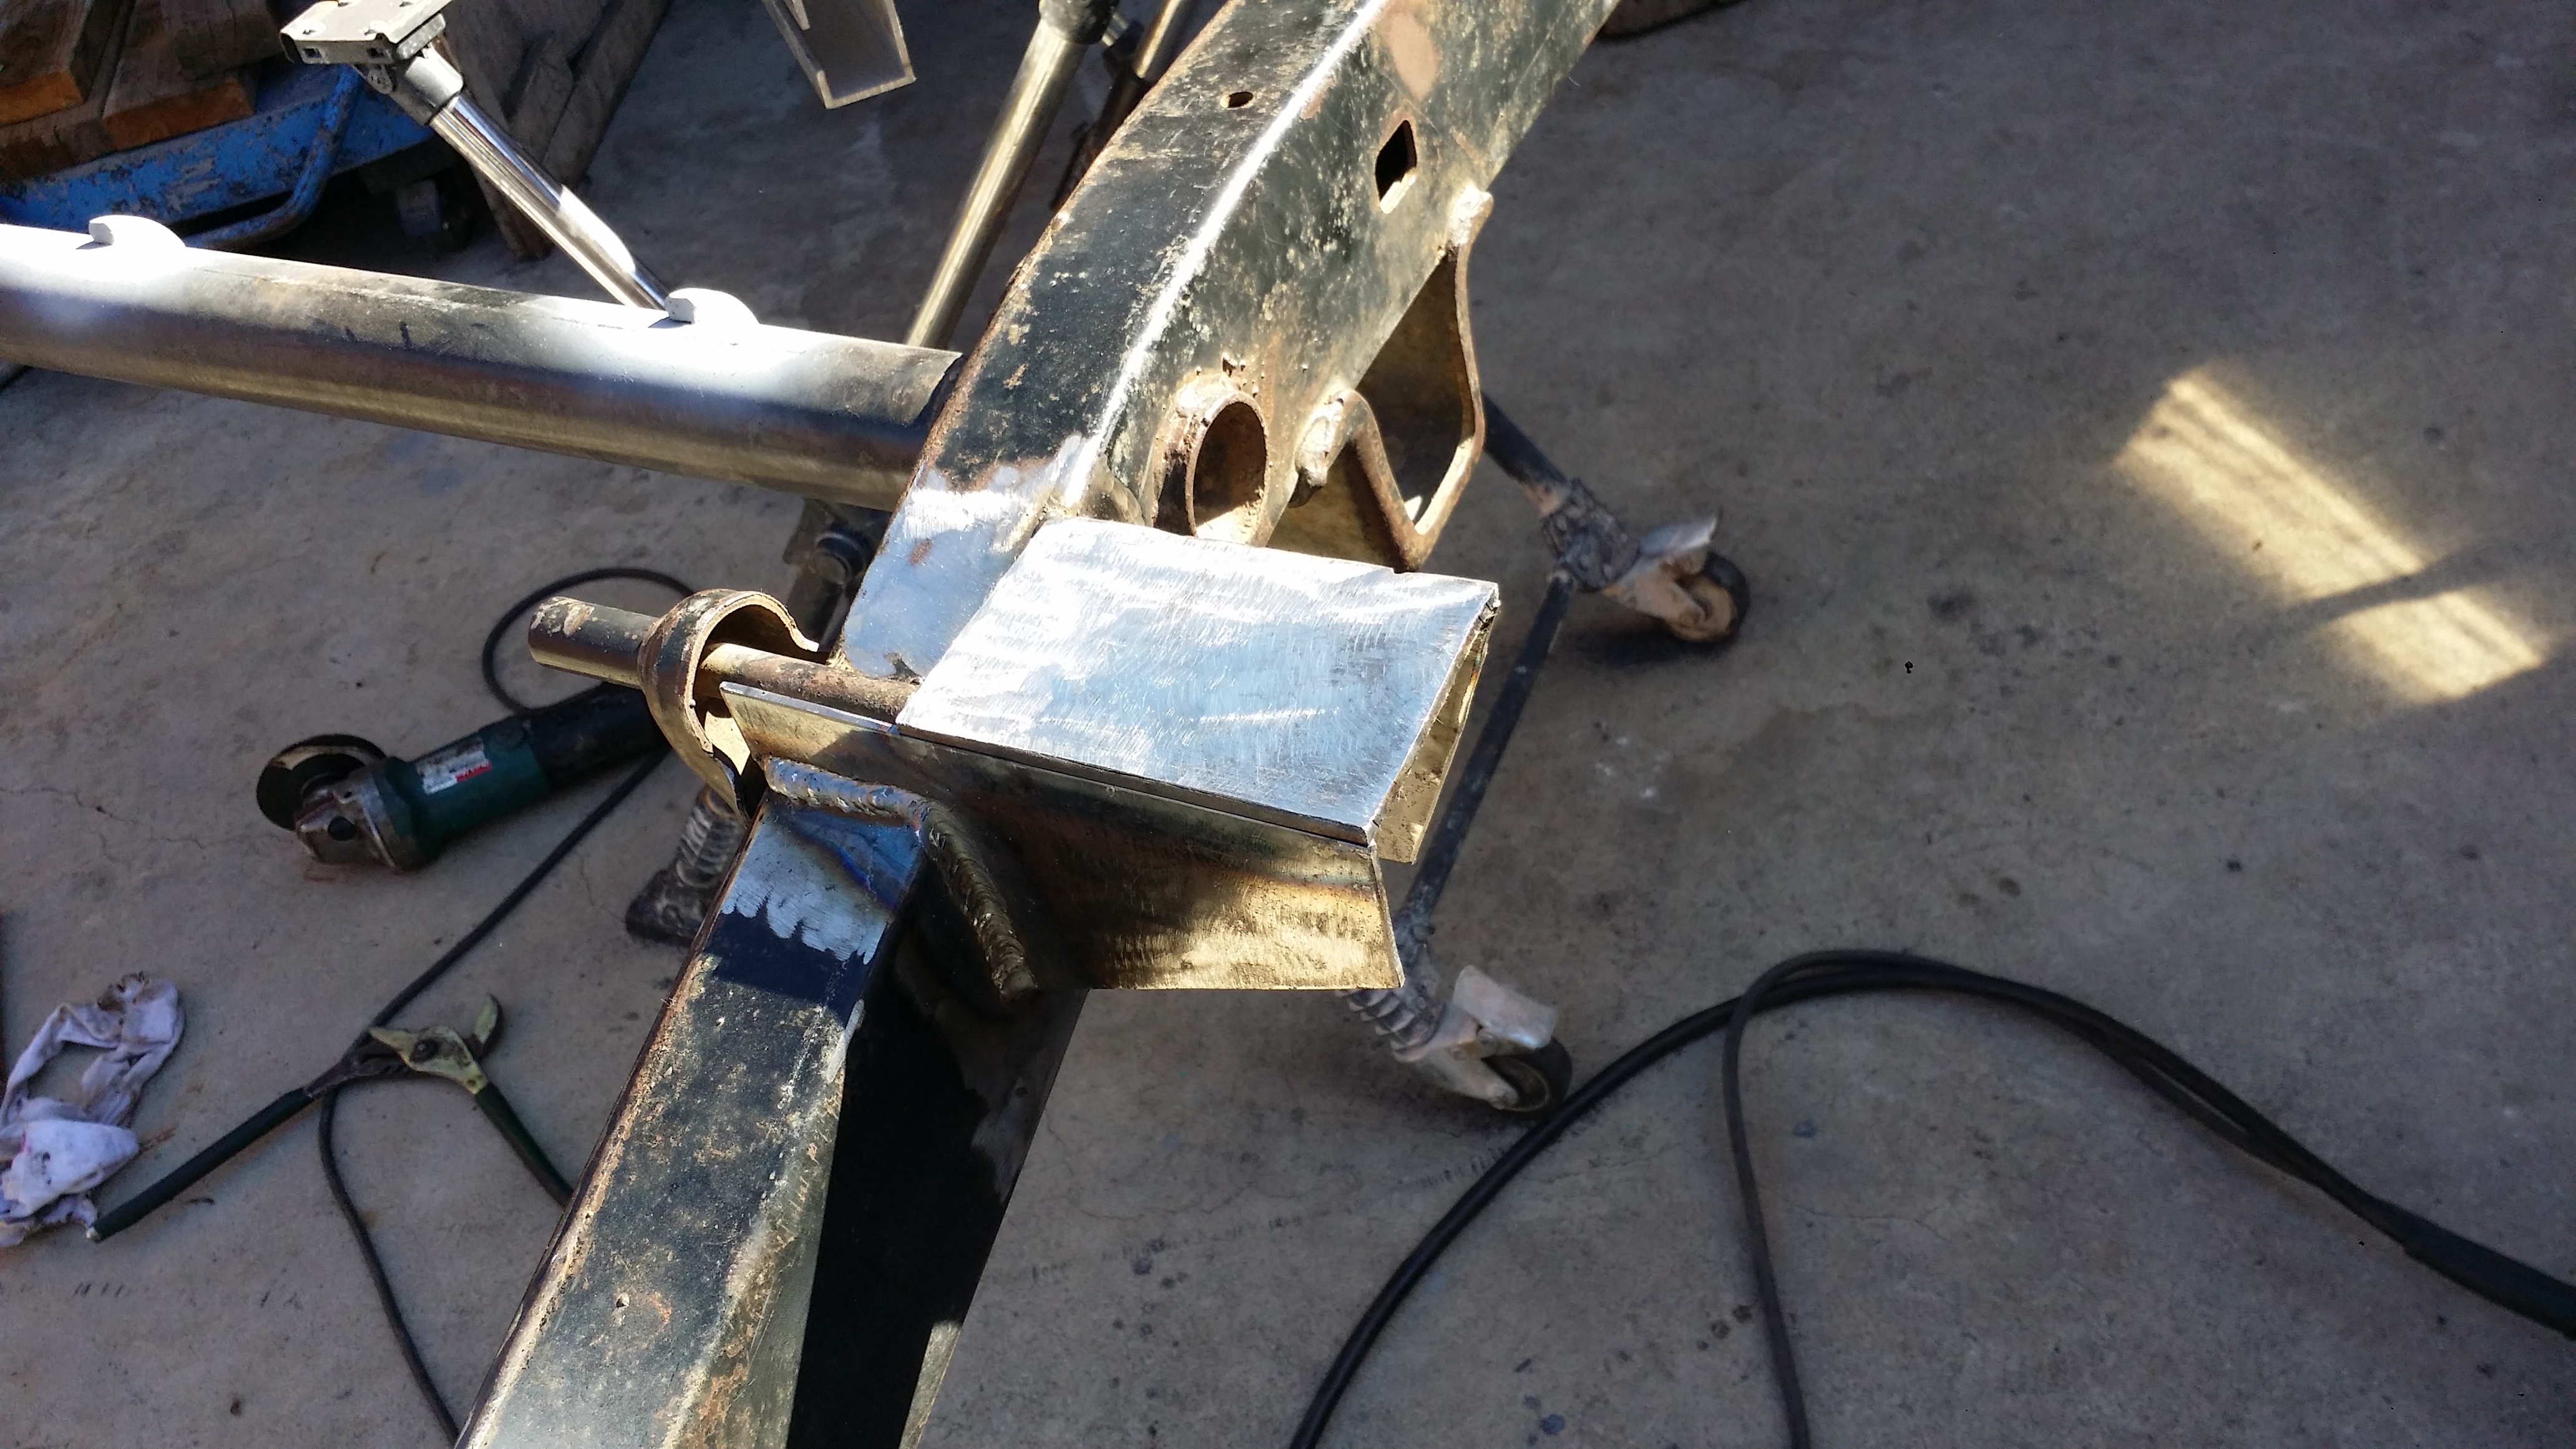
Wooo bumper is finally mounted onto it's permanent place on the frame! After this I need to add a simple rear hitch then begin on the trailer tongue.
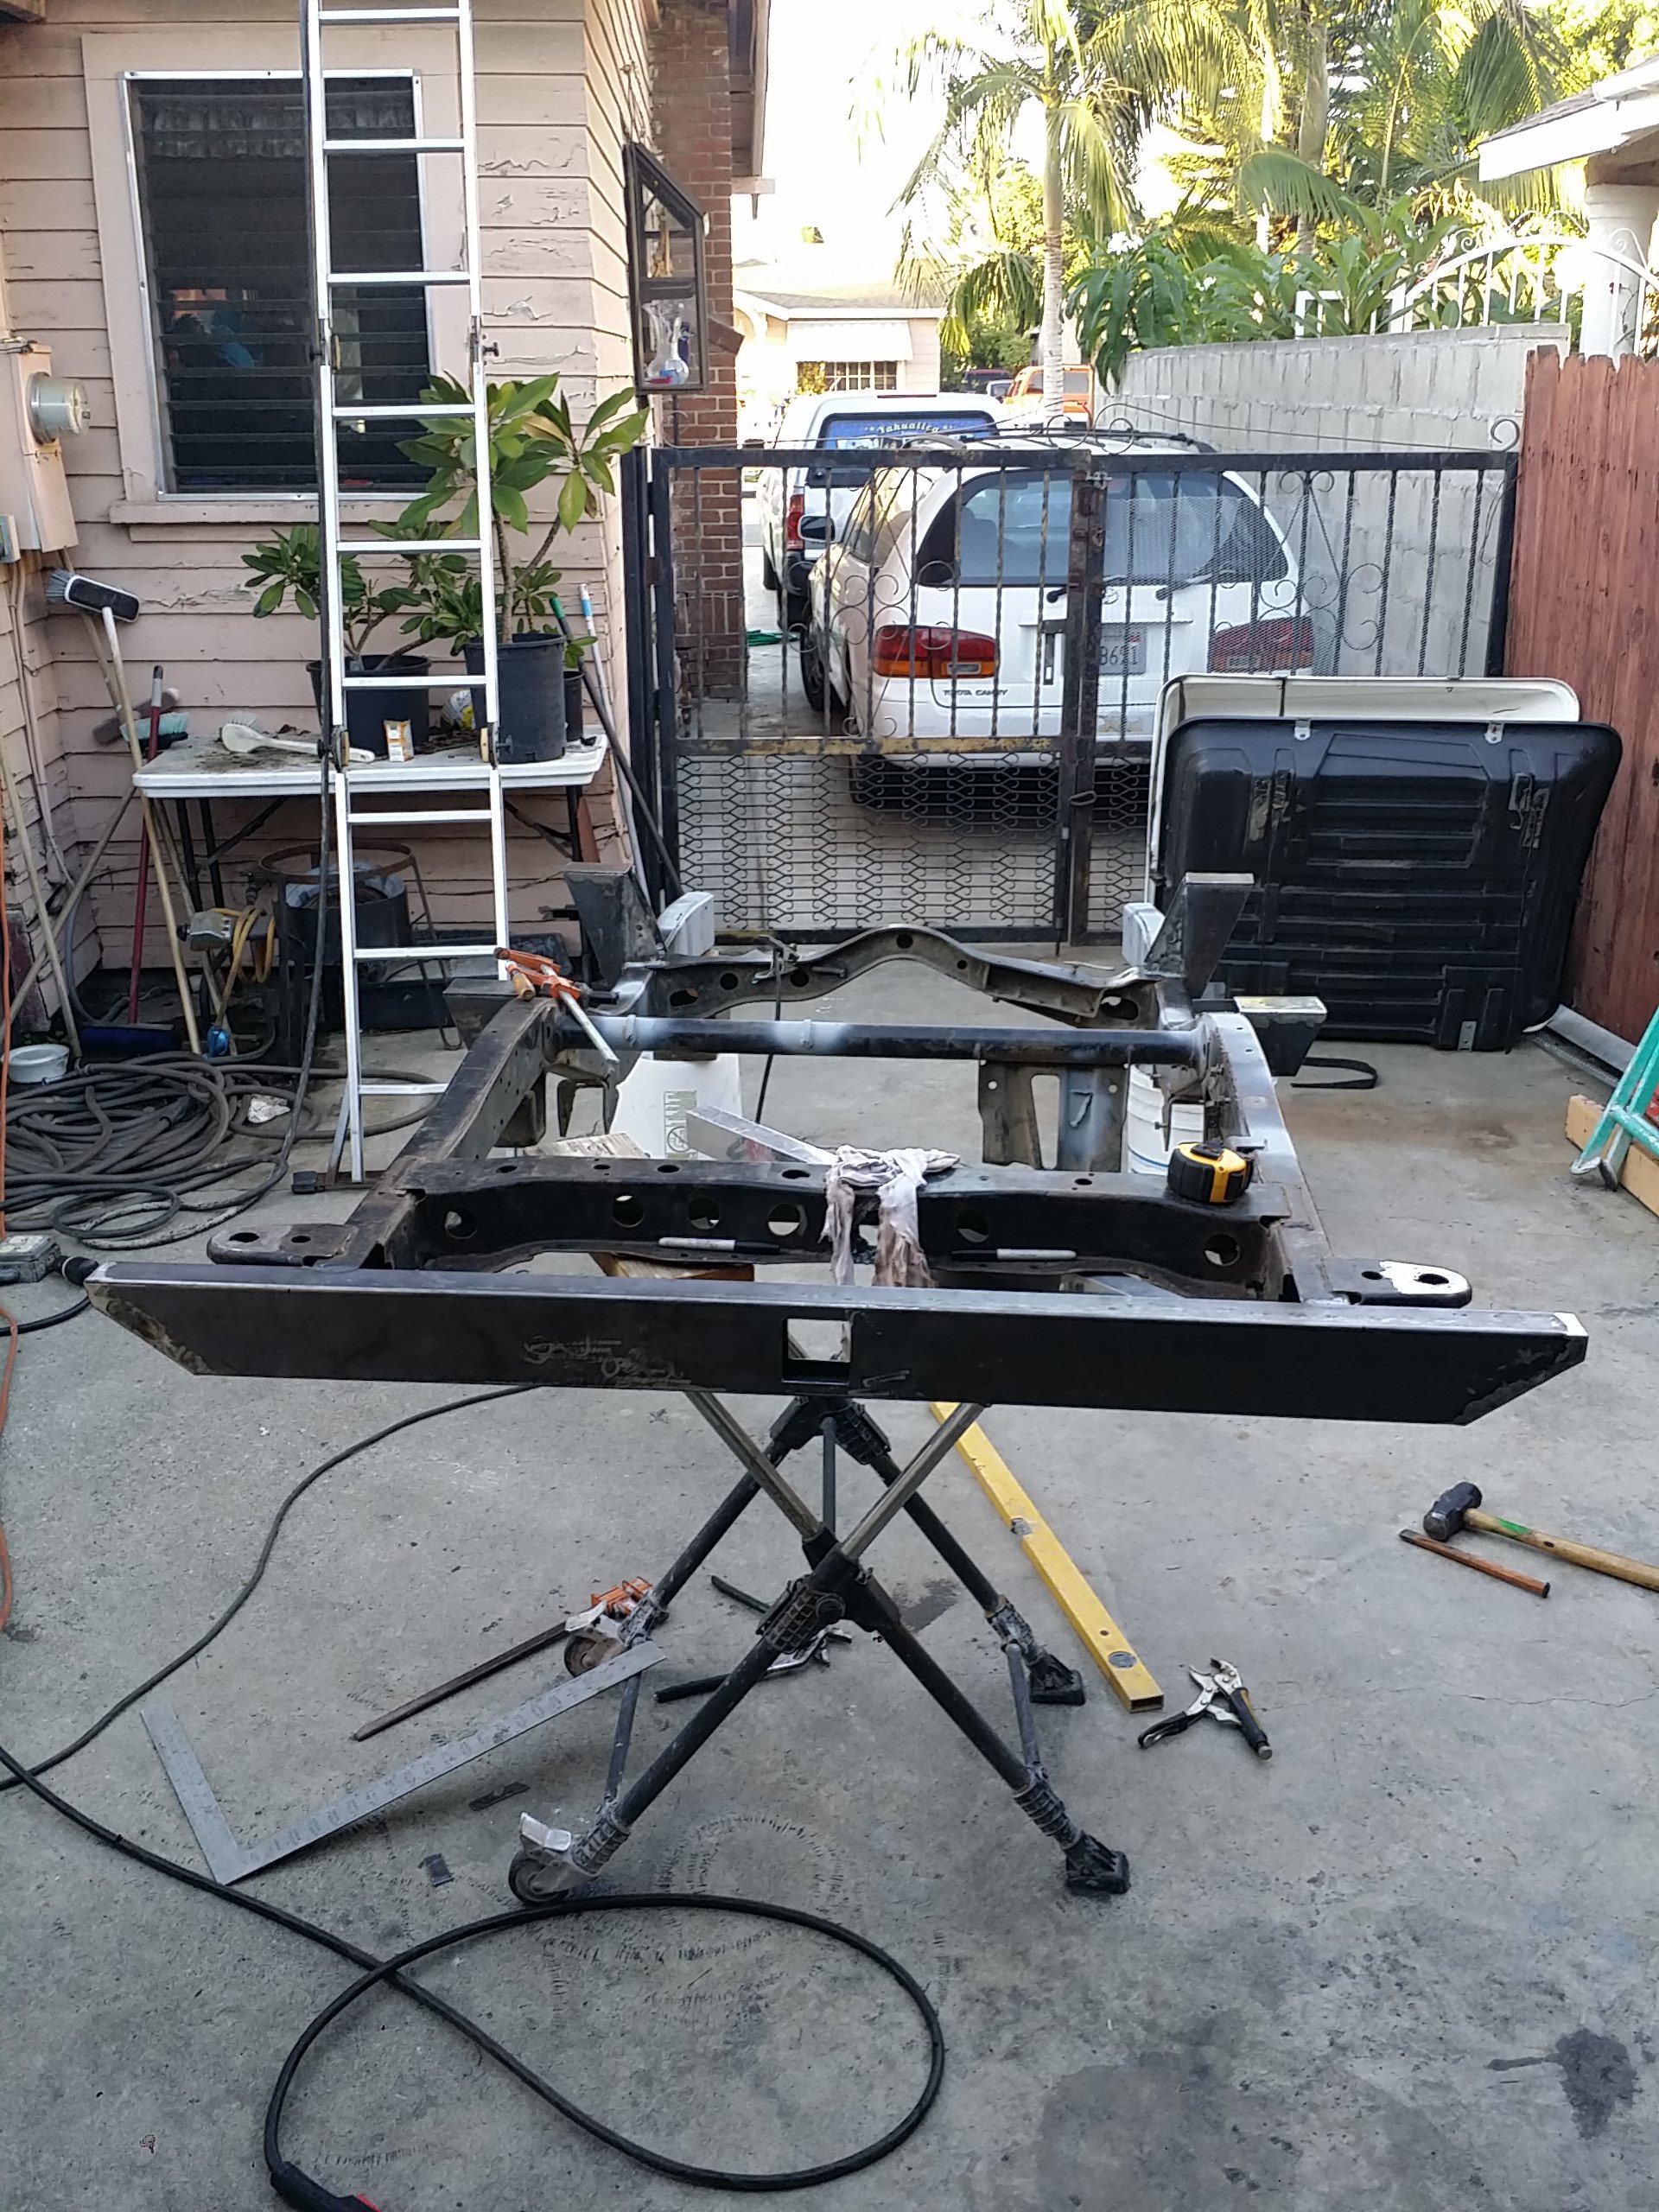
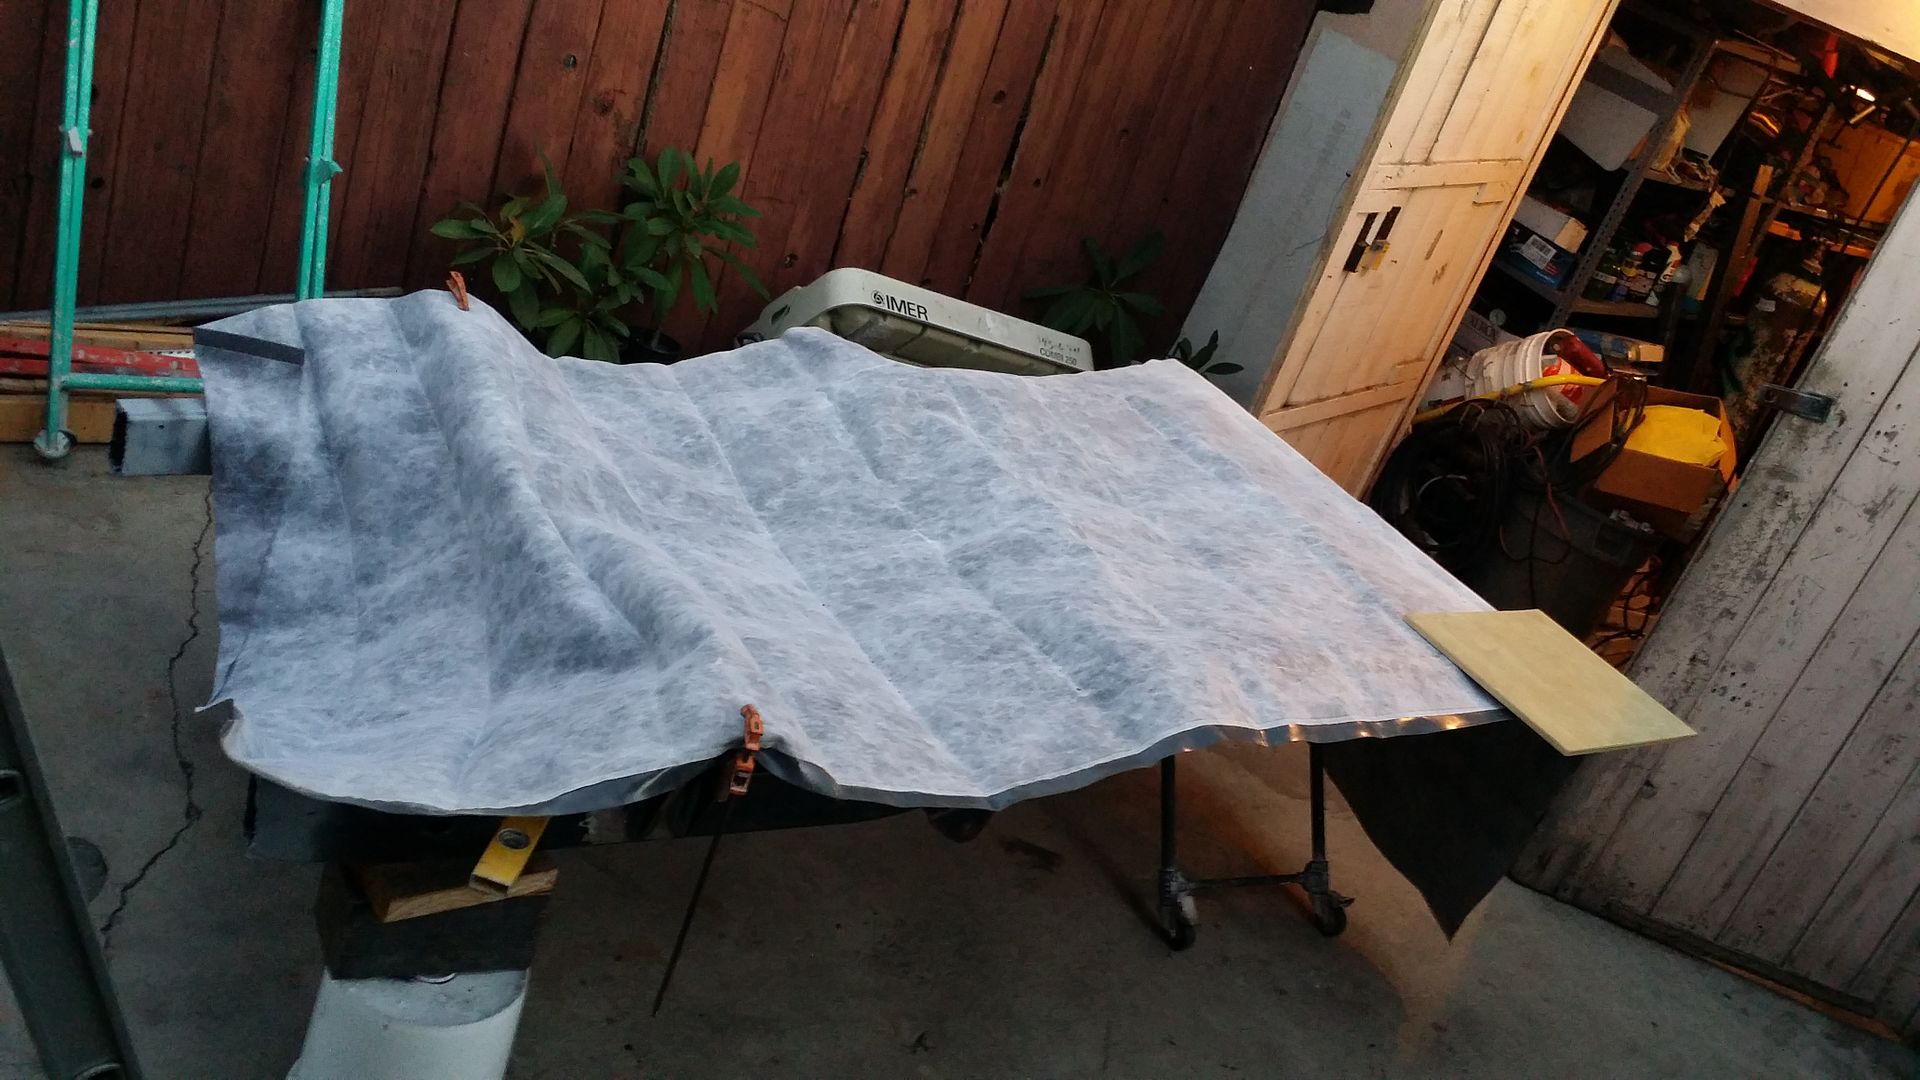
I'd like to buy a few cans of primer tomorrow and start priming most of the frame to prevent surface rust from forming. For now this rubber under lining membrane for waterproofing showers will do just fine
That is all for now.


Time to begin the smaller (middle) body mounts.
All cut out:


Squaring out the passenger side and making sure these mounts are parallel to each other.

Center mounts nicely welded into place.

 Welds are starting to look a lot better! I just needed practice.
 You cant see here but i have both the inside and outside parts of these mounts welded for a much more secure mount.


Ends of the bumper have been capped now. Welds came out okay but unfortunately i wasn't prepared to weld on such thin metal so the welds came up a bit more elevated the i would have liked. So i had to grind down the welds and just give it clean angles. I would have liked to just leave it as is but it wouldn't have looked so good.

Looks hella clean now!


Wooo bumper is finally mounted onto it's permanent place on the frame! After this I need to add a simple rear hitch then begin on the trailer tongue.

I'd like to buy a few cans of primer tomorrow and start priming most of the frame to prevent surface rust from forming. For now this rubber under lining membrane for waterproofing showers will do just fine

That is all for now.
Last edited by Redeth005; 09-30-2015 at 07:02 PM.


