Toyota Fiberglass - 1979-1983 Shortbed Review
 05-15-2014, 12:44 PM
#1
Toyota Fiberglass - 1979-1983 Shortbed Review
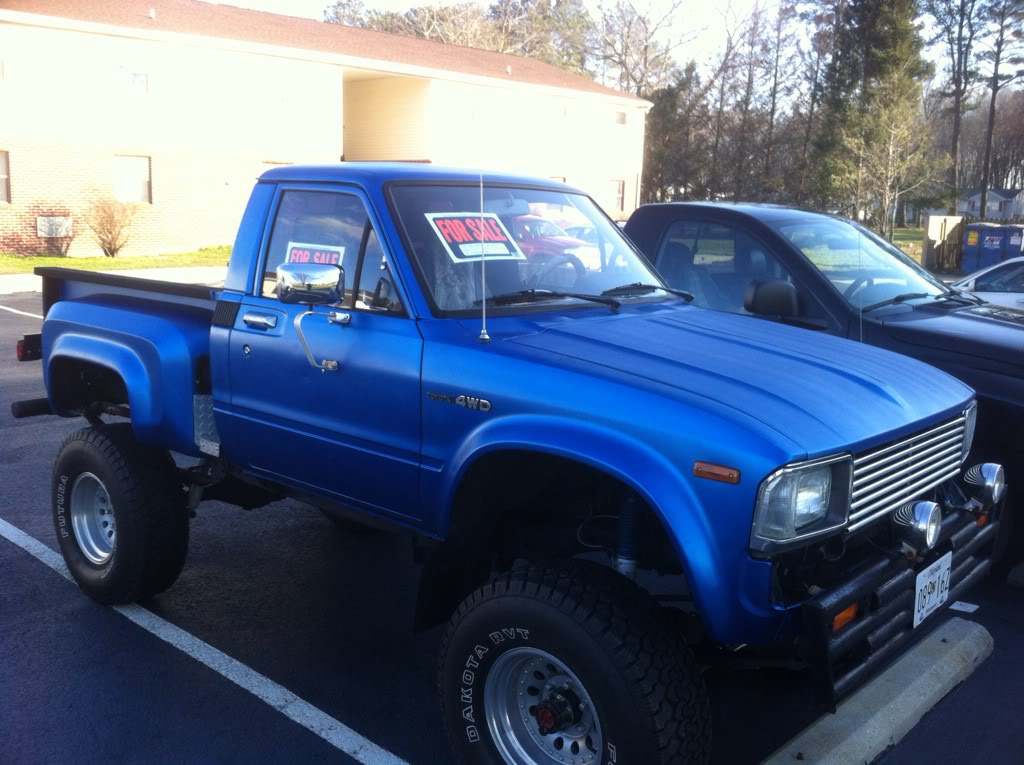
As promised guys, I'm going to do a quick review on the fiberglass bed that I bought from Corey (Slacker) at ToyotaFiberglass.com (Precision 4x4). Keep in mind that I'm not your typical "build a truck to wreck it on rocks and trails" kind of guy. My intended use for my truck will be a semi daily driver, trips to the beach, hunting, light very low risk off-roading and other things of that nature. I've always wanted one of these First Generation Toyota Pickups and I have invested a lot of time and money in bringing it back to life so I intend to baby it and keep it looking good for as long as I own it. That being said, here we go:
Cost:
Pros, there are a lot:
Cons, now the bad part. I'm not here to simply praise Corey for everything he did right since that wouldn't help you guys out, but there are a couple things that I would have asked him to do differently.
Annnnnnd here are some pictures, I'm sure I'll add more as I progress:
From BC Canada:
To Maryland, USA:
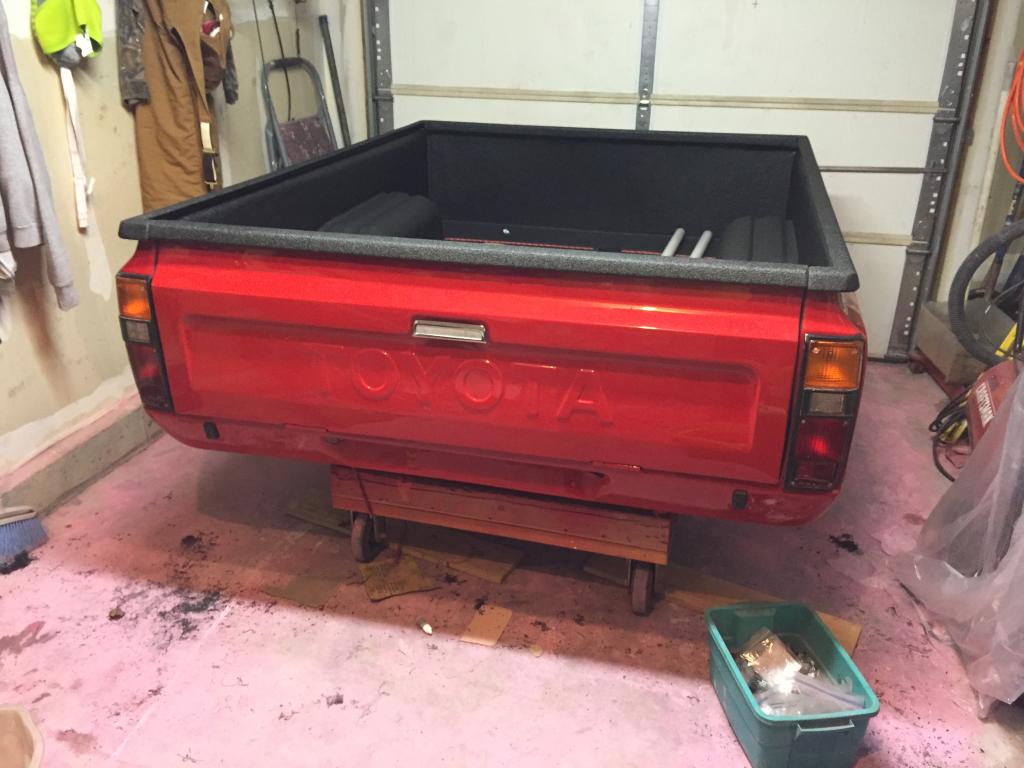
Uncrated:
What waves??? I'm thinking that maybe Corey doesn't see straight...
yep, no waves...

Ok...so maybe this wasn't a "quick" review...
Scope out my build thread to see more about finishing the truck that features this bed at:
https://www.yotatech.com/forums/f197...-build-264229/
Cost:
- Guys and gals, you get what you pay for. When you spend $500 on an old original steel bed then you'll likely get $500 worth of rust and spend hundreds (if not thousands) of dollars and countless hours getting it to an acceptable condition. I searched the entire country almost nonstop for nearly two years for a decent rust free original bed with absolutely no luck at all before I got up with Corey to build a fiberglass bed for me. An original Toyota steel bed would be great, but they come at a price that can't be measured with dollar signs. Even if I found a good original bed, I would likely have rust issues later on down the road since there are clearly flaws in the construction of Toyota beds given the fact that nearly all of the original factory beds are rusted in the same places - along the seams where the skits meet the bedsides, under the bed rails, around the tailgate hinges, at the seam where the wheel wells meet the bed floor, etc. If you have a rusted bed, then it will be in one of those places, if not all at some point. Fiberglass possesses an amazing characteristic...IT DOES NOT RUST! After dealing with all the metal work on my cab and frame, I was sold on doing the fiberglass bed. Unless you are an expert metal worker, you would feel the same way. With all that considered, the extra cost for a fiberglass bed was justified for me by negating the future headaches of dented steel, rust and bodywork. Here's the breakdown of the bed cost for those of you who were wondering:
- $1,895.00 --> Shortbed Box
- $450.00 --> Tail Gate
- $80.00 --> Tail Gate Hinge Core
- $29.95 --> Hardware Kit (For flares, taillights, bed mounts, markers, etc)
- $40.00 --> Fuel Door and Lock
- $100.00 --> Tailgate Hardware (Handle, latches, strikers, etc)
- $500.00 --> Freight
- $68.00 --> Crate
- $80.00 --> Customs
- $3,242.95 --> TOTAL
Pros, there are a lot:
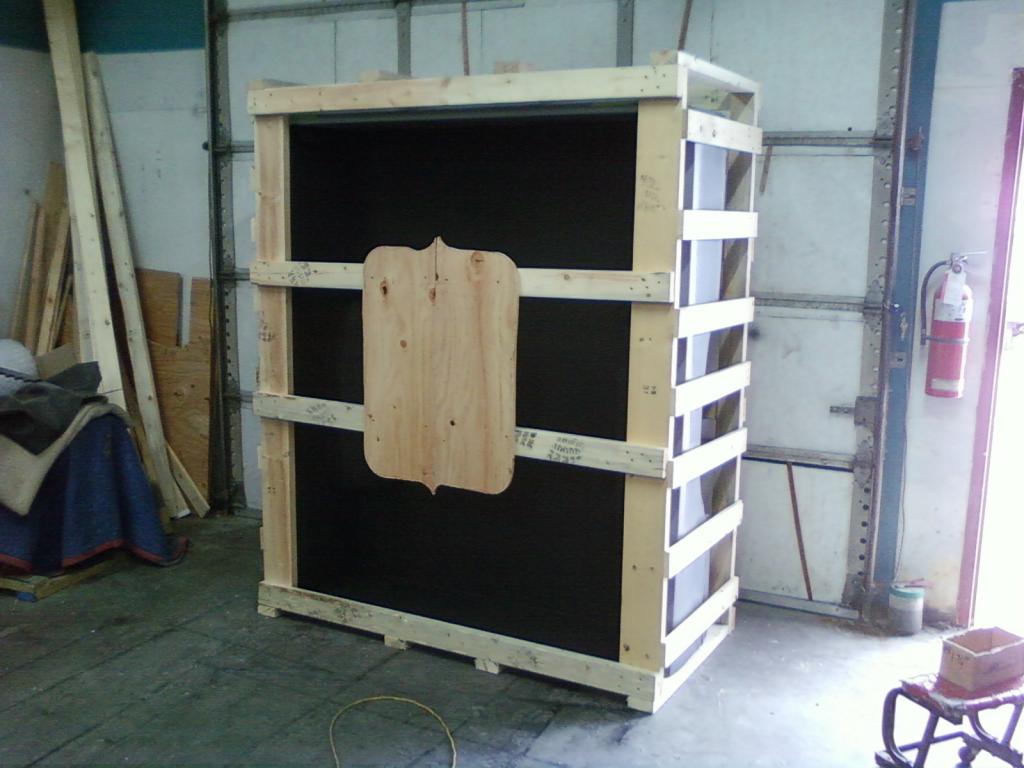
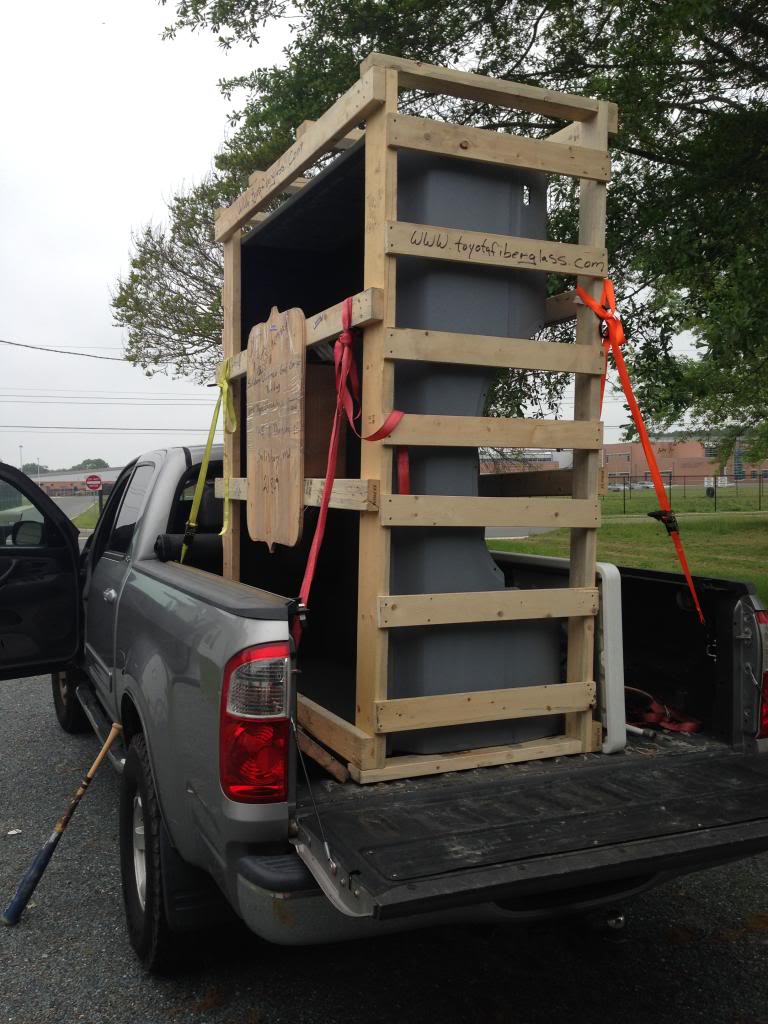
- Shipping - rather quick considering the distance. This bed traveled over 2,800 miles in less than 10 days and arrived on time in excellent condition. Only shipping damage was a little bit of the epoxy rubbed off from moving a little in the crate, but that's nothing to me. Corey crated it up very well using about 25 lbs of screws - the crate would certainly rust away before it ever rotted! Corey also handled all of the customs for me as well.
- Light weight - The bill of lading had it weighing in at 380 lbs crated. I'm guessing that after I removed all the lumber and the 25lbs of screws that it probably comes in around 350lbs. I'm not sure how much a factory steel bed weighs, but it seems like the fiberglass bed would likely be lighter or similar. The trucker, my friend and I were able to push it off the freight trailer directly onto my truck backed up to the trailer and then my friend and I were able to get it off my truck and into the garage with no problems.
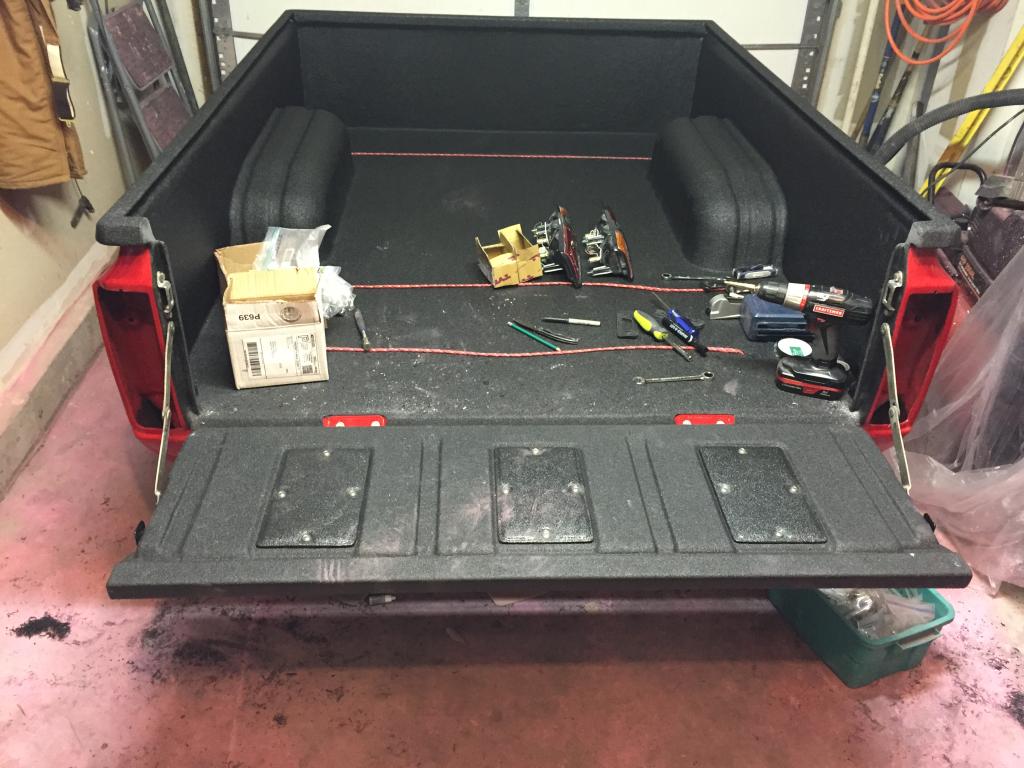
- Bed floor - the bed floor is a flat and NOT corrugated like your typical bed floor. To me, this is a plus since I'd much rather have a flat bed floor over corrugated for looks and since it isn't going to be abused I don't care as much about the strength that corrugation provides. Corey can explain the construction and strength side of it, but the floor is rather thick and appears to be very strong.
- Construction -
- This thing is SOLID! Now granted, I have yet to mount it on my chassis, but the bed skirts, bed rails and tail gate are by no means flimsy.
- The lines and dimensions are true and spot on to the original beds. I measured the width and height between the body lines on my cab and matched them up to the bed - I needed a tape measure that reads smaller than 1/16 of an inch to determine any differences.
- Comes sprayed with epoxy sealer so after some touch up of any scratches caused during shipping it can be easily sanded and sprayed with a urethane surfacer primer and top coated.
- Bed mounts/cross members are well reinforced
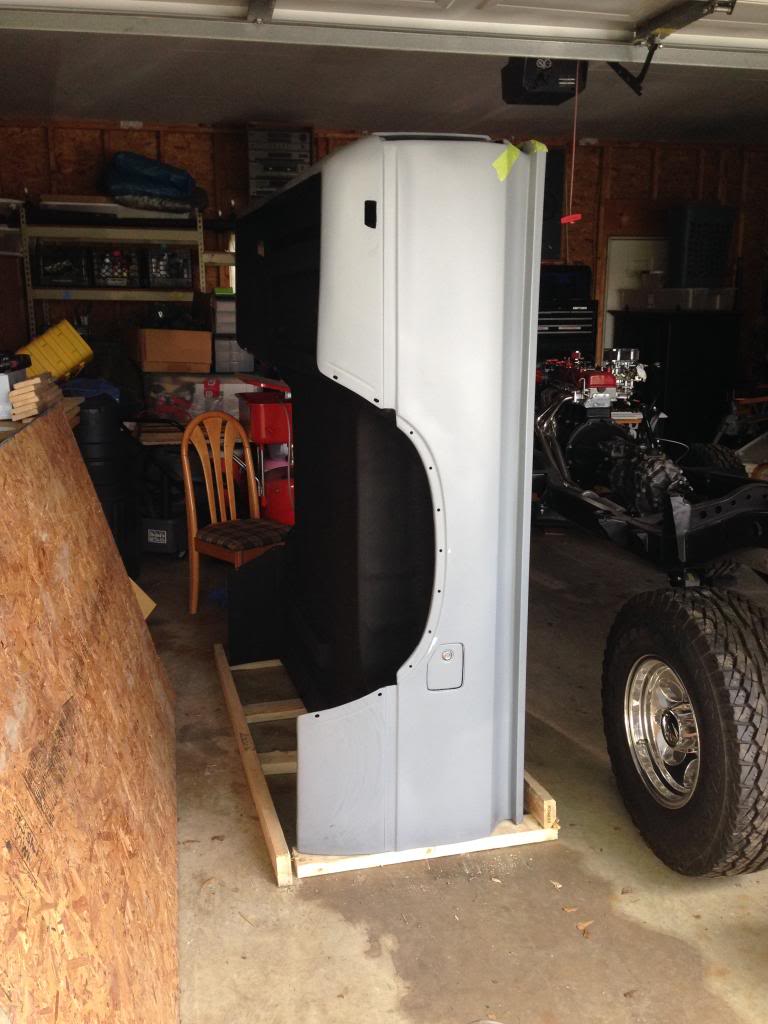
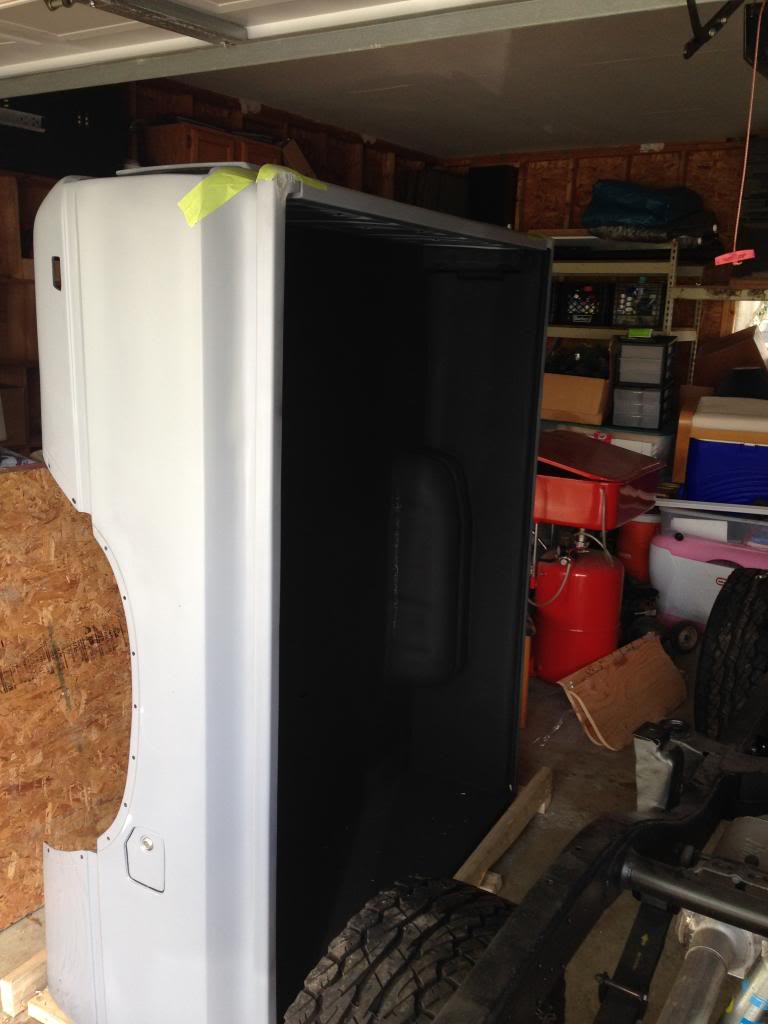
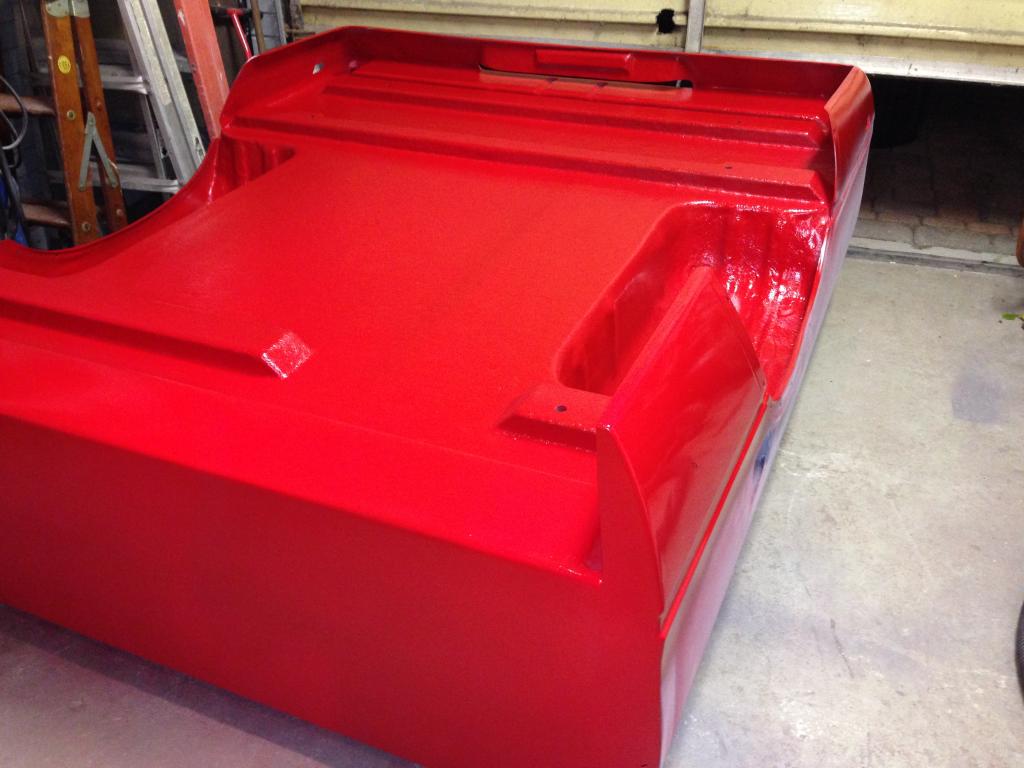
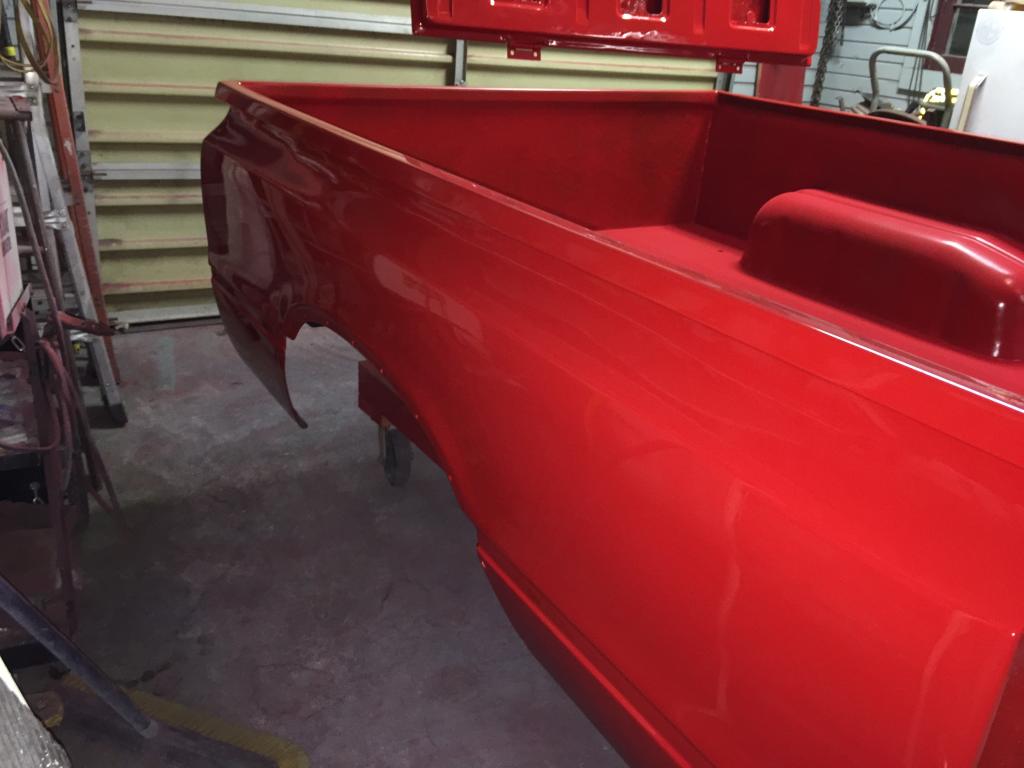
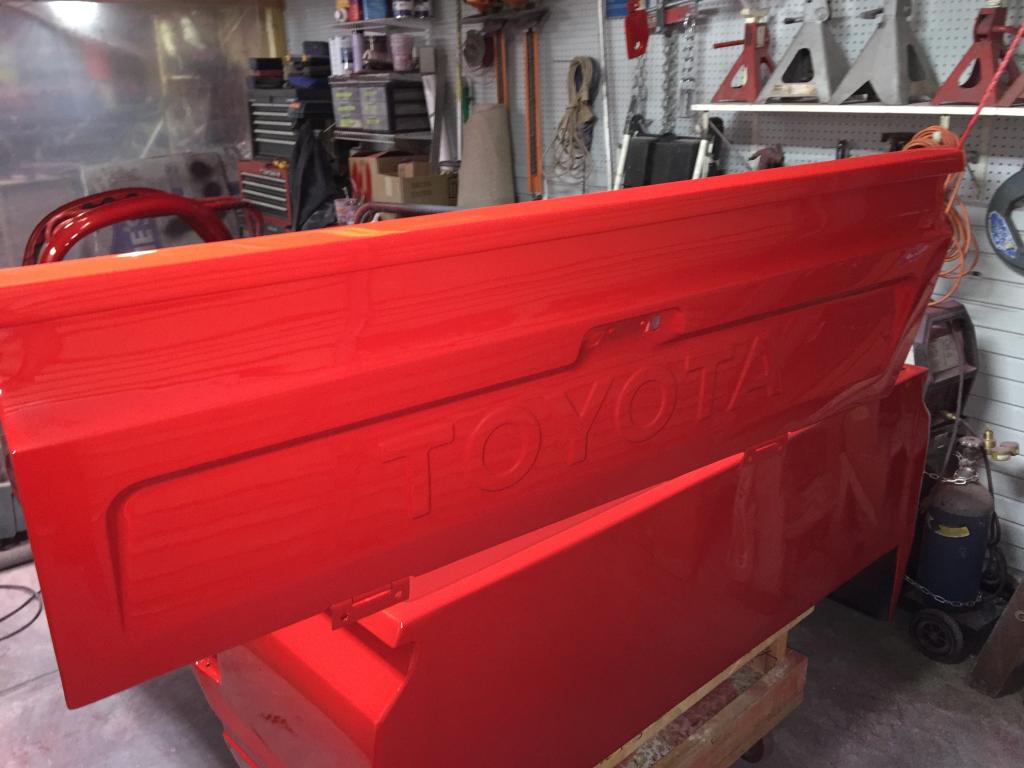
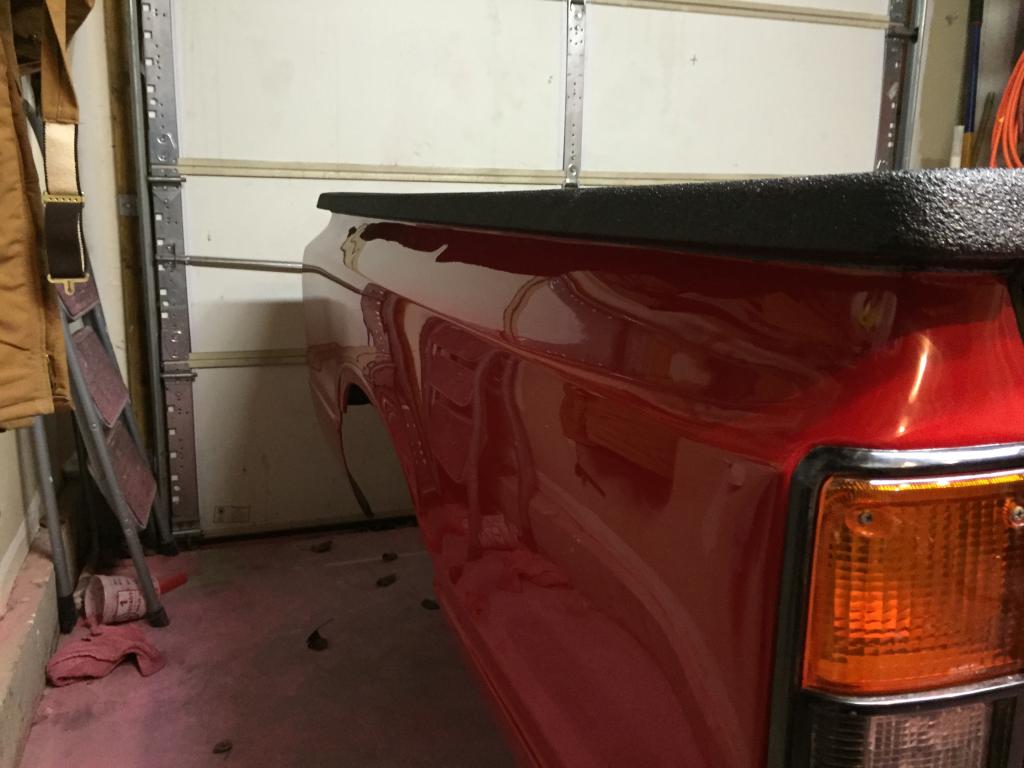
- The fiberglass work on the outside panels is impeccable! Truly amazing that somebody can take fiberglass and resin to create something like this! Corey had warned me earlier that there will be waves in the panels because the original beds all had a bit of waviness in them and that's what he took the mold off of, but I have no clue what the hell he is talking about! I looked down the bedsides and they look damn near perfect (pictures below). I plan on shooting it with guide coat and blocking it to see if I need to straighten anything out, but from what I can see I don't think it will be necessary. The tail gate appears to be very rigid. I put a little bit of weight on it to see if it would flex at all and it didn't budge. I would assume at this point that it would at least take the abuse that any regular steel tail gate would.
- Everything is pre-drilled for the tail lights, tail gate stays, tail gate strikers, fender flares and marker lights. The bed mount holes are not pre-drilled which I feel is better so that I can get it perfectly lined up before I drill them out myself
- The hardware kit is spot on and cheap - GET THE HARDWARE KIT! For those of you that have bought hardware in the past, you know how expensive it can get and $30 for the hardware is the best you're going to do. Not to mention, I had no idea that there would be that much hardware involved in putting this thing together.
Cons, now the bad part. I'm not here to simply praise Corey for everything he did right since that wouldn't help you guys out, but there are a couple things that I would have asked him to do differently.
- Fuel door (this isn't really Corey's fault) -
- If I had to do it all over again, I would go with the Trekker style fuel filler pocket instead of the fuel door. In looking at it, I just think that it looks like a better design.
- Fender flares (again, this isn't really Corey's fault) -
- I would like to have the fender flares molded into the bed like how the front flares are stamped into the fenders so I don't have to use the rubber factory fender flares. I asked Corey about this, but he doesn't have the molds to do such a modification (and I don't have the money to pay him to make the molds to do it).
- Bed interior and undercoating -
- Corey uses an acrylic paint to spray the inside and underside of the bed. I am planning on spraying a bed liner in the bed and underneath so I'm not too certain that the liner will properly adhere to the acrylic paint. I'll likely have to sand it down with some 80 grit before shooting it. This by no means is a deal breaker, but had I known that is how he did it then I would have just asked him not to spray it.
- Cost -
- Yes, it is expensive. This is something that everybody is going to have to get over. If you want a good product, you're going to have to pay for it. While I consider Corey a friend of mine and an excellent asset to the YotaTech community, he is a businessman through and through. He does this for a living and apparently has a lot of success doing it. A good businessman doesn't discount his service or products just because a customer feels like the price is too steep.
- Time frame -
- For me, it wasn't a big deal to wait over 6 months for a bed since my build wasn't even ready for it yet. I placed my deposit back on October 31, 2013 to get in Corey's production line up. He told me that I would be looking at an April or May completion date and he stayed true to that promise. My bed actually came at the perfect time for my build. If you need a bed next week, you aren't going to be getting it from Toyota Fiberglass. The man is busy busy busy! Expect and plan for at least a 6 to 12 month wait, but it's obvious if that many people are going to him then the products must be good and it is. You could also use the wait as a budget plan. Corey allowed me to put down a deposit to get in the line up and then I just paid off the balance when the bed was almost done. I'm sure that he would let customers pay a little as at a time while you wait so it doesn't seem to hit your wallet as hard.
Annnnnnd here are some pictures, I'm sure I'll add more as I progress:
From BC Canada:

To Maryland, USA:

Uncrated:


What waves??? I'm thinking that maybe Corey doesn't see straight...

yep, no waves...

Ok...so maybe this wasn't a "quick" review...
Scope out my build thread to see more about finishing the truck that features this bed at:
https://www.yotatech.com/forums/f197...-build-264229/
 05-19-2014, 07:31 AM
#2
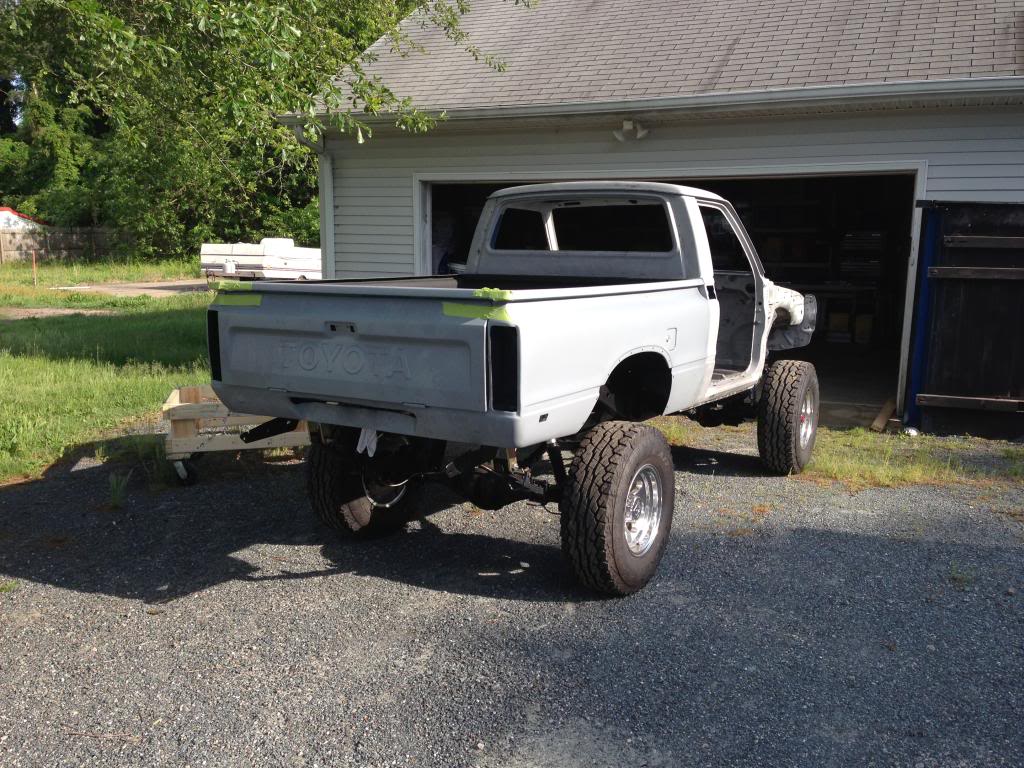
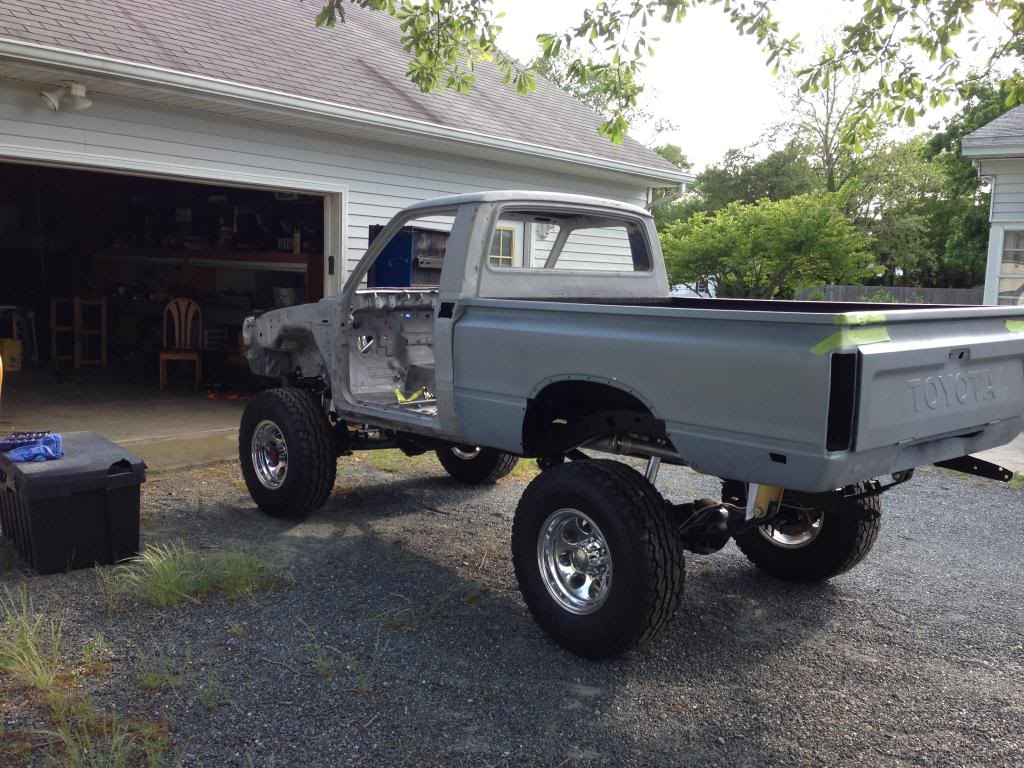
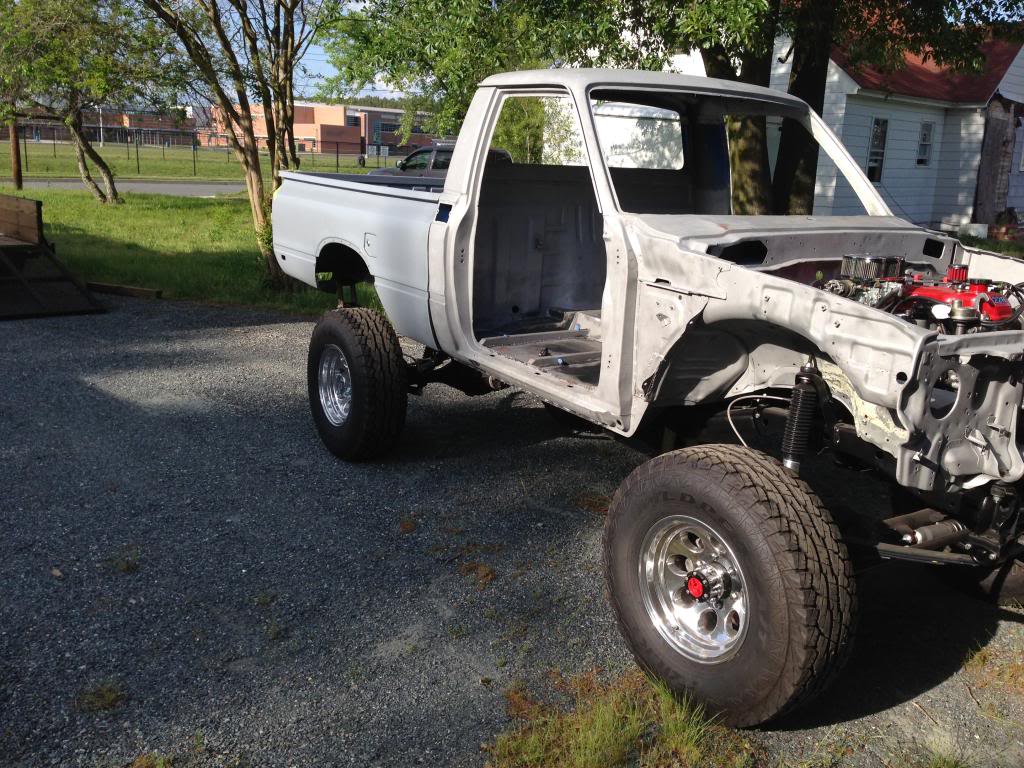
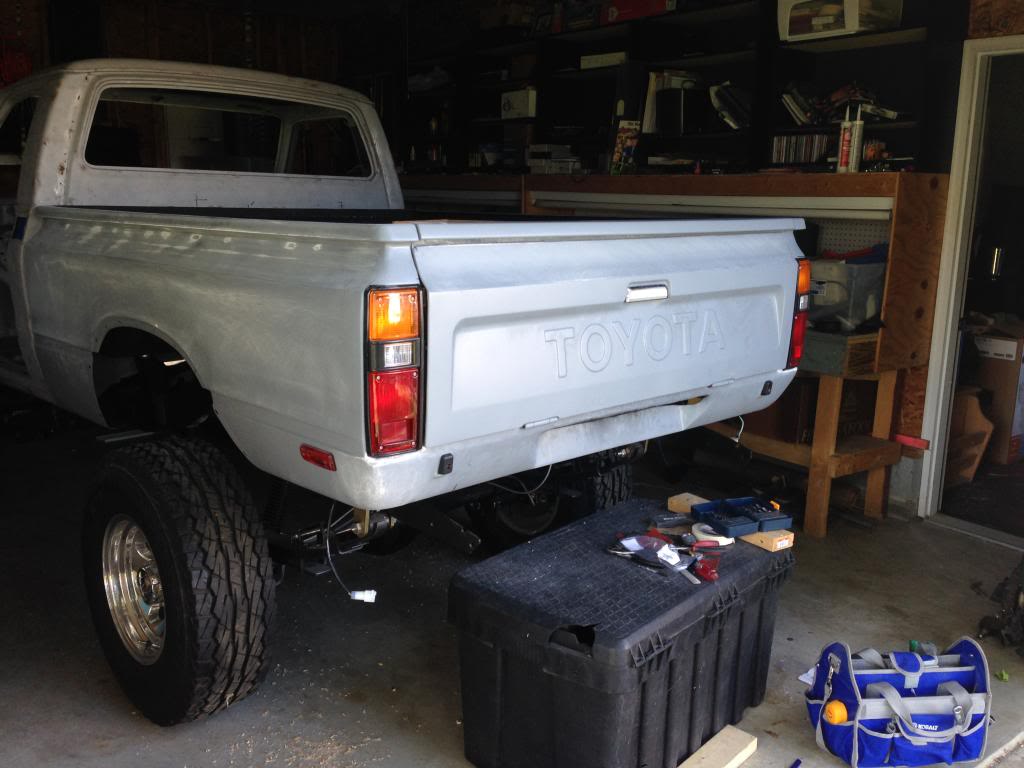
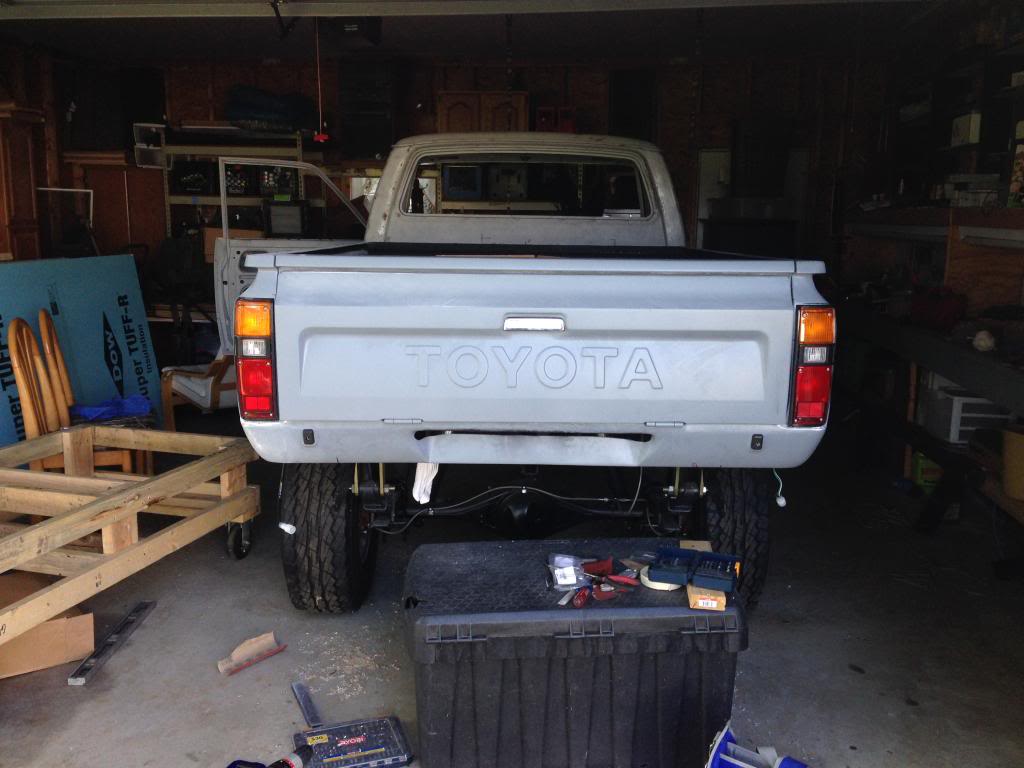
I got the bed mounted on my chassis for a quite mock up this weekend and everything went really well! Unfortunately, I think I may have been a little off in mounting my driver side rear cab mount causing it to sit slightly higher on that side. The bed sits perfectly flat on the bed mounts on the frame and the bed lines will match up well to the cab lines. The body lines in the pictures below look off a little, but they do match up - I will have to shim the cab properly to cover up my errors on the cab mount fabrication. The bed looks great though and I am still very satisfied!


 05-19-2014, 11:11 AM
#5
No body gap = one more Toyota rattle! LOL Nah, I haven't set the body gap between the bed and the cab yet. The bed isn't bolted down yet, I just slid the bed up tight to the cab so that I could see where the body lines were falling and to help center up the bed on the chassis. Corey doesn't pre-drill the bed mount holes so I still have to set the body gap and drill the holes where I want them. I'm thinking somewhere around one inch, but I'm still waiting on some feedback as to how much the factory body gap is.
10-28-2014, 08:55 AM
#6
A promised, another little update on the full review of this bed.
A while back I fit the bed and set the body gap between the bed and cab before drilling the mounting holes and bolting down the bed. The bed aligned well to the body gaps and minimal shims were needed to level the bed on the frame.
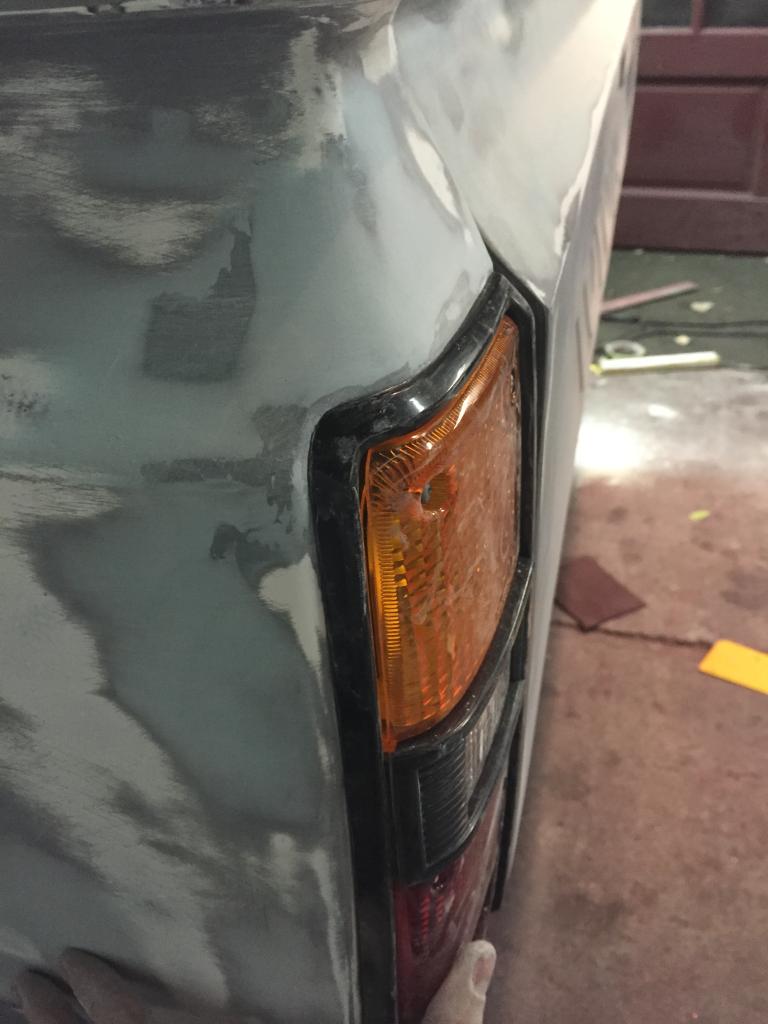
Mocked up the tail lights as well. I am using aftermarket tail lights so there are slight variations that caused some fitment issues. I was able to easily drill out the mounting holes in the bed to adjust the fit. In the pictures below, the tail gate appears to be out of alignment, but there was enough adjustment in the hinges to get it to align properly.
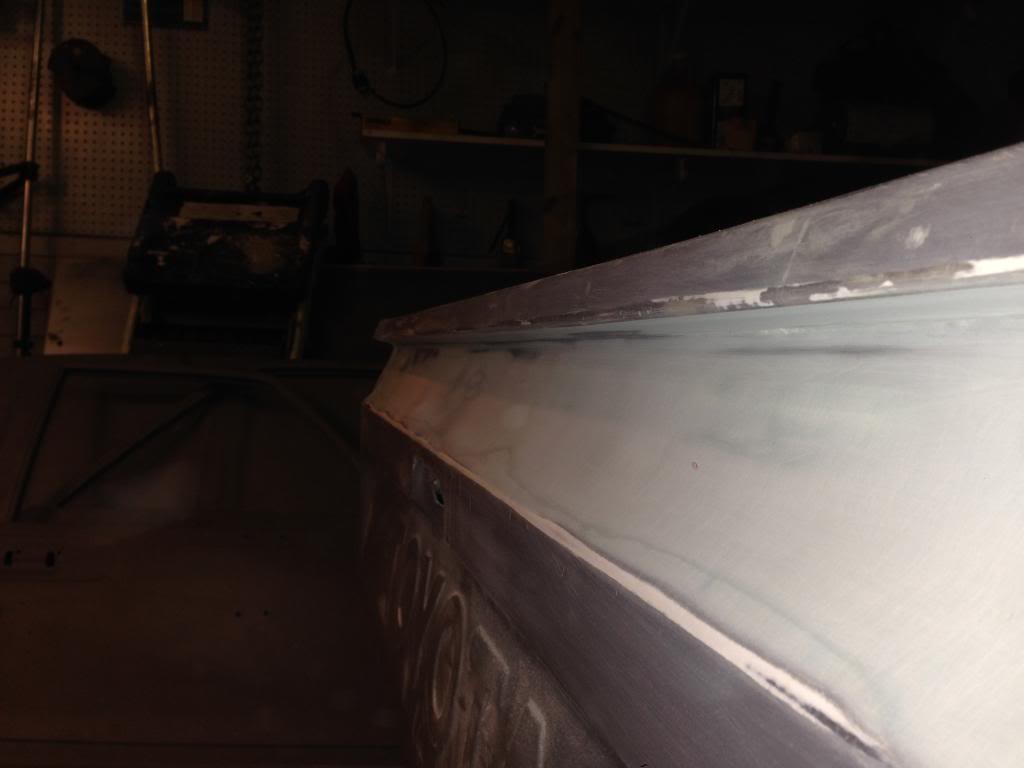
Another issue I had was the unfinished wrap where the bed surface meets the rollpan. Again, this wouldn't be an issue for most people, but I wanted to clean it up a bit. A couple swipes of filler, some blocking and I was easily able to get it to where I wanted it.
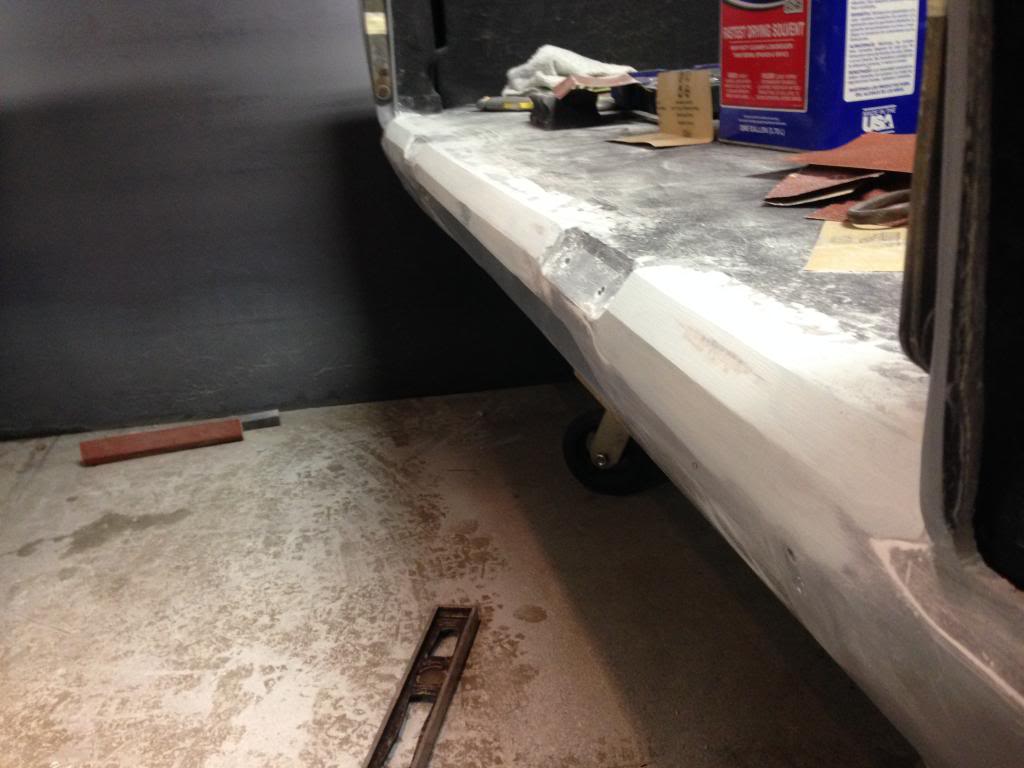
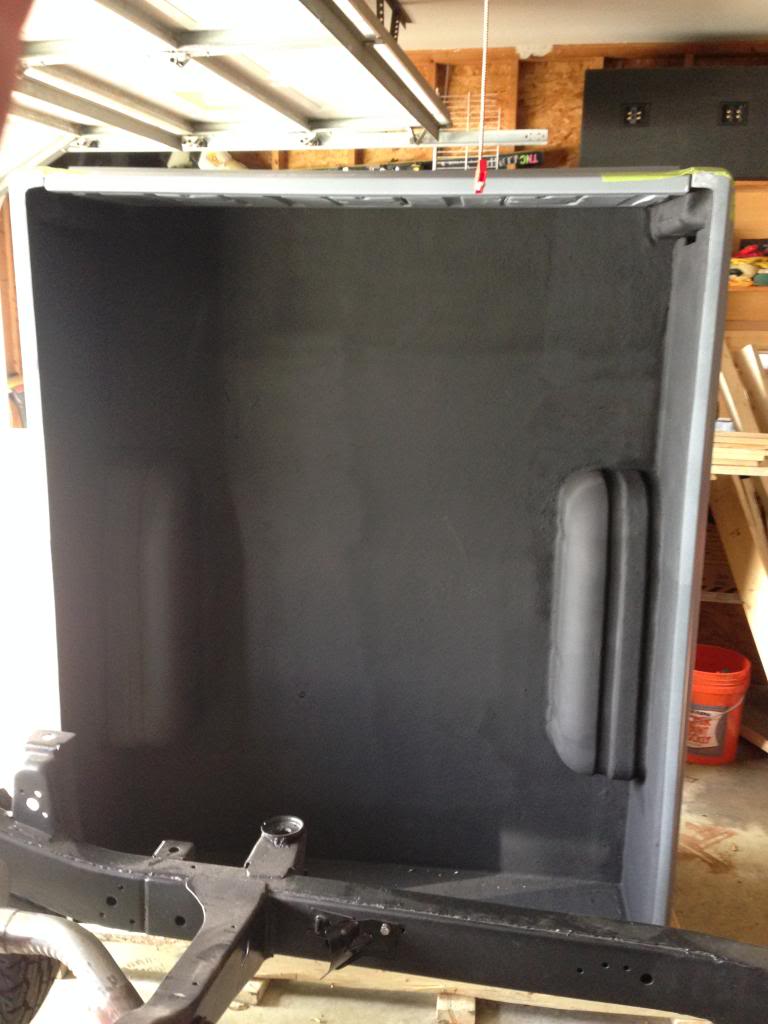
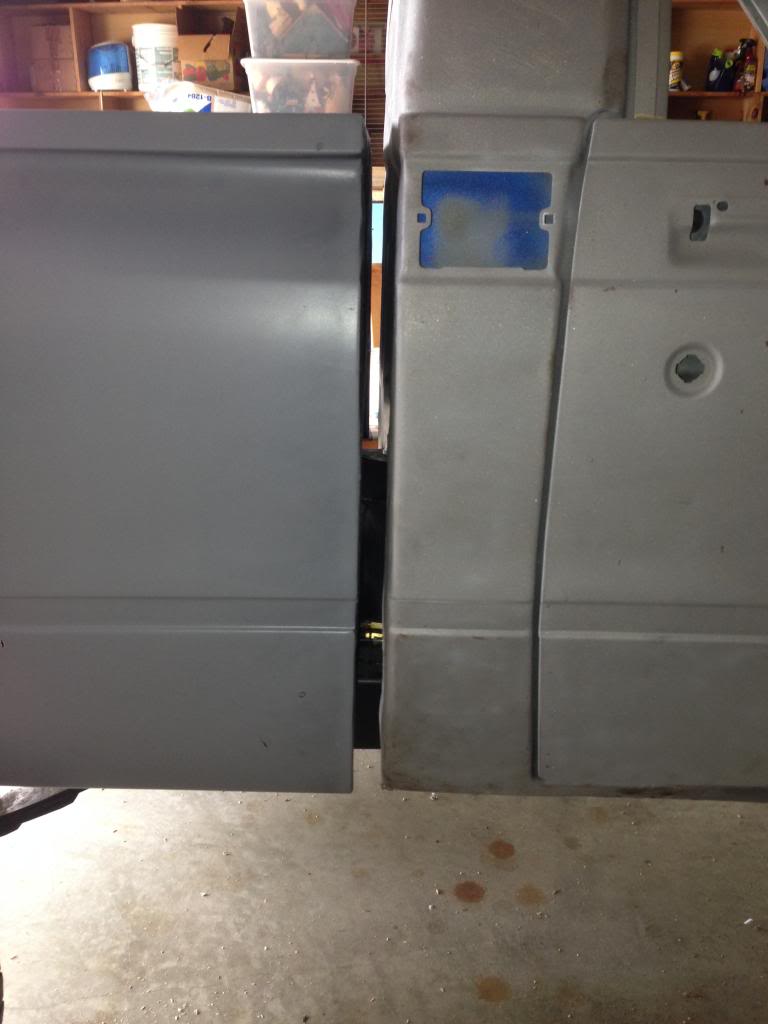
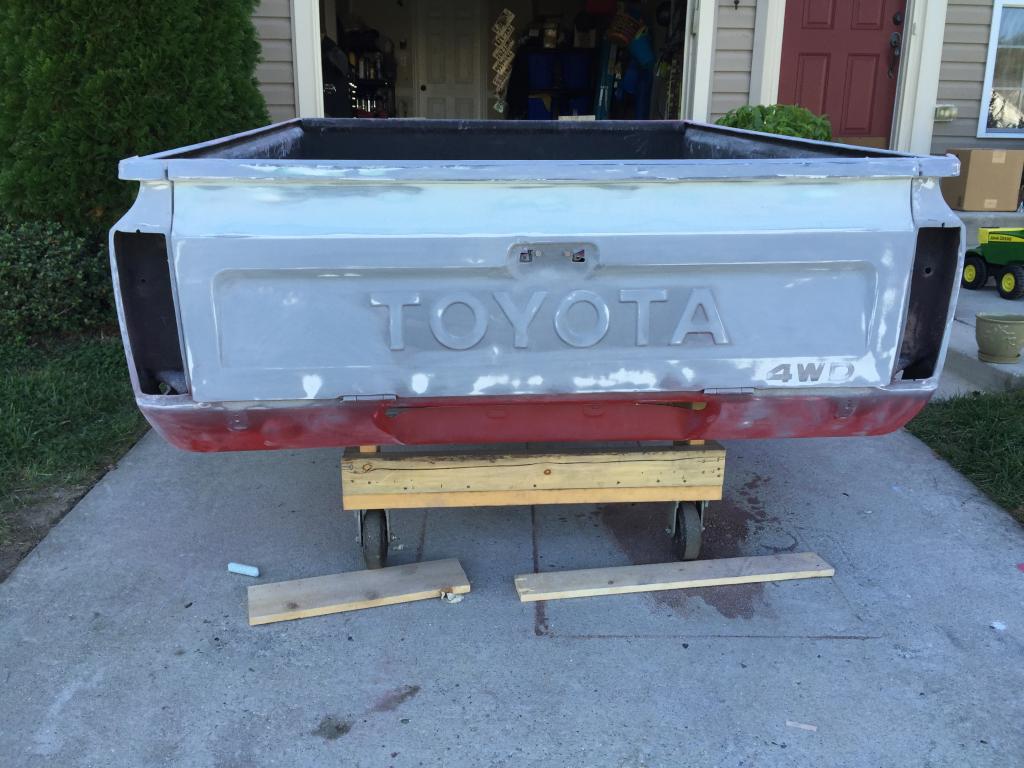
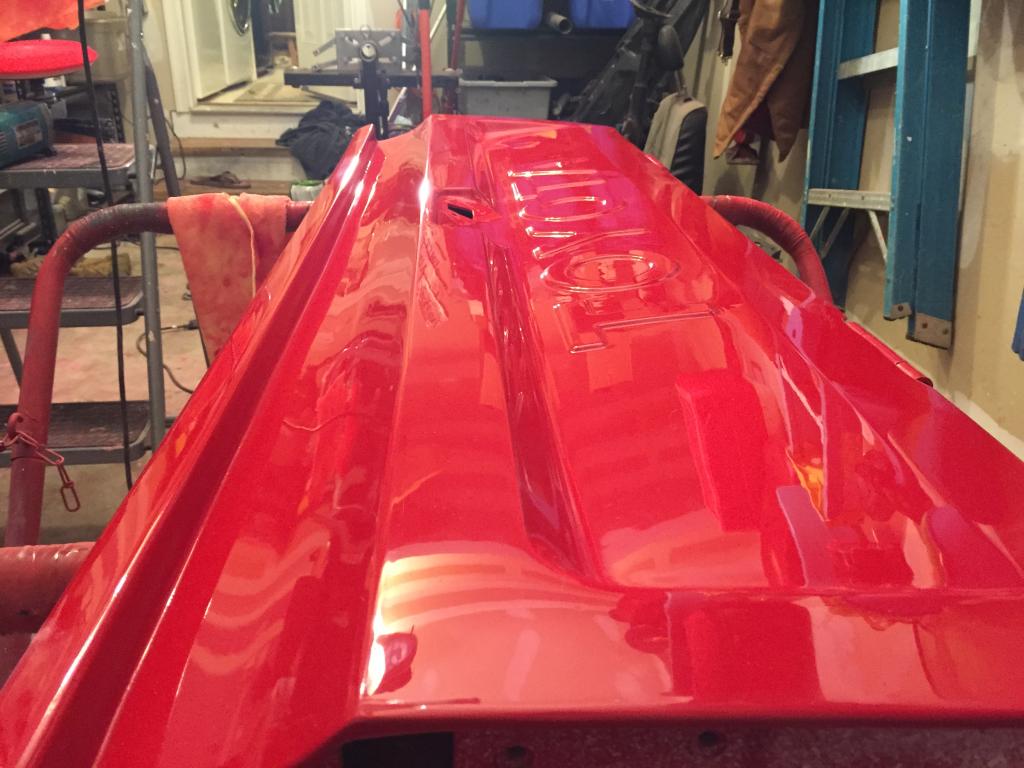
I also was not a big fan of the "lip" underneath the tail gate rail either. The factory tail gate comes with this lip as well and has been known as a point of failure. I also wanted the tail gate to match the rest of the rails on the bed so I filled it. (Note, the rails on the fiberglass bed do not have the lip under the rail like the factory beds - I think it is a better and cleaner design without the lip) In filling it I used a threaded steel bar for extra reinforcement followed by foam and short strand filler. Here's what it looked like originally:
and after filling:
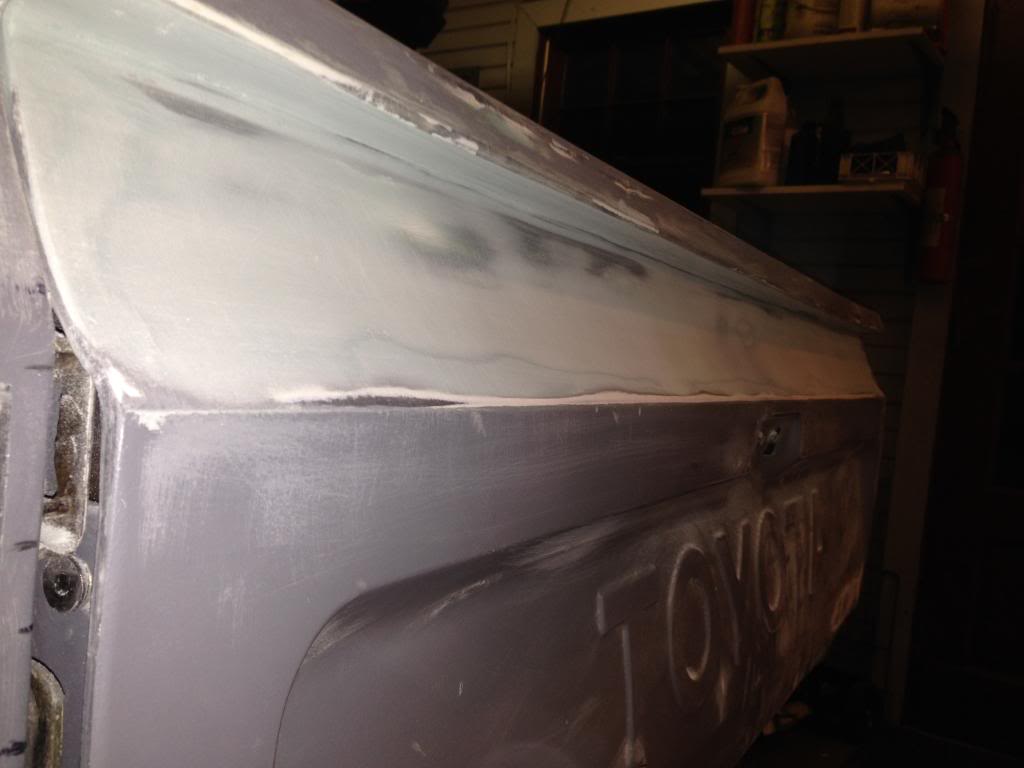
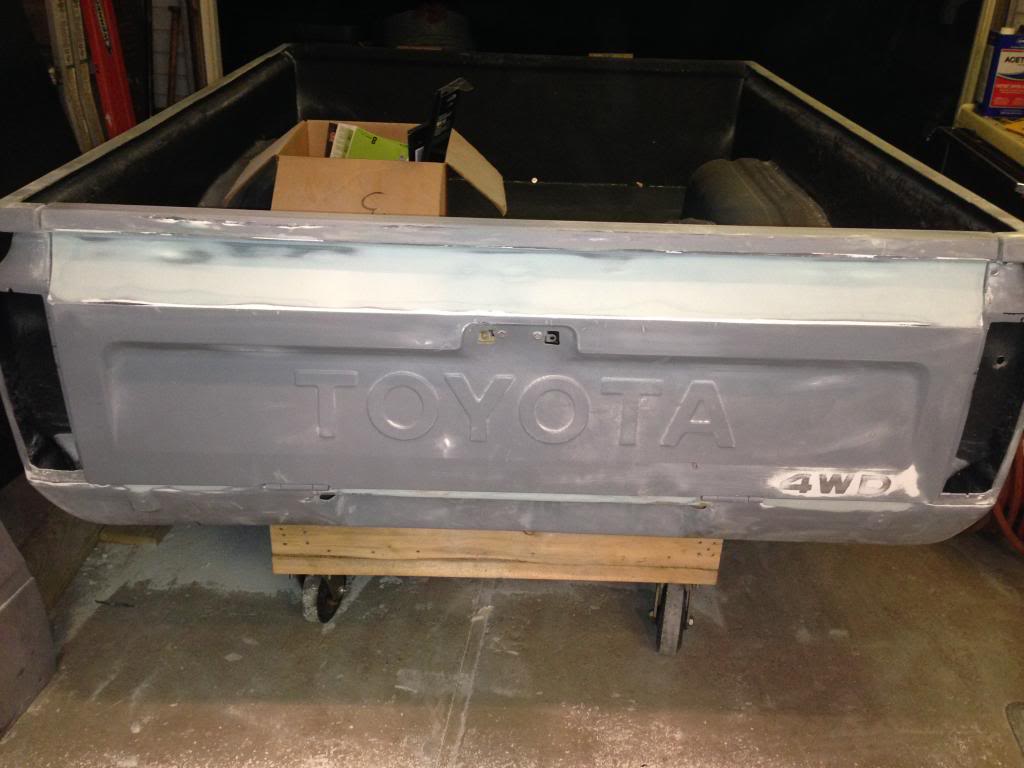
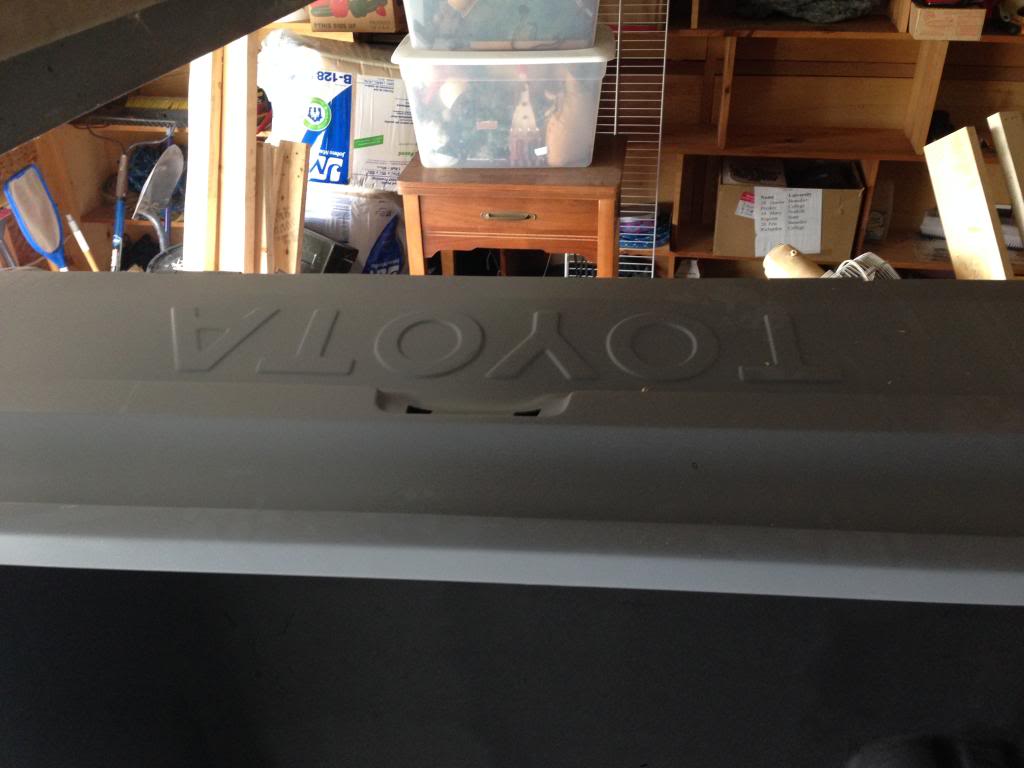
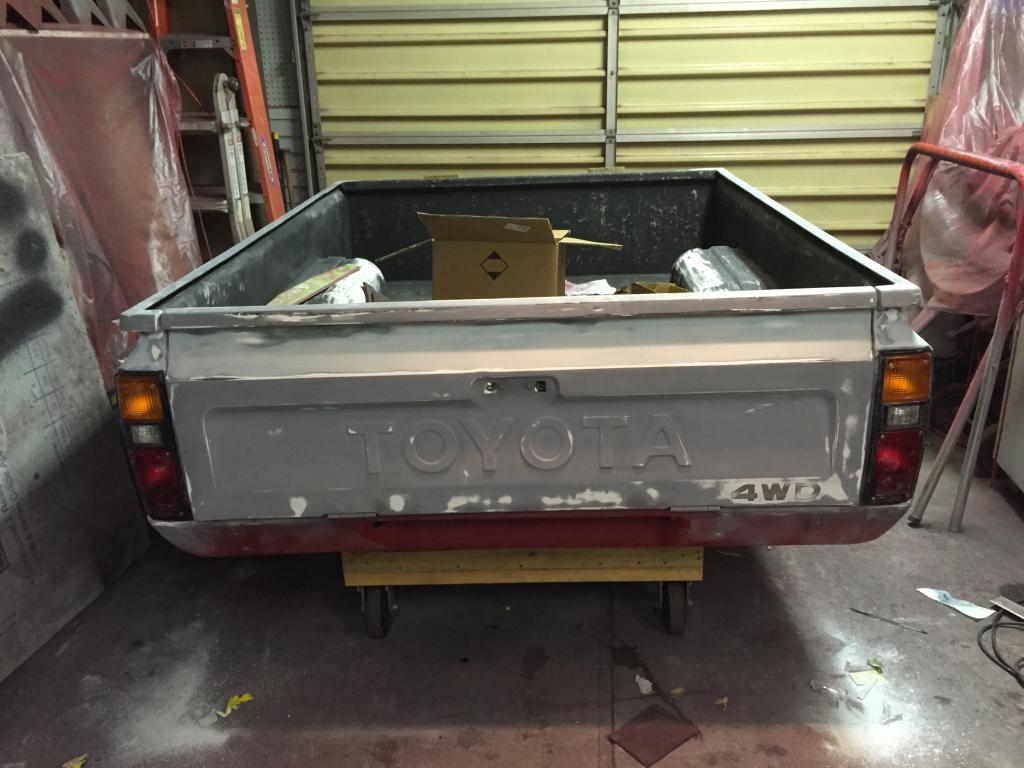
I also blocked off the raised "4WD" letters since I'm shaving all emblems except the grill and tail gate "Toyota" emblems.
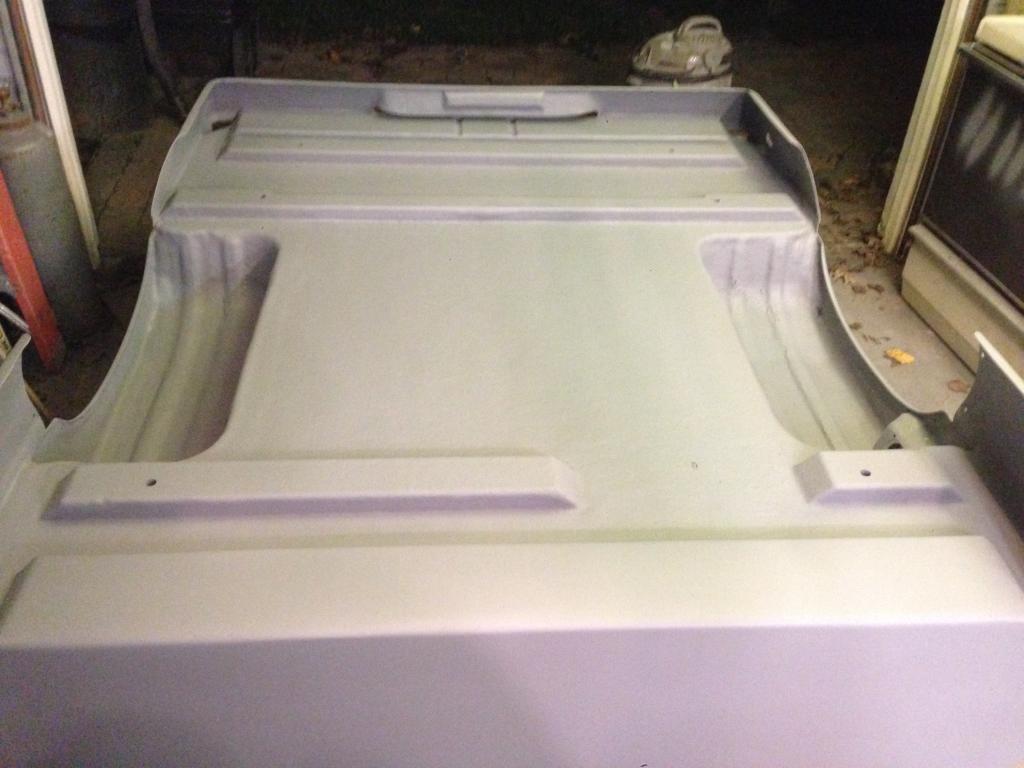
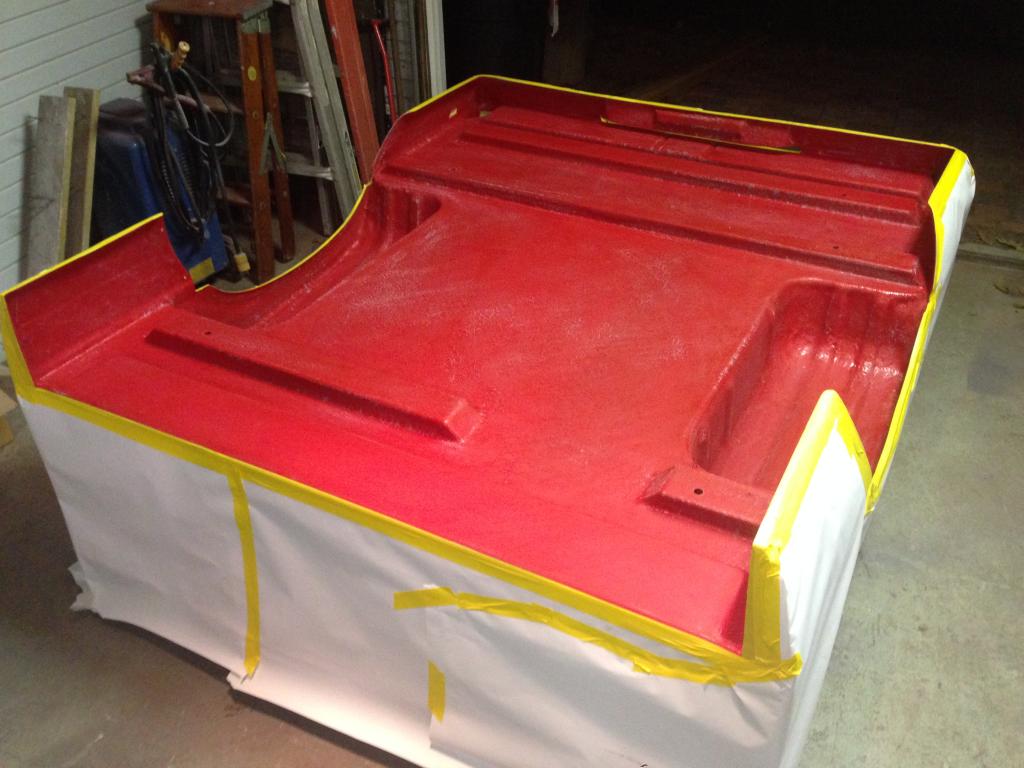
Here comes the tricky part. I have never really dealt with painting raw fiberglass before so I had a little hiccup in undercoating the bed. The first time around, I scuffed the paint that Corey applied to the bottom of the bed and sprayed it with epoxy. Within the epoxy recoat window I sprayed two coats of Raptor Liner. A few days later I came into the shop to realize that the Raptor Liner could easily be pealed off. Back to the drawing board. The second time around I did a "full" paint job to the underside of the bed prior to shooting the Raptor Liner:
1-Scuffed raw fiberglass
2-Sprayed epoxy - LET FULLY CURE
3-Scuffed epoxy
4-Sprayed surfacer - LET FULLY CURE
5-Scuffed surfacer
6-Sprayed single stage color - LET FULLY CURE
7-Scuffed color
8-Sprayed Raptor Liner
Now it worked out perfectly, but later found out (after searching for WEEKS) two things:
1-Raptor Liner CAN be sprayed over FULLY CURED epoxy
2-Certain degreasers/paint prep solvents soften the resins in fiberglass causing adhesion issues
So basically, in my first attempt to undercoat my bed, one of two things (or both caused my failure). 1) When I sprayed the Raptor over the epoxy within the recoat window, I learned that the activators in the Raptor are "hotter" than the epoxy thus instead of the epoxy being a tie coat, the Raptor "grabbed" and "softened" the epoxy and the epoxy "let go" of the substrate causing delamination. 2) When I degreased and prepped the fiberglass substrate the pre-paint solvent that I used (SEMsolve) softened the fiberglass resin and caused me to "trap" solvents under the epoxy and Raptor Line thus resulting in delamination. I think both scenarios contributed to the dilemma.
Nonetheless, I figured it out and moved on.
Primed:
Colored:
Color scuffed:
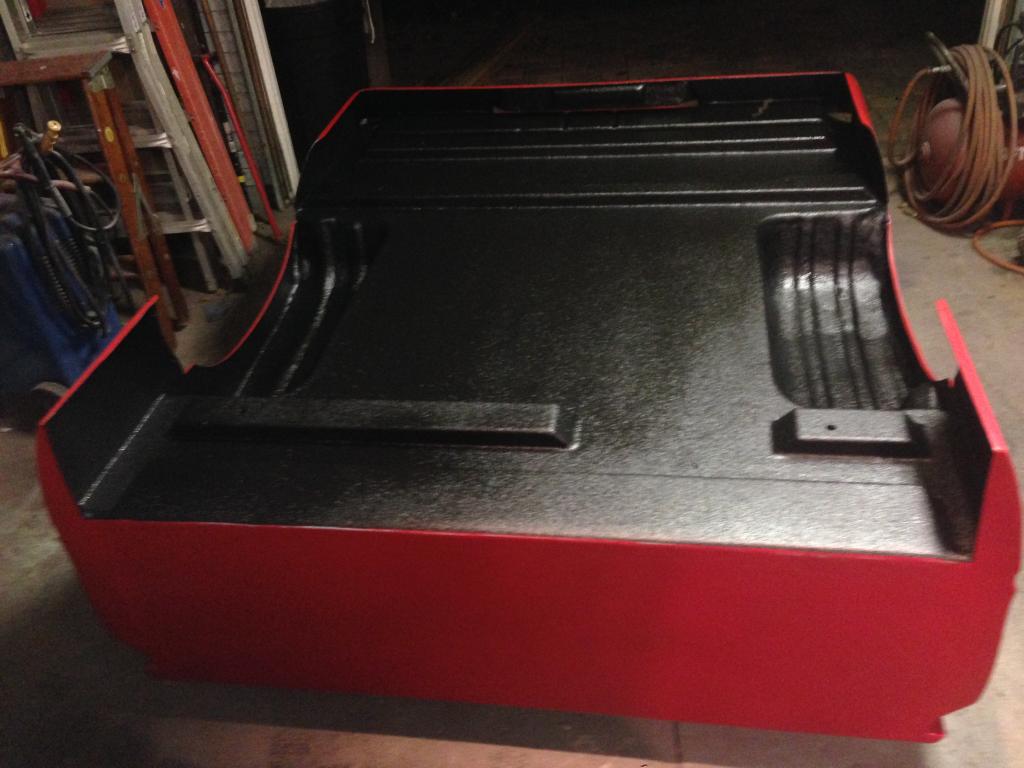
Raptor Lined:
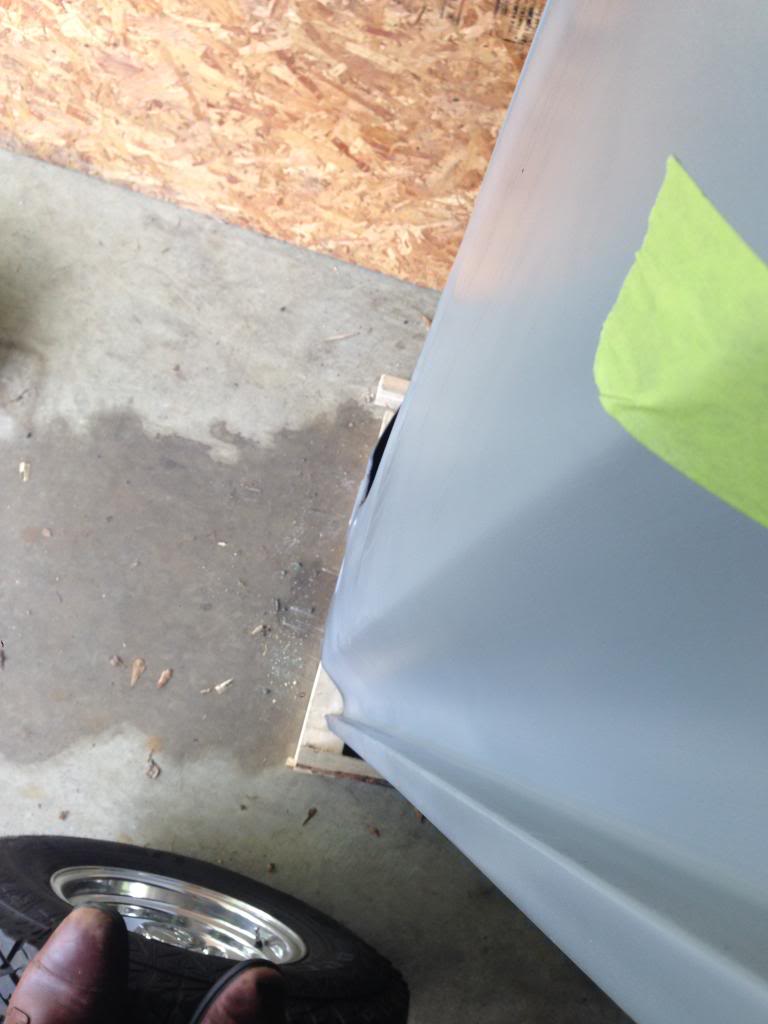
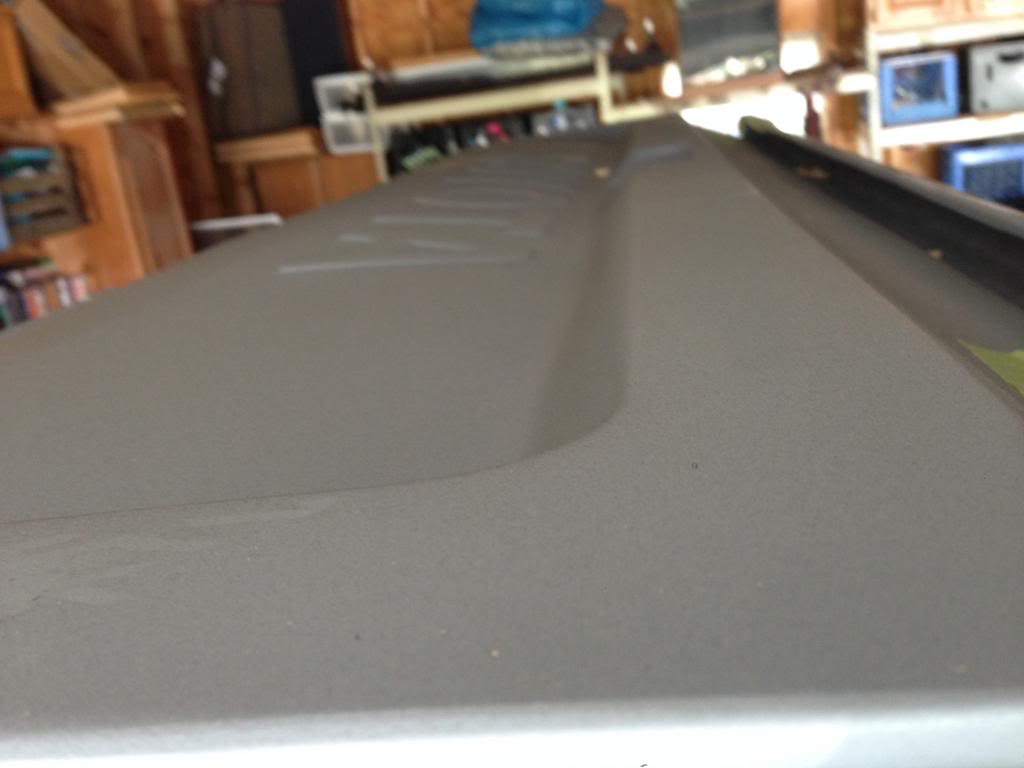
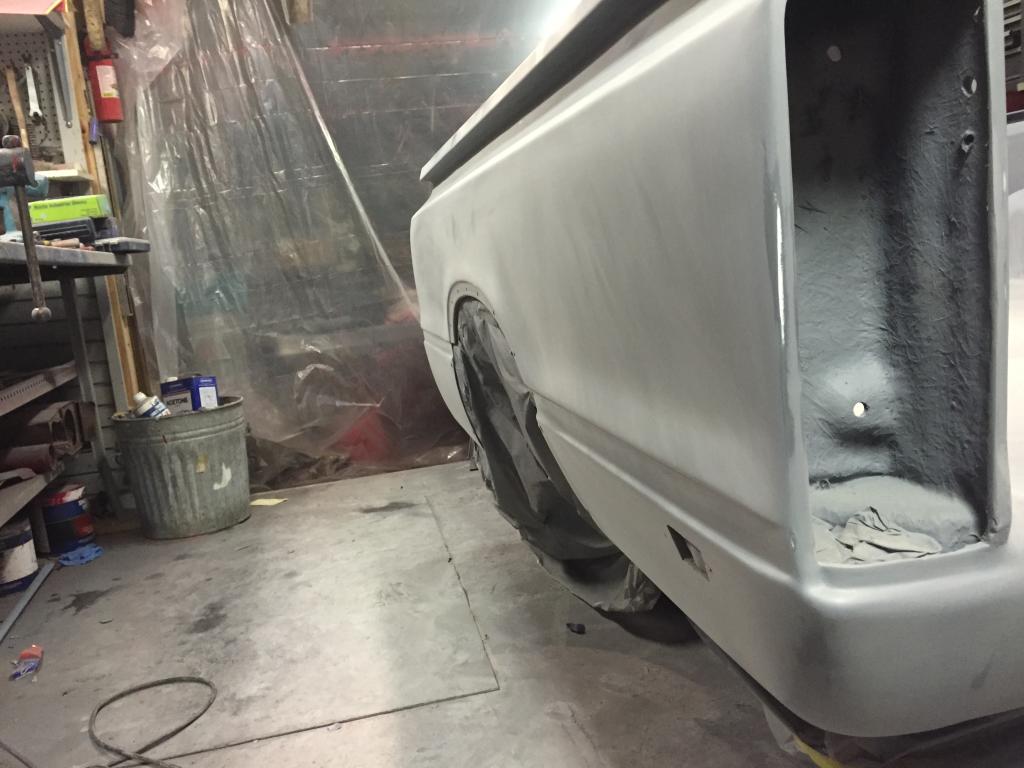
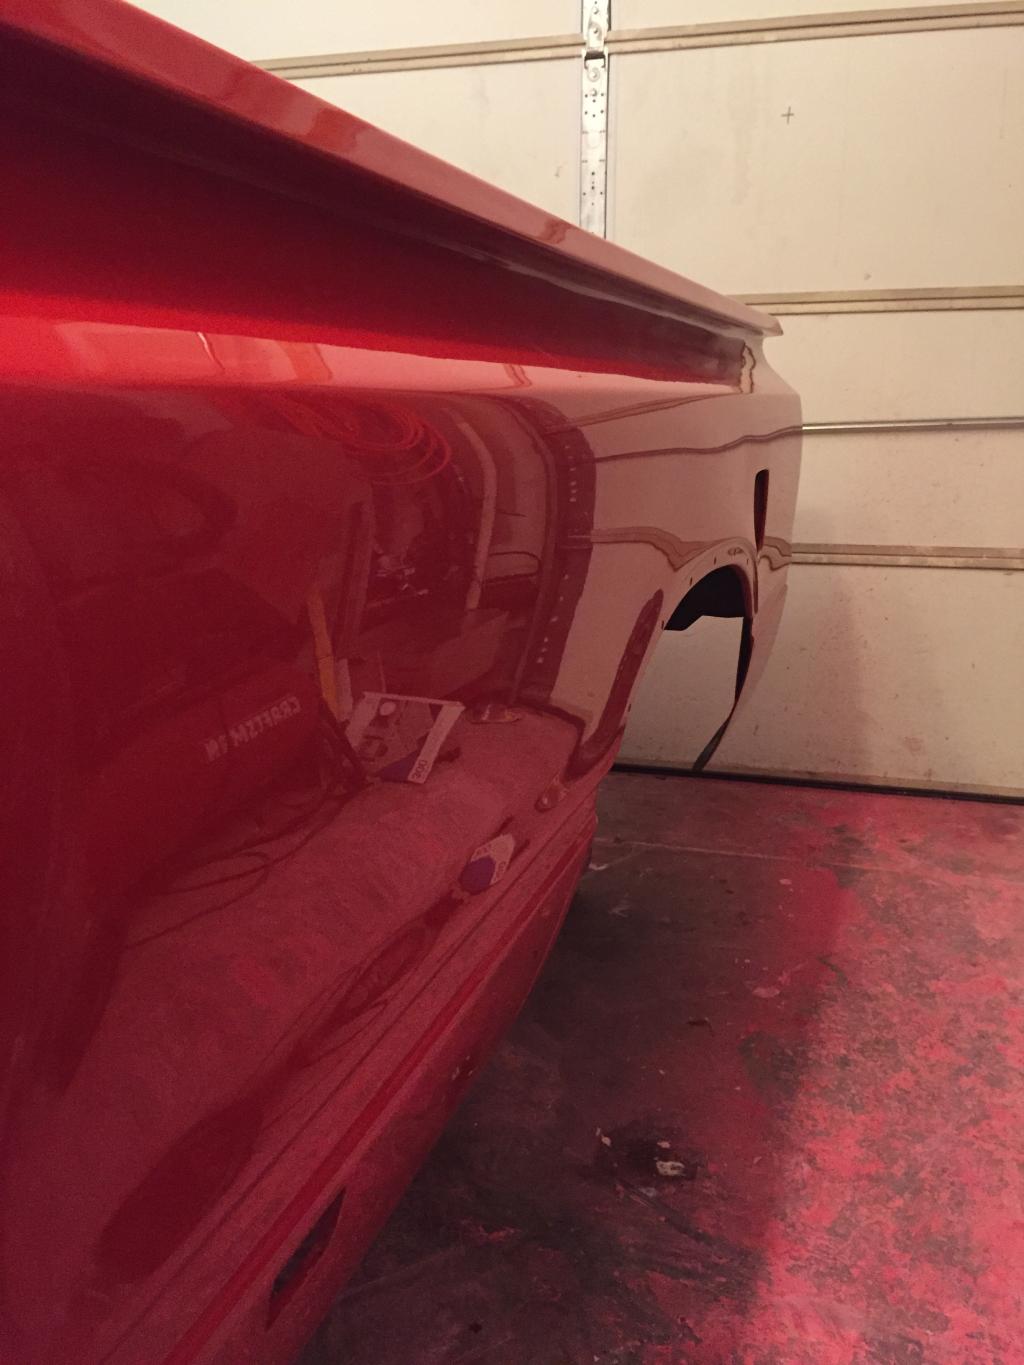
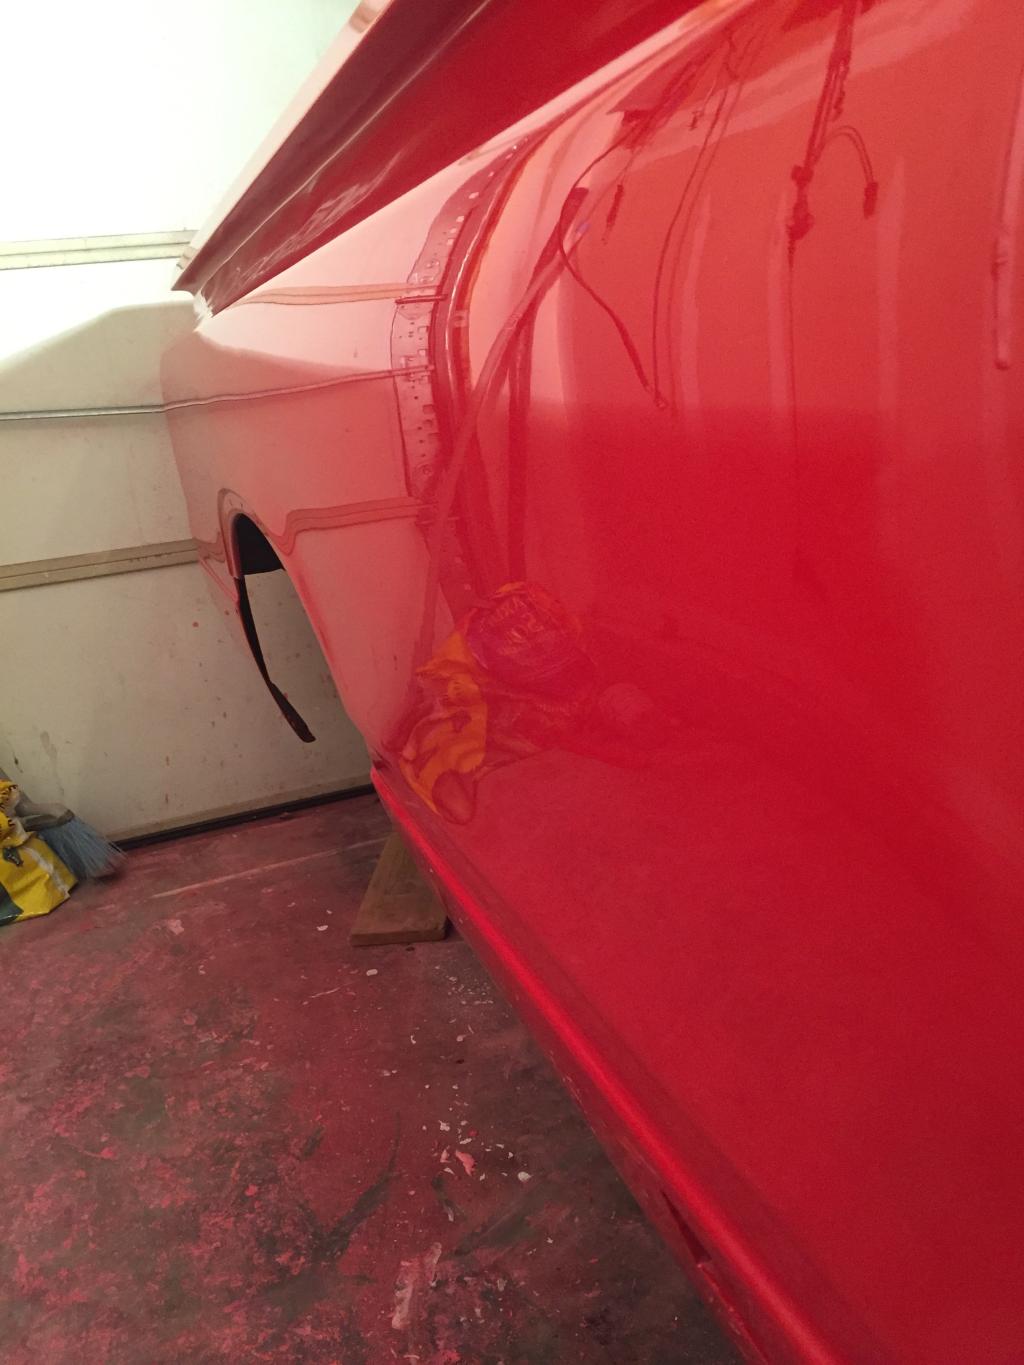
Now for finishing touches before paint. Fiberglass is naturally "wavy" and Corey uses a mold directly off of a factory bed. In doing such, he also preserved the waviness that the welds create in the bedsides up near the rails. He did this on purpose to preserve the factory look of steel for those who wanted it. For those who don't (like myself), it is a simple matter of blocking it down. I recently just got back around to "straightening" the bed for paint. I blocked the entire bed down to remove the waviness in the fiberglass and the welds. There are just two small spots where I want to apply a swipe of filler to address a contour around the fender wells, but other than that, I should be able to get everything straight with a couple coats of surfacer and a little bit of blocking. Yet again, as the bed was shipped, it would have been good enough for 95% of the people out there, but for me I want to take it a step further. There is still a little bit of blocking still left to do before I shoot a coat of epoxy and move on to the surfacer, but this will give you an idea of where I am currently.
You may be able to see the chalk circles marking the spots where I want to swipe some filler towards the rear of the fender arches in the following two pictures:
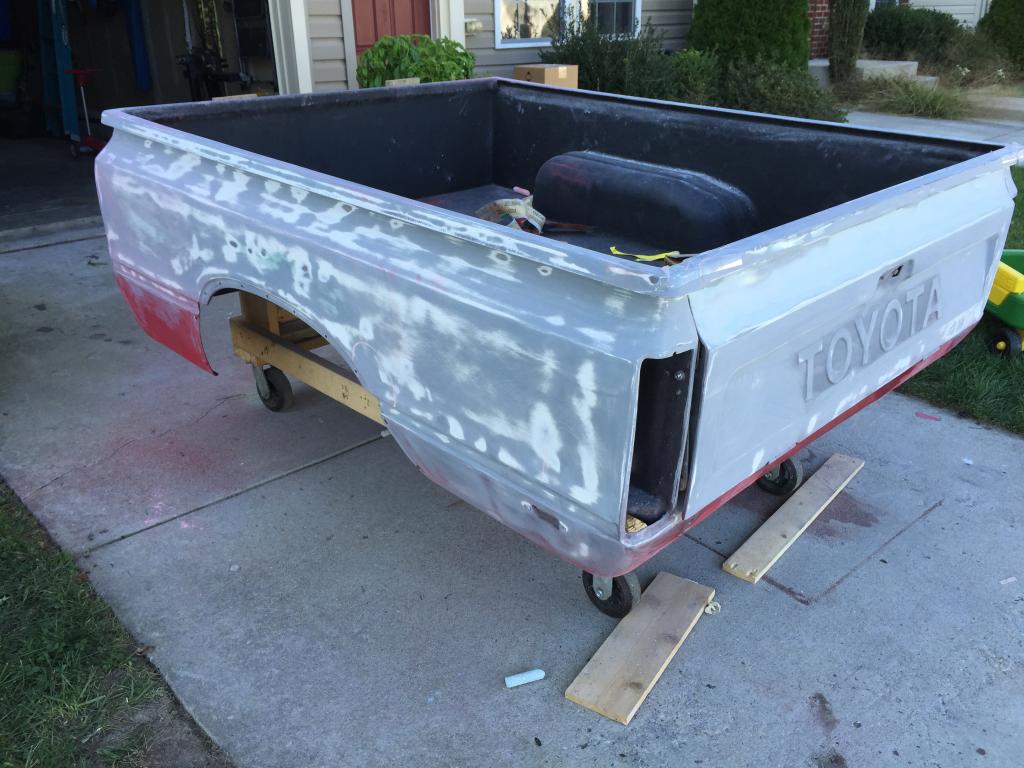
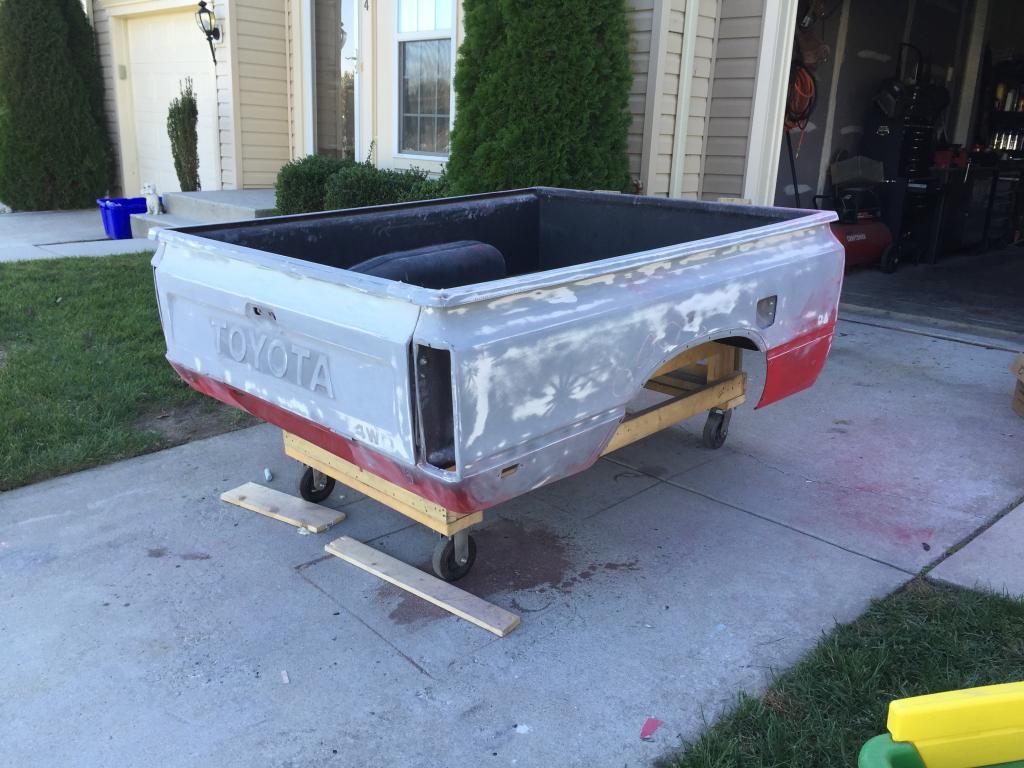
It may look worse than what it really is, but just keep in mind of how thin primer goes on - the places where you see that I sanded through the epoxy gives you an idea of how flat truly was before I started (or moreover, how ridiculously anal retentive I am).
Regrets? None so far! The amount of touch-ups that I have to do to the bed are miniscule compared to all the other things I have had to do to my build. I'll be sure to check back after paint with a final product. Feel free to ask questions!
A while back I fit the bed and set the body gap between the bed and cab before drilling the mounting holes and bolting down the bed. The bed aligned well to the body gaps and minimal shims were needed to level the bed on the frame.

Mocked up the tail lights as well. I am using aftermarket tail lights so there are slight variations that caused some fitment issues. I was able to easily drill out the mounting holes in the bed to adjust the fit. In the pictures below, the tail gate appears to be out of alignment, but there was enough adjustment in the hinges to get it to align properly.


Another issue I had was the unfinished wrap where the bed surface meets the rollpan. Again, this wouldn't be an issue for most people, but I wanted to clean it up a bit. A couple swipes of filler, some blocking and I was easily able to get it to where I wanted it.

I also was not a big fan of the "lip" underneath the tail gate rail either. The factory tail gate comes with this lip as well and has been known as a point of failure. I also wanted the tail gate to match the rest of the rails on the bed so I filled it. (Note, the rails on the fiberglass bed do not have the lip under the rail like the factory beds - I think it is a better and cleaner design without the lip) In filling it I used a threaded steel bar for extra reinforcement followed by foam and short strand filler. Here's what it looked like originally:
and after filling:


I also blocked off the raised "4WD" letters since I'm shaving all emblems except the grill and tail gate "Toyota" emblems.
Here comes the tricky part. I have never really dealt with painting raw fiberglass before so I had a little hiccup in undercoating the bed. The first time around, I scuffed the paint that Corey applied to the bottom of the bed and sprayed it with epoxy. Within the epoxy recoat window I sprayed two coats of Raptor Liner. A few days later I came into the shop to realize that the Raptor Liner could easily be pealed off. Back to the drawing board. The second time around I did a "full" paint job to the underside of the bed prior to shooting the Raptor Liner:
1-Scuffed raw fiberglass
2-Sprayed epoxy - LET FULLY CURE
3-Scuffed epoxy
4-Sprayed surfacer - LET FULLY CURE
5-Scuffed surfacer
6-Sprayed single stage color - LET FULLY CURE
7-Scuffed color
8-Sprayed Raptor Liner
Now it worked out perfectly, but later found out (after searching for WEEKS) two things:
1-Raptor Liner CAN be sprayed over FULLY CURED epoxy
2-Certain degreasers/paint prep solvents soften the resins in fiberglass causing adhesion issues
So basically, in my first attempt to undercoat my bed, one of two things (or both caused my failure). 1) When I sprayed the Raptor over the epoxy within the recoat window, I learned that the activators in the Raptor are "hotter" than the epoxy thus instead of the epoxy being a tie coat, the Raptor "grabbed" and "softened" the epoxy and the epoxy "let go" of the substrate causing delamination. 2) When I degreased and prepped the fiberglass substrate the pre-paint solvent that I used (SEMsolve) softened the fiberglass resin and caused me to "trap" solvents under the epoxy and Raptor Line thus resulting in delamination. I think both scenarios contributed to the dilemma.
Nonetheless, I figured it out and moved on.
Primed:

Colored:

Color scuffed:

Raptor Lined:


Now for finishing touches before paint. Fiberglass is naturally "wavy" and Corey uses a mold directly off of a factory bed. In doing such, he also preserved the waviness that the welds create in the bedsides up near the rails. He did this on purpose to preserve the factory look of steel for those who wanted it. For those who don't (like myself), it is a simple matter of blocking it down. I recently just got back around to "straightening" the bed for paint. I blocked the entire bed down to remove the waviness in the fiberglass and the welds. There are just two small spots where I want to apply a swipe of filler to address a contour around the fender wells, but other than that, I should be able to get everything straight with a couple coats of surfacer and a little bit of blocking. Yet again, as the bed was shipped, it would have been good enough for 95% of the people out there, but for me I want to take it a step further. There is still a little bit of blocking still left to do before I shoot a coat of epoxy and move on to the surfacer, but this will give you an idea of where I am currently.
You may be able to see the chalk circles marking the spots where I want to swipe some filler towards the rear of the fender arches in the following two pictures:


It may look worse than what it really is, but just keep in mind of how thin primer goes on - the places where you see that I sanded through the epoxy gives you an idea of how flat truly was before I started (or moreover, how ridiculously anal retentive I am).
Regrets? None so far! The amount of touch-ups that I have to do to the bed are miniscule compared to all the other things I have had to do to my build. I'll be sure to check back after paint with a final product. Feel free to ask questions!
Last edited by kawazx636; 10-28-2014 at 09:03 AM.
10-28-2014, 05:49 PM
#7
Registered User
Join Date: Jul 2009
Location: Rocky Mtn. House AB, Canada
Posts: 727
Likes: 0
Received 1 Like
on
1 Post
reminds me of the month spent doing my truck. Check out my build up thread if you want a sleeving idea for your box bolts. I'm convinced it was worth it. How well does your tailgate fit? mine rubs on both upper corners when closed.
Trending Topics
10-29-2014, 06:06 AM
#8
nothingbetter, I sent you a PM - I wanted to pick your brain on a couple things.
I just read over your build thread. I'm not too sure how I missed it for so long, but it looks excellent! I like that box bolt sleeve idea and I think I'll end up doing something similar as well - I imagine that it'll help prevent the bed bolts from loosening and possibly pulling through the fiberglass and wood substrate over the years. I didn't have any fitment issues at all with my tailgate other than just simple alignment, but like I said that was just an adjustment at the hinges.
I just read over your build thread. I'm not too sure how I missed it for so long, but it looks excellent! I like that box bolt sleeve idea and I think I'll end up doing something similar as well - I imagine that it'll help prevent the bed bolts from loosening and possibly pulling through the fiberglass and wood substrate over the years. I didn't have any fitment issues at all with my tailgate other than just simple alignment, but like I said that was just an adjustment at the hinges.
04-22-2015, 08:42 AM
#9
Stopping in for a quick update.
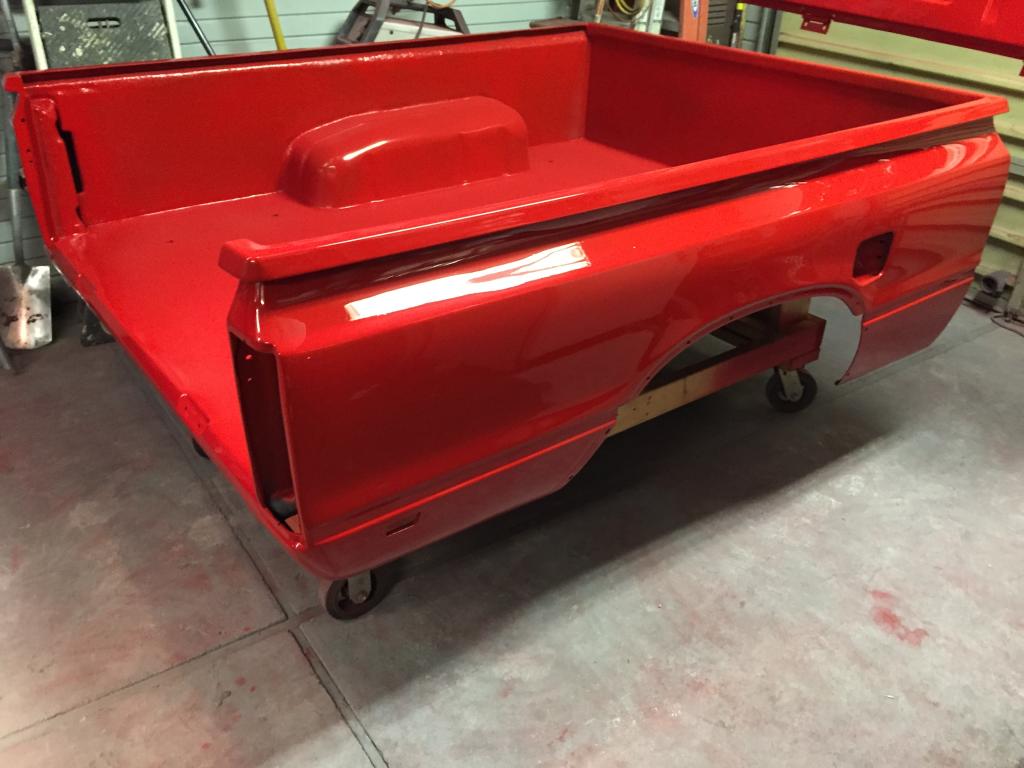
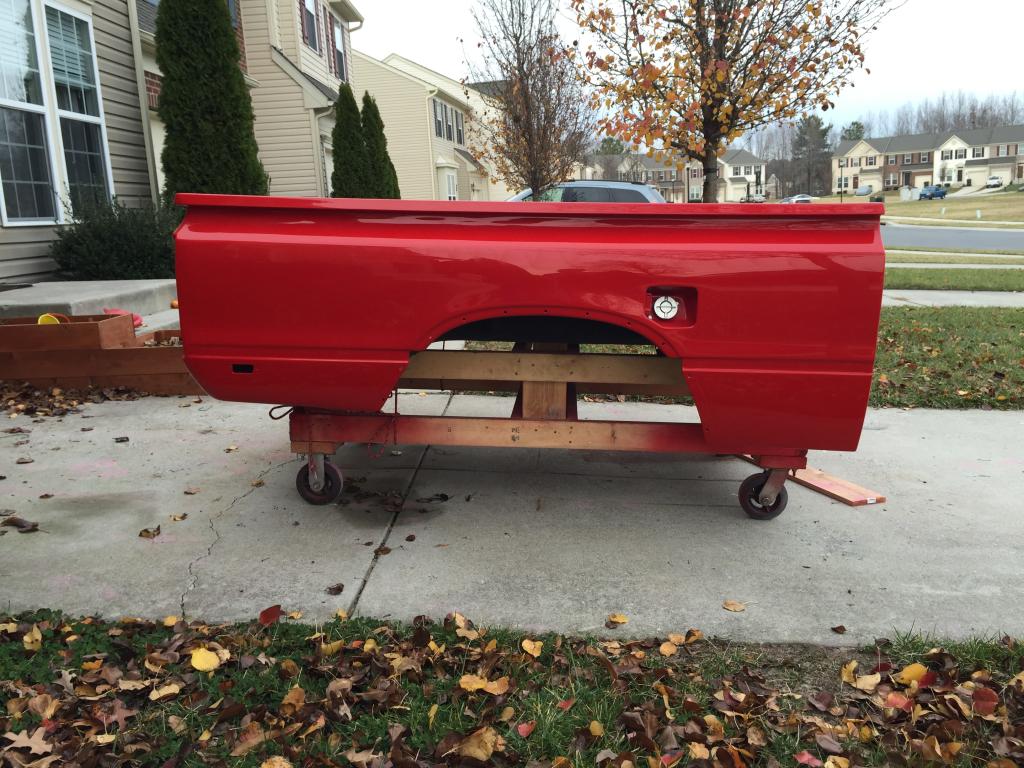
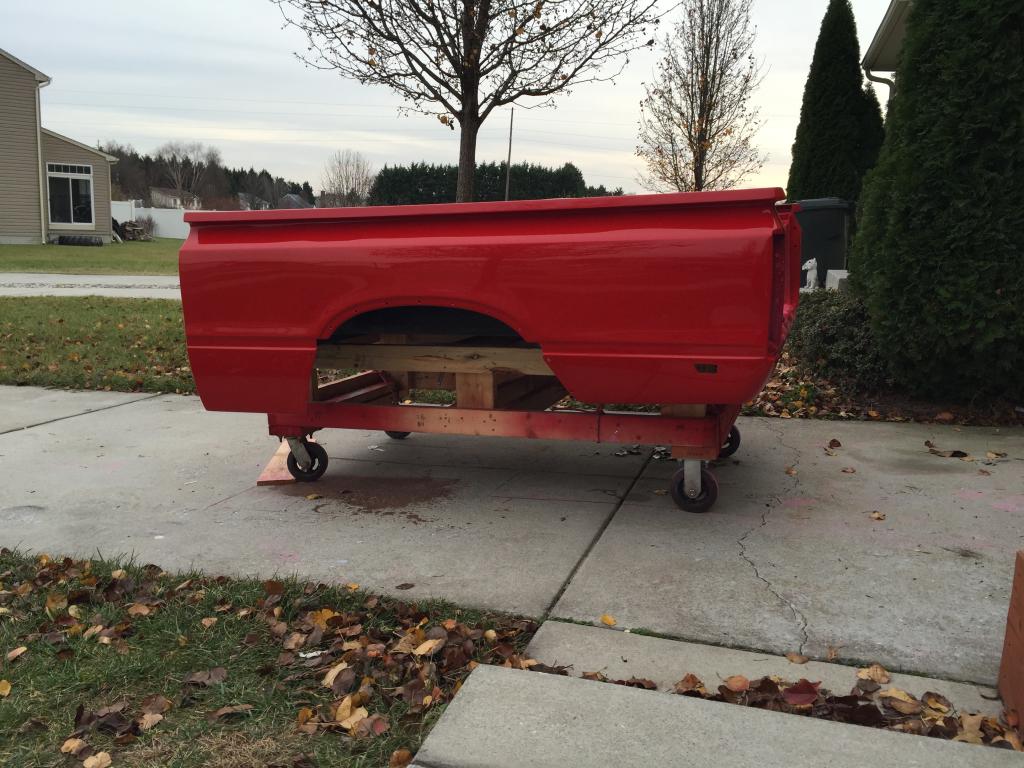
I have the bed completely finished - primed, painted, wetsanded, buffed, polished, waxed and Line-X'ed. The results are great!
Here are a couple key notes:
-Did some quick adjustments to get the tail light to fit a little better. This comes as a result of the nature of molding fiberglass and variations in aftermarket tail lights:

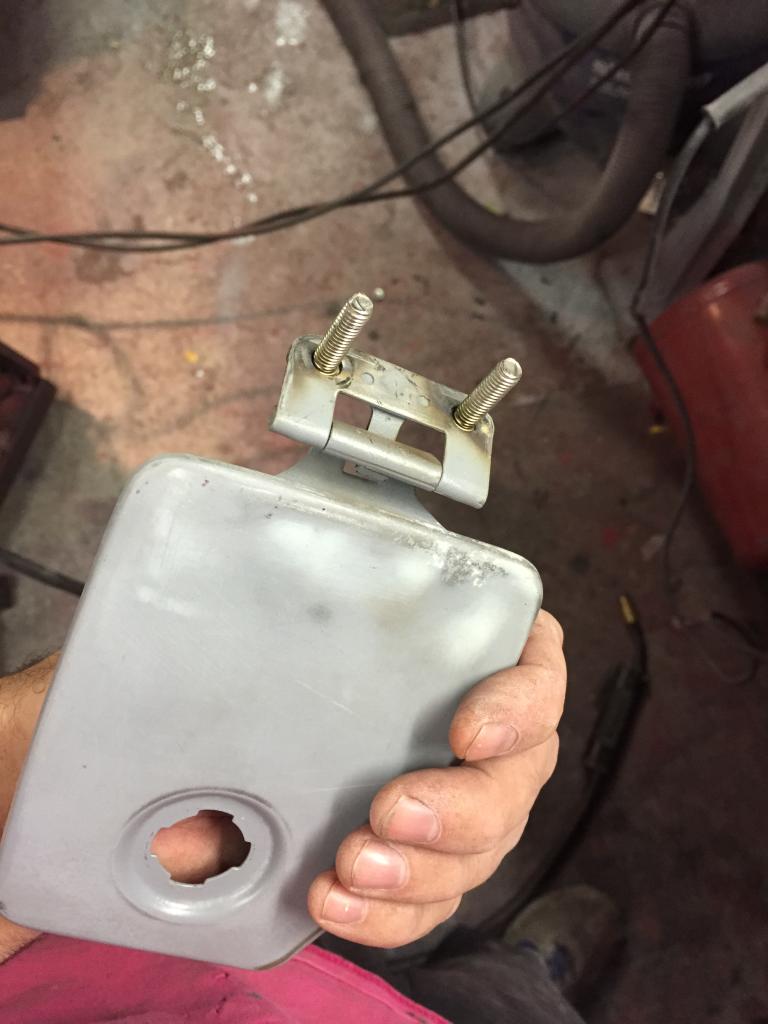
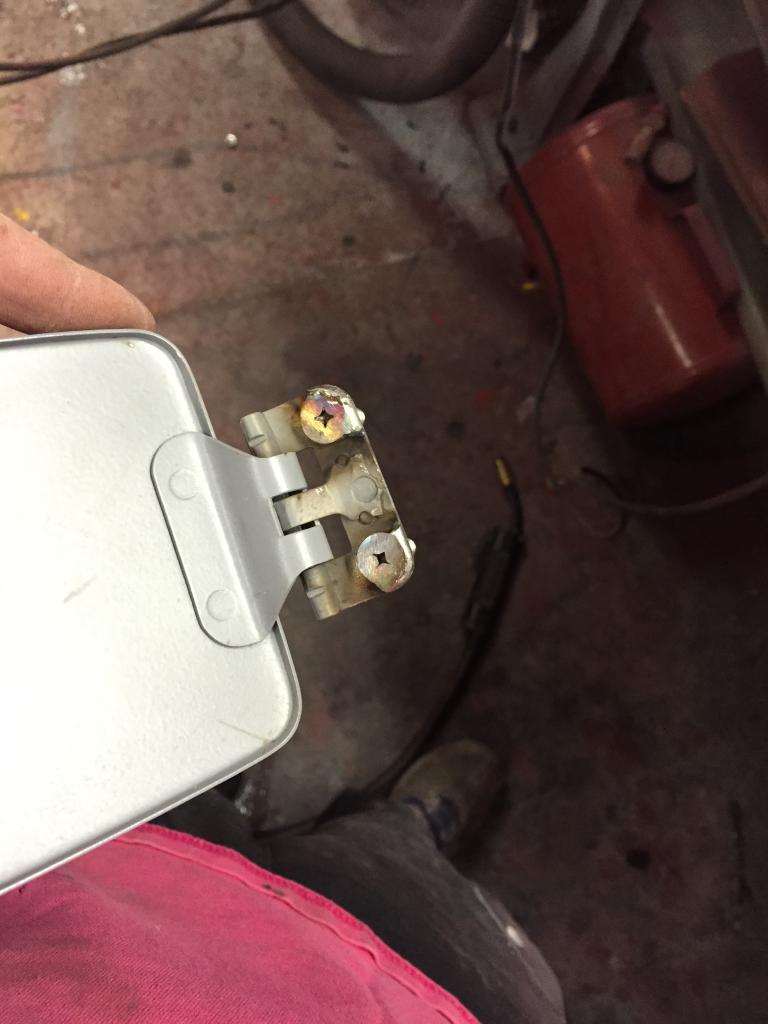
-I modified my fuel door so that it through-bolts instead of screws in. I just wanted to make it a little more easy to adjust so getting it just perfect is a tedious trial and error process:
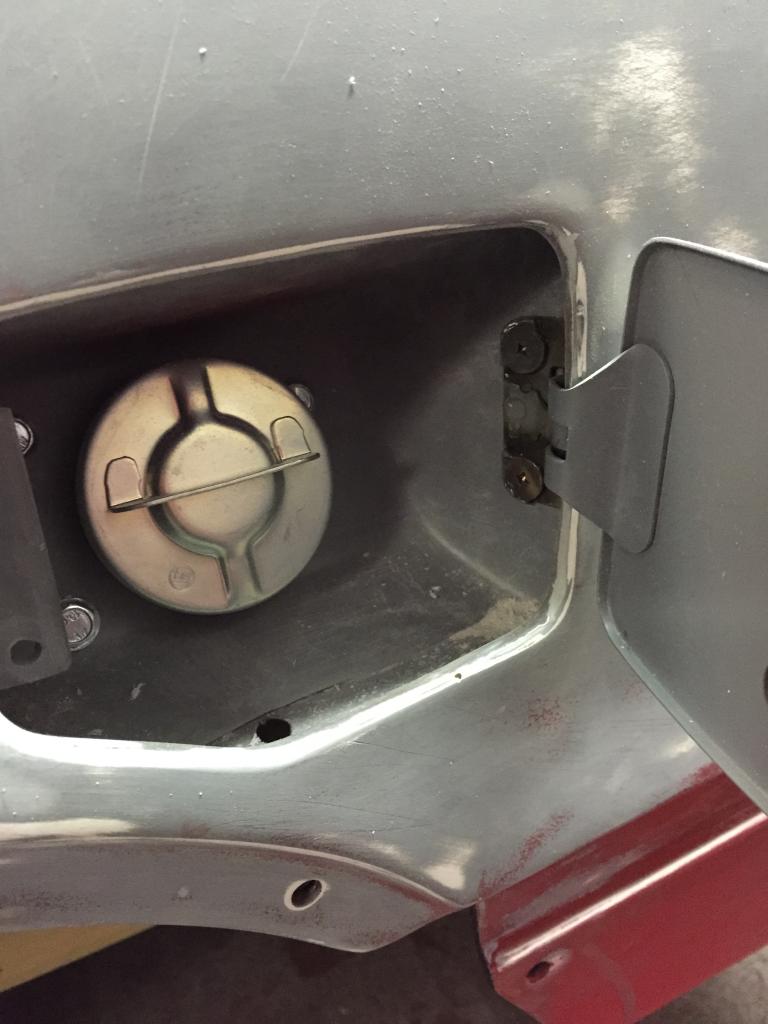
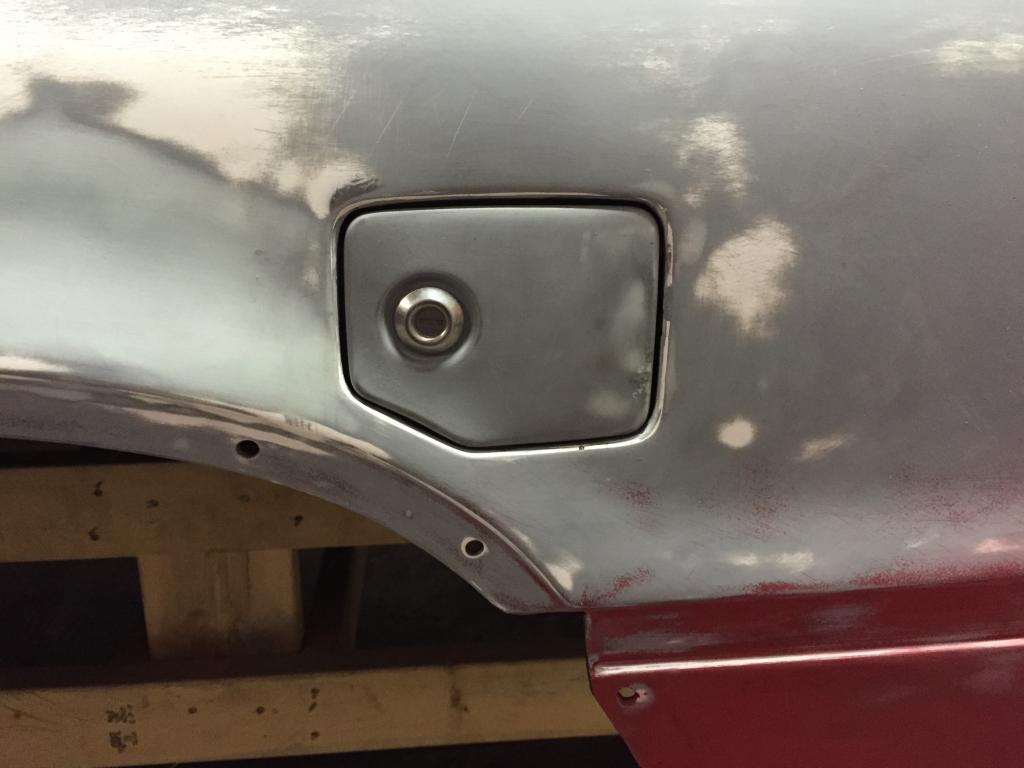
-Be aware of pinholes in the fiberglass. These are inevitable in the molding process, but they can be easily corrected with glazing putty and/or surfacer. You can see a larger one in the picture above about 1" to the left of the lower right corner of the fuel door
I wanted a nice flat look in the bed so I used some filler to smooth out what would otherwise be raw roving - me being picky again:

-The panels turned out nice and flat. I did do some light filling and blocking to achieve a more uniform surface, but it isn't necessary for all applications.
The bed is comes with epoxy, but I shot another coat after all the bodywork and then surfacer before paint. It is good practice to use the same system of paint all the way through the process to ensure compatibility. If I do this again, I would ask Corey not to shoot the bed with epoxy (or any other coating) before shipping - peace of mind in regards to paint compatibility I suppose.
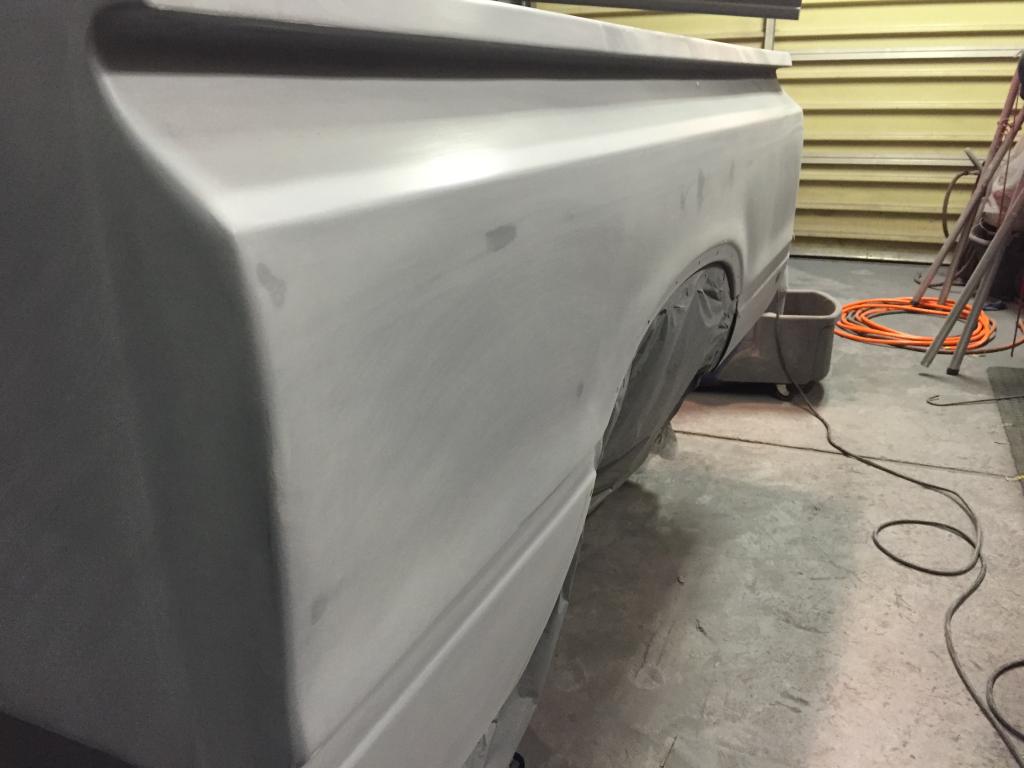
Painting went well. I'm not a professional, but I achieve professional results. The paint I used is a single stage 2K Urethane. Here it is prior to color sanding:
Everything was wetsanded, polished and buffed using Norton's Liquid Ice. These pictures show how straight the panels turned out:


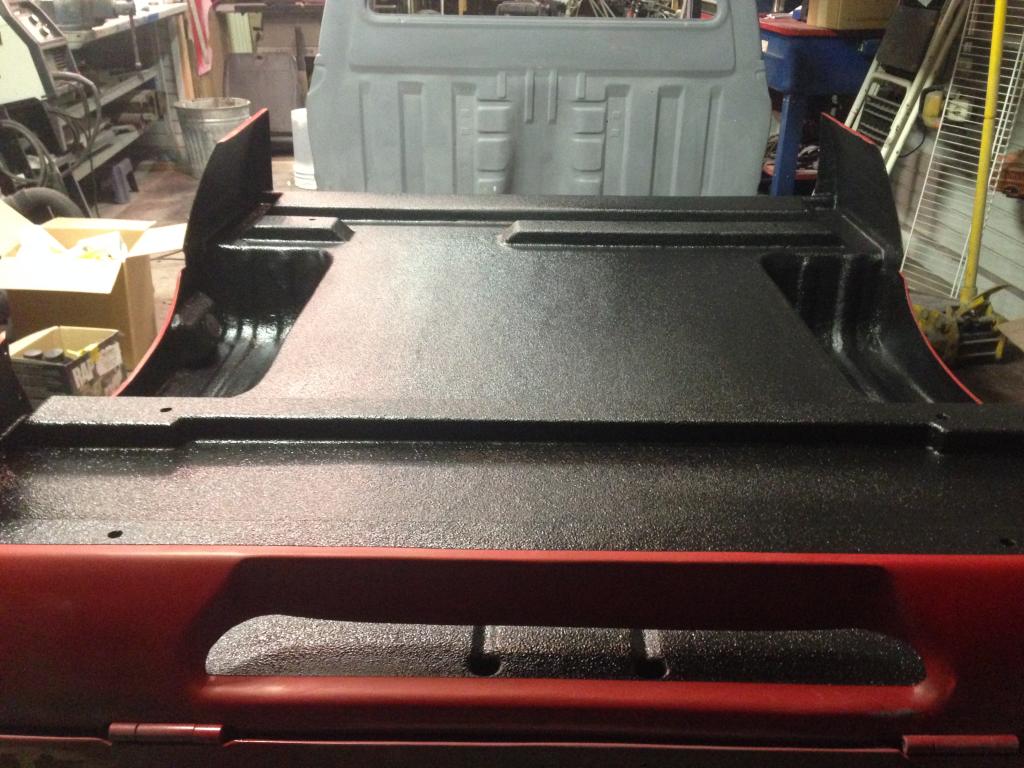
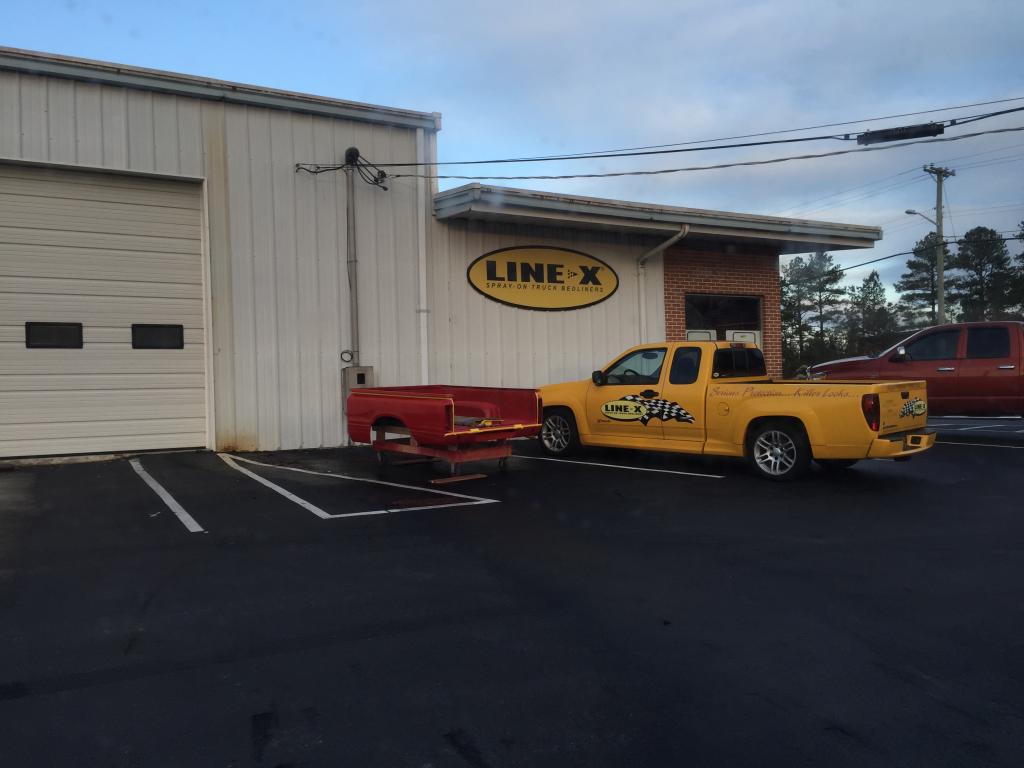
-Line-X went on well (except for the chips they put in my fresh paint!). Really stiffened the bed rails and provided some extra protection and durability. I would recommend going up and over the rails with bedliner.
Original flares fit well and had to holes for the rear marker lights. I used stainless hardware to mount them:
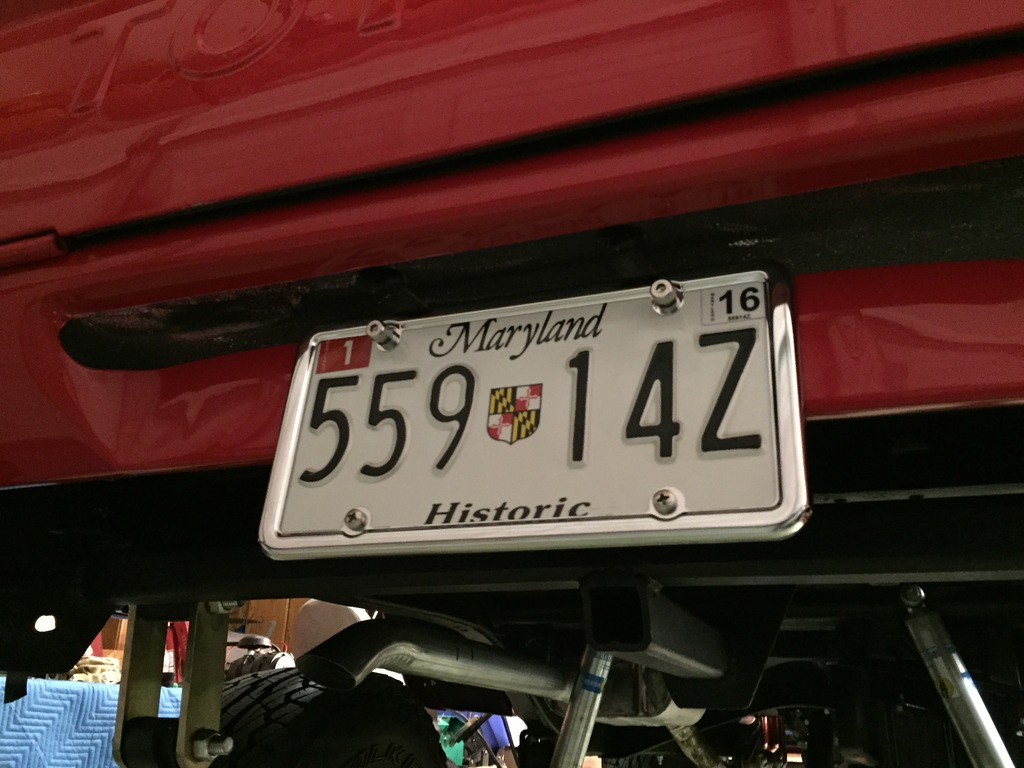
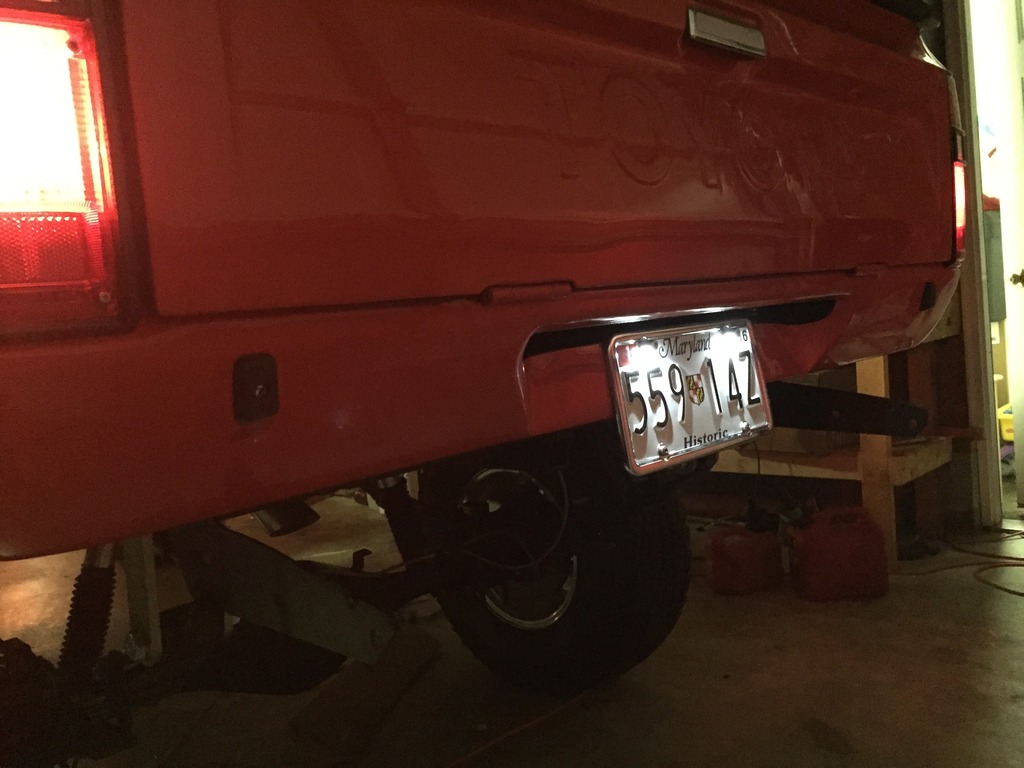
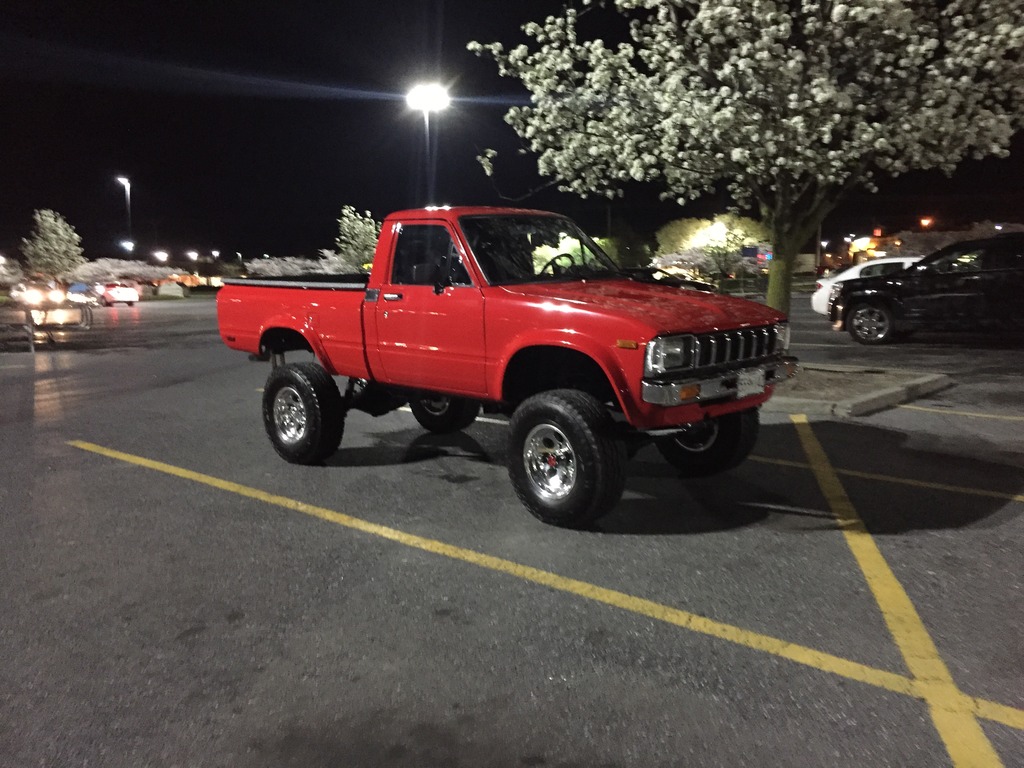
The stock tag lights can't mount up under the roll pan like a steel bed because the fiberglass bed does not have that "cavity." Corey has two holes recessed into the bottom of the bed for tag lights, but I wanted to do something simple that looked cool at the same time. I ended up going with motorcylce LED tag light bolts. The lights are housed in the top two tag bolts and shine down on the tag. Looks pretty trick at night, but practically invisible during the day:
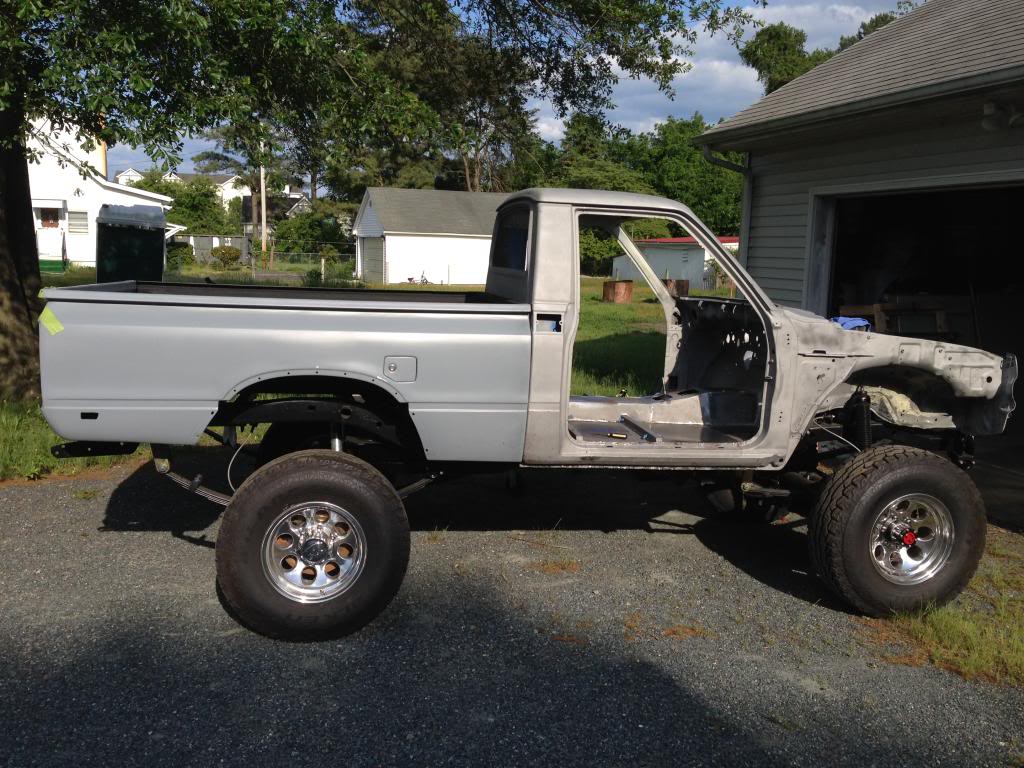
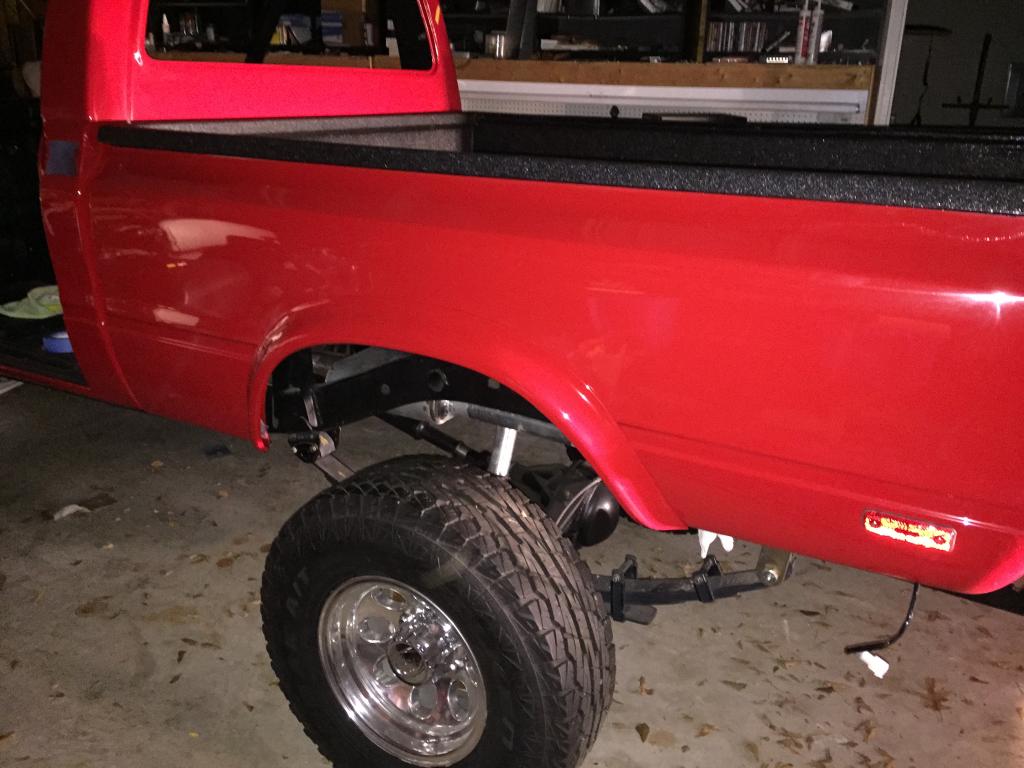
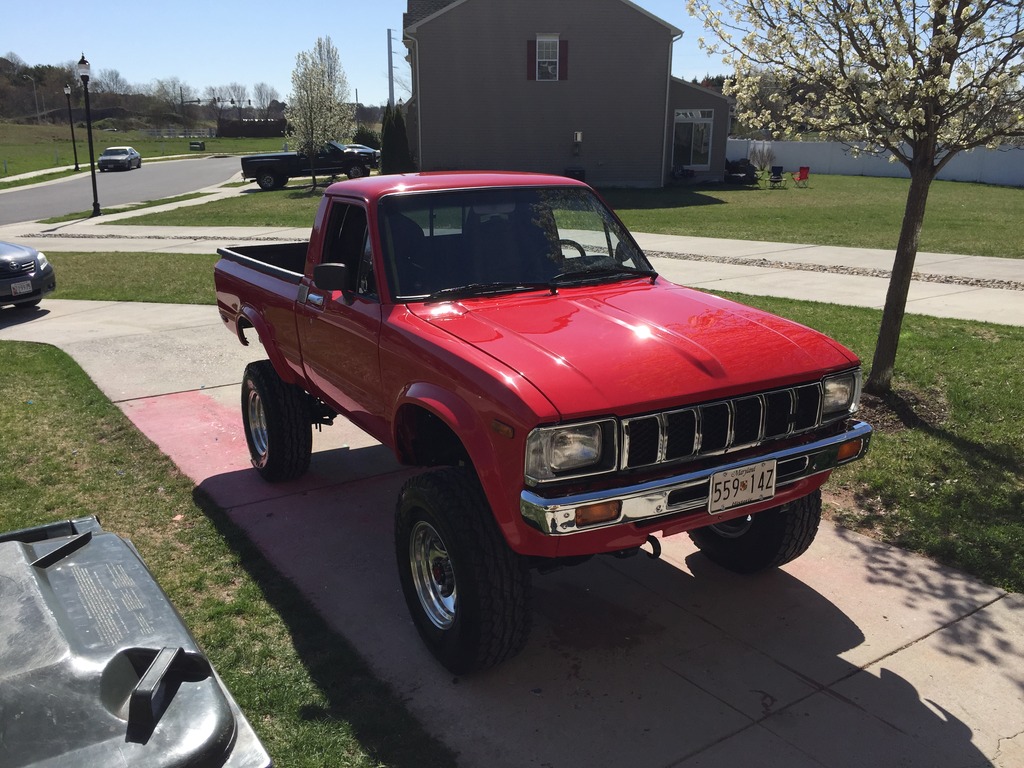
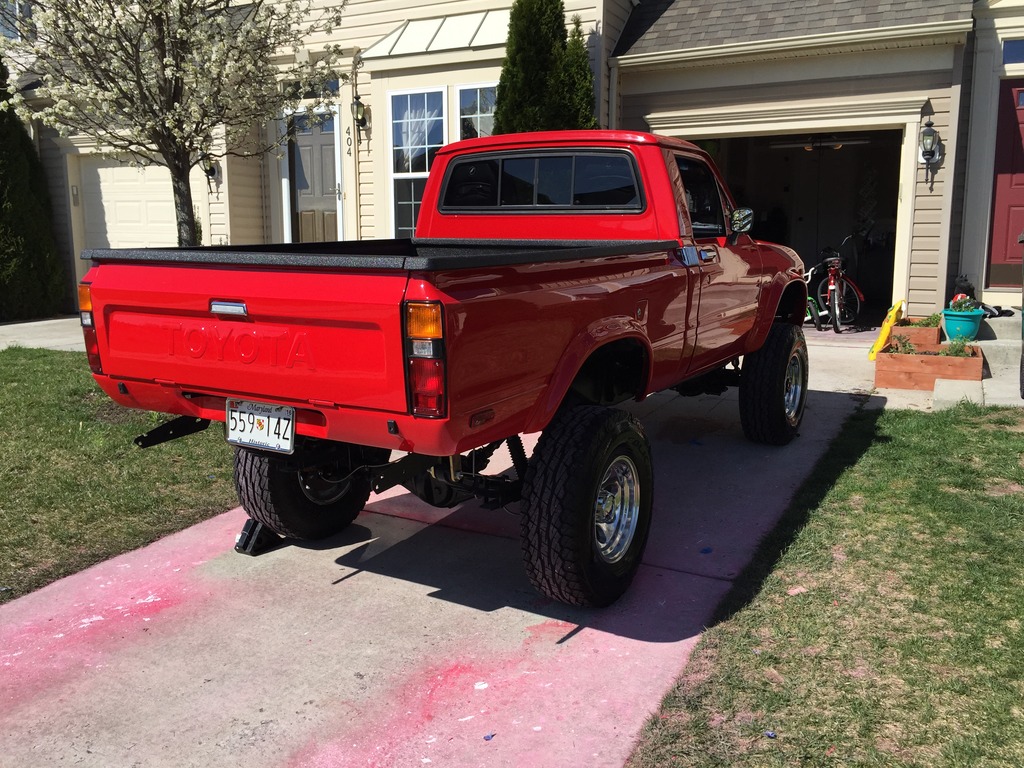
Fast forward a few months and this is how it looks completely put back together:
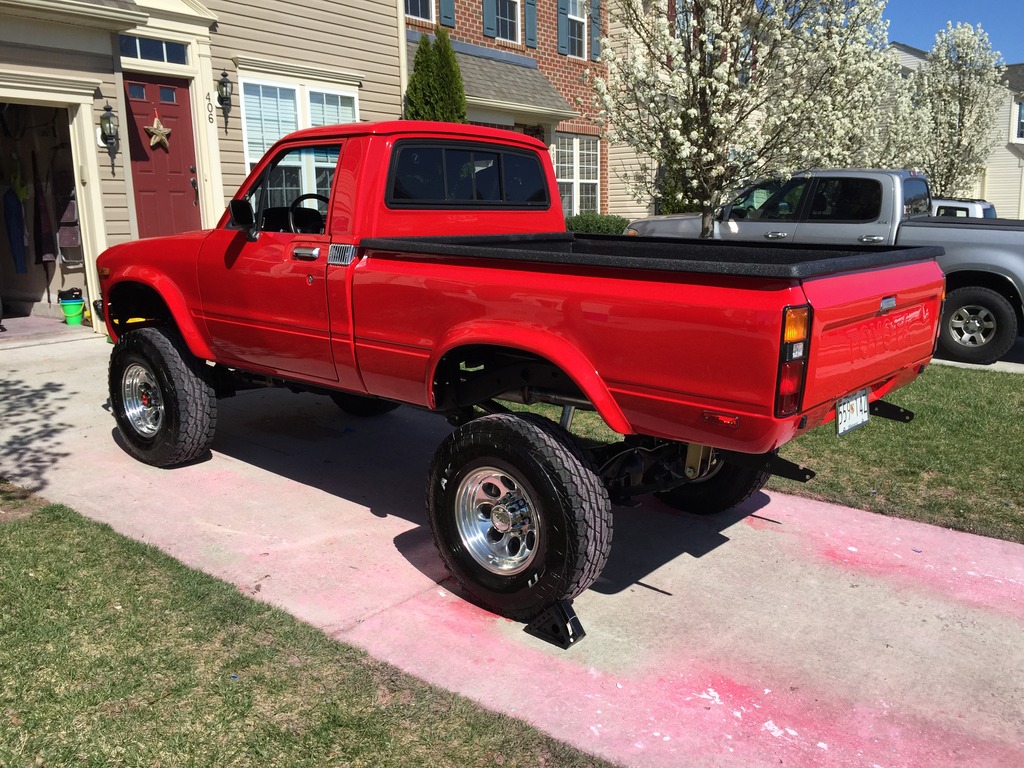
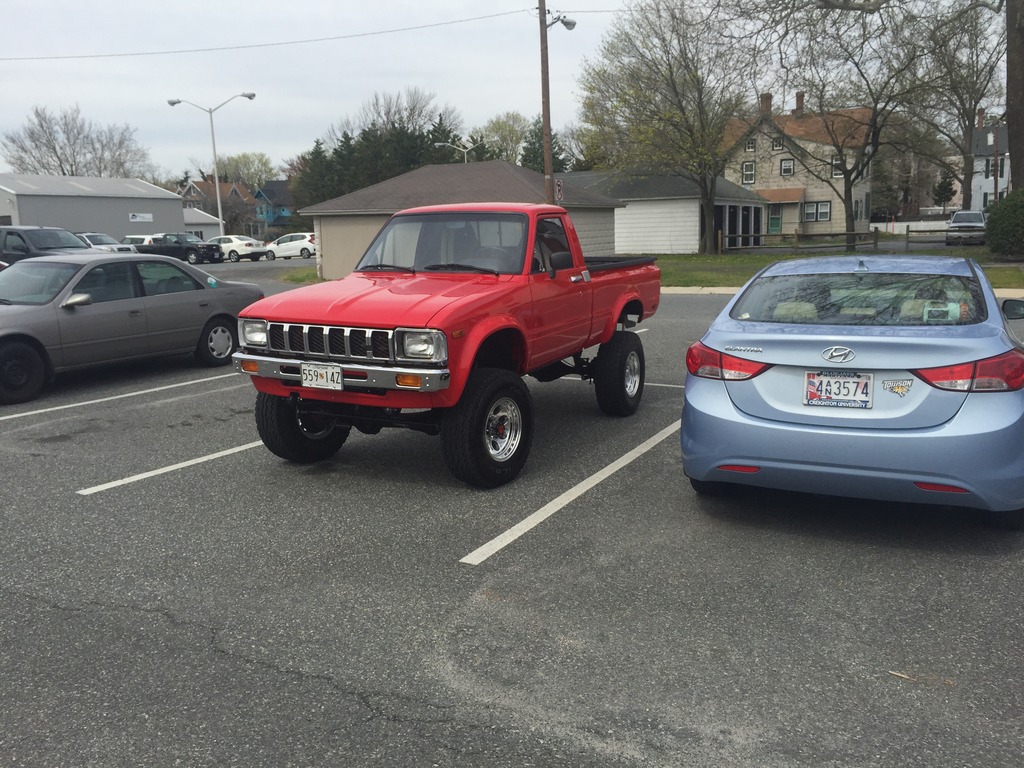
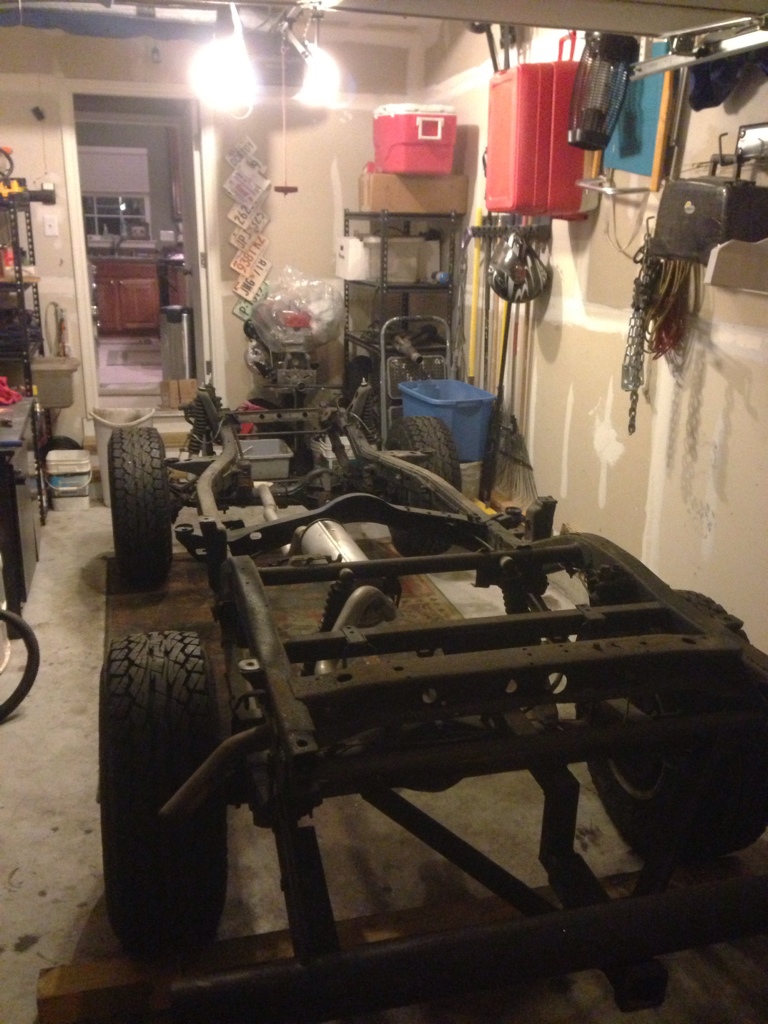
A real far cry from what it used to look like:

Overall, my experience with Corey and Toyota Fiberglass was great! The only things I would have changed would be No primers/coatings, Trekker style fuel filler (no door) and Molded on fender flares. That isn't a very long list. Would I do this again?? Absolutely! In fact, I've even considered going with a fiberglass cab if Corey would ever get it done (hint hint). Fiberglass ain't what it used to be folks - the stuff has come a long way, but the product is just one aspect of this whole experience. Corey's service after the sale is excellent! He doesn't just take your money and run - he has always returned my phone calls, emails and PMs even if it had nothing to do with the bed (although my emails are usually returned with a phone call because apparently he is much better at fiberglass than typing... LOL). That's good business right there folks!
I've also gained a good friend out of this deal. Corey, I'm sure you'll read this eventually, thanks for all your help! I couldn't have done it without you pal! Well... I could have, but the bodywork on a steel bed would have been a PITA!!
I have the bed completely finished - primed, painted, wetsanded, buffed, polished, waxed and Line-X'ed. The results are great!
Here are a couple key notes:
-Did some quick adjustments to get the tail light to fit a little better. This comes as a result of the nature of molding fiberglass and variations in aftermarket tail lights:


-I modified my fuel door so that it through-bolts instead of screws in. I just wanted to make it a little more easy to adjust so getting it just perfect is a tedious trial and error process:


-Be aware of pinholes in the fiberglass. These are inevitable in the molding process, but they can be easily corrected with glazing putty and/or surfacer. You can see a larger one in the picture above about 1" to the left of the lower right corner of the fuel door
I wanted a nice flat look in the bed so I used some filler to smooth out what would otherwise be raw roving - me being picky again:

-The panels turned out nice and flat. I did do some light filling and blocking to achieve a more uniform surface, but it isn't necessary for all applications.


The bed is comes with epoxy, but I shot another coat after all the bodywork and then surfacer before paint. It is good practice to use the same system of paint all the way through the process to ensure compatibility. If I do this again, I would ask Corey not to shoot the bed with epoxy (or any other coating) before shipping - peace of mind in regards to paint compatibility I suppose.
Painting went well. I'm not a professional, but I achieve professional results. The paint I used is a single stage 2K Urethane. Here it is prior to color sanding:


Everything was wetsanded, polished and buffed using Norton's Liquid Ice. These pictures show how straight the panels turned out:


-Line-X went on well (except for the chips they put in my fresh paint!). Really stiffened the bed rails and provided some extra protection and durability. I would recommend going up and over the rails with bedliner.


Original flares fit well and had to holes for the rear marker lights. I used stainless hardware to mount them:

The stock tag lights can't mount up under the roll pan like a steel bed because the fiberglass bed does not have that "cavity." Corey has two holes recessed into the bottom of the bed for tag lights, but I wanted to do something simple that looked cool at the same time. I ended up going with motorcylce LED tag light bolts. The lights are housed in the top two tag bolts and shine down on the tag. Looks pretty trick at night, but practically invisible during the day:


Fast forward a few months and this is how it looks completely put back together:


A real far cry from what it used to look like:


Overall, my experience with Corey and Toyota Fiberglass was great! The only things I would have changed would be No primers/coatings, Trekker style fuel filler (no door) and Molded on fender flares. That isn't a very long list. Would I do this again?? Absolutely! In fact, I've even considered going with a fiberglass cab if Corey would ever get it done (hint hint). Fiberglass ain't what it used to be folks - the stuff has come a long way, but the product is just one aspect of this whole experience. Corey's service after the sale is excellent! He doesn't just take your money and run - he has always returned my phone calls, emails and PMs even if it had nothing to do with the bed (although my emails are usually returned with a phone call because apparently he is much better at fiberglass than typing... LOL). That's good business right there folks!
I've also gained a good friend out of this deal. Corey, I'm sure you'll read this eventually, thanks for all your help! I couldn't have done it without you pal! Well... I could have, but the bodywork on a steel bed would have been a PITA!!
06-08-2015, 09:43 PM
#10
Registered User
 That Bed on the truck looks AWESOME and by the looks of it very much worth the money but quite a bit out of my reach for the moment. i live on a fixed VA compentation so I think I'll stick with a flatbed like I planned on in the first place. The flatbed will be about 750 if and when we do it and once its done I'll get it powder coated like I plan on doing with the steel wheels thats on the truck now. But alll in all I have to give Corey props for doing an excellent job with the bed and even tho I won't be doing it myself, if I could afford it I would surely do it. Well done again Corey.


Thread
Thread Starter
Forum
Replies
Last Post
FS[NorAtl]: 1989 pickup beds and leer cap Rhode island
mickyd9990
Misc Stuff (Vehicle Related)
0
07-06-2015 09:01 AM
Suprarossa
99+ Tundra, 00+ Sequoia, 98+ Land Cruiser/LX470
0
07-06-2015 05:21 AM
FS[SouthEast]: 1st Gen 4Runner Slider Window, Driver Side
coryc85
Misc Stuff (Vehicle Related)
0
07-06-2015 04:07 AM


