skrassow's 1999 Tacoma Build-Up Thread
 05-21-2009, 06:37 AM
#1
Registered User
Thread Starter

Join Date: Oct 2006
Location: Gulf Breeze, FL
Posts: 169
Likes: 0
Received 0 Likes
on
0 Posts
skrassow's 1999 Tacoma Build-Up Thread
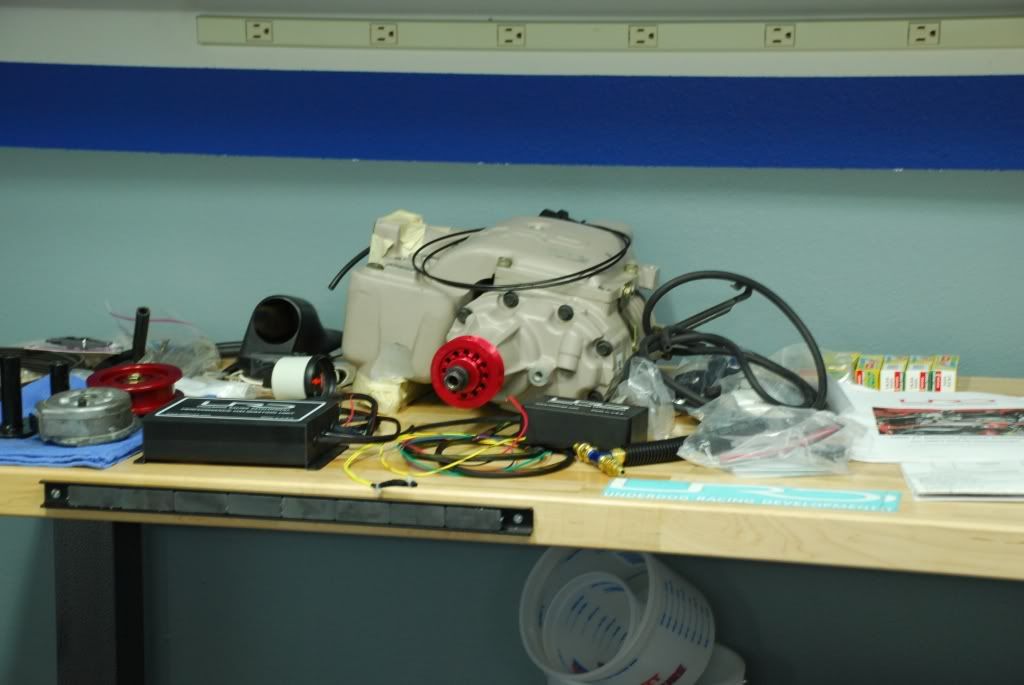
OK, so rather than continue hijacking TA's thread its time to start my own log. A little background on the truck; its a 99 xcab, 4x4 SR5, 5 spd, 125xxxmiles. I ve had the truck for 7 years or so, trouble free. Last year while overseas I came across a deal on a 1st gen SC that I couldnt pass up, so this weekend it gets stuffed in! Following TA, and speedy's lead (and many others), I decided to do it right and get the URD 7th to go along with it. And at the recommendation of URD, Im also going to install the 02 sens calibrator. For monitoring Im going with the PLX devices, DM100/OBD. This will give me one gauge in the truck to monitor AFR, and boost, as well as ALL OBD parameters, as well as an interface with the OBD to check/clear codes.
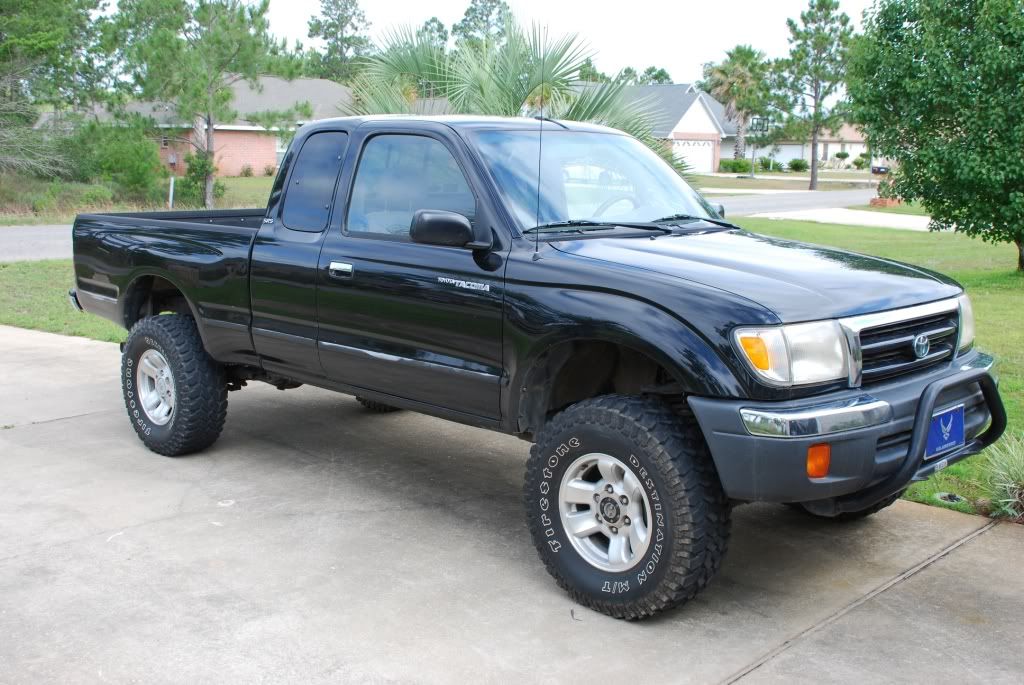
Heres how she sites today...3.5" fabtech suspension, 31x1050x15's.
And here are SOME of the parts I hope to get installed this weekend (PLX stuff hasn't arrived yet)
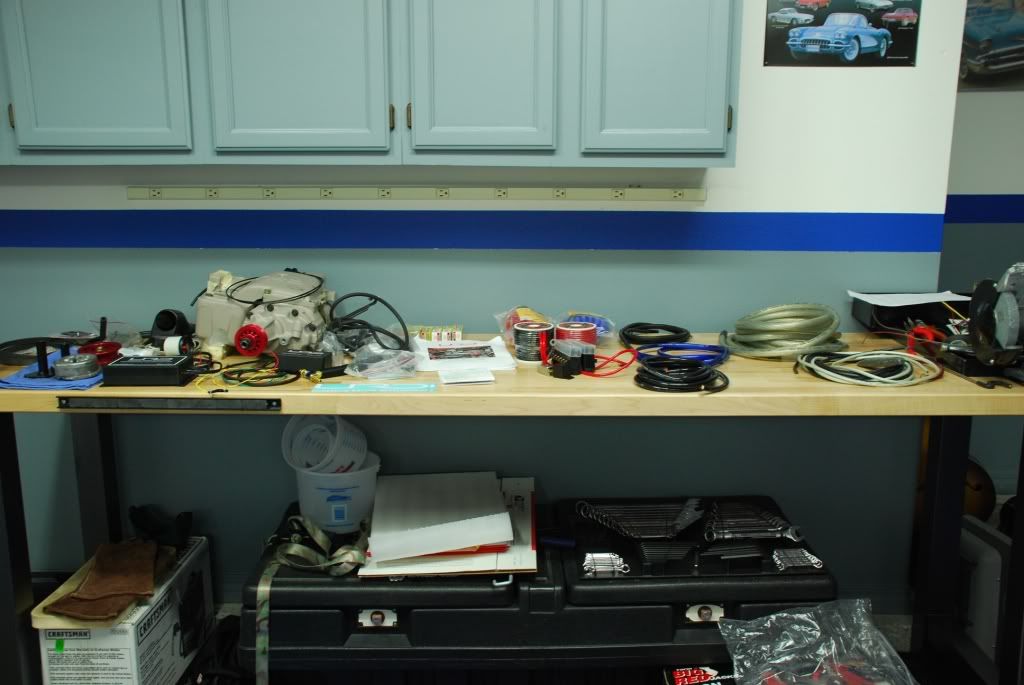
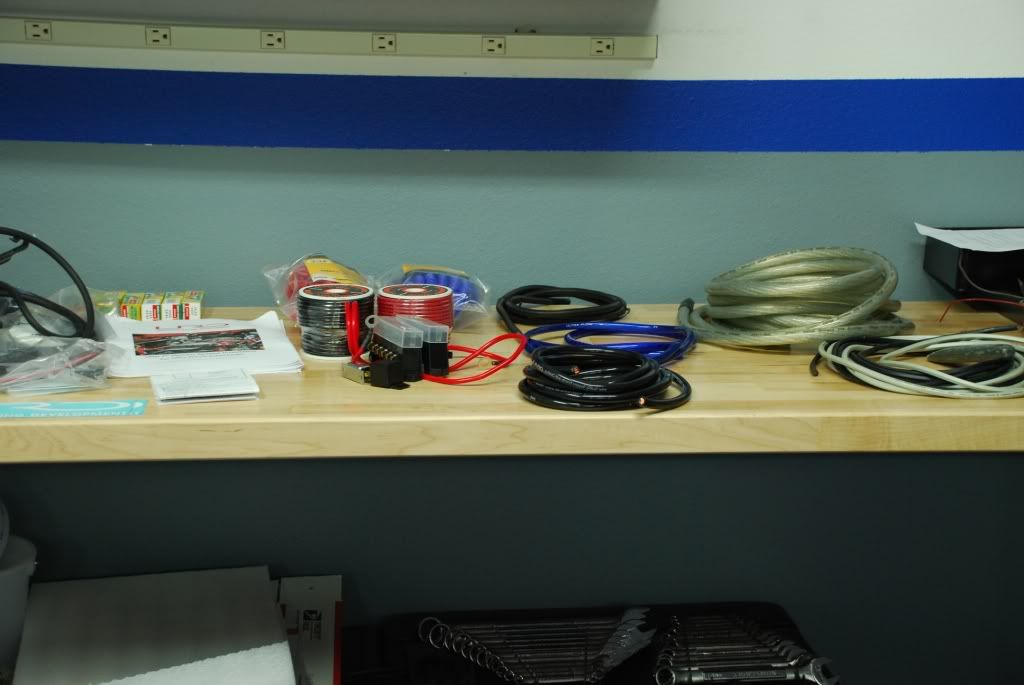
No ALL of that cable wont be used in the truck, but I plan to do the big 3 and clean up a crappy stereo install that circuit city left me with. As well as running new fuse blocks to separate all the goodies from the factory wiring as much as possible.
Look for pics of the progress throughout the weekend (yeah mine started early )
)
For any of the supercharging experts. After reading, and rereading the instructions from gadget, there is one spot that has me a bit puzzled. The wire harness for the injector has two wires, but I see no mention of where to connect them Any ideas on that?
Following TA, and speedy's lead (and many others), I decided to do it right and get the URD 7th to go along with it. And at the recommendation of URD, Im also going to install the 02 sens calibrator. For monitoring Im going with the PLX devices, DM100/OBD. This will give me one gauge in the truck to monitor AFR, and boost, as well as ALL OBD parameters, as well as an interface with the OBD to check/clear codes.Heres how she sites today...3.5" fabtech suspension, 31x1050x15's.
And here are SOME of the parts I hope to get installed this weekend (PLX stuff hasn't arrived yet)
No ALL of that cable wont be used in the truck, but I plan to do the big 3 and clean up a crappy stereo install that circuit city left me with. As well as running new fuse blocks to separate all the goodies from the factory wiring as much as possible.
Look for pics of the progress throughout the weekend (yeah mine started early
)For any of the supercharging experts. After reading, and rereading the instructions from gadget, there is one spot that has me a bit puzzled. The wire harness for the injector has two wires, but I see no mention of where to connect them
Any ideas on that?
Last edited by skrassow; 05-21-2009 at 07:17 PM.
 05-21-2009, 06:50 AM
#2
Contributing Member
Welcome to the supercharged world, it's a fun (but expensive) place to be.
Last edited by mastacox; 05-21-2009 at 06:52 AM.
05-21-2009, 06:54 AM
#3
Contributing Member
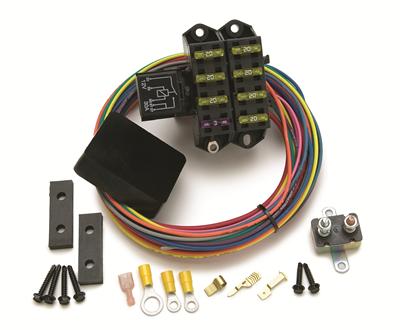
In case you don't have one already, I would also recommend getting a auxillary fuse block such as the Painless Cirkit Boss 7-Circuit unit. I installed one when I installed my URD kit, and it has been a great way to easily wire up gauges and extras with a fused ign-hot source.
05-21-2009, 07:05 AM
#4
Registered User
Thread Starter
Join Date: Oct 2006
Location: Gulf Breeze, FL
Posts: 169
Likes: 0
Received 0 Likes
on
0 Posts
Mastacox, thanks for the tips. The rest of the wiring is actually pretty easy, and the plug and play is expensive. Too mush to justify for the few connection there are. I have identified the rest of them and they are easy enough. I just dont see in the directions where these go. I may have to call gadget later.
I like those fuse blocks too. For now I have a couple of 6 circuit blocks that I will wire up with a relay to work just like that one. Not fancy, but effective.
I like those fuse blocks too. For now I have a couple of 6 circuit blocks that I will wire up with a relay to work just like that one. Not fancy, but effective.
05-21-2009, 04:08 PM
#6
Registered User
Thread Starter
Join Date: Oct 2006
Location: Gulf Breeze, FL
Posts: 169
Likes: 0
Received 0 Likes
on
0 Posts
Not much too exciting for today. I realized I had just filled up the tank about a week before and hadnt driven the truck because it needed a new tensioner pulley...so the tank was still full. Since I plan on replacing the fuel pump I figured I should drive it and burn up some fuel, so I spent most of the day in pcola.
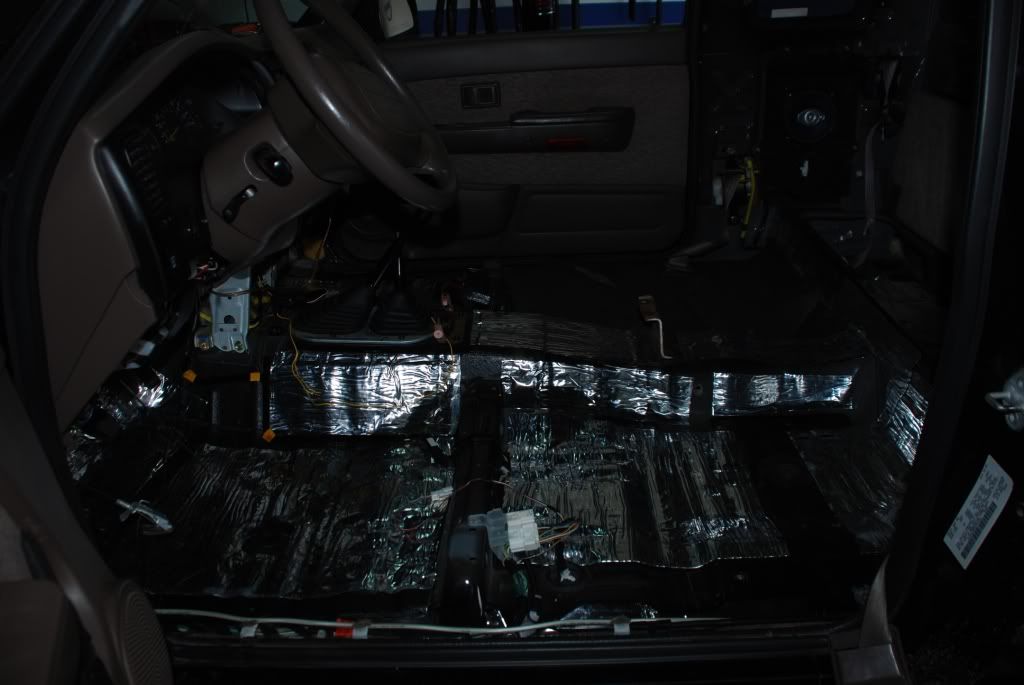
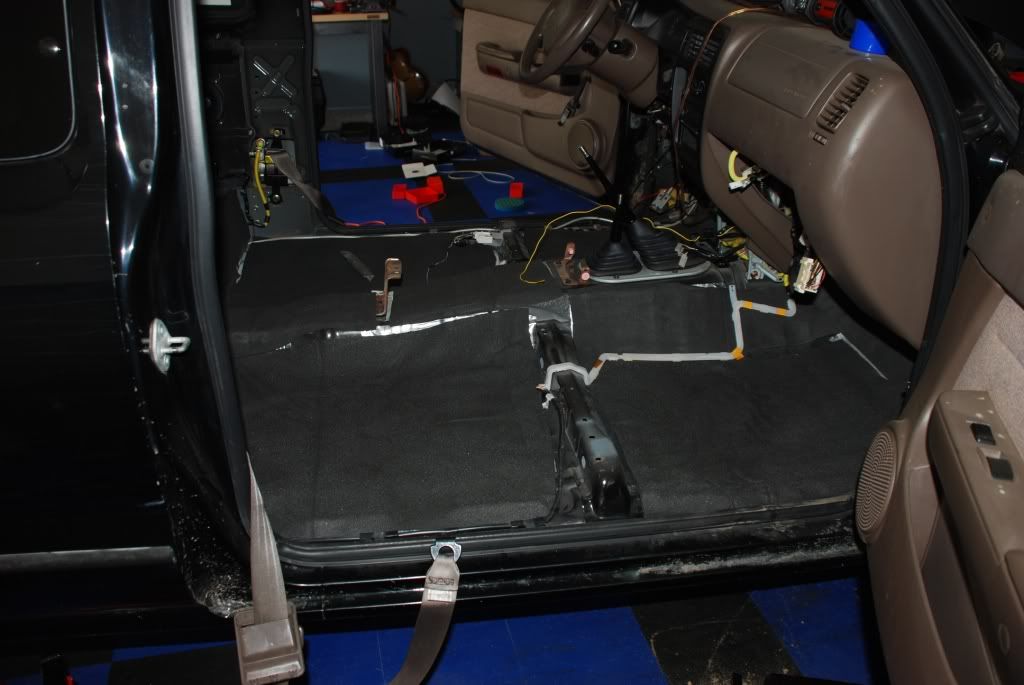
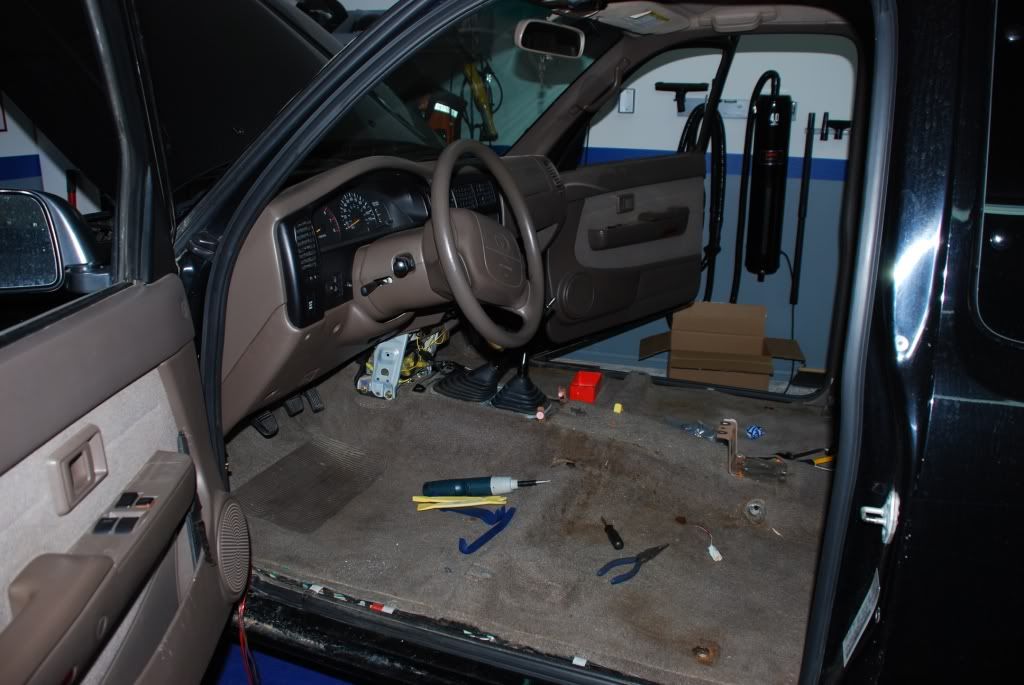
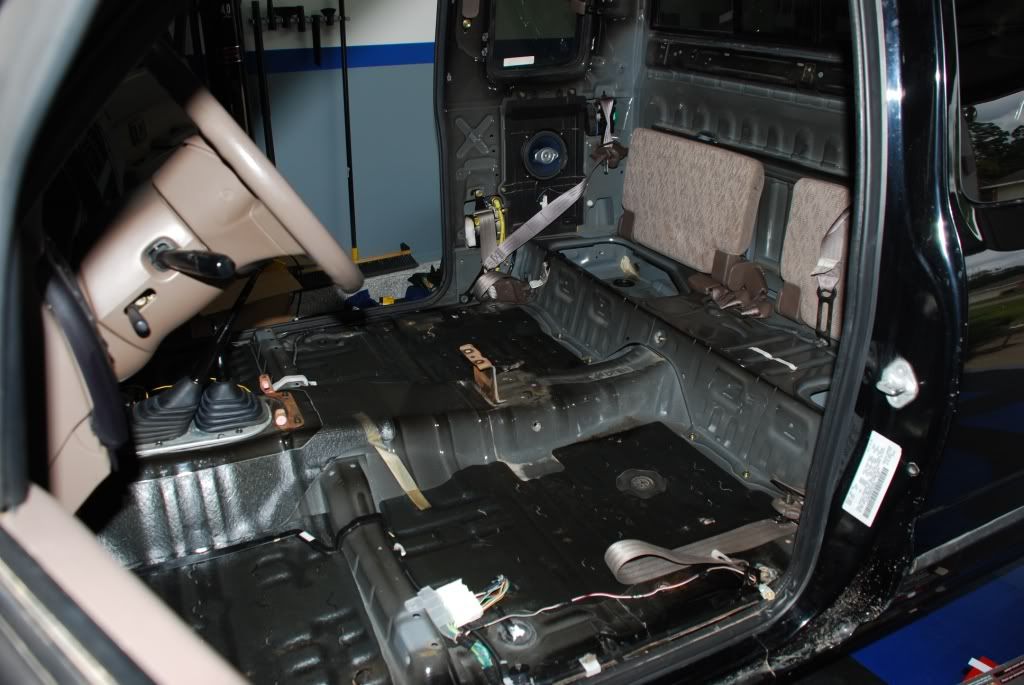
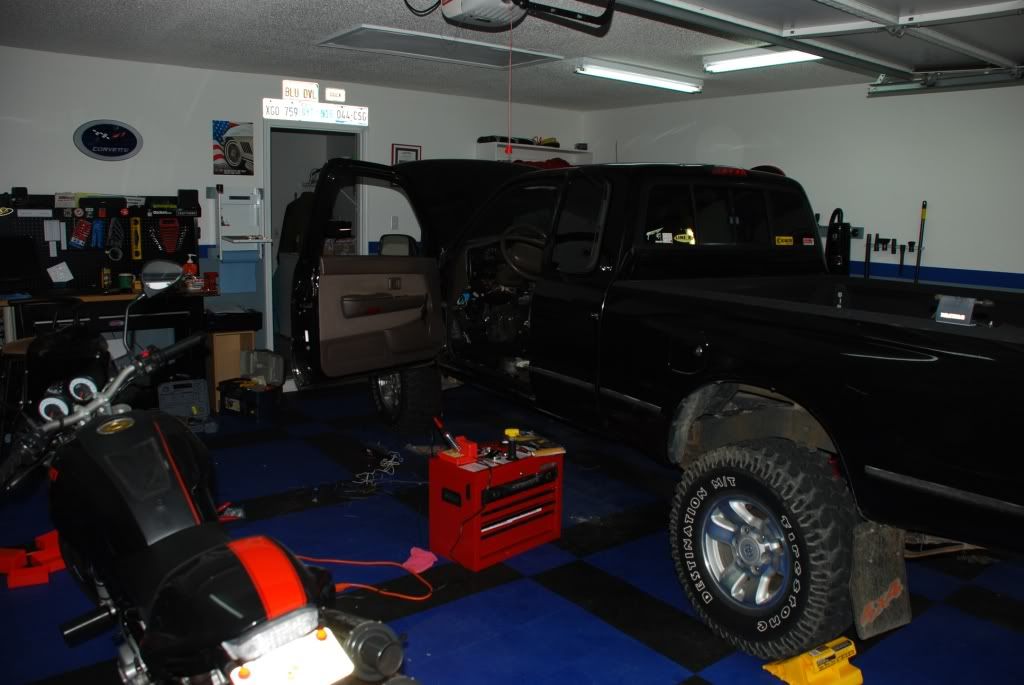
I did manage to get a jump on the interior. I got most of it gutted, not necessary for the URD stuff, but Im redoing some stereo wiring as well as putting in some sound dampener. Tomorrow Ill finish removing the interior and the old wiring so I can start fresh. Then its on to the the engine bay!
On a side note, a quick call to gadget confirmed that the wired off the 7th injector do indeed go to the corresponding wires on the controller. I figured as much, but with out it being specifically written somewhere I didnt want to assume.
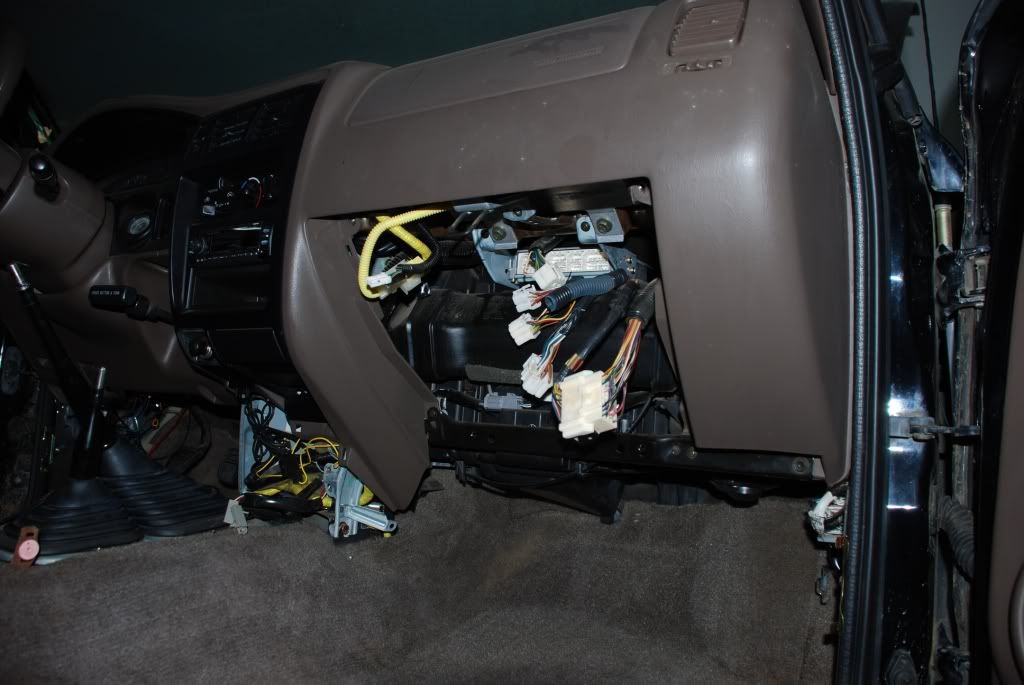
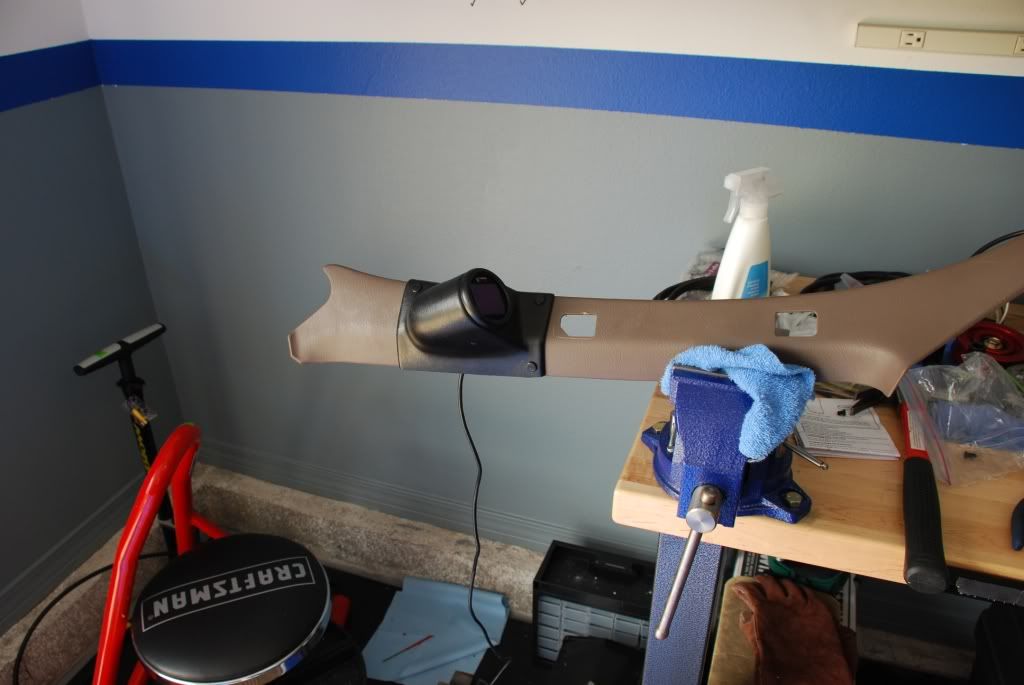
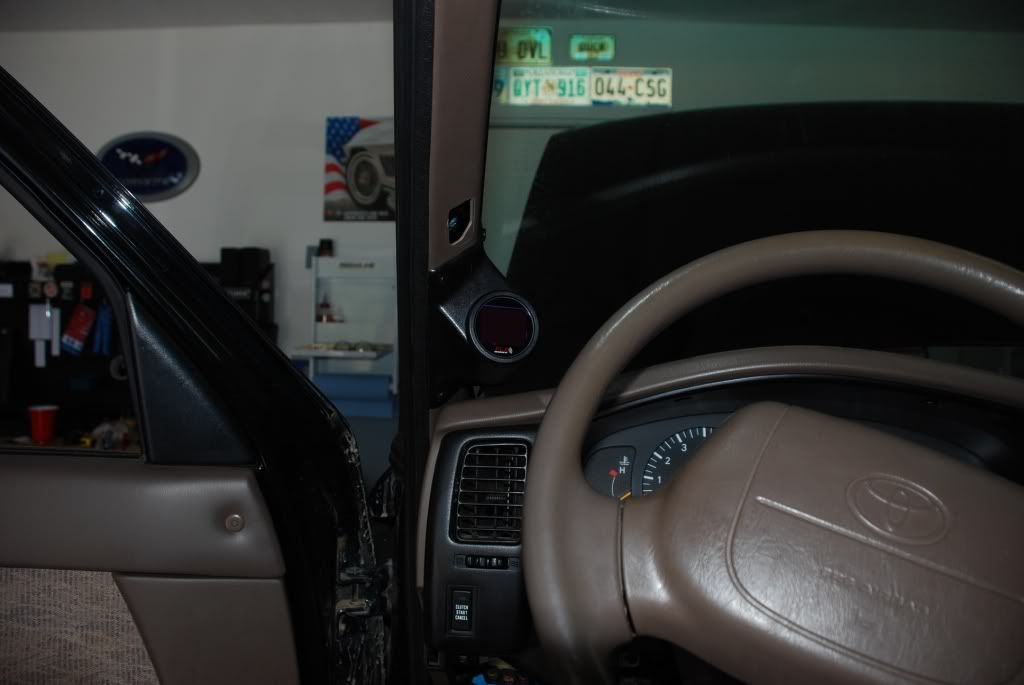
For anyone interested in how the URD stuff hooks in, these next two pictures show the harness you have to tie into. This is MUCH easier to get to with the pass seat out and then of course you need to remove the glove box and one panel behind it. Another 6 inches of wire to work with would have been nice, but it really isnt too bad. I shouldnt have any trouble getting in there to solder it up.

Anyone wanna go for a ride!?
I did manage to get a jump on the interior. I got most of it gutted, not necessary for the URD stuff, but Im redoing some stereo wiring as well as putting in some sound dampener. Tomorrow Ill finish removing the interior and the old wiring so I can start fresh. Then its on to the the engine bay!
On a side note, a quick call to gadget confirmed that the wired off the 7th injector do indeed go to the corresponding wires on the controller. I figured as much, but with out it being specifically written somewhere I didnt want to assume.
For anyone interested in how the URD stuff hooks in, these next two pictures show the harness you have to tie into. This is MUCH easier to get to with the pass seat out and then of course you need to remove the glove box and one panel behind it. Another 6 inches of wire to work with would have been nice, but it really isnt too bad. I shouldnt have any trouble getting in there to solder it up.
Anyone wanna go for a ride!?
Trending Topics
05-22-2009, 07:05 PM
#9
Registered User
Thread Starter
Join Date: Oct 2006
Location: Gulf Breeze, FL
Posts: 169
Likes: 0
Received 0 Likes
on
0 Posts
Not too much visible progress again today...seems like I am having a hard time gaining traction with this. I dont work so fast anymore! Typical day goes something like...
-wake up, have a few cups of coffee to figure out where Im at and what say it is
-Find answers to above questions, then proceed to garage, have a few more cups of coffee to remember while the heck the interior of my truck is in the bed of truck, and why the Vette is out in the rain!
-Finally pick up tools (hey its only been a few hours since I got up now!)
-realize I have the wrong tools, go to mean man at autozone to find out he doesnt have said tool either
-go back home, beat hammer and pry due to lack of proper tool, get one item done
-LUNCH TIME
-two hours later, resume beating hammering, and prying, accomplish a few more items
-damage something...take two steps back and drink a beer to analyze problem
-find solution, drink a victory beer
-make problem worse, drink sympathy beer
-well you get the idea...it end in lots of beer and not much work
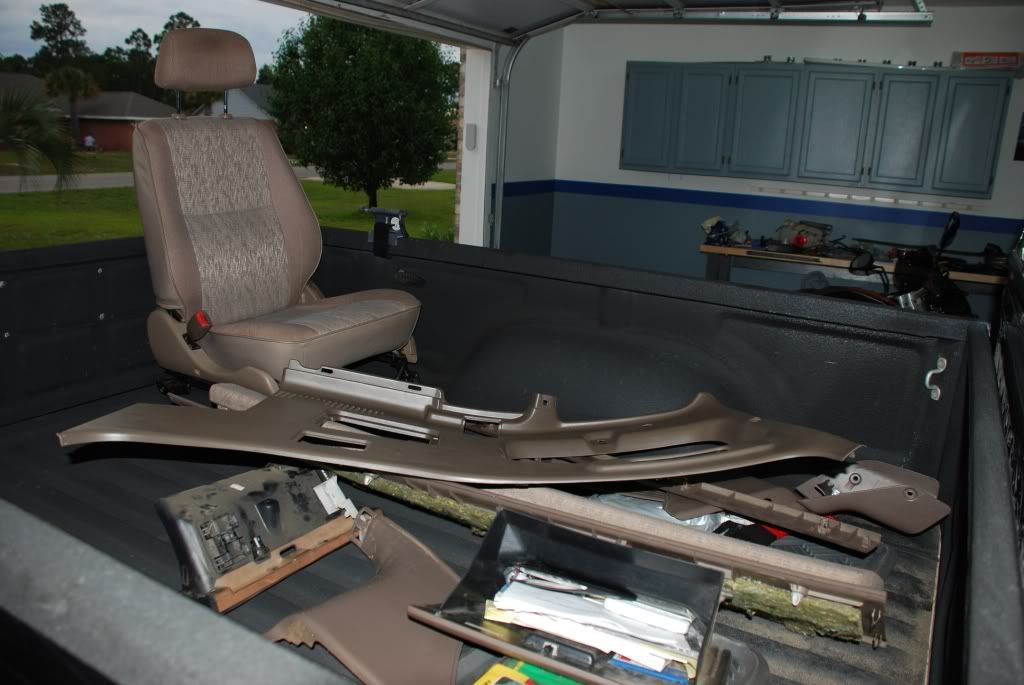
I did get the rest of the interior out.
I spent most of the morning fixing the crappy wiring left buy circuit city kids. There was literally feet of extra wire all balled up behind there! And a few connections that looked like they would fall apart at the next speed bump!
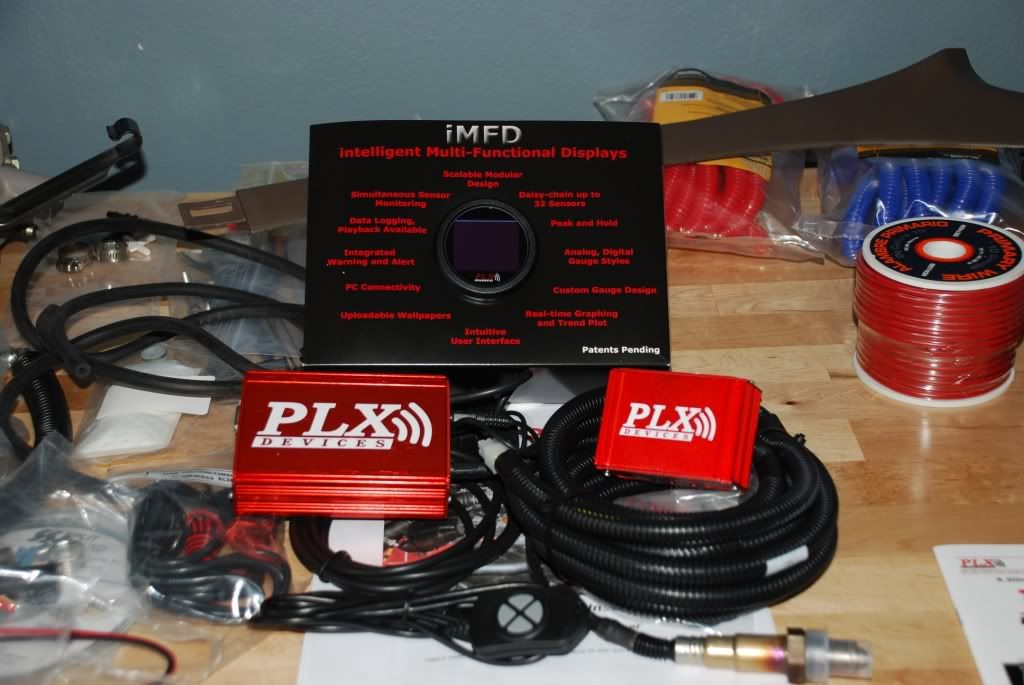
Then the mailman brought this today too (resulted in more beer)
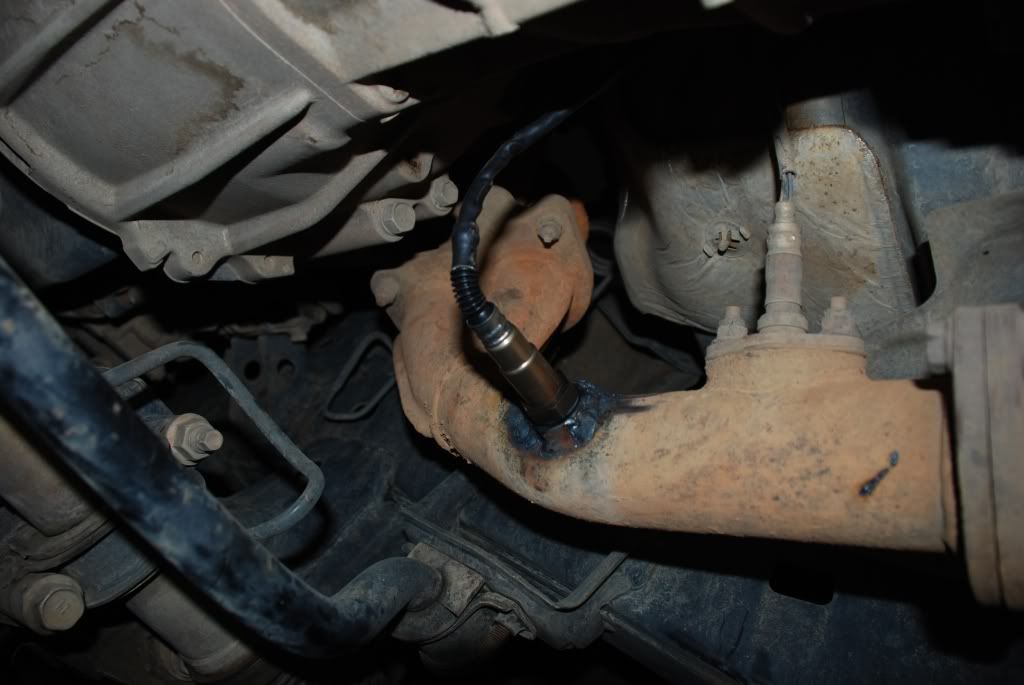
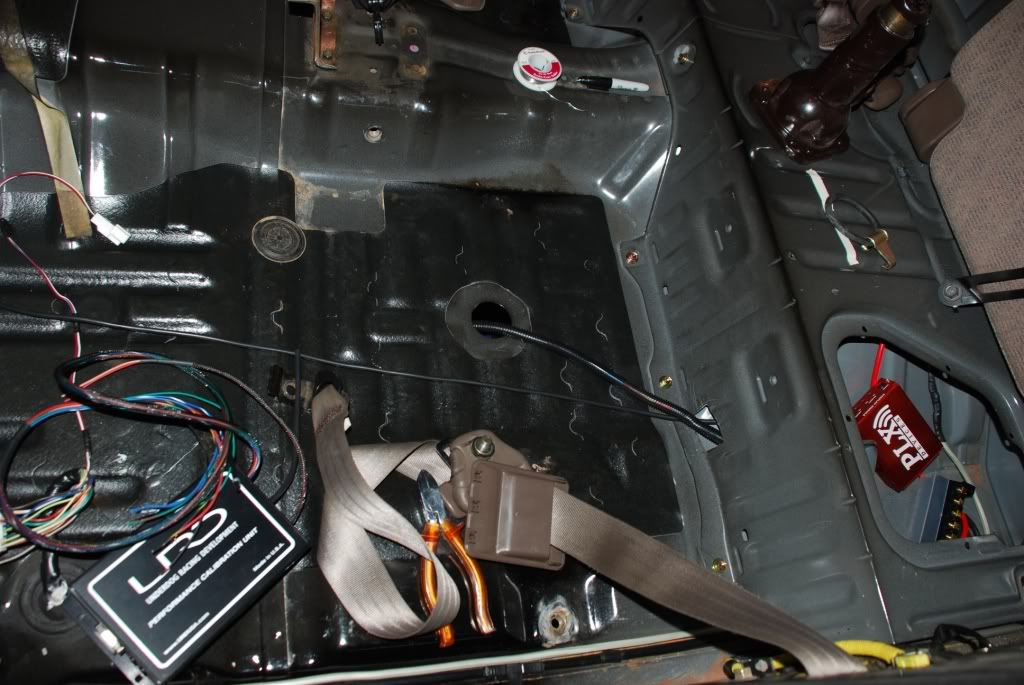
I went ahead and ran the AFR sensor to determine where it would run and the best place to bring it into the truck. I think i have decided to use the drain plug behind the driver seat. Tomorrow I will see if it can reach by going through the fire wall with the main harness, but I dont think its long enough. Ill be mounting the PLX modules in the cubby behind the driver side, so they have a good bit to travel. The URD PCU I will mount under the pass seat, for ease of access to the port for tuning, and the 02 cal will go in the pass side kick panel (it just fits). I also ran all the wire for the additional fuse block to power the PLX modules, it will go in the same cubby. Later Ill run another fuse block for lights, wench etc.
Kind of a crappy weld, and I would have liked it higher around the pipe
The red loom is the new wire for the fuse block, you can also see the circuit breaker mounted towards the top

PLX stuff in the back, and drain plug (will have to play around with that in the morning)
I hope that wire loom and plug can take a lot of heat. I just dont see a way to get it any further from the manifold
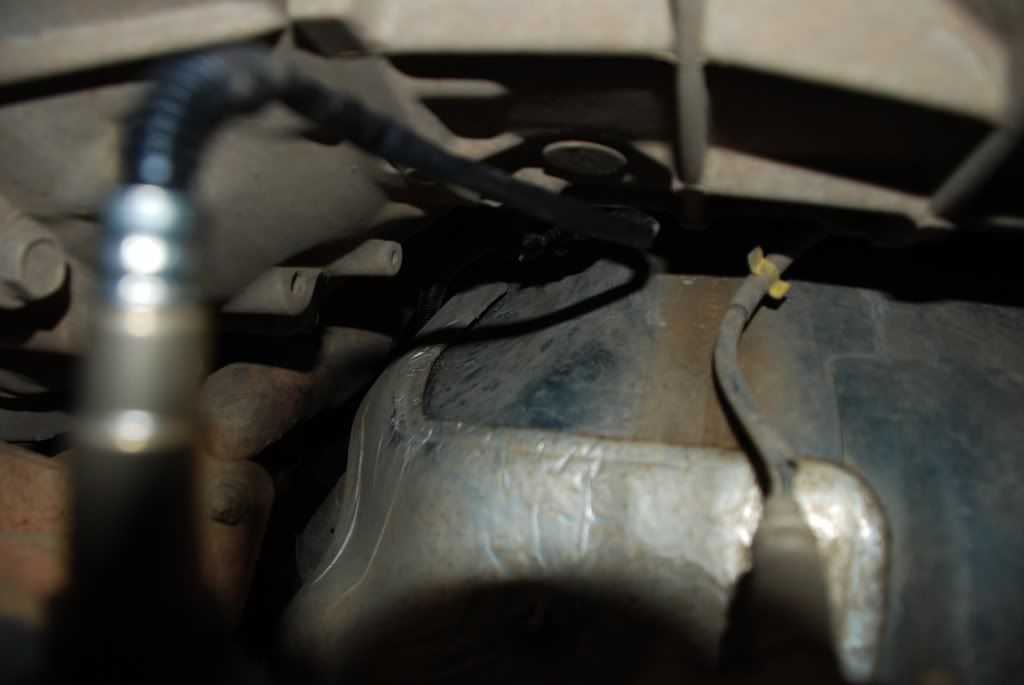
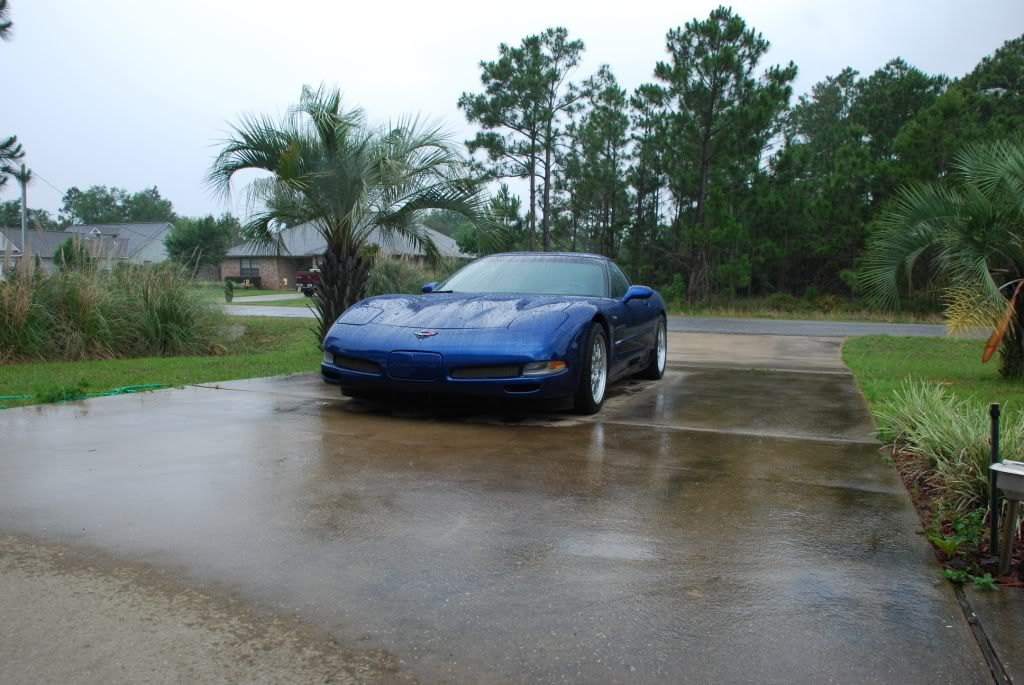
Poor car sitting in rain
-wake up, have a few cups of coffee to figure out where Im at and what say it is
-Find answers to above questions, then proceed to garage, have a few more cups of coffee to remember while the heck the interior of my truck is in the bed of truck, and why the Vette is out in the rain!
-Finally pick up tools (hey its only been a few hours since I got up now!)
-realize I have the wrong tools, go to mean man at autozone to find out he doesnt have said tool either
-go back home, beat hammer and pry due to lack of proper tool, get one item done
-LUNCH TIME
-two hours later, resume beating hammering, and prying, accomplish a few more items
-damage something...take two steps back and drink a beer to analyze problem
-find solution, drink a victory beer
-make problem worse, drink sympathy beer
-well you get the idea...it end in lots of beer and not much work
I did get the rest of the interior out.
I spent most of the morning fixing the crappy wiring left buy circuit city kids. There was literally feet of extra wire all balled up behind there! And a few connections that looked like they would fall apart at the next speed bump!
Then the mailman brought this today too (resulted in more beer
)I went ahead and ran the AFR sensor to determine where it would run and the best place to bring it into the truck. I think i have decided to use the drain plug behind the driver seat. Tomorrow I will see if it can reach by going through the fire wall with the main harness, but I dont think its long enough. Ill be mounting the PLX modules in the cubby behind the driver side, so they have a good bit to travel. The URD PCU I will mount under the pass seat, for ease of access to the port for tuning, and the 02 cal will go in the pass side kick panel (it just fits). I also ran all the wire for the additional fuse block to power the PLX modules, it will go in the same cubby. Later Ill run another fuse block for lights, wench etc.
Kind of a crappy weld, and I would have liked it higher around the pipe
The red loom is the new wire for the fuse block, you can also see the circuit breaker mounted towards the top
PLX stuff in the back, and drain plug (will have to play around with that in the morning)
I hope that wire loom and plug can take a lot of heat. I just dont see a way to get it any further from the manifold
Poor car sitting in rain
05-23-2009, 07:03 AM
#10
Registered User
Thread Starter
Join Date: Oct 2006
Location: Gulf Breeze, FL
Posts: 169
Likes: 0
Received 0 Likes
on
0 Posts
Anyone have experience running a harness for the AFR sensor? How close can you safely run these to transmission or worse, the manifold. I know they can take some heat, but Im a little worried about having it touch even the tranny. Inputs?
05-23-2009, 07:20 AM
#11
Contributing Member
I would think you'll be ok touching the tranny, you could maybe wrap some insulation around the wire if you're worried. The tranny only gets to what, 250-300 degrees max? I don't think that's hot enough to melt the harness, but I don't have fist hand experience with it...
P.S.- Sweet Vette man, and your garage rocks!!!
Last edited by mastacox; 05-23-2009 at 07:21 AM.
05-23-2009, 07:25 AM
#12
Registered User
Join Date: Aug 2008
Location: Nor, CAL
Posts: 1,816
Likes: 0
Received 0 Likes
on
0 Posts
Looking good!
Last edited by okie81; 05-23-2009 at 07:26 AM.
05-23-2009, 07:36 AM
#13
Registered User
Thread Starter
Join Date: Oct 2006
Location: Gulf Breeze, FL
Posts: 169
Likes: 0
Received 0 Likes
on
0 Posts
Yeah Im sure that loom has to be pretty tough, as well as the plastic connection plug...thingy. It was meant to go into the exhaust. If I was putting the controller in the engine bay then it would be easier, but since I trail this pretty good, I dont really like that idea. That box was not made to withstand the elements. So the loom has to come around the pass side and find its way through the firewall with the rest of the main wire harness (still trying to figure out how to do that without letting mud and water come flooding in).
As previously stated, I was looking at using the drain plug in the back of the cab. But that idea really wasnt making me comfortable either. Although it does keep things further from heat sources.
As previously stated, I was looking at using the drain plug in the back of the cab. But that idea really wasnt making me comfortable either. Although it does keep things further from heat sources.
05-23-2009, 07:39 AM
#14
Registered User
Nice build, Cant wait to see what else is in the future !!
So call me stupid, But thats the ECM behind the glove box correct ?
I've seen the one in my old 91 like 5827 times, But never seen the one in my 99 taco..
Nice truck BTW !!

So call me stupid, But thats the ECM behind the glove box correct ?
I've seen the one in my old 91 like 5827 times, But never seen the one in my 99 taco..
Nice truck BTW !!
05-23-2009, 10:34 AM
#15
Registered User
Thread Starter
Join Date: Oct 2006
Location: Gulf Breeze, FL
Posts: 169
Likes: 0
Received 0 Likes
on
0 Posts
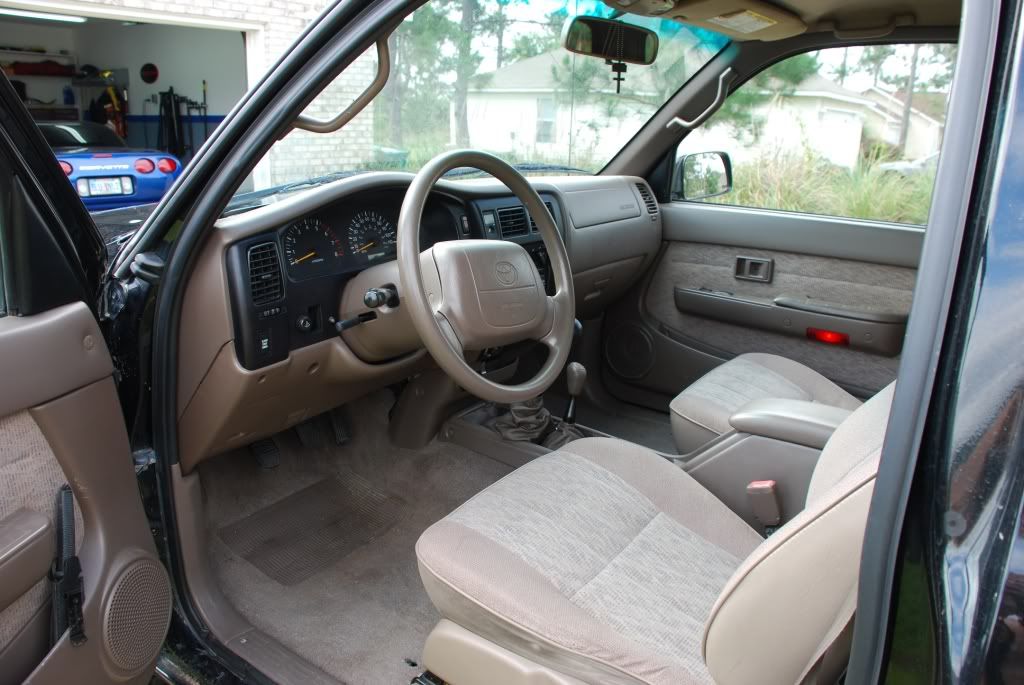
Scuba, yes thats the ECU. It runs the width and heigth of the white plugs you see and about 8 inches into the dash. Kinda looks like a big hard drive. I have also noticed a few smaller ones around the truck as well...no idea what they are though
05-23-2009, 03:16 PM
#16
Registered User
Thread Starter
Join Date: Oct 2006
Location: Gulf Breeze, FL
Posts: 169
Likes: 0
Received 0 Likes
on
0 Posts
OK, another ??? for the experts. Both of the URD controllers and obviously the boost gauge need to tap into the boost port on the supercharger. Everything I have read and seen has them all tied in near the SC itself. Is there any problem to running one line from the supercharger, into the truck and then splitting it into the three boxes? Is it somehow better to have all of them tied in as close to the unit as possible? Seems like its more line that way and that would be worse. anyone have any input?
05-23-2009, 05:12 PM
#17
Registered User
Yeah the hard drive esque gave it away thats why I asked, Seems like its in a much better spot in these things then it is in the older trucks..
Also, Im pretty sure you could get some wire insulator at vatozone or something that would make it ok to be near the tranny..
And with those drain plug, I was running a cb wire and just cut a small hole in it and shoved it through, Dont get much water/mud pits down here to need much waterproofing but I didnt just hack it, but yeah..
Good luck, Ill be lurking
05-23-2009, 05:26 PM
#18
Contributing Member
OK, another ??? for the experts. Both of the URD controllers and obviously the boost gauge need to tap into the boost port on the supercharger. Everything I have read and seen has them all tied in near the SC itself. Is there any problem to running one line from the supercharger, into the truck and then splitting it into the three boxes? Is it somehow better to have all of them tied in as close to the unit as possible? Seems like its more line that way and that would be worse. anyone have any input?
Poor vette, should be at the track being used proper like the ones i was racing today. Raced a lot of cars, a few Z06 vettes came out and were the real compition for the day. Those wide tires they have just gives them so much dang grip! (my car is actually faster on the strights, just not enough tracion in the corners with my skinny street tires).
My install took me the better part of a week so you are right on track, of course 3 days of mine was spent on the stinking headers.
05-23-2009, 08:12 PM
#20
Registered User
Thread Starter
Join Date: Oct 2006
Location: Gulf Breeze, FL
Posts: 169
Likes: 0
Received 0 Likes
on
0 Posts
Mine runs along the firewall/wheel well under the hood, keeping it as far away from the exhaust as possible (in some spots its maybe 6" away from it though). I then attached the controller under the hood near my auxillary fuse block, and ran the wire for the gauge through the firewall in the main harness gasket. I'll try taking some pictures if I get off my ass this morning.
I would think you'll be ok touching the tranny, you could maybe wrap some insulation around the wire if you're worried. The tranny only gets to what, 250-300 degrees max? I don't think that's hot enough to melt the harness, but I don't have fist hand experience with it...
P.S.- Sweet Vette man, and your garage rocks!!!
It would be a ton better if Sears would get me my freakin tool box that I ordered in FEB
TA, thats kind of what I figured with the boost line. But I dont like assuming things with this.
Were you racing the RX-7 out there? If so man I gotta ask...WHAT THE HECK DID YOU DO TO THAT THING, if your beating Z06's on the straights!!!
 The Z is no joke man, I havnt had a chance to get it to a track. Only been here since December so I got find out where the closest one is.
Red3.slow, I dont know about SUPER informative, but it should be entertaining at least!
Today was full of more trips for parts etc. My OCD kicked in again when I realized I was going to have to extend the harness for the PCU. That shouldnt have been a suprise since TA did the same thing
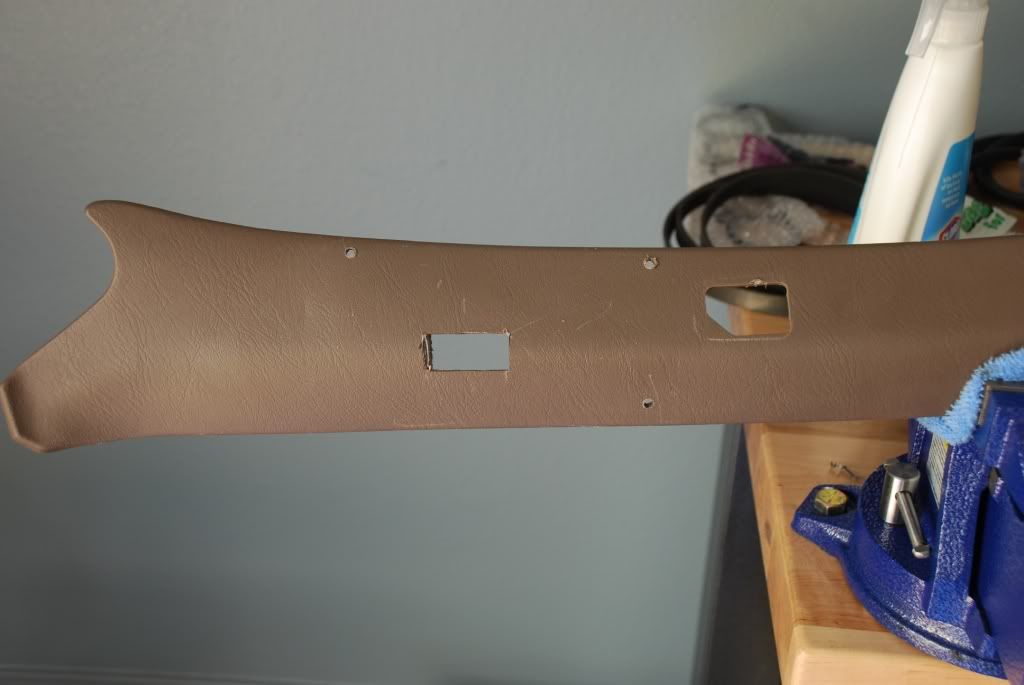
But I couldnt handle just using whatever wire I had around. So I drive over to an audio shop in Ft Walton and got the owners super hot wife to give me a Cadillac amp bypass harness for $30 (they cost a LOT more than that). It has all the colors I needed except tan. Even has a solid color and same color with white stripe. So Ill be able to get the colors pretty close to a pretty close match for what URD used. That will make things a lot easier if there is ever any trouble shooting to do. I also got the rest of the wiring and stereo cleaned up (Im suprised that thing was working at all), and the sound insulation in an carpet back in. As well as getting the fuse block mounted and wired, so I have power in the back now! Guage is mounted in the pod and the piller is back in as well.
So with any luck tomorrow I can wire in the URD controllers and then start in the engine (yeah Im probably working a little backwards from what most people would do).
the PLX uses a VGA cable, and the unit itself is pretty thin. So all I had to cut was a hole big enough to fit the VGA connector through.

BIG ole mess of wires...sure hope I dont cut one!

I ended up taking the AFR harness through here with everything else. It required "modifying" the boot a little. But I think with enough tape and zip ties Ill be able to get a good seal on it when Im done. The harness with the red ties is the AFR harness. You can kind of see how I ran it along the firewall. Its maybe down to 4-5' in some places, but I noticed there is a factory harness running right next to the drivers side manifold, mine is a least a few inches farther away than that, and farther downstream.

The insulation idea was because I had leftovers from the Vette a while back. Figures I may as well use it up. Although the Taco has a lot better sound dampening from the factory, But this should help take some drone out on the highway.