Siena's Toyota Hilux Gen 6 Make-Over & 3UZ-FE VVTi Swap
 01-31-2015, 07:39 AM
#201
Registered User
Thread Starter
Join Date: Dec 2013
Location: Aso Rock!
Posts: 214
Likes: 0
Received 0 Likes
on
0 Posts
I ordered a MK4 single-piece propshaft yesterday from RoughTrax, it should be with me by Monday, or Tuesday. I'll fit it, using new bolts which I picked up from my local Toyota dealership.
I might be just in time for snow, which is forecast.
I might be just in time for snow, which is forecast.
 02-01-2015, 06:07 AM
#202
Registered User
Thread Starter
Join Date: Dec 2013
Location: Aso Rock!
Posts: 214
Likes: 0
Received 0 Likes
on
0 Posts
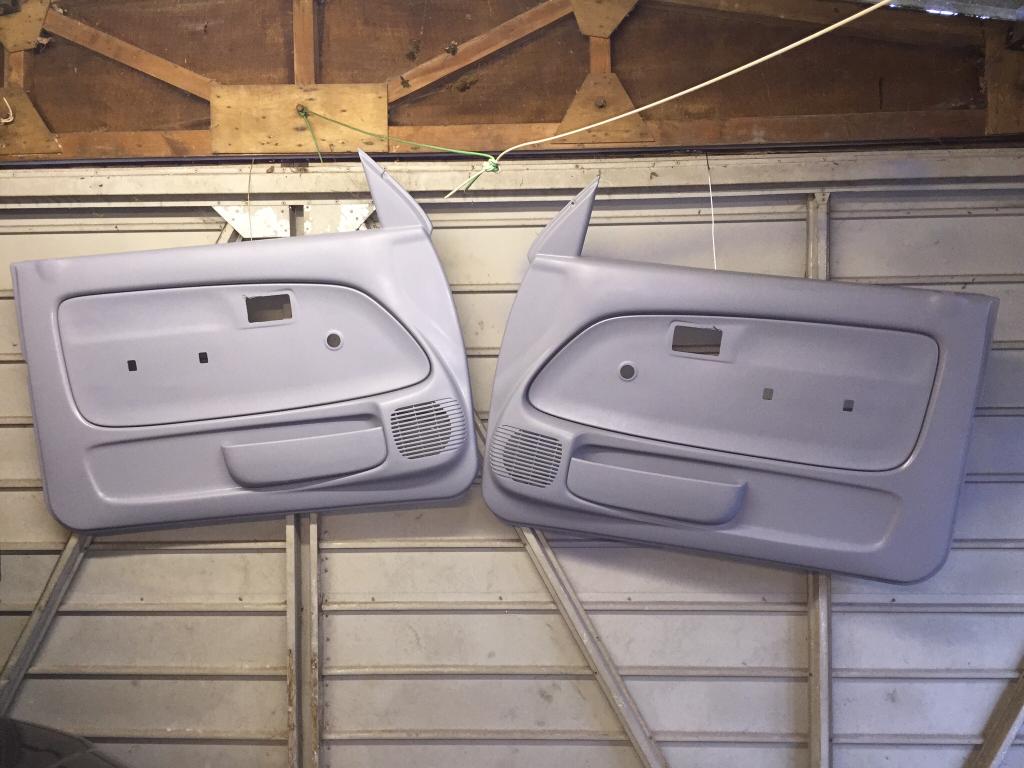
I prepared the door cards, and laid down 2 coats of plastic primer. I'm out of Rover Applejack, so I'll pick some up tomorrow. The door cards are in my improvised "oven" - a large cardboard box, with a hole cut in to accept my hot air-gun, where they'll sit for half an hour.


 02-01-2015, 04:14 PM
#204
Registered User
Wow. I'm glad to see you updated as I missed this build last spring. You did all that work and put it together with the steering wheel on the wrong side! Doh! I was nuts for the original bed with the hooks and embossed "Toyota" on the tailgate. We haven't had those features since the 80's. The Tacoma bed looks very much like the one you ended up with. My son (17) just got a 2000 Tacoma TRD X Cab. It's striking how different the lights are compared to your original. We don't have those rear fog lights.
Apparently body shops are the same the world over. It must be the fumes. The paint looks great from over here though. Very nice build and I am subscribed!
Apparently body shops are the same the world over. It must be the fumes. The paint looks great from over here though. Very nice build and I am subscribed!
02-02-2015, 02:54 AM
#205
Registered User
Thread Starter
Join Date: Dec 2013
Location: Aso Rock!
Posts: 214
Likes: 0
Received 0 Likes
on
0 Posts
Thanks Nervo! The paint is fine, it was the first shop that messed up.
I decided to lose the bed hooks, as I will not be using the truck as a load logger, more for leisure. And with a custom solid tonneau, the hooks become redundant, the recess actually gets clogged with dirt, traps moisture, and rust can become an issue.
The European 5th gen. Toyota Hilux has a lot in common with the Tacoma 1995 - 2004, the cabin is pretty much the same, with just the fenders and hood being different.
Last edited by Siena; 02-02-2015 at 02:56 AM.


 02-02-2015, 01:11 PM
#207
Registered User
Thread Starter
Join Date: Dec 2013
Location: Aso Rock!
Posts: 214
Likes: 0
Received 0 Likes
on
0 Posts
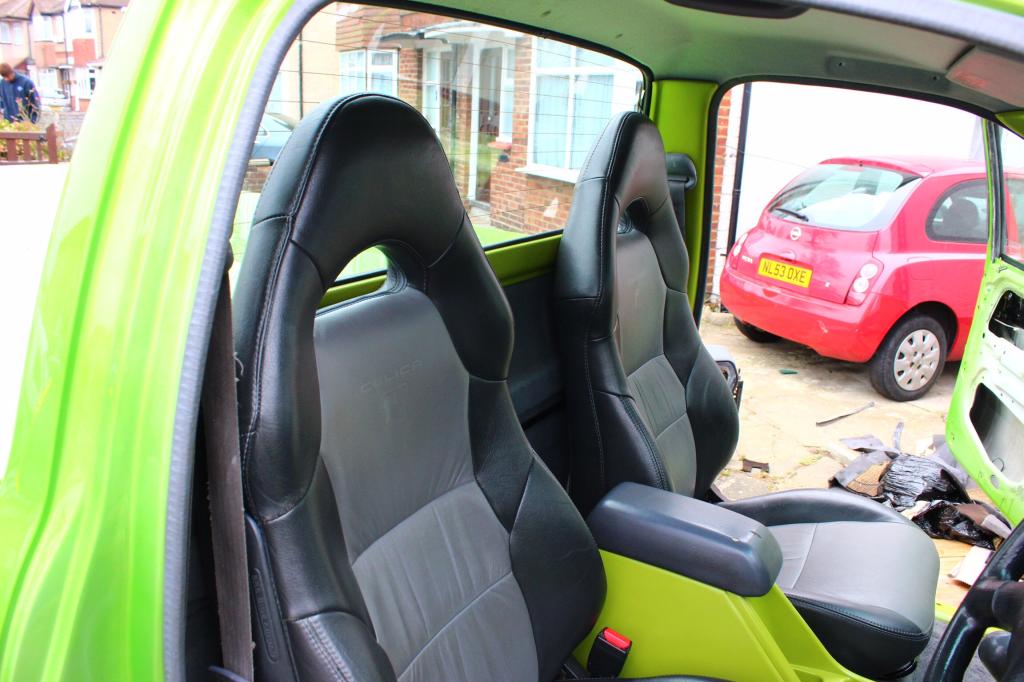
I need to figure out how to get the seat belts clean, or replace them if there's no way to get them looking decent. This was a proper working truck, and it shows.
02-03-2015, 01:53 PM
#208
Registered User
Thread Starter
Join Date: Dec 2013
Location: Aso Rock!
Posts: 214
Likes: 0
Received 0 Likes
on
0 Posts
My 1-piece propshaft arrived today (thanks to RoughTrax). It looked pretty good, and of course I bolted it straight onto my truck.
I pulled my seats out of the garage, and began the task of making them fit the MK5. This involved grinding off the steel rivets that hold the mounting feet to the subframe runners, and drilling out the spot welds too.
I then cut the entire runners off the Hilux, which will be welded to the now legless Celica runners. I opted to use the entire Hilux runners, as the Celica seats are pretty low, and I'm not exactly that short. This will give some added height. I'll take some pictures of this process later to better describe what I mean.


 02-06-2015, 09:01 AM
#211
Registered User
Thread Starter
Join Date: Dec 2013
Location: Aso Rock!
Posts: 214
Likes: 0
Received 0 Likes
on
0 Posts
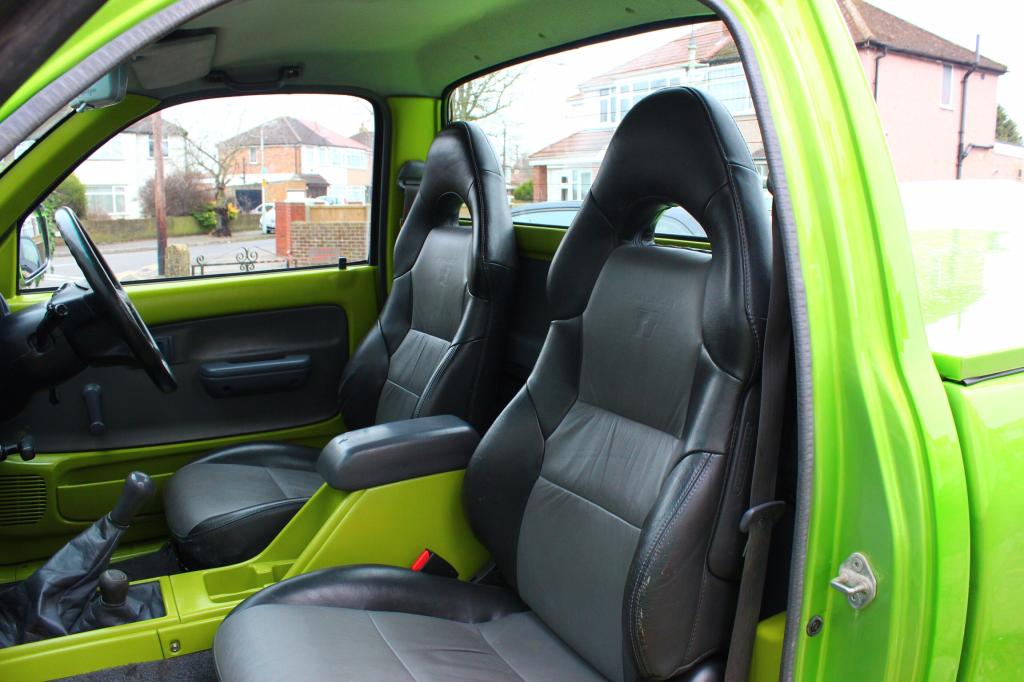
At last, I can actually drive my truck.
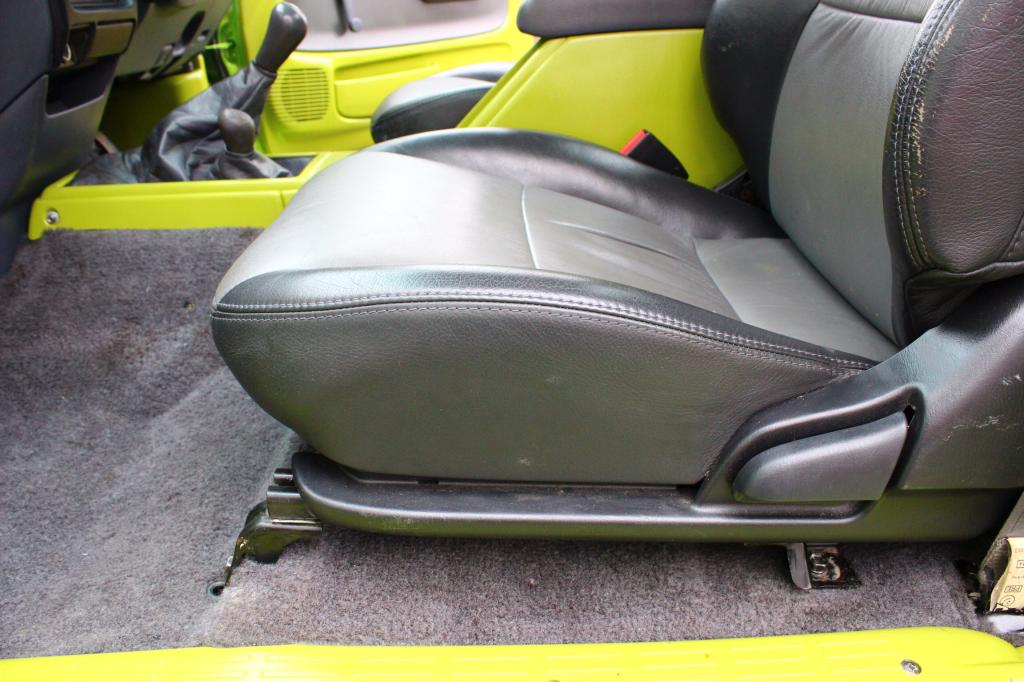
I installed the driver's Celica T Sport seat, after modifying the base to fit. I was going to weld the Hilux's subframe runner to that of the Celica, after cutting off the Celica's mounting feet. In the end, I went with high-tensile 13mm / M10 bolts, with matching spring washers and nuts.
I'm a bit concerned with welding the subframes. The seats have the seat belts bolted to the inner frames, so absolute anchorage is important, the consequences of the seats breaking free in the event of a crash doesn't bear thinking about. I lost a good friend of mine back in 2001, when the welded seat subframe in his immaculate Ford Escort RS Turbo S1 broke free, throwing him through the windshield.
He was in the passenger side with a laptop hooked up to the ECU, while his friend was driving. When the car was examined, the passenger' seat subframe had become brittle where it had been welded, and broke free. The driver's subframe had stress cracks, though the seat had not broken completely free, as the driver instinctively braced himself against the wheel just before impact.
The Celica seats are perfect for the Hilux, and once the driver's one had been bolted in, have the correct height ratio for a truck. The driver's seat is height adjustable, I have it on the lowest setting, and it's still more than high enough for me. The Celica seatbelt buckle is also compatible with the Hilux's seatbelt tongue. I was concerned I might have to get the Celica's seatbelt, as replacing the buckle with that of the Nilux would not have been an option, the Celica item has seatbelt warning, which I will need later.
I'll take some photographs later.
02-08-2015, 07:57 AM
#212
Registered User
Thread Starter
Join Date: Dec 2013
Location: Aso Rock!
Posts: 214
Likes: 0
Received 0 Likes
on
0 Posts
Both seats are now fitted, and I located the passenger's door locking knob, which I thought was missing, so I was able to fit it, as well as the door card.
I'm going to post pictures showing the modifications to the Celica seats, which makes them a bolt-in affair in a MK4/5.
I'm going to post pictures showing the modifications to the Celica seats, which makes them a bolt-in affair in a MK4/5.
02-08-2015, 08:00 AM
#213
Registered User
Thread Starter
Join Date: Dec 2013
Location: Aso Rock!
Posts: 214
Likes: 0
Received 0 Likes
on
0 Posts
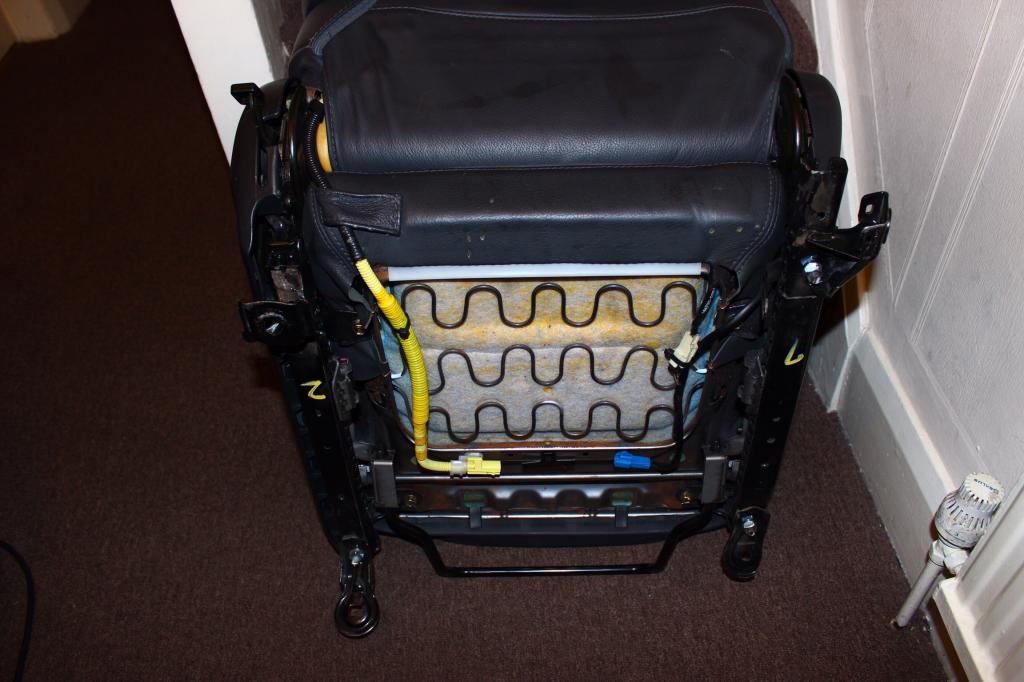
The Celica mounting tabs are spot welded to the runners, and also employ a steel rivet on each tab, the front rivets also double as locating pegs. There is just one spot weld per tab. These are all ground off, these are the redundant tabs:
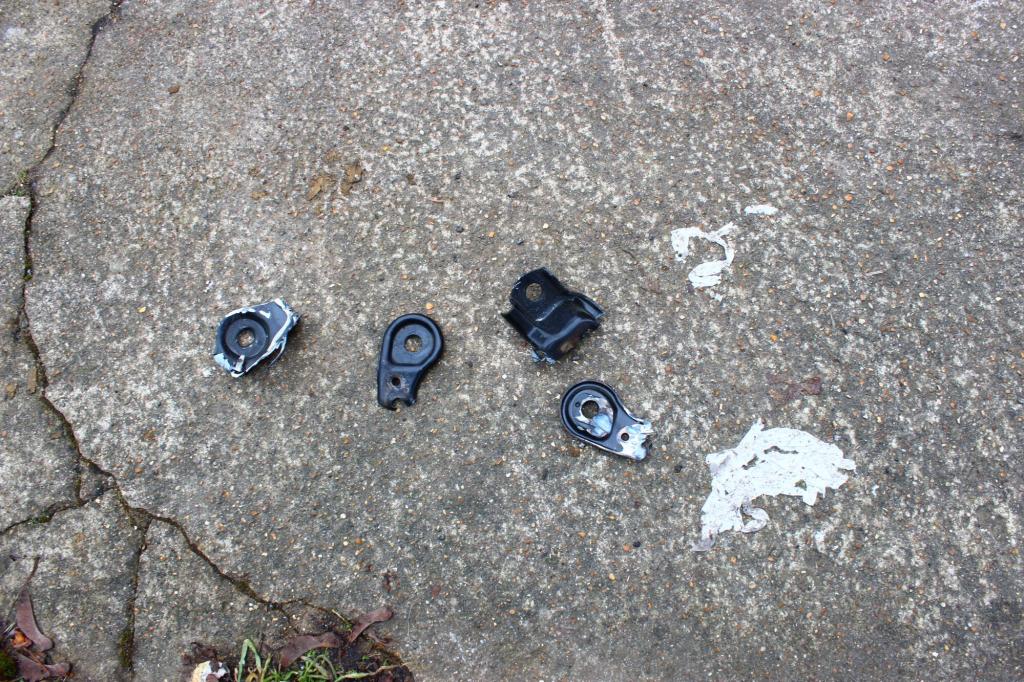
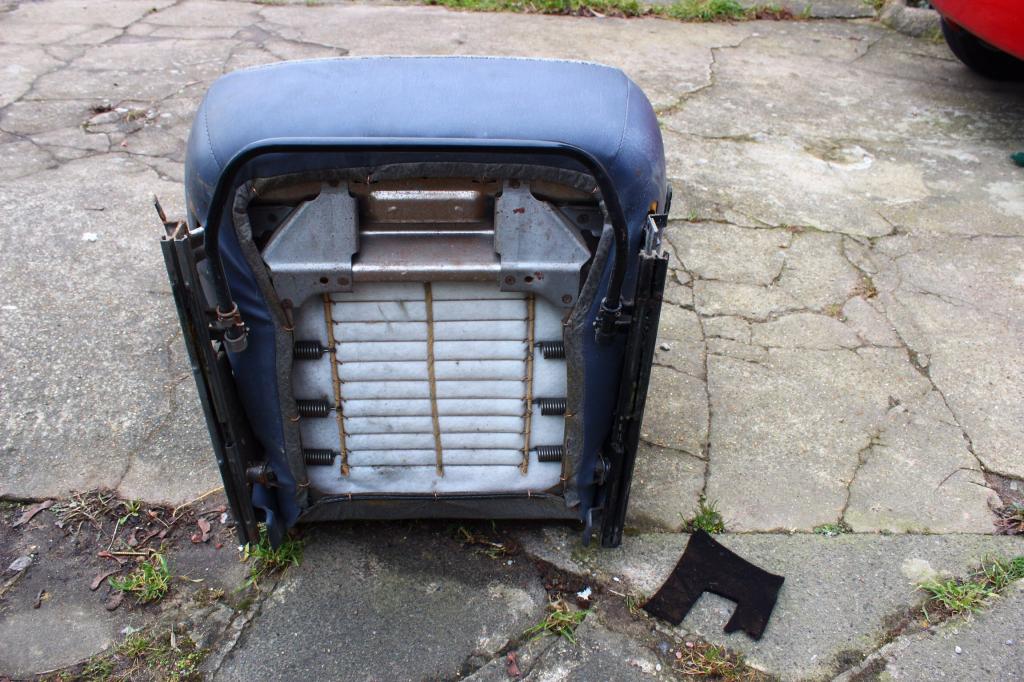
The Hilux runners are carefully cut off at the lower areas on both the inside and outside. You'll then end up with this:
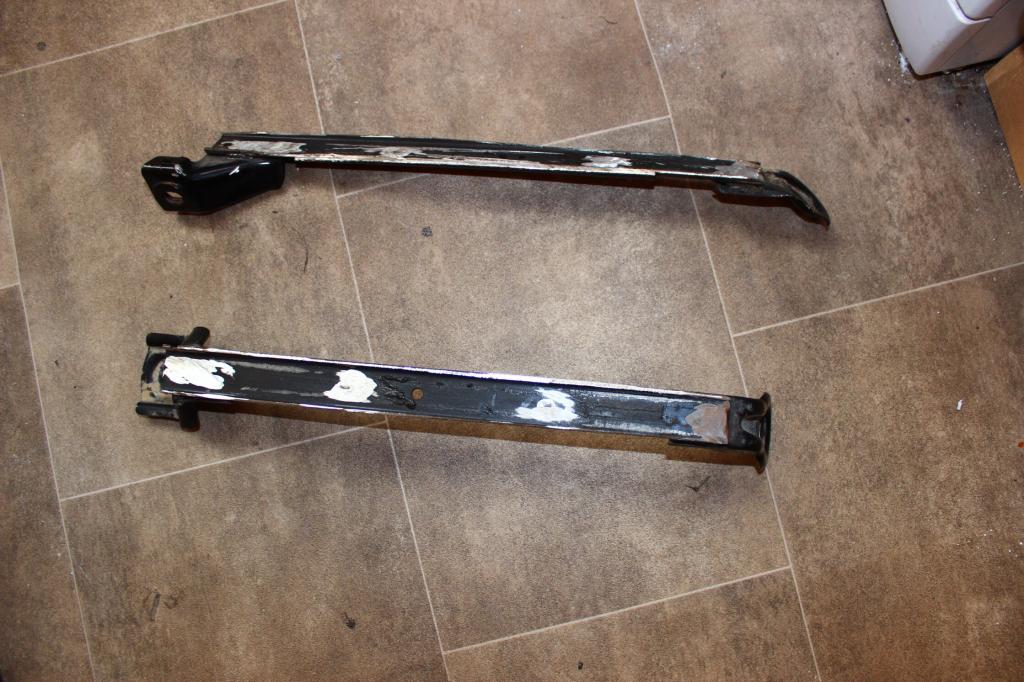
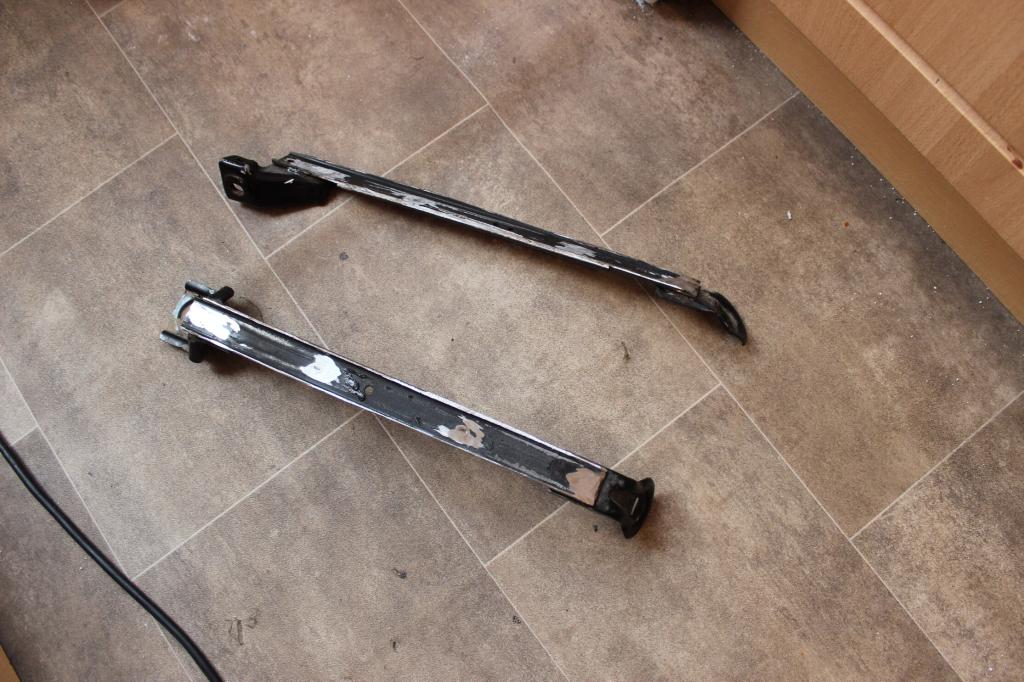
And end up with busted Hilux seats that look like this:
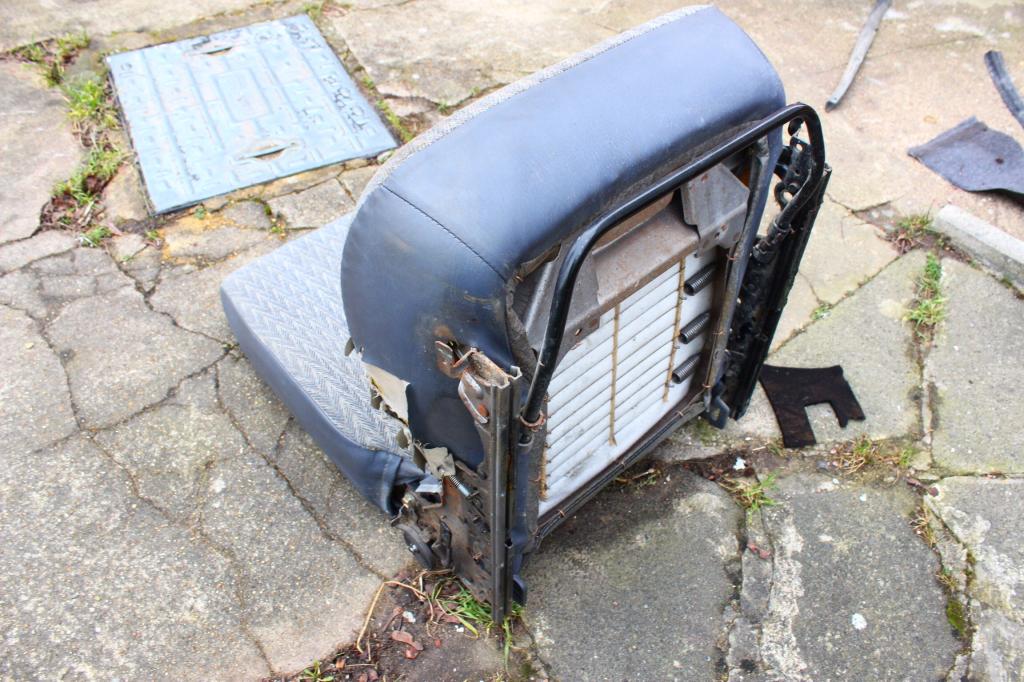
Make sure you don't mix the runners up, they are handed, and unique to driver's and passenger's seats. Inners and outlets are also different.. Using your grinder, remove rough edges and burrs. There are 2 raised dimples on on each of the runners, these need to be ground flat.
The good news is, the measurements between the runners on both the Celica and Hilux are the same, at 46.5mm. Handy, as the cut and trimmed Hilux runners need to be bolted to the Celica ones.
The rivets that partially secure the Hilux mounting tabs to the runners need to be ground completely flat, enough to allow them to be knocked out. I used a blunt punch and hammer. The same must be done to the Celica runners. The holes left are then made larger, I used a 10mm drill bit.
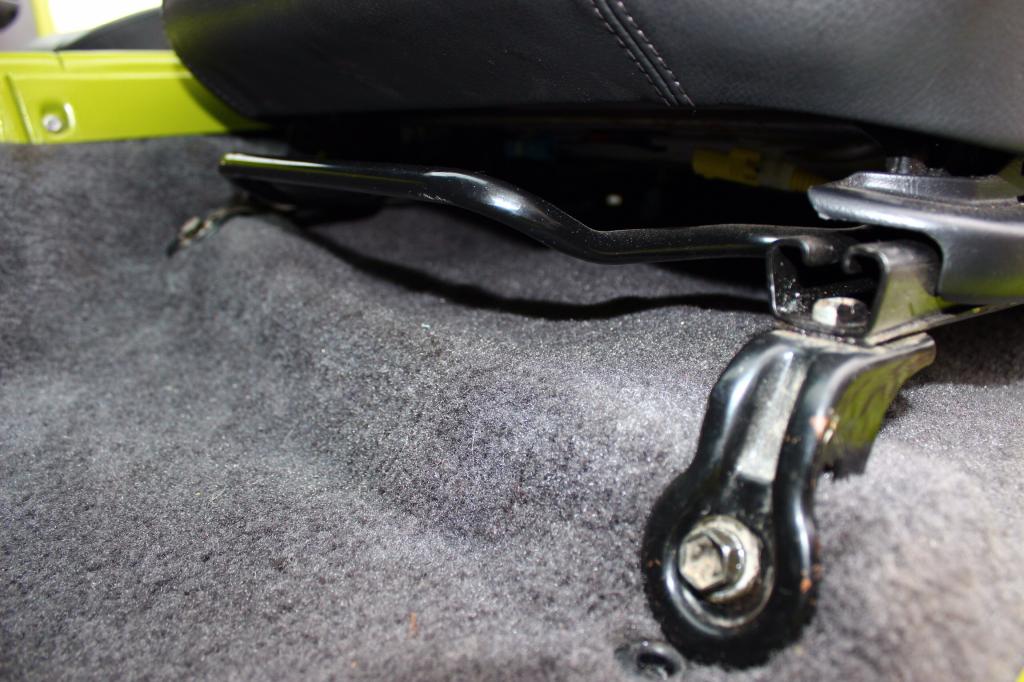
Starting from the front, I bolted the Hilux runners to the Celica seats. They are in exactly the same orientation, from front to back. The bolt heads need to be cut with a thin cutting disc, to end up with a hammer-head bolt, regular bolt heads won't go through the seat tracks. The heads need to be flat enough to allow the seats to slide in their tracks. You could cut the bolt heads down with a Dremel or similar, I used a thin cutting disc on an angle grinder.
The rear bolt holes on the Hilux runners don't line up with those on the Celica, so with the fronts bolted up loosely, swivel the runners so they are perfectly in line with those of the Celica, then using the existing holes on the Hilux runners as a pilot, drill the Celica runners. This must be done with the runners extended fully to the rear of the seats (seats slid fully forwards) to avoid the drill bit damaging the sliders.
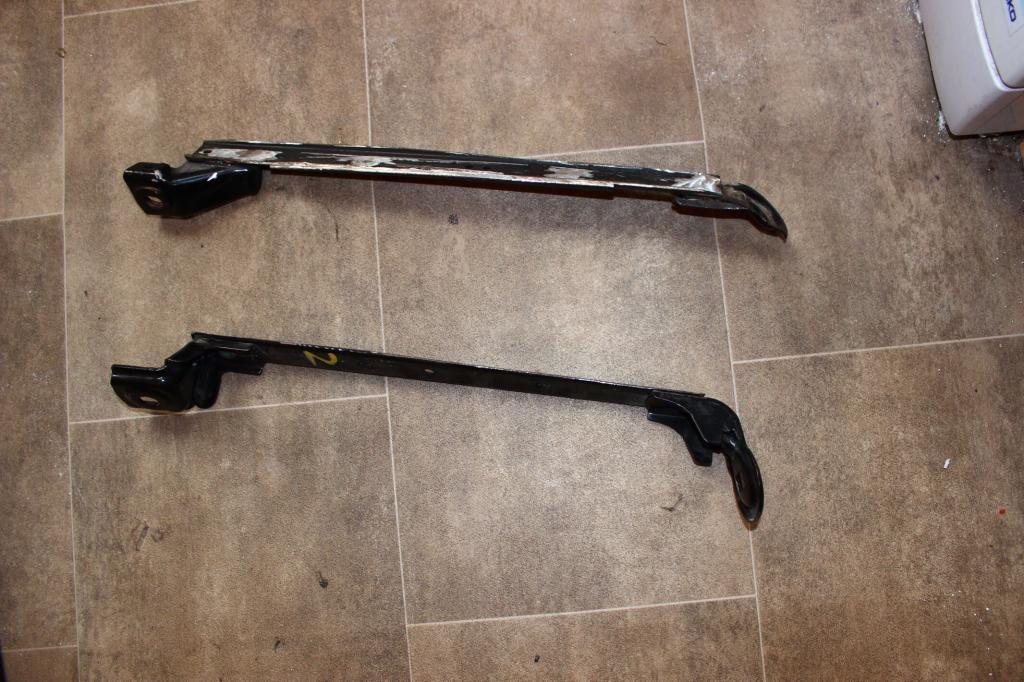
Once they are all bolted firmly in place (I torqued them up to 45Nm), you'll end up with this:
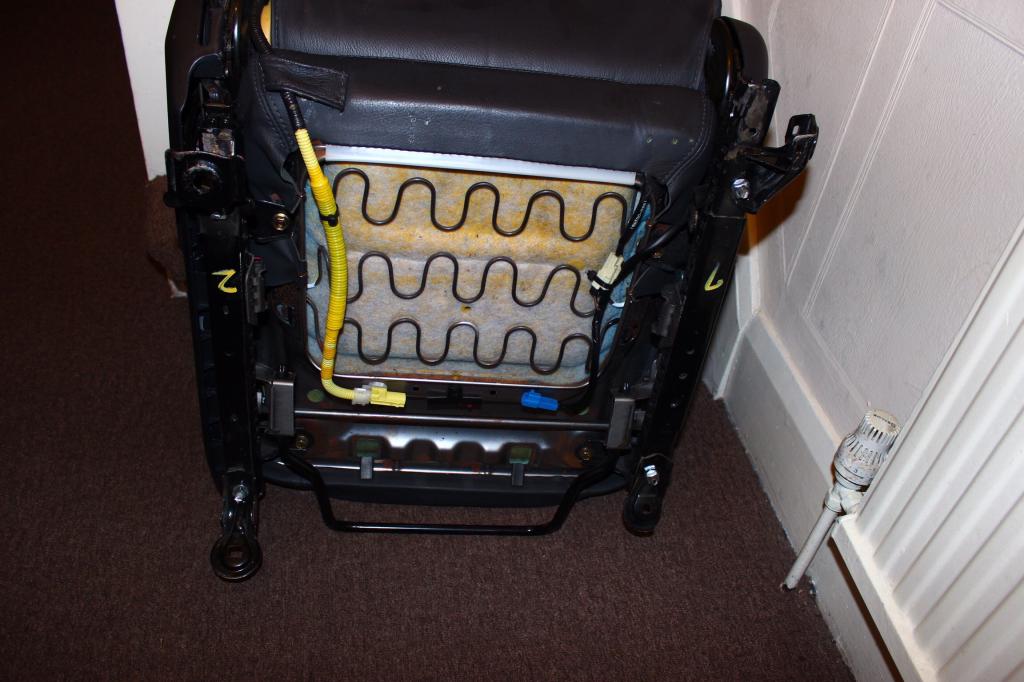
Ready to bolt into your MK4 or 5, looking like this:

The Hilux runners are carefully cut off at the lower areas on both the inside and outside. You'll then end up with this:


And end up with busted Hilux seats that look like this:


Make sure you don't mix the runners up, they are handed, and unique to driver's and passenger's seats. Inners and outlets are also different.. Using your grinder, remove rough edges and burrs. There are 2 raised dimples on on each of the runners, these need to be ground flat.
The good news is, the measurements between the runners on both the Celica and Hilux are the same, at 46.5mm. Handy, as the cut and trimmed Hilux runners need to be bolted to the Celica ones.
The rivets that partially secure the Hilux mounting tabs to the runners need to be ground completely flat, enough to allow them to be knocked out. I used a blunt punch and hammer. The same must be done to the Celica runners. The holes left are then made larger, I used a 10mm drill bit.
Starting from the front, I bolted the Hilux runners to the Celica seats. They are in exactly the same orientation, from front to back. The bolt heads need to be cut with a thin cutting disc, to end up with a hammer-head bolt, regular bolt heads won't go through the seat tracks. The heads need to be flat enough to allow the seats to slide in their tracks. You could cut the bolt heads down with a Dremel or similar, I used a thin cutting disc on an angle grinder.
The rear bolt holes on the Hilux runners don't line up with those on the Celica, so with the fronts bolted up loosely, swivel the runners so they are perfectly in line with those of the Celica, then using the existing holes on the Hilux runners as a pilot, drill the Celica runners. This must be done with the runners extended fully to the rear of the seats (seats slid fully forwards) to avoid the drill bit damaging the sliders.
Once they are all bolted firmly in place (I torqued them up to 45Nm), you'll end up with this:


Ready to bolt into your MK4 or 5, looking like this:


 02-09-2015, 08:53 AM
#214
Registered User
Thread Starter
Join Date: Dec 2013
Location: Aso Rock!
Posts: 214
Likes: 0
Received 0 Likes
on
0 Posts
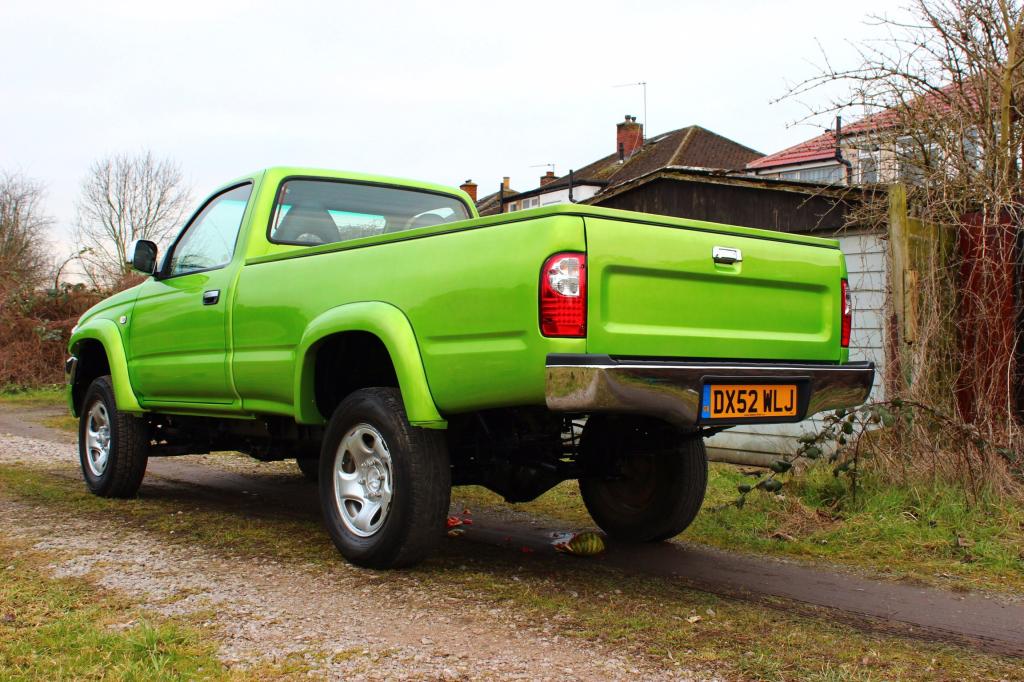
Ever since I got my truck back, I've had an issue with the rear lamps. I put this down to the rear harness being a bit messed up, after I removed the tow bar electrics. I was looking at a new harness, which worked out at well over �300 from Toyota.
I decided to pull the lamps out today, and compare the connections on the lamps themselves with that of my originals. Lo and behold, there was an incorrect pin layout on the nearside unit. After I corrected it, the lamps are working as they should. I also wired up the license plate lamps.
The stainless MK6 rear bumper came with a single lamp in the middle, though there are the usual cutouts for the twin lamp set-up. Interestingly, the MK5 lamps are a direct fit. I guess it makes sense, seeing as the MK6/7 also has a base model, which lacking a rear bumper, has the licence plate and lamps on the rear valence. All I had to do was extend the harness, and wire them up.
Tomorrow I'm booked in to have the headlamps aligned, as right now the beams can be seen from space. Time permitting, I'll fit the front wheel arch liners. I've only got one rear, the offside, and before I can fit it, I need to extend the fuel filler neck. I'm still on the hunt for a nearside rear, and most of the usual suspects only have Double Cabin models breaking, and I'm not sure how different they are to the Single Cabin version.
The hunt continues.
02-11-2015, 02:23 AM
#215
Registered User
Thread Starter
Join Date: Dec 2013
Location: Aso Rock!
Posts: 214
Likes: 0
Received 0 Likes
on
0 Posts
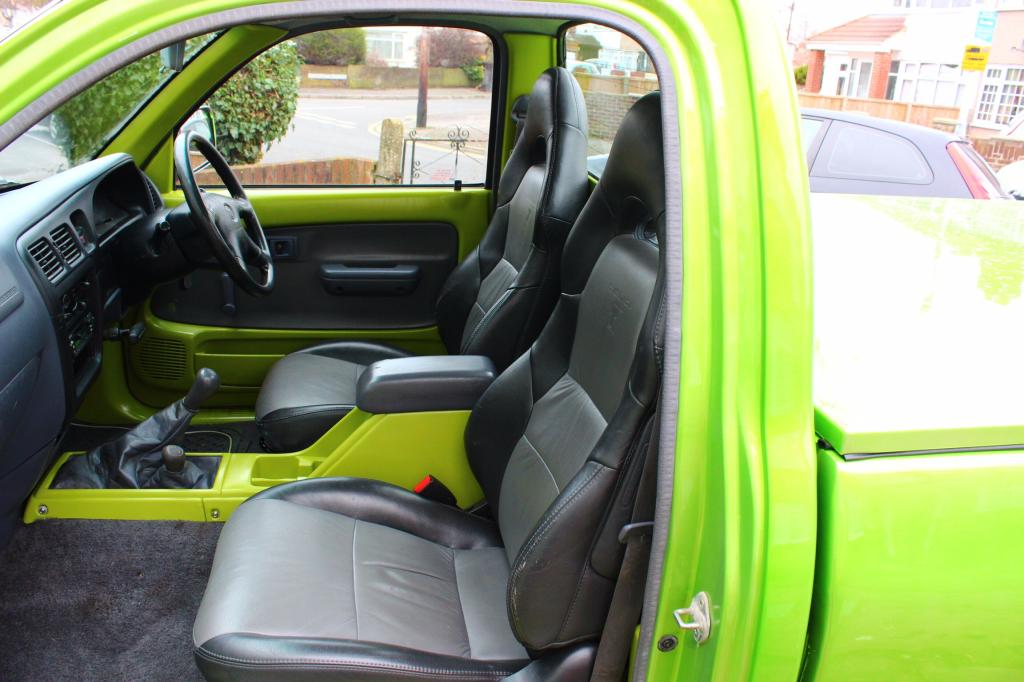
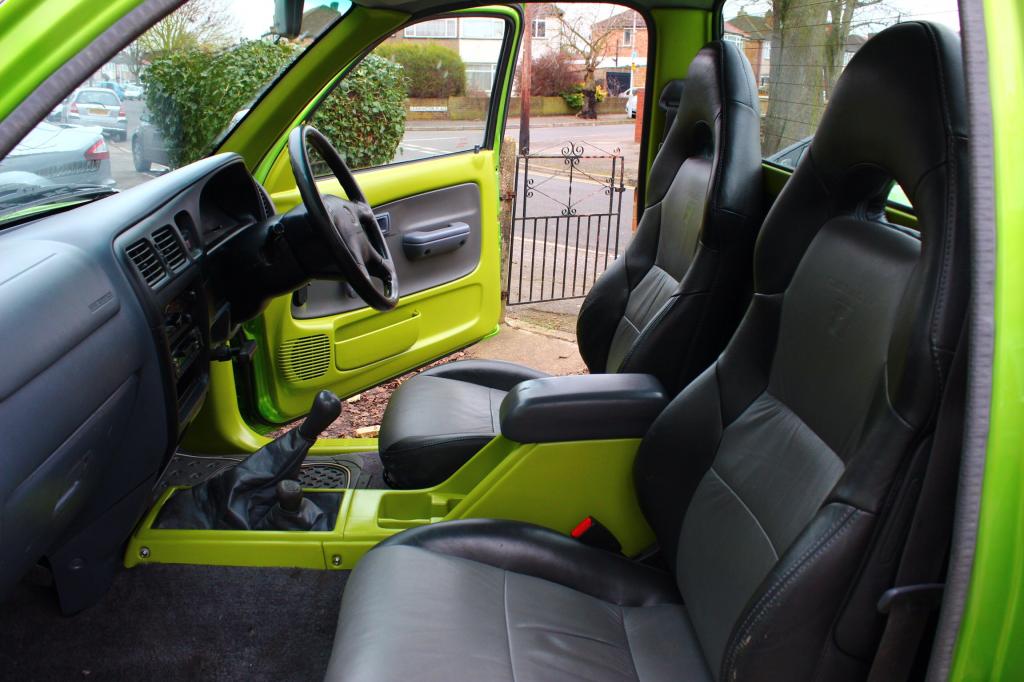
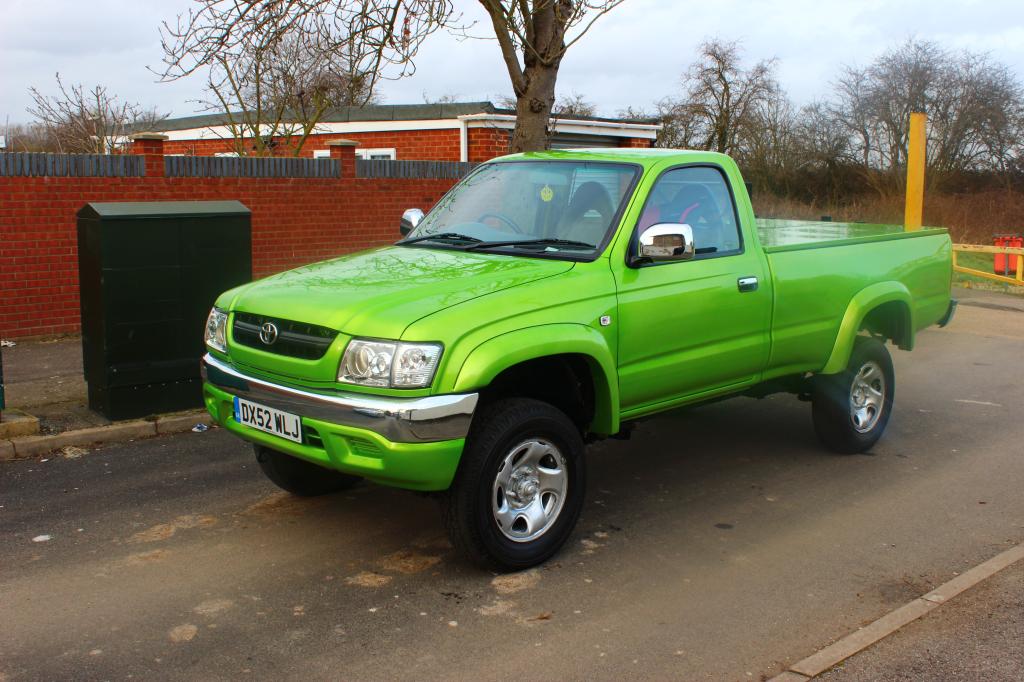
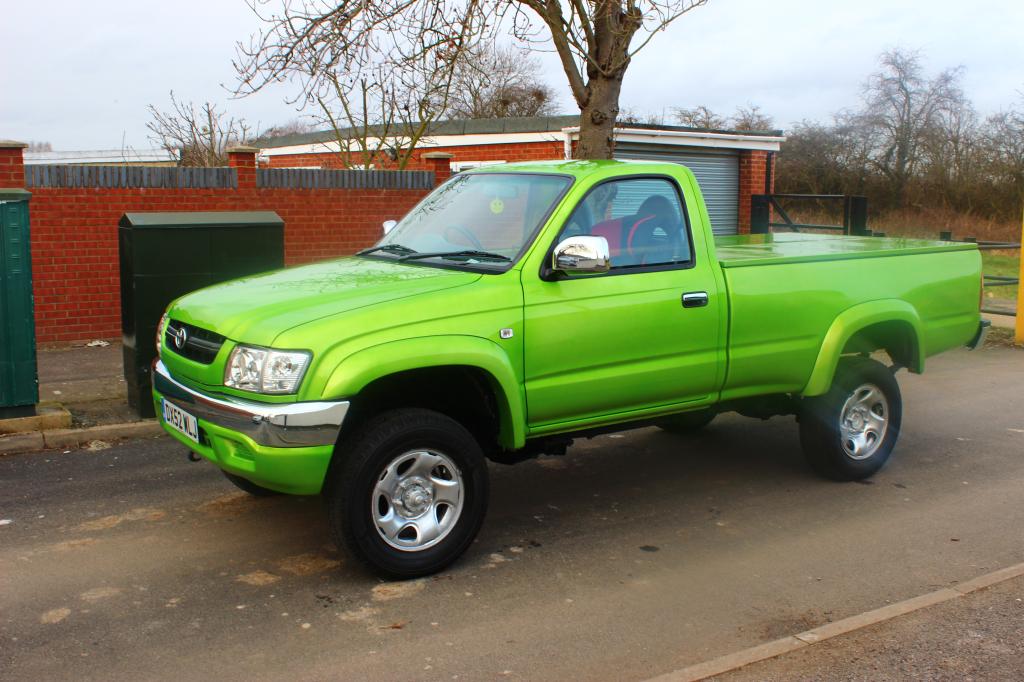
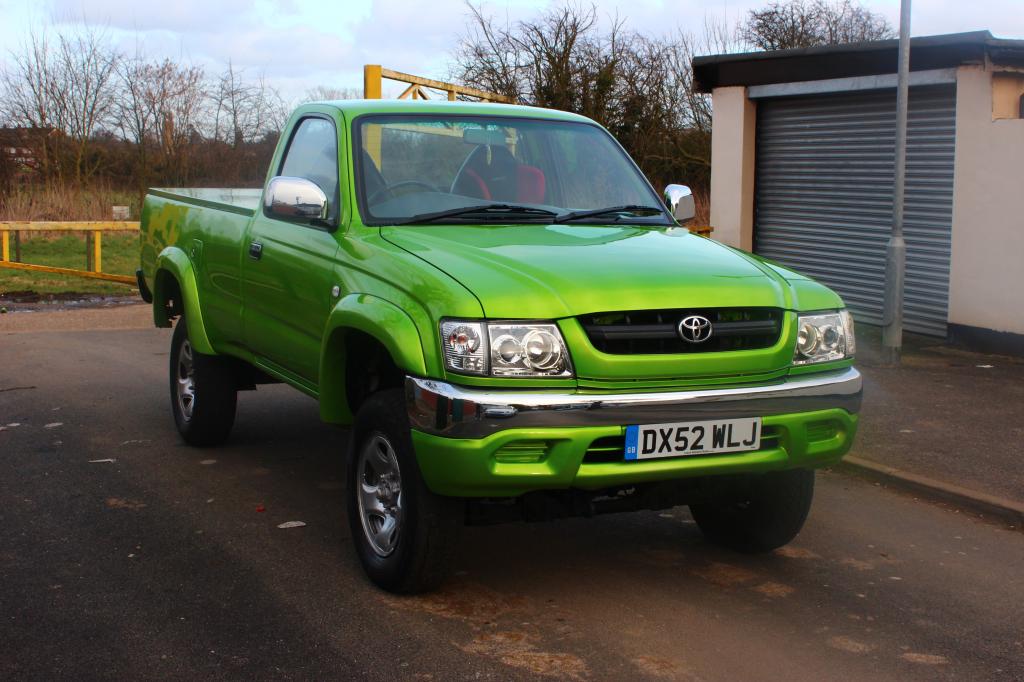
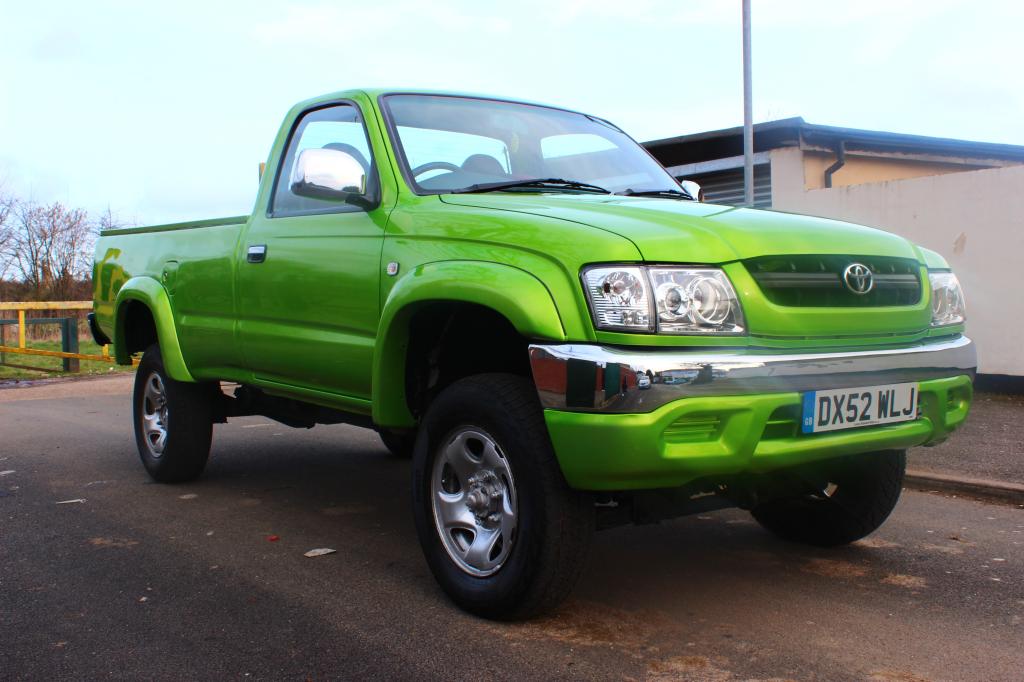
Yesterday, I had my headlamps properly aligned at a testing station. So at long last, I can actually drive my truck at night, without dazzling other road users.
I was also able to take some more high resolution pictures at a location other than my driveway.
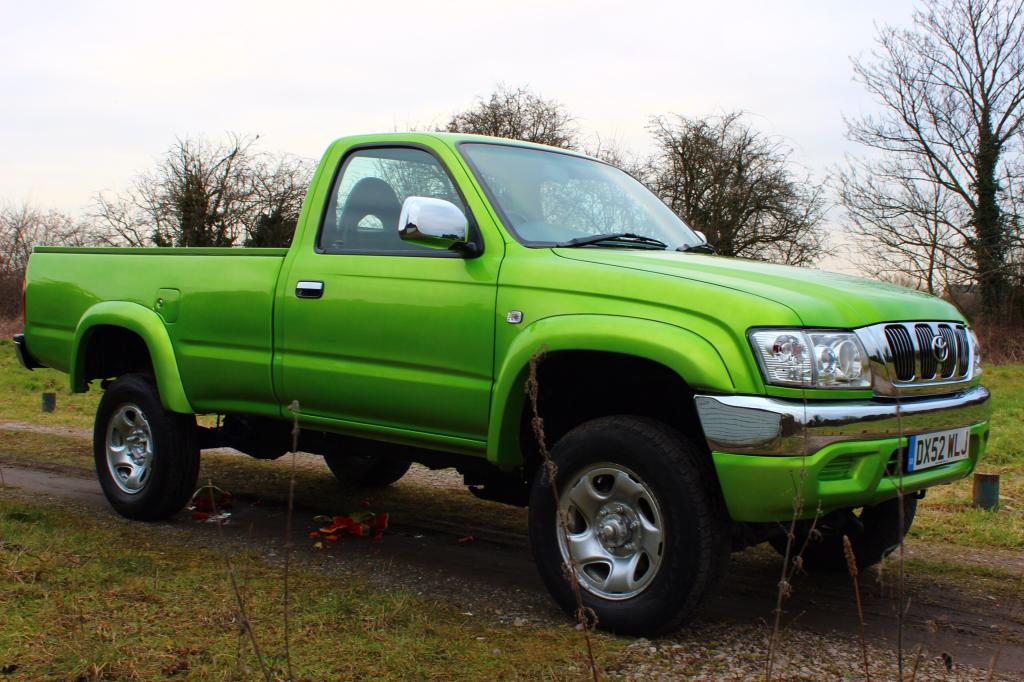
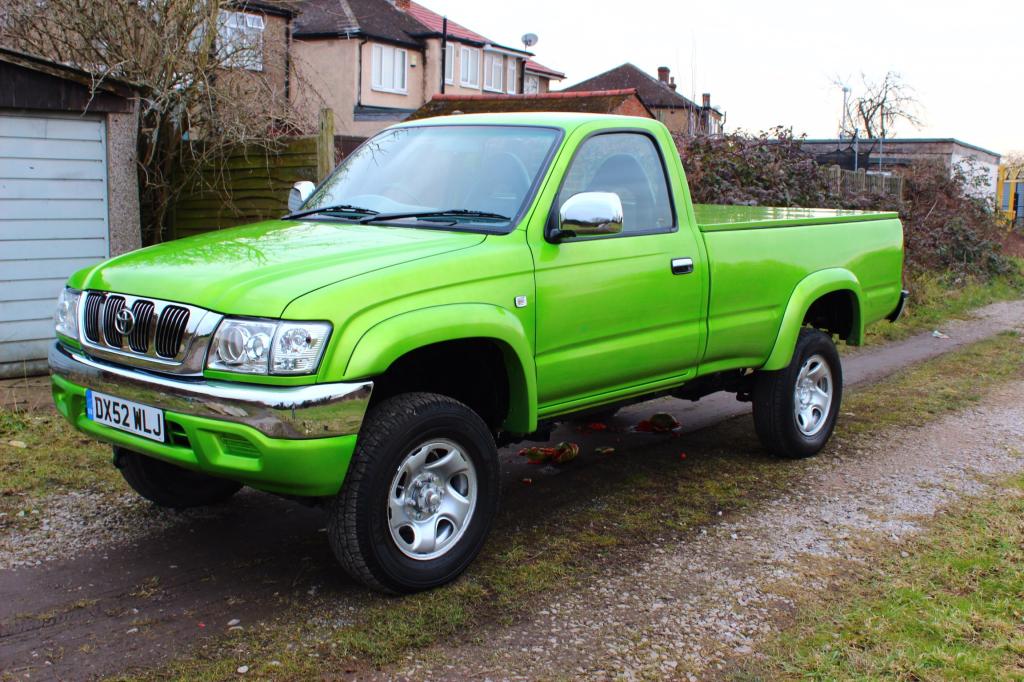
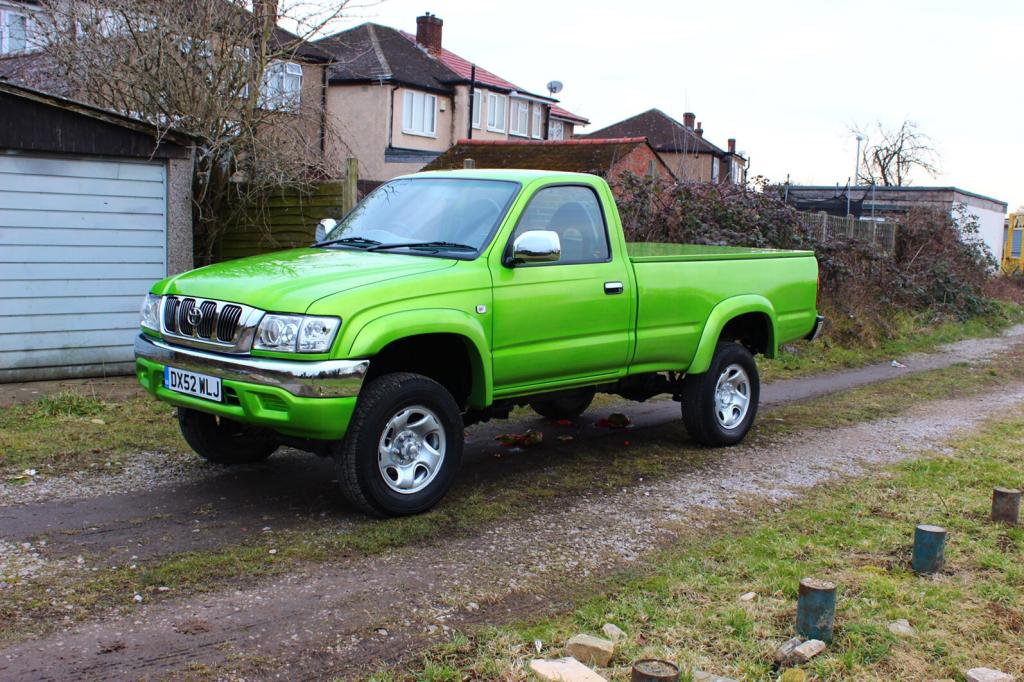

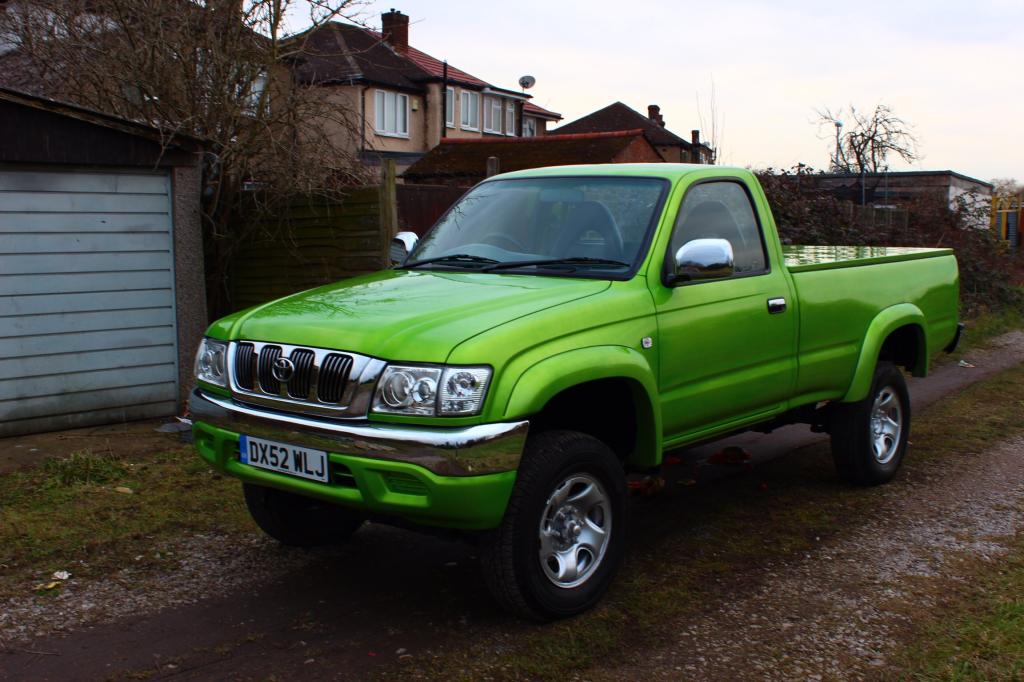
I was also able to take some more high resolution pictures at a location other than my driveway.


 02-22-2015, 04:02 AM
#217
Registered User
Thread Starter
Join Date: Dec 2013
Location: Aso Rock!
Posts: 214
Likes: 0
Received 0 Likes
on
0 Posts
After much thought, I have decided to go with an alternative power plant in my truck. Initially the plan was to keep it all Toyota, and I ended up with a pair of Lexus' - a 1998 LS400 non-VVTi and a 2001 LS430 VVTi. Both are awesome V8 motors in their own right.
However, the V8 offerings from Audi do produce considerably more power and torque in stock form. Even the earliest 3.6 V8 32V in the 1988 Audi V8 D11 produced 250hp.
I have an S8 motor from a 1998 Audi S8, a 4.2 V8 32V, this produces 340hp and 430Nm in stock trim. It's also a very rev-happy engine, redlined at a heady 7000rpm. It sounds very different to both my Lexus' , a nice rumble at low to mid throttle, rising to an angry rasping roar when driven in anger.
The S8 engine is very different to the standard Audi A8 4.2 V8 32V engine, which produces 300hp and 410Nm torque (still higher than the Lexus' output) and is redlined at 6500rpm.
I'm currently working on either an adapter plate solution, retaining the Hilux bell housing, allowing the S8 engine to bolt up, or an adapter losing the Hilux bell housing, allowing a cut off and suitably modified Audi bell housing to bolt to the Hilux transmission. We are currently about to relocate, so not much will be taking place right now, in terms of stripping down an Audi (I have 2 A4's) or removing the S8 engine from my DTM Race Audi A4 Quattro, which is having an Audi A8 4.2 V8 40V in place of the S8 unit.
We'll see how it all pans out, I may have both Lexus' for sale depending on the outcome.
02-23-2015, 02:55 PM
#219
Registered User
Thread Starter
Join Date: Dec 2013
Location: Aso Rock!
Posts: 214
Likes: 0
Received 0 Likes
on
0 Posts
03-01-2015, 08:13 AM
#220
Registered User
Thread Starter
Join Date: Dec 2013
Location: Aso Rock!
Posts: 214
Likes: 0
Received 0 Likes
on
0 Posts
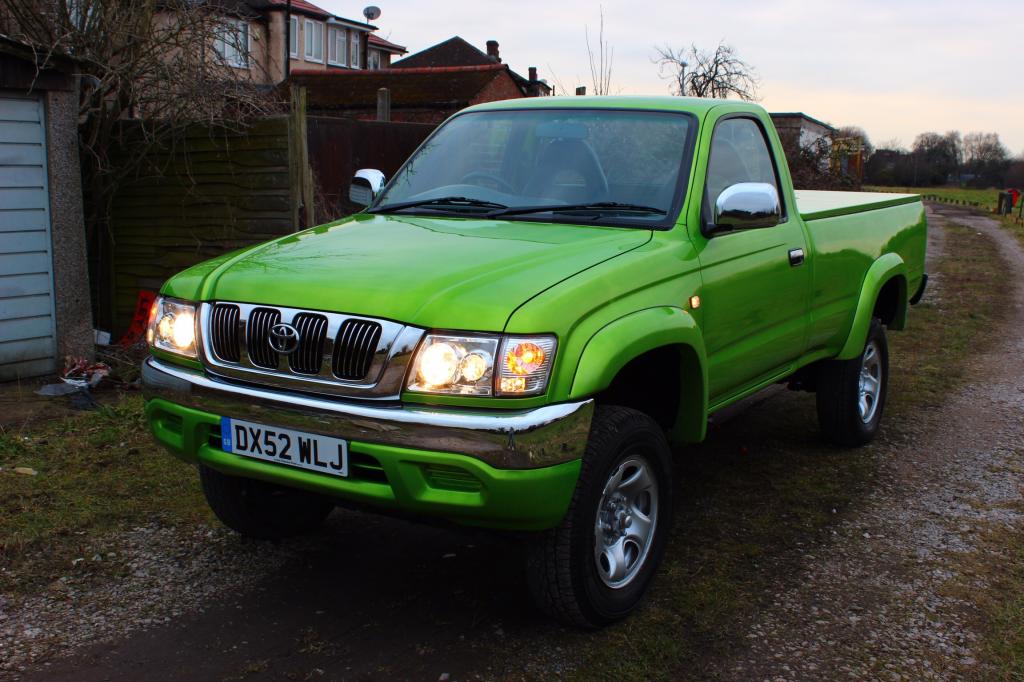
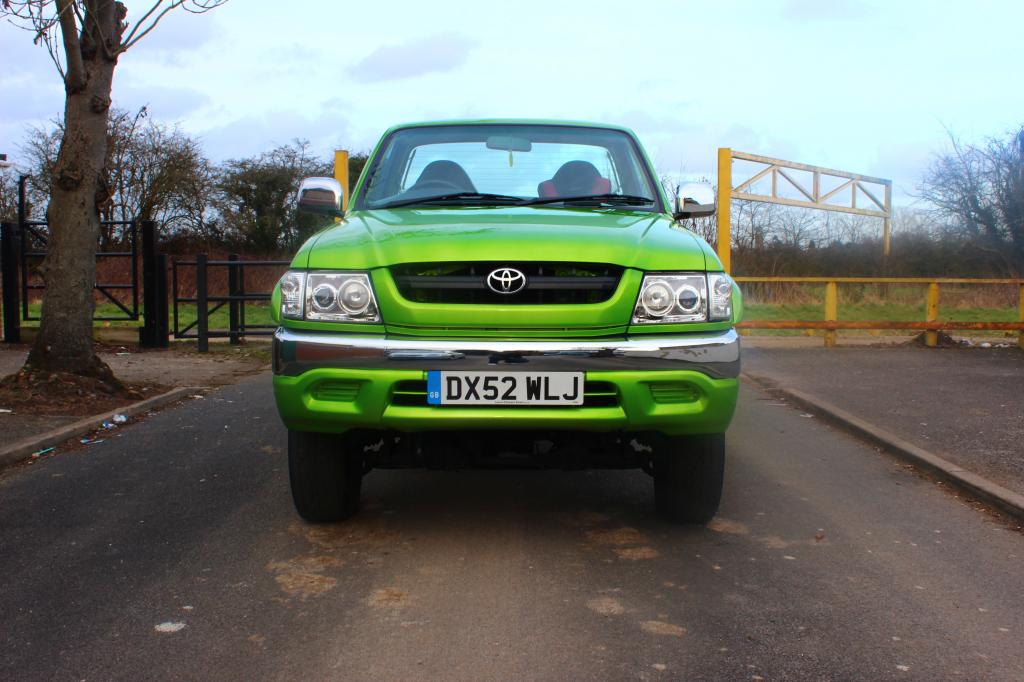
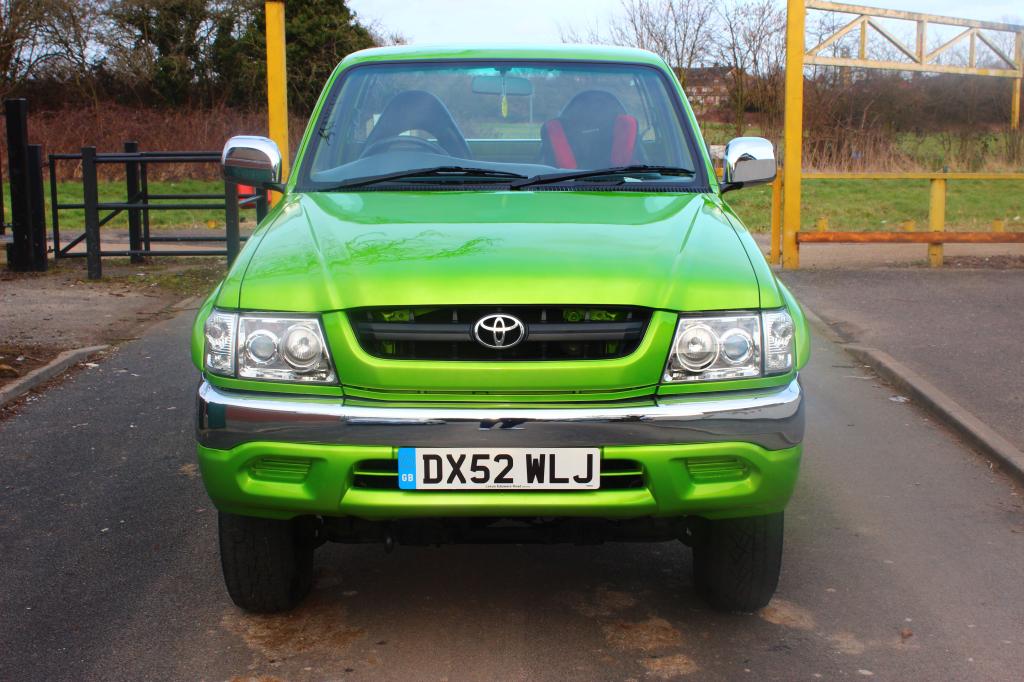
When I initially trial fitted the OEM Hilux grille, I didn't really give it a fair go. I viewed it on the truck, but without a front bumper and valence. The hood was also open, so it was not easy to see what the grille looked like in comparison to the Hilux Sport Rider item, which has been on the truck with the front end pretty much done.
Today I decided to swap the Sport Rider grille with the OEM one. And I must say it looks better, looks like you guys were right after all. It's a keeper. :thumbsup:
And I was so sure the chrome one was the winner. *cough cough*
What do you guys think?
Today I decided to swap the Sport Rider grille with the OEM one. And I must say it looks better, looks like you guys were right after all. It's a keeper. :thumbsup:
And I was so sure the chrome one was the winner. *cough cough*
What do you guys think?


