Siena's Toyota Hilux Gen 6 Make-Over & 3UZ-FE VVTi Swap
 01-16-2015, 11:01 AM
#181
Registered User
Thread Starter
Join Date: Dec 2013
Location: Aso Rock!
Posts: 214
Likes: 0
Received 0 Likes
on
0 Posts
The rubber seal for the tonneau cover turned up today, so that will be fitted tomorrow, along with a new set of license plates. I went all the way to the nearest Lexus dealership to get a set, as I want the Lexus branding on them. I'm not suffering from OCD, I just love a smattering of OEM. :thumbsup:
I just realised I haven't fitted the tailgate handle, so that'll get done tomorrow. I need to extend the license plate lamp wiring to the lamp in the bumper too.
I just realised I haven't fitted the tailgate handle, so that'll get done tomorrow. I need to extend the license plate lamp wiring to the lamp in the bumper too.
 01-18-2015, 07:11 AM
#182
Registered User
Thread Starter
Join Date: Dec 2013
Location: Aso Rock!
Posts: 214
Likes: 0
Received 0 Likes
on
0 Posts
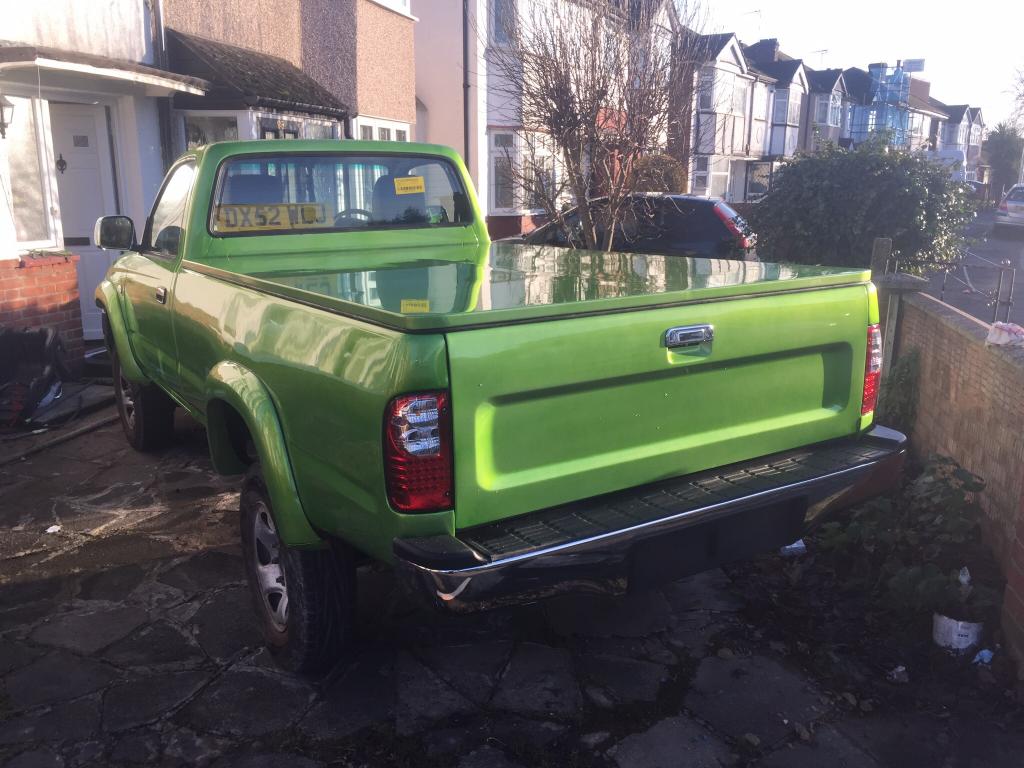
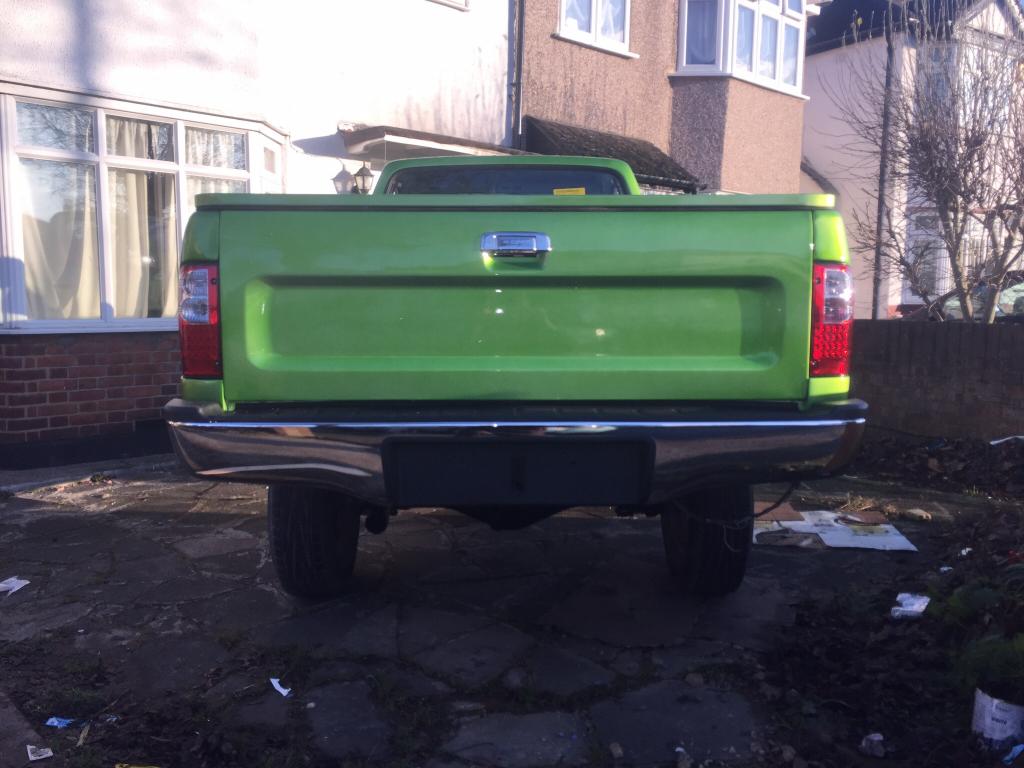
I fitted the tailgate handle, as well as the tonneau rubber seal.
From the onset, I wanted the tonneau and tailgate to be free of any clutter and external locks. I had a central tab welded onto the tonneau whilst it was still in it's basic frame stage. This tab will engage with a similar tab on the tailgate. So once the tonneau is hydraulically locked, the tailgate can't be opened.
I drilled a couple of holes in the corners of the bed rail, on either side of the tailgate. These will accept the 8mm pegs welded onto the corresponding areas of the tonneau. I need to fit a couple of grommets.
I was going to fit my license plates with double sided tape, but the texturised area on the rear bumper means proper adhesion may not be achieved. The front license plate mounting recess isn't flat either. I need to pick up some license plate screws.
01-18-2015, 07:15 AM
#183
Registered User
Thread Starter
Join Date: Dec 2013
Location: Aso Rock!
Posts: 214
Likes: 0
Received 0 Likes
on
0 Posts
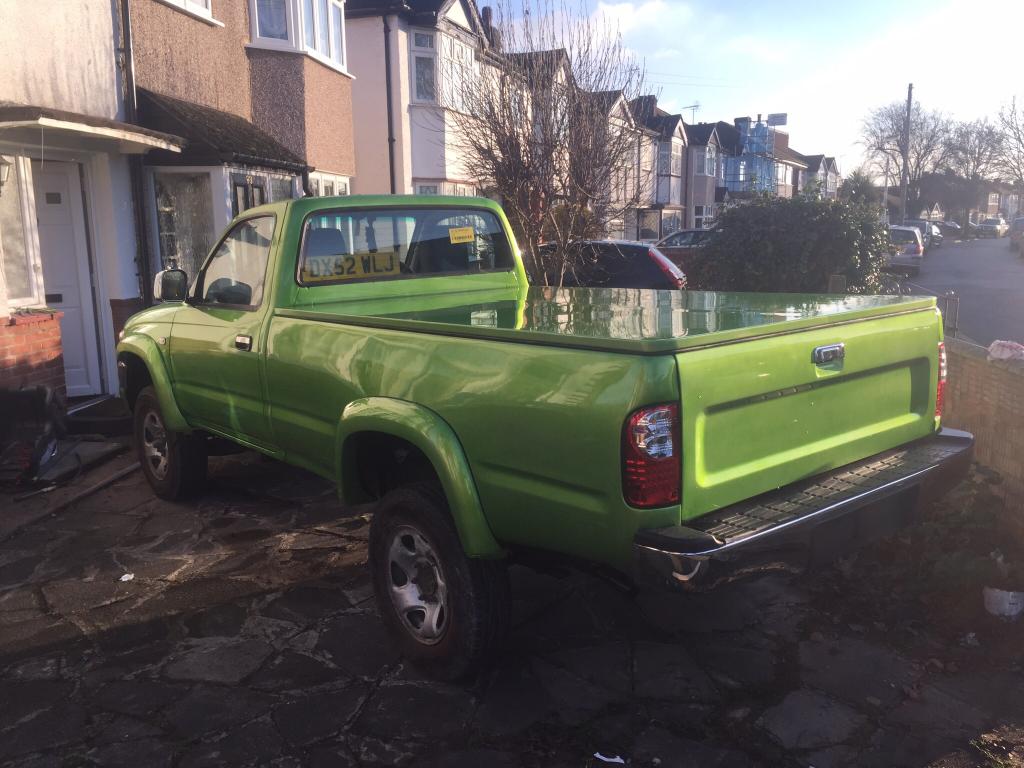
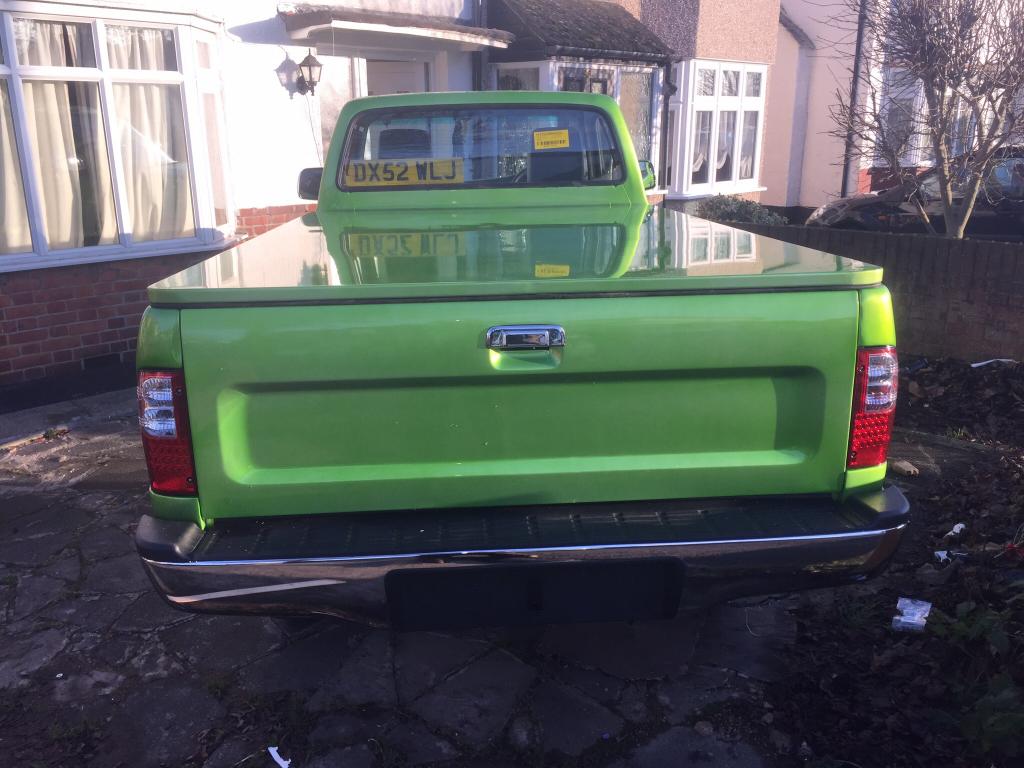
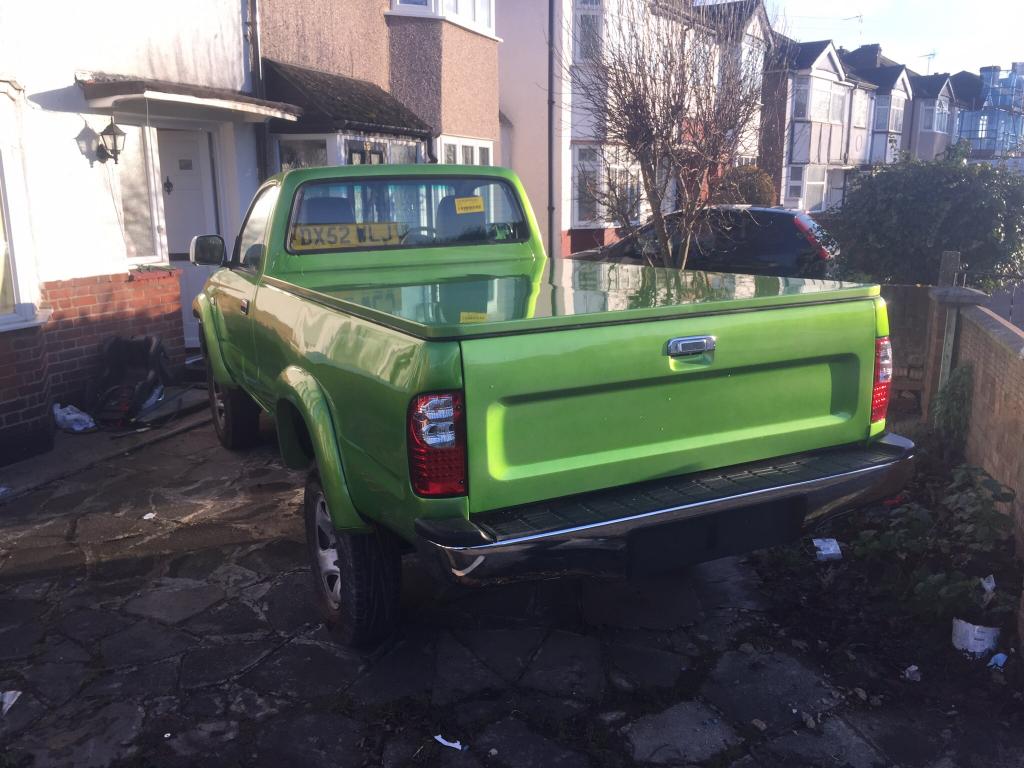
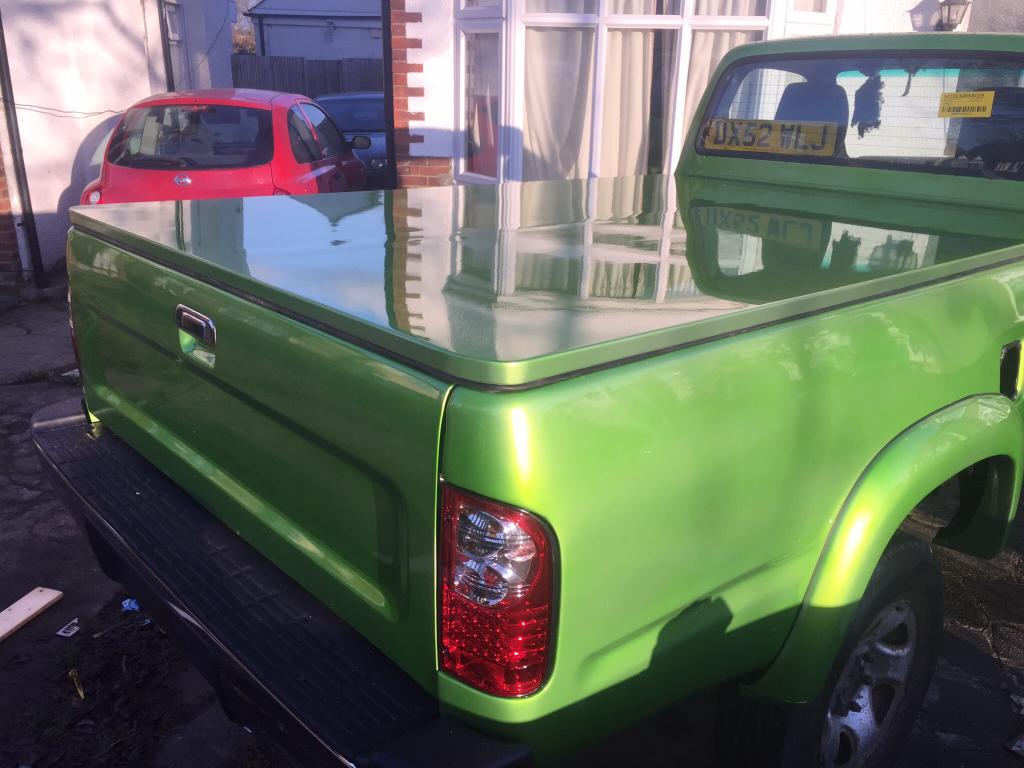
Pictures. This is the first time I've seen the tonneau completely shut, without lumps of tape-wrapped cloth at each corner to protect the bed rail:


 01-21-2015, 11:33 AM
#185
Registered User
Thread Starter
Join Date: Dec 2013
Location: Aso Rock!
Posts: 214
Likes: 0
Received 0 Likes
on
0 Posts
Today, I stripped out the interior, bar the dash. So seats, floor vinyl, centre console, a pillar trims, gear and transfer lever console, door cards.
I gave the floor a thorough wash and dry. No rust, which I didn't expect to find anyway. I gave the entire floor pan a coat of smooth black Hammerite.
All the plastic items I washed with warm soapy water. I will work some fragranced dash shine into them before refitting. I'll give the floor a couple of days to dry, then refit the vinyl. I need to get the bases of my Toyota Celica Gen. 7 leather seats modified to bolt in, I might need some parts off my originals.


 01-25-2015, 05:33 AM
#187
Registered User
Thread Starter
Join Date: Dec 2013
Location: Aso Rock!
Posts: 214
Likes: 0
Received 0 Likes
on
0 Posts
Yesterday the 24th January, I began the task of refitting the interior of my truck.
I had decided that the big expanse of grey wasn't really my thing, it made the interior rather cold and wintry. On the 22nd January, after I had washed all the plastic trim I'd removed to get the floor vinyl out, I prepared and painted the grey bits.
They are now green, but I didn't want to colour match them to the exterior, I wanted a slight contrast. I opted for Rover Applejack Green. And it looks pretty good. All parts were run over with a medium scotch pad, prior to applying plastic primier, and a plastic bonding promoter, ending with 2 top coats, allowing each coat to dry.
The aim of the scotch pad was not to remove the plastic grain, just to make the surface slightly matt, to aid adhesion
The parts painted so far are the A pillar trims, front kick panels, sill trims, centre console (both sections). Next I'll be removing the B pillar trims (after removing the seat belts) then the plastic trim behind the seats (below the screen). They will then be painted and replaced.
The dash itself, upper and lower will be painted Rover Applejack Green too (or trimmed in leather), with the black area around the instrument cluster, and glovebox being painted in a sharply contrasting Piano Black. The dashboard will be painted when I pull it to fit the Lexus' air conditioning at the same time the UZ motor's being installed.
I also had the roof lining washed while it was out, that has now been refitted, along with the washed sun visors, Rover Applejack Green A pillar trims, interior mirror and lamp, as well as the grab handle on the driver's side. The passenger side has no grab handle, just a pair of push in blanks that also serve as the retainers for the headlining. I have not fitted the blanks, as I want to order a grab handle for that side too.
My Surf carpet will be with me on Tuesday, it's a grey one. I will cut it down, have it deep steam cleaned, then evaluate it once dry. I may keep it grey, or have it dyed green (I did have the option of buying a green one, doh!)
The door cards, are still grey. They will be lined with slim foam, then upholstered in black and green leather. The manual window winder hole will be lost at the same time. My Celica Gen 7 seats will receive the same treatment.
Last edited by Siena; 01-25-2015 at 05:47 AM.
 01-26-2015, 12:51 PM
#191
Registered User
Thread Starter
Join Date: Dec 2013
Location: Aso Rock!
Posts: 214
Likes: 0
Received 0 Likes
on
0 Posts
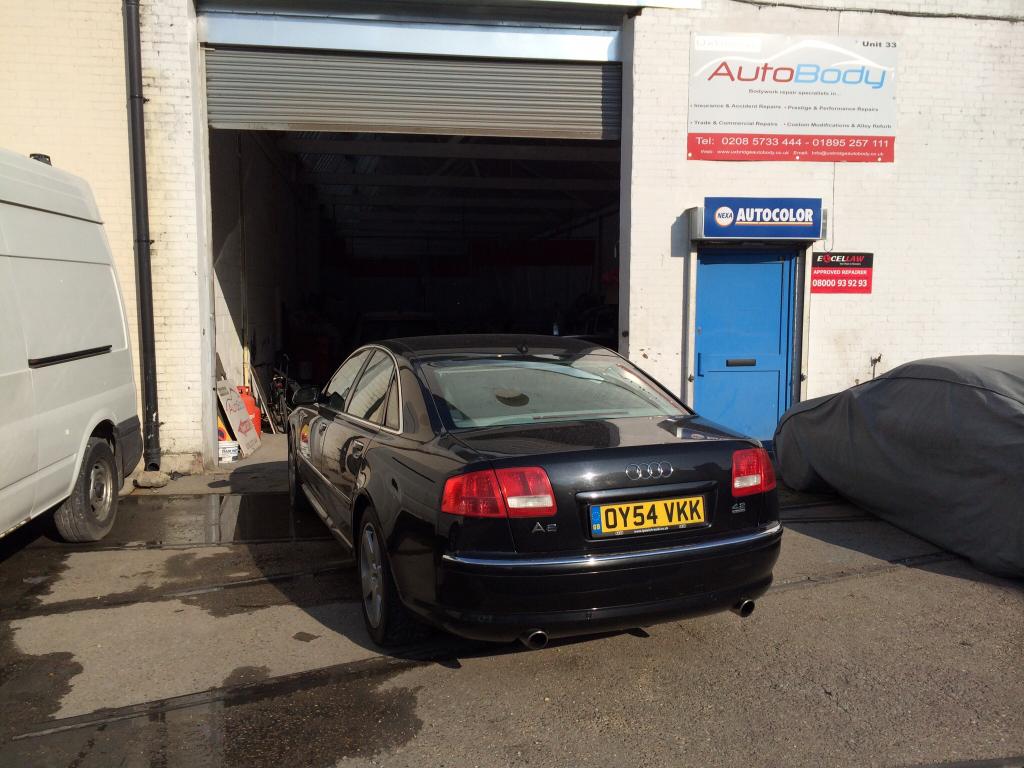
Just a word of warning - this is the bodyshop from hell, one to avoid. 20 weeks after dropping my truck off, stripping it down for them, supplying all materials - topcoat, basecoat, primer, lacquer, thinners and hardener, nothing was achieved.
I had to supply all the sheet metal to loose the hook recess on the bed, the strips to lose the rain channels in the roof, all cut to shape. As apparently, "we don't have sheet metal on site."
Altogether, 11.5 litres of paint were wasted, and that did not include the tonneau, which remained in primer. Paint and materials came to �757. And I parted with �1,190 for labour (total was �1,350). My fuel tank cap was lost, so was one of the under headlamp trims, and nearside rear wheel arch liner. The bed was poorly painted, and chipped where one of the workers opened a door against it, and scuffed elsewhere, by another worker dragging the oxcy acetylene trolley past the rear.
I found out today the roof was wet sanded without adequate coverage of the dash, and filler-coloured water ended up in the instrument cluster, seats, floor, and more importantly the ECU.
Still, I was lucky, others weren't so fortunate, one Mercedes-Benz C180 has been there for 2 years and 10 months. Doh!
Uxbridge Autobody, Hayes. Apparently amongst other work, they carry out "Custom Bodywork ". Lol.
 01-27-2015, 11:00 AM
#193
Registered User
Thread Starter
Join Date: Dec 2013
Location: Aso Rock!
Posts: 214
Likes: 0
Received 0 Likes
on
0 Posts
01-27-2015, 11:05 AM
#194
Registered User
Thread Starter
Join Date: Dec 2013
Location: Aso Rock!
Posts: 214
Likes: 0
Received 0 Likes
on
0 Posts
After some consideration, I have decided to retain the Lexus's automatic transmission in my 3UZ-FE swap. Yes, a manual is fun, but in terms of drive characteristics, the automatic transmission suits the big, torquey V8 better. It will also handle more torque than the manual.
Obviously the Lexus LS430 is RWD, as opposed to my Hilux, which is 4WD. I am purchasing a transfer box, from a '98 Toyota Surf 2.4 automatic.
This will bolt to the Lexus automatic transmission, in place of the end case. I can't use the transfer case from my own gearbox, as the automatic and manual transfer cases are NOT interchangeable. Also, I could get a newer transfer case from a 2001-2006 Land Cruiser automatic. But again, not compatible with my truck, as the output to the front differential is on the LEFT, as opposed to mine, which is on the RIGHT.
Things are looking good.
01-28-2015, 11:31 AM
#195
Registered User
Thread Starter
Join Date: Dec 2013
Location: Aso Rock!
Posts: 214
Likes: 0
Received 0 Likes
on
0 Posts
I took a stab at fitting the Surf carpet to my truck today.
Just so others who don't know are aware - the '96 - '02 Surf IS Hilux MK4/5 based. I laid the original vinyl floor covering from my truck over the Surf carpet, and the cut-outs are all in the same place, down to the seat mounting holes, and the slits in the footwells for the bend-over metal securing tabs.
Even the raised area for the seat front mounts is the same too. They are only available in blue and grey, I'm going to dye mine black though.
Unfortunately, I cut the damn carpet in the wrong place - too short! I forgot that the Hilux vinyl does NOT go all the way to the rear firewall. I could still lay the carpet as is, and lay a rear section. After all, the join will not be seen with the seats in place. However, I opted to order a replacement.
I did take time to install new wedge-shaped, twin-jet windshield washer jets, in the black vent panel at the base of the windshield. I have ordered a pack of 60 assorted rubber grommets, as I need to run the screen wash tubing through the top of the scuttle box, and connect to both jets. The jets are black, and pretty much concealed in the black ventilation panel.
I am a bit peeved though, I went to Halfords, to purchase a new set of wiper blades. Despite giving the registration of my rig, and they were able to identify it as a Toyota Hilux 250 EX 4x4, they still managed to give me a pair of Bosch blades that are wrong - at least one is too short 17"). I guess the nickel should've dropped when the lady who served me, asked if I was after front or REAR wiper blades. Rears on a Hilux?!
Swapping them over tomorrow.
01-28-2015, 11:37 AM
#196
Registered User
Thread Starter
Join Date: Dec 2013
Location: Aso Rock!
Posts: 214
Likes: 0
Received 0 Likes
on
0 Posts
I need to source a replacement rear lamp harness, mine is pretty messed up, the tow hitch was spliced into the harness real bad, so I have issues with the offside lamp.
If anyone here has a harness, or any links to a seller who's likely to have one, I'd really appreciate it.
If anyone here has a harness, or any links to a seller who's likely to have one, I'd really appreciate it.
01-29-2015, 08:19 AM
#197
Registered User
Thread Starter
Join Date: Dec 2013
Location: Aso Rock!
Posts: 214
Likes: 0
Received 0 Likes
on
0 Posts
My 2nd Hilux Surf carpet turned up today, much quicker than I anticipated. I ordered it just yesterday.
I laid it out, and gave it a good hot shampoo, then laid it out on the roof of our old Nissan Micra. Not much hope of it drying in the next couple of days, as it began to snow 20 minutes ago.
For the first time since Apple Candy came out of the shop, I gave her a good wash, the tyres got scrubbed and dressed, they came up pretty good too.
I have fitted the windshield washer jets, and new Bosch wiper blade on refurbished arms. My concern though is despite what I believe are the correct blade sizes - 17" passenger's side, and 20" driver's, there is a fairly large half-moon between both blades, at the base of the screen. As in there is a large gap between the leading edge of the driver's side blade, and the trailing edge of the passenger's. The driver's side blade is pretty close to the top of the screen, and the passenger's side is close to the end of the screen in it's parked position.
Can anyone post pictures of their '99 - 2003 Tacoma wipers? It's possible I need a longer blade on the passenger's side, with the extra length towards the driver's side blade, as opposed to the end of the screen.


 01-31-2015, 07:17 AM
#199
Registered User
Thread Starter
Join Date: Dec 2013
Location: Aso Rock!
Posts: 214
Likes: 0
Received 0 Likes
on
0 Posts
Today I moved onto the interior.
For starters, it needed a damn good clean, there was white dust everywhere, one of the legacies of the bodyshop, that did not deem it fit to cover the dash and other areas. The original seats were soggy, and no good to man or beast. I would have been pretty mad if I planned to re-use them.
I fitted the 3rd gen. Hilux Surf carpet, and I must say it's transformed the interior. The rear fabric below the screen, I had initially removed and washed, I was now able to refit it, along with all the grey plastic trim and centre consoles, which I had prepared, and painted in Rover Applejack Green.
I originally planned to dye the carpet and headlining black, but I think the grey contrasts nicely with the green trim. I still need to sort out the door cards, the centre area will remain grey, albeit refreshed, while the outer area will be Rover Applejack.
I was leaving the door cards off for the time being, as I wanted to install the electric window, mirrors and central locking harnesses first, but since I am using as much of the donor Lexus as possible, it would hardly matter. I will still need to splice the Lexus harness' to the MK5 electric window motors and mirrors, the only direct plug-ins will be the central locking actuators and electric window switches, as these will be from the Lexus.
I will be fitting a pair of 7th gen. Toyota Celica front seats. They are from a T Sport, in black and grey leather. I may retrim them, but I'll fit them first, and see how they look against my current colour scheme.
The dash, I'm leaving alone. It would be pretty hard to graft not just the Lexus instruments in, and have it looking OEM, but the switchgear, climate control panel etc. The MK5 dash will be junked come summer, in favour of another...


