habanero's 1996 4Runner Build-Up Thread
 07-17-2018, 03:30 PM
#3581
Contributing Member
Thread Starter
96 4Runner 299,798 miles
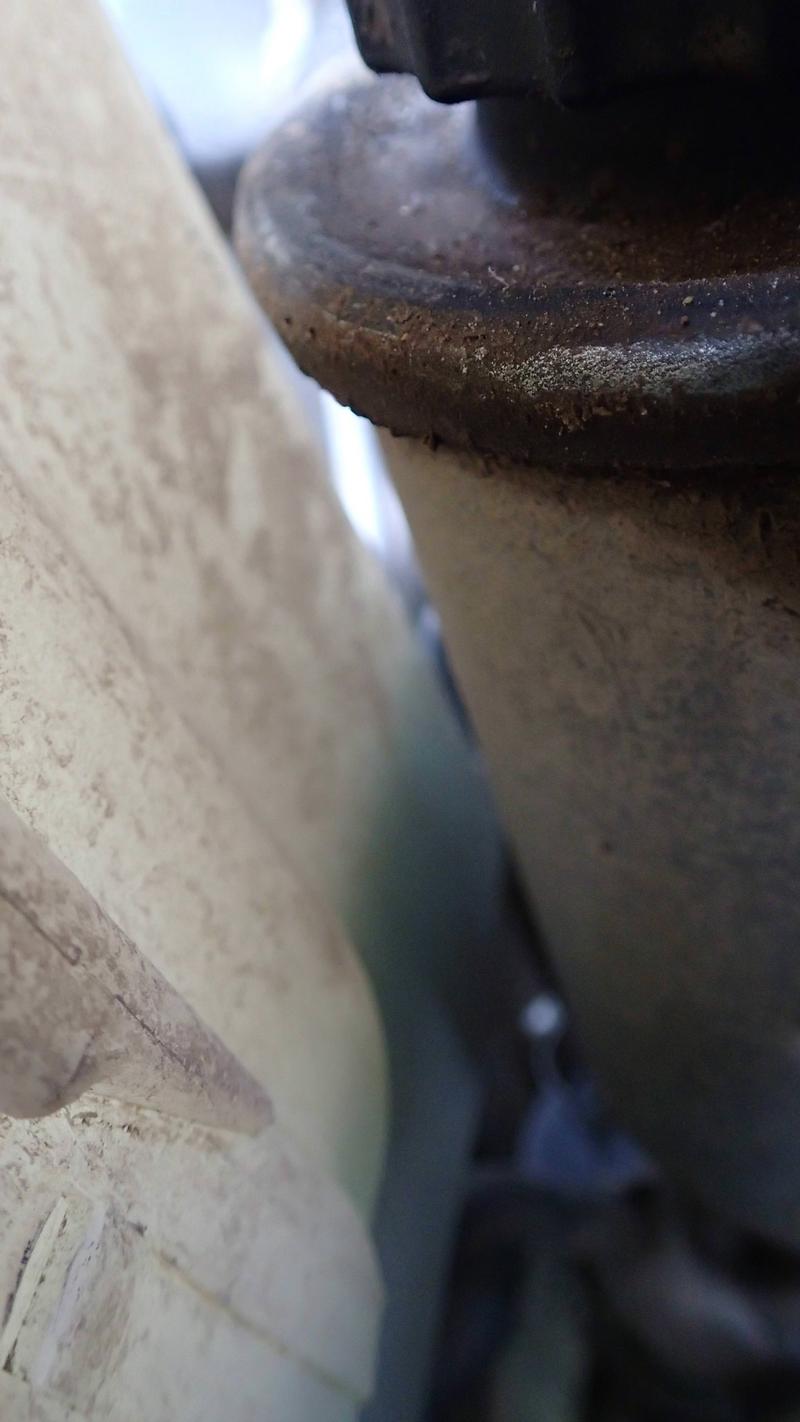
Finally got around to putting the gas tank skid back on. I thought I'd squashed it back outwards but apparently missed a spot where the tank is very close to the skid. Most of it is good though.
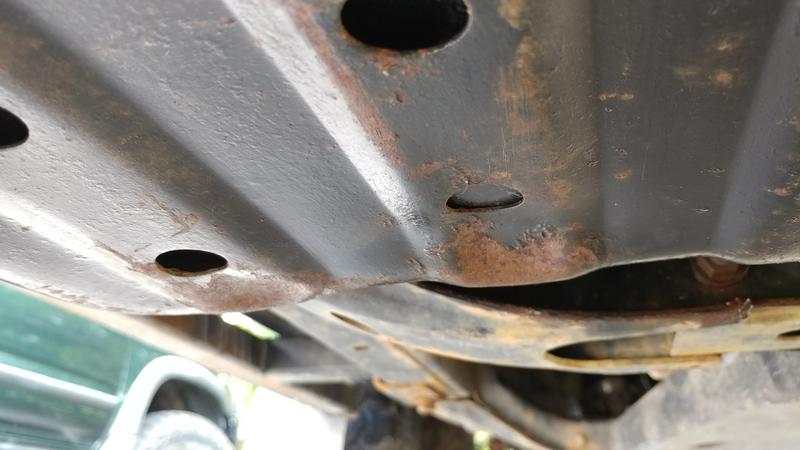
Also I had a little chat with the part that has been bitten by the drive shaft more than a few times as evidenced by the 2 rust rings on the shaft. It was all pulled out and bent at the contact area:
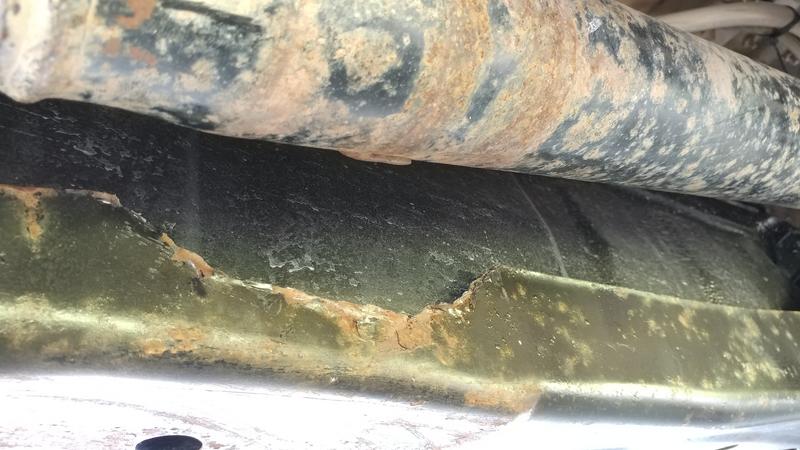
Really wanted to get a Lil Skip's tank skid but it wasn't in the budget cards this year.
Finally got around to putting the gas tank skid back on. I thought I'd squashed it back outwards but apparently missed a spot where the tank is very close to the skid. Most of it is good though.
Also I had a little chat with the part that has been bitten by the drive shaft more than a few times as evidenced by the 2 rust rings on the shaft. It was all pulled out and bent at the contact area:
Really wanted to get a Lil Skip's tank skid but it wasn't in the budget cards this year.
 07-22-2018, 04:39 PM
#3582
Registered User

Join Date: Jul 2018
Posts: 2
Likes: 0
Received 0 Likes
on
0 Posts
New here, I�ve been browsing your extensive thread, and have a question.
How did you attach you coolant reservoir to the air box, and how has that worked out for you?
I also put a dual battery set up in my tacoma but I�m not too happy with how my reservoir set up came out. I used one out of a corolla but I�m afraid it won�t take much of a beating.


And the air box needed an artificial foot so I made one for it.

Last edited by Uglytacoma; 07-22-2018 at 04:43 PM.
07-22-2018, 07:32 PM
#3583
Contributing Member
Thread Starter
Hi uglytaco...
I'm not in a place where I can do pics now but two bolts, run from the inside of the reservoir, into the airbox, then nuts on the airbox side. Takes a bit of patience as you want to make the holes barely big enough. Sealant to keep it from leaking. When you position the holes in the airbox keep in mind you have to avoid the air filter area. Also keep in mind the power steering reservoir...it will all fit if you are careful.
I can do more pics and measures in a couple of weeks if you want them.
07-23-2018, 05:26 PM
#3584
Registered User
Join Date: Jul 2018
Posts: 2
Likes: 0
Received 0 Likes
on
0 Posts
Thanks, sure when ever you can get pictures would be nice. I tried fitting the original tank in the same spot. But maybe the taco tank is bigger or there is less room. Because the tank sticks further up then yours, making the hood unable to close. Does yours touch the fan shroud or power power steering reservoir? This is what limits mine from sitting further down than yours. I�m going on a trip from Florida to Nova Scotia in the beginning of August, and would like to have some piece of mind with the reservoir, but worse comes to worse I�ll just have to make a better way to secure the corolla reservoir. Again thanks for the help and this wealth of information that is your thread.
Hi uglytaco...
I'm not in a place where I can do pics now but two bolts, run from the inside of the reservoir, into the airbox, then nuts on the airbox side. Takes a bit of patience as you want to make the holes barely big enough. Sealant to keep it from leaking. When you position the holes in the airbox keep in mind you have to avoid the air filter area. Also keep in mind the power steering reservoir...it will all fit if you are careful.
I can do more pics and measures in a couple of weeks if you want them.
I'm not in a place where I can do pics now but two bolts, run from the inside of the reservoir, into the airbox, then nuts on the airbox side. Takes a bit of patience as you want to make the holes barely big enough. Sealant to keep it from leaking. When you position the holes in the airbox keep in mind you have to avoid the air filter area. Also keep in mind the power steering reservoir...it will all fit if you are careful.
I can do more pics and measures in a couple of weeks if you want them.
Last edited by Uglytacoma; 07-23-2018 at 06:28 PM.
07-24-2018, 09:59 AM
#3585
Contributing Member
Thread Starter
Mine is an oe 4runner reservoir with the flat side against the air box. I have it at the approximate oe height. It doesn't touch the ps reservoir metal return line or the fan shroud by approx. 1/4" each and the reservoir itself by almost an inch.
I used to have a mountain bike bottle cage attached to the air box with the biggest bottle I had (they make bigger) with the top modified for the overflow hose but it occasionally overflowed, mostly due to things like a bad radiator cap.
I used to have a mountain bike bottle cage attached to the air box with the biggest bottle I had (they make bigger) with the top modified for the overflow hose but it occasionally overflowed, mostly due to things like a bad radiator cap.
07-26-2018, 05:42 AM
#3586
Registered User

Join Date: Jun 2016
Posts: 2
Likes: 0
Received 0 Likes
on
0 Posts
This is how the upper brackets fit, for when you move them to the new condenser:

I replaced the upper rubber isolator bushings and the sleeves, the old slides out and the new into its place.
2 Condenser Assembly Grommet 90099-32128.
2 Condenser Assembly Collar 88895-89102
and the lower isolator bushing, use pliers to compress and pull out the old one, the new one pushes into place:
2 Condenser Assembly Lower Insulator 88467-35020

^ that's what the bottom of the condenser uses to sit on the support, no need to unbolt the lower brackets from the condenser to remove it from the truck, only later to move the brackets to the new condenser.
and move this u-nut over to the new condenser:

Everything moved over:

I replaced the upper rubber isolator bushings and the sleeves, the old slides out and the new into its place.
2 Condenser Assembly Grommet 90099-32128.
2 Condenser Assembly Collar 88895-89102
and the lower isolator bushing, use pliers to compress and pull out the old one, the new one pushes into place:
2 Condenser Assembly Lower Insulator 88467-35020
^ that's what the bottom of the condenser uses to sit on the support, no need to unbolt the lower brackets from the condenser to remove it from the truck, only later to move the brackets to the new condenser.
and move this u-nut over to the new condenser:
Everything moved over:
I'm about to do the very same job to install my new condenser, but my old brackets, grommets, washers and bolts were are all badly rusted. I found this page by googling the part numbers, which are not available through my usual supplier (Amayama), which led me to assume that they are no longer in production. However, it seems that you recently purchased them, new, so I'd be very grateful if you could share where you go them from.

Thanks,
Daniel
07-26-2018, 10:42 AM
#3587
Contributing Member
Thread Starter
Hi Daniel- I bought the condenser bits at EB Toyota....online parts department....though I imagine you could get them from any American parts dealer? You'll have to let us know.
Don't forget the receiver dryer when you order your condenser.

Don't forget the receiver dryer when you order your condenser.
Last edited by habanero; 07-26-2018 at 10:44 AM.
07-26-2018, 10:50 AM
#3588
Contributing Member
Thread Starter
So far:
Inoperable locker, speed sender w/check engine, missing upper a-arm nut (replaced with Napa bits til I can get by a junkyard).
If you happen to be on Elephant Hill and find it...

Finished EH, then drove another 60ish mostly road miles to get a replacement.
Inoperable locker, speed sender w/check engine, missing upper a-arm nut (replaced with Napa bits til I can get by a junkyard).
If you happen to be on Elephant Hill and find it...
Finished EH, then drove another 60ish mostly road miles to get a replacement.
07-29-2018, 11:58 AM
#3589
Contributing Member
Thread Starter
Speed sender was bad ground....can't see anything wrong with wire or connector and the other 2 grounds on the bolt are fine.
CB mic has broken wire and doesn't receive.
CB mic has broken wire and doesn't receive.
07-29-2018, 02:39 PM
#3590
check out his website: https://eurasiaoverland.com/author/
its pretty cool
07-31-2018, 05:16 PM
#3591
Registered User
It was nice meeting y'all, Hab! We made it back in one piece! The only casualties were Andrew's rear axle seal and for me a rear shock bushing that has been missing for the last 4k miles or so
08-01-2018, 03:38 PM
#3592
Contributing Member
Thread Starter
Thanks for both the info and site dropzone, I'm kinda limited right now, missed the location.
I'll have to pull the e-locker when I get back home, non-working from the get go. I've been open the whole trip. So far doing okay, Pearl pass yesterday...beer today! Well, 1 beer today.
It was good to meet you too chuckles, can't wait to read your trip report when I can!
I'll have to pull the e-locker when I get back home, non-working from the get go. I've been open the whole trip. So far doing okay, Pearl pass yesterday...beer today! Well, 1 beer today.
It was good to meet you too chuckles, can't wait to read your trip report when I can!
08-05-2018, 05:39 PM
#3593
Contributing Member
Thread Starter
96 4Runner 303,263 miles
Drove it home.
Did a lot of things, including some new-to-us things. Drove approx 3500 miles over the past 16 days.
Our tent was our home in all kinds of climates and mostly good weather. We hiked and biked and wheeled and had a great time.
Trip and repair reports pending.
I. am. beat.
Tonight I won't have to air the bed up.

Uglytacoma: I owe you pics and have not forgotten, will take care of that tomorrow.
EurasiaOverland: Should have guessed from the name that you wouldn't be looking for bits here, so glad Dropzone had what I hoped turned out to be very useful info for you and thanks again dropzone for said info.
And happy.
Drove it home.
Did a lot of things, including some new-to-us things. Drove approx 3500 miles over the past 16 days.
Our tent was our home in all kinds of climates and mostly good weather. We hiked and biked and wheeled and had a great time.
Trip and repair reports pending.
I. am. beat.
Tonight I won't have to air the bed up.
Uglytacoma: I owe you pics and have not forgotten, will take care of that tomorrow.
EurasiaOverland: Should have guessed from the name that you wouldn't be looking for bits here, so glad Dropzone had what I hoped turned out to be very useful info for you and thanks again dropzone for said info.
And happy.
Last edited by habanero; 08-05-2018 at 05:44 PM.

 08-06-2018, 05:23 PM
#3595
Contributing Member
Thread Starter
For Uglytacoma:
Relocated coolant recovery tank, 96 4Runner 3.4
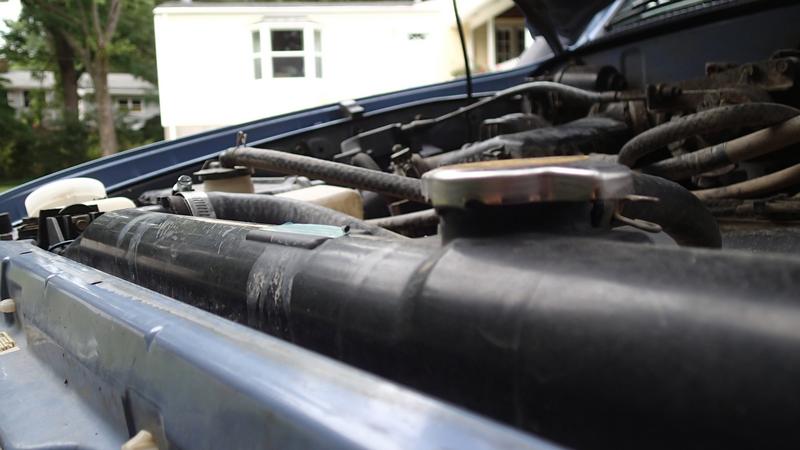
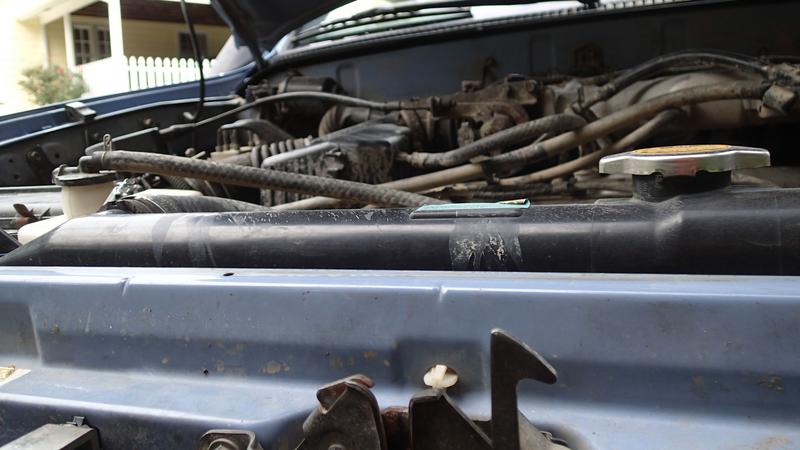
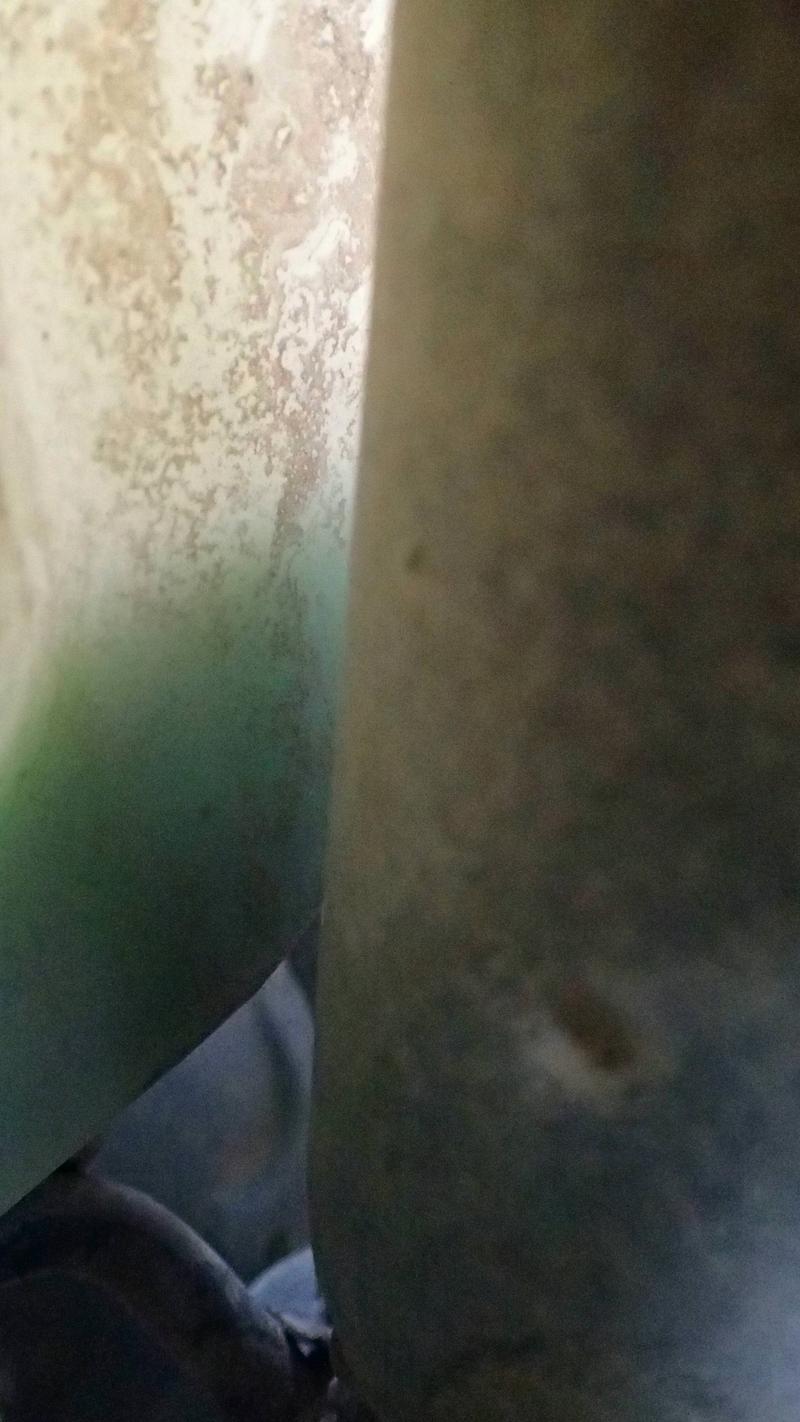
Space between the power steering pump and tank- it allllmost touches the power steering pump metal return line
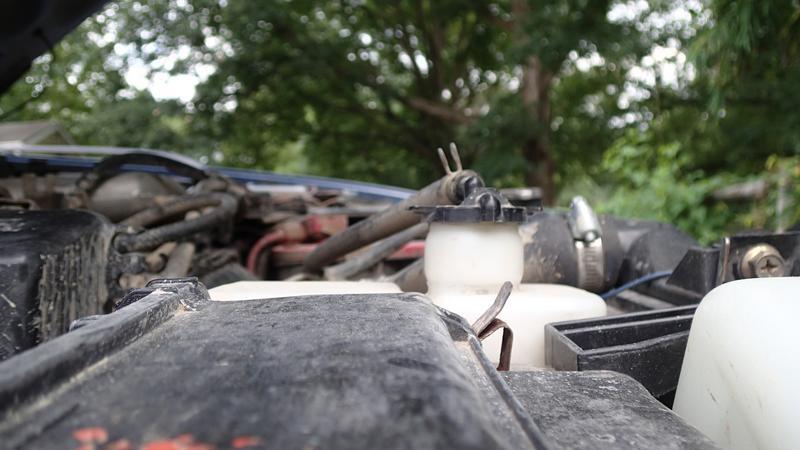
The flat side is mounted to the air box because that's what works best with the shape of our tanks

Space between the fan shroud and recovery tank
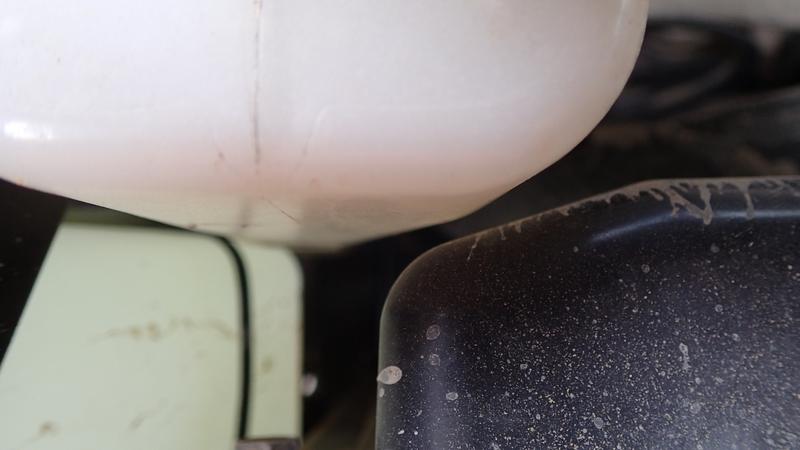
Another shot between power steering reservoir and recovery tank
and another between fan shroud and tank
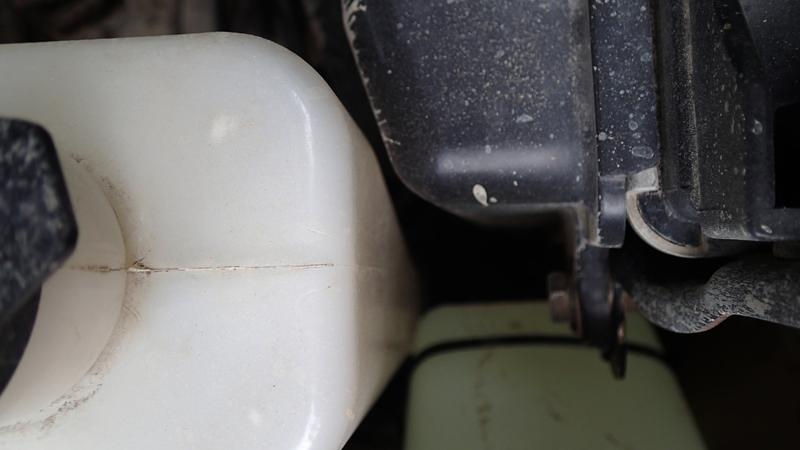
where it sits in relation to the air box
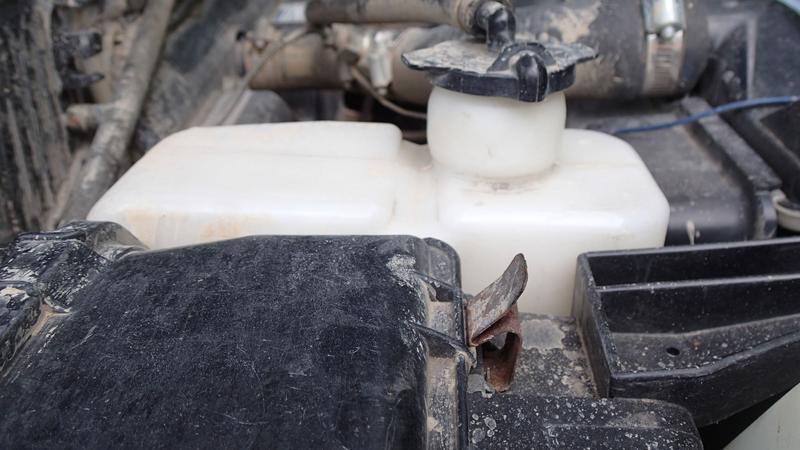
here you can see one of the bolts that poke into the air box. I actually put it too far back and it slightly interferes with the air filter. Try not to do that.
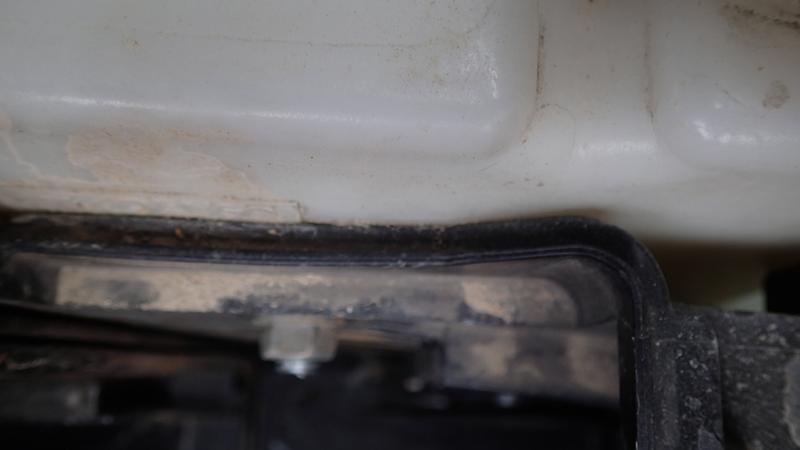
Both bolts in this pic. They are run through the recovery tank, into the air box and sealed with rtv

If anybody wants something specific let me know. The bike bottle with bottle cage was a lot simpler, but use a bigger one than I did.
Relocated coolant recovery tank, 96 4Runner 3.4
Space between the power steering pump and tank- it allllmost touches the power steering pump metal return line
The flat side is mounted to the air box because that's what works best with the shape of our tanks
Space between the fan shroud and recovery tank
Another shot between power steering reservoir and recovery tank
and another between fan shroud and tank
where it sits in relation to the air box
here you can see one of the bolts that poke into the air box. I actually put it too far back and it slightly interferes with the air filter. Try not to do that.
Both bolts in this pic. They are run through the recovery tank, into the air box and sealed with rtv
If anybody wants something specific let me know. The bike bottle with bottle cage was a lot simpler, but use a bigger one than I did.
Last edited by habanero; 08-06-2018 at 05:25 PM.


 08-07-2018, 01:48 PM
#3597
Contributing Member
Thread Starter
Hey old87yota!
It's the highlight of the year, our little trips. I've been trying to weed through pics and videos off 5 devices and it's making me dizzy!
It's been storming on and off all day so not much got done.
The snorkel really seemed to help but things still got (not as) dusty so I did:
New air filter
cleaned the maf
And cleaned some of the nasty muck-dirt from a disgust-o-puddle coming off the Kokopelli trail out of the engine bay.
My current laundry list is:
1) Regrease front manual hubs (maintenance)
2) Address antenna spring activity. It's a heavy duty spring but boy, does that sucker wag crazily sometimes. I'm thinking shoving a bit of plastic tube over the spring will help....cheap to do and one way to find out...
3)Repair non-lighting rear cargo light- continuity says bad bulb though the element looks intact, need to replace bulb
4)Replace non-lighting door open light in instrument cluster. Passenger area lights when door open, and the indicator light doesn't work for any of the doors- leading me to believe it's the actual bulb. Was contact on instrument cluster
5)Snag a washer/nut for the upper a-arm bolt to replace the lost one. Use the Napa nuts as jam nuts since loctite didn't do the trick.
6)Double check the ground wire for the speedometer, make sure no breaks or loose connections. It is still working fine since unbolting/rebolting at original ground point. Ground appears to be fine.
7) Make a book showing all my mods, especially electrical, and where power and ground and wire routing is for each mod (couldn't remember where the speedo ground was at first)
8)Replace air filter
9)Clean MAF
10) Research P0420 code- tripped about 5 times during the trip, usually on deceleration after running kind of hard. Both o2 sensors are fairly new, cat is new-ish
11)Research super-pressurized fuel tank/ angrily buzzing charcoal canister/ able to stop by unplugging vsv- at altitude. Test vsv, look for clogged lines. VSV for evap is not opening. The canister itself tested fine, no leaks, air came and went where air was supposed to go.
12)Oil change as maintenance
13)Maybe pound out some of the nastier hits to the skid plates. Those are some pretty big hits, not really gonna buff out.
14)Find out why the e-locker isn't working! Bad ground at the relay.
15)Replace broken front dif breather
16)Popping out of 2nd gear when in 4lo. Reworked the metal framework and took off some of the rubber for the under-the-shift-boot boot.
17)Add flap to vent. Well, that was not easy.
I think that's it.
Does anyone want to see Tincup, Elephant Hill and/or Pearl Pass entire videos? In 3 minute increments? I might have to have the kid show me how to make a You-Tube channel or something, if there's enough interest.
Or I could just do the highlights here.
It's the highlight of the year, our little trips. I've been trying to weed through pics and videos off 5 devices and it's making me dizzy!
It's been storming on and off all day so not much got done.
The snorkel really seemed to help but things still got (not as) dusty so I did:
New air filter
cleaned the maf
And cleaned some of the nasty muck-dirt from a disgust-o-puddle coming off the Kokopelli trail out of the engine bay.
My current laundry list is:
1) Regrease front manual hubs (maintenance)
2) Address antenna spring activity. It's a heavy duty spring but boy, does that sucker wag crazily sometimes. I'm thinking shoving a bit of plastic tube over the spring will help....cheap to do and one way to find out...
3)
4)
5)
6)
7) Make a book showing all my mods, especially electrical, and where power and ground and wire routing is for each mod (couldn't remember where the speedo ground was at first)
8)
9)
10) Research P0420 code- tripped about 5 times during the trip, usually on deceleration after running kind of hard. Both o2 sensors are fairly new, cat is new-ish
11)
12)
13)
14)
15)
16)
17)
I think that's it.
Does anyone want to see Tincup, Elephant Hill and/or Pearl Pass entire videos? In 3 minute increments? I might have to have the kid show me how to make a You-Tube channel or something, if there's enough interest.
Or I could just do the highlights here.
Last edited by habanero; 09-02-2018 at 03:31 PM.
08-08-2018, 06:22 PM
#3598
Contributing Member
Thread Starter
E-locker turned out to be right where I thought it was-ugh.
The ground wire at the relay had come apart internally, all neatly covered by heat shrink. My solder work needs a bit of....work, I guess. I was having difficulty at the time with the cold weather back when I wired it up.
The wire had been pulled out of the connector at some point.
Everything works again.
For a lark I took the e-locker motor off and inspected it. All looked good and my jb weld on the backing plate is holding nicely. Was very careful to pry as uniformly as possible and only at the edges. Probably having slopped anti-seize on the studs the last time helped a lot.
So that's two bad ground wires and both having hidden issues. I never did find anything wrong with the speed sender ground.
Guess if I don't want things malfunctioning I shouldn't be adding them to the truck!
08-09-2018, 04:55 PM
#3599
Contributing Member
Thread Starter
96 4Runner 303,289 miles
Oil change
Oil change


