1997 4Runner SR5 2WD Buildup
 03-19-2011, 12:18 AM
#1
Registered User
Thread Starter
Join Date: Jul 2009
Location: California City, CA
Posts: 198
Likes: 0
Received 0 Likes
on
0 Posts
1997 4Runner SR5 2WD Buildup
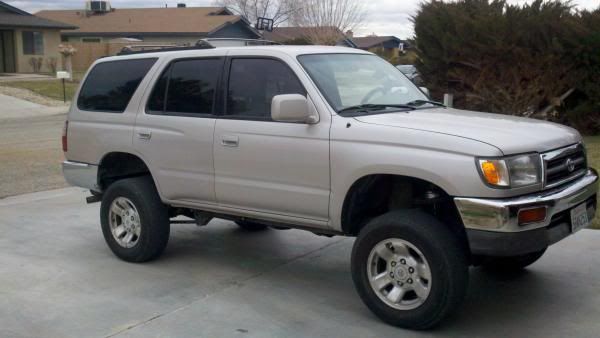
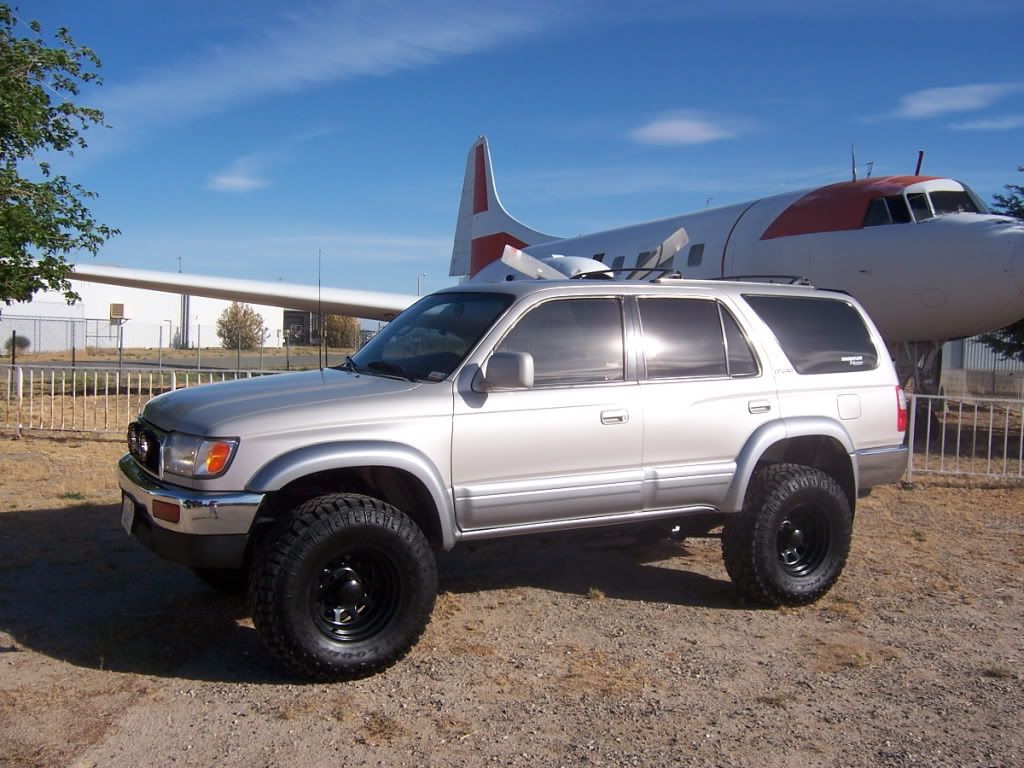
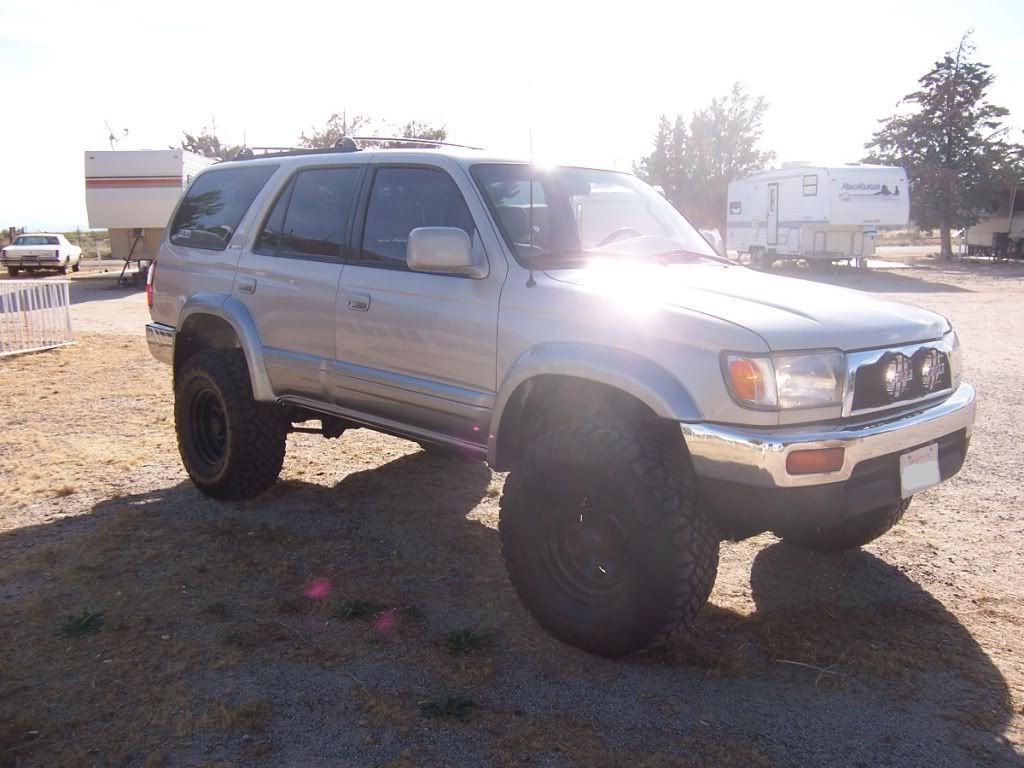
Ok, I got here back in July 2007. I paid $5000.00 for her from a used car dealer ship that specializes in used 4Runners down in Los Angeles Ca. Unfortunately I don’t have any pictures of how she looked when I first got her, but I can tell you, her prior owner did not took care of her at all. Although I got her for a decent price, I had to fix a bent front bumper and do a major cleaning job of the interiors. One of the first MODS I did on her was to replace the “gold plated” emblems for some regular chrome plated ones. I also replaced the factory stereo speakers but kept the factory receiver, for now. Between 2008 and 2010 I had to put all my plans on hold, but now I’m back on track. Like I said, she was neglected badly, but she has come long ways from the way she looked when I first got her. Anyway here is a picture I took days before getting the new wheels/tires installed:
On this picture I had the lift installed:
Here are some of the upgrades I've done recently so far:
- New Chrome plated emblems
- Replaced fatory speakers & added a 10" sub, still have factory receiver
- Installed 3" Toytec spacer suspension lift & 1" 4Crawlers Body lift.
- Blackrock 942 Type D window 15x8 wheels & 33x12.5x15 Goodyear Duratracs tires
- 18" Magnaflow 11256 muffler with Maganflow 35123 Exhaust tip "Weld-on type"
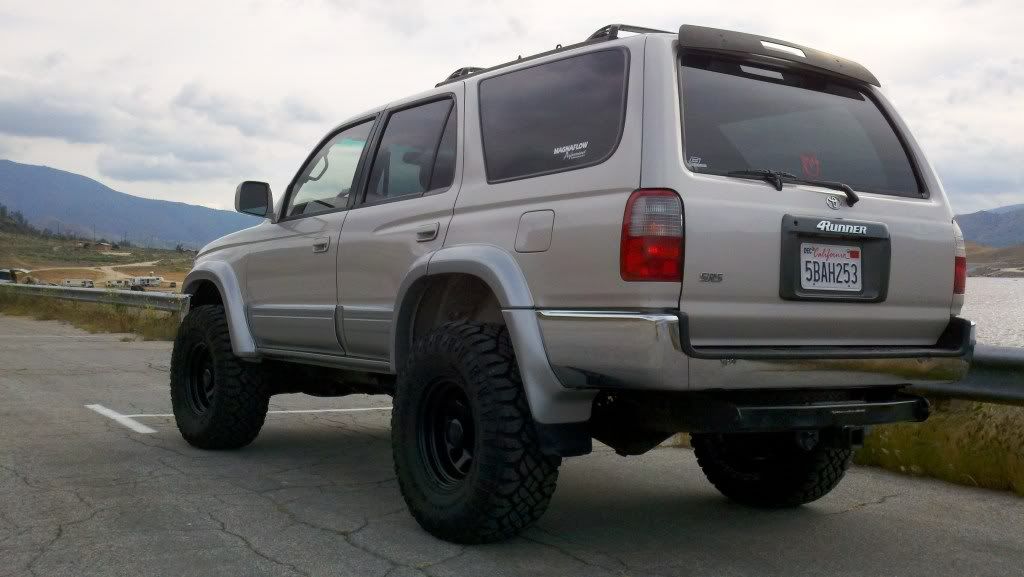
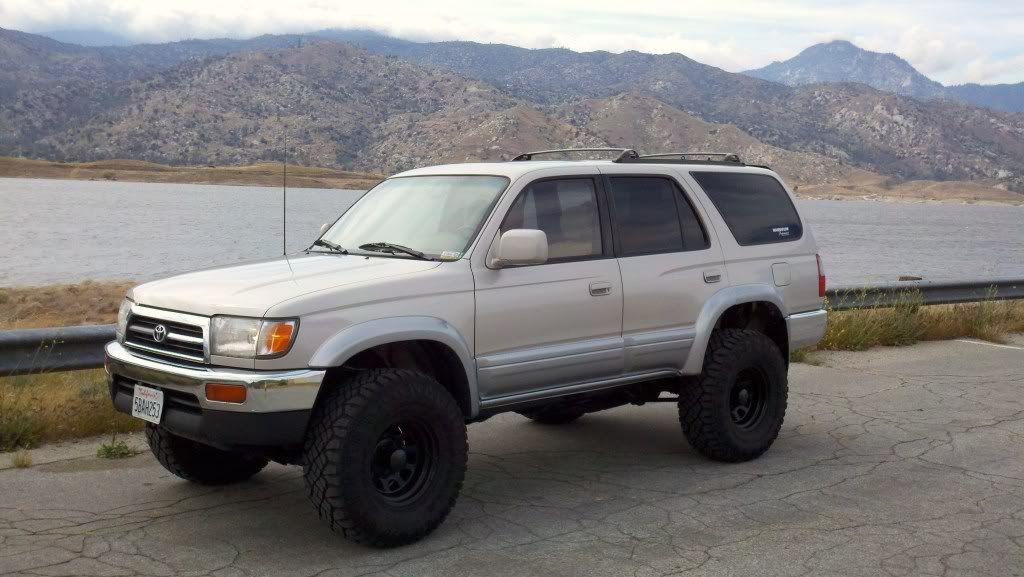
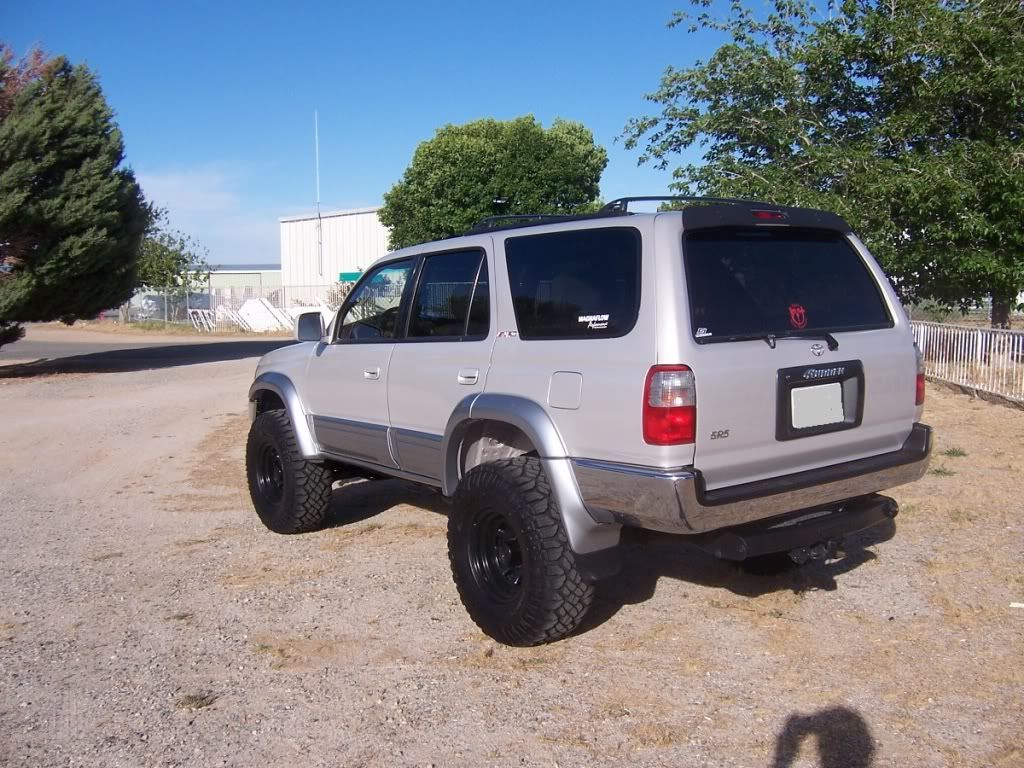
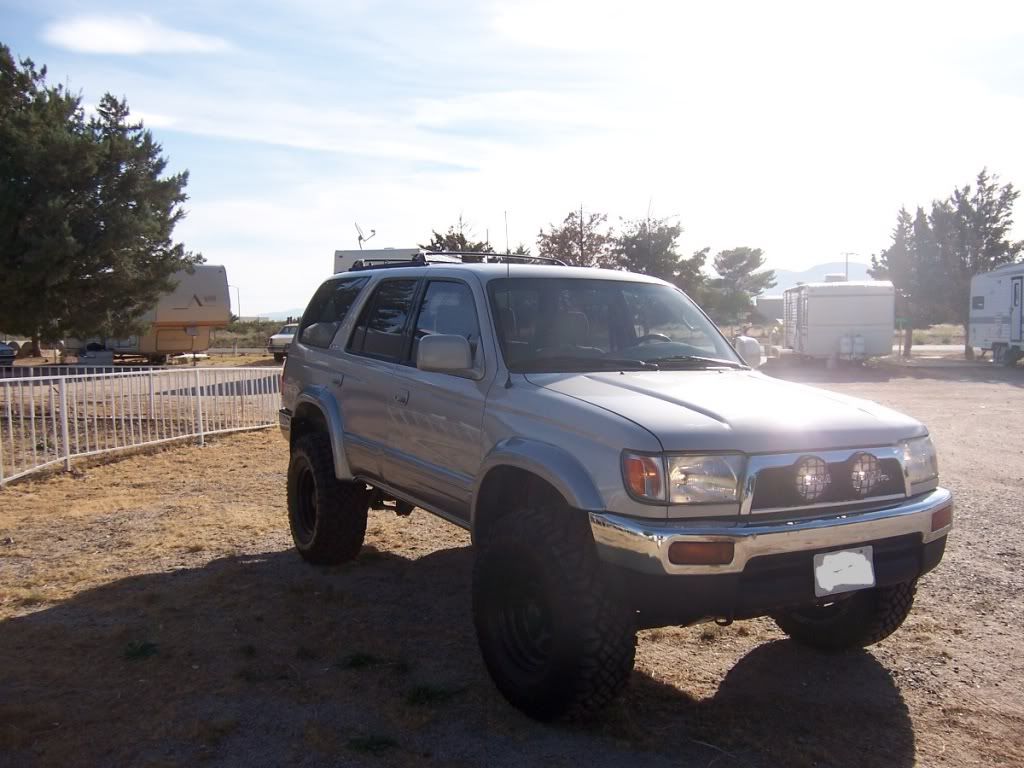
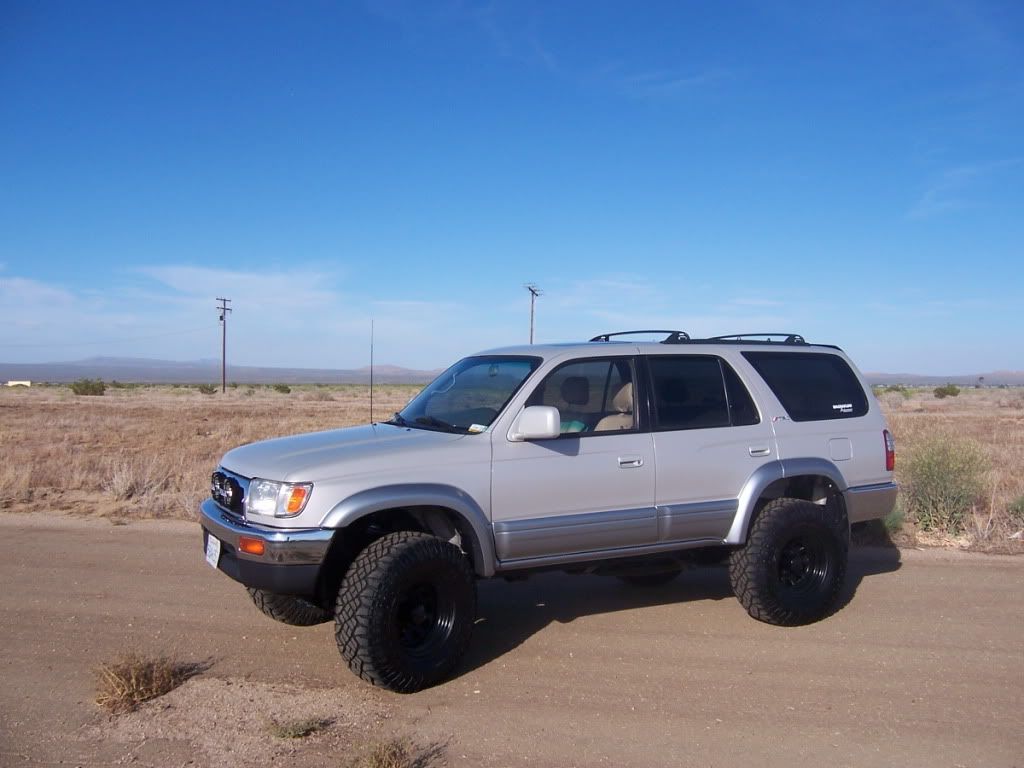
Anyway here are some pictures of how she looks now with new wheels & tires:
Day I got new tires installed:
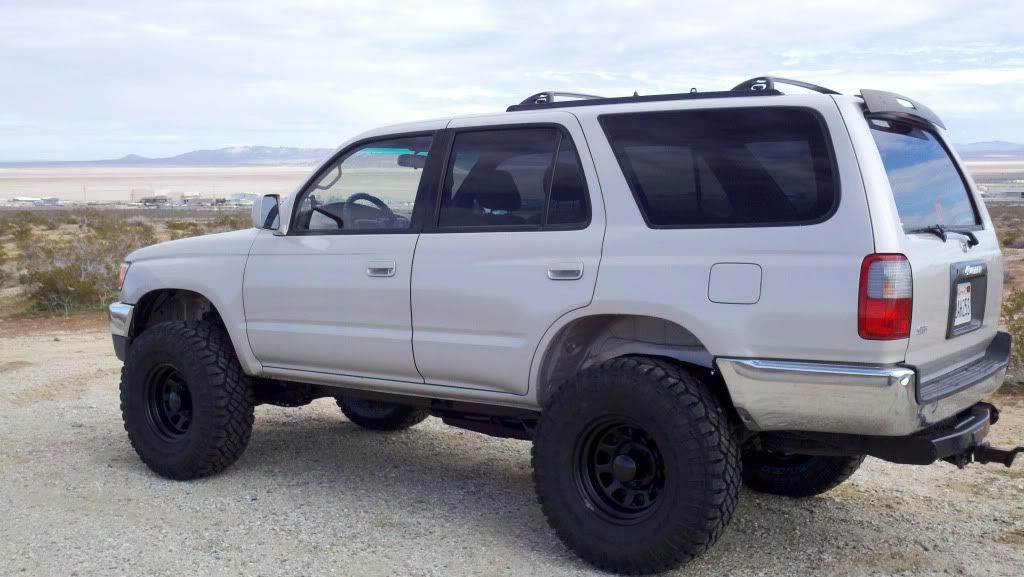
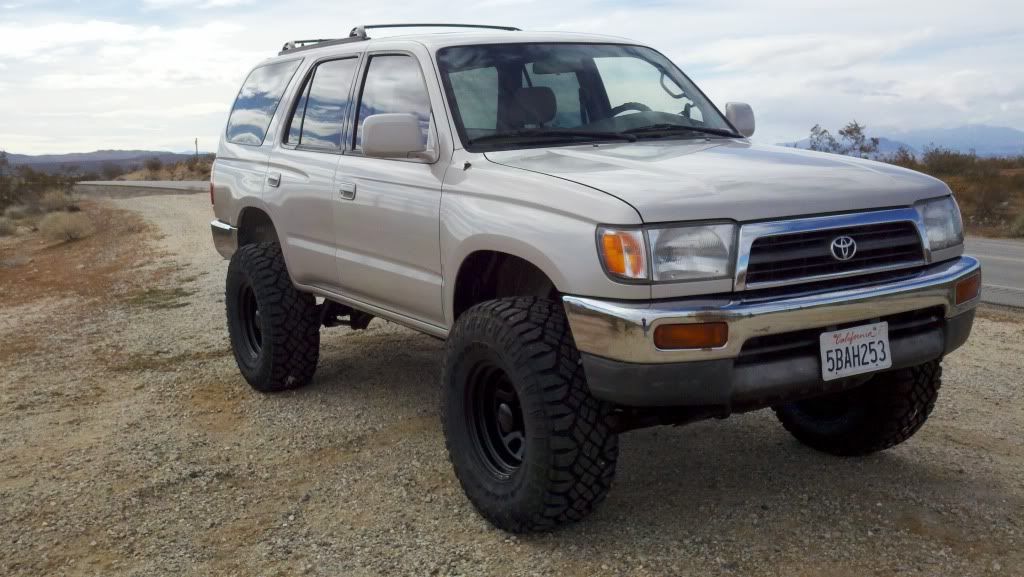
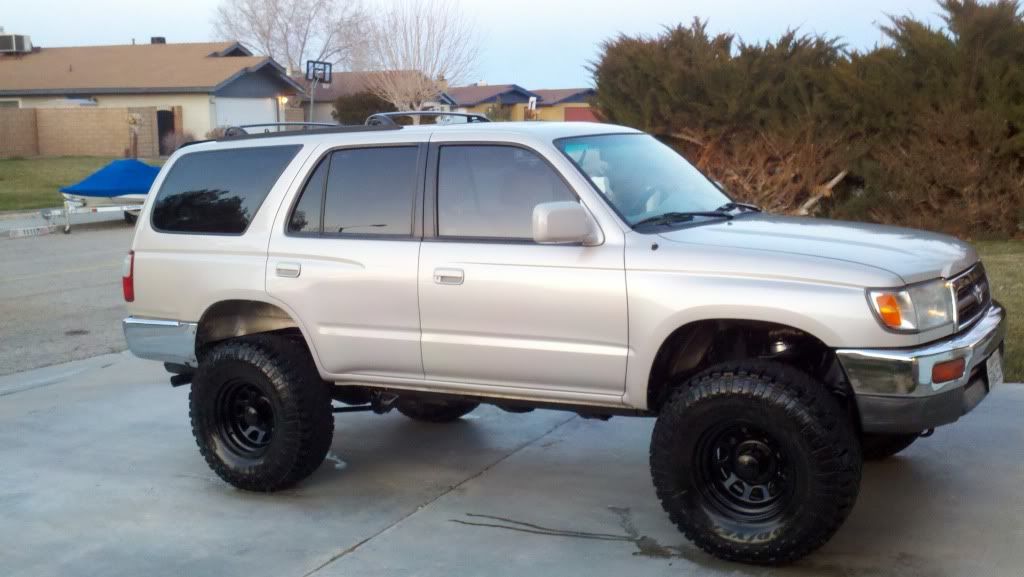
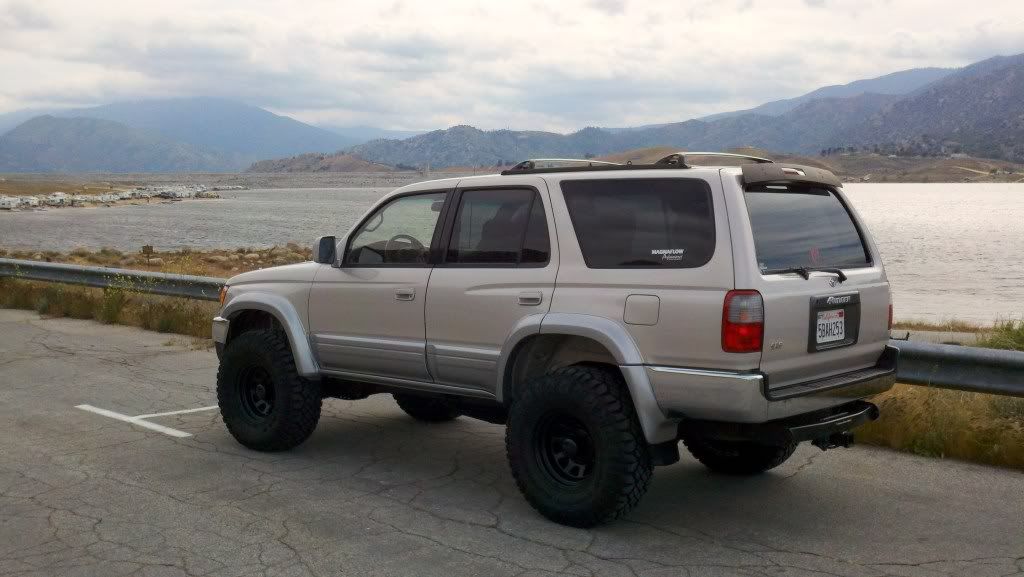
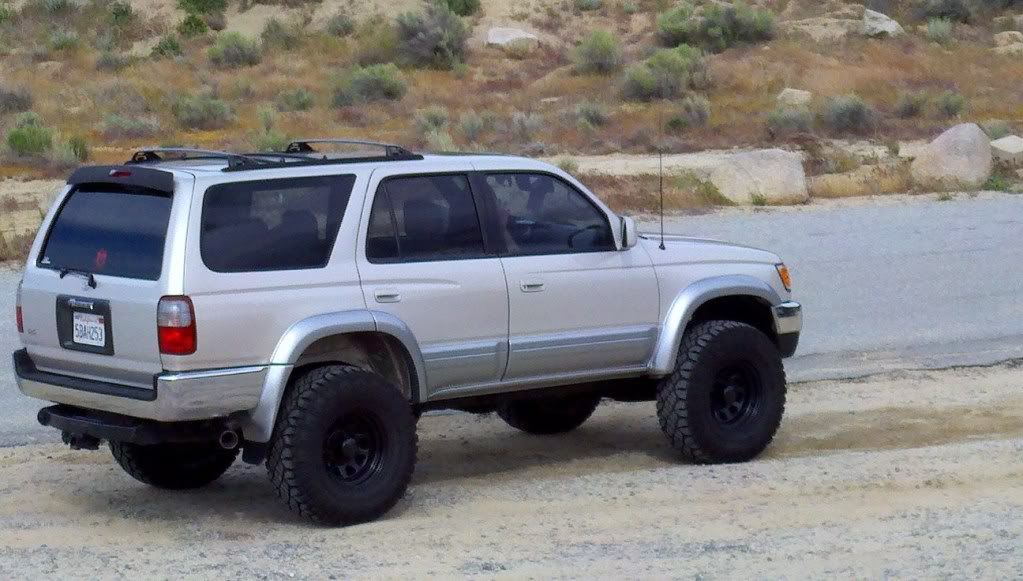
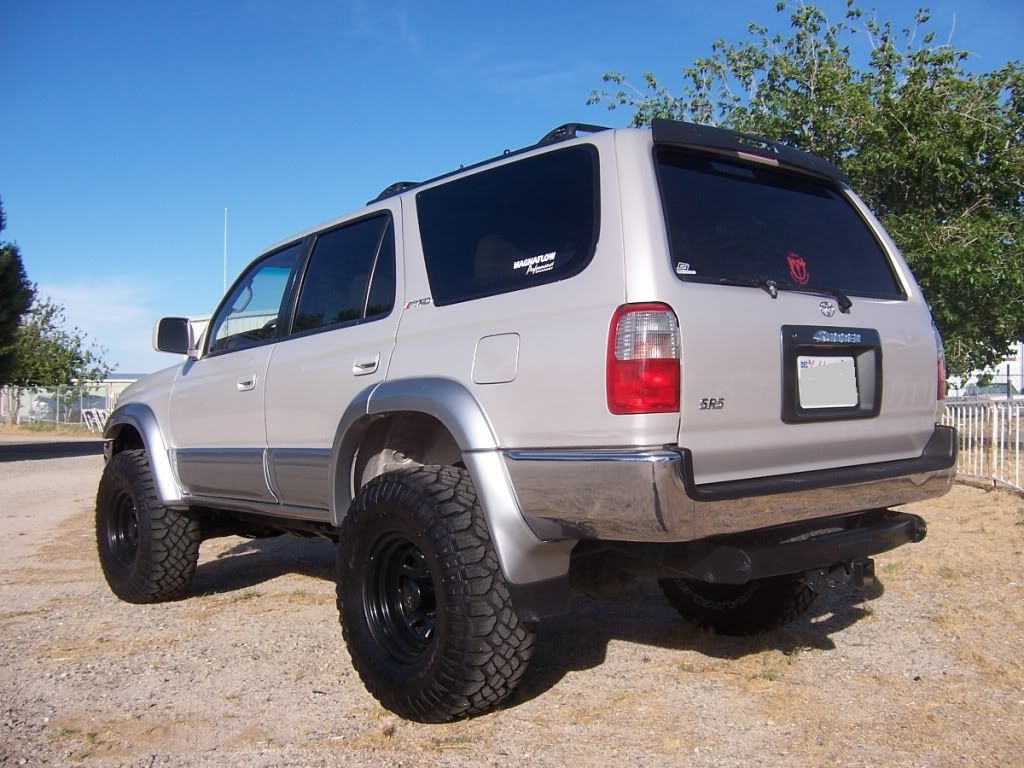
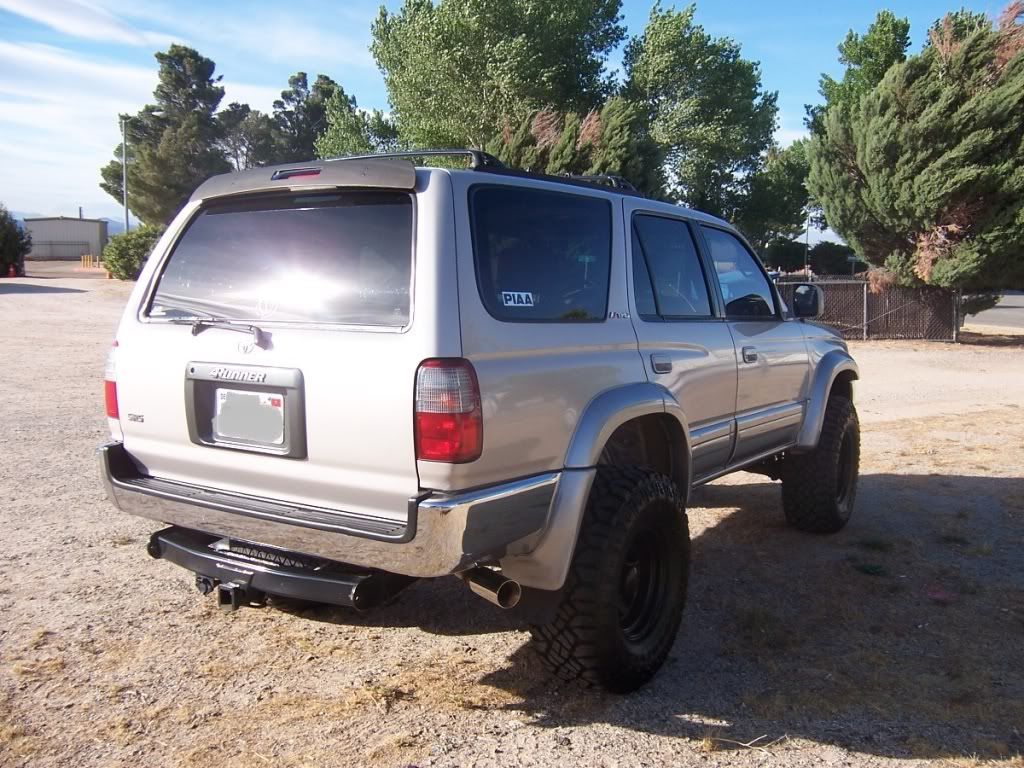
Here is anotherone right after a bath:
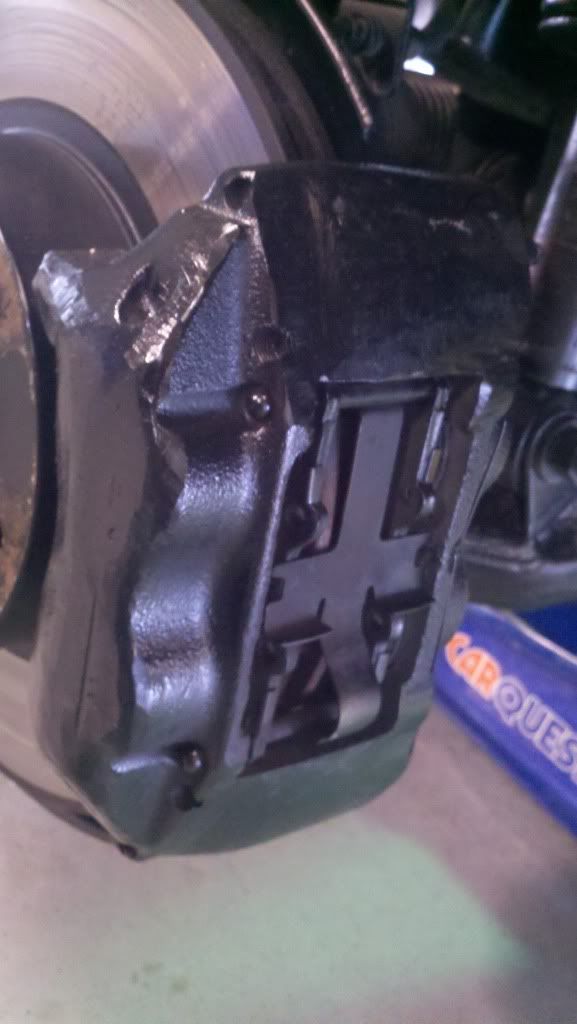
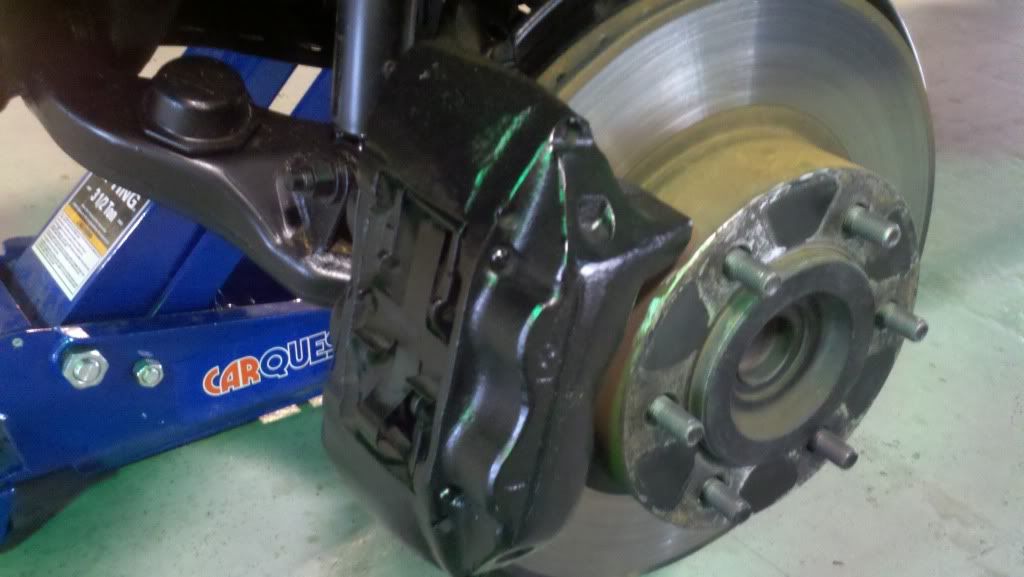
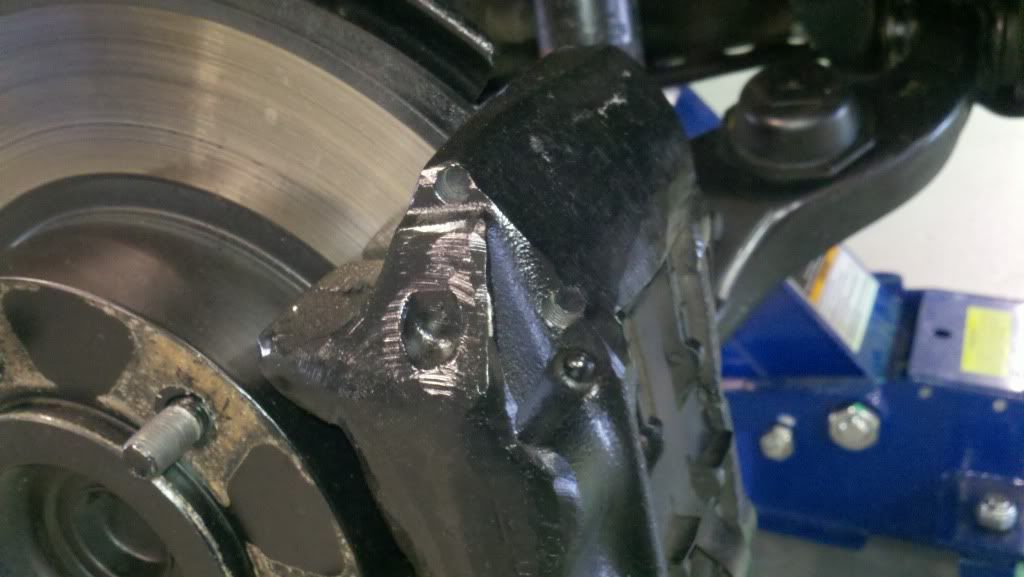
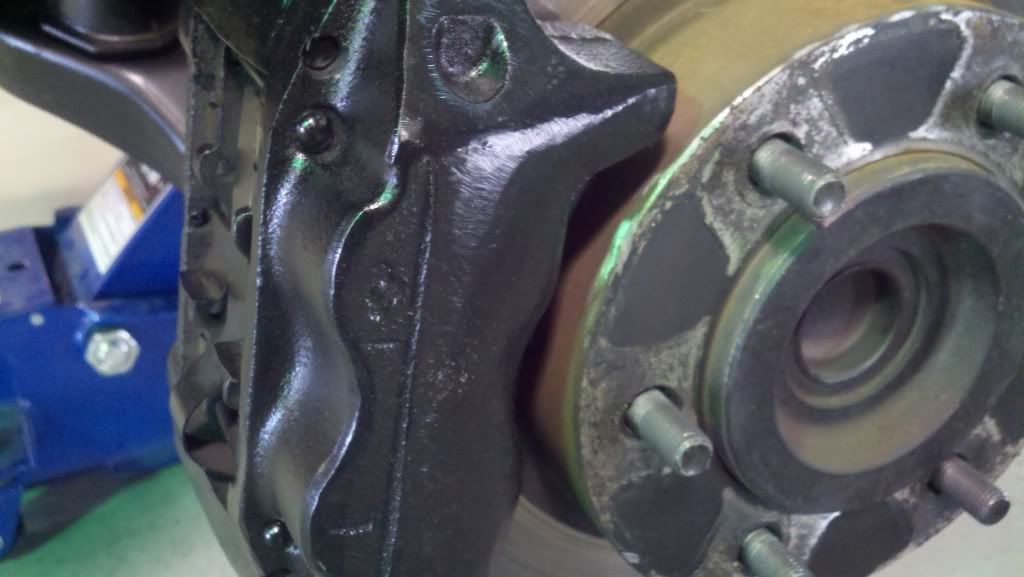
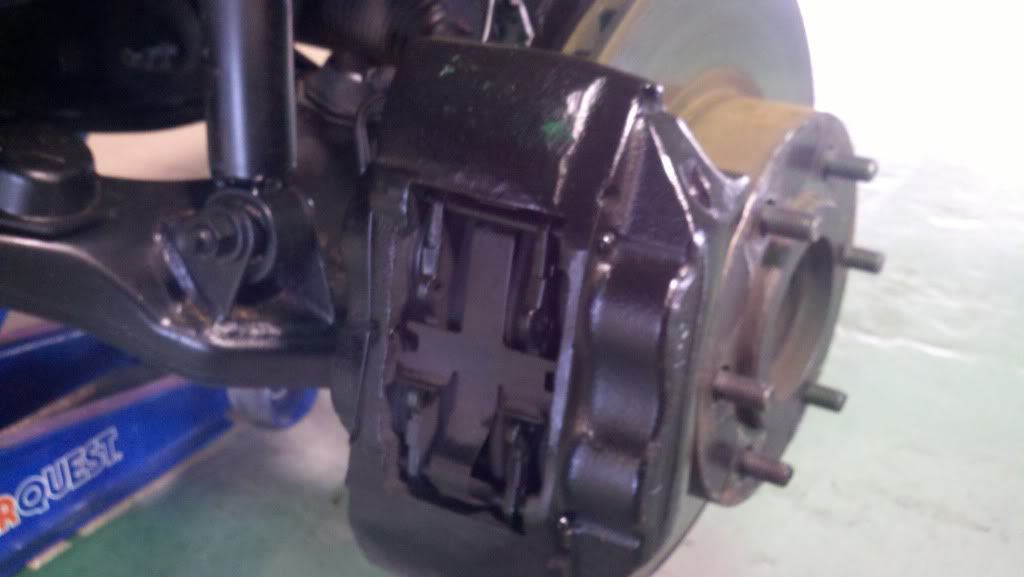
Getting the new wheels to fit was no easy task, I had to grind down the calipers in order to get the new wheels to fit. Some members have asked why I decided to go with 15" wheels, especially since I already had factory 16" wheels. Well first I new I had to get new wheels since my factory 16" wheels are not in the best looking conditions, also I really like the way they look of the 15" steel wheels, and also getting tires for 15" wheels is a lot cheaper. Here are some pictures of the calipers after grinding the heck out of them:

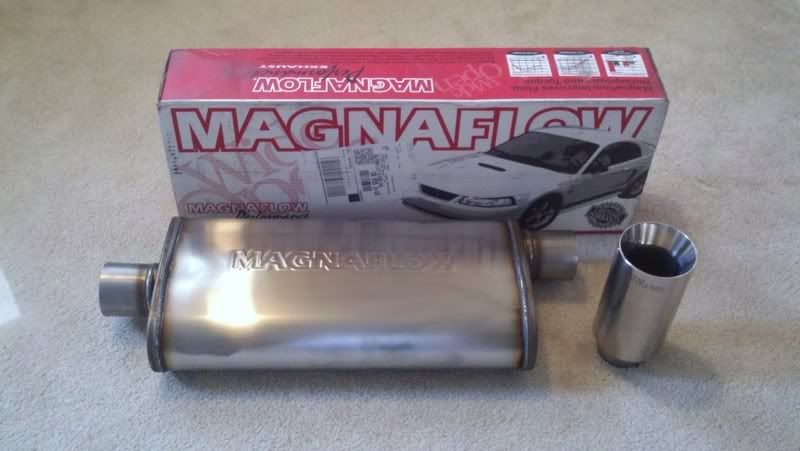
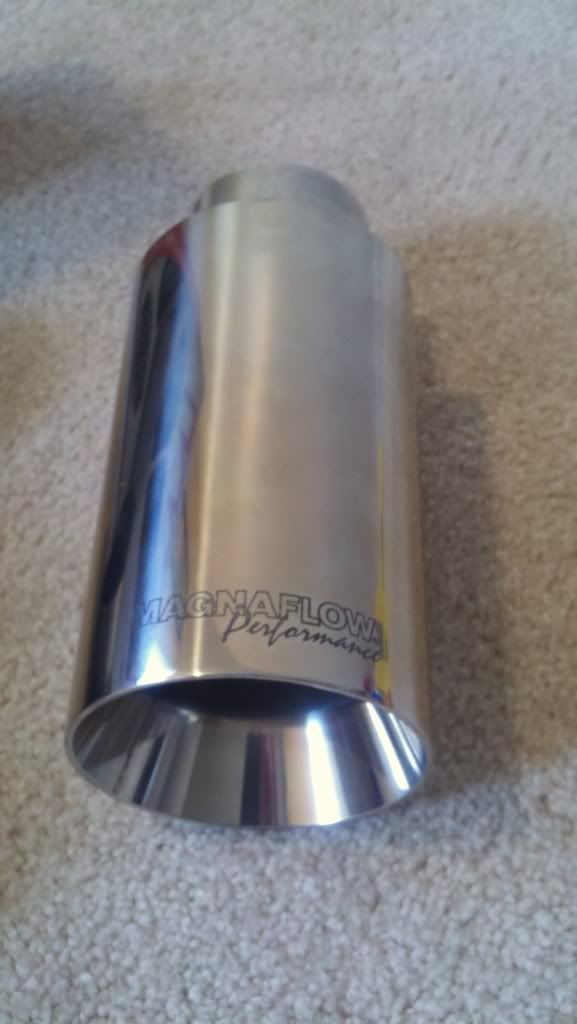
I also got a 18" Maganflow muffler (part# 11256), installed two days ago. The sound is perfect. This muffler in my opinion is the perfect replacement for our trucks if you are looking for a mild and not to over the top exhaust sound. I also complemented the new magnaflow with a Magnaflow exhaust tip, part# 35123. Cost of parts and labor are as follow:
-Maganflow-11256 18" muffler $72.00 shipped from ebay
-Magnaflow-35123 doubled wall exhaust tip $48.00 shipped form ebay
-Installation labor $110.00 at Joe's Muffler shop Lancaster Ca
The installation also included new 2.5" custom pipes from the cat all the way back.
Below, I've posted some pictures of the parts before installation and a video so that everyone can appreciate the sound:
[YOUTUBE]http://www.youtube.com/watch?v=naqY_0Il0go
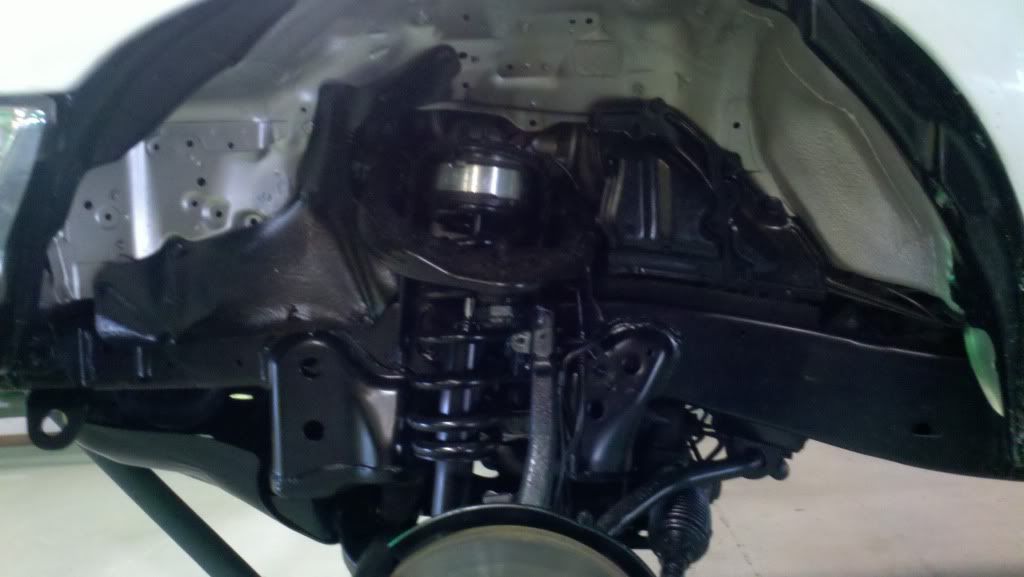
On the following picture I went a little over the top with paint. I cleaned all four wheel wells, and after some painting, here is an example fo the results:
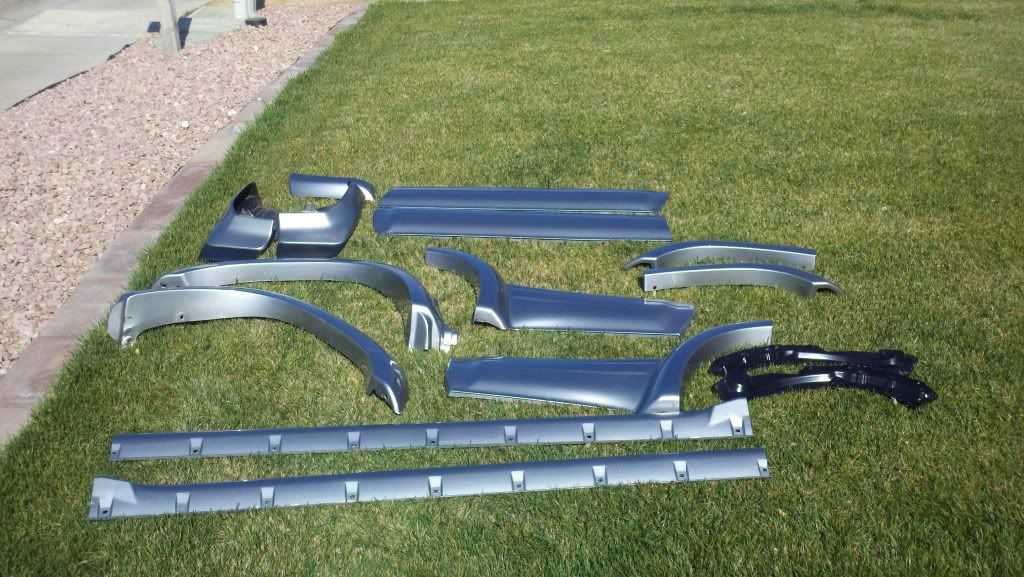
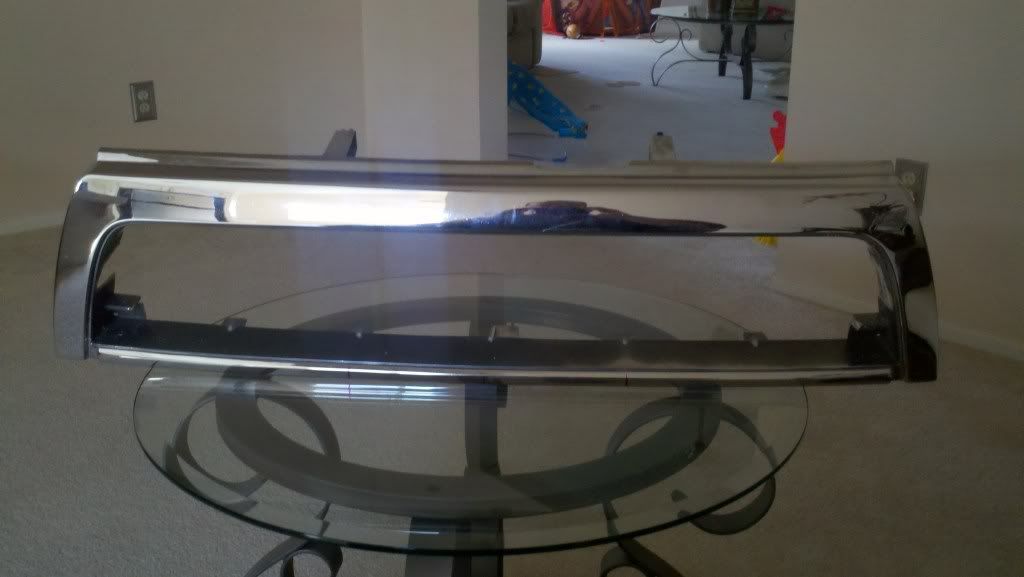
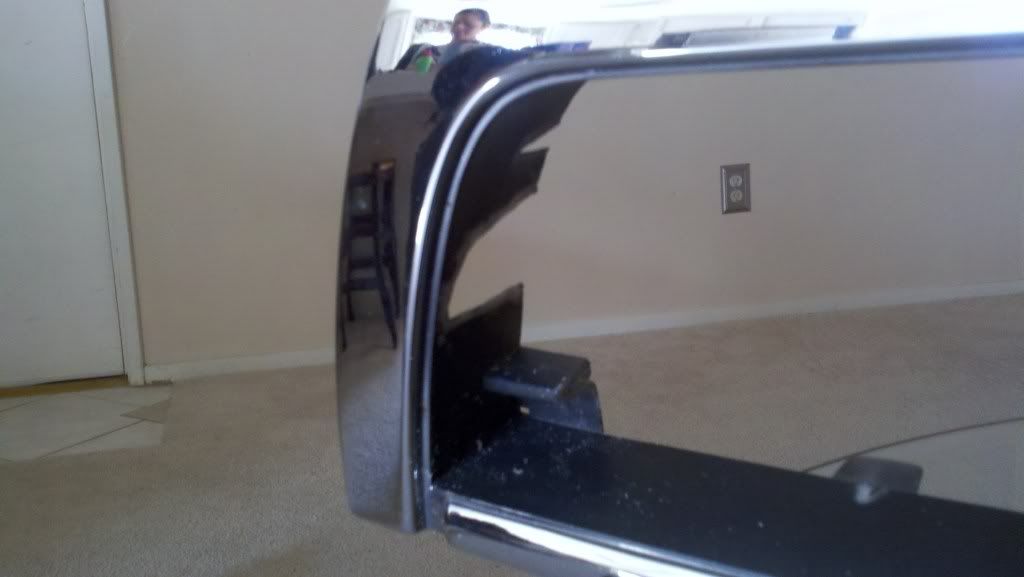
Well, a couple of weeks ago I was lucky enough find a set of Limited fender Flares on ebay for $320.00. So here are some pictures and details of the installation process:
This are the Flares after a quick wash, jsut before starting the install:
[IMG]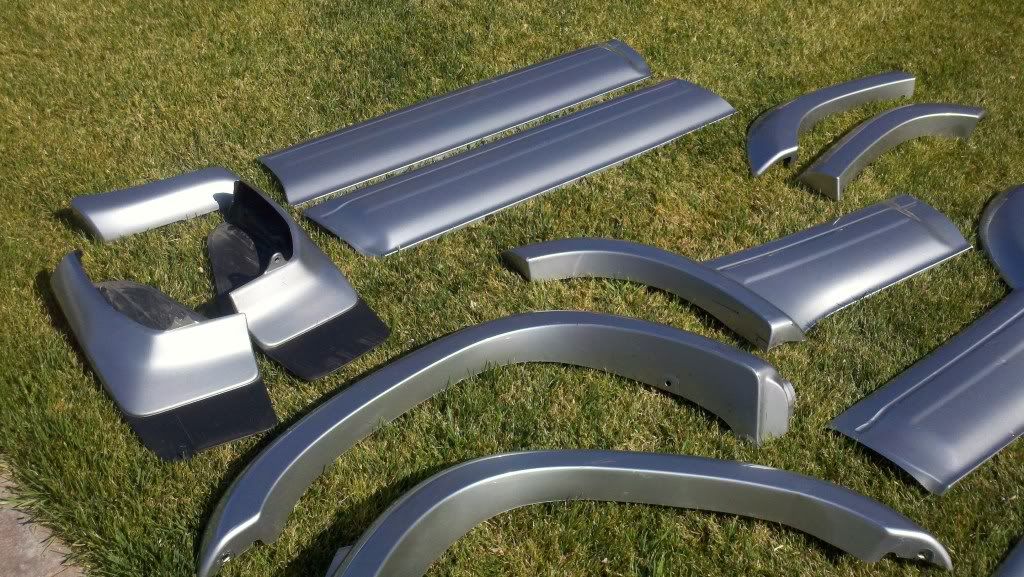 [/IMG]
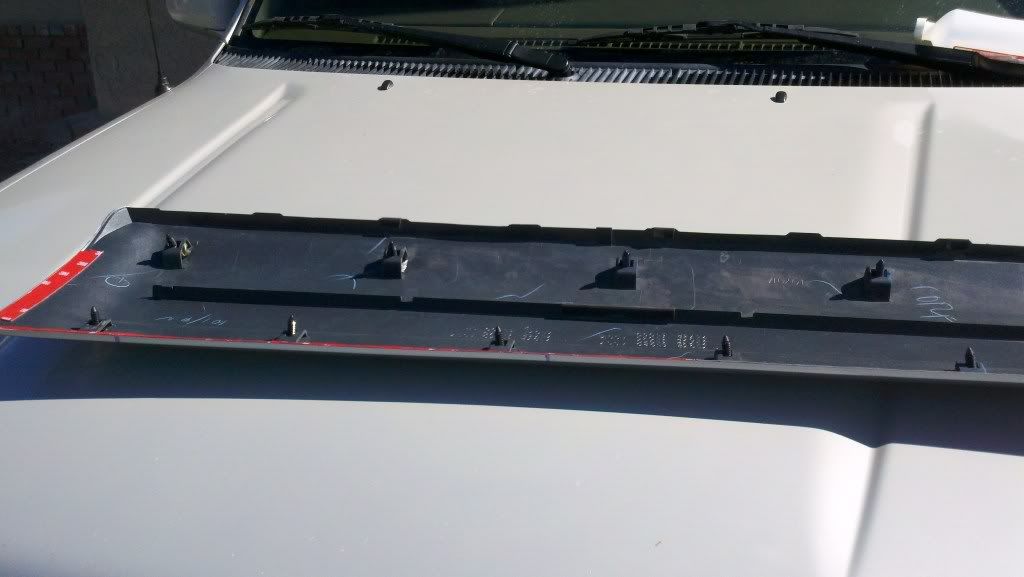
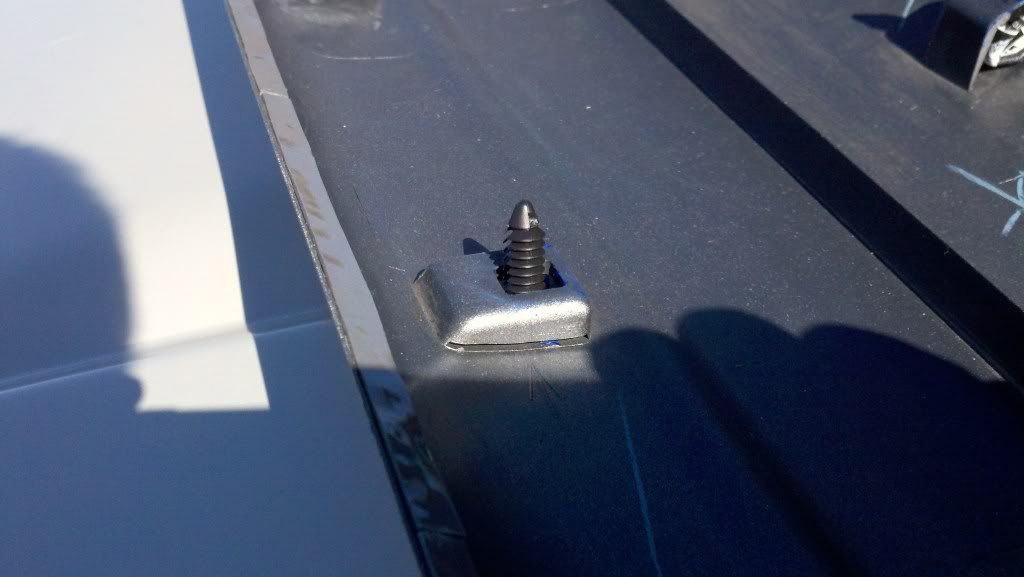
Next, Here are some shots of how I had to drill the doors and panels in order to get the flares installed:
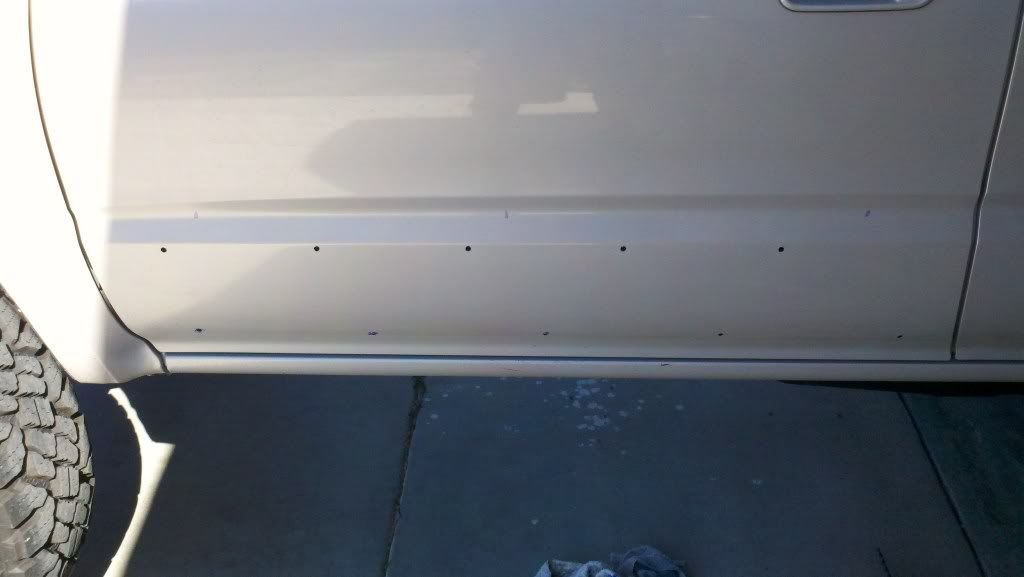

When I priced the OEM clips that I would need to get this flares installed, my local Toyota dealer quoted me $287.00 for all the clips and brackets required for the install. I had to improvise, I went to my local ACE hardware store and found this clips. I also got some 3M double sided tape and some screws and bolts:
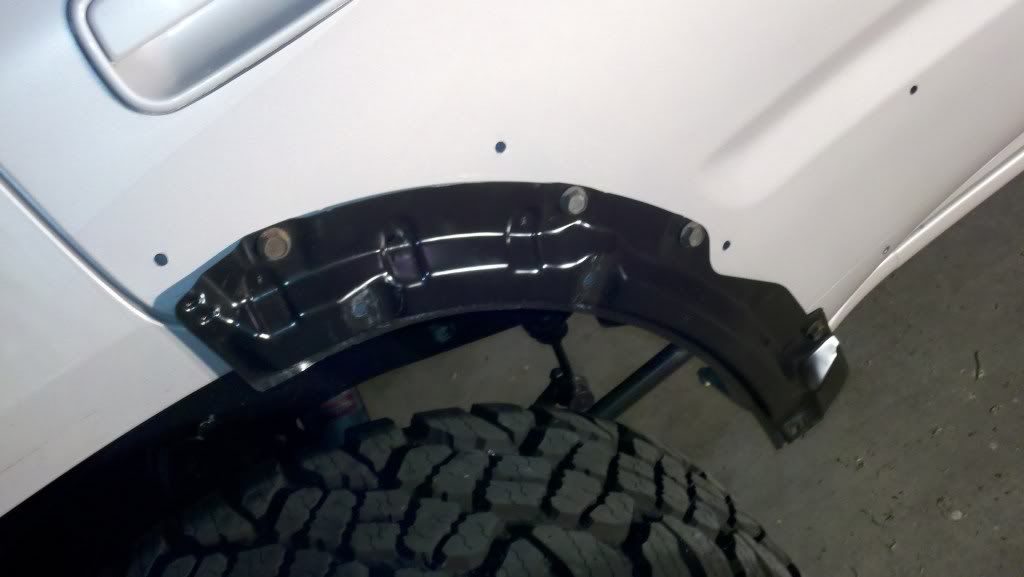
And after working at it for about four days (I was been extremely careful), here is the final product:

It was a lot of work, measuring 10 times before drilling and stuff, but it was worth it. Let me know what you all think. O I got this flares from someone who had listed them in ebay. I paid $320.00 for them.
On this picture I had the lift installed:
Here are some of the upgrades I've done recently so far:
- New Chrome plated emblems
- Replaced fatory speakers & added a 10" sub, still have factory receiver
- Installed 3" Toytec spacer suspension lift & 1" 4Crawlers Body lift.
- Blackrock 942 Type D window 15x8 wheels & 33x12.5x15 Goodyear Duratracs tires
- 18" Magnaflow 11256 muffler with Maganflow 35123 Exhaust tip "Weld-on type"
Anyway here are some pictures of how she looks now with new wheels & tires:
Day I got new tires installed:
Here is anotherone right after a bath:
Getting the new wheels to fit was no easy task, I had to grind down the calipers in order to get the new wheels to fit. Some members have asked why I decided to go with 15" wheels, especially since I already had factory 16" wheels. Well first I new I had to get new wheels since my factory 16" wheels are not in the best looking conditions, also I really like the way they look of the 15" steel wheels, and also getting tires for 15" wheels is a lot cheaper. Here are some pictures of the calipers after grinding the heck out of them:
I also got a 18" Maganflow muffler (part# 11256), installed two days ago. The sound is perfect. This muffler in my opinion is the perfect replacement for our trucks if you are looking for a mild and not to over the top exhaust sound. I also complemented the new magnaflow with a Magnaflow exhaust tip, part# 35123. Cost of parts and labor are as follow:
-Maganflow-11256 18" muffler $72.00 shipped from ebay
-Magnaflow-35123 doubled wall exhaust tip $48.00 shipped form ebay
-Installation labor $110.00 at Joe's Muffler shop Lancaster Ca
The installation also included new 2.5" custom pipes from the cat all the way back.
Below, I've posted some pictures of the parts before installation and a video so that everyone can appreciate the sound:
[YOUTUBE]http://www.youtube.com/watch?v=naqY_0Il0go
On the following picture I went a little over the top with paint. I cleaned all four wheel wells, and after some painting, here is an example fo the results:
Well, a couple of weeks ago I was lucky enough find a set of Limited fender Flares on ebay for $320.00. So here are some pictures and details of the installation process:
This are the Flares after a quick wash, jsut before starting the install:
[IMG]
[/IMG]Next, Here are some shots of how I had to drill the doors and panels in order to get the flares installed:
When I priced the OEM clips that I would need to get this flares installed, my local Toyota dealer quoted me $287.00 for all the clips and brackets required for the install. I had to improvise, I went to my local ACE hardware store and found this clips. I also got some 3M double sided tape and some screws and bolts:
And after working at it for about four days (I was been extremely careful), here is the final product:
It was a lot of work, measuring 10 times before drilling and stuff, but it was worth it. Let me know what you all think. O I got this flares from someone who had listed them in ebay. I paid $320.00 for them.
Last edited by traxxi2003; 04-21-2011 at 03:29 AM. Reason: adding pictures
 05-21-2011, 08:11 PM
#2
Registered User
Thread Starter
Join Date: Jul 2009
Location: California City, CA
Posts: 198
Likes: 0
Received 0 Likes
on
0 Posts
And the mods and upgrades continue!!
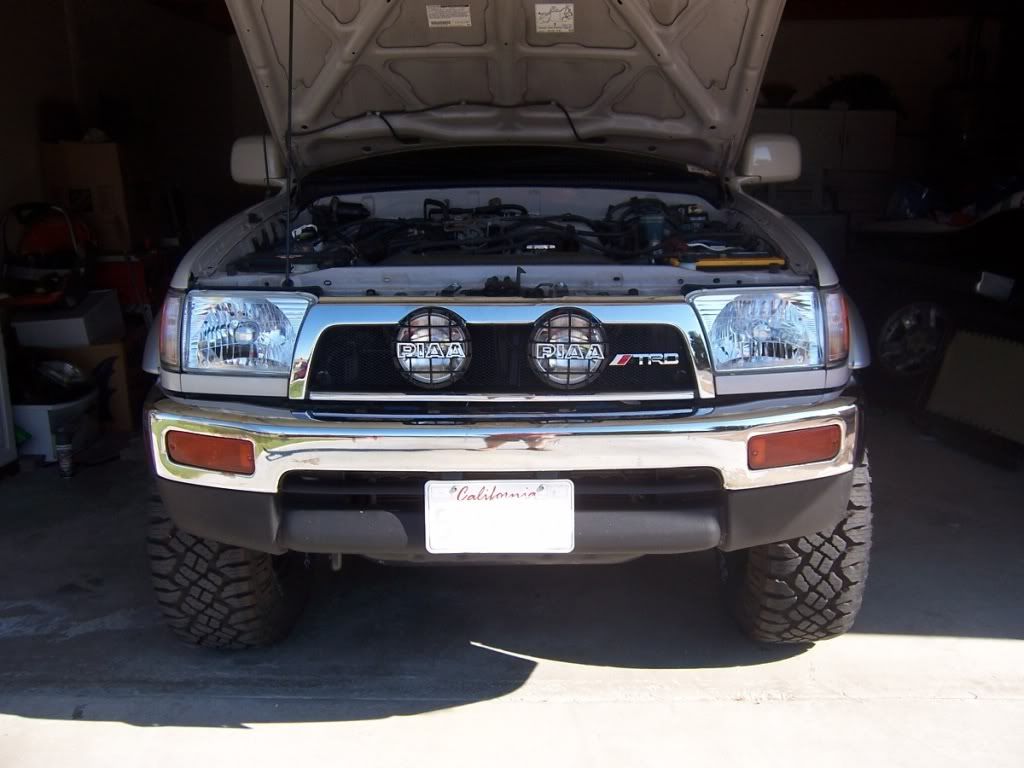
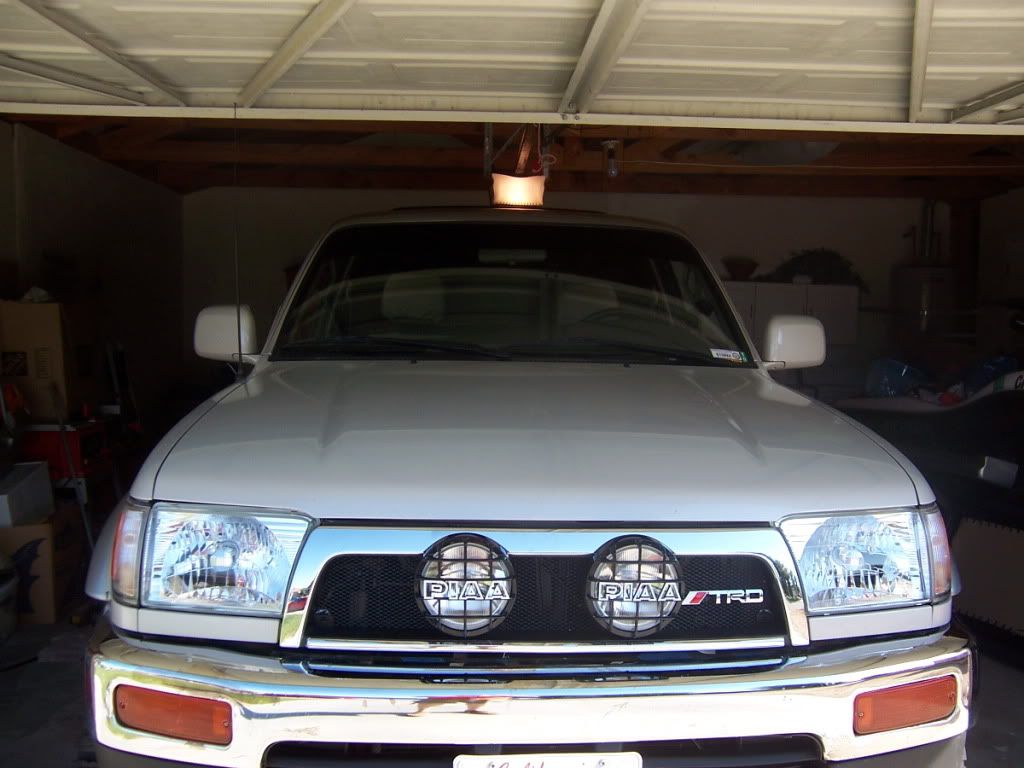
When I first learned about the Satoshi mod, I didn’t really cared for it much. That was until I came across “Blcktpgsr’s 97 Black 4Runner. His truck in my opinion has to be the one of the best looking 3rd Gen 4Runner out there. So, the credit goes to “Blcktpgsr’s" for the Satoshi/PIAA Lights Mod. In his version of the Satoshi Mod, he incorporated a set of PIAA 520’s Off-road lights on the grill. I like it so much, that I had to copy it. Anyway here are some pictures I took along the way. Enjoy!
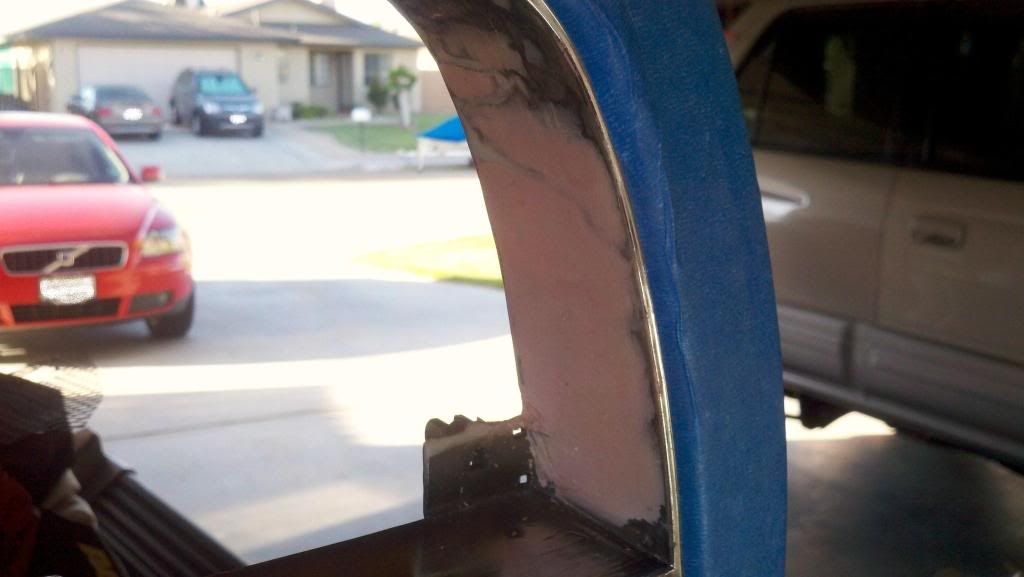
The following three pics were taken after cutting the OEM Toyota Emblem:
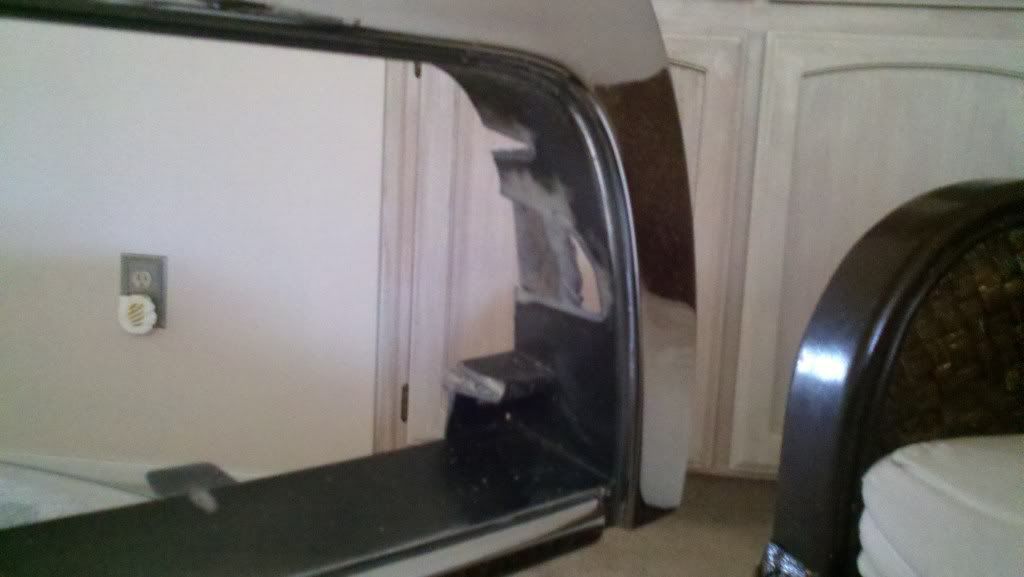
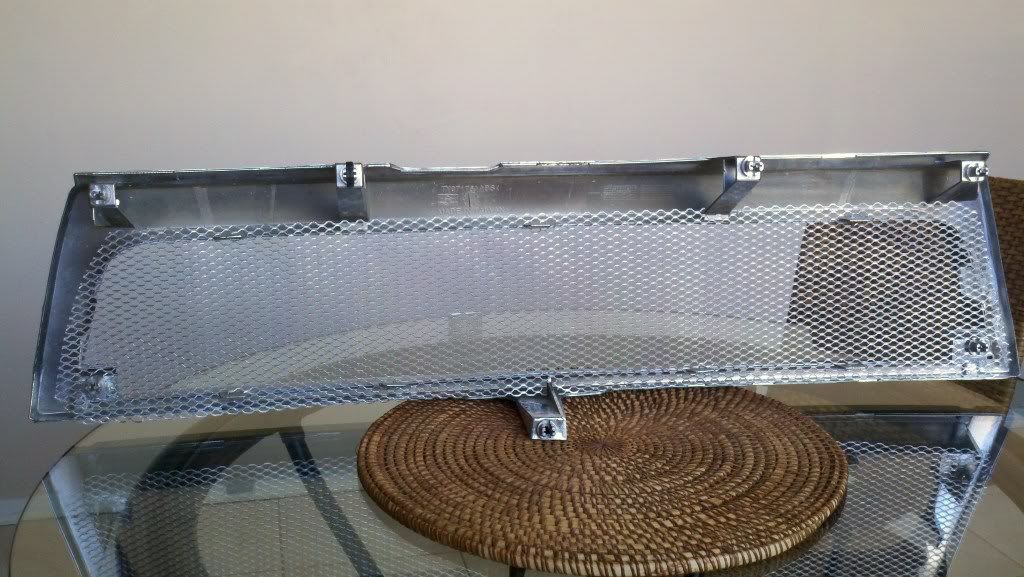
For the Mesh, I was able to get a pre-cut piece at my local Home Depot for $2.69. Here are some pics of the unpainted mesh after I was done cutting it:

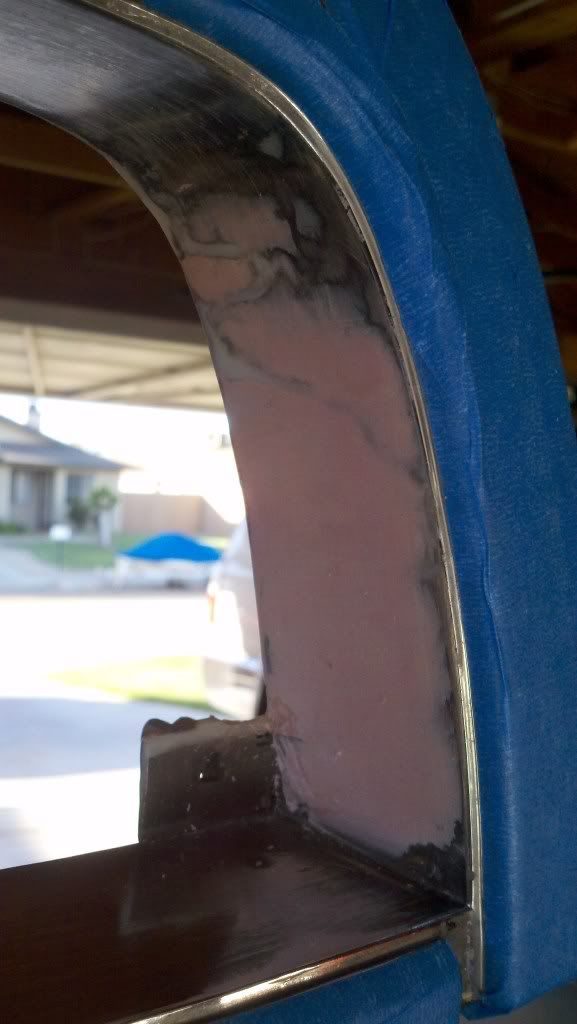
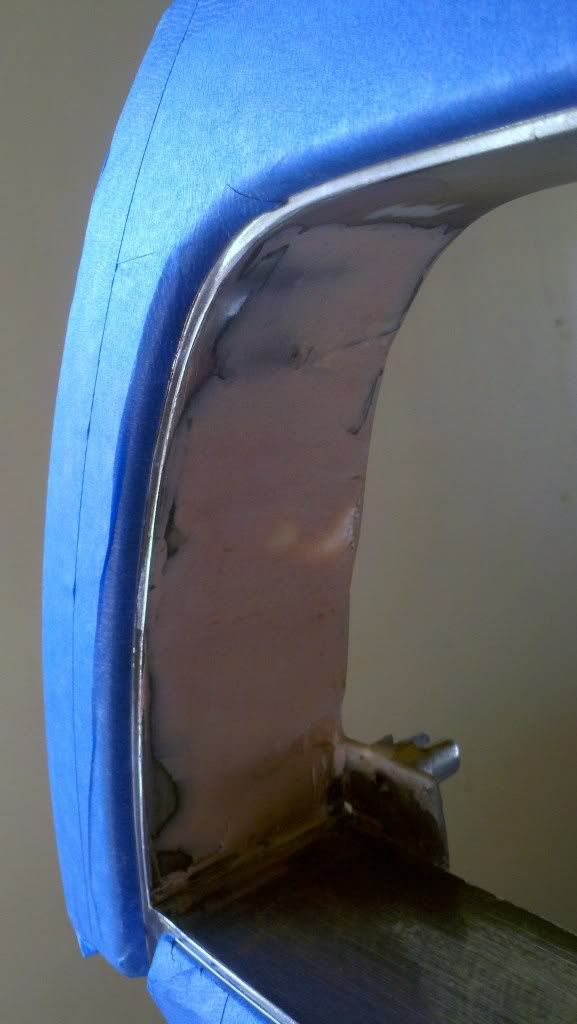
Next, it was time to cover the holes that were left on the grill after cutting the center piece. I used fiber glass & Bondo to cover the holes.
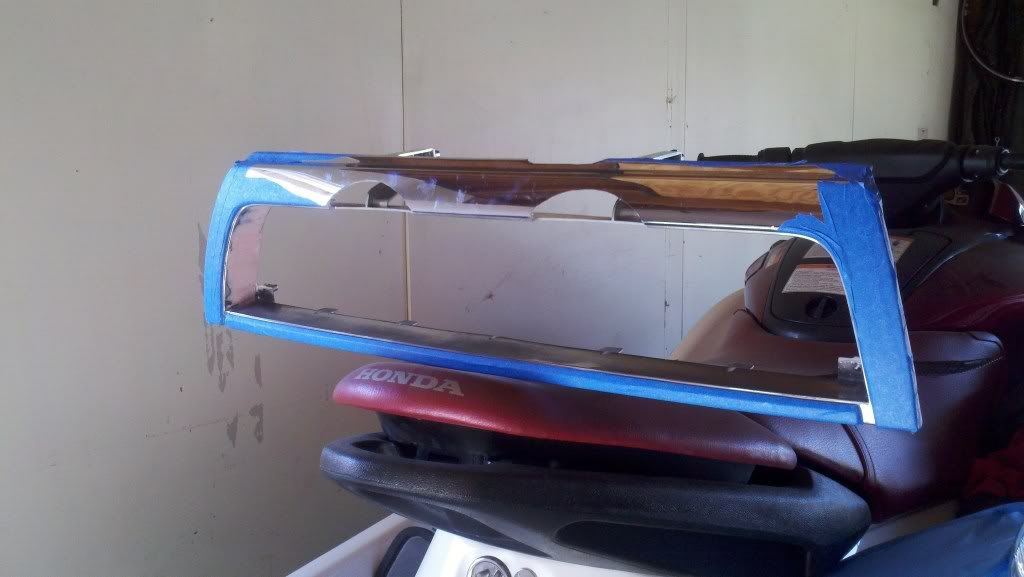
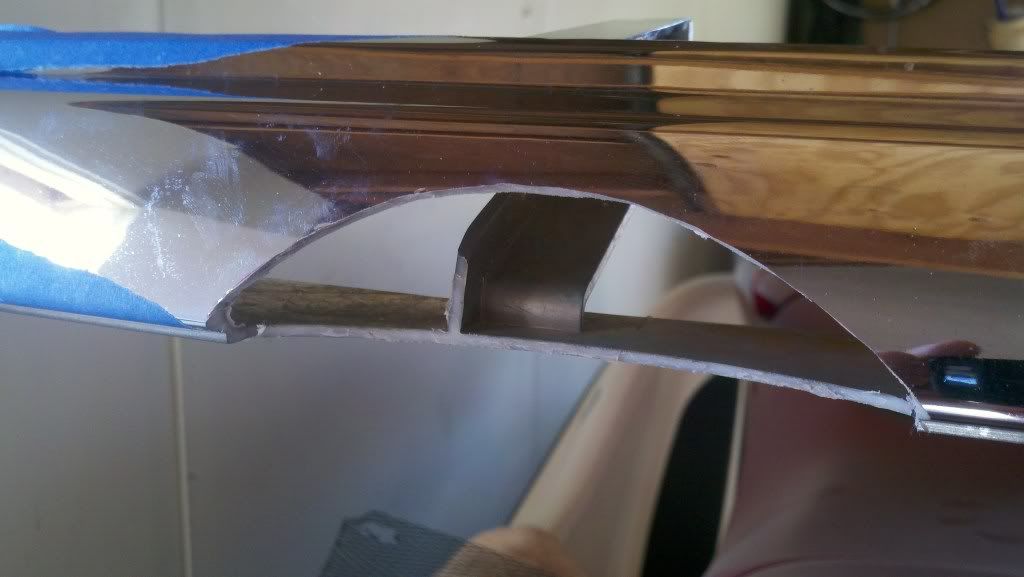
Next it was time to cut the top of the grill in order to make room for the PIAA 520's:
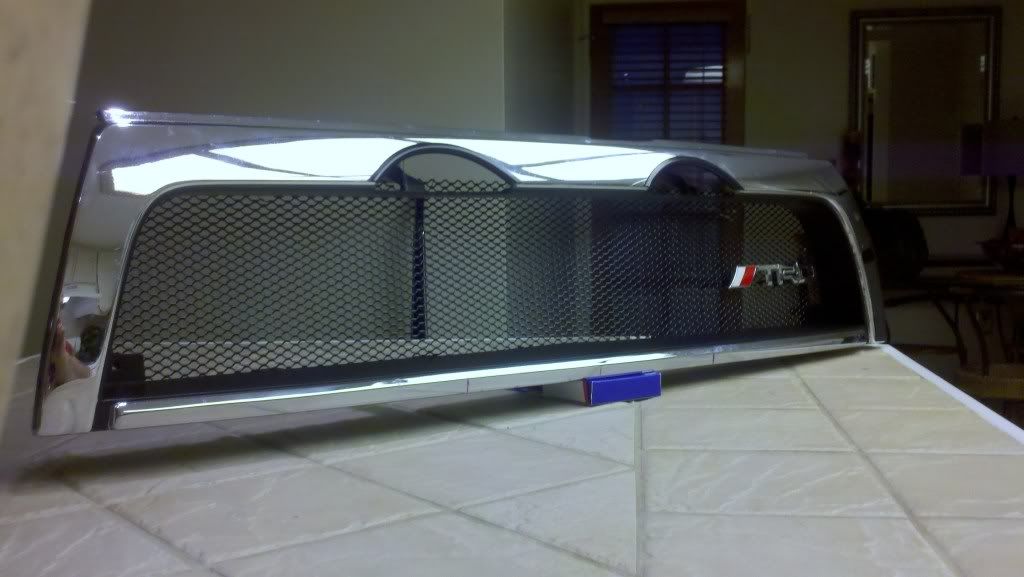
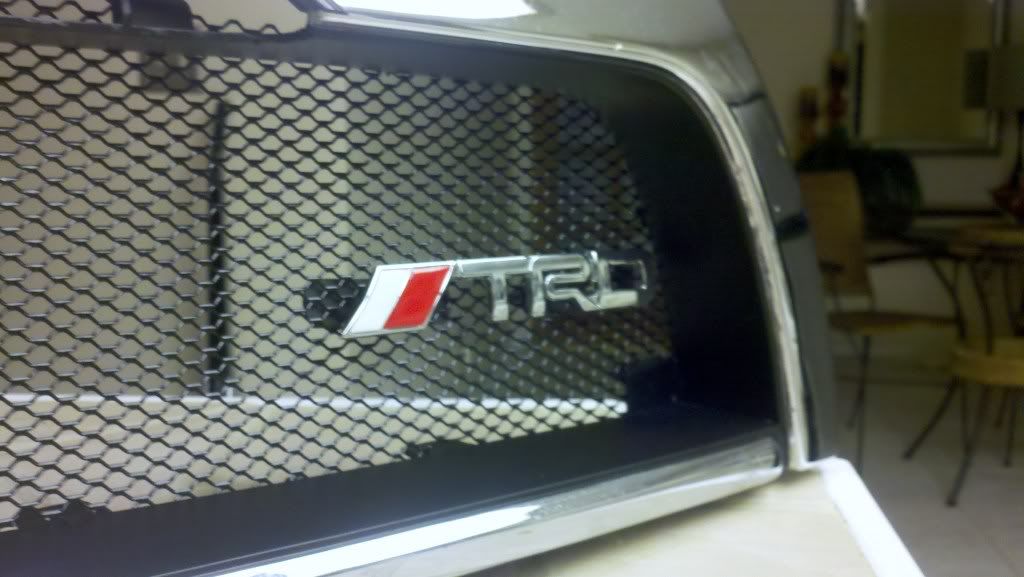
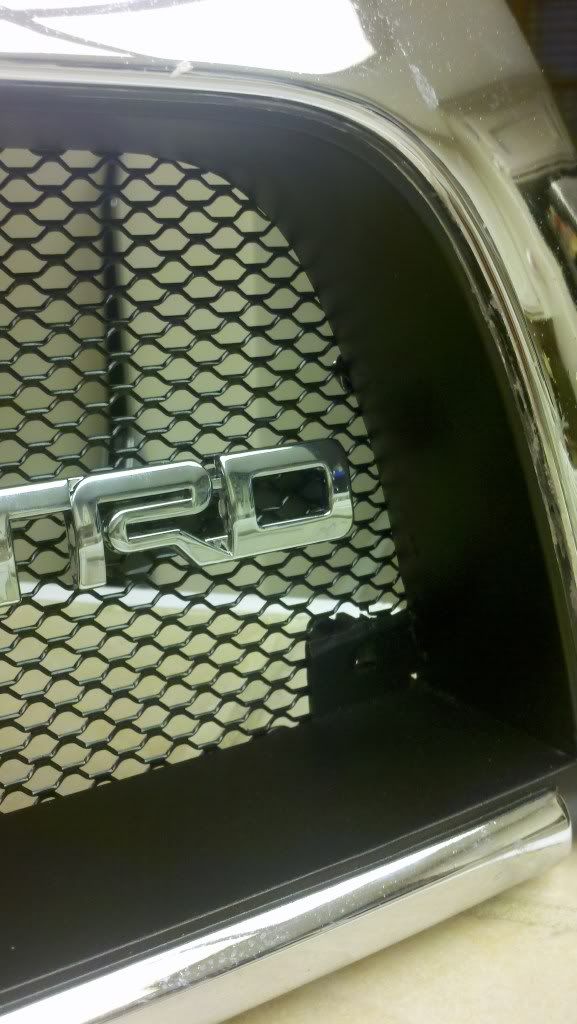
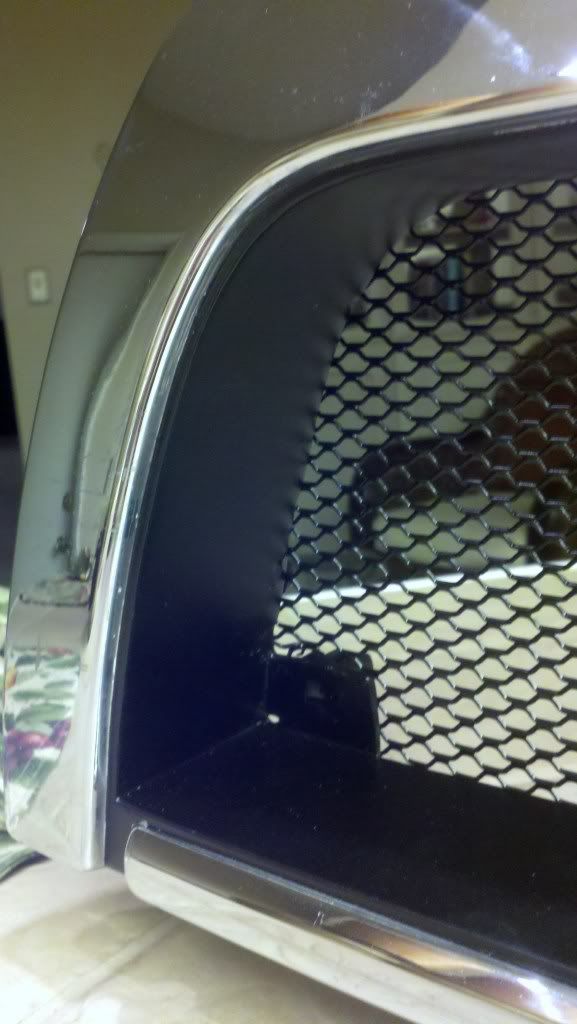
Finally, after some painting and cleaning, here are some pics showing the finished grill:
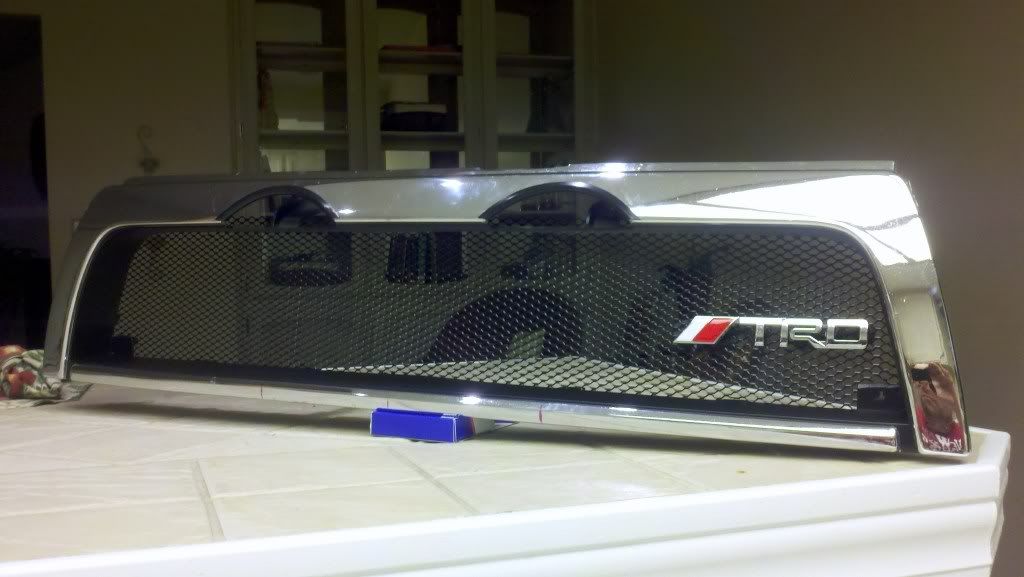
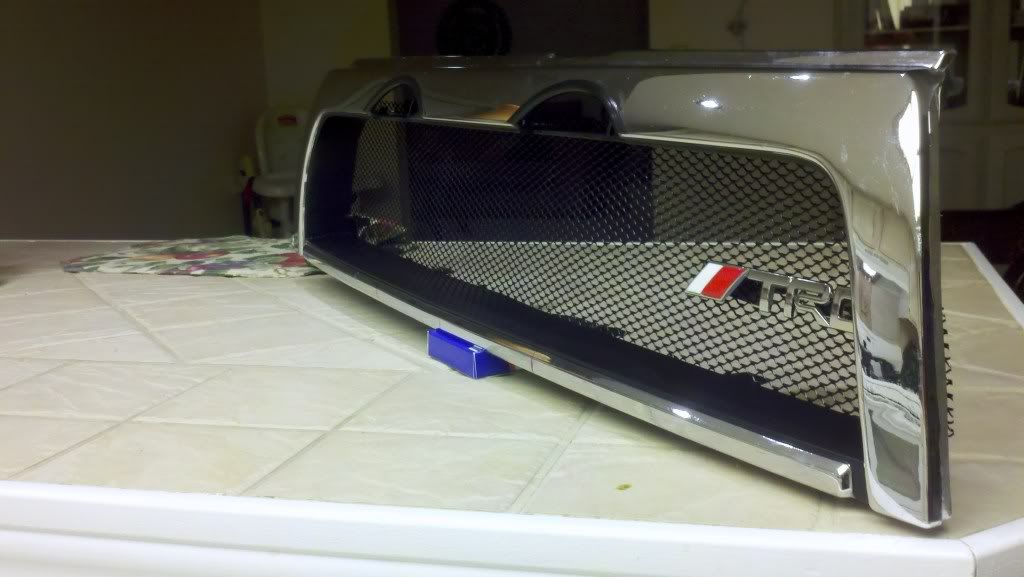
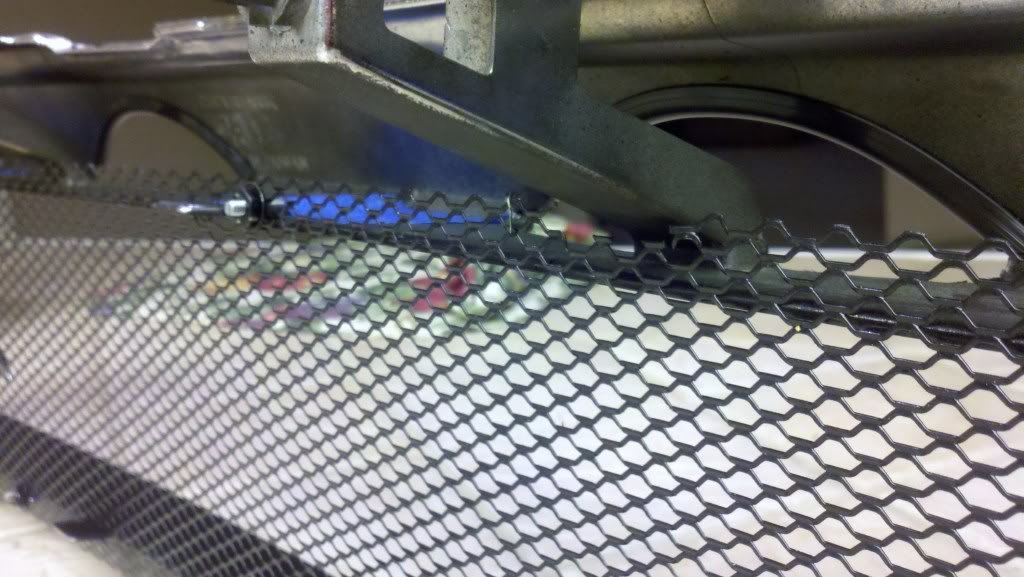
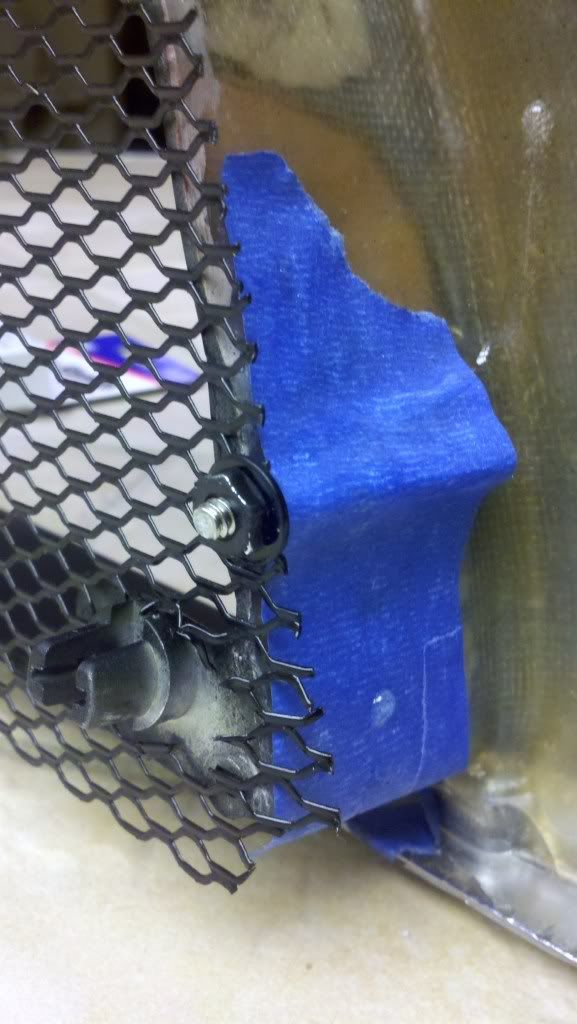
To secure the mesh firmily to the grill frame, I glued some studs with epoxy to the grill frame:


This mod is not 100% done, I still need to install the lights to the truck and fabricate some brackets for the lights. At soon as I'm done I will update with more pictures. Thanks!
When I first learned about the Satoshi mod, I didn’t really cared for it much. That was until I came across “Blcktpgsr’s 97 Black 4Runner. His truck in my opinion has to be the one of the best looking 3rd Gen 4Runner out there. So, the credit goes to “Blcktpgsr’s" for the Satoshi/PIAA Lights Mod. In his version of the Satoshi Mod, he incorporated a set of PIAA 520’s Off-road lights on the grill. I like it so much, that I had to copy it. Anyway here are some pictures I took along the way. Enjoy!
The following three pics were taken after cutting the OEM Toyota Emblem:
For the Mesh, I was able to get a pre-cut piece at my local Home Depot for $2.69. Here are some pics of the unpainted mesh after I was done cutting it:
Next, it was time to cover the holes that were left on the grill after cutting the center piece. I used fiber glass & Bondo to cover the holes.
Next it was time to cut the top of the grill in order to make room for the PIAA 520's:
Finally, after some painting and cleaning, here are some pics showing the finished grill:
To secure the mesh firmily to the grill frame, I glued some studs with epoxy to the grill frame:
This mod is not 100% done, I still need to install the lights to the truck and fabricate some brackets for the lights. At soon as I'm done I will update with more pictures. Thanks!
05-21-2011, 08:14 PM
#3
Registered User
Thread Starter
Join Date: Jul 2009
Location: California City, CA
Posts: 198
Likes: 0
Received 0 Likes
on
0 Posts
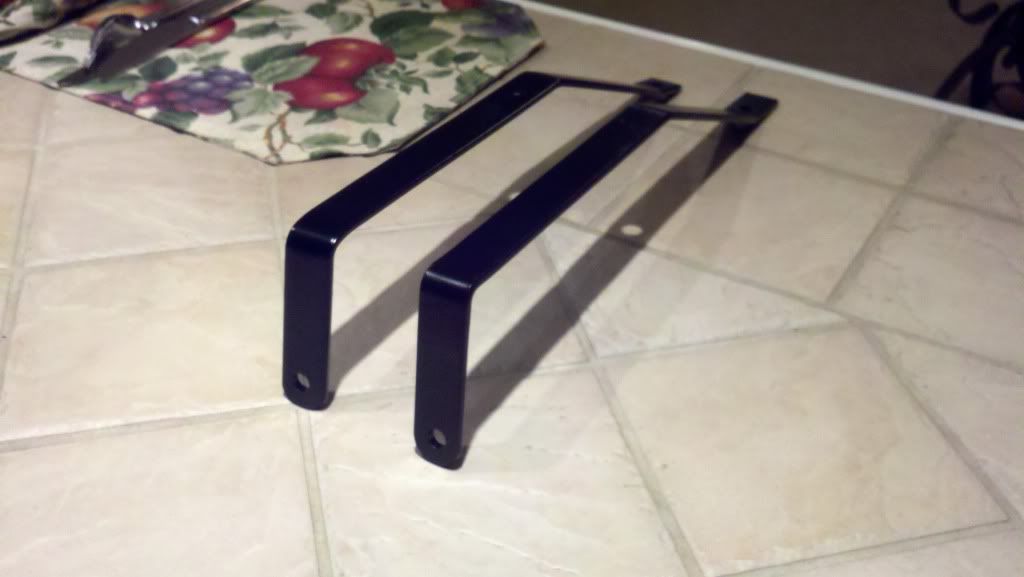
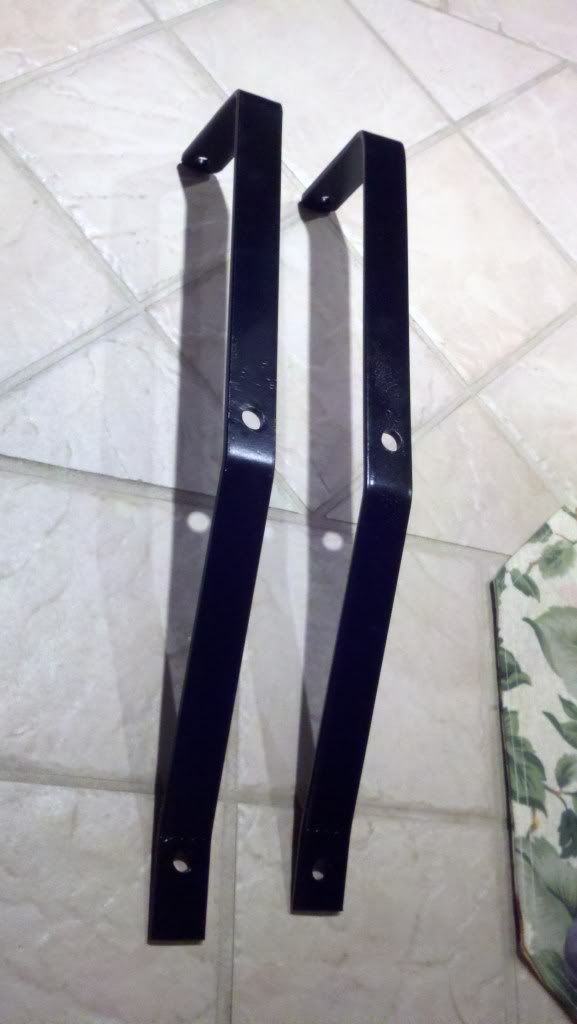
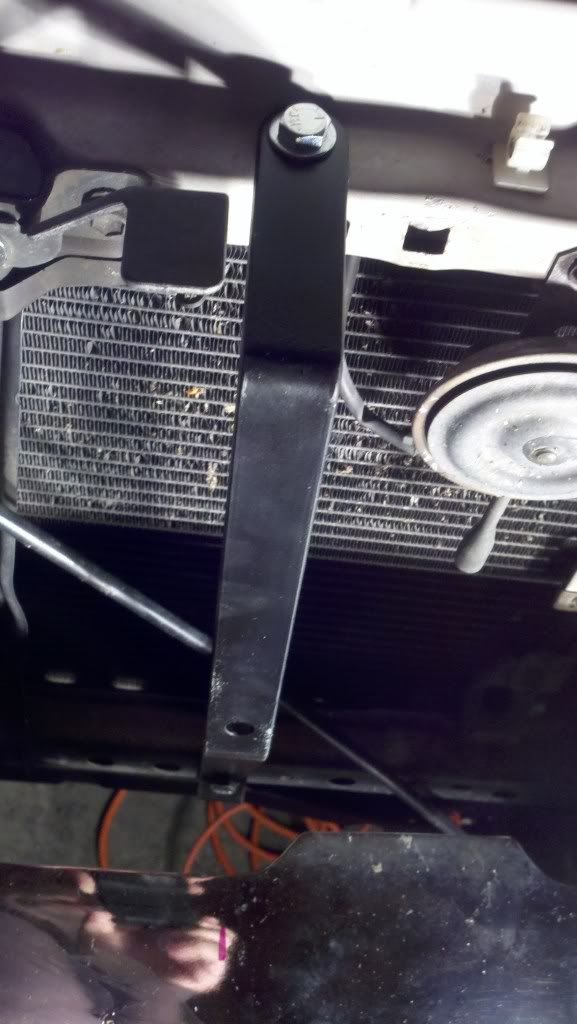
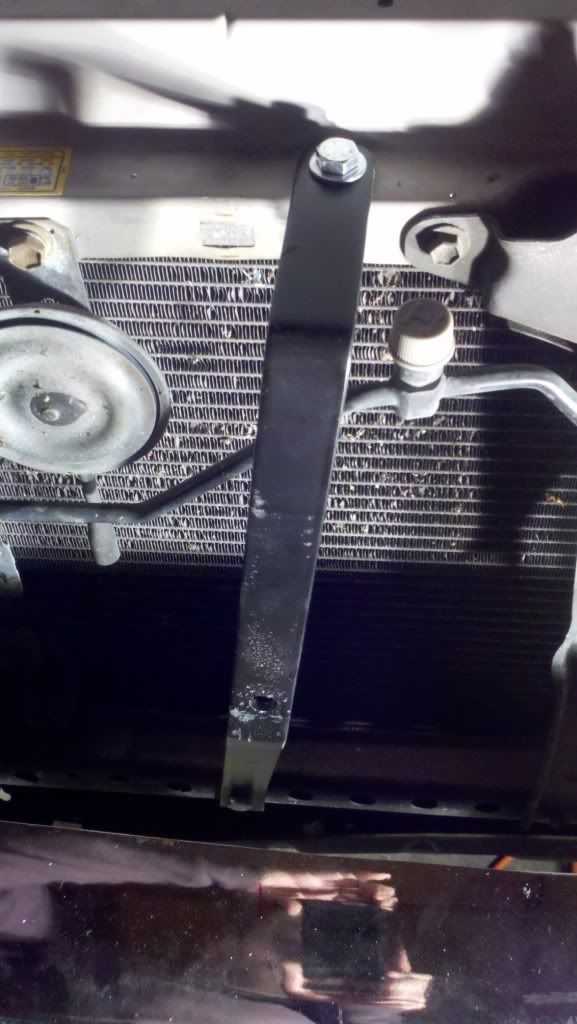
I just got done making the brackets for the lights, They seem like a little to "overkill" but I want it to make sure that they would not vibrate once installed. I should be done with installation tomorrow, weather permiting! Here are some pictures:
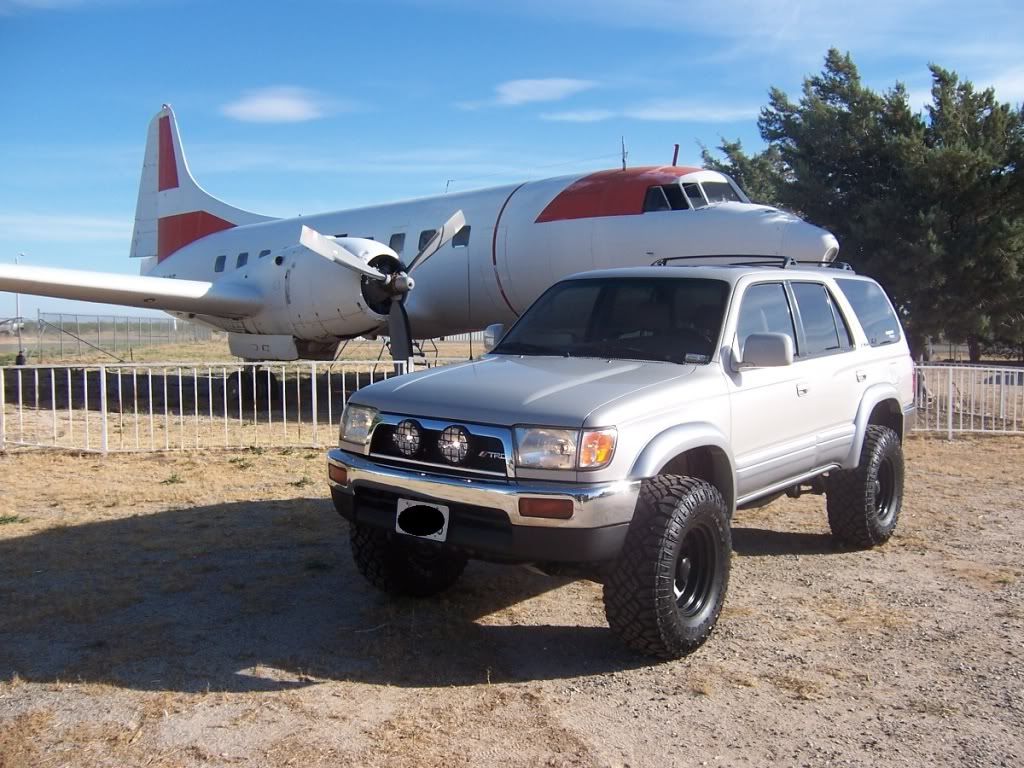
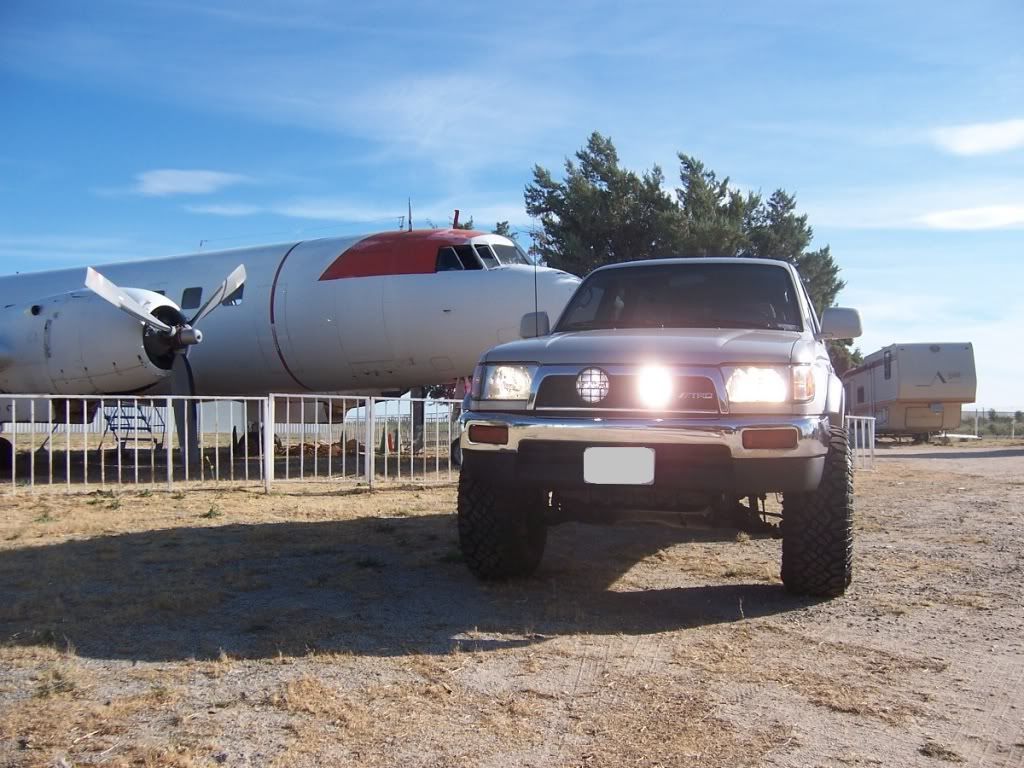
I just got done with the Satoshi/PIAA 520's MOD in my truck. Once again the credit for this MOD goes to “Blcktpgsr’s. It was from his truck I copied the idea of combining the Satoshi grill and a set of PIAA 520's. I hope you guys like it. Well here are the pics:
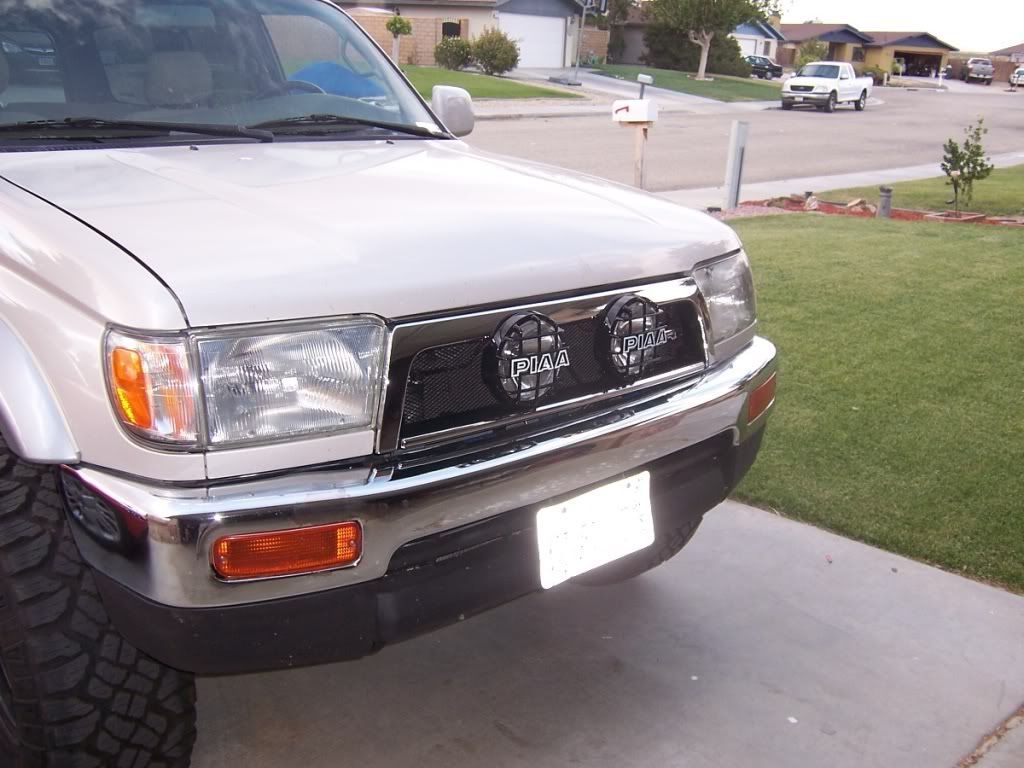
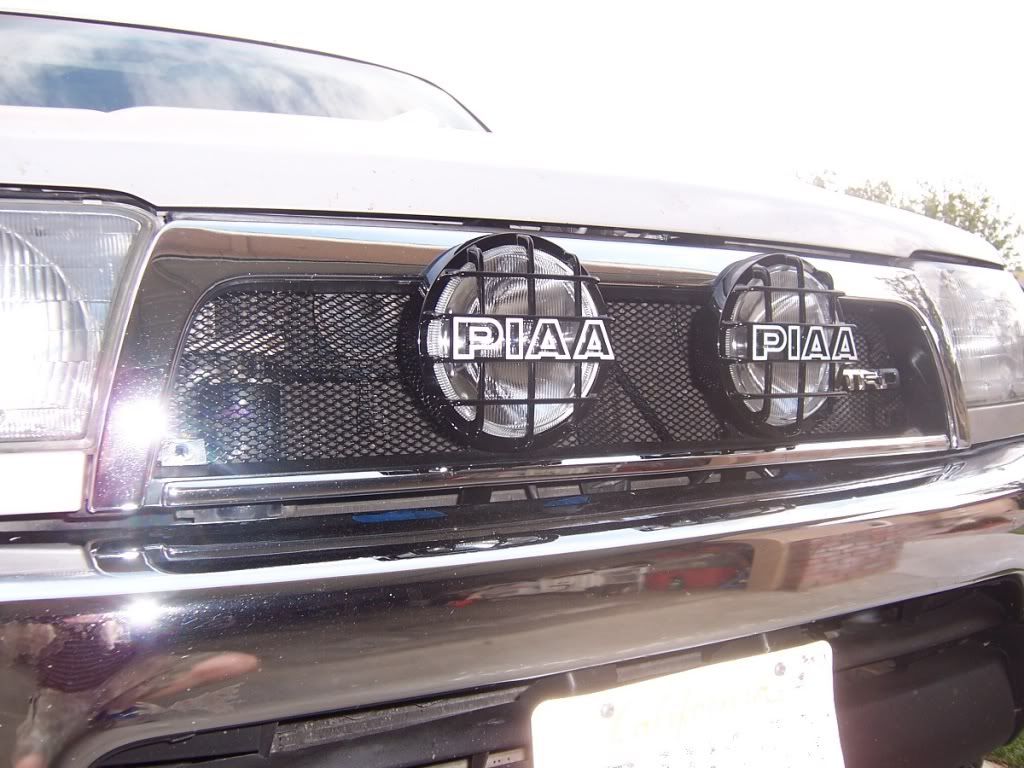
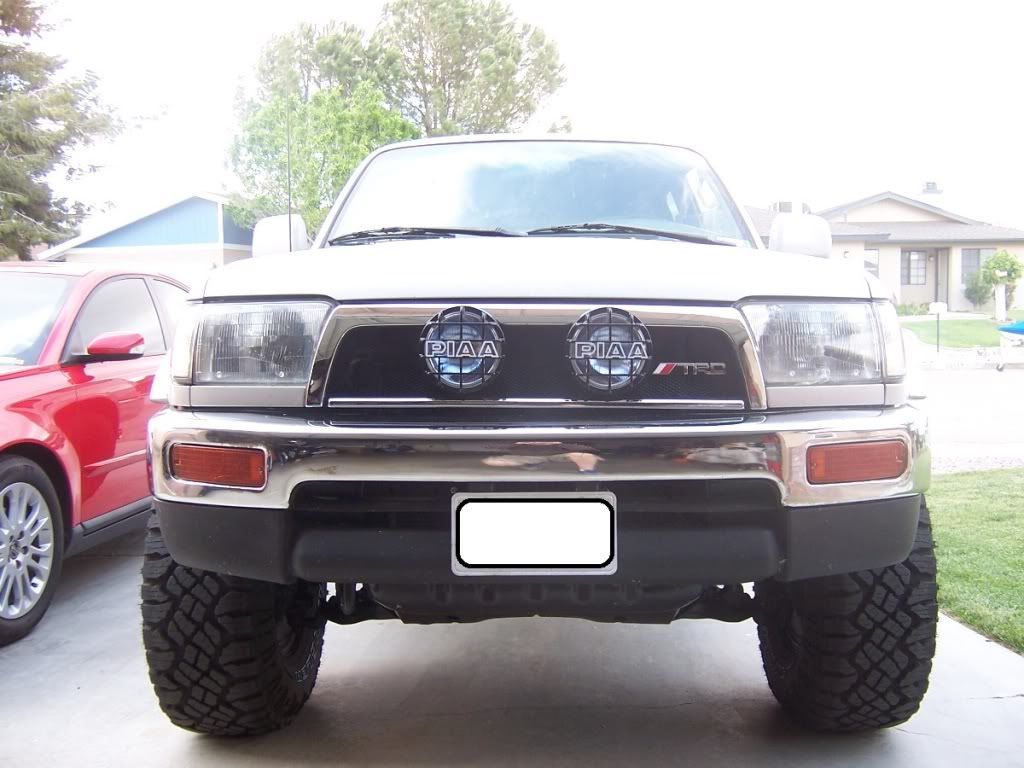

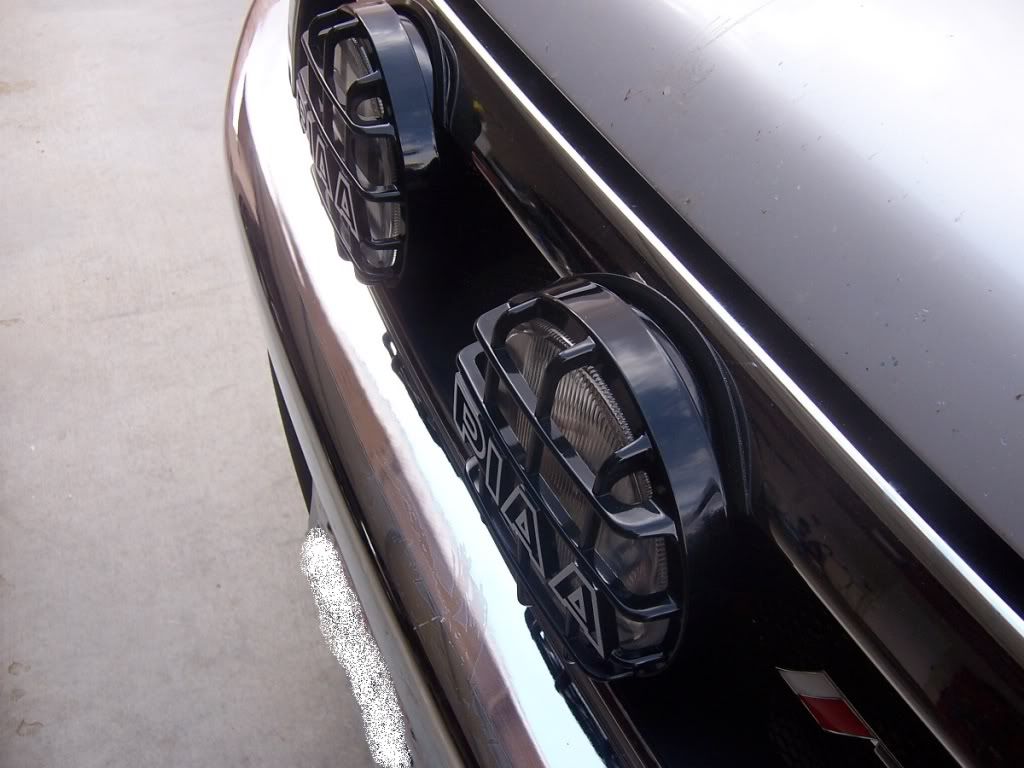
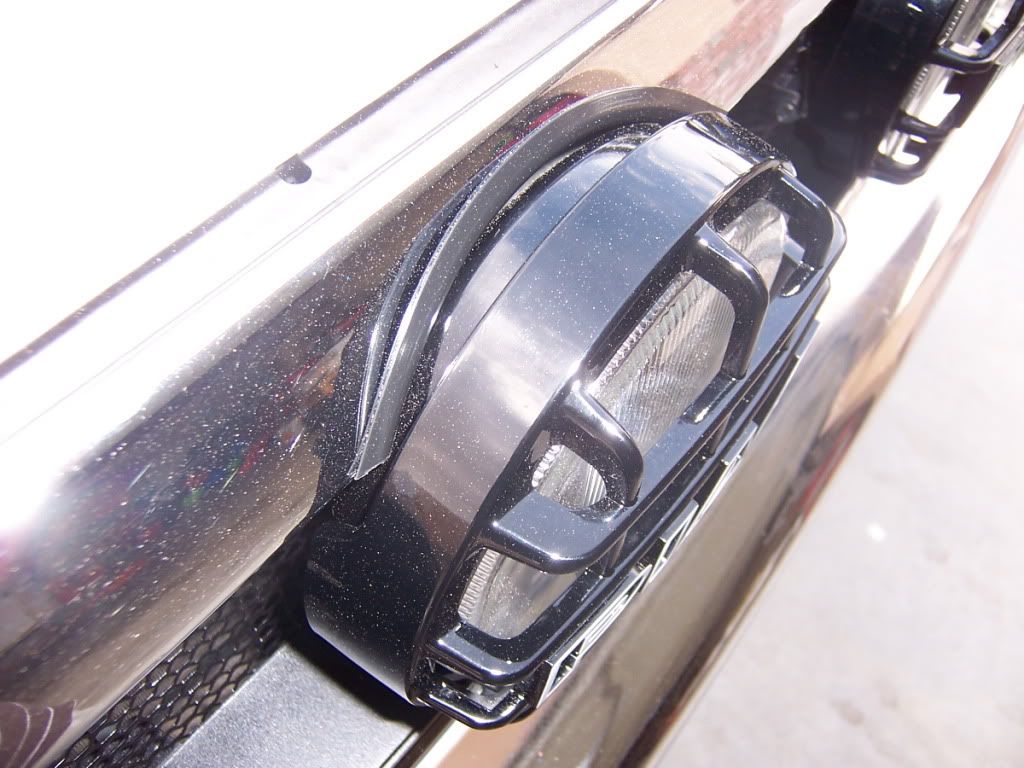
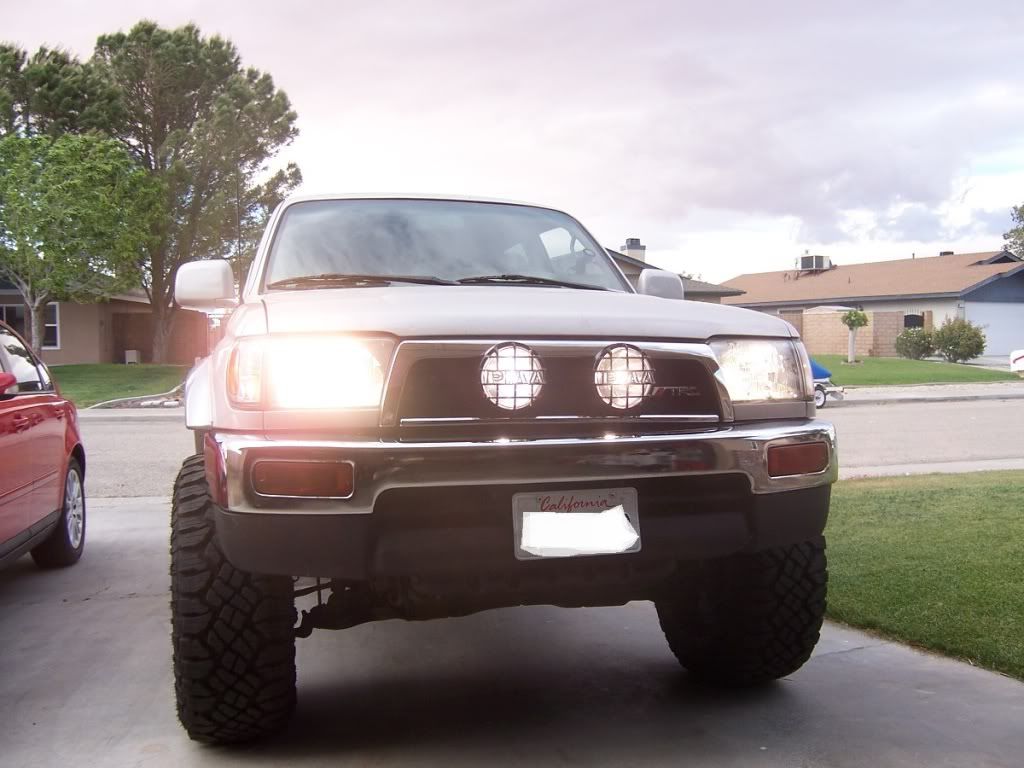
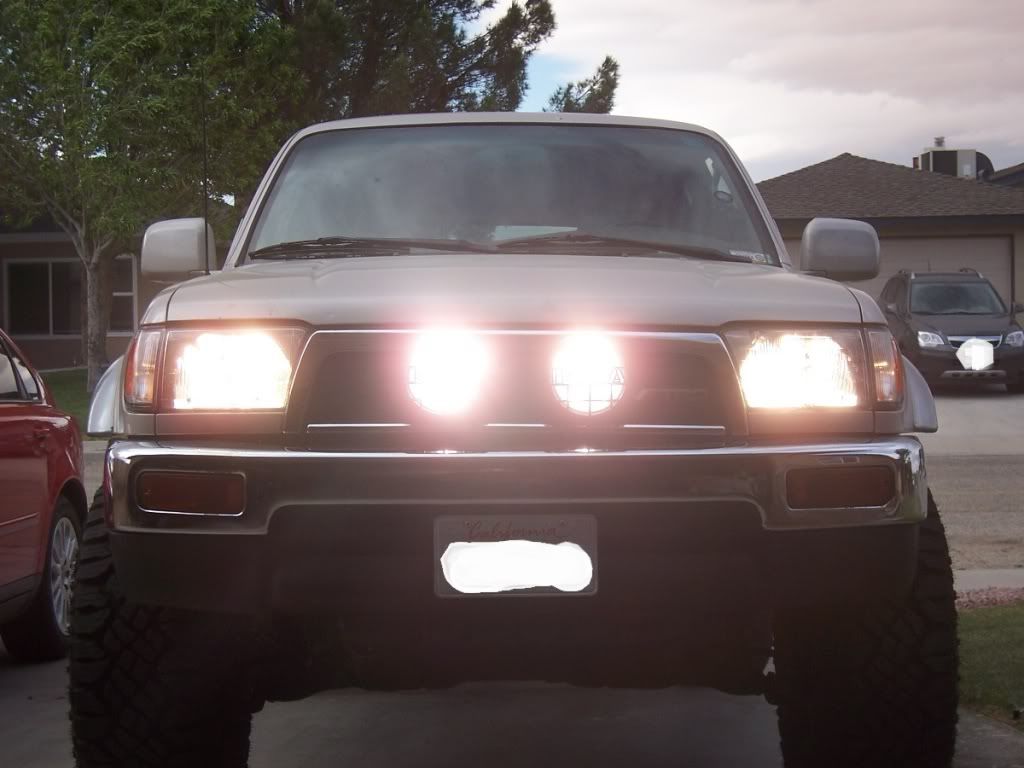
Well, I think the MOD came out as I was expecting. Next add on will be a set of PIAA Fog lights. Thanks for all your comments!
I just got done with the Satoshi/PIAA 520's MOD in my truck. Once again the credit for this MOD goes to “Blcktpgsr’s. It was from his truck I copied the idea of combining the Satoshi grill and a set of PIAA 520's. I hope you guys like it. Well here are the pics:
Well, I think the MOD came out as I was expecting. Next add on will be a set of PIAA Fog lights. Thanks for all your comments!
Last edited by traxxi2003; 05-21-2011 at 08:16 PM.
05-21-2011, 08:23 PM
#4
Registered User
Thread Starter
Join Date: Jul 2009
Location: California City, CA
Posts: 198
Likes: 0
Received 0 Likes
on
0 Posts
Next mod in mind is to re-gear to 4.88, it desperately needs it. In the mean time here are some pictures I took today after adding the "TRD" emblems to the truck, I placed two "TRD" emblems right where the "Limited" trucks usually have the "Limited" emblems behind the rear doors.

Well, hope you all have enjoyed this thread. Until next MOD!!!!!
Well, hope you all have enjoyed this thread. Until next MOD!!!!!
Last edited by traxxi2003; 05-21-2011 at 08:26 PM.
05-23-2011, 06:43 PM
#5
Registered User
That grill looks really good.
I really like how its tied together, incorporating them into the grill like that makes it almost look like it could have been a stock option. Keeps it all very clean.
I might have to do something similar, I've always wanted to weld the upper & lower half of the bumper together, make them flush, cut the middle bars that run along the bottom 1/2, then put off-road lights in there.
Serious prop's tho, that is a very tight 4runner!!
06-01-2011, 05:31 PM
#6
Registered User
Thread Starter
Join Date: Jul 2009
Location: California City, CA
Posts: 198
Likes: 0
Received 0 Likes
on
0 Posts
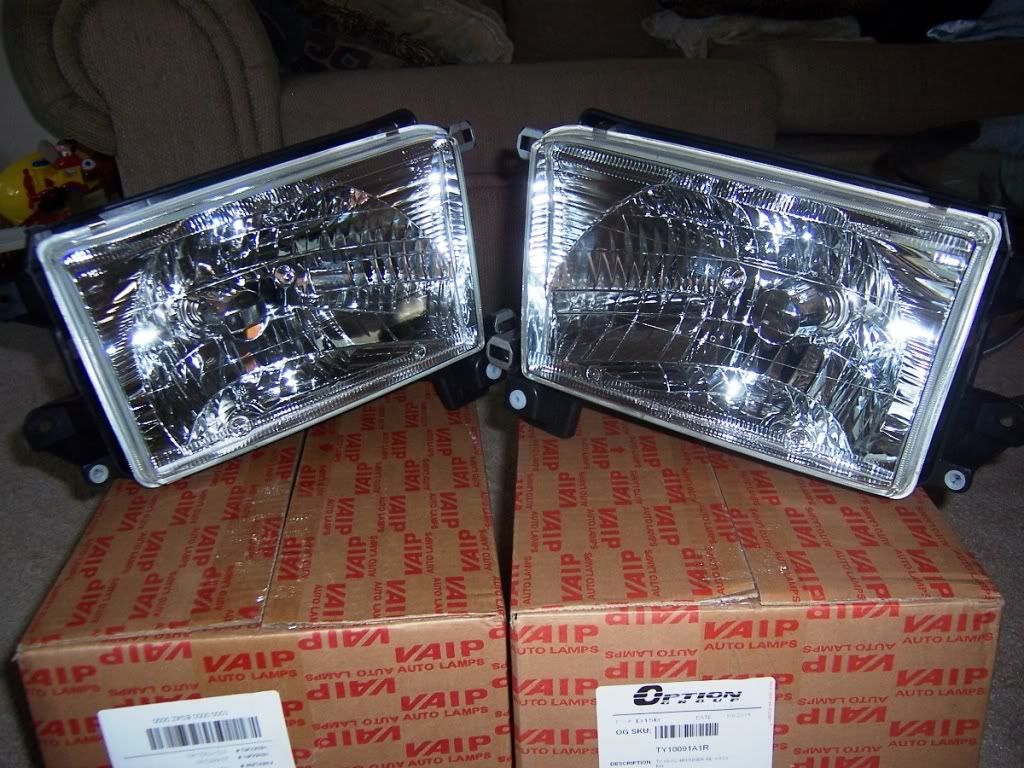
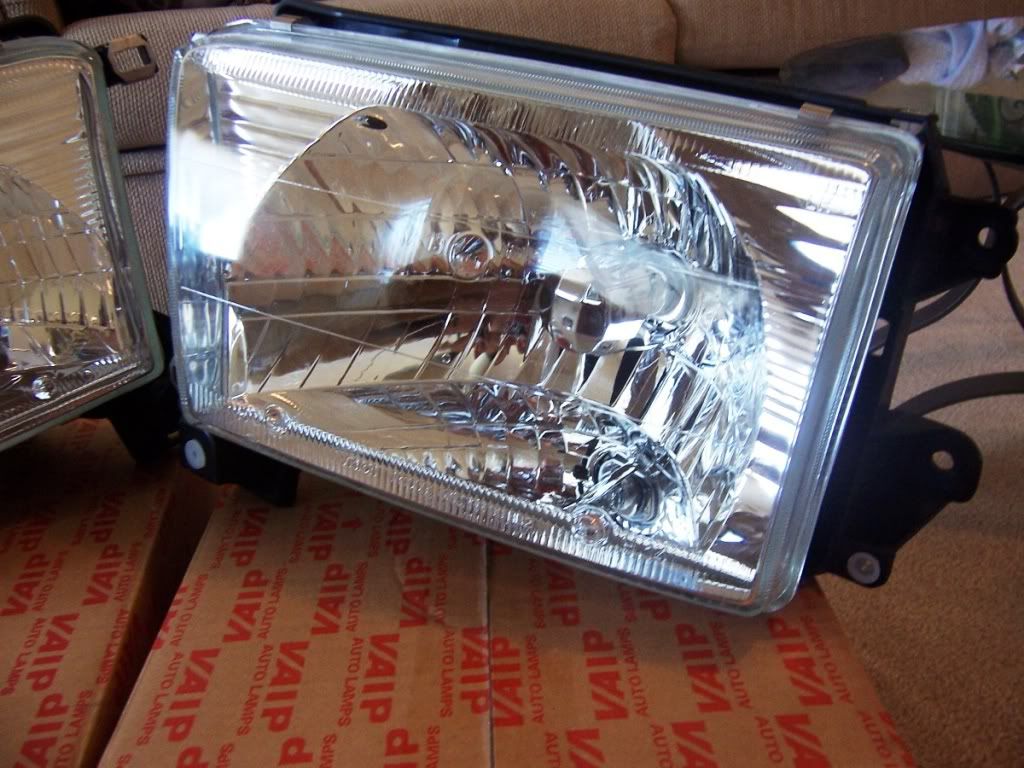
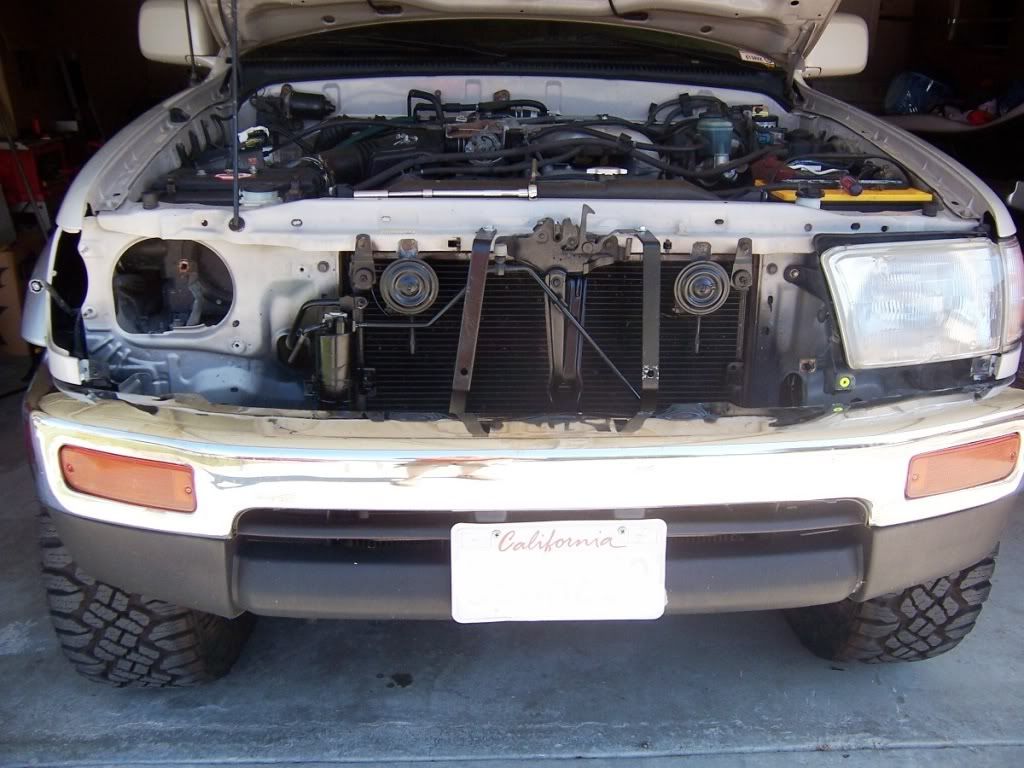
Well, Today I finally replaced those ugly 1997 headlights. Well, one of them was cracked anyway. I got the replacements off of EBAY from "CAR PARTS OUTLET" they are based out of Buena Park Ca, so I was able to get them in in just 1 day!!!! They have the glass lenses, not the cheap plastic ones, they even included light bulbs. After shipping and of course taxes, They came out to be only about $83.00 for the pair. Anyway here is the link for them:
http://cgi.ebay.com/ebaymotors/ws/eB...K%3AMEWNX%3AIT
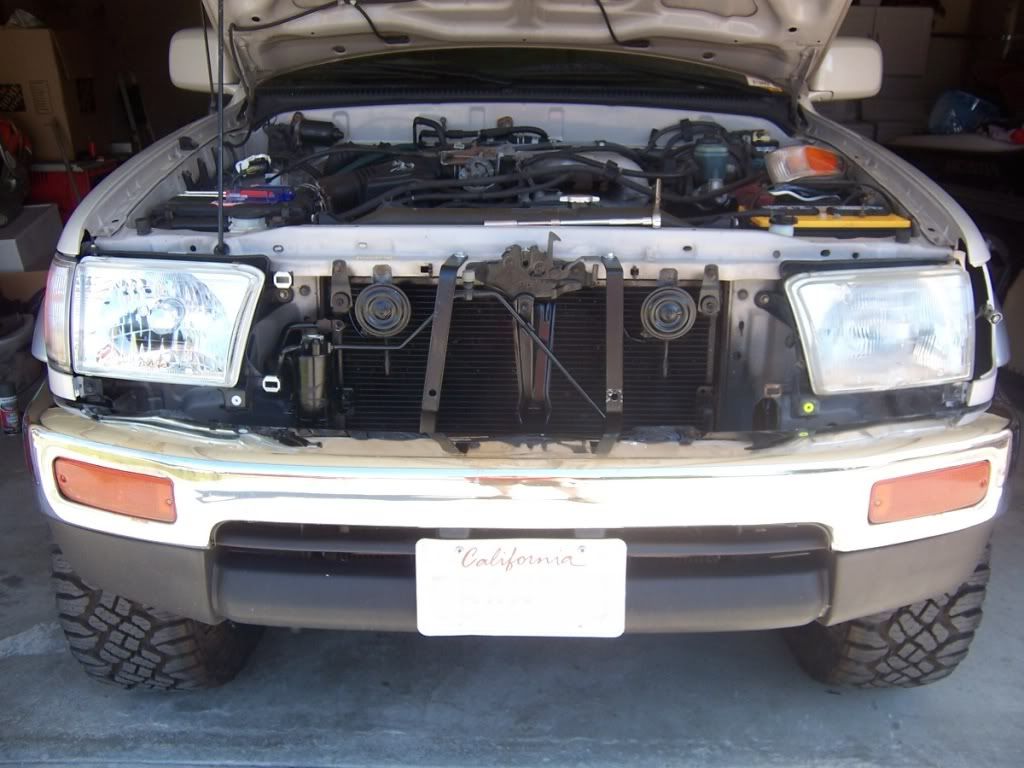
Now let see some pictures:

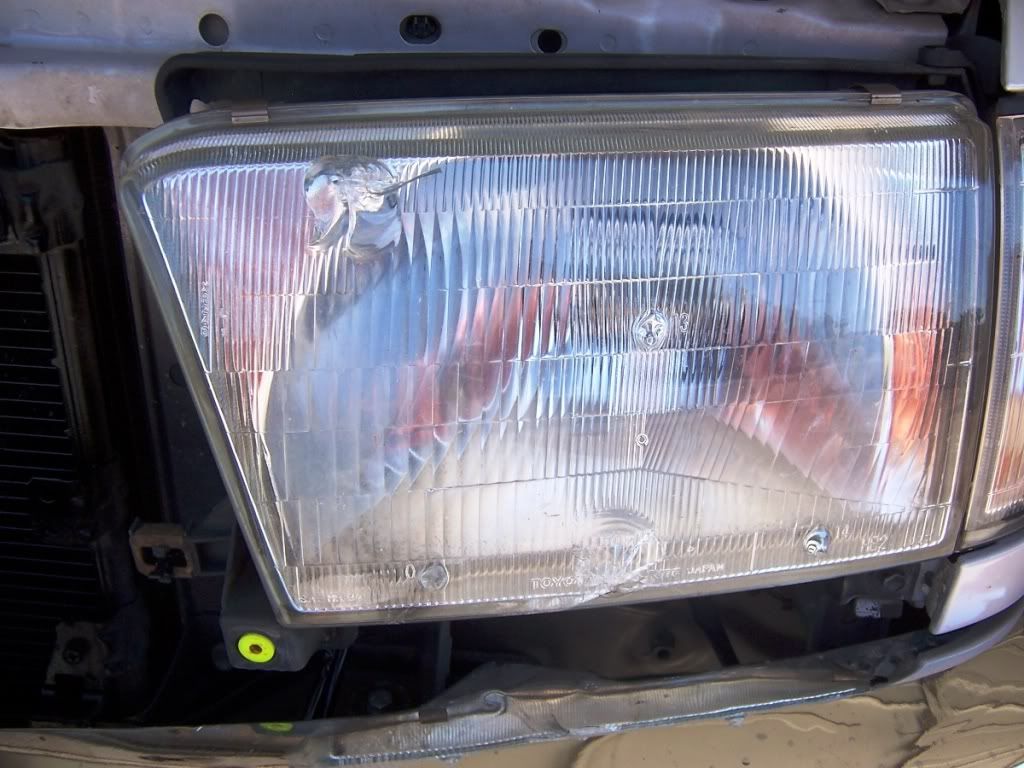
Here is a closeup of the old/cracked headlight:
New Headlight on the Left / Old on the right.
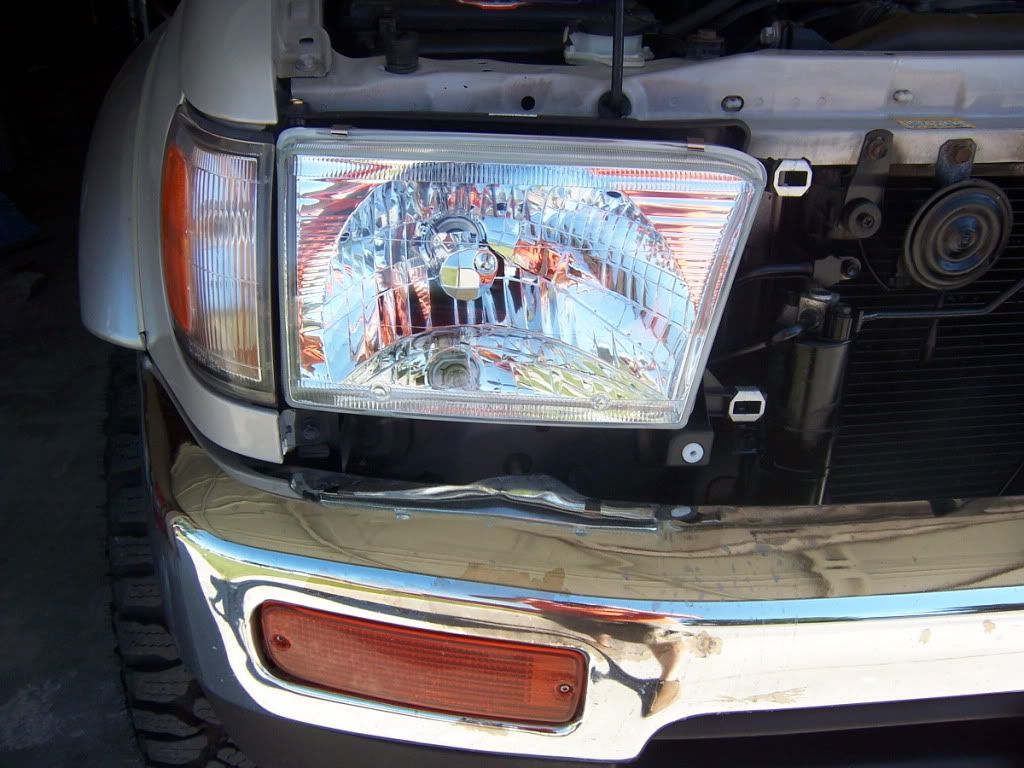
Next, I will getting some clear corner and turn signal lights, to complete the mod.
http://cgi.ebay.com/ebaymotors/ws/eB...K%3AMEWNX%3AIT
Now let see some pictures:
Here is a closeup of the old/cracked headlight:
New Headlight on the Left / Old on the right.
Next, I will getting some clear corner and turn signal lights, to complete the mod.
Last edited by traxxi2003; 06-01-2011 at 05:52 PM.
Trending Topics
06-01-2011, 07:53 PM
#8
Registered User
Thread Starter
Join Date: Jul 2009
Location: California City, CA
Posts: 198
Likes: 0
Received 0 Likes
on
0 Posts
Thanks stockwell45! Well as a matter of fact, I was saving to get a Lockright Locker, but I was fortunate enough to find a slightly used Lock right locker on ebay for $104.00 shipped. It should be hear tomorrow, and the new Yukon 4.88 should arrive no later than Friday. Yeah I could not believe it either as to how good these lights look, considering how much I paid for them. What really took me by surprise was the fact that they came with glass lenses. Usually for that price, all you get is a cheap replacement with plastic lenses, I guess I lucked out!!!
06-01-2011, 09:22 PM
#11
Registered User
Thread Starter
Join Date: Jul 2009
Location: California City, CA
Posts: 198
Likes: 0
Received 0 Likes
on
0 Posts
Thanks Mike & Madbomber for your comments. To answer your question "MadBomber", I 'm very happy with the light spread of this lights. I took a video tonight during my drive to work, but I won't be able to uploaded into YouTube until the morning, because I need a WIFI connection. Look for it tomorrow morning. In a few words, Considering how much I paid for them, I'm glad with the results. They still beat OEM cost!
06-02-2011, 06:03 AM
#13
Registered User
Thread Starter
Join Date: Jul 2009
Location: California City, CA
Posts: 198
Likes: 0
Received 0 Likes
on
0 Posts
Ok, here is a video I took with my phone last night on my way to work. Again it was recorded using a phone, so quality is not the greatest. Last few seconds of the video shows the high beams and the PIAA 520's at the same time. Keep in mind that I haven't properly aimed the new headlights nor the PIAA 520's yet. Let me what you all think. here is the video:
http://www.youtube.com/watch?v=8R-FrDuOgCw
http://www.youtube.com/watch?v=8R-FrDuOgCw
06-02-2011, 02:41 PM
#14
Registered User
Thread Starter
Join Date: Jul 2009
Location: California City, CA
Posts: 198
Likes: 0
Received 0 Likes
on
0 Posts
Ok, a little update, I just received the used "Lock Right" Locker that I got from EBAY for $104.00 shipped. i also have new 4.88 gears on the way, they should be here tomorrow. So far the best gear install quote I've been able to get is from "YotaMasters" they are located in Corona Ca. They offered to do the installation for $225.00, that is just for labor, I will be providing all the parts. They only problem is that it will be quite a drive for me, about 3+- hour drive depending on traffic. There is another local shop, but their experience with Toyota rear end's is limited. Their quote was $250.00. Anyway here are some pics of the locker, tomorrow I will post some pics of the gears. Enjoy!!
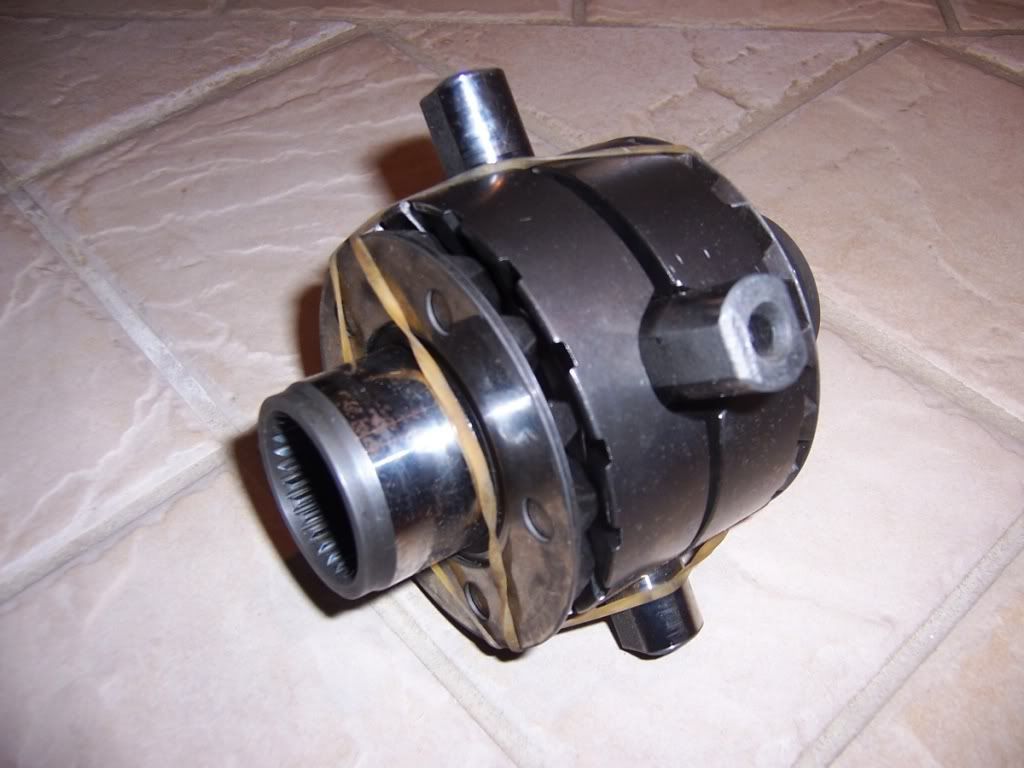
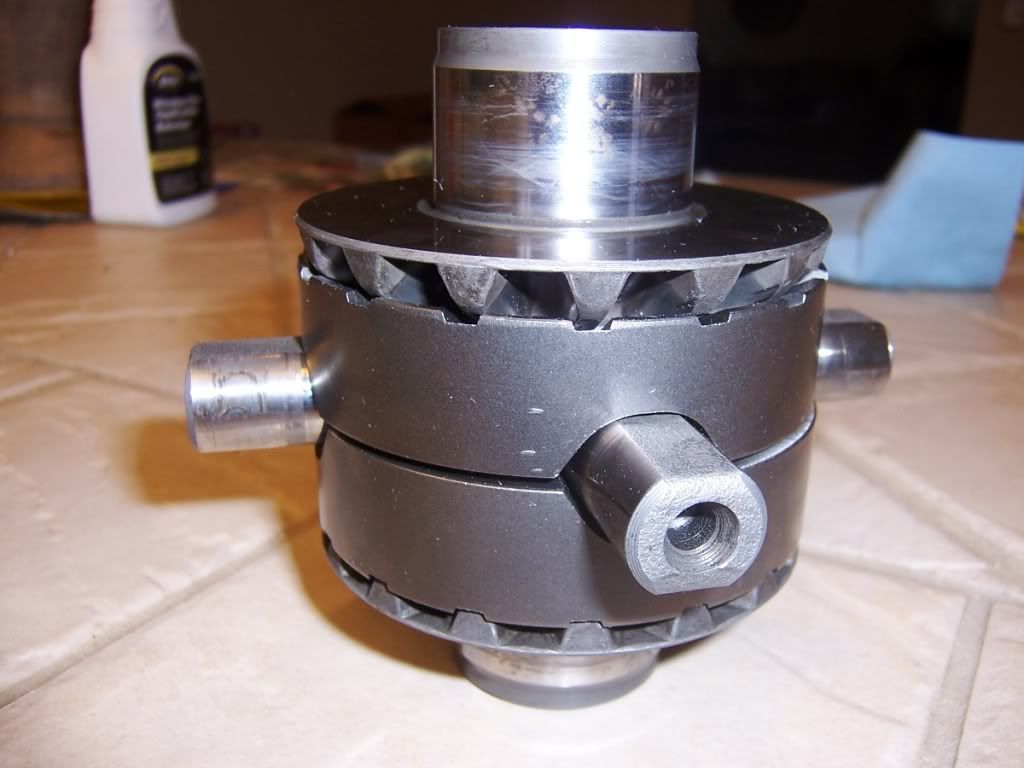
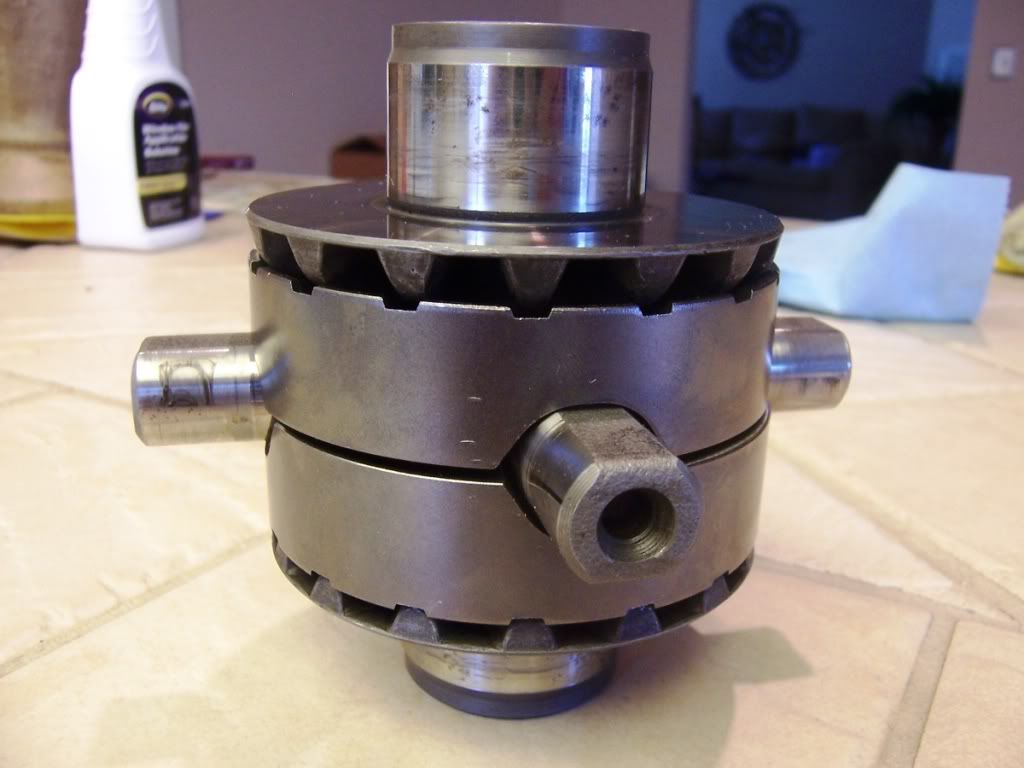
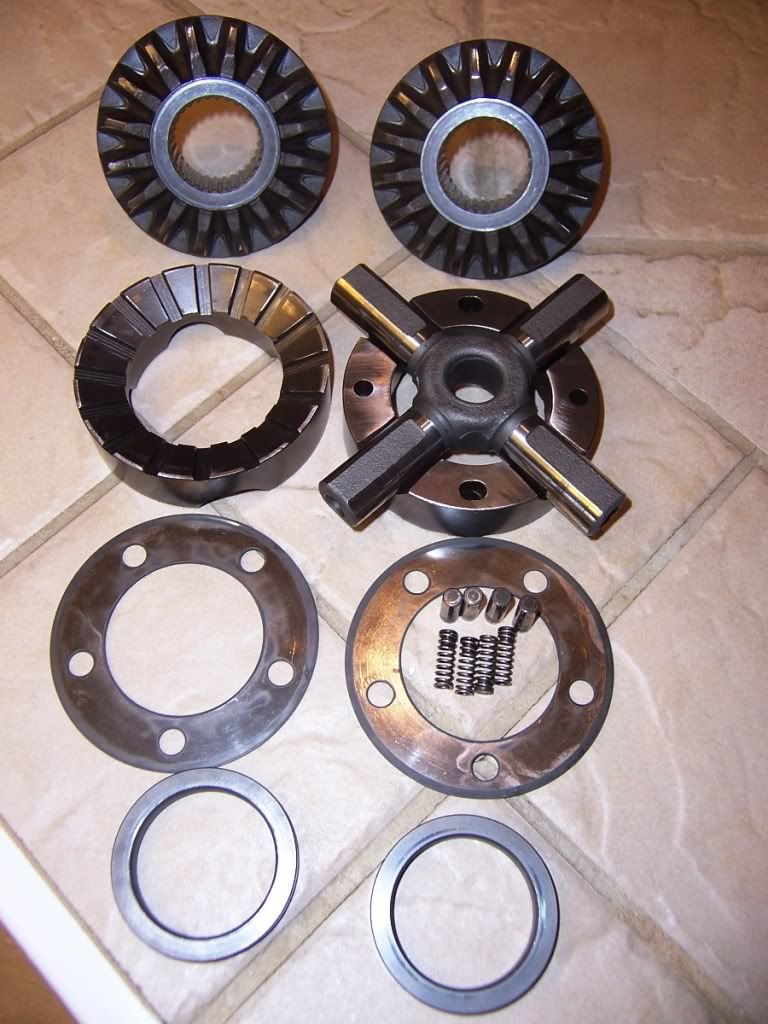
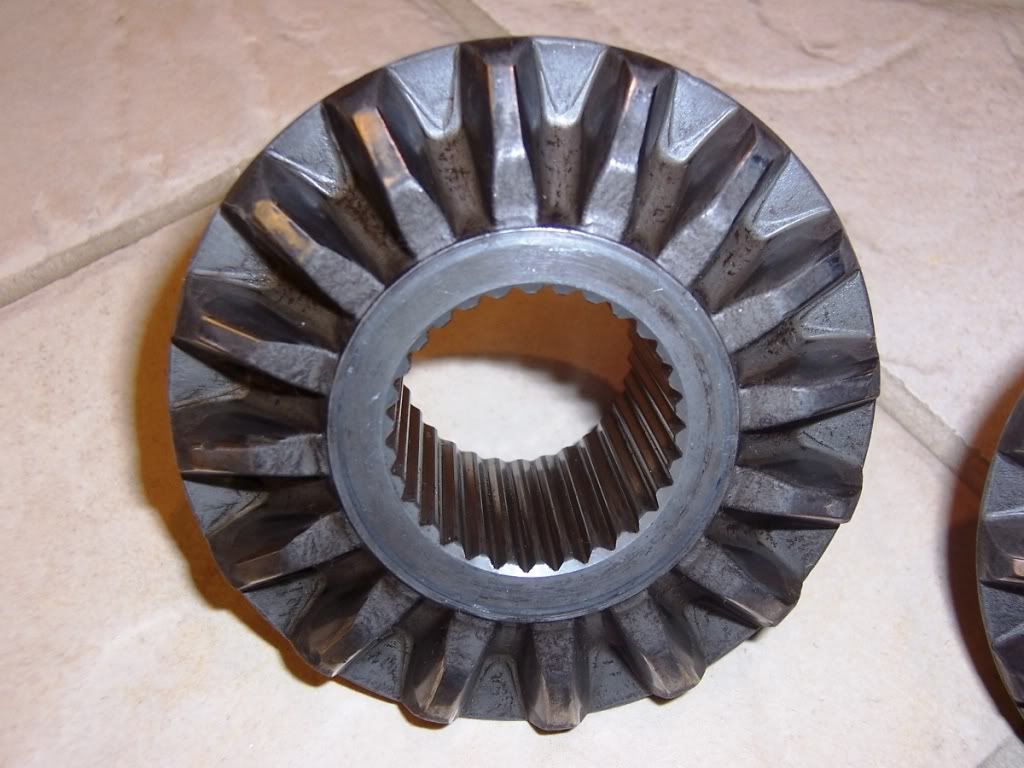
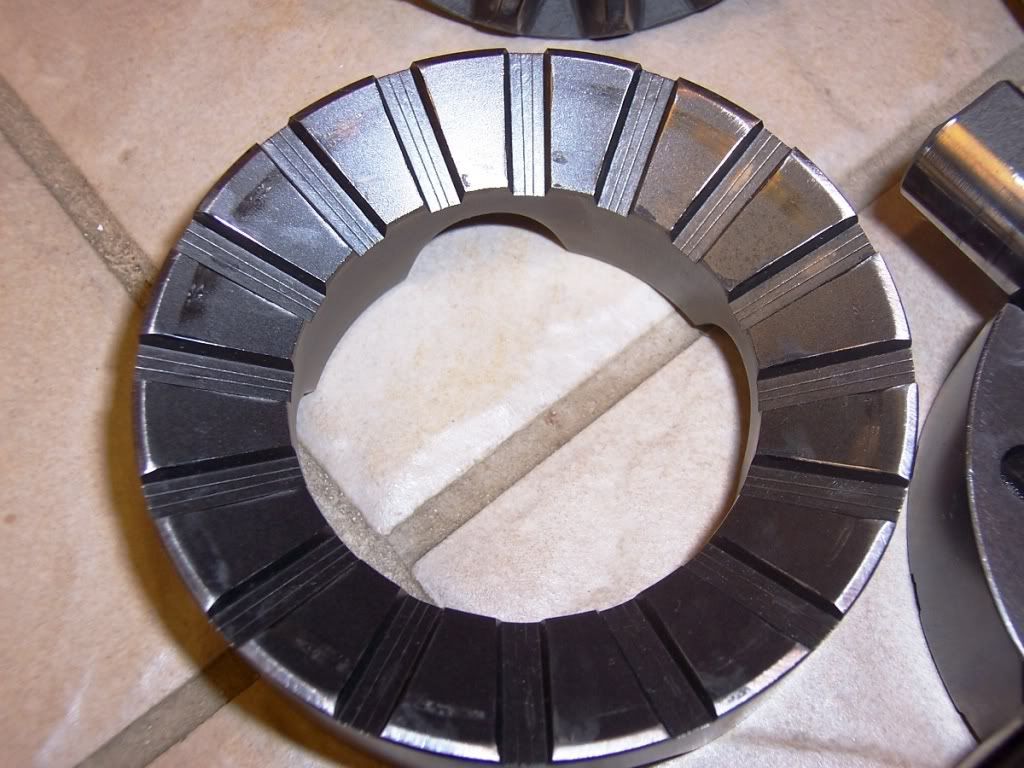
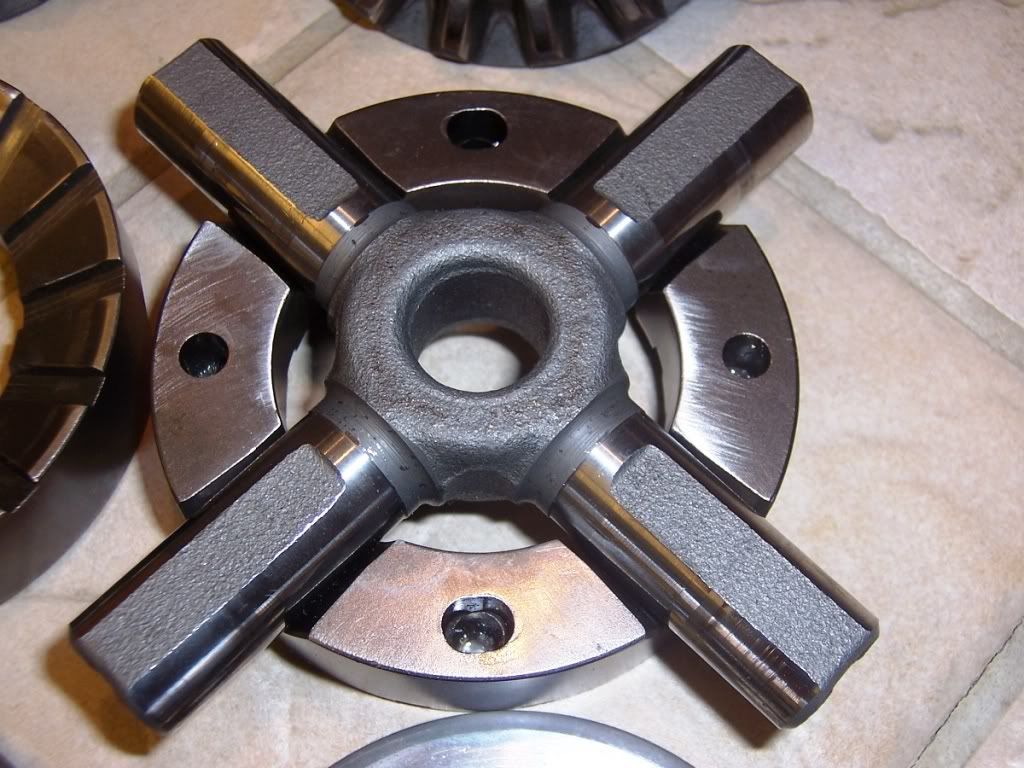
Not bad for $104.00!
Not bad for $104.00!
Last edited by traxxi2003; 06-02-2011 at 02:44 PM.
06-03-2011, 12:50 PM
#15
Registered User
Thread Starter
Join Date: Jul 2009
Location: California City, CA
Posts: 198
Likes: 0
Received 0 Likes
on
0 Posts
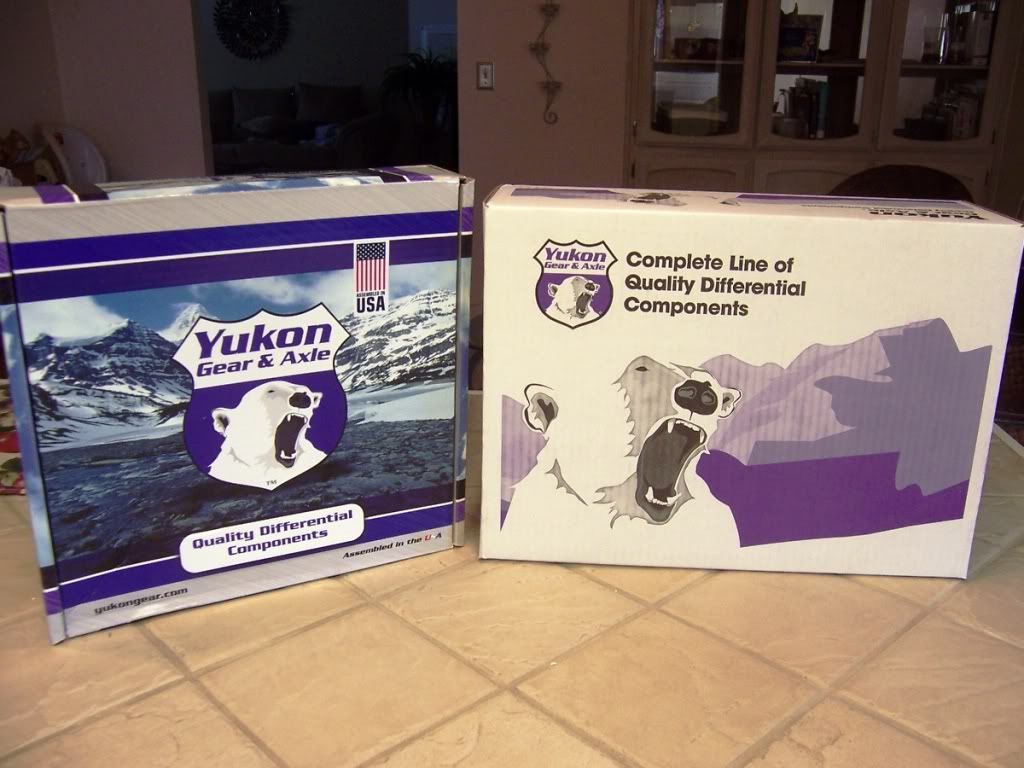
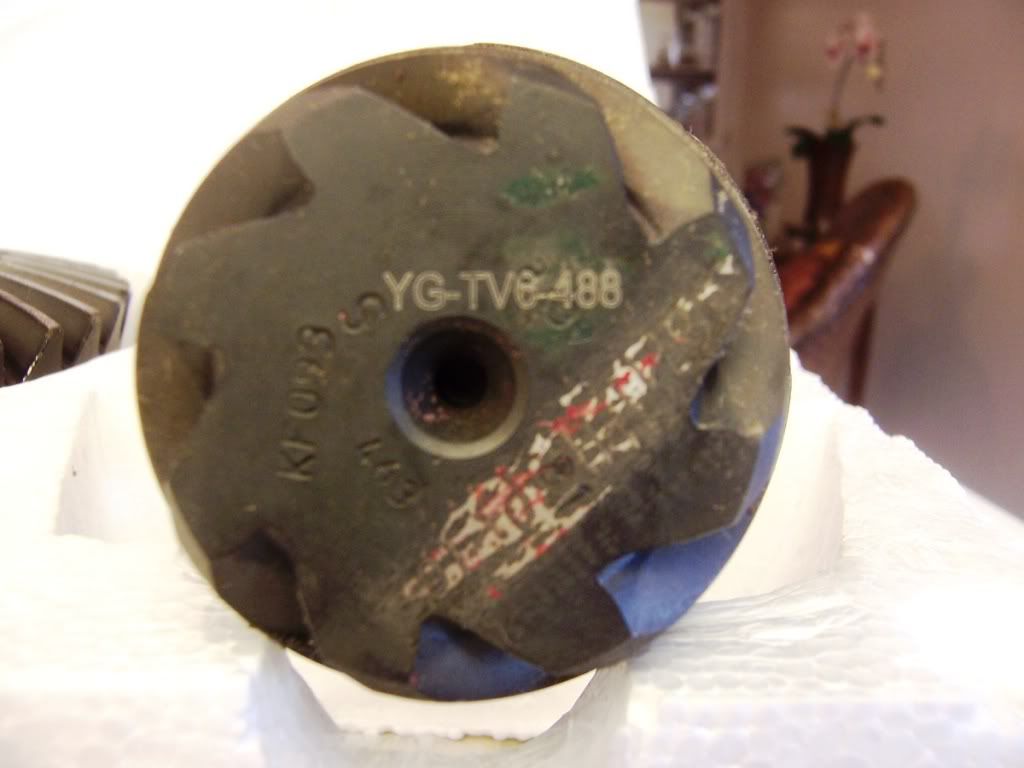
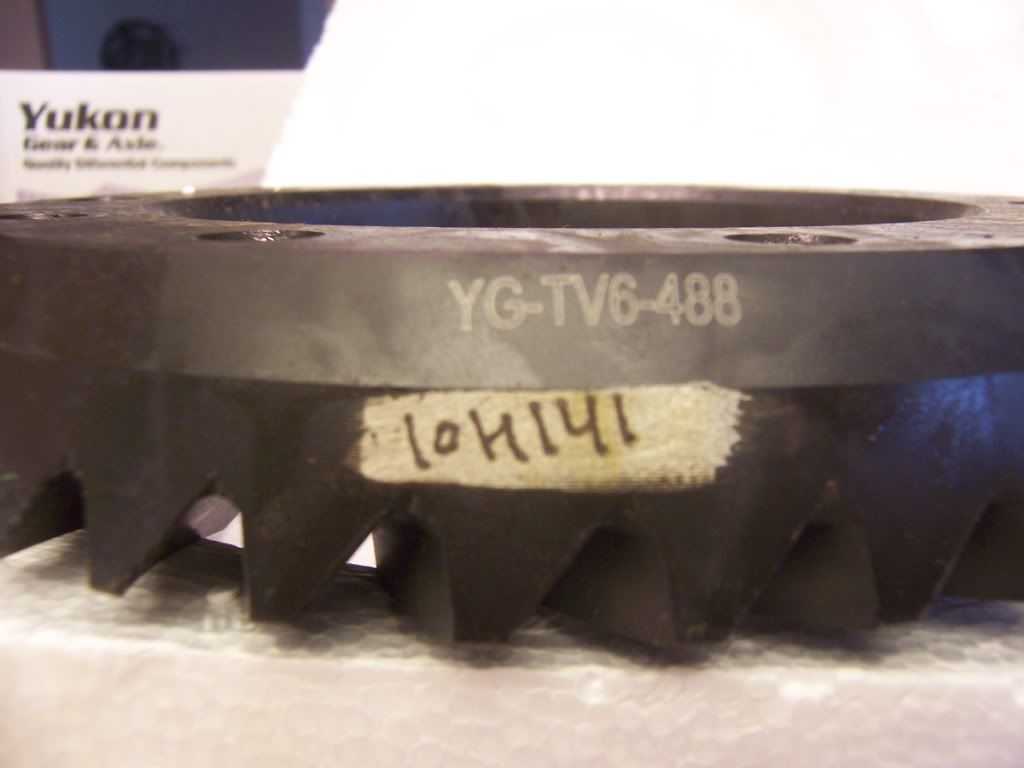
Look at what UPS brought in today! New Yukon 4.88 gears. I ordered them from Seven Springs Customs, (http://completeoffroad.com/) they are based out of Dubuque Iowa. They have the best prices on Yukon gears that I been able to find. And the offer free shipping. I got the gears/master install kit for $338.00. Anyway here are some pics:
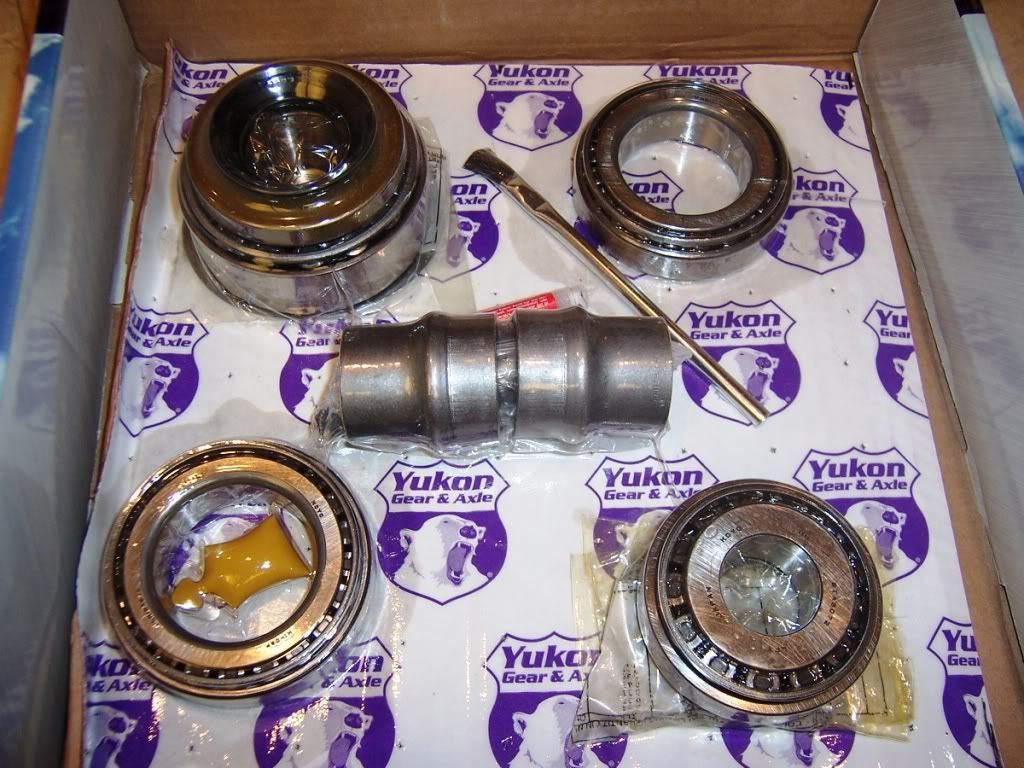
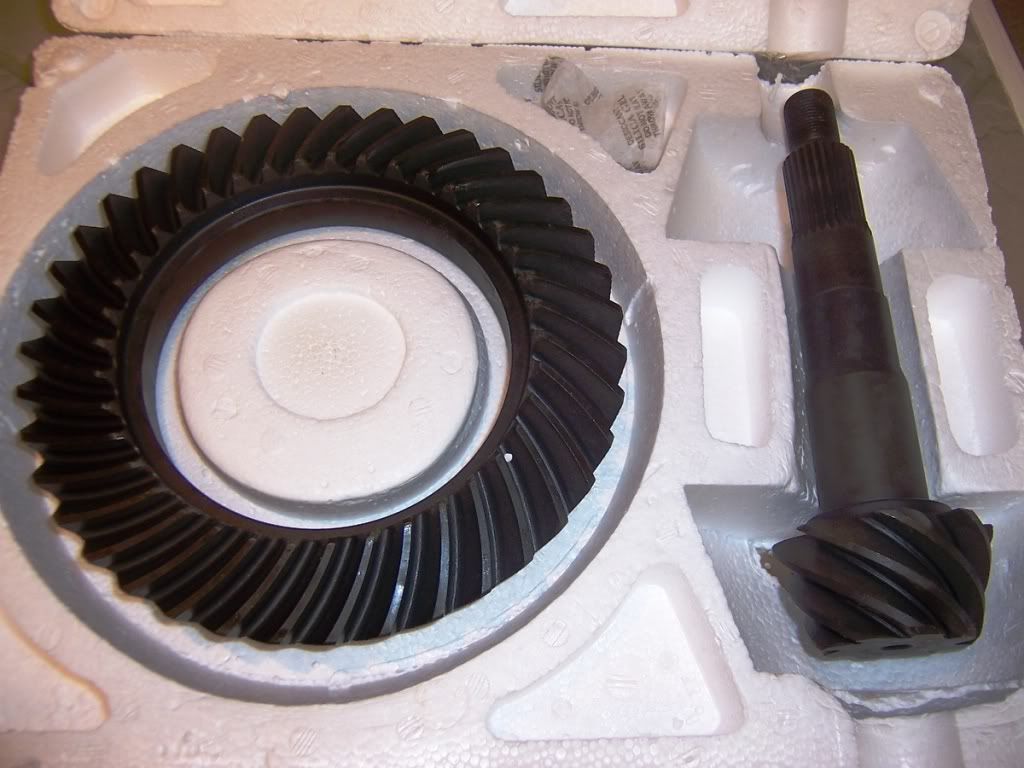
Definitely will post pictures of the removal/install of the gears.
Definitely will post pictures of the removal/install of the gears.
Last edited by traxxi2003; 06-03-2011 at 12:51 PM.
06-07-2011, 11:55 PM
#16
Registered User
Thread Starter
Join Date: Jul 2009
Location: California City, CA
Posts: 198
Likes: 0
Received 0 Likes
on
0 Posts
Well, I picked up the 3rd member from "Yarman Driveshaft" Lancaster Ca, today. Peace of advice: to all the members leaving in Southern Ca,
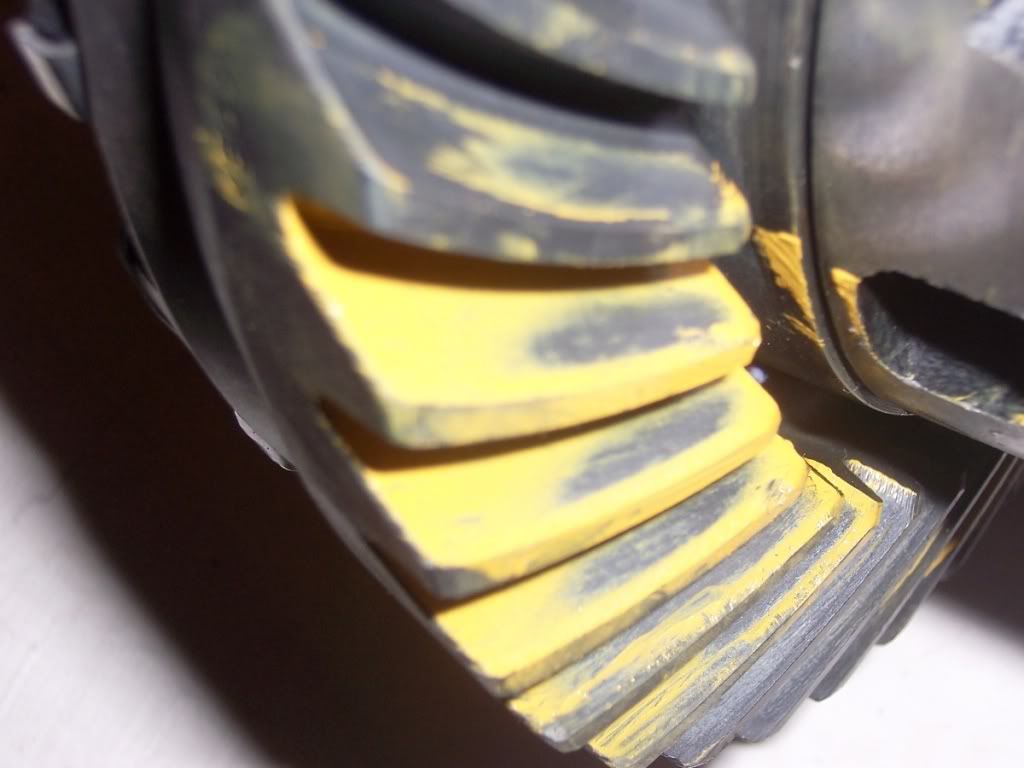
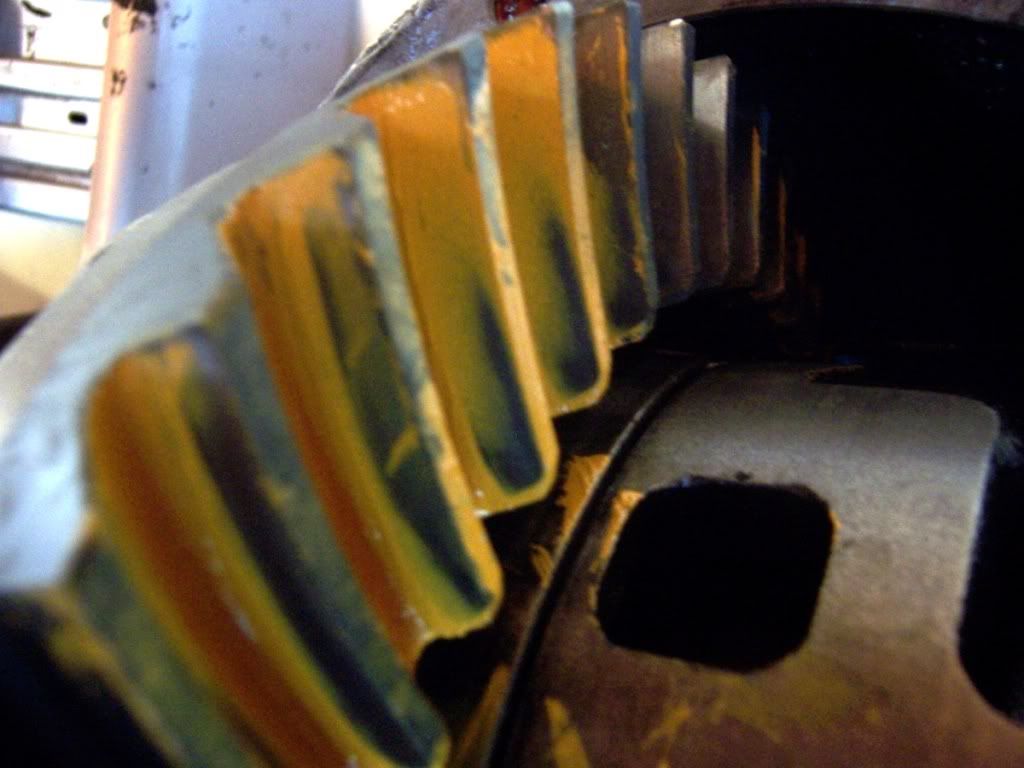
!!!!!!Please!!!!!! do not go to this establishment. After getting the 3rd member back on the truck, I went out for the first drive with my new 4.88's. The gears started to "whine" within the first 15 miles on the new gears. I got hold of ZUK, emailed him a few pictures that I had taken just before the installation, and he said that just by looking at the pictures, he could tell that it had been setup wrong, (pinnion too shallow). This !@$%^& guy is probably not going to refund my money, I don't trust him to re-do the setup, (it should had been done correct first time around) so, I waisted $300.00 for nothing. Now, I'm going to have to wait until I can afford to pay another gear setup, And I can't drive my truck. Definetly reporting this guy to the BBB. Anyway, sorry for venting! here are the pictures of the contact pattern:
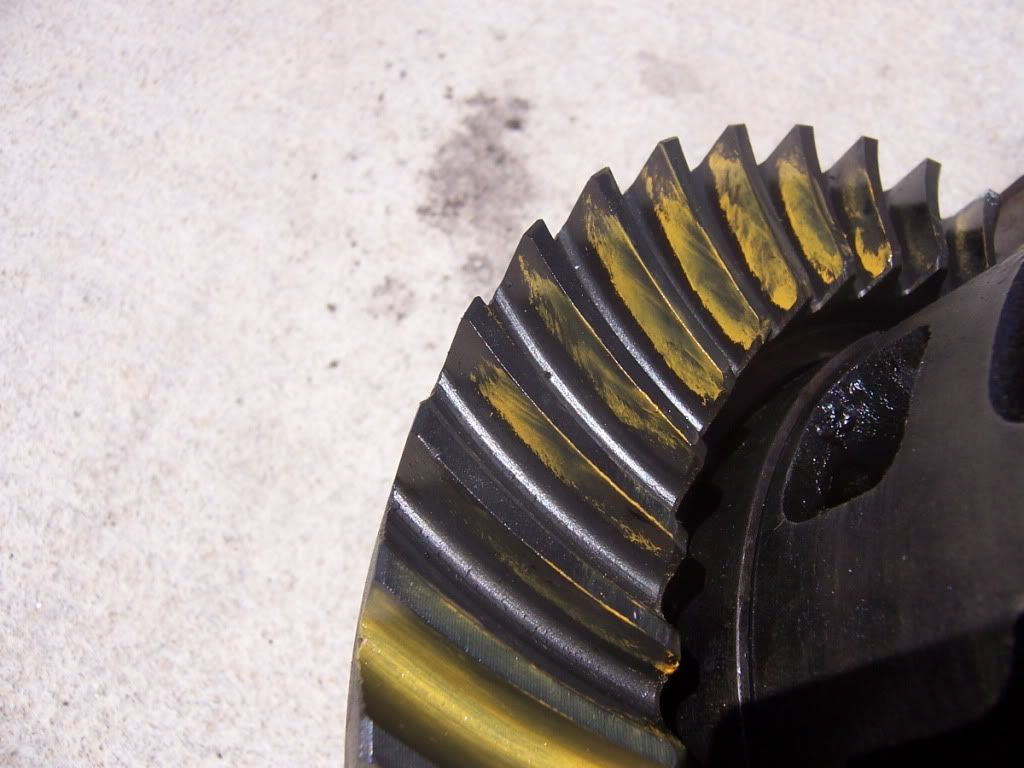
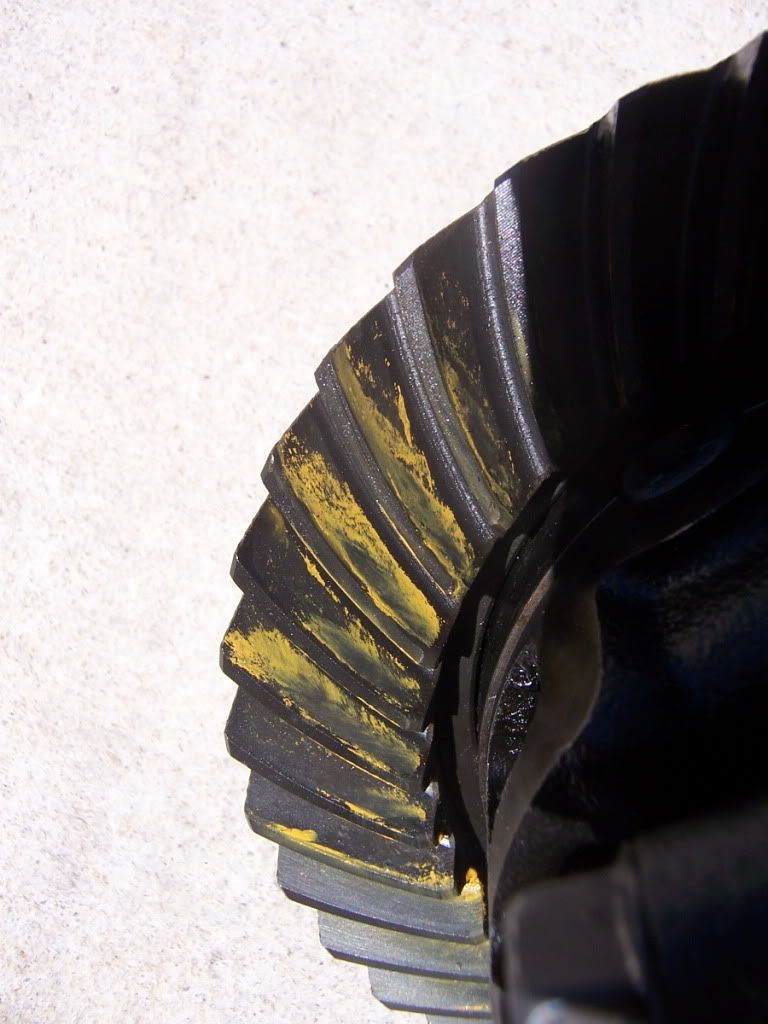


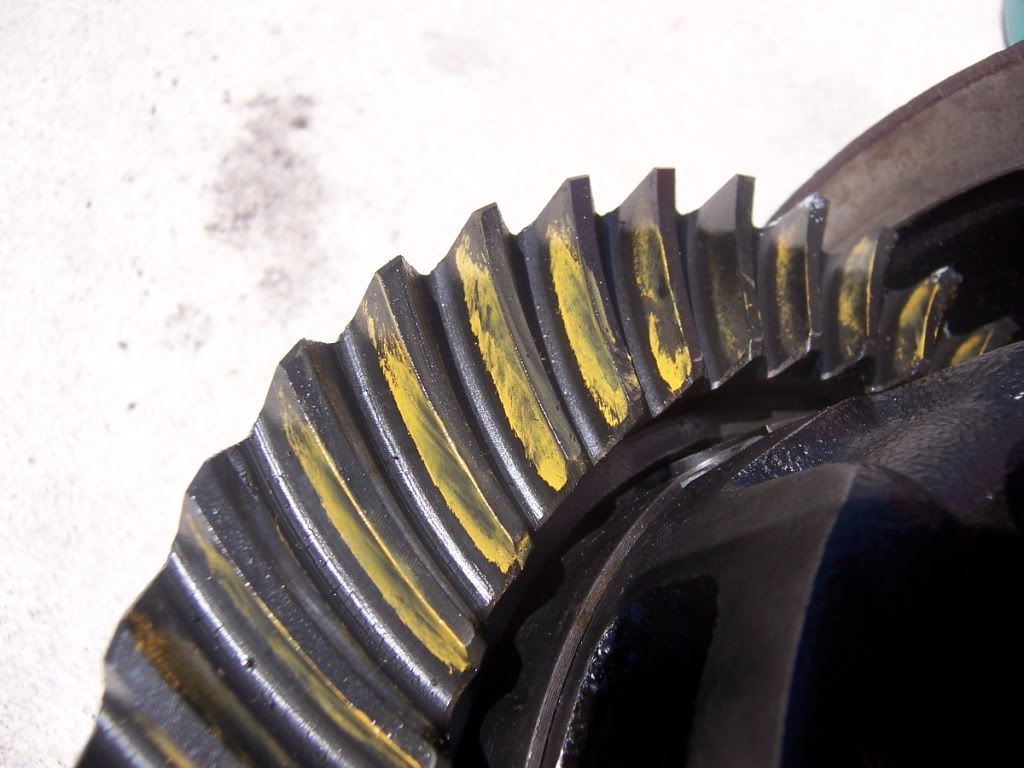
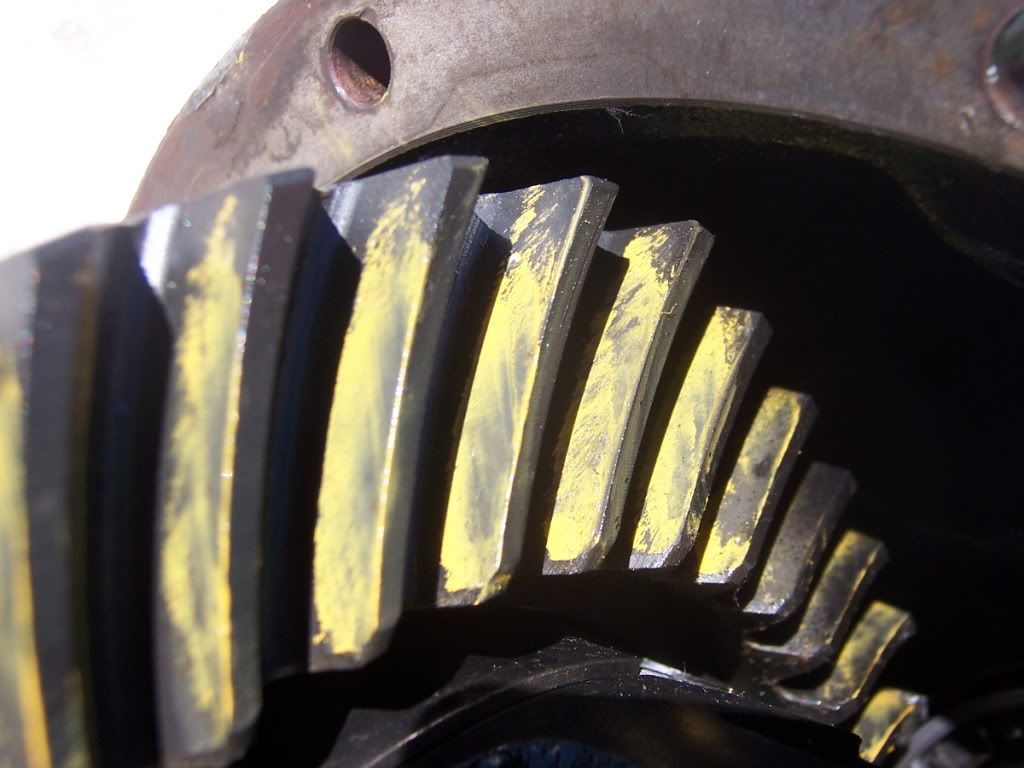
!!!!!!Please!!!!!! do not go to this establishment. After getting the 3rd member back on the truck, I went out for the first drive with my new 4.88's. The gears started to "whine" within the first 15 miles on the new gears. I got hold of ZUK, emailed him a few pictures that I had taken just before the installation, and he said that just by looking at the pictures, he could tell that it had been setup wrong, (pinnion too shallow). This !@$%^& guy is probably not going to refund my money, I don't trust him to re-do the setup, (it should had been done correct first time around) so, I waisted $300.00 for nothing. Now, I'm going to have to wait until I can afford to pay another gear setup, And I can't drive my truck. Definetly reporting this guy to the BBB. Anyway, sorry for venting! here are the pictures of the contact pattern:
Last edited by traxxi2003; 06-14-2011 at 02:38 AM.
06-14-2011, 02:11 AM
#17
Registered User
Thread Starter
Join Date: Jul 2009
Location: California City, CA
Posts: 198
Likes: 0
Received 0 Likes
on
0 Posts
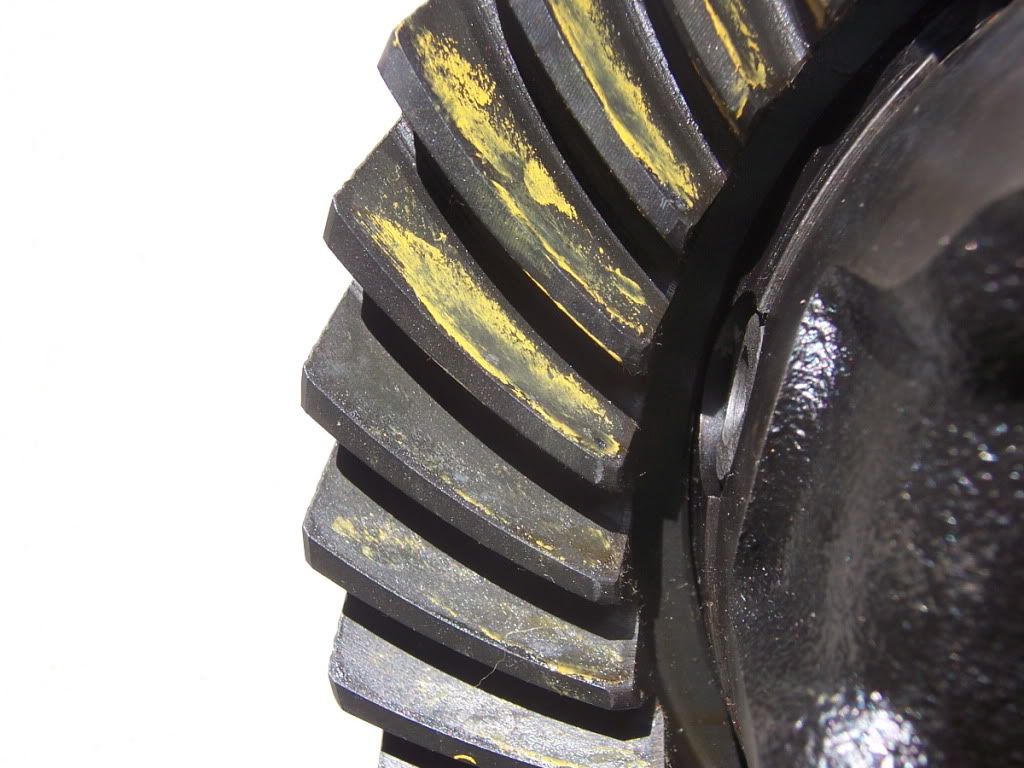
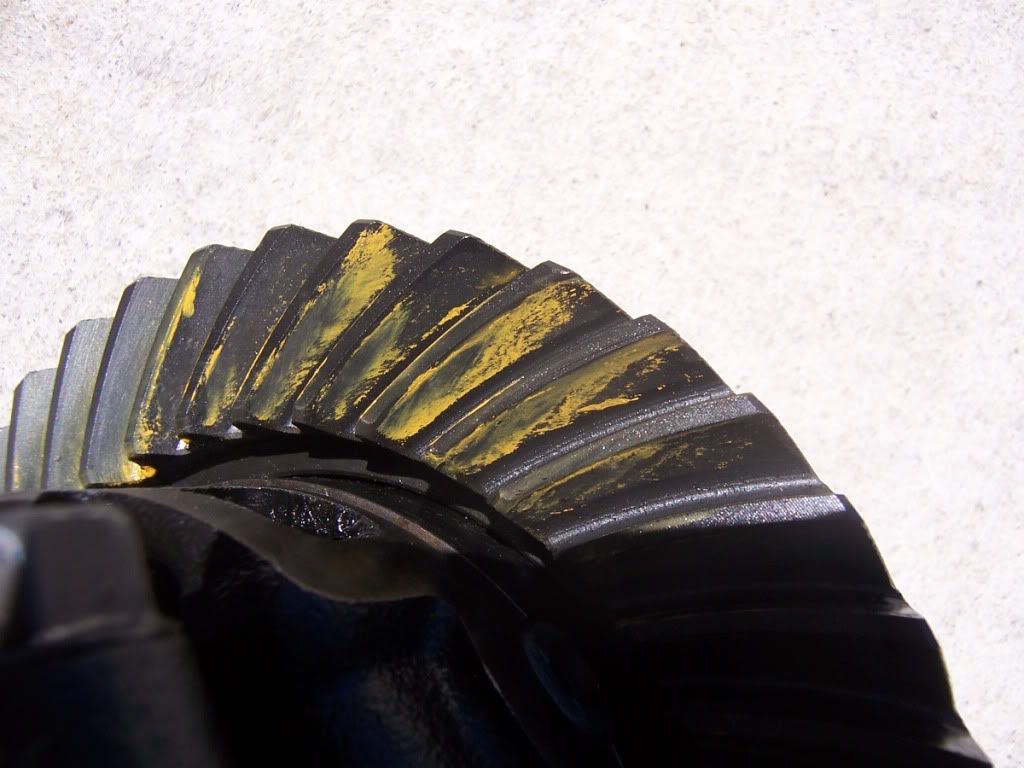
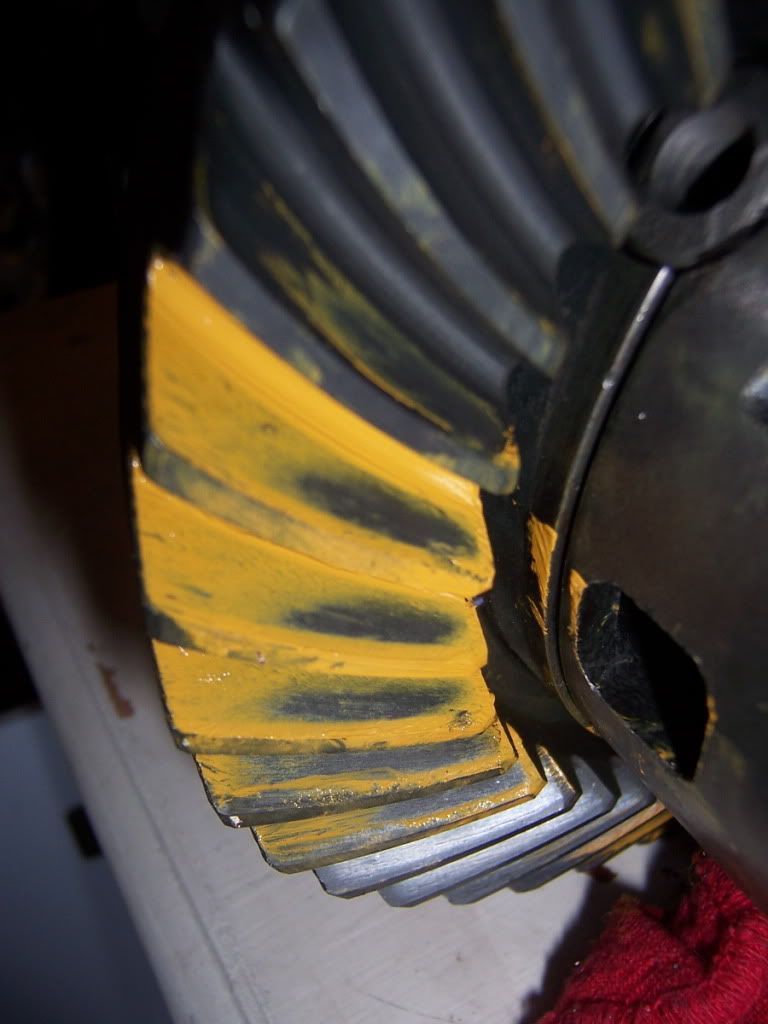
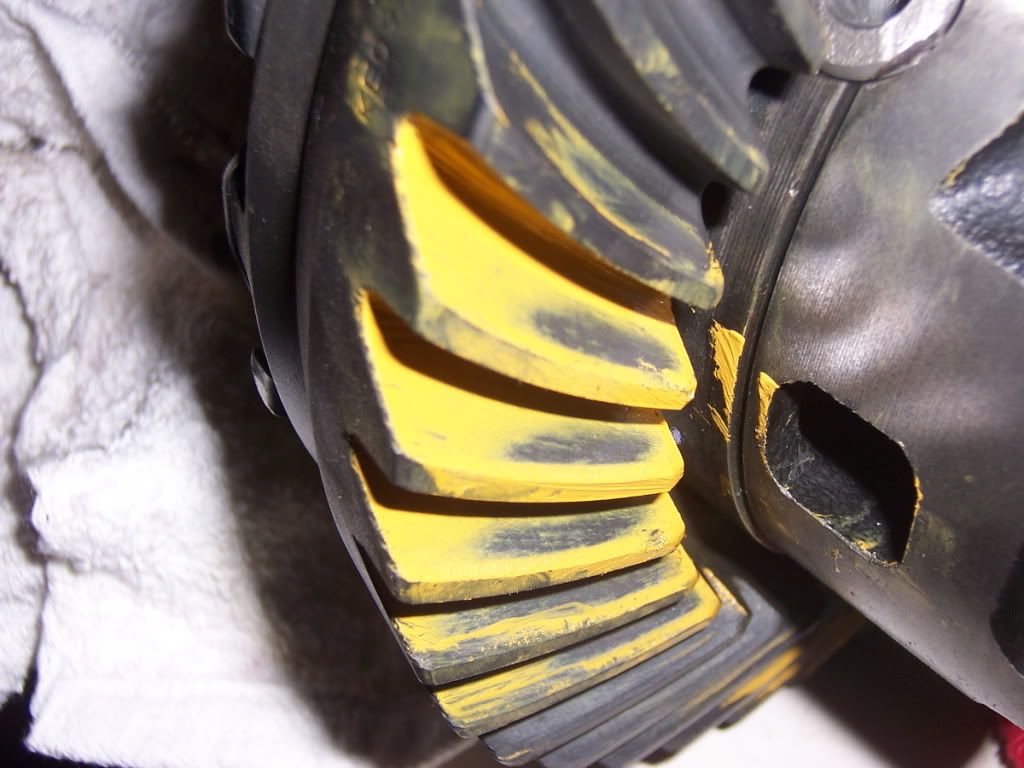
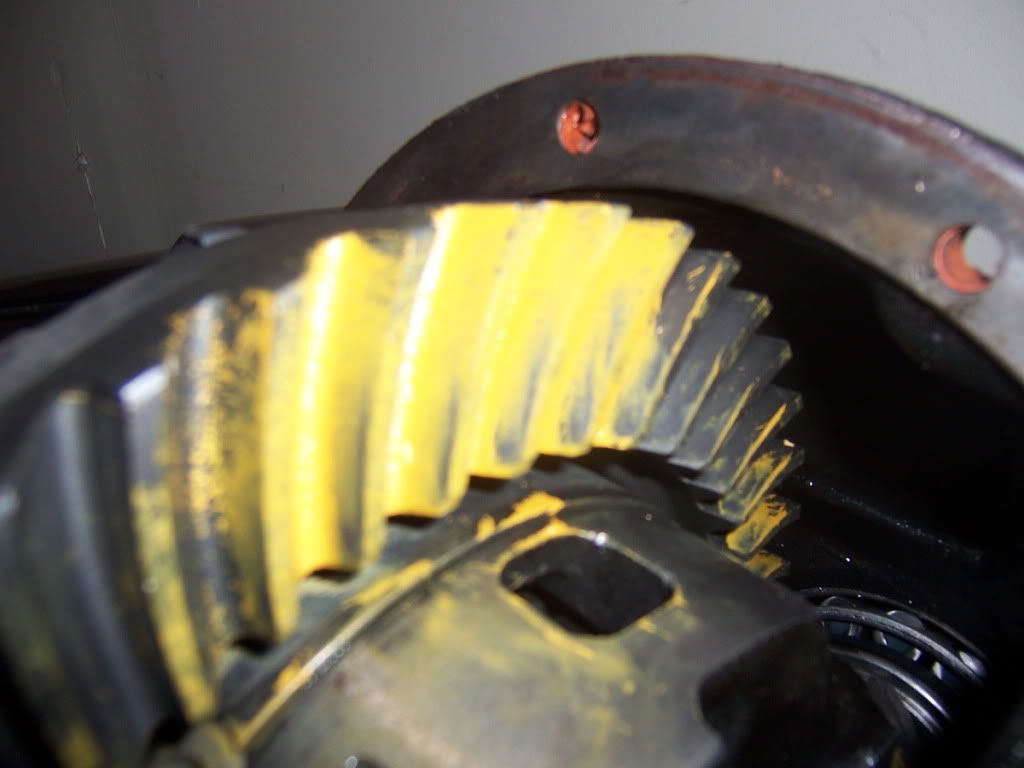
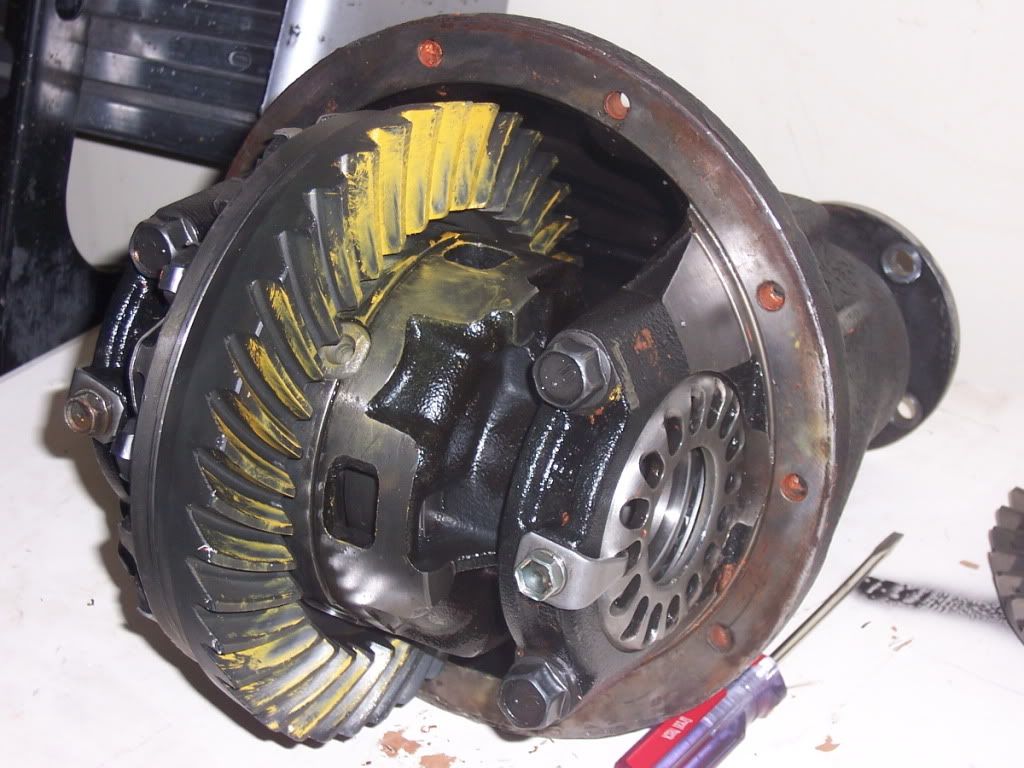
Well, I just picked up my truck's differential from my local shop for the (SECOND TIME). I had to take it back to them, after the gears started whining on acceleration with only 12 miles into the new gears "break-in" drive. After a quick inspection of the second setup attempt, I can tell that they deifnetly did a better job at setting up the new gears the second time around. The Pinion Pre-load feels more within specs, and the Backlash was set to .007. But I'm not to craizy about the tooth contact pattern. The owner of the diff shop told me that they contacted "Randy's Ring & Pinion Customer service, and after some email exchange with some pictures of the pattern optained, The Tech Rep from Randy's endorsed the acheived pattern as an acceptable one. In my opinion this pattern, compared to "ZUK's work, still looks a little off. In my opinion, even though there is some improvements on the tooth contact pattern when you compare the pictures above (first setup attempt) to the pictures below (second attempt), I believe they are not 100% perfect. What you all think?
Last edited by traxxi2003; 06-14-2011 at 02:40 AM.
06-14-2011, 09:21 AM
#18
Dang Jose I wish I knew that you were regearing your truck sooner...I would have been able to share some pretty valuabe info...
I am also looking to regear because, as you know, the 33X12.5's are just too big for the stock 4.10's. I have been doing some research and got some price quotes from a couple of shops that specialize in off-road vehicles or differential work. Most shops gave me about a $2,000 quote to regear the front and rear differential to 4.88's and install a lockright locker in the rear.
After starting this thread: https://www.yotatech.com/forums/f120...earing-235138/ and getting some advice from other YotaTech members, I decided to just buy the complete 3rd's that are already regeared to 4.88's and have the locker installed from here: http://eastcoastgearsupply.com/i-157...-8-v6-3rd.html.
I am planning on installing the rear differential myself and I will take it to a shop to install the front differential. Since I am doing the work on the rear differential myself, it will only cost about $850 for the parts and $0 for labor. The front will run me about $600 for the differential and another $200 to have it installed. That still leave the total at about $1,600 to regar both differentials to 4.88's and install a lockright locker in the rear. Since I was planning on spending $2,000 I might just put a lockright locker in the front too...
06-15-2011, 01:14 AM
#19
Registered User
Thread Starter
Join Date: Jul 2009
Location: California City, CA
Posts: 198
Likes: 0
Received 0 Likes
on
0 Posts
Jimmy I was also considering to buy an already setup third member from "East Coast Gears" but because I was able to find a slightly used LockRight locker for $100.00, and new Yukon 4.88 gears/Yukon Master Install kit for $338.00 shipped, I had to jump on them. Even after the rather expensive setup charge (considering I had to take the diff back to them) I was able to re-gear to 4.88 for about $750.00 including gear oil. So you could say I save about $100.00+-. But again, after my experience, I'm not sure anymore if the $100.00 I saved was worth my time considering my truck was in the garage for about 6 days while the shop was doing the gear setup for a second time. Otherwise $850.00 for a pre-setup new differential that is definitely a good deal. Good Luck on your re-gear keep us posted!!!
06-15-2011, 12:55 PM
#20
Jimmy I was also considering to buy an already setup third member from "East Coast Gears" but because I was able to find a slightly used LockRight locker for $100.00, and new Yukon 4.88 gears/Yukon Master Install kit for $338.00 shipped, I had to jump on them. Even after the rather expensive setup charge (considering I had to take the diff back to them) I was able to re-gear to 4.88 for about $750.00 including gear oil. So you could say I save about $100.00+-. But again, after my experience, I'm not sure anymore if the $100.00 I saved was worth my time considering my truck was in the garage for about 6 days while the shop was doing the gear setup for a second time. Otherwise $850.00 for a pre-setup new differential that is definitely a good deal. Good Luck on your re-gear keep us posted!!!
That really sucks that you had to take the differential back to them and have them fix something that they messed up. That is what I am hoping to avoid by ordering the complete 3rd's from ECGS. Their 3rds carry a 5 year warranty and they are all about differentials so I know that they will be done correctly.
I am planning on installing the rear differential myself because it is a simple drop the old and replace with the new install but the front is a little more complicated so I am going to have a shop install the front.
I wish I could regear for like $850, but I guess that is one of the few downsides of having 4WD
 . I will keep my build thread updated with my progress!


