TOY91Runner's 91 4Runner SAS + Leaf Swap Build Up Thread
 09-06-2012, 06:10 PM
#1
Registered User
Thread Starter
TOY91Runner's 91 4Runner SAS + Leaf Swap Build Up Thread
1st post so bare with me ill do my best...
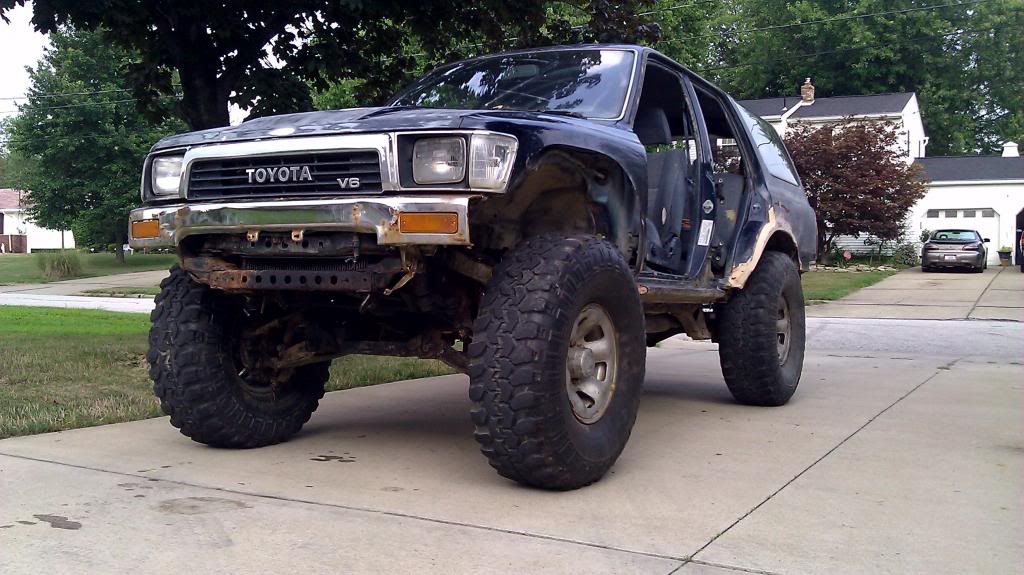
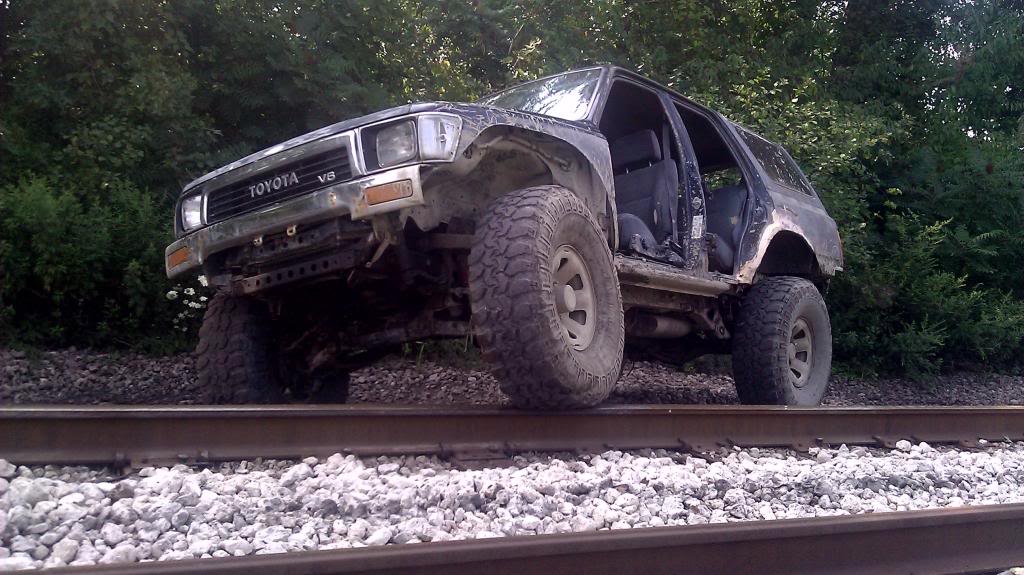
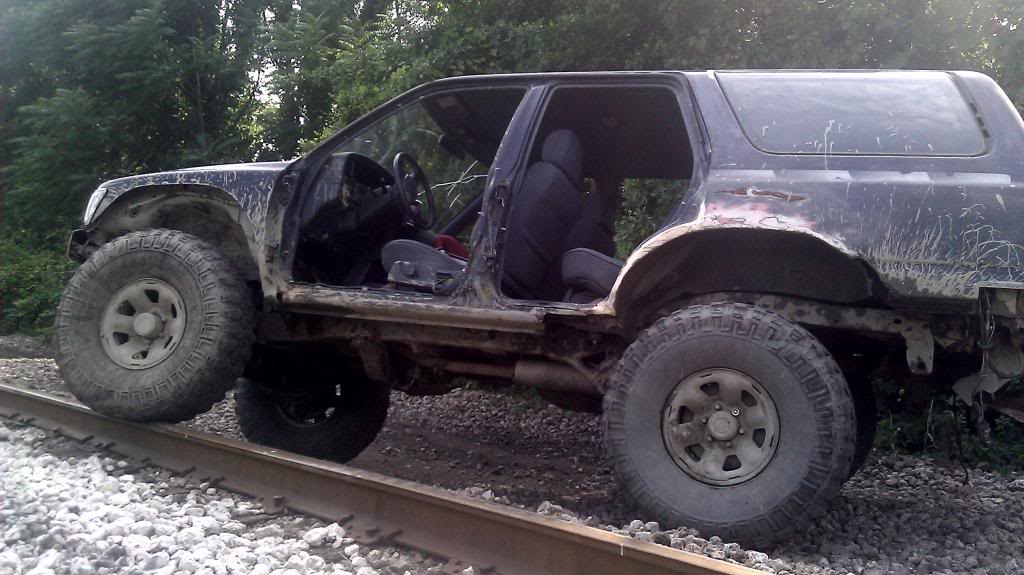
Started with a 91 4runner bought off craigslist for $500 running, drivable, but ugly and very rusted. 3vze with the r150f 5 speed tranny had 31s no lift. (sorry no pics, lost my phone with everything before the 1st trail build up build up). Had no starter, no doors, no bumpers, trashed interior and 180k on the clock.
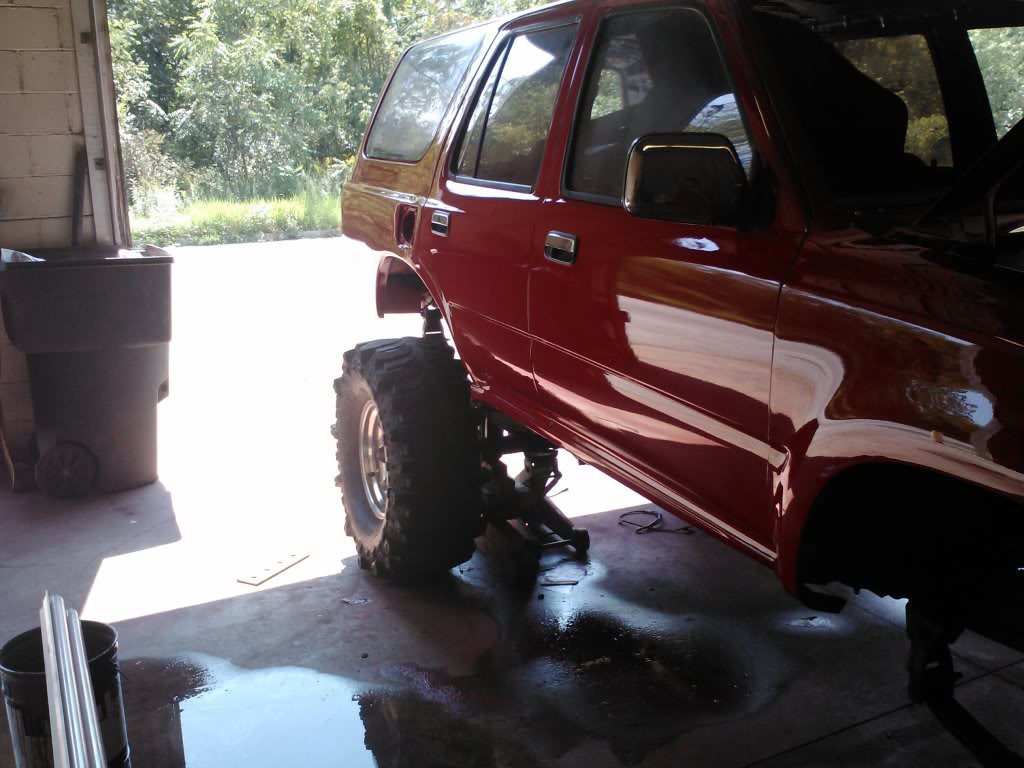
My first step was a small lift running coil spacers in the rear and BJ spacer up front with torsion cranked until i figured out which route i wanted to take SAS or IFS Lift. Oh and i added some 36x12x16 radial Swampers i picked up cheap.
SAS was the way to go and while i was under there i figured i swap the rusted coils and coil buckets out for some 63" chevy leafs along with full width GM Corp 10 Bolts
Installing BJ lift in front.

There is rust EVERYWHERE!!! Quarter rust both sides, rockers are gone on both sides, there are no door jambs in the rear on both sides, along with severe frame rust, and much much more haha.
Heres some pics i managed to save:
Used sea foam to fill in the rusted quarter and door jambs and sanded it down for the time being until i got her to the shop to sheet metal it up and do it the right way but thought it was funny to mention
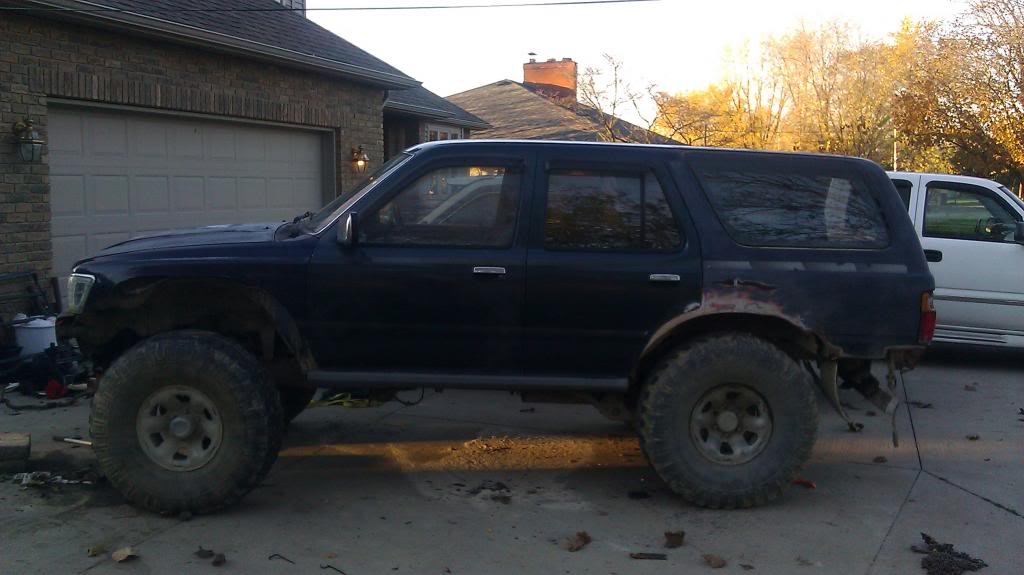
Ended up buying some doors... Sadly the first week of owning the truck the coil buckets rusted completely through and i knew it was time to start my build.
Started with a 91 4runner bought off craigslist for $500 running, drivable, but ugly and very rusted. 3vze with the r150f 5 speed tranny had 31s no lift. (sorry no pics, lost my phone with everything before the 1st trail build up build up). Had no starter, no doors, no bumpers, trashed interior and 180k on the clock.
My first step was a small lift running coil spacers in the rear and BJ spacer up front with torsion cranked until i figured out which route i wanted to take SAS or IFS Lift. Oh and i added some 36x12x16 radial Swampers i picked up cheap.
SAS was the way to go and while i was under there i figured i swap the rusted coils and coil buckets out for some 63" chevy leafs along with full width GM Corp 10 Bolts
Installing BJ lift in front.
There is rust EVERYWHERE!!! Quarter rust both sides, rockers are gone on both sides, there are no door jambs in the rear on both sides, along with severe frame rust, and much much more haha.
Heres some pics i managed to save:
Used sea foam to fill in the rusted quarter and door jambs and sanded it down for the time being until i got her to the shop to sheet metal it up and do it the right way but thought it was funny to mention
Ended up buying some doors... Sadly the first week of owning the truck the coil buckets rusted completely through and i knew it was time to start my build.
 09-06-2012, 06:29 PM
#2
Registered User
Thread Starter
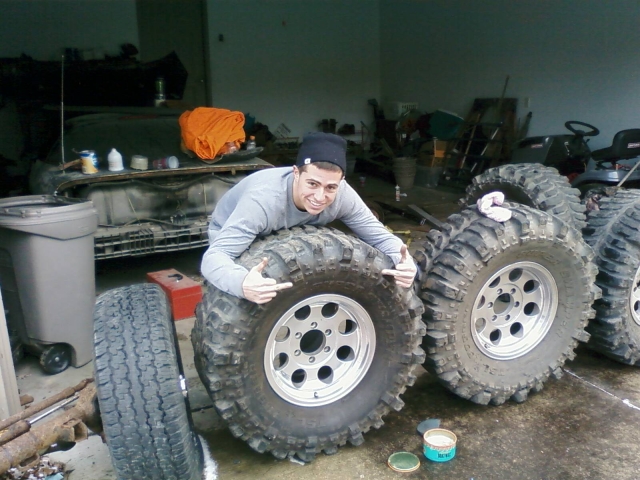
My first step in the build was to located a solid axle from an older runner but had no luck so i ended up going with the 10 Bolt corp front and back, 3.43 gears with posi locker in the rear paid $200 for the set and a set of 35x16x16.5 Boggers on M/T Classic's
I then need to get some leaf springs for the rear and found a set of lightly used 63" chevy leafs off an older full size 4x4 had the 4 leaf pack, and a set of 59" s10 leafs that had the 3 pack off a 94 for some extra support those runners rear ends are sooooo heavy.
For the front leaf springs i used a new set of 89 4runner rear leafs with a 6" lift up front. stretched my wheel base a few inches but gave the truck a nice stance.
Once i had all the main parts to start the build i was on my way to torching and burning and welding for the next few months.
09-06-2012, 06:46 PM
#3
Registered User
Thread Starter
I decided to attack the rear first. Removed the old axle and coils quite easy since everything was rust. Used a torch for the coils and linkage and a wheel cutter for the rest. I was out of there in a few hours. the hardest part was cleaning up all the disaster and making it look clean that was the majority of my time before mounting.
Slide the axle under and took some measurements
Welded new leaf perches on the new axles and welded new homemade spring hangers... Didnt make the shackles yet so its still supported by the over head crane.
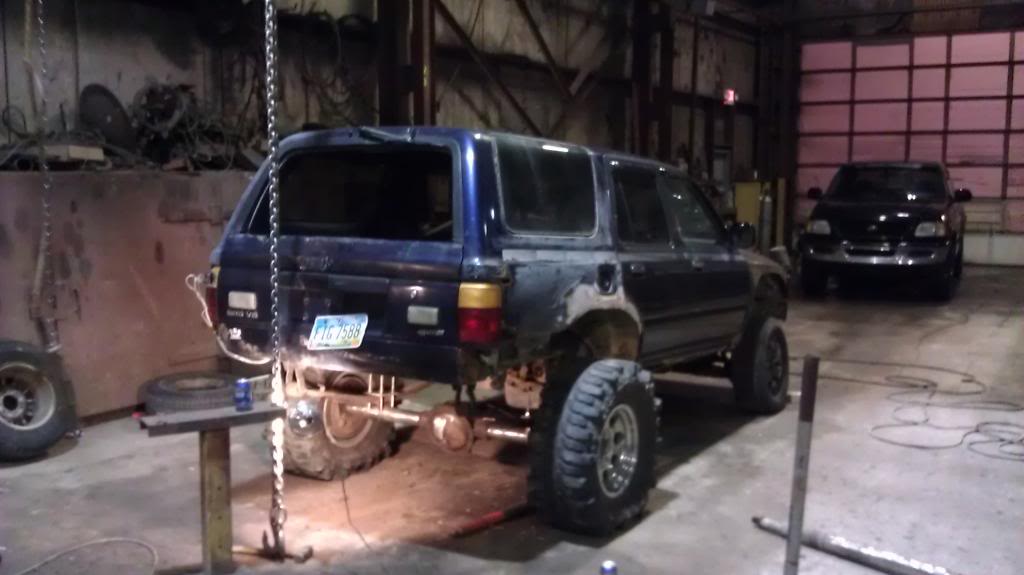
This was my new stance on 59" chevy s10 springs sprung over the axle but needed alot more support for that rear end so i played with another set of combos.
My best set up that flexed but still held the weight was the main leaf from the 59" s10 as the main. Leaf 2 was the main leaf off the 63" chevys with the eyelids cut off. Leaf 3 and 4 where #2 and #3 off the 63" cut down. And the 5th leaf was the overload leaf from the 59" chevy springs
RECAP: Leaf 1 59" Main Leaf
Leaf 2 63" Chevy Main Leaf with eyelids cut off
Leaf 3&4 63" Packing leafs
Leaf 5 59" Overload Leaf
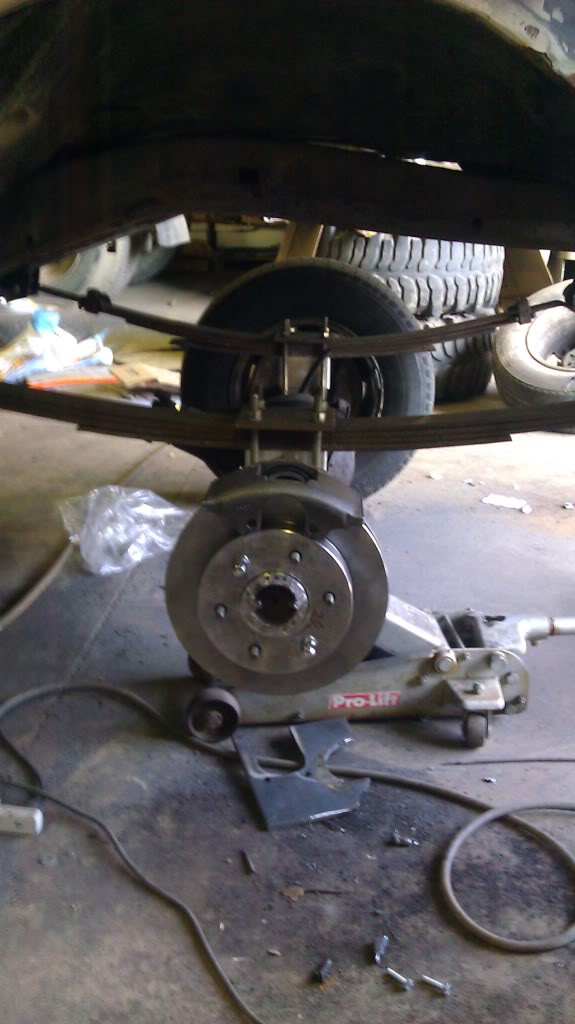
My new stance mounted and welded up with mock up springs. Looks good and stretched wheel base a few inches.
Slide the axle under and took some measurements
Welded new leaf perches on the new axles and welded new homemade spring hangers... Didnt make the shackles yet so its still supported by the over head crane.
This was my new stance on 59" chevy s10 springs sprung over the axle but needed alot more support for that rear end so i played with another set of combos.
My best set up that flexed but still held the weight was the main leaf from the 59" s10 as the main. Leaf 2 was the main leaf off the 63" chevys with the eyelids cut off. Leaf 3 and 4 where #2 and #3 off the 63" cut down. And the 5th leaf was the overload leaf from the 59" chevy springs
RECAP: Leaf 1 59" Main Leaf
Leaf 2 63" Chevy Main Leaf with eyelids cut off
Leaf 3&4 63" Packing leafs
Leaf 5 59" Overload Leaf
My new stance mounted and welded up with mock up springs. Looks good and stretched wheel base a few inches.
09-06-2012, 07:25 PM
#4
Registered User
Thread Starter
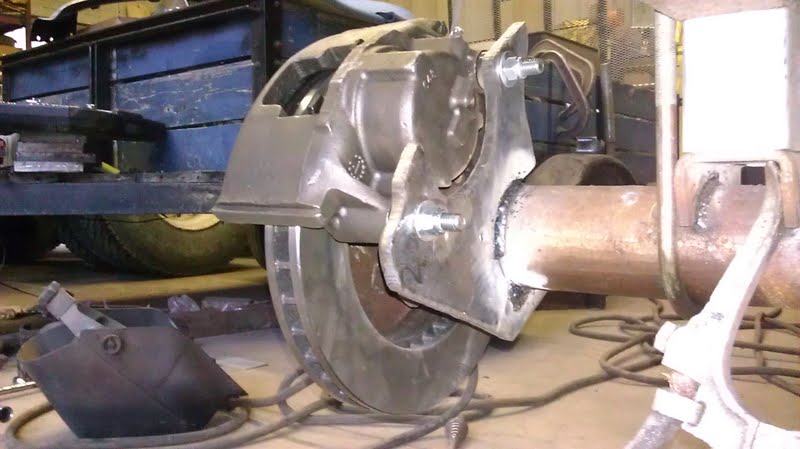
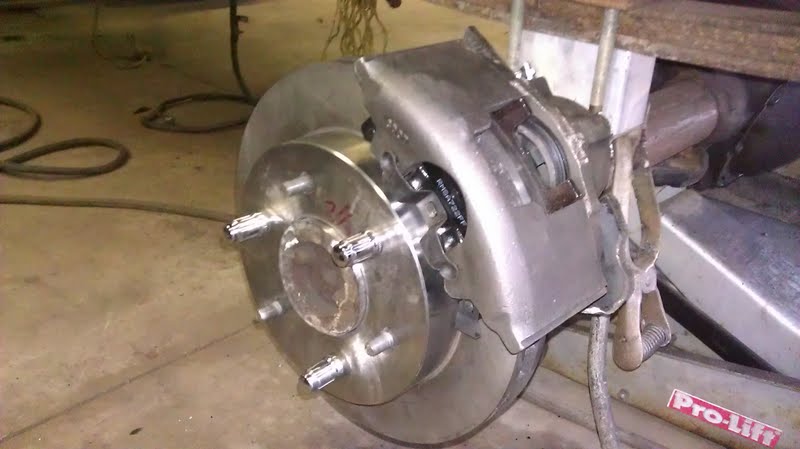
The rear went in no problems at all. Took 3 guys, a case of bud light, and about 5 hours of our time to line everything up, weld everything into place, and bull˟˟˟˟ for a while. Could have been a 2-3 hour job but i wasnt in any hurry. Once the rear was all welded up we rolled her around the back to the garage and started a DISK BRAKE conversion for the rear.
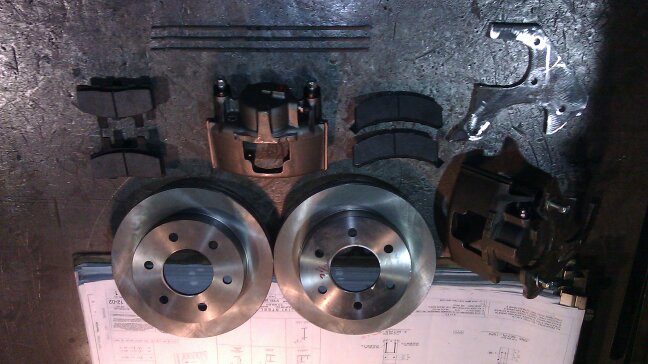
Kit was home build i wasnt buying a kit for upwards of a grand when i could piece it together myself...
Rotors from a 95 Chevy 1500
Calipers from a 95 Chevy Tahoe
Custom fabbed brackets to weld to axle and hold calipers
Some bolts, pads, and some brake cleaner and you got yourself a kit
Only cost me around $150 bucks since the most part of money is in those brackets but we just made them ourself. Oh and another thing we had to get the rotors mic'd out to fit the hub on the rear axle. Turned out perfect and used nickle plated lines front to back.
Since i upgraded my brakes from drum to disk my pedal became very soft and musshy... The master cylinder wasnt big enough for those upgraded big brakes front and back so we replaced our master cylinder with an E-350
1 1/8" bore master cylinder. Found that to be the best feel. 1" Bore was still to soft and anything bigger than 1 1/8" was too stiff. we also played around with the brake booster and tried different combos but i feel the E-350 was the best choice for any of you that might want to convert to disk.
09-06-2012, 07:40 PM
#5
Registered User
Thread Starter
Next step was to fix the rotted frame. It was the worst frame rot i have ever seen short of being in pieces. Im suprised it even held up as long as it did not to mention it was close to impossible to weld those leaf hangers on without reinforcing it. When i was done you couldnt even tell there was any rot. 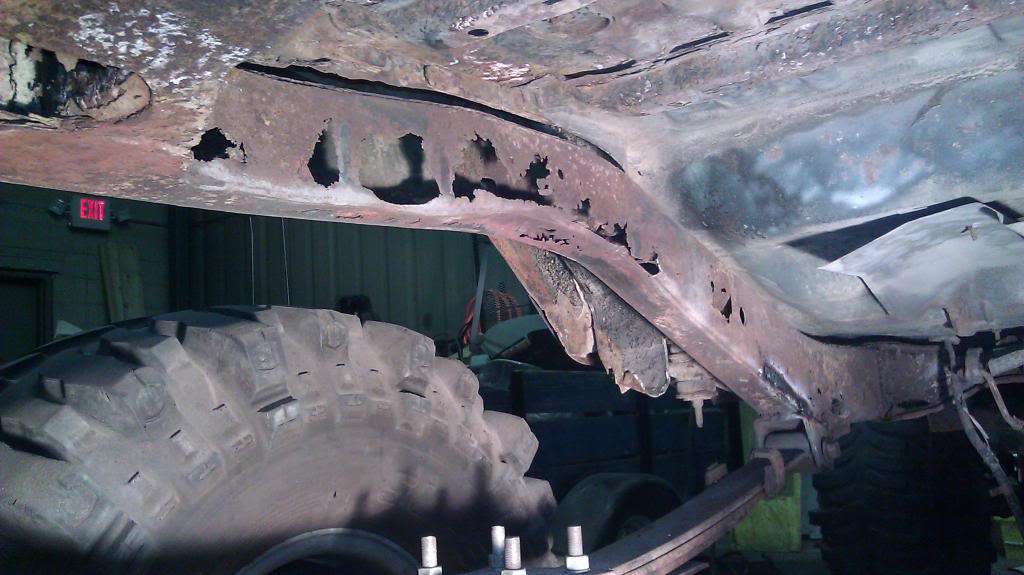
The whole frame looked like this from the driver side door all the way back. Cross braces were rotted, everything was completely gone.
Started reconstructing the whole frame back. Just a rough picture before we started grinding, galvinizing, and undercoating.

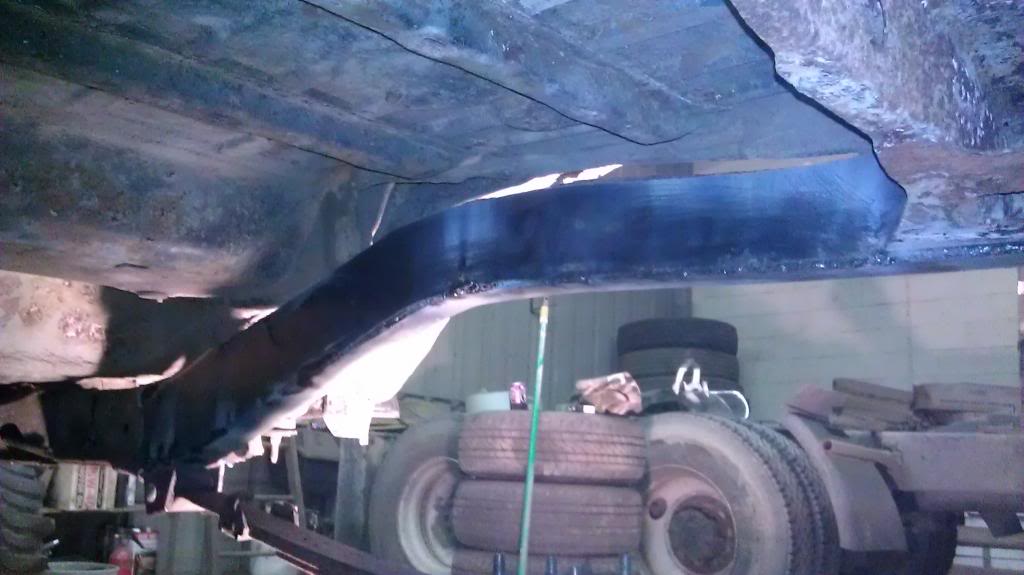
Used m6 channel to support the frame. Kinda overkill but i wanted to make sure the truck can take a beating and look good at the same time.

Finished Frame product. Mounted shocks (es9000) not sure if i like them or not yet, at a 60 degree angle towards the middle so i could get more flex out of the shocks and not top or bottom them out as if they were straight up in stock location. All in all the frame turned out beautiful with the undercoating as well as the shocks and rear axle as a whole.
The whole frame looked like this from the driver side door all the way back. Cross braces were rotted, everything was completely gone.
Started reconstructing the whole frame back. Just a rough picture before we started grinding, galvinizing, and undercoating.
Used m6 channel to support the frame. Kinda overkill but i wanted to make sure the truck can take a beating and look good at the same time.
Finished Frame product. Mounted shocks (es9000) not sure if i like them or not yet, at a 60 degree angle towards the middle so i could get more flex out of the shocks and not top or bottom them out as if they were straight up in stock location. All in all the frame turned out beautiful with the undercoating as well as the shocks and rear axle as a whole.
09-06-2012, 08:06 PM
#6
Registered User
Thread Starter
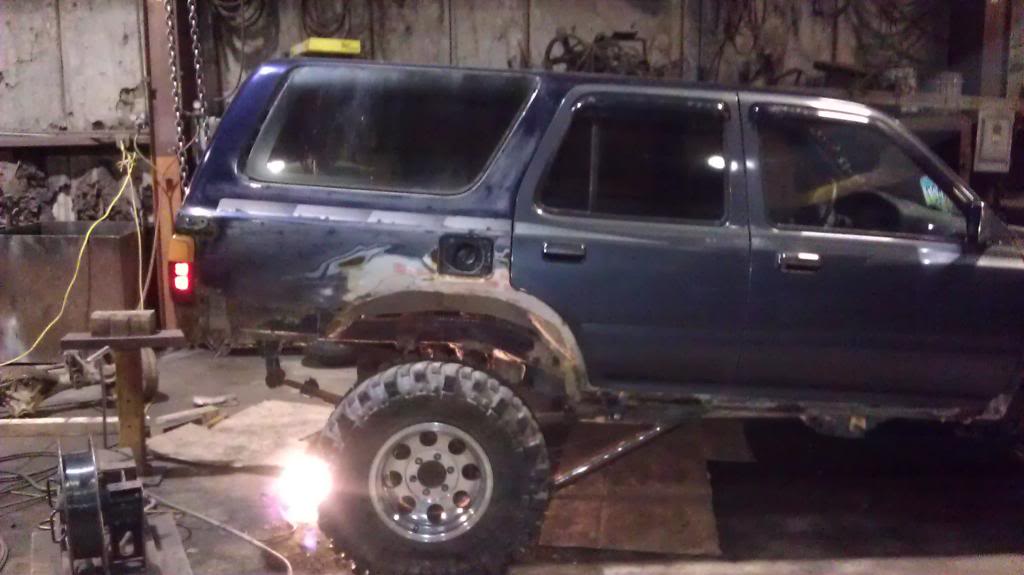
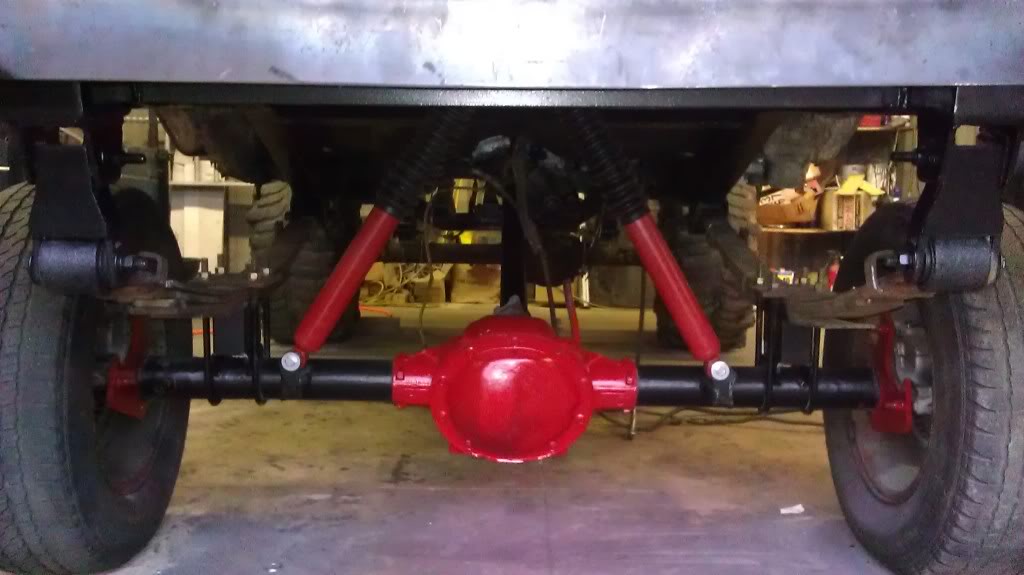
Finally got the back the way i wanted it and finished. Took me a little over a month to complete the install working on and off on weekends but well worth it. I gained so much more clearance my frame now sits upwards of 30" from the ground. My wheel base in the rear was now stretched about 3" which ment i needed to replace those quarter panels and stretch them as well which wont be a problem since the quarter is rusted out anyway. The axle is so much wider too and more stable. Its going to be tight in some trails but well worth it when ill be climbing hills or flexing over obsticles. All in all the rear was a 110% hit and im happy with the outcome and so glad i chose the SAS swap over a 6" ifs lift with limited travel. Finished the rear build off with Pro comp es9000 front F-350 front shocks which measure in over 16" of travel.
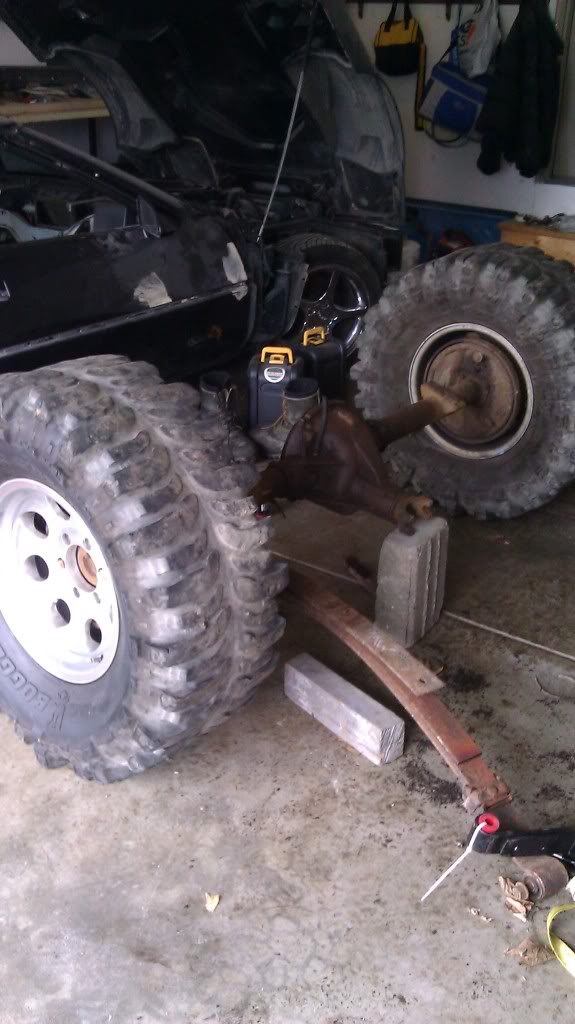
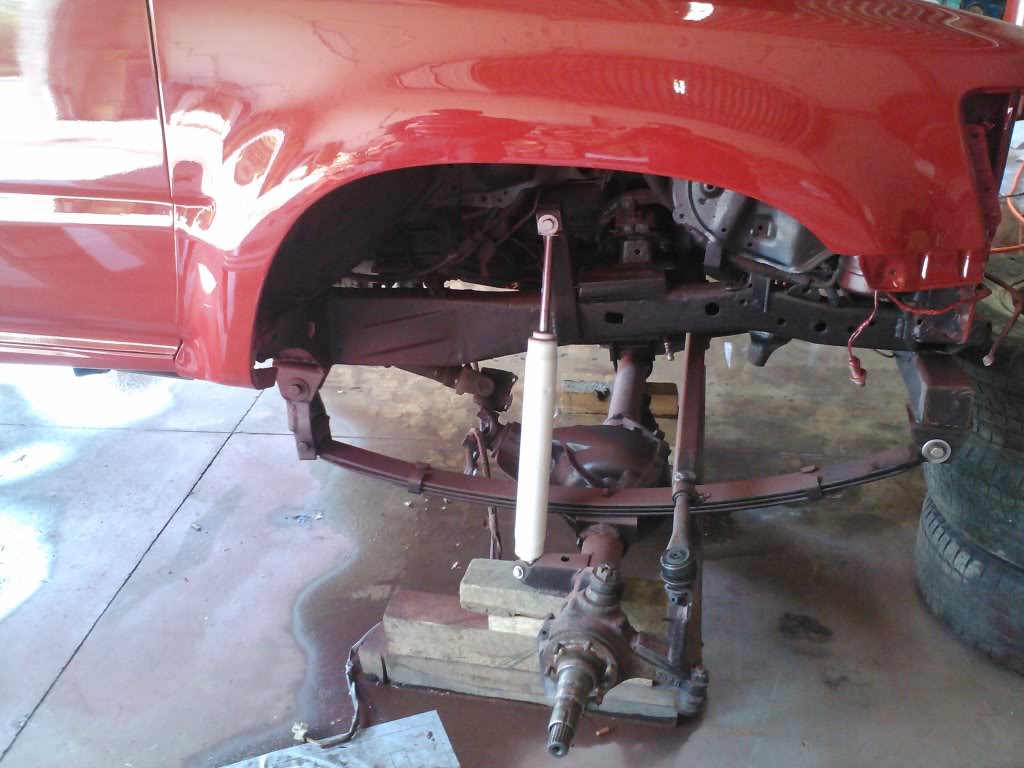
Since the rear is done the only thing left to do under the truck is install the front axle, weld in hangers, make a crossmember for the front leaf hangers, make up some shock mounts, and a few small misc things. (sorry no pics axle completely out of the truck)
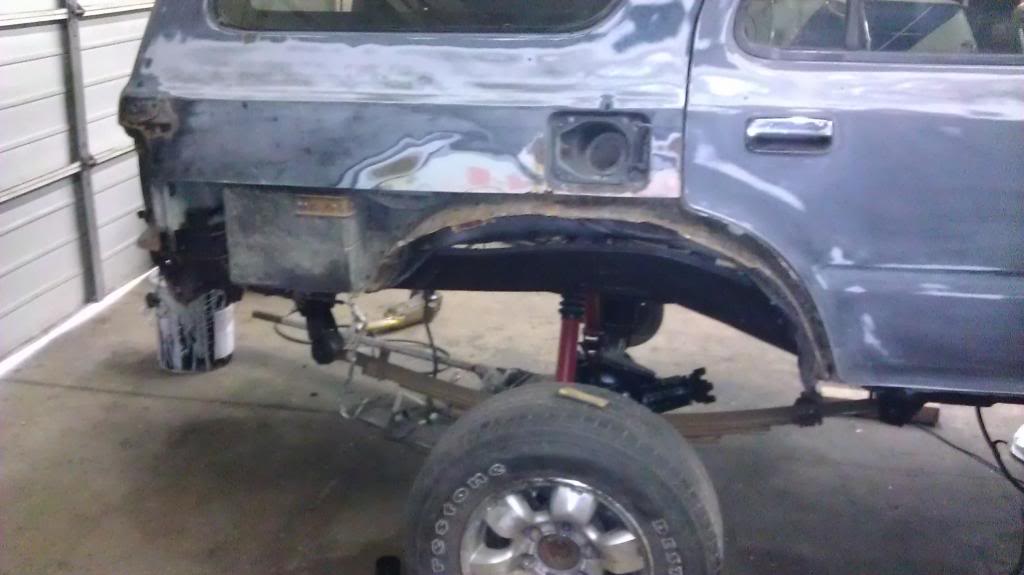
With the axle in place you can see the stance is very wide and aggressive. As for mounting the leafs we took a 3x3x3/8 tube across the front and welded 2 leaf hangers to each side than welded the whole crossmember to the frame of the truck. Used 6" 89 4runner rear leafs in the front... stretched my wheel base out an extra 2" or 3" from stock and gave me a net stretch of around 7" to 8" total front and back. we used our own fabbed 7 1/2" shackles in front and rear to give it the level stance we were looking for. Although the truck is ugly and rusted still it has a long way to go before i get to pull it out of the shop. Body work, paint, and hopefully a winter install of a 7mgte or 2jzgte still toying with both right now havent made up my mind.
with the front hanger in place we bolted up our leafs and lowered them down to the axle, lined everything up and made our marks for the rear hanger. It ended up being exactly under the body mount below the front doors near the edge of the fenders.
Im happy how it turned out so far. I just have to throw a few odds and ins with it underneath.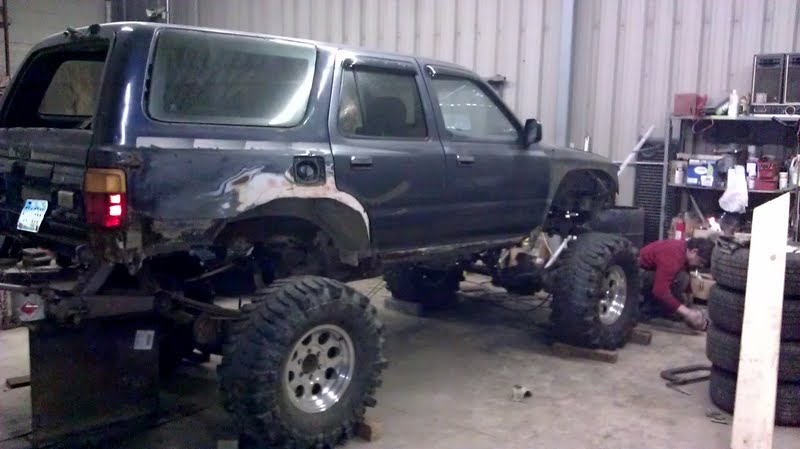
ill continue my post tomorrow. If anyone needs any demensions, sizes, part numbers, or information ill be happy to take more pics, have numbers, and lengths for anything if your wanting to do a build like this.
Since the rear is done the only thing left to do under the truck is install the front axle, weld in hangers, make a crossmember for the front leaf hangers, make up some shock mounts, and a few small misc things. (sorry no pics axle completely out of the truck)
With the axle in place you can see the stance is very wide and aggressive. As for mounting the leafs we took a 3x3x3/8 tube across the front and welded 2 leaf hangers to each side than welded the whole crossmember to the frame of the truck. Used 6" 89 4runner rear leafs in the front... stretched my wheel base out an extra 2" or 3" from stock and gave me a net stretch of around 7" to 8" total front and back. we used our own fabbed 7 1/2" shackles in front and rear to give it the level stance we were looking for. Although the truck is ugly and rusted still it has a long way to go before i get to pull it out of the shop. Body work, paint, and hopefully a winter install of a 7mgte or 2jzgte still toying with both right now havent made up my mind.
with the front hanger in place we bolted up our leafs and lowered them down to the axle, lined everything up and made our marks for the rear hanger. It ended up being exactly under the body mount below the front doors near the edge of the fenders.
Im happy how it turned out so far. I just have to throw a few odds and ins with it underneath.
ill continue my post tomorrow. If anyone needs any demensions, sizes, part numbers, or information ill be happy to take more pics, have numbers, and lengths for anything if your wanting to do a build like this.
09-07-2012, 12:14 PM
#7
Registered User
Thread Starter
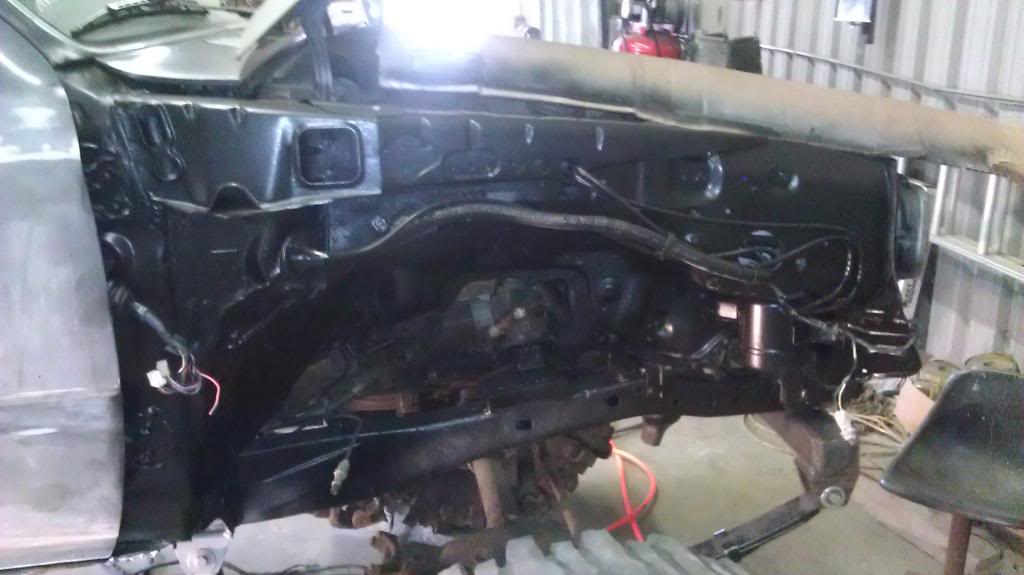
We started by removing all the gas lines and wires from the wheel well area before we torched. After the lines were removed we torched off the the upper and lower arms at there base and removed the whole hub as one unit. We then cut off the torsion bars and removed those. (When removing upper control arm youll notice the motor mount is all one piece with the arm) i just torched parrellel with the frame and patched a piece of 1 1/2" plate in where i burnt off the mount.
Wish i had pics but yet again i lost my phone.
Anyway we cut everything off took around 5 hours slowly yet again its only a few hour job, and cleaned up the frame nice a pretty.
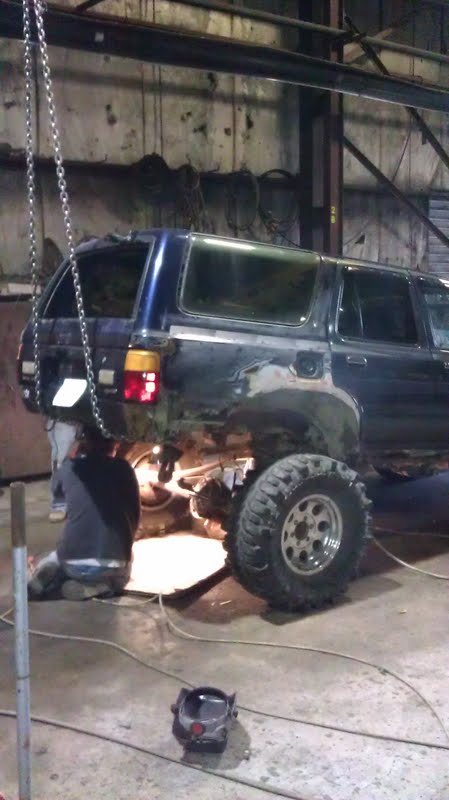
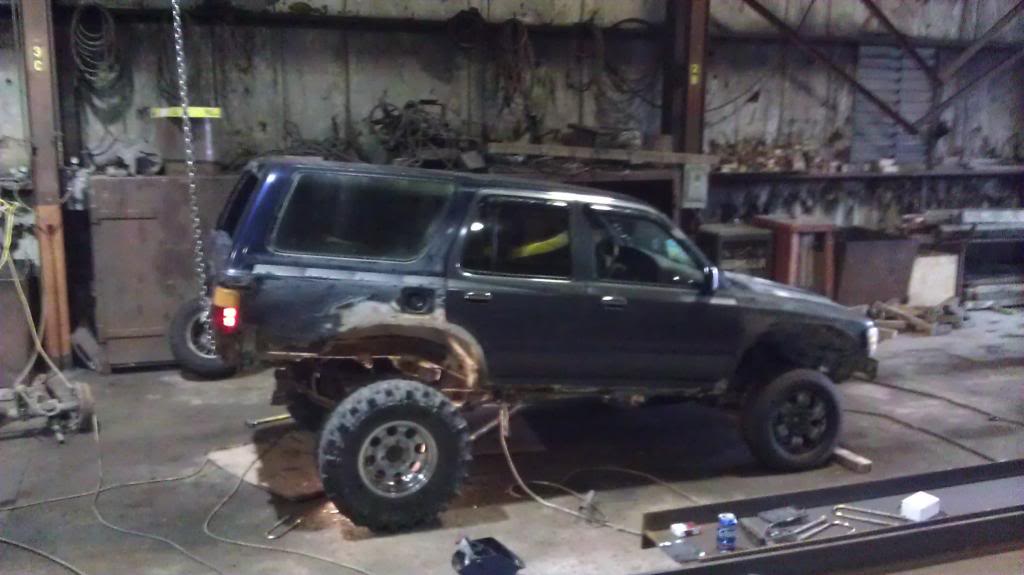
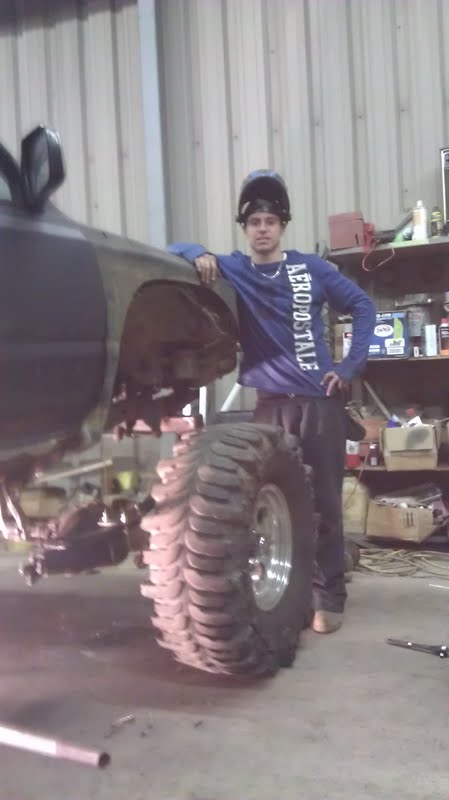
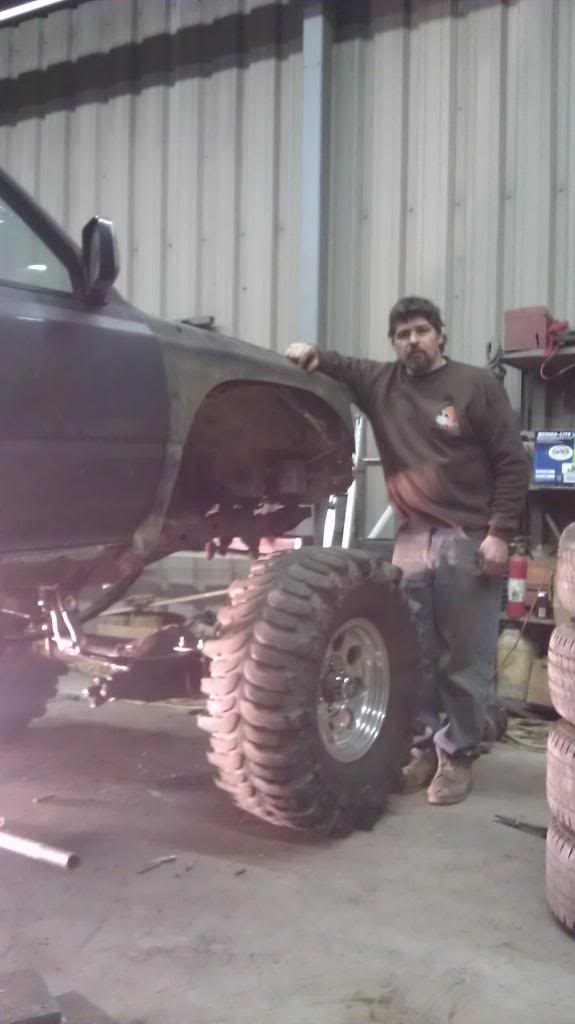
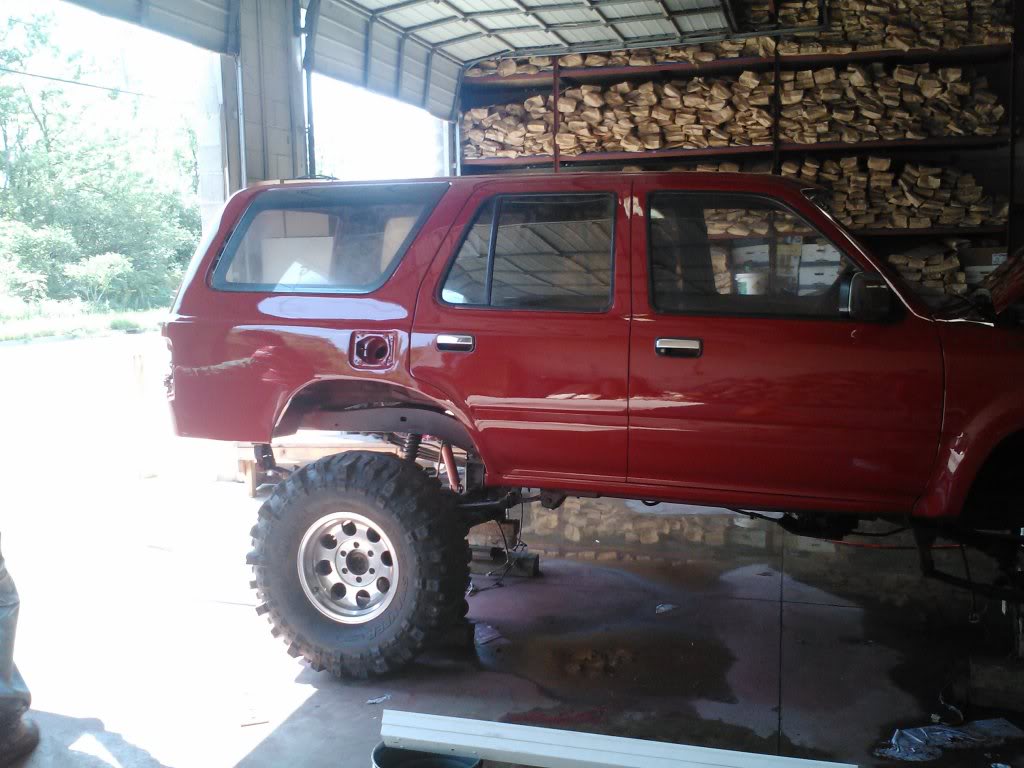
this is our stance after the complete swap front and back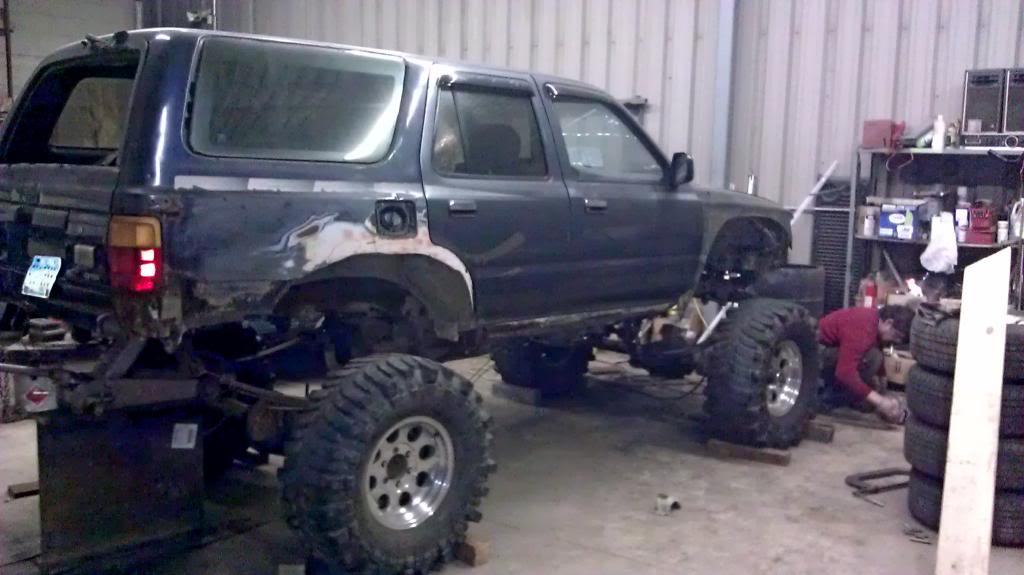
Wish i had pics but yet again i lost my phone.
Anyway we cut everything off took around 5 hours slowly yet again its only a few hour job, and cleaned up the frame nice a pretty.
this is our stance after the complete swap front and back
Trending Topics
09-07-2012, 12:28 PM
#8
Registered User
Thread Starter
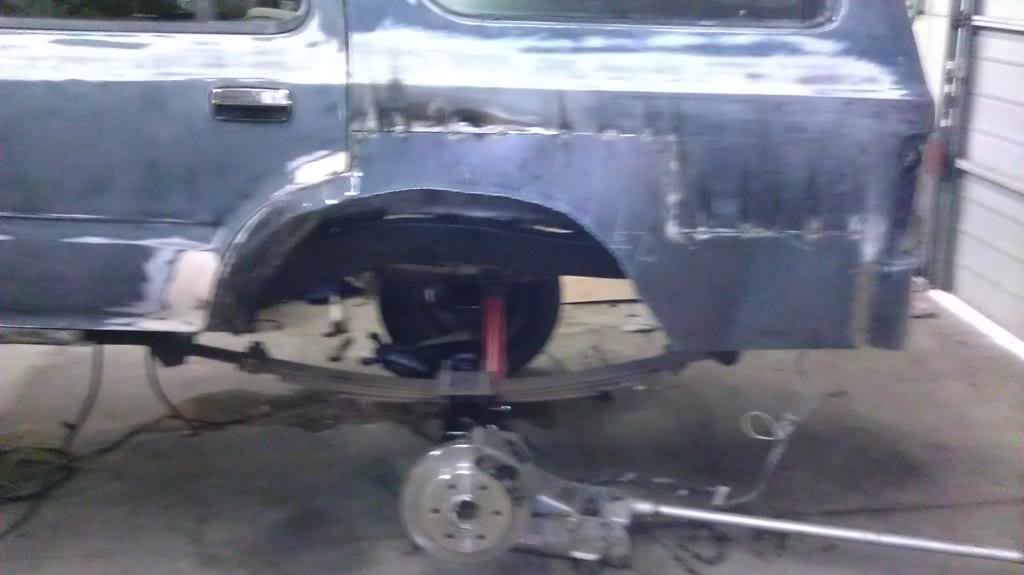
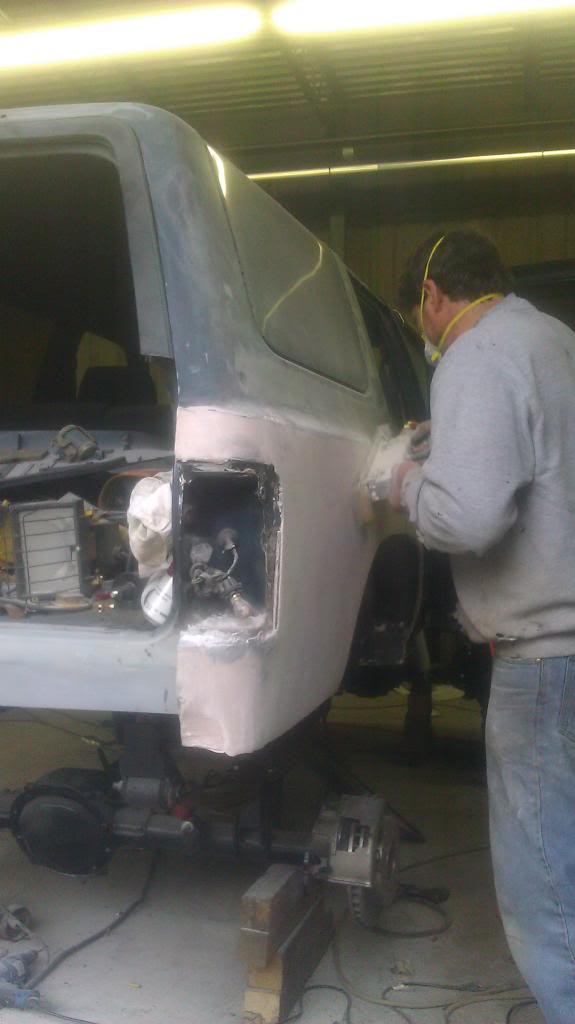
After all the under body work was done we started on the body work which was by far the most time consuming part of the build. took several months of on and off work to finally get it where i wanted. but we started in the rear on the quarter panels that were rotted away. Took a cut off saw and cut out the rear rusted area to make my new stretched quarter panel. used 1/16" sheet metal for the new quarters tacked them in and used ALL METAL... By far my favorite thing in the world to use, a little pricey at close to $40 bucks a quart but it gets the job done and its like puting a weld down its so strong.
It was so rusted we ended up taking everything off up to where u see it plus ground smooth what was left of the door jamb which was nothing there to begin with and started tacking in our sheet metal and molding our wheel wells
Sheet metal tacked in on both sides. I then put a thin coat of that all metal i talked about earlier over my ground smooth welds and started to putty up all the seems on each side.
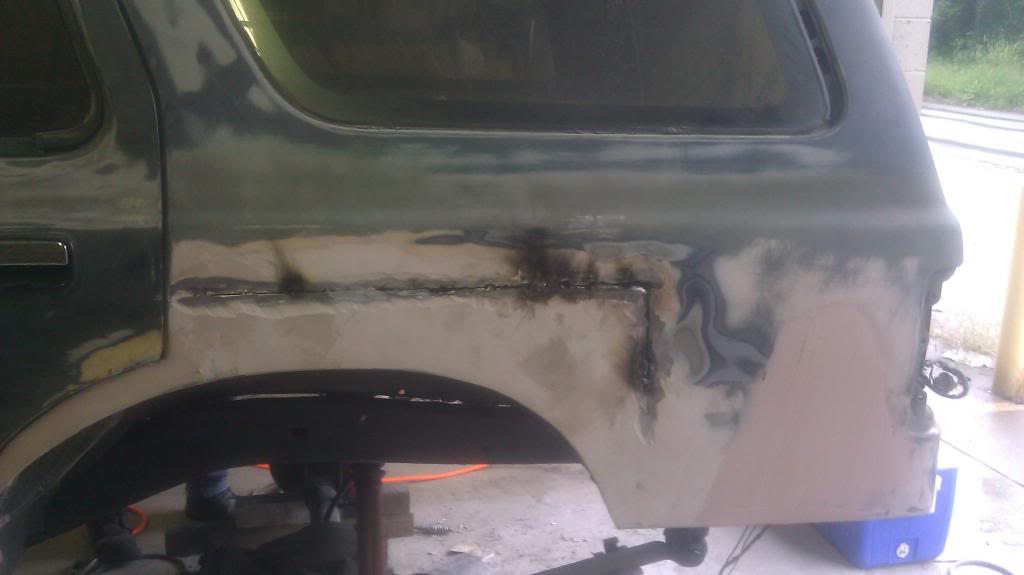
This side caused me some problems... had it all welded, ground, puttied, and sanded but noticed a small seem where the new piece was spliced in. took a tack hammer to the seem to indent it and the seem cracked all the way down. Actually glad it happened before paint and not after but went back and made sure it was supported with more than enough tacks and all metal.
It was so rusted we ended up taking everything off up to where u see it plus ground smooth what was left of the door jamb which was nothing there to begin with and started tacking in our sheet metal and molding our wheel wells
Sheet metal tacked in on both sides. I then put a thin coat of that all metal i talked about earlier over my ground smooth welds and started to putty up all the seems on each side.
This side caused me some problems... had it all welded, ground, puttied, and sanded but noticed a small seem where the new piece was spliced in. took a tack hammer to the seem to indent it and the seem cracked all the way down. Actually glad it happened before paint and not after but went back and made sure it was supported with more than enough tacks and all metal.
09-07-2012, 12:49 PM
#9
Registered User
Thread Starter
With finished quarters and door jambs i went ahead and started on the rockers. The rockers were gone and i decided to go a different route with it so they wouldnt ever rust out again. took a set of 2002 Toyota celica stock side skirts and fit them up to my rockers, they fit like a glove and look even better.
after the rocker where done i replaced my front ground fenders with a set of stock oem fenders to fill in the monster gap from before and i was off to paint.
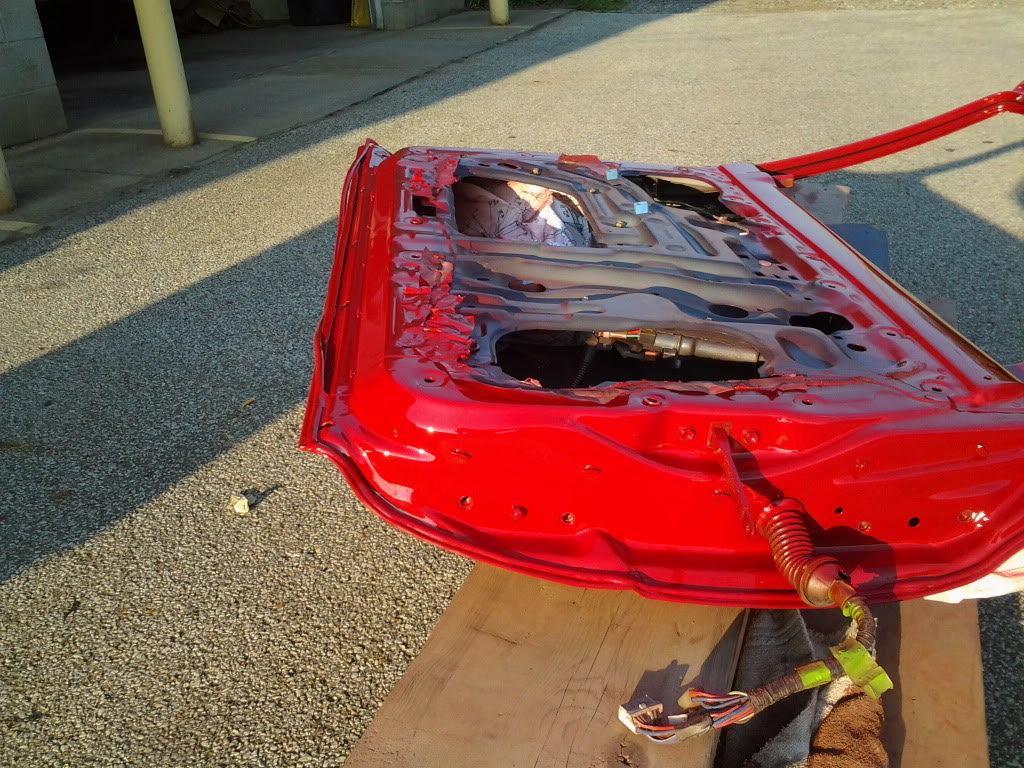
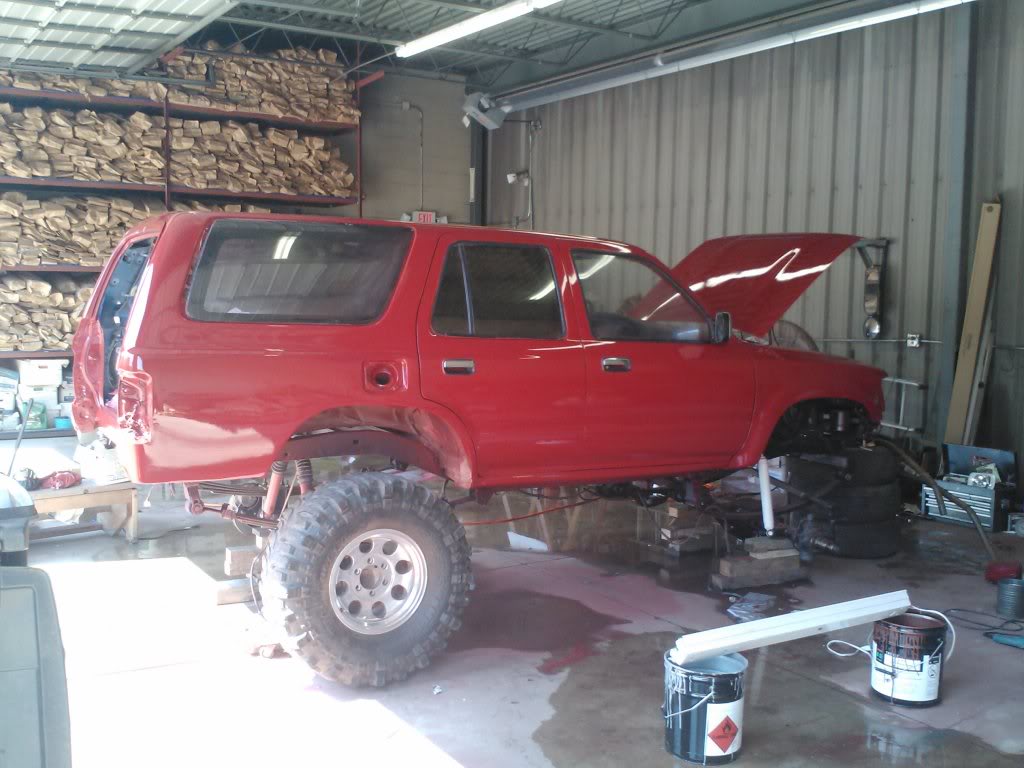
Candy Apple Red Acrylic Enamel Paint job. Sprayed in ourself in the garage of our fab shop and it turned out beautiful. Cost us under $600 for everything, paint, hardener, clear, fish eye remover, tack cloths, sand paper, tape, and a few other small things but it turned out like a mirror.

Door jamb that was gone now fresh and painted.
Im not going to bore everyone with the primer stage pictures but we put about 5 coats of primer, primer filler, and primer sealer to make sure any nicks or scratches were taken care of.
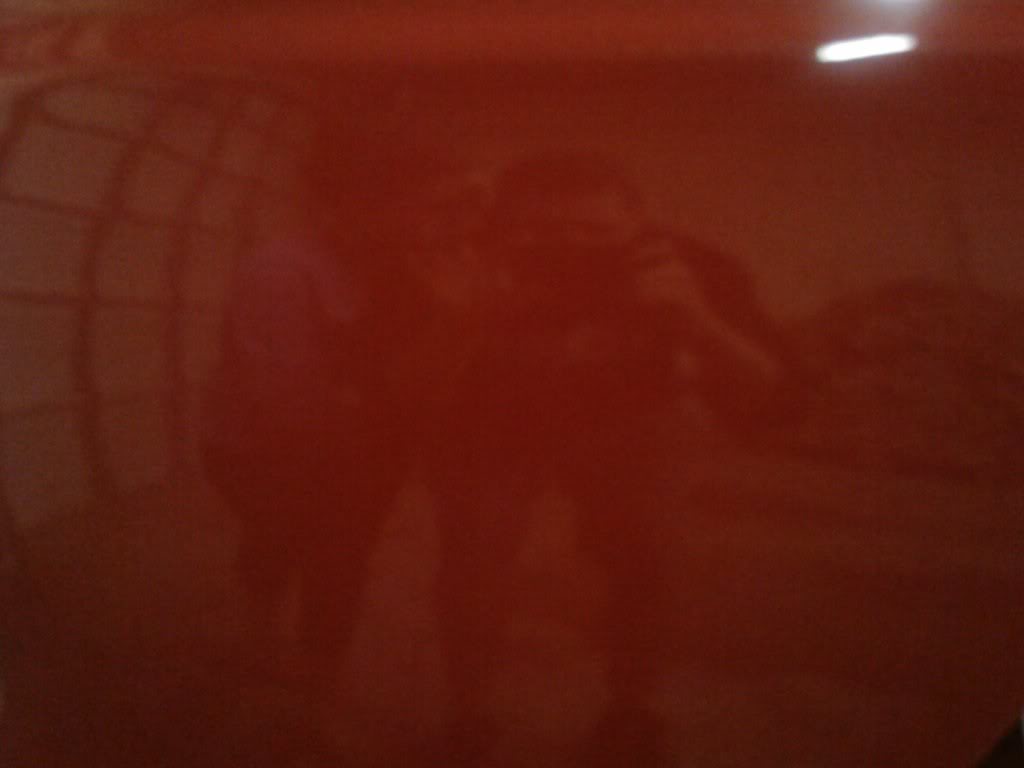
Wish i had a better camera it really shows no justice to the actual paint job itself.
after the rocker where done i replaced my front ground fenders with a set of stock oem fenders to fill in the monster gap from before and i was off to paint.
Candy Apple Red Acrylic Enamel Paint job. Sprayed in ourself in the garage of our fab shop and it turned out beautiful. Cost us under $600 for everything, paint, hardener, clear, fish eye remover, tack cloths, sand paper, tape, and a few other small things but it turned out like a mirror.
Door jamb that was gone now fresh and painted.
Im not going to bore everyone with the primer stage pictures but we put about 5 coats of primer, primer filler, and primer sealer to make sure any nicks or scratches were taken care of.
Wish i had a better camera it really shows no justice to the actual paint job itself.
 09-07-2012, 01:00 PM
#11
Registered User
Thread Starter
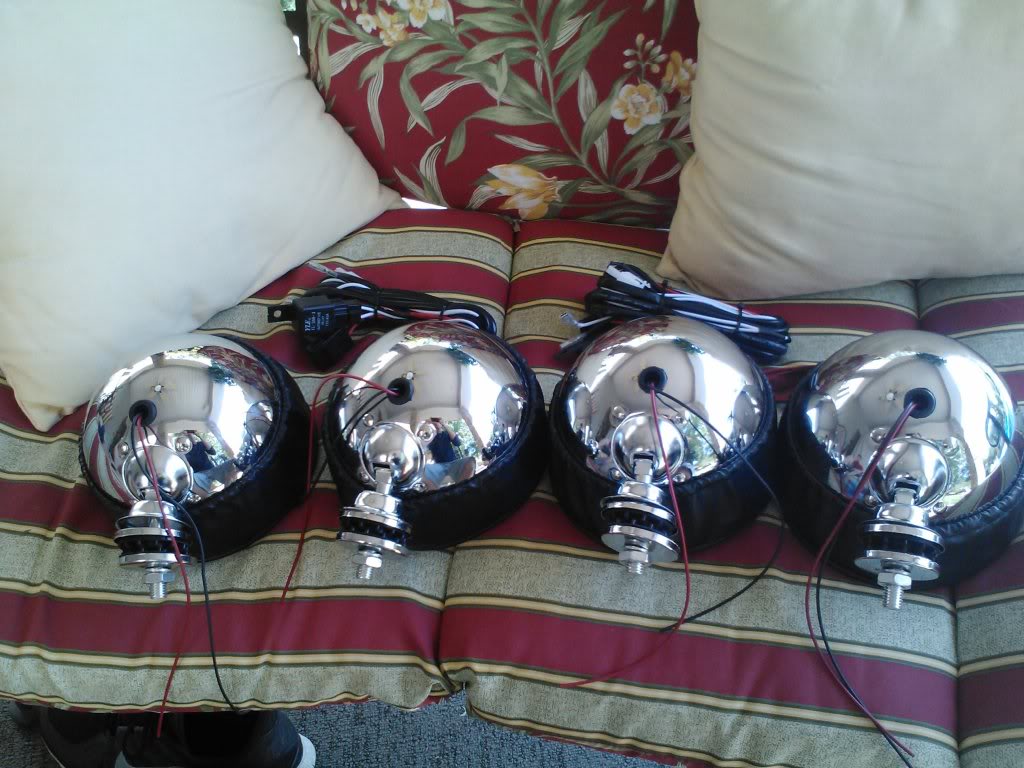
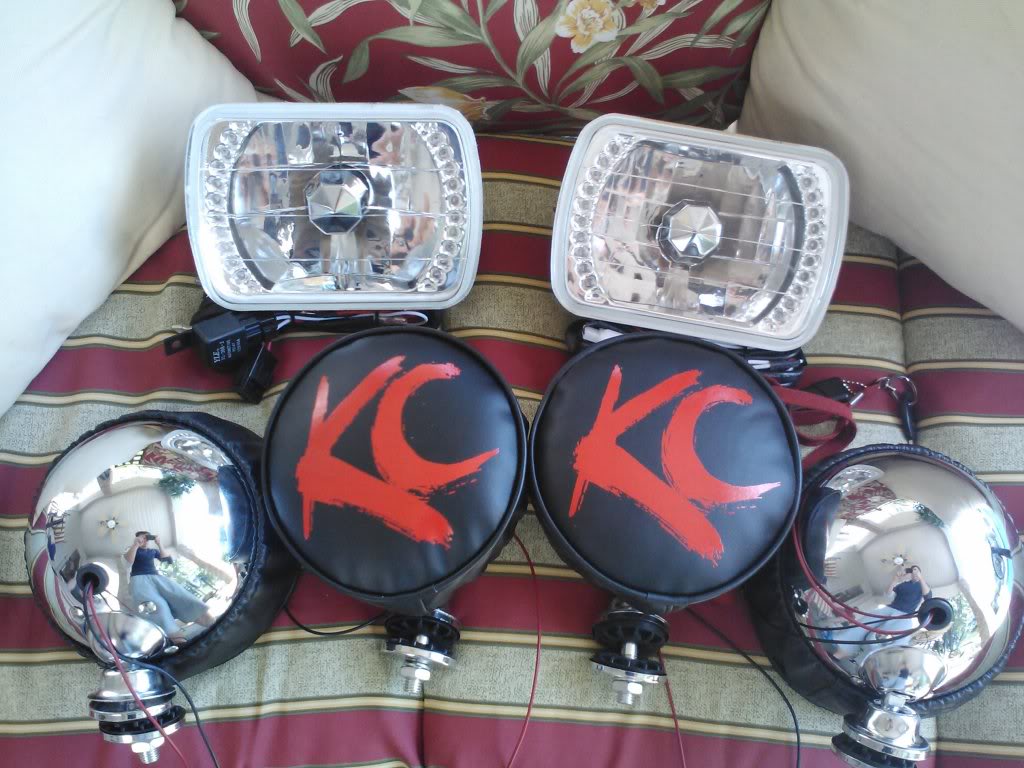
Now that my lights are in its time to go make me a bumper...
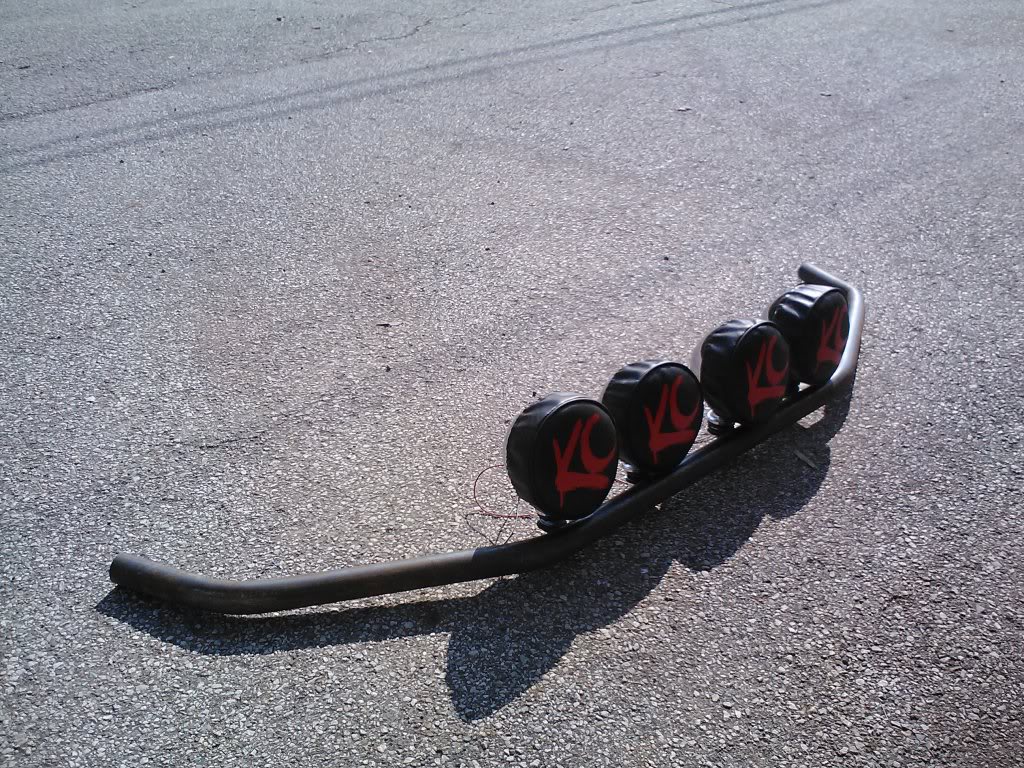
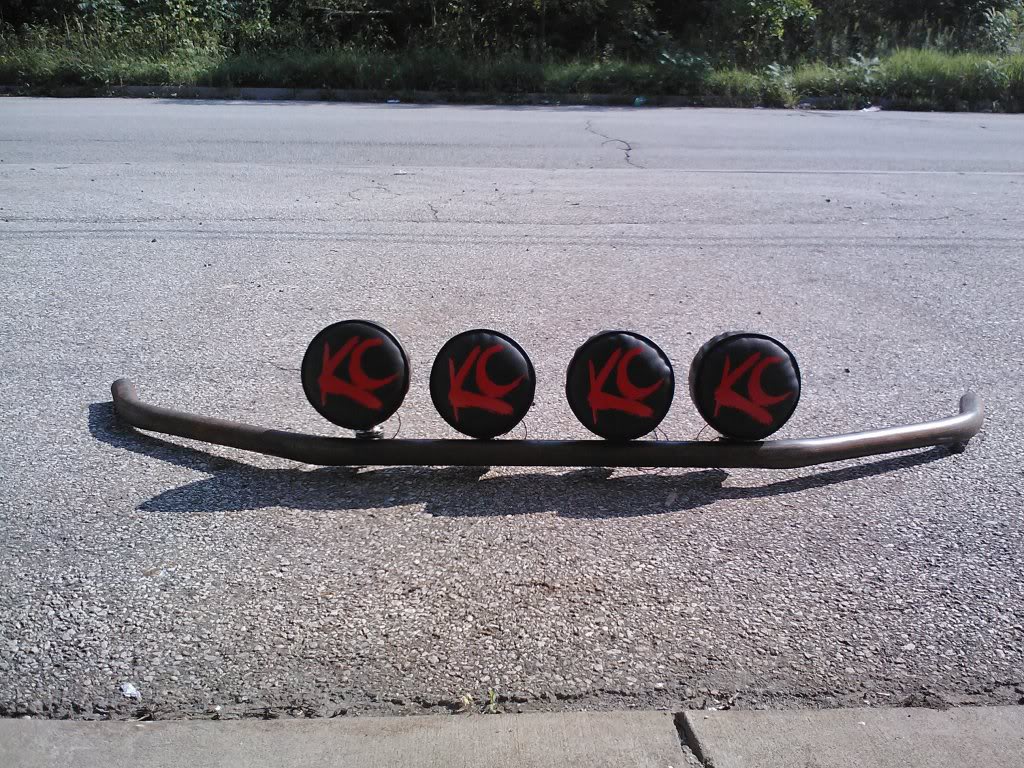
My first attempt to make the bumper was a sad attempt it was way too wide and looked like crap.
*** Tip of advice when making a pipe or tube bumper Start from one side and continue around and finish at the other side dont start in the middle like i did and have no way of fixing it if its too wide besides cutting it in half haha.***
Anyway i made the main light beam and main support bar first just started it yesterday but ran out of pipe to make my stinger and winch mount area below light bar but the initial idea is there ill have more pics posted up when its all said and done. I used a harbor freight 12 ton pipe bender with 1 1/2" 1/8" thick DOM pipe.
 09-07-2012, 01:08 PM
#12
Registered User
Thread Starter
And this is where i sit now. Work still needing to be done on it. Still need to fab up the rest of the bumper for the front, havent decided on the rear bumper design yet, need to make the rock sliders, and thinking about putting an exo cage on her but im not sure if i want to go through with it yet or not. Still need to figure out the front driveshaft, locate a cheap flat top knuckle for high steer, mount my gastank and skid plates, and mount my new radiator and tranny cooler. Alot more to deal with but these are my main concerns.
 09-09-2012, 09:42 PM
#14
NICE, glad you started a thread... now STOP IT with this sick thing... It's giving mine "red yota envy"! lol. JK... but I love it, man... Not usually a fan of the HUGE ones... but this seems like it'll be a beast out there... Waiting for videos, when you do get out there.. CAN'T wait, actually.. but don't have much choice, right? lol
09-10-2012, 09:46 AM
#18
Registered User
Thread Starter
Paint turned out beautiful. Little dust on the hood since i painted it in a garage not a booth but im going to buff it out when the paint cures. Ill be sure to post videos once i get out in the trails and thanks for the support and comments...
09-10-2012, 09:51 AM
#19
Registered User
Thread Starter
Yeah noticed that when i first put them on and sat the full weight down. Figured the rear leafs would lay down and compress more but i calculated wrong. Once i get everything on the truck where i can at least roll it ill going back to fix all the bugs. Front was the same way until the new springs relaxed into place but the rear needs some help haha.


