MaltDisney's '86 4Runner brought back to life
 10-28-2013, 04:33 PM
#1
Registered User
Thread Starter
MaltDisney's '86 4Runner brought back to life
Edit: I am continuing to update old posts with pics and trying to make them be in a more logical order.
I will begin this thread by acknowledging that I have very few photos of this truck from the day I brought it home. Please forgive, I had my cell phones memory card commit suicide on me.
So I have a problem with looking on craigslist and that's how I ended up with my '86 4Runner. The guy had it listed as an '82 for $2K and it mentioned a clean frame, which had me scratchin my head (the year that is), but I decided to go take a look anyway. Obviously it didn't turn out to be an '82, but that didn't stop me from purchasing it for 1500 bucks. I just think 1st gens are so cool with the removable top.
It was running real poorly, but with my limited knowledge (and the power of Yotatech) I figured I'd be able to solve any running issues..
Turns out that the truck was only running on 2 cylinders-2&3 not participating- but when I checked the compression on all cylinders I got roughly 175, 180, 180, 140 psi (1234) which told me the motor didn't need a full rebuild.
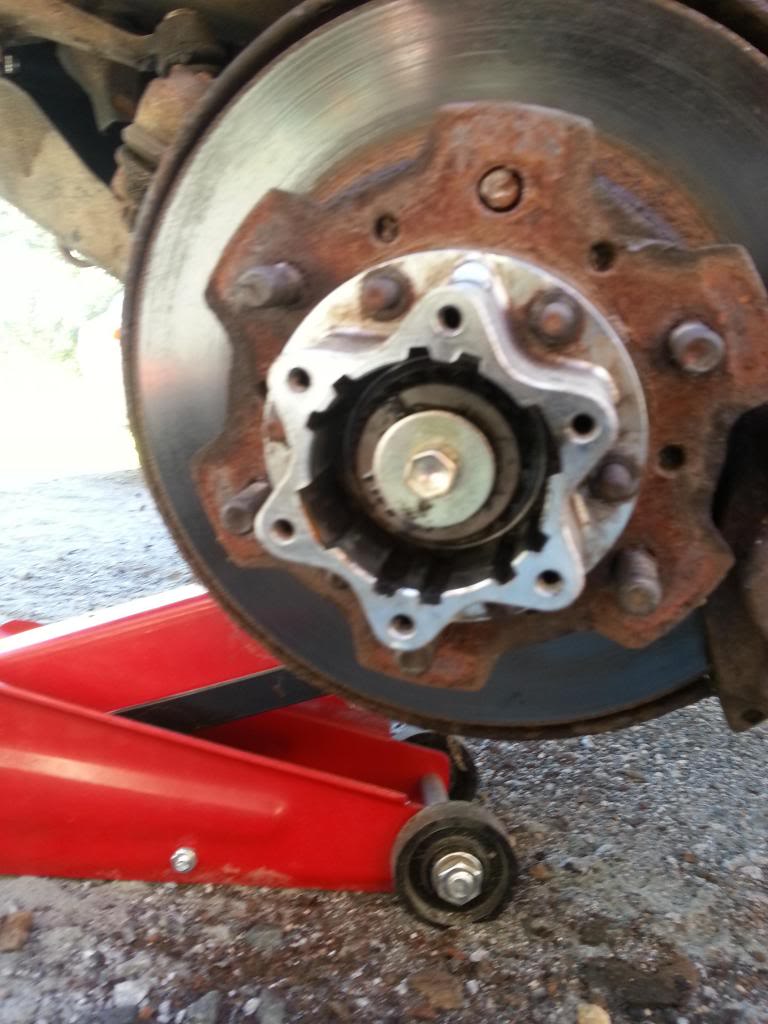
So first things first I took on the s##**y suspension. It needed all new upper ball joints (lowers looked OK), pads rotors and calipers, shocks and the leaf sprigs were totally flat. Here's a pic of me making the upper control arm take its medicine hehe - 4crawler 1.5" ball joint spacers.
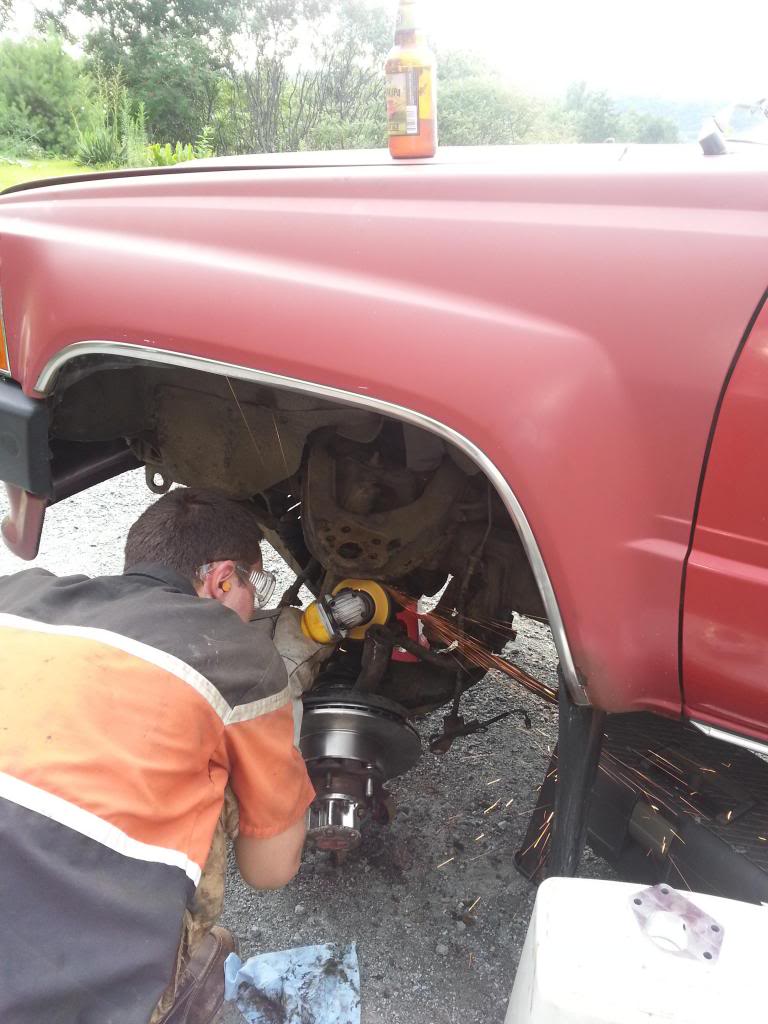
you can also see my new rotors installed.
One of the wheel studs on the drivers side was broken, so I figured that replacing the discs would give me a good chance to replace aforementioned stud. Here is where I learned a VERY valuable lesson: ALWAYS use a press to insert studs into hub. If you don't you could end up having to drill out a stud because the lugnut is still attached but the stud just spins and you cant get your wheel off...
I am uploading more pics. will post more soon.
I will begin this thread by acknowledging that I have very few photos of this truck from the day I brought it home. Please forgive, I had my cell phones memory card commit suicide on me.
So I have a problem with looking on craigslist and that's how I ended up with my '86 4Runner. The guy had it listed as an '82 for $2K and it mentioned a clean frame, which had me scratchin my head (the year that is), but I decided to go take a look anyway. Obviously it didn't turn out to be an '82, but that didn't stop me from purchasing it for 1500 bucks. I just think 1st gens are so cool with the removable top.
It was running real poorly, but with my limited knowledge (and the power of Yotatech) I figured I'd be able to solve any running issues..
Turns out that the truck was only running on 2 cylinders-2&3 not participating- but when I checked the compression on all cylinders I got roughly 175, 180, 180, 140 psi (1234) which told me the motor didn't need a full rebuild.
So first things first I took on the s##**y suspension. It needed all new upper ball joints (lowers looked OK), pads rotors and calipers, shocks and the leaf sprigs were totally flat. Here's a pic of me making the upper control arm take its medicine hehe - 4crawler 1.5" ball joint spacers.
you can also see my new rotors installed.
One of the wheel studs on the drivers side was broken, so I figured that replacing the discs would give me a good chance to replace aforementioned stud. Here is where I learned a VERY valuable lesson: ALWAYS use a press to insert studs into hub. If you don't you could end up having to drill out a stud because the lugnut is still attached but the stud just spins and you cant get your wheel off...
I am uploading more pics. will post more soon.
Last edited by MaltDisney; 11-05-2013 at 02:04 PM.
 10-28-2013, 04:48 PM
#2
Registered User
Thread Starter
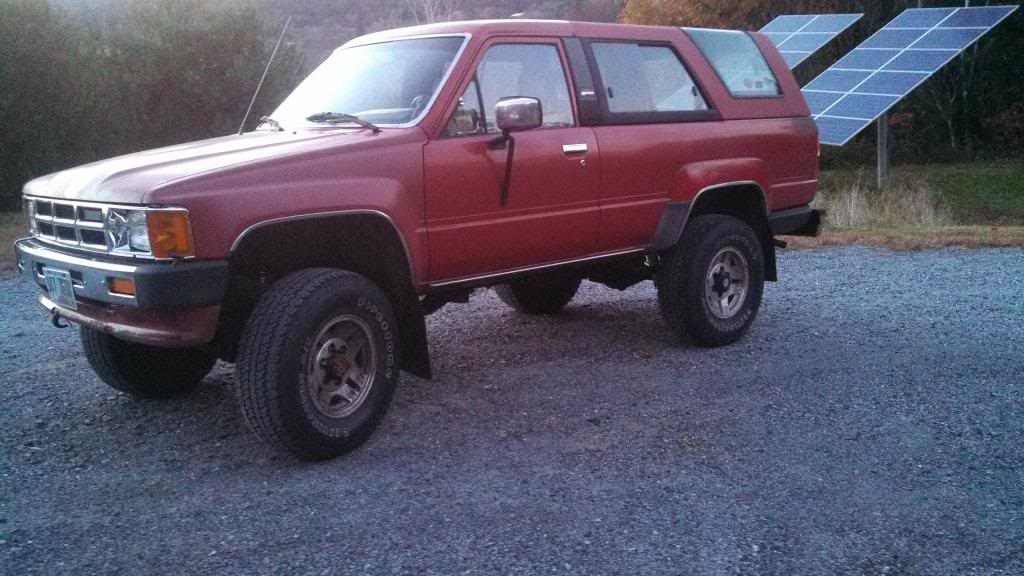
well while I am waiting for more images to upload here is a pic of my '86
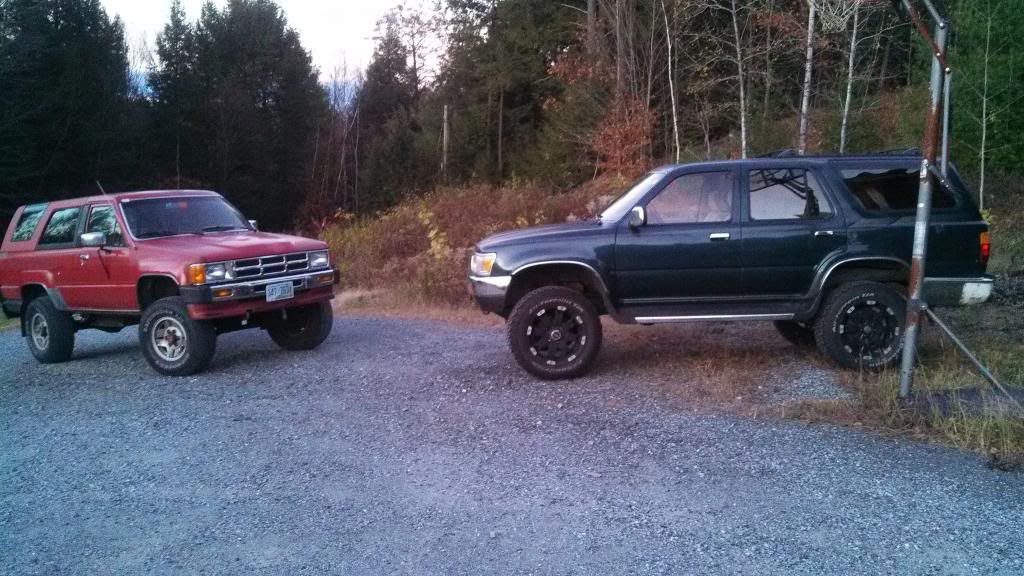
and here's one with its older (only because I've had her for longer) sister.
Here is a link to the thread for my '94
MaltDisney's dual 4runner build up-'86 & '94 and I realize it says dual, cause I was gonna do both in one thread, but it was suggested I split them up
and here's one with its older (only because I've had her for longer) sister.
Here is a link to the thread for my '94
MaltDisney's dual 4runner build up-'86 & '94 and I realize it says dual, cause I was gonna do both in one thread, but it was suggested I split them up
10-28-2013, 05:32 PM
#3
Registered User
Thread Starter
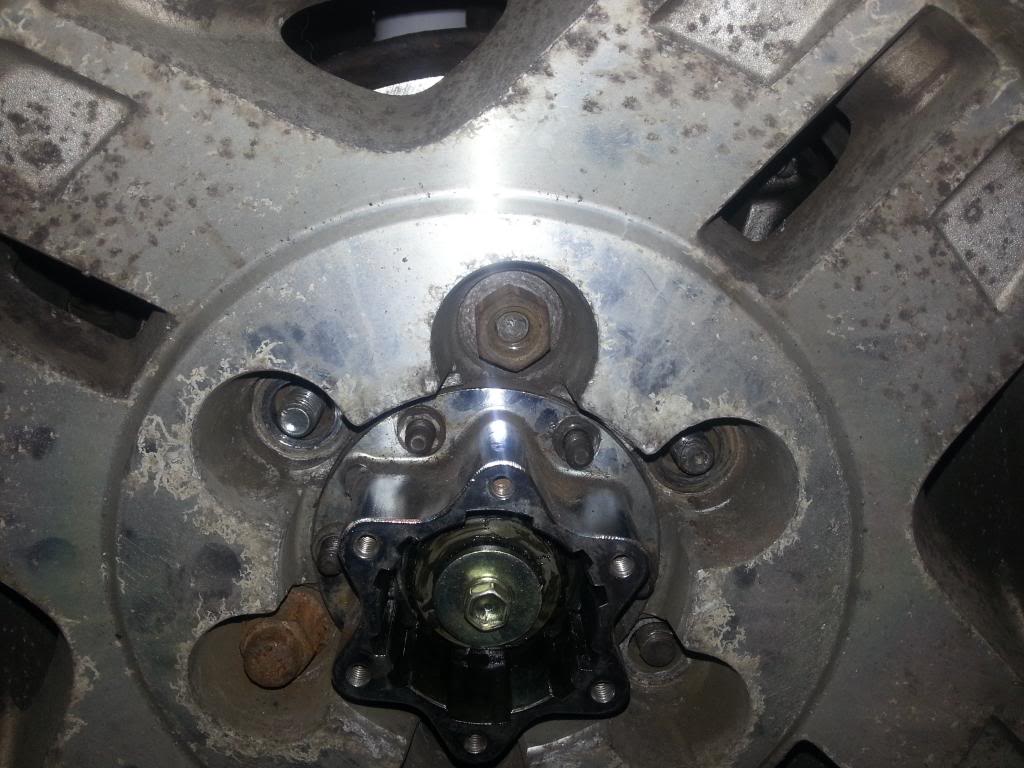
more pics of dirty drivers front before
old ball joint, caliper and warped disc
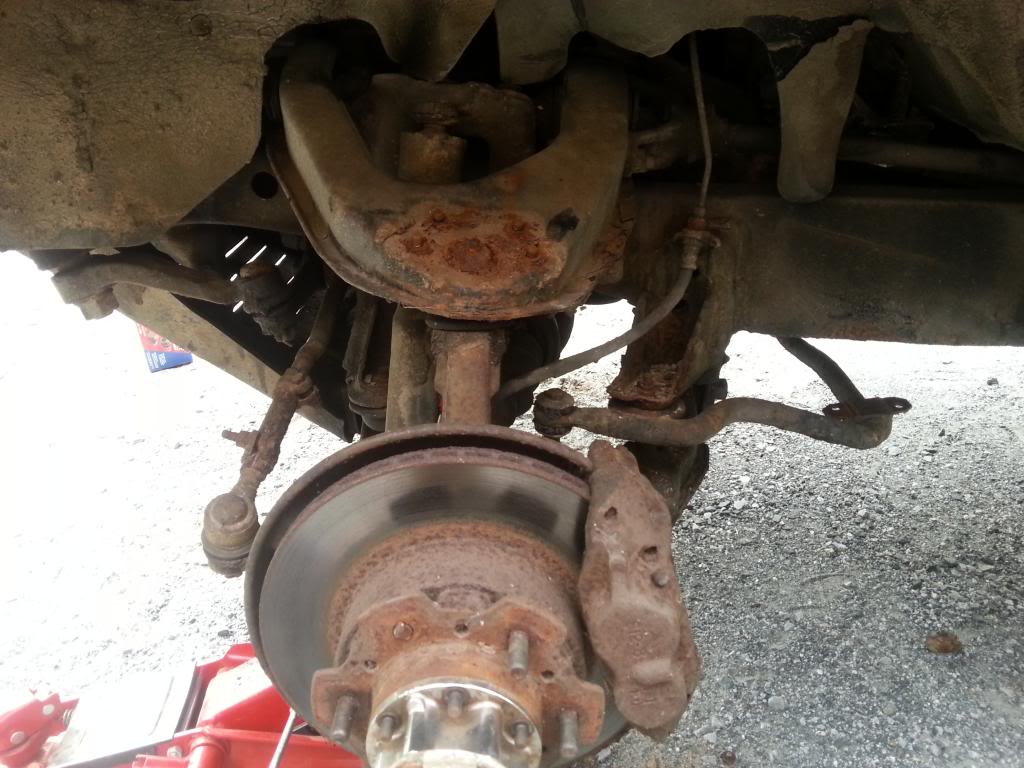
original broken stud
2 striped studs with lugnuts stuck on took me HOURS with many drill bits to get them removed... I'll repeat, make sure you press your studs into the hub or you are asking for trouble. btw I ended up going oem with the studs (2x as expensive as autozone) b/c I read somewhere that the autozone variety are of lower quality and I Never want to drill out a stud again!
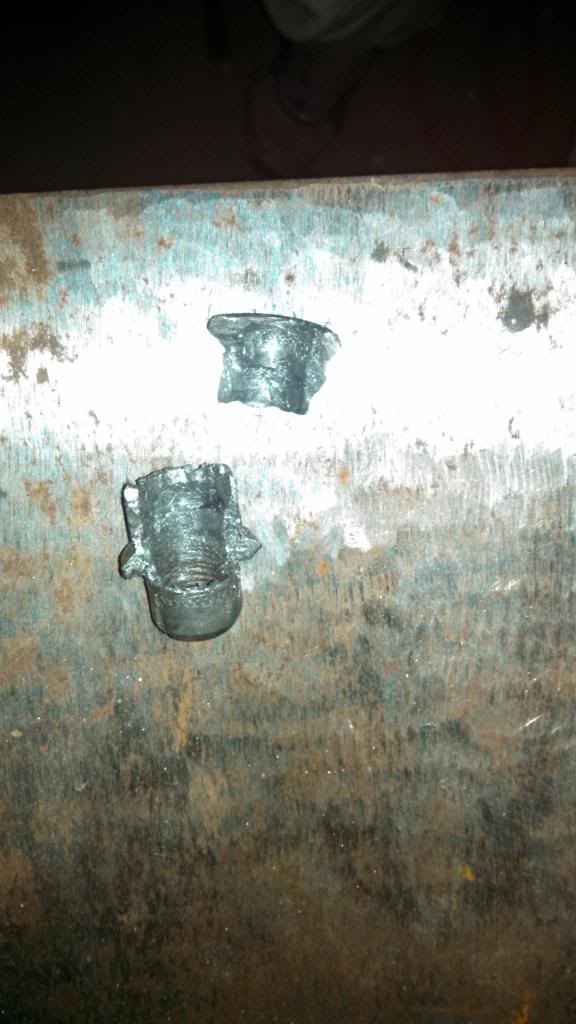
Here's a shot of what the lug nuts looked like once I finally got them off
original broken stud
2 striped studs with lugnuts stuck on
took me HOURS with many drill bits to get them removed... I'll repeat, make sure you press your studs into the hub or you are asking for trouble. btw I ended up going oem with the studs (2x as expensive as autozone) b/c I read somewhere that the autozone variety are of lower quality and I Never want to drill out a stud again!Here's a shot of what the lug nuts looked like once I finally got them off
Last edited by MaltDisney; 11-05-2013 at 03:13 PM.
10-28-2013, 07:04 PM
#4
Registered User
Thread Starter
the quest for 4 cylinders
So as I think I mentioned earlier, when I bought this car- and I realize this may make me sound dumb- it was running on 2/4 cylinders, only I didn't know that.. In my defense I think I was blinded by wanting a 1st gen runner with the 22re.
Anyways, I did the 'ole "pull spark plug wires and see if the engine note changes" test to determine why it was running so poorly with no power. The answer was 2 and 3 not firing. compression results listed in post #1.
This began my quest to solve the running issues.
I started by replacing:
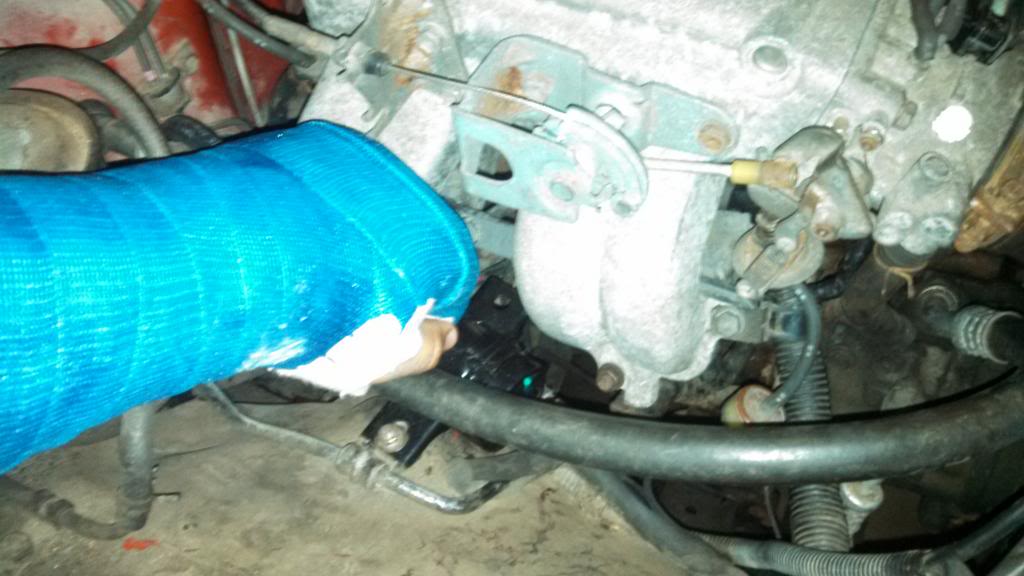
-fuel filter ($18)- old had lots of rust. real pain to get at (under lower intake, relocated to fender. see pic below
-air filter (~$15)
-blew air thru the return line to ensure it was clog free
-plugs, cap, rotor, and wires ($~45ish-dont remember)
-new fuel pump (went with denso) so it was ~$130 At least the first gens have that access port under the rear seat.
(other things perhaps that I dont remember)
-->when I changed the fuel pump it felt like I got one of the missing cylinders to come back but it didnt
http://i1362.photobucket.com/albums/...ps62eee9e5.jpg
unfortunately now my pics are pasting as a link. will re-post the pics tom.
I decided that if my I had compression, a good fuel pump (also I replaced most of the fuel line because I broke some putting the pump in), and spark, then my problem must be with the injectors. Pics to follow tomorrow.
In my defense I think I was blinded by wanting a 1st gen runner with the 22re.Anyways, I did the 'ole "pull spark plug wires and see if the engine note changes" test to determine why it was running so poorly with no power. The answer was 2 and 3 not firing. compression results listed in post #1.
This began my quest to solve the running issues.
I started by replacing:
-fuel filter ($18)- old had lots of rust. real pain to get at (under lower intake, relocated to fender. see pic below
-air filter (~$15)
-blew air thru the return line to ensure it was clog free
-plugs, cap, rotor, and wires ($~45ish-dont remember)
-new fuel pump (went with denso) so it was ~$130 At least the first gens have that access port under the rear seat.
(other things perhaps that I dont remember)
-->when I changed the fuel pump it felt like I got one of the missing cylinders to come back but it didnt
http://i1362.photobucket.com/albums/...ps62eee9e5.jpg
unfortunately now my pics are pasting as a link. will re-post the pics tom.
I decided that if my I had compression, a good fuel pump (also I replaced most of the fuel line because I broke some putting the pump in), and spark, then my problem must be with the injectors. Pics to follow tomorrow.
10-29-2013, 09:12 AM
#5
Registered User
Thread Starter
the fuel filters below my cast
and here's a picture of what my injectors looked like when I finally got them out
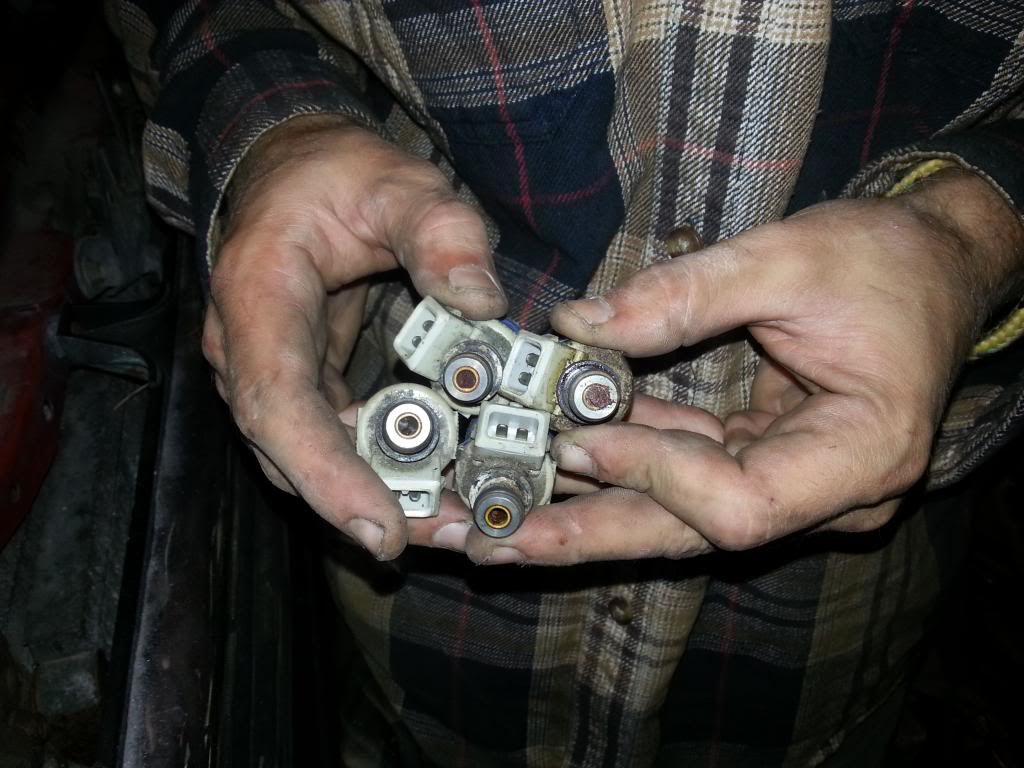
I sent them off to witchhunter
WitchHunter Performance - Injector Cleaning & Flow Testing Services
they are awesome. well back to work. more info later
and here's a picture of what my injectors looked like when I finally got them out
I sent them off to witchhunter
WitchHunter Performance - Injector Cleaning & Flow Testing Services
they are awesome. well back to work. more info later
10-29-2013, 02:37 PM
#6
Registered User
Thread Starter
The to 2 injectors shown in the above pic are 2 & 3- no wonder the weren't firing.
While I had the upper intake off I decided I might as well take the lower off as well and get them both hot-tanked at the local machine shop. Turns out the owner is a yota man himself so he cut me a break on the cleaning - $40 - and he got the trottle body completely clean!. I dont reallly have any before/after pics cause its hard to tell how much cleaner they actually got. I didnt get then bead blasted which wouldve made the difference clear, but that would cost more and I'm not rebuilding it right now.
While I had the upper intake off I decided I might as well take the lower off as well and get them both hot-tanked at the local machine shop. Turns out the owner is a yota man himself so he cut me a break on the cleaning - $40 - and he got the trottle body completely clean!. I dont reallly have any before/after pics cause its hard to tell how much cleaner they actually got. I didnt get then bead blasted which wouldve made the difference clear, but that would cost more and I'm not rebuilding it right now.
10-29-2013, 03:15 PM
#7
Registered User
Thread Starter
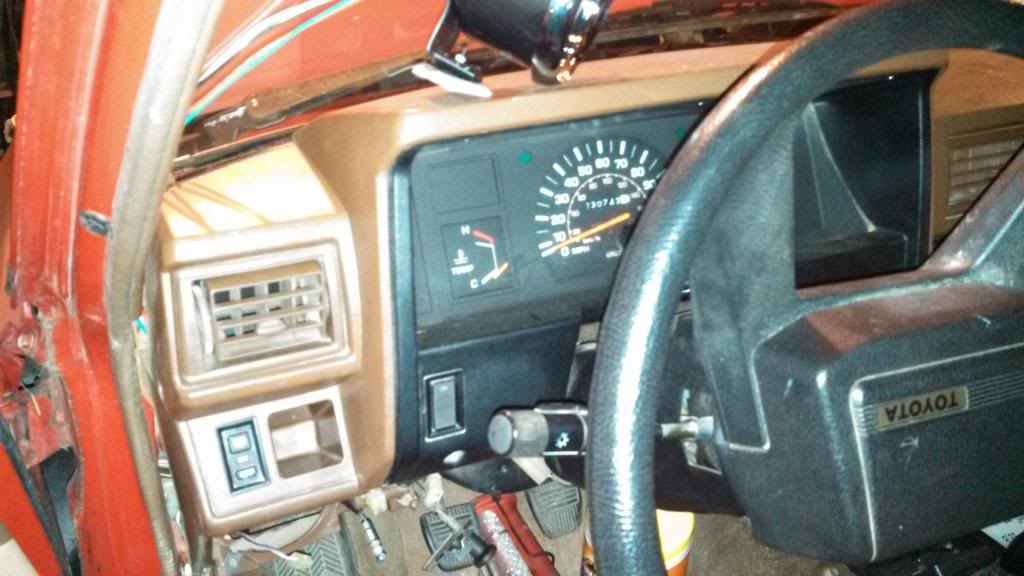
RPMs anyone? Aftermarket tach install
So this runner is a dlx version which means I have no tach in my cluster. I really like knowing what rpm I'm at when I have a manual transmission  , so I bought an aftermarket tach for maybe $30 at autozone. It can also help with diagnosing running issues.
I read a lot of posts seeing how/where other people install theirs and saw a bunch of responses to people saying "why don't you just install an sr5 cluster?" - my reason is that I wasn't feeling like spending $100+ on an sr5 cluster -at least not right now- also the install time for an aftermarket is Much quicker (or should be if you can use both your hands..).
Anyways this install is really simple and you can do it w/o drilling any holes in your dash.
I feel lucky that my dash is crack-free so I would have felt like an idiot if I drilled any holes in my perfect dash.
dash
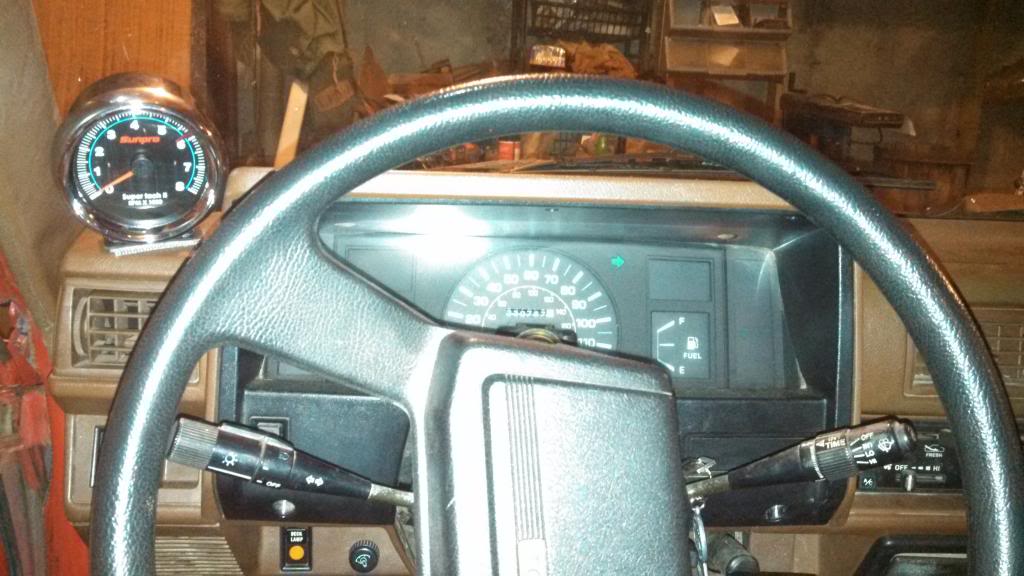
here's a shot with the tach installed
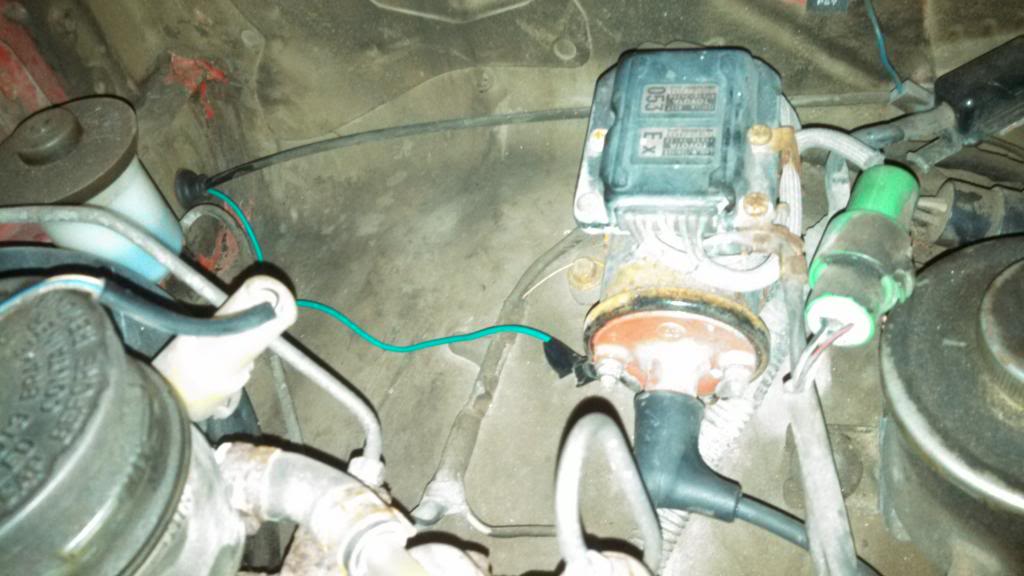
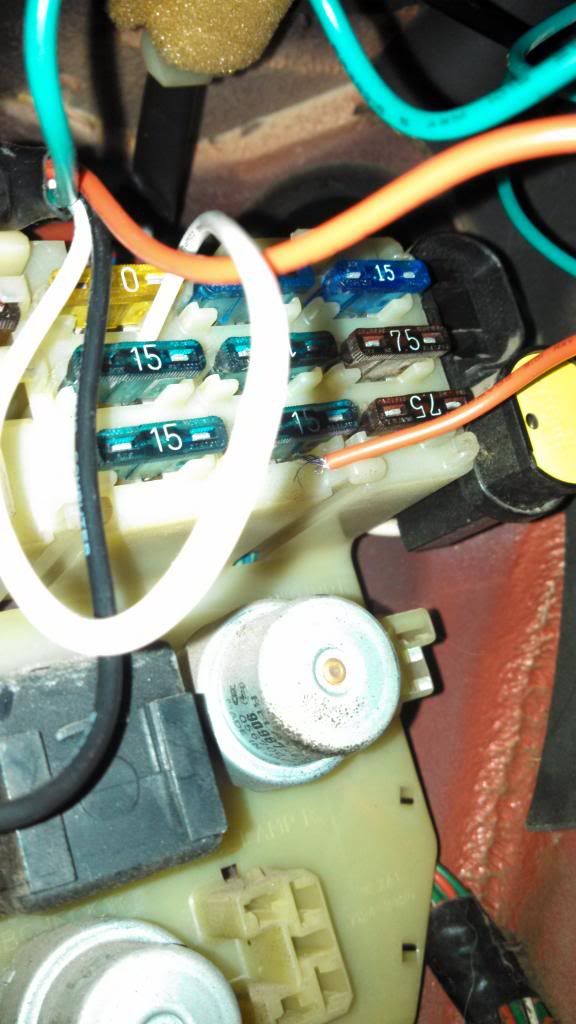
here's where I connected the white(backlighting) and the red(pwer) in the drivers kick panel. It didn't have a cover with lables but fortunately I found
http://www.4crawler.com/4x4/4R_TechI...tml#Electrical
which told whats-what. Hurray for Roger Brown!
red goes to the engine fuse and white goes to tail lights

the green wire I ran thru the fire wall with the cable for the hood release. To do this I taped the green wire to the cable and pulled the cable from the engine bay.
I ran the wires along the side of the air duct along the driver's side and used velcro to hold the tach to my dash with out ruining my dash.
, so I bought an aftermarket tach for maybe $30 at autozone. It can also help with diagnosing running issues.I read a lot of posts seeing how/where other people install theirs and saw a bunch of responses to people saying "why don't you just install an sr5 cluster?" - my reason is that I wasn't feeling like spending $100+ on an sr5 cluster -at least not right now- also the install time for an aftermarket is Much quicker (or should be if you can use both your hands..).
Anyways this install is really simple and you can do it w/o drilling any holes in your dash.
I feel lucky that my dash is crack-free so I would have felt like an idiot if I drilled any holes in my perfect dash.
dash
here's a shot with the tach installed
here's where I connected the white(backlighting) and the red(pwer) in the drivers kick panel. It didn't have a cover with lables but fortunately I found
http://www.4crawler.com/4x4/4R_TechI...tml#Electrical
which told whats-what. Hurray for Roger Brown!
red goes to the engine fuse and white goes to tail lights
the green wire I ran thru the fire wall with the cable for the hood release. To do this I taped the green wire to the cable and pulled the cable from the engine bay.
I ran the wires along the side of the air duct along the driver's side and used velcro to hold the tach to my dash with out ruining my dash.
Trending Topics
10-29-2013, 04:16 PM
#8
Registered User
Thread Starter
It_is_alive!
so after I got the upper and lower intakes and the fuel rail + injectors back together The truck started and all cylinders were firing!
Unfortunately, he engine would not idle properly and goosing the throttle had no effect grrrrrr. At first I thought I had some air in my cooling system that was screwing up the IAC valve (hoping that I wouldn't need to replace it $$$$$). Or possibly a vacuum leak, but when I sprayed carb cleaner nothing changed.
Then decided that I should make sure my tps was adjusted properly per 4crawler's instructions http://www.4crawler.com/4x4/CheapTricks/TPS/index.shtml and it failed tests 2 and 3 and passed all others. It turns out the symptoms of failing tests 2+3= my symptoms!
I would have liked to buy oem but... the stealerships near me wanted $150 [OEM part # 89452-28030] and wouldn't have it for 3 days so I bought one from autozone [part # TPS436] and had it the next day - got it for $~63 with 20%off coupon!!
I got the duralast tps adjusted correctly and finally I have a properly running 4runner!!!!!
Now I am driving it to work on a regular basis (2 days in a row so far) so I can focus on more mundane things like my steering components - loose enough that the said they couldn't do a front end alignment - bummer, driving anyways. I plan to fix that in a couple weeks.
The first task I need/want to tackle since getting her running well is
because 2/3 of the mounts on the back (shown below) rusted to death, and the license plate lights are dead as well.
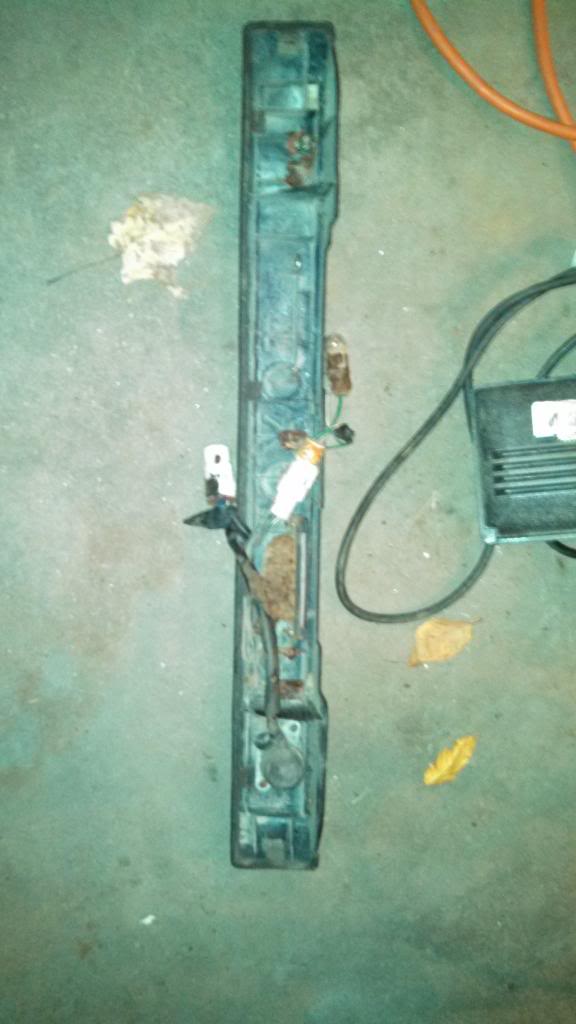
I guess it's tough to tell, but one of the mounts is still there.
I thought about trying to buy a replacement one but the only I saw on fleabay was $80. Then i thought I could probably just buy replacement mounts at the stealership, but the only sell it as a whole unit for $160!! yeah no thanks... so plan to try and make replacement mounts. Ill do my best to document this process in pics.
Here's a shot of another future piece to this project:
the dreaded center console Dun_dun_dun - obv the POs handy work...

oh I also installed some alpine type s 4" speakers I had that I was going to put in my brother's ford ranger but decided not to. listed for 70 bones on crutchfield, got 'em for $30 on amazon. head unit is still junk and so is the speaker wire... so more work required.
Also, now that I can actually drive it on the freeway I can see why people complain about the loudness. I plan on doing something similar to Rad4runner https://www.yotatech.com/forums/f199...00/index6.html (towards the end of the page).
I would be happy for any input and hope this thread can be useful to someone. I figure I've gotten so much from the folks on this site, I'll do what I can to continue the helping. now- out to the garage
Unfortunately, he engine would not idle properly and goosing the throttle had no effect grrrrrr. At first I thought I had some air in my cooling system that was screwing up the IAC valve (hoping that I wouldn't need to replace it $$$$$). Or possibly a vacuum leak, but when I sprayed carb cleaner nothing changed.
Then decided that I should make sure my tps was adjusted properly per 4crawler's instructions http://www.4crawler.com/4x4/CheapTricks/TPS/index.shtml and it failed tests 2 and 3 and passed all others. It turns out the symptoms of failing tests 2+3= my symptoms!
I would have liked to buy oem but... the stealerships near me wanted $150 [OEM part # 89452-28030] and wouldn't have it for 3 days so I bought one from autozone [part # TPS436] and had it the next day - got it for $~63 with 20%off coupon!!
I got the duralast tps adjusted correctly and finally I have a properly running 4runner!!!!!
Now I am driving it to work on a regular basis (2 days in a row so far) so I can focus on more mundane things like my steering components - loose enough that the said they couldn't do a front end alignment - bummer, driving anyways. I plan to fix that in a couple weeks.
The first task I need/want to tackle since getting her running well is
because 2/3 of the mounts on the back (shown below) rusted to death, and the license plate lights are dead as well.
I guess it's tough to tell, but one of the mounts is still there.
I thought about trying to buy a replacement one but the only I saw on fleabay was $80. Then i thought I could probably just buy replacement mounts at the stealership, but the only sell it as a whole unit for $160!!
yeah no thanks... so plan to try and make replacement mounts. Ill do my best to document this process in pics.Here's a shot of another future piece to this project:
the dreaded center console Dun_dun_dun - obv the POs handy work...
oh I also installed some alpine type s 4" speakers I had that I was going to put in my brother's ford ranger but decided not to. listed for 70 bones on crutchfield, got 'em for $30 on amazon.
head unit is still junk and so is the speaker wire... so more work required. Also, now that I can actually drive it on the freeway I can see why people complain about the loudness. I plan on doing something similar to Rad4runner https://www.yotatech.com/forums/f199...00/index6.html (towards the end of the page).
I would be happy for any input and hope this thread can be useful to someone. I figure I've gotten so much from the folks on this site, I'll do what I can to continue the helping. now- out to the garage
Last edited by MaltDisney; 11-05-2013 at 02:11 PM.
10-29-2013, 06:13 PM
#9
... so I bought an aftermarket tach for maybe $30 at autozone. It can also help with diagnosing running issues.
here's where I connected the white(backlighting) and the red(pwer) in the drivers kick panel. It didn't have a cover with lables but fortunately I found
http://www.4crawler.com/4x4/4R_TechI...tml#Electrical
which told whats-what. Hurray for Roger Brown!
red goes to the engine fuse and white goes to tail lights
[/IMG]
... I can see why people complain about the loudness. I plan on doing something similar to Rad4runner https://www.yotatech.com/forums/f199...00/index6.html
Direct link to project is here
unfortunately now my pics are pasting as a link. will re-post the pics
Just edit post so you enclose the URL with "[img]" before link, then "[/img]" after.
like [img]http...colon...slash...shash......JPGdotCom) [/img]
 11-02-2013, 07:36 AM
#11
Registered User
Thread Starter
[QUOTE=RAD4Runner;52133519]
Am considering a tach, too. When you feel like wiring it up cleaner (to the wires in the back of fuse block) and you need help, let me know.]
do you need to cut any wires to do it properly? Just curious cause of so i will probably just leave it as i would like to upgrade to the sr5 cluster at some point..
11-02-2013, 07:42 AM
#12
Registered User
Thread Starter
Thanks for watching! I will do my best to keep the thread updated. Ive done a lot of reading here and you're threads have definitely popped up a few times. I'm particularly interested in getting some speakers for my roll bar like i think i saw you did, if i recall correctly
11-02-2013, 08:16 AM
#13
Registered User
That giant tach has to go...lol
Nice to see another runner under construction. Glad to see you got the tan interior....the porno red color is too much...lol
Is the trucks name Mickey?
Nice to see another runner under construction. Glad to see you got the tan interior....the porno red color is too much...lol
Is the trucks name Mickey?
11-02-2013, 09:54 AM
#14
Regards
11-05-2013, 04:01 PM
#15
Registered User
Thread Starter
 job. Some poorly done bondo/repaint that went on for sure.
 A half-way decent repaint is on my bucket list, maybe this upcoming summer, but not really a priority yet.
11-05-2013, 04:23 PM
#16
Registered User
Thread Starter
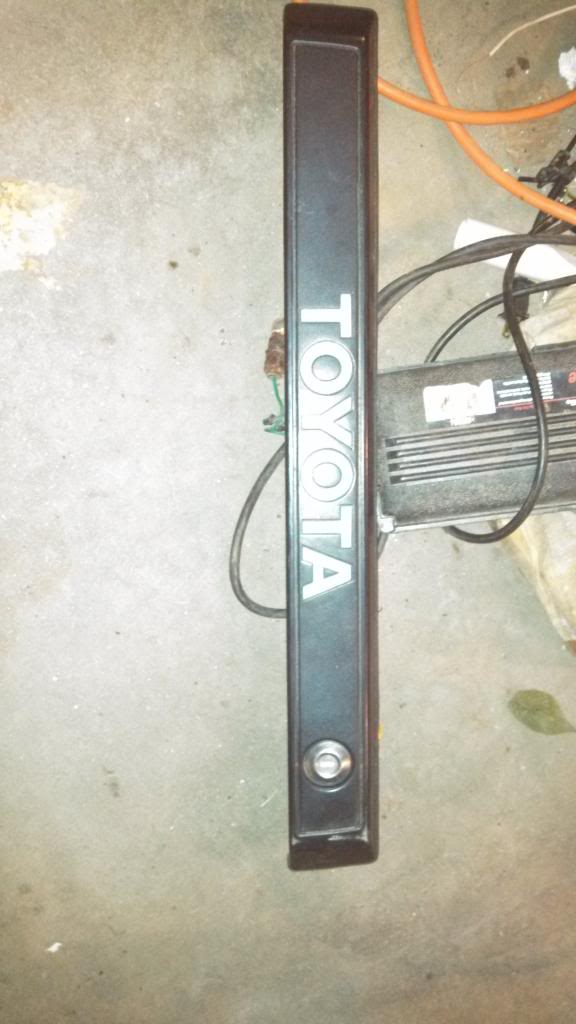
tailgate trim piece
So I figured out the general idea of how I wanted to re-attachmy rear tailgate trim, but I haven't gotten it right just yet.
here's another shot of the only original bracket left
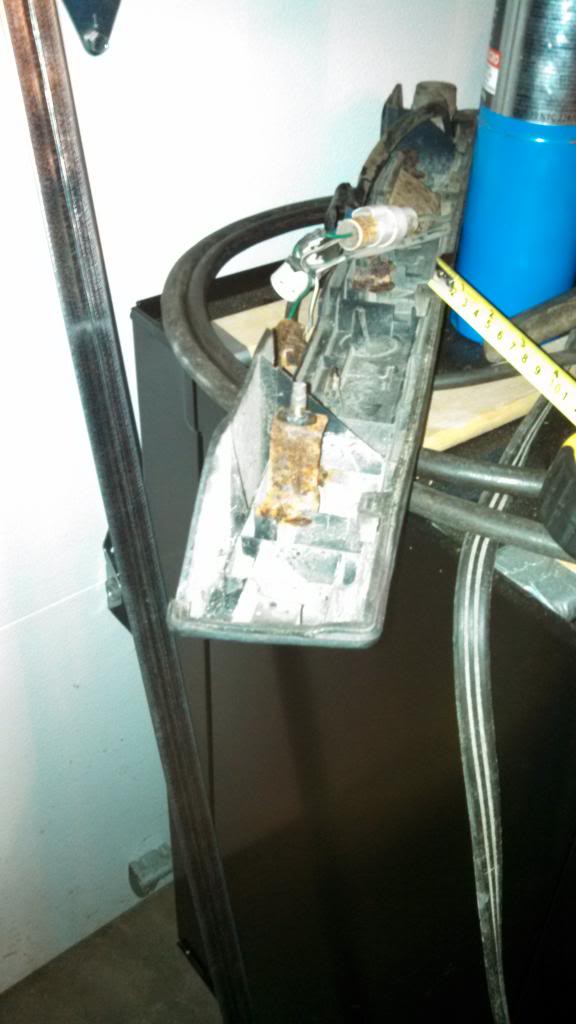
The metal I'm using/used to create the new brackets (about $4 at HD)
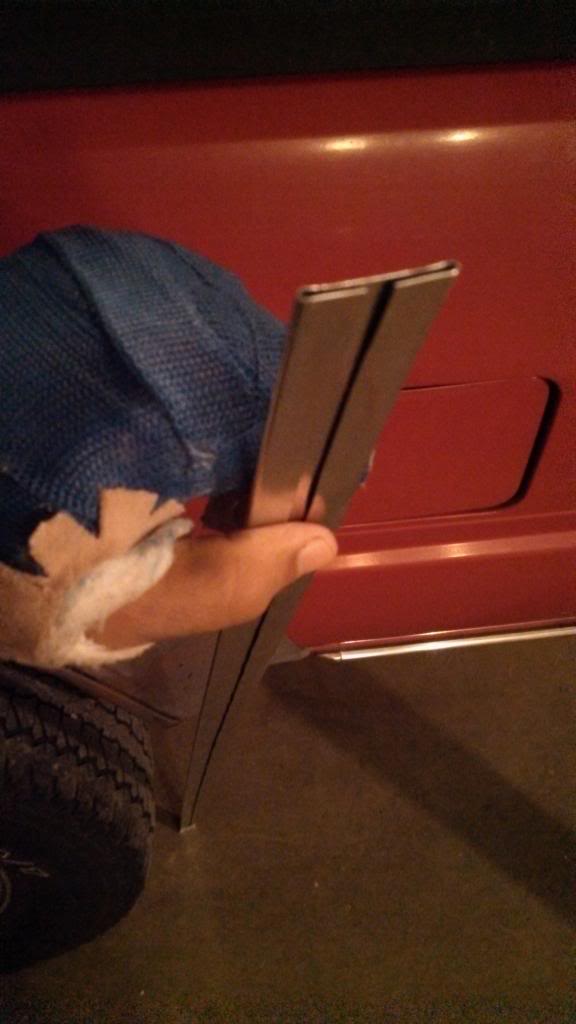
I cut it about 4" long, drilled a hole big enough for an M6 1.0 (I think) threaded bolt, which I secured with JB weld, and drilled 2 more holes
to attach the mount to the trim.
here's the 2 new brackets attached
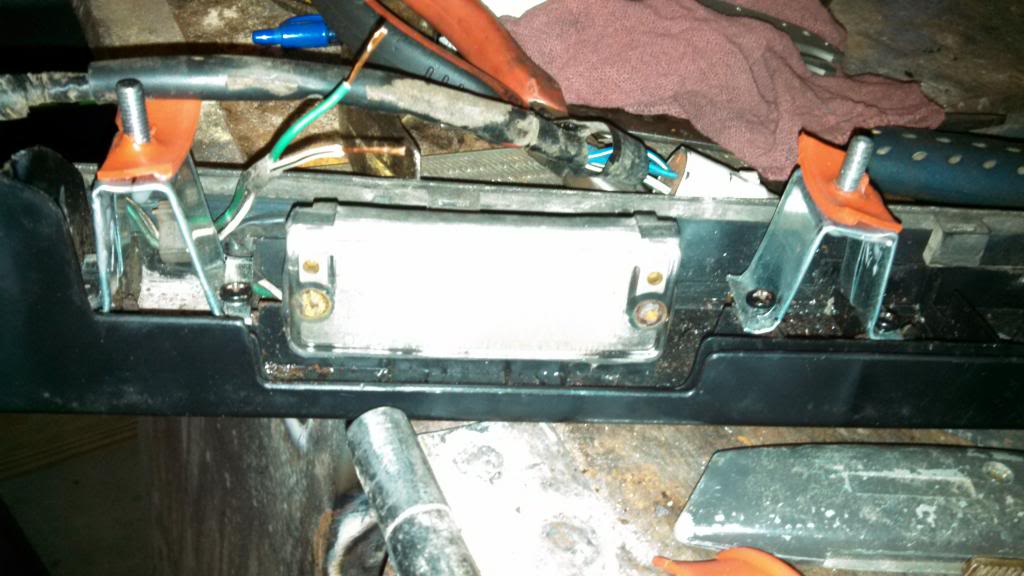
and another showing all 3 brackets -btw the orange/red rubber is for padding, and its from the skyjacker silicone boots that I elected not to put on my shocks.
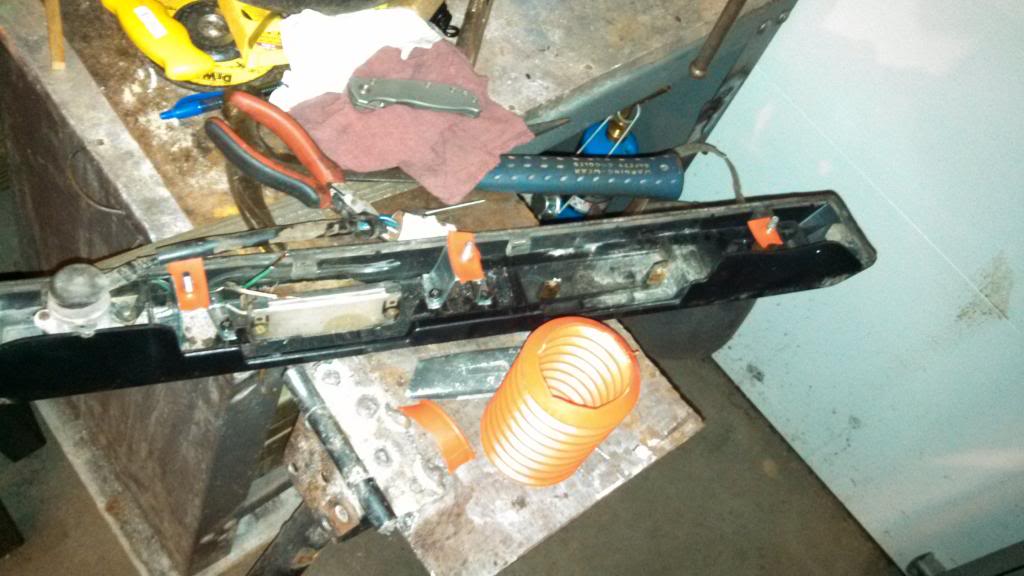
The light I am using for my license plate ~$10 at autozone
070c0faa-3620-45ca-9903-2ca177581ccb_zps1f34028b.jpg?t=1383700855
Now the final product (round 1) going to re-do the brackets as I made them too tall so there is an unsightly gap
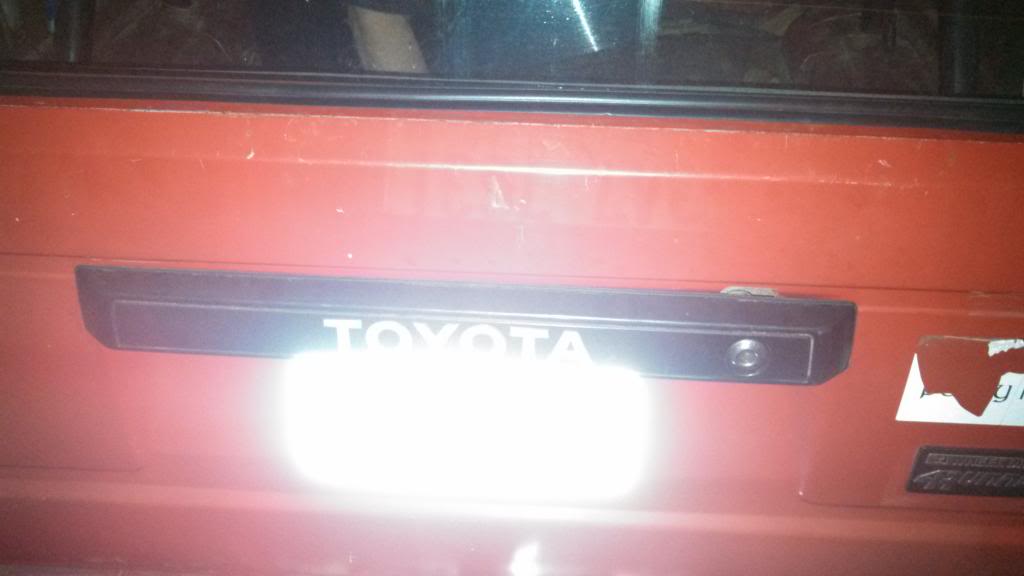
(the brightness is from the license plate light)
here's another shot of the only original bracket left
The metal I'm using/used to create the new brackets (about $4 at HD)
I cut it about 4" long, drilled a hole big enough for an M6 1.0 (I think) threaded bolt, which I secured with JB weld, and drilled 2 more holes
to attach the mount to the trim.
here's the 2 new brackets attached
and another showing all 3 brackets -btw the orange/red rubber is for padding, and its from the skyjacker silicone boots that I elected not to put on my shocks.
The light I am using for my license plate ~$10 at autozone
070c0faa-3620-45ca-9903-2ca177581ccb_zps1f34028b.jpg?t=1383700855
Now the final product (round 1) going to re-do the brackets as I made them too tall so there is an unsightly gap
(the brightness is from the license plate light)
11-05-2013, 04:36 PM
#18
Registered User
Thread Starter
clutch not working all off a sudden?
So on monday I hopped into my car, barely got down the driveway, and realized that I would not make it to work because I couldn't change gears.
Fortunately I was able to take a different vehicle, but I was still PO that my great-running 4runner was already having problems after just barely getting it drivable.
I was particularly worried that I might have to replace the clutch - not outside my capability, but it sorta is while my hand is still broken. but hallelujah when I checked yesterday after work I saw that the clutch master had no fluid in it. And the slave cylinder looked to have a few drips on it, so I think it must have a slow leak.
So my dad and I bled the clutch last night and I drove it today. When I checked tonight when I got home the level hadn't moved.
I will still be replacing the slave cylinder b/c its pretty cheap (only $15 'n change on amazon for Aisin). should be here tomorrow thanks to prime!
11-05-2013, 04:38 PM
#19
Registered User
Thread Starter


