Gyoas759s 1995 4Runner Adventure Wagon
 03-20-2016, 07:01 PM
#1
Registered User
Thread Starter
Join Date: Jun 2009
Location: Grand Valley, Pennsylvania
Posts: 73
Likes: 0
Received 0 Likes
on
0 Posts
Gyoas759s 1995 4Runner Adventure Wagon
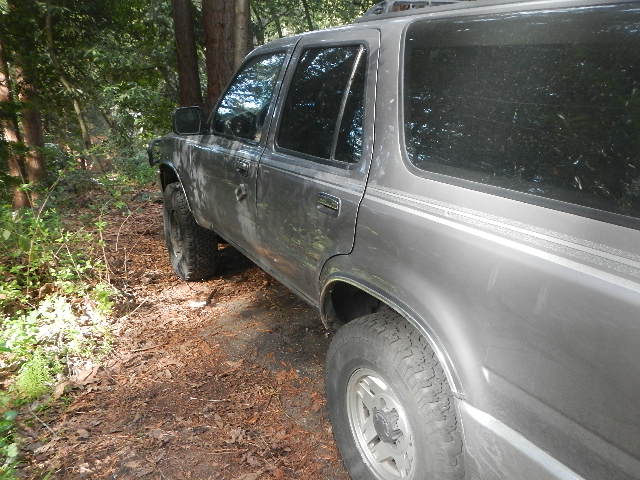
Back for the first time in years. For a number of years I drove an 87 4x4 pickup and loved it. With stock dual range 4x4 and 31 inch tires it took me all over the place. Finally I sold it a few years back as rust was getting the better of it and replaced it with a lifted Subaru Impreza. That impreza was sold in favor of an Outback last year after moving to California and having our first kid but I have missed having an off roader.
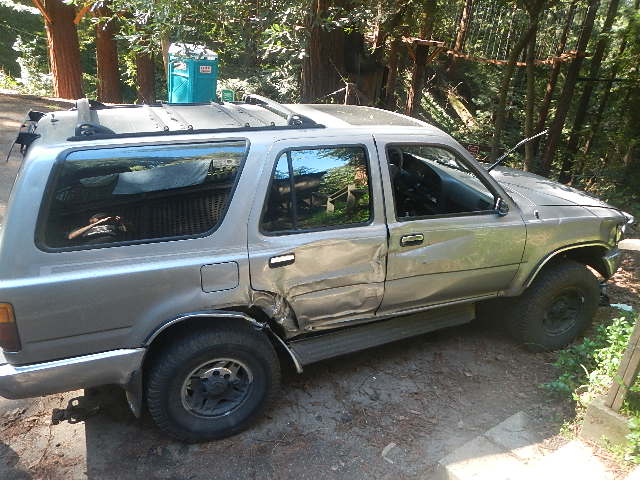
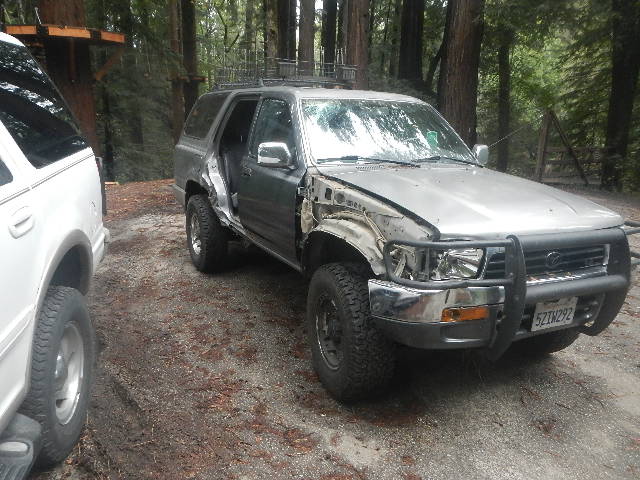
I was selling a 1996 Outback that I had bought as a secondary project and got word that a work buddy of mine was looking for a good reliable runner after he had crashed his 4runner. I looked it over and frame was straight, but passenger side body was crunched up some. We made a deal where he traded me the 4Runner and some cash for my outback. He had a commuter and I had a new project.
Here it is on day 1.
Specs.
1995 4Runner SR5 - 3VZE and dual range 5 speed
230,000 miles
California rust free
Starts runs and drives
31 inch BFG ATs
Newish shocks
Hesitation under load at low RPM (plug wires most likely)
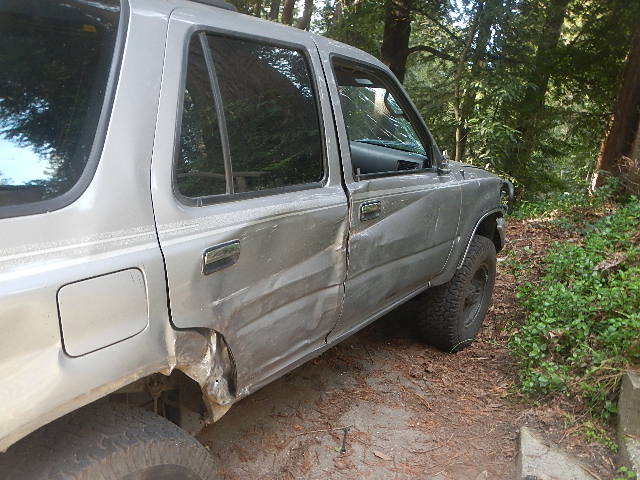
Smashed up - damaged bumper, headlight, corner lamp, fender, windshield, both doors, rear quarter, rocker panel and running board.
The plan.
Scour local boneyards and craigslist and put the body back together.
Rustoleum paint job
Basket rack and swing style spare gate to carry 2 spares
Tune up and clean up to get it running well
Longer term.
2.5-3 inch lift and upgrade to 33s
Guy in ohio makes a custom bellhousing that mates a W series Toyota transmission to an EJ Series Subaru Motor - If/when the 3VZE needs large scale help, I may replace it with a 90s EJ22 or EJ25/EJ22 Frankenmotor to have the best of both worlds. (Born and raised on Subaru and can take them apart in my sleep) The simple, lightweight and reliable EJ motor with the durability and toughness of the Toyota frame and driveline would be the perfect matchup for me. But the 3VZE is pretty stout and seems in good condition so this is likely years down the line.
I was selling a 1996 Outback that I had bought as a secondary project and got word that a work buddy of mine was looking for a good reliable runner after he had crashed his 4runner. I looked it over and frame was straight, but passenger side body was crunched up some. We made a deal where he traded me the 4Runner and some cash for my outback. He had a commuter and I had a new project.
Here it is on day 1.


Specs.
1995 4Runner SR5 - 3VZE and dual range 5 speed
230,000 miles
California rust free
Starts runs and drives
31 inch BFG ATs
Newish shocks
Hesitation under load at low RPM (plug wires most likely)
Smashed up - damaged bumper, headlight, corner lamp, fender, windshield, both doors, rear quarter, rocker panel and running board.
The plan.
Scour local boneyards and craigslist and put the body back together.
Rustoleum paint job
Basket rack and swing style spare gate to carry 2 spares
Tune up and clean up to get it running well
Longer term.
2.5-3 inch lift and upgrade to 33s
Guy in ohio makes a custom bellhousing that mates a W series Toyota transmission to an EJ Series Subaru Motor - If/when the 3VZE needs large scale help, I may replace it with a 90s EJ22 or EJ25/EJ22 Frankenmotor to have the best of both worlds. (Born and raised on Subaru and can take them apart in my sleep) The simple, lightweight and reliable EJ motor with the durability and toughness of the Toyota frame and driveline would be the perfect matchup for me. But the 3VZE is pretty stout and seems in good condition so this is likely years down the line.
Last edited by gyoas759; 03-20-2016 at 07:20 PM.
 03-20-2016, 07:45 PM
#2
Registered User
Thread Starter
Join Date: Jun 2009
Location: Grand Valley, Pennsylvania
Posts: 73
Likes: 0
Received 0 Likes
on
0 Posts
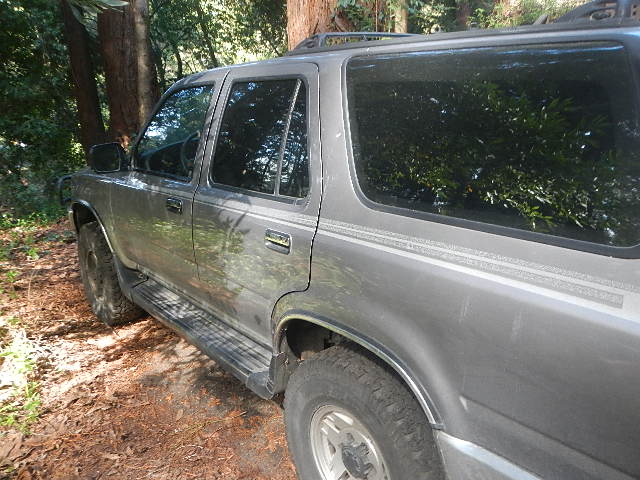
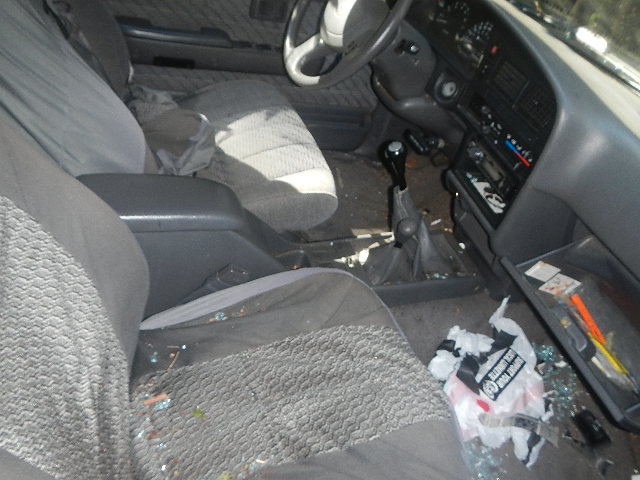
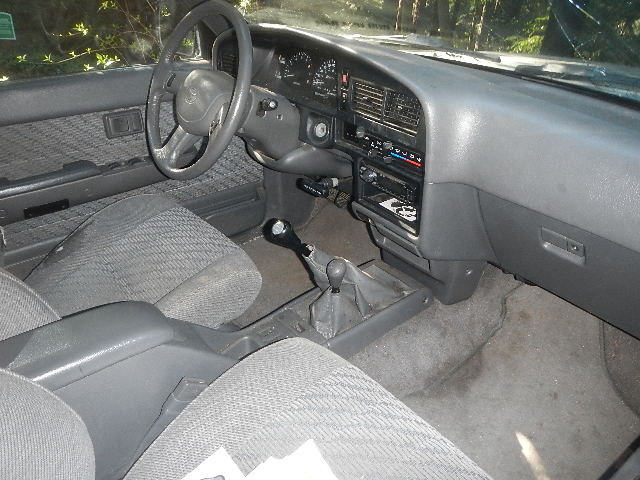
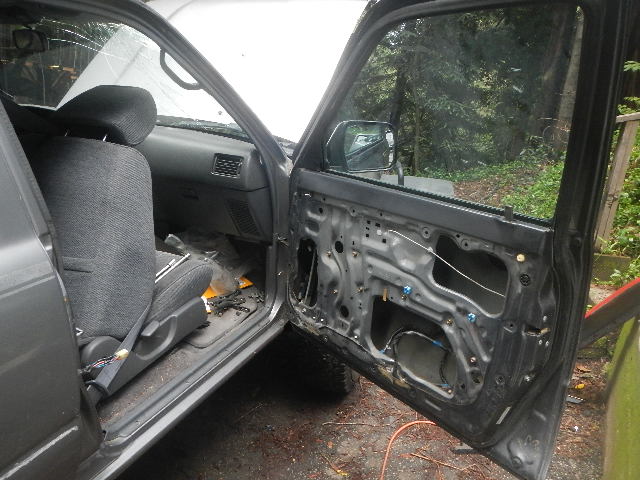
Step #1. was to remove the running boards. Looked a whole lot better once they were off. Also took a vacuum cleaner to it and got a lot of the dirt and broken glass out of the interior. Had seat covers that were showing their age so I removed them. Drivers seat shows some wear but isn't bad.


 03-22-2016, 12:22 PM
#3
Registered User
Thread Starter
Join Date: Jun 2009
Location: Grand Valley, Pennsylvania
Posts: 73
Likes: 0
Received 0 Likes
on
0 Posts
Started tearing at it. The local pick N pulls provided doors, fender, headlight, hood and bumper. Found a local guy on craigslist with a good windshield already pulled. The basket rack from my Subaru fit about perfectly up top. Fills the space but doesn't cover the sunroof.
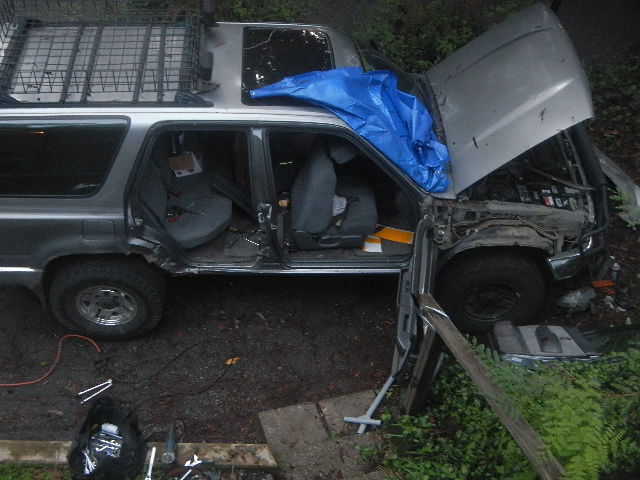
Had to cut into the drivers door quite a bit and use a pry bar and hammer to finally open it. Install of the new door went on fine but the latch did not reach. B pillar was caved in about 1 1/2 - 2 inches. Rigged a come-along to a tow strap and anchored it to the trailer hitch of my Ford Expedition and cranked it back. Took about 4 pulls and the door latches pretty well now. Still opens with a bit of a pop but for backyard body work I'm happy with it. This will be a no frills operation overall. Simple and reliable.
Original wiring and the donor door wiring were a little off. The window stuff and interior lights had the same harnesses. Power door actuator and power mirrors were different.


Had to cut into the drivers door quite a bit and use a pry bar and hammer to finally open it. Install of the new door went on fine but the latch did not reach. B pillar was caved in about 1 1/2 - 2 inches. Rigged a come-along to a tow strap and anchored it to the trailer hitch of my Ford Expedition and cranked it back. Took about 4 pulls and the door latches pretty well now. Still opens with a bit of a pop but for backyard body work I'm happy with it. This will be a no frills operation overall. Simple and reliable.

Original wiring and the donor door wiring were a little off. The window stuff and interior lights had the same harnesses. Power door actuator and power mirrors were different.
03-22-2016, 12:30 PM
#4
Registered User
Thread Starter
Join Date: Jun 2009
Location: Grand Valley, Pennsylvania
Posts: 73
Likes: 0
Received 0 Likes
on
0 Posts

Cut my thumb on a piece of glass from the headlight while pulling it. Blood and sweat already into this project. (Will hopefully avoid the tears)

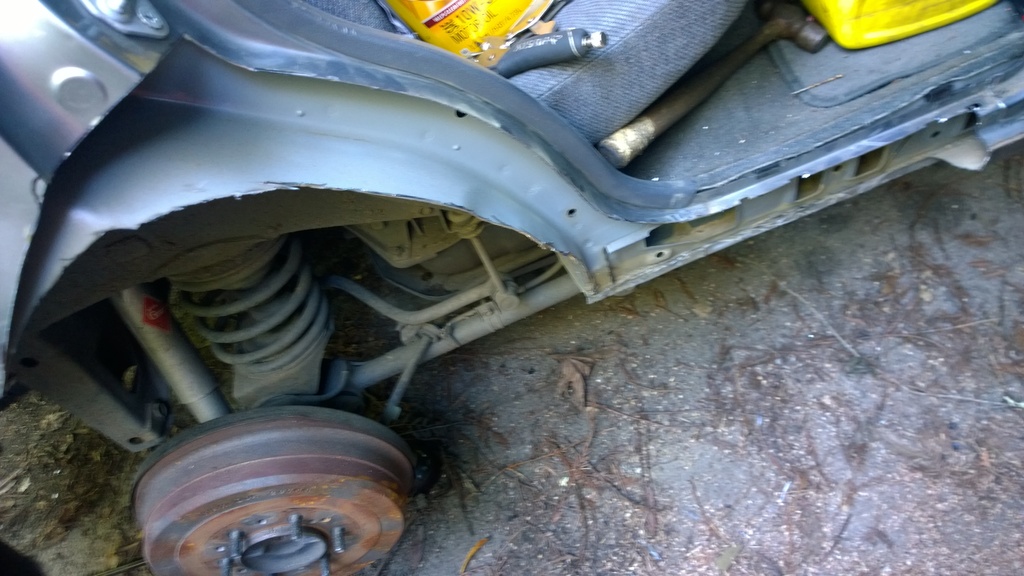
Originally planned on keeping the dented bumper for a while and just make it driveable for the time being but the bumper was bent up high enough that the new headlight could not fit where it belonged. Probably my 4th trip to the junkyard so far.

Straight and pretty clean at this point.

New fender. There was a gray one that matched the truck at the yard but had a few crinkles to it. I'm not going to be fussy about the body or paint job on this but figured that I'd start out as nice as possible.

Wiring in the 1990 stuff to the 1995. Liquid electrical tape leftover from doing some internal transmission wiring. 2 coats of this stuff and then a wrap in electrical tape should last forever.

The pile of dented metal so I could get my core fees back from the yard. Kept some of the usable stuff for future use or to pass on to others.
03-22-2016, 01:05 PM
#5
Registered User
Thread Starter
Join Date: Jun 2009
Location: Grand Valley, Pennsylvania
Posts: 73
Likes: 0
Received 0 Likes
on
0 Posts

These speakers came about $15 a set on Ebay right now. The ones in there were original and only crackled and buzzed so the only way to hear the music was to have it adjusted all the way to the rear. These are already much better.

Had to drill 3 of the 4 holes to mount them.


Starting to look like something again.
03-22-2016, 01:14 PM
#6
Registered User
Thread Starter
Join Date: Jun 2009
Location: Grand Valley, Pennsylvania
Posts: 73
Likes: 0
Received 0 Likes
on
0 Posts

Didn't want to take the time to get cable to pull the windshield, so I cut and broke it out with a box cutter, screwdriver and some tugging with my welding gloves.

Cleaned and ready for new glass

In. And passed our first rainfall since.
03-22-2016, 01:29 PM
#7
Registered User
Thread Starter
Join Date: Jun 2009
Location: Grand Valley, Pennsylvania
Posts: 73
Likes: 0
Received 0 Likes
on
0 Posts


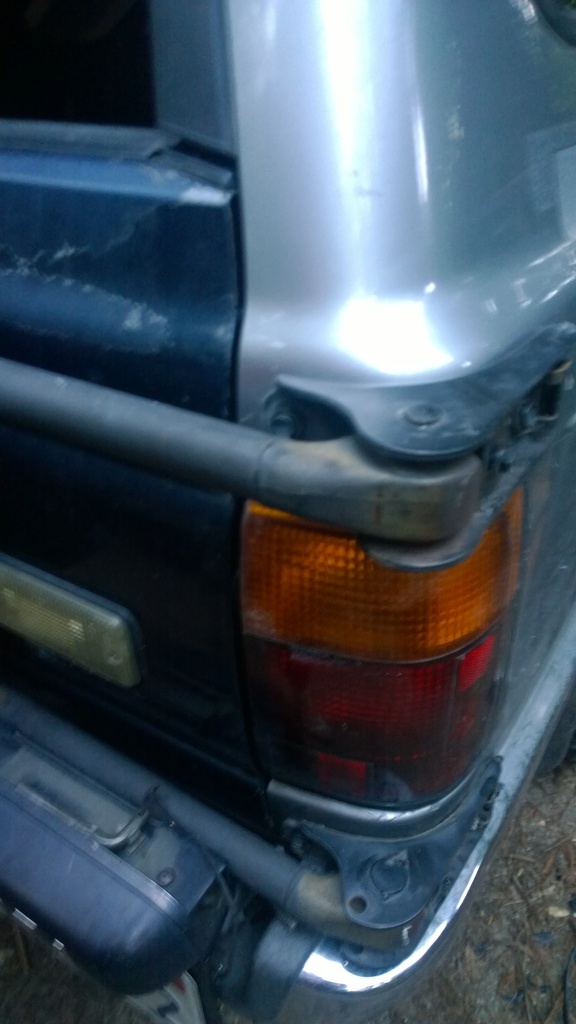
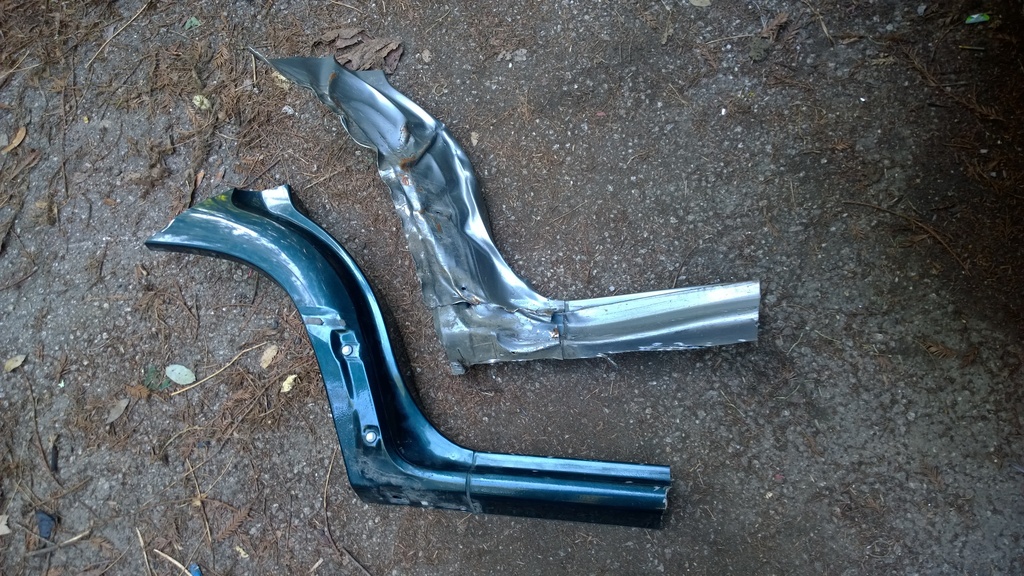
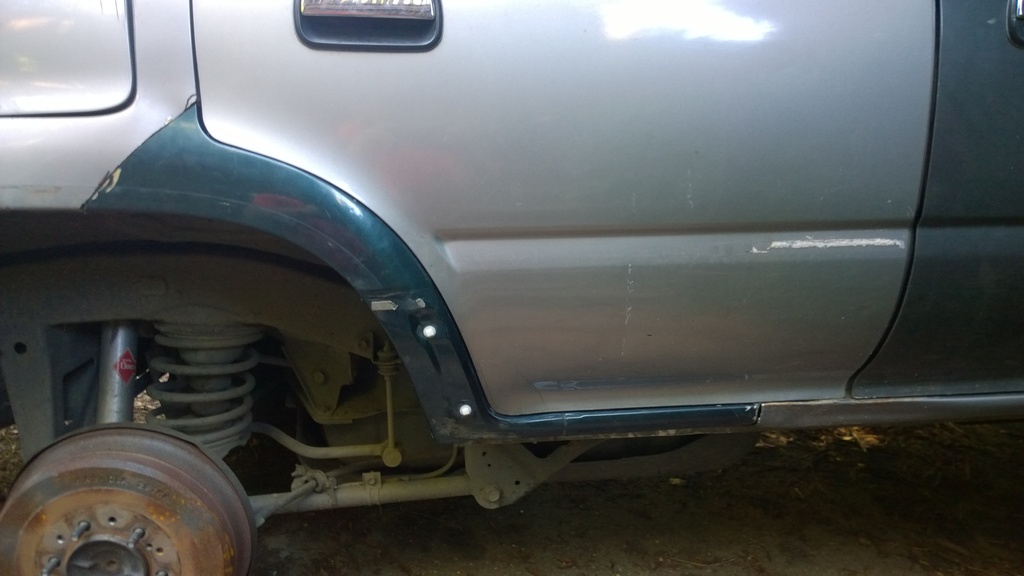
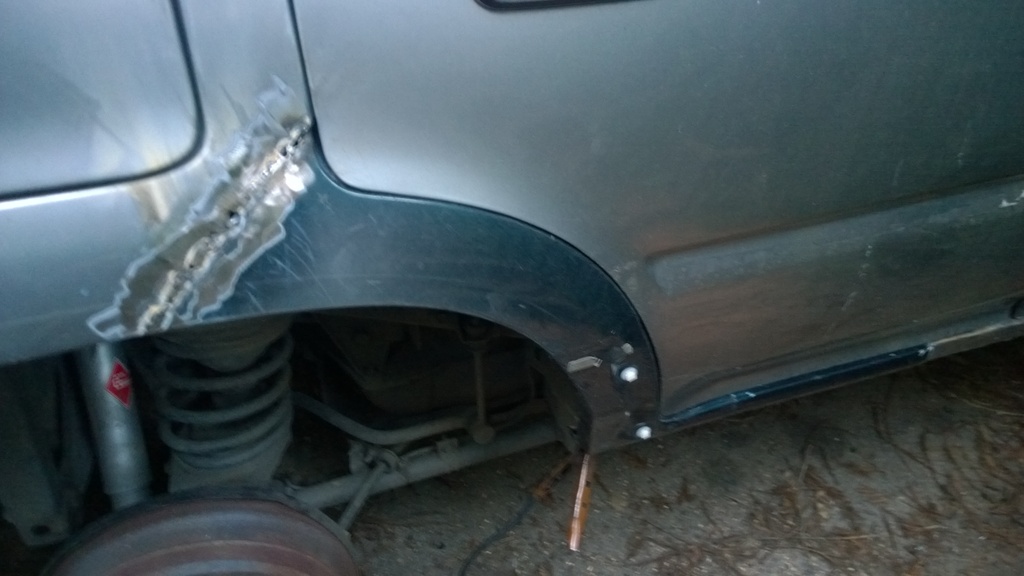
This crunched part is the remaining damage. The guy I bought the windshield from was parting out a 94 4runner so I was able to get the part cut out.

I'll cut and weld to get it mostly flush
Trending Topics
03-22-2016, 01:47 PM
#8
Registered User
Thread Starter
Join Date: Jun 2009
Location: Grand Valley, Pennsylvania
Posts: 73
Likes: 0
Received 0 Likes
on
0 Posts


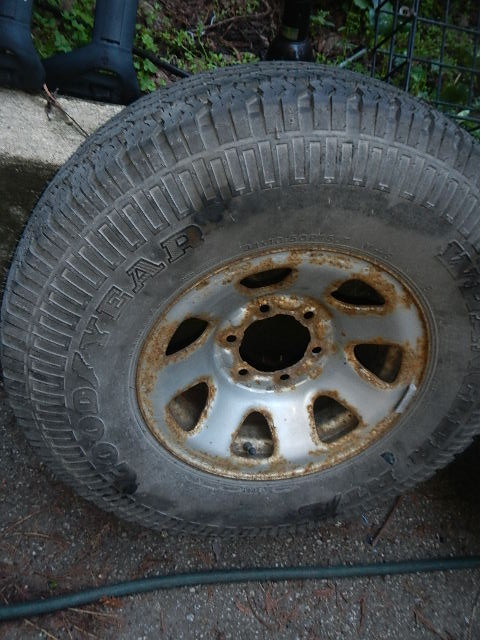
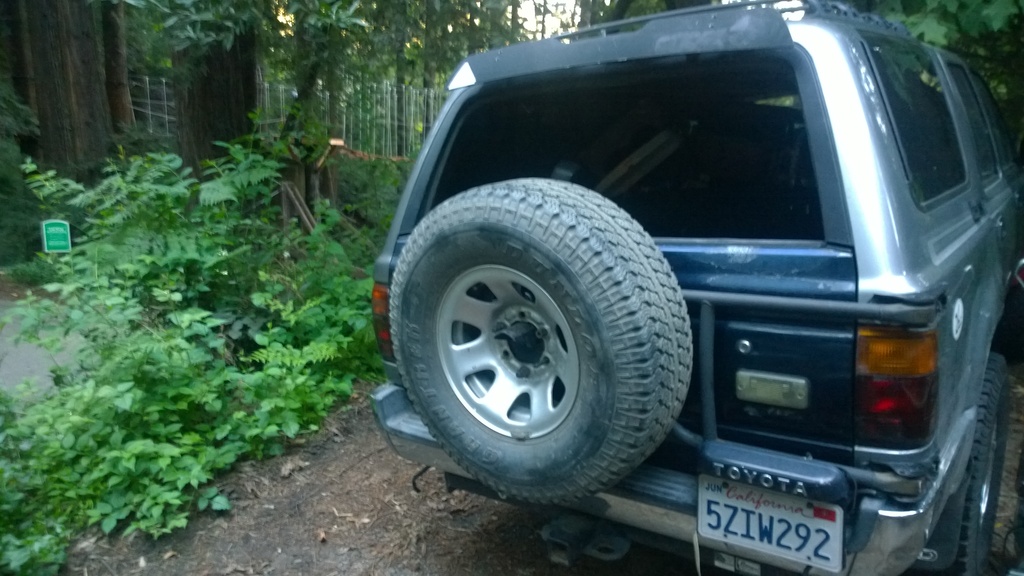
Lowered the spare down to check on it. Nearly new and All terrain style.

Swapped the original door cards in. Looks original again on the inside.

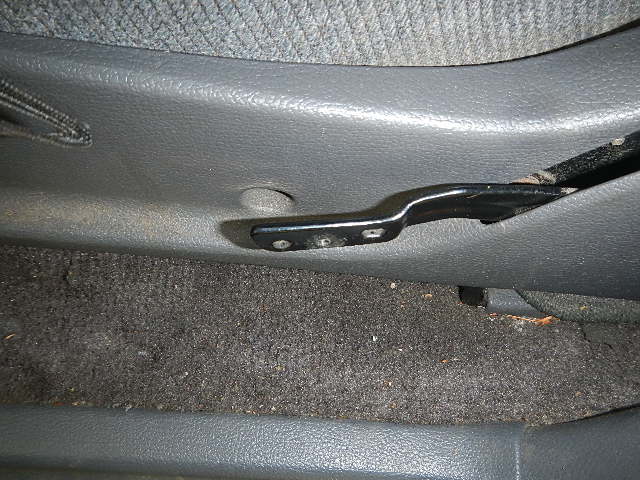
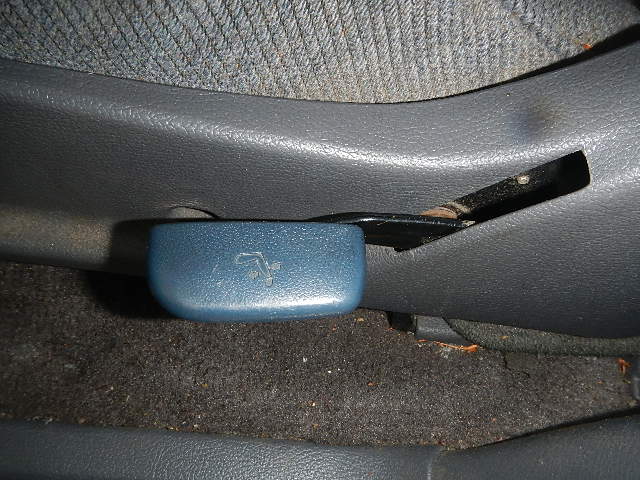
SCORE! Found a 1990 in a yard with the swing style spare holder. Got the whole gate rather than mess with wiring backup lights and such. Also got a second set of roof bars for added support for the basket rack. All for about $60.
(EDIT 4/10/17- Wiring the swing gate style is super simple. All the wire colors match. One is doubled up for the license plate lights. You have to run about 3 feet of wire from the license plate side to the drivers side to reach. But it all matches colors and all worked well!)
Last edited by gyoas759; 04-10-2017 at 05:17 PM.
03-22-2016, 01:53 PM
#9
Registered User
Thread Starter
Join Date: Jun 2009
Location: Grand Valley, Pennsylvania
Posts: 73
Likes: 0
Received 0 Likes
on
0 Posts
For $25. I got my second spare. Rim is not pretty but the tire is unused!
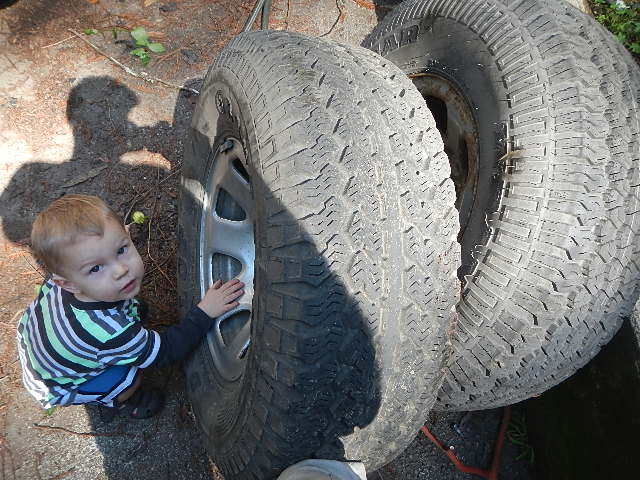
My helper giving it his inspection.
Taking care of some of the smaller details.


My helper giving it his inspection.


Taking care of some of the smaller details.
03-22-2016, 05:36 PM
#12
Registered User
Thread Starter
Join Date: Jun 2009
Location: Grand Valley, Pennsylvania
Posts: 73
Likes: 0
Received 0 Likes
on
0 Posts
I prefer to carry two spares when I go off road but didn't want to sacrifice cargo space. I'll keep one on the chain hoist under the rear and the other on the swing gate. That way I wont be drenched in cold sweat and heading home if I blow one back in the middle of nowhere.
Back when I lived in Pennsylvania and drove my 87 pickup I just tossed an extra in the bed. Was on a trip with a buddy and a tight trail went through a stand of hemlock trees. My toyota made it through just fine. My buddies jeep wrangler put a dead branch through the sidewall. We swapped the spare on and seriously 30 feet later the same thing happened on the other side. Had to cram 4 guys in the cab of my shortbed and wheel our way back to civilization and a tire shop. $260 and 8 hours later we finally got him mobile again.
Ever since, one spare has seemed just barely sufficient. I believe luck favors the prepared.
03-22-2016, 06:46 PM
#13
Registered User
Join Date: May 2009
Location: Sierra Foothills
Posts: 216
Likes: 0
Received 0 Likes
on
0 Posts
I have a similar story, but I was alone in the desert 30 miles from Gerlach Nevada. Luckily there was a cowboy caravan coming through and they had an extra spare I could borrow, it would have been a long walk out. Now I am real paranoid about a spare, and an air compressor AND a plug kit.
I have a question about that tail gate. Is it possible to just swap out the center section where the license plate lives(d) or is the whole thing different?
I have a question about that tail gate. Is it possible to just swap out the center section where the license plate lives(d) or is the whole thing different?
03-22-2016, 07:40 PM
#14
Registered User
Thread Starter
Join Date: Jun 2009
Location: Grand Valley, Pennsylvania
Posts: 73
Likes: 0
Received 0 Likes
on
0 Posts
Yeah. Was researching it and a couple guys have done it. At the very least you need the bracket that it latches onto. Not sure what reinforcements it has in there inside the gate. Definitely have to reinforce the corner where the swing door mounts.
I originally was going to just pull the bracket and trim, but the backup lights would have been covered by the spare. At the junkyard price (Which happened to include a 40% off sale that day.) and since I'm painting the truck anyway it just became much easier to grab the whole thing.
I originally was going to just pull the bracket and trim, but the backup lights would have been covered by the spare. At the junkyard price (Which happened to include a 40% off sale that day.) and since I'm painting the truck anyway it just became much easier to grab the whole thing.
03-22-2016, 10:59 PM
#15
Registered User
Thread Starter
Join Date: Jun 2009
Location: Grand Valley, Pennsylvania
Posts: 73
Likes: 0
Received 0 Likes
on
0 Posts
I have a similar story, but I was alone in the desert 30 miles from Gerlach Nevada. Luckily there was a cowboy caravan coming through and they had an extra spare I could borrow, it would have been a long walk out. Now I am real paranoid about a spare, and an air compressor AND a plug kit.
I have a question about that tail gate. Is it possible to just swap out the center section where the license plate lives(d) or is the whole thing different?
I have a question about that tail gate. Is it possible to just swap out the center section where the license plate lives(d) or is the whole thing different?
03-24-2016, 10:34 AM
#16
Registered User
Thread Starter
Join Date: Jun 2009
Location: Grand Valley, Pennsylvania
Posts: 73
Likes: 0
Received 0 Likes
on
0 Posts

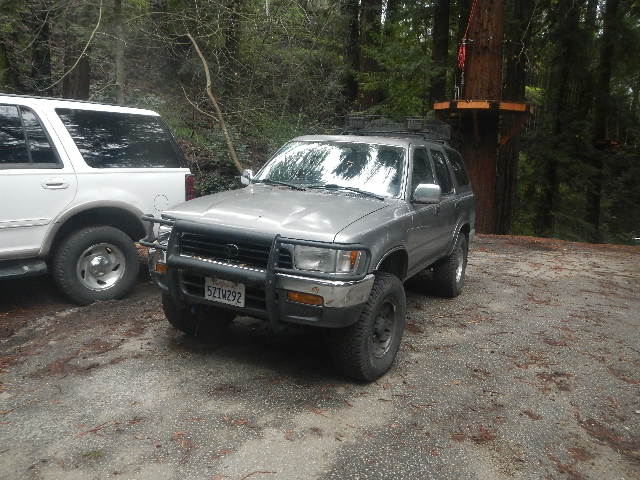
4 roof bars on. No need to worry about the basket rack sagging now. Planning on reinforcing it anyway. I want to be able to load kayaks/canoe and other big stuff up there without having to remove the rack.
03-30-2016, 03:07 PM
#17
Registered User
Thread Starter
Join Date: Jun 2009
Location: Grand Valley, Pennsylvania
Posts: 73
Likes: 0
Received 0 Likes
on
0 Posts
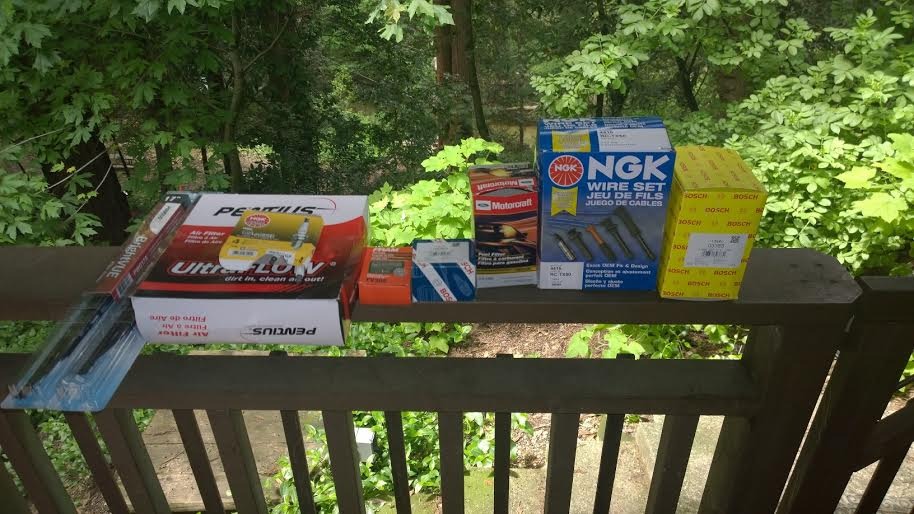
Put in an order to Rock Auto and some Ebay etc. to get this tuned up. New plugs, wires, air filter, fuel filter, PCV, distributor cap & rotor and wiper blades. Fresh oil & filter too.
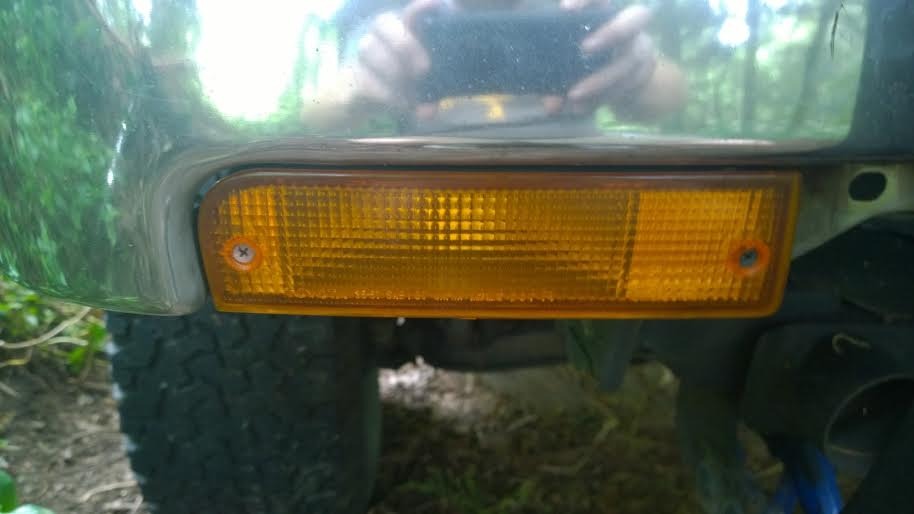
Found a back up light cover from a recycler in Fresno that is being shipped to me.
Need to find a passenger side turn signal.
Injured my back last week - sounds like I damaged a disc so I'm not wrenching on it til next week at least.
What else for good preventative maintenance? Probably going for Toyota thermostat unless there's a decent aftermarket brand that is as good.
03-30-2016, 03:38 PM
#18
Registered User
Join Date: May 2009
Location: Sierra Foothills
Posts: 216
Likes: 0
Received 0 Likes
on
0 Posts
Beck Arnley thermostats seem to be ok. I've used one with no issues on several occasions.
I only use toyota oil filters, I was told they have a flap in them that the aftermarket ones don't and that flap keeps the oil from draining out when not running, which in turn means the oil is there when it starts up again.
Other than that I would make sure to check oil levels in all of the running gear and hit all the zirc fitting while you are down there.
04-17-2016, 08:31 PM
#19
Registered User
Thread Starter
Join Date: Jun 2009
Location: Grand Valley, Pennsylvania
Posts: 73
Likes: 0
Received 0 Likes
on
0 Posts
Back is healing up and I'm at about 90% if I'm not pushing too hard or for too long. Progress is being made on this project again. Never could find a turn signal in any of the yards so I ordered one on ebay.
Other goodies arrived via FEDEX.
Got more done and will update after I find the cord to upload the pics.

Other goodies arrived via FEDEX.

Got more done and will update after I find the cord to upload the pics.
06-05-2016, 11:54 PM
#20
Registered User
Thread Starter
Join Date: Jun 2009
Location: Grand Valley, Pennsylvania
Posts: 73
Likes: 0
Received 0 Likes
on
0 Posts
Got plug wires in with no change. Leaning toward dirty TB or MAF.
Got the swing gate on! Already feels more rugged but saggy butt is more obvious.
Cut out the crunched metal.
New stuff is tacked in with the welder
Got the swing gate on! Already feels more rugged but saggy butt is more obvious.


Cut out the crunched metal.


New stuff is tacked in with the welder


