Fordfanatic27s 86 toyota build.
 01-09-2013, 05:15 AM
#1
Registered User
Thread Starter

Join Date: Jan 2013
Posts: 33
Likes: 0
Received 0 Likes
on
0 Posts
Fordfanatic27s 86 toyota build.
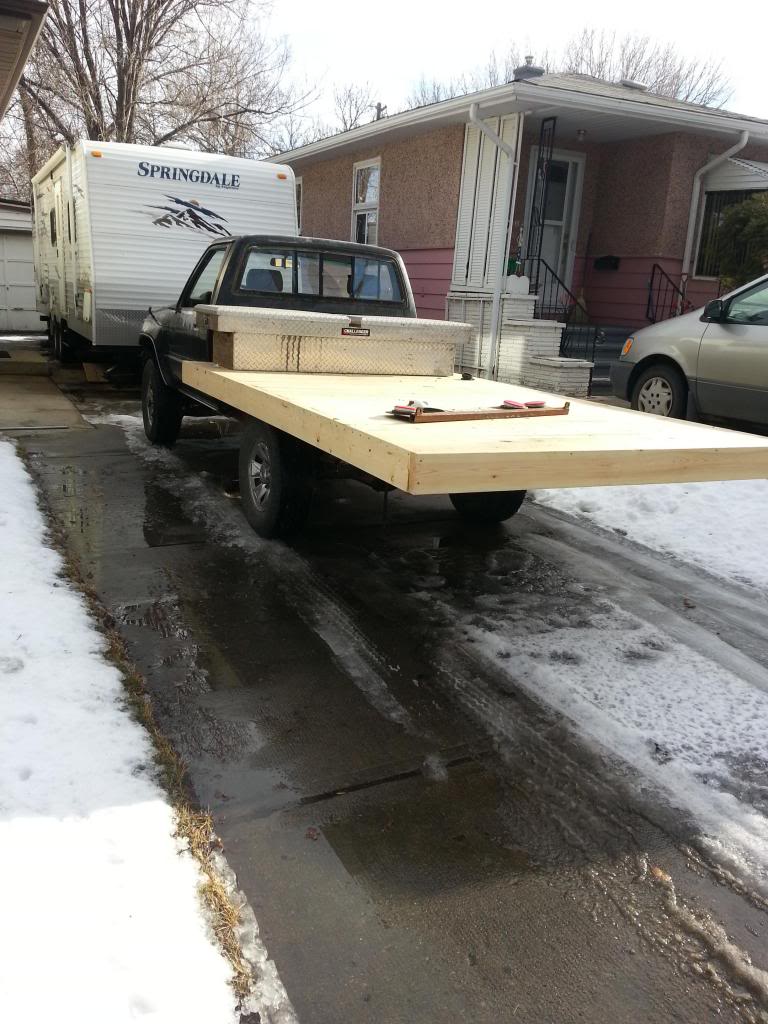
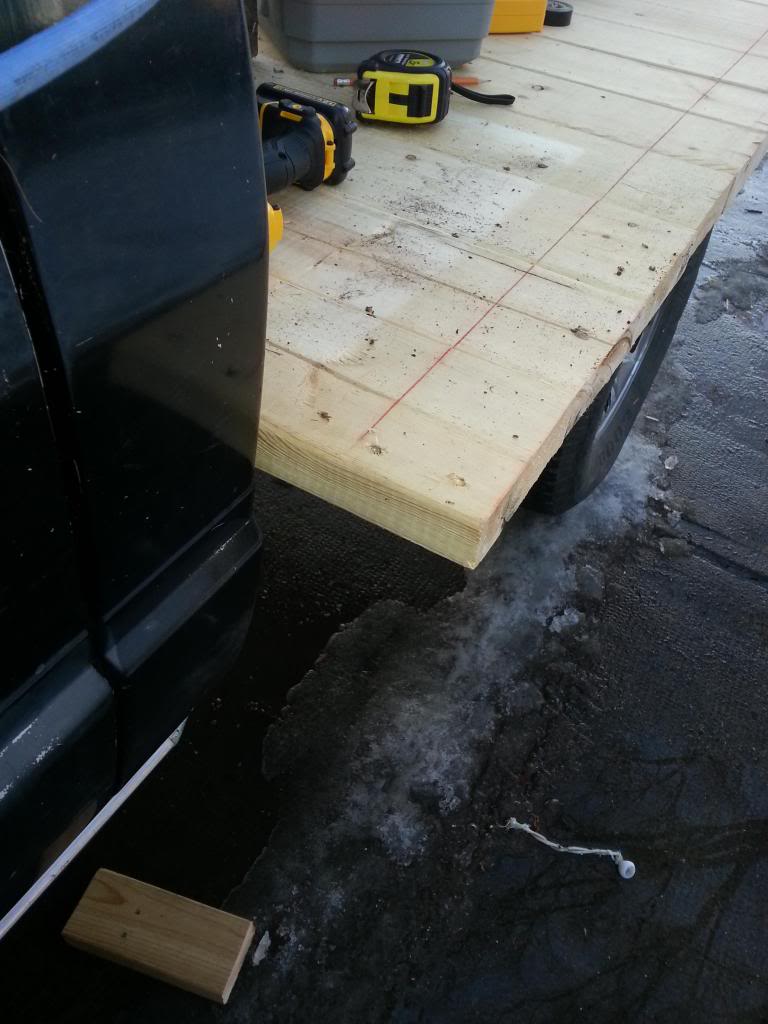
Hi, ive had my yota for about a year. I payed 30 bucks for it. 4x4 works great, no rust, but its not pretty either. interior was completely dissasembled and laying about, a welder owned it and butchered the wiring harness when he swapped in an older carb'ed engine instead of the factory fuel injected one. when i got it none of the lights worked, it had a 15 amp parasytic draw etc. so yeah... total hunk of ˟˟˟˟ haha. i cut every wire out from the headlamp back bought a roll of wire and went to work and rewired every single part of the vehicle from scratch. and if anyone ever tried to work on this thing again itd be a disaster because every wire in the vehicle is yellow haha. but anyway... everything works now. interior is reassembled. and it has a rediculously long flat bed i built on it right now that i used to transport my crotch rockets once. my plan is to half the flatdeck and start building a nice little 4x4 trail rig. i need enough of a flat deck to pick up sheets of plywood though for home projects.
 01-09-2013, 12:30 PM
#3
Registered User
Thread Starter
Join Date: Jan 2013
Posts: 33
Likes: 0
Received 0 Likes
on
0 Posts
im a journeyman ford mech so rewiring an 86 was surprisingly easy and painless. but being that they dont teach carb technology at college anymore i am still a noob to this 22re or whatever engine is in here. i just tracked down a friend retiring in autobody and he sold me all his sprayers sanders hammers etc for body work for 50 bucks so step one will be shorten the deck and then start sanding and prepping for paint. also thinking of bringing it to work and undercoating both sides of the floor boards inside and outside the truck so they dont rust out
01-16-2013, 08:54 AM
#4
Registered User
Thread Starter
Join Date: Jan 2013
Posts: 33
Likes: 0
Received 0 Likes
on
0 Posts
update. i removed the wood deck, thank god, and measured and priced out what i need to make a more proper flat deck with a steel frame and just boards up top. also going to incorporate a headache rack, i blew all my money this month on an air compressor and welder so will have to wait a month to get the parts. i also ordered these rims

which i think will look sweet after i spray the truck flat black. im still undecided on the tire size and type. i had good year wrangler duratracs on my last 4x4 and liked them but am leaning towards bfg since i get them at cost through work. also i am waiting on a quote for a 2 inch lift kit which i want to put on before i buy tires to fit accordingly. i measured the cab and sourced out a newer ranger bench seat i wish to install to replace the two worn bucket seats. in the next few weeks i will gut the interior entirely and undercoat it inside and out and put a clear film spray over top to keep it from being sticky in the cab. will be sure to take pictures. theres still tons that needs to be done, from patching small drill holes from the moron that tore off the pass mirror then self tapped a ford mirror in its place. to sanding, body filling, etc, priced out 2x6x1/4 channel iron to make a beefy front
bumper and mount a winch.etc. many updates to come.
edit- my photo wont work for some reason heres a direct link
http://www.google.ca/imgres?um=1&hl=...7&tx=115&ty=90
Last edited by fordfanatic27; 01-16-2013 at 08:57 AM.
01-21-2013, 05:40 AM
#5
Registered User
Thread Starter
Join Date: Jan 2013
Posts: 33
Likes: 0
Received 0 Likes
on
0 Posts
update with pics JAN.21
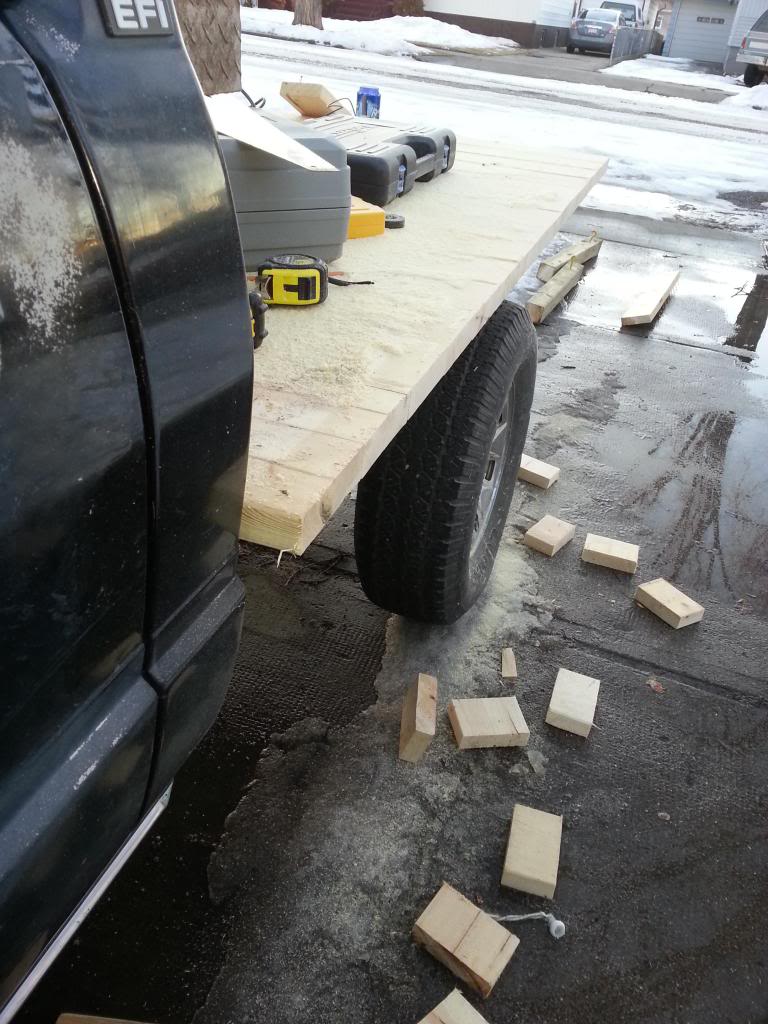
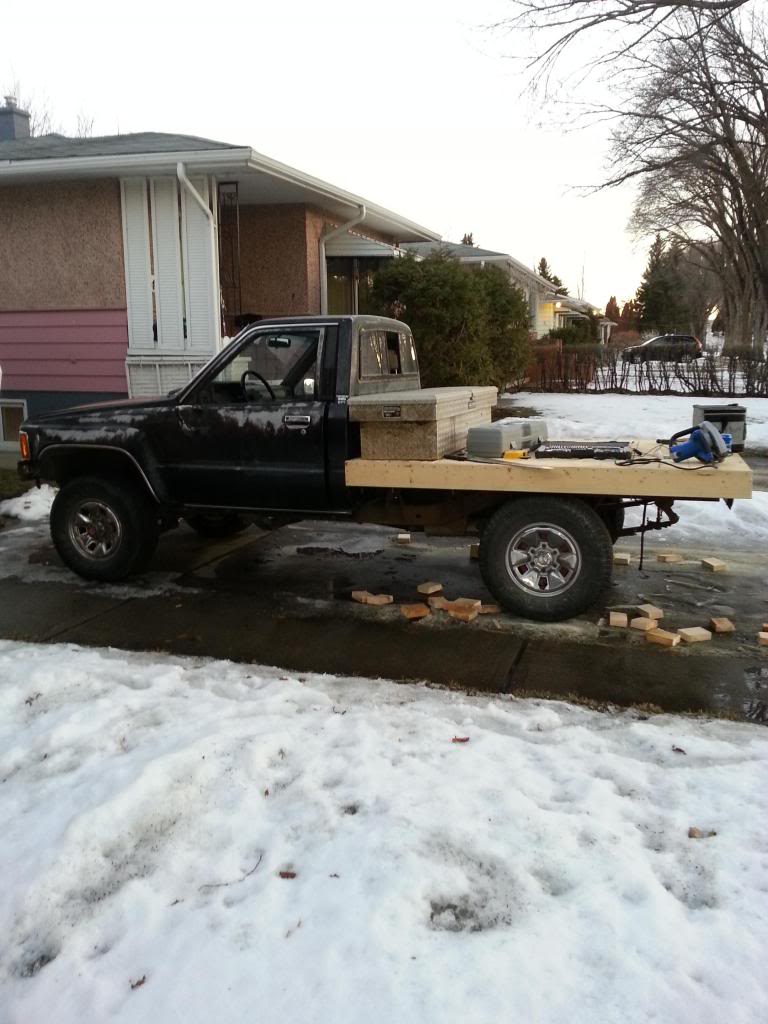
My truck is in my home town that i moved away from in september. i loaded up a bunch of tools and traveled 2 and a half hours to go work on the truck. it was mild weathered on friday and the truck just needed a boost and start effortlessly. on friday i shortened and narrowed the rediculous deck on the truck that i made more as a joke than anything to carry my gixxer 750's. the truck was quickly retired when i found out a hard launch in first with 2 bikes on the back, and my rockets werent the only things that could pull a mean wheelie.  but anyway. heres the update
before
this is how much deck i removed, almost 4 feet
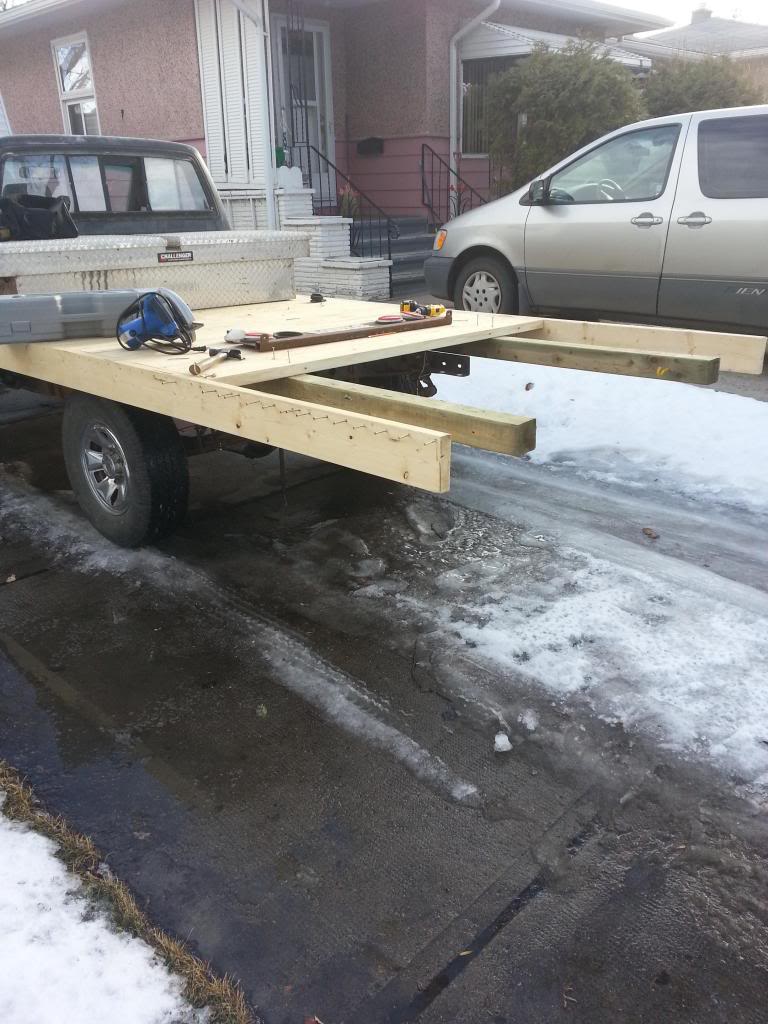
now to narrow it
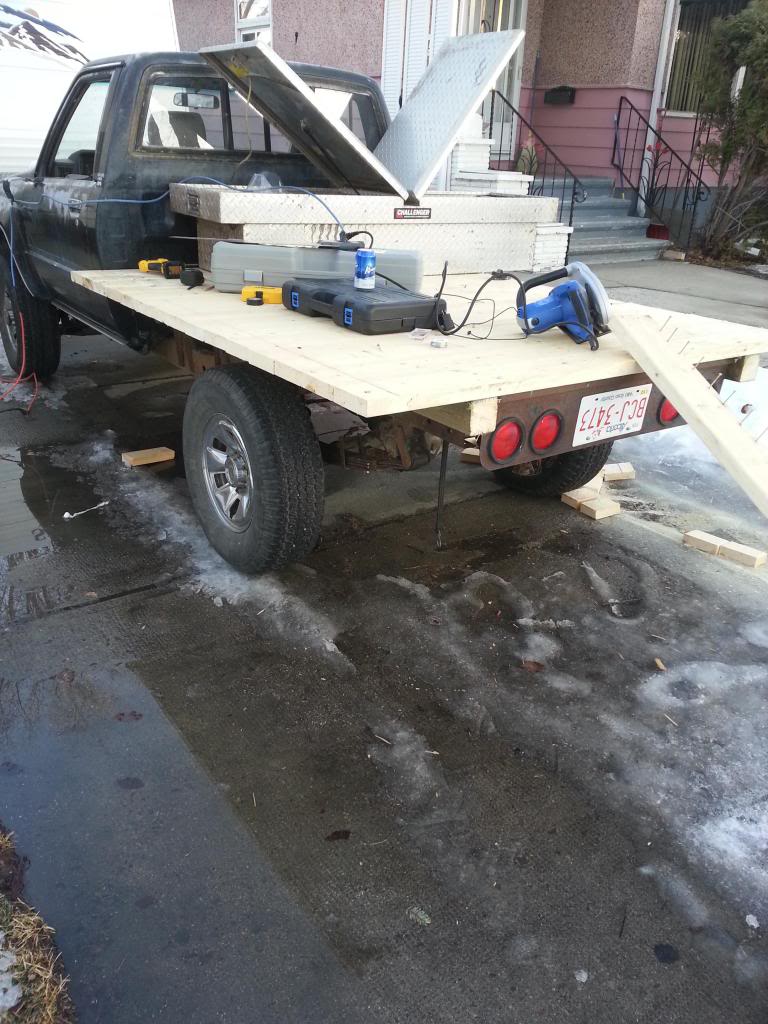
i wired in a temporary light bar. i just used butt connectors and zip ties because it know its temporary. my plan is to remove the wood deck altogether and build a steel one eventually.
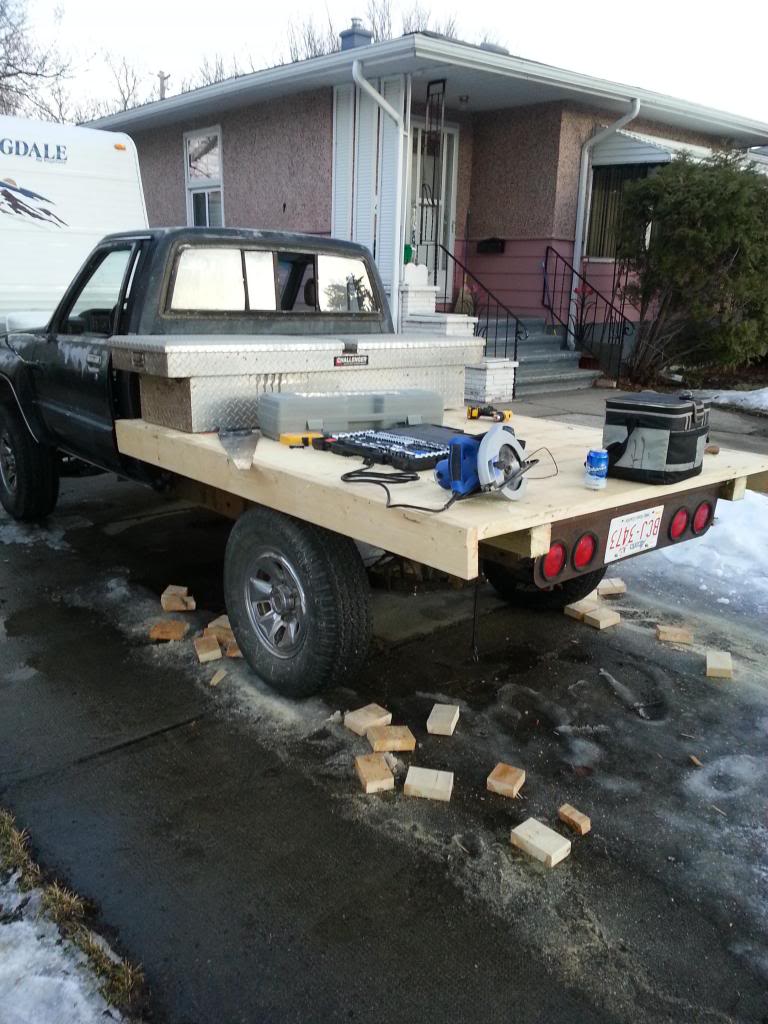
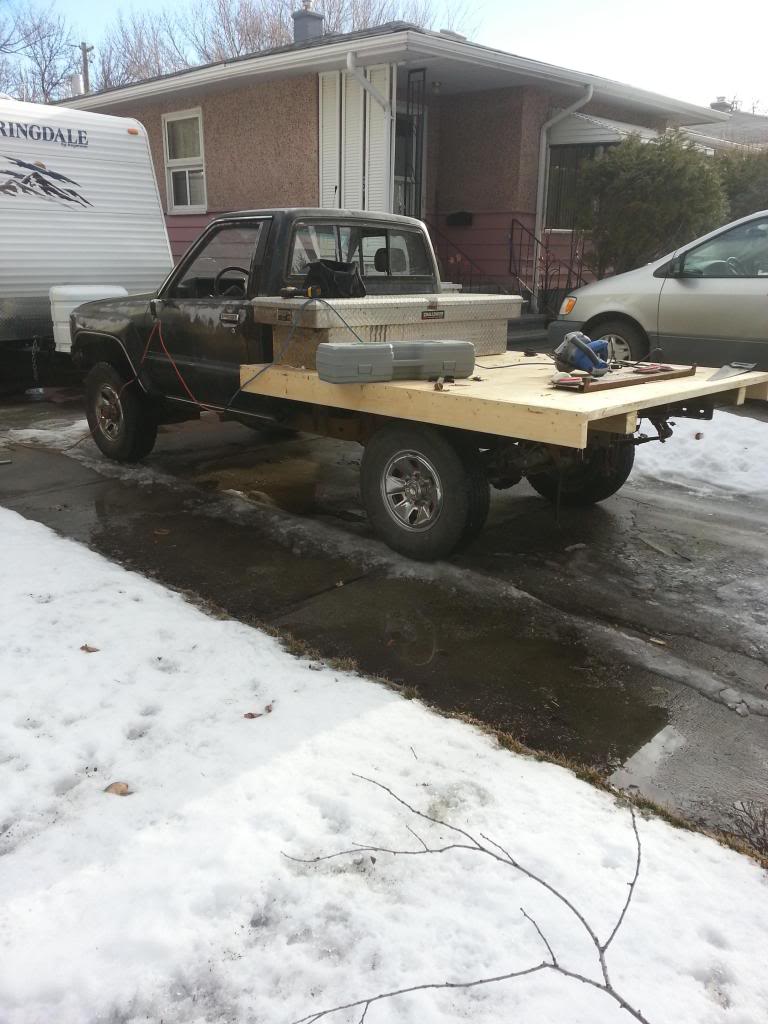
hey! it looks like a truck again and not a third world country tow truck
the plan was to bring the toyota home this weekend. it started and ran fine on friday when it was -10 celcius. but by sunday when i went to leave and begin its 2 and a half hour journey home it was -20 celcius and that old carbed 22r was going to have nothing to do with starting. i tried playing with the choke and force feeding it fuel down the carb, and nothing could get that stubborn bitch running. so its ready to go home to finish its restoration im just waiting on a nice day. ive always thought as carbeurators as natures vaginas. finicky sobs.
ps- looking for both factory mirrors for my 86, pick a parts and autowreckers have been no help here! msg me if you have some in good shape for sale. as well as various dash pieces.
but anyway. heres the updatebefore
this is how much deck i removed, almost 4 feet
now to narrow it
i wired in a temporary light bar. i just used butt connectors and zip ties because it know its temporary. my plan is to remove the wood deck altogether and build a steel one eventually.
hey! it looks like a truck again and not a third world country tow truck
the plan was to bring the toyota home this weekend. it started and ran fine on friday when it was -10 celcius. but by sunday when i went to leave and begin its 2 and a half hour journey home it was -20 celcius and that old carbed 22r was going to have nothing to do with starting. i tried playing with the choke and force feeding it fuel down the carb, and nothing could get that stubborn bitch running. so its ready to go home to finish its restoration im just waiting on a nice day. ive always thought as carbeurators as natures vaginas. finicky sobs.
ps- looking for both factory mirrors for my 86, pick a parts and autowreckers have been no help here! msg me if you have some in good shape for sale. as well as various dash pieces.
Last edited by fordfanatic27; 01-21-2013 at 05:43 AM.
01-22-2013, 04:16 PM
#7
Registered User
Thread Starter
Join Date: Jan 2013
Posts: 33
Likes: 0
Received 0 Likes
on
0 Posts
thanks terry, im battling cancer and just had a surgery go awful. they were removing tumors and struck an artery and didnt notice and sowed me back up and i just about died before they realized what they had done. it was a close call. im bedded up for at least 3 weeks now which will put a serious damper in my budget for a month or 2 but will be sure to update when i can.
Trending Topics
 01-31-2013, 09:24 PM
#9
Registered User
Thread Starter
Join Date: Jan 2013
Posts: 33
Likes: 0
Received 0 Likes
on
0 Posts
small update. i only worked on the truck for half an hour tonight before it started to rain/snow. but i tore the old seats and center console and trim out. they are for sale or garbage. the driver seat is ripped but the passenger is in good shape if it had a shampoo. the center console is a bit faded but not cracked and in good shape. if you want them pm me their not worth much to me. anyway, i found this...
http://www.jcwhitney.com/replacement...83y1986g12u0j1
and im reallllllllly tempted to give it a go for $20 bucks. the carpet is salvageable out of my truck but i want a black carpet anyway. and while the carpets out ill properly run the speaker wires and also lay the wires for the trucks future heated leather seats. like i said, not much of an update, but more will come soon. oh and for those thinking wow thats kind of dangerous working with a lantern at midnight in the backyard you could burn yourself. well youd be right it fell and i went to catch it and burnt the livin ˟˟˟˟ out of my hand and the worst part is i knew it was going to happen as soon as i couldnt find my flashlight lol.
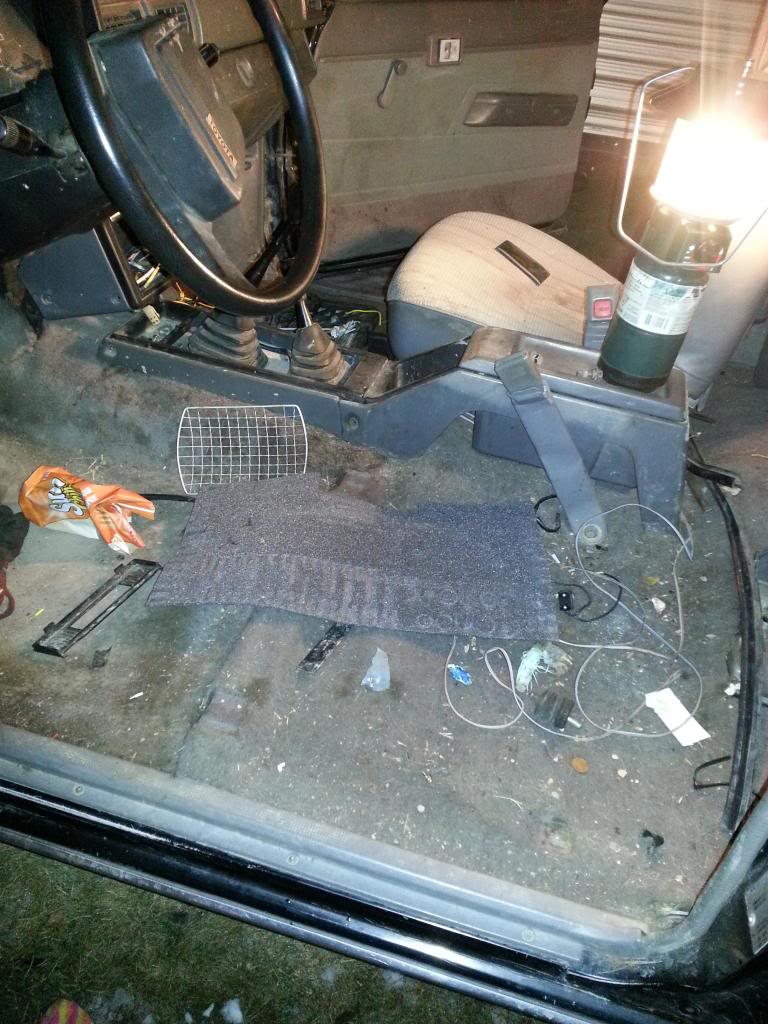
yeah... i havent cleaned it since i bought it yet. i dont know if its full of dog hair or horse hair haha
http://www.jcwhitney.com/replacement...83y1986g12u0j1
and im reallllllllly tempted to give it a go for $20 bucks. the carpet is salvageable out of my truck but i want a black carpet anyway. and while the carpets out ill properly run the speaker wires and also lay the wires for the trucks future heated leather seats. like i said, not much of an update, but more will come soon. oh and for those thinking wow thats kind of dangerous working with a lantern at midnight in the backyard you could burn yourself. well youd be right it fell and i went to catch it and burnt the livin ˟˟˟˟ out of my hand and the worst part is i knew it was going to happen as soon as i couldnt find my flashlight lol.
yeah... i havent cleaned it since i bought it yet. i dont know if its full of dog hair or horse hair haha
02-05-2013, 01:22 PM
#10
Registered User
Thread Starter
Join Date: Jan 2013
Posts: 33
Likes: 0
Received 0 Likes
on
0 Posts
update.
the truck wouldnt start this morning. it didnt take long to find the culprit
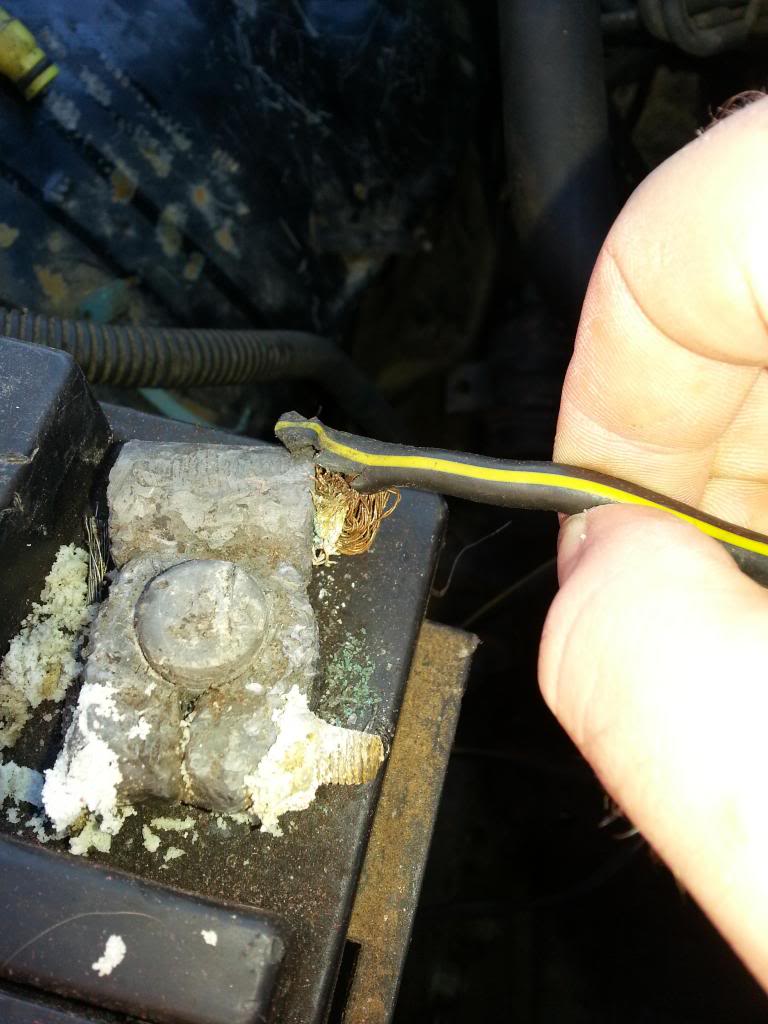
replaced

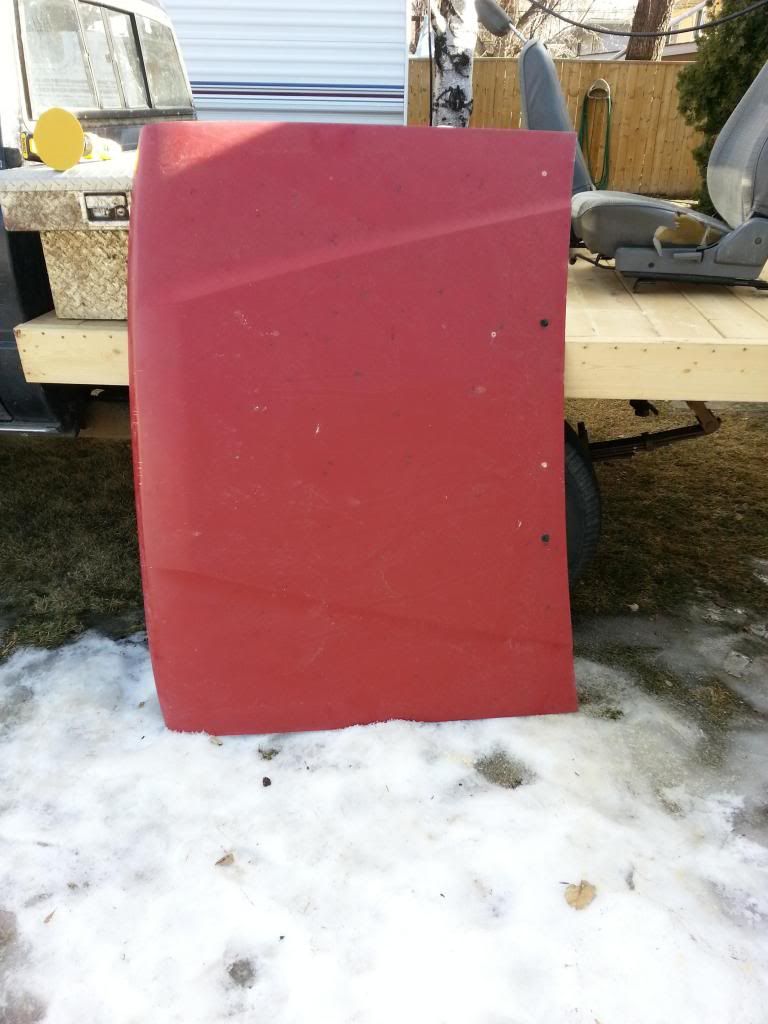
removed hood
i chose my hood to be my guinea pig for my first sand and paint attempt because of the easy contours and corners. good thing i did...
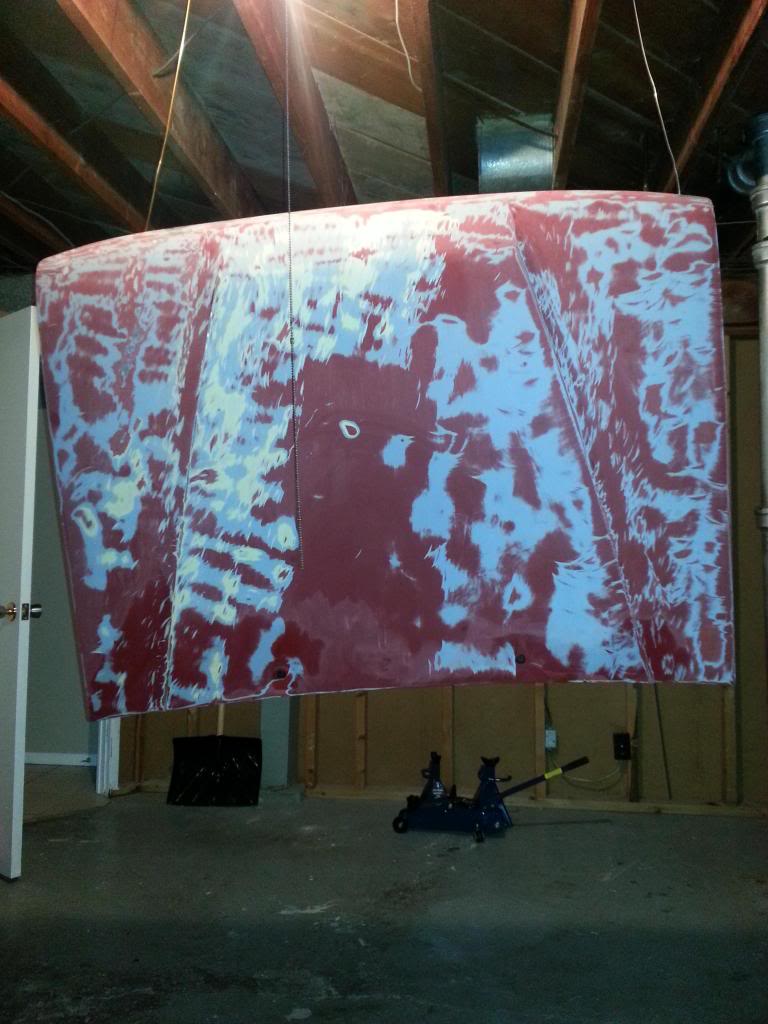
sanded hood with 80, then went over with a hand block because i was like jed from the chain saw massacre, the dewalt drill with a sanding disc on it was my chain saw, and the hood was my victom.
primered
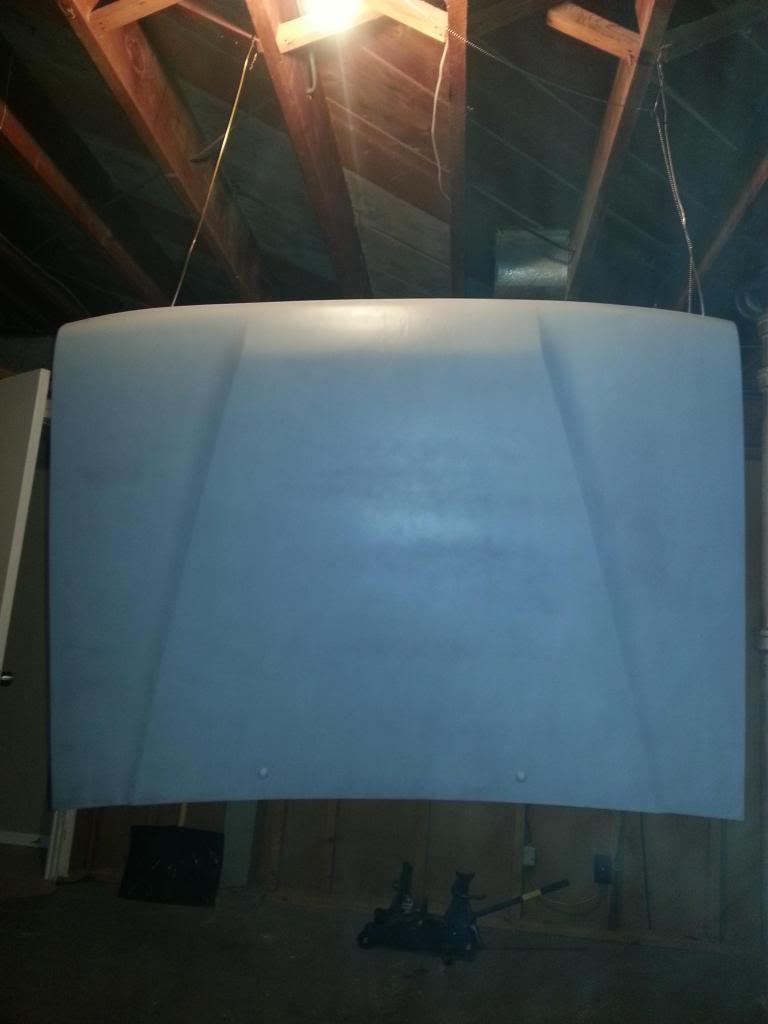
where i butchered the hood with the sanding disc i made little grooves that i will have to go back and touch up. can i bondo over filler primer or do i need to sand it down again by hand and reprime it?
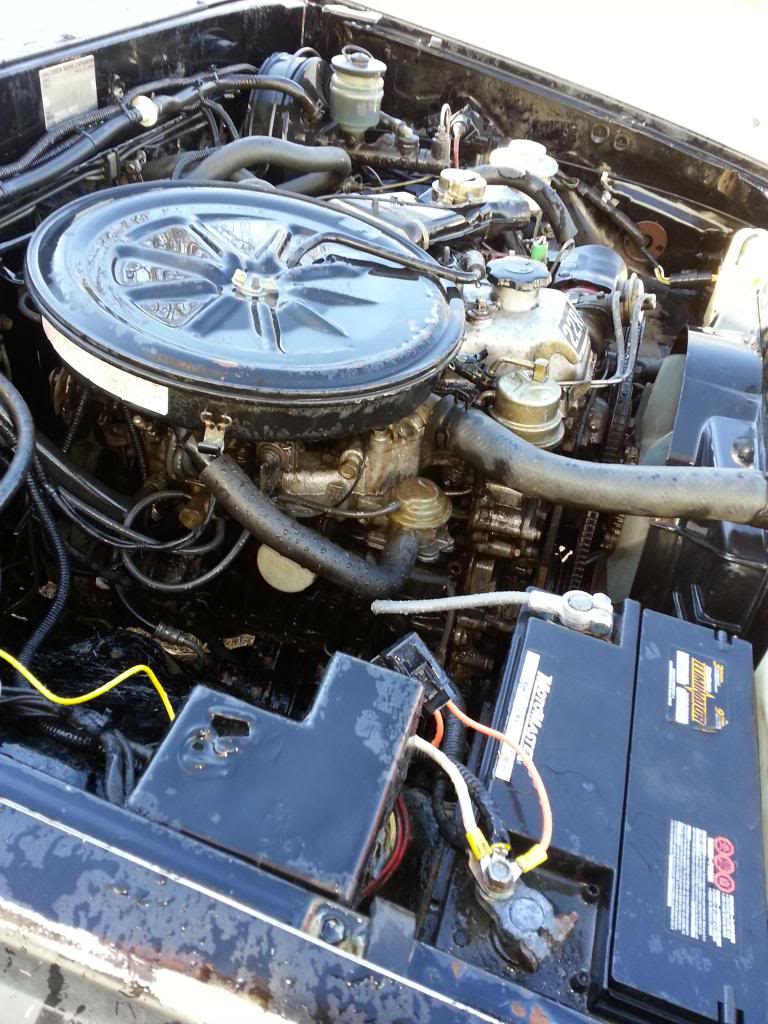
it seemed like as good a time as any to try some engine shampoo

it worked fairly well.
it didnt get everything, but i didnt expect it too
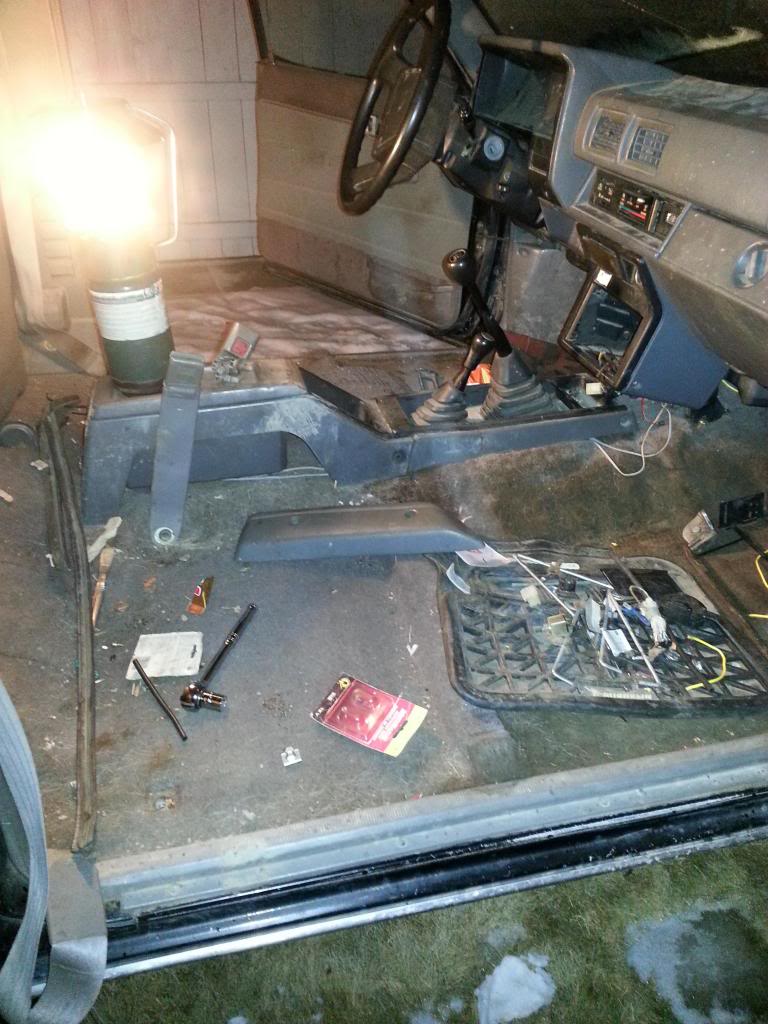
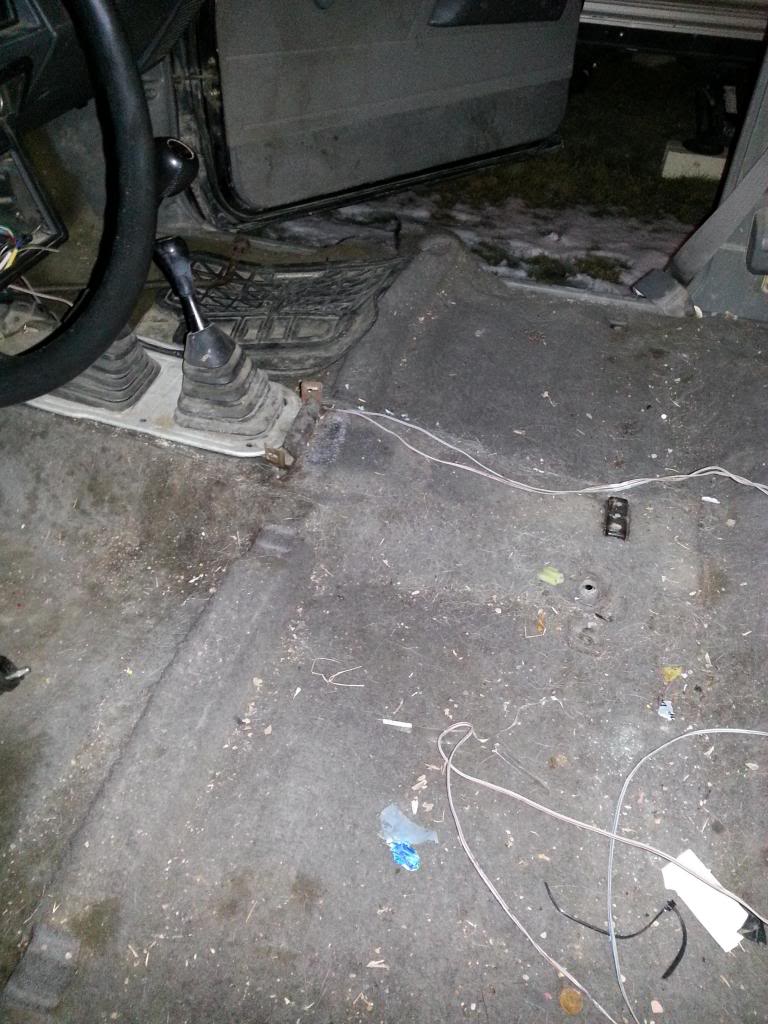
i also forgot to take some pics of the other stuff i did, i pulled the interior trim and carpet and such. its now bare besides the dash. ready for some waterproofing and rewiring.
the truck wouldnt start this morning. it didnt take long to find the culprit
replaced
removed hood
i chose my hood to be my guinea pig for my first sand and paint attempt because of the easy contours and corners. good thing i did...
sanded hood with 80, then went over with a hand block because i was like jed from the chain saw massacre, the dewalt drill with a sanding disc on it was my chain saw, and the hood was my victom.
primered
where i butchered the hood with the sanding disc i made little grooves that i will have to go back and touch up. can i bondo over filler primer or do i need to sand it down again by hand and reprime it?
it seemed like as good a time as any to try some engine shampoo
it worked fairly well.
it didnt get everything, but i didnt expect it too
i also forgot to take some pics of the other stuff i did, i pulled the interior trim and carpet and such. its now bare besides the dash. ready for some waterproofing and rewiring.
02-05-2013, 04:11 PM
#11

Depending how bad the dings/scritches(yes scritches!) are. Scotch pads are your friend. You really just need to knock off the shine (if you have any left) and oxidized and chaulky paint.
Check the primer label or TDS(Tech data sheet) for the fill, should be closer to 160-200grit I think.
Also check your filler label, it'll say if it is ok for painted surfaces. Generally it's not recommended.
For a super smooth fill and finish you'll want to pick up some of this stuff (Generic or cheaper is just as good), or maybe some of this. They give the filler a smoother texture and alter the elasticity, the first one also makes it less prone to shrinkage (IIRC). Both are just added to the filler mix. Or the finishing glaze/putty can be used alone.
You might not need any filler, just a couple extra coats of sandable/high-fill primer over the drill marks(spot sprayed). Then sand off the extra till it blends with the rest. Use the biggest sanding block/plane you can get your hands on.
And finally..
A great place to do test shoots is the inside of the front fenders. No ones EVER going to see those.
Pick up some of the super thin drop cloth plastic at the local big-box hardware store and staple it to those ceiling rafters.
Mop the floor and paint while it's still wet, cuts the dust 95% and you don't get paint spray on it.
Get a movable light stand or two, the pictures and painting will be easier to see. It also increases the air/surface temps, so the paint dries faster and harder (or at all, yeah i saw that snow!).
Looks pretty good from here, we can't see any scratches
02-05-2013, 04:18 PM
#12
Registered User
Thread Starter
Join Date: Jan 2013
Posts: 33
Likes: 0
Received 0 Likes
on
0 Posts
Wow, thats alot of really good advice, thanks alot. their phone pics. but their actually quite deep gagues, my being a novice was definately showing. i hacked that poor hood pretty bad but none of it is down to bare metal so i should be able to sand it out and reprime it and be back on track. im glad i picked a hood thats long and flat to practice auto body techniques on.
02-05-2013, 04:28 PM
#13
One more thing I thought of remebering how sad your drivers door looks. If you have the time and space it's better to use a paint stripper and steel-wool, when you're going down to bare metal it will leave the factory rust dip intact.
If the paint label/tds doesn't say what grade sand paper call up thier support # and they can find it.
Just go slow and use a finer paper and more elbow grease. There are lots of good you tube videos also, I haven't done body work in over 20 years and they were a good refresher.
If the paint label/tds doesn't say what grade sand paper call up thier support # and they can find it.
Just go slow and use a finer paper and more elbow grease. There are lots of good you tube videos also, I haven't done body work in over 20 years and they were a good refresher.
02-05-2013, 07:40 PM
#15
There are some videos for back-taping. "My buddy Phil" from diyautoschool/swrnc has a good video on wetsanding clear coat also. Fair warning he does get a bit loud in some of his videos, but it just shows he's passionate
 and maybe a little crazy
That cheap/thin plastic drop cloth stuff is much easier to cover things like the interior. Sure beats trying to wrestle with paper over large holes, like the door openings or your tires and rims.
I've been using some ACE hardware painters tape "removes clean up to XXX time" yeah right, gummed up my rearview in less than 24 hours. Not sure what quality 3m auto paint specific costs but if you can source it from your paint supplier or the local body shop do.
If you wind up with tape residue or over spray on glass and you can't get it off with your rag,I use a wet razor blade just make sure to wipe/keep it clean or it'll flex/twist and make gouges.
Use the hard to reach never seen bits for practice or warm up. They're either never seen or visually isolated.
Are you using a gun or cans btw?
The "shoots from any direction" rattle cans are abit more than the generic 99� stuff but well worth it if you have to do any flat spraying. You have a place to hang stuff of course, where I been doing my trim painting on my tail gate or my work bench.
Don't sweat the little stuff you do your best with but just don't like, no one is going to notice untill you point it out most of the time anyways.
What color are you going to spray?
Lighter colors hide minor imperfections better than dark. Mine will be the factory metallic red, an up hill battle for sure
02-05-2013, 07:48 PM
#16
Registered User
Thread Starter
Join Date: Jan 2013
Posts: 33
Likes: 0
Received 0 Likes
on
0 Posts
well im not too worried about the interior over spraying except at the dash, the carpet and full interior have been gutted until after i spray the body, then im applying a layer of undercoat to both the inner cab floor boards, and under neath side of them. then im installing new black carpet because i dont think theres any hope of getting the factory grey carpet clean i found a few drop in replacement carpets for a decent price. i actually do have a DA sander and primer sprayer but no air compressor ironically so im rattle canning it as a first attempt. i used 3m sand paper and sanding blocks etc, and duplicolor filler primer with duplicolor flat black. now everyone and their dog tells me to go flat black to hide the imperfections and i bought one can to see how the hood turns out but im not sold on that. id actually like the vehicle go a bright white but my friends with autobody experience told me theres 100% chance ill screw it up.they all said go flat black for learning purposes and if a year or 2 later i want to redo it ill have alot more experience under my belt to paint it white. so im really humming and hawing on that, but the hood at least for now is going flat black and if it looks okay then the whole truck is going flat black. should be a fairly forgiving color since the origional color was black. also is there a spray on clear coat to go on after? i know rattle can paint jobs can look good for a year or 2 then bird ˟˟˟˟ stains and sun oxidyzing ruins them.
02-05-2013, 09:13 PM
#17
Yep, "Rustoleum automotive clear cloat" In the fancy spray at any angle can at the local big box hardware places. Was thinking of trying it on my hood if I can get the dent straight w/o cracking the paint or maybe the roof, both have sad clears on them now and need sanded out. Not sure if they have a satin clear, that would give it some protection but still a bit of the mat/flat finish.
02-05-2013, 10:32 PM
#18
Yea I just saw a satin clear at menards earlier tonight , not sure who made it. The rust~oluem automotive paints are great , stand back a little spray all the angles first then spray the field. do a thin coat , then when dry a little heavier ,try to keep a wet edge as you spray , and repeat untill you are good with it . My experience with clears are the more gloss the better, and a ton of coats, it drys fast so you can just spray it, come back in like 10 or 20 min and hit it again. Gloss seems to hold up better than a lower sheen clear in the long term, usually if your using spray cans the clear finish dulls faster than a real ppg or cup gun applied clear. So you might be able to do flat black, gloss clear and in two months it might dull down and look like a matte or satin clear . I used satin clear on some center caps and in a month it had paint chipping off, did the same in gloss " same product " and they dulled in like a month and looked not as glossy and held up. Just my opinion, hope it helps and good luck .
02-05-2013, 11:58 PM
#19
stand back a little spray all the angles first then spray the field
I don't recall off hand if the technic or bad effect is called combing.
You spray the edges or seams first so you have somewhere to fan out and blend into. If it's done wrong you get a comb effect(op look at that I remebered), where the edges lap.
come back in like 10 or 20 min and hit it again
I used satin clear on some center caps and in a month it had paint chipping off, did the same in gloss " same product " and they dulled in like a month and looked not as glossy and held up.
Satin would have more solids in them so it makes sense they will degrade faster than a pure binder(clear coat), like the flat colors oxidize faster than gloss. So use more coats of satin than you would a pure clear, this will give you something to sand off when it starts to dull.
I think there is conflicting information along the lines of "Spray cans are softer.. Spray cans are harder..". My guess would be those are brand and application environment related. Maybe its muggy out, maybe the chemist had something on his mind, ect.
Thanks hoghead. Peersonal(yes peer!) preferences and experiences are always a helpfull thing. They either alter or enforce ones own line of thinking, no matter wether they differ or not.
Last edited by Co_94_PU; 02-06-2013 at 12:00 AM.
02-06-2013, 06:01 AM
#20
Registered User
Thread Starter
Join Date: Jan 2013
Posts: 33
Likes: 0
Received 0 Likes
on
0 Posts
great, ive learned so much. thank you guys. today ill probably stick to the hand block with some 120p and see if i can get those gauges out that my 80 grit and drill put in. some of them are reallllly bad haha. the primer really shows off all the imperfections


