ChefYota4x4's 1987 4Runner Build-Up Thread
 05-15-2010, 09:53 AM
#61
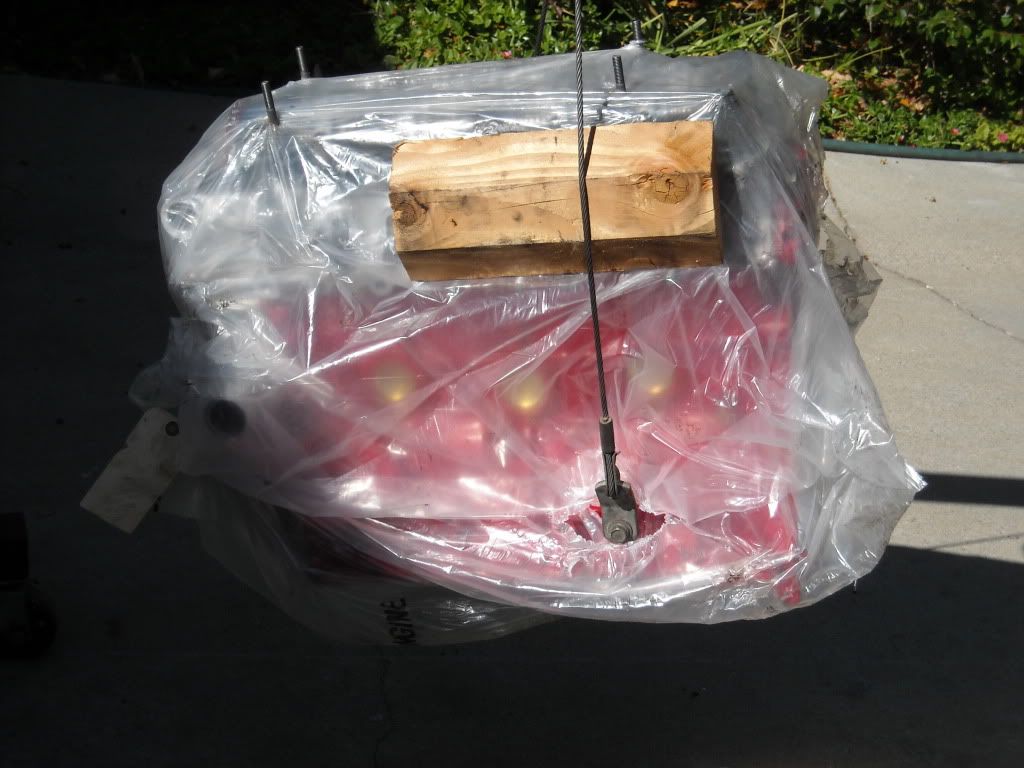
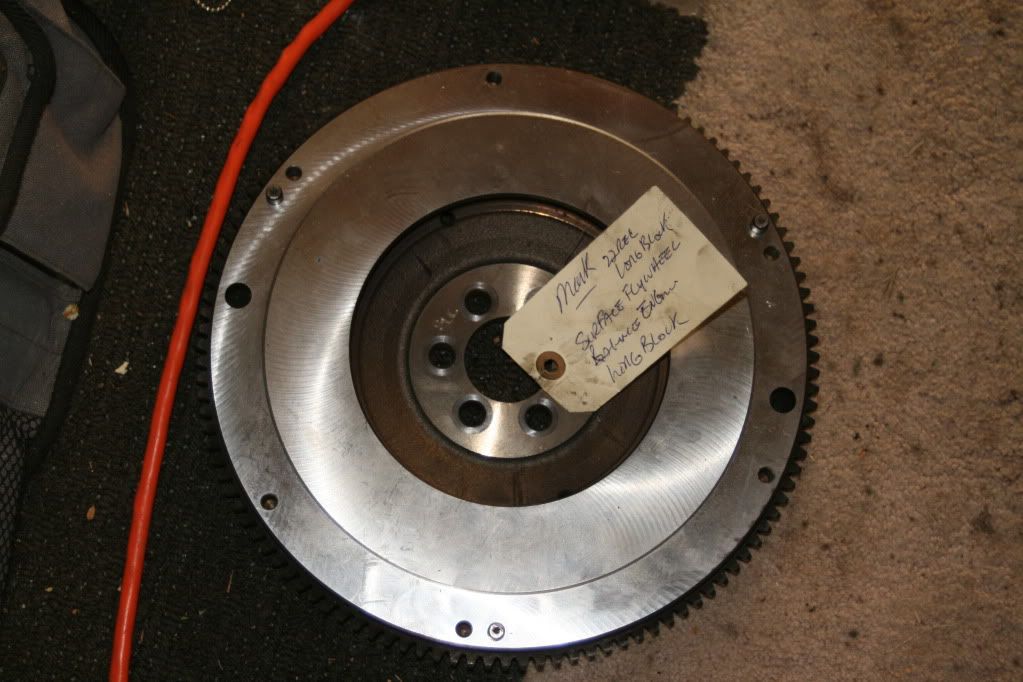
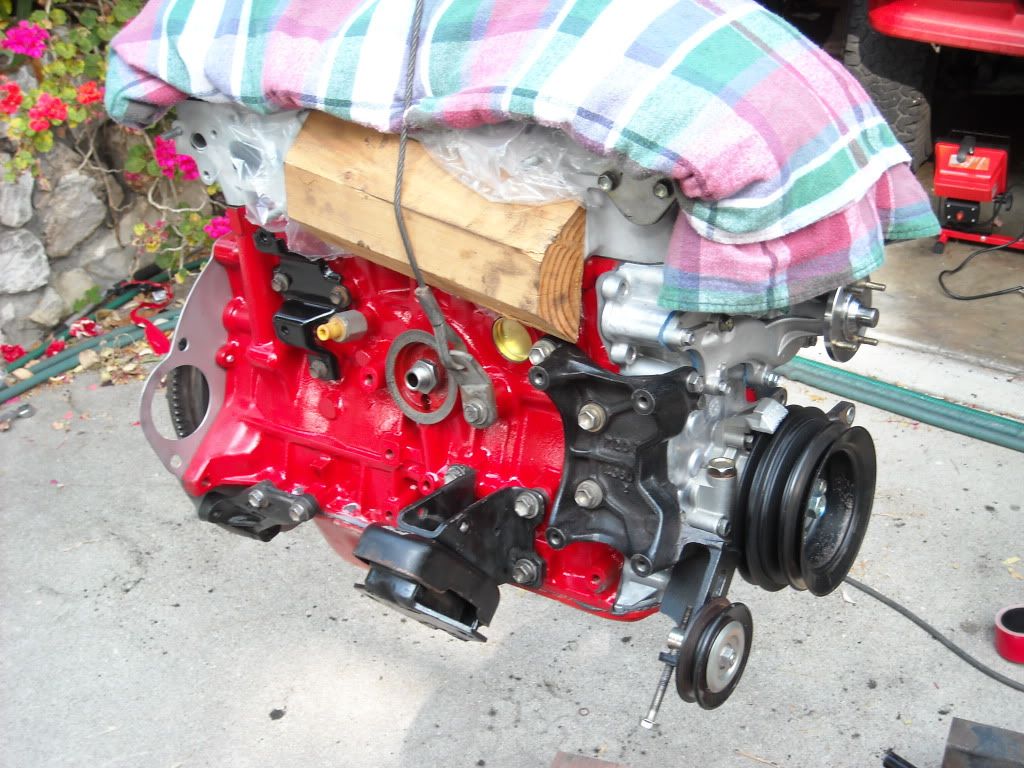
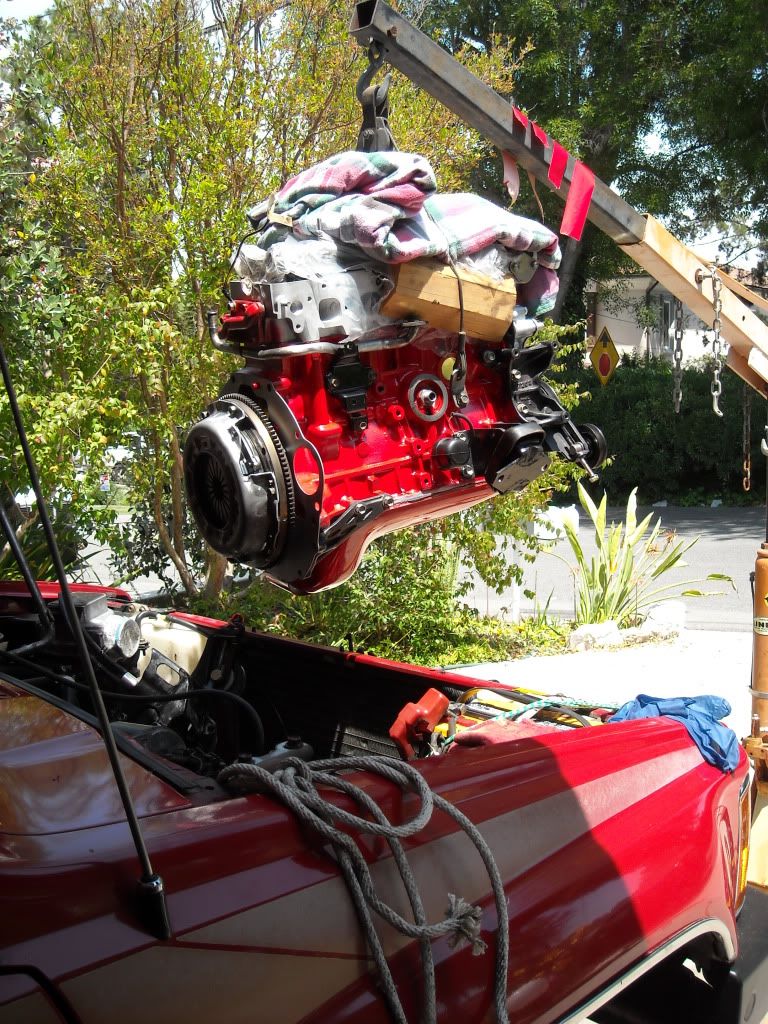
Well, I got it back, and it's GO TIME! LOL......Here's the Balanced- long block, before I started anything....
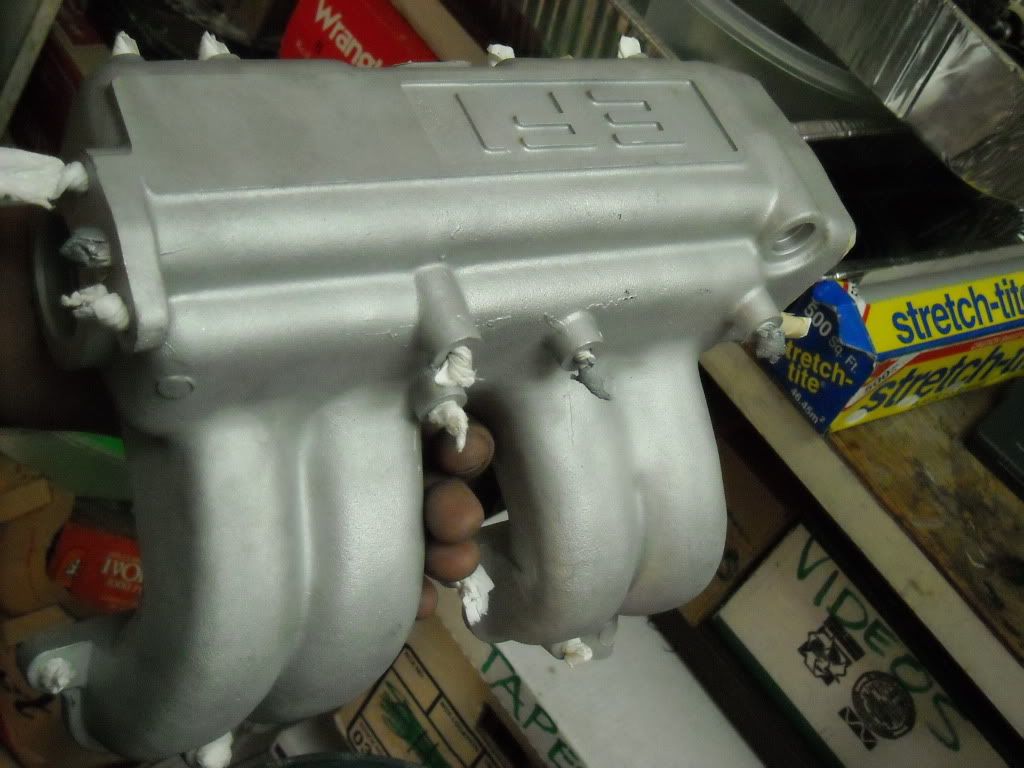
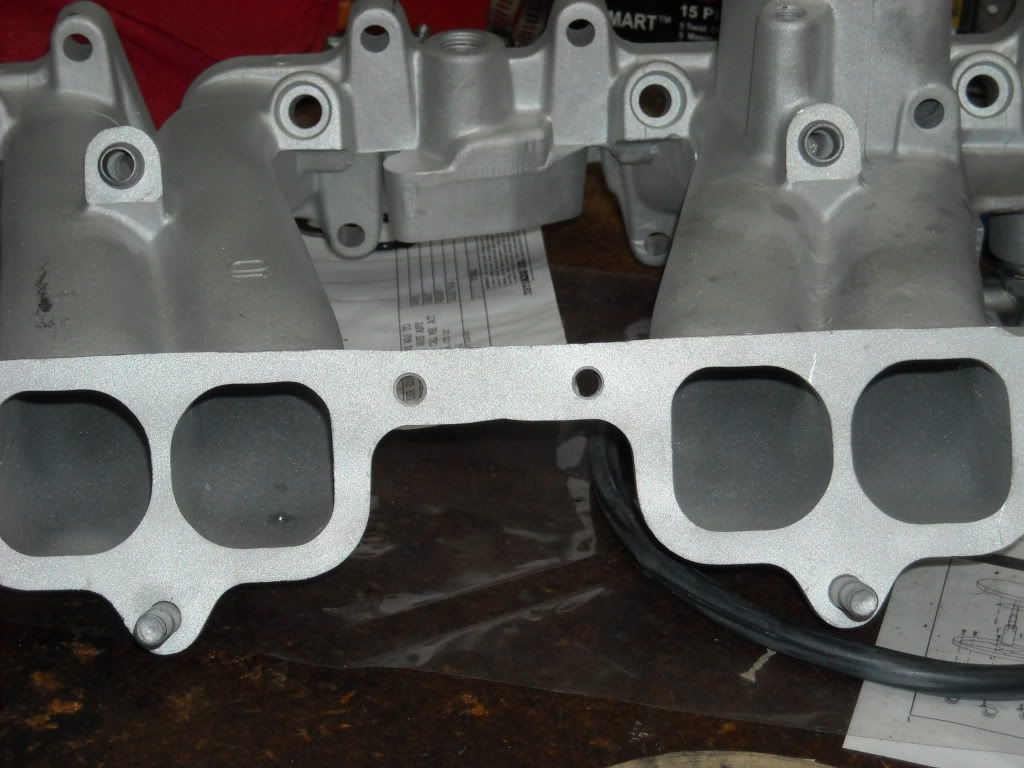
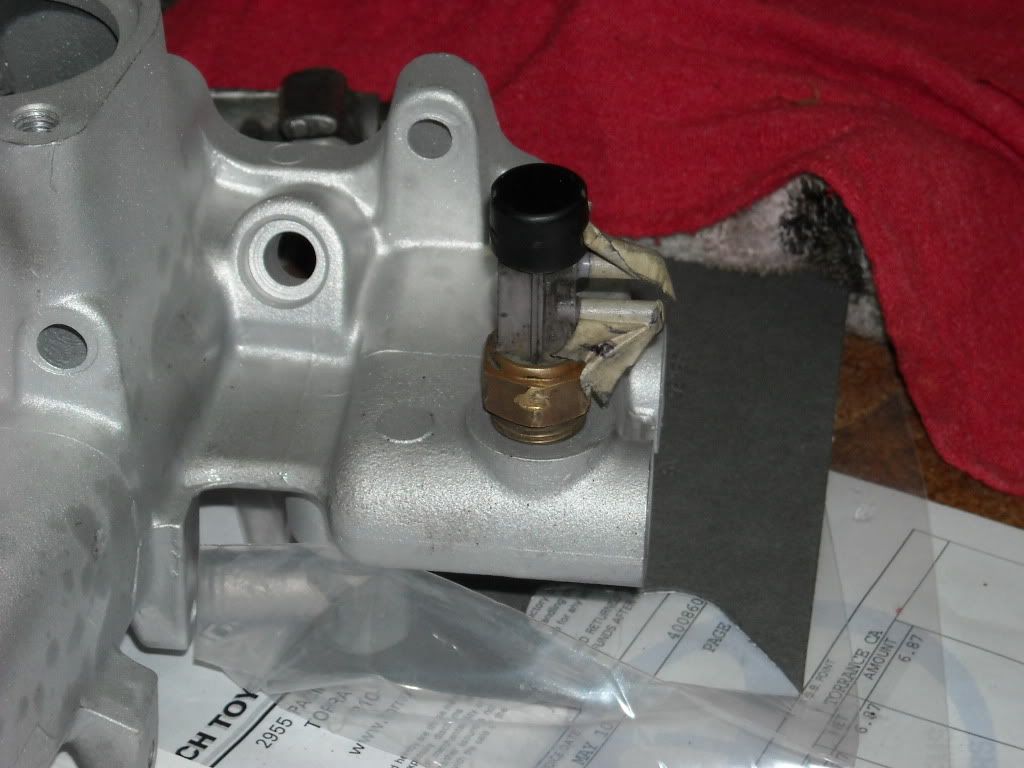
Then, here's the bead blasted intakes(which the machinst was able to fix-shredded BVSV and intake port threads..., balanced flywheel and clutch kit........
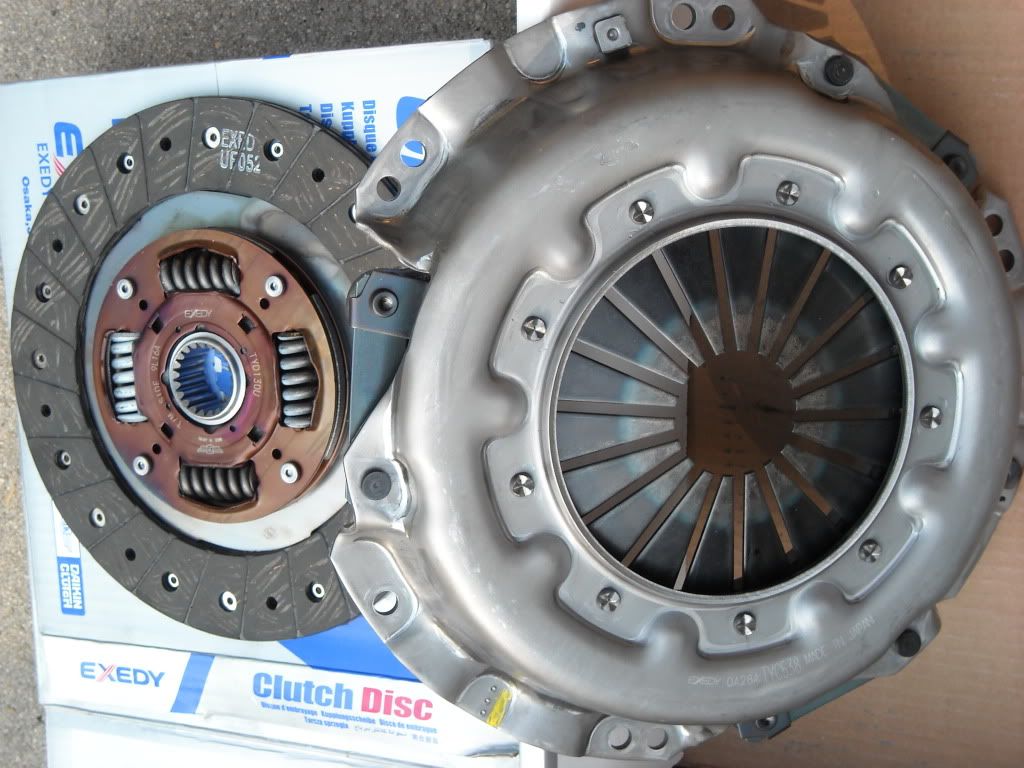
Then, I installed the Daikin Pro-Clutch Kit(Pilot Bearing, Clutch disc, Pressure plate and T.O. Bearing........
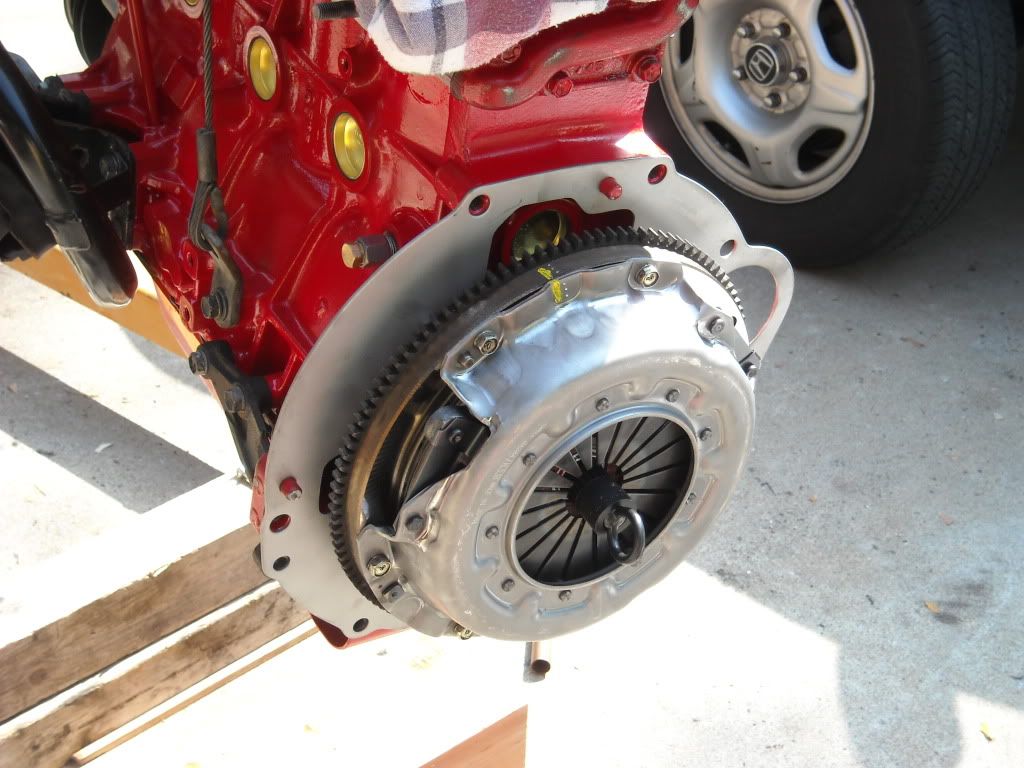
This SOB was not particularly cooperative! lol....The T.O. Bearing had to come off that sleeve, and the book calls for 2-3 jaw puller(not the best idea, lol), so I went down to Kragen for their 50% off tools sale, got a 1 3/16's socket and a 32mm socket, pounded the old bearing off, and then pounded the new one one(CAKE, lol.....and they had me calling a machine shop such? hahaha).......

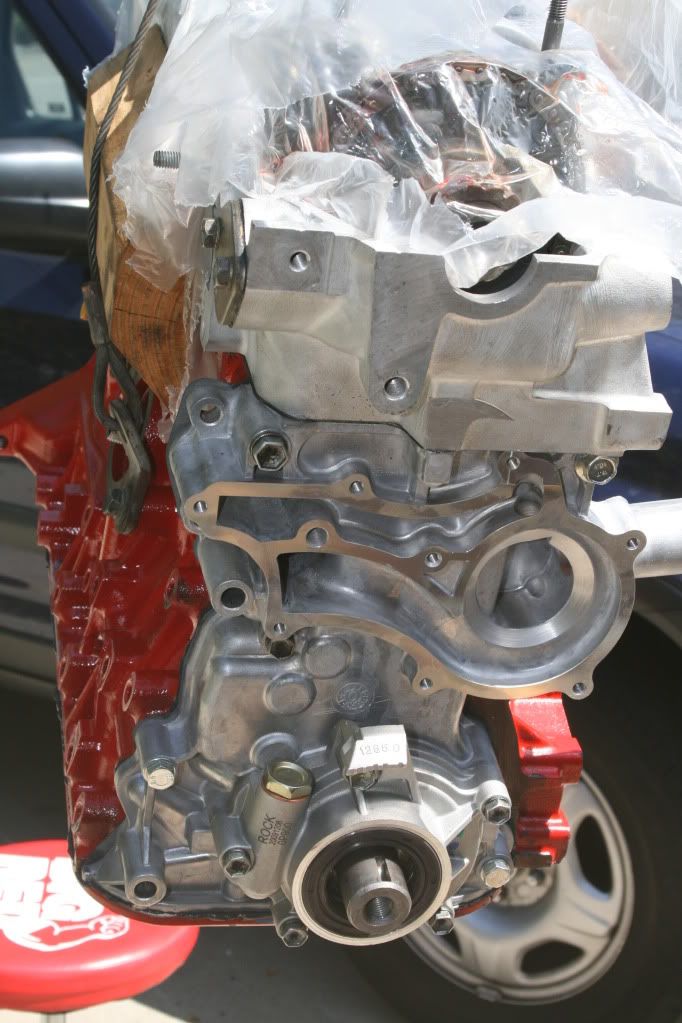
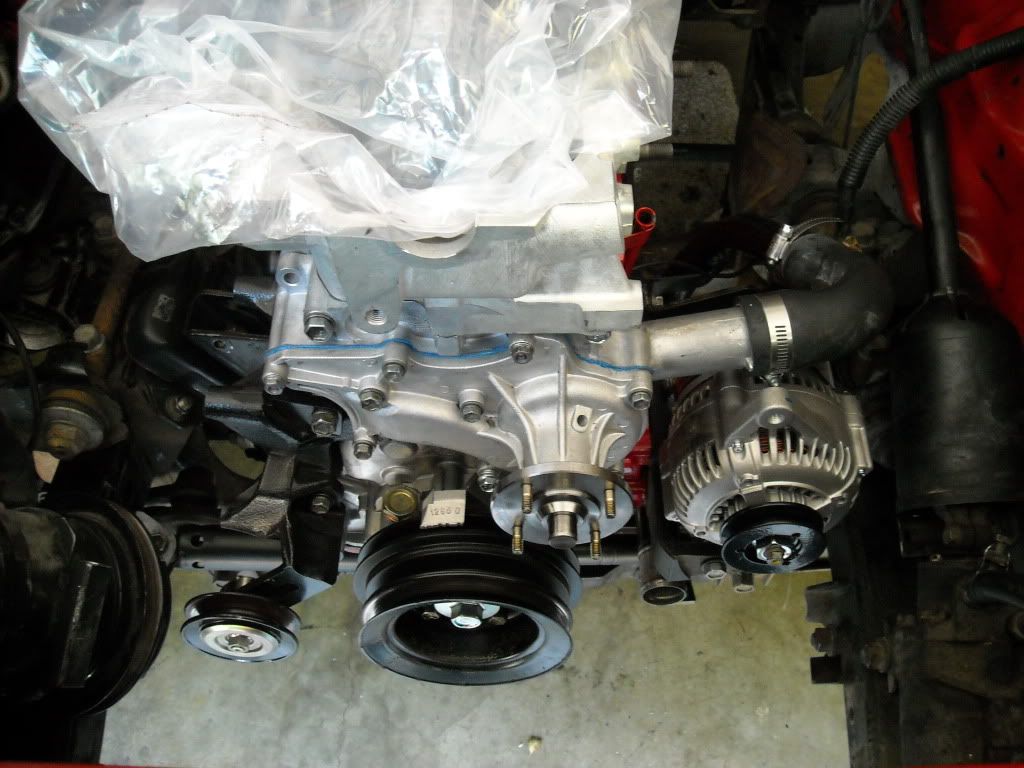
At the same time I installed the NEW Harmonic Balancer and new Crank Bolt(yes, I removed the lock-tite, lol), because, seeing that I HAVE NO HELP, I had to have something on the other side to crank against, in order to tighten the Flywheel down to 80lbs.....thus, the Crank bolt(plus, figured, 'why not get the crank snugged down to at least 80lbs too, till I could get it installed and put it in gear).......Had my boss sit behind the torque wrench on the flywheel side, calling out, '80lbs, stop', while I cranked down on both sides, I couldn't see the torque wrench(Yes, it's the needle type, ...but it's a snap-on, and it's VERY strong, so give me a break, k? lololol.) As you can see, I also installed the new Water pump, mounts, B.housing brackets, Water pipe and some other gizmos, hehehe....
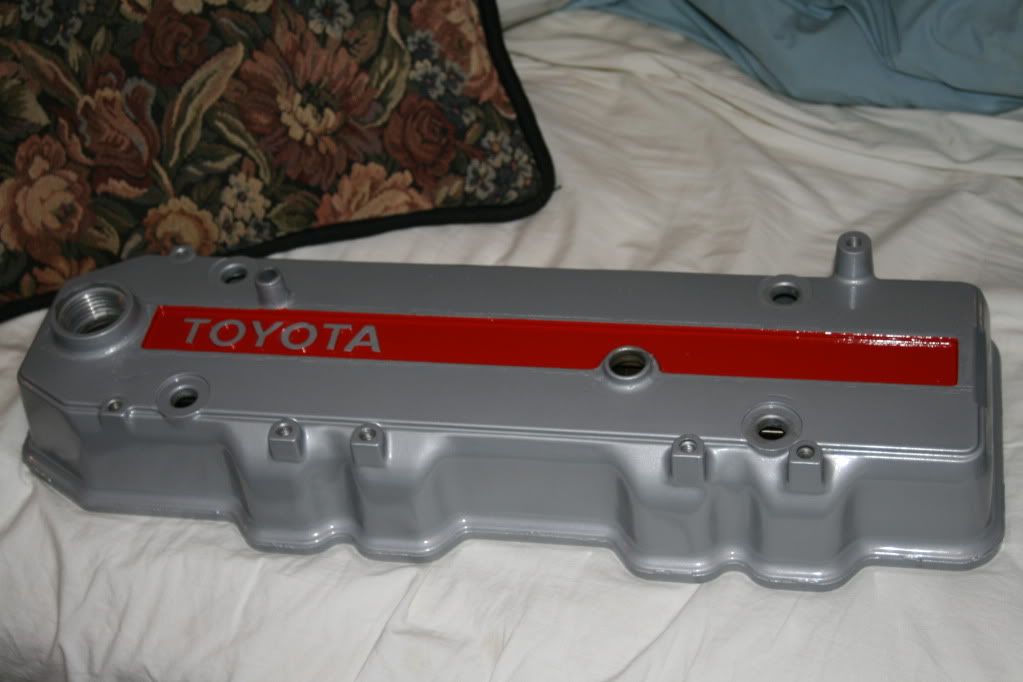
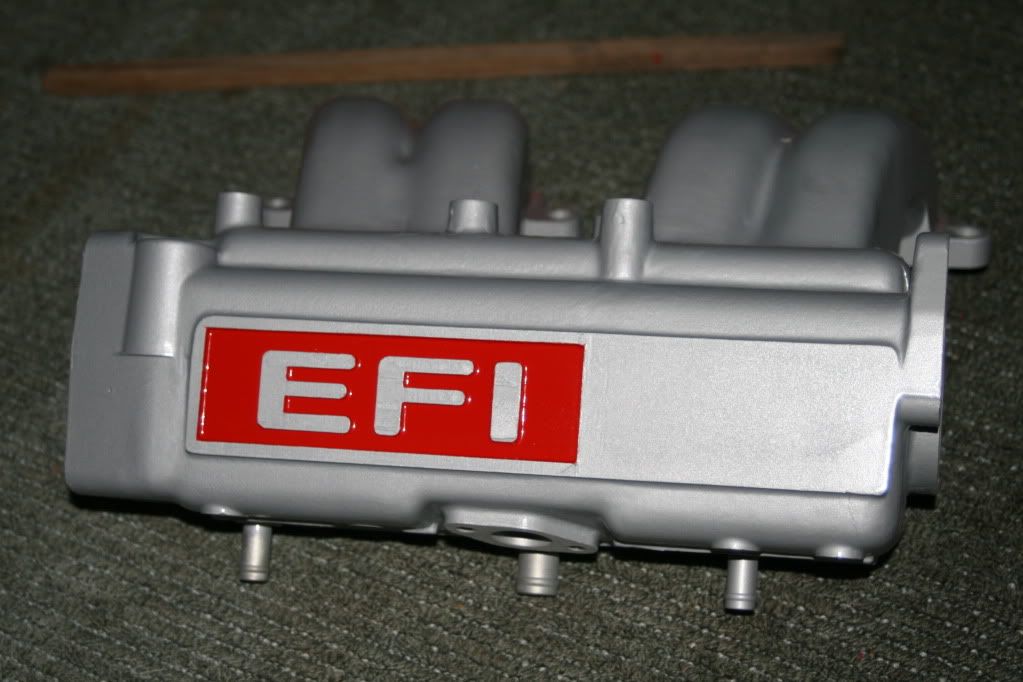
While I was waiting for some parts, I decided to throw some dull-aluminum paint on the upper intake and Valve Cover, as well as some Ford-Red on the pan, to match the block.....

Then, I taped off the valve cover and upper intake, having decided to go with the Ford-Red inset on the both........
Then, I sat down on my STEAL of a deal hydrolic Seat with tool plate base, which I picked up at Big Lots for 12$(open box, gotta love it! hahaha), and checked out the projects of some of my new friends from YotaTech!, lolol......
Some other stuff I cleaned up as best as I could.....
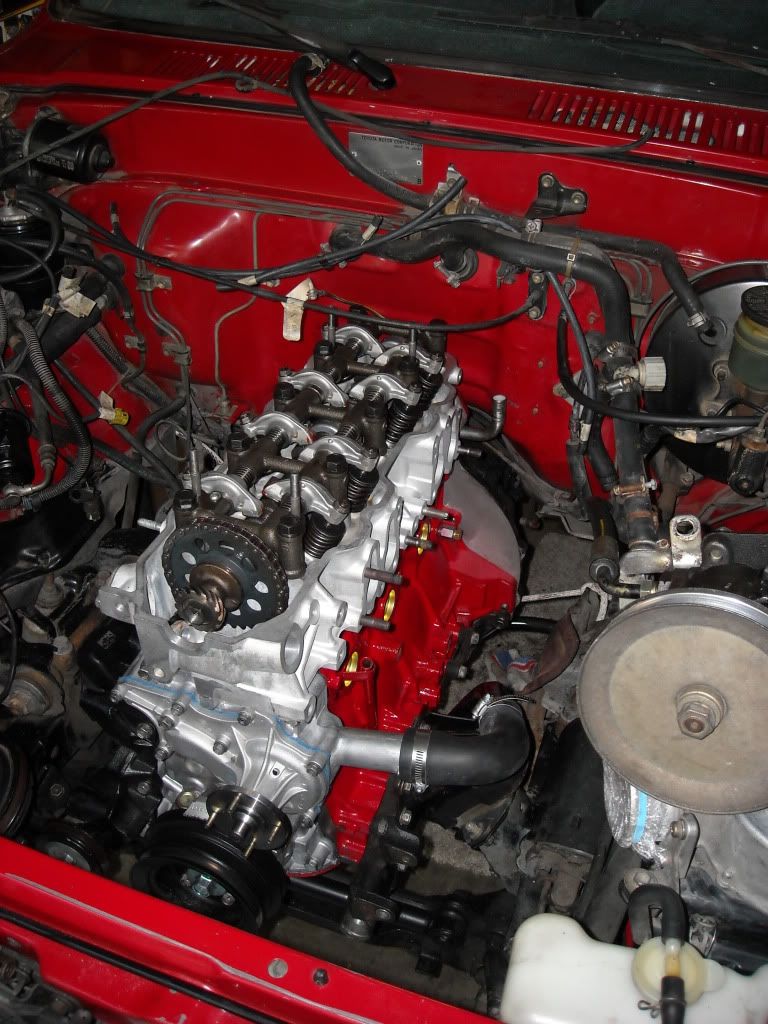
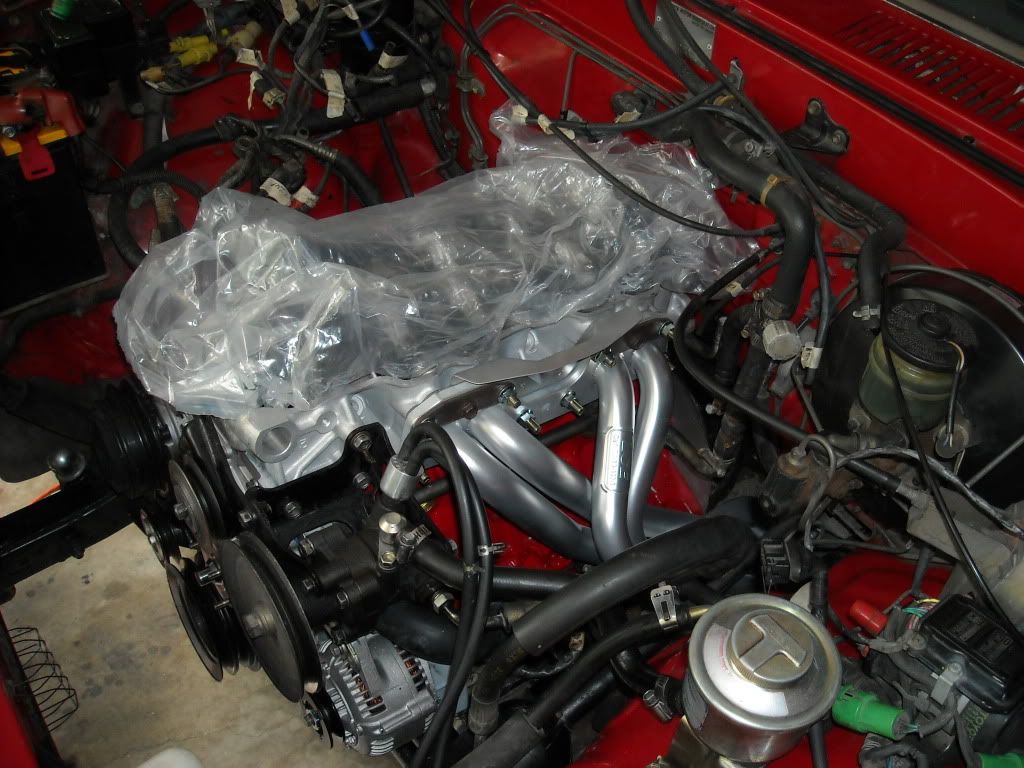
So now, I'm ready to go, ...>new mounts(I'll get back to that!), all spotless brackets and waterpump(plus stealership- shaped-20$ hose to go on there), Oil pan installed(another thing I'll get back to), full clutch kit installed, and it was time to drop her in!........
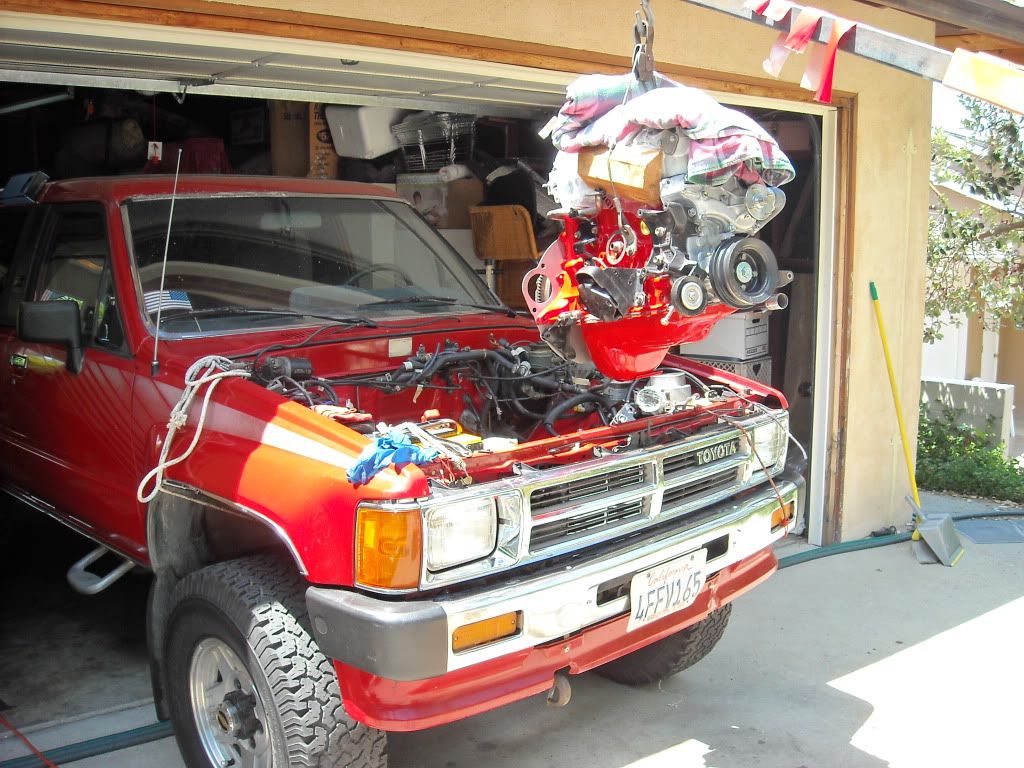

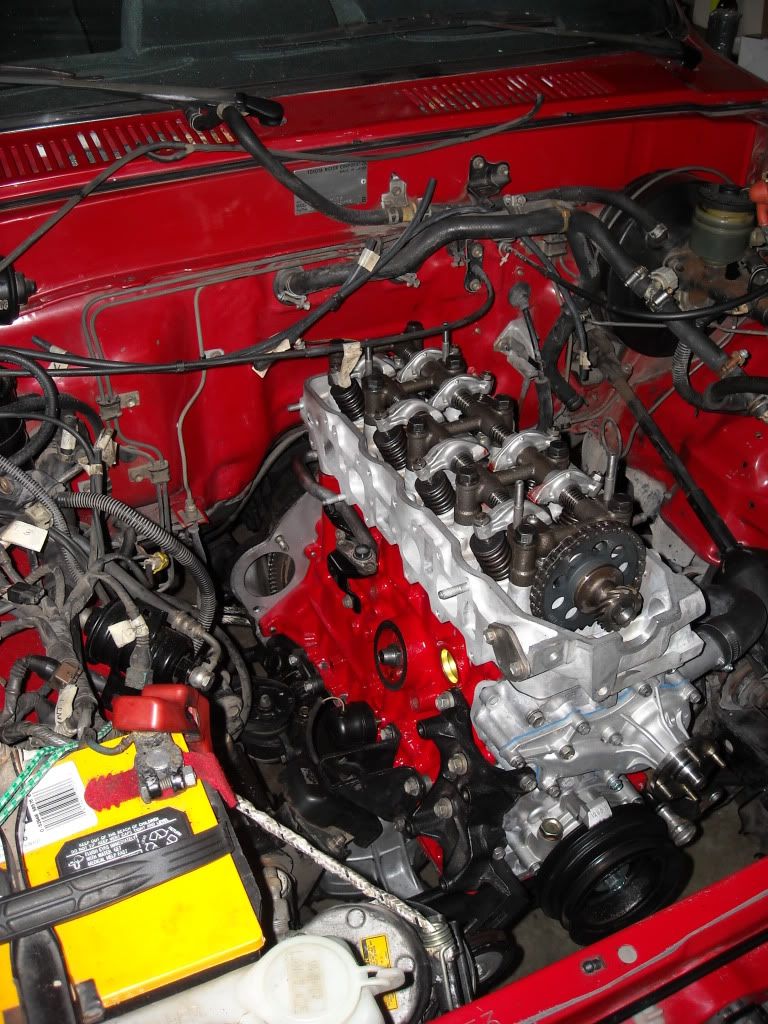
Now, what you probably can not see, in the 3rd picture from the top(here above), is that the motor mounts in that picture are the new ones......yeah, and guess what? THEY WERE THE WRONG ONES! Thanks NAPA! Yep, they were 5/16'' or so TOO TALL! GRRRRRR, and NO MATTER what I did, trying to get both mounts to seat?....NO LUCK! So, I stood back, noticed that the driver side mount(as in that pic with the plastic still covering the head) was TALLER than the pass. side. "Hmmmmmmm", I thought to myself, with MANY OTHER HARSH WORDS INSERTED, "I could swear that is not right!". So, I stood on by the driver side tire, looked down, and I COULD TELL the rubber was cocked toward the rear of the truck.....Eventually, carefully lifting the motor as high as I could(mind you, at this time, I had the tranny all bolted up, etc.), I pulled out the new mounts, and GUESS WHAT?..>yep, too big, as I said. So, I put in the old mounts(they're still in pretty good shape), and VOILA!!!!!!----SHE POPPED RIGHT INTO PLACE, WITHOUT ANY OF THE FORMER TUGGING, CURSING, SWEATING LIKE A PIG IN THE SUN that I'd previously been dealing with for OVER AN HOUR AND A HALF!!!!! Again, THANKS , NAPA! Not only were they too tall, but they were BOTH different, on closer inspection. One of them, that I had put on the driver side....it had a taper at the base, which did not go through the mount-housing. In other words, IT WAS FUBAR BEFORE I BEGAN! lol, hahaha. Not only that, but they were two different brands! Partly my bad, admittedly, for not inspecting them CLOSELY, ...but C'MON, ....motor mounts?
Some other problems; When installing the water pump, I had a bag of bolts, not knowing which went where. That took a while to figure out, and then, upon installing it, a bolt snapped off. Luckily, my buddy at the Stealership found me one that would work, and I was on my way again after another 1.5 hour diversion!lol.
Also, a tip for newbies....DO NOT tighten the B.housing brackets that bolt to the back/bottom of the block......you WILL NOT likely get the bolts to line up and you'll have to stop and crawl out and loosen them up, until you get all the bolts in quite a bit.
My oil pan 'issue', as I've mentioned earlier, was that I USED A GASKET! If you have 85 or later motor....DON'T do this! lol. It takes too long for a newbie like myself to get it all set and in place, then torque down properly, and in the process, the gasket almost always pops out at the bolt holes(Yes, I was only at 13lbs...or whatever it said, lol). I guess if I'd read the paragraph in parenthesis, before attempting this, I'd not have bothered to try and install it in the first place(yeah, I KNOW, lol).
All in all, I think I did ok for my first time with one of these. I wish I had the time and skill and extra vehicle to do the rebuild myself, but I think that, 1. Getting this completely rebuilt and balanced, all top quality parts, 2. balanced flywheel, 3. new Harmonic Balancer, 4.New Pro-Clutch Kit, 5. New Timing Cover(forgot to mention that mine had nearly worn through), 6. Replacement Crank(I'll explain below), a performance Cam, EVERYTHING new internally and above.....1400$?....I think I did ok, considering what I've read and studied, EXTENSIVELY, lol. Yes, it was a friend and business associate of a VERY good friend, so I got a 'deal'....but I would think most people would jump on that, especially if you're a newbie like myself, no?
Regarding that, I wanted to explain that the crank and harmonic?..... the key had ground almost 1/16th of an inch to the side, screwing up my harmonic balancer and and crank-key slot, putting me very close to, from everything I've read, a possible snapped chain and, subsequently, a much worse case scenario?
I'll post more pics and progress as I get time to put it all back together(THANK GOD i took pictures! lol)
Thanks, guys, for all the input. Pismo-Joe, you were really, very helpful, and I appreciate it, very much! Everyone else who gave me advice, thus far, I'M ALSO very grateful for! I mean, I honestly don't think I would have even tried, were it not for some encouragement and technical advice from this site,....through research or personal! Now, .....to get it ACTUALLY running! LOL.
Then, here's the bead blasted intakes(which the machinst was able to fix-shredded BVSV and intake port threads..., balanced flywheel and clutch kit........
Then, I installed the Daikin Pro-Clutch Kit(Pilot Bearing, Clutch disc, Pressure plate and T.O. Bearing........
This SOB was not particularly cooperative! lol....The T.O. Bearing had to come off that sleeve, and the book calls for 2-3 jaw puller(not the best idea, lol), so I went down to Kragen for their 50% off tools sale, got a 1 3/16's socket and a 32mm socket, pounded the old bearing off, and then pounded the new one one(CAKE, lol.....and they had me calling a machine shop such? hahaha).......
At the same time I installed the NEW Harmonic Balancer and new Crank Bolt(yes, I removed the lock-tite, lol), because, seeing that I HAVE NO HELP, I had to have something on the other side to crank against, in order to tighten the Flywheel down to 80lbs.....thus, the Crank bolt(plus, figured, 'why not get the crank snugged down to at least 80lbs too, till I could get it installed and put it in gear).......Had my boss sit behind the torque wrench on the flywheel side, calling out, '80lbs, stop', while I cranked down on both sides, I couldn't see the torque wrench(Yes, it's the needle type, ...but it's a snap-on, and it's VERY strong, so give me a break, k? lololol.) As you can see, I also installed the new Water pump, mounts, B.housing brackets, Water pipe and some other gizmos, hehehe....
While I was waiting for some parts, I decided to throw some dull-aluminum paint on the upper intake and Valve Cover, as well as some Ford-Red on the pan, to match the block.....
Then, I taped off the valve cover and upper intake, having decided to go with the Ford-Red inset on the both........
Then, I sat down on my STEAL of a deal hydrolic Seat with tool plate base, which I picked up at Big Lots for 12$(open box, gotta love it! hahaha), and checked out the projects of some of my new friends from YotaTech!, lolol......
Some other stuff I cleaned up as best as I could.....
So now, I'm ready to go, ...>new mounts(I'll get back to that!), all spotless brackets and waterpump(plus stealership- shaped-20$ hose to go on there), Oil pan installed(another thing I'll get back to), full clutch kit installed, and it was time to drop her in!........
Now, what you probably can not see, in the 3rd picture from the top(here above), is that the motor mounts in that picture are the new ones......yeah, and guess what? THEY WERE THE WRONG ONES! Thanks NAPA! Yep, they were 5/16'' or so TOO TALL! GRRRRRR, and NO MATTER what I did, trying to get both mounts to seat?....NO LUCK! So, I stood back, noticed that the driver side mount(as in that pic with the plastic still covering the head) was TALLER than the pass. side. "Hmmmmmmm", I thought to myself, with MANY OTHER HARSH WORDS INSERTED, "I could swear that is not right!". So, I stood on by the driver side tire, looked down, and I COULD TELL the rubber was cocked toward the rear of the truck.....Eventually, carefully lifting the motor as high as I could(mind you, at this time, I had the tranny all bolted up, etc.), I pulled out the new mounts, and GUESS WHAT?..>yep, too big, as I said. So, I put in the old mounts(they're still in pretty good shape), and VOILA!!!!!!----SHE POPPED RIGHT INTO PLACE, WITHOUT ANY OF THE FORMER TUGGING, CURSING, SWEATING LIKE A PIG IN THE SUN that I'd previously been dealing with for OVER AN HOUR AND A HALF!!!!! Again, THANKS , NAPA! Not only were they too tall, but they were BOTH different, on closer inspection. One of them, that I had put on the driver side....it had a taper at the base, which did not go through the mount-housing. In other words, IT WAS FUBAR BEFORE I BEGAN! lol, hahaha. Not only that, but they were two different brands! Partly my bad, admittedly, for not inspecting them CLOSELY, ...but C'MON, ....motor mounts?
Some other problems; When installing the water pump, I had a bag of bolts, not knowing which went where. That took a while to figure out, and then, upon installing it, a bolt snapped off. Luckily, my buddy at the Stealership found me one that would work, and I was on my way again after another 1.5 hour diversion!lol.
Also, a tip for newbies....DO NOT tighten the B.housing brackets that bolt to the back/bottom of the block......you WILL NOT likely get the bolts to line up and you'll have to stop and crawl out and loosen them up, until you get all the bolts in quite a bit.
My oil pan 'issue', as I've mentioned earlier, was that I USED A GASKET! If you have 85 or later motor....DON'T do this! lol. It takes too long for a newbie like myself to get it all set and in place, then torque down properly, and in the process, the gasket almost always pops out at the bolt holes(Yes, I was only at 13lbs...or whatever it said, lol). I guess if I'd read the paragraph in parenthesis, before attempting this, I'd not have bothered to try and install it in the first place(yeah, I KNOW, lol).
All in all, I think I did ok for my first time with one of these. I wish I had the time and skill and extra vehicle to do the rebuild myself, but I think that, 1. Getting this completely rebuilt and balanced, all top quality parts, 2. balanced flywheel, 3. new Harmonic Balancer, 4.New Pro-Clutch Kit, 5. New Timing Cover(forgot to mention that mine had nearly worn through), 6. Replacement Crank(I'll explain below), a performance Cam, EVERYTHING new internally and above.....1400$?....I think I did ok, considering what I've read and studied, EXTENSIVELY, lol. Yes, it was a friend and business associate of a VERY good friend, so I got a 'deal'....but I would think most people would jump on that, especially if you're a newbie like myself, no?
Regarding that, I wanted to explain that the crank and harmonic?..... the key had ground almost 1/16th of an inch to the side, screwing up my harmonic balancer and and crank-key slot, putting me very close to, from everything I've read, a possible snapped chain and, subsequently, a much worse case scenario?
I'll post more pics and progress as I get time to put it all back together(THANK GOD i took pictures! lol)
Thanks, guys, for all the input. Pismo-Joe, you were really, very helpful, and I appreciate it, very much! Everyone else who gave me advice, thus far, I'M ALSO very grateful for! I mean, I honestly don't think I would have even tried, were it not for some encouragement and technical advice from this site,....through research or personal! Now, .....to get it ACTUALLY running! LOL.
 05-15-2010, 10:09 AM
#63
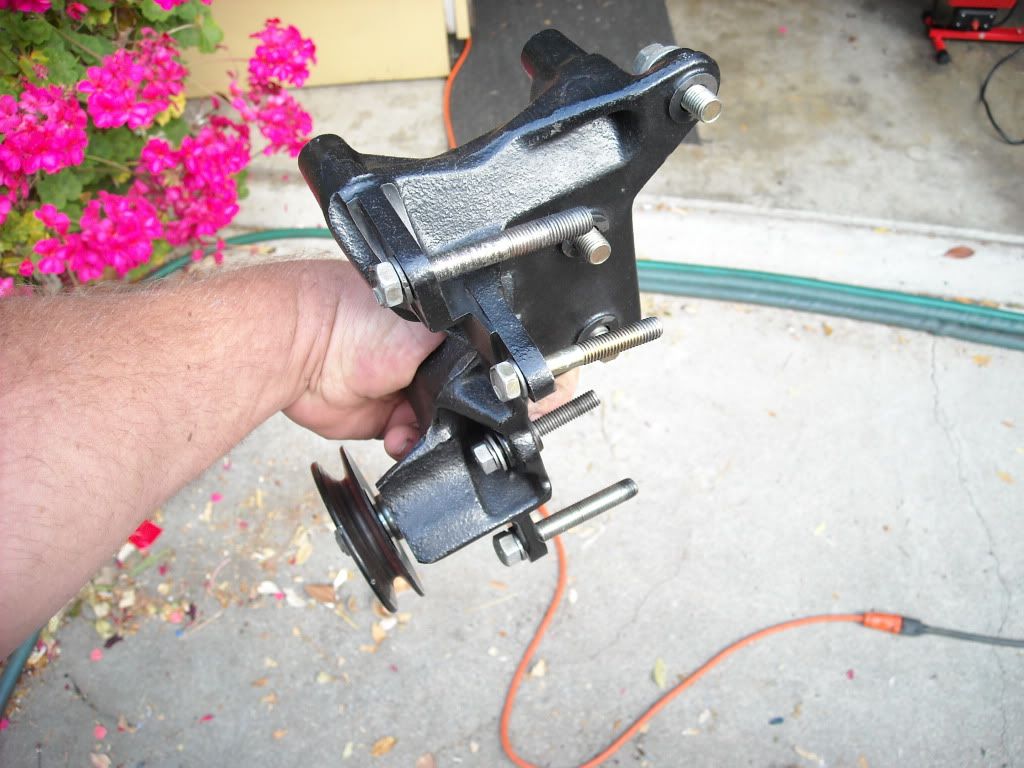
Just thought I'd throw this in there, along with the 'install portion' above....
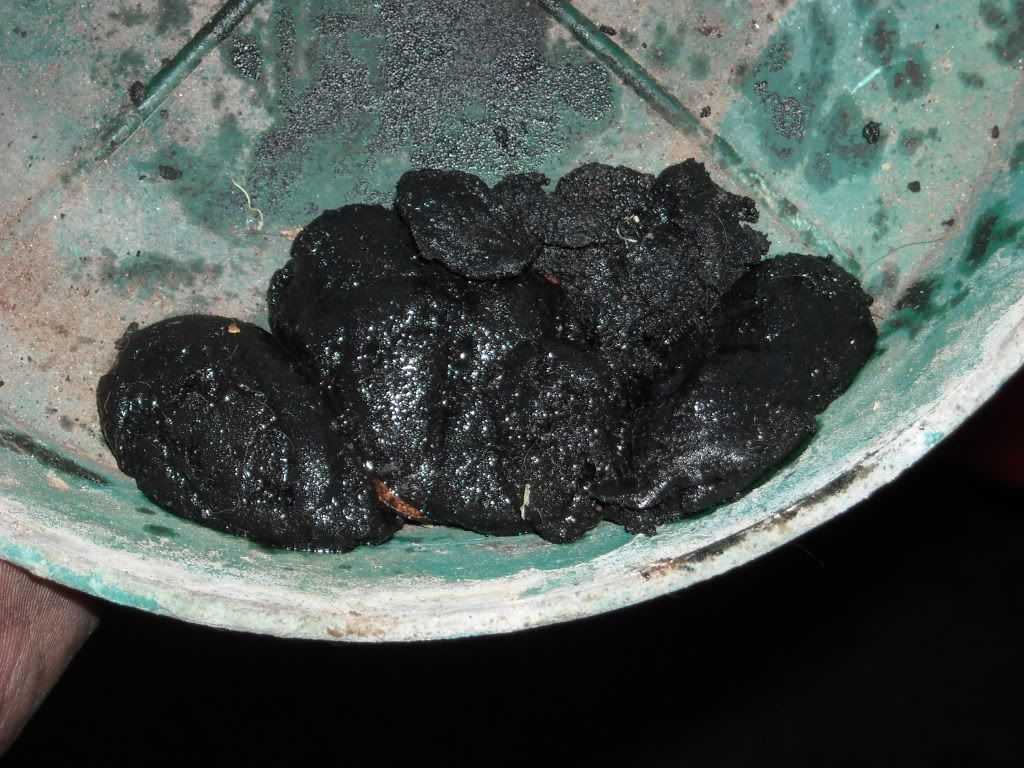
Yes, that's grease.....JUST FROM MY STEERING PUMP BRACKET! lol. I have about 3 more POUNDS of it, all from just the firewalls, mounts, brackets, etc.. I think I got the firewalls pretty clean, eh^^^? lol
Yes, that's grease.....JUST FROM MY STEERING PUMP BRACKET! lol. I have about 3 more POUNDS of it, all from just the firewalls, mounts, brackets, etc.. I think I got the firewalls pretty clean, eh^^^? lol
05-15-2010, 11:29 AM
#65
Registered User
Lookin good! Hope shes purring soon!
I think you just motivated me to have my intake plenum glass beaded....I was just gonna degrease it and call it good lol but yours looks brand new!!
I think you just motivated me to have my intake plenum glass beaded....I was just gonna degrease it and call it good lol but yours looks brand new!!
05-15-2010, 02:50 PM
#67
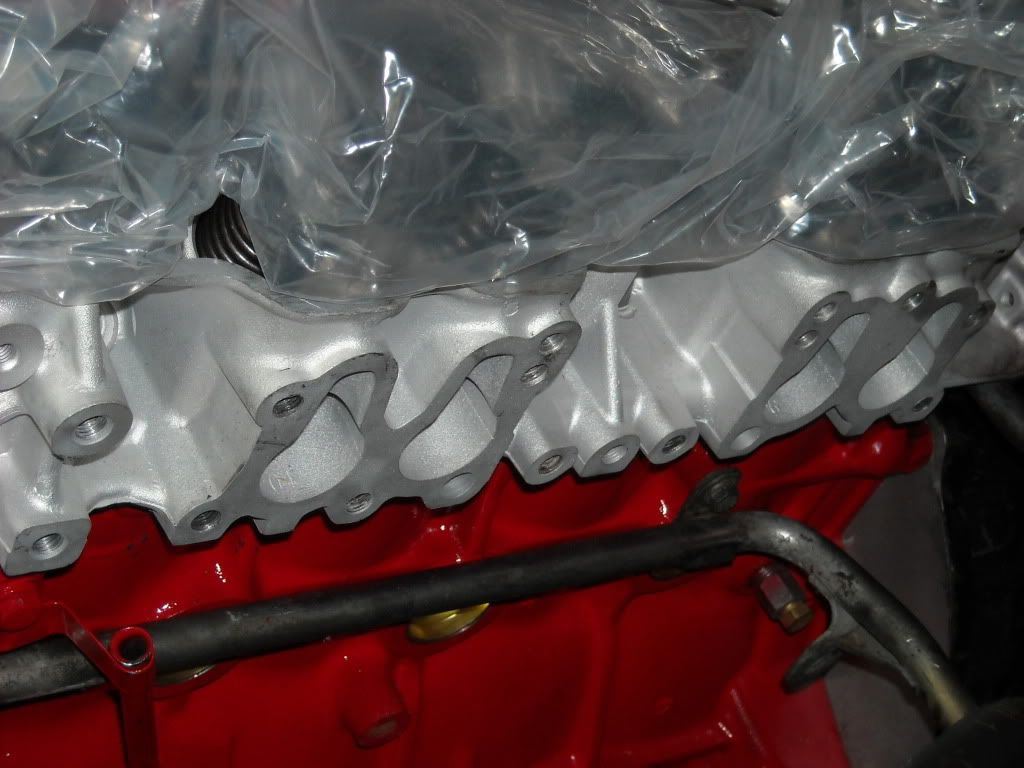
Yeah, Pismo, they are ! I'm going to have to get those out, and I'm not happy about it, trust me. I have spent way too much time on this to leave those in there, believe me! Only thing is, ......one of them, the top left, is REALLY stuck in there. I have a stud-remover tool, got it the other day, but I'm worried about shredding the threads and then STILL not being able to get it out! Any thoughts?
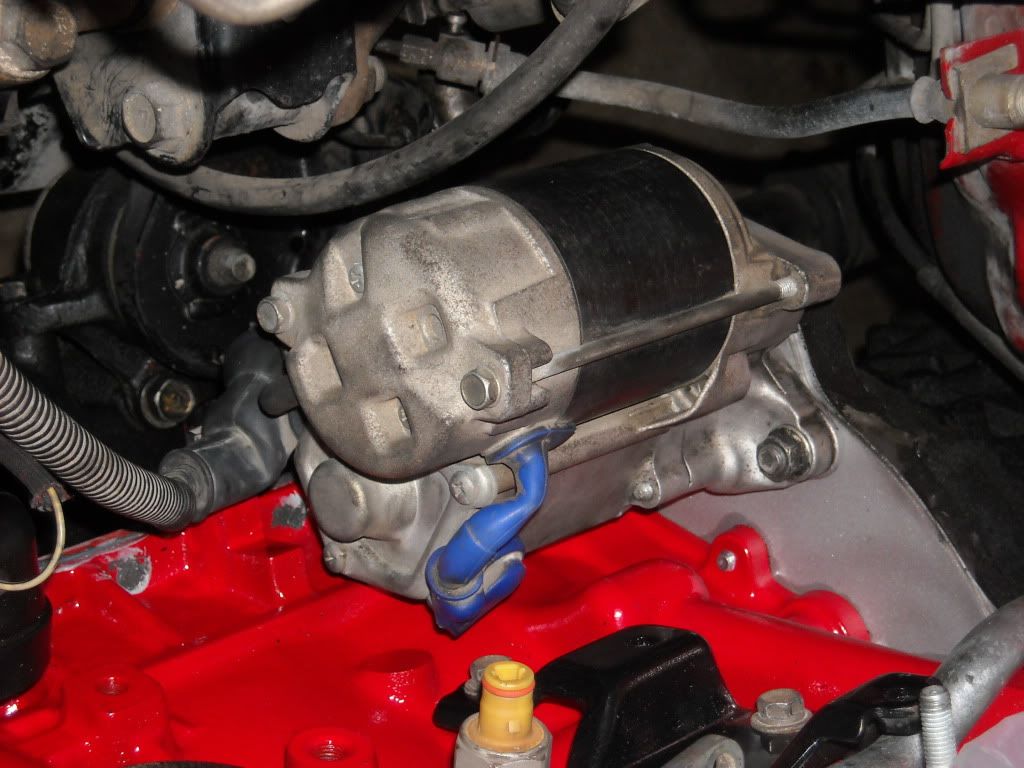
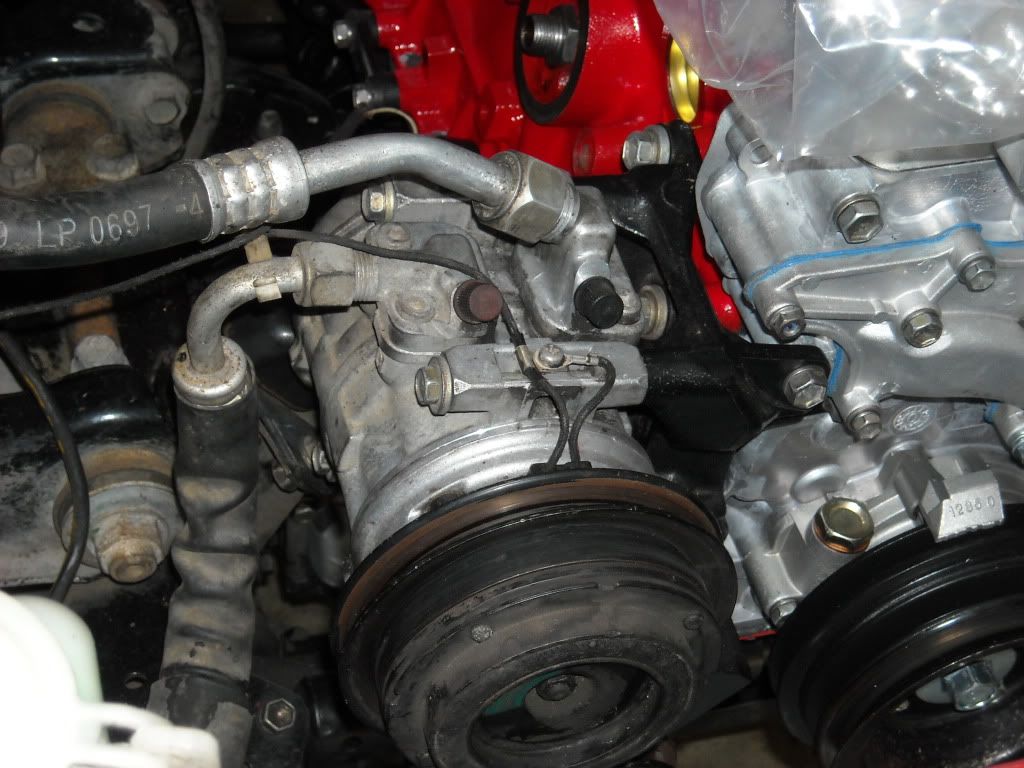
Btw, thanks guys, I appreciate the thumbs up. I'm about an hour from putting the intake back in, and already got the AC, Steering Pump Bracket/pump, fuel filter, Alt(OMGOSH, all the new alternators come with this molded in washer/flange thing on the pulley side, which sticks out a bit, and HOLY CRAP, I couldn't get it in there....so I had to file it down .....) Oh well, I figure I'll have a few problems, like when I just tried to plug one of the two plugs that goes back to the tranny from the harness, ....and the prong came out the back and the end going to the back fell on me....
! I'm going to have to get those out, and I'm not happy about it, trust me. I have spent way too much time on this to leave those in there, believe me! Only thing is, ......one of them, the top left, is REALLY stuck in there. I have a stud-remover tool, got it the other day, but I'm worried about shredding the threads and then STILL not being able to get it out! Any thoughts?Btw, thanks guys, I appreciate the thumbs up. I'm about an hour from putting the intake back in, and already got the AC, Steering Pump Bracket/pump, fuel filter, Alt(OMGOSH, all the new alternators come with this molded in washer/flange thing on the pulley side, which sticks out a bit, and HOLY CRAP, I couldn't get it in there....so I had to file it down
.....) Oh well, I figure I'll have a few problems, like when I just tried to plug one of the two plugs that goes back to the tranny from the harness, ....and the prong came out the back and the end going to the back fell on me....
05-15-2010, 03:48 PM
#68
Some other things, coming up......and I'm saving the most CRUCIAL, for Pismo, for last! lolol....
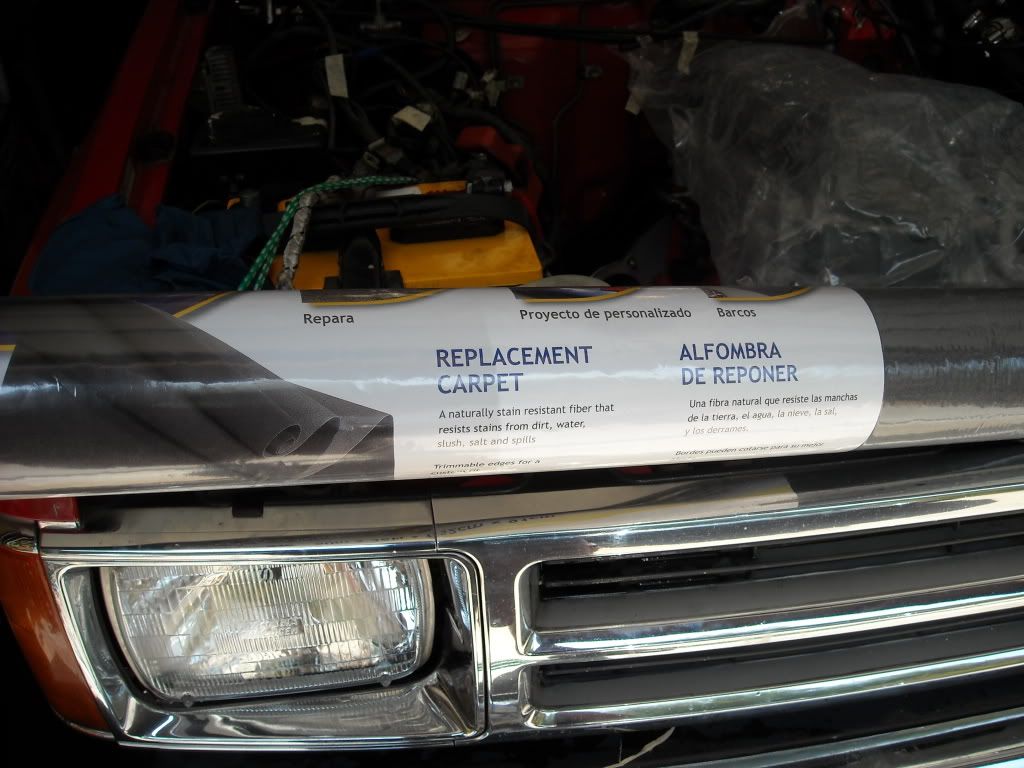
Got carpet to redo the back seat area and bed, plus moisture resistant padding I have in the storeroom, already......
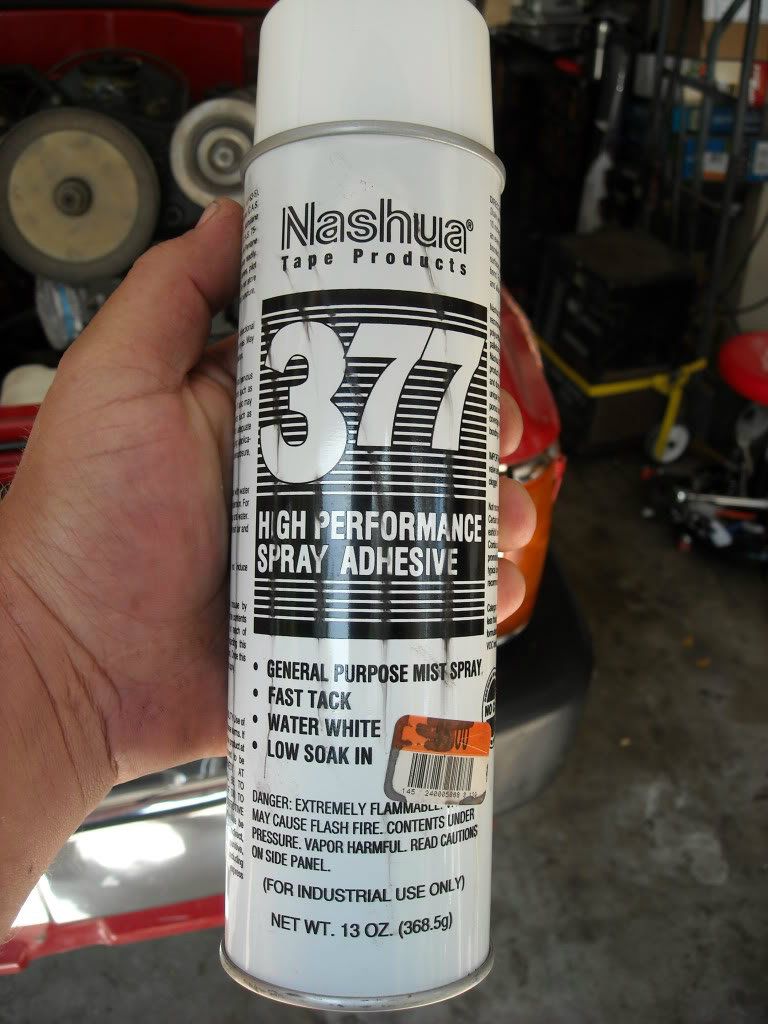
One of the better adhesives I've found, for said Carpet, hehehe........
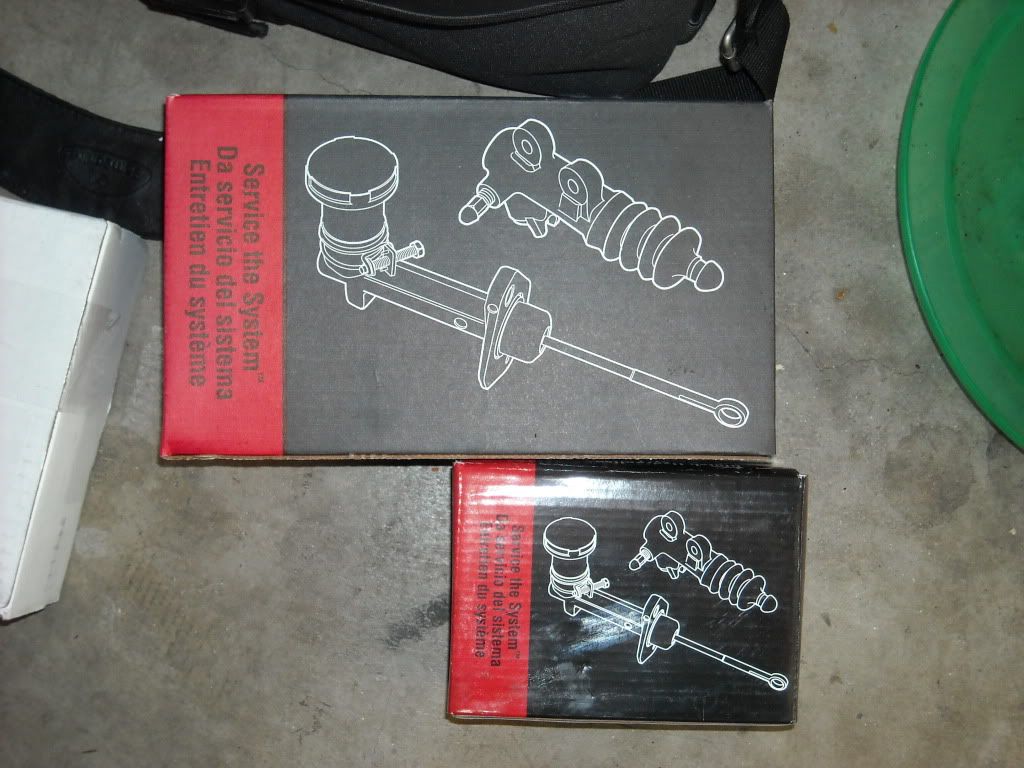
New Clutch Slave and Master Cylinders........
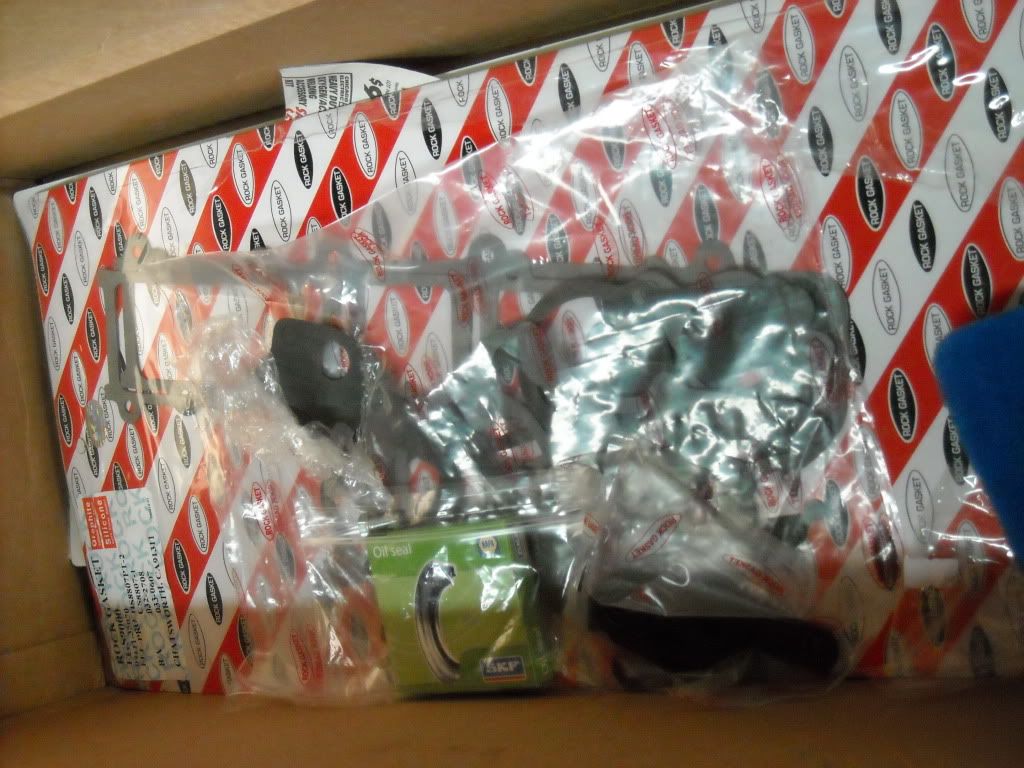
New Clutch Fork dust boot, mine was mangled and FILLED with grease(another sign, I'd suppose, of the bearing beginning to go out?).......

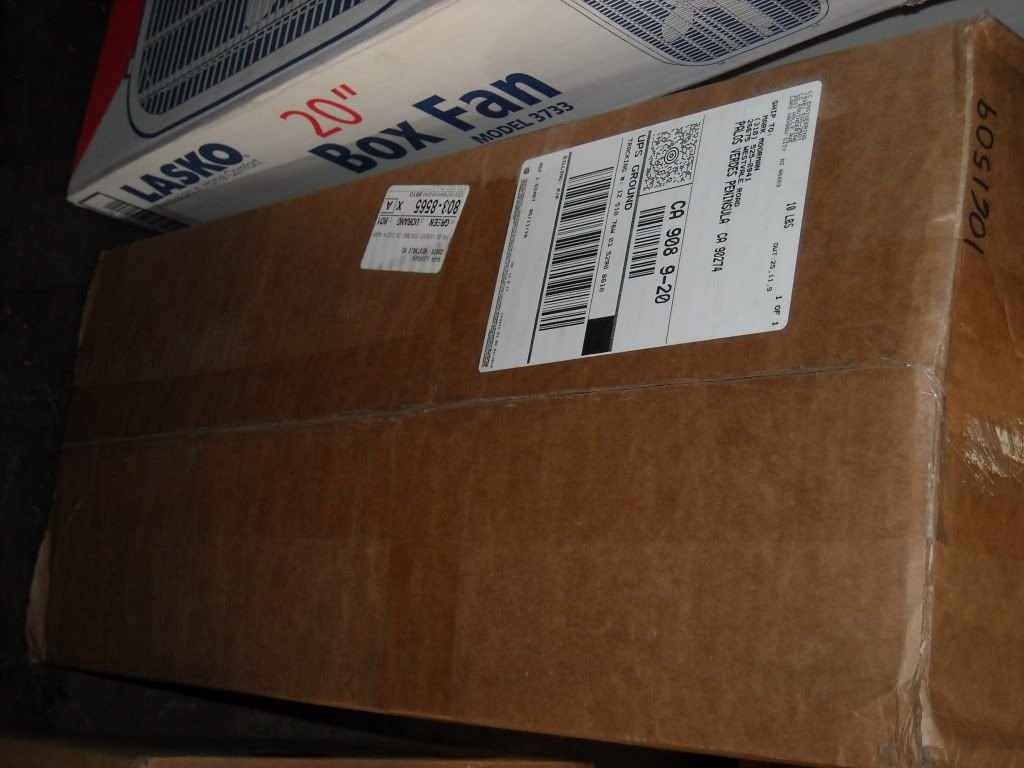
New, Supposedly quality Fuel Pump and the other box?....From LCE, the 8.5MM wires and Plug Wire loom........

New LCE Cold Air intake kit, w/powdercoated Tube and K&N Filter, adapter and so-on-kit, lol....
A bunch of left over crap, and other crap I need that I haven't used yet....
Some progress in my spare time today, ...................
And, for the grand finale.....I wouldn't take no for an answer from these FROZEN ARSE BEEEEOTCHES, ..................
HAPPY PISMO? Jk, I fully agree, and I just had a conversation with the machinist, whom was VERY much screaming at his main builder, hahaha. Not to worry, though, they are VERY respected and I'm sure, knowing my luck, it was just some left over murphy's law I didn't collect last week! lol. Oh, and btw, just so know, He sent home all the old pistons, bearings, Rods, etc., just so I could see how they were, the Harmonic Balancer(guys, I'll get a pic, it's MANGLED in there, which my neighbor and I noticed before I even pulled the motor), and along with showing me the crank that he had to swap out/with COG key, which was also about half eaten into. I put it all in a box, buried in the back of the garage, but I'll get some pics for you all to see......I guess I feel I got pretty lucky going with my suspicions that something was REALLY not right, lol
Anyway, thanks again, Pismo,....and Rob, I sure hope you're up somewhere enjoying the Rain-Camping with the lil one!
M.W.M., Certified Executive Chef, .....and wannabe mechanic! hahaha!
Got carpet to redo the back seat area and bed, plus moisture resistant padding I have in the storeroom, already......
One of the better adhesives I've found, for said Carpet, hehehe........
New Clutch Slave and Master Cylinders........
New Clutch Fork dust boot, mine was mangled and FILLED with grease(another sign, I'd suppose, of the bearing beginning to go out?).......
New, Supposedly quality Fuel Pump and the other box?....From LCE, the 8.5MM wires and Plug Wire loom........
New LCE Cold Air intake kit, w/powdercoated Tube and K&N Filter, adapter and so-on-kit, lol....
A bunch of left over crap, and other crap I need that I haven't used yet....
Some progress in my spare time today, ...................
And, for the grand finale.....I wouldn't take no for an answer from these FROZEN ARSE BEEEEOTCHES, ..................
HAPPY PISMO? Jk, I fully agree, and I just had a conversation with the machinist, whom was VERY much screaming at his main builder, hahaha. Not to worry, though, they are VERY respected and I'm sure, knowing my luck, it was just some left over murphy's law I didn't collect last week! lol. Oh, and btw, just so know, He sent home all the old pistons, bearings, Rods, etc., just so I could see how they were, the Harmonic Balancer(guys, I'll get a pic, it's MANGLED in there, which my neighbor and I noticed before I even pulled the motor), and along with showing me the crank that he had to swap out/with COG key, which was also about half eaten into. I put it all in a box, buried in the back of the garage, but I'll get some pics for you all to see......I guess I feel I got pretty lucky going with my suspicions that something was REALLY not right, lol
Anyway, thanks again, Pismo,....and Rob, I sure hope you're up somewhere enjoying the Rain-Camping with the lil one!
M.W.M., Certified Executive Chef, .....and wannabe mechanic! hahaha!
Last edited by ChefYota4x4; 05-15-2010 at 03:51 PM.
05-15-2010, 03:56 PM
#69
OH, btw, Pismo....Yes, it's worth it to have them blasted, and he did that for me for free> But, Not sure if you saw when I said, I painted them with Dull-Aluminum/Premium Engine paint, then taped off and did the red inset. Even if you don't do any red or whatever, THAT PAINT IS WORTH IT! Why?....because, well, then you can get yer greasy hands on it and NOT HAVE ANY TROUBLE GETTING THE STAINS OFF! lol. The blasted aluminum needs it, because it soaks up ANY particle of dust or grease and then never lets go. In fact, even if you touch it with clean hands, ...it will show that spot, later, as dust collect, etc. I know you're aware of that, Pismo...just a heads up for any newbies like me, planning on taking off the intake and such.
> But, Not sure if you saw when I said, I painted them with Dull-Aluminum/Premium Engine paint, then taped off and did the red inset. Even if you don't do any red or whatever, THAT PAINT IS WORTH IT! Why?....because, well, then you can get yer greasy hands on it and NOT HAVE ANY TROUBLE GETTING THE STAINS OFF! lol. The blasted aluminum needs it, because it soaks up ANY particle of dust or grease and then never lets go. In fact, even if you touch it with clean hands, ...it will show that spot, later, as dust collect, etc. I know you're aware of that, Pismo...just a heads up for any newbies like me, planning on taking off the intake and such.
05-15-2010, 05:48 PM
#71
I thought about that, 92, but something told me that it might run, causing areas that don't wind up too well. I should have tried it on a test area of something, because taping it off WAS A PITA! lol. Also, you can't tell, but even though I waited almost 48 hours, the tape caused quite a few imperfections, even though I'd been very careful to only use the smallest amount as I could.
Oh well, live and learn. If you tape it all off, make sure you wait several days or have it baked on, first, hahaha
Oh well, live and learn. If you tape it all off, make sure you wait several days or have it baked on, first,
hahaha
05-15-2010, 05:53 PM
#72
+Oh, another btw.......Newbies to rebuilds and tear downs? EVEN IF YOU'RE IN A HURRY, or someone is rushing you, like in my case, TAKE PICTURES or have a camera running....Especially when it comes to the Alternator/sliding bracket! lol. Wasn't a big deal, had to pull the steering again, but I didn't notice a bolt missing, cuz the builder replaced that one in the upper timing cover with a new one....the other one goes in the dip stick brace at the top-to the block.
05-16-2010, 01:39 PM
#73
Contributing Member

oh my GAWD man! You've definately on-upped me! that engine is looking BEAUTIFUL!!!
awesome job on the cleaning and painting!
I'm jelous

Last edited by iamsuperbleeder; 05-16-2010 at 01:48 PM.
05-16-2010, 03:23 PM
#74
Registered User
haha thanks I am happy! I didn't want to see you bust a stud and have an exhaust leak on a brand new engine! Looks great!
And thanks for the heads up on the aluminum! Ill be sure to paint it! Man I'm jealous lol
And thanks for the heads up on the aluminum! Ill be sure to paint it! Man I'm jealous lol
05-16-2010, 05:08 PM
#75
Bleederrrrrrrr! Sup man? I'm glad, it means a lot to me that more experienced Toy'natics like what they see....especially after all that work! lol. Actually, your build inspired me quite a bit, along with Pismo, Cougar, 92 Toy and a few others.
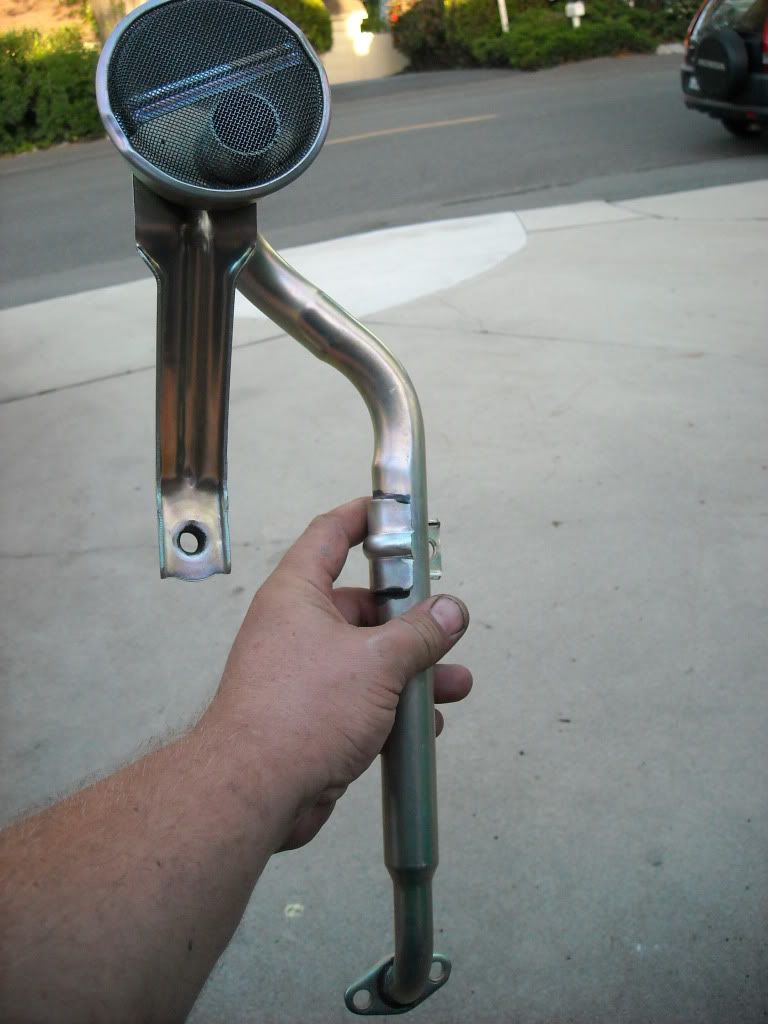
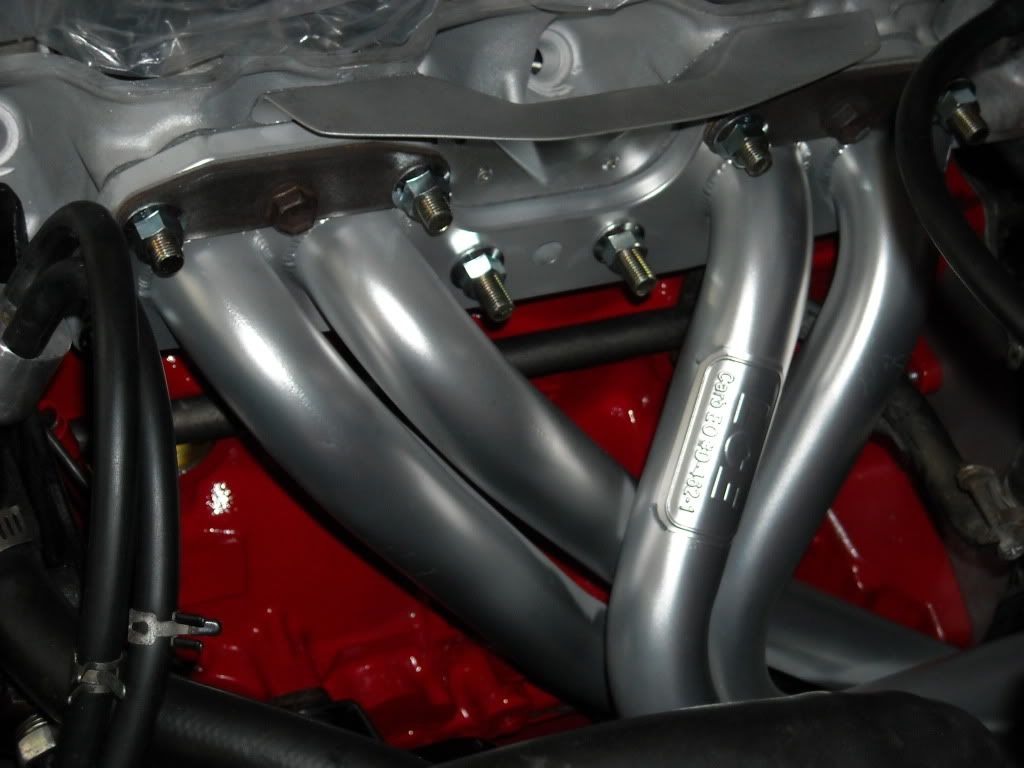
PISMO, howzit? I got the header in, I'll take pics later...had to remove the steering shield, but not the under driver-seat one, like I'd heard others having to do. So yeah, that's done, and my Cold Air conversion Kit is nearly done as well...Just have to drill a hole, lol. Not that I mind drilling,....i think they gave me a lock nut for the other side, and I'll be sure to use some HDuty RTV on it, just to seal it up.
Next, I'll start on installing the intake side, ....but I wanted to wait for the paint to dry another couple days, just to be sure. The stuff dries pretty fast, ...but setting? Not so much, lol. I messed up a lil on the taping, didn't wait long enough(2 days)....Should have baked it in the oven at 150 for a few hours, eh?
Above, I mentioned the alternator bracket? Well, I done did it again,....I looked down in the corner, and the steering support bracket, that bolts into the front of the block, rides just above the alternator bracket, and bolts in 2 places into the steering pump housing?....YEAH, I forgoteded it, lol! I had to tear it all down, again, but it only took me about 10 minutes, this time, as I'd done it twice already! lol. Oh well, at least it was painted like brand new, and with all this new paint in there, it should all clean up easier in the future, eh?
I'll post more pics, later, ....thanks for the encouragement, guys!
PISMO, howzit? I got the header in, I'll take pics later...had to remove the steering shield, but not the under driver-seat one, like I'd heard others having to do. So yeah, that's done, and my Cold Air conversion Kit is nearly done as well...Just have to drill a hole
, lol. Not that I mind drilling,....i think they gave me a lock nut for the other side, and I'll be sure to use some HDuty RTV on it, just to seal it up. Next, I'll start on installing the intake side, ....but I wanted to wait for the paint to dry another couple days, just to be sure. The stuff dries pretty fast, ...but setting? Not so much, lol. I messed up a lil on the taping, didn't wait long enough(2 days)....Should have baked it in the oven at 150 for a few hours, eh?
Above, I mentioned the alternator bracket? Well, I done did it again,....I looked down in the corner, and the steering support bracket, that bolts into the front of the block, rides just above the alternator bracket, and bolts in 2 places into the steering pump housing?....YEAH, I forgoteded it, lol! I had to tear it all down, again, but it only took me about 10 minutes, this time, as I'd done it twice already! lol. Oh well, at least it was painted like brand new, and with all this new paint in there, it should all clean up easier in the future, eh?
I'll post more pics, later, ....thanks for the encouragement, guys!
05-16-2010, 06:15 PM
#76
Registered User
Barely been on lately, what with the new job, fixing the randomness on my runner. You have came a LONG ways since i was last on, looking great, now find me a nice cheap mountain bike so I have transpo to work, and follow in your footsteps.
Hey, you di mention back when, you did the seafoam treatment, me and moze just did it today, i smoked for like 20 minutes on half can, moze smoked for about 30, and a ton of it. Is there anything else you noticed afterwards to watch out for?
Hey, you di mention back when, you did the seafoam treatment, me and moze just did it today, i smoked for like 20 minutes on half can, moze smoked for about 30, and a ton of it. Is there anything else you noticed afterwards to watch out for?
05-16-2010, 07:30 PM
#77
Registered User
Join Date: Mar 2010
Location: Mojave Desert, California
Posts: 413
Likes: 0
Received 0 Likes
on
0 Posts
I think mine is still smoking....
Anyway, VERY nice build-up man! Thats gonna be one sweet running rig when its all put back together! You are very right though, Ford Red, looks a LOT like toyota red. Which is funny, because I'm thinking about getting my runner painted that new sparkly ford blue, the kind the new Ford Raptor has available. Its already pretty close to the same color I have. I'd say I wanna do my valve cover like yours, but I gotta be original, so I'm gonna do it in blue! LOL, just kidding. My motors running great after the seafoam treatment, so I won't be rebuilding it anytime soon. Let me know how well that cold air intake works out! been thinkin about gettin one.
Anyway, VERY nice build-up man! Thats gonna be one sweet running rig when its all put back together! You are very right though, Ford Red, looks a LOT like toyota red. Which is funny, because I'm thinking about getting my runner painted that new sparkly ford blue, the kind the new Ford Raptor has available. Its already pretty close to the same color I have. I'd say I wanna do my valve cover like yours, but I gotta be original, so I'm gonna do it in blue! LOL, just kidding. My motors running great after the seafoam treatment, so I won't be rebuilding it anytime soon. Let me know how well that cold air intake works out! been thinkin about gettin one.
Last edited by Mojave_Moze; 05-16-2010 at 07:44 PM.
05-16-2010, 07:40 PM
#78
Hey Sean, Moze,
Yeah, I've got a bit done, hahaha. Unfortunately, I can't just stay at it all day. Anyway, about the Seafoam, I'm not saying it's bad, good or anything else....The only thing I notice is that many people say that they've done that treatment, then suddenly tons of things began to go wrong. That could just be coincidence, and then again, it might not be.
I noticed that mine smoked like pig, also, but when tearing down the motor, it really wasn't noticeably less in the "BLACK GOO" dept. I think for that, it's really worth it to tear down the intake, send off the injectors, clean all the ports and vacuum inlets really well, then slap in a new gasket or 2 for what, 11$?Plus 100 for the Injectors? I also noticed that some people have even hydrolocked, seizing their motors, using it improperly. One thing that always gets me curious about it is, ......"where does all that carbon that it loosens up go?" Ok, most of it out of the exhaust....but what about the crap it cleans off the rings, when used in the crankcase? Couldn't that possibly cause oil to get past the rings once they're cleaned a bit? What do I know, anyway? lol........I don't think I'll have a problem using it in the tank from now on, in about 20k Miles....but for now? Nahhhhhhh, lol.
Last edited by ChefYota4x4; 05-16-2010 at 07:41 PM.
05-16-2010, 08:01 PM
#79
Registered User
Join Date: Sep 2009
Location: MT
Posts: 187
Likes: 0
Received 0 Likes
on
0 Posts
eh, Seafoam did not do much of anything for me good or bad. Noticeable anyway of course. I'm NOT knowledgeable about engines...I've replaced a few parts like a water pump on a 351, and a tuneup on this 3.0...just neccessary emergency stuff, usually with my dad... and that's pretty much it 
05-16-2010, 08:17 PM
#80
Ok, well, I had to get a pic or two of what I got done, today...........
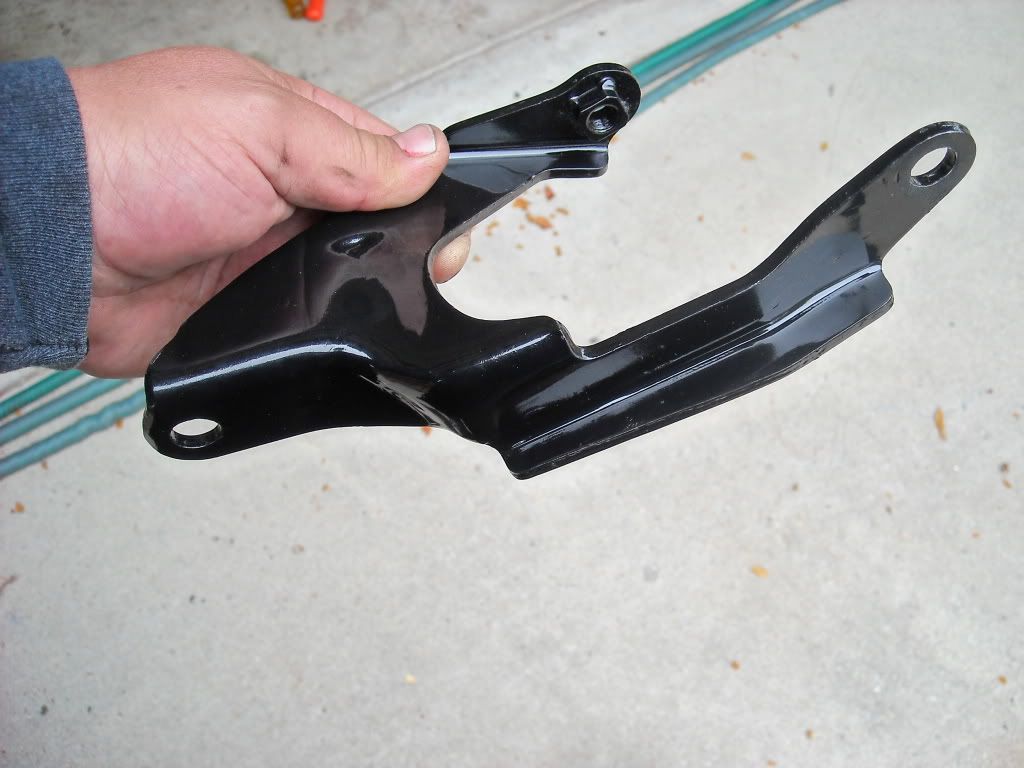
And, well, here's the STUPID bracket I forgot! lolol, .........
And, what the heck, here's what I had to stop and do for the third time today, hahaha...
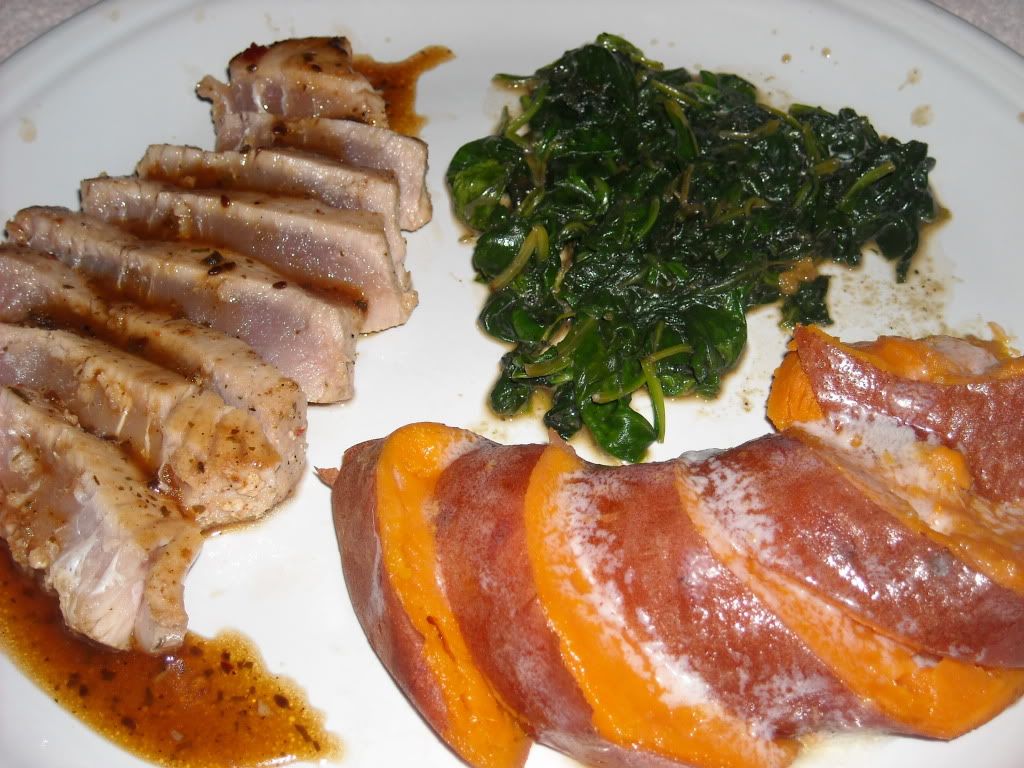
Grade AA Ahi-Tuna Seared-W/Gyoza Sauce, Baked Sweet Potatoes in Sweet Butter and Flash Sauteed Spinach in Garlic and Peppercorn Sauce.....Yeah,......that's what they asked for, and well, .....Ahi's one of my fav's! ....So I didn't mind, hahaha.
L8r all, be updating asap!
Chef Mark
And, well, here's the STUPID bracket I forgot! lolol, .........
And, what the heck, here's what I had to stop and do for the third time today, hahaha...
Grade AA Ahi-Tuna Seared-W/Gyoza Sauce, Baked Sweet Potatoes in Sweet Butter and Flash Sauteed Spinach in Garlic and Peppercorn Sauce.....Yeah,......that's what they asked for, and well, .....Ahi's one of my fav's! ....So I didn't mind, hahaha.
L8r all, be updating asap!
Chef Mark
Last edited by ChefYota4x4; 05-16-2010 at 08:19 PM.


