When you click on links to various merchants on this site and make a purchase, this can result in this site earning a commission. Affiliate programs and affiliations include, but are not limited to, the eBay Partner Network.
My power steering idler ate it's bearings and locked up.
Pulled the assembly off, removed the retaining clip, and removed the bearing. Almost half the balls are AWOL, there were several separators mashes into the ones that were there.
It appears to be the none sealed bearing type "204".
Not sure what to replace it with, consensus is it's a 6204-something but there are lots of letter subtypes. Timken website didn't have an easy to find description of the letter codes.
Can source the alternator bearing from Toyota, which seems the same open backed one I removed. Or the whole pulley from the local part store, the locals have the alternator bearing listed but it's only 2-3$ more for the pulley and bearing..
Still haven't gotten around to the downpipe fab, maybe tomorrow : eyes crossed :
I don't know why you'd want a bearing thats not sealed on both sides.
I'd get a 6204-2rs (sealed both sides)
You can pay as little or as much as you want for them. On ebay, as little as 2 dollars and change with free shipping for a chinese one , or less than $6 shipped for a Nachi bearing made in Japan.
I dont think a turbo truck would be any different then a standard truck but for the power steering pulley https://www.yotatech.com/forums/f199...l#post51649322 I get mine at Orielly. I think I have used the same bearing for the AC pulley if I recall correctly.
I cringed watching that guy pop the retaining clip off with a screwdriver, any time you can use pliers on a clip please do. You very much do not want one flying loose especially when it's that large. Last time I had a clip fly free I nearly blinded myself permanently and it was just a little door panel clip.
The PS and AC tensioner pulleys should be identical in most ways that matter. AutoZone part interchange says it's a pretty generic part also and fits a dozen or so makes and hundreds of models.
I do wonder about the AC one some. I see people reporting there were two thinner bearings inside. Is that a hack, an upgrade or OEM.
Got into the shop for about an hour tonight. Got the flange mounts drilled, most of the opening hogged out with a carbide tipped holesaw, and torched off the material interference with the waste gate arm. Mocked up a template to make a cutout from the straight pipe.
And because I have the ADD, pretty sure we/I forgot to pull the intermediate pipe back out and drove back to the house with it just floating around hanging off the cross members.
Now in my defense we slapped the OEM down pipe, ox sensor, and my stubby exhaust back on in about five minutes in the dark with just a phone for a flashlight, then took the kiddos truck to meet up for dinner a few towns up the road. And snagged the runner on the way home afterwards.
I just remembered the darn intermediate pipe as I was grabbing a flash light to take the crappy photo above. I never heard it fall out, and they didn't run it over in the road behind me. So it's still there hanging out.
I suspect I have a vacuum leak, minor hissing on startup heard.
Had to jump box it again after it sat a few days, might have a glitch in the rear speaker amps or it's just the darn radio and clock on the lightly abused battery.
still have the less the perfect sparkplugs
rich smelling exhaust and random popping.
the leak ive been fussing over from the turbo oil drain, isn't the threaded drain the flange is loose! Danger danger Will Robinson!!
rear heater hose compromised, it's working its way up the insulation, not leaking at the hose clamp.
No power steering makes me look like I'm drunk swerving from one side of the lane to the other.
Need to refill the tank and calc mileage, but I'm avoiding the gas stations so I'm not tempted to buy cigars been almost a week and it's getting really tempting.
Last edited by Co_94_PU; 01-16-2017 at 12:56 PM.
Reason: Strike done items
Got the turbo oil leak resealed, hoping for the last time.
Had a drip of coolant off the brackets next to the radiator drain, torqued the drain another 1/8th turn. Cursing the nylon the whole time. I'm not certain there is an o-ring on it. Might use the OEM drain next time I have to drain the system, that will give me piece of mind I'm not going to snap off the plastic tabs and allow me to put a drain hose in the hole.
Lost an EGR bolt somewhere off the rear of the plenum, maybe it's on my work bench? I pulled a way to short bolt out and noticed its the one with shiney black paint which is either off the front of the head or an oil pan bolt. Put a generic 1" back in and cinched it back up. Still hearing air suction somewhere.
Replaced (reinforced actually) spring clip on PCV hose at plenum with a hose clamp. Still sucking air.
Brake booster line hose clamp at plenum was loose, cinched up till the line doesn't spin. Still sucking air.
Could be a leak at the lower intake runner to head, but it's inaccessible.
Cleaned up the slag on the downpipe flange with a bastard and mill file, for busy work waiting till closing time at the shop.
Sorry I forgot to take photos untill we were heading home, but! Spend another hour or so in the shop working with my kiddo. We got the elbow cut and tacked to the flange. Got the filler section cut out and tacked to the flange and elbow. We were trying to template the gaps and it was being difficult, he asked if we should just stitch weld the gaps (yeah that's why he's a pro and I'm not a welder). Brilliant! He lays down a couple layers on the flange for filler then one more pass sealed that side.
He had a date so we called it quits for the night. He will finish it up tomorrow, maybe before he comes home for lunch or after work. Still needs, to stitch one side of the gap, inner and outside passes around the elbow, then some clean up on the grinder.
That leaves the lower flange to mate with the exhaust intermediate pipe that needs fabricating. Might ditch the OEM flange for a part store universal one. And the oxygen sensor's bung.
It's going to need some clean up first then I guess some exhaust paint to protect the steel. Since I didn't source stainless.
Going to have to source an annular cutter or none center cutting face mill bit to enlarge the waste gate hole. They didn't have anything at the shop that would get down there and his boss is the only one that knows how to fabricate bits for the mill, and I can't afford to pay his boss what his time is worth.
I think that is everything?
Oh yeah, my radiator cap is cheap junk. It's not sucking from the resivore. I fill the radiator, it heats up and purges to the RESI then sucks in air through the cap instead. Have to add that to the list of dealership/OEM parts I need, along with a good PCV valve and gromet.
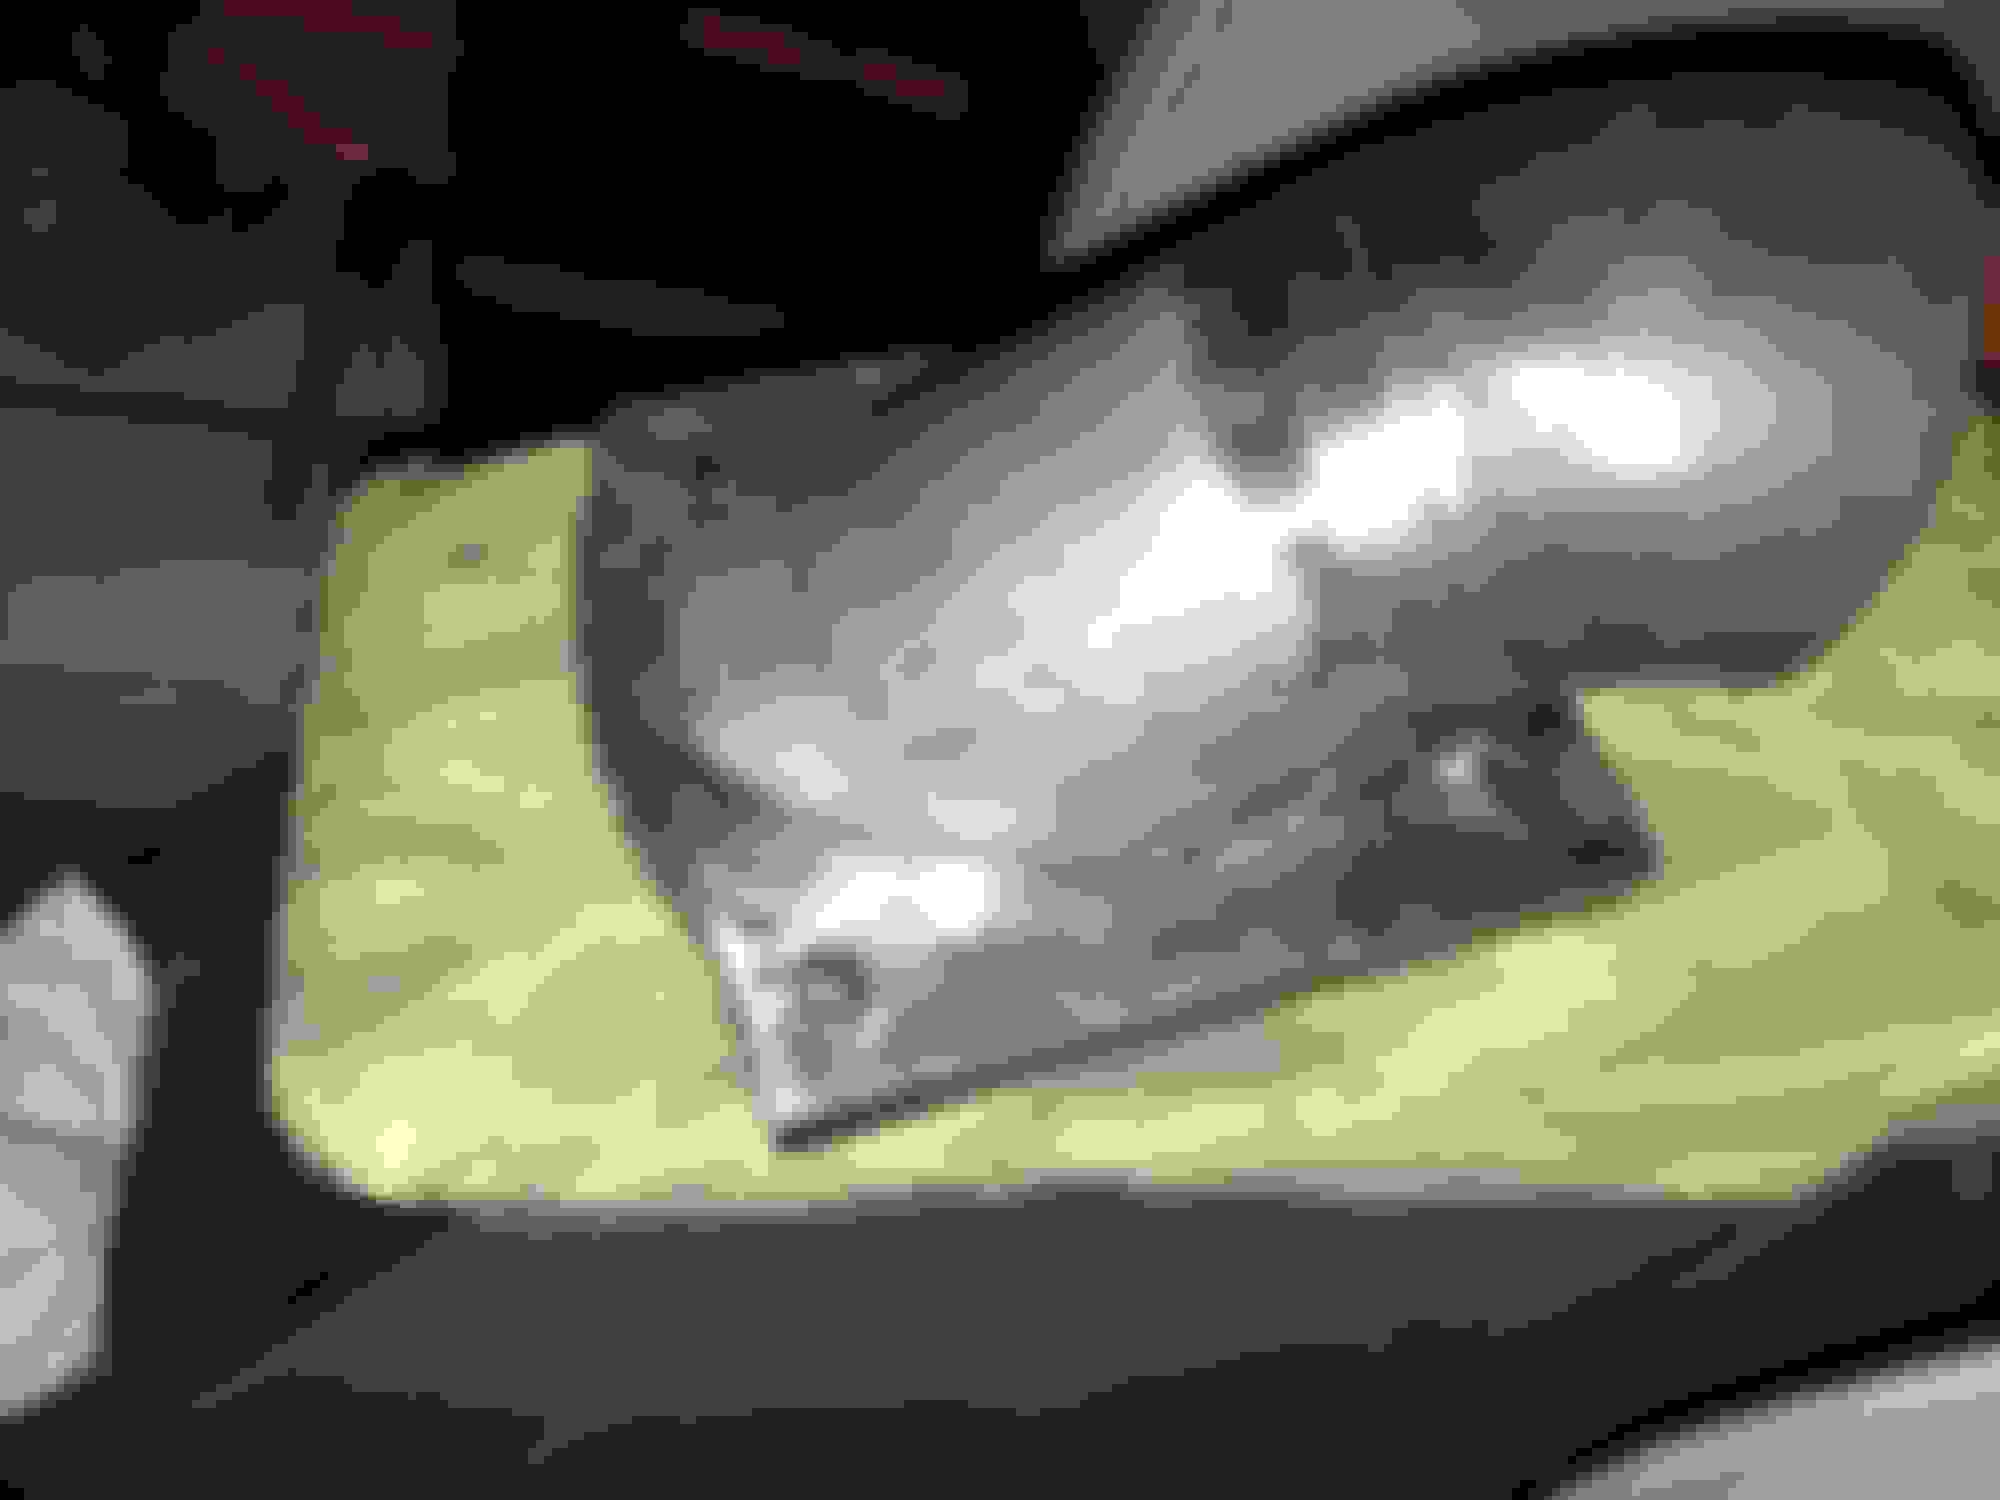
More busy work, pulled the drivers side mirror off and snugged up the tensioner so it quits flopping around. It's an aftermarket one and doesn't match the wear line in the paint from the original, it sits an eighth inch higher on the top body line and maybe a quarter inch higher than the wear mark at the bottom (made in Taiwan, "kly" branded).
Speedyracer's Ct20 downpipe oxygen sensor housing, and emergency pipe.
Spend half the afternoon trying to sort thru part store websites for an exhaust flange, the three bolt one, that is weldable. Finally got fed up and called, they only stock the split flanges and wanted to order me one of the light gauge ones even after explained it needs to be a weldable type and thick.
Called around to the auto shops, got one place advertising custom exhaust but thier smallest diameters are the big diesel type nothing in a ~2 inch and he referred me to another shop. Called the recommended place and they don't do exhaust work at all.
Going to have to trace the OEM downpipe lower flange and copy it I guess.
Anyways on with the show!
it is still in a rough form, no grinding, no paint, no o2 bung or owner flange.
You can see on the left it needs trimmed to allow the waste gate to open fully. It does have room but it's a fiddly fit where you have to slide it around on the bolts (which should and will be studs).
We got totally lucky with the lower right hole, notice it's under the elbow, the bolt just barely slides in at an angle. Might need to clearance the flange a little to get an exhaust nut on a stud here, but it's got plenty of meat to it at 1/2 inch thick to take a 16th off.
Marker noting modifications needed. One little obvious pin hole. And all the welds need ground back to fit the nut and a socket.
Emergency exhaust.
And my stubby. It's just tacked right now. We will chuck it up on the rotary table (an old lathe they use for welding pipes) and run a single bead around it.
This stub just barely fits inside a piece of accordion pipe.
This will get put into the "trail kit" along with caps for the two oil lines and a section of heater hose for the coolant bypass.
To-do:
Sort through my gaskets for the o2 ones and copy that into steel. Drill the main opening for the sensor then file or grind a flat in the schedule 40 to weld on a flange. Drill and tap for the mounting studs.
Sort through scrap for lower flange materials, make two copies one for the E pipe one for the down tube.
Fabricate a longer brace to support the turbo off the engine.
Then I think this section will be completed, sans painting (I need to pick a color, red black or aluminum)
PS: notice corrosion on the mock up housing? This is from handling it with solvent soaked hands which ate thru the factory coating. #3 still looks new even after hanging in the engine bay and being one and off with all the lovely Colorado brine and salt.
Started on those temp sender's, but didn't get very far before it was time to head down to the shop..
Small blowout on the second pass
Clearance the waste gate actuator arm.
Reliefs around the mounting holes.
No pictures..
Got the new downpipe test fitted on the turbo. Angle could have been just a smidge better maybe a half degree farther to the outside to give more clearance to the bellhousing. Considering it was done off the truck, off the turbo and totally by eye, it's perfect.
Got the o2 and lower flange outlines templated on to cardboard.
Still need to pickup the header paint, exhaust and o2 hardware. Cinch the cutoff section of the intermediate pipe back to the exhaust, and see where it lines up with the elbow cutoff, with some luck the downpipe won't need extended.
Aisen hub indexer, 4wd, cruise control, power steering leak.
Took my hub apart and put the index ball in, could have gone with a bigger ball. I reused the spring after prying it out and cleaning it up, might still swap it out for the stuff I ordered from McMaster-carr adding a mm or two to the length. With the smaller ball it is not as firm as I'd like it.
Need to inspect the other side and make sure it is engaging, and repack the grease.
Tried to get a tire perched up on a stump in the yard, over reached maybe, and aborted before the boost got out of hand and triggered the code 14.
..
Slopped a bunch of mud every where. now I have to wash that off along with the bird crap because I keep parking under the trees. Might have to get the sled out and drag the driveway flat (again) too.
..
Trying to trigger the cruise control diagnostics, erratically unsuccessful. Going to need to clean the switch on the column, "set" is unreliable and resume is AWOL.
..
with out the PS pump running it was obvious there was a leak lower than the hoses. Got a full quarter turn on the lower two bolts before they torqued up right. Probably wants a new gasket but until the pump gets reconnected it's leak free.
..
these are the two temp sender's on the thermostat housing. Can't really see it in the pic but they're inscribed with the same part number. Also in the image is the AC's vsv wires flopping about with no plug. Forgive my grainy tablet camera, the sun light as fading fast
I lost my safety pin somewhere and a sharpened paper clip just isn't the same when trying to release plugs and connectors. Haveing the right tool would be nice. Wiring SST.
You have been getting quite a bit done. I have only worked on one turbo truck and it seems like it could get complicated quickly.
Making a list on your thread is a great way to keep track of what you need to go back and finish. These build threads can be better then any tool you may have in the shop.
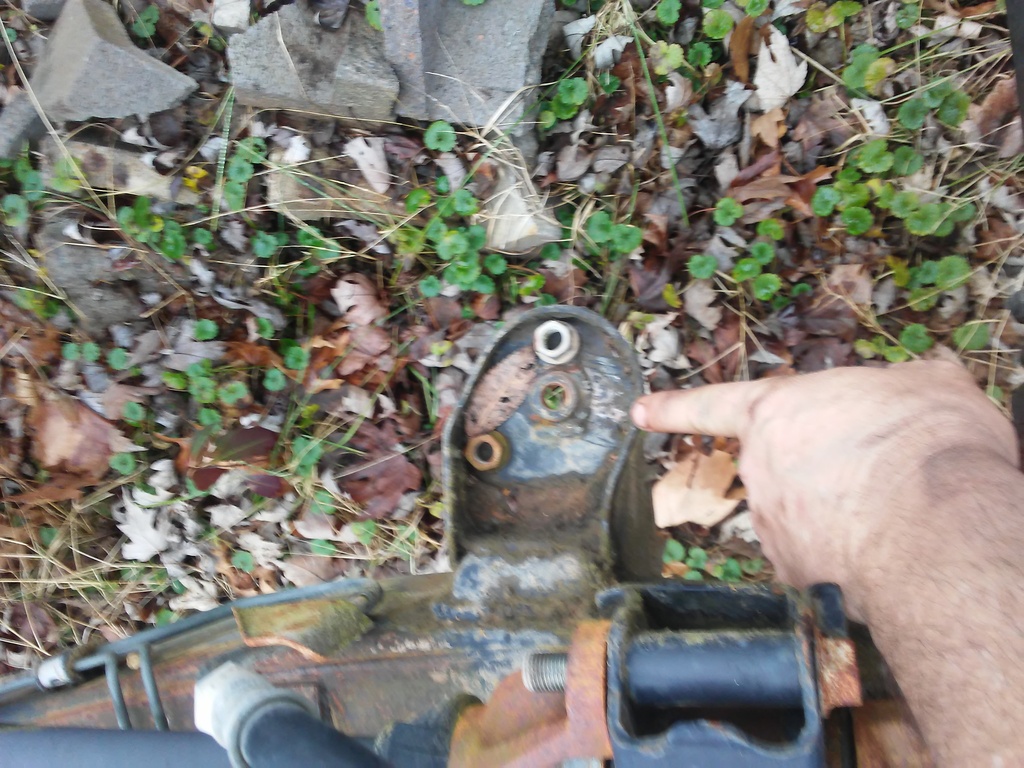
I seen you are missing a bolt for the EGR, If it does not fall to the ground, check on this part of the frame in the picture below. It is my first place to look when not hitting the ground. This is a frame I have in the back and you can not get a good picture of it in the truck with a motor in. When the motor is in, it covers the piece I am pointing to and is not easy to see the nuts and bolts that will go there.
I posted up links for the 88 electric wiring diagram book Link
Please if you have a copy and you would be willing to send via PM let me know. I've spent much time trying to track it down again on Google and the wayback machine and the internet out here is abysmal slow!
Took a few minutes to inventory missing and damaged trim.
.
No pics.
Outer shifter suround chipped by someone forcing it on with transmission wires not cinched in place.
.
Need both sides, divers side seatbelt is broken off at the strap loop have a file folder spring clip holding it off the floor. Bumper, end caps, valence, and skid plate. Panel clips, cap mount covers, deck lamp cover.
I do have the rollbar coverwrap, which surprised me it was intact and in place. Pinch trim that sandwiches the deck trim and body. Left side. No visor mounts or visors, left and right Dome light cover. Roof liner is trashed. Rear wiper cover (missing from photo also, oops)
 01-14-2017, 06:45 PM


 now I have to wash that off along with the bird crap because I keep parking under the trees. Might have to get the sled out and drag the driveway flat (again) too.