Yaoksurewhatever's 85 22r 2wd Pickup Build-up...
 03-16-2013, 08:42 PM
#1
Registered User
Thread Starter

Join Date: Nov 2012
Posts: 16
Likes: 0
Received 0 Likes
on
0 Posts
Yaoksurewhatever's 85 22r 2wd Pickup Build-up...
....and Intro.
Hi all, new guy.
I've been on yotatech for the last couple of weeks studying up on the 22r. The last Toyota I owned was a 79 corolla sr5 (fun car) but that was 18 years ago.
Pickup Background
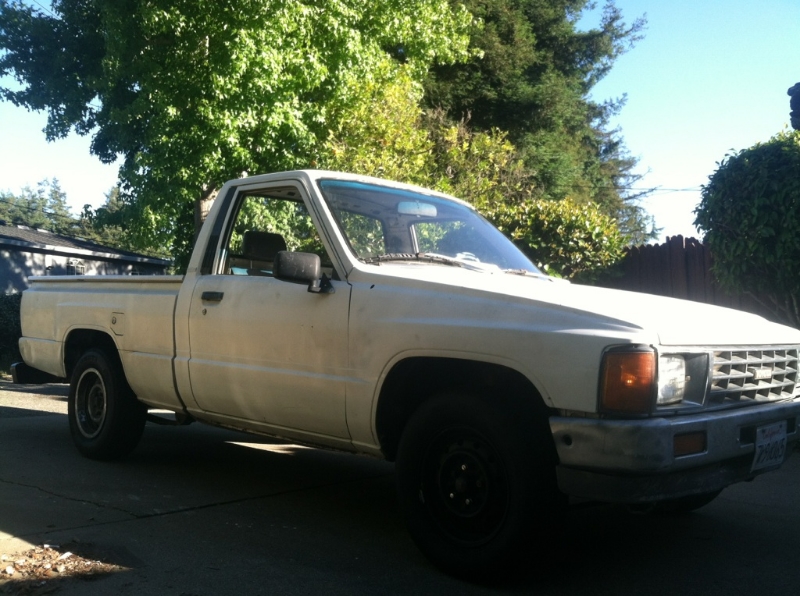
Its a base model, 2wd, 22r, 4 speed, odo reads 197000. "runs, registered, passed CA. smog 6 months ago, blah blah bla..."
Bought this pickup in desperation (moving and needed a work truck..I had a honda) about 8 months ago off craigslist for double its worth. It was my last option after
2 other trucks fell thru. It definitely served its purpose but I go to finally put it in my name and.... Failed everything on the pre-smog. Stolen plates on the truck. "Illegal mods" on the engine involving wood and ductape, and a host of other issues...hmm. ok! I got screwed! Ya, my fault, over it. I parked it in my backyard and forgot it. But, now I'm compelled to dump some time and a little $$$ just to fix it out of spite. Its really not what I want, (1st gen 4runner) and it should be a parts truck, however, Project 'Why Bother?' is now underway.
Ok, Here are the few pic's i took of my progress before i figured I'd start a thread.
This is the day I brought her home..
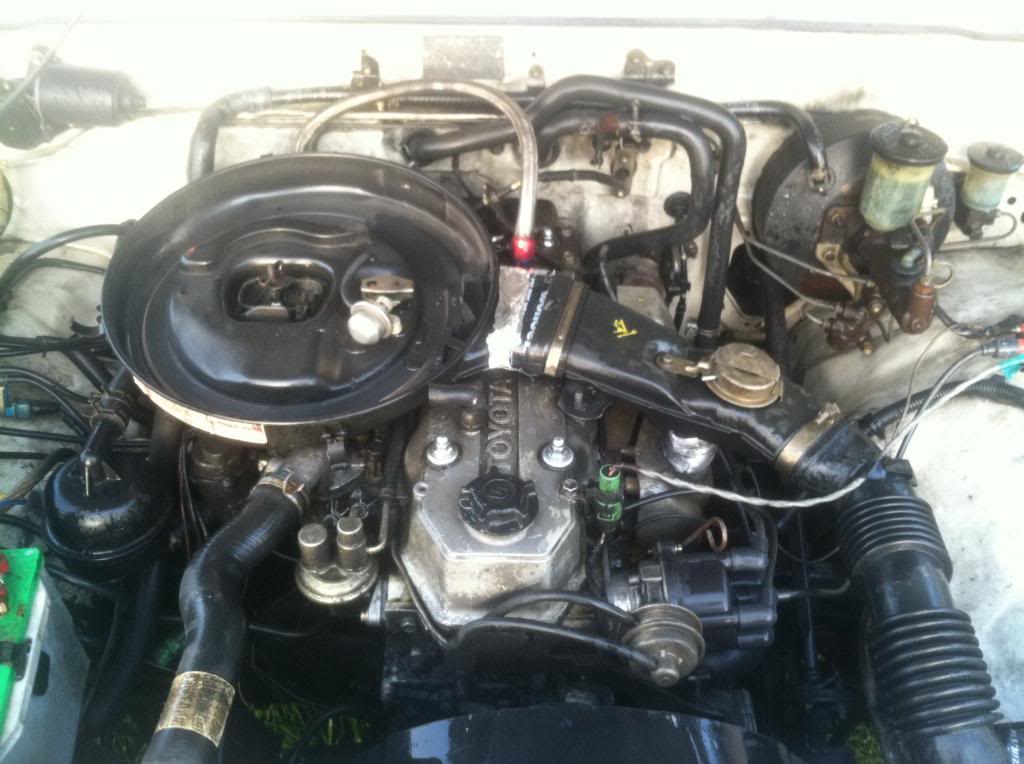
Engine bay after a quick hose down. You can see the after-market gas line coming out of the PCV on the valve cover. It was just shoved in their! Held in by a (broken!) plastic tube.
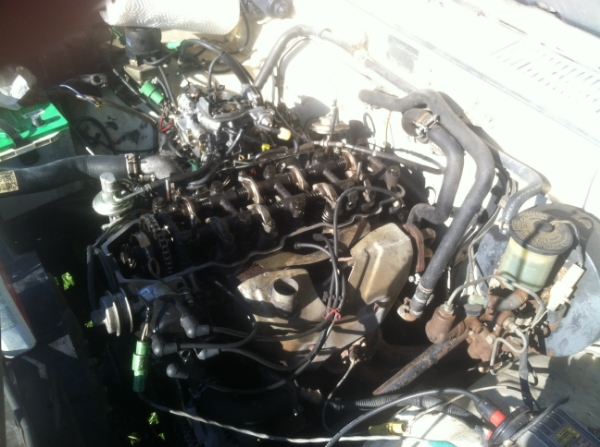
Removed valve cover to check chain guides. Cant see in this pic but they were gone.
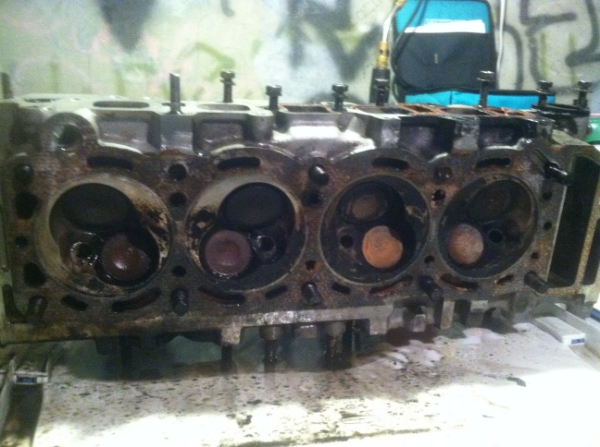
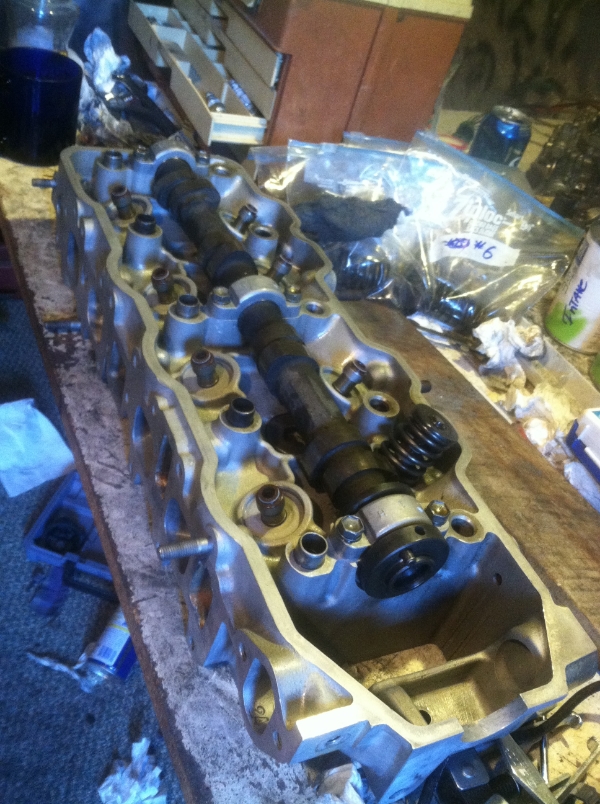
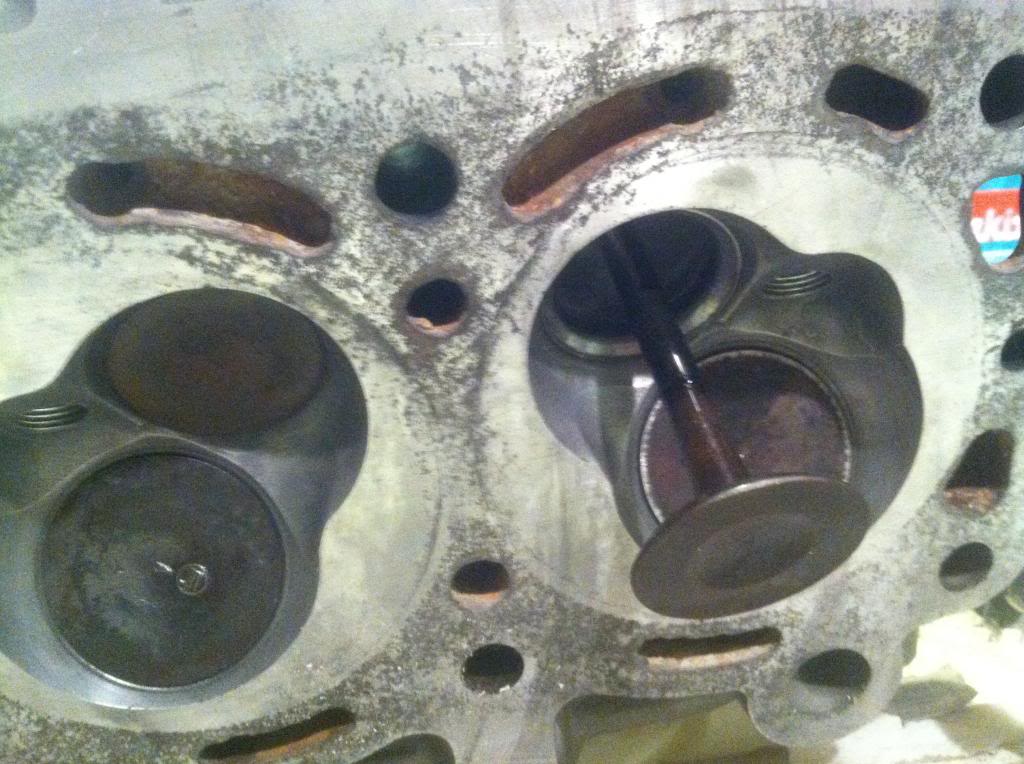
This is a picture of my first mistake. Its the head sitting on my bench, days before I realized I should have done a compression check first.
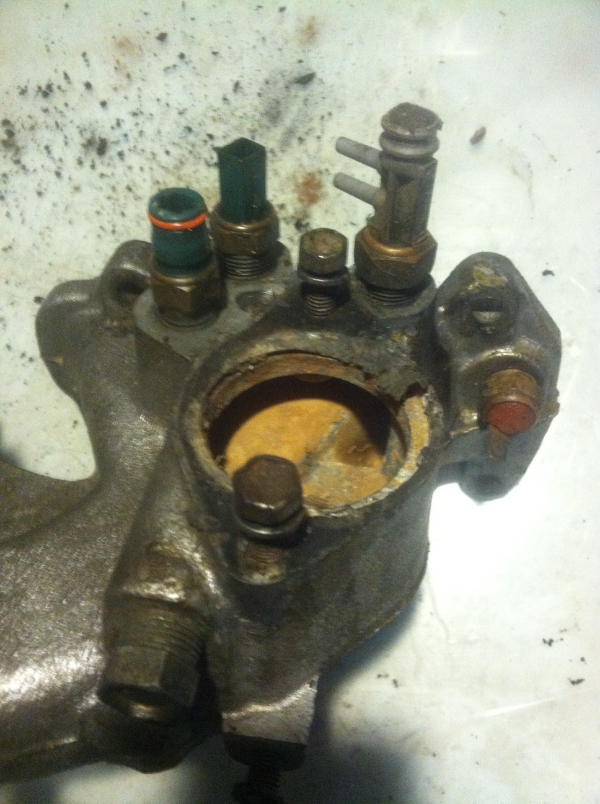
Here's the thermostat housing. No thermostat was installed and temperature sending unit wires were cut at the harness.
Doin some cleaning.
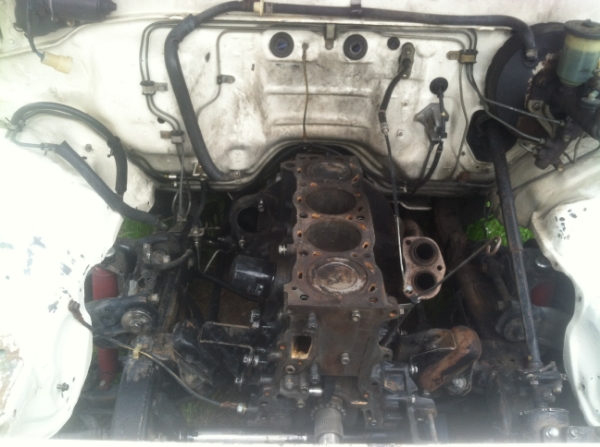
Got it down to the block. (no engine hoist yet)
At one point I got a little nervous about taking the springs and valves out to clean and change the valve steam seals, so i took a bunch of pics. It turned out to be a simple process, so I made a quick "how-to" or at least a, "how-I-did-it" Hope it helps someone.
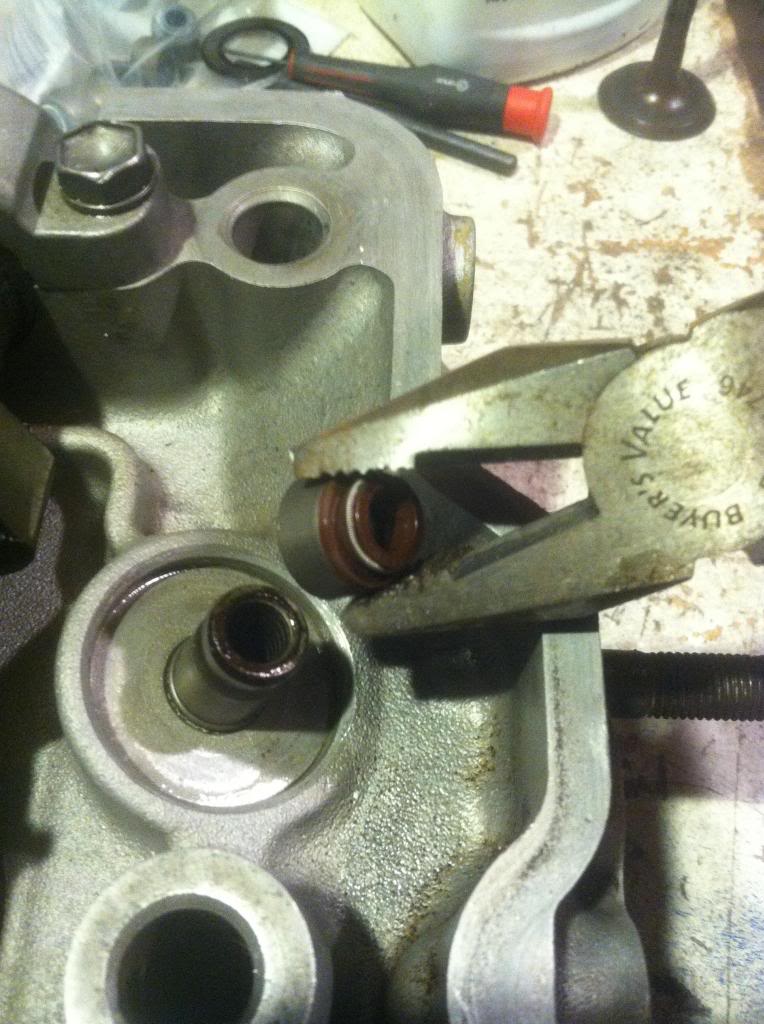
1. Attach my napa spring compressor

2. Compressed the spring, gave it a little bump on the head with my fist and the spring dropped to the head exposing the 2 keepers (crescent shaped things.)
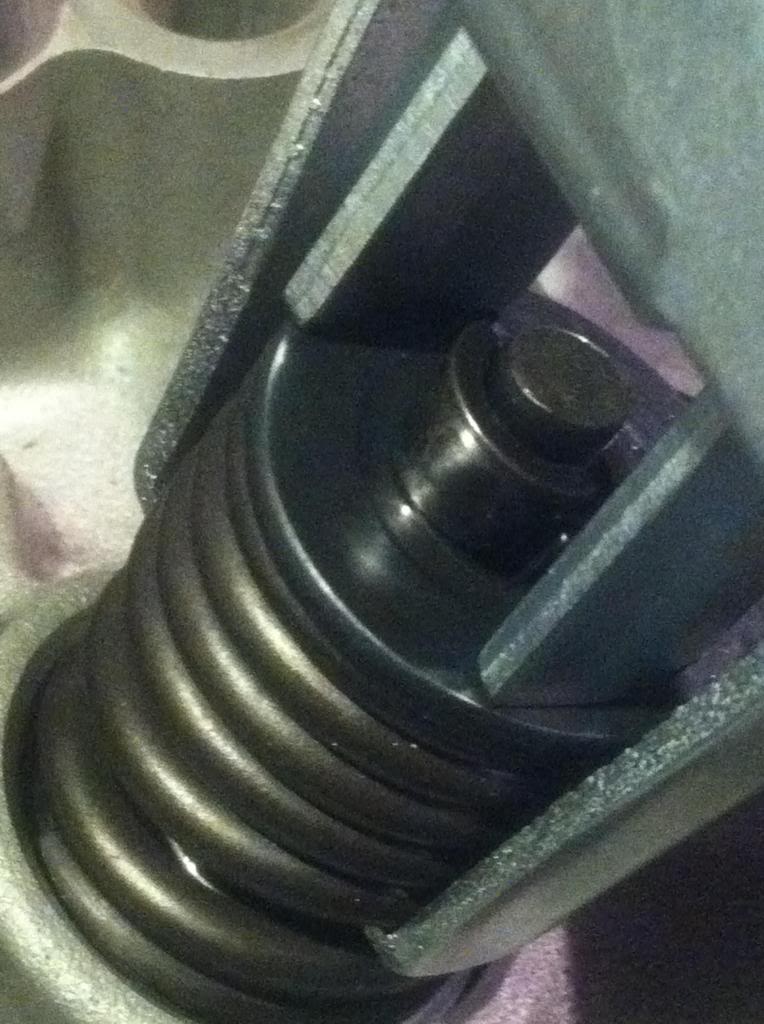
3. Remove said keepers.
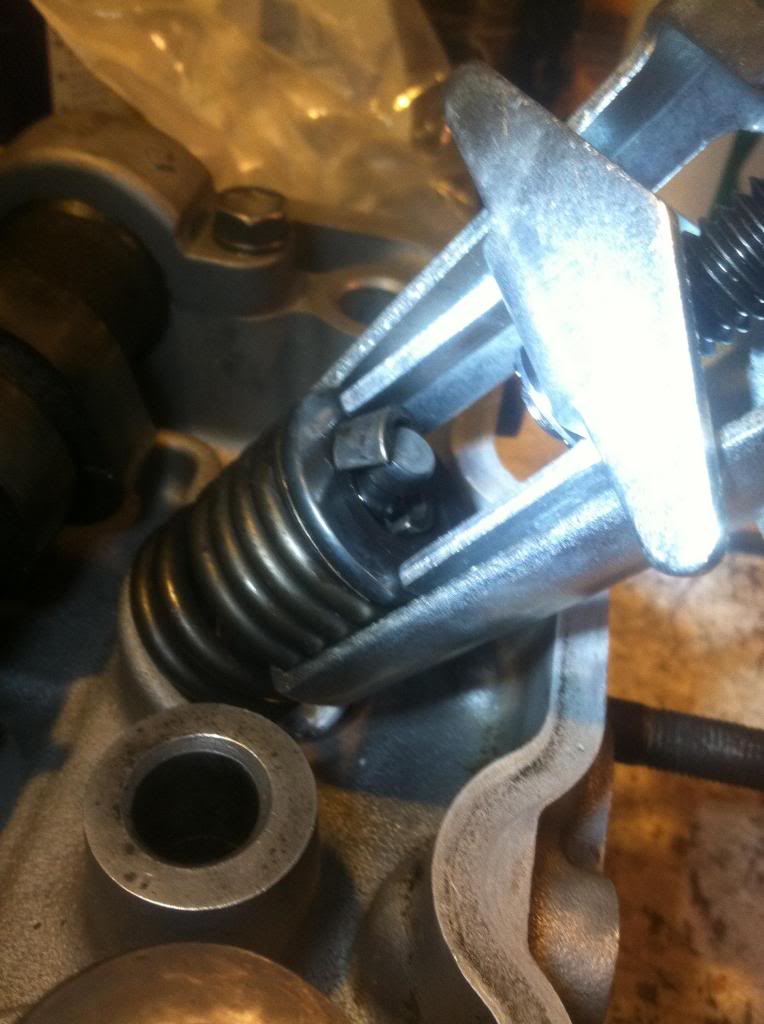
4. Here's what came off so far.
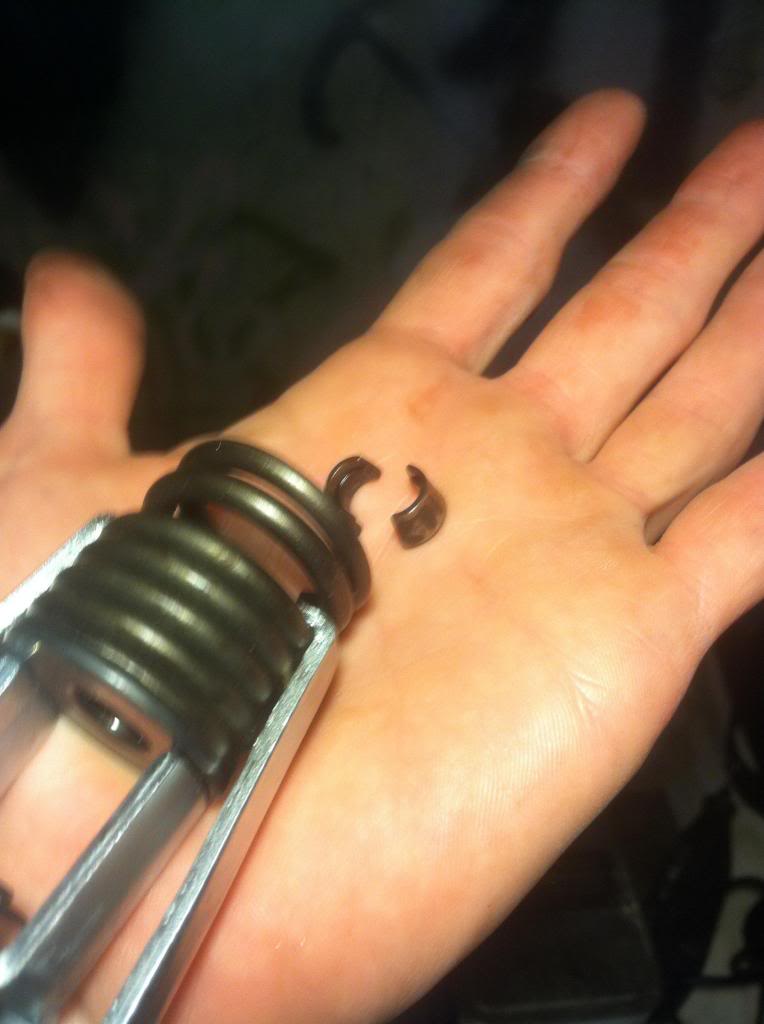
5. Between the spring and the head is this metal ring. Mine took some gentle prying to get off.
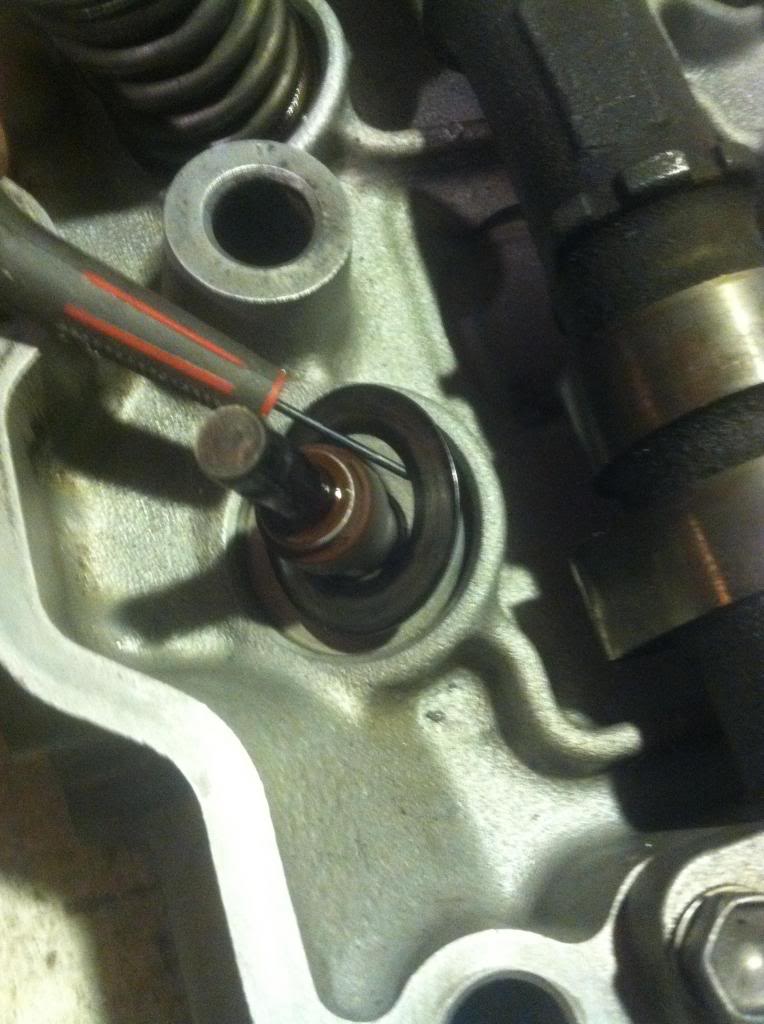
6. Pulled the valve through the bottom of the head. All but one exhaust valve came out really smooth.
7. Remove old valve steam guide seals. I did it with a pair of pliers and a light grip. They came off easy.
Now, Put it back together.
8. Two drops of oil smeared in the seal and around the guide, I pushed the new seal on at a slight degree, rocked and twisted it with my fingers until it seated against the valve guide. *Kinda hard to tell if its seated because of the rubber like material, in fact, this is the only thing I wasn't 100% on. Should I tap them down? They 'feel' right tho..
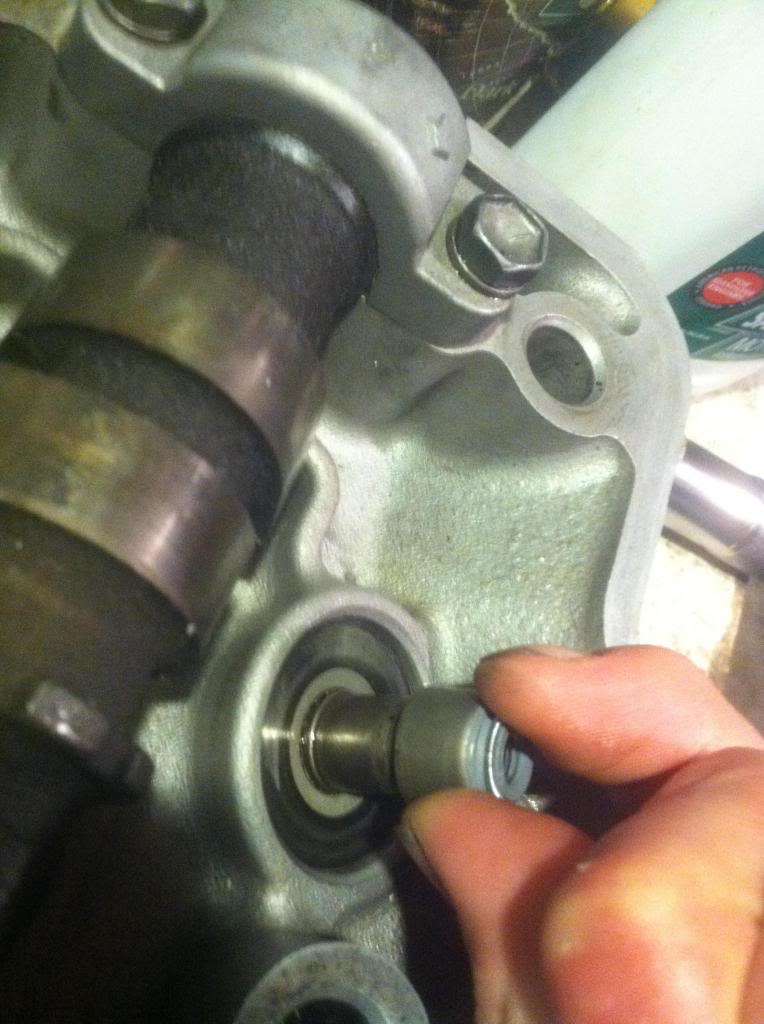
9. I lightly oiled and re-installed the valve (same guid it came out of/same way it came out) and re-installed the metal ring. Just set it in their, best side down.

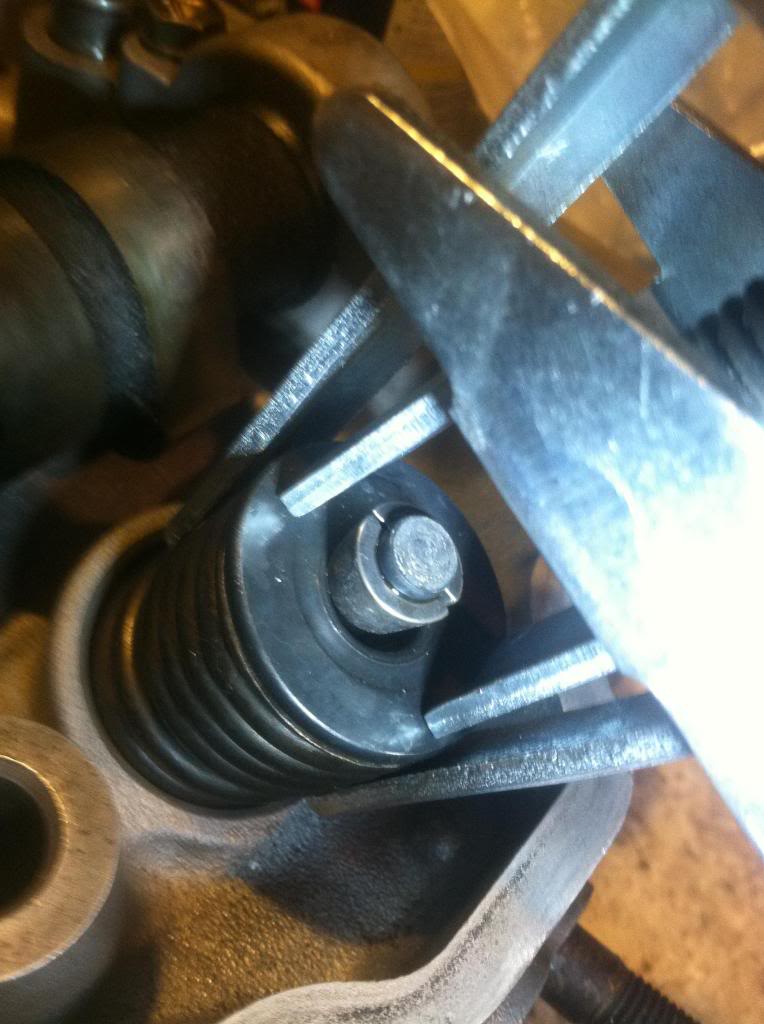
10. With the head sitting flat on the table, I used wadded-up rag in the combustion chamber to keep the valve from sliding down. Put the compressed spring (& retainer ring) in it's home. Lightly coat the 2 valve keepers (crescent shaped things) with motor oil and placed them (tapered side towards head) in the valve steam grove. Lift up on the spring (via tool) to hold the keepers in place and carefully de-compressed spring. I wiggled and pushed in each completed valve to make sure everything was seated correctly.
11. Repeat steps 1-10 eight times.
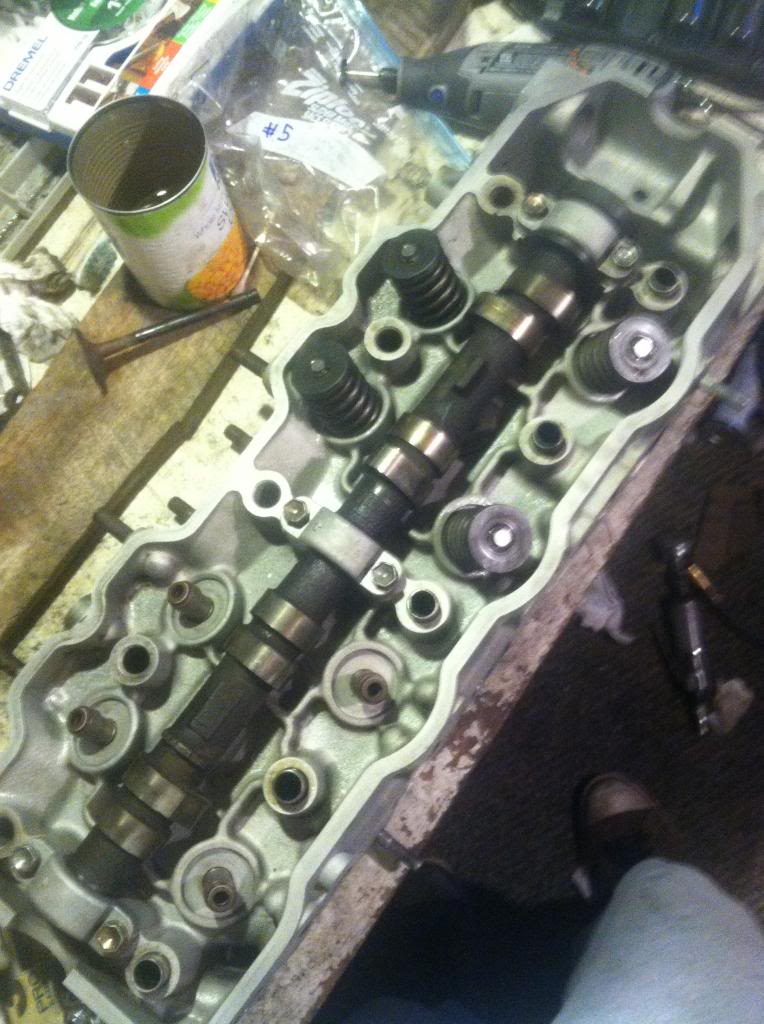
Ok, that took most my Saturday. Thats all for now.
Hi all, new guy.
I've been on yotatech for the last couple of weeks studying up on the 22r. The last Toyota I owned was a 79 corolla sr5 (fun car) but that was 18 years ago.
Pickup Background
Its a base model, 2wd, 22r, 4 speed, odo reads 197000. "runs, registered, passed CA. smog 6 months ago, blah blah bla..."
Bought this pickup in desperation (moving and needed a work truck..I had a honda) about 8 months ago off craigslist for double its worth. It was my last option after
2 other trucks fell thru. It definitely served its purpose but I go to finally put it in my name and.... Failed everything on the pre-smog. Stolen plates on the truck. "Illegal mods" on the engine involving wood and ductape, and a host of other issues...hmm. ok! I got screwed! Ya, my fault, over it. I parked it in my backyard and forgot it. But, now I'm compelled to dump some time and a little $$$ just to fix it out of spite. Its really not what I want, (1st gen 4runner) and it should be a parts truck, however, Project 'Why Bother?' is now underway.
Ok, Here are the few pic's i took of my progress before i figured I'd start a thread.
This is the day I brought her home..
Engine bay after a quick hose down. You can see the after-market gas line coming out of the PCV on the valve cover. It was just shoved in their! Held in by a (broken!) plastic tube.
Removed valve cover to check chain guides. Cant see in this pic but they were gone.
This is a picture of my first mistake. Its the head sitting on my bench, days before I realized I should have done a compression check first.
Here's the thermostat housing. No thermostat was installed and temperature sending unit wires were cut at the harness.
Doin some cleaning.
Got it down to the block. (no engine hoist yet)
At one point I got a little nervous about taking the springs and valves out to clean and change the valve steam seals, so i took a bunch of pics. It turned out to be a simple process, so I made a quick "how-to" or at least a, "how-I-did-it" Hope it helps someone.
1. Attach my napa spring compressor
2. Compressed the spring, gave it a little bump on the head with my fist and the spring dropped to the head exposing the 2 keepers (crescent shaped things.)
3. Remove said keepers.
4. Here's what came off so far.
5. Between the spring and the head is this metal ring. Mine took some gentle prying to get off.
6. Pulled the valve through the bottom of the head. All but one exhaust valve came out really smooth.
7. Remove old valve steam guide seals. I did it with a pair of pliers and a light grip. They came off easy.
Now, Put it back together.
8. Two drops of oil smeared in the seal and around the guide, I pushed the new seal on at a slight degree, rocked and twisted it with my fingers until it seated against the valve guide. *Kinda hard to tell if its seated because of the rubber like material, in fact, this is the only thing I wasn't 100% on. Should I tap them down? They 'feel' right tho..
9. I lightly oiled and re-installed the valve (same guid it came out of/same way it came out) and re-installed the metal ring. Just set it in their, best side down.
10. With the head sitting flat on the table, I used wadded-up rag in the combustion chamber to keep the valve from sliding down. Put the compressed spring (& retainer ring) in it's home. Lightly coat the 2 valve keepers (crescent shaped things) with motor oil and placed them (tapered side towards head) in the valve steam grove. Lift up on the spring (via tool) to hold the keepers in place and carefully de-compressed spring. I wiggled and pushed in each completed valve to make sure everything was seated correctly.
11. Repeat steps 1-10 eight times.
Ok, that took most my Saturday. Thats all for now.
 03-17-2013, 11:46 AM
#3
Registered User
Thread Starter
Join Date: Nov 2012
Posts: 16
Likes: 0
Received 0 Likes
on
0 Posts
Thanks Gizler00.
Like that look too. Haven't really thought about stance yet, just letting it evolve as I go.
I'm confident enough about the valve seal seating on this one, but def. give your advice a shot when its on something like what you got there. Nice runner!
Like that look too. Haven't really thought about stance yet, just letting it evolve as I go.
I'm confident enough about the valve seal seating on this one, but def. give your advice a shot when its on something like what you got there. Nice runner!

Thread
Thread Starter
Forum
Replies
Last Post
GreatLakesGuy
The Classifieds GraveYard
8
09-04-2015 09:27 AM


